Skip the store-bought pie crust, it's so easy to make your own and it tastes amazing! This homemade pie crust recipe is simple to make and is perfect for all of your pie needs!
This post contains affiliate links, please read my full disclaimer here.
You’ll find the full recipe with ingredient amounts and instructions in the recipe card at the bottom of this post. Be sure to check out the blog post itself for extra tips and tricks!
This homemade pie crust is perfect for all of your dessert needs, and it's my go to for Thanksgiving and the holiday season.
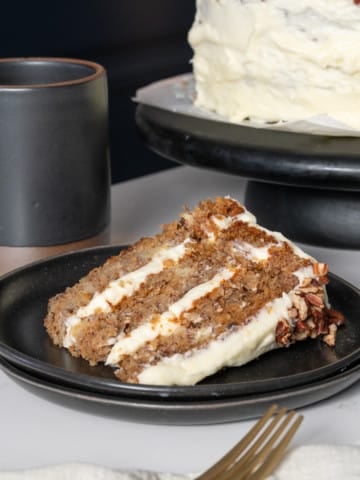
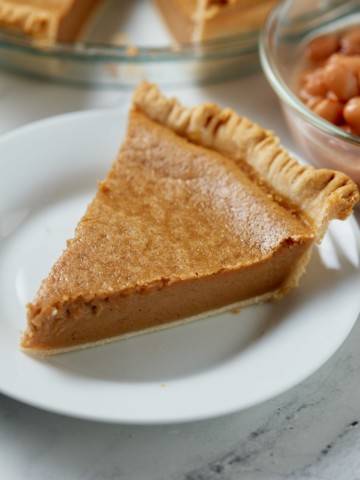
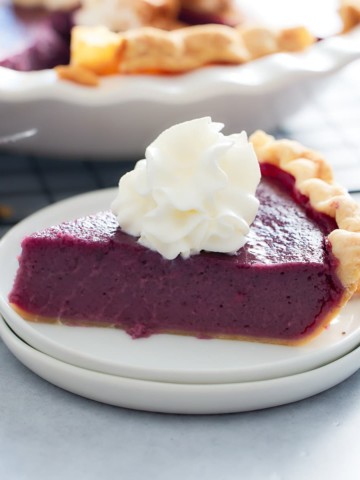
Made with simple ingredients, this pie crust is perfect for make ahead desserts and is freezer friendly. Fill it with your favorite pie fillings like pumpkin, sweet potato, cherry or apple.
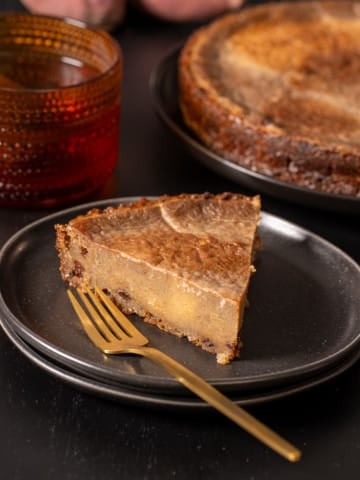
For more delicious desserts, be sure to check out my Southern Sweet Potato Pie and Chess Pie.
How to make this homemade pie crust recipe
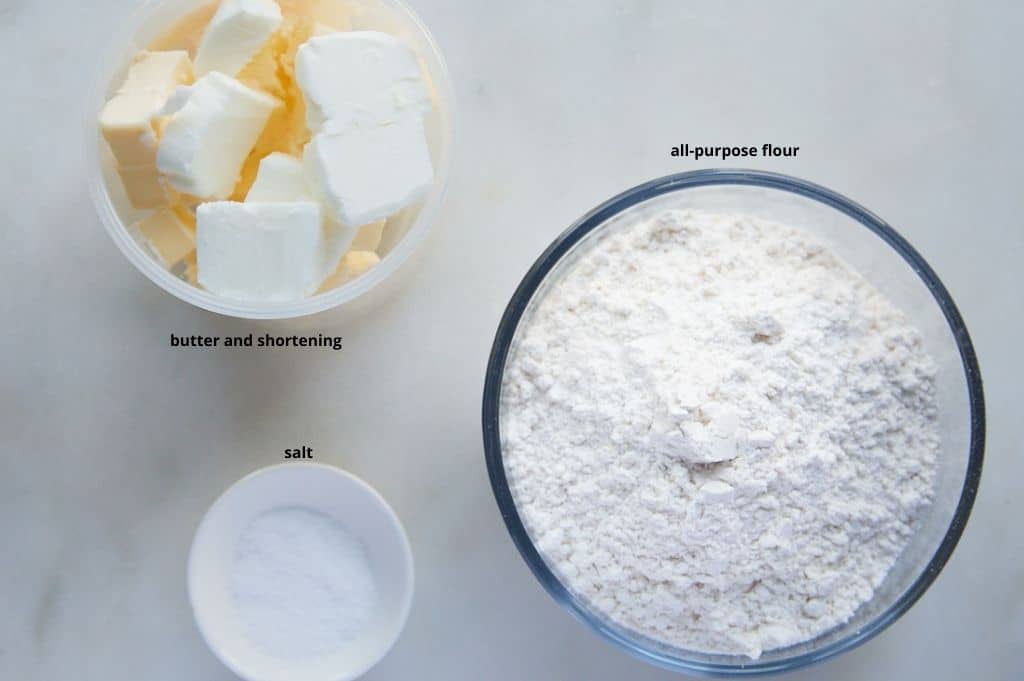
- Gather your ingredients.
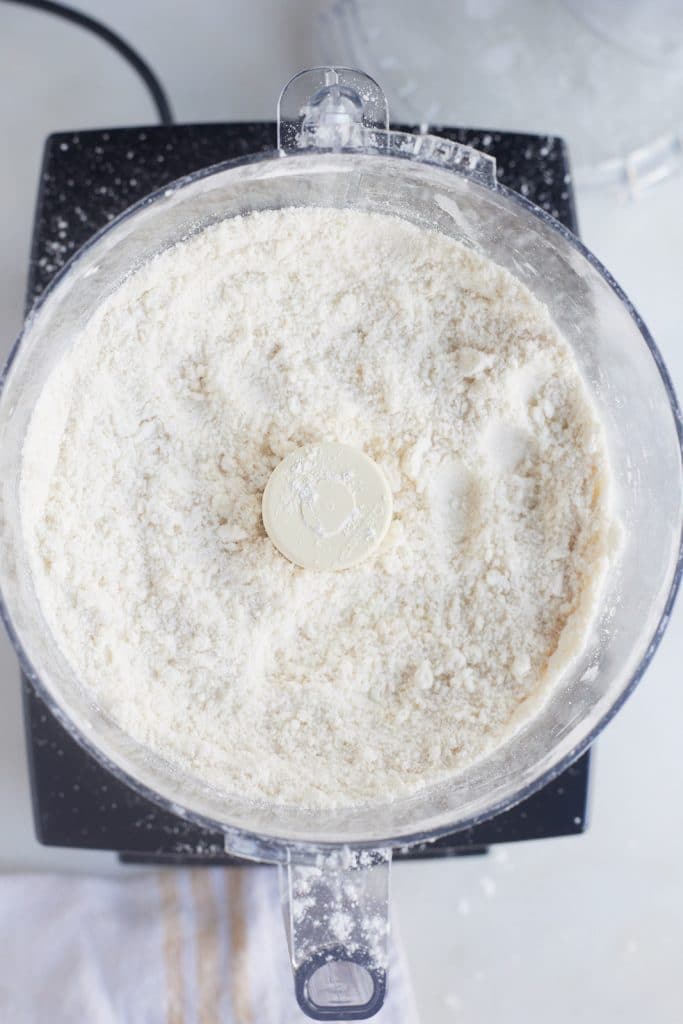
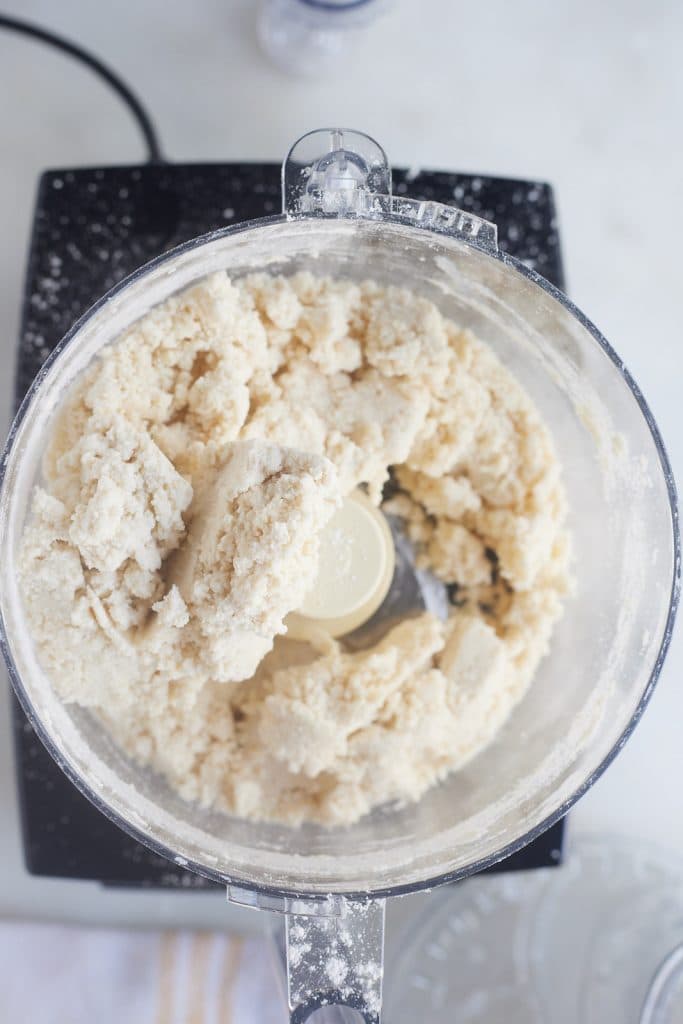
- Place flour and salt in the base of a food processor. Pulse until mixed through.
- Add butter and shortening.
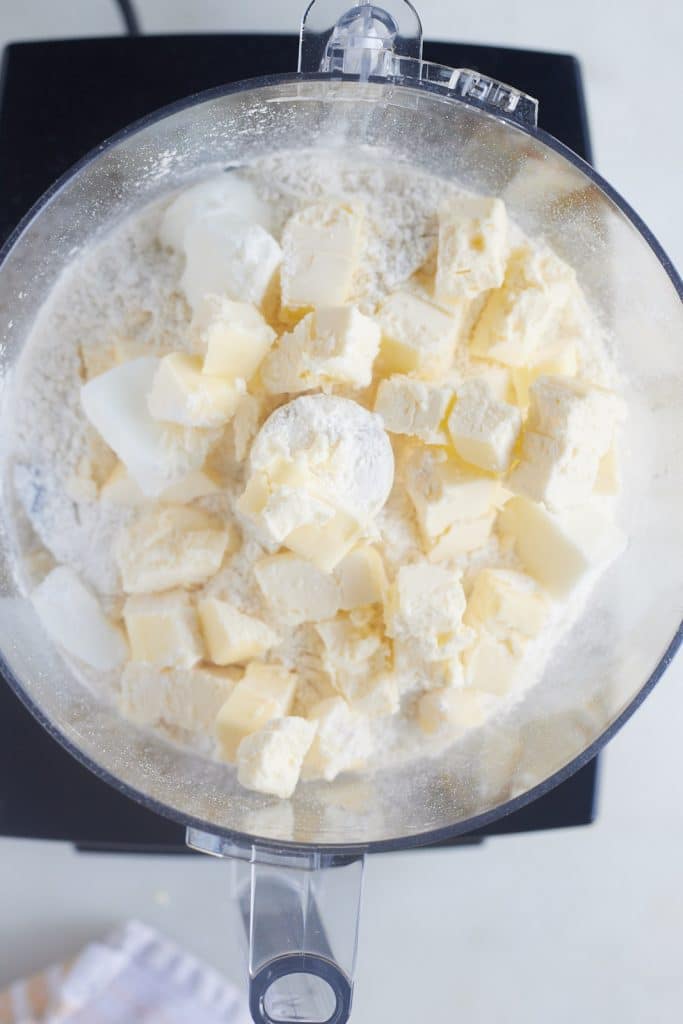
- Pulse until butter and shortening is cut into pieces into the flour.
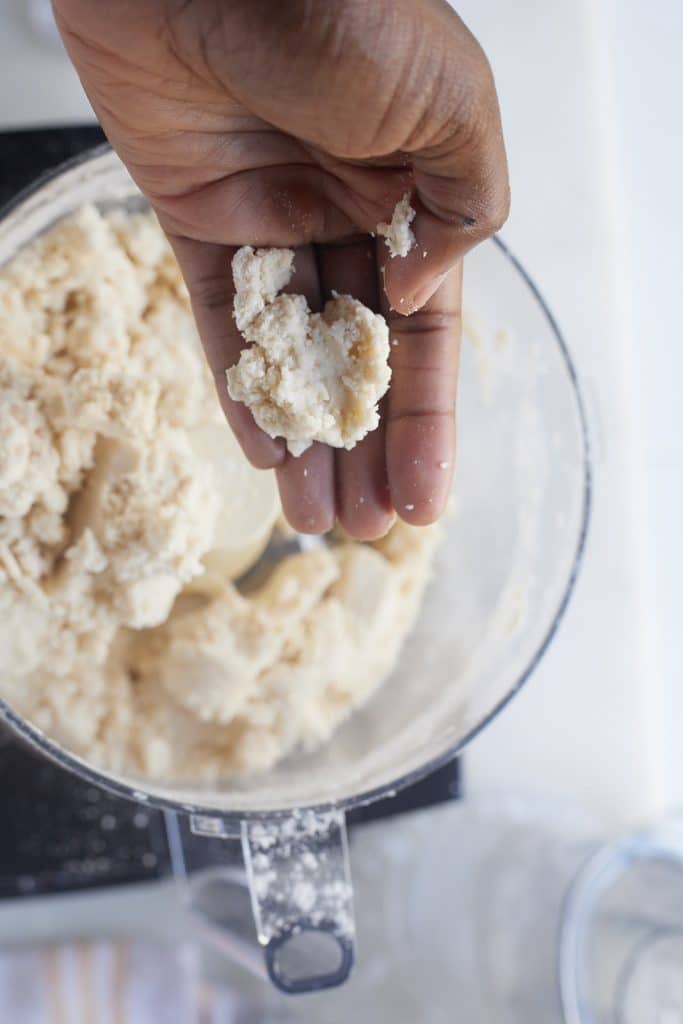
- Add 8 tablespoon of water and pulse until the dough starts to pull away from the walls of the food processor. If the dough appears too dry and crumbly, add more water, about ½ tablespoon at a time.
- The dough should be able to smoosh together between your fingers.
- Remove dough and place onto a floured surface.
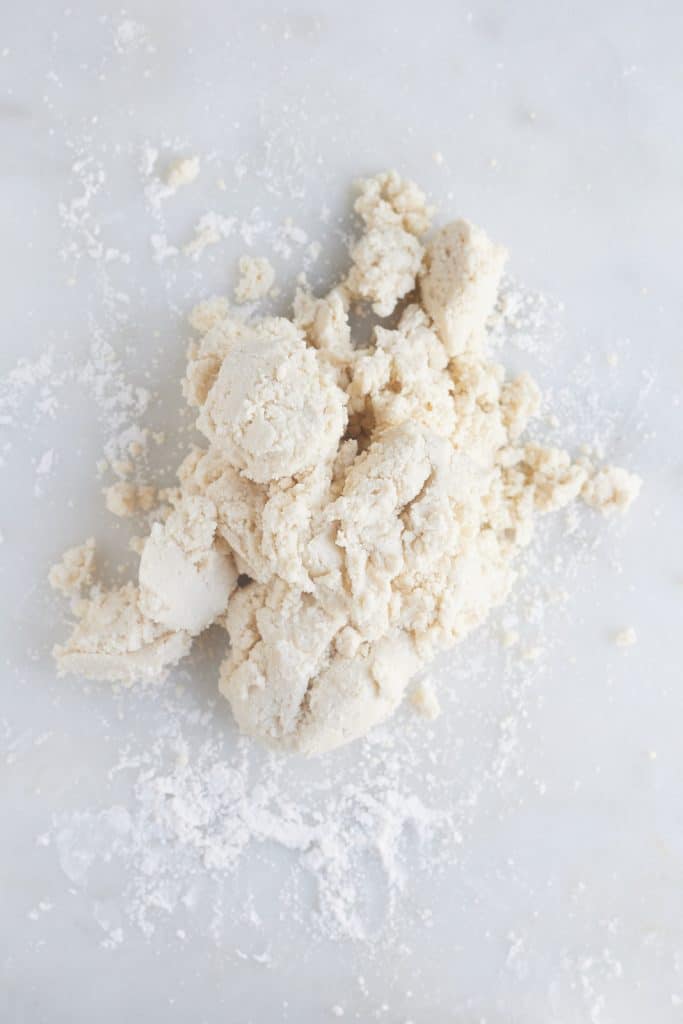
- Use your hands and form dough into a ball, then cut the ball into two separate pieces. Flatten the pieces into two separate disks.
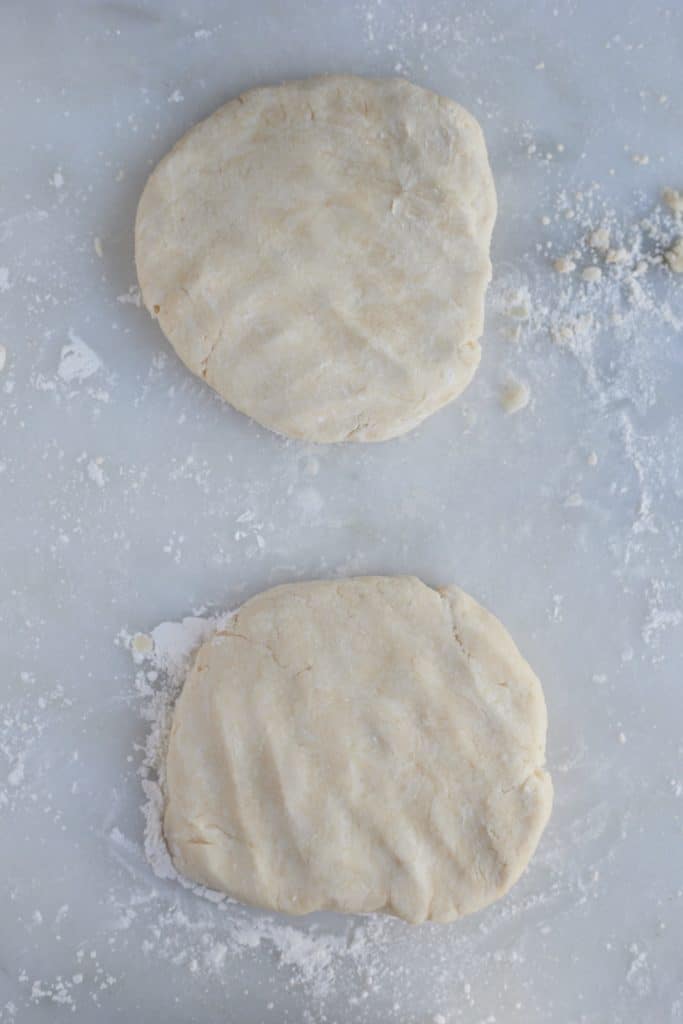
- Wrap the disk in plastic wrap and place in the fridge for at least 45 minutes or up to 3 days.
- Remove disk from fridge and allow to sit for around 5 minutes, or until the dough is warm enough to roll out.
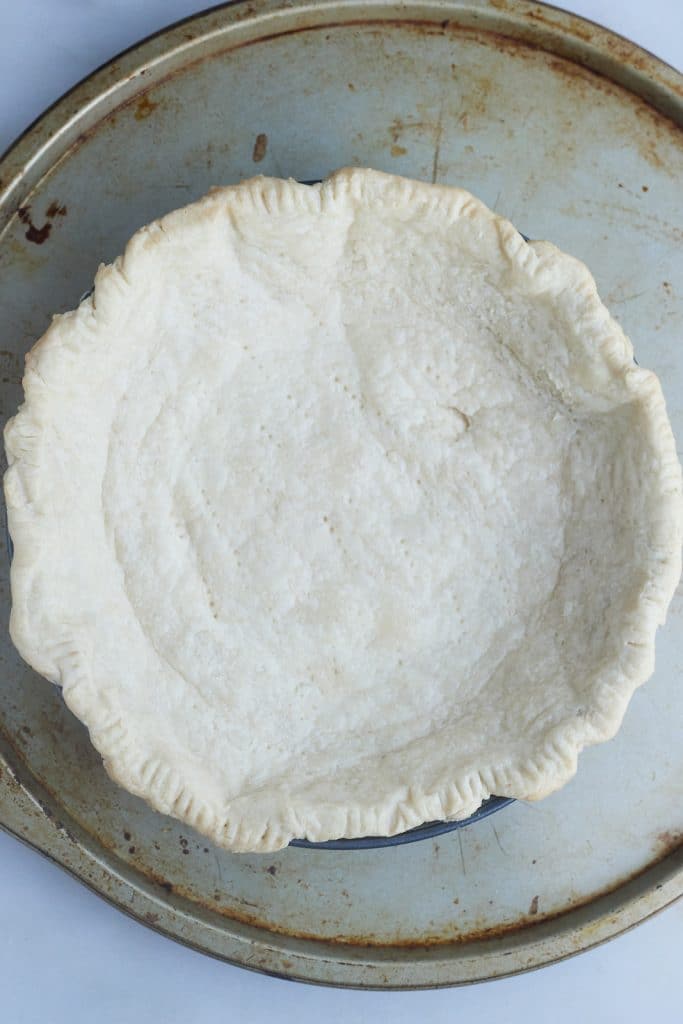
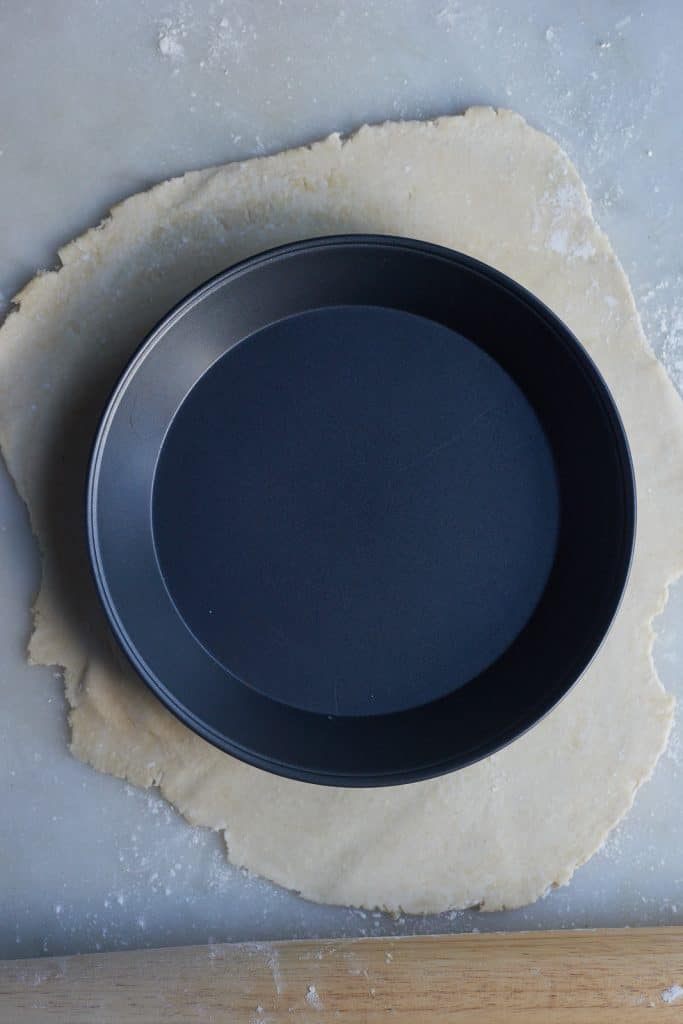
- Place the dough on a floured surface and roll the dough until it’s about ⅛ inch thick and long enough to extend about 1-2 inches beyond your pie plate. Rotate the dough while rolling it out to ensure it doesn’t stick to the board.
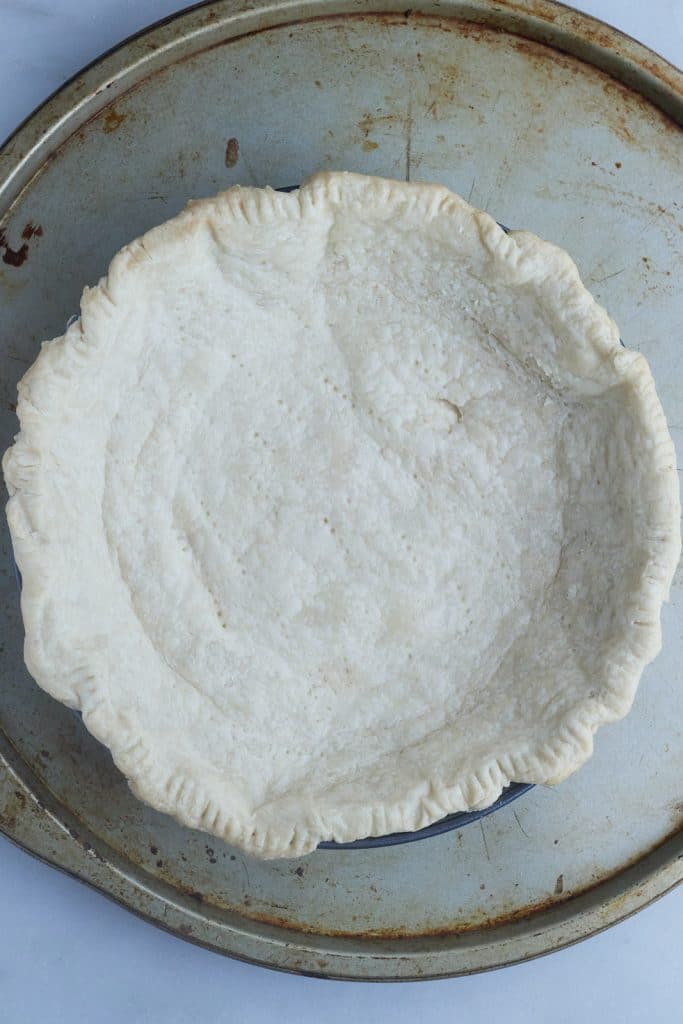
- Roll the dough over your rolling pin and lay it on the pie plate.
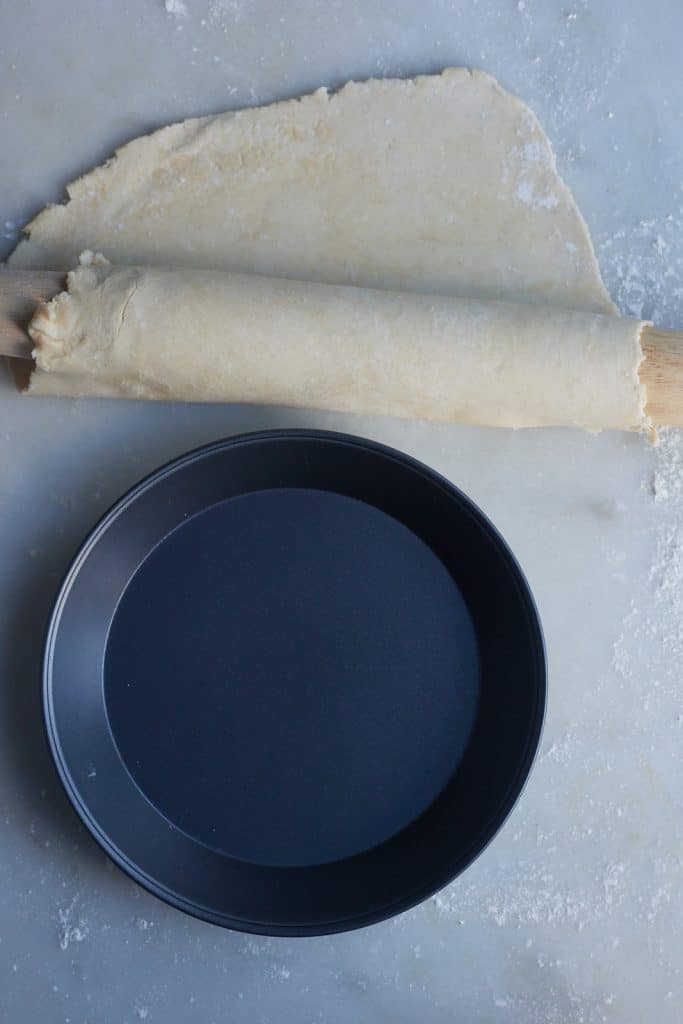
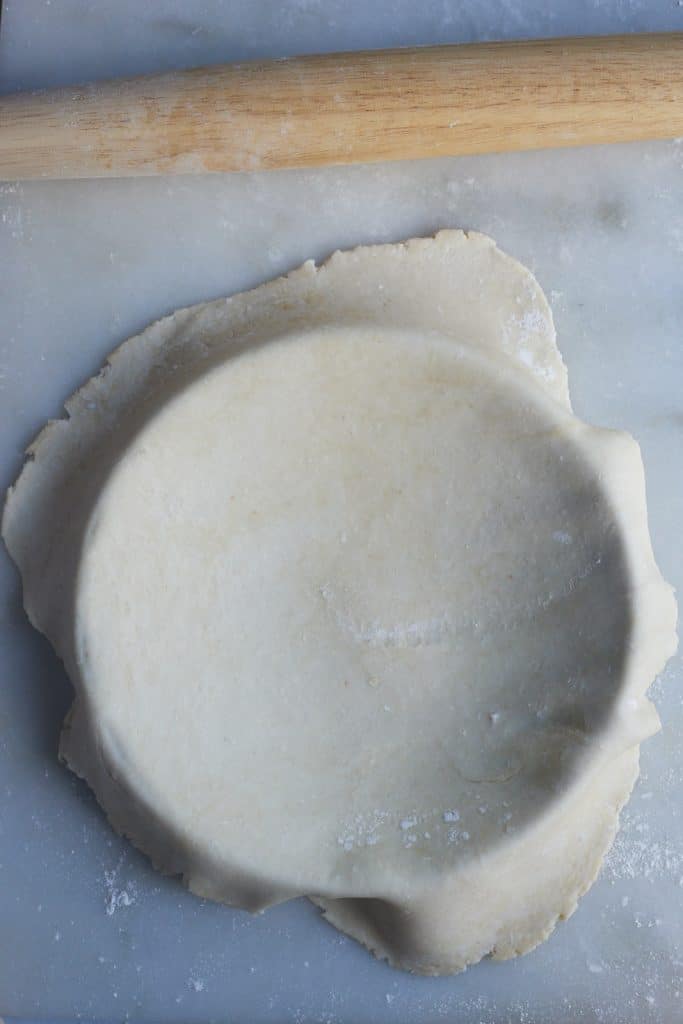
- Adjust the pie dough so that it fits in your pie plate but do not stretch it to fit.
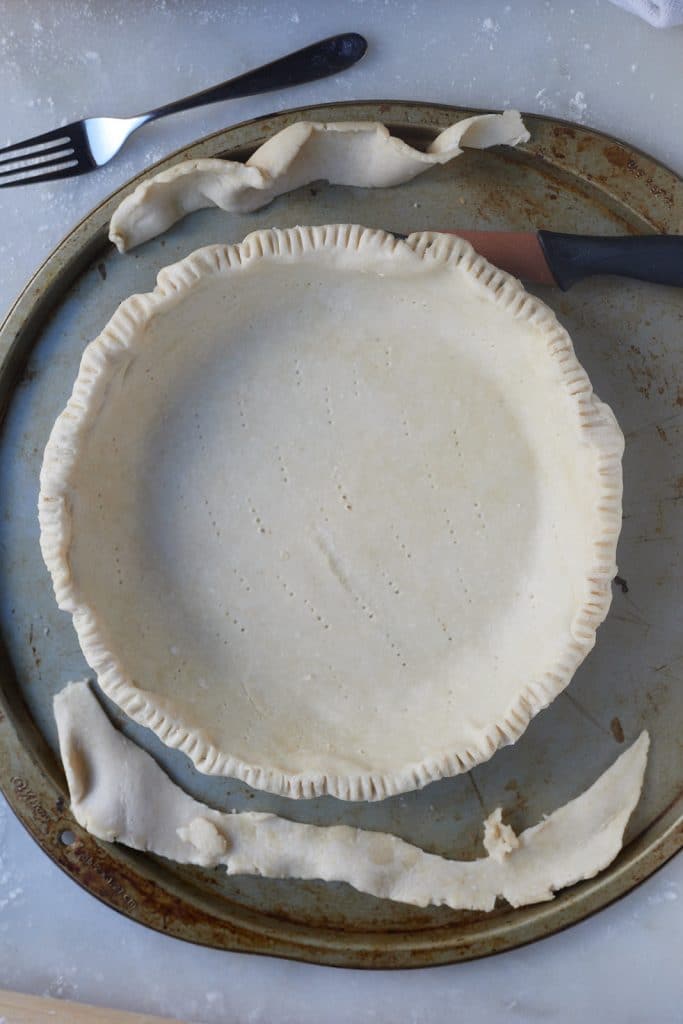
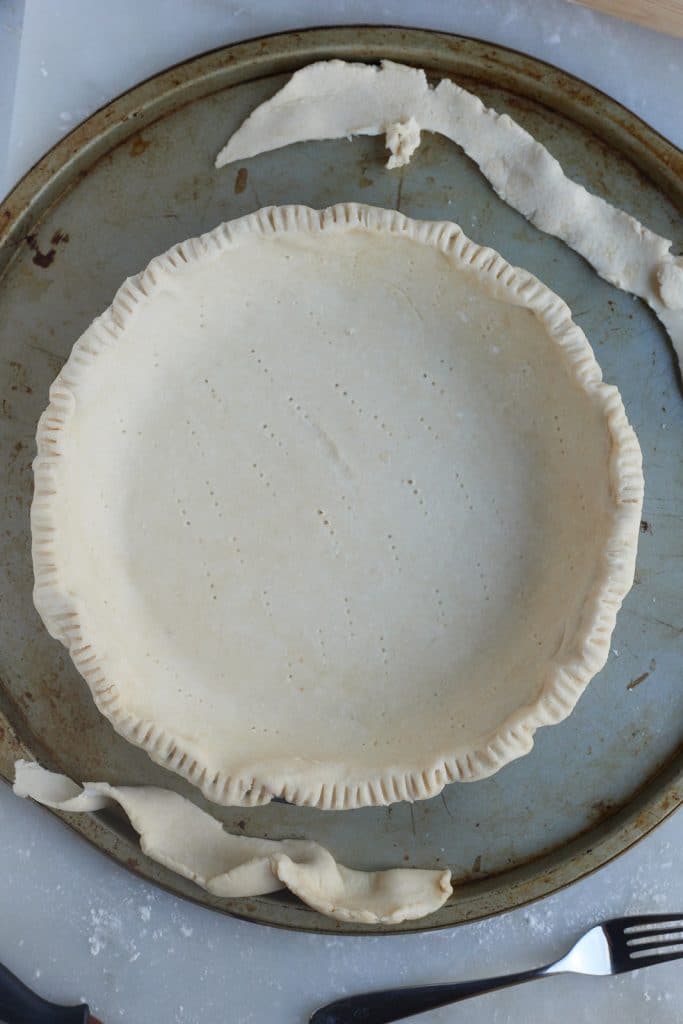
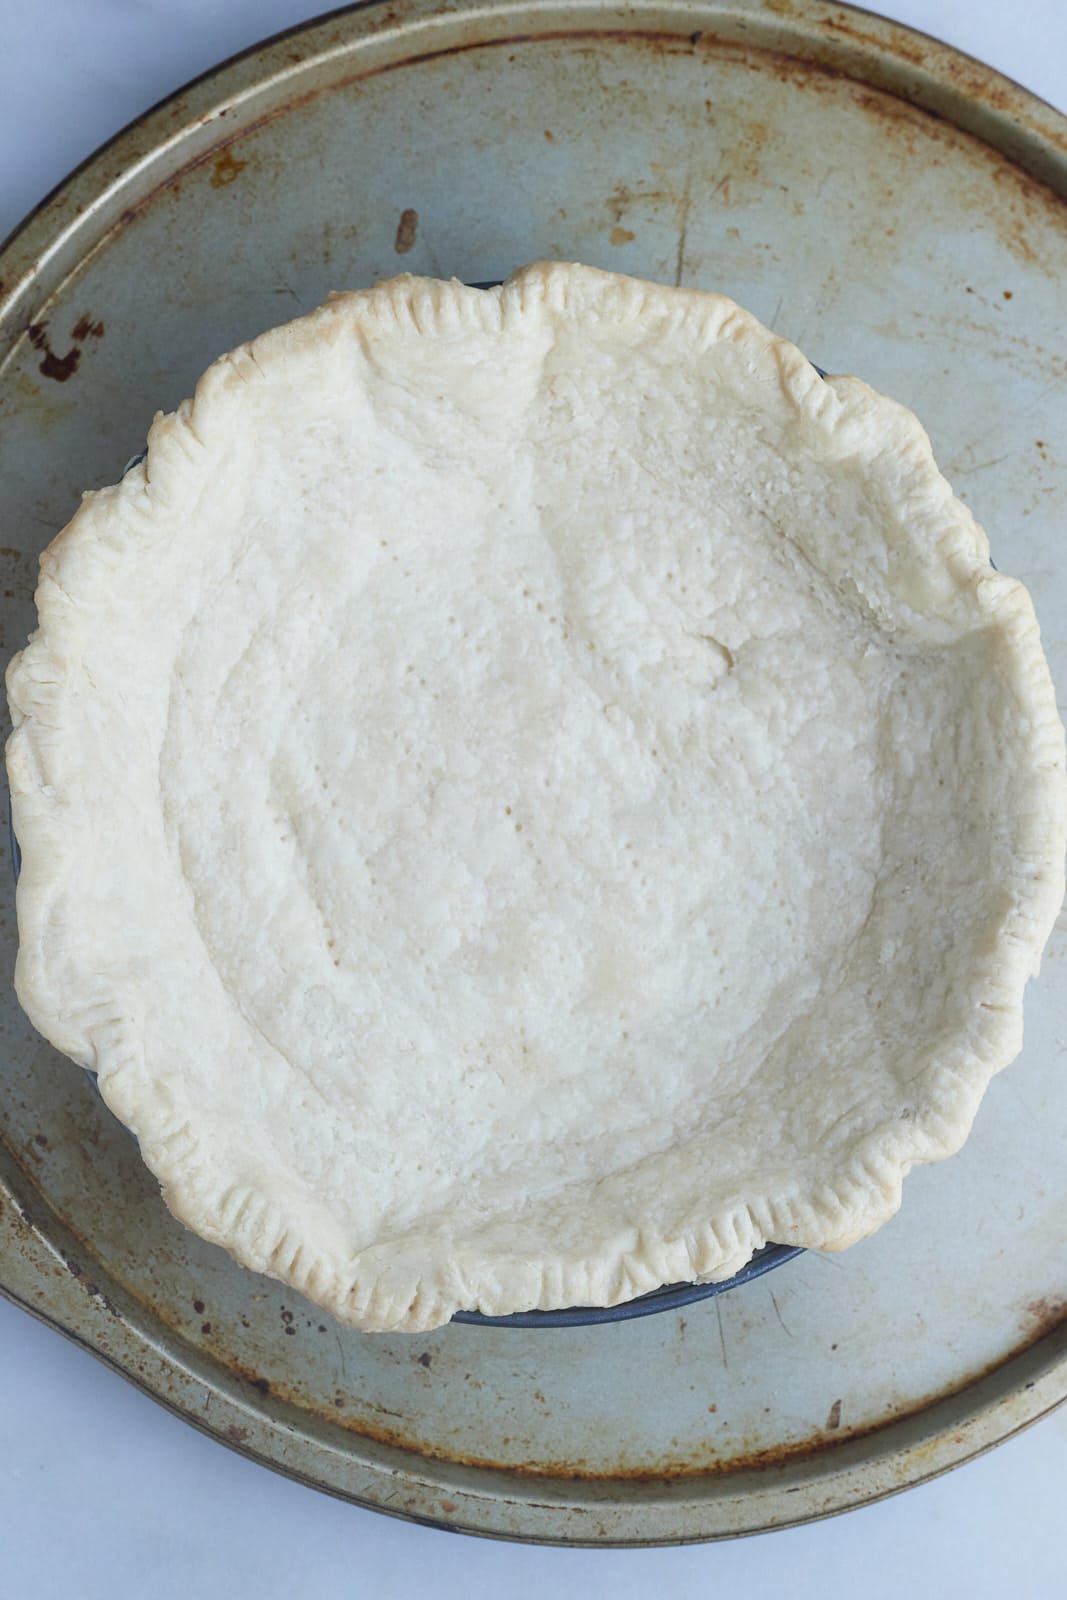
- To decorate the sides of your pie crust, trim or tuck under any excess dough and use your fingers or a fork to crimp the sides. Use crust as instructed in your recipe.
I often parbake my crust because I love making custard pies, like sweet potato pie and chess pie.
To Partially Bake the Crust
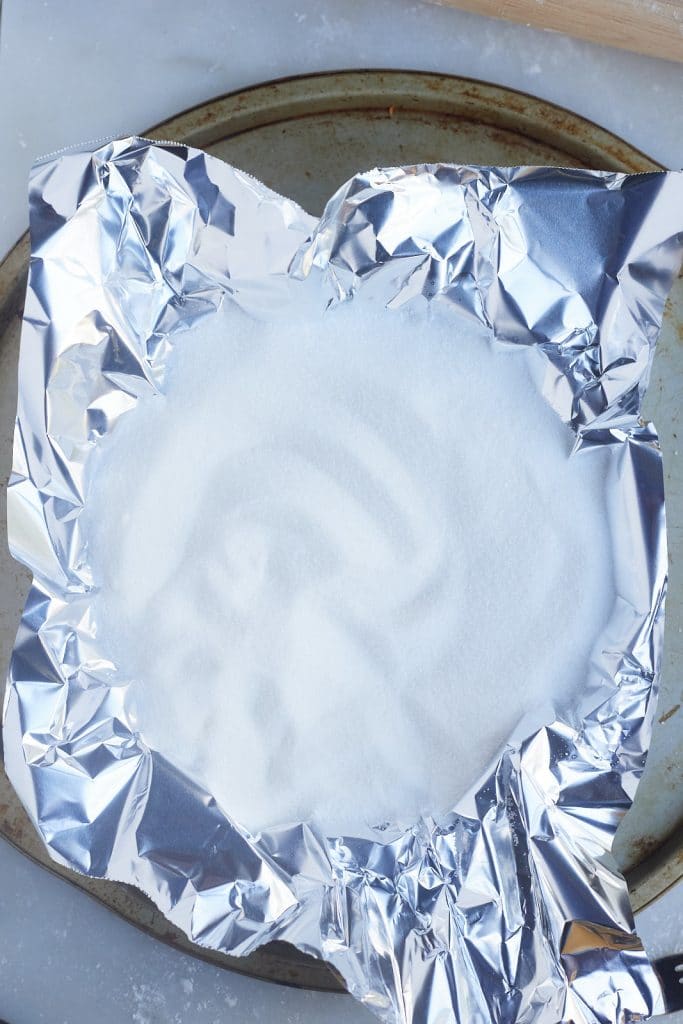
- Preheat the oven to 375 degrees Fahrenheit. After placing the pie in the pie plate, dock the inside of the pie crust all over with a fork. Place the pie crust in the freezer for 10 minutes. Place pie crust on a baking sheet and lay foil paper in the middle of the pie crust, making sure it covers the entire pie crust.
- Fill the inside with white sugar, pie weights, or beans until the inside is full and the foil paper is laying along the sides of the pie. If using sugar, feel free to reuse it over and over again and store in an airtight container. If using beans, discard them after baking.
- Bake in a preheated oven for 15-17 minutes. Remove foil paper and pie weights and continue baking for 8-10 minutes to bake the bottom. Remove from the oven.
Can you make it ahead of time?
You can make the dough for this pie crust up to 3 days ahead of time and keep it wrapped in plastic in the fridge. You can also roll out the dough and place it in the pie dish and it will keep covered for up to 5 days.
Can you freeze it?
You can freeze the homemade pie crust either part baked or un baked.
Unbaked: Cover the tin with plastic wrap and place in a freezer bag. It will keep well for up to 3 months. You can bake the crust straight out of the freezer.
Baked: Baked pie crusts will keep well in the freezer for up to 6 months. Let the cool completely before wrapping and storing. Again, you can just add your filling and bake from frozen.
Do you need to use shortening?
I like to use a mixture of shortening and butter in my pie crust. The butter gives it a nice rich flavor and the shortening gives a more tender and flakey crust. You can use all butter or all shortening, but I think some of both is the best way forward.
Recipe Notes and Tips
- How small you cut the pieces of butter into the pie dough will depend on how you plan on using the pie dough. For top crust and really flaky pie dough, cut the butter and shortening into the size of peas. For custard pies that need a pre-baked crust, such as sweet potato pie or chess pie, cut the butter smaller, until it resembles coarse cornmeal. This is known as making a mealy pie dough.
- I place all my cut butter and shortening in the freezer for about an hour before I start to bake the pie. It ensures all my pie crust stays nice and cold in the food processor.
Use this homemade crust with these pie recipes:
More Dessert Recipes
- Blueberry Compote
- Homemade Chocolate Pudding
- Homemade Churros (Air Fryer or Stovetop)
- Moist Chocolate Cola Cake
Homemade Pie Crust Recipe
Ingredients
Instructions
- Place flour and salt in the base of a food processor. Pulse until mixed through. Add butter and shortening and pulse until butter and shortening is cut into pieces into the flour.*
- Add 8 tablespoon of water and pulse until the dough starts to pull away from the walls of the food processor. If the dough appears too dry and crumbly, add more water, about ½ tablespoon at a time. The dough should be able to smoosh together between your fingers.
- Remove dough and place onto a floured surface. Use your hands and form dough into a ball, then cut the ball into two separate pieces. Flatten the pieces into two separate disks.
- Wrap the disk in plastic wrap and place in the fridge for at least 45 minutes or up to 3 days.
- Remove disk from fridge and allow to sit for around 5 minutes, or until the dough is warm enough to roll out.
- Place the dough on a floured surface and roll the dough until it’s about ⅛ inch thick and long enough to extend about 1-2 inches beyond your pie plate. Rotate the dough while rolling it out to ensure it doesn’t stick to the board.
- Roll the dough over your rolling pin and lay it on the pie plate. Adjust the pie dough so that it fits in your pie plate but do not stretch it to fit.
- To decorate the sides, trim or tuck under any excess dough and use your fingers or a fork to crimp the sides. Use crust as instructed in your recipe.
- To Partially Bake: Preheat the oven to 375 degrees Fahrenheit. After placing the pie in the pie plate, dock the inside of the pie crust all over with a fork. Place the pie crust in the freezer for 10 minutes. Place pie crust on a baking sheet and lay foil paper in the middle of the pie crust, making sure it covers the entire pie crust. Fill the inside with white sugar, pie weights, or beans until the inside is full and the foil paper is laying along the sides of the pie. Bake in a preheated oven for 15-17 minutes. Remove foil paper and pie weights and continue baking for 8-10 minutes to bake the bottom. Remove from the oven.
Leave a Reply