
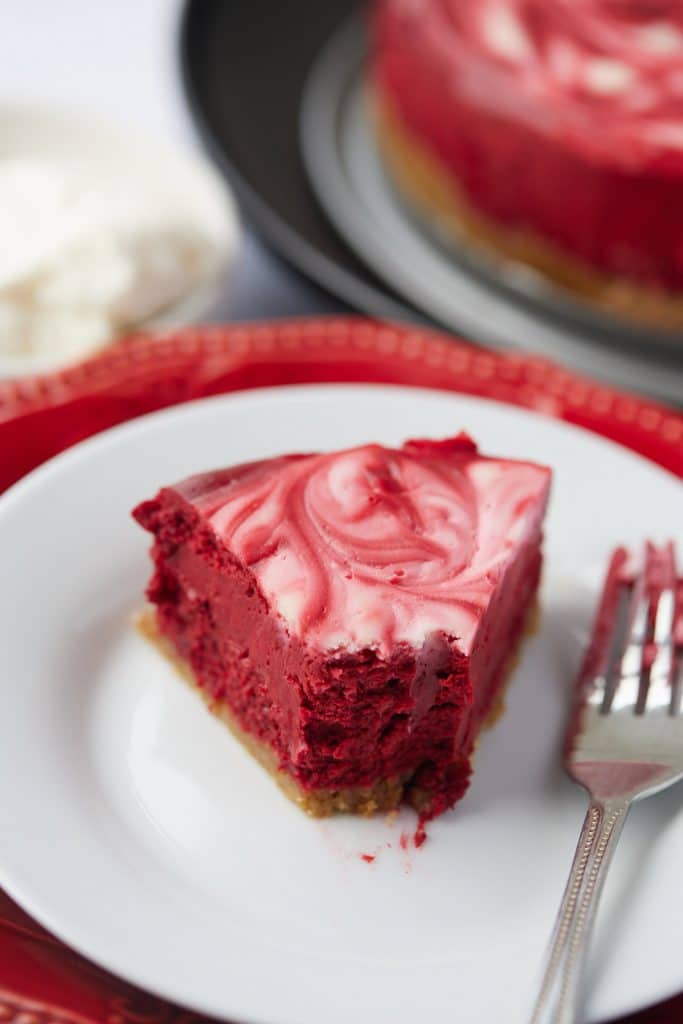
This delicious red velvet cheesecake is a wonderful treat for Valentine's Day, or any time of the year! Flavored with cocoa powder with a ginger cookie crust, this pressure cooker cheesecake comes out wonderfully light and fluffy.
This post contains affiliate links, please read my full disclaimer here.
You’ll find the full recipe with ingredient amounts and instructions in the recipe card at the bottom of this post. Be sure to check out the blog post itself for extra tips and tricks!
Do you have any plans for Valentine's Day? We are pretty low key on the day, but that doesn't mean I won't be enjoying this delicious red dessert!
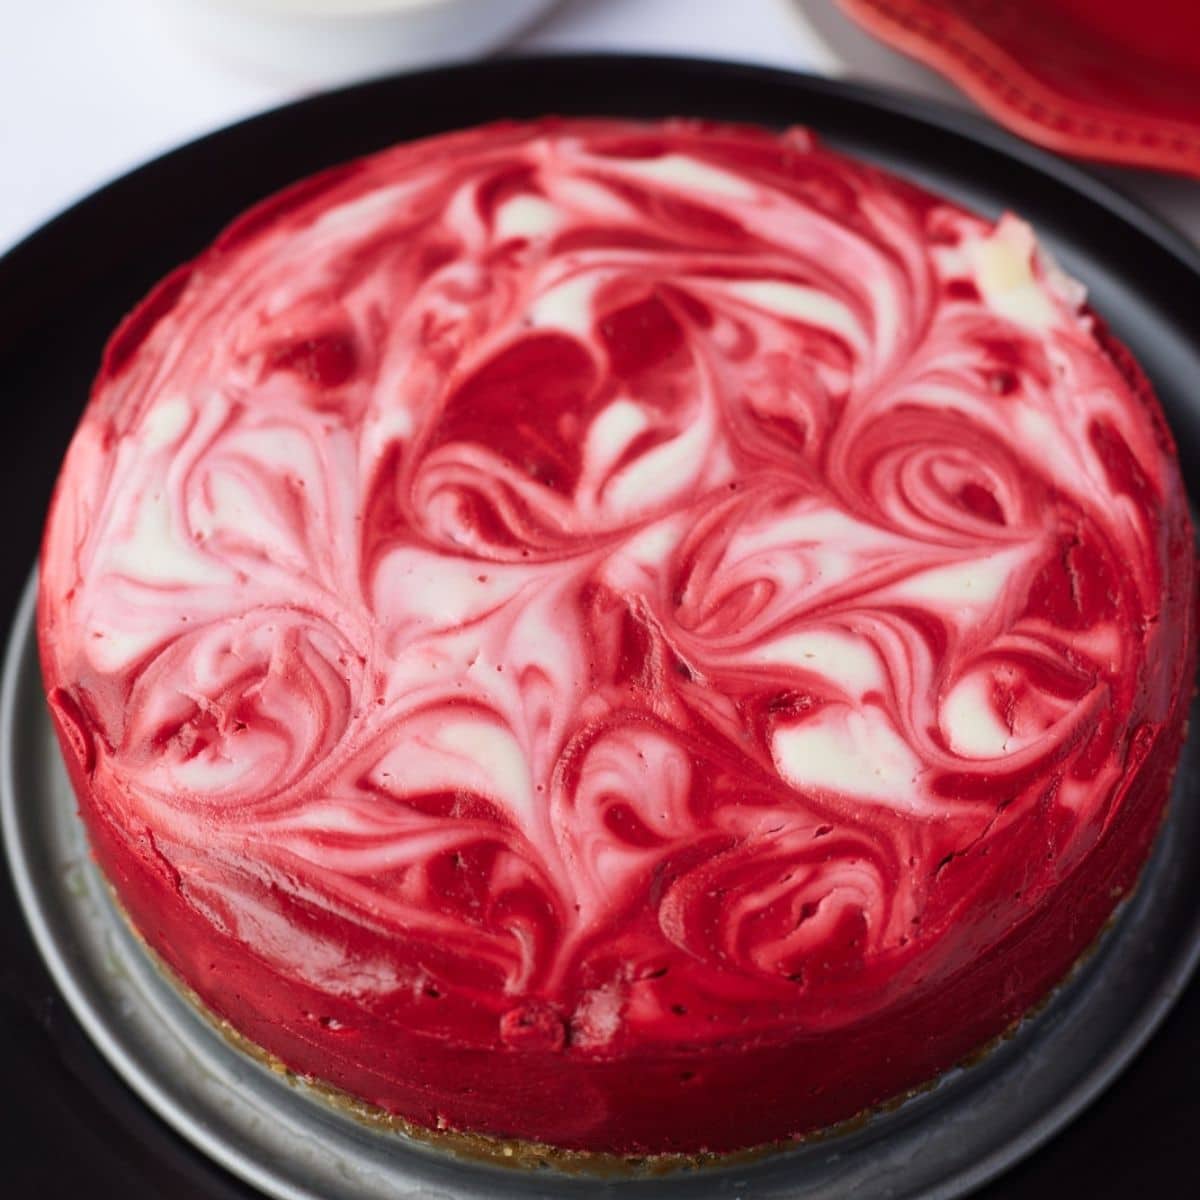
This red velvet cheesecake is all kinds of delicious. It has a decadent and rich chocolate flavor and the ginger snap crust is to die for.
This cheesecake recipe is cooked in the Instant Pot and is totally foolproof. This method ensures the fluffiest and creamiest cheesecake you'll ever make!
For more cheesecake recipes, be sure to try my Instant Pot Carrot Cake Cheesecake!
How to make a red velvet cheesecake
- Gather your ingredients.
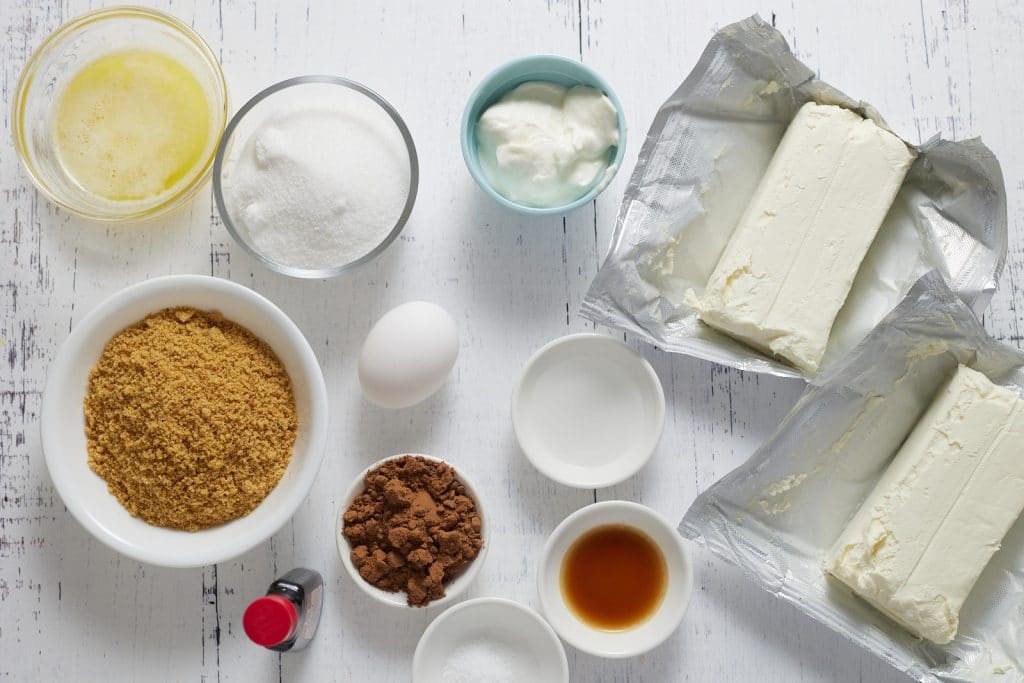
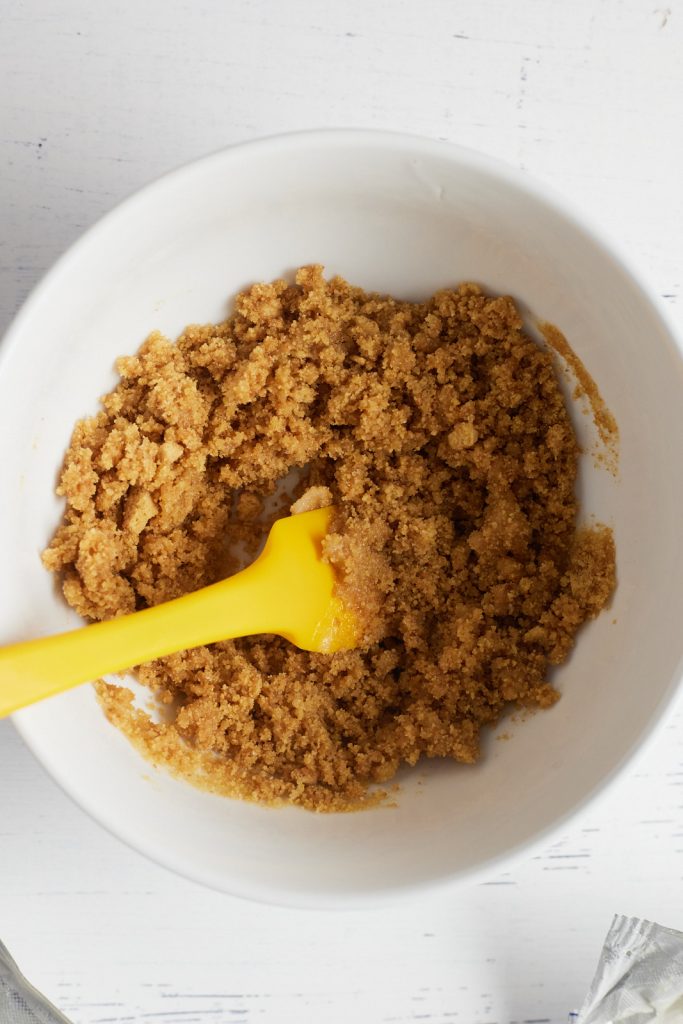
- Place cookie crumbs, sugar, and unsalted butter in a medium sized bowl and stir until combined.
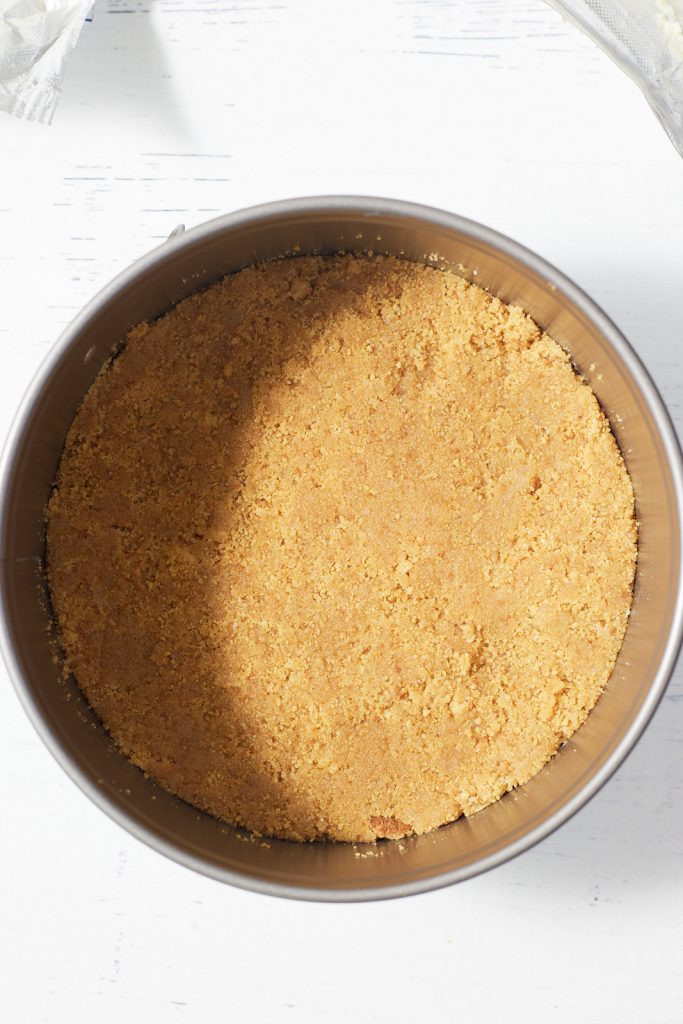
- Place in the bottom of a greased 7 inch springform pan. Set aside.
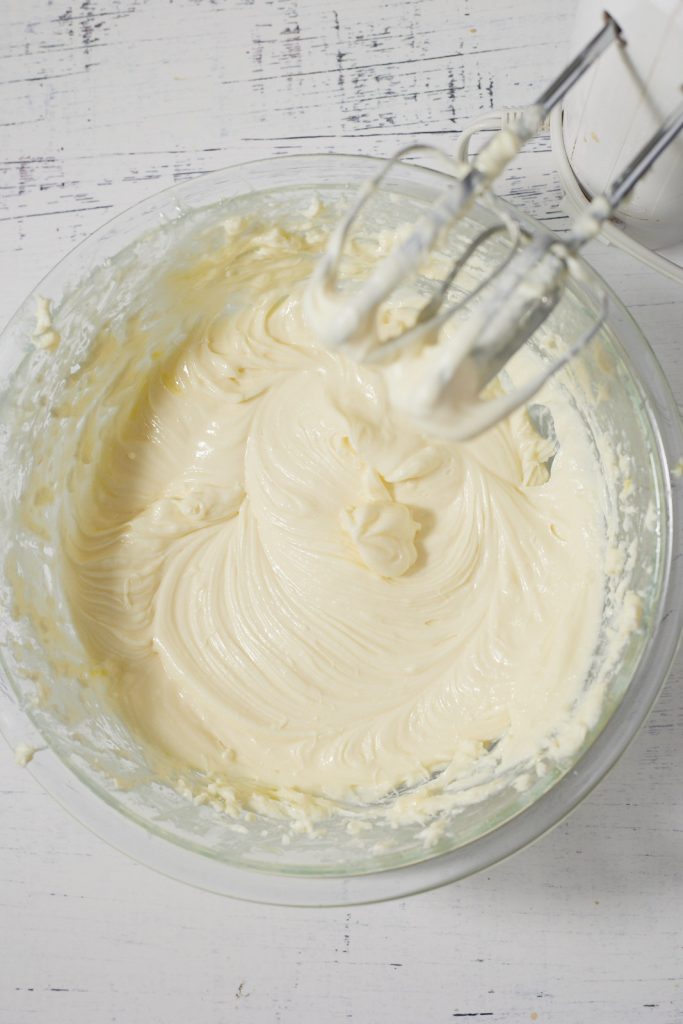
- Place cream cheese, granulated sugar, and salt in a large bowl. Using a hand mixer, beat the cream cheese and sugar on medium speed until combined. Add sour cream, egg, vanilla extract, and vinegar and beat on medium speed until well blended. Remove about ¼ cup of the batter mixture and set aside.
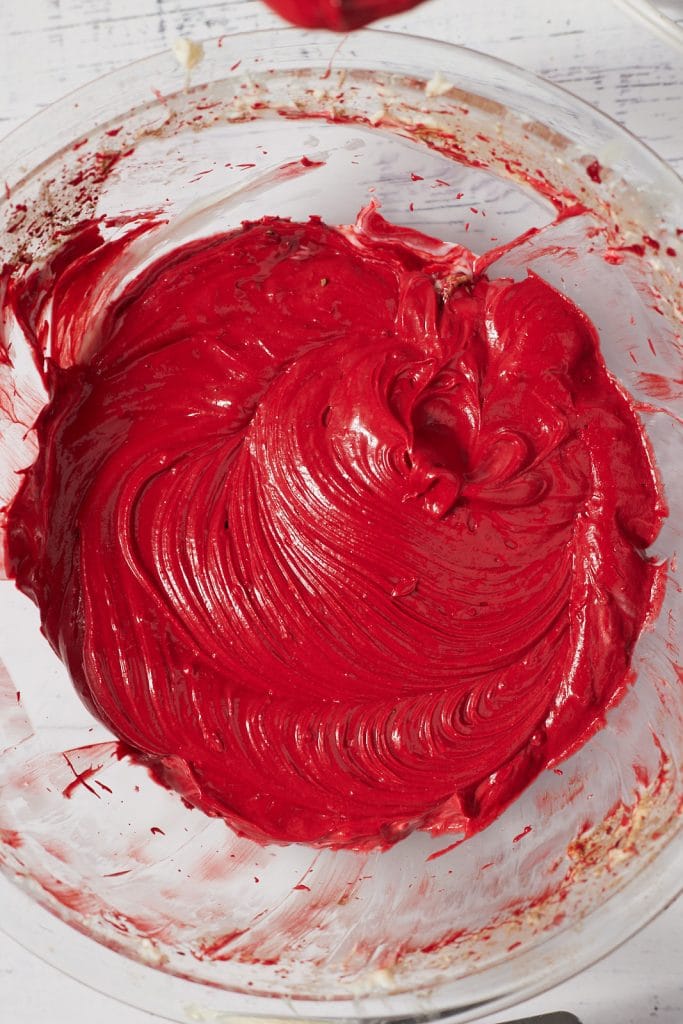
- Add cocoa powder and food coloring to the bowl and beat until incorporated.
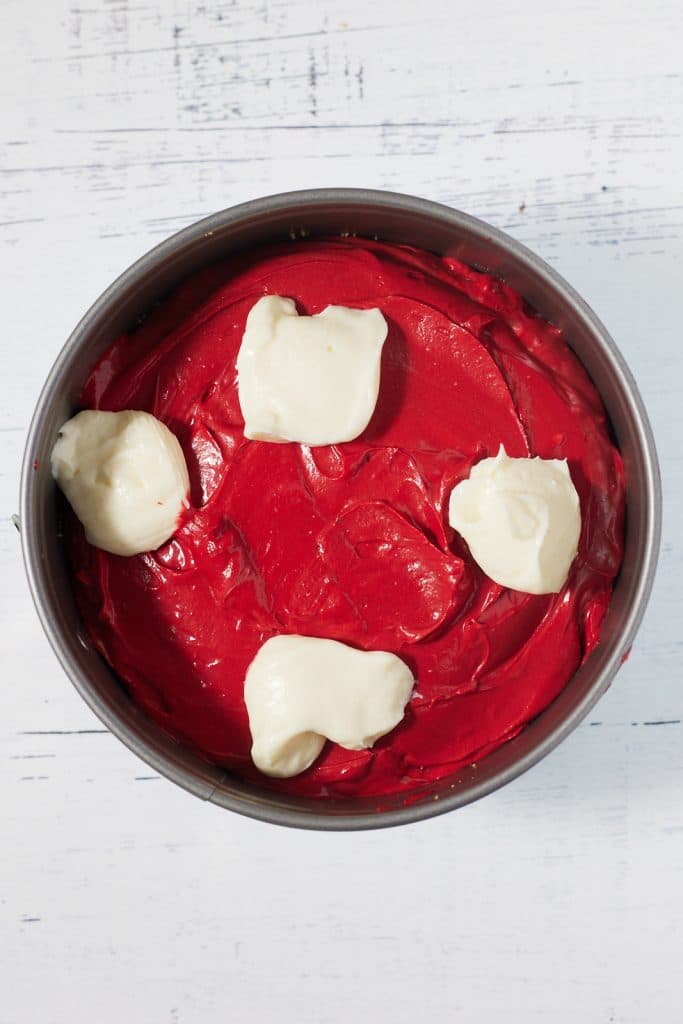
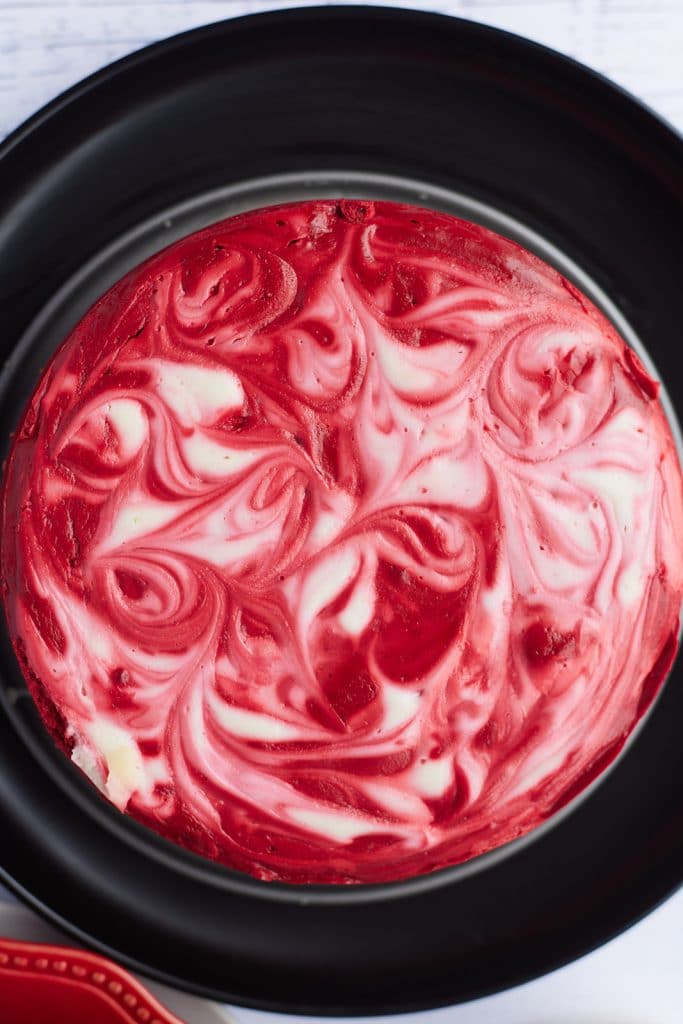
- Pour this mixture into the prepared springform pan and smooth the top.
- Place the ¼ cup of set aside batter mixture on top of the cheesecake.
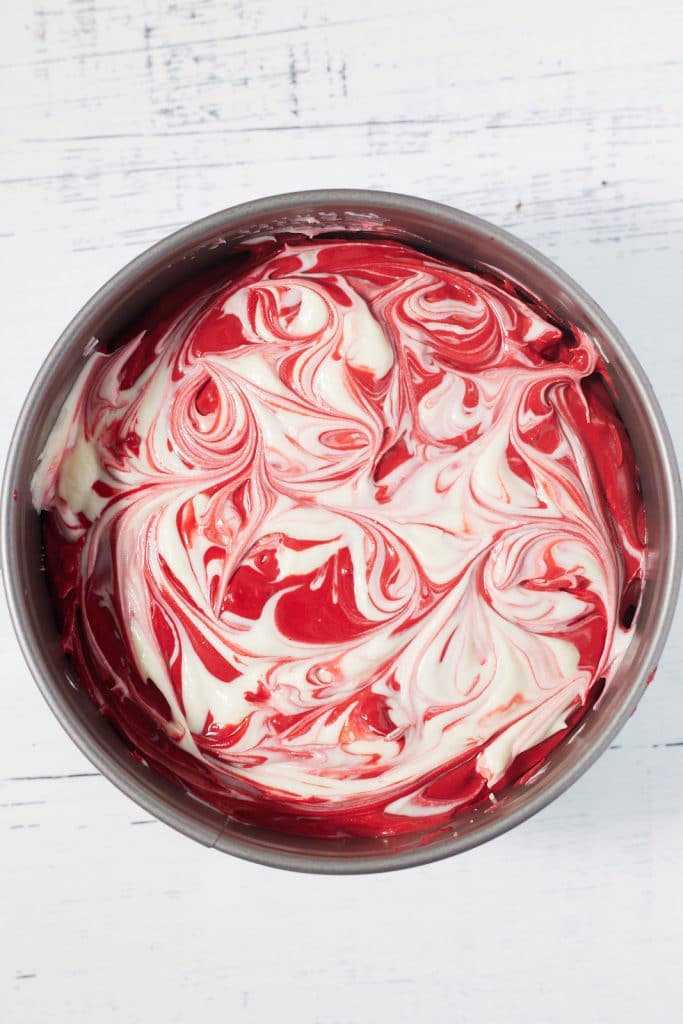
- Create a swirl with a chopstick or toothpick.
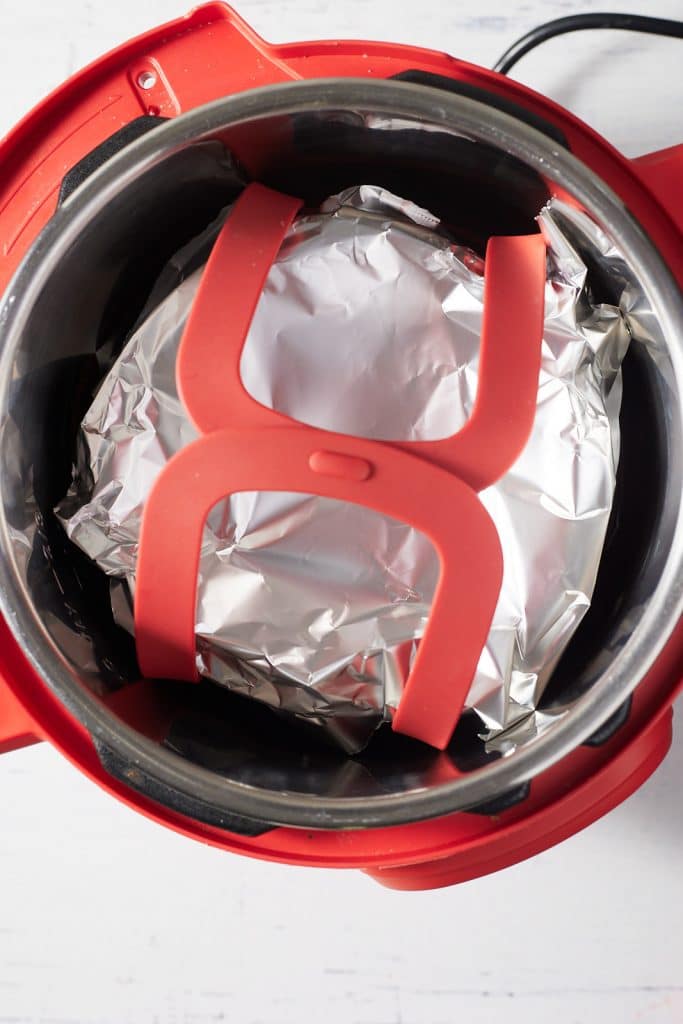
- Cover springform pan with foil paper.
- Add 1 cup of water to Instant Pot. Add cake to Instant Pot on trivet or bakeware sling.
- Cover and cook on high pressure for 35 minutes, allowing for natural release for 10 minutes.
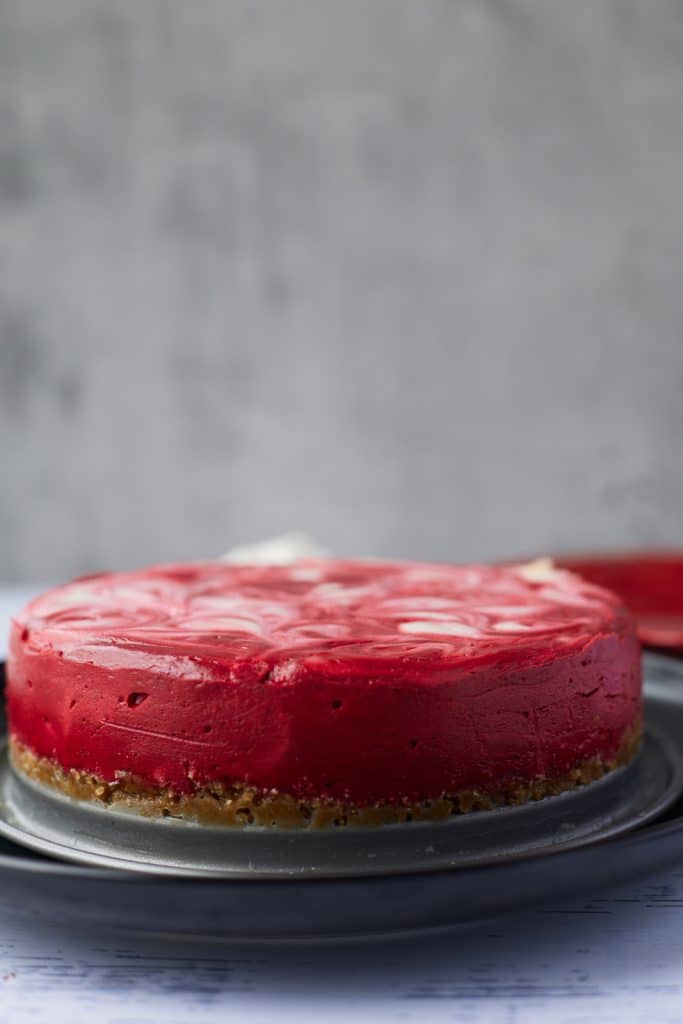
- Remove cake and allow to cool on the counter, then transfer to the fridge. Refrigerate 2-24 hours, the longer the better.
How do you stop the cheesecake from cracking?
Cheesecakes can crack for two main reasons.
- If the cake batter is over mixed, this can cause cracking. If you whip too much air into it, the cake can rise and then collapse, causing the cracks.
- Cheesecakes also crack when the cool too quickly, so be sure to naturally release the pressure in your Instant Pot rather than a quick release.
How long does it keep?
Once your cheesecake has cooled in the fridge, cover it loosely with plastic wrap or foil. It's best within the first couple of days, but will keep well for 4 to 5.
Can you freeze it?
Yes, cheesecake freezes well, and you can freeze it in slices or whole. If freezing whole, I like to keep it in the springform pan. Wrap several times in plastic wrap and foil and it will keep for up to a month. For individual slices, it's best to freeze them solid on a baking sheet before wrapping and placing in a container or freezer bag.
Thaw frozen cheesecake in the fridge overnight before enjoying.
Recipe Notes and Tips
- Take care not to over mix the batter.
- Natural release the pressure for the Instant Pot so that the cheesecake doesn't cool too quickly.
More Pressure Cooker Recipes
- Instant Pot Carrot Cake Cheesecake
- Instant Pot Chocolate Molten Cake Bites
- Pressure Cooker Lemon Curd
- Instant Pot Rice Pudding
Red Velvet Cheesecake
Ingredients
Instructions
- Place cookie crumbs, sugar, and unsalted butter in a medium sized bowl and stir until combined. Place in the bottom of a greased 7 inch springform pan. Set aside.
- Place cream cheese, granulated sugar, and salt in a large bowl. Using a hand mixer, eat the cream cheese and sugar on medium speed until combined. Add sour cream, egg, vanilla extract, and vinegar and beat on medium speed until well blended. Remove about ¼ cup of the batter mixture and set aside.
- Add cocoa powder and food coloring to the bowl and beat until incorporated. Pour this mixture into the prepared springform pan and smooth the top.
- Place the ¼ cup of set aside batter mixture on top of the cheesecake and create a swirl with a chopstick or toothpick.
- Cover springform pan with foil paper.
- Add 1 cup of water to Instant Pot. Add cake to Instant Pot on trivet or bakeware sling.
- Cook on high pressure for 35 minutes, allowing for natural release for 10 minutes.
- Remove cake and allow to cool on the counter, then transfer to the fridge. Refrigerate 2-24 hours, the longer the better.
Nutrition
Notes
- Take care not to over mix the batter.
- Natural release the pressure for the Instant Pot so that the cheesecake doesn't cool too quickly.
SEAN says
I tried the oxtail and ended up burning my onions in the browning stage and made the best ox I ever had (slow cook dutch oven), my tenant from Westmoreland begging for the recipe. I found the flavor is not the same in the instant pot – same exact ingredients.
What brand of flavoring you used to do 2-ounces? Its expensive where Im at.
thanks for everything!
sw
Tanya says
Hi Sean, thanks! I use the Grace browning for that dish.
ted says
Oh my god! This is a pure bliss to taste buds. I love desserts, and cant wait to try this at home. But I would like to replace butter with cow ghee. They both are good options for baking! Still I guess, ghee is indeed a more wise choice in terms of health
Heather says
I just made this today....when I took the foil off after cooking and natural release, it looks a little wiggly like Jello. Is it supposed to look this way? Will it firm up as it cools and sets in the fridge? I'm kind of freaking out because I followed the instructions exactly but unsure what happened.
Tanya says
Hi Heather, you should have a little wiggle and it'll firm up after chilling. If it's really really wiggly, you can place the top of the pressure cooker back on and cook for an additional 10 minutes on high pressure.
Virginia Lee says
A little wiggly is fine. I have been making all kinds of cheesecakes for. 40 ears now.
Kari says
I love the idea of combining a red velvet cake and cheesecake and making it in a pressure cooker! This is such a delight to discover!
Tanya says
Thanks so much Kari 🙂