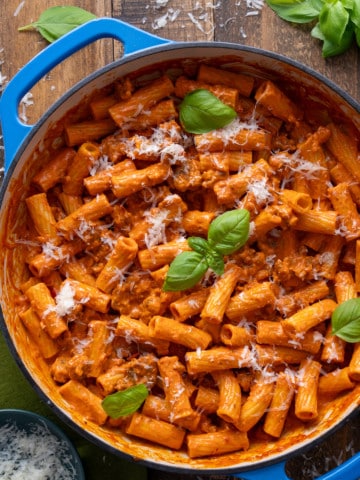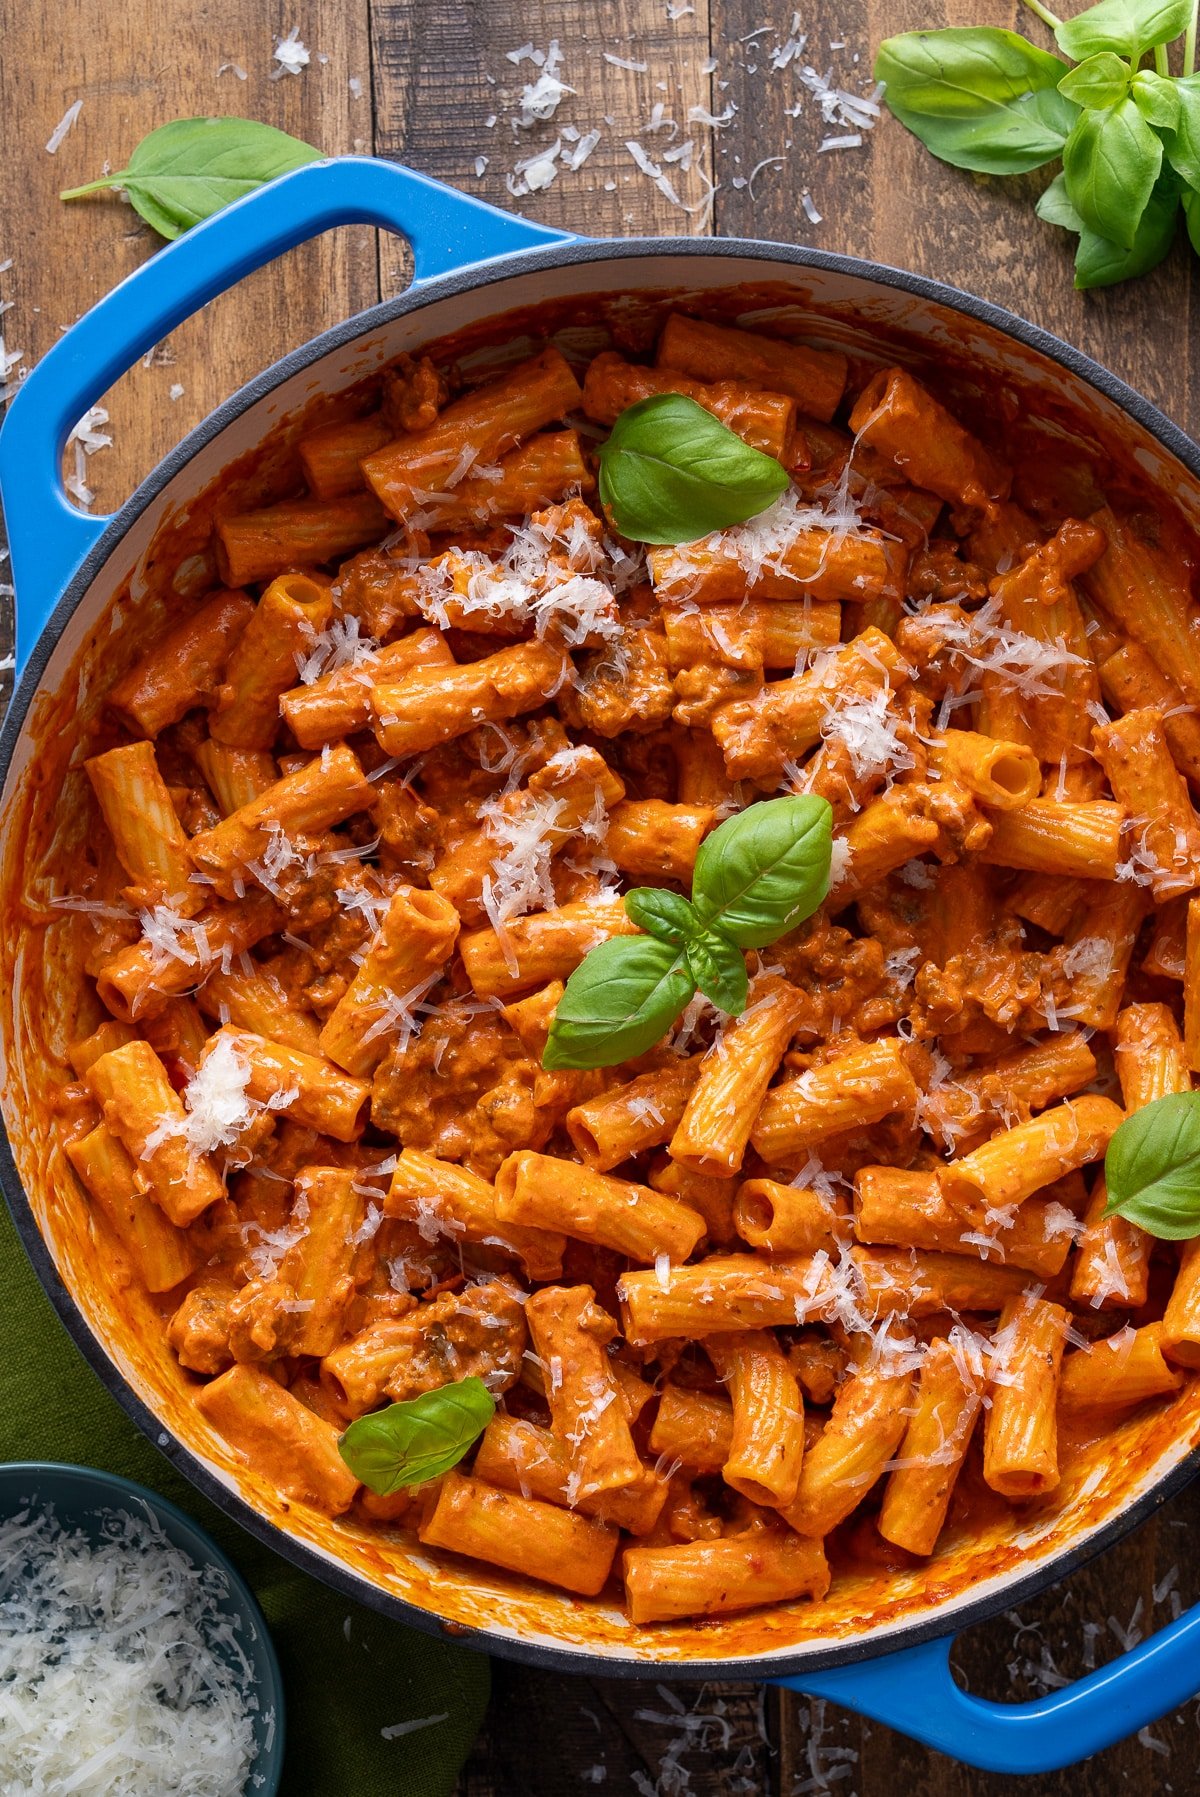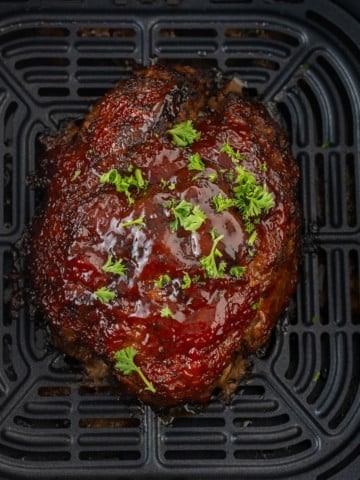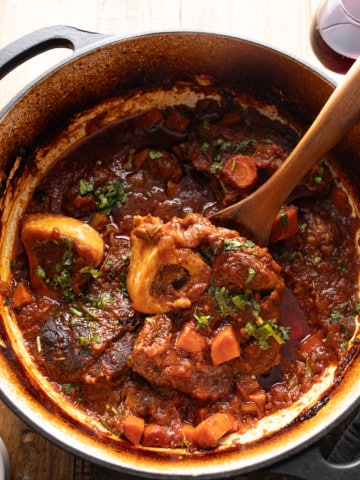
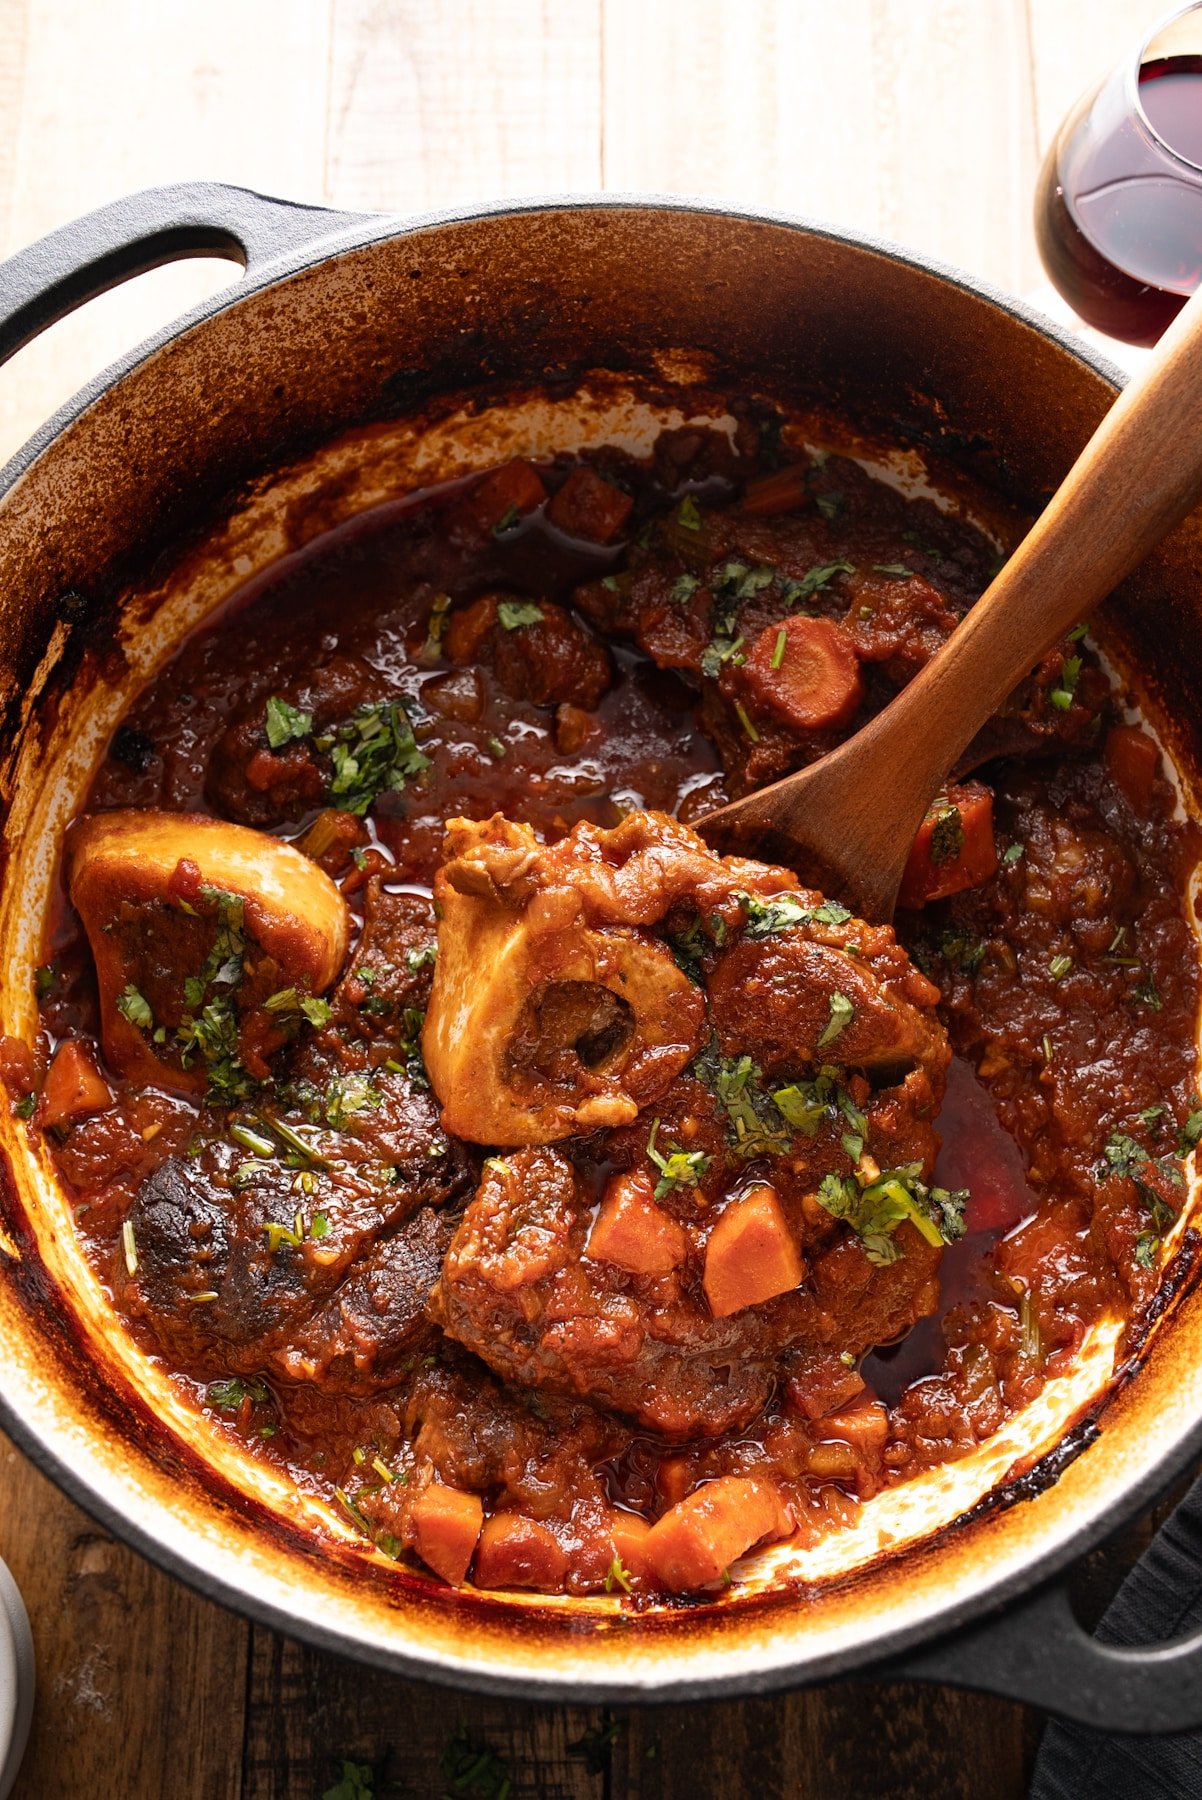
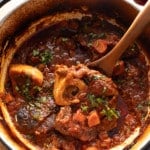
These tender braised beef shanks simmer in a rich, savory sauce with red wine, onions, garlic, and warm spices. The meat becomes so tender it falls off the bone, and the sauce has so much depth of flavor you’ll be asking for seconds.

I have always obsessed over fall-apart, melt-in-your-mouth beef dishes. My Jamaican oxtail stew has been my favorite comfort food for years. The rich flavor and soft texture are simply amazing.
It was only natural that I share this braised beef shank recipe. For this slow-braised beef recipe, I use the traditional way of cooking beef shanks. This method involves slow cooking in a tasty sauce made of tomatoes, onions, garlic, and red wine. I've tweaked the seasoning to add a little Caribbean flair by adding allspice and ground ginger.
-♡ Tanya
Recipe Quick Facts
- Beef shanks deliver rich, restaurant-quality flavor at roughly half the price of more premium cuts like short ribs or oxtail.
- This dish improves with time, making it perfect for meal prep or entertaining. Just prepare it up to 4 days in advance and reheat it when needed.
- Freezer-Friendly: Completely cooled braised beef shanks can be frozen in their sauce for up to 3 months without losing quality. To reheat, thaw overnight in the fridge and warm in a covered pot over low heat.
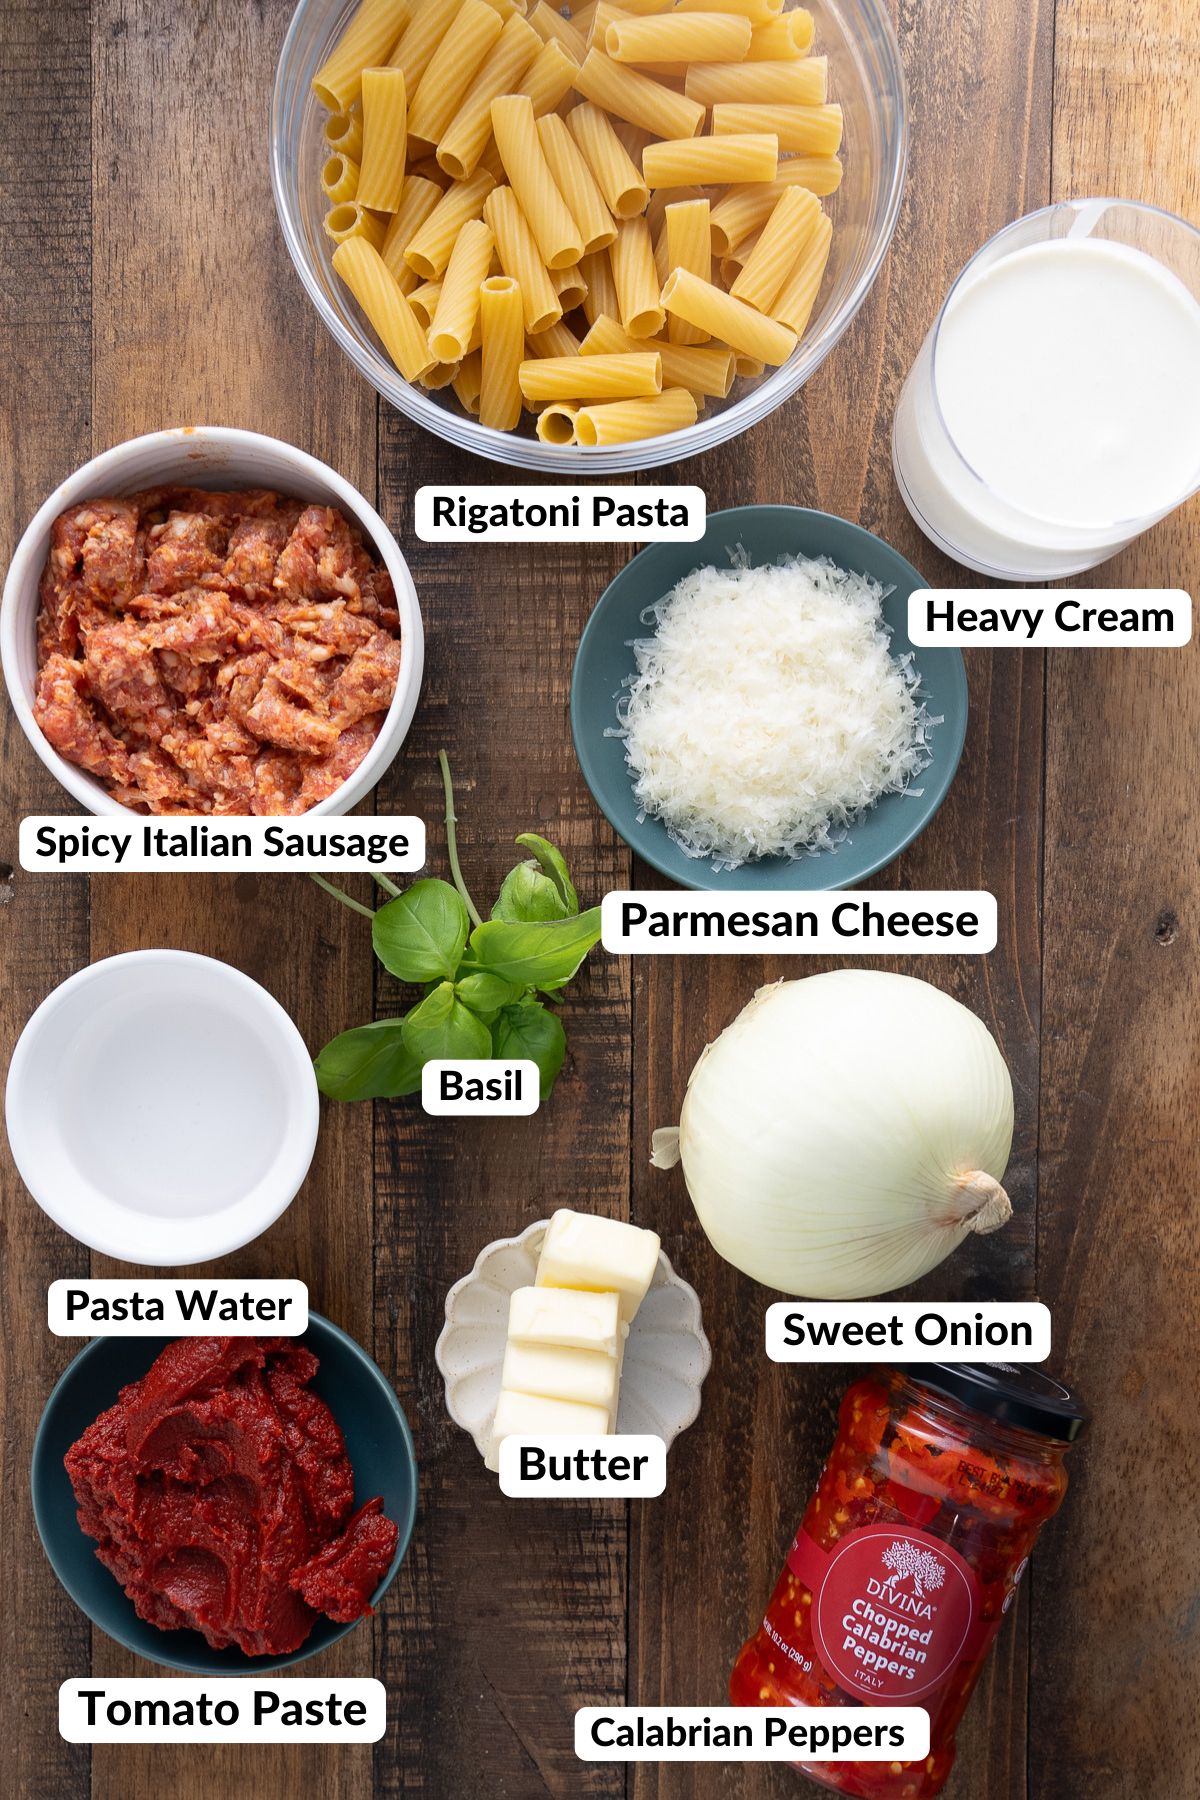
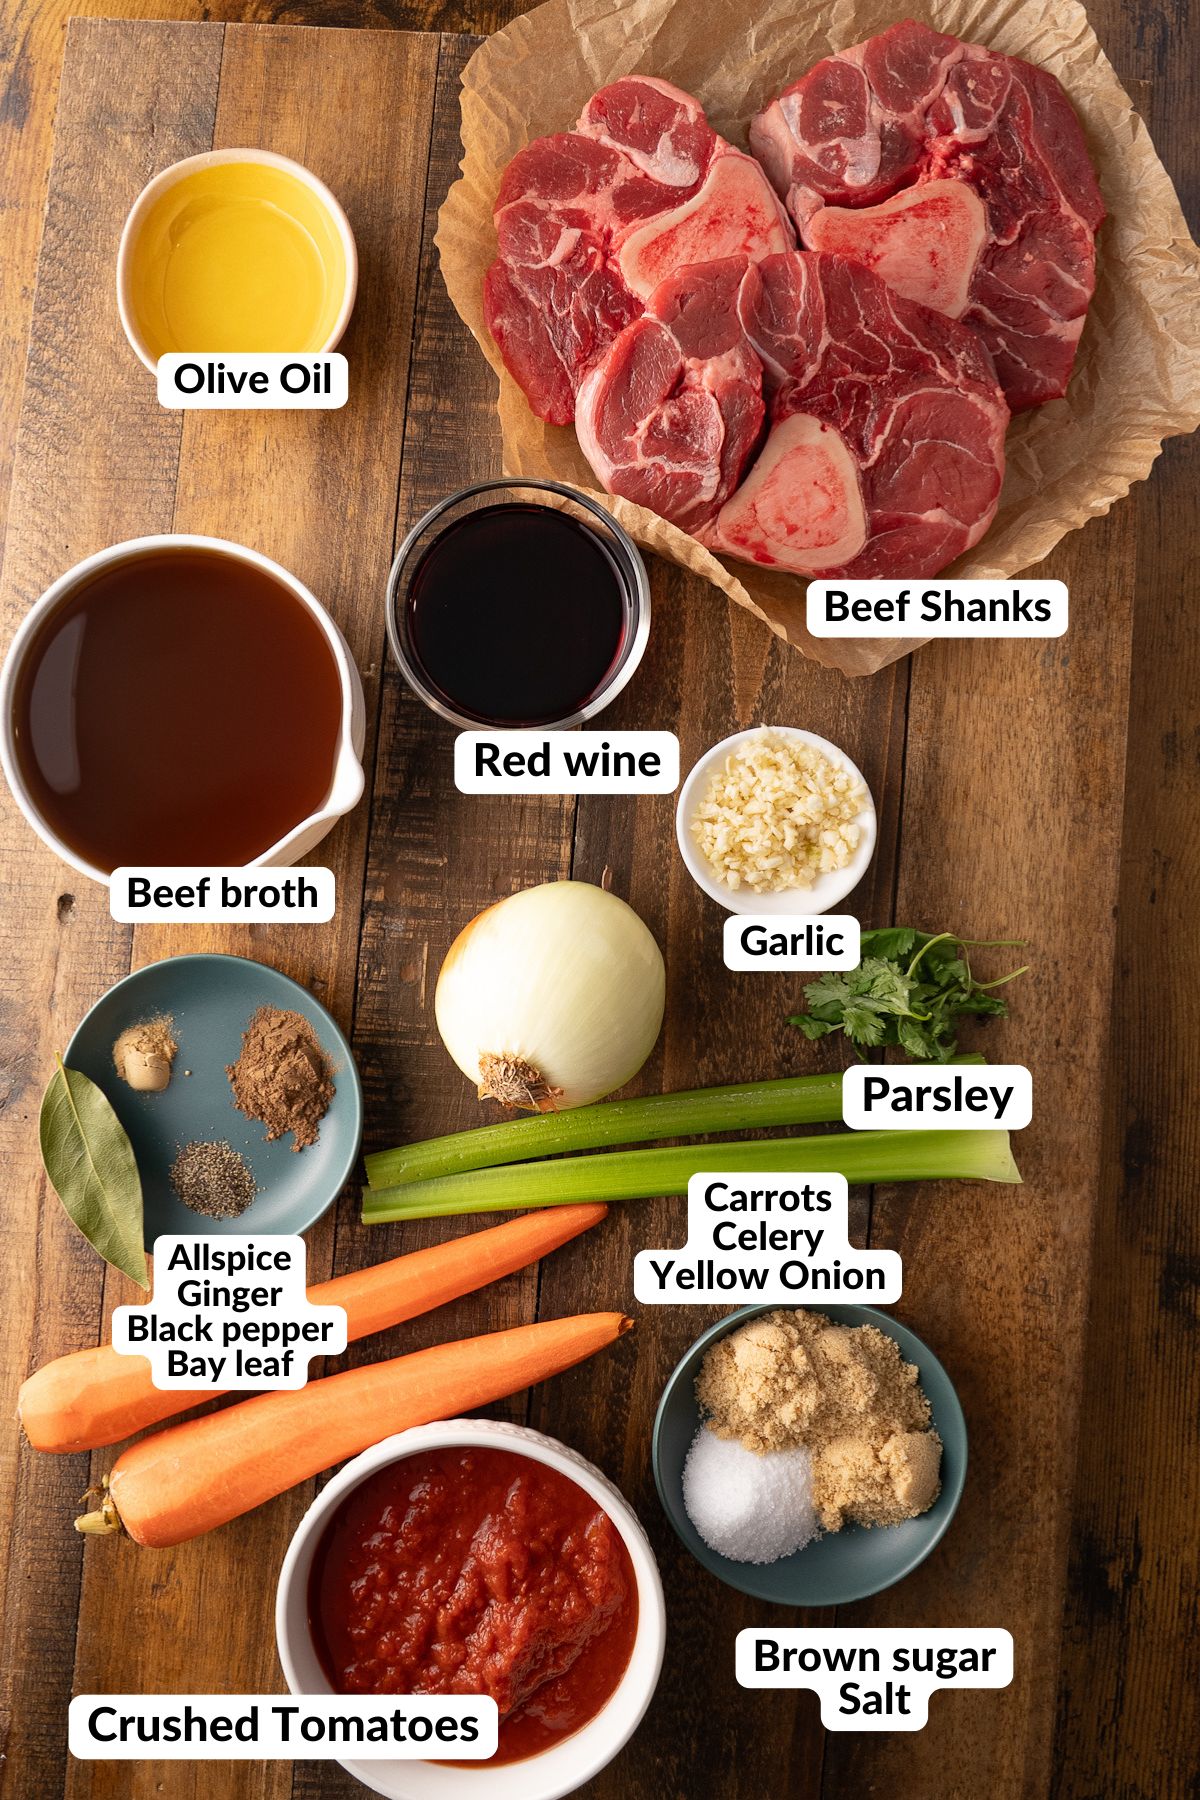
A Quick Look at the Ingredients
Ingredient amounts and full recipe instructions are on the printable recipe card at the bottom of the post.
- Beef Shanks – With their impressive center bone for deep flavor
- For the Spice Rub: Light brown sugar, kosher salt, allspice, ground ginger, black pepper
- The Base: Onion, carrots, celery (the classic mirepoix trio), fresh garlic cloves, olive oil for searing
- The Braising Liquid: Crushed tomatoes, beef broth, dry red wine (optional, but highly recommended), bay leaf
- For Finishing: Salt and freshly ground black pepper, and fresh parsley
Recommended Tool

This large Dutch oven is perfect for making a big batch of stew.
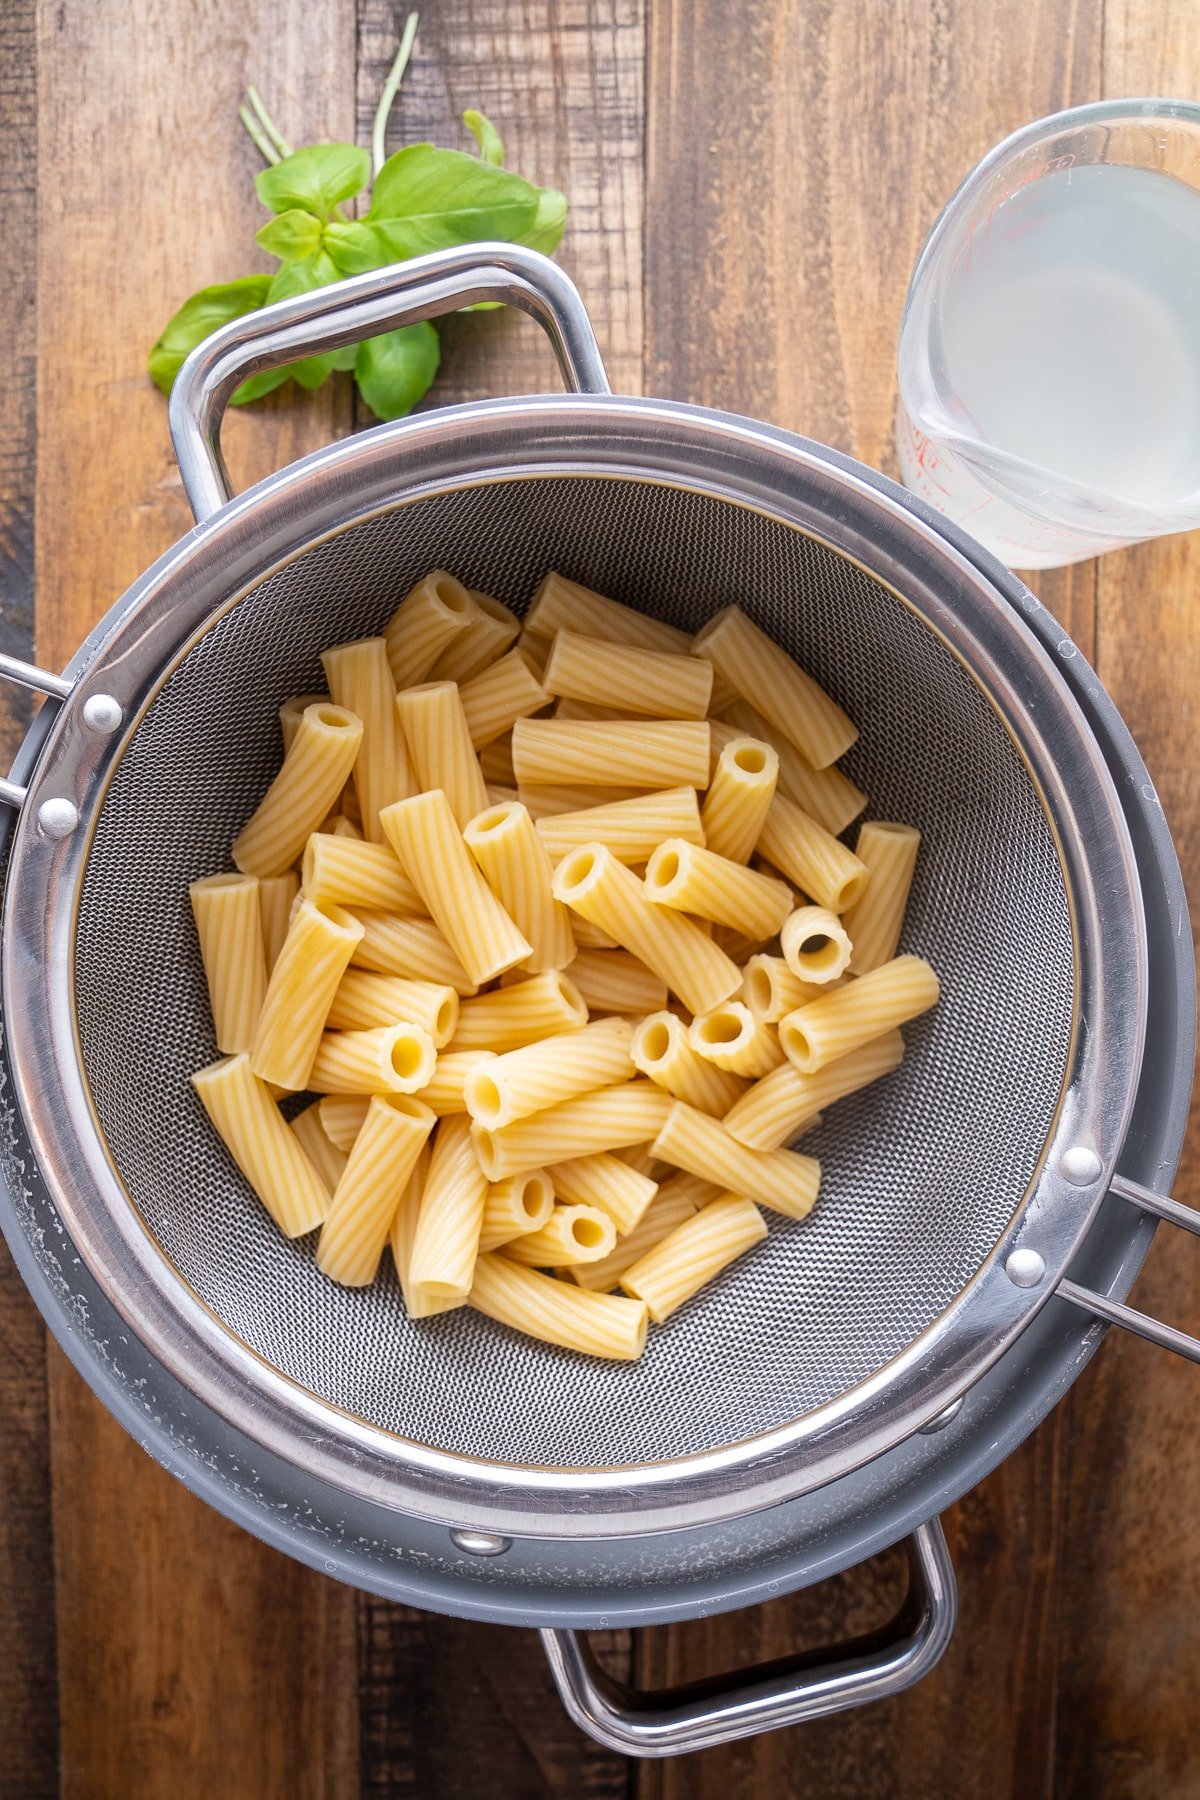
How to Make Fall-Off-The-Bone Tender Beef Shanks
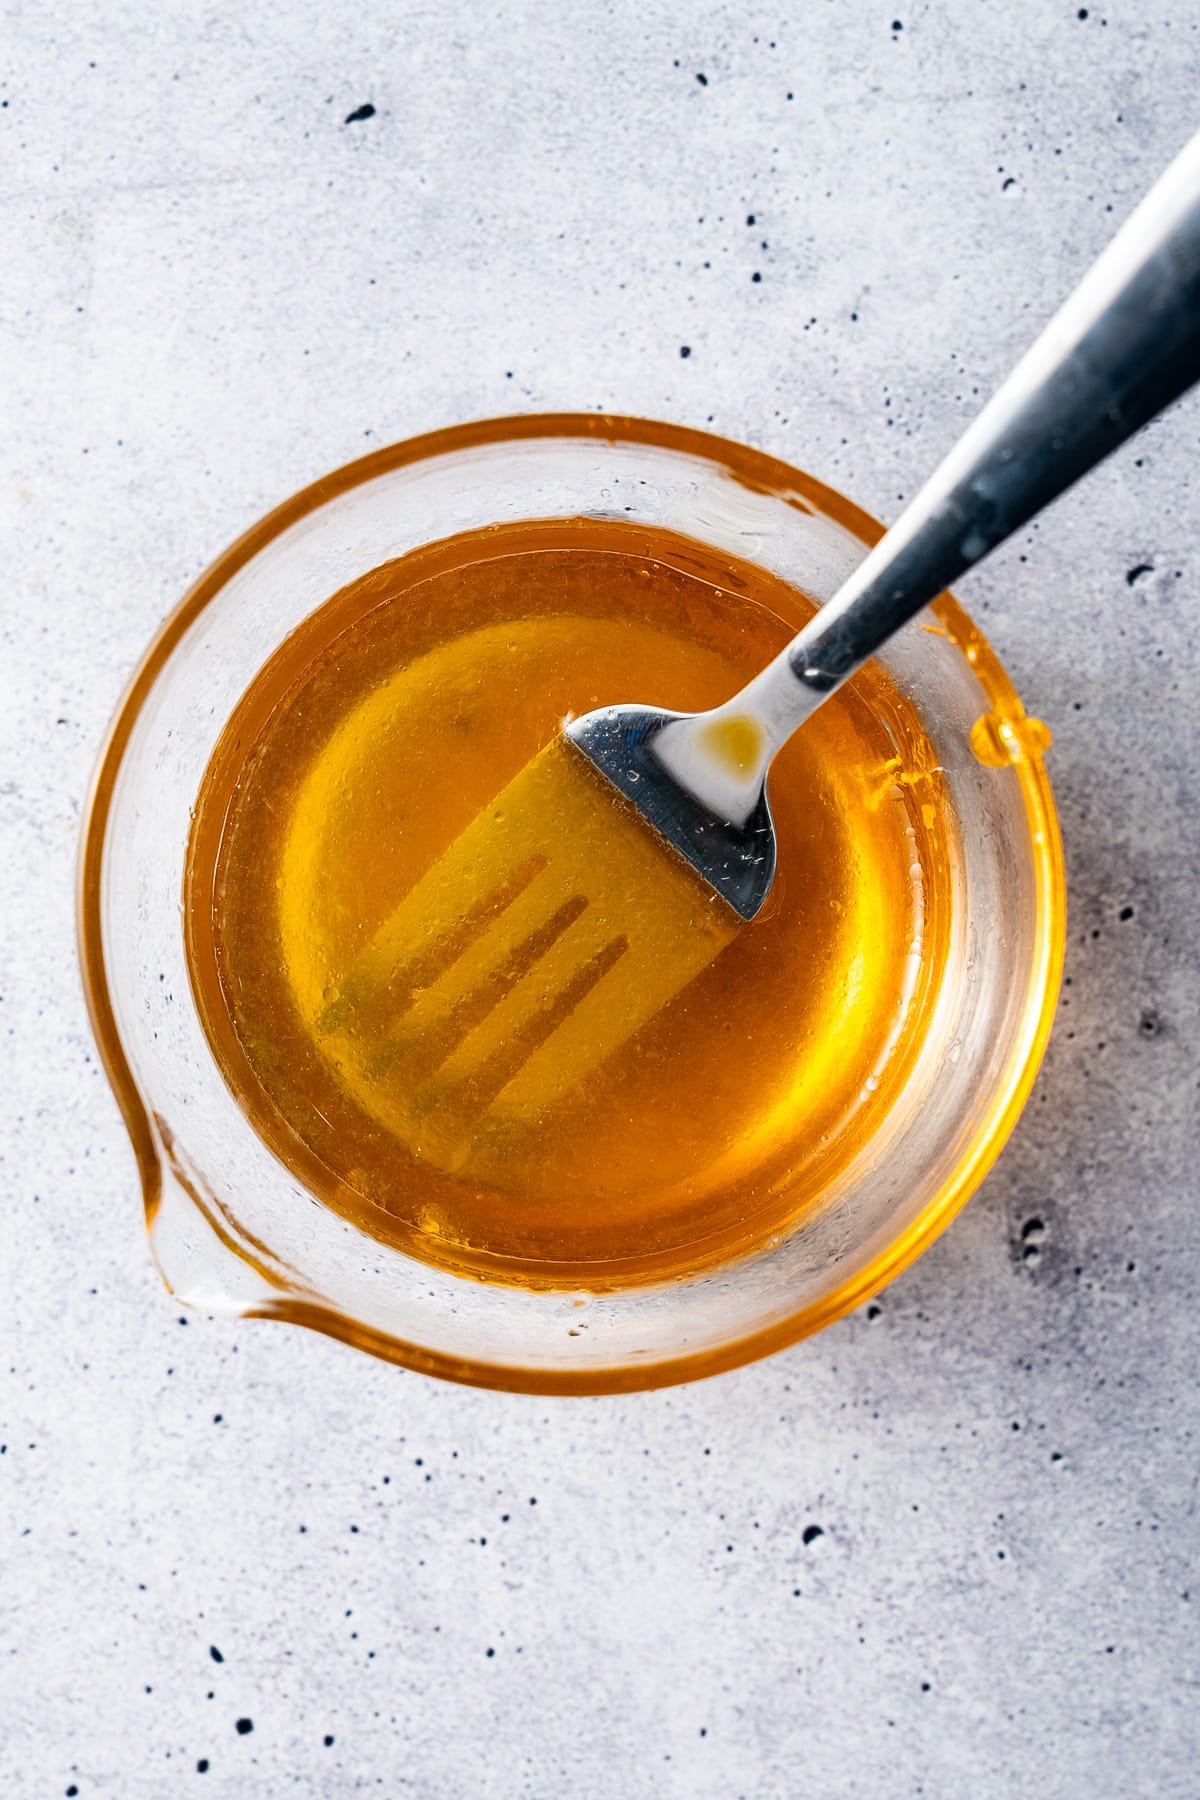
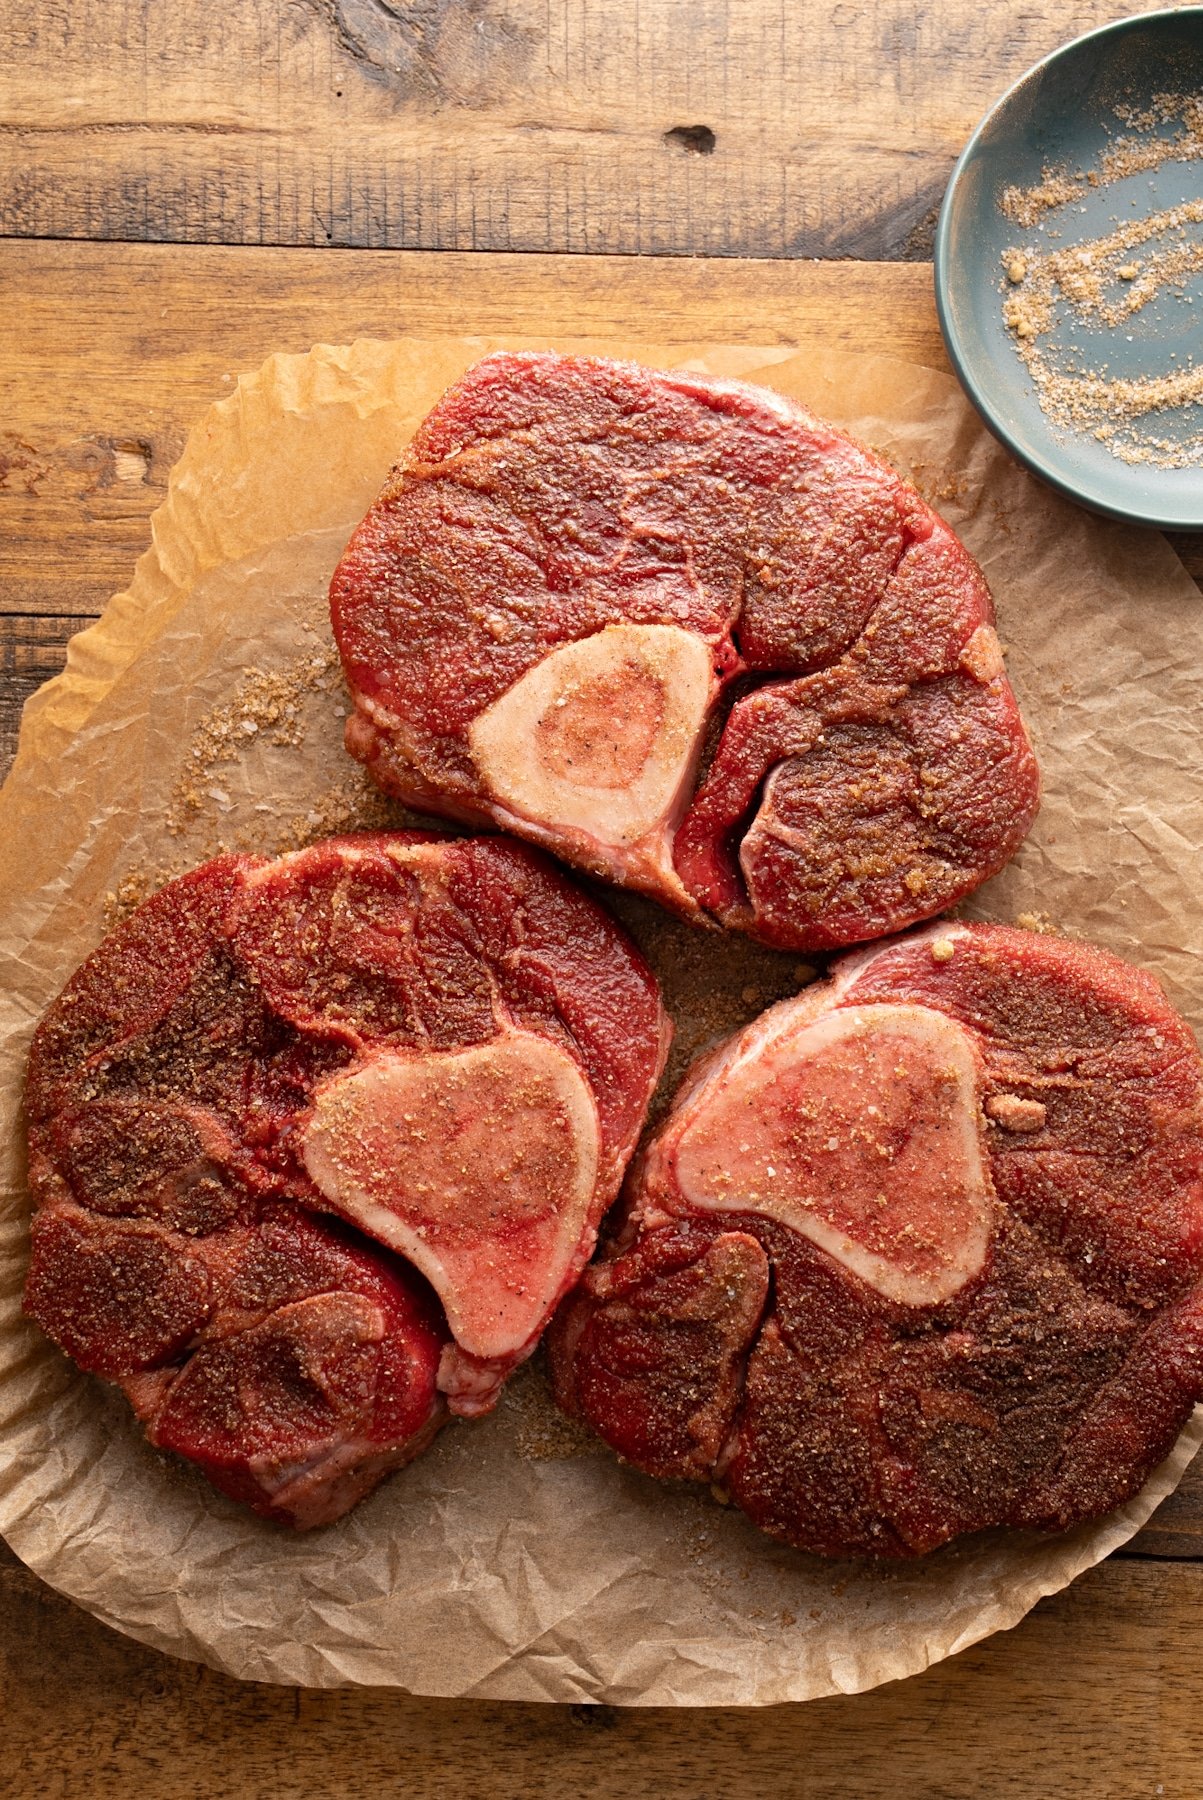
Step 1: Preheat your oven to 325°F (163°C) and position the oven rack in the middle. In a small bowl, combine the brown sugar, kosher salt, allspice, ground ginger, and black pepper to make your spice rub.
Step 2: Pat the beef shanks dry with paper towels. Generously coat each shank with the spice mixture, making sure they’re well covered on all sides.
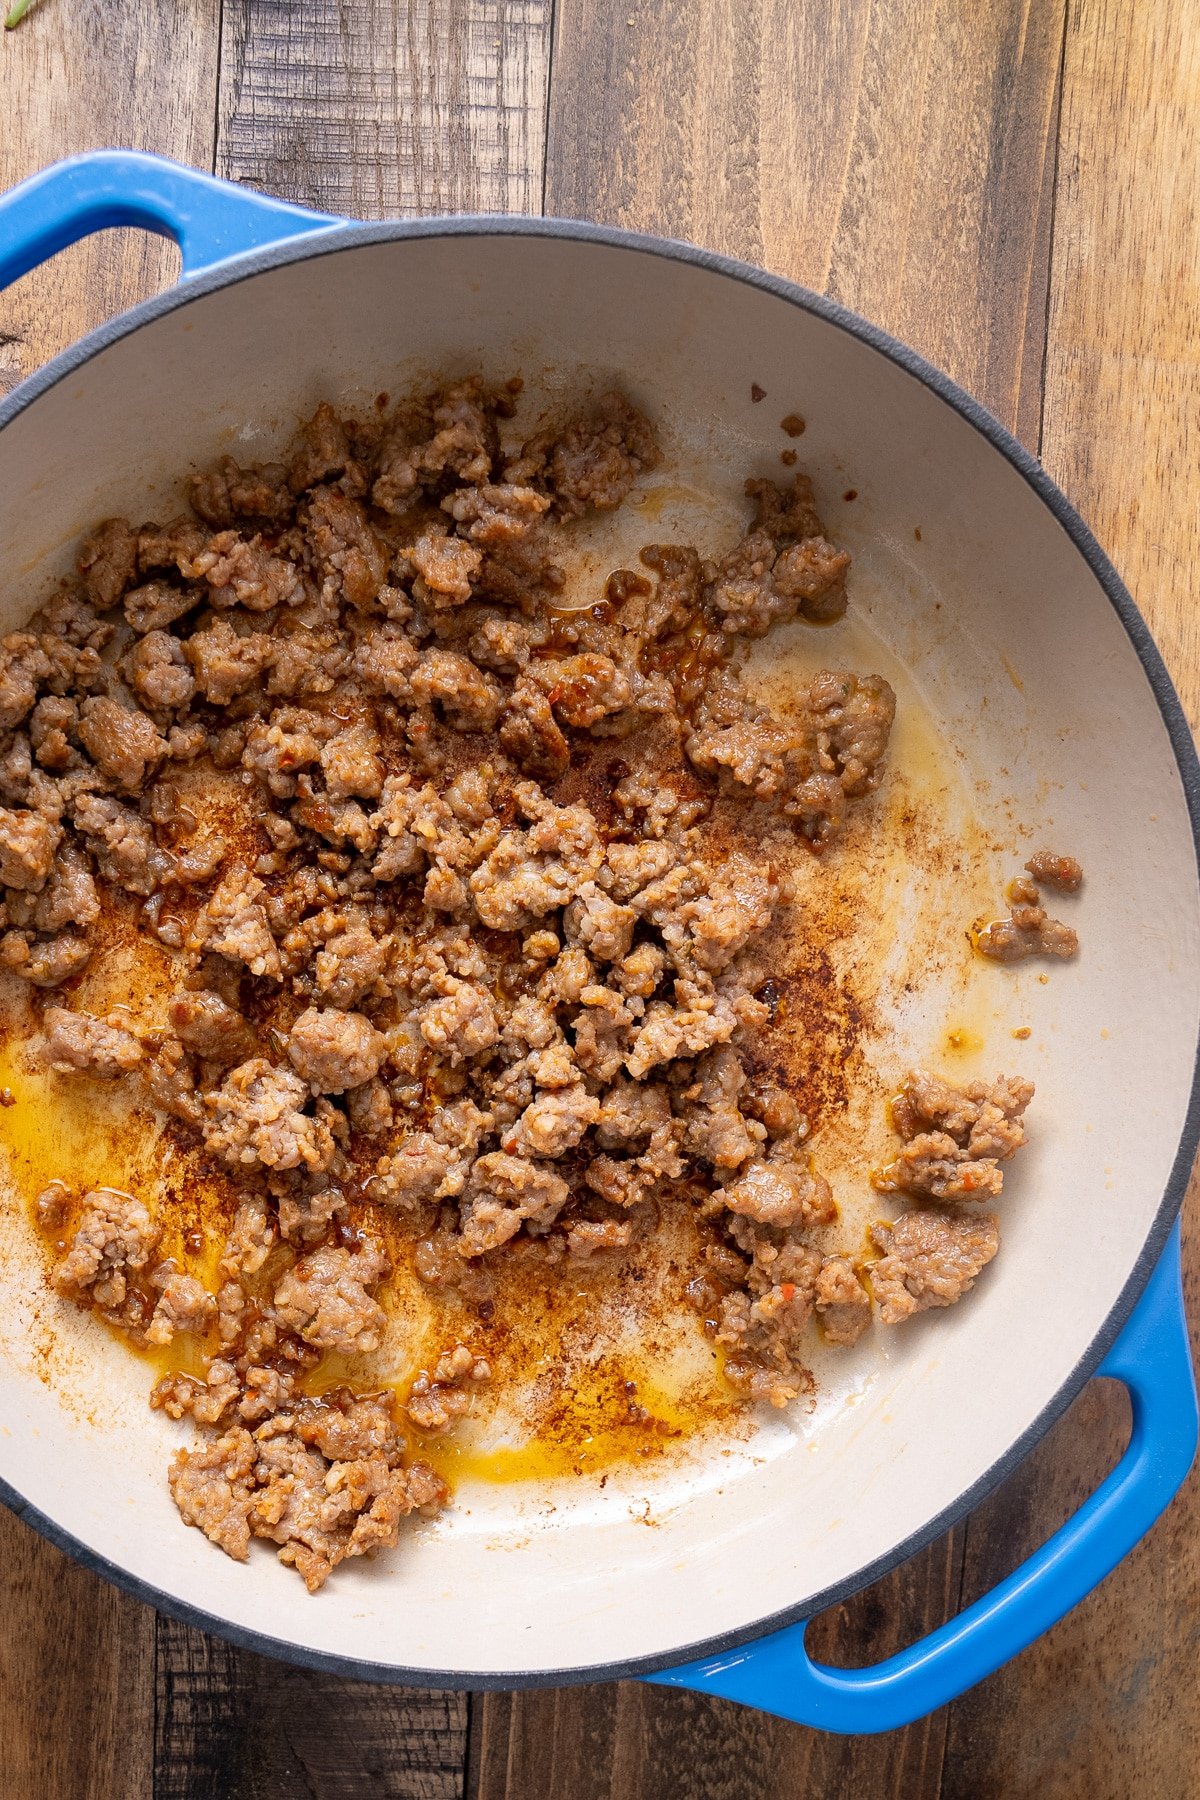
Step 3: Heat the olive oil in a large, oven-safe Dutch oven over medium heat until it shimmers. Place the shanks in the hot oil and sear for about 3-4 minutes per side until they develop a deep, caramelized brown crust.
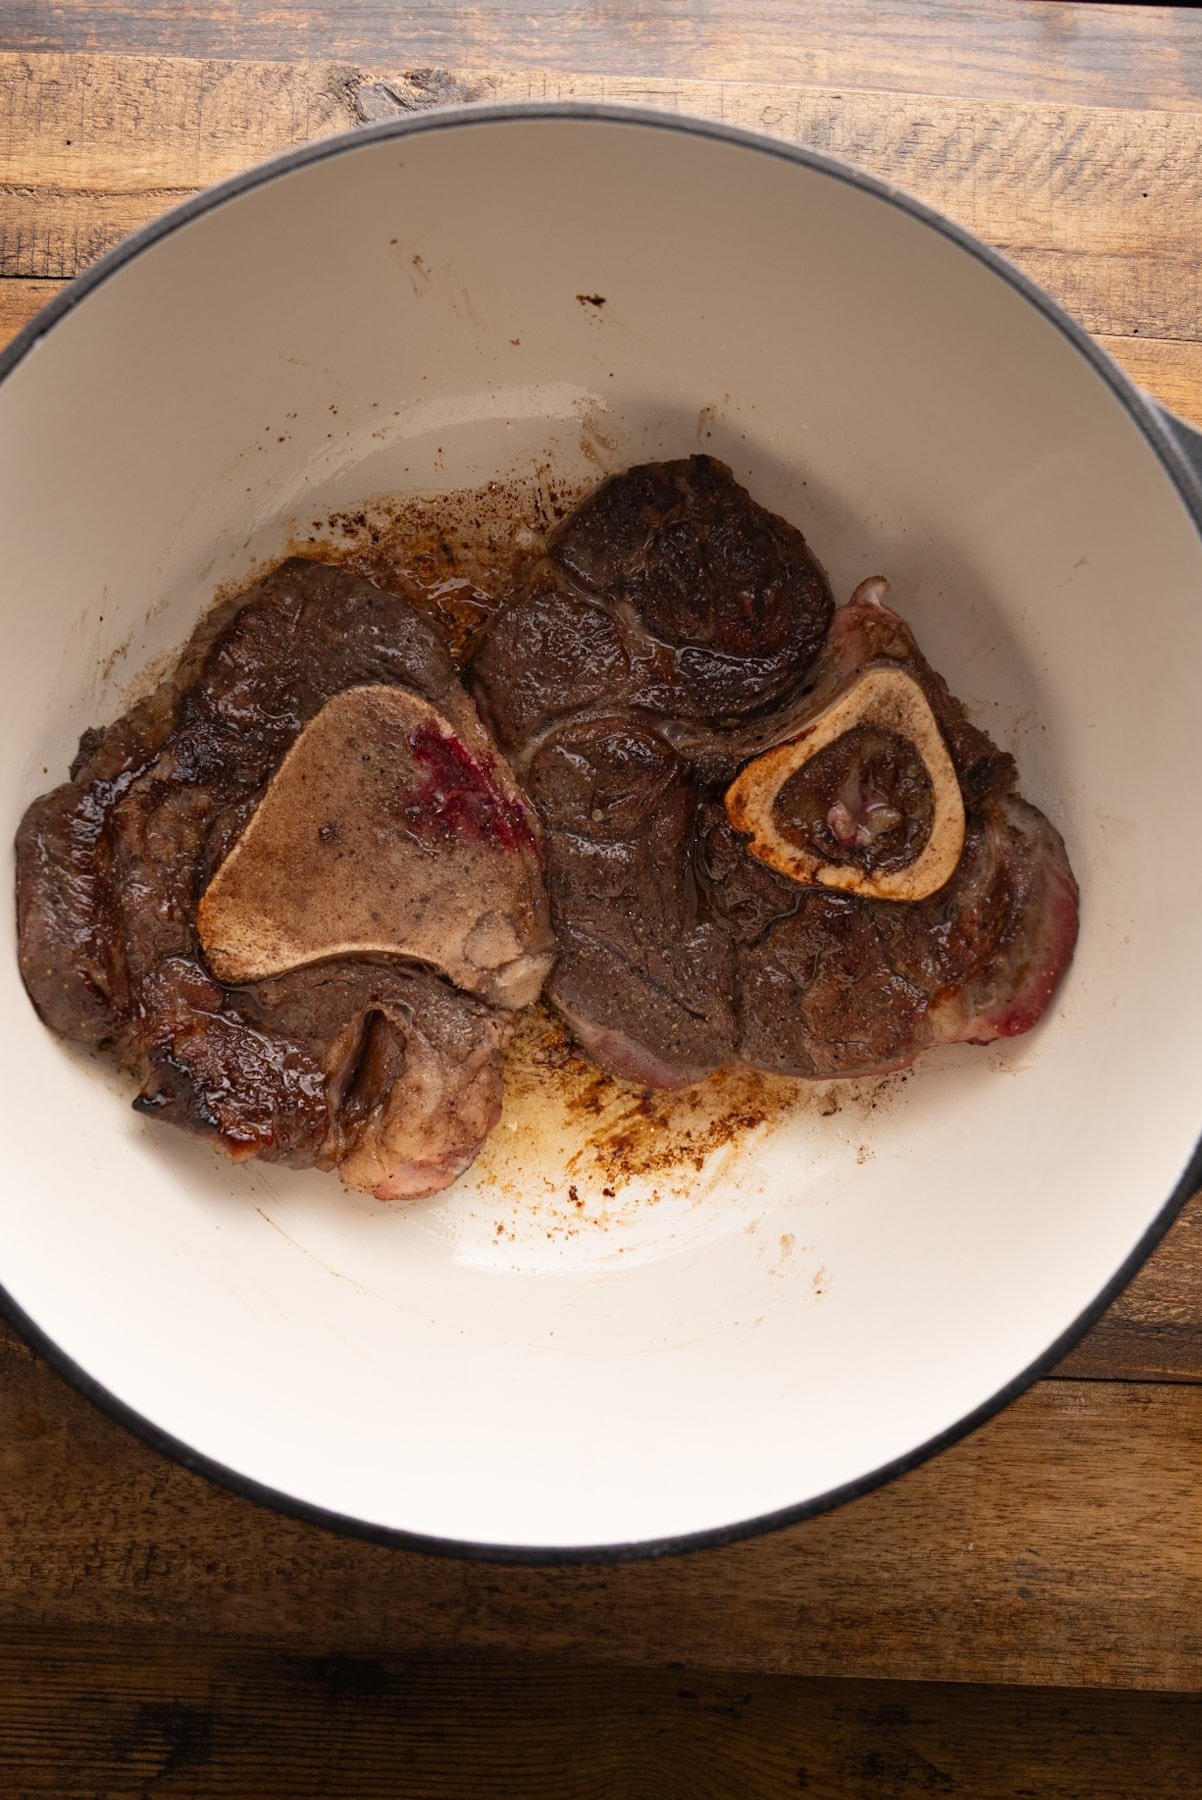
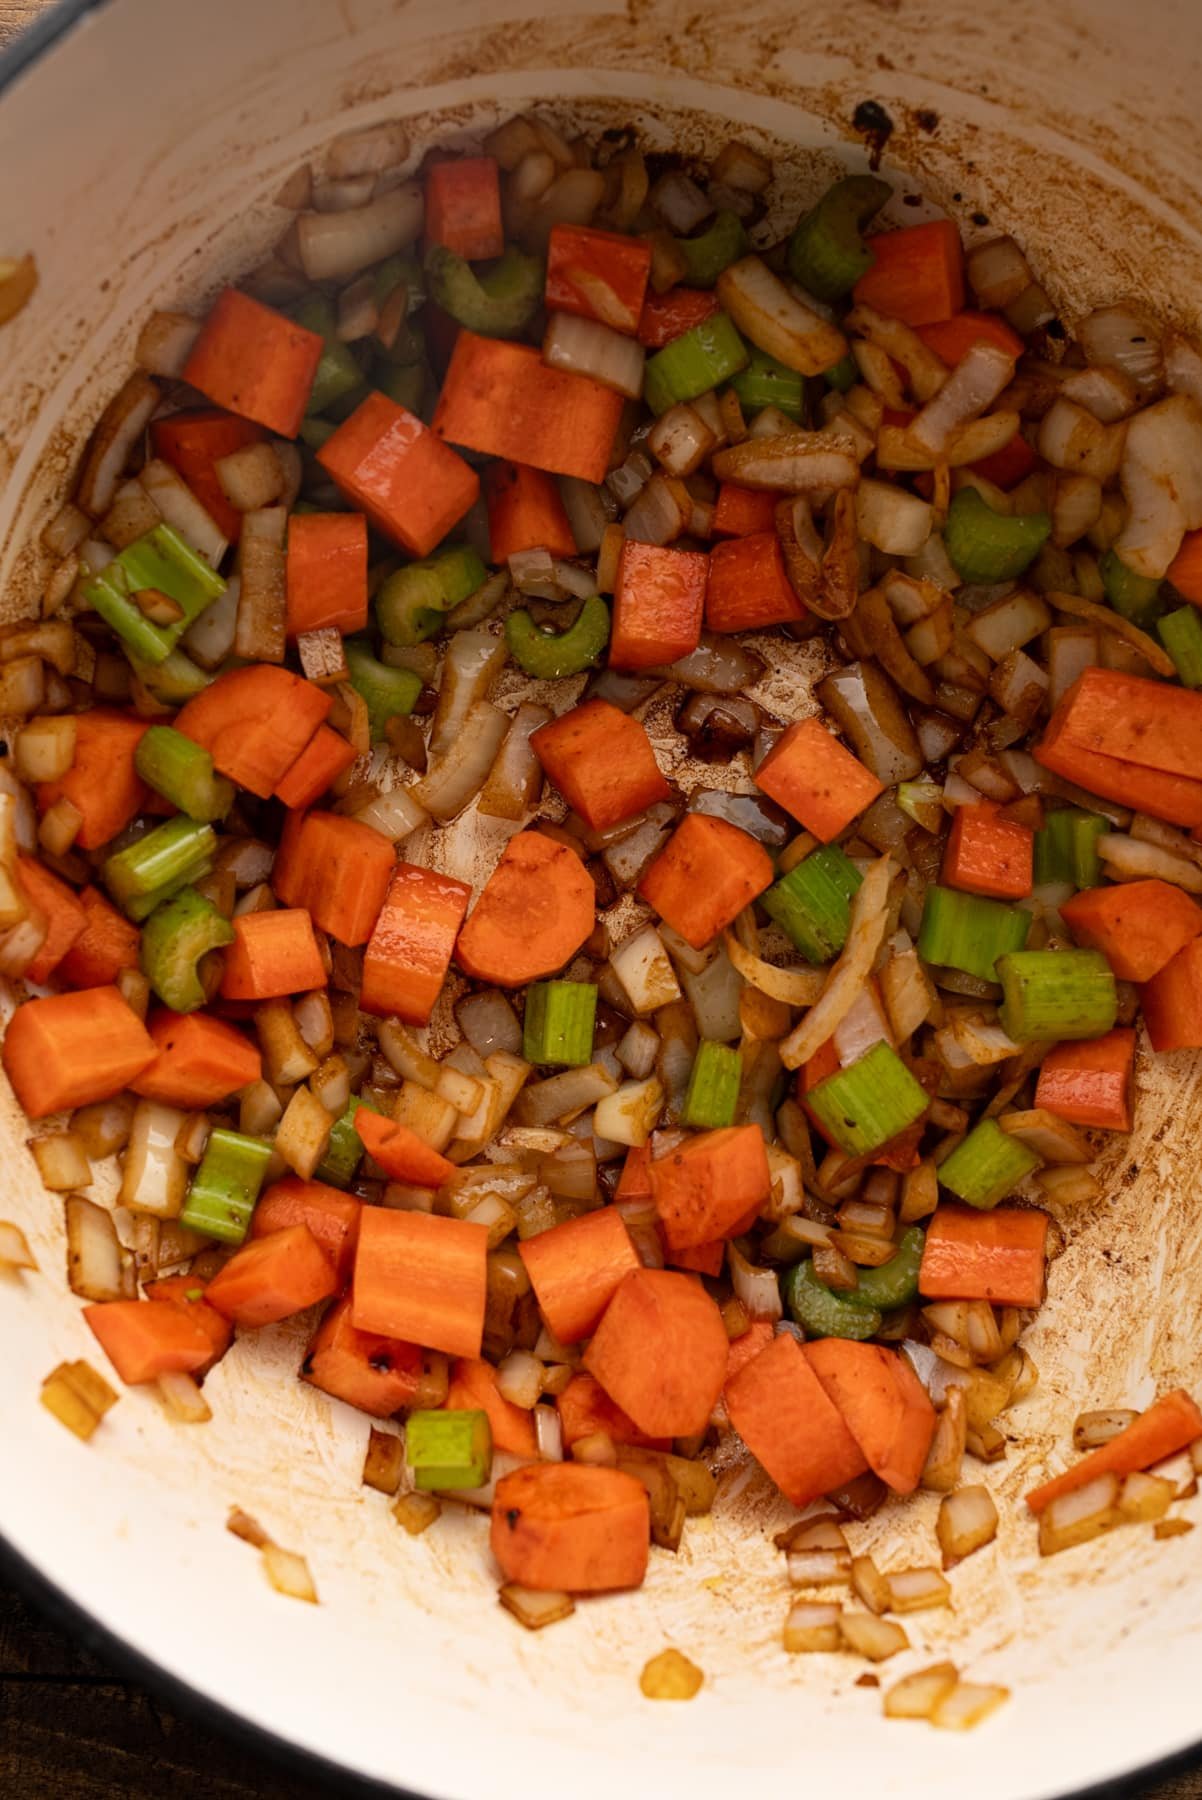
Step 4: Remove the shanks to a plate and set them aside. In the same pot, add the chopped yellow onion, carrots, and celery. Cook for about 5 minutes, stirring occasionally and scraping up the browned bits from the bottom.
Add the minced garlic and cook for another minute until fragrant, being careful not to burn it.
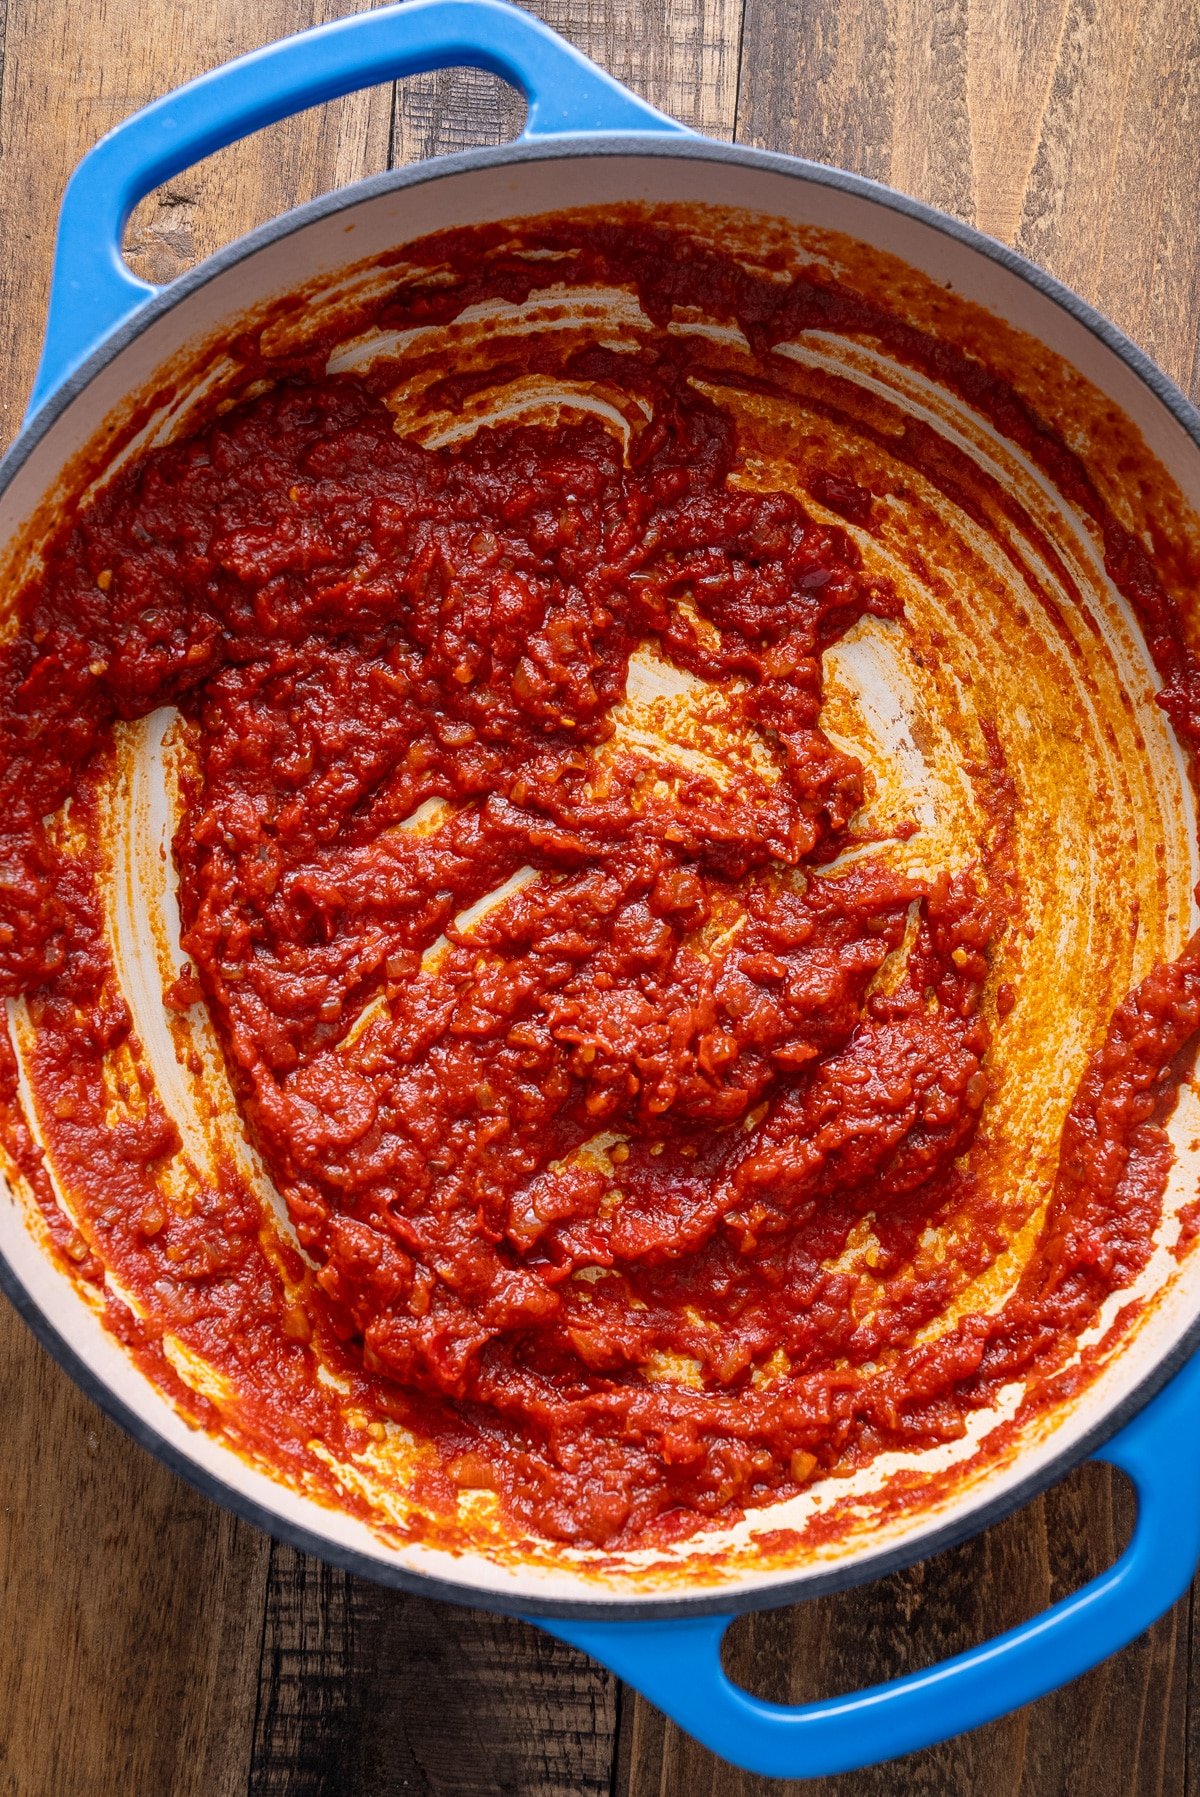
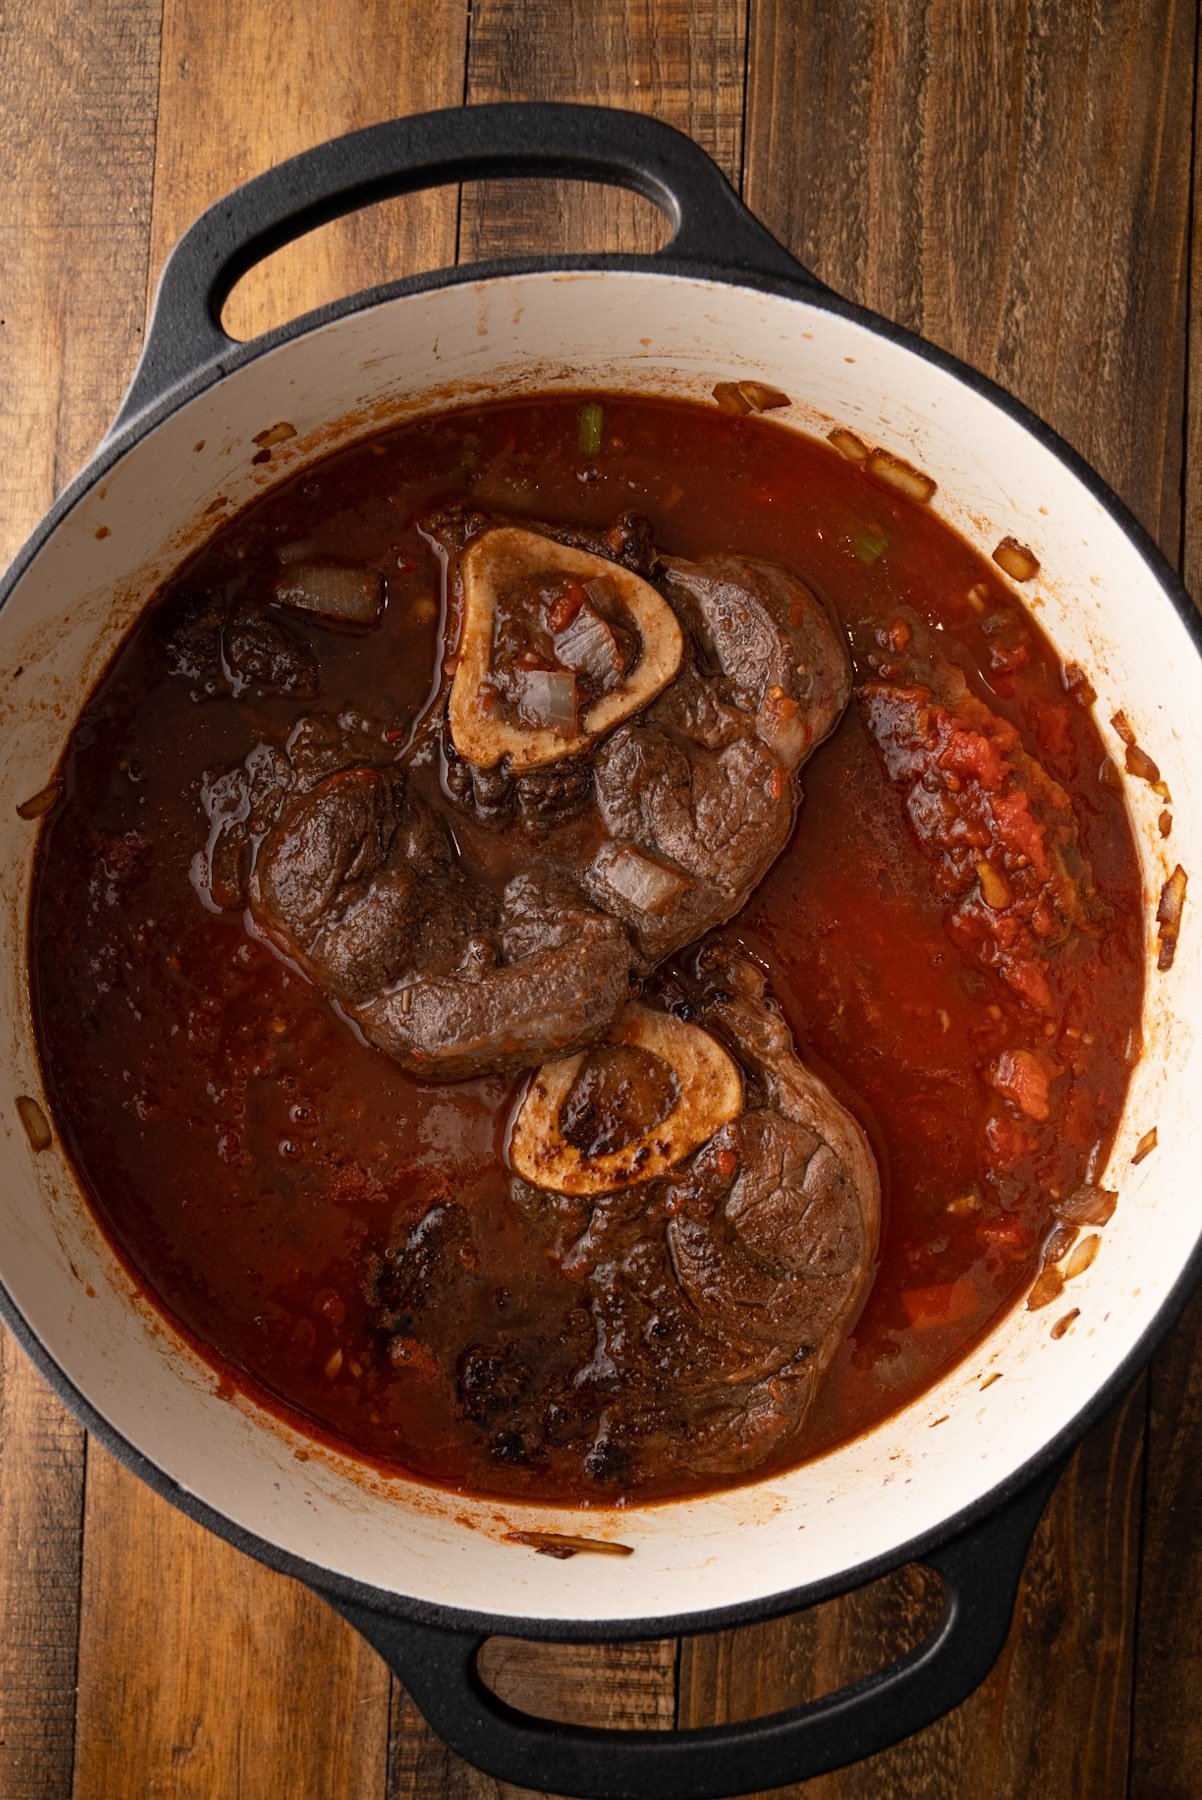
Step 5: If using red wine, pour it in and stir, and let it simmer for about 2 minutes, allowing the alcohol to cook off while deglazing the pot.
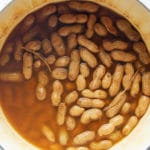
Add the crushed tomatoes, beef broth, and bay leaf, stirring to combine all the ingredients. Return the seared beef shanks to the pot and arrange them so they’re mostly submerged in the liquid.
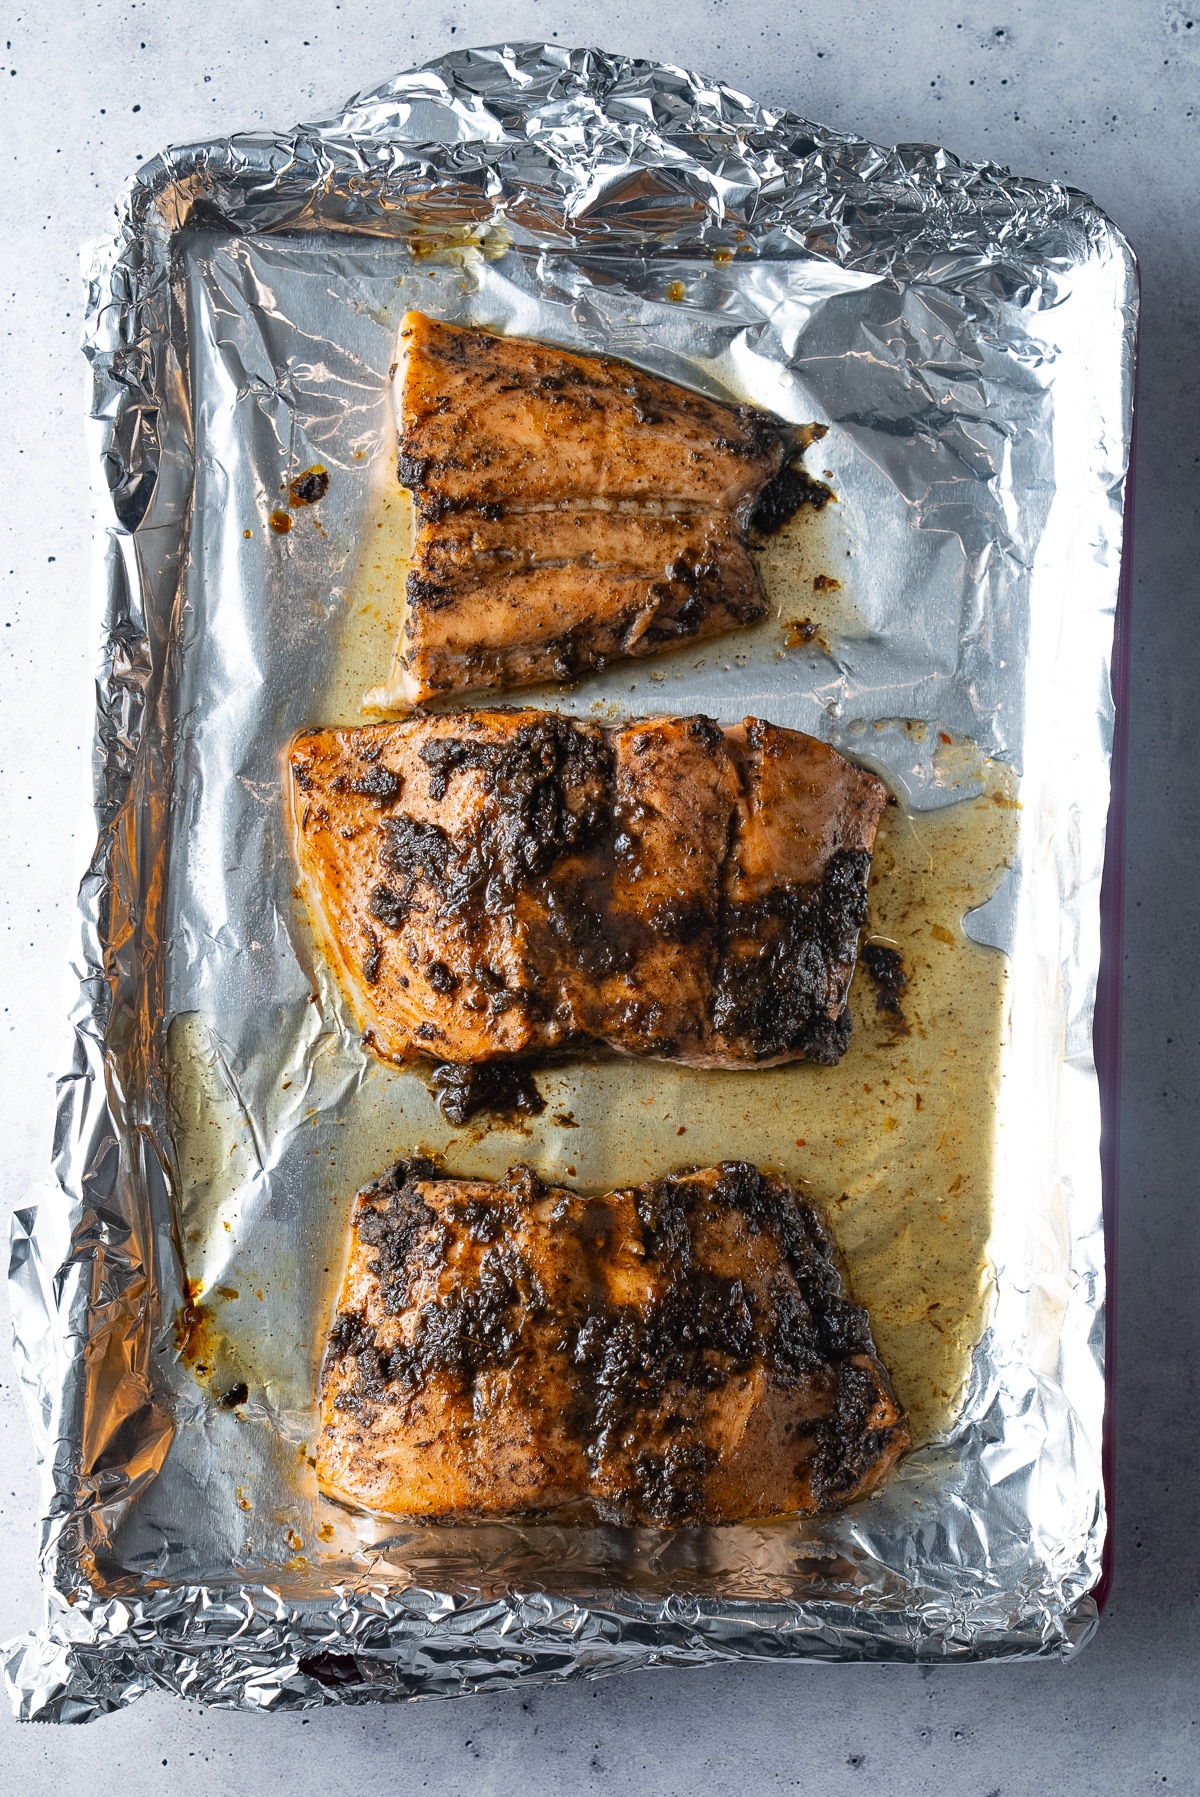
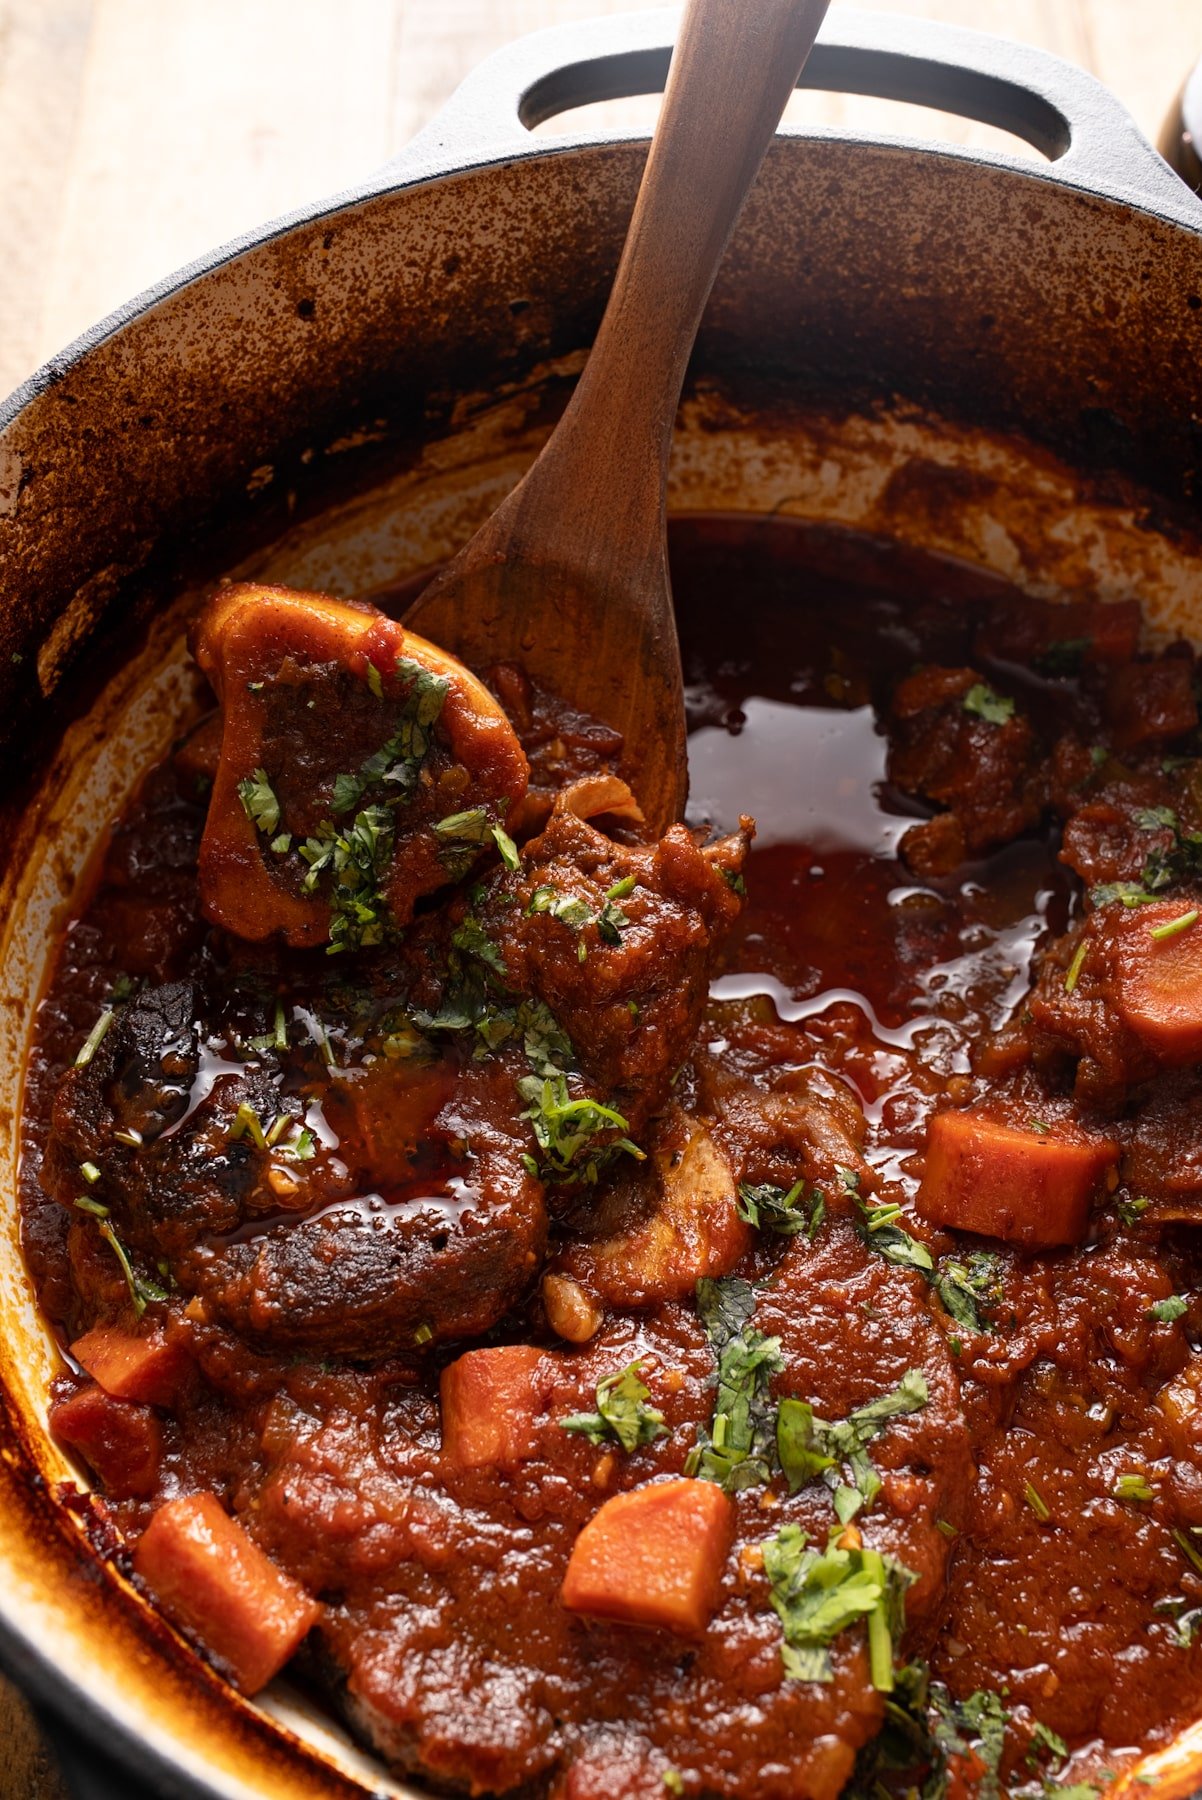
Step 6: Cover the pot with a tight-fitting lid and place it in the preheated oven (middle rack). Braise for 2.5 to 3 hours, until the meat is fork-tender and falling off the bone. Remove from the oven.
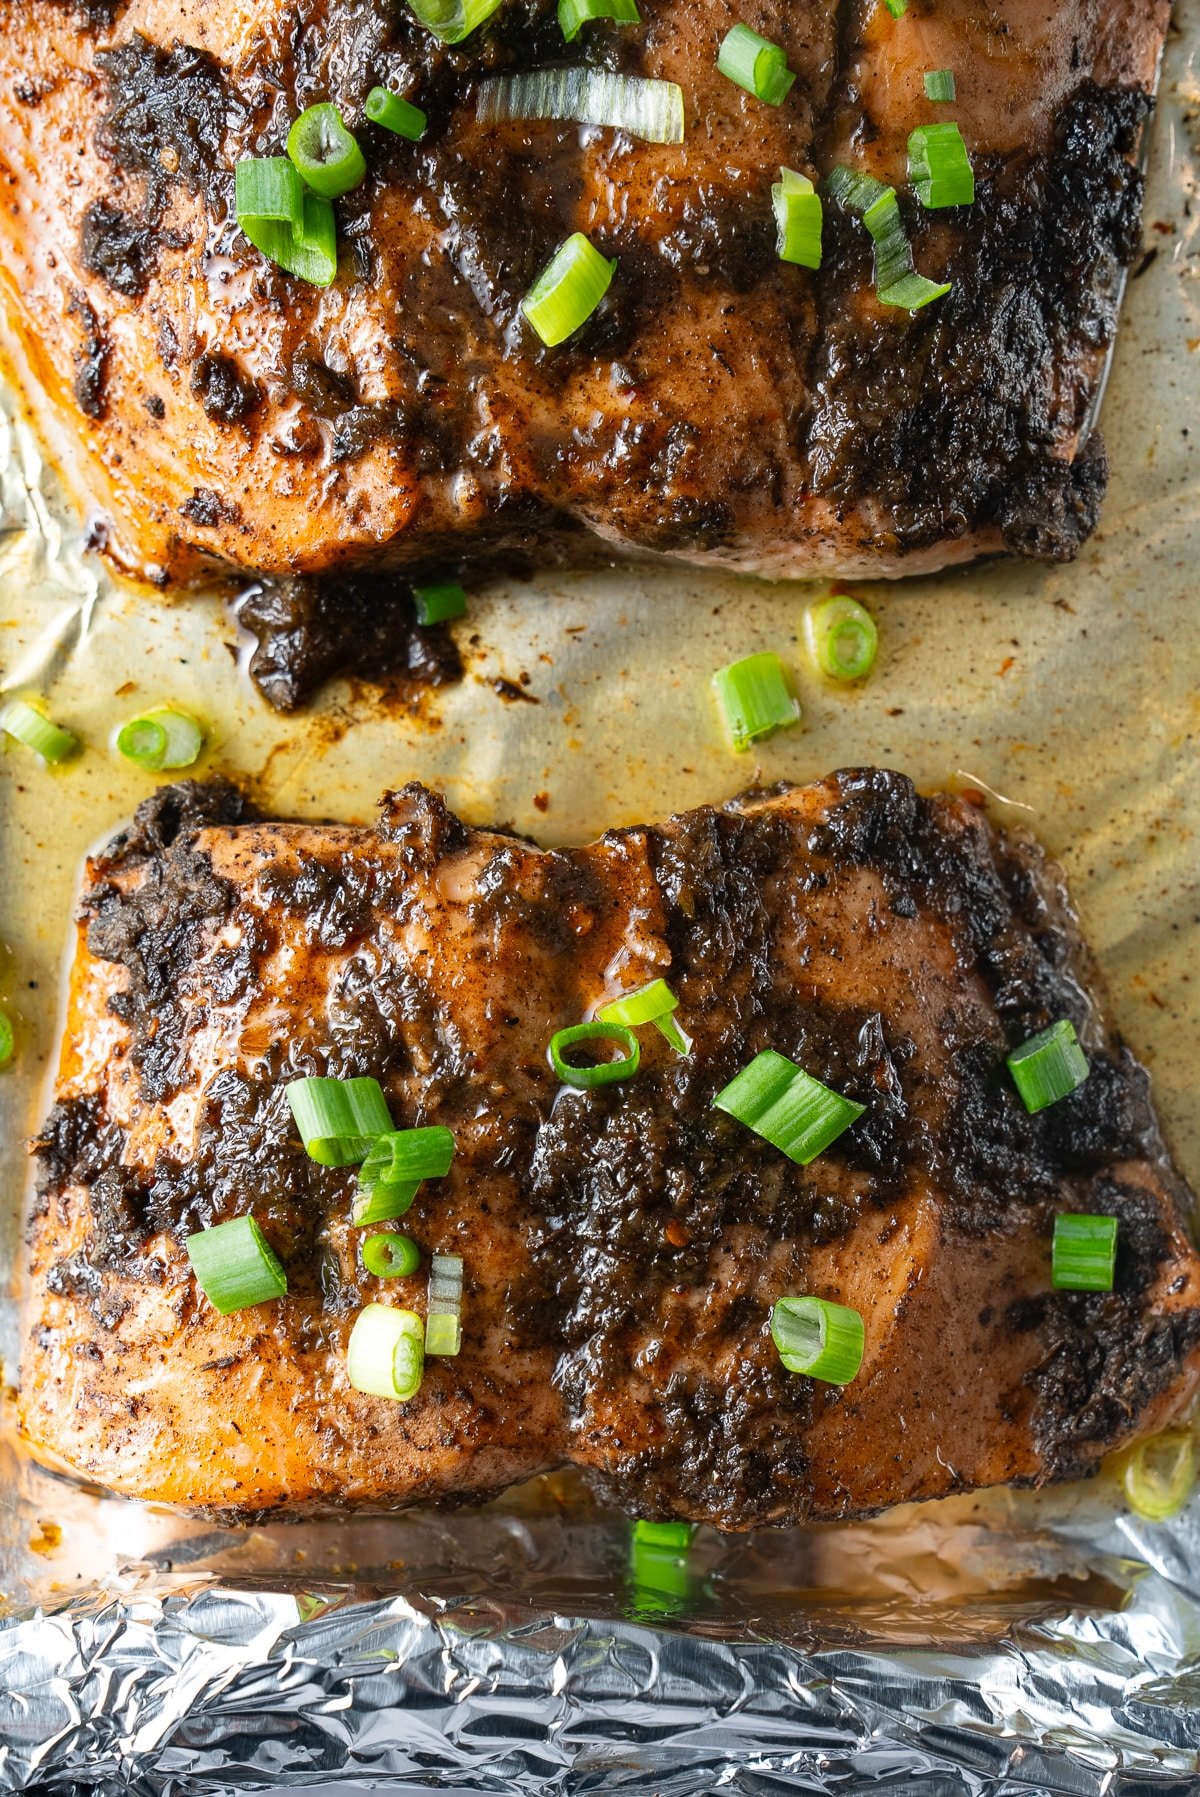
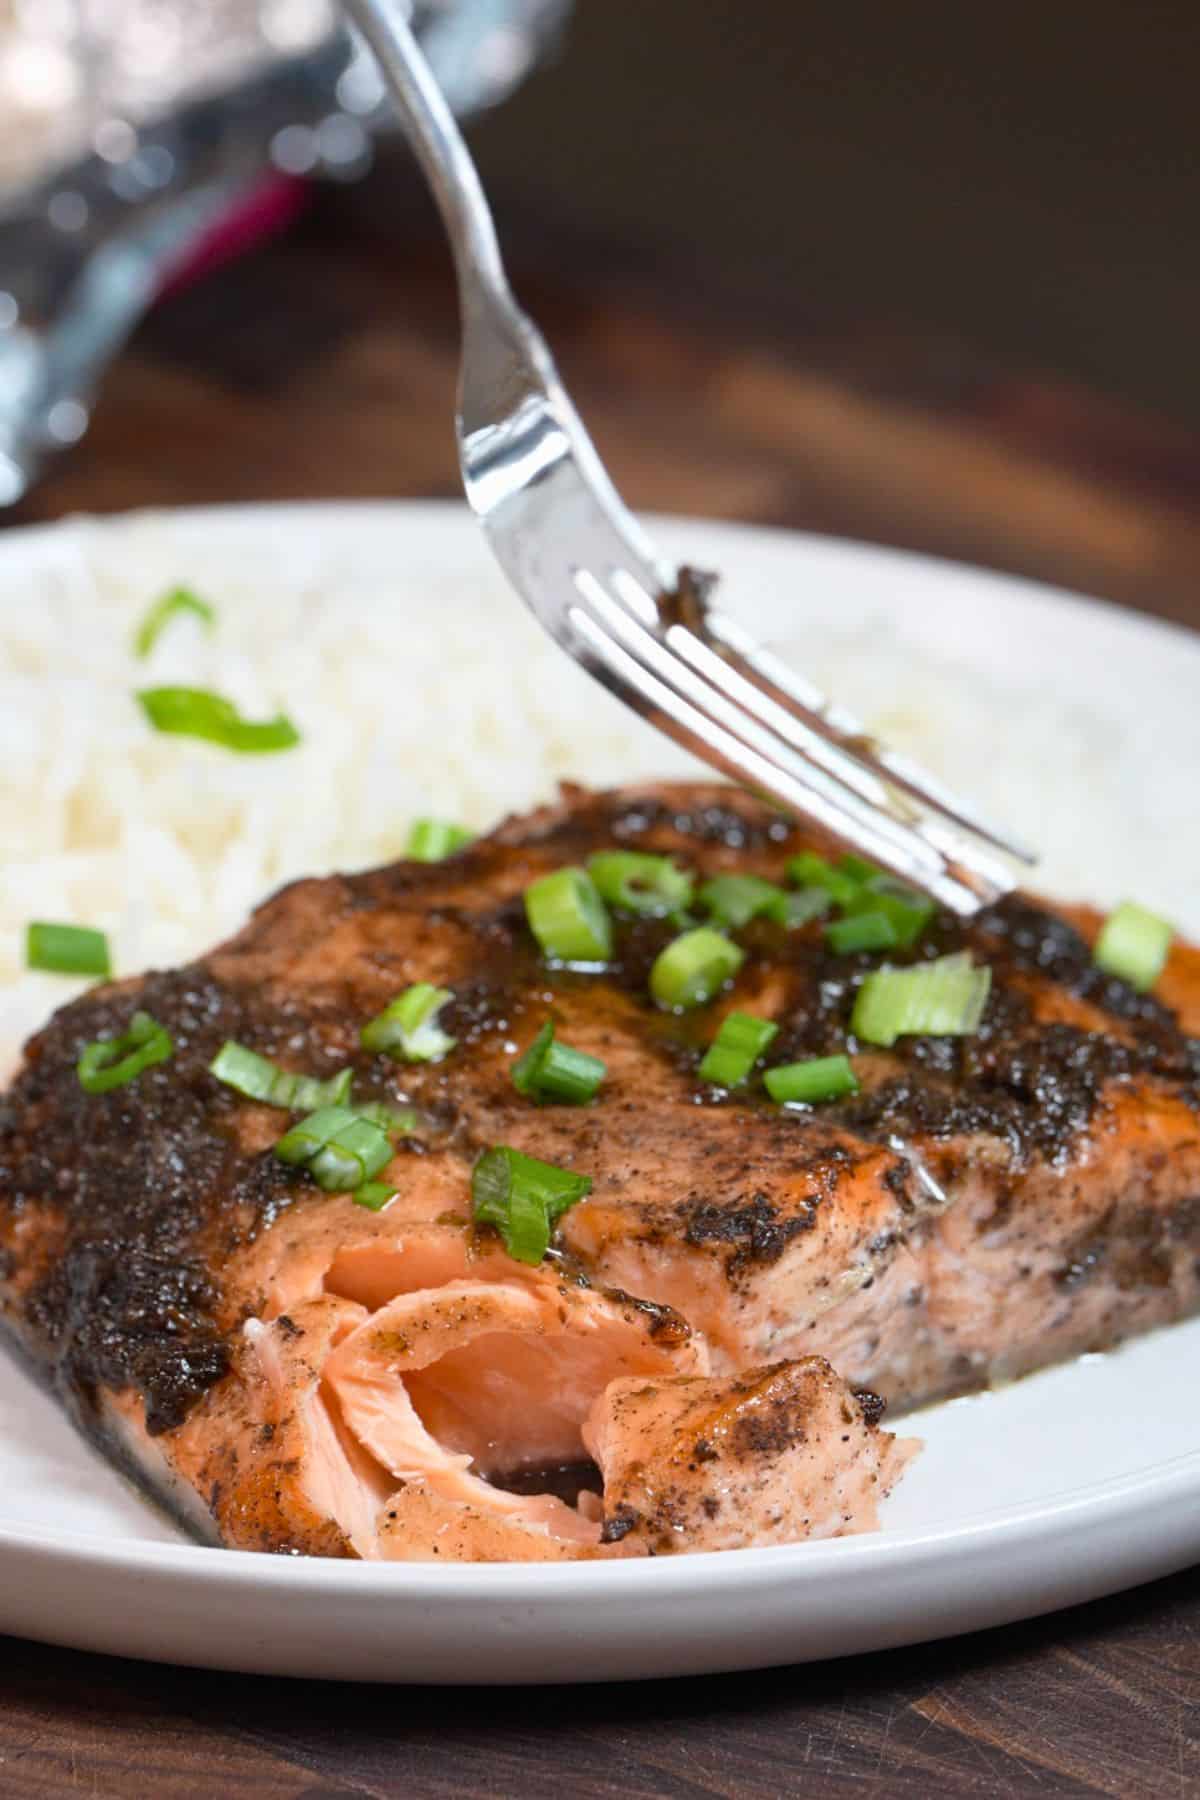
Step 7: Remove the bay leaf and season with additional salt and black pepper to taste. Garnish with chopped fresh parsley before serving.
Other Cooking Methods
If you don't have the time to braise these in the oven, try these shortcuts:
- Pressure Cooker: 45 minutes at high pressure, followed by a natural release.
- Slow Cooker: Sear the shanks first, then cook for 7-8 hours on low or 4-5 hours on high.
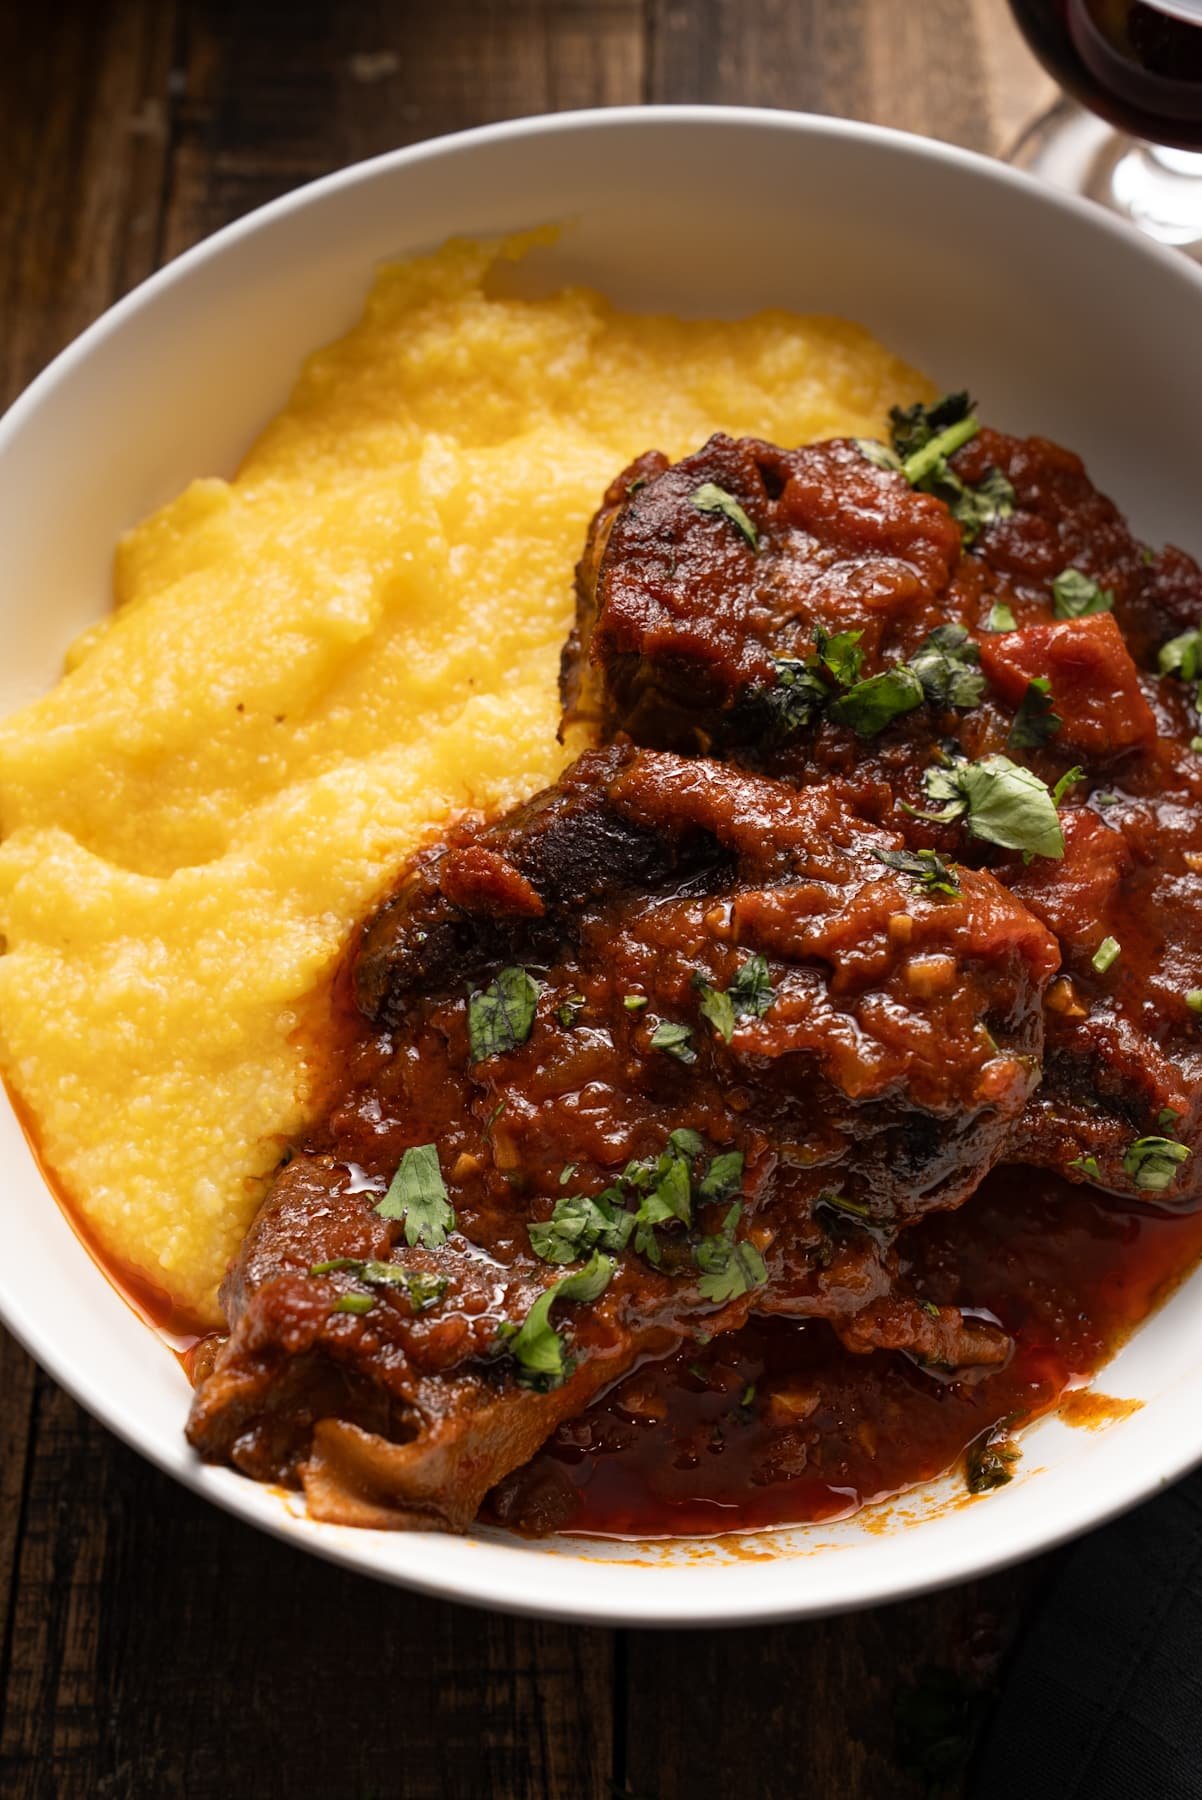
Serving Suggestions
This braised beef shank recipe is best served with:
🥔 Creamy mashed potatoes - my favorite base for these fall-apart beef shanks and gravy.
🍚 Steamed white rice, coconut rice, or buttery polenta
🥖 Crusty bread – Perfect for soaking up the rich sauce!
Tanya’s Top Tips
- Select beef shanks with a generous amount of meat surrounding the bone and visible marbling for optimal flavor and texture.
- Sear your beef shanks in batches rather than crowding the pot. If you're short on time, at least sear half the shanks properly. The seared ones will contribute enough flavor to carry the dish.
I hope you love this braised beef shanks recipe as much as we do. If you have tried this or any other recipe on my blog, please rate it and let me know how it turned out in the comments below!
Braised Beef Shanks
Ingredients
- 3 Tablespoons light brown sugar
- 1 Tablespoon kosher salt
- 1 teaspoon ground allspice
- ½ teaspoon ground ginger
- ½ teaspoon ground black pepper
- 3 beef shanks about 1-1.5 lbs each
- 2 Tablespoons olive oil
- 1 large yellow onion chopped
- 2 medium carrots chopped
- 2 medium celery stalks chopped
- 4 cloves garlic minced
- ½ cup dry red wine optional
- 28 ounce can crushed tomatoes
- 2 cups beef broth
- 1 bay leaf
- 1 Tablespoon fresh parsley chopped (for garnish)
Instructions
- Preheat the oven to 325°F (163°C).
- In a small bowl, mix the brown sugar, kosher salt, allspice, ground ginger, and black pepper. Pat the beef shanks dry and rub the spice mixture all over them, ensuring they are well coated.
- Heat the olive oil in a large oven-safe Dutch oven over medium heat. Sear the beef shanks for about 3–4 minutes per side until they develop a deep brown crust. Once browned, remove them from the pot and set them aside on a plate.
- In the same pot, add the chopped onion, carrots, and celery. Sauté for about 5 minutes, stirring occasionally, and scrape up any browned bits from the bottom. Stir in the minced garlic and cook for another minute until fragrant.
- Pour in the dry red wine (if using), stir, and let it simmer for about 2 minutes, allowing the alcohol to cook off. Add the crushed tomatoes, beef broth, and bay leaf, stirring to combine. Return the seared beef shanks to the pot, ensuring they are mostly submerged in the braising liquid.
- Cover the pot with a lid and transfer it to the preheated oven. Let the beef shanks braise for about 2.5 to 3 hours, or until they are fork-tender and easily pull apart. Once done, remove the bay leaf and adjust the seasoning with salt and black pepper to taste.
- Garnish with freshly chopped parsley. Serve and enjoy.
Video
Notes
-
- Choose beef shanks with a lot of meat around the bone and visible marbling for the best flavor and texture.
-
- Sear your beef shanks in batches rather than crowding the pot. If you're short on time, at least sear half the shanks properly. The seared ones will contribute enough flavor to carry the dish.