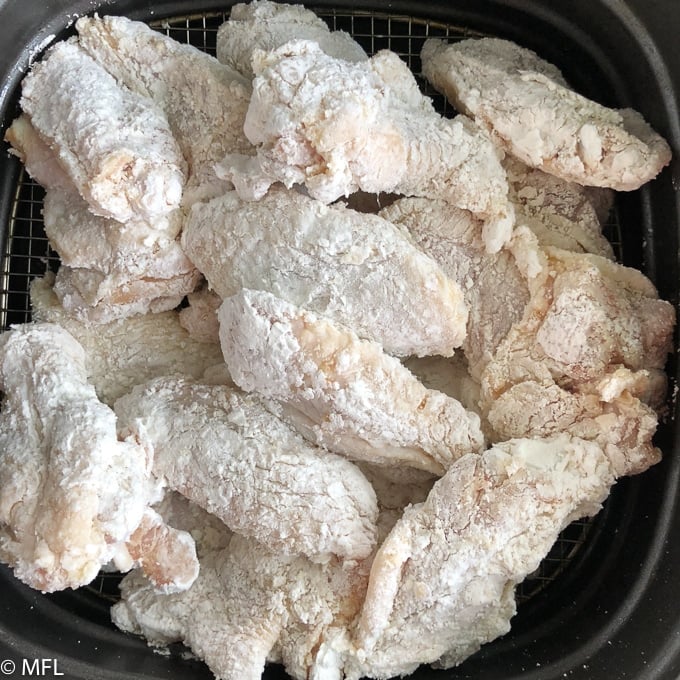
This Roasted Tomato Basil Soup Recipe is the best ever! Not only is it creamy and delicious, but it can be made in less than an hour with all fresh ingredients. With vegetables that are roasted in the air fryer, this flavorful soup can be on your table in less than 1 hour.
I love a good and delicious tomato soup. As a matter of fact, I have two rules when it comes to tomato soup.
The soup must be homemade and use fresh tomatoes, none from a can; and
My tomatoes and vegetables must be roasted
Why the rules? Because following that method has lead to some of the best tomato soup I've ever had. I used to roast my vegetables in the oven when I wanted to make tomato soup from scratch but found that it took longer than I wanted to roast the vegetables. Now that I have my air fryer, I can roast vegetables in half the amount of time it takes to roast in the oven.
How to make the best Tomato Soup from fresh tomatoes?
All you need is about 1 lb of any kind of fresh tomato. I tend to stick with roma or tomatoes on the vine for this recipe, whichever I have on hand. Both tomatoes roast beautifully in the air fryer.
Roast the tomatoes, along with onion, carrot, garlic cloves, and red bell pepper in the air fryer for about 25 minutes at 360 degrees. Roasting your vegetables will allow your tomatoes to roast, not burn, releasing the natural sweetness of the tomatoes and other vegetables.
Once your vegetables are roasted, you will add your stock and warm a bit for added flavor. Then blend, add your chopped basil, cream, and splash of balsamic vinegar.
To Peel or Not to peel the tomatoes for the Best Tomato Basil Soup Recipe? That is the Question…
Once my tomatoes and vegetables are roasted, I sometimes peel the skin off of the tomatoes and red pepper. This results in a smoother finish to my soup once it's blended. It really depends on the day on whether I do this or not. The soup is still delicious either way but for the smoothest soup possible, you must do the following: peel, blend in a blender, and pour through a fine mesh strainer.
What Goes with the Best Tomato Basil Soup?
I like to serve our tomato basil soup topped with parmesan cheese. Serve along side a delicious grilled cheese sandwich if you want a full meal.
I hope you enjoy this roasted tomato basil soup as much as we do. During these summer months, enjoy those tomatoes and fresh basil as much as you can. 🙂
Watch this video tutorial and see how I make this tomato basil soup from start to finish.
Roast these tomatoes in the air fryer for The Best Tomato and Basil Soup. This soup can be on your table in less than 1 hour with robust flavor from the roasted vegetables.
Spray the bottom of the air fryer basket with a little oil to prevent sticking. Add the tomatoes, red bell pepper, onion, carrot, garlic cloves to the air fryer and set for 360 degrees Fahrenheit and 25 minutes to roast.
Check the air fryer basket about halfway through and shake to ensure even roasting. Shake again when there is about 5 minutes left on the timer.
Once air fryer timer goes off, transfer vegetables to a medium stock pan and add chicken broth to stock pan. Allow mixture to come to a boil. Reduce heat and simmer for about 5 minutes. Once done, blend soup with immersion blender or allow to cool and use a traditional blender to blend the soup.
Add basil, heavy cream, splash of balsamic vinegar. Salt and pepper to taste. Top with parmesan cheese.
Notes
*NEVER add liquid to an air fryer. *You can peel the tomatoes and red bell pepper after removing from the basket if you choose to. Just make sure they cool a bit before you do so.*Always allow the liquids to cool before adding to a traditional blender to avoid burns.
First and foremost, never ever put liquids in the Air Fryer. The Air fryer is used to roast the Vegetables. I use it in place of the oven because it roast my vegetables in half of the amount of time it would take to roast in the oven.
For a smoother soup consistency, pour soup into a fine mesh strainer once blended. I like my tomato soup a tiny bit chunky.
Never use over the counter aerosole spray cans in your air fryer. It's best to purchase a good spray bottle and use vegetable or olive oils to spray. I use the Evo Oil Sprayer Bottle.
Step by Step Photos of the Best Tomato Basil Soup Recipe
Add vegetables to air fryer basket.
Spray vegetables with oil.
Roast at 360 degrees Farenheit for 25 minutes.
Allow vegetables to cool and peel tomatoes and red bell pepper if you wish.
Add vegetbales and chicken broth to pot. Bring to boil, reduce heat, and allow to simmer for about 5 minutes.
Blend with immersion blender.
Add heavy cream and basil
All done. Blend for longer or pour through mesh strainer for smoother consistency.
Cheerwine Floats made with vanilla bean ice cream and amazing cherry flavored Cola are a delicious treat for the summer. This spin on a traditional float is an easy treat for those hot summer months.
You’ll find the full recipe with ingredient amounts and instructions in the recipe card at the bottom of this post. Be sure to check out the blog post itself for extra tips and tricks!
What the heck is a Cheerwine Float? I'm sure plenty of you have that question...unless you've been to North Carolina and tried a cute, yet chain, fast food restaurant known as CookOut. Well that was my first time ever trying Cheerwine and I had it in the form of a float. The float was delicious. I am obsessed. The end.
Just kidding. Cheerwine is just too amazing not to give you just a tad bit of information about it.
What is Cheerwine?
Cheerwine is a cherry flavored soda that was created in Salisbury, NC in 1917. The company is owned by the Peeler family (still, how cool is that) and can be found in many Southern grocery stores.
What does Cheerwine Taste Like?
Sorry folks but it does not taste like wine. Just imagine your favorite cola with a delicous cherry flavor. It does not taste like artificial cherry either, but taste like somone manually squeezed cherry juice into some Cola. If this is in fact true, I'd love to meet that person. It's in fact hard to describe how incredible Cheerwine is but trust me when I say it's delicious.
How to Make a Cheerwine Float?
A Cheerwine float is pretty easy to make. Just grab your favorite glass, fill it with vanilla bean ice cream, and add your soda until it fizzes at the top. Stick a straw in it and enjoy.
You can add the maraschino cherries if you like but they aren’t necessary, they just make it pretty.
This elegant Pan Seared Scallops Recipe is served over an amazing purple carrot and ginger chutney and potato and leek soup. This post is #sponsored by A Table is Set: A four city tour served with a Coke. All opnions are my own.
You’ll find the full recipe with ingredient amounts and instructions in the recipe card at the bottom of this post. Be sure to check out the blog post itself for extra tips and tricks!
I live for amazing food and recipes. I watch cooking shows, try different restaurants, and read cookbooks for fun. Call me a foodie nerd. So imagine how thrilled this foodie nerd was to hear about the Soul Food Sessions Tour, The Table is Set: A four city-tour served with a Coke.
So what is Soul Food Sessions? It's a series of nonprofit dinners in Charlotte, NC that was created to help increase diverity in the culinary industry. The movement acknowledges and supports people of color in the culinary, hospitality, and beverage industry. I have to say that I am excited about this movement. The need for diversity in the food blog world was one of the reasons I started My Forking Life. I am honored they asked me to help spread the word about their upcoming tour.
Soul Food Sessions has partnered with Coca-Cola Consolidated to take their dinners on a four city tour. The tour starts in Charlotte, NC (their home market) on June 19th, 2018. Next stops will be Washington DC, Baltimore MD, and Charleston SC.
Now what does any of this have to do with these scallops? Everything!!!! I was blessed with the opportunity to create this pan seared scallops recipe that will be served at the dinner in Charlotte, NC. It was my first time making scallops. It was my first time making chutney. But the results? AMAZING!!! I truly hope they can bless your palet with this dish in all 4 stops because it is delicious!
I wish I could say that I created this recipe but all credit goes to Chef Greg Williams, one of the founders of Soul Food Sessions and co-owner of What the Fries Food Truck. Let's just say the man is a culinary genius. The flavor of that chutney had me dancing around my kitchen in joy. It has now been deemed a staple recipe for our home kitchen.
I had a blast recreating this dish and I learned a ton about picking scallops and cooking chutney. Check out my step by step photos below to learn what I learned.
That's one great thing I can say about this tour, it will awaken your inner foodie and encourage you to try foods you wouldn't typically eat at home.
It's recommended that you pair this pan-seared scallop recipe with Coca-Cola Zero Sugar. Coca-Cola Zero Sugar brings to the forefront the richness of scallops combined with the bold flavors of ginger and garlic in the chutney.
Pan Seared Scallops with Purple Carrot Chutney Paired with Coca Cola. Coca-Cola Zero Sugar brings to the forefront the richness of scallops combined with the boastful flavors of ginger and garlic in chutney.
Heat 1 tablespoon olive oil in medium sauté pan over medium heat. Add carrots, onion, garlic, ginger and sugar. Let brown and caramelize for 5 minutes. Add balsamic vinegar to deglaze pan. Cook for 30 minutes. Set aside.
MAKE THE SCALLOPS.
Heat 1 tablespoon olive oil in medium sauté pan over medium heat. Dry scallops with paper towel and salt and pepper to taste. Add to pan, being careful not to overcrowd scallops. Sear until golden-brown; flip and repeat.
PLATE THE DISH.
Spoon potato leek soup into base of bowl. Top with chutney and scallops. Finish with chives and balsamic vinaigrette.
Serve and enjoy with a Coca-Cola Zero Sugar.
Notes
Find this recipe and others at The Table is Set..Make sure to use dry packed scallops for this dish.
Step by Step Photos of Pan Seared Scallops with Purple Carrot Chutney
This Hawaiian Macaroni Salad Recipe is a delicious spin on traditional macaroni salad. The creamy tangy and sweet sauce combined with pasta and bright vegetables make this the perfect pasta salad.
You’ll find the full recipe with ingredient amounts and instructions in the recipe card at the bottom of this post. Be sure to check out the blog post itself for extra tips and tricks!
Summer is made for cookouts, spiked lemonade, and macaroni salad. Ok, summer is so much more than that but if you know me, you know I love me some summer. Speaking of summer, one of my best summer memories is from a summer when I was 17 and I traveled to Hawaii to stay for an entire month! Best summer ever!!! Although the summer I got married on June 21st, the first day of summer, may just have that one beat. Either way, I had a blast in Hawaii visiting family, volunteering at the local hospital, hiking, attending luau's, and straight chilling.
I love this recipe for Hawaiian Macaroni Salad because everytime I make it it brings back memories of my time on the island (I only stayed on Oahu). This recipe is so simple yet delicious that it's a must try for any macaroni salad lover.
What is Hawaiian Macaroni Salad?
It's a creamy sweet and tangy salad that can be found all over Hawaii. There are many additions that can be added, but base recipes generally include elbow macaroni that has been slightly over cooked and lots of good quality mayonnaise.
What makes Hawaiian Macaroni Salad Different?
The Sauce!! It's sweet, tangy, and oh so delicious. The mayonniase, milk, and apple cider vinegar are keys to the sauce. Most Hawaiian Macaroni Salad recipes require at least 2 cups of mayonaise...this one does not. I'm not that into mayonnaise and the movie Undercover Brother makes me feel bad for even liking it. Just kidding. But I feel that my version just didn't need 2 cups.
Traditional Hawaiian Macaroni Salad also tends to have super soft overcooked noodles to absorb all the creamy sauce. I like my noodles cooked to al dente so I don't overcook it. My obsession with the dish is with the sauce.
Hawaiian Macaroni Salad with or without Tuna, That is the Question!
The beauty of this dish is that it is amazing with or without tuna. I make it both ways often, my daughter doesn't like the tuna (hence why my photos are missing tuna). On the other hand, everyone else loves it with tuna. Your choice, both are amazing.
I really hope you enjoy this Hawaiian Macaroni Salad recipe. It's perfect for bbq's, cookouts, and for meal preps throughout the week.
Tips for Hawaiian Macaroni Salad Recipe
Allow your macaroni to cool for about 10 -15 minutes before adding the sauce. That will help keep your sauce creamy.
Use high quality mayonnaise only for this recipe. Any high quality brand will do.
Have fun with the additions to the recipe. Sub veggies for other veggies, protein for other proteins, etc. It's the sauce that really makes this dish pop.
This macaroni salad is best after refrigeration. 2 hours is usually enough for the flavors to mend together.
Prepare elbow macaroni as indicated on the box, drain, and set aside to cool.
Combine mayonnaise, sugar, dijon mustard, apple cider vinegar, milk, salt, and black pepper in a medium bowl and stir to combine.
Place pasta, red onion, red bell pepper, cucumber, carrots, and tuna (if you are using tuna) in a separate bowl. Pour sauce over top and stir to combine.
This Cheddar and Sour Cream Corn on the Cob seasoning is a delicious twist on traditional corn on the cob. Serve it along side your favorite cookout meal for a fun and tasty side dish.
You’ll find the full recipe with ingredient amounts and instructions in the recipe card at the bottom of this post. Be sure to check out the blog post itself for extra tips and tricks!
There is something magical about grabbing an ear of corn with both hands and chowing down. Heck, you could use one hand for all I care but corn eaten off the cob is just simply amazing. There’s a relaxation that comes along with it that I just can’t explain. In our house, we eat a ton of corn on the cob. It was one of my cravings during my pregnancy and if I ate it, we all ate it.
Traditionally, we would season our corn with loads of butter and some salt. Of course, as foodies, we had to start to think outside the box and then this corn on the cob seasoning became a favorite in our household. The credit for this beauty goes to hubby who loves cheddar and sour cream potato chips.The corn on the cob seasoning in this recipe is pretty simple and involves minmum ingredients, cheesy puffs, sour cream, and our top secret ingredient...Jerk Seasoning. I guess it’s not so top secret anymore. Actually, it’s not really top secret...my hubby puts jerk seasoning on just about everything and he was the brain child behind this recipe creation. If you don’t have jerk seasoning than salt is just as fine as a substiute. But seriously, use the jerk if you can.
You can prepare the corn anyway you like when it comes to this recipe, as long as it’s cooked. I like to use my Instant Pot as it’s quick, easy, and gets my corn cooked just the way we like, cooked with a nice little crunch that leaves juices flying everywhere. With only a 2 minute pressure cooktime, this method just can’t be beat.
Now that I’ve let you all know about this corn on the cob seasoning, I’d love to hear from you about your favorite corn on the cob seasoning in the comments below. Until the next recipe, Enjoy 🙂
Place 1 cup of water in instant Pot. Add trivet and place corn on top of trivet. Cover and pressure cook on Manual for 2 minutes. Once timer goes off, quick release.
Oven Instructions
Preheat oven to 450 degrees. Wrap corn in foil and place on cookie sheet. Roast in oven for 20-25 minutes until done.
Grill Instructions
Wrap corn in heavy duty foil. Cook over coals/grill gate turning occasionally for about 15 minutes until corn is done.
While corn is cooking, add Cheeto Puffs to food processor along with jerk seasoning. Process until cheetos look like light breadcrumbs. (See photo below). Spread Processed cheetos on a flat surface.
Once corn is done and cool enough to handle, spread sour cream over corn with brush. Then roll corn into cheetos. Serve and Enjoy 🙂
This Pressure Cooker Salmon is the perfect quick and elegant meal. Top it with a creamy herb parmesan sauce for a quick and fancy meal.
I would have never imagined that I, Tanya, would be cooking salmon in an electric pressure cooker. Not too sure why I am surprised since I use my Instant Pot for just about everything. I’ve made sous vide egg bites and cornmeal porridge for breakfast and this beautiful shrimp paella for dinner and meal prep lunches. But fish, in the pot? Yes, it can be done and it’s so awesome.
The inspiration for this recipe comes from a high school friend Katharine who informed me of a salmon recipe she created in her Instant Pot. Her method was simple yet genius. Salmon in pot with stock, herbs, and lemon juice; pressure cook, remove and add cornstarch and let cook until it thickened. Amazing sauce and fish. I was intrigued and I decided to give it a go myself.
But there was a problem. Every single time I wanted to try the recipe, I didn’t feel like making a store run to get fresh non frozen salmon. And the week I finally bought salmon, I bought it frozen and forgot to defrost it the day I wanted to make it. Yes, fish defrost quite quickly under running water but even that felt like such a hassle. So it dawned on me, why not cook it from frozen, just like I did with the shrimp in the shrimp paella.
I set it to the same cook time for 5 minutes, closed the lid, and said a prayer. Well prayer works because my salmon came out perfect! With just a 5 minute cook time, my salmon was done from frozen. My fish was flakey and perfectly cooked, and I was able to make an amazing sauce in the same pot once done. Dinner was complete in less than 20 minutes!
The beauty with this salmon in the pressure cooker is the ability to use fresh or frozen fish. Non frozen fish will cook with a pressure cook time of about 3 minutes. Use your judgment when setting cook times for fresh or frozen fish. The thicker and bigger the filet, the longer the cook time.
You can have fun with the herbs used in this dish as well. I've used various combos of basil, parsley, chives, and dill and it's always been delicious.
Some may have some questions about this dish and I’ve made a nice notes section for this pressure cooker salmon along with step by step photos. Of course, if you come up with new questions or love this dish, feel free to leave me a comment below. As always, enjoy 🙂
Pressure Cooker Salmon with Creamy Herb Parmesan Sauce
This Pressure Cooker Salmon with Creamy Herb Parmesan Sauce is the perfect quick weeknight and elegant meal. Top it with a creamy herb parmesan sauce for a quick and fancy meal.
Place water and garlic in insert with trivet on top. Place salmon on top of trivet.
Close pressure cooker and set on Manual for 4-5 minutes.*
Once timer goes off, quick release the pressure. Remove salmon and trivet from the pot.
Turn off pressure cooker and set to Saute and adjust to Normal.
Once water begins to boil, whisk in the heavy cream and bring to a boil again. Allow to boil for about 2-3 minutes. The mixture should be able to stick to the back of a spoon.
Turn off pressure cooker and remove insert from heat. Whisk in chives, parsley, dill, parmesan cheese, and lemon juice. Salt and pepper to taste.
Notes on Pressure Cooker Salmon with Creamy Herb Parmesan Sauce
The time listed is for 4-5 minutes under high pressure for frozen salmon. Thicker bigger filets will likely need a 5 minute cook time while thinner ones will need less of a cook time. Use your judgment when setting cook times to avoid overcooked and dry fish.
Dry herbs can be substituted for the fresh in this recipe, just cut herb amount in half. Also, add herbs before pressure cooking if using dry herbs. Fresh herbs should be added as instructed in the recipe.
Broth can be used in place of water for recipe.
It takes about 10 minutes to reach pressure in the pressure cooker. Make sure quick release is done as soon as pressure cooker timer goes off to avoid overcooked salmon.
These directions are for a 6 quart Instant Pot. Please modify accordingly for bigger or smaller models.
Serve over pasta or rice with a side of vegetables to complete your meal.
Step by Step Photos of Pressure Cooker Salmon with Creamy Herb Parmesan Sauce
Pin Pressure Cooker Salmon with Creamy Herb Parmesan Sauce
Everyone needs a list of great recipes for air fryers. This list has you covered for breakfast, lunch, and dinner. Here's a list of recipes to get you started. This post may contain affiliate links, please read my full disclosure here.
So you’re trying to decide if you should buy an air fryer. Believe me, I was there. I have a small kitchen and another kitchen appliance terrified me. Where would I put it? Would I actually use it? Do I really need something just to fry food without oil?
This Healthy General Tso's Chicken Recipe is still fried but "fried" in the air fryer and can be made in less than 30 minutes. Top it with the amazing general tso's sauce for an easy and quick weeknight dinner.
You’ll find the full recipe with ingredient amounts and instructions in the recipe card at the bottom of this post. Be sure to check out the blog post itself for extra tips and tricks!
I have a few rules when it comes to General Tso's chicken. It must have crunch, it must have a little spice, and it must be saucy! At least that was my experience the first time I tried this dish.
It was almost 10 years ago when I first had it at a restaurant in Durham, NC during law school. I first tried this dish during a study break with friends and I fell in love.
It was also during this study break that I bit into one of the hot peppers that comes in the dish and I couldn't breathe for a good minute. The peppers are not to be eaten, the peppers are not to be eaten. I wish I knew that before I took a bite.
Despite the incident with the pepper, the dish was delicious. The chicken had the perfect crunch and the sauce was a perfect combination of sweet and salty. The depth of flavor was amazing. It's a dish that I came to love and recreate in my kitchen quite often.
Initially, my general process when creating general Tso's chicken was to batter and fry the chicken pieces until crunchy and then coat them in my sauce.
Although delicious, it became a bit cumbersome for weeknight dinners. My deep fryer broke which was a bummer and the time it took to heat oil on the stovetop just didn't fit into my tight schedule for weeknights.
So one night when my daughter requested this for dinner, a light bulb clicked in my head and I found that my Air Fryer would be the perfect fix. It became a win win because the air fryer cut the time it took to prepare the general tso chicken recipe but it also became my new healthy general tso chicken recipe since I needed no oil to fry it.
I initially purchased my air fryer to deal with a pregnancy craving I had for french fries. Well to be fair, I always crave french fries so I shouldn't blame that on pregnancy. Either way, I use my air fryer for much more than french fries and I am excited to share with you all the recipes I create in this amazing appliance.
What is an Air Fryer?
So what's an air fryer you may ask? In general, it's an appliance that recreates fried foods without actually frying the food in tons of oil. It also roasts and bakes food but its main claim to fame is the fact that it can give the same texture as fried foods without using a ton of oil.
It's a healthier option for home cooks who desire the delicious crunch that comes with fried foods but not the delicious calories and fat. It also tends to have a quicker cook time than many foods that are typically baked in the oven.
With help of my air fryer, I create this dish in less than 30 minutes. That's right, I use the air fryer to prep my chicken and I create my sauce while that's going.
There are a few tips and tricks to make this recipe a success. For one, you will want to coat your chicken pieces in potato starch. It's a tip I picked up from This Old Gal. It provides the perfect crunch for the chicken pieces without changing the taste profile.
You will also want to make sure that your air fryer basket is properly oiled. I just put a little olive oil on a paper towel and rub it all over the bottom of my basket. That way the chicken pieces won't stick when frying. This is the only oil you will need for frying the chicken pieces in this recipe. How awesome is that?!?
The last tip is to shake the air fryer basket about every 5 minutes when cooking. This will ensure that your chicken pieces are evenly cooked and crisp.
The beauty of this dish is that while your chicken pieces are cooking in the air fryer, you can work on creating your sauce on the stovetop. Dump the chicken pieces into the sauce when they are done cooking for the perfect weeknight dinner.
I like to serve our healthy general tso chicken recipe with a side of white rice I make in my Instant Pot. For veggies, I serve with steamed or air fried broccoli.
I hope you enjoy this healthy General Tso Chicken recipe in the air fryer as much as we do.
Looking for other Healthy Air Fryer Recipes? Try these out...
This healthy General Tso's Chicken Recipe is still fried but "fried" in the air fryer and can be made in less than 30 minutes. Top it with the amazing general tso sauce for an easy and quick weeknight dinner.
Set Air Fryer to 400 degrees Fahrenheit. Coat chicken thighs with potato starch making sure all pieces are fully covered. Use tongs to place chicken pieces in Air Fryer basket. Cook chicken pieces for 20-25 minutes until crispy, shaking basket every 5 minutes.
Meanwhile, prepare sauce by heating vegetable oil in skillet over medium-high heat. Once hot, add green onions, dried chilies, garlic, and ginger and stir fry for about 1 minute, until chillies brighten in color and onions have softened.
Add brown sugar, chicken broth, soy sauce, rice vinegar, sesame oil, and pinch of salt to the skillet and stir. Bring to a boil and cook for about 3 minutes.
Once chicken in air fryer is finished, add to sauce and stir in.
Create a thickener by whisking 2 teaspoons of corn starch in ¼ cup cold water. Stir into boiling sauce and allow to cook for about 1 minute, until sauce has thickened.
Serve with rice and vegetable and Enjoy 🙂
Notes
Note for Healthy General Tso's Chicken Recipe
Break a few of the chills peppers in half before adding to skillet for a spicier dish.
Suggested Tools for Healthy General Tso's Chicken Recipe
I have this Air FryerYou will want to coat chicken with Silicone Kitchen Tongs so coating stays on chicken when mixing and transferring to air fryer.A skillet for making the sauce on the stove top.
This Copycat Rice a Roni recipe is even better than the boxed version. Make it in the Instant Pot for a hands off quick, easy, and healthier side dish.
You’ll find the full recipe with ingredient amounts and instructions in the recipe card at the bottom of this post. Be sure to check out the blog post itself for extra tips and tricks!
You ever have a random craving for a meal from your childhood? Happens to me quite often. I'll be thinking of what to create in my kitchen and I'll get a sudden urge for a dish I hadn't had in years. That's how it was when it came to this Rice a Roni.
Even as an adult, I used to buy the flavored rice and pastas from the dried goods section of the supermarket. Once I realized that these things were full of sodium and other no no ingredients, I stopped buying them.
As a matter of fact, I discovered that it was much easier and cheaper to make flavored rice out of ingredients I already had in my pantry.
Hence this homemade copycat rice a roni was born. I recall the first time I made it to go along with a delicious steak dinner I made for hubby and myself. Apparently he used to eat rice a roni as a kid too and loved it. So I made this copycat rice a roni, plated it beside a delicious steak and asparagus dinner, and waited for the verdict.
Initially, he thought it came from the box and he claimed I doctored it up somehow because it tasted so delicious. He was in shock when I told him it wasn't from a box. As a matter of fact, he didn't believe me, still doesn't believe, and always looks in the trash for a rice a roni box as evidence when I make it.
I tend to make all my rice in my Instant Pot now and this copycat rice a roni is no different. Reason being is that with the right ratio, rice cooked in the pressure cooker always comes out perfect. I tend to walk away and forget to lower the stove when it comes to stove top rice. The pressure cooker allows me to place my ingredients in the pot, set my timer, and go on to the rest of my meal. Perfection and no more burned rice bottom.
The great thing about this rice a roni is that you can prep the majority of the ingredients ahead of time. No need for a rice a roni seasoning packet when all the dry herbs and spices are in your cupboard. The only herb in this recipe that isn't dried is the parsley. Dry parsley can be substituted but fresh parsley is so much better.
I hope you enjoy this homemade copycat rice a roni as much as we do. I hope your family believes you when you tell them it's not from the box. As always, Enjoy 🙂
Looking for more Instant Pot recipes with rice? Try these out:
Combine dry thyme, minced dry onion, garlic powder, salt, and turmeric. Set aside.
Set pressure cooker to sauté. Once Hot, add butter and let melt. Once melted, add thin spaghetti noodles and stir until toasted, about 2 minutes.
Add rice and stir for about 30 seconds, until slightly toasted.
Add spice mixture and chicken broth and stir, ensuring that there are no pieces stuck to the bottom. Turn off sauté mode on pressure cooker and set pressure cooker on Manual mode for 8 minutes. Cover pressure cooker, making sure valve is set to sealed.
Once pressure cooking time is done, allow to natural release for 10 minutes, then quick release any remaining pressure by moving valve to "venting"
Open lid and add chopped parsley. Fluff with fork and Enjoy!
Video
Notes
Make sure there are no dry bits stuck to the bottom of the pot. This could result in that annoying "burn" signal some pressure cookers give off. Once you add your broth, stir with a wooden spoon to ensure there is no food stuck to the bottom. Basmati rice can be substituted for the long grain. I always rinse my rice under cold water before cooking. I started doing it out of habit because mama taught me that way. It yields a much fluffier non sticky rice. *If subbing dry for fresh parsley, reduce amount to 1 tsp.
Nutrition
Calories: 160kcal
Step by Step Photos of Copycat Rice a Roni in Pressure Cooker
This zucchini mushroom chicken is a chinese restuarant dish that can be on your dinner table in a hurry with minimum ingredients. Coated in an amazing sauce with tender chicken pieces makes this meal a winner.
You’ll find the full recipe with ingredient amounts and instructions in the recipe card at the bottom of this post. Be sure to check out the blog post itself for extra tips and tricks!
There was a point in my life that I ordered chinese food about once a week. I mean, how convenient is to sit at home, order dinner over the phone, and have it delivered piping hot at your door? Pretty convenient I'd say. And I would continue to do this until I realized that sometimes that food wasn't piping hot when it reached my door. Or sometimes I'd shell out 40 bucks for a meal that I could make for a fraction of the cost. Or sometimes the meals I ordered were very high in sodium which can cause a host of health issues.
So cooking Chinese dishes at home became a thing for me and it should become a thing for you too. So about this Zucchini Mushroom Chicken...omg delicious!!! Not only are the flavors of this dish amazing, but if you follow my technique for this recipe, you will end up with the most tender pieces of chicken breast you ever had in your meal.
Chicken breast is one of the most trickiest parts of the chicken to cook with as it's not as forgiving if you overcook it. Most chinese restaurants have mastered the chicken breast by providing succulent velvet textured chicken. How do they it you may ask? Well they...velvet the chicken.
If you do a google search about velveting chicken you will find various techniques on how to do it. Some say you should parboil the chicken first, others have it coated in cornstarch and then parboiled. Either way, most ways were too complicated and discouraging. This way is by far the easiest and brings amazing results. I find that velveting the chicken is an important step in this zucchini mushroom recipe and I hope you don't skip it. If you do, no worries, your dish will still be amazing but seriously consider giving it a try.
When it comes to stir fry at home, I usually use my large nonstick pan rather than my wok. Since I cook on an electric stovetop, there isn't enough heat to properly heat up all sides of a wok. A non-stick skillet works best for home cooks, especially those with electric burners.
I hope you enjoy this zucchini mushroom chicken recipe as much as we do. Don't forget to scroll down and check out the step by step photos for this meal.
Looking for more Zucchini Recipes? Try these Zucchini Fritters made in an Air Fryer.
Looking for more Stir fry recipes? try this one out:
This zucchini mushroom chicken is a chinese restuarant dish that can be on your dinner table in a hurry with minimum ingredients. Coated in an amazing sauce with tender chicken pieces makes this meal a winner.
1medium zucchinicut in half lengthwise, then sliced
salt and pepper to taste
Instructions
Sprinkle baking soda over chicken breast, making sure it is fully coated. Set aside for 20 minutes.
Combine soy sauce, rice vinegar, sugar, garlic, ginger, and red pepper flakes if using. Set aside.
Rince baking soda off of chicken and dry with good quality paper towels.
Add 1 tablespoon vegetable oil and sesame oil in pan over medium-high heat. Once oil is hot, add chicken and cook until both sides are browned, around 4 minutes.
Remove chicken from pan. Add remaining vegetable oil to pan and add zucchini, mushrooms, and onion. Cook while stirring until vegetables have softened, about 3 minutes.
Add chicken and sauce to pan, stirring until vegetable and chicken is fully coated with sauce. Cook for about 1 minute more. Serve with white or brown rice.
Step by Step Photos of Zucchini Chicken and Mushrooms
Place baking soda over thinly sliced chicken breast. Set aside for 20 minutes.
Slice onion, zucchini, and mushrooms. Set aside.
Prepare sauce. Set aside.
Rinse chicken and pat chicken pieces dry.
Cook chicke over medium-high heat until browned on both sides. Remove from pan.
Cook zucchini, onion, and mushrooms in pan until softened.
Add chicken and sauce to the pan. Cook for about 1 minute more.
Notes on Zucchini Mushroom Chicken
The chicken breast will feel a tad bit slimy after baking soda is rinsed off. Do not fear, it will cook just fine. Make sure you use good quality paper towels when drying the chicken so they don't stick to it.
Make sure all the baking soda is rinsed off chicken. You don't want the chicken to taste like baking soda in the final dish.
Chop vegetables and prepare sauce while chicken is marinating in the baking soda. That's the beauty that makes this dish a 30 minute dinner.
Add red pepper flakes if you want a bit of spice in the dish.