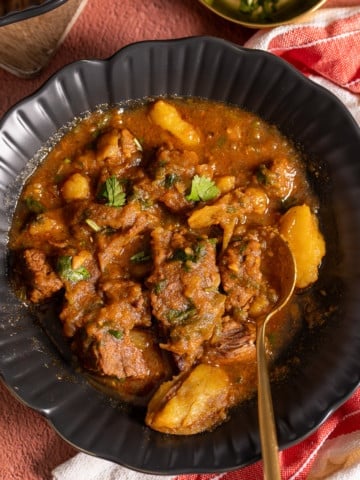
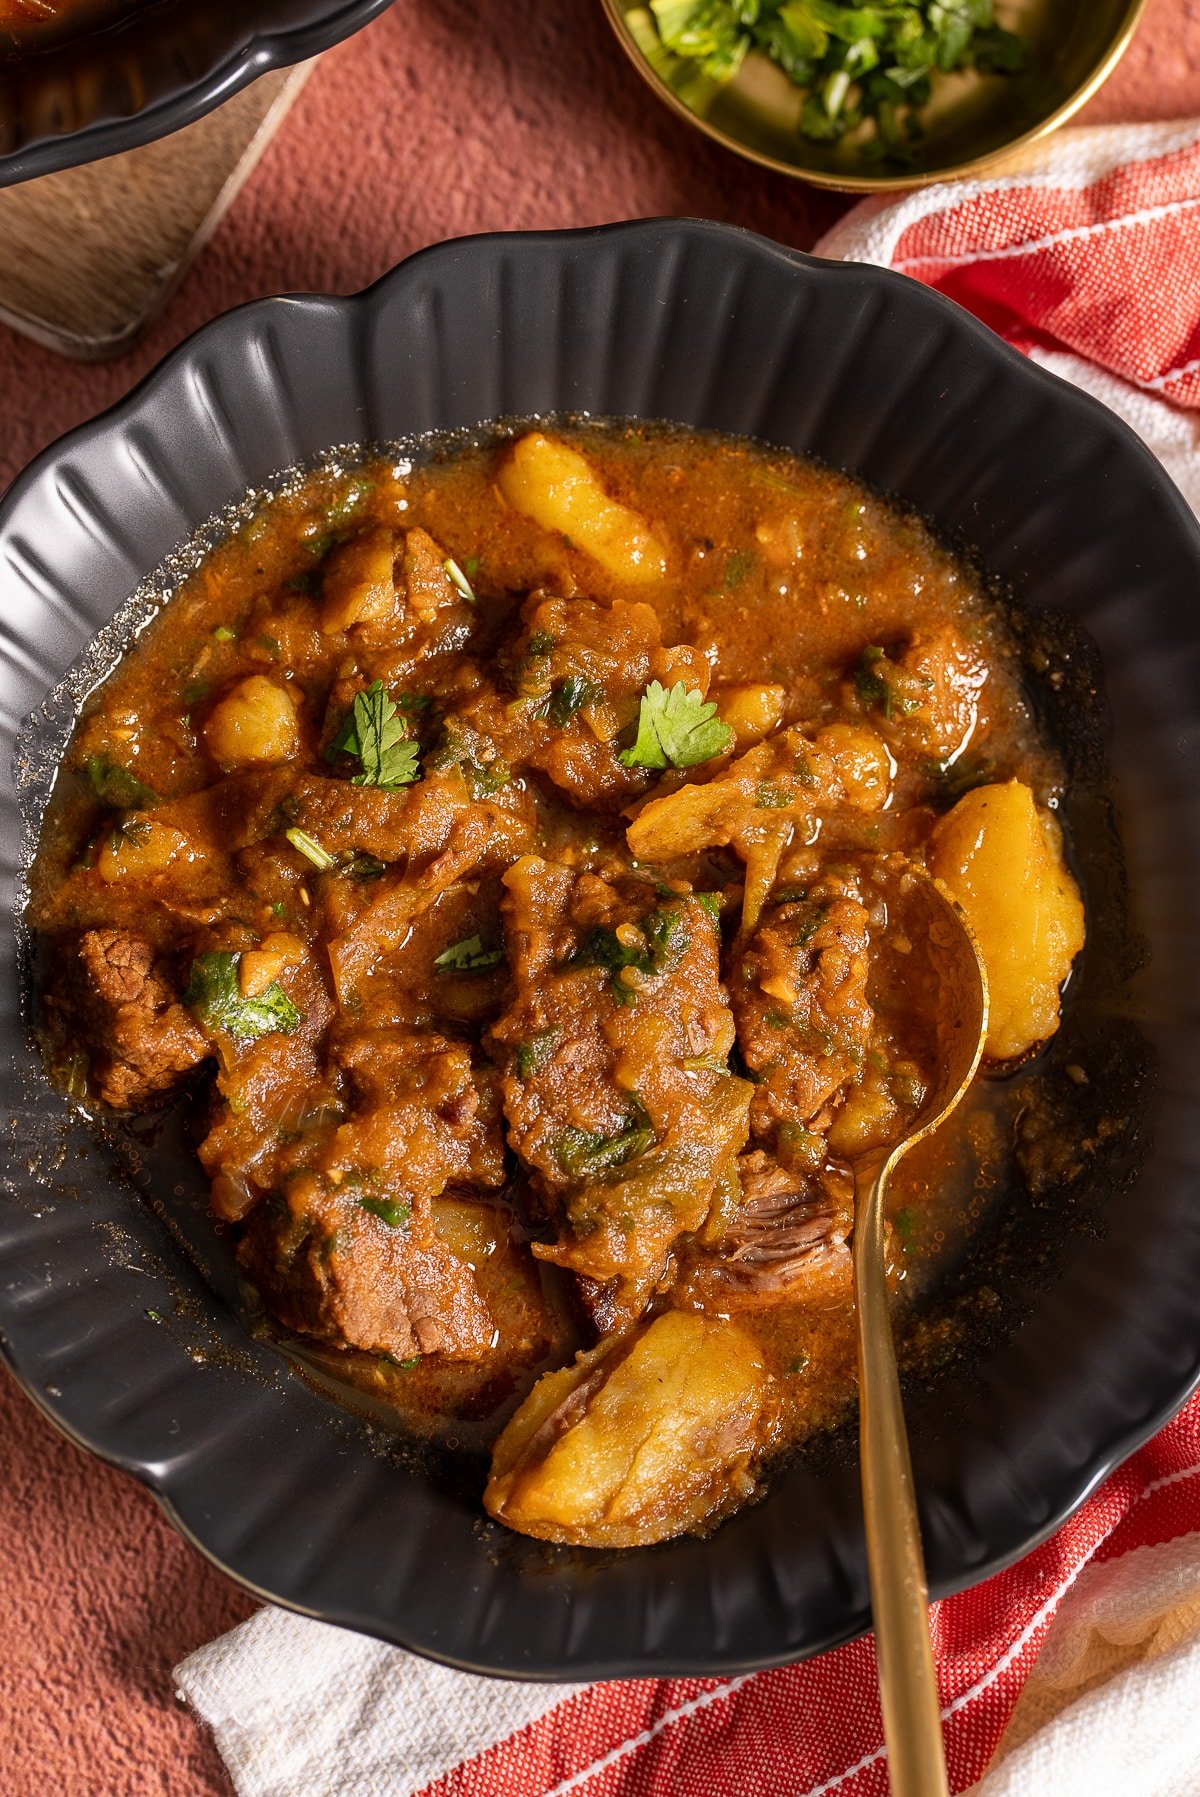
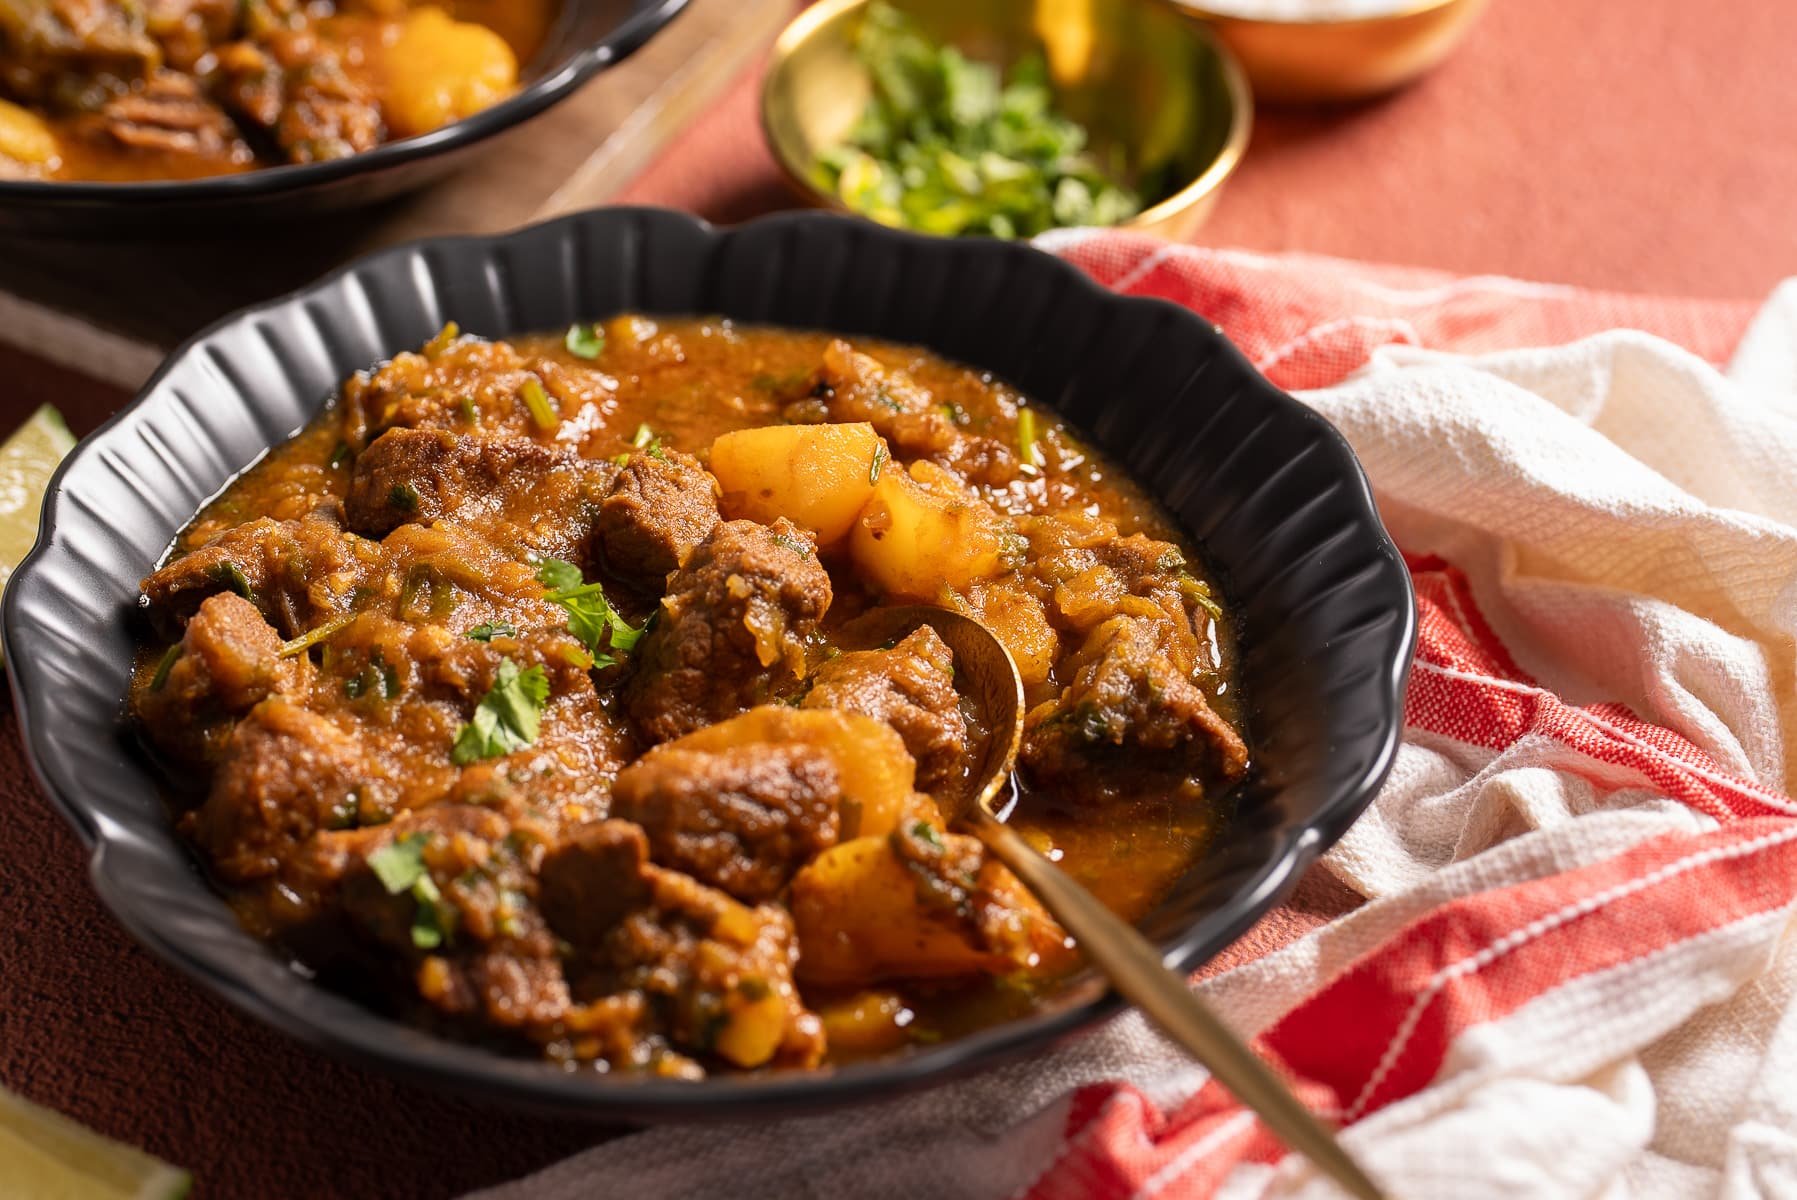
This Stove Top Beef Stew features tender pieces of beef simmered in a delicious gravy, making it perfect for when you crave a hearty stew with amazing flavor.
You’ll find the full recipe with ingredient amounts and instructions in the recipe card at the bottom of this post. Be sure to check out the blog post itself for extra tips and tricks!
Beef stew is my go-to comfort food, especially when the weather turns chilly. It's warm, comforting, and incredibly flavorful when prepared correctly. This recipe was inspired by a beef stew I enjoyed in the Dominican Republic, which featured peppers and onions, as well as a delicious gravy that I loved.
For this recipe, I marinated the beef beforehand to provide a wonderful flavor and help tenderize the beef, using green bell peppers and onions, along with various seasonings, like adobo seasoning, soy sauce, lime juice, and other seasonings.
I cook this recipe entirely on the stovetop for convenience, but you can also bake it in the oven if you prefer a more hands-off approach.
If you like cozy beef recipes, then you'll love this beef and vegetable soup.

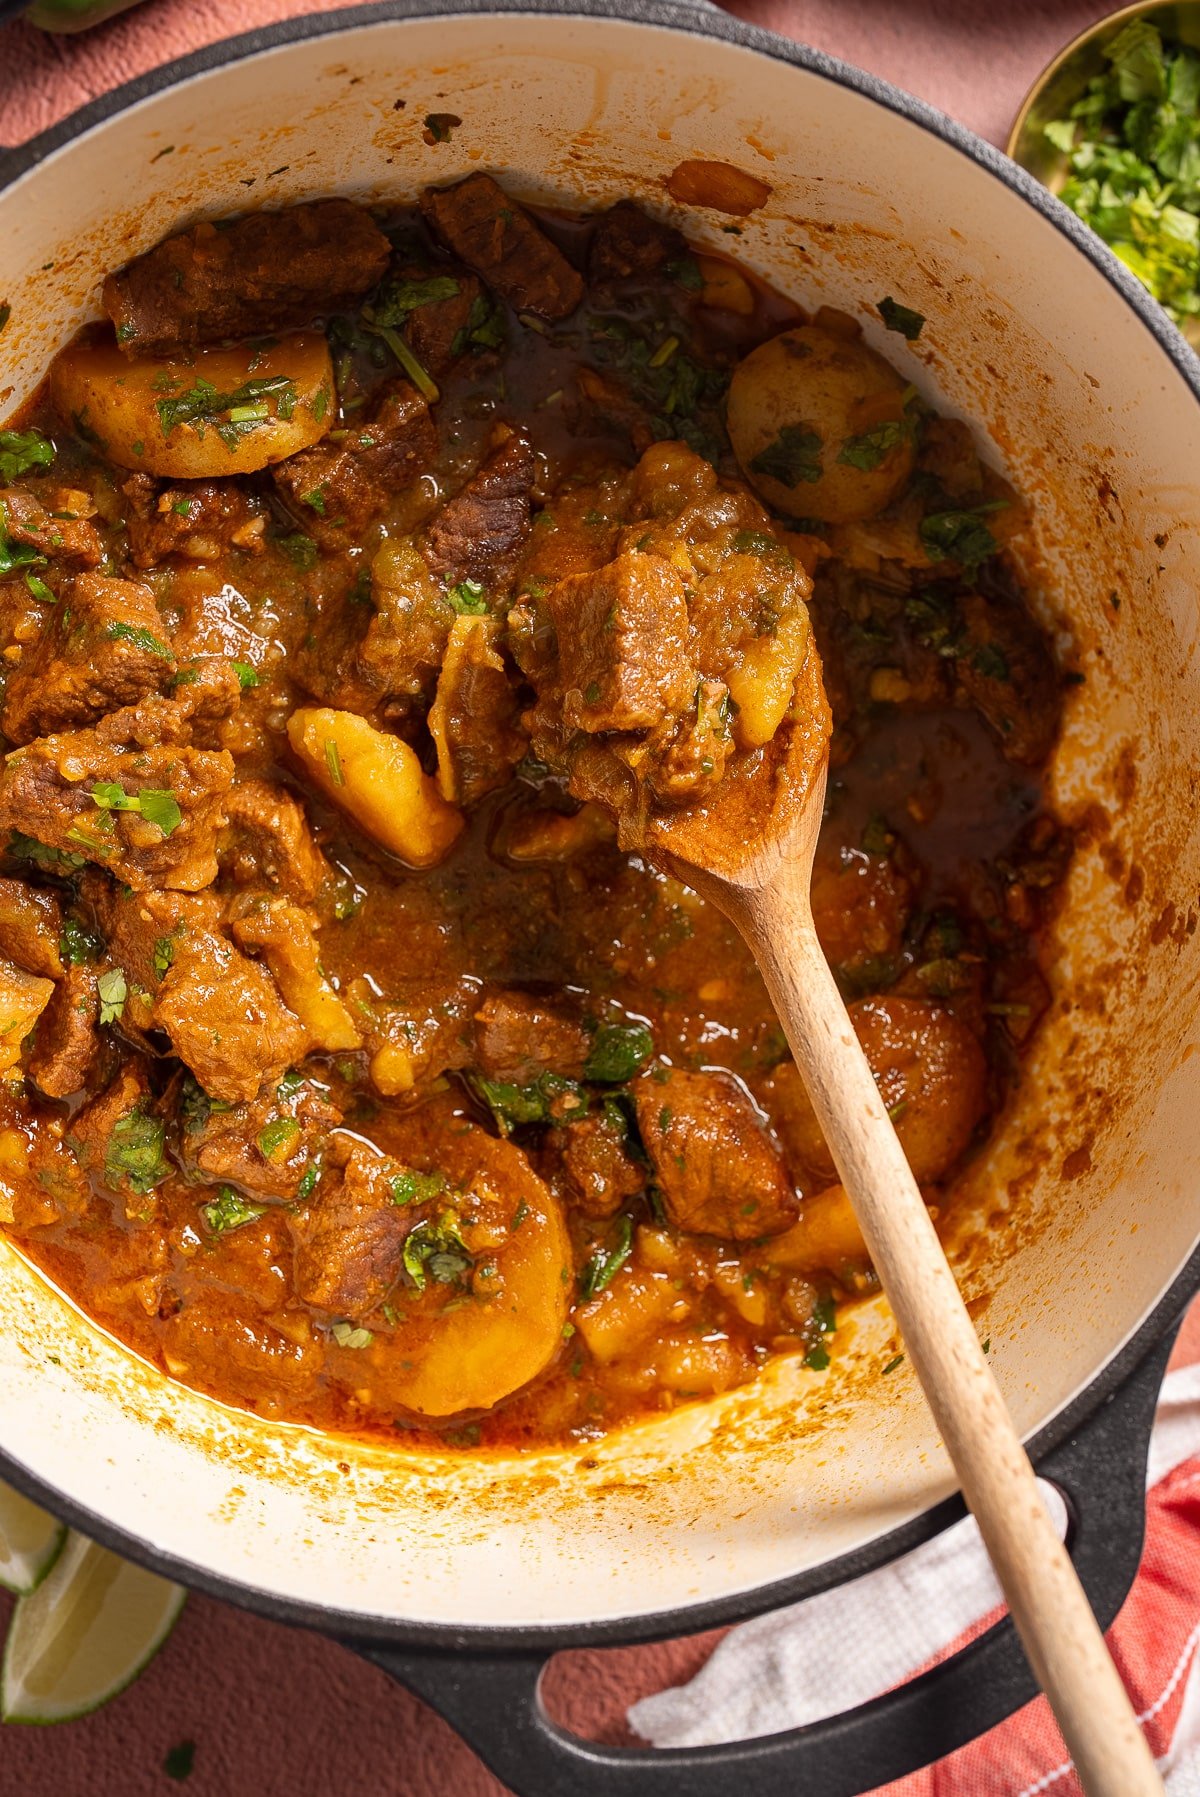
Many beef stews lean on carrots, potatoes, and peas for heartiness, but this one takes a different path. Instead, it layers bold flavors right into the meat and broth.
Soy sauce and lime juice add depth, while peppers, onions, and garlic create a savory base that makes every bite rich and deeply seasoned. It’s hearty, comforting, and a dish my whole family absolutely loved—I think yours will too!
♡ Tanya
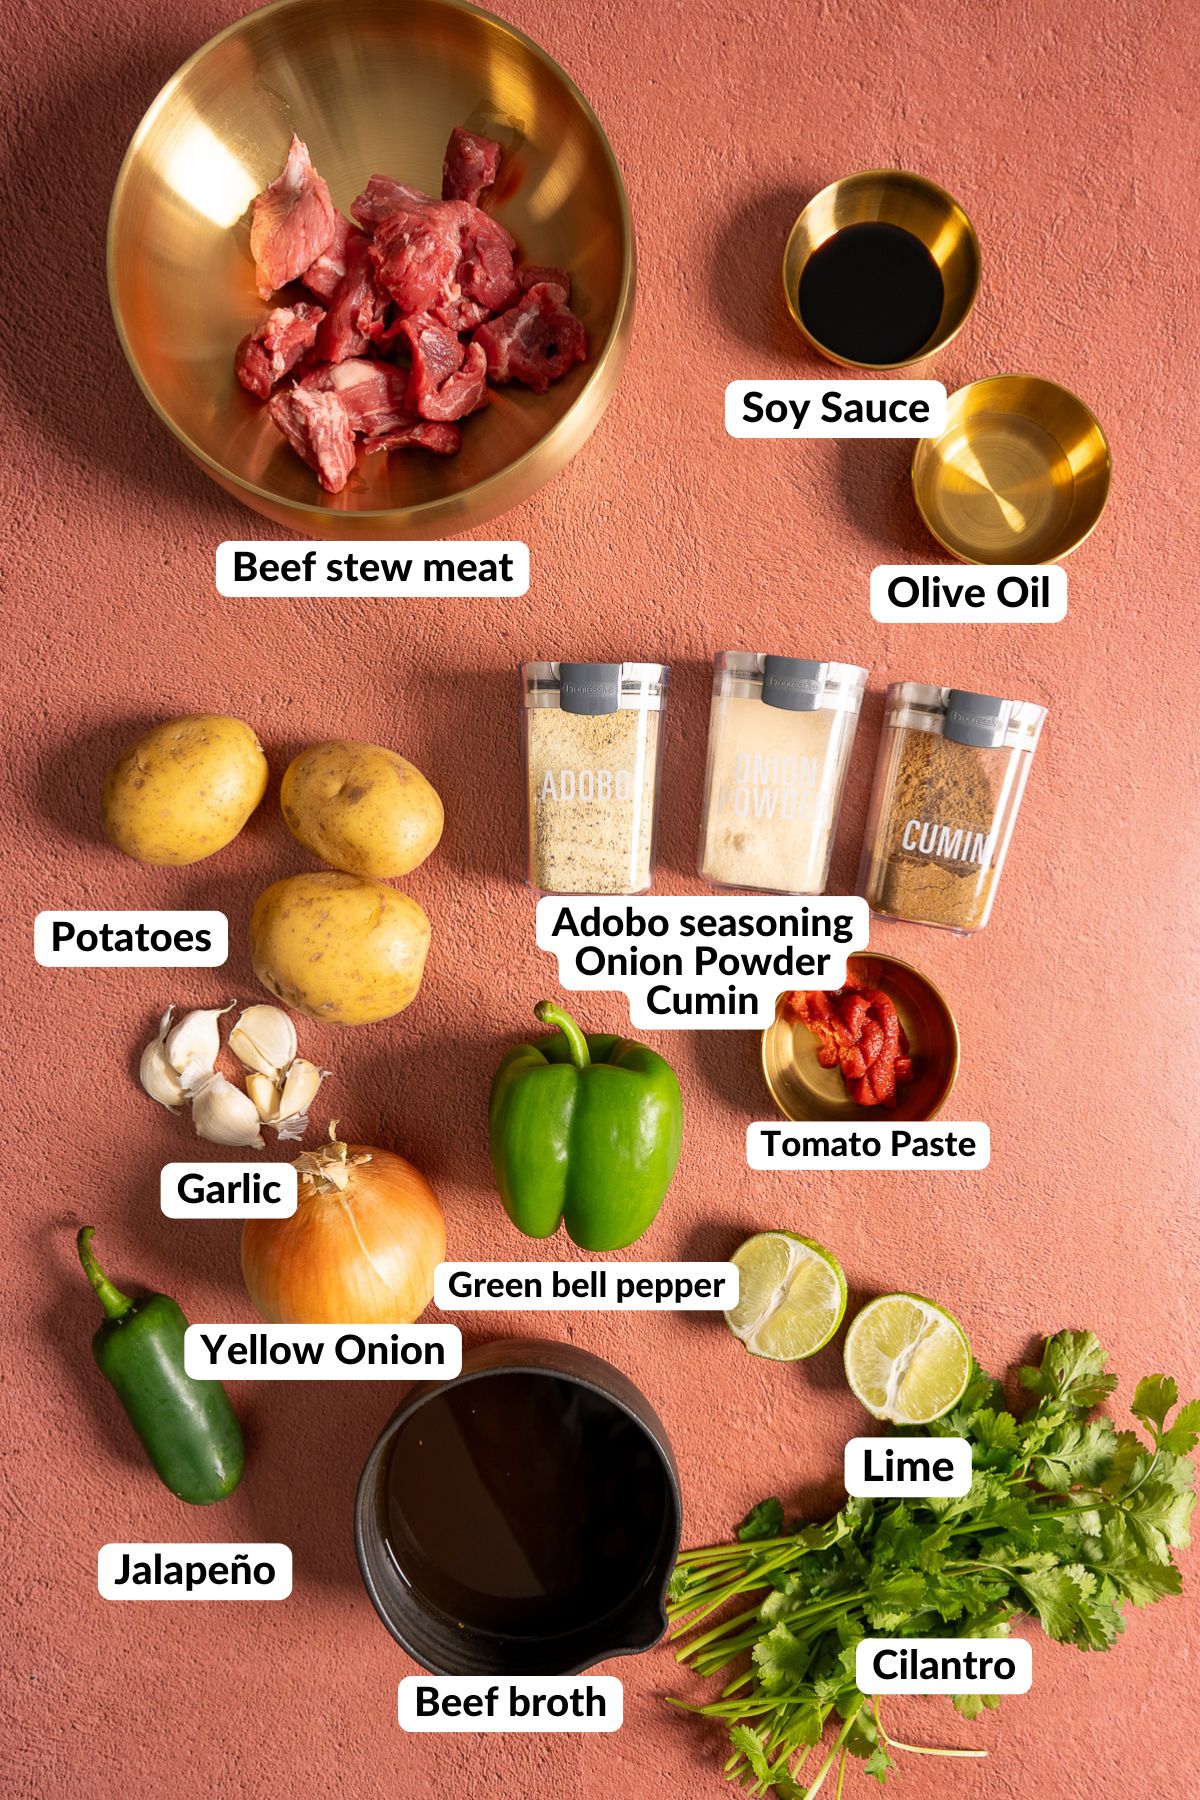
A Quick Look at the Beef Stew Ingredients
Ingredient amounts and full recipe instructions are on the printable recipe card at the bottom of the post.
- For Marinating the Meat:
- Beef stew meat - I buy meat that is pre-packaged and already labeled as beef stew meat. You could also use chuck roast or brisket, cut into 1-inch cubes, or any well-marbled cut suitable for slow cooking.
- Soy sauce, adobo seasoning, onion powder, cumin, lime juice – these ingredients come together to create a flavorful marinade that not only seasons the beef but also helps tenderize it. The combination infuses the meat with a savory, tangy, and slightly citrusy taste that sets the foundation for a rich and delicious stew.
- For Cooking:
- Olive oil, yellow onion, green bell pepper, jalapeño, garlic, tomato paste, beef or chicken broth—these ingredients form the aromatic base and savory sauce for the stew. Sautéing the vegetables in olive oil builds flavor, while the tomato paste adds richness and depth. The broth brings everything together, creating a hearty, flavorful gravy that infuses the beef and vegetables as they simmer.
- Vegetables:
- Potatoes - I use yellow potatoes to thicken the stew and make it more hearty. You can also substitute red potatoes, russet potatoes, or carrots and potatoes. I add these towards the end of cooking.
- Garnish:
- Cilantro - I like the pops of color that fresh cilantro provides at the end of cooking. You can also use parsley if you are not a fan of cilantro.
Recommended Tools


How to Make Stovetop Beef Stew
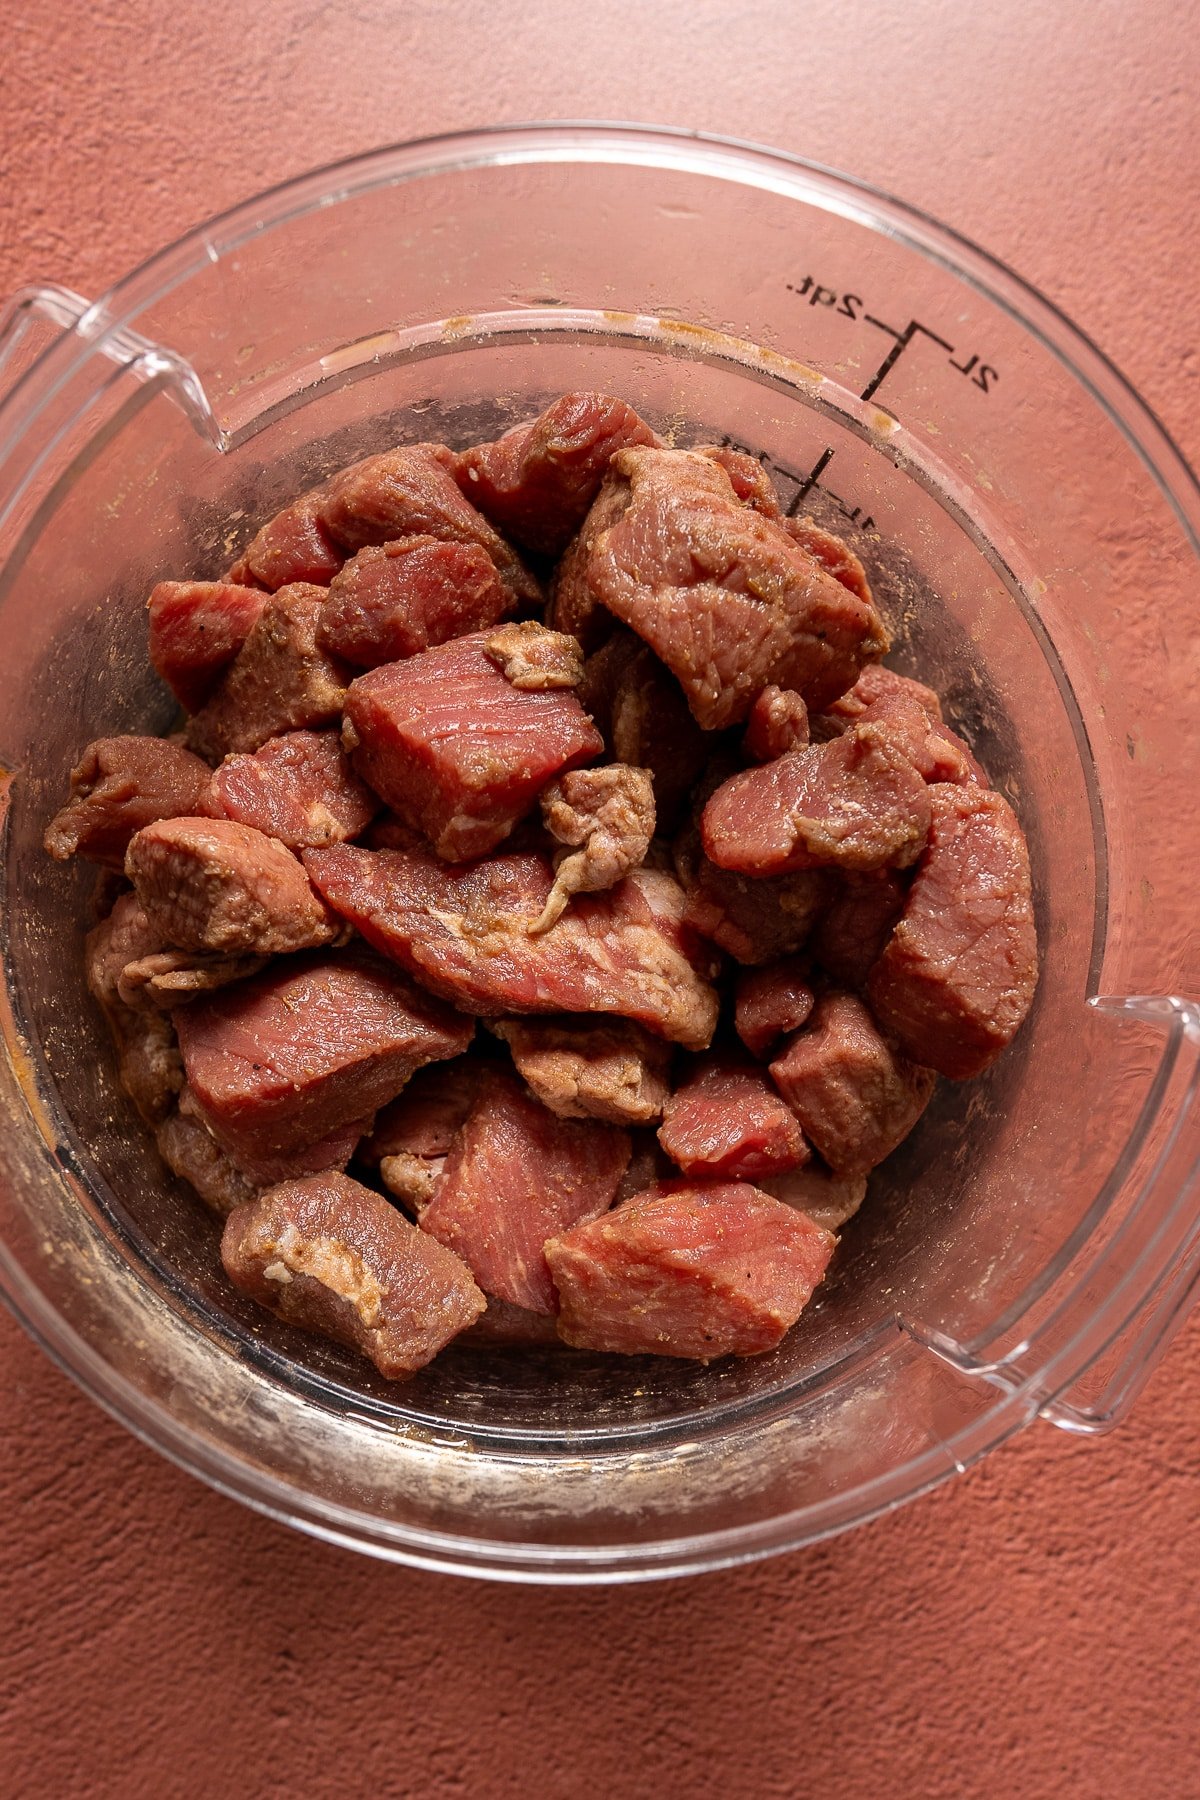
Step 1: Combine the beef, soy sauce, adobo seasoning, onion powder, cumin, and lime juice in a large bowl and mix well to coat the beef. Cover and marinate for 1–2 hours in the refrigerator. For the best flavor, marinate overnight if you have time.
💡 Tip: Marinating not only enhances flavor but also tenderizes the beef, making it melt-in-your-mouth tender.
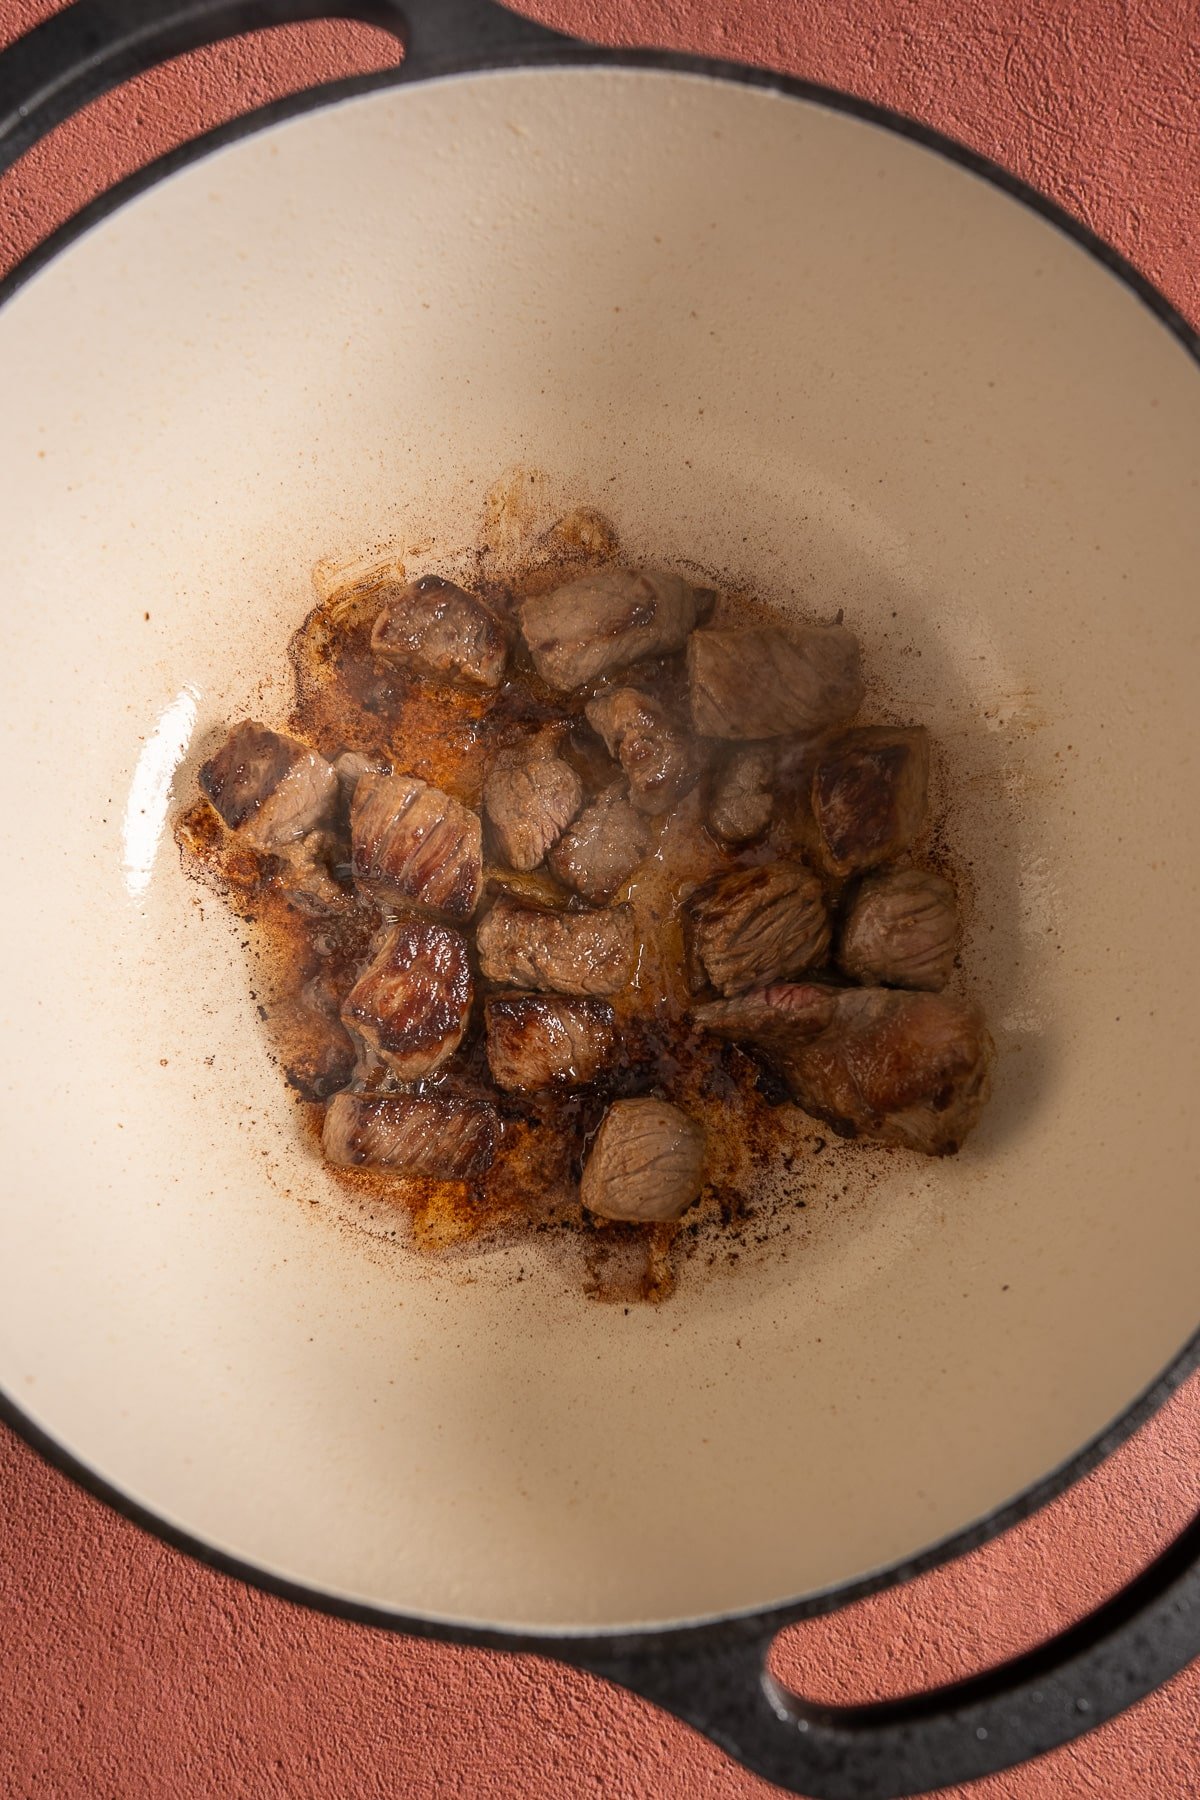
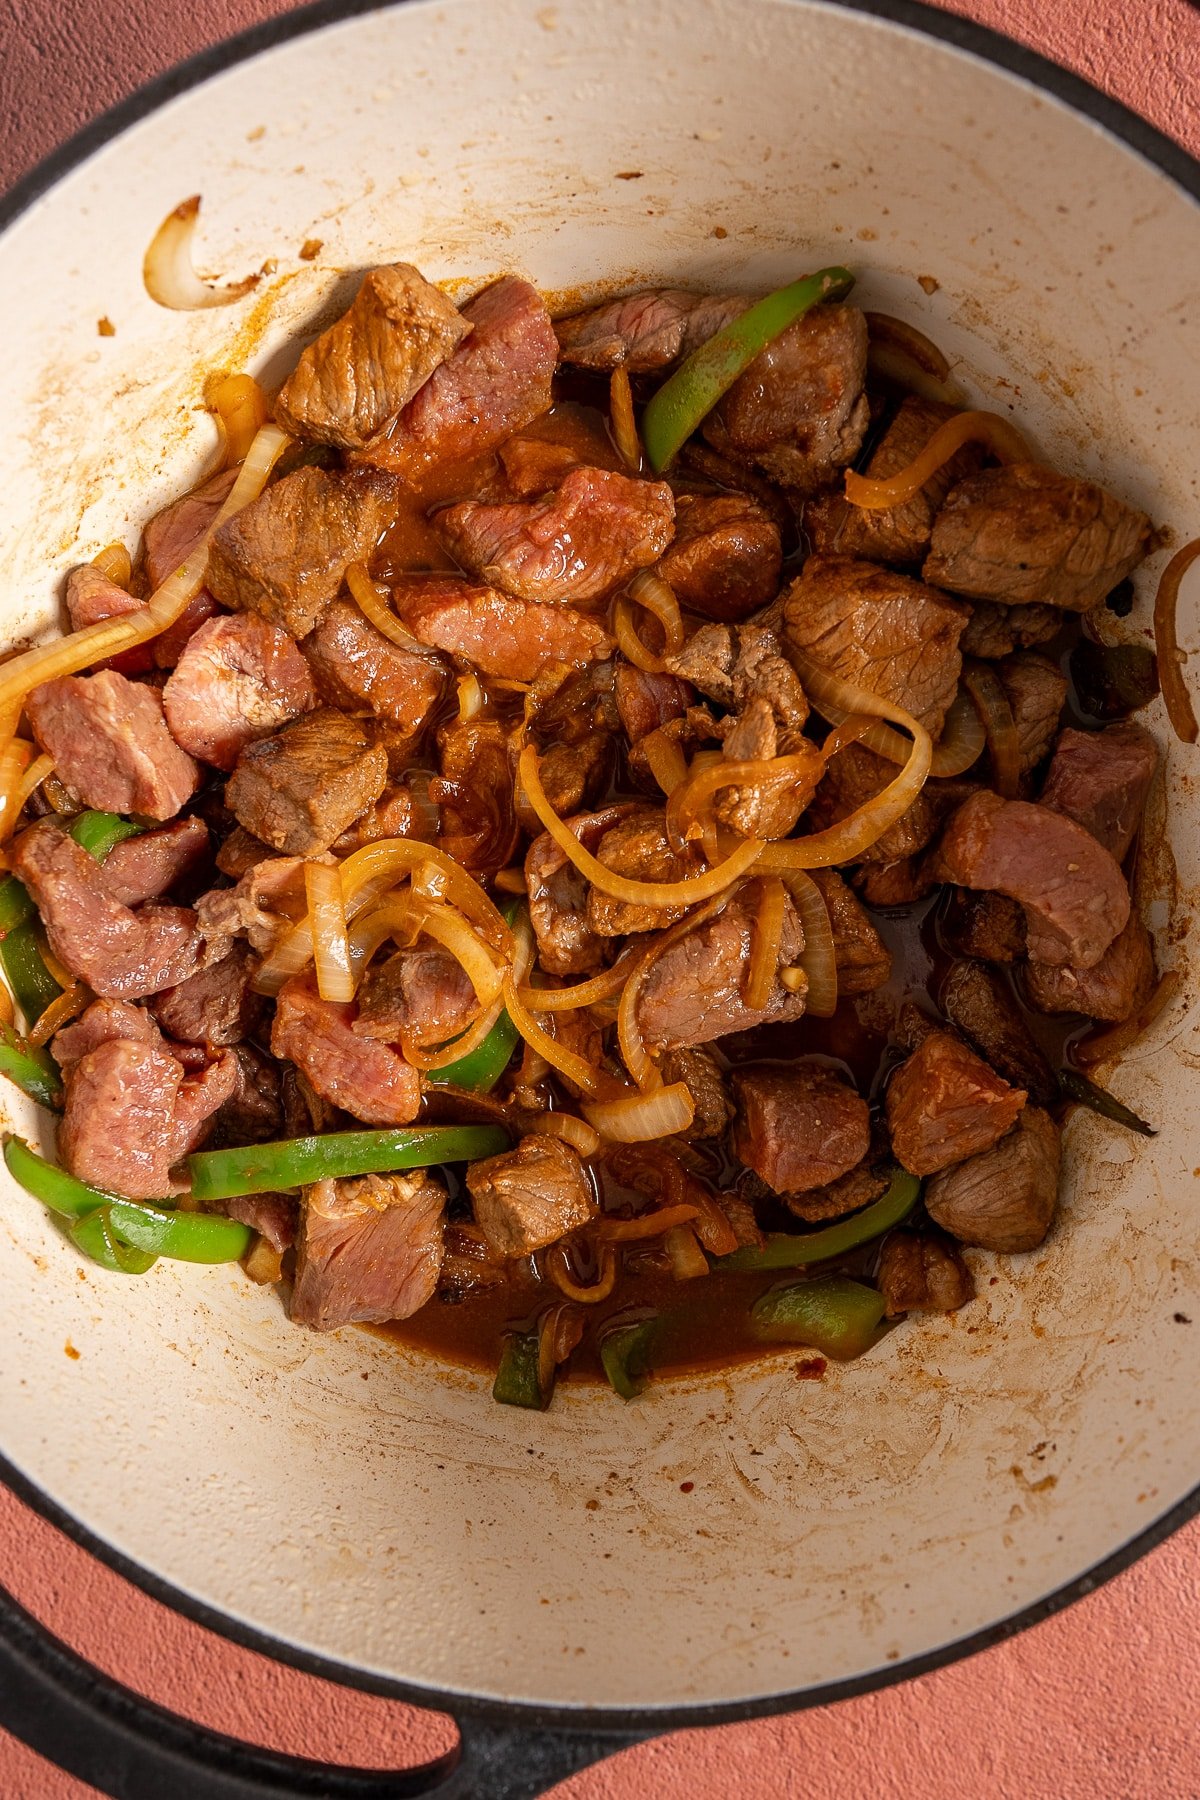
Step 2: Heat olive oil in a Dutch oven or heavy-bottomed pot over medium-high heat. Once hot, add the marinated beef in a single layer in the pot, searing each piece for 2–3 minutes per side until browned. Avoid overcrowding the pot to ensure a good sear. Remove the beef and set aside.
💡 Tip: I like to brown only about half of the beef instead of all of it. Browning some pieces adds plenty of flavor without overcrowding the pot or risking the fond (those browned bits) burning. It also saves time. The unseared beef still absorbs flavor as it simmers, so you get a rich stew without the extra hassle.
Step 3: In the same pot, add sliced yellow onion, green bell pepper, and jalapeño. Pour in 2 tablespoons of beef broth to deglaze the pot, scraping up any browned bits stuck to the bottom.
Cook the vegetables for 3–4 minutes, or until they are softened. Stir in the chopped garlic and tomato paste, cooking for another 30 seconds to release their flavors.

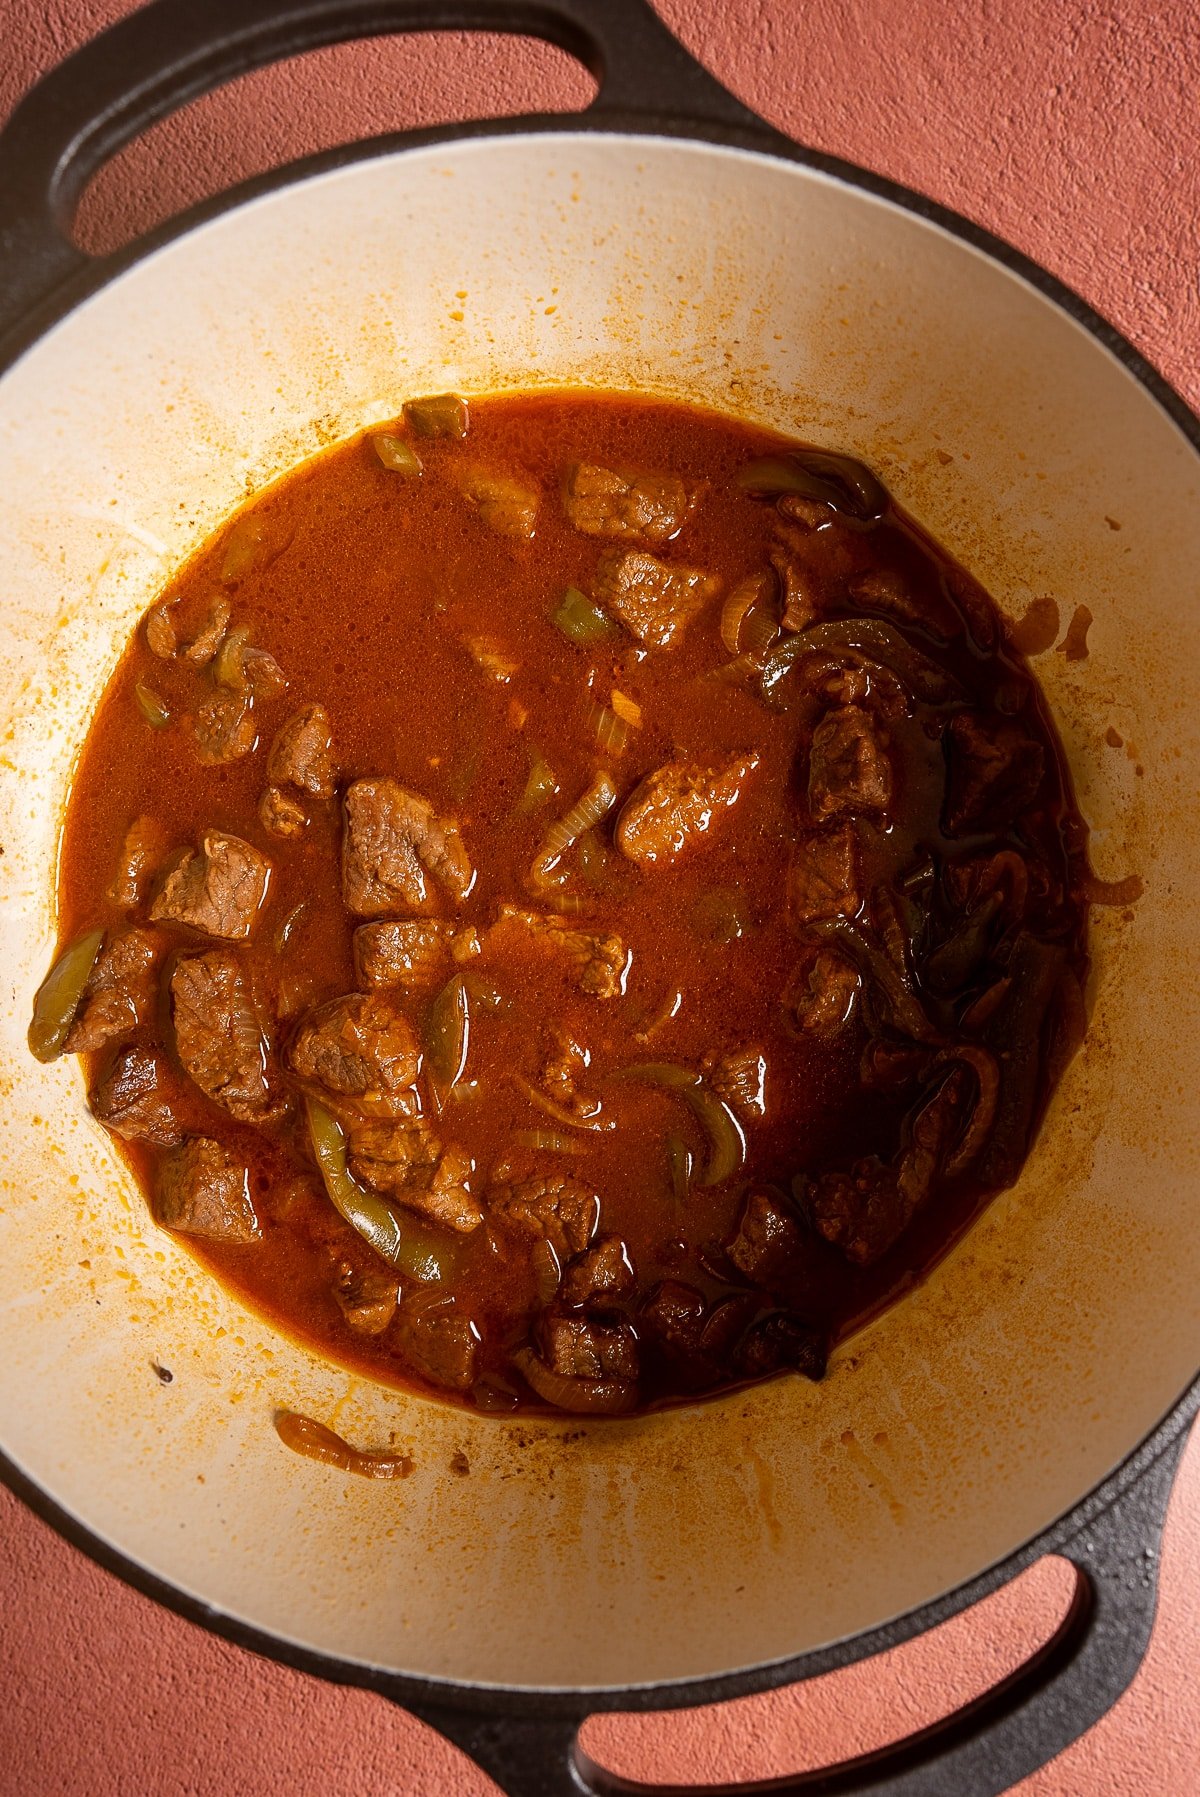
Step 4: Return the seared beef, along with any unseared beef, to the pot. Add 1 cup of beef broth and stir well, scraping the bottom again to ensure nothing is sticking. Reduce the heat to low, cover the pot, and let the stew simmer gently for 45 minutes. Stir occasionally to prevent sticking.
Tip: Keep the liquid level halfway up the beef. If it looks too dry, add a splash of hot water.
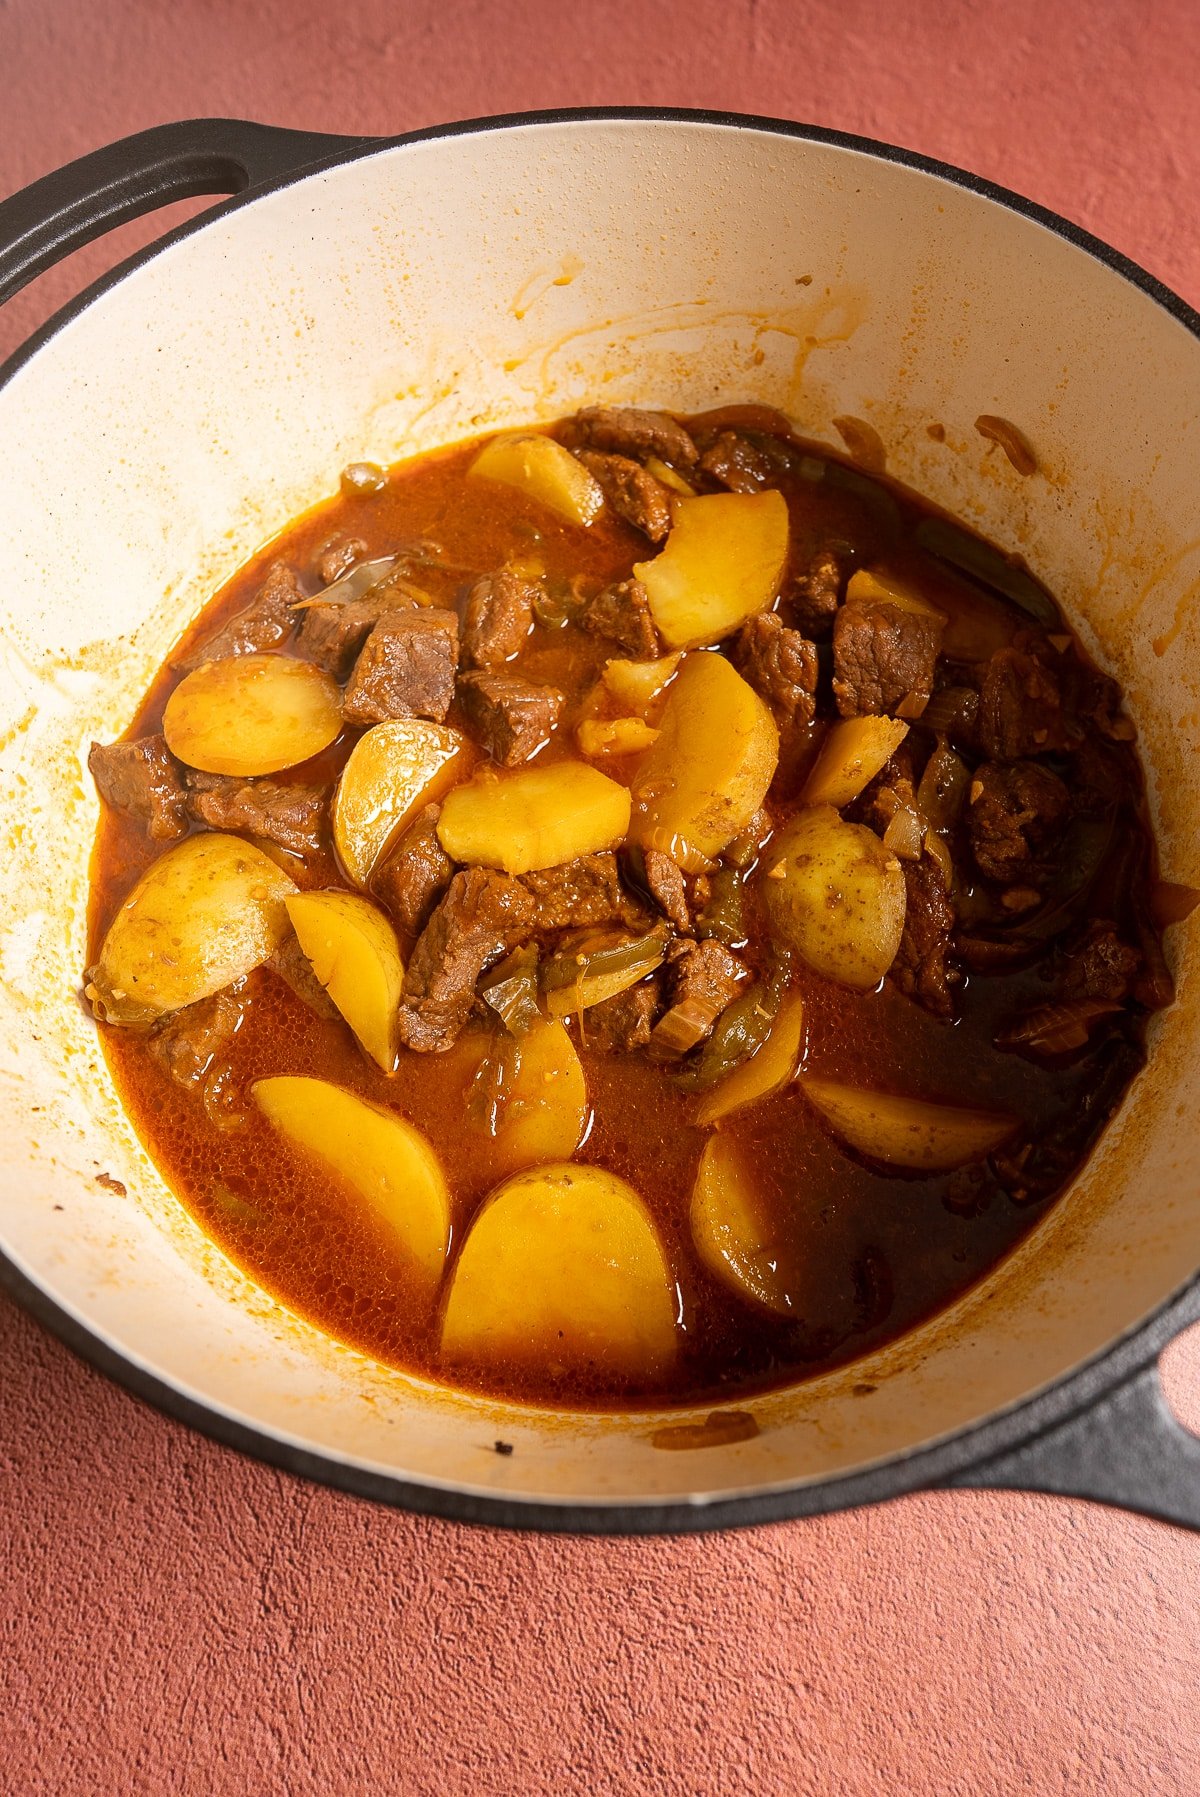
Step 5: After 45 minutes, stir in the peeled and chopped potatoes. Cover and continue simmering for another 30–35 minutes, or until the beef is tender and the potatoes are cooked through but not falling apart.
💡Tip: Yellow potatoes are great for this recipe because they hold their shape while adding creaminess to the stew.
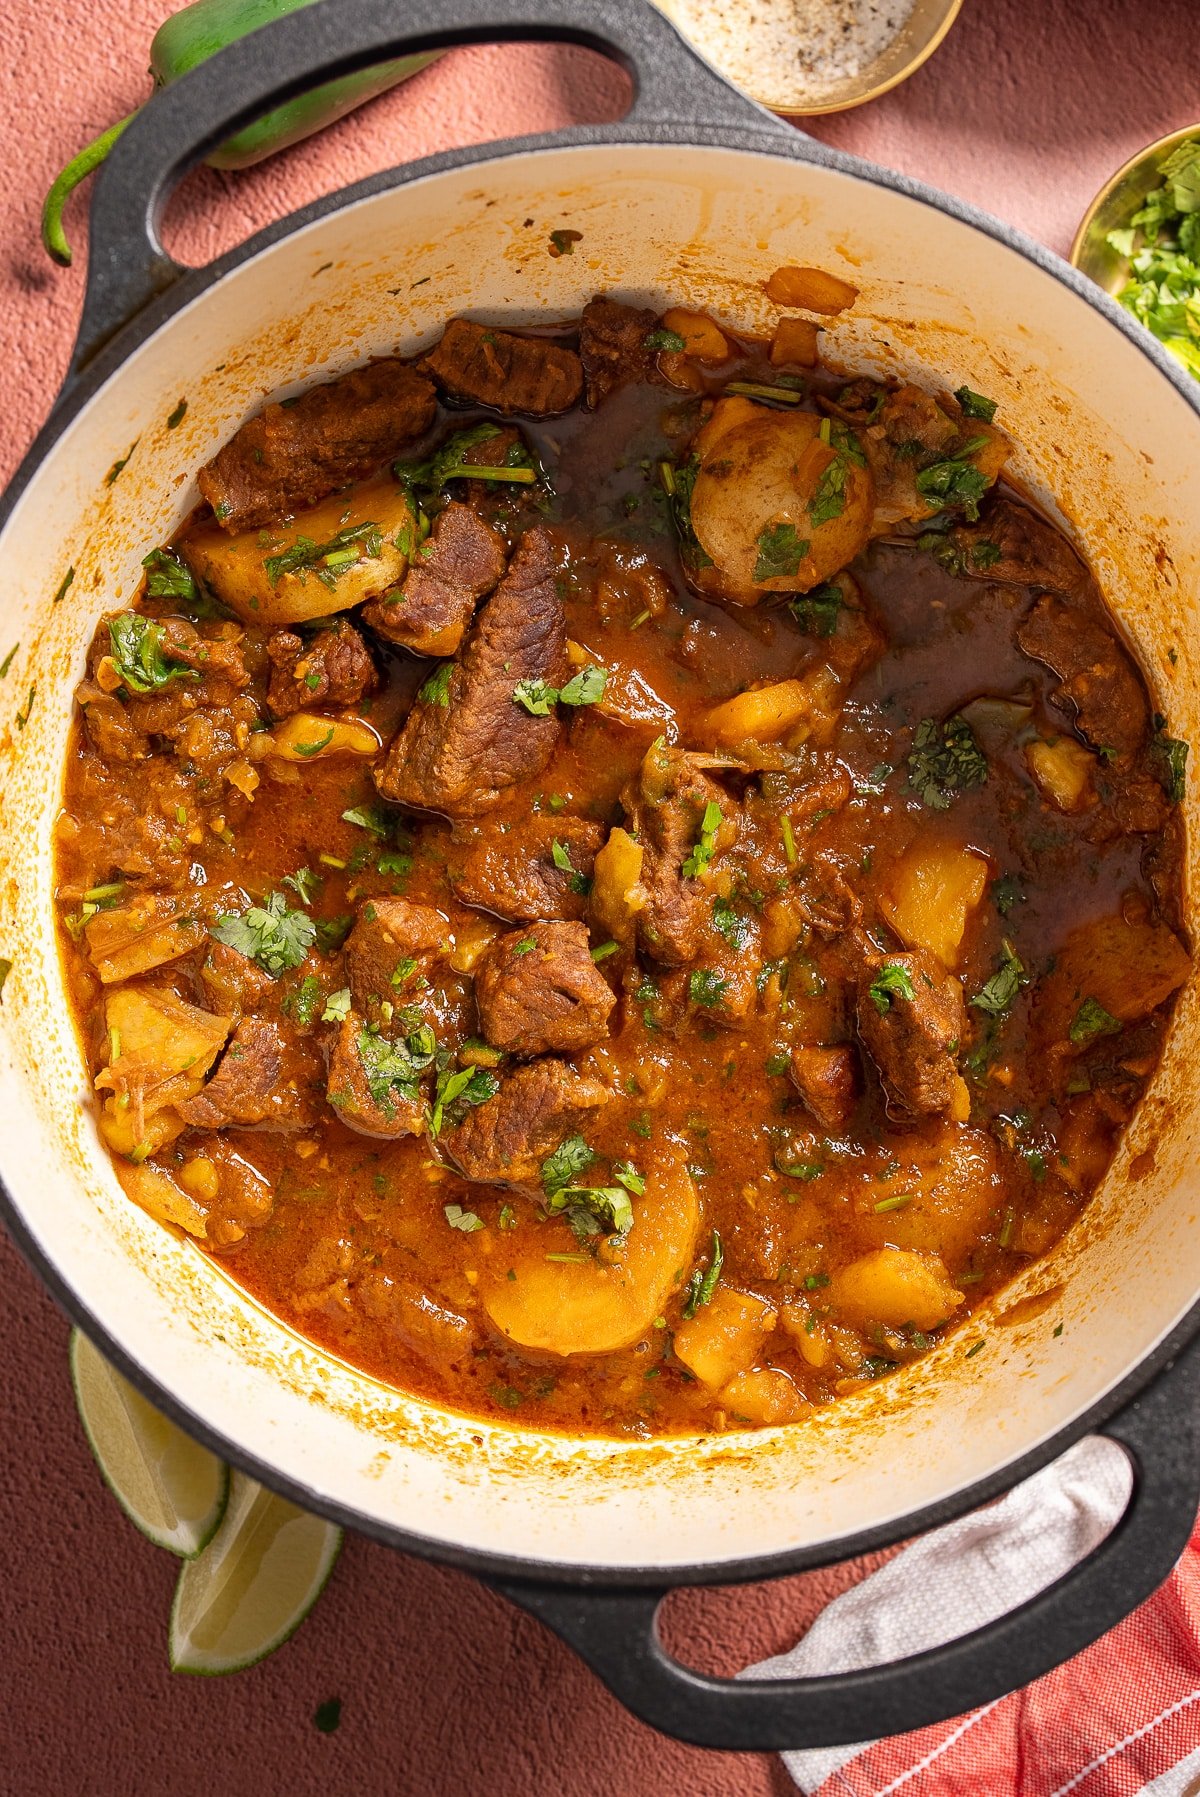
Step 6: Once the stew is done, stir in freshly chopped cilantro or parsley for a pop of color and freshness. Taste and adjust the seasoning with salt or pepper as needed.
💡Tip: If you’re not a fan of cilantro, parsley works just as well for garnish.
Step 7: Serve the beef stew. It's excellent over hot rice or with crusty bread.
How to Store Beef Stew
- Refrigerator: Cool completely, store in an airtight container up to 3–4 days. Reheat gently on the stovetop or in the microwave.
- Freezer: Freeze in airtight containers or freezer bags up to 3 months. Thaw overnight in the fridge before reheating.
- Reheating Tip: Add a splash of broth or water if it thickens too much.
Tanya’s Top Tips for the Best Beef Stew
- Use a well-marbled cut like chuck for the most tender beef.
- Don’t rush the simmer; low and slow is what makes the beef melt-in-your-mouth tender.
- Browning some (not all) of the beef adds great flavor without making the process too fussy.
FAQs
Yes! After marinating, brown the beef and sauté the vegetables as directed, then transfer everything to a slow cooker. Add broth, cover, and cook on low for 7 to 8 hours or high for 4 to 5 hours, until tender.
What can I use instead of potatoes?
Carrots, sweet potatoes, or yucca are great alternatives. Just make sure to cut them into evenly sized chunks so they cook at the same rate.
Marinating adds extra flavor and tenderness, but you can skip it if you’re short on time. The stew will still be delicious — just season the beef generously before searing.
If the stew is too thin, simmer uncovered for 10–15 minutes to let the liquid reduce. You can also mash a few potatoes directly into the stew for natural thickening.
I hope you love this beef stew recipe as much as we do. If you're looking for more stew recipes, check these out.

Stovetop Beef Stew Recipe
Ingredients
- 2 pounds beef stew meat chuck roast or similar, cut into 1-inch cubes
- 1 tablespoon soy sauce
- 2 teaspoons adobo seasoning
- 1 teaspoon onion powder
- ½ teaspoon cumin
- Juice of 1 lime about 2 tablespoons
- 1 tablespoon olive oil
- 1 yellow onion sliced
- 1 green bell pepper sliced
- 1 jalapeño seeded and sliced (optional, for heat)
- 6 garlic cloves chopped
- 2 tablespoons tomato paste
- 1 cup beef or chicken broth low-sodium preferred; more as needed
- 2 medium potatoes peeled and cut into 1-inch chunks
- ½ cup fresh cilantro or parsley, for garnish
Instructions
- In a medium bowl, combine the beef, soy sauce, adobo seasoning, onion powder, cumin, and lime juice. Mix well to coat. Cover and refrigerate for 1 to 2 hours, or overnight for best flavor.
- Heat olive oil in a Dutch oven or heavy pot over medium-high heat. Working in batches, sear the beef for 3 to 4 minutes per side until browned. Remove and set aside.
- In the same pot, add the onion, green bell pepper, and jalapeño. Pour in 2 tablespoons of broth to deglaze, scraping up browned bits from the bottom. Cook for 3 to 4 minutes, until softened. Stir in the garlic and tomato paste and cook for 30 seconds.
- Return the beef to the pot. Add 1 cup of broth, stirring to release any remaining fond. Reduce the heat to low, cover, and simmer gently for 45 minutes, stirring occasionally.
- Stir in the potatoes. Cover and continue simmering for 30 to 35 minutes, until the beef is tender and the potatoes are cooked through but not falling apart. Add more broth or a splash of water if the stew becomes too dry.
- Stir in the cilantro or parsley. Taste and adjust seasoning with salt and pepper. Serve hot with rice, tostones, or avocado.
Video
Notes
- For the most tender beef, let the stew simmer low and slow. If the beef isn’t tender after the listed time, continue simmering until it softens.
- Potatoes can be swapped with carrots, sweet potatoes, or yucca. Just cut them into even chunks so they cook evenly.