
My Forking Life

  • Air Fryer
  • Jamaican
  • Entree
  • Browse Recipes
  • Breakfast
  • Side Dishes
  • About
menu icon
go to homepage
  • Air Fryer
  • Jamaican
  • Entree
  • Browse Recipes
  • Breakfast
  • Side Dishes
  • About
search icon
Homepage link
  • Air Fryer
  • Jamaican
  • Entree
  • Browse Recipes
  • Breakfast
  • Side Dishes
  • About
×
Home

February 13, 2026 by Tanya Harris Leave a Comment

Spinach Artichoke Dip

Spinach artichoke dip in skillet with tortilla chips on the side.

This spinach artichoke dip recipe is hot, cheesy, and the first thing to go at any party. Three kinds of cheese, just the right amount of spinach and artichoke, and it comes out bubbly and golden every time.

Spinach artichoke dip in skillet with tortilla chips on the side.

You’ll find the full recipe with ingredient amounts and instructions in the recipe card at the bottom of this post. Be sure to check out the blog post itself for extra tips and tricks!

pic of Tanya

The key to the best spinach artichoke dip is the ratio. If there's too much, then the whole thing tastes like a block of spinach. I use three cheeses here, mozzarella, Monterey Jack, and Parmesan, and it also makes all the difference.

If you're building out a dip spread, my Beer Cheese Dip for Pretzels or my queso dip.

Love, Tanya

Spinach Artichoke Dip At a Glance

  • Prep Time: 10 minutes
  • Cook Time: 25–30 minutes
  • Total Time: 35–40 minutes
  • Serves: 10
  • Best For: parties, holiday gatherings, appetizer spreads

A Quick Look at the Ingredients

Ingredient amounts and full recipe instructions are on the printable recipe card at the bottom of the post.

  • Cream cheese — The base of the dip. Make sure it's fully softened to room temperature before you start mixing, or you'll end up with lumps.
  • Sour cream — Adds a gentle tang and helps soften the cream cheese so the dip isn't too dense.
  • Mayonnaise — Works alongside the sour cream to keep things creamy and rich. Full-fat mayo gives you the best results.
  • Cheese - All shredded and grated, I use Parmesan, mozzarella, and Monterey Jack cheese.
  • Frozen spinach, thawed and squeezed dry — I prefer frozen over fresh here because it's already cooked down, so you get a consistent amount every time. The key is squeezing out every bit of water — more on that below.
  • Canned artichoke hearts, drained and chopped — Quartered artichoke hearts work great. Drain them well and chop them into smaller pieces so they distribute evenly throughout the dip.
  • Seasonings - Garlic powder, salt, black pepper, red pepper flakes
  • Cooking spray - so the dip doesn't stick to the pan.
ingredients for spinach artichoke dip on table in bowls

How to Make Spinach Artichoke Dip

Step 1: Preheat your oven to 350°F. Spray a cast-iron skillet or an 8x8 baking dish with cooking spray, then set aside.

Step 2: Mix the base. In a large bowl, stir together the cream cheese, sour cream, and mayonnaise until smooth and well combined.

Step 3: Add the cheeses and seasoning. Stir in the Parmesan, three-quarters of the mozzarella, all of the Monterey Jack, garlic powder, salt, pepper, and red pepper flakes. Mix until everything is evenly combined.

cheeses mixed in yellow bowl

Step 4: Fold in the spinach and artichokes. Add the squeezed-dry spinach and chopped artichoke hearts. Fold everything together until evenly distributed.

miced cheeses and spinach and artichoke in bowl on spoon

Step 5: Transfer and top. Spread the dip mixture into your prepared skillet or baking dish. Scatter the remaining quarter cup of mozzarella on top.

Step 6: Bake. Bake for 25–30 minutes, until the dip is bubbling around the edges and the top is golden. Rest for a couple of minutes, then serve warm, straight from the skillet.

spinach dip in cast iron skillet before baking
Spinach artichoke dip in skillet with tortilla chips on the side.

Variations

  • Slow cooker version: Mix everything together and cook on low for 2–3 hours, stirring once halfway through. The top won't get golden and crispy, but it's a great hands-off option for parties.
  • Fresh spinach: You can use fresh spinach instead of frozen. Cook it down in a skillet first, then let it cool and squeeze it as dry as possible before adding to the dip.
  • Add some heat: Stir in a tablespoon of diced jalapeños or a dash of hot sauce to kick things up.
  • Make it lighter: Swap the mayonnaise for Greek yogurt and use reduced-fat cream cheese. The texture will be slightly different but still very good.
  • Add protein: Stir in shredded rotisserie chicken to make this a heartier dip.
Chip picking up spinach artichoke dip

Make Ahead and Storage

Make ahead: You can assemble this dip up to 24 hours in advance and keep it covered in the refrigerator unbaked. When you're ready to serve, bake it straight from the fridge and add 5–10 minutes to the baking time.

Storage: Leftover dip keeps well in an airtight container in the refrigerator for up to 4 days. You could also freeze the dip. Assemble it, cover tightly, and freeze for up to 2 months. Thaw overnight in the refrigerator before baking as directed.

Reheating: Reheat in the oven at 350°F for 10–15 minutes until warmed through and bubbling again. You can also microwave individual portions, though the oven gives you a better texture.

spinach artichoke dip in a cast iron skillet with chips on the side

Tanya's Top Tips

  • Soften the cream cheese completely. Cold cream cheese won't mix smoothly. Leave it on the counter for 30–60 minutes before you start, or microwave it in 10-second intervals until it's soft but not melted.
  • Cast iron holds heat well. Baking in a cast-iron skillet keeps the dip warm longer on the table. If you don't have one, a regular baking dish works just fine.
  • Don't overbake. Pull it out when it's bubbling and the cheese on top is golden. Overbaking dries it out.

FAQs

Can I make it ahead of time?

Yes. Assemble the dip up to 24 hours in advance, cover, and refrigerate. Bake it when you're ready to serve. Add a few extra minutes to the baking time since it's going in cold.

What can I serve with this dip?

Tortilla chips, toasted baguette slices, pita chips, pretzels, crackers, or raw vegetables. Any sturdy dipper works. Avoid anything too thin or flimsy that will break when you scoop.

I hope you love this spinach artichoke dip as much as we do. If you're looking for more dip and appetizer recipes, try these out:

  • Beer Cheese Dip for Pretzels — A quick, creamy beer cheese dip made for dunking soft pretzels.
  • Easy Queso Dip — Smooth, cheesy, and perfect with tortilla chips.
  • Slow Cooker Cheesy Hot Shrimp Dip — Creamy, cheesy shrimp dip that comes together in the slow cooker.
  • Air Fryer Pretzel Bites — Soft, pillowy pretzel bites that are the perfect companion for any dip.
Spinach artichoke dip in skillet with tortilla chips on the side.
Print Recipe
No ratings yet

Spinach Artichoke Dip Recipe

This baked spinach artichoke dip is rich, creamy, and loaded with three cheeses.
Prep Time10 minutes mins
Cook Time25 minutes mins
Total Time35 minutes mins
Course: Appetizer
Cuisine: American
Keyword: hot spinach artichoke dip, spinach artichoke dip
Servings: 10
Calories: 316kcal
Author: Tanya Harris

Ingredients

  • 8 oz cream cheese softened
  • ½ cup sour cream
  • ½ cup mayonnaise
  • ¾ cup freshly grated Parmesan cheese
  • 1 cup shredded mozzarella cheese divided (¾ cup mixed in, ¼ cup for topping)
  • ½ cup shredded Monterey Jack cheese
  • 8 oz frozen spinach thawed and thoroughly squeezed dry
  • 14 oz can artichoke hearts drained and chopped
  • 1 teaspoon garlic powder
  • ½ teaspoon table salt
  • ¼ teaspoon black pepper
  • ¼ teaspoon red pepper flakes
  • cooking spray

Instructions

  • Spray a cast-iron skillet or an 8x8 baking dish with cooking spray, then set aside.
  • In a large bowl, mix cream cheese, sour cream, and mayonnaise together until smooth.
  • Stir in Parmesan, ¾ cup mozzarella, Monterey Jack, garlic powder, salt, pepper, and red pepper flakes.
  • Fold in the spinach and artichokes until well combined.
  • Transfer to the prepared skillet or baking dish. Top with the remaining ¼ cup mozzarella.
  • Bake for 25–30 minutes until bubbly and golden on top. Serve warm.

Notes

  • Squeeze the spinach completely dry using a clean kitchen towel or several layers of paper towels. Excess moisture will make the dip watery.
  • Make sure the cream cheese is fully softened to room temperature before mixing to avoid lumps.
  • Can be assembled up to 24 hours ahead and refrigerated unbaked. Add 5–10 minutes to the baking time if going straight from the fridge.
  • Leftovers can be kept in an airtight container in the refrigerator for up to 4 days. Reheat at 350°F for 10–15 minutes.

Nutrition

Calories: 316kcal | Carbohydrates: 6g | Protein: 9g | Fat: 28g | Saturated Fat: 11g | Polyunsaturated Fat: 6g | Monounsaturated Fat: 6g | Trans Fat: 0.02g | Cholesterol: 55mg | Sodium: 550mg | Potassium: 157mg | Fiber: 2g | Sugar: 2g | Vitamin A: 3639IU | Vitamin C: 10mg | Calcium: 237mg | Iron: 1mg

February 11, 2026 by Tanya Harris 4 Comments

Easy and Fluffy Coconut Rice Recipe

coconut rice in bowl with spoon

This coconut rice recipe is fragrant, fluffy, and has the most beautiful coconut flavor. Made with jasmine rice and coconut milk, it's one of the easiest and most delicious rice recipes you can make.

coconut rice in bowl with spoon

You’ll find the full recipe with ingredient amounts and instructions in the recipe card at the bottom of this post. Be sure to check out the blog post itself for extra tips and tricks!

pic of Tanya

If you've ever had my Jamaican Rice and Peas, you know I love cooking rice in coconut milk. That recipe is a staple in my house and one of the most popular on the blog. But sometimes you want the same creamy coconut flavor without the kidney beans and all the extra seasonings. I like to call this the cousin of rice and peas.

This rice comes out fluffy, with the grains separated and not gluey or mushy. This rice goes best when serving dishes with bold, saucy flavors, like curry chicken or even my chipotle chicken. It's one of those rice recipes that makes the entire plate feel more complete but special.

Love, Tanya

Coconut Rice at a Glance

  • Prep Time: 5 minutes
  • Cook Time: 20 minutes
  • Rest Time: 5 minutes
  • Total Time: 30 minutes
  • Serves: 4-6
  • Best For: Weeknight dinners, Caribbean dishes, Asian dishes, meal prep

A Quick Look at The Ingredients

Ingredient amounts and full recipe instructions are on the printable recipe card at the bottom of the post.

  • Jasmine rice – Jasmine rice is my go-to for this coconut rice recipe because it's naturally aromatic and cooks up fluffy every time. You could also use basmati rice or another long-grain white rice, but Jasmine gives you the best texture and flavor with the coconut milk. Brown rice can be used, but you'll need to increase the water and the cook time. Brown rice typically takes 40-45 minutes to cook and requires about an extra half cup of water. The coconut flavor will be milder since brown rice has a nuttier taste on its own.
  • Full-fat coconut milk – Use one can of full-fat canned coconut milk. This is where all of the coconut flavor comes from. Give the can a good shake before opening since the cream and liquid tend to separate. I like to stir the coconut milk well before adding it to the pot.
  • Water – One cup of water added alongside the coconut milk helps the rice cook evenly without becoming too heavy or sticky. The ratio of coconut milk to water is what keeps this rice fluffy rather than dense.
  • Kosher salt – I use 2½ teaspoons, which seasons the rice properly all the way through. If you're using table salt, reduce it to about 2 teaspoons.
  • Bay leaf and cinnamon stick – These sit on top of the rice while it cooks and add a subtle flavor. You'll remove them before serving. They're a nod to how rice and peas are seasoned in Jamaican cooking, and some aromatics on top.
  • Fresh lime juice – A squeeze of lime right before serving brightens the coconut rice and keeps the flavors from feeling one-note.
coconut rice ingredients

How to Make Coconut Rice

This is a simple stovetop coconut rice recipe that comes together in about 30 minutes with almost no hands-on work. The key is low heat and leaving the lid on while the rice cooks.

Step 1: Rinse the jasmine rice thoroughly under cold water until the water runs clear. This removes excess starch and prevents the cooked rice from turning sticky or gummy.

Step 2: Add the rinsed rice, kosher salt, full-fat coconut milk, and water to a medium-sized pot. Stir to combine. Place the bay leaf and cinnamon stick on top of the rice mixture.

coconut rice ingredients in pot before cooking

Step 3: Bring the mixture to a gentle boil over medium heat. Once it starts bubbling, reduce the heat to low, cover the pot with a tight-fitting lid, and let it simmer for 20 minutes. Do not lift the lid during this time.

Step 4: Remove the pot from the heat and let it sit, still covered, for an additional 5 minutes. This allows the rice to finish steaming and absorb any remaining liquid.

coconut rice in pot after cooking

Step 5: Remove the bay leaf and cinnamon stick, fluff the rice with a fork, and squeeze fresh lime juice over the top before serving.

coconut rice fluffed with fork with hand holding the bowl

How to Cook Coconut Rice in a Rice Cooker

Add the rinsed jasmine rice, full-fat canned coconut milk, water, and salt to your rice cooker. Place the bay leaf and cinnamon stick on top. Set the rice cooker to the white rice or Jasmine rice setting and let it do the work. Once the rice cooker switches to warm, let the rice sit for 5 minutes before removing the bay leaf and cinnamon stick. Fluff with a fork and finish with lime juice.

You could also bake this rice in the oven as well.

Serving Suggestions

Coconut rice pairs well with anything that has bold, saucy, or spicy flavors. The subtle coconut flavor rounds out the plate without competing with the main dish.

Some of my favorites to serve alongside this rice:

  • Jamaican Oxtail – The rich gravy over this fluffy coconut rice is everything.
  • Braised Beef Shanks - For a showstopping pairing, serve this coconut rice alongside my fall-off-the-bone Braised Beef Shanks. The rich, savory gravy soaks into every grain.
  • Jamaican Jerk Chicken – The subtle sweetness of coconut balances the heat from the jerk seasoning.
  • Easy Oven-Baked Fish – A lighter option that still pairs well with the coconut flavor.
  • Picadillo - A ground beef dish simmered in a savory tomato sauce that goes well with this rice.
coconut rice in pot after cooking

Make Ahead and Storage

  • Storage: Let the cooked rice cool completely, then store it in an airtight container in the refrigerator for up to 4 days. The texture may firm up a bit in the fridge, which is normal.
  • Freezing: This coconut rice freezes well. Portion it into freezer-safe bags or containers and freeze for up to 2 months. Thaw overnight in the fridge before reheating.
  • Reheating: Add a splash of water to the rice and reheat in the microwave or on the stovetop over low heat. The extra moisture helps restore the fluffy texture.

Tanya's Top Tips

  • Rinse the rice until the water runs clear. This removes the surface starch and prevents the cooked rice from turning sticky or gummy. With coconut milk already making the rice richer, you want each grain to stay distinct and fluffy.
  • Use full-fat canned coconut milk. Light coconut milk doesn't have enough coconut flavor or richness to make a difference. The full-fat version is what gives this coconut rice its creamy taste. Full-fat coconut milk without thickeners or stabilizers may leave a thin film on top after steaming. Simply fluff the rice to bring it back together.
  • Squeeze the lime juice right before serving. The acid brightens the coconut rice. Feel free to leave it out.
coconut rice on black bowl with spoon

I hope you love this coconut rice recipe as much as we do. If you're looking for more rice recipes and side dishes, try these out:

  • Jamaican Rice and Peas – The classic Jamaican coconut milk rice with kidney beans and all the seasonings.
  • Easy Yellow Rice – A vibrant, turmeric-seasoned rice that works as a side for almost anything.
  • Oven Baked Rice – A hands-off method for perfectly cooked rice every time.
  • Cilantro Lime Rice – Bright and fresh, this rice is perfect for bowls and Latin-inspired dishes.
  • Jollof Rice - a West African rice made with a flavorful tomato base, known for it's red color.
coconut rice in bowl with spoon
Print Recipe
5 from 1 vote

Coconut Rice Recipe

This coconut rice recipe is fragrant, fluffy, and full of coconut flavor. Made with jasmine rice, full-fat canned coconut milk, and a touch of cinnamon, it's the easiest and most delicious side dish.
Prep Time5 minutes mins
Cook Time20 minutes mins
5 minutes mins
Total Time30 minutes mins
Course: Side Dish
Cuisine: Caribbean
Keyword: coconut rice
Servings: 6
Calories: 227kcal
Author: Tanya Harris

Ingredients

  • 2 cups jasmine rice rinsed until water runs clear
  • 1 13.5-oz can full-fat coconut milk, shaken and stirred
  • 1 cup water
  • 2½ teaspoons kosher salt
  • 1 bay leaf
  • 1 cinnamon stick
  • 1 squeeze fresh lime juice optional

Instructions

  • Rinse the jasmine rice thoroughly under cold water until the water runs clear.
  • Add the rinsed rice, kosher salt, coconut milk, and water to a medium-sized pot. Stir to combine.
  • Place the bay leaf and cinnamon stick on top of the rice mixture.
  • Bring the mixture to a gentle boil over medium-high heat.
  • Reduce the heat to low, cover the pot with a tight-fitting lid, and let it simmer for 20 minutes.
  • Remove the pot from the heat and let it sit, covered, for an additional 5 minutes.
  • Discard the bay leaf and cinnamon stick. Fluff the rice with a fork and squeeze fresh lime juice over the top before serving.

Video

Notes

  • If using table salt instead of kosher salt, reduce the amount to about 2 teaspoons.
  • This coconut rice can also be made in a rice cooker using the white rice setting.
  • Leftover cooked rice stores well in the fridge for up to 4 days and freezes for up to 2 months.
  • Full-fat coconut milk without thickeners or stabilizers may leave a thin film on top after steaming. Simply fluff the rice to bring it back together.

Nutrition

Calories: 227kcal | Carbohydrates: 50g | Protein: 4g | Fat: 0.4g | Saturated Fat: 0.1g | Polyunsaturated Fat: 0.1g | Monounsaturated Fat: 0.1g | Sodium: 974mg | Potassium: 74mg | Fiber: 1g | Sugar: 0.1g | Vitamin A: 3IU | Vitamin C: 0.1mg | Calcium: 25mg | Iron: 1mg

February 6, 2026 by Tanya Harris 10 Comments

Air Fryer Cauliflower Wings

crispy breaded air fryer cauliflower wings coated in wing sauce

If you love wings, you'll love my Air Fryer Cauliflower Wings, doused in a seasoned wet batter and coated in panko bread crumbs before being air fried to crisp perfection. Then pour over your favorite wing sauce and enjoy.

crispy breaded air fryer cauliflower wings coated in wing sauce

You’ll find the full recipe with ingredient amounts and instructions in the recipe card at the bottom of this post. Be sure to check out the blog post itself for extra tips and tricks!

pic of Tanya

I am always looking for new and interesting ways to get more veggies into my family's diets. These air fryer cauliflower wings with buffalo sauce have become a real hit and make a regular appearance on the dinner table.

Air-fryer cauliflower wings with panko breadcrumbs are easy to make and take only 10 minutes to prepare. You can coat them in sauce, or serve the sauce in a bowl alongside. It's all down to personal taste and how crispy you like your wings - it's a split in my house.

If you would rather make these in an oven, check out my oven-baked cauliflower wings.

Love, Tanya

Air Fryer Cauliflower Wings at a Glance

  • Prep Time: 10 minutes
  • Cook Time: 17 minutes
  • Total Time: 27 minutes
  • Serves: 4
  • Best For: Game day snacks, easy appetizers, meatless dinners, and party platters

Ingredients You Need

Ingredient amounts and full recipe instructions are on the printable recipe card at the bottom of the post.

air fryer cauliflower wings ingredients set into individual bowls
  • Head of cauliflower: look for a fresh head with no brown spots.
  • Wet Batter: all-purpose flour, garlic powder, kosher salt, onion powder, paprika, ground black pepper, and almond milk.
  • Panko bread crumbs: these give the wings an extra crunch! This is quite important if you want to keep these wings crispy and serve them with dipping sauce on the side.
  • Wing sauce: feel free to use any wing sauce you like. My favorite is my spicy buffalo sauce.

How to make Air Fryer Cauliflower Wings

bowl filled with seasoned flour
bowl filled with air fryer cauliflower wings batter

Step 1: Preheat the air fryer to 350 degrees Fahrenheit (180°C). 

Step 2: Mix all-purpose flour, garlic powder, kosher salt, onion powder, paprika, and black pepper in a large bowl. Slowly whisk in almond milk until you get a loose but slightly thick batter. 

Place panko breadcrumbs in a separate dish. 

cauliflower florets being coated in bowl of batter and separate bowl of panko breadcrumbs

Step 3: Place the cauliflower florets in the wet batter, coating all sides, then shake off any excess. Then place the florets into the panko breadcrumbs, ensuring all sides are coated. 

uncooked, breaded cauliflower florets in air fryer basket

Step 4: Place the breaded florets into the preheated air fryer basket in a single layer. You will not be able to fit all the florets at once; you will need to cook them in batches. 

air fryer basket filled with cooked cauliflower wings

Step 5: Air-fry at 350 degrees Fahrenheit (180°C) for 15-17 minutes, flipping halfway through, until golden. Repeat steps 4-6 with the remaining florets.  

Step 6: Remove florets and serve as is, or toss in your favorite wing sauce.

Tanya's Top Tips

These tips will help you make the best air-fryer cauliflower wings you've ever had. 

  • For the best results, always preheat your air fryer so it's hot and ready to go.
  • Take time to knock off any excess batter when coating the cauliflower; otherwise, it can become soggy.
  • The cauliflower wings will be crispy when removed from the air fryer. Once tossed in the sauce, they will lose their crispiness. If you prefer crispy wings, use the sauce for dipping rather than tossing them.

crispy breaded air fryer cauliflower wings with wing sauce being poured over

How to serve Air Fryer Cauliflower Wings

This recipe serves 4 as an appetizer with your favorite wing sauce or dip. Try my Easy Queso Dip, or my BBQ Black-Eyed Pea Dip which would be a treat with these tasty bites.

If you enjoy cauliflower as much as I do, try my 3 Flavor Cauliflower Wings that are baked in the oven.

How to store 

To refrigerate: If storing leftover cauliflower wings, I recommend storing them without the wing sauce poured over, as they will become soggy once stored.

Instead, place the fried cauliflower wings in an airtight container in the refrigerator for up to 3 days. When ready to eat, reheat them in the air fryer at 350°F (180°C) for 3–5 minutes, or until heated through and crispy again.

Make ahead: You can prepare the cauliflower and the batter ahead of time, then store them separately in the refrigerator until you are ready to start cooking. I do not recommend coating the cauliflower in the batter and panko bread crumb mixture before this, as the panko will become soggy if left to sit.

crispy breaded air fryer cauliflower wings coated in wing sauce

FAQs

How to make crispy cauliflower wings?

The trick is to get the air fryer nice and hot. I cook the cauliflower at 350 degrees Fahrenheit. Then work in batches to cook the cauliflower in a single layer. This ensures that the cauliflower becomes crispy. Do not be tempted to load up the air fryer basket or you will steam the cauliflower, and it will become mushy.

Why are my cauliflower wings soggy?

Cauliflower wings can become soggy if you coat them it too much batter or pour over too much sauce once they are cooked. If you prefer super crispy cauliflower wings, don't pour over the sauce. Serve the sauce in a separate dipping bowl.

If you have tried this Air Fryer Cauliflower Wings recipe, or any other recipe on my blog, then please rate it and let me know how it turned out in the comments below!

crispy breaded air fryer cauliflower wings coated in wing sauce
Print Recipe
4.67 from 3 votes

Air Fryer Cauliflower Wings

Air fryer cauliflower wings, coated in a spicy batter and panko bread crumbs before being fried and then coated in your favorite wing sauce.
Prep Time10 minutes mins
Cook Time17 minutes mins
Total Time27 minutes mins
Course: Appetizer, Snack
Cuisine: American
Keyword: air fryer cauliflower wings, air fryer cauliflower wings buffalo, air fryer cauliflower wings panko
Servings: 4
Calories: 284kcal
Author: Tanya Harris

Equipment

  • 1 Air Fryer

Ingredients

  • 1 medium head of cauliflower broken into florets - about 4-5 cups
  • 1 cup all purpose flour
  • 1 ½ teaspoon garlic powder
  • 1 ½ teaspoon kosher salt
  • 1 teaspoon onion powder
  • 1 teaspoon paprika
  • ½ teaspoon black pepper
  • 1 cup almond milk
  • 2 cups panko bread crumbs
  • 2 cups of your favorite wing sauce

Instructions

  • Preheat the air fryer to 350 degrees Fahrenheit.
  • Mix all-purpose flour, garlic powder, kosher salt, onion powder, paprika, and black pepper in a large bowl. Slowly whisk in milk, until you get a loose but slightly thick batter.
  • Place panko breadcrumbs in a separate dish.
  • Place the cauliflower florets in the wet batter, coating all sides and shaking off any excess. Then place the florets into the panko breadcrumbs, making sure all sides are coated.
  • Place the breaded florets into the preheated air fryer basket in a single layer. You will not be able to fit all the florets at this time; you will need to cook these in batches.
  • Air fry at 350 degrees Fahrenheit for 15-17 minutes, until golden, flipping halfway through. Repeat steps 4-6 with the with the remaining florets.
  • Remove florets and serve as is, or toss in your favorite wing sauce.

Notes

  • The cauliflower wings will be crispy when removed from the air fryer. Once tossed in sauce, they will lose their crispiness. If you prefer crispy wings, use the sauce as a dipping sauce rather than tossing them.
  • Don't overcrowd your air fryer basket; you want to cook the florets in a single layer so that it fries rather than steams. So, work in batches depending on the size of your air fryer basket.

Nutrition

Calories: 284kcal | Carbohydrates: 54g | Protein: 11g | Fat: 3g | Saturated Fat: 1g | Polyunsaturated Fat: 1g | Monounsaturated Fat: 1g | Sodium: 4897mg | Potassium: 555mg | Fiber: 6g | Sugar: 5g | Vitamin A: 248IU | Vitamin C: 69mg | Calcium: 172mg | Iron: 4mg

This post was originally published January 22, 2023. It has been updated with new information.

February 2, 2026 by Tanya Harris 22 Comments

Easy Mayonnaise Biscuits (5 Ingredients, Drop Biscuit Recipe)

a basket of artfully arranged biscuits

I learned classic biscuit‑making in a hands‑on class years ago, and this mayo biscuit version is my shortcut when I need biscuits fast without cutting in butter.

mayonnaise biscuits in a bowl

You’ll find the full recipe with ingredient amounts and instructions in the recipe card at the bottom of this post. Be sure to check out the blog post itself for extra tips and tricks!

pic of Tanya

Living in the South has made me love a good ol’ biscuit, so much so that I even took a biscuit‑making class to learn how to make classic biscuits from scratch. When I have the time, I still love making those traditional biscuits, and I even make biscuits in the air fryer when I want to bake them fast.

Now, when I want a quick biscuit with almost no effort, I use this mayonnaise biscuit recipe. The mayonnaise provides all the fat you need for tender, fluffy biscuits. They come together fast. Just mix the ingredients, drop the dough on the pan, and bake. I love having this as an option I think you will too.

Love, Tanya

Mayonnaise Biscuits at a Glance

  • Prep Time: 10 minutes
  • Cook Time: 12 minutes
  • Total Time: Under 30 minutes
  • Serves: About 10 biscuits
  • Best For: Quick weeknight sides, breakfast, or when you need biscuits fast without cutting in butter

A Quick Look at the Ingredients

Ingredient amounts and full recipe instructions are on the printable recipe card at the bottom of the post.

  • Self-rising flour – gives the biscuits lift without needing separate baking powder and salt.
  • Milk – whole milk is best for richness and tender texture.
  • Mayonnaise – the star ingredient; it replaces the butter and provides fat, moisture, and flavor. I prefer to use Duke’s mayo for these biscuits, but any brand of mayonnaise will work. 
  • Sugar – adds a touch of sweetness and helps with browning.
  • Salt – enhances all the flavors.
ingredients for mayonnaise biscuits

How to make mayonnaise biscuits

Step 1: Preheat the oven to 400 degrees Fahrenheit. 

Step 2: Place all of the ingredients in a large bowl and mix just until combined.

batter for mayonnaise biscuits in glass bowl

Step 3: Use a large cookie scoop to drop the biscuits by spoonful onto a greased baking sheet.

mayonnaise biscuits on sheetpan

Step 4: Bake for 12 minutes or until golden brown. 

baked mayonnaise biscuits on sheetpan

Step 5: Remove and serve with your favorite toppings, such as butter or jam.

jam spread on biscuits on plate with knife on side

Tanya's Top Tips

These biscuits can be altered to match your tastes and preferences. Here are some tips and tricks that will help make this easy biscuit recipe.   

  • You can put these drop biscuits into muffin cups instead of on a baking sheet.  
  • Brush the tops with melted butter to make them golden brown. 
  • If you don’t have self-rising flour, you can use all-purpose flour. If you use all-purpose flour, mix in 3 teaspoons of baking powder and ½ teaspoon of salt to it.

What can I add to these biscuits? 

Stir in some basic ingredients that will pump up your mayo biscuits. There are so many delicious options to choose from! Use these ideas to get started or choose your own.

  • Jalapenos
  • Cheese; goat cheese, fontina, parmesan cheese, cheddar
  • Green onions
  • Minced garlic or garlic powder
  • Herbs like parsley, thyme, sage, dill, rosemary
  • Bacon
  • Cinnamon sugar     
biscuits stacked on top of each other

Topping ideas  

The best part about these particular biscuits is that you can top them with sweet or savory ingredients. Choose what you're in the mood for, and go for it!

Here are some tasty options that you can try:

  • Jams and Jellies
  • Marmalade
  • Butter
  • Apple butter
  • Blueberry compote
  • Whipped cream 

How to serve mayonnaise biscuits 

Mayonnaise biscuits are a southern tradition served by themselves or paired with other simple ingredients.

Cut them in half and make a classic sandwich with a fried egg, spinach, ham, asparagus, or sausage gravy.

You can pair them with main courses like smothered pork chops, air fryer bone-in chicken breasts, or marinated air fryer salmon. 

biscuits in bowl with jam on side

How to store 

Store: Keep leftover homemade biscuits in an airtight container or large freezer bag on the counter for three days or in the fridge for up to one week.

Freeze: These mayonnaise rolls can easily be frozen to save for later. You can make a big batch and serve them with breakfast or dinner any day of the week.

To freeze them, lay the biscuits in a single layer on a sheet pan, freeze them for 30 minutes, and then place them in a gallon-size bag back in the freezer.  

I hope you love these biscuits as much as we do. If you have tried this or any other recipe on my blog, please rate it and let me know how it turned out in the comments below!

a basket of artfully arranged biscuits
Print Recipe
4.48 from 19 votes

Mayonnaise Biscuits

Mayonnaise Biscuits are tender and fluffy, made with only five ingredients, and are ready to eat in just under 30 minutes.
Prep Time10 minutes mins
Cook Time12 minutes mins
Course: Side Dish
Cuisine: American
Keyword: mayonnaise biscuits
Servings: 10 biscuits
Calories: 106kcal
Author: Tanya Harris

Ingredients

  • 2 cups self-rising flour
  • 1 cup milk
  • 6 tablespoons Duke's mayonnaise
  • 1 teaspoon sugar
  • ⅛ teaspoon salt

Instructions

  • Preheat the oven to 400 degrees Fahrenheit.
  • Place all the ingredients in a large bowl and mix just until combined.
  • Use a large cookie scoop to drop the biscuits by spoonful onto a greased baking sheet.
  • Bake for 12 minutes or until golden brown.
  • Remove and serve with favorite toppings, like butter or jam.

Video

Notes

  • I prefer to use Duke’s mayo for these biscuits but any brand of mayonnaise should work.
  • If you don’t have self-rising flour, you can use all-purpose flour. If you use all-purpose flour, mix in 3 teaspoons of baking powder and ½ teaspoon of salt to it.

Nutrition

Serving: 10g | Calories: 106kcal | Carbohydrates: 20g | Protein: 4g | Fat: 1g | Saturated Fat: 1g | Polyunsaturated Fat: 0.2g | Monounsaturated Fat: 0.2g | Cholesterol: 3mg | Sodium: 39mg | Potassium: 62mg | Fiber: 1g | Sugar: 2g | Vitamin A: 40IU | Calcium: 34mg | Iron: 0.2mg

This post was originally published on August 16, 2022, and has been updated with new content and tips.

January 28, 2026 by Tanya Harris 3 Comments

Cajun Jambalaya Recipe (One-Pot)

Jambalaya in pot

I love this Cajun jambalaya for bringing bold Louisiana flavors to the table in one pot: smoky andouille sausage, tender chicken, and the classic "holy trinity" with perfectly seasoned rice.

hands picking up jambalaya with spoon from pot

You’ll find the full recipe with ingredient amounts and instructions in the recipe card at the bottom of this post. Be sure to check out the blog post itself for extra tips and tricks!

pic of Tanya

Jambalaya is one of my absolute favorite rice dishes. There's something about the combination of the andouille sausage, tender chicken pieces, and perfectly seasoned rice. It took me a while to get this recipe just how I wanted it, but once I got it, oh my gosh, I couldn't stop making it this way.

You'll find many jambalaya recipes that include tomatoes, but this one does not. This version is more commonly known as Cajun-style or "brown" jambalaya, and it's my preferred way to enjoy it. Without the tomatoes, I find that the flavors of the sausage and the chicken really come through.

This rice also freezes wonderfully. It's perfect for meal prep, too. If you like Southern rice dishes, you gotta try my dirty rice.

Love, Tanya

JAMBALAYA AT A GLANCE

  • Prep Time: 20 minutes
  • Cook Time: 40 minutes
  • Total Time: 1 hour
  • Serves: 6
  • Best For: Weeknight dinners, feeding a crowd, meal prep, weekend cooking

A QUICK LOOK AT THE INGREDIENTS

Ingredient amounts and full recipe instructions are on the printable recipe card at the bottom of the post.

  • Andouille sausage - I prefer Ragin' Cajun Andouille for its smoky, spicy flavor, which is essential to jambalaya. Use any andouille sausage you like.
  • Chicken thighs - Boneless, skinless thighs stay tender and juicy even with longer cooking times.
  • Onion, celery, bell pepper, and garlic - This classic Louisiana base builds the foundation of flavor. Don't skip the garlic either.
  • Parboiled rice - I use parboiled rice because it doesn't get mushy and holds up beautifully in one-pot dishes, staying firm and fluffy with grains that separate easily. Long-grain white rice works too, but it just won't be as sturdy and may be slightly mushy. It'll be fine if that's what you got, but for more separated grains, use the parboiled rice.
  • Cajun seasoning - Your favorite brand works. I like Dan-O's Cajun seasoning for this dish, or you can use a homemade Cajun seasoning blend.
  • Bay leaves, thyme, and cayenne - These add layers of aromatic depth and heat.
  • Chicken broth - Use good-quality broth.
  • Green onions and hot sauce - Mainly for garnish.
ingredients for jambalaya

Suggested Tool

Mercer Culinary Enameled Cast Iron Round Dutch Oven, 6 qt., Matte Black

I suggest using a heavy-bottom pot with a tight-fitting lid when making this jambalaya on the stovetop. You will be browning a lot of meat, and a heavy pot distributes heat evenly to prevent burning and sticking while the lid traps steam to cook the rice properly.
Buy Now

HOW TO MAKE JAMBALAYA

Step 1: Season chicken thighs with kosher salt and black pepper. Set aside. In a large Dutch oven or heavy pot over medium-high heat, brown the sausage slices until they develop some color and release their fat, about 5 minutes. Remove and set aside.

Step 2: In the same pot, brown the chicken pieces in the sausage fat until lightly browned on all sides, about 5-7 minutes. Remove from the pot and then remove excess fat, leaving about 2-3 tablespoons in the pot.

Sausage in cooking skillet
Chicken cooking in pot

Step 3: Add the diced onion, bell pepper, celery, and minced garlic to the pot along with about 2 tablespoons of the chicken broth. Scrape up any browned bits from the bottom of the pan with a wooden spoon as the vegetables cook. Cook until the vegetables soften and start to caramelize, about 8-10 minutes, lightly.

Step 4: Stir in the rice, coating it with the vegetables and that flavorful fat. Add the Cajun seasoning, thyme, and cayenne pepper, stirring to distribute them through the rice evenly.

Peppers and onion sautéing in pot
Rice and seasonings in skillet

Step 5: Pour in the remaining 3 cups of chicken broth. Return the browned sausage and chicken to the pot along with any accumulated juices. Stir everything well and nestle the bay leaves on top. Bring to a boil.

ingredients for jambalaya in pot before steaming

Step 6: Once boiling, reduce the heat to low, cover the pot tightly, and simmer for 22 minutes without lifting the lid.

Step 7: After 22 minutes, remove the pot from the heat and let it stand, still covered, for 5 minutes. This resting time enables the rice to finish cooking with residual heat. Then, open the lid, remove the bay leaves, and fluff the rice with a fork.

Step 8: Garnish with sliced green onions and serve with hot sauce on the side.

Jambalaya in pot

SERVING SUGGESTIONS

Jambalaya is a complete meal on its own, but I love serving it with Classic Southern Cornbread or Easy Cornbread Muffins. A simple green salad or Southern Cucumber Salad on the side adds a fresh, crisp contrast to the rich, spicy rice.

And don't forget the hot sauce. Louisiana-style hot sauce works well with this dish if you're a fan of some extra spice.

MAKE AHEAD AND STORAGE

  • Storage: Store leftover jambalaya in an airtight container in the refrigerator for up to 4 days. The flavors actually meld and deepen overnight, so it tastes even better the next day.
  • Freezing: Jambalaya freezes beautifully. Let it cool completely, then transfer to freezer-safe containers or bags. It'll keep for up to 3 months. Thaw overnight in the refrigerator before reheating.
  • Reheating: Reheat on the stovetop over medium-low heat with a splash of chicken broth to loosen it up, or microwave individual portions with a damp paper towel on top to keep it from drying out.
jambalaya in bowl

TANYA'S TOP TIPS

  • Don't skip the browning - Browning the sausage and chicken creates fond (those stuck-on browned bits), which adds incredible depth of flavor to the whole dish. If the bottom of the pot is getting too dark, reduce the heat a bit. You don't want the fond to burn.
  • Keep the lid on - Once you cover the pot to simmer, do not lift the lid. Peeking releases steam and affects how evenly the rice cooks.
  • Let it rest - That 5-minute resting period after cooking is essential. It lets the rice finish absorbing any remaining liquid, making fluffing easier.

A LITTLE HISTORY OF JAMBALAYA

One thing I learned during my research is that jambalaya is influenced by Spanish paella. When I discovered that connection, I was overjoyed because I also love paella. In Louisiana, rice dishes, like Spanish paella, were adapted to local ingredients and blended with French and West African influences, and over time, jambalaya was born.

Now, jambalaya comes in two main styles. Creole jambalaya (often called "red jambalaya") includes tomatoes and is what you'll find in New Orleans and other urban areas. Cajun jambalaya (often called "brown jambalaya") skips the tomatoes entirely and comes from the rural bayous and small towns of south Louisiana. This recipe is Cajun-style—no tomatoes, just deep, rich flavor from browning the meat and building layers of seasoning.

RELATED RECIPES

I hope you love this jambalaya recipe as much as we do. If you're looking for more one-pot meals and Southern comfort food, try these out:

  • One-Pot Jerk Chicken and Rice - Caribbean flavors in an easy one-pot meal
  • Ground Chicken and Rice - this is my creative take on a Caribbean version of dirty rice. It's fun and delicious.
  • Dirty rice - I use chicken livers in my recipe, as I find they give it a more authentic taste than the traditional dirty rice I am familiar with.
  • Gumbo - This classic Cajun Gumbo is made with chicken and andouille sausage. If you love a flavorful stew with a dark roux, you'll love this recipe.

If you have tried this or any other recipe on my blog, please rate it and let me know how it turned out in the comments below!

Jambalaya in pot
Print Recipe
4.50 from 2 votes

Jambalaya Recipe

This Cajun jambalaya brings bold Louisiana flavors to your table, with smoky andouille sausage, tender chicken thighs, and the classic holy trinity of vegetables, all in a perfectly seasoned one-pot rice dish.
Prep Time20 minutes mins
Cook Time40 minutes mins
Total Time1 hour hr
Course: entree
Cuisine: American, Cajun
Keyword: cajun jambalaya, jambalaya
Servings: 6 people
Calories: 766kcal
Author: Tanya Harris

Ingredients

  • 1 ½ pounds boneless skinless chicken thighs, chopped into 1-inch cubes
  • 1 teaspoon kosher salt
  • ½ teaspoon ground black pepper
  • 1 pound andouille sausage sliced into ½-inch rounds
  • 1 ½ cups diced yellow onion about 1 large onion
  • 1 cup diced green bell pepper 1 medium pepper
  • 1 cup diced celery about 2 stalks
  • 4 cloves garlic minced
  • 2 cups parboiled rice or long-grain white rice
  • 4 cups chicken broth divided
  • 2 tablespoons Cajun seasoning
  • 2 bay leaves
  • 1 teaspoon dried thyme
  • ½ teaspoon cayenne pepper adjust to taste
  • ½ cup sliced green onions
  • Hot sauce to taste

Instructions

  • Season chicken thighs with kosher salt and black pepper. Set aside. In a large Dutch oven or heavy pot over medium-high heat, brown the sausage slices until they develop color and release their fat, about 5 minutes. Remove and set aside.
  • In the same pot, brown the chicken pieces in the sausage fat until lightly browned on all sides, about 5-7 minutes. Remove and set aside with the sausage. Remove excess fat, leaving about 2-3 tablespoons in the pot.
  • Add the diced onion, bell pepper, celery, and minced garlic to the pot along with about 2 tablespoons of the chicken broth. Scrape up any browned bits from the bottom of the pan with a wooden spoon as the vegetables cook. Cook until the vegetables soften and start to caramelize, about 8-10 minutes, lightly.
  • Stir in rice, coating it with the vegetables. Add Cajun seasoning, thyme, and cayenne pepper.
  • Pour in the remaining chicken broth. Return sausage and chicken to the pot along with any accumulated juices. Stir well and top with bay leaves. Bring to a boil.
  • Once boiling, reduce the heat to low, cover tightly, and simmer for 22 minutes without lifting the lid.
  • Remove from heat and let stand, covered, for 5 minutes. Open the lid, remove bay leaves, and fluff with a fork.
  • Garnish with sliced green onions and serve with hot sauce on the side.

Notes

  • This recipe uses parboiled rice because it doesn't get mushy and holds up well in one-pot dishes. Long-grain white rice works too, but it just won't be as firm and fluffy.
  • Jambalaya tastes even better the next day, as the flavors meld. Store in an airtight container in the refrigerator for up to 4 days.

Nutrition

Calories: 766kcal | Carbohydrates: 60g | Protein: 39g | Fat: 41g | Saturated Fat: 12g | Polyunsaturated Fat: 8g | Monounsaturated Fat: 17g | Trans Fat: 0.3g | Cholesterol: 179mg | Sodium: 1694mg | Potassium: 827mg | Fiber: 3g | Sugar: 5g | Vitamin A: 1602IU | Vitamin C: 26mg | Calcium: 77mg | Iron: 3mg

January 26, 2026 by Tanya Harris 4 Comments

Jamaican Pepper Steak

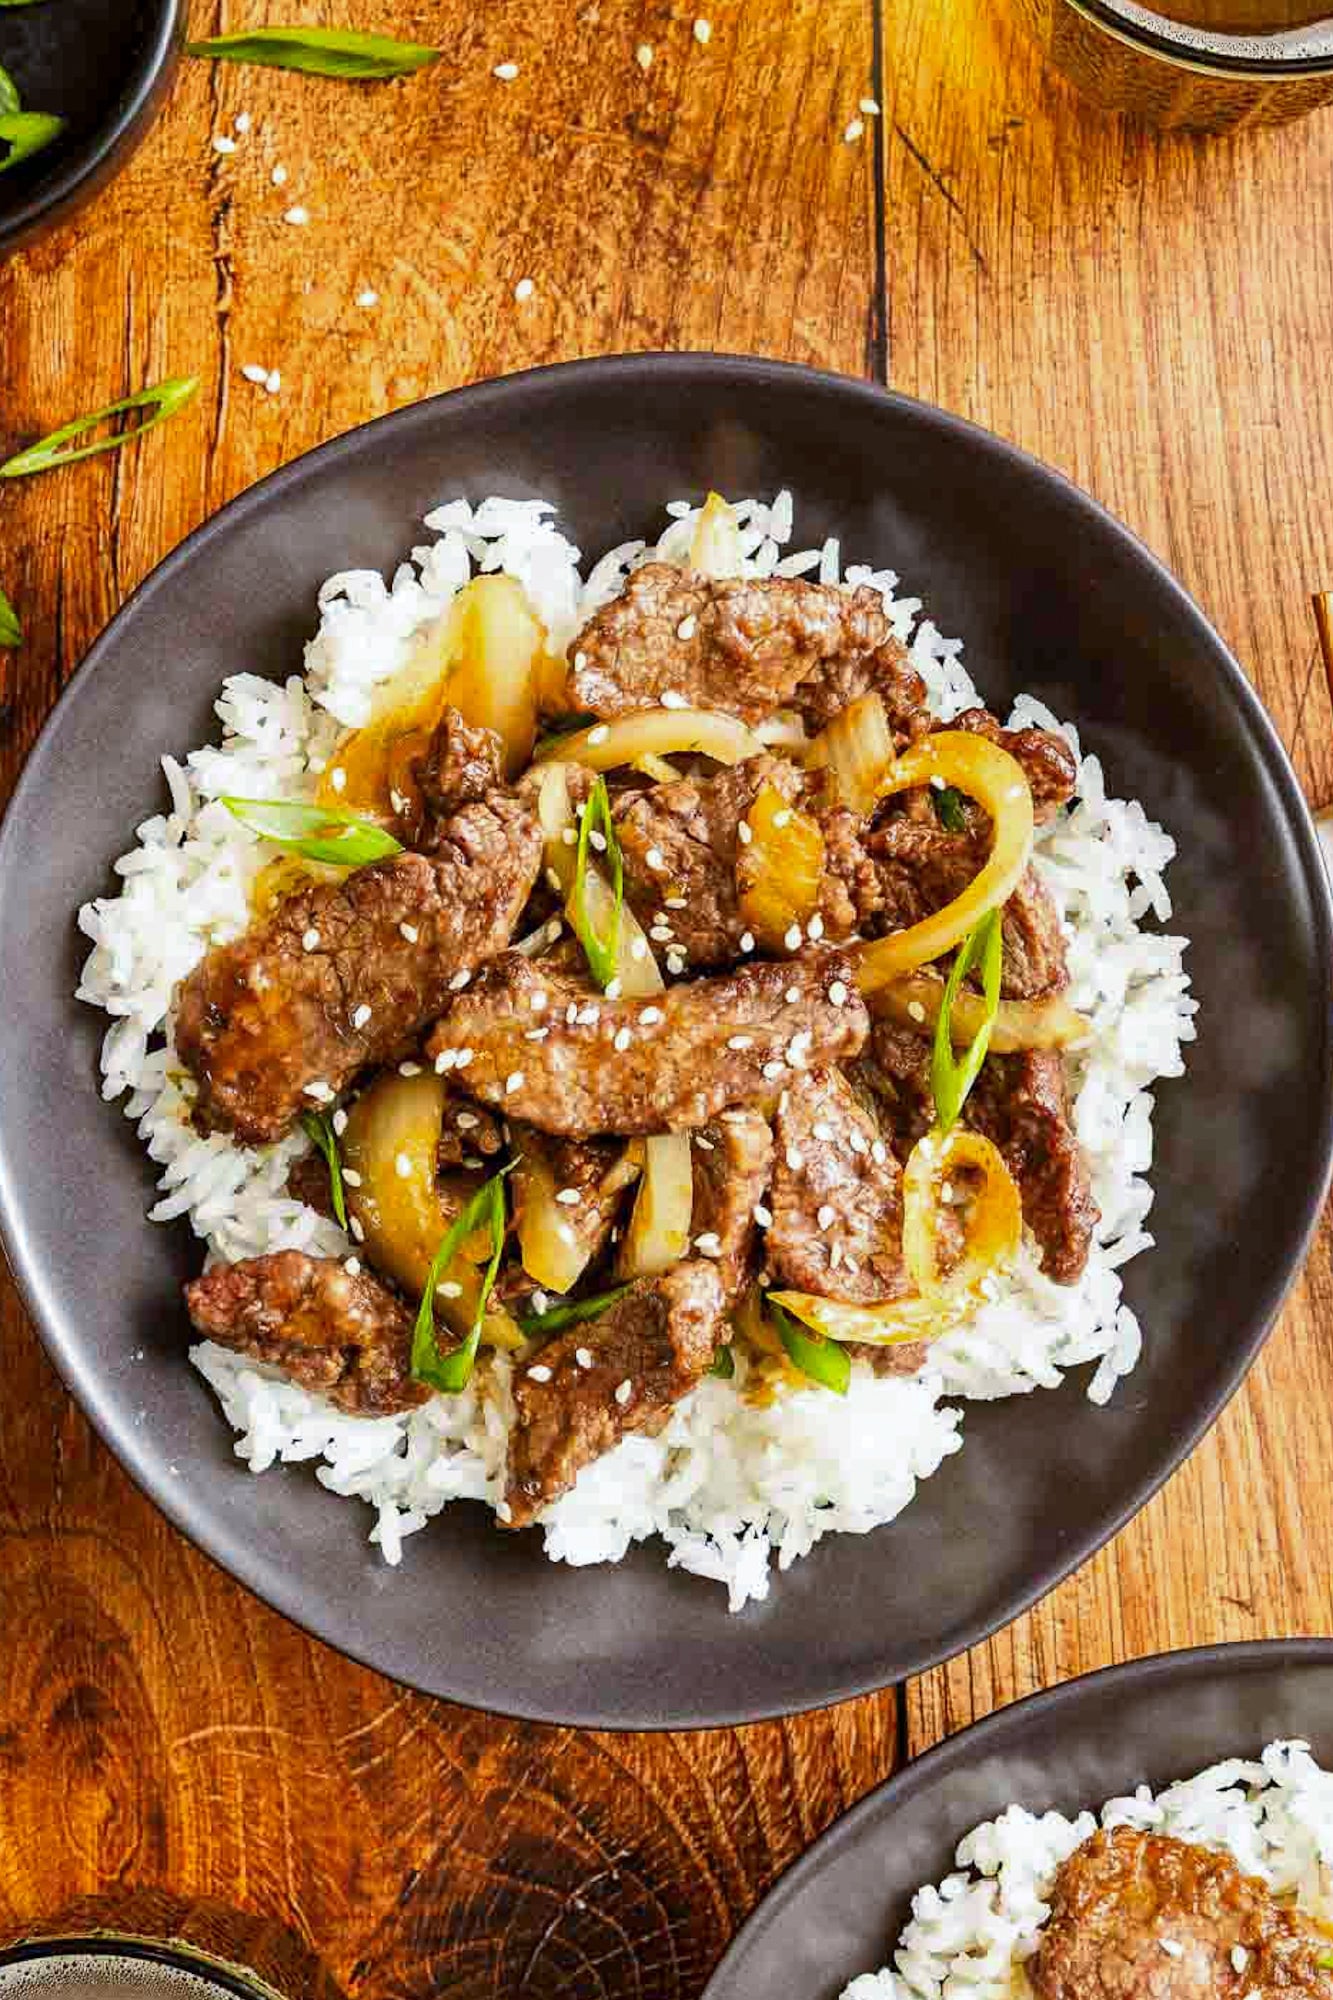
Jamaican pepper steak in a bowl with a spoon lifting up some of the pepper steak.

This Jamaican pepper steak is a quick stir-fry loaded with tender beef, sweet bell peppers, and warm island spices. It's the kind of weeknight dinner that comes together fast but tastes like you spent hours on it.

Jamaican pepper steak in a bowl with a spoon lifting up some of the pepper steak.

You’ll find the full recipe with ingredient amounts and instructions in the recipe card at the bottom of this post. Be sure to check out the blog post itself for extra tips and tricks!

tanya holding pepper steak

Pepper steak is one of those dishes that reflects the Chinese influence in Jamaican cooking. The Jamaican version takes the stir-fry concept and adds scotch bonnet pepper, fresh thyme, allspice, and all-purpose seasoning. It's got that quick cooking method from Chinese cuisine, but the flavors are unmistakably Jamaican.

I make this when I want something quick and full of flavor. It works for a regular weeknight, but it's also nice enough for a romantic dinner at home. Serve it over rice.

Love, Tanya

JAMAICAN PEPPER STEAK AT A GLANCE

  • Prep Time: 15 minutes
  • Cook Time: 20 minutes
  • Total Time: 35 minutes
  • Serves: 6 people
  • Best For: Quick weeknight dinners, romantic dinners, meal prep

A QUICK LOOK AT THE INGREDIENTS

Ingredient amounts and full recipe instructions are on the printable recipe card at the bottom of the post.

For the Beef

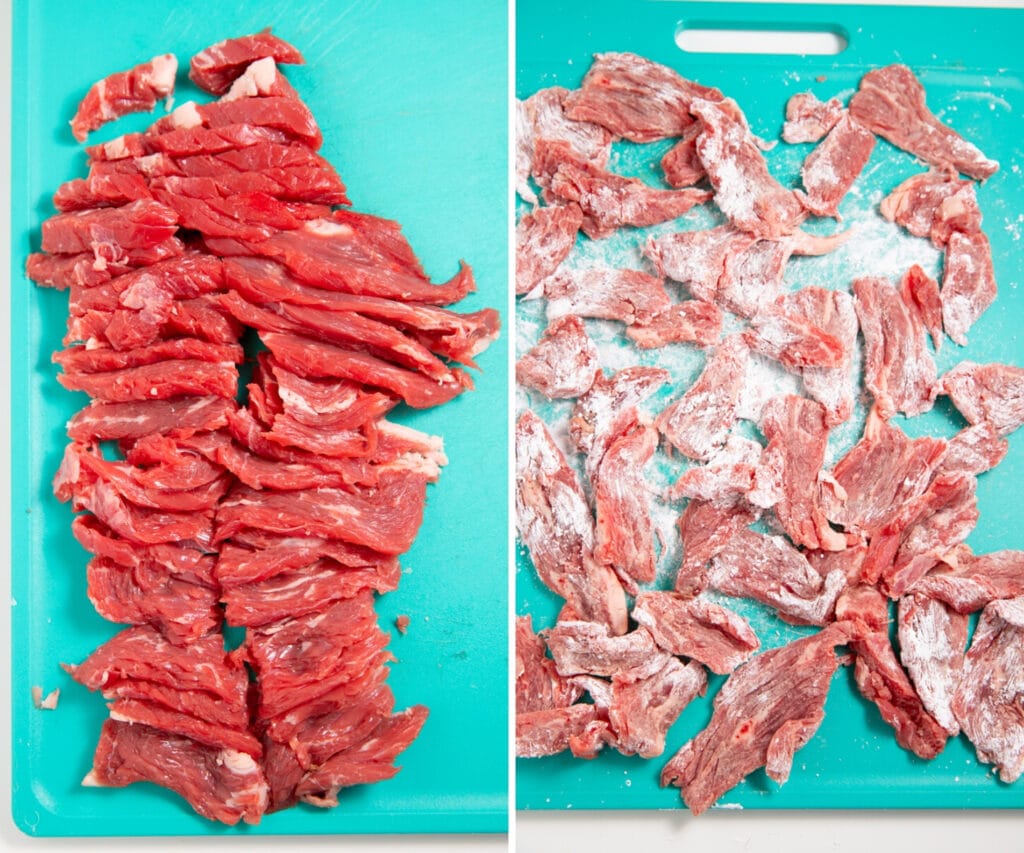
  • Top sirloin or flank steak - Cut into thin strips about ¼ inch thick, slicing against the grain for tenderness.
  • Soy sauce, all-purpose seasoning, ground allspice, and cornstarch - These season and coat the beef. The cornstarch also helps with velveting, keeping the meat tender, and thickening the sauce later.

For the Sauce

Beef broth, dark soy sauce, Worcestershire sauce, garlic powder, onion powder, black pepper, and cornstarch

For the Stir-Fry

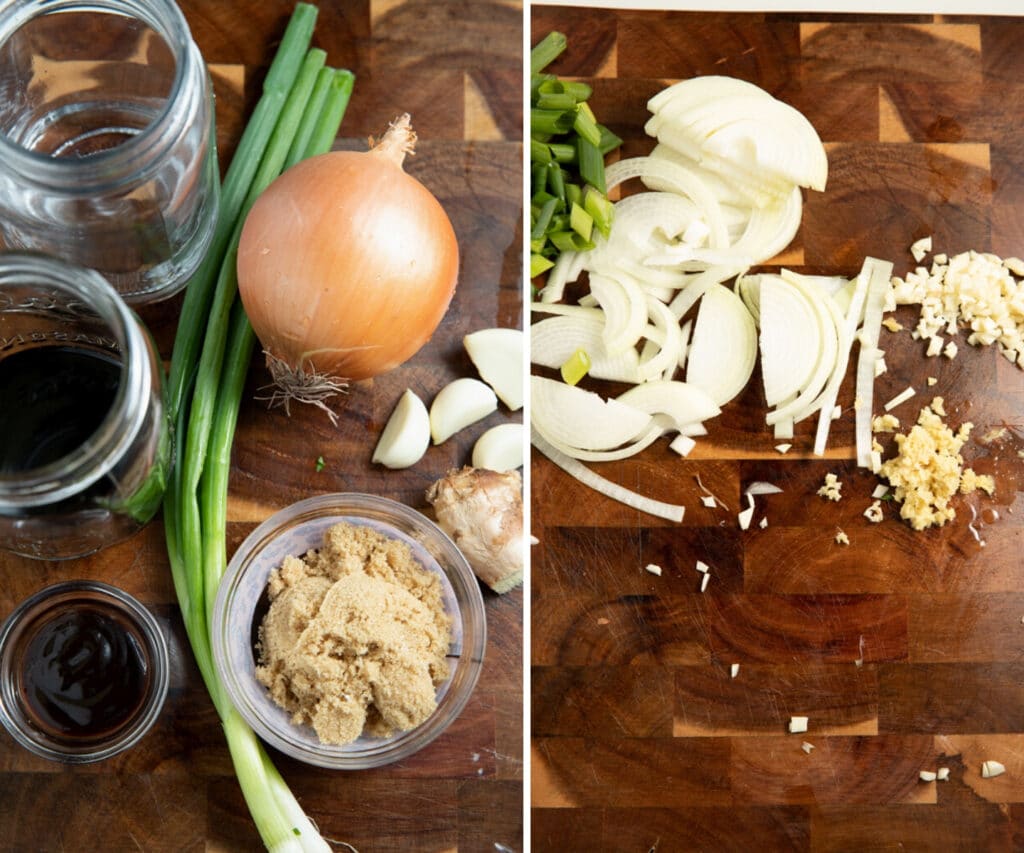
Bell peppers, yellow onion, garlic, fresh ginger, scotch bonnet pepper, fresh thyme, olive oil, and green onions - I use red, yellow, and green peppers. Slice the peppers and onion about ¼ inch thick. You can go a little thinner, but keep them thicker than ⅛ inch. Slice the peppers about the same thickness as the beef. Slice the garlic, mince the ginger, and slice the scotch bonnet (remove seeds for less heat).

ingredients for pepper steak on table

HOW TO MAKE JAMAICAN PEPPER STEAK

This recipe comes together quickly once you start cooking, so have everything prepped and ready to go before you turn on the heat.

Step 1: Marinate the beef

In a bowl, combine the sliced beef with all-purpose seasoning, allspice, soy sauce, and cornstarch. Mix until the beef is evenly coated. Let it marinate for 30 minutes while you prep your vegetables and make the sauce. This marinating time makes a real difference in flavor and texture.

Step 2: Make the sauce

In a bowl, whisk together the beef broth, dark soy sauce, Worcestershire sauce, garlic powder, onion powder, ground black pepper, and cornstarch. Set this aside until you need it later.

Steak being marinated in a bowl.
Sauce for pepper steak with whisk in bowl.

Step 3: Sear the beef

Heat 2 tablespoons of oil in a large skillet or wok over medium-high heat. Add the beef in batches to avoid overcrowding the pan. Sear for 2-3 minutes, until browned, flipping halfway through. Remove it from the pan and set aside.

Step 4: Cook the vegetables

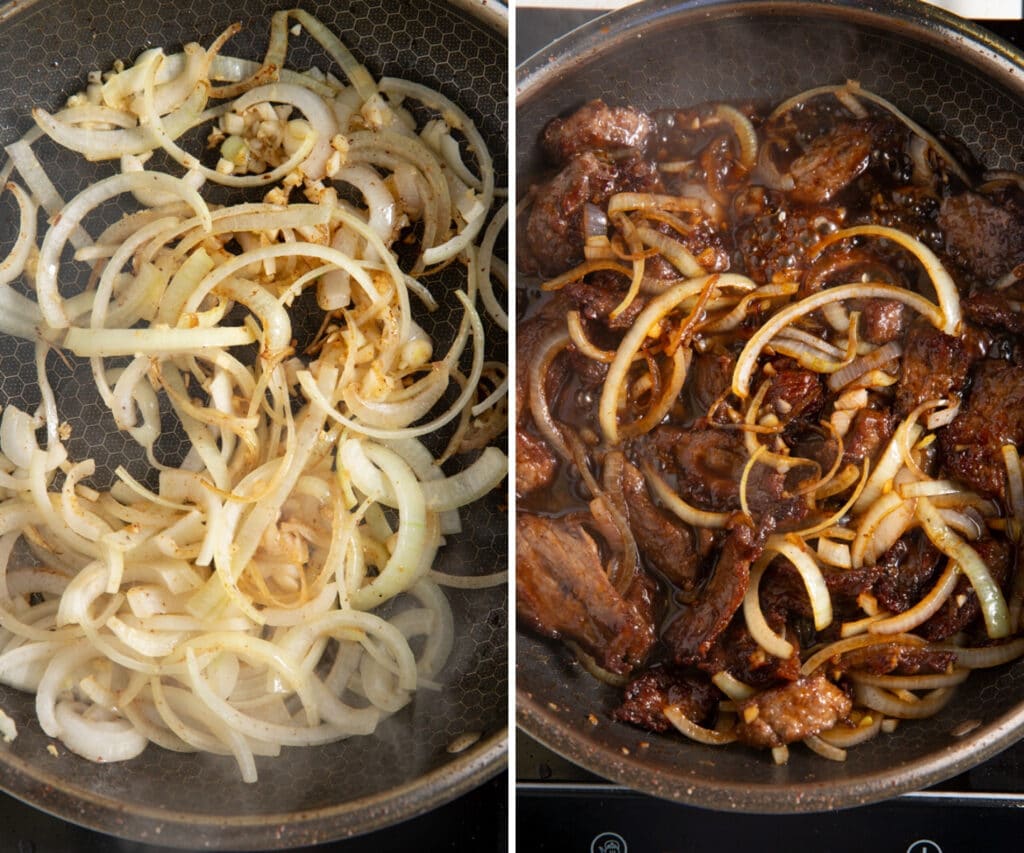
In the same pan, add 2 tablespoons of oil if needed. Add the yellow onions and peppers and cook for 3-4 minutes, stirring until they've softened. Add the garlic, ginger, green onions, scotch bonnet, and thyme sprigs and stir for another minute.

Steak pieces frying in a skillet.
peppers being sauteed in pan

Step 5: Bring it together

Return the beef to the pan with the vegetables. Pour in the sauce you made earlier and stir everything together. Reduce the heat to medium and simmer for 2-3 minutes, until the sauce thickens.

Close-up side image of Jamaican pepper steak in a bowl.

Step 6: Finish and serve

Remove from heat and serve hot over rice.

VARIATIONS

  • Milder version - Skip the scotch bonnet entirely and use only bell peppers. You'll still get the Jamaican flavors from the thyme and allspice without the added heat.
  • Chicken pepper steak - Swap the beef for thinly sliced chicken breast or thighs. The cooking time stays about the same.
  • Extra vegetables - Add mushrooms, snap peas, or carrots to bulk it up.
  • Spicier version - Keep the seeds in the scotch bonnet, or add a second pepper. Or use a scotch bonnet pepper sauce.

SERVING SUGGESTIONS

Serve this pepper steak over white rice, brown rice, or my Jamaican rice and peas for a complete meal. Fried plantains make a sweet contrast to the savory stir-fry. You could also pair it with Jamaican cabbage for a lighter side option.

MAKE AHEAD AND STORAGE

  • Storage: Keep leftovers in an airtight container in the refrigerator for up to 3 days. The vegetables may soften a bit, but it still tastes good.
  • Freezing: You can freeze this for up to 2 months. Let it cool completely before transferring to a freezer-safe container. With freezing, it may change the texture.
  • Reheating: Reheat in a skillet over medium heat until warmed through. You can add a splash of water or broth if the sauce has thickened too much.

TANYA'S TOP TIPS

  • Best beef cuts - Top sirloin, flank steak, or skirt steak work best. Slice against the grain about ¼-inch thick.
  • Don't overcrowd the pan - If your pan isn't big enough, cook the beef in batches. Overcrowding drops the temperature and the beef will steam instead of sear.
  • Prep everything first - Once you start cooking, things move fast. Have all your ingredients measured, chopped, and ready to go.
Hand holding bowl of pepper steak with fork picking up the steak.

RELATED RECIPES

I hope you love this Jamaican pepper steak as much as we do. If you're looking for more Jamaican and Caribbean-inspired recipes, try these out:

  • Jamaican curry chicken - Another weeknight favorite with bold island flavors.
  • One-pot jerk chicken and rice - Everything cooks together for an easy cleanup.
  • Brown stew chicken - A classic Jamaican comfort food with rich gravy.
  • Rasta pasta - Creamy Caribbean pasta with jerk-seasoned chicken.

If you make this Jamaican pepper steak recipe, please let us know how you like it by leaving a review below. Your feedback is appreciated!

Jamaican pepper steak in a bowl with a spoon lifting up some of the pepper steak.
Print Recipe
5 from 2 votes

Jamaican Pepper Steak Recipe

This Jamaican pepper steak combines tender beef strips with colorful bell peppers and warm island spices for a quick, flavorful stir-fry.
Prep Time15 minutes mins
Cook Time20 minutes mins
Total Time35 minutes mins
Course: entree
Cuisine: Caribbean
Keyword: Jamaican pepper steak, pepper steak
Servings: 6
Calories: 215kcal
Author: Tanya Harris

Ingredients

For the Beef

  • 1 pound top sirloin or flank steak sliced into thin strips about ¼ inch thick
  • 2 teaspoons all-purpose seasoning
  • ½ teaspoon ground allspice
  • 2 tablespoons soy sauce
  • ½ tablespoon cornstarch

For the Sauce

  • 1½ cups beef broth
  • 2 tablespoons dark soy sauce
  • 1 tablespoon Worcestershire sauce
  • 1 teaspoon garlic powder
  • 1 teaspoon onion powder
  • ½ teaspoon ground black pepper
  • 1 tablespoon cornstarch

For the Stir-Fry

  • 3-4 tablespoons olive oil divided
  • ½ red bell pepper sliced into strips about ¼ inch thick
  • ½ yellow bell pepper sliced into strips about ¼ inch thick
  • ½ green bell pepper sliced into strips about ¼ inch thick
  • 1 large yellow onion sliced into strips about ¼ inch thick
  • 3 cloves garlic thinly sliced
  • 1 tablespoon fresh ginger minced
  • 1 scotch bonnet or habanero pepper thinly sliced (remove seeds for less heat)
  • 2 sprigs fresh thyme or 1 teaspoon dried
  • 3 green onions sliced

Instructions

  • In a bowl, season steak strips with all-purpose seasoning, allspice, soy sauce, and cornstarch. Mix well and let marinate for 30 minutes.
  • Make the sauce by whisking together beef broth, dark soy sauce, Worcestershire sauce, garlic powder, onion powder, ground black pepper, and cornstarch. Set aside.
  • Heat 2 tablespoons oil in a large skillet or wok over medium-high heat. Add beef in batches (don't overcrowd) and sear for 2-3 minutes until browned, flipping halfway. Remove and set aside.
  • In the same pan, add 2 tablespoons oil if needed. Add the yellow onion and peppers and cook for 3-4 minutes, stirring until the onion and peppers have softened. Add garlic, green onion, ginger, scotch bonnet, and thyme and stir for an additional minute.
  • Return the beef to the pan and add the sauce. Stir to combine. Reduce the heat to medium and simmer for 2-3 minutes until the sauce has thickened.
  • Remove from heat and serve hot.

Video

Notes

  • Slice beef about ¼ inch thick against the grain for maximum tenderness
  • Slice peppers and onions about ¼ inch thick for even cooking
  • This is best served fresh, but leftovers keep for 3 days in the refrigerator

Nutrition

Calories: 215kcal | Carbohydrates: 10g | Protein: 19g | Fat: 11g | Saturated Fat: 3g | Polyunsaturated Fat: 1g | Monounsaturated Fat: 7g | Cholesterol: 45mg | Sodium: 832mg | Potassium: 499mg | Fiber: 2g | Sugar: 2g | Vitamin A: 491IU | Vitamin C: 45mg | Calcium: 71mg | Iron: 3mg

January 12, 2026 by Tanya Harris Leave a Comment

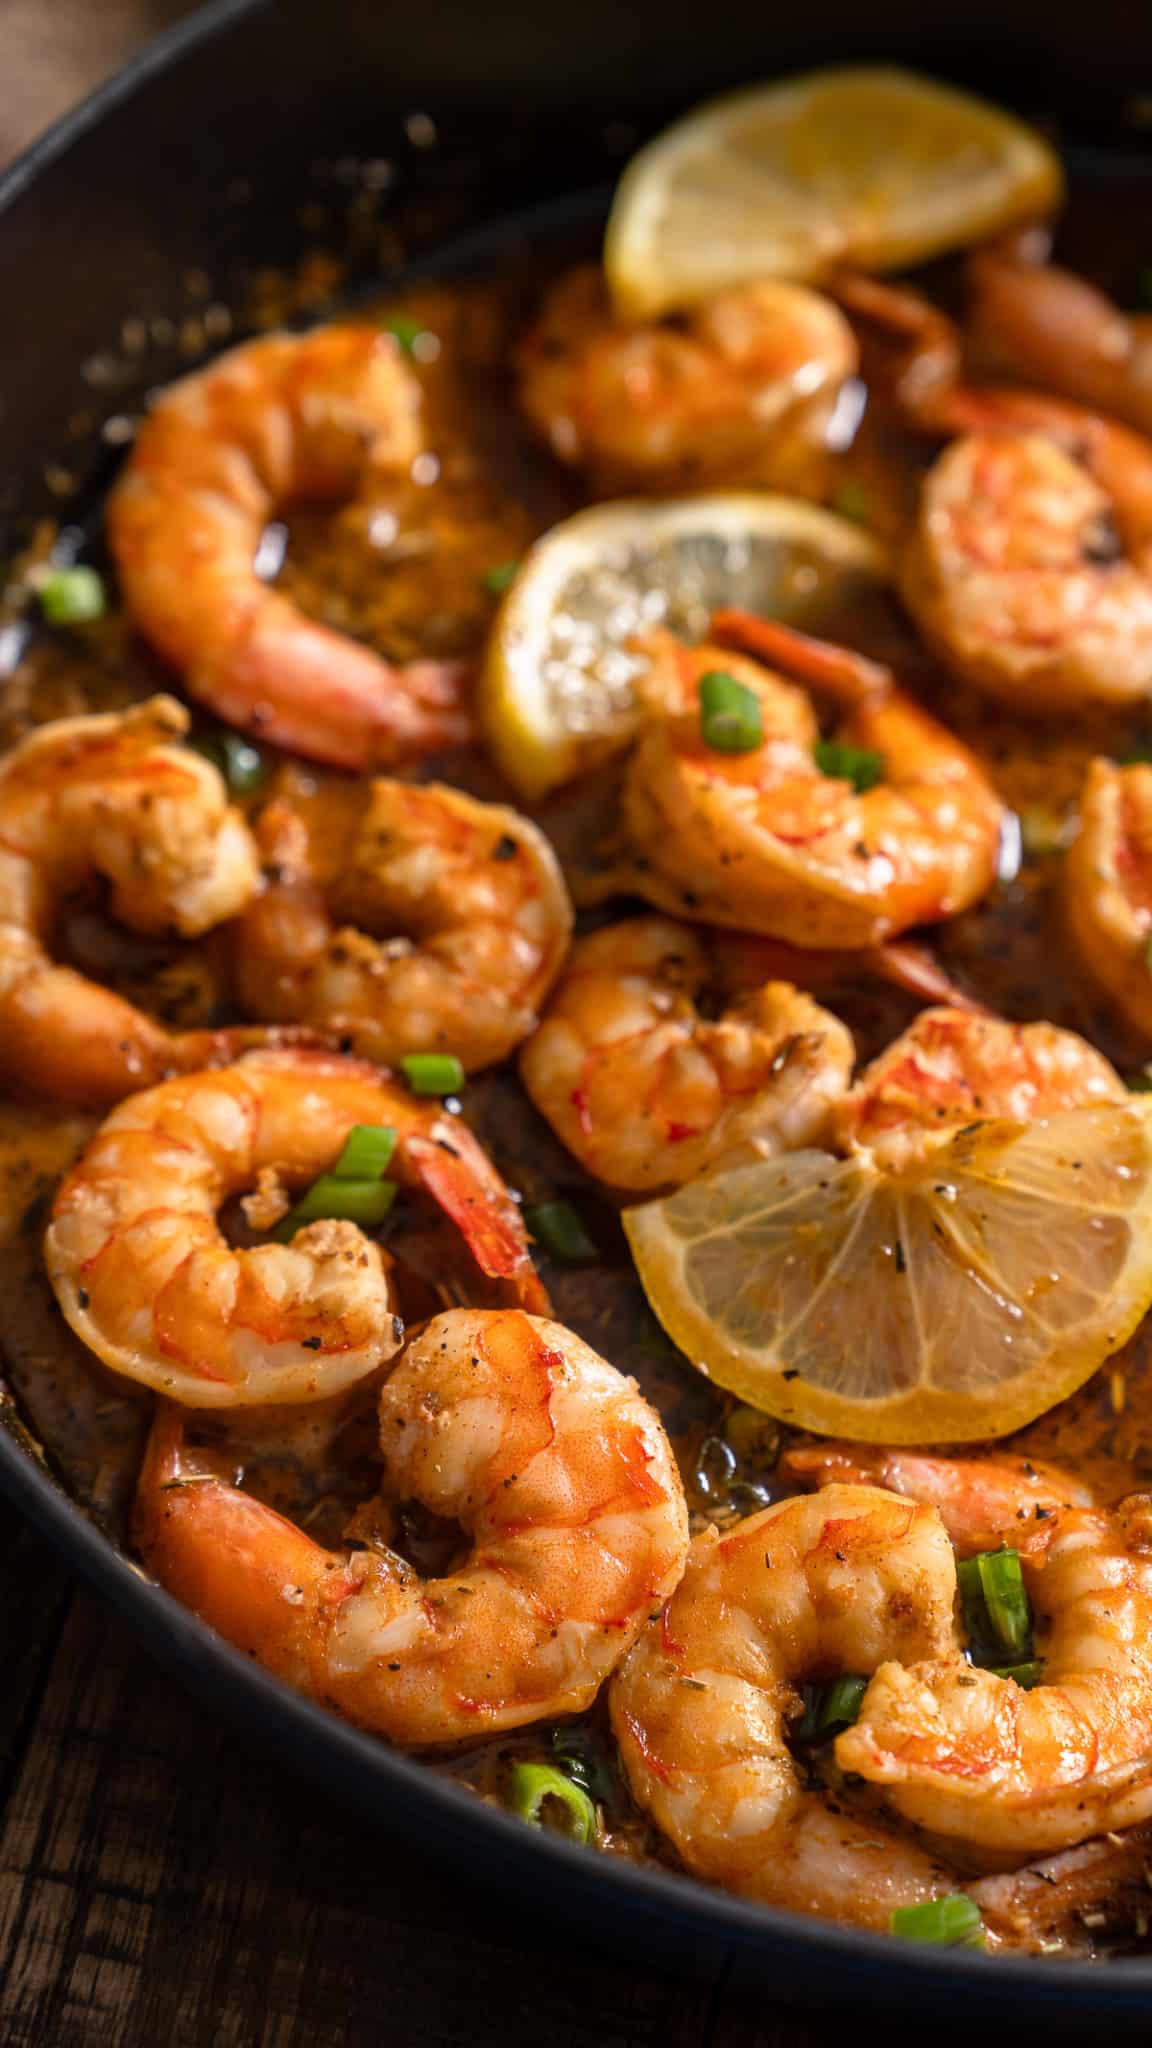
Cajun Broiled Shrimp (Quick and Easy)

broiled shrimp on plate with lemon and pardley in background

This broiled shrimp is quick, flavorful, and ready in less than 30 minutes. With a simple Cajun marinade and a blast of high heat, you get tender shrimp with perfectly charred edges every time.

broiled shrimp on plate with lemon and pardley in background

You’ll find the full recipe with ingredient amounts and instructions in the recipe card at the bottom of this post. Be sure to check out the blog post itself for extra tips and tricks!

pic of Tanya

I keep bags of frozen jumbo shrimp in my freezer because they're one of the easiest proteins to work with. I can defrost them, peel and devein, and have dinner on the table fast. The broiler does most of the work, giving you those nice charred spots without having to stand over a hot pan.

This recipe uses garlic paste instead of minced garlic. The paste coats the shrimp evenly and saves prep time. You can buy it at the store or make your own by mashing fresh garlic with a pinch of salt. I like to serve this as an appetizer with cocktail sauce, or pair it with rice and vegetables for a complete meal. If you save your shrimp shells as I do, check out my Shrimp Stock recipe. Waste not, want not.

Love, Tanya

BROILED SHRIMP AT A GLANCE

Prep Time: 15 minutes
Cook Time: 6-8 minutes
Total Time: 21-23 minutes
Serves: 4
Best For: Quick weeknight dinners, appetizers, meal prep

A QUICK LOOK AT THE INGREDIENTS

Ingredient amounts and full recipe instructions are on the printable recipe card at the bottom of the post.

  • Jumbo shrimp - I buy whole jumbo frozen shrimp, defrost and peel them myself, leaving the tails on. This lets me save the shells for making shrimp stock later. You can also buy peeled shrimp to save time.
  • Garlic paste - This is the secret to getting garlic flavor on every piece of shrimp. The paste coats better than minced garlic. You can find it in tubes at most grocery stores, or make it by mashing fresh garlic with salt until smooth.
  • Cajun seasoning - Adds heat and complexity. Different brands vary in saltiness, so taste your marinade before adding the shrimp.
  • Olive oil - Helps the marinade stick to the shrimp and prevents them from drying out under the broiler.
  • Worcestershire sauce - Adds savory depth and a bit of umami.
  • Salt and black pepper - To taste. Go easy on the salt since Cajun seasoning already contains it.
  • Fresh lemon wedges - A squeeze of lemon juice at the end brightens everything up.
  • Finely chopped parsley - for a pop of color when serving to make it fancy. But honestly, it's optional.
ingredients for the broiled shrimp

HOW TO MAKE BROILED SHRIMP

Step 1: Position the oven rack 4-6 inches from the heat source and then turn on the broiler. This distance gives you good charring without burning.

Step 2: Make the garlic paste by mashing the garlic with a pinch of salt until it forms a smooth paste. If you're using store-bought garlic paste, skip this step.

Step 3: In a bowl, combine the garlic paste, Cajun seasoning, olive oil, and Worcestershire sauce. Add salt and black pepper to taste. Since Cajun seasoning blends vary, taste the marinade and adjust the seasoning before adding the shrimp.

Step 4: Add the shrimp to the bowl and toss until they're evenly coated with the marinade.

seasoned shrimp in bowl

Step 5: Arrange the shrimp in a single layer on a half sheet pan. Don't overlap them or they'll steam instead of char.

raw seasoned shrimp on baking sheet

Step 6: Broil for 6-8 minutes, flipping halfway through, until the shrimp are pink, opaque, and slightly charred at the edges. Watch them closely since broilers vary in intensity.

broiled shrimp on sheet pan

Step 7: Remove from the oven and squeeze fresh lemon juice over the top. Top with parsley if using it. Serve immediately.

fork picking up broiled shrimp

Having Fun with these Shrimp

I'm giving you a base recipe, but make it your own by trying some of these versions:

  • Spicy version: Add a pinch of cayenne pepper or red pepper flakes to the marinade.
  • Garlic butter: Brush the cooked shrimp with melted garlic butter as soon as they come out of the oven.
  • Herb addition: Toss in some fresh chopped parsley or cilantro for color and freshness.
  • Different seasonings: Swap the Cajun seasoning for Old Bay, jerk seasoning, or Italian herbs.

SERVING SUGGESTIONS

Serve this broiled shrimp as an appetizer with cocktail sauce or remoulade for dipping. It's great for parties.

For a full meal, pair it with Jamaican Rice and Peas, Easy Yellow Rice, or Oven-Baked Rice. Add a side of Marinated Air Fryer Vegetables or a simple green salad.

The shrimp also works great over pasta. Try it with Rasta Pasta or mixed into a cold pasta salad.

close up of broiled shrimp on plate

HOW TO BUY AND PREP SHRIMP

I buy whole frozen jumbo shrimp and defrost them in cold water. Once thawed, I peel and devein them myself. This takes a few extra minutes, but it saves money and lets me keep the shells for making stock.

When buying frozen shrimp, check the ingredient list. You want shrimp, with shrimp as the only ingredient listed. Some brands add sodium tripolyphosphate or other preservatives, which prevent the shrimp from charring properly under the broiler. Plain shrimp will give you those nice caramelized edges.

This recipe uses very large or jumbo shrimp (16/20 to 21/25 count per pound), which is why the cook time is 6-8 minutes. If you're using smaller shrimp, such as medium (41/50 count) or large (31/40 count), reduce the cook time to 4-6 minutes and watch them closely. Just know that smaller shrimp won't char the same way larger ones do because they cook through faster.

If you're short on time, buy already peeled and deveined shrimp. They work just as well in this recipe.

MAKE AHEAD AND STORAGE

Storage: Keep leftover broiled shrimp in an airtight container in the refrigerator for up to 3 days. The texture stays good, though they won't be quite as crispy as when fresh.

Freezing: You can freeze cooked shrimp for up to 2 months. Thaw in the refrigerator overnight, then reheat.

Reheating: Warm in a skillet over medium heat for 2-3 minutes, or microwave in 30-second intervals. Don't overcook or they'll get rubbery.

TANYA'S TOP TIPS

  • Don't skip tasting the marinade before adding the shrimp. Cajun seasonings vary widely in salt content, and you don't want oversalted shrimp.
  • Make sure your shrimp are dry before tossing them in the marinade. Pat them with paper towels if needed. Wet shrimp won't brown properly.
  • Keep an eye on them while broiling. Broilers vary in intensity, and shrimp can go from perfectly done to overcooked in less than a minute.
fork picking up broiled shrimp

RELATED RECIPES

I hope you love this broiled shrimp recipe as much as we do. If you're looking for more shrimp recipes or other broiled dishes, try these out:

  • Baked Jamaican Jerk Shrimp - Spicy, smoky, and full of island flavor. This recipe adds some peppers and pineapple. It's perfect for using in bowls or wrapping up with a tortilla.
  • Air Fryer Lemon Garlic Shrimp - Another quick cooking method with bright citrus notes. This is perfect for my friends who love cooking in the air fryer and want well-flavored shrimp.
  • Juicy Broiled Chicken Breast - If you love broiling, try this chicken recipe. It's perfect for using in salads.
  • Shrimp Cocktail - A classic appetizer that never goes out of style.
  • Easy Shrimp Salad - Perfect for lunch or light dinners, using poached shrimp.
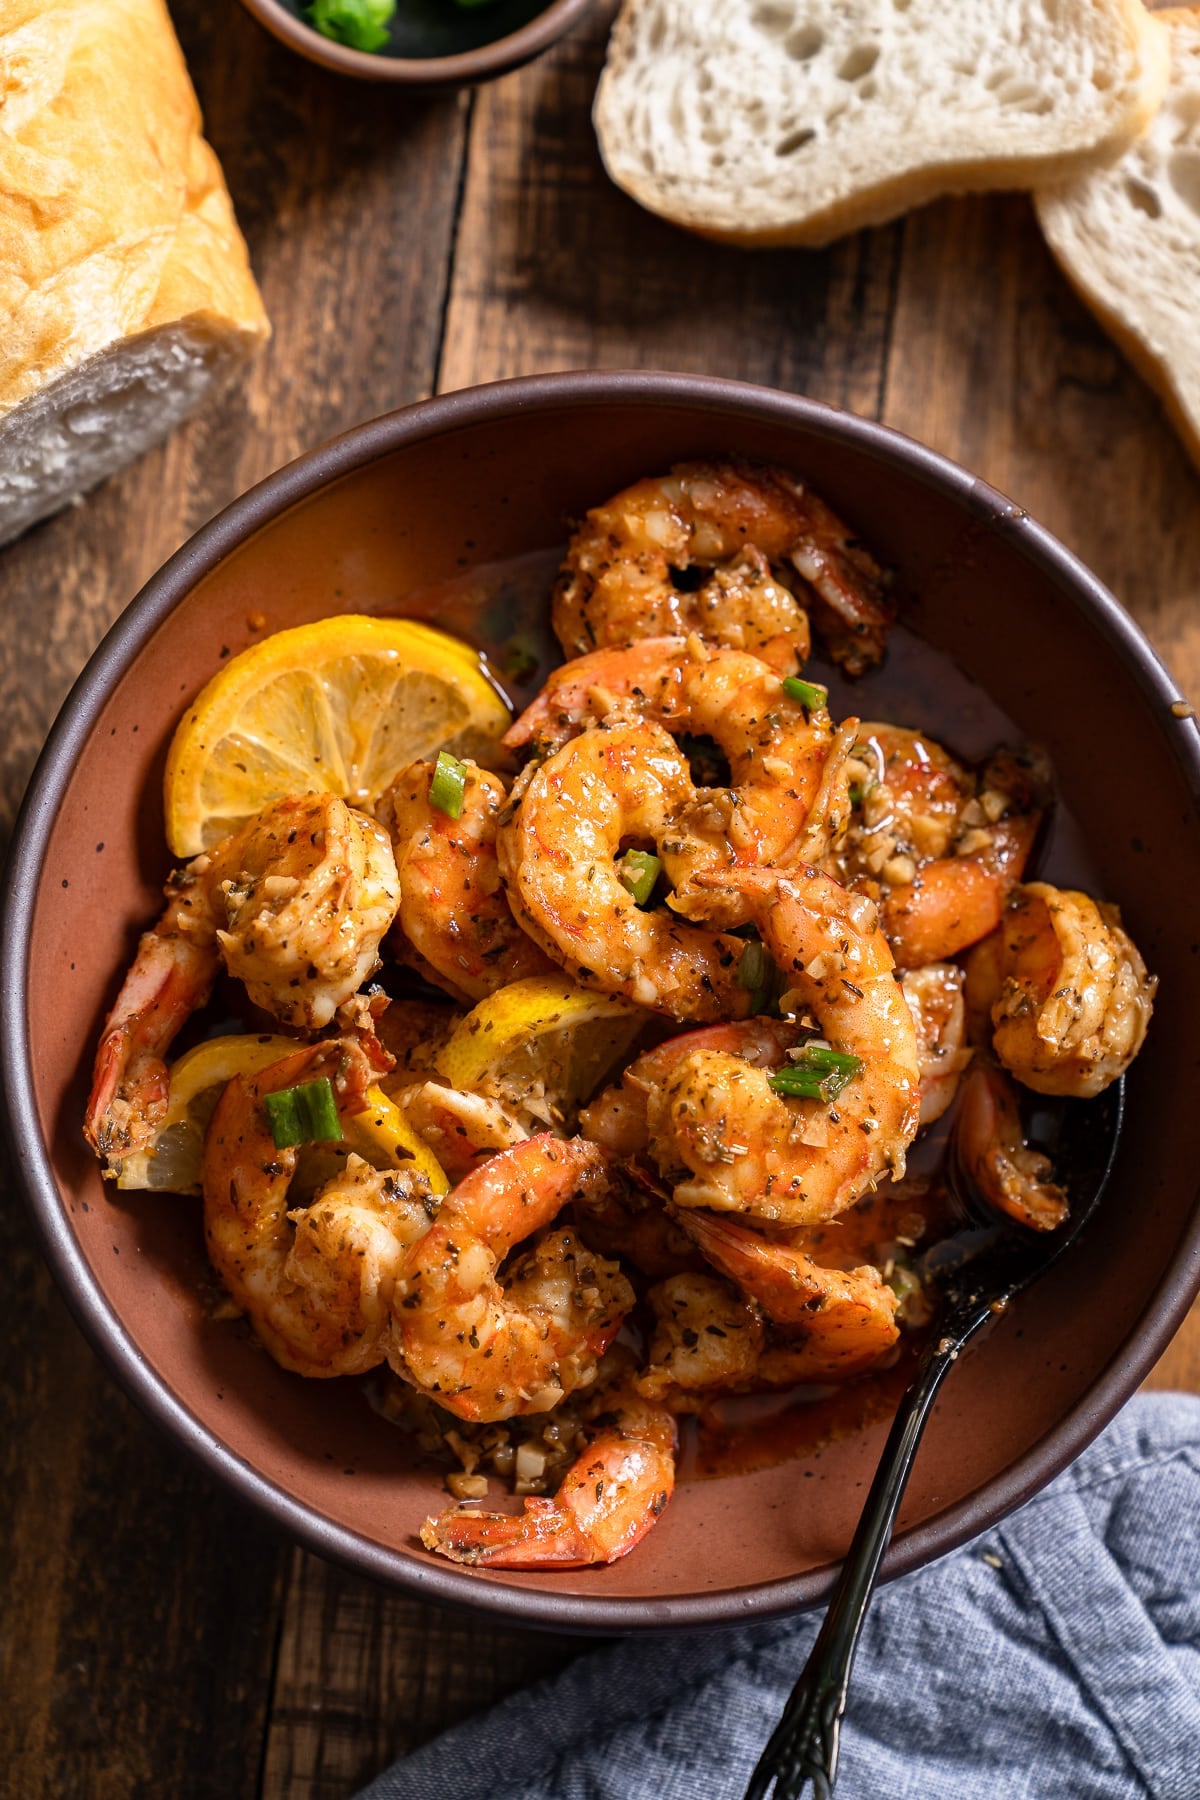
  • New Orleans BBQ Shrimp - a quick stovetop dish with the most flavorful sauce.
  • Shrimp Boil - A classic seafood feast with shrimp, sausage, corn, and potatoes, all cooked together with bold seasoning.

If you make this broiled shrimp recipe, please let us know how you like it by leaving a review below. Your feedback is appreciated!

broiled shrimp on plate with lemon and pardley in background
Print Recipe
No ratings yet

Broiled Shrimp Recipe

This broiled shrimp is quick, flavorful, and ready in less than 30 minutes. With a simple Cajun marinade and perfectly charred edges, it's an easy weeknight dinner or appetizer.
Prep Time15 minutes mins
Cook Time6 minutes mins
Total Time21 minutes mins
Course: Appetizer
Cuisine: American
Keyword: broiled shrimp, broiled shrimp recipe
Servings: 4 people
Calories: 152kcal
Author: Tanya Harris

Equipment

  • Sheet Pan

Ingredients

  • 1 lb jumbo shrimp peeled and deveined
  • 2 teaspoons garlic paste about to 2 garlic cloves
  • 2 teaspoons Cajun seasoning
  • 2 tablespoons olive oil
  • 1 tablespoon Worcestershire sauce
  • Salt and black pepper to taste
  • Fresh lemon wedges for serving
  • Chopped parsley for garnish optional

Instructions

  • Position the rack 4-6 inches from the heat source and then turn on the broiler.
  • In a bowl, combine the garlic paste, Cajun seasoning, olive oil, and Worcestershire sauce. Add salt and black pepper to taste.
  • Add the shrimp to the bowl and toss until evenly coated with the marinade.
  • Arrange the shrimp in a single layer on a half sheet pan.
  • Broil for 6-8 minutes, flipping halfway, until the shrimp are pink, opaque, and slightly charred at the edges.
  • Remove from the oven and squeeze fresh lemon juice over the top. Top with parsley if using. Serve immediately.

Notes

  • Cajun seasoning blends vary in salt content. Always taste the marinade before adding extra salt.
  • Pat shrimp dry before marinating for better browning.
  • Don't overlap shrimp on the pan or they'll steam instead of char.

Nutrition

Calories: 152kcal | Carbohydrates: 3g | Protein: 16g | Fat: 8g | Saturated Fat: 1g | Polyunsaturated Fat: 1g | Monounsaturated Fat: 5g | Trans Fat: 0.01g | Cholesterol: 143mg | Sodium: 698mg | Potassium: 195mg | Fiber: 0.4g | Sugar: 1g | Vitamin A: 700IU | Vitamin C: 1mg | Calcium: 73mg | Iron: 1mg

December 24, 2025 by Tanya Harris 4 Comments

Black Bean Soup Recipe

black bean soup in a bowl with toppings

This black bean soup is hearty, smoky, and loaded with flavor. Made with tender black beans, smoky ham hock, and warm spices, it's the kind of cozy soup that hits the spot every time.

black bean soup in a bowl with toppings

You’ll find the full recipe with ingredient amounts and instructions in the recipe card at the bottom of this post. Be sure to check out the blog post itself for extra tips and tricks!

pic of Tanya

If you're a regular reader here, you know I love a good cozy soup with lots of flavor. That's exactly what this black bean soup is. I'm a huge fan of black beans. They're filling, flavorful, and I use them all the time. You'll find them in my Slow Cooker Black Beans, my Black Bean Salsa, and now in this soup.

This is one of those recipes I make when I want something comforting and easy. I usually make this in my pressure cooker for a quicker meal, but sometimes I let it simmer away on the stovetop until the beans get tender. The smoky ham hock gives it so much flavor, and that splash of vinegar at the end really brightens everything up.

Love, Tanya

Black Bean Soup At a Glance

  • Prep Time: 20 minutes
  • Cook Time: 45 minutes (pressure cooker) or 1 hour 30 minutes (stovetop)
  • Total Time: 1 hour (pressure cooker) or 1 hour 45 minutes (stovetop)
  • Serves: 6-8
  • Best For: Weeknight dinners, cozy lunches, meal prep

A Quick Look at The Ingredients

Ingredient amounts and full recipe instructions are on the printable recipe card at the bottom of the post.

  • Olive oil - used for sautéing the vegetables. Feel free to use any other high-heat cooking oil, like avocado oil, or even bacon fat.
  • Yellow onion, green bell pepper, garlic - diced onion and bell pepper, minced garlic form the aromatic base.
  • Ground cumin, dried oregano, salt, pepper, and bay leaves - to add seasoning to this dish.
  • Dried black beans - rinsed and picked over, no soaking needed
  • Smoked ham hock - this is what gives the soup its smoky, rich flavor. You can sub this with smoked turkey, bacon, or simply leave it out if you aren't a fan. You can add a little chipotle in adobo or smoked paprika if you want that smoky flavor with no meat.
  • Broth, water - chicken or vegetable broth both work great, combined with water to cook the beans.
  • White vinegar - added at the end to brighten the flavors
  • For serving - sour cream, chopped onion, cilantro, lime wedges.
ingredients for black bean soup

How to Make Black Bean Soup

I've added instructions for the pressure cooker and the stovetop. This recipe is so adaptable.

Step 1: Set your pressure cooker to sauté mode on high. Add the olive oil and heat until shimmering. Add the diced onion and bell pepper, and sauté for about 5 minutes until softened. Add the minced garlic, cumin, and oregano. Sauté for about 10 seconds, then turn off the sauté function.

vegetables in pressure cooker being cooked

Step 2: Add the black beans, ham hock, bay leaves, broth, and water to the pot. Stir to combine. Secure the lid and set to pressure cook on high for 45 minutes. When the time is up, allow the pressure to release naturally.

ham hock and beans and liquid in pressure cooker

Step 3. Carefully remove the ham hock and the bay leaves from the pot. Shred the meat from the bone, discarding the bone and any excess fat. Return the shredded meat to the pot. Discard the bay leaves. Using a wooden spoon, smash some of the beans against the side of the pot to create a thicker, creamier texture while keeping some beans whole.

spoon holding up black beans

Step 4. Stir in the white vinegar, then adjust the seasoning with salt and pepper to taste. Serve hot with sour cream, chopped onion, cilantro, and lime wedges.

black bean soup in bowl with spoon

Stovetop Method

Follow step 1 above, using a large pot or Dutch oven over medium-high heat instead of a pressure cooker. Add the black beans, ham hock, bay leaves, broth, and water. Bring to a boil, then reduce the heat to low. Cover and simmer for 1 hour and 30 minutes, or until beans are tender.

Stir occasionally and add more water if needed. Remove the ham hock, shred the meat, and return it to the pot. Smash some of the beans against the side of the pot for texture. Stir in the white vinegar, then adjust the seasoning with salt and pepper to taste. Serve hot with toppings.

Variations

  • Make it vegetarian by omitting the ham hock and using vegetable broth. Add a teaspoon of smoked paprika for that smoky depth you'll be missing.
  • Use different toppings, such as shredded cheese, avocado, or crushed tortilla chips.
  • Add a can of diced tomatoes or some chopped carrots and celery to the soup for extra vegetables.
  • For a thicker soup, mash more of the beans. For a thinner soup, add more broth or water.

Serving Suggestions

  • Serve this black bean soup with warm cornbread or add a side of rice to make it even more filling.
  • Top with fresh jalapeños if you like some heat.
black bean soup in bowl with linen on side

Should I Soak the Beans?

I usually skip soaking the beans, and they turn out perfectly tender using either cooking method. However, if you want to soak them, go right ahead. Soaking means your beans will cook a bit faster. If you do soak them, reduce the pressure cooking time to about 30 minutes or the stovetop time to about 1 hour.

If your beans are older, they may need a little extra time; just keep simmering until they’re tender.

Make Ahead and Storage

Store leftover black bean soup in an airtight container in the refrigerator for up to 5 days. The soup will thicken as it sits, so you may need to add a bit of broth or water when reheating. The soup can be frozen for up to 3 months.

Tanya's Top Tips

  • No need to soak the beans for either cooking method; they'll cook perfectly as is.
  • The vinegar at the end brightens the flavors, so don't skip it. You could also use lime juice or lemon. It brightens the dish.
  • When shredding the ham hock meat, watch out for small bones and remove any excess fat.
  • Hold back on extra salt until after cooking, since the ham hock and broth can be salty.

I hope you love this black bean soup recipe as much as we do. If you're looking for more hearty soup recipes, try these out:

  • Split Pea Soup with Ham - Another flavorful soup, but made with the ham bone.
  • Sausage Lentil Soup - Hearty and full of flavor, sausage and lentils are such a good combo.
  • 15 Bean Soup - If you love bean soups, this one's a must-try. I use Italian sausage to season this 15-bean soup.
  • Vegetable Beef Soup - Hearty and delicious, perfect for cold days.
black bean soup in a bowl with toppings
Print Recipe
5 from 1 vote

Black Bean Soup Recipe

This hearty black bean soup is rich, flavorful, and made with smoky ham hock for depth. The pressure cooker makes it quick and easy, while the stovetop method is just as delicious with a bit more patience. Serve with sour cream, fresh cilantro, chopped onion, and lime wedges for a complete meal.
Prep Time20 minutes mins
Cook Time45 minutes mins
Total Time1 hour hr 5 minutes mins
Course: Soup
Cuisine: American, Caribbean
Keyword: black bean soup
Servings: 6 people
Calories: 416kcal
Author: Tanya Harris

Ingredients

  • 2 Tablespoons olive oil
  • 1 large yellow onion diced
  • 1 large green bell pepper diced
  • 4-6 cloves garlic minced
  • 2 teaspoons ground cumin
  • 1 teaspoon dried oregano
  • 1 lb dried black beans rinsed and picked over
  • 1 smoked ham hock about 7.9 ounce
  • 4 cups chicken broth or vegetable
  • 2 cups water
  • 2 bay leaves
  • Salt and pepper to taste
  • 2 Tablespoons white vinegar

Instructions

Pressure Cooker Method

  • Set pressure cooker to sauté mode. Add olive oil, onion, and bell pepper. Sauté 5 minutes until softened. Add garlic, cumin, and oregano. Sauté 10 seconds, then turn off sauté function.
  • Add black beans, ham hock, bay leaves, broth, and water. Secure lid and pressure cook on high for 45 minutes. Allow natural pressure release.
  • Remove the bay leaves and discard.. Remove ham hock, shred meat, and return to pot. Smash some beans against the side of the pot for thicker texture.
  • Stir in vinegar and season with salt and pepper. Serve hot with desired toppings.

Stovetop Method

  • Heat olive oil in large pot over medium-high heat. Add onion and bell pepper. Sauté 5 minutes until softened. Add garlic, cumin, and oregano. Sauté 10 seconds.
  • Add black beans, ham hock, bay leaves, broth, and water. Bring to a boil, then reduce to low. Cover and simmer 1 hour 30 minutes until beans are tender. Stir occasionally and add water if needed.
  • Remove the bay leaves and discard. Remove ham hock, shred meat, and return to pot. Smash some beans for texture. Stir in vinegar and season with salt and pepper. Serve hot with desired toppings.

Video

Notes

  • For a vegetarian version, omit the ham hock and use vegetable broth. Add a teaspoon of smoked paprika for depth.
  • Soup keeps well in the refrigerator for up to 5 days and freezes beautifully for up to 3 months.

Nutrition

Calories: 416kcal | Carbohydrates: 51g | Protein: 26g | Fat: 13g | Saturated Fat: 3g | Polyunsaturated Fat: 2g | Monounsaturated Fat: 7g | Cholesterol: 34mg | Sodium: 1050mg | Potassium: 1305mg | Fiber: 12g | Sugar: 3g | Vitamin A: 33IU | Vitamin C: 2mg | Calcium: 128mg | Iron: 5mg

December 17, 2025 by Tanya Harris 5 Comments

Jamaican Sorrel Drink

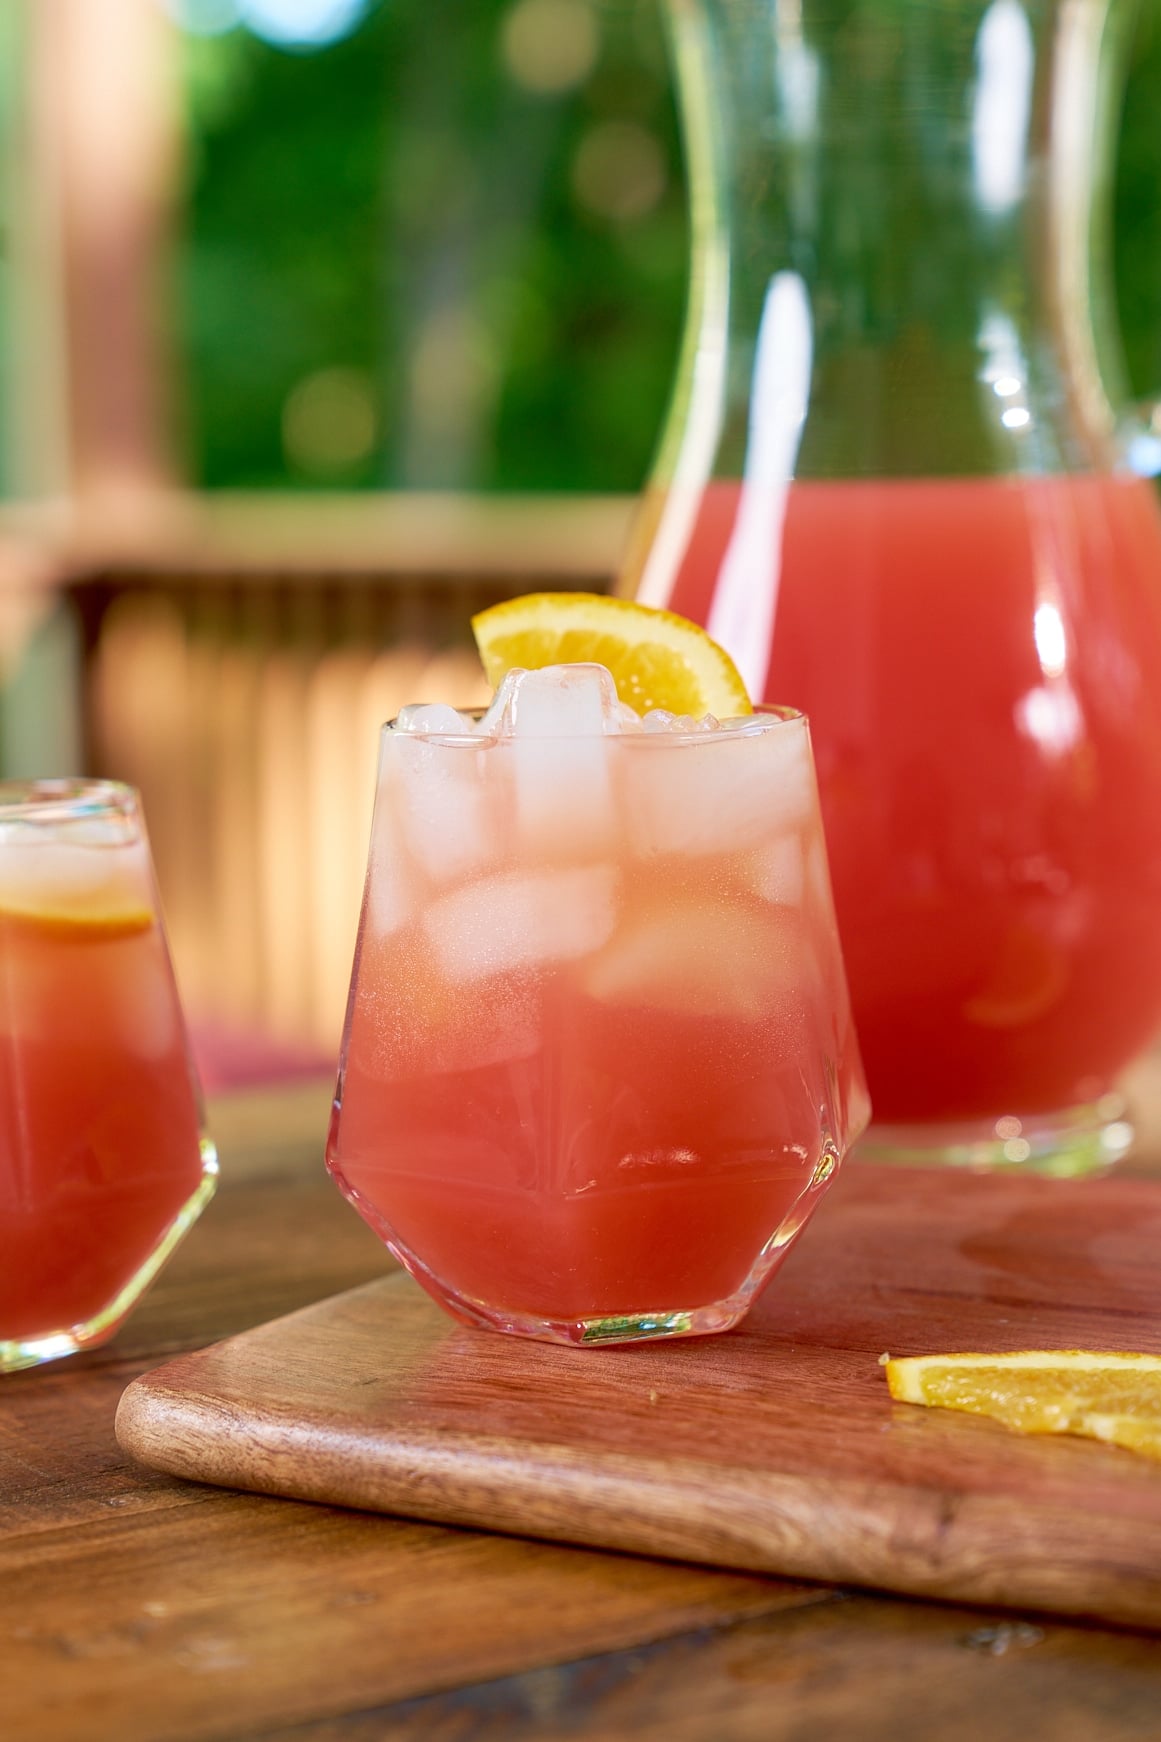
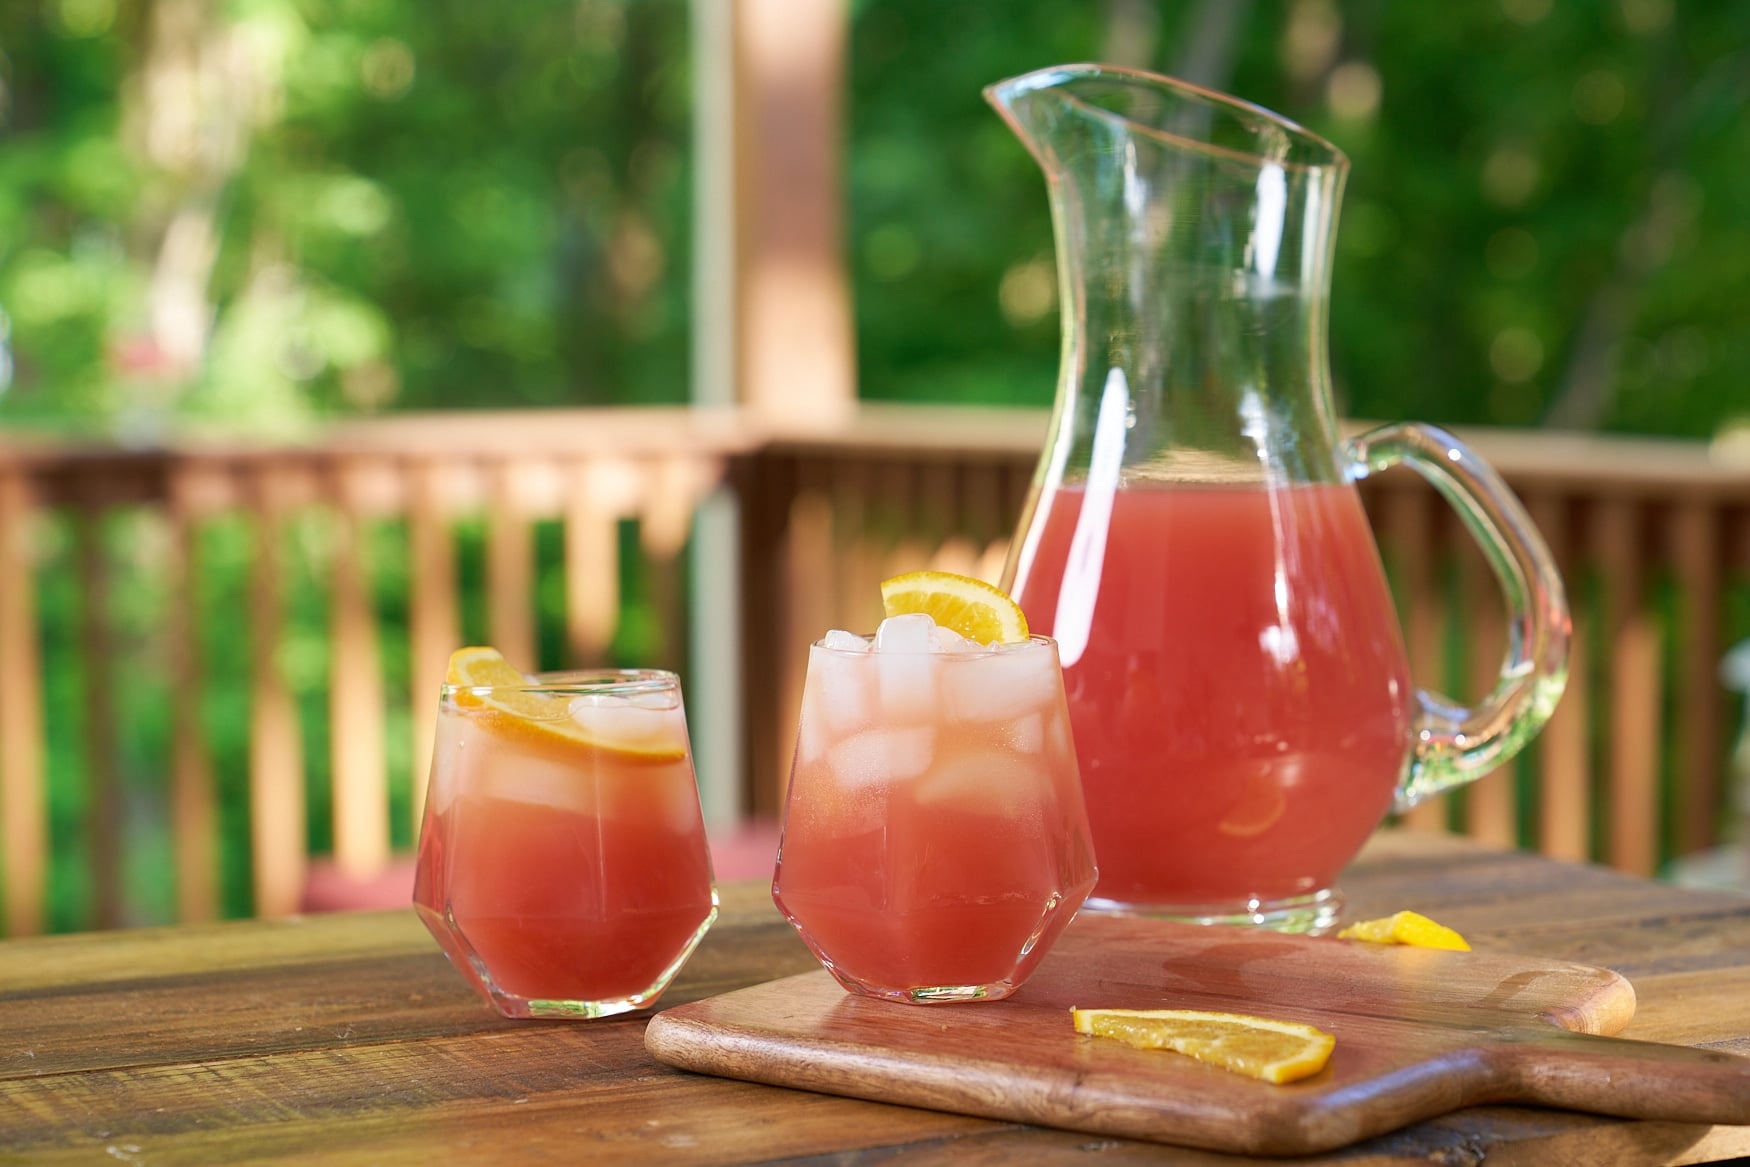
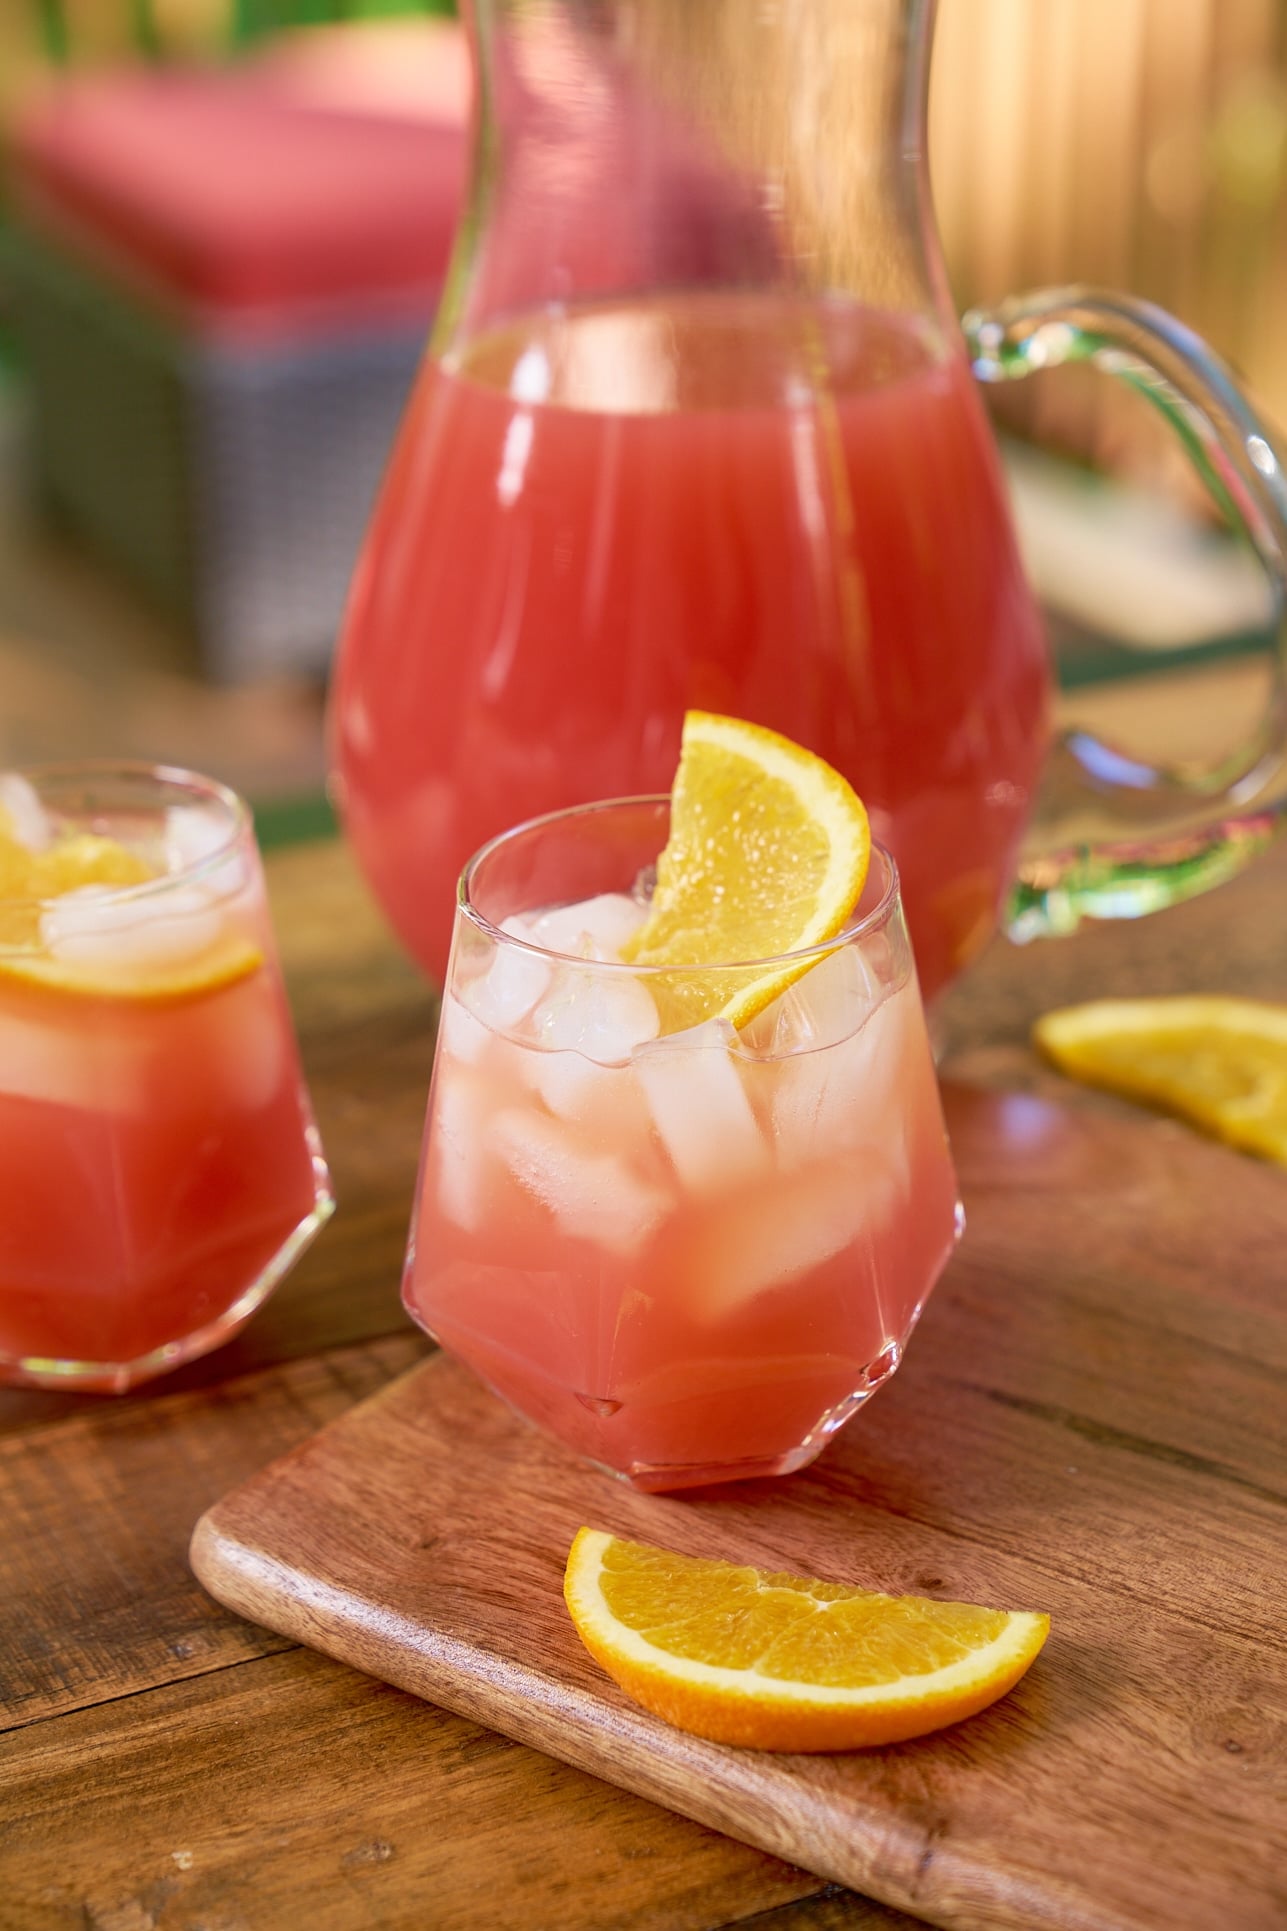
2 glasses of sorrel on a cutting board

This Jamaican sorrel drink is a Holiday staple. It's made from dried sorrel steeped with warming spices until it turns a gorgeous ruby color. The flavor is tart and slightly sweet, and I love serving it ice-cold.

2 glasses of sorrel on a cutting board

You’ll find the full recipe with ingredient amounts and instructions in the recipe card at the bottom of this post. Be sure to check out the blog post itself for extra tips and tricks!

Every Christmas morning deserves a tall glass of cold, refreshing sorrel punch. I know, it seems backward to drink a tall glass of cold anything during the winter, but this sorrel punch is a traditional drink I grew up drinking. It’s pretty much a must in any Caribbean household.

pic of Tanya

Sorrel generally involves overnight steeping of fresh or dried sorrel to release the flavors. It's pretty quick to get everything together; you just need patience in getting the herbs to steep long enough to release maximum flavor.

Initially, I made this in a pressure cooker to speed up the process, but the traditional stovetop method is best. You just gotta give it a day or 2 to get the best flavor possible. But the wait is so well worth it.

For more drink recipes, check out my Homemade Cranberry Lemonade and Slow Cooker Hot Holiday Punch.

♡, Tanya

A Quick Look at the Ingredients

  • Sorrel - These are the dried sepals of the hibiscus flower, deep red in color. I use dried sorrel, which you can find at Caribbean markets or online.
  • Ginger - Freshly grated ginger is best. It makes a real difference in the flavor, so don't skip this step.
  • Whole Spices - I use pimento seeds (allspice berries), whole cloves, and a cinnamon stick. These warm spices give the drink its signature holiday flavor. Feel free to use more or less of these, but I strongly suggest using whole spices rather than ground. Ground spices may make your drink muddy.
  • Water - The base for steeping everything together.
ingredients for sorrel on table

How to make this sorrel drink

Step 1: Wash the sorrel and ginger and drain the water. Add the sorrel, ginger, pimento seeds, cloves, and cinnamon stick to a large pot with the water and bring to a boil.

ingredients for sorrel in water on stovetop being boiled

Step 2: Remove from heat immediately and cover the pot. Let the mixture steep for at least 8 hours, or preferably overnight in the refrigerator.

Step 3: Strain the mixture and discard the solids. Sweeten with sugar to taste, stirring until fully dissolved.

sorrel being strained

Step 4: Serve chilled over ice. Store in the refrigerator for up to 2 weeks. The flavor improves after a day or two.

glass of sorrel with ice

What is sorrel?

Caribbean sorrel is also known as the Roselle plant (Hibiscus sabdariffa), which is a species of the hibiscus flower. This sorrel is not the same as the leafy green plant known as sorrel. This sorrel is bright red in color and gives dishes an amazing, deep, rich red color, perfect for Christmas!

It adds a tart and tangy flavor, similar to cranberries or pomegranate. Another popular name for this beautiful flower is "flor de jamaica."

A hand holding sorrel

You can find dried sorrel leaves in Caribbean markets or online.

There are also many well-known health benefits of sorrel, a.k.a. hibiscus. To be honest, I like to prepare and drink this year-round, not just for Christmas.

How do you serve it?

This punch is best served ice cold, so once you have made it, keep it in the fridge until you are ready to serve. Fill glasses with ice, pour the drink over it, and garnish with a fresh orange slice.

Two glasses of sorrel drink garnished with orange slices

Tanya's Top Tips

  • Use freshly grated ginger rather than pre-grated for the best flavor. Don't skip on grating the ginger, it makes a difference in the flavor.
  • If you prefer some alcohol in your holiday drinks, you can easily spike this sorrel drink. Add white rum or vodka to the pitcher or to the individual glasses before serving.
  • For a fizzy drink, I add a splash of Ginger ale to the top when serving.

More Holiday Drink Recipes

  • Jamaican Style Carrot Juice Recipe
  • Jamaican Ginger Beer
  • Jamaican Rum Punch Recipe
  • Green Sherbet Punch
  • Hot Cocoa
2 glasses of sorrel on a cutting board
Print Recipe
4.80 from 5 votes

Jamaican Sorrel Drink Recipe

This Jamaican sorrel drink is a herb infused beverage served over ice. Traditionally served during the holidays it's refreshing, easy to make and full of flavor.
Prep Time10 minutes mins
Steep Time8 hours hrs
Total Time8 hours hrs 10 minutes mins
Course: Drinks
Cuisine: Jamaican
Keyword: how to make sorrel drink, sorrel and ginger, sorrel drink
Servings: 6 drinks
Calories: 27kcal
Author: Tanya Harris

Equipment

  • Dried Sorrel

Ingredients

  • 4 Oz dried sorrel about 3 cups
  • 3 Oz ginger grated
  • 1 Tablespoon pimento seeds allspice berries
  • 1 teaspoon whole cloves
  • 1 stick cinnamon
  • 10 cups water
  • sugar to taste

Instructions

  • Wash the sorrel and ginger and drain the water. Add the sorrel, ginger, pimento seeds, cloves, and cinnamon stick to a large pot with the water and bring to a boil.
  • Remove from heat immediately and cover the pot. Let the mixture steep for at least 8 hours, or preferably overnight in the refrigerator.
  • Strain the mixture and discard the solids. Sweeten with sugar to taste, stirring until fully dissolved.
  • Serve chilled over ice. Store in the refrigerator for up to 2 weeks. The flavor improves after a day or two.

Video

Notes

  • Use freshly grated ginger rather than pre-grated for the best flavor.
  • Sweeten with brown sugar or dilute with additional water to suit your tastes.
  • I usually add about 1 cup of sugar. 

Nutrition

Calories: 27kcal | Carbohydrates: 4g | Protein: 1g | Fat: 1g | Saturated Fat: 0.1g | Polyunsaturated Fat: 0.2g | Monounsaturated Fat: 0.4g | Sodium: 23mg | Potassium: 75mg | Fiber: 1g | Sugar: 0.4g | Vitamin A: 456IU | Vitamin C: 10mg | Calcium: 25mg | Iron: 1mg

This post was originally published September 14, 2020. It has been updated with new photos and information.
December 15, 2025 by Tanya Harris 7 Comments

Easy Creamy Broccoli Cheddar Soup Recipe

spoon picking up soup from bowl

This homemade broccoli cheddar soup is thick, creamy, and ready in about 45 minutes. A touch of nutmeg and thyme round out the flavors, and it tastes just like the restaurant version I've been ordering for years.

broccoli cheddar soup 1

You’ll find the full recipe with ingredient amounts and instructions in the recipe card at the bottom of this post. Be sure to check out the blog post itself for extra tips and tricks!

I've been on a mission lately to up my culinary skills, and one of the things I'm most proud of is learning to make my own soups from scratch. I love a roux soup to keep me cozy, especially during the colder months. There's something about mastering that butter and flour base that makes you feel like a real cook.

pic of Tanya

Broccoli and cheddar soup is something I’ve always ordered at restaurants, and I was so glad when I finally decided to make it at home. After making my Cream of Mushroom Soup and loving the roux technique, I knew I had to tackle broccoli cheddar next. Creamy soups might be my favorite.

I also make my own Homemade Chicken Broth now, which is perfect for recipes like this.

The best part about this recipe is how it comes together in under an hour and tastes better than anything you’d get at a chain restaurant.

♡, Tanya

Broccoli Cheddar Soup At a Glance

  • Prep Time: 15 minutes
  • Cook Time: 30 minutes
  • Total Time: 45 minutes
  • Serves: 6
  • Best For: Weeknight dinners, cozy lunches, meal prep

A Quick Look at The Ingredients You'll Need

  • Butter and all-purpose flour - The foundation of your roux. Use unsalted butter so you can control the salt level. All-purpose flour works with the butter to create the roux that thickens your soup.
  • Onion, celery, carrot - This aromatic trio adds depth and a subtle sweetness to the soup base.
  • Garlic - Use 2 to 4 cloves, depending on how much you love garlic. Or more, it's your soup, and I honestly think there are no rules when it comes to how much garlic to add.
  • Broccoli - Fresh or frozen works here. I chop the stems separately from the florets since the stems need more cooking time. If you're looking for more ways to use broccoli, try my Air Fryer Broccoli or Oven Baked Broccoli.
  • Chicken or vegetable broth - The liquid base of your soup. Use homemade or store-bought.
  • Heavy cream - This is what makes the soup rich and creamy.
  • Sharp cheddar cheese - Grate it fresh from a block for the best melting quality and flavor.
  • Dried thyme, ground nutmeg, salt, and pepper - For seasoning the soup.
ingredients for broccoli cheddar soup on table

How to Make Broccoli Cheddar Soup

Step 1: Melt the butter in a large pot or Dutch oven over medium-low heat. Add the onion, celery, carrot, garlic, and a pinch of salt. Cook gently, stirring occasionally, until the vegetables are soft and translucent, about 6 to 8 minutes. You want them soft, not browned.

vegetables cooking in butter in pot

Step 2: Add the chopped broccoli stems and cook for 3 to 4 minutes, stirring occasionally, until the stems begin to soften.

Step 3: Sprinkle the flour evenly over the vegetables. Stir well to coat everything, then cook for 2 to 3 minutes, stirring constantly, to cook out the raw flour taste. This is your roux.

Step 4: Gradually whisk in the broth, stirring constantly to prevent lumps from forming. Bring the mixture to a simmer.

Step 5: Add the broccoli florets and thyme to the pot. Bring to a simmer and simmer gently, uncovered, until all vegetables are completely tender, about 8 to 10 minutes. If using frozen broccoli, this may take slightly less time.

broccoli and vegetables covered in broth in pot

Step 6: Remove the pot from the heat and carefully puree the soup to your desired consistency. For a perfectly smooth soup, puree all of it; for a chunkier soup, puree only half and leave the rest with texture.

pureed broccoli cheddar soup in pot

Step 7: Return the soup to the pot if you used a blender, and stir in the heavy cream. Add the grated cheddar cheese in small handfuls, stirring after each addition until all the cheese is melted and the soup is smooth and creamy.

Step 8: Taste and adjust seasoning with salt and pepper. Add the nutmeg.

broccoli cheddar soup being picked up with spoon

Variations

  • Make it chunky: If you prefer a chunkier soup with visible broccoli pieces, only puree half of the soup and leave the rest with texture.
  • Add protein: Stir in shredded rotisserie chicken or crispy bacon bits for a heartier meal.
  • Use different cheese: Try a combination of sharp cheddar and gruyere for a more complex flavor, or add a bit of parmesan for extra depth.
  • Spice it up: Add a pinch of cayenne pepper or red pepper flakes for a slight kick.
  • Make it vegetarian: Use vegetable broth instead of chicken broth.

Serving Suggestions

This soup is a meal on its own, but it goes great with crusty bread for dipping. A simple side salad makes a nice contrast to the richness of the soup. You can also serve it in bread bowls for an extra special presentation. That may be next on my list of culinary skills to attempt.
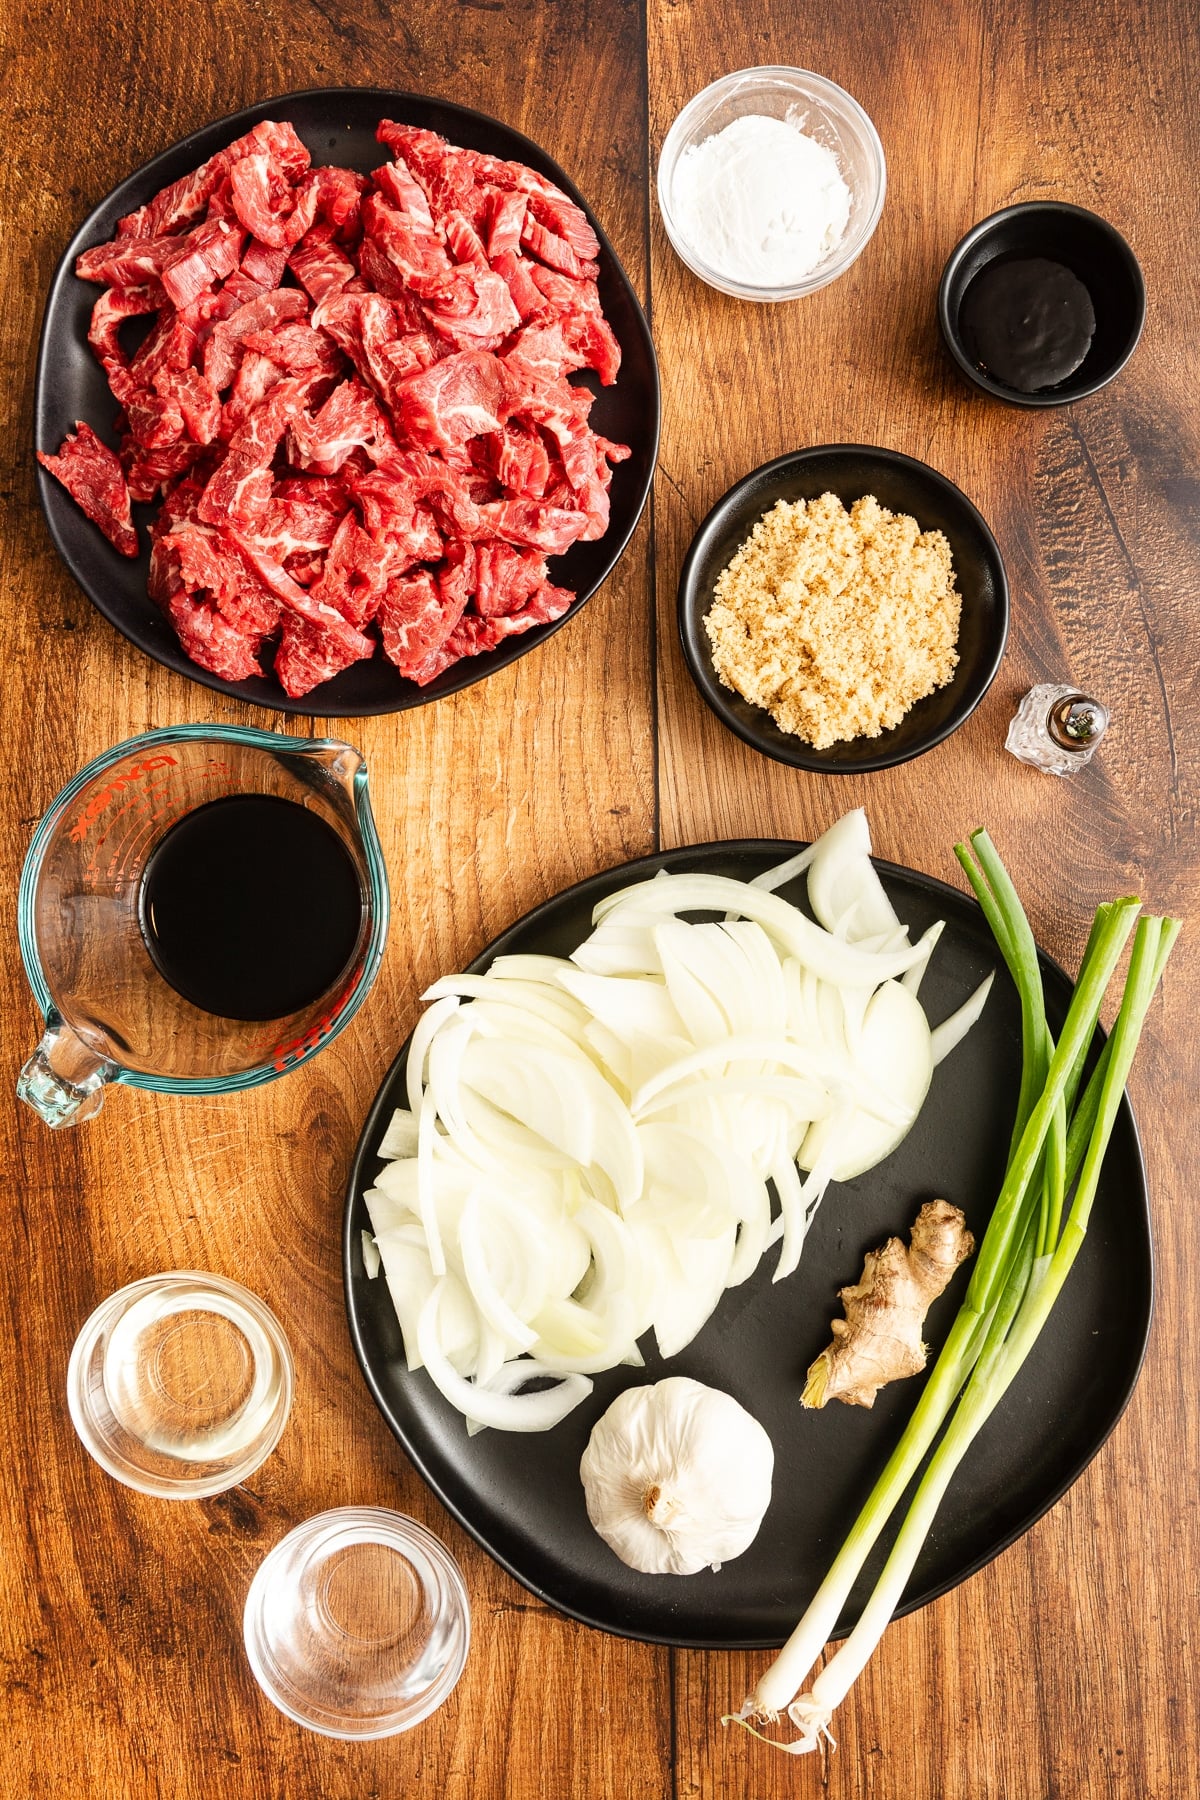
For a complete comfort food meal, pair it with Air Fryer Biscuits, mayonnaise biscuits, or a grilled cheese sandwich.

Can I Make This Soup Ahead or Freeze It?

This soup tastes even better the next day. Store it in an airtight container in the refrigerator for up to 4 days. Reheat gently on the stovetop, adding a splash of broth or cream if it's too thick.

You can freeze this soup for up to 2 months. When ready to serve, reheat it slowly on the stovetop from frozen, whisking frequently as it thaws and warms. This helps keep the texture smooth and prevents the dairy from separating.

Troubleshooting: Why Did My Soup Turn Out Grainy?

If your soup turned out grainy, it's usually because the cheese was added when the soup was too hot, causing the proteins to seize up. Always remove the soup from direct heat before adding the cheese, and add it gradually while stirring. Using freshly grated cheese from a block rather than pre-shredded cheese also helps, since pre-shredded cheese contains anti-caking agents that can affect texture.

Tanya's Top Tips for the Best Broccoli Cheddar Soup

  • Don't rush the roux: Take your time cooking the flour with the vegetables for a few minutes. This cooks out the raw flour taste and ensures your soup won't have a pasty flavor.
  • Use block cheese: Pre-shredded cheese contains anti-caking agents that can make your soup grainy. Grate your own cheese from a block for the smoothest, creamiest results.
  • Control the thickness: If your soup is too thick, thin it out with a bit more broth or cream. If it's too thin, let it simmer a bit longer or make a small additional roux with a tablespoon each of butter and flour, then whisk it into the soup.
  • Season as you go: Add salt at the beginning when cooking the vegetables to help them release moisture and soften properly. Taste and adjust the seasoning again at the end.
  • Save some florets: If you like texture in your soup, reserve a handful of small florets to stir in after blending for some nice bites of broccoli.
spoon picking up soup from bowl

If you make this Broccoli Cheddar Soup, I'd love to hear how it turned out! Leave a comment below and let me know what you think.

spoon picking up soup from bowl
Print Recipe
5 from 2 votes

Creamy Broccoli Cheddar Soup

A creamy, comforting broccoli cheddar soup made with a classic roux base. This recipe features the beloved combination of sharp cheddar and tender broccoli, elevated with warm nutmeg and freshly ground black pepper for aromatic depth.
Prep Time15 minutes mins
Cook Time30 minutes mins
Total Time45 minutes mins
Course: Soup
Cuisine: American
Keyword: broccoli cheddar soup
Servings: 6 people
Calories: 274kcal
Author: Tanya Harris

Ingredients

  • 4 tablespoons unsalted butter
  • 1 medium onion chopped
  • 1 stalk celery chopped
  • 1 medium carrot chopped
  • 2 to 4 garlic cloves chopped
  • 4 cups broccoli fresh or frozen (stems chopped, florets cut into bite-sized pieces, and stems separated from florets)
  • 4 tablespoons all-purpose flour
  • 4 cups chicken or vegetable broth
  • ½ cup heavy cream
  • 1 cup sharp cheddar cheese grated (plus extra for garnish)
  • 1 teaspoon dried thyme
  • ¼ teaspoon ground nutmeg
  • Salt and pepper to taste

Instructions

  • Melt the butter in a large pot or Dutch oven over medium-low heat. Add the onion, celery, carrot, and garlic. Add a pinch of salt. Cook gently, stirring occasionally, until the vegetables are soft and translucent, about 6 to 8 minutes. The goal is to soften without browning.
  • Add the chopped broccoli stems and cook for 3 to 4 minutes, stirring occasionally, until the stems begin to soften.
  • Sprinkle the flour evenly over the vegetables. Stir well to coat everything, then cook for 2 to 3 minutes, stirring constantly, to cook out the raw flour taste.
  • Gradually whisk in the broth, stirring constantly to prevent lumps from forming. Bring the mixture to a simmer.
  • Add the broccoli florets and thyme to the pot. Bring to a simmer and simmer gently, uncovered, until all vegetables are completely tender, about 8 to 10 minutes. If using frozen broccoli, this may take slightly less time.
  • Remove the pot from the heat and carefully puree the soup in batches in a blender until silky smooth, allowing steam to escape from the lid. Or use an immersion blender. You can also puree the soup to your desired consistency.
  • Return the soup to the pot (if using a blender) and stir in the heavy cream. Add the grated cheddar cheese in small handfuls, stirring after each addition until all the cheese is melted and the soup is smooth and creamy.
  • Stir in the nutmeg and season with salt and pepper to taste.
  • Ladle the hot soup into bowls. Garnish with extra shredded cheddar cheese or a sprinkle of fresh thyme leaves if desired.

Notes

  • Store leftover soup in an airtight container in the refrigerator for up to 4 days. Reheat gently on the stovetop, adding a splash of broth or cream if needed to thin the soup.
  • Always remove the soup from the heat before adding the cheese and add it gradually while stirring to prevent the cheese from becoming grainy. Use freshly grated cheese from a block for the best results.

Nutrition

Calories: 274kcal | Carbohydrates: 13g | Protein: 9g | Fat: 22g | Saturated Fat: 13g | Polyunsaturated Fat: 1g | Monounsaturated Fat: 5g | Trans Fat: 0.3g | Cholesterol: 64mg | Sodium: 748mg | Potassium: 337mg | Fiber: 2g | Sugar: 4g | Vitamin A: 2817IU | Vitamin C: 55mg | Calcium: 198mg | Iron: 1mg
  • « Previous Page
  • 1
  • …
  • 3
  • 4
  • 5
  • 6
  • 7
  • …
  • 73
  • Next Page »
tanya holding bowl and mixing

Welcome!

Welcome to My Forking Life! Hi, I'm Tanya, an attorney, busy wife and mom, and lover of quick, easy, and delicious meals.

More about me

Popular Recipes

  • Jamaican Oxtails Recipe
  • brown stew chicken in pan
    Brown Stew Chicken
  • Air fryer fried chicken on a white platter
    Air Fryer Fried Chicken
  • Jamaican Instant Pot Rice and Beans

Holiday Favorites

  • sweet potato pie on a plate
    Southern Sweet Potato Pie Recipe
  • spoon lifting gravy out of gravy dish
    Easy Recipe for Gravy without Drippings
  • Stirring the giblet gravy with a spoon.
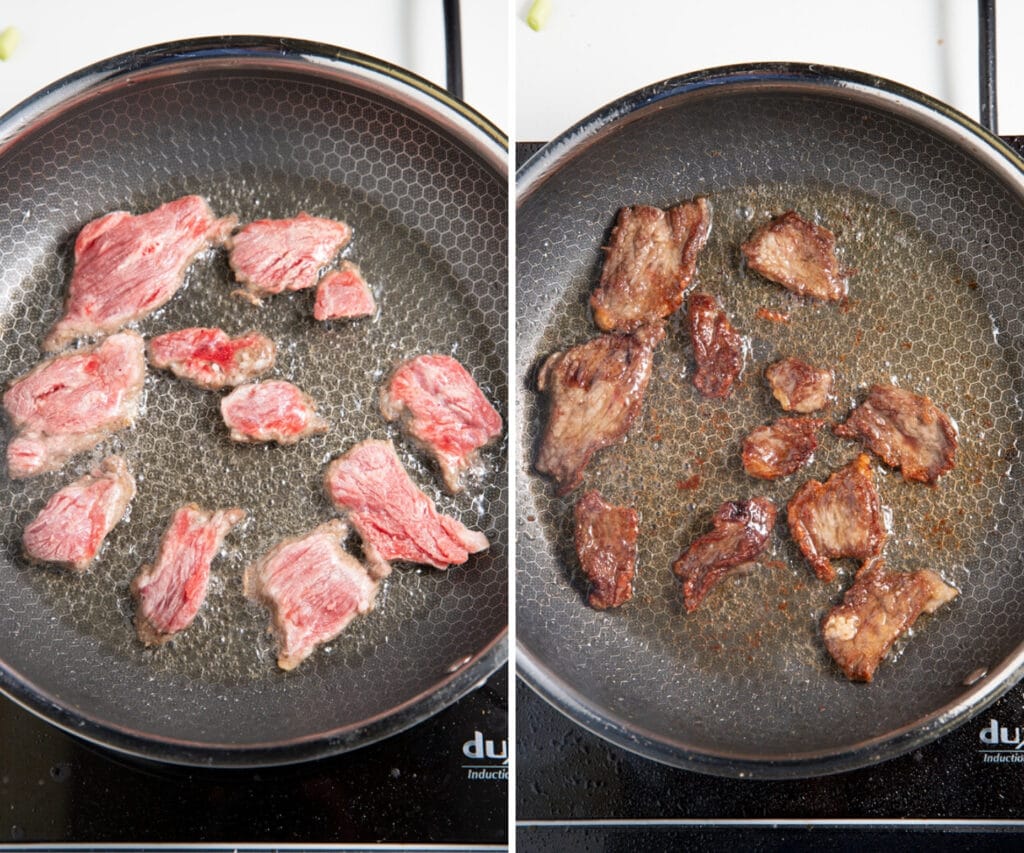
    Grandma's Giblet Gravy Recipe
  • creamy baked macaroni and cheese, the best baked macaroni and cheese, creamy mac and cheese
    Creamy Baked Macaroni and Cheese
as seen on...various online websites text listed

Footer

↑ back to top
  • Privacy Policy
  • Contact
  • About Tanya

As an Amazon Associate, I earn from qualifying purchases.
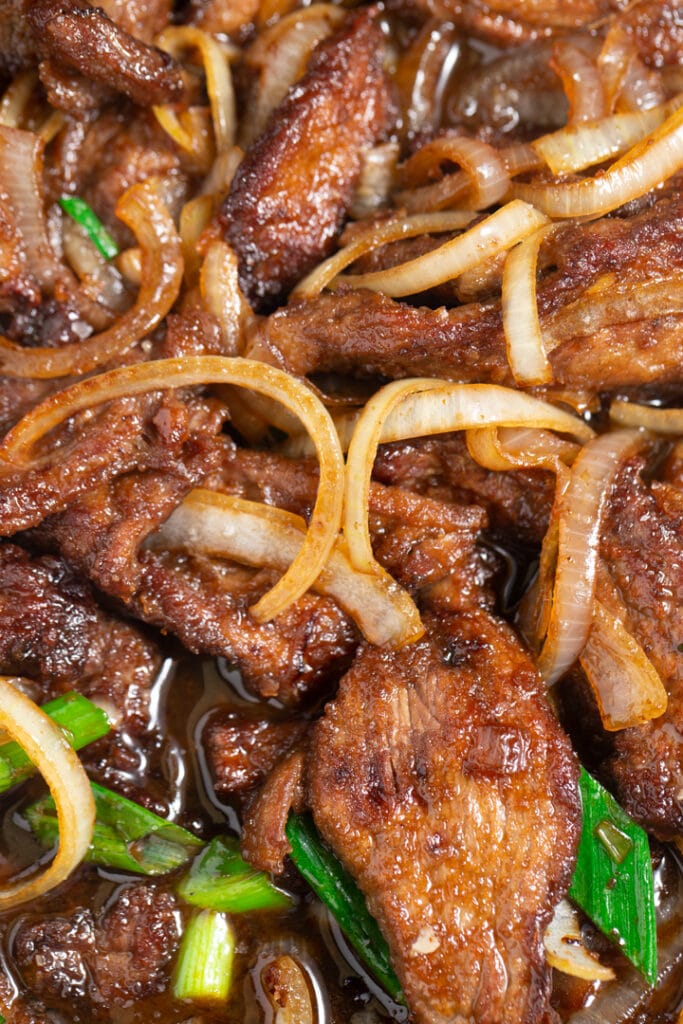
Copyright © 2026 My Forking Life

Rate This Recipe

Your vote:


Let us know what you thought of this recipe:

This worked exactly as written, thanks!
My family loved this!
Thank you for sharing this recipe

Or write in your own words:

A rating is required
A name is required
An email is required