These delicious and easy Air Fryer Steak Kebabs are made in your Air Fryer with little effort. Marinated steak and delicious air fried vegetables make this air fryer recipe a family favorite.
This post contains affiliate links, please read my full disclaimer here.
Full Recipe/Instructions are available in the
recipe card at the bottom of the post.
You can find important tips/tricks in the
blog post.
It’s cold outside but I still get to make air fryer steak kebabs without using an outdoor grill. Thanks to my Air Fryer, I get to have kebabs year round.
My favorite type of kebab are these steak kebabs. Steak in the air fryer is an all time favorite of mine so steak kebabs just seemed appropriate.
Can you make steak in an Air Fryer?
Yes, yes, and yes. This Perfect Air Fryer Steak recipe is one of our favorite ways to prepare steak. Following the same methods I used in that recipe, I was able to prepare perfect steak kebabs/skewers.
How to make steak kebabs/skewers in an Air Fryer?
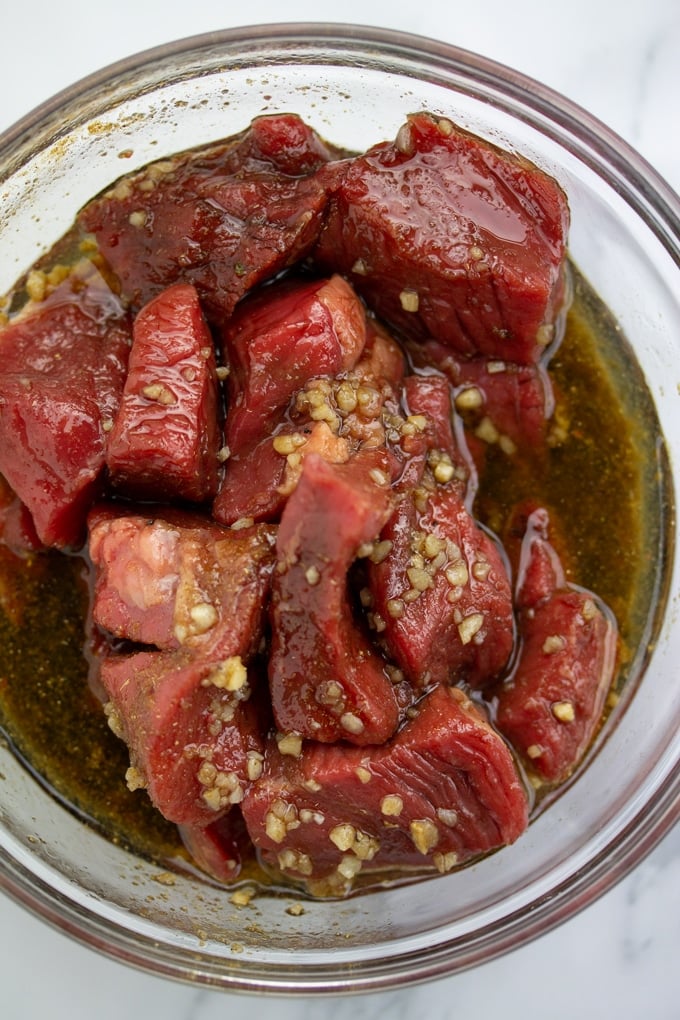
First, you'll start by marinating your steak. I use sirloin steak that has been cut into 1 inch cubes. I try my hardest to make sure all the steak is about the same size so it cooks evenly.
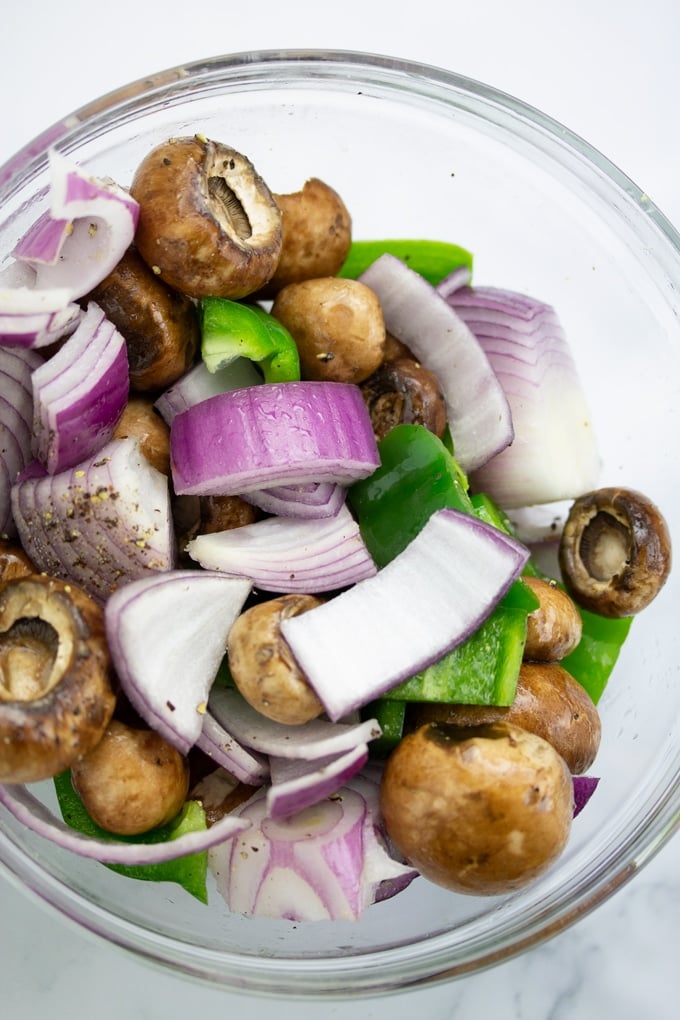
Then you will prepare your vegetables by chopping your onions, peppers, and cleaning those super dirty mushrooms. I then toss them in a bowl with some olive oil and I sprinkle a little bit of salt and fresh cracked black pepper over them.
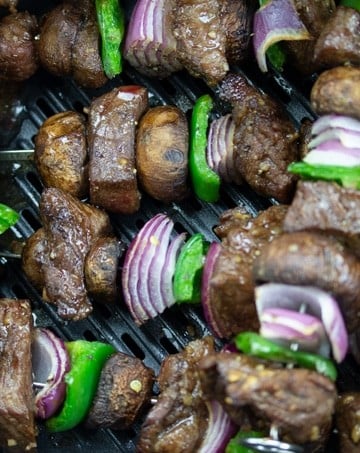
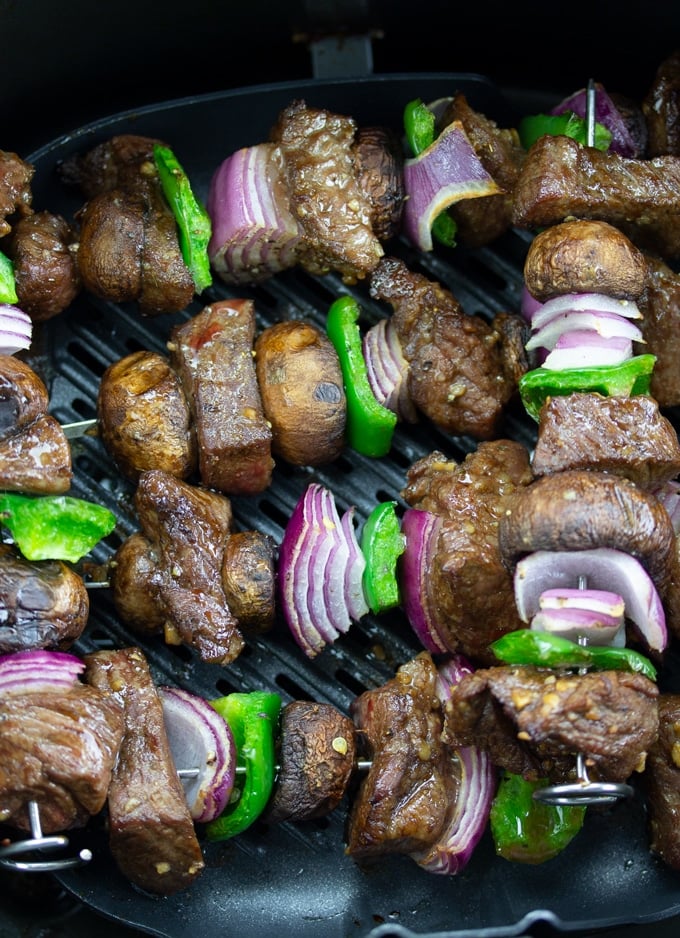
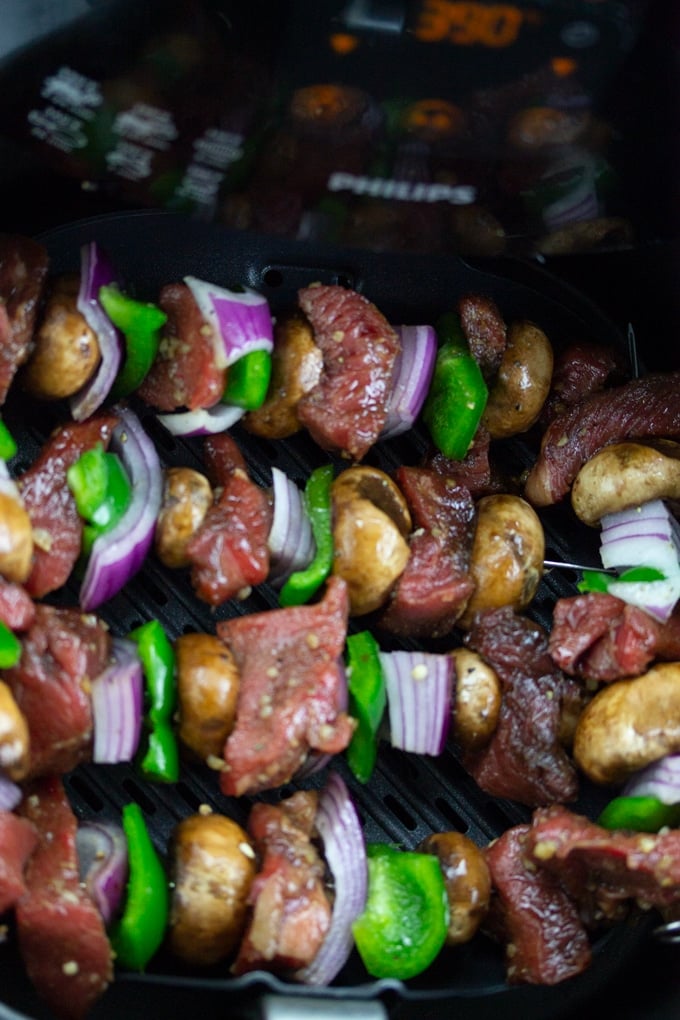
Grab your skewers and start placing your kebabs on. I use metal skewers that came with this air fryer kit. They are reusable and fit right inside my Air Fryer. You could use wooden skewers but you would want to soak them first so that they don't burn. Here's a
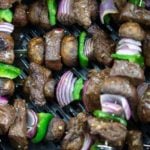
Once the meat and vegetables are placed on your skewers, place them in your preheated Air Fryer of 390 degrees Fahrenheit. I usually can fit about 6 kebabs on my Air Fryer. I cook my kebabs for 12 minutes, flipping them halfway through.
What is the best meat and vegetables to use for my kebabs?
I suggest using top sirloin for these steak kebabs. It’s a cheaper cut but stays juicy after marinating and air frying.
For the vegetables, I've included my favorites in this recipe but you could definetly sub for your favorites. I'm thinking zucchini, pearl onions, and colored bell peppers would be great.
I hope you enjoy this Air Fryer Steak Kebab recipe as much as we do. Until next time.
Looking for more fun Air Fryer Recipes? Try these out:
- Air Fryer Sweet and Spicy Brussel Sprouts
- Air Fryer Avocado Egg Rolls
- Air Fryer Sweet & Spicy Bacon Wrapped Chicken Bites
- Air Fryer Jamaican Jerk Pork
Air Fryer Steak Kebabs
Ingredients
- 1 lb sirloin steak cut into 1 inch chunks
- ¼ cup olive oil
- ¼ cup soy sauce
- 1 Tablespoon garlic minced
- 1 teaspoon brown sugar
- ½ teaspoon ground cumin
- ¼ teaspoon black pepper
- 8 oz Baby Bella mushrooms stems removed
- 1 red onion chopped into 1 inch pieces
- 1 Green Bell Pepper chopped into 1 inch pieces
- salt and pepper to taste
Instructions
- Combine steak, olive oil, soy sauce, garlic, brown sugar, cumin, salt and black pepper. Allow to marinate for 30 minutes.
- Place marinated meat, baby bella mushrooms, green pepper, and red onion on skewers.
- Preheat air fryer to 390 degrees Fahrenheit. Once preheated, place skewers inside of Air fryer. Cook for 10-12 minutes, flipping halfway.
- Remove and Enjoy:)
Video
Notes
- 125°F for rare
- 135°F for medium rare
- 145°F for medium
- 150°F for medium well