My Forking Life

  • Air Fryer
  • Jamaican
  • Entree
  • Browse Recipes
  • Breakfast
  • Side Dishes
  • About
menu icon
go to homepage
  • Air Fryer
  • Jamaican
  • Entree
  • Browse Recipes
  • Breakfast
  • Side Dishes
  • About
search icon
Homepage link
  • Air Fryer
  • Jamaican
  • Entree
  • Browse Recipes
  • Breakfast
  • Side Dishes
  • About
×
Home

February 2, 2021 by Tanya Harris 100 Comments

The Best Air Fryer Lamb Chops

air fryer lamb chops in the air fryer basket covered with chimichurri sauce

Cook the most perfect of lamb chops in minutes with your trusty air fryer! Marinated in red wine vinegar and herbs, the chops come out perfectly cooked and tender. Ready to serve in 15 minutes!

Six cooked lamb chops on a white plate.

This post contains affiliate links, please read my full disclaimer here.

You’ll find the full recipe with ingredient amounts and instructions in the recipe card at the bottom of this post. Be sure to check out the blog post itself for extra tips and tricks!

Lamb is one of my favorite meats! It has a robust taste that is slightly gamey and grassy and makes a welcome change from beef or chicken.

When cooked in the air fryer, these lamb chops are so succulent and have a nice crust to them. They come out perfectly cooked and I love that they are ready to serve in minutes!

If you love lamb, be sure to try my Pan-Seared Lamb Chops with Garlic Rosemary Butter or my Moroccan Soup!

How to make air fryer lamb chops

  • Combine lamb chops, olive oil, red wine vinegar, rosemary, oregano, salt, garlic powder, and black pepper in a bowl. Rub the marinade into the meat and cover and chill for 1 hour.
Raw lamb chops in the marinade.
  • Preheat air fryer to 400 degrees Fahrenheit.
  • Add lamb chops to the air fryer basket.
Raw lamb chops placed in the air fryer basket.
  • Cook for 7-9 minutes, flipping halfway.
Cooked lamb chops in the air fryer basket.
  • Serve them as is or cover them with this delicious homemade chimichurri sauce.
Close up of the cooked lamb chops in the air fryer with chimicurri sauce on it.

How do you know when the lamb is cooked?

Cooking the lamb chops in the air fryer will take between 7 and 9 minutes. The easiest way to make sure it is cooked to your liking is to use an Instant read thermometer. At 120F they will be rare, 130F is medium and over 145F is well done.

When cooked past medium, the gamey flavor of the lamb becomes more pronounced.

How long can you marinate the lamb?

Lamb chops are fairly tender, and because we use red wine vinegar in the marinade, they don't need to be prepped too far ahead of time. I find an hour of marinating works perfectly, but you can leave them for up to 5 hours. If you leave them longer than that, the acid can start to break down the fibers too much and your lamb can turn out tough.

What so you serve with them?

These air fried lamb chops are perfect to serve as a quick and easy weeknight meal, but fancy enough to serve to guests and they make for an excellent Easter meal. They are great with all kinds of veggie and potato sides. Try them with:

  • Creamy Mashed Potatoes
  • Sautéed Beet Greens
  • Air Fried Carrots
Lamb chops on a white plate with the end cut off.

Recipe Notes and Tips

  • The temperature of the lamb should reach an internal temperature of 145 degrees Fahrenheit for medium-well.
  • The cut of lamb makes a difference in the gaminess of the lamb. Lamb Leg Chops will have less of a gamey flavor but they usually are more expensive.
  • This lamb recipe is great accompanied with a homemade chimichurri sauce.

More Air Fryer Recipes

  • Seasoned Air Fryer Asparagus
  • Air Fryer Grilled Cheese
  • Crispy Air Fryer Bacon
  • Air Fryer Crab Legs
air fryer lamb chops in the air fryer basket covered with chimichurri sauce
Print Recipe
4.82 from 88 votes

The Best Air Fryer Lamb Chops

Cook the most perfect of lamb chops in minutes with your trusty air fryer! Marinaded in red wine vinegar and herbs, the chops come out perfectly cooked and tender.
Prep Time5 minutes mins
Cook Time8 minutes mins
Marinating time1 hour hr
Total Time13 minutes mins
Course: Main Course
Cuisine: American
Keyword: air fried lamb recipe, how to cook lamb chops. inan air fryer, quick lamb chop recipe
Servings: 4 servings
Calories: 350kcal
Author: Tanya Harris

Ingredients

  • 1.5 lbs lamb chops lamb loin chops or lamb leg chops

Marinade

  • 2 Tablespoon olive oil
  • 1 Tablespoon red wine vinegar
  • 1 teaspoon dried rosemary
  • ½ teaspoon dried oregano
  • ½ teaspoon kosher salt
  • ½ teaspoon garlic powder
  • ¼ teaspoon black pepper

Instructions

  • Combine lamb chops, olive oil, red wine vinegar, rosemary, oregano, salt, garlic powder, and black pepper in a bowl. Rub the marinade into the meat and cover and chill for 1 hour.
  • Preheat air fryer to 400 degrees Fahrenheit.
  • Add lamb chops to the air fryer basket and cook for 7-9 minutes, flipping halfway.

Video

Notes

  • The temperature of the lamb should reach an internal temperature of 145 degrees Fahrenheit for medium-well.
  • The cut of lamb makes a difference in the gaminess of the lamb. Lamb Leg Chops will have less of a gamey flavor but they usually are more expensive.
  • This lamb recipe is great accompanied with a homemade chimichurri sauce.

Nutrition

Calories: 350kcal | Carbohydrates: 1g | Protein: 42g | Fat: 19g | Saturated Fat: 6g | Cholesterol: 129mg | Sodium: 391mg | Potassium: 547mg | Fiber: 1g | Sugar: 1g | Vitamin A: 6IU | Vitamin C: 1mg | Calcium: 25mg | Iron: 4mg

February 2, 2021 by Tanya Harris 2 Comments

Chimichurri Sauce

This easy to make Argentinean chimichurri sauce is a great accompaniment to red meats like steak and lamb and it takes minutes to make at home.

Chimichurri served in a white bowl with a wooden spoon.

You’ll find the full recipe with ingredient amounts and instructions in the recipe card at the bottom of this post. Be sure to check out the blog post itself for extra tips and tricks!

This chimichurri sauce is a quick and easy way to add a burst of flavor to your meals.

Made with a blend of herbs and spices, it's fresh and bold in flavor and it takes minutes to make.

This is perfect sauce to top on steak, chicken, lamb chops, and even this rice recipe. Or use it like a marinade, like I did in my chimichurri chicken recipe.

How to make chimichurri sauce

Finely chop parsley, cilantro, and garlic cloves or add these ingredients to a mini food processor until finely chopped.

The ingredients in a blender.
The ingredients blended.

Add to a medium-sized bowl.

Add extra virgin olive oil, red wine vinegar, salt, red chili flakes, and black pepper and stir to combine. Serve and enjoy.

Green chimichurri in a white bowl ready to serve.

How do you serve it?

Traditionally, this Argentinean chimichurri is served as a condiment on top of grilled steaks, and it's also great with lamb. You don't need to stop there, though! It's great to use as a topping for a burger, whole roasted fish, drizzled over pizza, or even added to a pasta salad!

How long does it keep?

Because we use fresh herbs in this sauce, it doesn't have a super long shelf life. It will keep well, covered in the fridge for 2 to 3 days. If you want to make a larger batch, it freezes really well and will keep well for up to 3 months.

Recipe Variations

This is a fairly traditional chimichurri recipe, and it's a classic for a reason, it's so tasty! We use a mix of parsley and cilantro to make it, but if you don't like cilantro, you can make it with all parsley. Red wine vinegar can be swapped for white wine or apple cider vinegar if that's what you have. You can also increase or decrease the amount of chili flakes added to suit your taste.

Close up of a wooden spoon in the green herb sauce.

Recipe Notes and Tips

  • It's quick and easy to make this sauce in a food processor, but you can easily finely chop everything by hand if you prefer.
  • Make sure your herbs are super fresh for the best flavor.
  • Use extra virgin olive oil rather than regular or light for this recipe.

More Sauce Recipes

  • Homemade BBQ Sauce
  • Peruvian Green Sauce (Aji Verde)
  • Homemade Remoulade Sauce
  • Cranberry Sauce
Green chimichurri in a white bowl ready to serve.
Print Recipe
5 from 1 vote

Chimichurri Sauce

This easy to make Argentinean chimichurri sauce is a great accompaniment to red meats like steak and lamb and it takes minutes to make at home in a blender.
Prep Time5 minutes mins
Total Time5 minutes mins
Course: Condiment
Cuisine: South American
Keyword: Argentinean chimichurri sauce, blender chimichurri sauce, how to make chimichurri, sauce for steak
Servings: 4 servings
Calories: 171kcal
Author: Tanya Harris

Ingredients

  • 1 cup chopped fresh flat-leaf parsley
  • ½ cup chopped fresh cilantro
  • 4 garlic cloves
  • ⅓ cup extra virgin olive oil
  • 2 Tablespoon red wine vinegar
  • ½ teaspoon Kosher salt
  • ¼ teaspoon red chili flakes
  • ⅛ teaspoon black pepper

Instructions

  • Finely chop parsley, cilantro, and garlic cloves or add these ingredients to a mini food processor until finely chopped. Add to a medium-sized bowl.
  • Add extra virgin olive oil, red wine vinegar, salt, red chili flakes, and black pepper and stir to combine. Serve and enjoy.

Video

Notes

  • Chimichurri sauce is on lamb and steaks.
  • It's quick and easy to make this sauce in a food processor, but you can easily finely chop everything by hand if you prefer.
  • Make sure your herbs are super fresh for the best flavor.
  • Use extra virgin olive oil rather than regular or light for this recipe.

Nutrition

Calories: 171kcal | Carbohydrates: 2g | Protein: 1g | Fat: 18g | Saturated Fat: 3g | Sodium: 304mg | Potassium: 112mg | Fiber: 1g | Sugar: 1g | Vitamin A: 1436IU | Vitamin C: 21mg | Calcium: 29mg | Iron: 1mg

January 21, 2021 by Tanya Harris 8 Comments

Red Velvet Cheesecake (Pressure Cooker Recipe)

red velvet cheesecake on black plate

This delicious red velvet cheesecake is a wonderful treat for Valentine's Day, or any time of the year! Flavored with cocoa powder with a ginger cookie crust, this pressure cooker cheesecake comes out wonderfully light and fluffy.

A slice of red velvet cheesecake with the end cut off with a fork.

This post contains affiliate links, please read my full disclaimer here.

You’ll find the full recipe with ingredient amounts and instructions in the recipe card at the bottom of this post. Be sure to check out the blog post itself for extra tips and tricks!

Do you have any plans for Valentine's Day? We are pretty low key on the day, but that doesn't mean I won't be enjoying this delicious red dessert!

This red velvet cheesecake is all kinds of delicious. It has a decadent and rich chocolate flavor and the ginger snap crust is to die for.

This cheesecake recipe is cooked in the Instant Pot and is totally foolproof. This method ensures the fluffiest and creamiest cheesecake you'll ever make!

For more cheesecake recipes, be sure to try my Instant Pot Carrot Cake Cheesecake!

How to make a red velvet cheesecake

  • Gather your ingredients.
Ingredients to make the cheesecake.
  • Place cookie crumbs, sugar, and unsalted butter in a medium sized bowl and stir until combined.
The ingredinets for the crust mixed together.
  • Place in the bottom of a greased 7 inch springform pan. Set aside.
The cheesecake crust in a springform pan.
  • Place cream cheese, granulated sugar, and salt in a large bowl. Using a hand mixer, beat the cream cheese and sugar on medium speed until combined. Add sour cream, egg, vanilla extract, and vinegar and beat on medium speed until well blended. Remove about ¼ cup of the batter mixture and set aside.
The cake batter mixed together.
  • Add cocoa powder and food coloring to the bowl and beat until incorporated.
The red cake batter in a glass bowl.
  • Pour this mixture into the prepared springform pan and smooth the top.
  • Place the ¼ cup of set aside batter mixture on top of the cheesecake.
Four dollops of white batter on the red cake.
  • Create a swirl with a chopstick or toothpick.
The white batter swirled into the red cake.
  • Cover springform pan with foil paper.
  • Add 1 cup of water to Instant Pot. Add cake to Instant Pot on trivet or bakeware sling.
  • Cover and cook on high pressure for 35 minutes, allowing for natural release for 10 minutes.
The ccheesecake wrapped with foil in a pressure cooker.
  • Remove cake and allow to cool on the counter, then transfer to the fridge. Refrigerate 2-24 hours, the longer the better.
Overhead view of the red and white cheesecake.

How do you stop the cheesecake from cracking?

Cheesecakes can crack for two main reasons.

  1. If the cake batter is over mixed, this can cause cracking. If you whip too much air into it, the cake can rise and then collapse, causing the cracks.
  2. Cheesecakes also crack when the cool too quickly, so be sure to naturally release the pressure in your Instant Pot rather than a quick release.

How long does it keep?

Once your cheesecake has cooled in the fridge, cover it loosely with plastic wrap or foil. It's best within the first couple of days, but will keep well for 4 to 5.

Can you freeze it?

Yes, cheesecake freezes well, and you can freeze it in slices or whole. If freezing whole, I like to keep it in the springform pan. Wrap several times in plastic wrap and foil and it will keep for up to a month. For individual slices, it's best to freeze them solid on a baking sheet before wrapping and placing in a container or freezer bag.

Thaw frozen cheesecake in the fridge overnight before enjoying.

Side view of the red velvet cheesecake.

Recipe Notes and Tips

  • Take care not to over mix the batter.
  • Natural release the pressure for the Instant Pot so that the cheesecake doesn't cool too quickly.

More Pressure Cooker Recipes

  • Instant Pot Carrot Cake Cheesecake
  • Instant Pot Chocolate Molten Cake Bites
  • Pressure Cooker Lemon Curd
  • Instant Pot Rice Pudding
red velvet cheesecake on black plate
Print Recipe
5 from 4 votes

Red Velvet Cheesecake

This delicious red velvet cheesecake is a wonderful treat for Valentine's Day, or any time of the year!
Prep Time15 minutes mins
Cook Time35 minutes mins
Natural release10 minutes mins
Total Time1 hour hr
Course: Dessert
Cuisine: American
Keyword: instant pot cheesecake, pressure cooker cheesecake, velentines day cheesecake
Servings: 8 servings
Calories: 381kcal
Author: Tanya Harris

Ingredients

Crust

  • ¾ cups ginger cookie crumbs crushed in a food processor
  • 1 Tablespoon sugar
  • 3 Tablespoon unsalted butter

Filling

  • 2 8 oz packs cream cheese softened
  • ¾ cup granulated sugar
  • ¼ teaspoon salt
  • ¼ cup sour cream
  • 1 large egg
  • 1 ½ teaspoon vanilla extract
  • 1 teaspoon distilled vinegar
  • 2 Tablespoon cocoa powder
  • 2 oz red food coloring

Instructions

Prepare the crust

  • Place cookie crumbs, sugar, and unsalted butter in a medium sized bowl and stir until combined. Place in the bottom of a greased 7 inch springform pan. Set aside.

Prepare the filling

  • Place cream cheese, granulated sugar, and salt in a large bowl. Using a hand mixer, eat the cream cheese and sugar on medium speed until combined. Add sour cream, egg, vanilla extract, and vinegar and beat on medium speed until well blended. Remove about ¼ cup of the batter mixture and set aside.
  • Add cocoa powder and food coloring to the bowl and beat until incorporated. Pour this mixture into the prepared springform pan and smooth the top.
  • Place the ¼ cup of set aside batter mixture on top of the cheesecake and create a swirl with a chopstick or toothpick.
  • Cover springform pan with foil paper.
  • Add 1 cup of water to Instant Pot. Add cake to Instant Pot on trivet or bakeware sling.
  • Cook on high pressure for 35 minutes, allowing for natural release for 10 minutes.
  • Remove cake and allow to cool on the counter, then transfer to the fridge. Refrigerate 2-24 hours, the longer the better.

Notes

  • Take care not to over mix the batter.
  • Natural release the pressure for the Instant Pot so that the cheesecake doesn't cool too quickly.

Nutrition

Calories: 381kcal | Carbohydrates: 32g | Protein: 5g | Fat: 27g | Saturated Fat: 15g | Cholesterol: 98mg | Sodium: 322mg | Potassium: 152mg | Fiber: 1g | Sugar: 24g | Vitamin A: 967IU | Calcium: 78mg | Iron: 1mg

January 19, 2021 by Tanya Harris 6 Comments

Air Fryer Grilled Cheese (3 Ways)

grilled cheese sandwich in basket

Level up your grilled cheese game with your trusty air fryer, the results are out of this world and you will have the best grilled cheese on your hands in minutes. Choose from classic cheddar cheese, garlic butter grilled cheese or a BLT!

A grilled cheese cut in half.

This post contains affiliate links, please read my full disclaimer here.

You’ll find the full recipe with ingredient amounts and instructions in the recipe card at the bottom of this post. Be sure to check out the blog post itself for extra tips and tricks!

Grilled cheese is one of my favorite things in the world, and I know I am not alone!

This air fryer grilled cheese recipe is one of the most popular in my kitchen, and let me tell you, once you make them like this, you will never cook them on the stovetop again!

The toast is so perfectly crisp and the cheese is melted all the way through, the hardest thing is choosing which sandwich to make!

If you love these, be sure to try my Breakfast Sandwiches and Garlic Butter Cheese Steak Sandwiches!

How to make air fryer grilled cheese

Cheddar Cheese or Garlic Butter Grilled Cheese

Preheat the air fryer to 360 degrees Fahrenheit. Place mayonnaise, butter, or garlic butter on one side of each side of the bread. Place cheese on the side of bread that does not have mayo or butter. Put the sides of bread with cheese on it together. Place in the preheated air fryer basket and cook for 3 minutes.

A grilled cheese in the air fryer basket before being cooked.

Open the air fryer basket, flip, and cook for an additional 2 minutes or until the bread is toasty and the cheese has melted.

The grilled cheese in an air fryer basket.

Remove from air fryer and enjoy.

A grilled cheese sandwich on a white plate cut into two triangles.

BLT Grilled Cheese

Preheat the air fryer to 360 degrees Fahrenheit. Place mayonnaise or butter on one side of each side of the bread. Place cheese on the side of bread that does not have mayo.

Lay the bread on top of each other in a way that they are partially covered. This will make it easier to open the bread to add the remaining ingredients.

Once slice of bread on top of cheese on a piece of bread in an air fryer.

Cook for 3 minutes. Open the sandwich and place bacon, tomato, and lettuce in the sandwich. Close the sandwich and flip the sandwich and cook for 2 minutes or until the bread is toasty.

A BLT grilled cheese sandwich in the air fryer.

Do you use mayo or butter for grilled cheese?

You can use either butter or mayo for your grilled cheese. I prefer to use mayonnaise and if you haven't tried it yet, you must! The egg in the mayo helps to get the outside of the sandwich super crispy. It also has a higher heat point so you can easily get all the cheese melted without burning the outside. Butter also works well for this recipe. The garlic butter grilled cheese is one of my favorites.

What do you serve it with?

A grilled cheese is perfect for literally any occasion! This air fryer recipe is a great go to for a quick and tasty lunch. You can easily make it into a fuller meal by serving it with a side of fries and tomato soup.

Variations

A grilled cheese is so easy to make your own! These three recipes are always my go-to, but you can easily add in other ingredients that you have. Mix up your cheeses, or try adding in some shredded bbq chicken or thinly sliced steak.

A BLT grilled cheese cut in half on a wooden chopping board.

Recipe Notes and Tips

You can use whatever bread you prefer for your grilled cheese. If using sliced sourdough bread, you may need an additional minute or two to get the nice golden crust.

More Air Fryer Recipes

  • Crispy Air Fryer Bacon
  • Air Fryer Crab Legs
  • Easy Air Fryer Pizza
  • Air Fryer Crispy Fried Shrimp
  • Air Fryer Calzones
A grilled cheese cut in half.
Print Recipe
5 from 1 vote

Air Fryer Grilled Cheese (3 Ways)

Level up your grilled cheese game with your trusty air fryer, the results are out of this world and you will have the best grilled cheese on your hands in minutes.
Prep Time5 minutes mins
Cook Time5 minutes mins
Total Time10 minutes mins
Course: Sandwich
Cuisine: American
Keyword: Air fried grilled cheese, BLT grilled cheese, how to make grilled cheese in an air fryer
Servings: 1 grilled cheese
Calories: 365kcal
Author: Tanya Harris

Equipment

  • Large Air Fryer

Ingredients

Cheddar Cheese Grilled Cheese

  • 2 Slices of white bread
  • 2 slices of cheddar cheese
  • 1 Tablespoon mayonnaise or butter

Garlic Butter Grilled Cheese

  • 2 slices of white bread
  • 1 slices of provolone
  • 1 slices of mozzarella
  • 1 Tablespoon garlic herb butter

BLT Grilled Cheese

  • 2 slices of white bread
  • 2 slices of cheddar cheddar cheese
  • 2 Slices of thick cut bacon cooked
  • 1 Roma tomato sliced thinly
  • 1 lettuce
  • 2 Tablespoon mayonnaise or butter

Instructions

For Cheddar Cheese and Garlic Butter Grilled Cheese

  • Preheat the air fryer to 360 degrees Fahrenheit. Place mayonnaise or butter on one side of each side of the bread. Place cheese on the side of bread that does not have mayo. Put the bread together. Place in the preheated air fryer basket and cook for 3 minutes. Open the air fryer basket, flip, and cook for an additional 2 minutes or until the bread is toasty and the cheese has melted.

BLT Grilled Cheese

  • Preheat the air fryer to 360 degrees Fahrenheit. Place mayonnaise or butter on one side of each side of the bread. Place cheese on the side of bread that does not have mayo. Lay the bread on top of each other in a way that they are partially covered. This will make it easier to open the bread to add the remaining ingredients. Cook for 3 minutes. Open the sandwich and place bacon, tomato, and lettuce in the sandwich. Flip the sandwich and cook for 2 minutes or until the bread is toasty.

Video

Notes

  • You can use whatever bread you prefer for your grilled cheese. If using sliced sourdough bread, you may need an additional minute or two to get the nice golden crust.
  • Nutritional values are for one cheddar cheese grilled cheese sandwich.

Nutrition

Calories: 365kcal | Carbohydrates: 25g | Protein: 13g | Fat: 23g | Saturated Fat: 9g | Cholesterol: 42mg | Sodium: 546mg | Potassium: 58mg | Fiber: 1g | Sugar: 3g | Vitamin A: 341IU | Calcium: 375mg | Iron: 2mg

January 12, 2021 by Tanya Harris 3 Comments

Pressure Cooker (Instant Pot) BBQ Chicken

Shredded BBQ chicken being picked up with tongs.

It's so quick and easy to make a batch of shredded BBQ chicken in your pressure cooker. You just need four ingredients and it's ready to enjoy in less than 30 minutes!

Shredded BBQ chicken being picked up with tongs.

This post contains affiliate links, please read my full disclaimer here.

You’ll find the full recipe with ingredient amounts and instructions in the recipe card at the bottom of this post. Be sure to check out the blog post itself for extra tips and tricks!

Time to grab you Instant Pot and make the most delicious pulled BBQ chicken for all your sandwich needs! This pressure cooker BBQ chicken is a true dump and go recipe and it results in the most flavorful shredded chicken.

This is a great go to BBQ chicken recipe when you are running short on time and have hungry mouths to feed!

For more BBQ recipes, be sure to try my BBQ Ribs and Sticky Chicken Legs!

How to make pressure cooker BBQ chicken

  • Gather your ingredients.
The ingredients for the recipe ready to use.
  • Place chicken, chicken broth, and bbq seasoning in pressure cooker insert.
The chicken and other ingredients in the Instant Pot ready to cook.
  • Close and cook high pressure for 14 min.
  • After the 14 minutes, allow the pressure cooker to naturally release for 10 min. Quick release any remaining pressure.
The chicken in the pressure cooker after cooking.
  • Remove chicken and place in a large bowl and shred.
Shredded chicken in a white bowl.
  • Add bbq sauce and serve how you like.
BBQ sauce being stirred into the shredded chicken.

What's the best cut of chicken to use?

I find the best shredded BBQ chicken is made with a mixture breast and thighs for optimal texture and flavor. The thighs contain more fat to keep the chicken nice and juicy, as well as having a deeper flavor. You can use one or the other if you choose. Use skinless and boneless chicken so that it is easy to shred.

What's the best BBQ sauce to use?

You can use your favorite BBQ sauce for this recipe. If you are following a low carb or keto diet, use a sugar free sauce. If you have time, be sure to whip up a batch of my tangy BBQ sauce, otherwise your go to store bought bottle will work just great.

As far as the seasoning to use in this recipe, my homemade bbq seasoning is perfect.

Can you make it ahead of time?

This pressure cooker BBQ chicken is great for meal prep and freezer meals.

Refrigerate: Make the recipe and let the chicken cool to room temperature. Place it in an airtight container and it will keep well in the fridge for up to 4 days.

Freeze: Make the recipe and let the chicken cool to room temperature. Place it in a ziplock bag, removing as much air as possible. It will keep well frozen for up to 3 months. Defrost in the fridge overnight before reheating.

Reheat the chicken on the stovetop on a medium heat, stirring occasionally until heated through.

BBQ shredded chicken served in a bun.

Recipe Notes and Tips

  • The chicken needs to be naturally released from pressure. Do not quick release until after 10 minutes.
  • This is great to use as sandwiches, over rice, on pizza, and so much more.
  • Do not add the bbq sauce to the pressure cooker while it is pressure cooking.

More Instant Pot Recipes

  • Instant Pot Chili
  • Creamy Instant Pot Chicken Tacos
  • Pressure Cooker Rice Pudding
  • Hearty Instant Pot Vegetable Soup
Close up of pressure cooker BBQ chicken served in a burger bun.
Print Recipe
5 from 2 votes

Pressure Cooker BBQ Chicken

It's so quick and easy to make a batch of shredded BBQ chicken in your pressure cooker. You just need four ingredients and it's ready to enjoy in less than 30 minutes!
Prep Time5 minutes mins
Cook Time14 minutes mins
Release pressure10 minutes mins
Total Time29 minutes mins
Course: Main Course
Cuisine: American
Keyword: BBQ pulled chicken, how to make shredded chicken, Instant Pot shredded chicken
Servings: 6 servings
Calories: 465kcal
Author: Tanya Harris

Ingredients

  • 2 lbs boneless and skinless chicken ½ chicken breast, ½ chicken thighs
  • 1 cup chicken broth
  • 2 Tablespoon bbq seasoning
  • 1.5 cup bbq sauce

Instructions

  • Place chicken, chicken broth, and bbq seasoning in pressure cooker insert.
  • Close and cook high pressure for 14 min.
  • After the 14 minutes, allow the pressure cooker to naturally release for 10 min. Quick release any remaining pressure.
  • Remove chicken and place in a large bowl and shred. Add bbq sauce and serve how you like.

Notes

  • I prefer to use a combo of chicken breast and thighs for this recipe for optimal texture and flavor. You can use one or the other if you choose.
  • This is great to use as sandwiches, over rice, on pizza, and so much more.
  • Do not add the bbq sauce to the pressure cooker while it is pressure cooking.

Nutrition

Calories: 465kcal | Carbohydrates: 33g | Protein: 29g | Fat: 24g | Saturated Fat: 7g | Cholesterol: 113mg | Sodium: 985mg | Potassium: 517mg | Fiber: 1g | Sugar: 24g | Vitamin A: 502IU | Vitamin C: 6mg | Calcium: 92mg | Iron: 4mg

January 7, 2021 by Tanya Harris Leave a Comment

Winter Fruit Salad

orange juice being poured over fruit salad

This easy and delicious winter fruit salad recipe is the perfect side dish for breakfast, brunch, or an easy snack. Made with an array of fruits that are in season in the winter and tossed in a delicious orange and honey dressing. 

white bowl with fruit salad inside of it with spoon sticking out in corner

This post contains affiliate links, please read my full disclaimer here.

You’ll find the full recipe with ingredient amounts and instructions in the recipe card at the bottom of this post. Be sure to check out the blog post itself for extra tips and tricks!

Brrr, it’s cold outside. And the only thing I can truly appreciate about this weather are the cute clothes, hot chocolate, and this healthy winter salad. Ha.

All jokes aside, this salad is so easy you’ll want to make it weekly. It’s perfect for a small gathering or simply for meal prep. Just make the salad ahead of time and enjoy. 

How to Make a Winter Fruit Salad

Gather some of your favorite fruit that is in season in Winter and peel and chop them (except the apples, keep the skin on). Buying fruit that is in season will be cheaper and the quality will be much better. 

ingredient photo of apples, clementines, kiwi, promegranate seeds, honey, orange juice, and mint leaves

I opted for apples, kiwi, clementines, and pomegranate seeds. I also added some copped mint for an added burst of flavor. 

Place the cut fruit in a large bowl. 

various fruits in white bowl in rows

Prepare the dressing by combining orange juice and honey in a small bowl and whisking until combined. Pour the dressing over the fruit and toss until combined.

Fun fact, the citric acid, in the orange juice, will allow your apples to avoid turning brown for a couple of days. 

orange juice being poured over fruit salad

And there you have it, an easy, really easy, winter fruit salad. 

winter fruit salad in a white bowl with a honey pot and fruit surrounding it

Looking for more brunch recipes? Try these out:

  • Zucchini Muffins
  • Homemade Biscuits
  • Million Dollar Bacon
  • Banana Fritters

Watch this video tutorial and see how I make this Winter Fruit Salad from start to finish.

orange juice being poured over fruit salad
Print Recipe
5 from 1 vote

Winter Fruit Salad

This easy and delicious winter fruit salad is the perfect side dish for breakfast, brunch, or an easy snack. Made with an array of fruits that are in season in the winter and tossed in a delicious orange and honey dressing.
Prep Time10 minutes mins
Cook Time0 minutes mins
0 minutes mins
Total Time10 minutes mins
Course: Breakfast
Cuisine: American
Keyword: fruit salad, winter fruit salad
Servings: 6 people
Calories: 101kcal
Author: Tanya Harris

Ingredients

  • 2 large apples chopped, honey crisp preferred
  • 2 kiwi fruit peeled and chopped
  • 2 clementines peeled and separated
  • 1 cup pomegranate seeds
  • 2 Tablespoon mint leaves finely chopped
  • ¼ cup orange juice
  • 1 Tablespoon honey

Instructions

  • Place fruit and mint leaves in a large bowl.
  • In a separate small bowl, add orange juice and honey and whisk until combined. Pour over fruit and toss until combined.

Video

Notes

  • This salad can be made up to 3 days ahead. Any longer than that and your fruit may get too soft and your apples will start to brown. You’ll want to store this in an airtight container if making ahead.
  • The flavors in this salad will get stronger overtime, especially the mint. 

Nutrition

Calories: 101kcal | Carbohydrates: 25g | Protein: 1g | Fat: 1g | Saturated Fat: 1g | Sodium: 3mg | Potassium: 298mg | Fiber: 4g | Sugar: 19g | Vitamin A: 151IU | Vitamin C: 51mg | Calcium: 28mg | Iron: 1mg

January 4, 2021 by Tanya Harris 60 Comments

Air Fryer Basket vs Air Fryer Toaster Oven, Side by Side

side by side of chicken wings in basket and air fryer tray

Many people have either an air fryer basket or an air fryer toaster oven and wonder how they can adapt recipes created for the basket to work in the oven. This blog post will provide you with a step-by-step breakdown of cooking in the basket vs the air fryer toaster oven. 

french fries in air fryer basket on left, french fries in air fryer oven tray on right

As a collector of air fryers...Really, I couldn’t stop myself from buying shiny new models. I found myself wondering what the difference was between the air fryer basket and the air fryer oven. The apparent difference is that one is larger than the other (the ovens typically provide more cooking space). Another difference was that baskets provided a nice little handle that allowed me to shake my food. But what about the actual food? Did they produce different results?

I took some time to note how three of my popular recipes performed in each machine. I chose to make and take note of the following recipes:

  1. Frozen French Fries  
  2. Air Fryer Apple Chips
  3. Air Fryer Chicken Wings

Things you should know beforehand:

All air fryer brands are not created the same, so the two I used could have different results from the ones you may have at home. However, your cook times shouldn’t be much different than mine. 

For the basket, I used the Cosori 5.8qt and for the oven, I used the Instant Omni Plus Air Fryer Toaster Oven. 

For the first round of the air fryer basket vs air fryer toaster oven, let's start with frozen French fries...

Air Fryer French Fries

fries in air fryer basket on left and fries in air fryer tray for oven on right

These air fryer French fries are the reason I bought an air fryer in the first place. I used frozen French fries for this side-by-side comparison. I typically air fry French fries anywhere from 8-12 minutes, depending on the type of fries and how thickly cut they are. 

Amount: .75 lbs of frozen shoestring French fries.

Preheat:  Both the basket and the oven were preheated at 400 degrees Fahrenheit for 5 minutes. Then, each was cooked at 400 degrees Fahrenheit until it reached the desired crispiness. 

  • Basket: The basket took 8 minutes to cook until it reached the desired crispiness. 
  • Oven: The oven took 13 minutes to cook until the desired crispness was achieved.
cooked french fries on 2 white plates, with the text basket on left, the text oven on right
 
  • Winner: The basket, by a little...as it cooked a few minutes faster. 

Air Fryer Apple Chips

cooked apple slices in air fryer basket on left and apple slices in air fryer tray for oven on right

These Air Fryer Apple Chips are another quick favorite snack for my girls and me. It’s just one way I can make them get that apple a day to keep the doctor away. I used 1 Gala apple for this recipe.  

Amount: 1 large Gala apple sliced into 2.5mm slices.

Preheat: None. I start apple chips from a cold basket. My air fryer oven does an automatic preheat time, so I adjusted the oven cook time to accommodate that. 

  • Basket: Cooked for 16 minutes to reach desired crispiness. 
  • Oven: Cooked for 17 minutes to reach the desired crispiness.
2 white plates with cooked apple chips, text that says basket on left and text that says oven on right

Winner: The oven, by a little. My husband said the ones in the oven tasted crispier. I thought they were the same. I’d say it’s a tie and with only a one-minute difference, I’d prefer to do these in the oven since there is more space.

Air Fryer Chicken Wings

These Air Fryer Chicken Wings are one of my all-time favorite things to make in the air fryer. So easy, crispy, and delicious. I cooked these wings without added seasonings to show the comparison.  

cooked chicken wings in air freyr basket on left, cooked chicken wings in air fryer oven tray on right

Amount: 1.83 lbs of chicken wings placed in each device. 

Preheat: I preheated each machine to 400°F for 5 minutes before adding the wings.

  • Basket: Took 27 minutes to get the desired color and crispiness on these wings.
  • Oven: It took 38 minutes to achieve the desired color and crispiness on these wings. Please note that the wings in the photo above, on the right, show the oven wings pulled at 27 minutes. They were much lighter than the wings in the basket, so I added them back in until they were a deeper brown.  
2 white plates with cooked chicken wings, text that says basket on left, text that says oven on right.

Winner: The basket. The wings were done much faster. However, once I increased the time on the oven wings, I could not tell a difference.

Conclusions:

  • Whether it’s the air fryer basket or the air fryer oven, both will cook faster than a conventional oven. An air fryer basket and oven typically take 5 minutes to preheat.  
  • The air fryer basket tends to cook foods a little faster than the air fryer oven, and the cooking time will vary between machines and types of food being cooked. 
  • The air fryer oven can hold more food. Although not pictured here, we use our air fryer oven to make pizza in the air fryer. We’re only able to fit one small-sized pizza in the air fryer basket. With the oven, we can fit two pan-sized pizzas side by side. 
  • When converting recipes created for an air fryer basket to an air fryer oven, plan to cook the recipes for a slightly longer time. As each air fryer is different, keep a close eye on the food. You can watch the food in the oven as it cooks, so you don't overcook it.

I hope you found this side by side comparison helpful. If you’re looking for more helpful articles about air frying, check out these articles:

  • Air Fryer Tips
  • Easy Beginner Air Fryer Recipes
  • Top 10 Accessories for Air Fryers

December 21, 2020 by Tanya Harris 7 Comments

11 Delicious Air Fryer Breakfast Recipes

biscuits in an air fryer basket

Breakfast is the most important meal of the day and I love when it is quick and easy. That's where my Air Fryer comes in. I have so many amazing Air Fryer breakfast recipes here on My Forking Life. I wanted to compile them into an roundup post to make your meal planning a little easier!

Air Fryer Recipes, Tips, and More!!

Subscribe to get my exclusive Air Fryer newsletter and receive my 5 part Air Fryer Companion Guide!

    I won't send you spam. You can also unsubscribe at any time.

    Air Fryer Breakfast Recipes

    Air Fryer Breakfast Bakery Recipes

    blueberry biscuits on white plate with other biscuits in background

    Blueberry Biscuits

    These sweet biscuits are loaded with blueberries and drizzled with a delicious glaze. Super easy to make and you just need a handful of simple ingredients.

    biscuits in an air fryer basket

    Homemade Air Fryer Biscuits

    Not a fan of blueberries or looking to make biscuits and gravy? These Homemade Air Fryer Biscuits are so quick and easy to make and they come out perfect every single time! Wonderfully fluffy, these traditional biscuits are a great make-ahead side.

    air frter donuts on a plate

    Flaky Air Fryer Donuts

    These puff pastry air fryer donuts are wonderfully flaky and delicious! They are so quick and easy to make in the air fryer and require just 5 ingredients. Be warned, they are going to disappear quickly!

    bagels on the plate

    Easy Homemade Bagel Recipe

    These Easy Homemade Bagels are so easy yet delicious. Made with only 3 ingredients, this bagel has a nice outer crust and soft inside, this is the only bagel recipe you’ll ever need.

    Air Fryer Breakfast Meat Recipes

    Image for How to Cook Livermush

    How to Cook Livermush

    If you haven’t tried this classic North Carolina dish, now is the time! Livermush is such a flavorful dish and it’s so quick to cook and it’s great for hearty breakfasts and weekend brunches. I promise you it will be your new favorite!

    cooked bacon in air fryer basket

    Crispy Air Fryer Bacon

    Get the most perfect crispy bacon every single time with your trusty air fryer! So easy and quick to make with no mess and an excellent addition to any breakfast!

    Air Fryer Egg Recipes

    Image for Air Fryer Egg Frittata

    Air Fryer Egg Frittata

    This Air Fryer Egg Frittata recipe is the easiest  way to make a delicious breakfast frittata in your Air Fryer. It’s loaded with veggies and tons of flavor. It’s the perfect Air Fryer Breakfast.

    air fryer whole eggs in basket

    Easy Peel Air Fryer Hard Boiled Eggs

    These Easy Peel Air Fryer Hard Boiled Eggs are easy to make and easy to peel. Yes, there’s a new way to make “boiled” eggs and it’s perfect!

    breakfast sandwiches wrapped in plastic wrap on marble with one sandwich unwrapped

    Freezer Friendly Breakfast Sandwiches

    Make it an easy and delicious morning with these make-ahead breakfast sandwiches made with egg and bacon. You can make a batch of these if you’re serving a large number of people for breakfast or you can make these and freeze them for a grab and go breakfast. Reheat them right in the air fryer.

    Air Fryer Breakfast Side Dishes

    These Breakfast Air Fried Potatoes are crispy on the outside and tender on the inside, just how breakfast potatoes should be. Step by step photos included to get the perfect breakfast potatoes in the air fryer.  #airfryer #healthy #airfriedpotatoes #easy #airfryerrecipes #myforkinglife #potaesintheairfryer

    Breakfast Air Fried Potatoes

    These Breakfast Air Fried Potatoes are crispy on the outside and tender on the inside, just how breakfast potatoes should be. Step by step photos included to get the perfect breakfast potatoes in the air fryer.

    Image for Air Fryer Zucchini Fritters

    Air Fryer Zucchini Fritters

    These Air Fryer Zucchini Fritters are a delicious healthy snack that can easily be made in your Air Fryer. Pair it with a delicious herb dip for a real treat.

    Now the only question left... what are you going to make for breakfast?

    December 10, 2020 by Tanya Harris 13 Comments

    Pressure Cooker (Instant Pot) Chili

    A spoon in a bowl of chili topped with sour cream, shredded cheese and fresh jalapenos.

    Get the most delicious chili in a fraction of the time with your trusty pressure cooker! So rich and flavorful, this chili is easy to make, perfectly comforting and so so tasty!

    A spoon in a bowl of chili topped with sour cream, shredded cheese and fresh jalapenos.

    This post contains affiliate links, please read my full disclaimer here.

    You’ll find the full recipe with ingredient amounts and instructions in the recipe card at the bottom of this post. Be sure to check out the blog post itself for extra tips and tricks!

    Quite honestly, there is never a bad time for chili! It's a constant in our house! When you don't have hours to spend to watch a simmering pot, grab your pressure cooker for an effortless family dinner.

    So hearty and rich in flavor, this Instant Pot chili is ready to serve within an hour, and it's great for meal prep too!

    For more hearty pressure cooker recipes, be sure to check out my Vegetable Soup and Chicken and Potatoes.

    How to make pressure cooker chili

    Gather your ingredients.

    Ingredients to make the recipe on a white work surface.

    Chop the onion, garlic and jalapeno.

    Chopped onions, garlic and jalapeno on a cutting board.

    Turn the pressure cooker on the high-sauté function. Once the display says “HOT,” add oil. Add onions, jalapeño, and garlic cloves and sauté for about 5-7 minutes, until onions have softened.

    Onions, garlic and jalapeno being cooked in the Instant Pot.

    Add ground beef and stir, cooking until ground beef is no longer pink and is browned. Then add chili powder, cumin, oregano, Worcestershire sauce and stir until combined.

    The beef browned in the pressure cooker.

    Press Cancel on the pressure cooker. Add vegetable juice, water, kidney beans, yellow corn kernels, and brown sugar. Do not stir. Cover the pressure and cook on high pressure for 35 minutes.

    Beans and corn added to the pressure cooker.

    Once pressure cooking time is up, allow the pressure to natural release for at least 15 minutes.

    Once all pressure is released, press Cancel on the pressure cooker and open the lid. Stir the chili. It will appear watery. Press the sauté button and allow the chili to simmer for 5-10 minutes, stirring occasionally, until it’s reduced to your likeness. Salt to taste.

    Some of the cooked shili on a wooden spoon over the Instant Pot.

    What do you serve it with?

    This chili is great to serve by itself in a big bowl with your favorite toppings. I love to serve it with my Cornbread Muffins or you can serve it on a bed of rice.

    When it comes to toppings, for me, you can never have enough! Try topping it with:

    • Shredded cheese
    • Sour cream
    • Fresh jalapeños
    • Sliced avocado
    • Guacamole
    • Salsa
    • Crispy tortilla strips

    Can you make it ahead of time?

    If you are getting organized, pressure cooker chili is a great recipe for meal prep. Once you've made it, let it cool completely before placing in an airtight container and it will keep well for 4 to 5 days. Reheat it gently on the stovetop, or in the microwave, until warmed through to serve.

    The flavors develop even more the next day, so leftovers are always really tasty!

    Can you freeze it?

    Yes! This freezes really well! It will keep well for up to 6 months, I always have some in my freezer! Thaw the chili in the fridge overnight before reheating.

    A bowl of pressure cooker chili with a spoon in it and served with toppings.

    Recipe Notes and Tips

    • The chili will appear watery once you open the lid after pressure cooking as the water hasn’t had the chance to evaporate. Simmer after pressure cooking to reduce the water amount and build flavor.
    • This chili is relatively mild. If you like it spicier, add a little cayenne.
    • Feel free to add in other veggies that you have in your fridge. Mushrooms, bell peppers and carrots all work really well.

    Watch this video tutorial and see how I make this chili from start to finish.

    More Pressure Cooker Recipes

    • Creamy Instant Pot Chicken Tacos
    • Creamy Instant Pot Mashed Potatoes
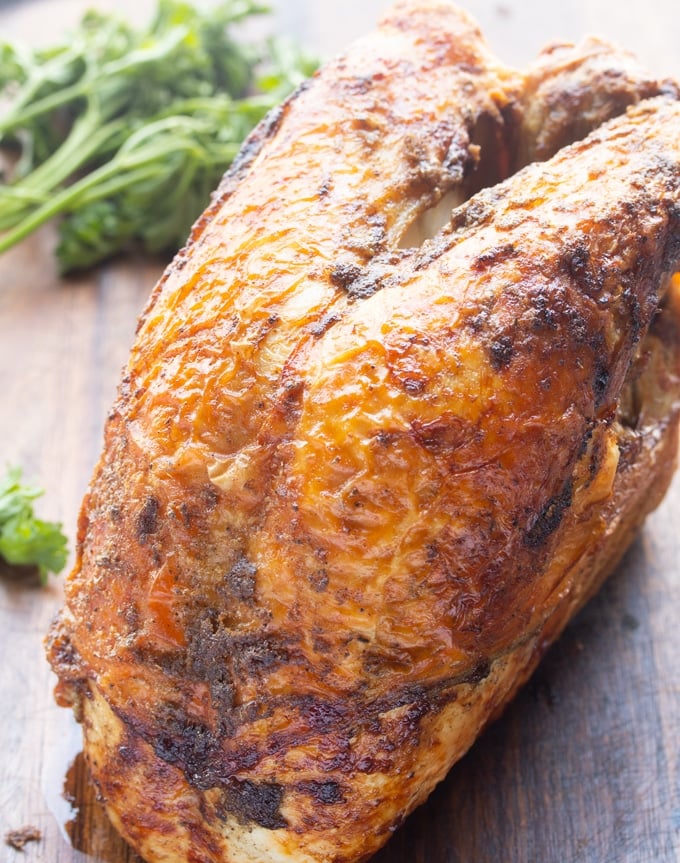
    • Instant Pot Turkey Breast (Bone-in or Boneless)
    • North Carolina Instant Pot Pulled Pork
    Chili served in a white bowl with a spoon.
    Print Recipe
    4.50 from 2 votes

    Pressure Cooker (Instant Pot) Chili

    Get the most delicious chili in a fraction of the time with your trusty pressure cooker! So rich and flavorful, this chili is easy to make, perfectly comforting and so so tasty!
    Prep Time5 minutes mins
    Cook Time50 minutes mins
    Total Time55 minutes mins
    Course: Main Course
    Cuisine: American
    Keyword: how to cook chili in a pressure cooker, instant pot chili recipe
    Servings: 4 servings
    Calories: 534kcal
    Author: Tanya Harris

    Ingredients

    • 2 Tbs oil
    • 2 yellow onions chopped
    • 2 jalapeño chopped
    • 4 garlic cloves chopped
    • 1 lb ground beef
    • 2 Tablespoon chili powder
    • 1 teaspoon cumin
    • 1 teaspoon oregano
    • 1 Tablespoon Worcestershire sauce
    • 1 ½ cup vegetable juice like V8
    • ¾ cup water
    • 1 can red kidney beans drained and rinsed
    • 1 cup yellow corn kernels frozen
    • ½ Tablespoon brown sugar
    • Salt to taste

    Instructions

    • Turn the pressure cooker on the high-sauté function. Once the display says “HOT,” add oil. Add onions, jalapeño, and garlic cloves and sauté for about 5-7 minutes, until onions have softened. Add ground beef and stir, cooking until ground beef is no longer pink and is browned. Add chili powder, cumin, oregano, Worcestershire sauce and stir until combined.
    • Press Cancel on the pressure cooker. Add vegetable juice, water, kidney beans, yellow corn kernels, and brown sugar. Do not stir. Cover the pressure and cook on high pressure for 35 minutes. Once pressure cooking time is up, allow the pressure to natural release for at least 15 minutes.
    • Once all pressure is released, press Cancel on the pressure cooker and open the lid. Stir the chili. It will appear watery. Press the sauté button and allow the chili to simmer for 5-10 minutes until it’s reduced to your likeness. Salt to taste.

    Video

    Notes

    • The chili will appear watery once you open the lid after pressure cooking as the water hasn’t had the chance to evaporate. Simmer after pressure cooking to reduce the water amount and build flavor.
    • This chili is relatively mild. If you like it spicier, add a little cayenne.
    • Feel free to add in other veggies that you have in your fridge. Mushrooms, bell peppers and carrots all work really well.

    Nutrition

    Calories: 534kcal | Carbohydrates: 37g | Protein: 28g | Fat: 31g | Saturated Fat: 9g | Cholesterol: 81mg | Sodium: 686mg | Potassium: 1029mg | Fiber: 9g | Sugar: 11g | Vitamin A: 2027IU | Vitamin C: 42mg | Calcium: 108mg | Iron: 5mg

    December 6, 2020 by Tanya Harris 10 Comments

    Crispy Air Fryer Bacon

    cooked bacon in air fryer basket

    Get the most perfect crispy bacon every single time with your trusty air fryer! So easy and quick to make with no mess and an excellent addition to any breakfast!

    Air fryer bacon served on a white plate.

    This post contains affiliate links, please read my full disclaimer here.

    You’ll find the full recipe with ingredient amounts and instructions in the recipe card at the bottom of this post. Be sure to check out the blog post itself for extra tips and tricks!

    It's no secret here that I love my air fryer! Such a quick and effortless way to cook so many foods and the results are always so good! Well, bacon is no different!

    This crispy air fryer bacon takes minutes to prep and you can cook a whole pack at the same time, perfect if you are feeding a crowd! Make breakfasts a breeze or crumble it on top of soups or other recipes.

    Use this air fried bacon on top of Sheet Pan Pancakes or in my Shrimp and Bacon Spinach Salad. If you don't have an air fryer, you'll also find my how-to bake bacon in the oven post helpful.

    How to make crispy air fryer bacon

    • Lay bacon in an air fryer basket, bacon can overlap.
    Raw bacon strips in an air fryer basket.
    • Cook on 360 degrees Fahrenheit for 12-15 minutes, turning every 5 minutes.
    Bacon starting to cook the air fryer basket.
    Bacon pieces nearly cooked.
    • Remove and enjoy.
    Overhead shot of the bacon cooked in the air fryer basket.

    My air fryer is smoking when cooking bacon

    Some air fryers are known for smoking while cooking bacon, but you can remedy this pretty easily. Place a little water in the bottom of the basket or a piece of bread to soak up the grease can reduce the smoking.

    Always use a clean air fryer when cooking bacon or other greasy meats to reduce the amount of smoke, and be sure to clean out the grease before using your air fryer again.

    How long does it take to cook bacon in an air fryer?

    A full 12 ounce packet of bacon will take between 12 and 15 minutes to cook, depending on how crispy you like it. If you are cooking less than the full pack, it will take around 8 to 10 minutes. Stir the bacon every 5 minutes or so so that it cooks evenly.

    How long will it keep?

    Once you have cooked your bacon, let it cool and it will keep well covered in the fridge for 4 to 5 days. I like to cook a whole pack of bacon and then I can add it to dishes in the week for a burst of flavor.

    You can also reheat it in the air fryer at 375F for 3 to 5 minutes.

    5 pieces of cooked bacon in the air fryer basket.

    Recipe Notes and Tips

    • Keep an eye on that bacon. Some air fryers will cook bacon faster than others. Watch it closely to avoid overcooking.
    • If you’re cooking less than a pack of bacon, your bacon will cook much quicker, in about 8-10 minutes.
    • This method works for pork and turkey bacon.
    • If you don’t want your bacon to curl, cook less at a time and lay them in a single layer. They’ll still curl a little. I like curly bacon pieces though 🙂
    • I used the oven directions on the back of the bacon to figure out the approximate cook time for the air fryer. I usually go 30 degrees below the recommended oven temperature and I cut the time about 20%. That's one of the best air fryer tips to have.

    More Air Fryer Recipes

    • Air Fryer French Toast
    • Air Fryer Crab Legs
    • Air Fryer Holiday Ham
    • Easy Air Fryer Pizza
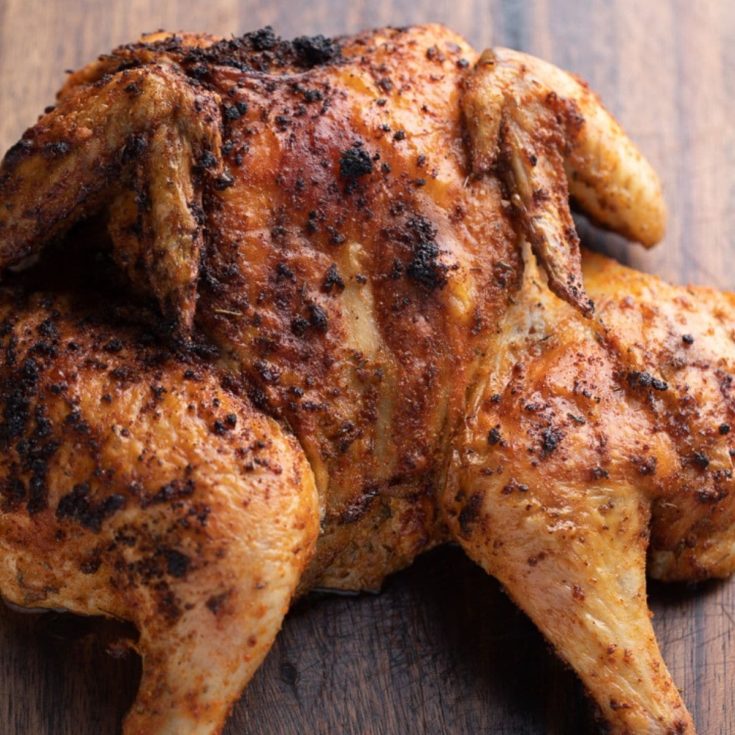
    • Air Fried Spatchcock Chicken
    Air fryer bacon served on a white plate.
    Print Recipe
    5 from 3 votes

    Crispy Air Fryer Bacon

    Get the perfect crispy bacon every single time with your trusty air fryer! So easy and quick to make with no mess and an excellent addition to any breakfast!
    Prep Time3 minutes mins
    Cook Time12 minutes mins
    Total Time15 minutes mins
    Course: Breakfast, Main Course
    Cuisine: American
    Keyword: air fried bacon, how to cook bacon in an air fryer, how to cook crispy bacon
    Servings: 6 servings
    Calories: 236kcal
    Author: Tanya Harris

    Ingredients

    • 12 oz pack of bacon

    Instructions

    • Lay bacon in an air fryer basket, bacon can overlap. Cook on 360 degrees Fahrenheit for 12-15 minutes, turning every 5 minutes. Remove and enjoy.

    Notes

    • Keep an eye on that bacon. Some air fryers will cook bacon faster than others. Watch it closely to avoid overcooking.
    • If you’re cooking less than a pack of bacon, your bacon will cook much quicker, in about 8-10 minutes.
    • Some air fryers are known for smoking while cooking bacon. Place a little water in the bottom of the basket or a piece of bread to soak up the grease can reduce the smoking. Also, always use a clean air fryer when cooking bacon or other greasy meats to reduce the amount of smoke.
    • This method works for pork and turkey bacon.
    • If you don’t want your bacon to curl, cook less at a time and lay them in a single layer. They’ll still curl a little. I like curly bacon pieces though 🙂

    Nutrition

    Calories: 236kcal | Carbohydrates: 1g | Protein: 7g | Fat: 23g | Saturated Fat: 8g | Cholesterol: 37mg | Sodium: 375mg | Potassium: 112mg | Vitamin A: 21IU | Calcium: 3mg | Iron: 1mg
    • « Previous Page
    • 1
    • …
    • 50
    • 51
    • 52
    • 53
    • 54
    • …
    • 73
    • Next Page »
    tanya holding bowl and mixing

    Welcome!

    Welcome to My Forking Life! Hi, I'm Tanya, an attorney, busy wife and mom, and lover of quick, easy, and delicious meals.

    More about me

    Popular Recipes

    • Jamaican Oxtails Recipe
    • brown stew chicken in pan
      Brown Stew Chicken
    • Air fryer fried chicken on a white platter
      Air Fryer Fried Chicken
    • Jamaican Instant Pot Rice and Beans

    Holiday Favorites

    • sweet potato pie on a plate
      Southern Sweet Potato Pie Recipe
    • spoon lifting gravy out of gravy dish
      Easy Recipe for Gravy without Drippings
    • Stirring the giblet gravy with a spoon.
      Grandma's Giblet Gravy Recipe
    • creamy baked macaroni and cheese, the best baked macaroni and cheese, creamy mac and cheese
      Creamy Baked Macaroni and Cheese
    as seen on...various online websites text listed

    Footer

    ↑ back to top
    • Privacy Policy
    • Contact
    • About Tanya

    As an Amazon Associate, I earn from qualifying purchases.

    Copyright © 2026 My Forking Life

    Rate This Recipe

    Your vote:


    Let us know what you thought of this recipe:

    This worked exactly as written, thanks!
    My family loved this!
    Thank you for sharing this recipe

    Or write in your own words:

    A rating is required
    A name is required
    An email is required