
My Forking Life

  • Air Fryer
  • Jamaican
  • Entree
  • Browse Recipes
  • Breakfast
  • Side Dishes
  • About
menu icon
go to homepage
  • Air Fryer
  • Jamaican
  • Entree
  • Browse Recipes
  • Breakfast
  • Side Dishes
  • About
search icon
Homepage link
  • Air Fryer
  • Jamaican
  • Entree
  • Browse Recipes
  • Breakfast
  • Side Dishes
  • About
×
Home

September 3, 2026 by Tanya Harris Leave a Comment

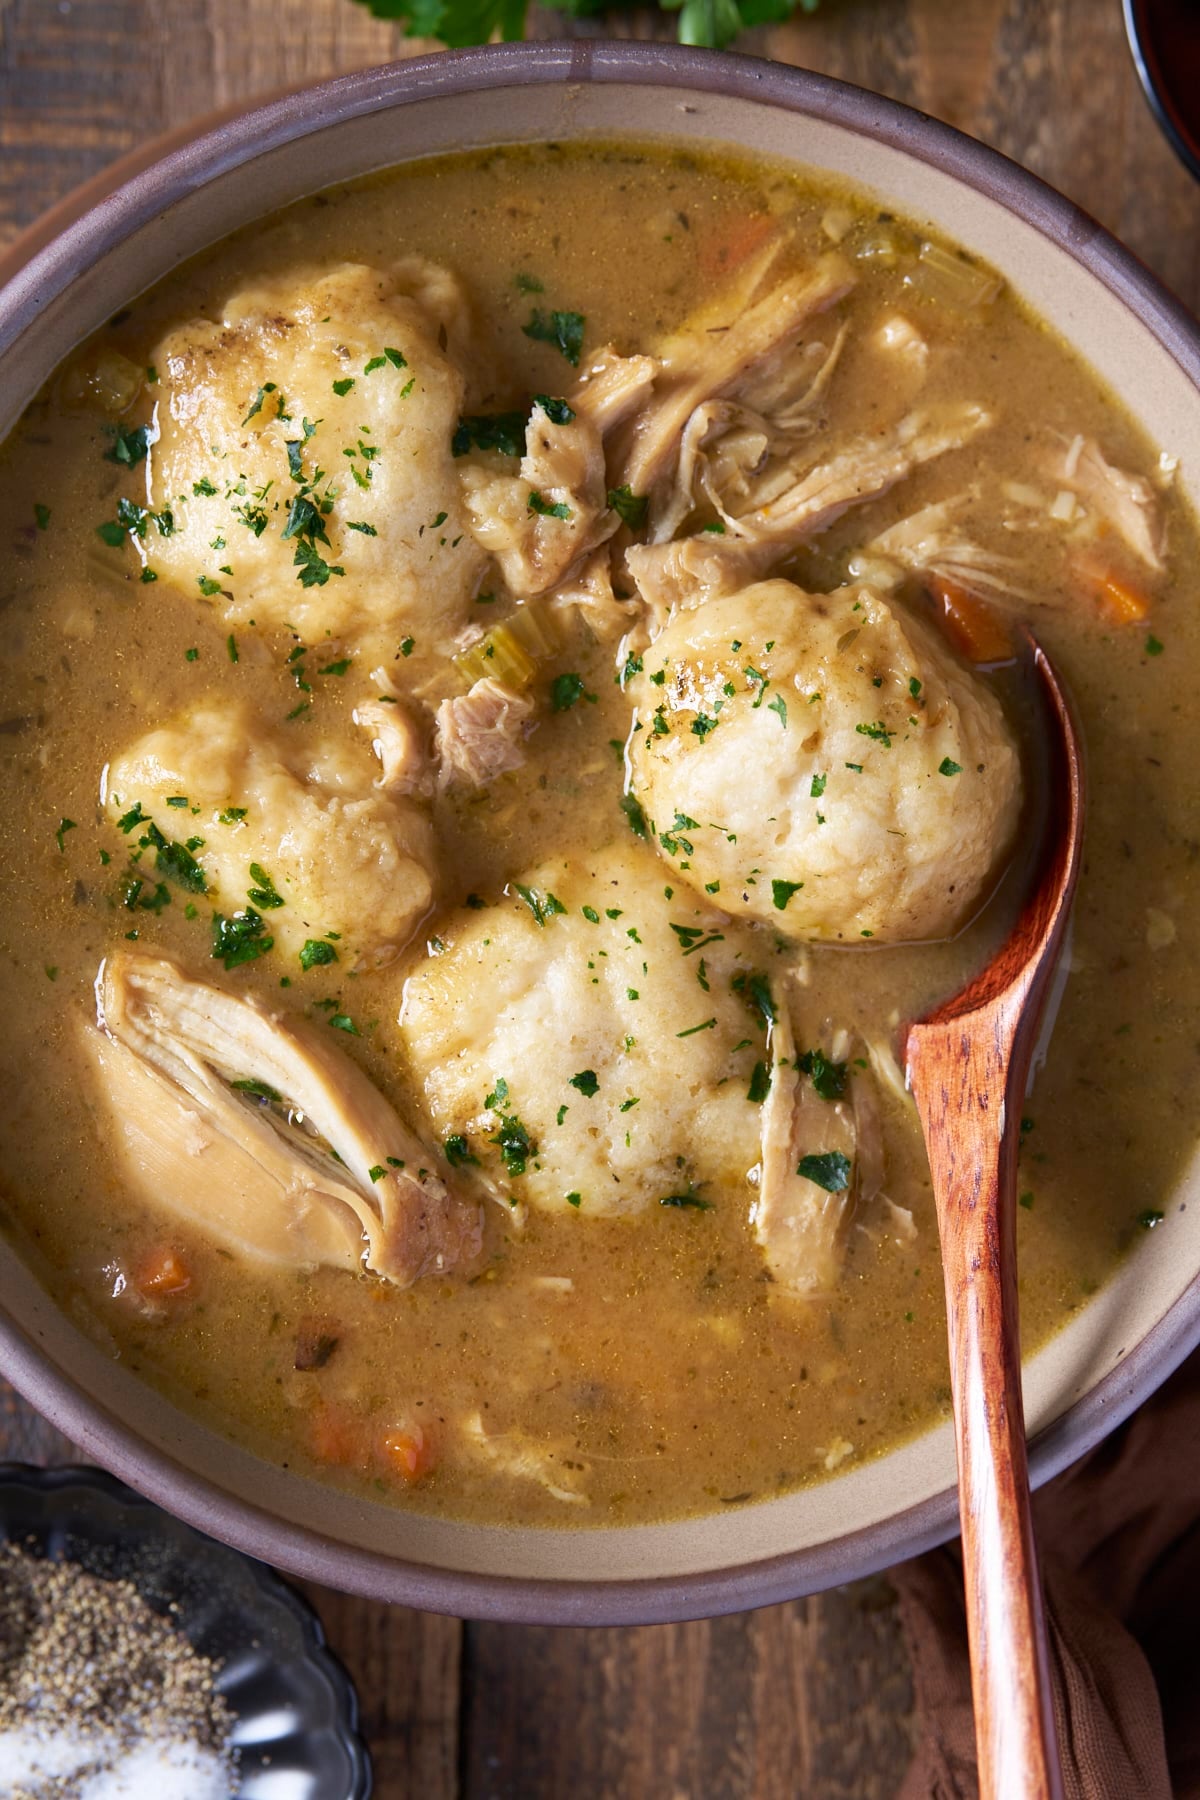
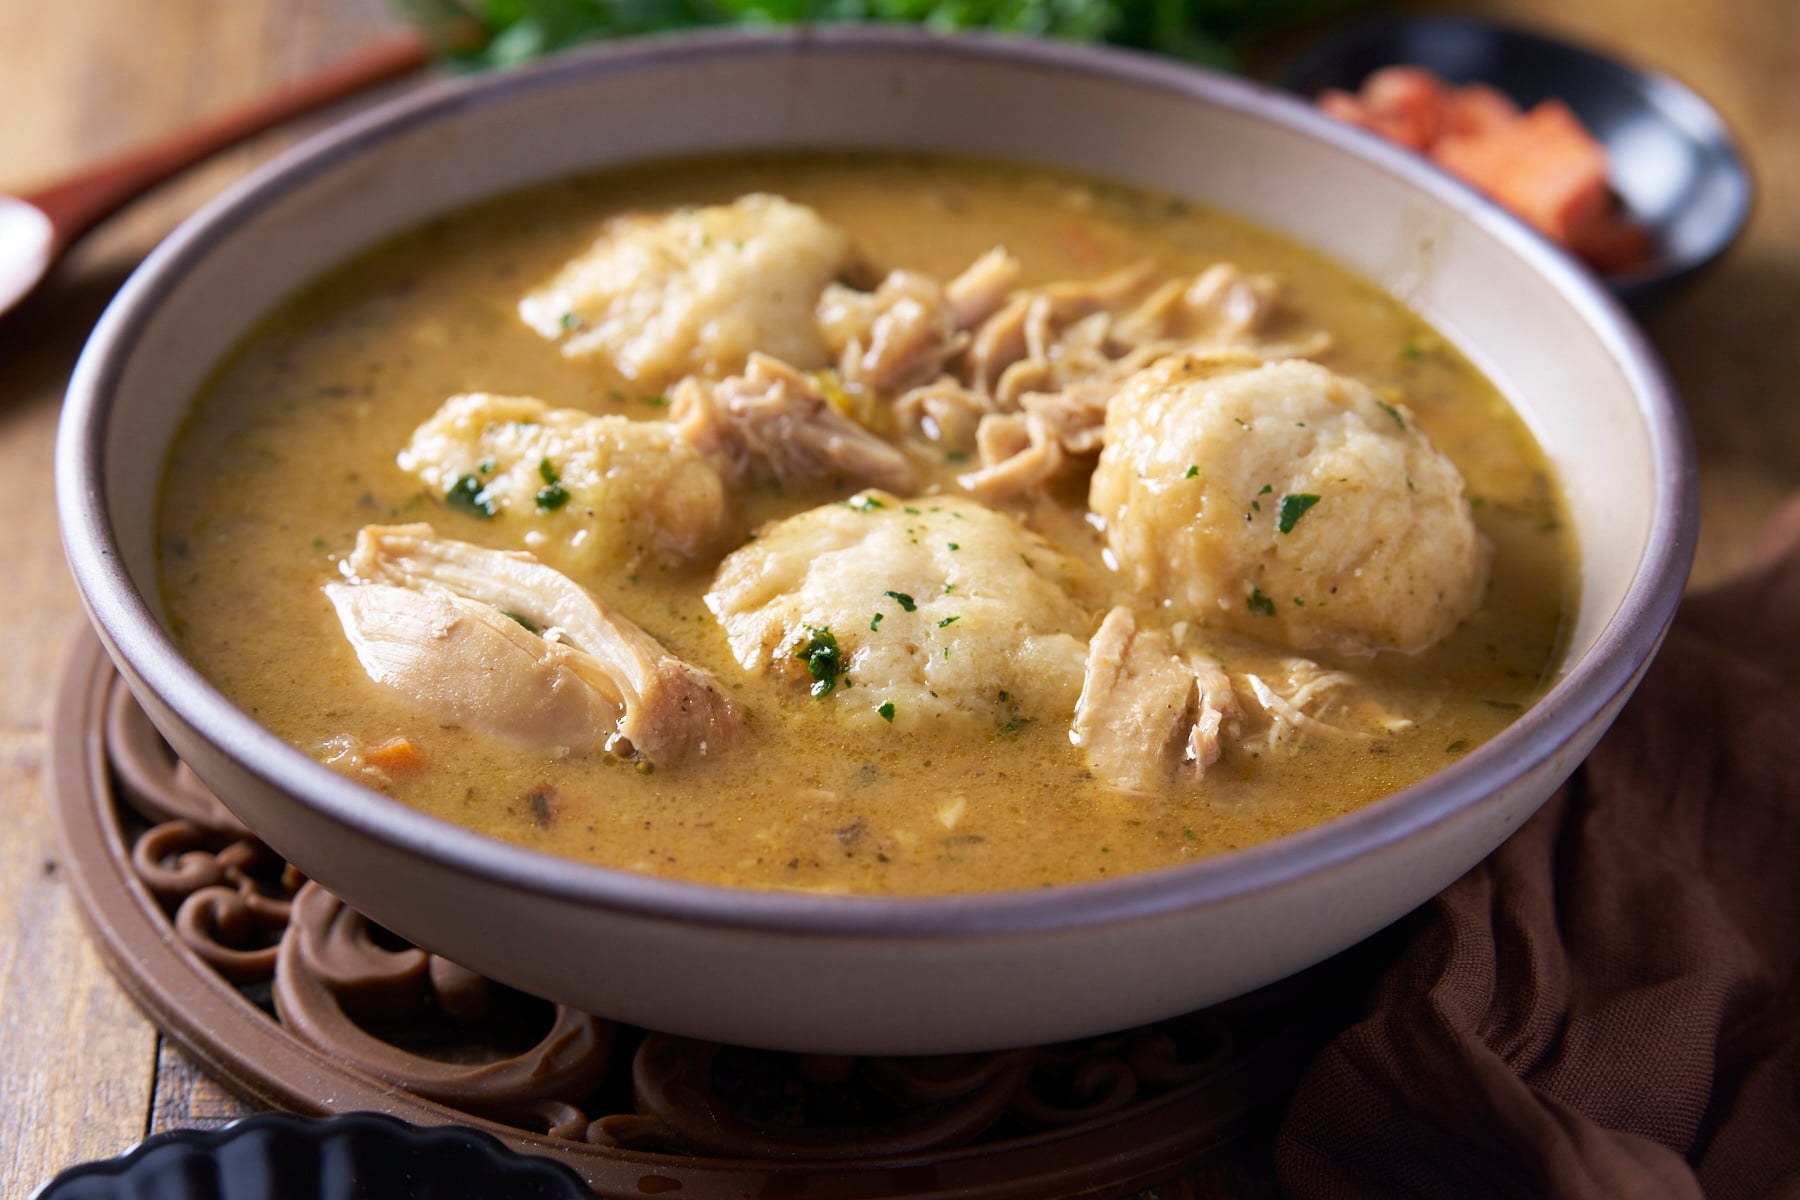
Flavorful Chicken and Dumplings

Overhead bowl of chicken and dumplings with a wooden spoon

Chicken and dumplings, made in one pot with a flavorful chicken broth and big fluffy dumplings that float right on top.

Overhead bowl of chicken and dumplings with a wooden spoon

You’ll find the full recipe with ingredient amounts and instructions in the recipe card at the bottom of this post. Be sure to check out the blog post itself for extra tips and tricks!
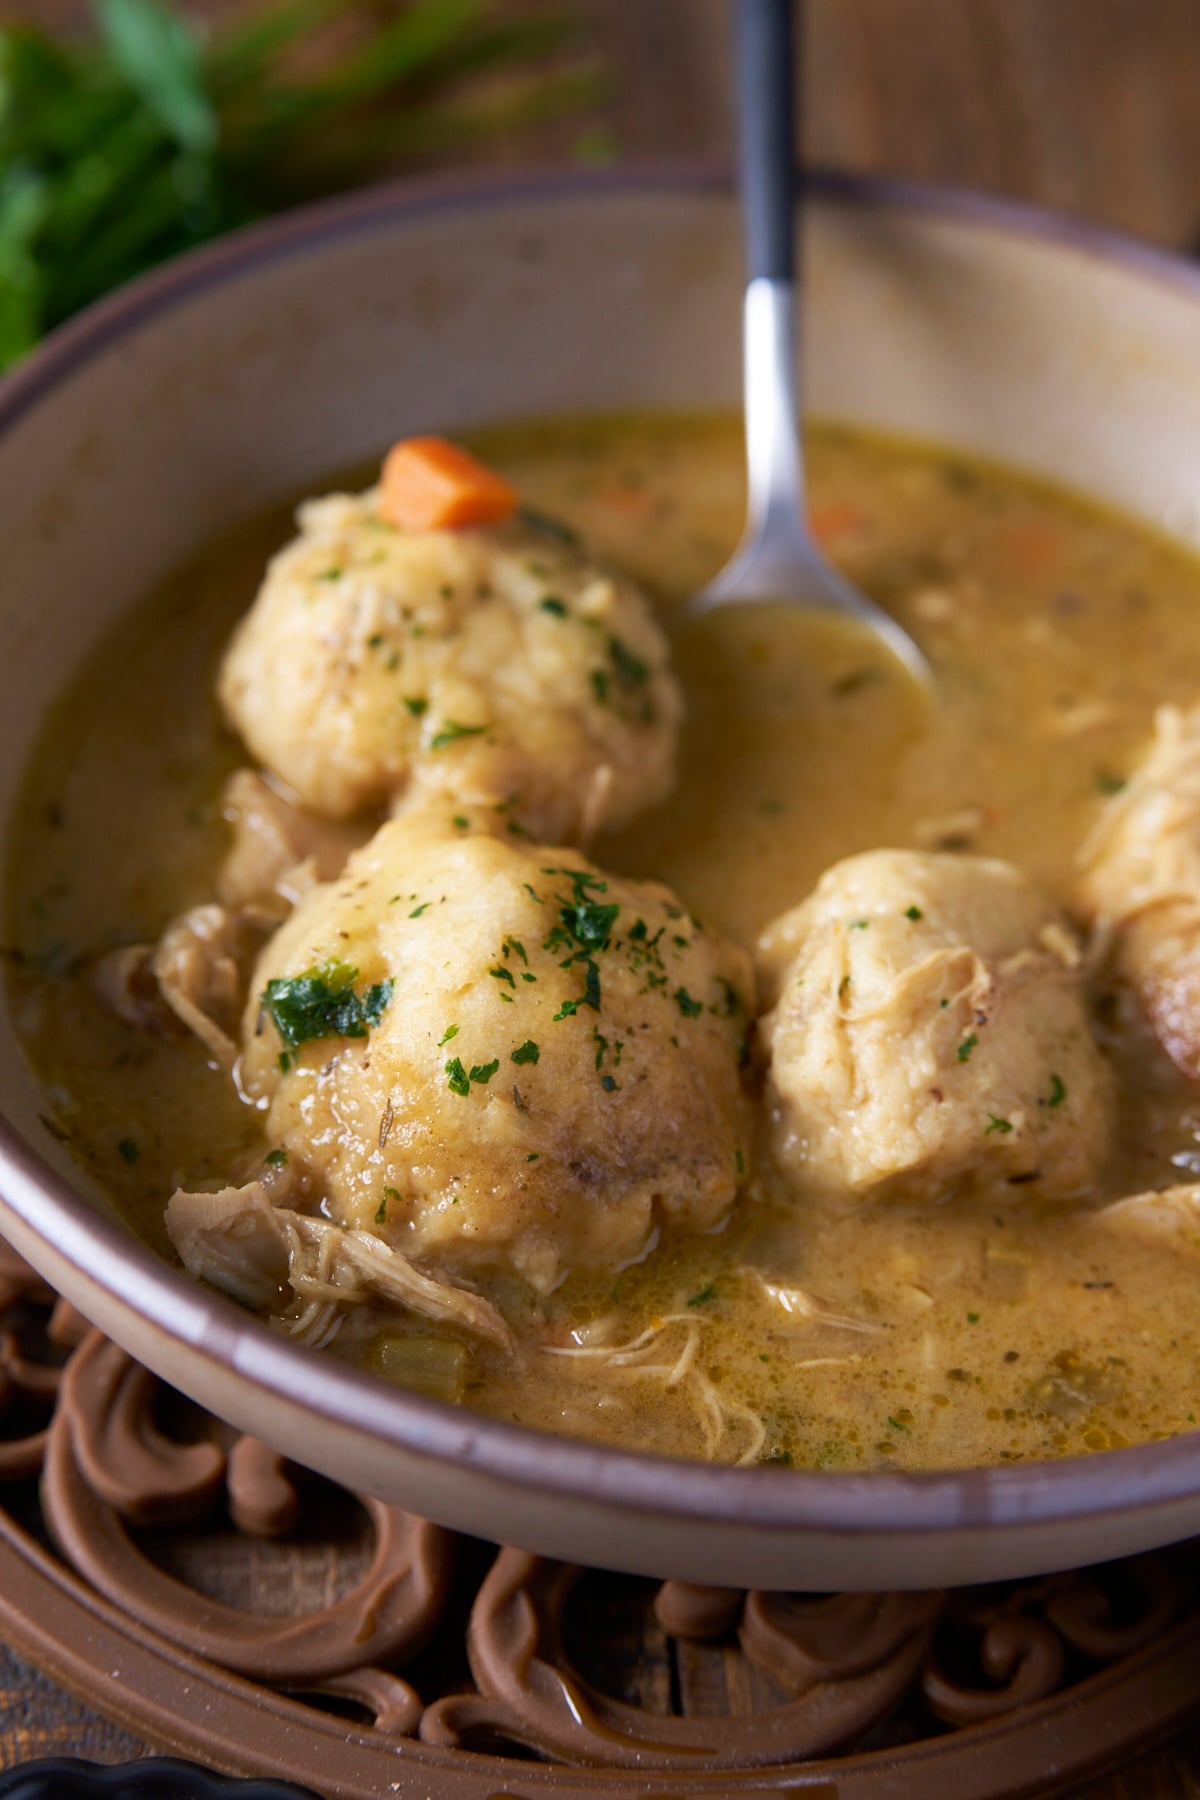
chicken and dumplings in bowl with spoon in bowl

Chicken and Dumplings at a Glance

  • Best for: Sunday dinner, cold weather, feeding a crowd from one pot
  • Prep time: 15 minutes
  • Cook time: 1 hour 15 minutes
  • Total time: 1 hour 30 minutes
  • Serves: 4-6
  • Good to know: One pot start to finish, no rolling or cutting dough, and the dumplings steam on top of the broth instead of boiling in it

My Take on This Recipe

close up Tanya holding bowl

Chicken and dumplings is comfort food to me. What I love about this Southern dish is that it's built from scratch for the most part, and that starts with the chicken. I use bone-in, skin-on chicken thighs to really amp up the flavor of the broth. Plus, the chicken stays nice and juicy, and it's easy to shred. Thighs are what I use in my braised chicken thighs, too.

For dumplings, I stick to the biscuit-like ones. My hubby grew up with the dumplings that are rolled thin before being added to the soup. I do the fluffy ones because they remind me of the dumplings I ate in my soups when I was growing up. Whichever one you choose, you can't go wrong. This is comfort food at its finest.

Happy Cooking,

Tanya

Equipment You May Need

You need a large Dutch oven to make a good pot of chicken and dumplings. A good dutch oven will allow you to sear the chicken well, developing flavor, and allow the soup to simmer away without burning the bottom of your pot.

STAUB Cast Iron Dutch Oven 4-qt Round Cocotte
A heavy Dutch oven holds a steady simmer without scorching, and a snug lid traps the steam that actually cooks the dumplings. Any large Dutch oven works, this one is just what I use.
Buy Now

How to Make Chicken and Dumplings

Make the Chicken and Gravy

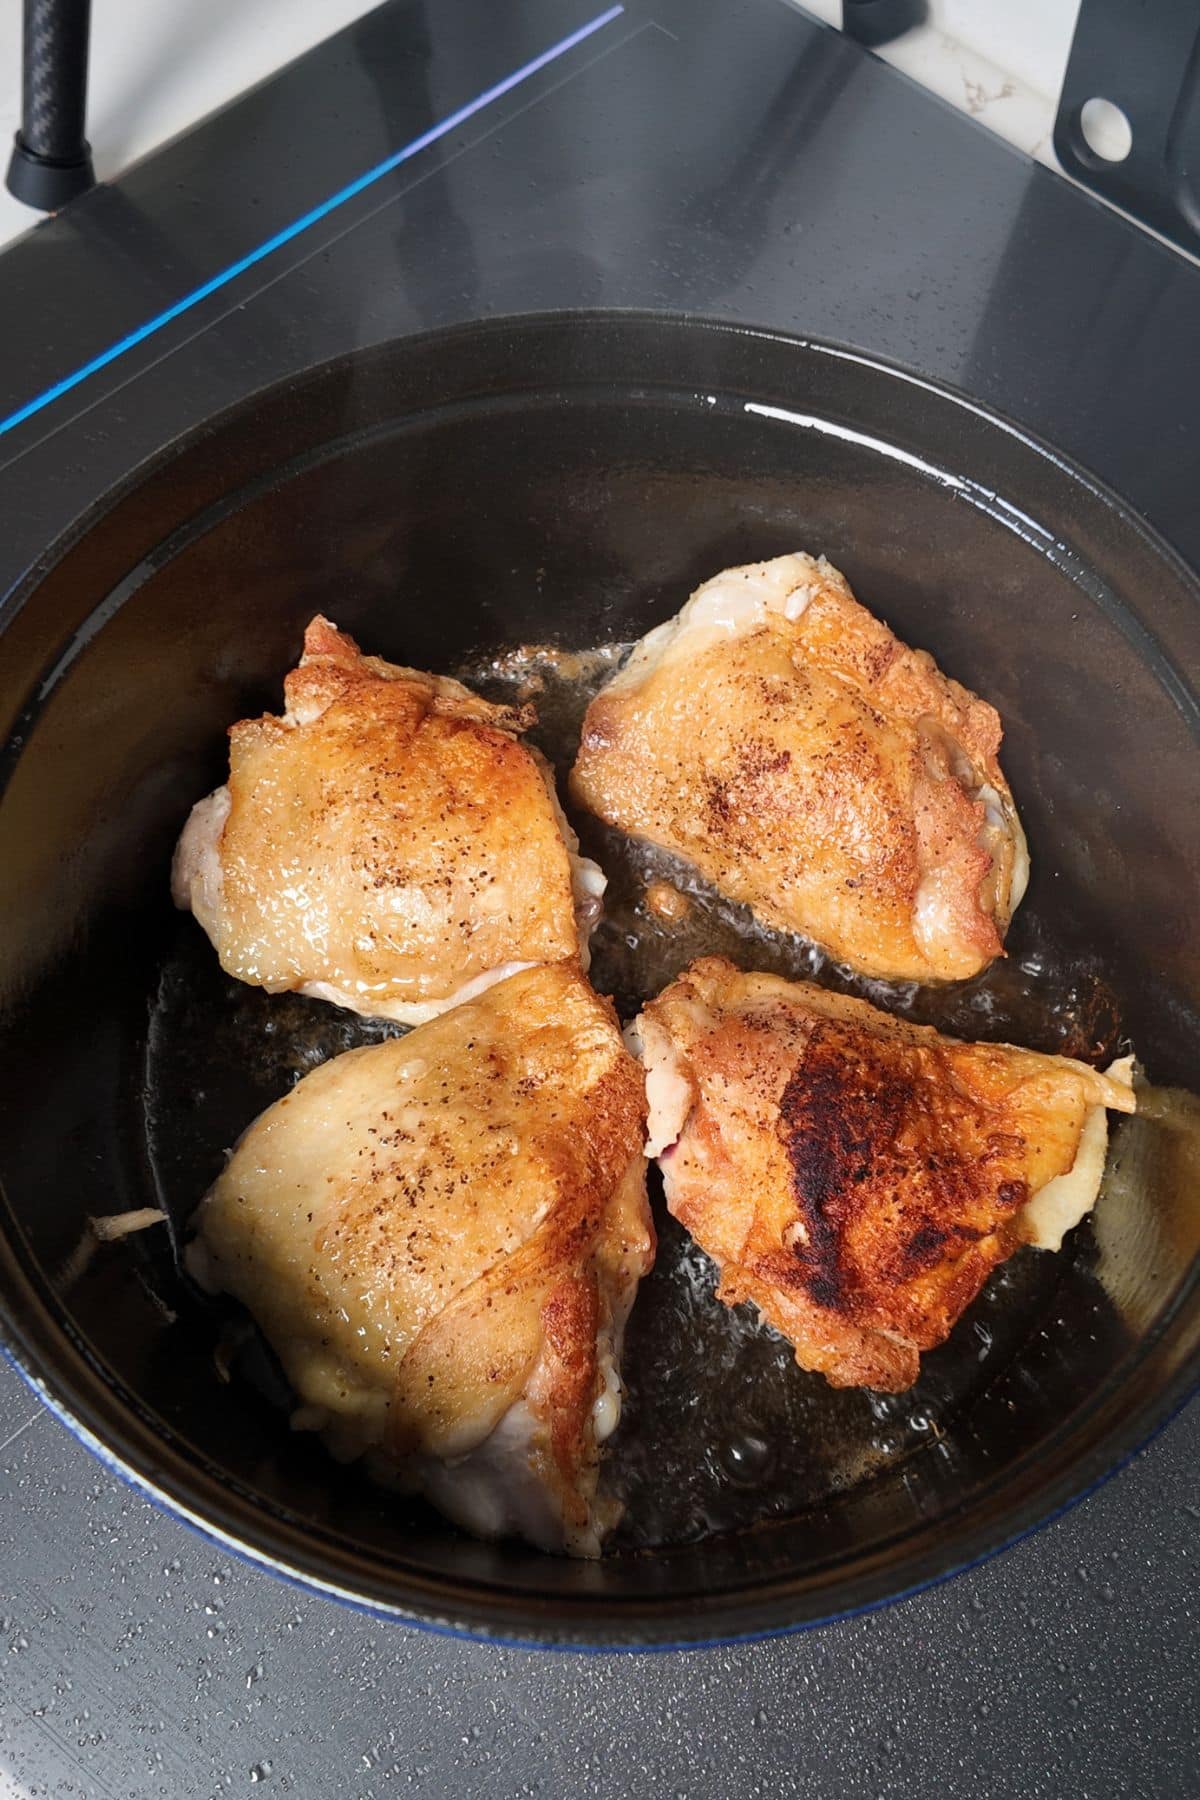
Step 1: Season and brown the chicken. Pat the thighs dry and season both sides with kosher salt and black pepper.

Heat the oil in a large Dutch oven over medium-high heat. Lay the thighs in skin side down and brown 5 to 7 minutes, until they release from the pot on their own. Flip and brown 3 to 4 minutes more. They don't need to be cooked through. Move them to a plate.

chicken thighs browning in pot

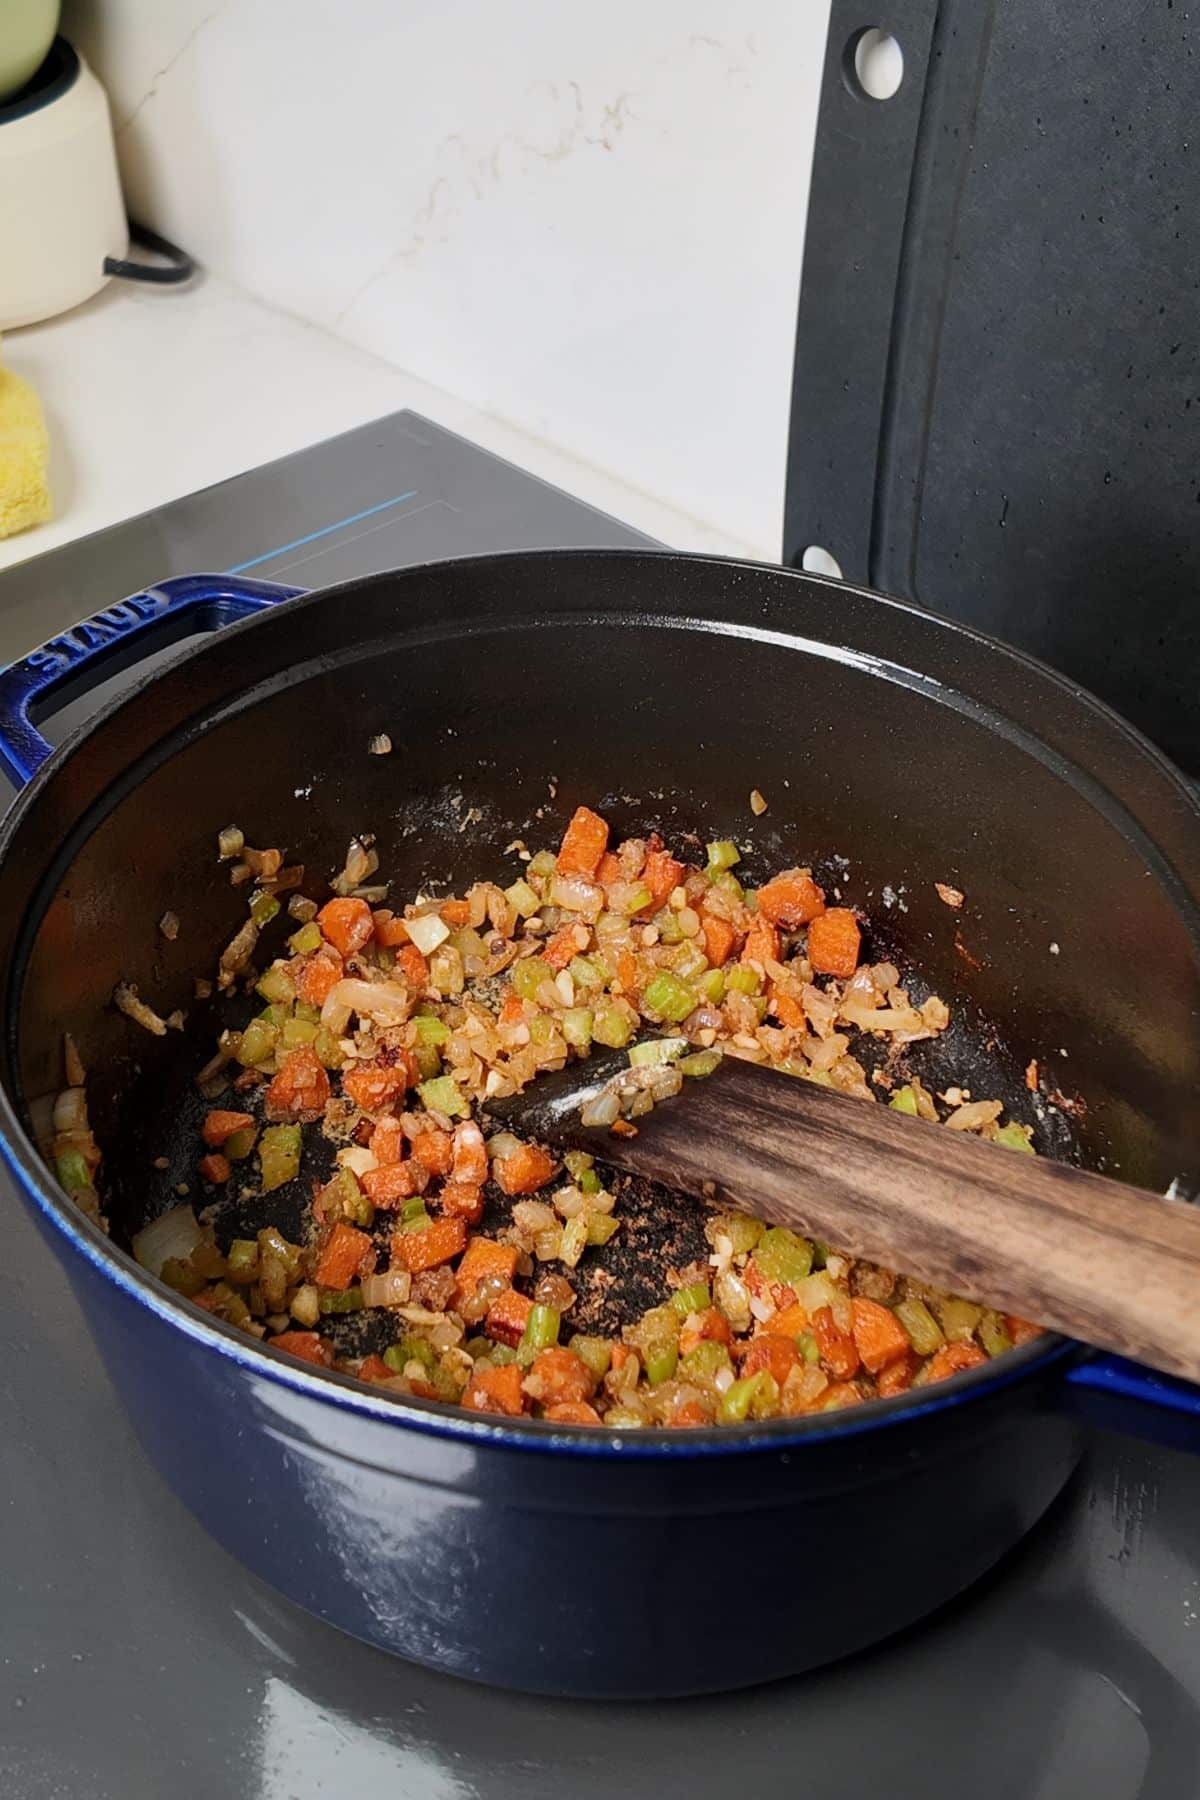
Step 2: Cook the vegetables and toast the flour. Drain the fat down to about 2 tablespoons and lower the heat to medium. Add the onion, celery, and carrots and cook 5 to 6 minutes, until softened.

Add the garlic for 30 seconds, then sprinkle in the flour and cook for 1 minute. It'll look coated and pasty, which is right. That minute keeps the broth from tasting floury later.

vegetables cooking in pot with flour

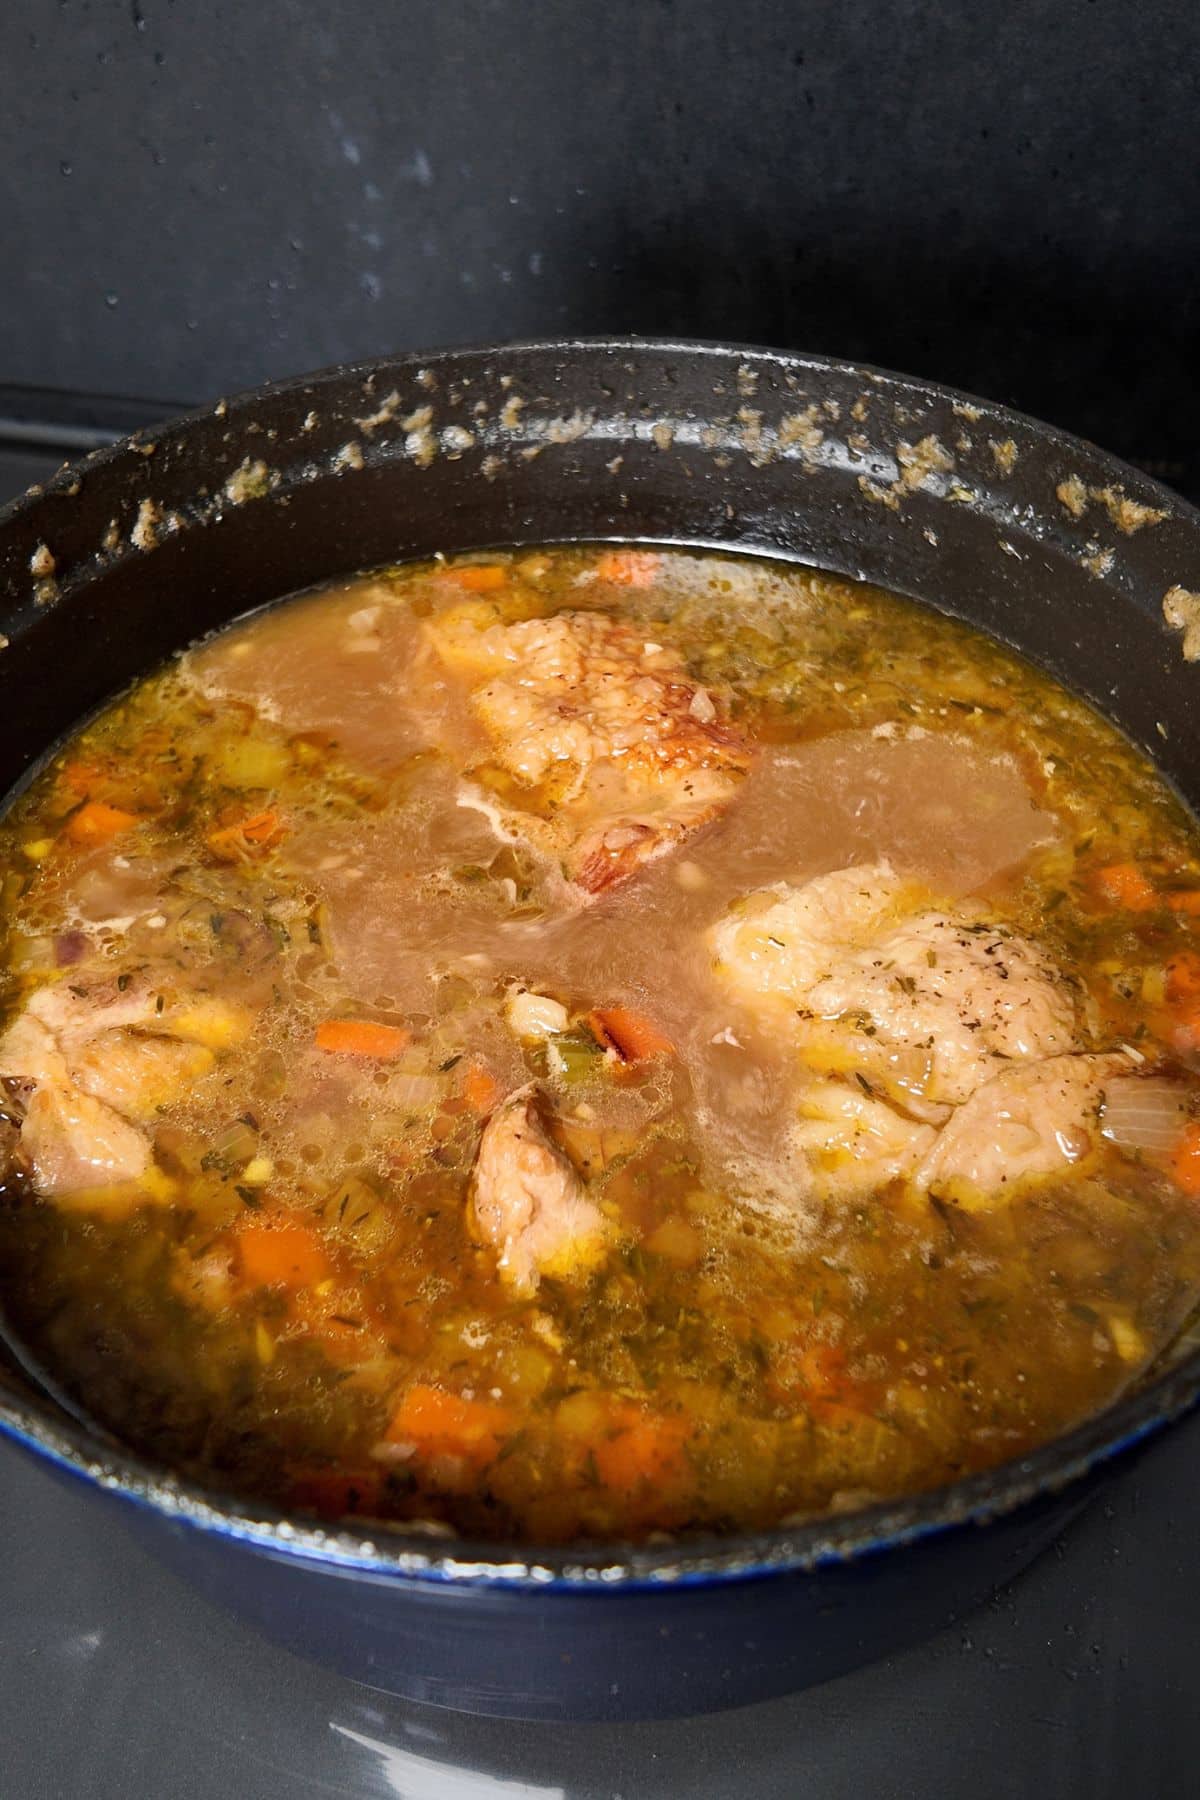
Step 3: Simmer the chicken. Pour in the broth and scrape the bottom of the pot as you go. Add the poultry seasoning and thyme, then return the thighs and their juices.

Bring it to a gentle simmer, cover, and cook 35 to 45 minutes, until the chicken pulls apart with a fork. Chicken is safe at 165°F (74°C), and after this long in the broth the thighs will be well past it.

chicken inside chicken and dumpling pot

Make the Dumplings

Step 4: Shred the chicken and shape the dumplings. Transfer the thighs to a plate. Once cool enough to handle, discard the skin and bones, shred the meat, and return it to the pot. Add heavy cream and simmer gently. Taste the broth and season with additional salt and pepper if needed.

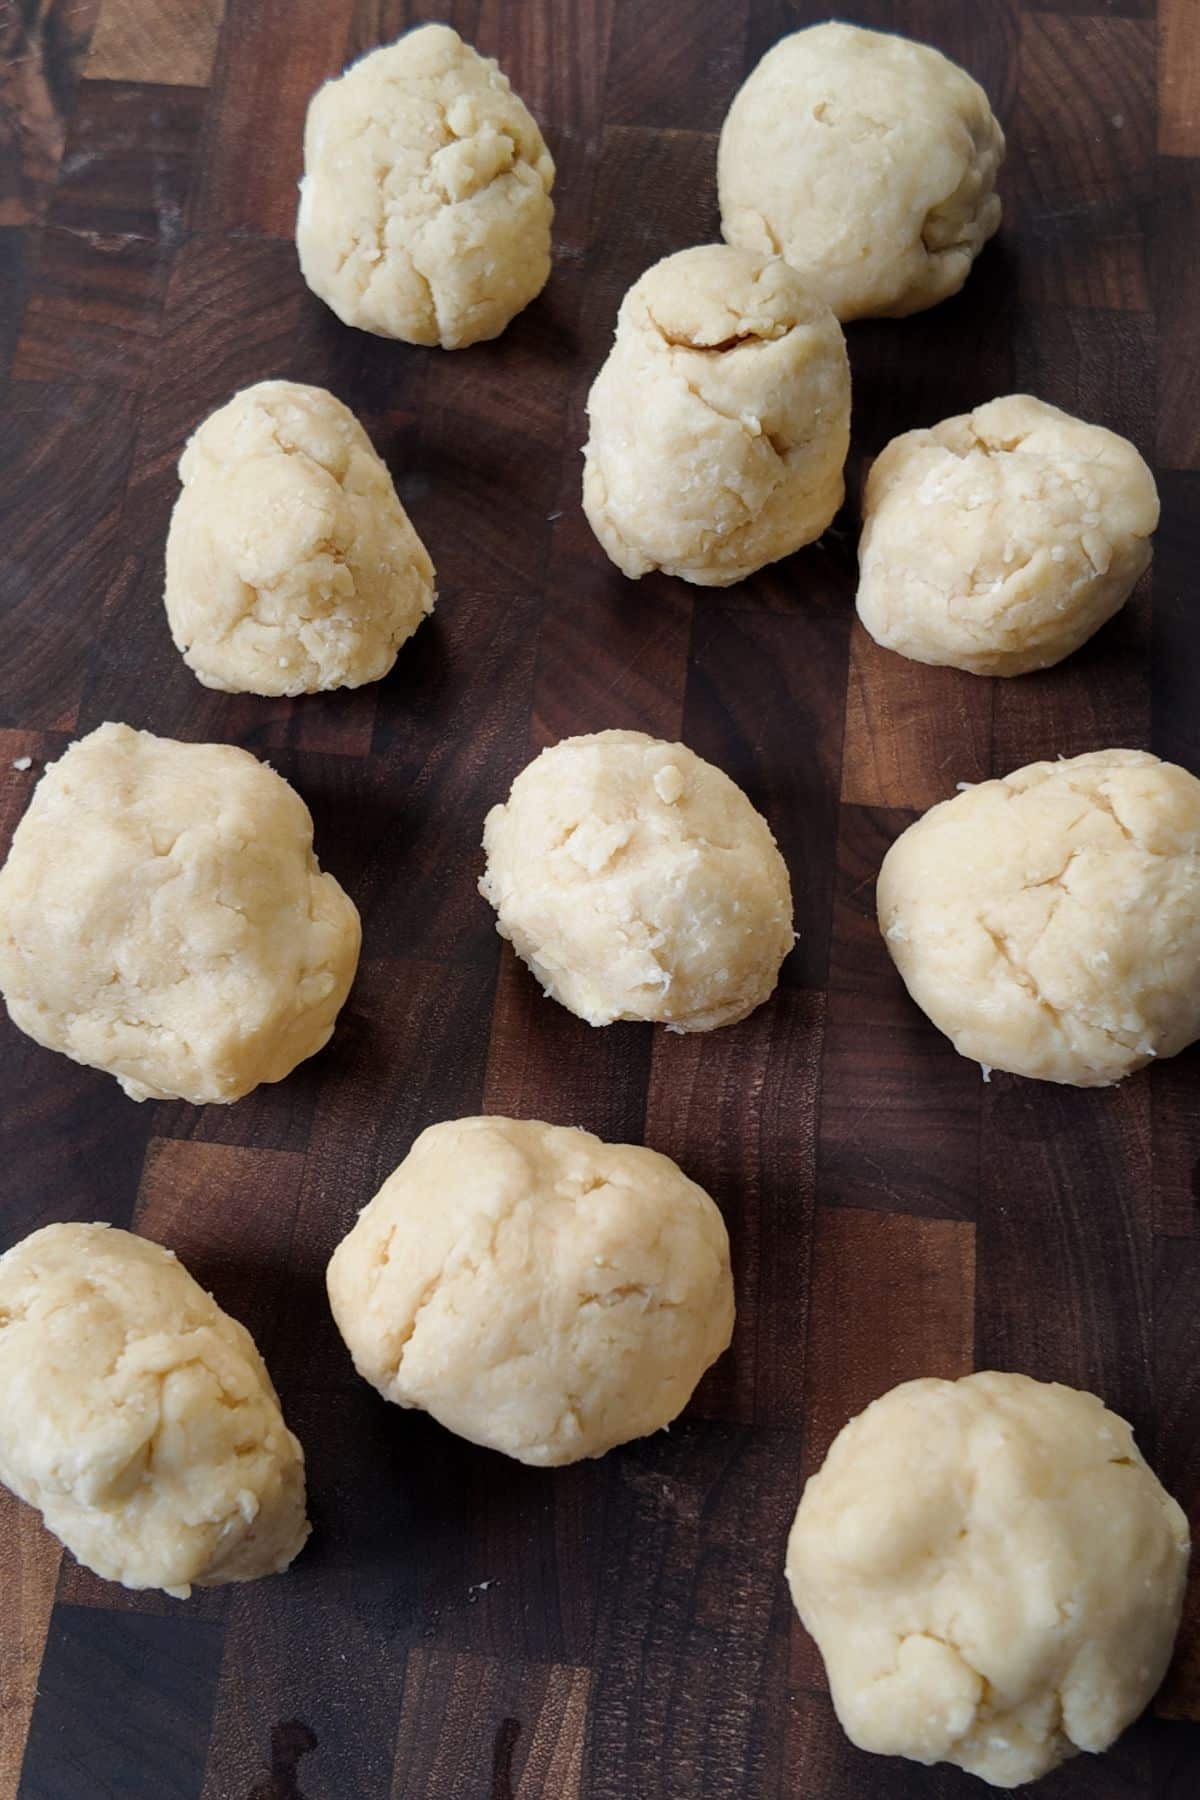
In a medium bowl, whisk the flour, baking powder, and salt. Cut in the cold butter until it forms coarse crumbs with pea-sized bits remaining, then stir in the heavy cream just until a soft dough forms. Divide and gently shape the dough into rounds (about 10-12 golf-ball-sized portions). They do not need to look perfect.

Rounds of dumpling dough resting on a wooden cutting board

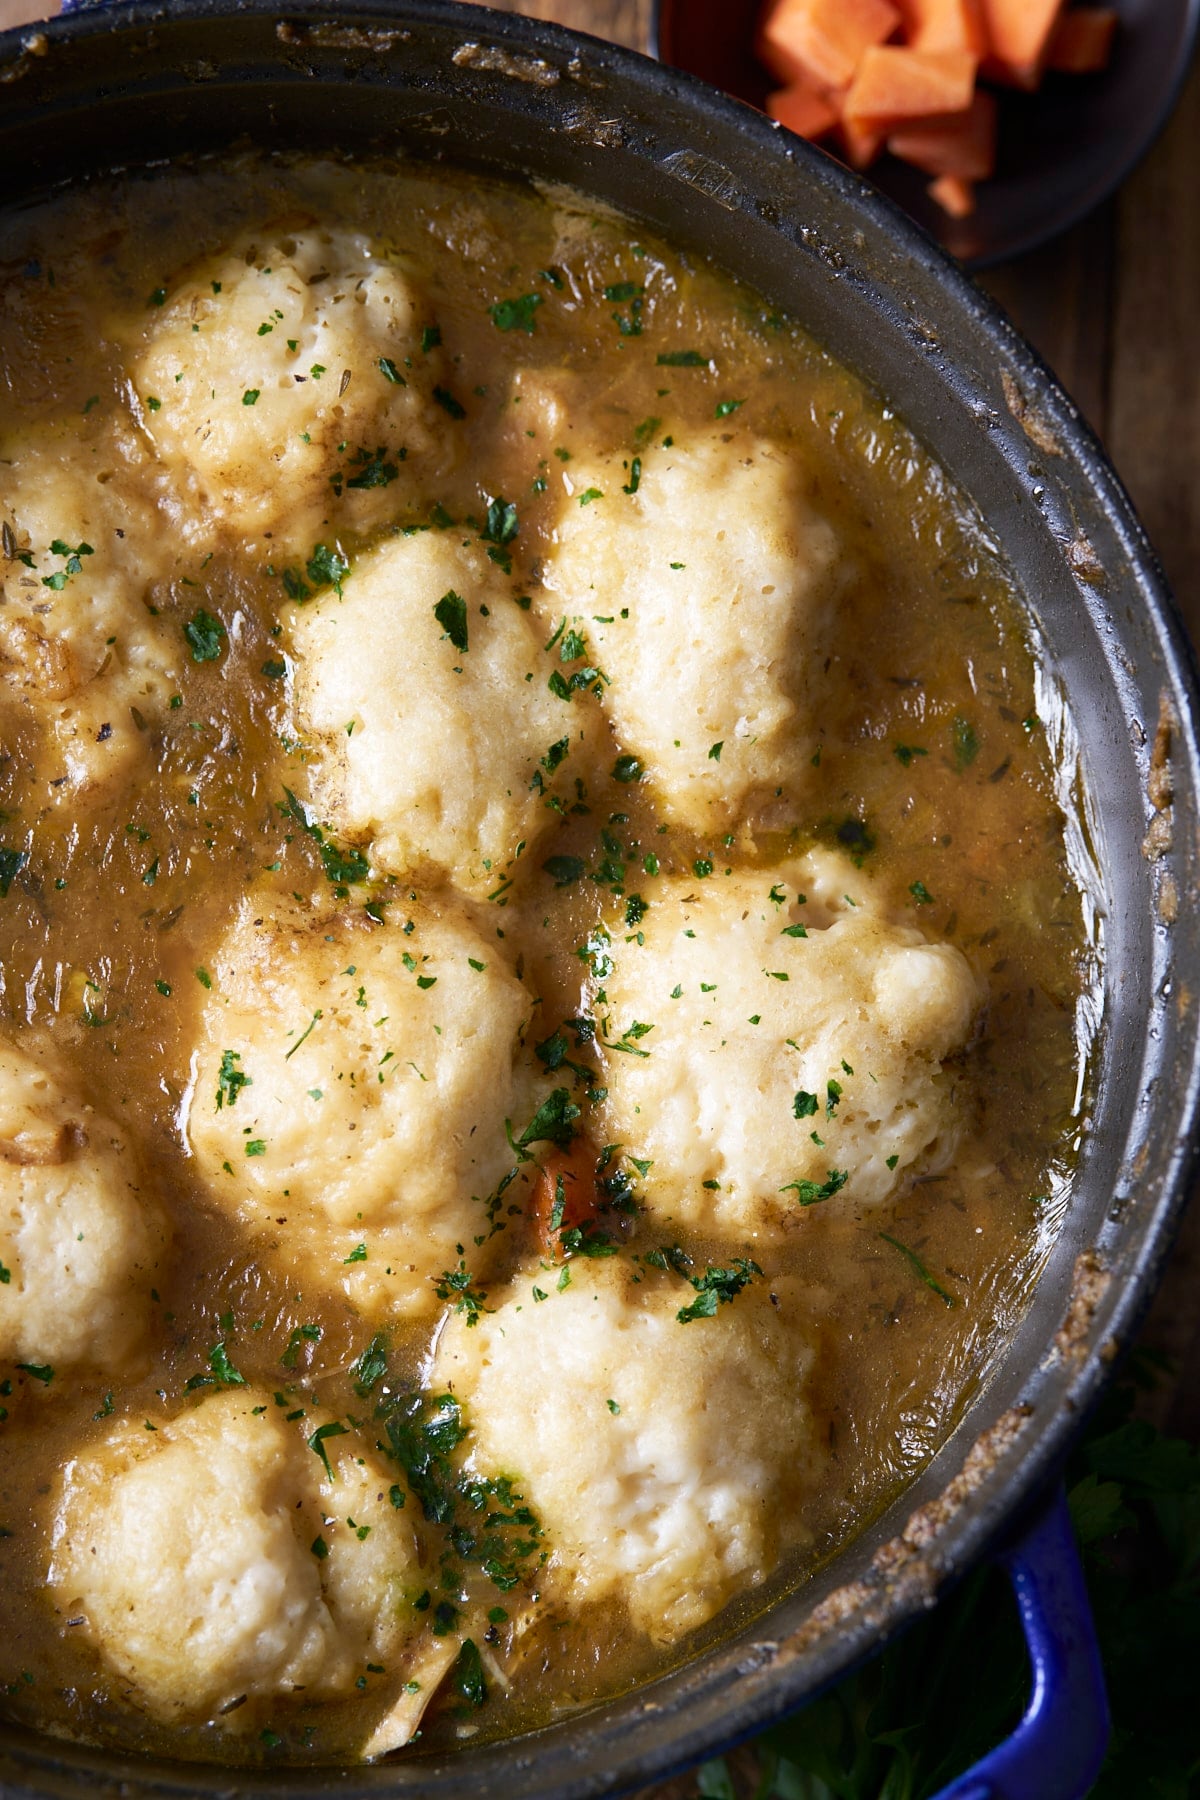
Step 5: Cook the dumplings. Drop the rounds into the simmering broth with space between them. They swell, so a crowded pot gives you one big raft.

Cover and cook 12 to 15 minutes without stirring and without lifting the lid. They're done when they're puffed and dry in the center.

Overhead view of finished chicken and dumplings in a blue Staub Dutch oven

Step 6: Rest and serve. Off the heat, covered, for 5 minutes. Serve hot.

Overhead bowl of chicken and dumplings with a wooden spoon

Tanya's Top Tips

  • Brown the chicken well. Deep golden, not pale. Most of what the broth tastes like comes from those first 10 minutes.
  • Keep the butter cold. Cold butter steams inside the dumpling. Warm butter blends into the flour and you get dense little rocks.
  • Don't lift the lid. The dumplings cook by steam, so every peek drops the temperature and leaves the tops wet.
  • Gentle simmer, not a boil. A hard boil knocks the dumplings around until they break apart.

Variations - How to Change Up This Recipe

  • Use rotisserie or leftover chicken. Skip the browning, cook the vegetables in butter or oil, and stir the shredded chicken into the broth before the dumplings go on. My slow cooker whole chicken leaves you with the right kind of leftovers for this dish.
  • Add peas. Frozen peas stirred in with the shredded chicken need a couple of minutes, no more.
  • Make it thicker. Simmer the broth uncovered for a few minutes before the dumplings go in.

Drop Dumplings vs. Rolled Dumplings

Dumplings come in two classic styles, and depending on where you grew up, you likely have a strong loyalty to one or the other:

  • Drop Dumplings: Made from a soft, biscuit dough spooned over simmering broth. As they steam under the closed lid, they puff up into light, pillowy mounds floating on top.
  • Rolled Dumplings: Rolled flat, cut into strips or squares, and dropped into broth. They cook into chewy, slick noodles that thicken the soup into a rich stew.

This recipe uses drop dumplings. They soak up all that rich chicken flavor while staying light and fluffy inside, with no rolling pin or floured counter required. I do roll them into balls, similar to how my granny makes her dumplings.

Storage, Reheating, and Freezing

  • Refrigerator. Airtight container up to 3 days. The dumplings keep drinking broth, so what you put away as soup often comes out as stew.
  • Reheating. Low heat on the stovetop with a splash of broth stirred in, covered so the dumplings warm through by steam. Skip the hard boil, it breaks them down.
  • Freezing. I wouldn't freeze it with the dumplings in. Flour, butter, and cream all come back grainy. Freeze the chicken and broth on their own, then make a fresh batch of dough when you thaw it.

FAQs

What's the difference between drop dumplings and rolled dumplings? 

Drop dumplings, what I make here, are a soft biscuit-style dough dropped in as rounds that puff up and stay tall. Rolled dumplings get rolled flat, cut into strips, and go soft and slick in the broth. People are loyal to whichever one they grew up on.

Should chicken and dumplings be thick?

Depends on who raised you. Mine sits between a soup and a stew, thick enough to coat a spoon but still loose enough to eat with one. Simmer it uncovered for a few minutes before the dumplings go in if you want it thicker.

chicken and dumplings in bowl

Looking for more hearty soup recipes? Check these out:

  • Vegetable Beef Soup - Tender beef and a pile of vegetables in a rich, savory broth. Another big pot situation.
  • Split Pea Soup with Ham - Thick, smoky, and one of the easiest soups on the site.
  • Oxtail Soup - Oxtail simmered low and slow into a deep, beefy broth.

I hope you love this recipe as much as we do. If you have tried this recipe or any other recipe on my blog, please rate it and let me know how it turned out in the comments below! Your feedback is invaluable and helps us grow. Thank you for your support!

Overhead bowl of chicken and dumplings with a wooden spoon
Print Recipe
No ratings yet

Chicken and Dumplings Recipe

Classic chicken and dumplings made with flavorful chicken broth, and fluffy soft dumplings.
Prep Time15 minutes mins
Cook Time1 hour hr 15 minutes mins
Total Time1 hour hr 30 minutes mins
Course: Main Course
Cuisine: American
Keyword: chicken and dumplings
Servings: 6
Calories: 490kcal
Author: Tanya Harris

Equipment

  • 1 4-quart Dutch Oven

Ingredients

Chicken and Broth

  • 3 pounds bone-in skin-on chicken thighs (about 6 to 8 thighs)
  • 1 teaspoon kosher salt plus more to taste
  • ½ teaspoon black pepper plus more to taste
  • 2 tablespoons neutral oil
  • 1 cup yellow onion finely diced (about 1 medium onion)
  • ½ cup celery finely diced (about 2 medium ribs)
  • ½ cup carrots finely diced (about 1 medium carrot)
  • 4 cloves garlic minced
  • 2 tablespoons all-purpose flour
  • 6 cups low-sodium chicken broth
  • 1 teaspoon poultry seasoning
  • 1 teaspoon dried thyme
  • ½ cup heavy cream

Dumplings

  • 1 ½ cups all-purpose flour
  • 2 teaspoons baking powder
  • 1 teaspoon kosher salt
  • 4 tablespoons cold unsalted butter
  • ½ cup heavy cream

Instructions

Chicken and Broth

  • Pat the chicken thighs dry and season both sides with the kosher salt and black pepper.
  • Heat the neutral oil in a large Dutch oven over medium-high heat. Add the chicken thighs skin side down and cook until well browned, about 5 to 7 minutes. Turn and brown the second side, about 3 to 4 minutes. Transfer the chicken to a plate.
  • Drain off the excess fat, leaving about 2 tablespoons in the pot. Reduce the heat to medium. Add the onion, celery, and carrots and cook, stirring occasionally, until softened, about 5 to 6 minutes.
  • Add the garlic and cook 30 seconds. Add the flour, stir, and cook 1 minute.
  • Pour in the chicken broth, scraping up the browned bits from the bottom of the pot. Add the poultry seasoning and dried thyme. Return the chicken thighs and any accumulated juices to the pot.
  • Bring the broth to a gentle simmer. Cover and cook until the chicken is tender, about 35 to 45 minutes. Chicken is safe at an internal temperature of 165°F (74°C).
  • Transfer the chicken thighs to a plate. When cool enough to handle, remove and discard the skin and bones. Shred or chop the chicken into bite-size pieces.
  • Return the shredded chicken to the pot, along with the heavy cream, and bring the broth back to a gentle simmer. Taste and season with additional salt and black pepper as needed.

Dumplings

  • In a medium bowl, whisk together the flour, baking powder, and salt. Cut in the cold butter with a pastry cutter, fork, or fingertips until the mixture resembles coarse crumbs with some pea-size pieces of butter. Stir in the heavy cream just until a thick dough forms. If the dough appears dry, add more cream 1 teaspoon at a time.
  • Break the dough into rounds, about 10-12 golf-ball sized rounds, and drop them into the gently simmering chicken mixture, leaving space between each dumpling.
  • Cover the pot and cook without stirring for 12 to 15 minutes, until the dumplings are puffed and cooked through.
  • Remove the pot from the heat and let stand, covered, for 5 minutes. Serve hot.

Notes

  • Chicken: Bone-in, skin-on thighs give the broth the most flavor. Boneless or skinless can be used, but brown them anyway and expect a lighter broth. You could use chicken breast if that's what you prefer.
  • Broth: Use low-sodium chicken broth to control the amount of salt in the final dish.
  • Shortcut: Cooked rotisserie or leftover chicken can be used. Skip the browning step, cook the vegetables in butter or oil, and stir the shredded chicken into the broth before adding the dumplings.
  • Lid: Do not lift the lid or stir while the dumplings cook. They cook by trapped steam.
  • Storage: Refrigerate up to 3 days. Reheat gently, covered, with a splash of broth. Freezing with the dumplings in is not recommended.

Nutrition

Calories: 490kcal | Carbohydrates: 35g | Protein: 32g | Fat: 25g | Saturated Fat: 13g | Cholesterol: 135mg | Sodium: 780mg | Potassium: 520mg | Fiber: 2g | Sugar: 3g | Calcium: 140mg | Iron: 2.5mg

September 1, 2026 by Tanya Harris Leave a Comment

Lomo Saltado (Peruvian Beef Stir Fry)

lomo saltado on plate with fries

Peruvian lomo saltado is a bold, savory beef stir-fry with tender strips of steak, charred red onion, and ají amarillo tossed in a glossy soy-and-vinegar sauce.

plated lomo saltado with tender beef, charred onions, and crispy fries"

You’ll find the full recipe with ingredient amounts and instructions in the recipe card at the bottom of this post. Be sure to check out the blog post itself for extra tips and tricks!

tanya holding a plate of lomo saltado

I learned to make lomo saltado during a cooking class in Peru. The moment our instructor pulled out a massive wok, I was shocked, and that was how I learned about the rich Asian influence in Peruvian cuisine.

I had eaten lomo saltado at many restaurants in the United States before taking the class, but making it in Peru gave me a new appreciation for the dish.

Lomo saltado is served with fries, and I learned that the best way to make them is to slowly fry them in oil on the stove while you prep the ingredients for the stir-fry. At least that's what we did in class. This also goes well with garlic-flavored rice. It's a great quick dish with plenty of flavor.

Happy Cooking,

Tanya

A Quick Look at The Ingredients

Ingredient amounts and full recipe instructions are on the printable recipe card at the bottom of the post.

Please see the recipe card below for the full printable recipe, ingredients, and instructions. Here you will find step-by-step photos of how to make this recipe.

  • Beef tenderloin. Tenderloin is a tender cut of beef and the usual cut used in Lomo Saltado. Tenderloin sears fast and still stays tender. It's best to buy a tenderloin steak or filet mignon and slice it yourself. Slice across the grain to keep it tender.
  • Ají amarillo. This is the Peruvian yellow chili that gives the dish its flavor, and it is more fruity than fiery. I buy mine at my local Latin grocery store, in the freezer section, which is where you will usually find whole ají amarillo in the States. If you cannot find the fresh or frozen chili, ají amarillo paste works and is often shelf-stable in the same store or online. Use ½ tablespoon of paste in place of the whole chili.
  • Russet or Yukon Gold potatoes. Either works. Cut them into even sticks so they cook at the same rate.
  • Red onion. Cut it into thick slices, not thin ones. You want the pieces to char on the edges and still have some crunch left.
  • Garlic and green onions. Fresh minced garlic adds that classic aromatic punch to the stir-fry, while sliced green onions bring a mild bite and fresh color right at the end.
  • Roma tomatoes. Also sliced thick for the stir-fry.
  • Red wine vinegar and soy sauce. These two make the sauce.
  • Fresh Cilantro. Added at the end to give flavor and give the dish some color.
  • Salt and pepper. Used to season the steak and add any additional flavor you may want to the dish.
  • Cooked rice. For serving.
ingredients for lomo saltado in bowls

How to Make Peruvian Lomo Saltado

Please see the recipe card below for the full printable recipe, ingredients, and instructions. Here you will find step-by-step photos of how to make this recipe.

Step 1: Slow fry the potatoes. Peel the potatoes and cut them into ½-inch sticks, rinse in cold water to remove starch, and pat thoroughly dry.

Heat 1 inch of vegetable oil in a heavy-bottomed pot over medium heat until it reaches 325°F (165°C). Fry the potatoes for about 25 to 30 minutes, stirring occasionally, until deeply golden and crisp. Drain on a wire rack, then place in a bowl and toss immediately with salt. Keep warm.

fries being pulled out of hot oil

Step 2: Season and sear the beef. While your potatoes are cooking, toss sliced beef with salt and pepper.

Heat a wok or heavy skillet over high heat. Add 2 tablespoons of oil and sear half the beef in a single layer for 1 to 2 minutes without moving it to get a char. Flip, cook for 1 minute more, and transfer to a plate. Add about 1 tablespoon of oil and sear the second batch.

beef searing in wok

Step 3: Stir-fry and sauce. Heat the remaining oil. Add the sliced red onion, ají amarillo, and minced garlic. Stir-fry over high heat for 1 to 2 minutes, stirring constantly, until fragrant and slightly charred.

Return the beef and juices to the pan along with the tomato wedges and green onions. Pour ¼ cup red wine vinegar and 2 tablespoons soy sauce into the pan. Stir-fry for 30 seconds to 1 minute until the sauce turns glossy and coats everything.

stir fry beef in wok

Step 4: Finish and serve. Take the pan off the heat and fold in 2 tablespoons of chopped cilantro. Pile the crispy fries on a platter or individual plates, spoon the beef and vegetables and all that sauce right over the top, or next to it. Serve immediately with warm white rice.

lomo saltado on plate

Storage, Reheating, and Freezing

  • Storing. Store the beef and vegetables in an airtight container in the refrigerator for up to 3 days. Store the fries separately. They will soften in the fridge no matter what, but they hold up better on their own than sitting in sauce overnight.
  • Reheating. Reheat the beef and vegetables in a hot skillet for a minute or two, just until warmed through. The microwave works, but it will keep cooking the beef and firm it up. Bring the fries back in a 400°F (204°C) oven or in the air fryer for a few minutes until they crisp again.

Tanya's Top Tips

  • Get everything cut before you turn on the wok. The stir-fry portion of this recipe takes about four minutes from start to finish.
  • Slice the beef across the grain. You can see the muscle fibers running in one direction. Cut perpendicular to them.
lomo saltado on plate with fries

FAQs

What is lomo saltado?

It is a Peruvian beef stir-fry that comes out of Peru's chifa tradition, the Chinese Peruvian cooking that developed after Chinese immigrants arrived in Peru in the 1800s. That is why you get soy sauce and wok cooking sitting alongside ají amarillo and Peruvian potatoes on the same plate. "Saltado" refers to the stir-fry technique itself.

Is lomo saltado spicy?

Not very. Ají amarillo is fruity and moderately hot, and seeding it as I do here takes out most of the burn. If you are sensitive to heat, use half the chili or leave it out.

Do the fries go on the plate or in the pan?

You will see it both ways in Peru. I serve mine under the beef so they catch the sauce but keep some crunch. Tossing them into the pan at the end works too if you like them fully coated.

More Peruvian Recipes to Try

  • Peruvian Chicken – Juicy, flavorful chicken that is perfect for building a larger Peruvian-inspired meal.
  • Peruvian Green Sauce – A creamy, spicy sauce that tastes especially delicious drizzled over lomo saltado fries.
  • Garlic-Flavored Rice – An easy, savory side dish to serve with lomo saltado.

I hope you love this recipe as much as we do. If you have tried this recipe or any other recipe on my blog, please rate it and let me know how it turned out in the comments below! Your feedback is invaluable and helps us grow. Thank you for your support!

lomo saltado on plate with fries
Print Recipe
No ratings yet

Lomo Saltado (Peruvian Beef Stir Fry)

Tender beef tenderloin seared hard and fast with red onion, ají amarillo, and tomato in a glossy soy and vinegar sauce, served over crispy hand cut fries with white rice. This is the Peruvian classic I learned to make in Peru.
Prep Time20 minutes mins
Cook Time30 minutes mins
Total Time50 minutes mins
Course: entree
Cuisine: Peruvian
Keyword: lomo saltado, Peruvian beef stir fry
Servings: 4
Calories: 585kcal
Author: Tanya Harris

Equipment

  • Cast Iron Wok

Ingredients

Crispy Potatoes

  • 1.5 pounds Russet or Yukon Gold potatoes, peeled and cut into ½ inch thick sticks
  • Neutral oil for frying vegetable or canola
  • 1 teaspoon kosher salt

Beef and Stir Fry

  • 1 pound beef tenderloin sliced across the grain into strips, about ½ inch thick
  • ½ teaspoon kosher salt
  • ½ teaspoon ground black pepper
  • 4 tablespoons high heat cooking oil divided
  • 1 medium red onion cut into ½ inch thick slices
  • 1 ají amarillo chili pepper seeded and julienned (or ½ tablespoon ají amarillo paste)
  • 3 cloves garlic finely minced
  • 2 roma tomatoes seeded and cut into wedges
  • 3 green onions sliced
  • ¼ cup red wine vinegar
  • 2 tablespoons soy sauce
  • 2 tablespoons fresh cilantro finely chopped

For Serving

  • Cooked long grain white rice

Instructions

For the Potatoes

  • Rinse the cut potato sticks in cold water to remove excess surface starch, then dry them thoroughly with paper towels.
  • Heat 1 inch of oil in a heavy-bottomed pot or Dutch oven to 325°F (165°C). Fry the potatoes slowly for 25 to 30 minutes, stirring occasionally, until deeply golden, blistered, and crisp throughout. Drain on a wire rack, then place in a bowl and toss immediately with salt. Keep warm.

For the Beef Stir Fry

  • In a bowl, toss the sliced beef tenderloin with the ½ teaspoon kosher salt and the black pepper until evenly coated.
  • Heat a large wok or heavy skillet over high heat until smoking hot. Add 2 tablespoons of the oil. Add half the beef in a single layer and sear undisturbed for 1 to 2 minutes, until a dark char develops. Flip and cook 1 minute more, then transfer to a plate.
  • Add 1 tablespoon of the oil and sear the second batch of beef the same way. Set aside on the plate.
  • Add the remaining 1 tablespoon of oil to the hot pan. Add the red onion, ají amarillo, and garlic. Stir fry over high heat for 1 to 2 minutes, until the garlic is fragrant and the onions are lightly charred at the edges but still crisp.
  • Return the beef and any resting juices to the pan. Add the tomato wedges and green onions. Pour the red wine vinegar and soy sauce around the perimeter of the pan. Toss continuously over high heat for 45 to 60 seconds, until the sauce reduces into a glossy glaze that coats the meat and vegetables.
  • Remove from the heat and fold in the chopped cilantro. Arrange the crispy fried potatoes on a serving platter or individual plates, spoon the beef and vegetables over the top, and serve immediately with warm white rice.

Notes

Storage: Refrigerate the beef and vegetables in an airtight container up to 3 days, storing the fries separately. Reheat the beef in a hot skillet and re-crisp the fries in a 400°F (204°C) oven or air fryer. Not recommended for freezing.

Nutrition

Calories: 585kcal | Carbohydrates: 42g | Protein: 36g | Fat: 30g | Saturated Fat: 6g | Cholesterol: 75mg | Sodium: 930mg | Fiber: 4g | Sugar: 5g

Peru is such an amazing place to visit. Here are some photos of the Lomo Saltado from our cooking class.

lomo saltado on plate with fries and rice
lomo saltado in bowl

August 24, 2026 by Tanya Harris Leave a Comment

Creamy Chicken Spaghetti

chicken spaghetti in skillet with spoon

This creamy and cheesy chicken spaghetti is made in one pot on the stove. It's weeknight-friendly, and puts good eating on the table easily.

chicken spaghetti in skillet with spoon

You’ll find the full recipe with ingredient amounts and instructions in the recipe card at the bottom of this post. Be sure to check out the blog post itself for extra tips and tricks!

close up of chicken spaghetti in the pan

About this Chicken Spaghetti

  • Best for: Weeknight dinner, feeding a family, one-pot meal
  • Time to make: 45 minutes
  • Good to know: I keep this recipe in one-pot, on the stove. If you want to use your oven, you can get a nice golden cheesy crust. It's up to you 🙂
close up Tanya holding bowl

Years ago, I shared a pressure cooker chicken spaghetti, and it took off. People love that recipe, and I do too. However, many people who didn't have a pressure cooker really wanted a traditional version of making it. So here it is.

For this recipe, I chose to keep it a one-pot meal made completely on the stove. This is so good and so easy to whip up in one pot in an instant. Serve it alone, or with a side salad.

Happy cooking,

Tanya

A Quick Look at the Ingredients You Will Need

Ingredient amounts and full recipe instructions are on the printable recipe card at the bottom of the post.

  • Chicken thighs. I use boneless, skinless thighs and leave them whole during searing. Thighs stay juicy through the simmer, and they brown better as whole pieces than when cut up. You can use chicken breast if that's what you have, but watch it closely so it doesn't dry out.
  • Seasoned salt, Italian seasoning, paprika, red pepper flakes. All of the seasonings I add in this dish to give it so much flavor.
  • Baby bella mushrooms. I love these mushrooms. They go along so well with the cheese and other flavors in this pasta. 
  • Diced tomatoes with green chiles. I use Ro*Tel. It’s an easy way to add some color and flavor to this pasta dish.  
  • Thin spaghetti. This is a preference thing. I like how thin spaghetti soaks up the sauce, and I like the texture better here. Regular spaghetti works fine in this dish as well.
  • Sharp cheddar. We stick to cheddar for convenience and cost, and sharp cheddar gives you the most flavor per cup. Shred it off the block if you have a minute, but I’ve also made this recipe with the bagged cheddar, and it was perfectly fine. Cheese melted fine, and it still tasted oh so good. 
  • Heavy cream. Goes in at the end, off high heat, so it doesn't break. This also thickens the sauce and makes it creamy.

Equipment

You need a wide, large, deep skillet with a tight-fitting lid. This will ensure your liquid doesn't evaporate too quickly.

If you want to do the optional broiled cheese top, your pot needs to be oven-safe and safe under a broiler, and it goes in uncovered.

How to Make Chicken Spaghetti

Please see the recipe card below for the full printable recipe, ingredients, and instructions. Here you will find step-by-step photos of how to make this recipe.

Step 1: Season the chicken thighs on both sides with 1 ½ teaspoons of the seasoned salt. Heat the olive oil in your pot over medium-high heat and lay the thighs in an even layer, leaving them whole.

Sear 5 to 6 minutes per side, until they're lightly browned on the outside. Move them to a clean cutting board and let them rest for a few minutes.

chicken sear in skillet

Step 2: Reduce the heat to medium and add the butter. Once it melts, add the chopped onion and sliced mushrooms, scraping up the browned bits from the bottom as they release.

Cook 4 to 5 minutes, until the onion is translucent and the mushrooms have given up their liquid and softened.

Stir in the minced garlic, the diced tomatoes with green chiles, paprika, Italian seasoning, red pepper flakes, and the remaining seasoned salt. Stir and cook for about 20 seconds.

tomatoes, mushrooms, and onions in skillet

Step 3: While the vegetables cook, chop the rested chicken into bite-size pieces.

Pour in the chicken broth and return the chopped chicken to the pot along with any juices that collected on the board. Bring the liquid to a simmer.

Add the broken spaghetti, spreading it out and pressing down gently so the noodles are mostly submerged. They won't be perfectly covered, and that's fine.

spaghetti in broken noodle pieces and chicken pieces

Step 4: Cover with the tight-fitting lid, reduce the heat to medium-low, and simmer 8 to 10 minutes. Stir 2 or 3 times while it cooks so the noodles don't clump together.

chicken spaghetti cooking in skillet

Step 5: Turn the heat down to low. Pour in the heavy cream and stir in 2 cups of the shredded sharp cheddar. Stir 2 to 3 minutes, until the cheese is fully melted.

Now here's the part where you might panic. The sauce is going to look thin. Let it sit 5 to 10 minutes off the heat, stirring occasionally, and it thickens right up as the starch and the cream settle.

fork picking up chicken spaghetti fron skillet

Serve and enjoy.

Optional Broiling Step: Sprinkle an extra ½ cup of sharp cheddar over the top. Place your oven-safe skillet directly under the broiler on high for 2 to 4 minutes, uncovered, until the cheese is melted, bubbling, and golden brown.

Tanya's Top Tips

  • Sear the thighs whole. This is the biggest change from my pressure cooker version. Whole pieces sit flat against the pot and brown properly. Cut them up first and they crowd, steam, and stay pale.
  • Do not boil the noodles first. The starch the pasta releases as it cooks is what thickens this sauce. Boil them separately and you pour that thickener down the drain.
  • The lid matters more than the pot. A lid that doesn't seal well lets steam escape and you'll end up short on liquid with crunchy noodles. If yours is loose, lay a piece of foil under it.
  • Trust the sitting time. A watery-looking sauce at the 2 minute mark is normal. Cheese sauce and cream both thicken as they cool. Give it the full 10 minutes before you decide anything is wrong.

What to Serve with Chicken Spaghetti

This is a full meal on its own, so I keep the sides simple and green.

  • Southern green beans or smothered green beans
  • A collard green salad if you want something crisp against all that cream
  • Garlic bread, and my garlic herb butter spread on toasted bread does the job
chicken spaghetti close up

Storage, Reheating, and Freezing

Refrigerator: Cool it down and store in an airtight container for up to 4 days.

Reheating: The pasta keeps absorbing sauce in the fridge, so it'll be thick and tight the next day. Reheat in a skillet over low heat with a splash of chicken broth, milk, or cream, stirring until it loosens back up. The microwave works too, in 30 second bursts with a splash of liquid stirred in between.

Freezing: I don't recommend freezing this one. Cream sauces separate when they thaw and cooked pasta comes back mushy. If you want a freezer meal, cook and freeze the seasoned chicken-and-vegetable base separately, then make the pasta fresh.

I hope you love this recipe as much as we do. If you have tried this recipe or any other recipe on my blog, please rate it and let me know how it turned out in the comments below! Your feedback is invaluable and helps us grow. Thank you for your support!

chicken spaghetti in skillet with spoon
Print Recipe
No ratings yet

Chicken Spaghetti Recipe

Creamy one pot chicken spaghetti with seared chicken thighs, mushrooms, and sharp cheddar. The noodles cook right in the sauce, so there's no second pot to wash.
Prep Time10 minutes mins
Cook Time35 minutes mins
Total Time45 minutes mins
Course: entree, Main Course
Cuisine: American
Keyword: chicken spaghetti
Servings: 6 servings
Calories: 866kcal
Author: Tanya Harris

Ingredients

  • 1.5 pounds boneless skinless chicken thighs
  • 2 teaspoons seasoned salt divided
  • 2 tablespoons olive oil
  • 3 tablespoons unsalted butter
  • ½ cup yellow onion chopped
  • 8 ounces baby bella mushrooms sliced
  • 2 cloves garlic minced (about ½ tablespoon)
  • 1 10-ounce can diced tomatoes with green chiles such as Ro*Tel, undrained
  • 1 teaspoon paprika
  • ½ teaspoon Italian seasoning
  • ½ teaspoon red pepper flakes
  • 3 cups chicken broth
  • 10 ounces thin spaghetti broken in half
  • 1 cup heavy cream
  • 2.5 cups sharp cheddar cheese shredded, divided

Instructions

  • Season the chicken thighs on both sides with 1 ½ teaspoons of the seasoned salt.
  • Heat the olive oil in a Dutch oven, braiser, or deep skillet over medium-high heat. Add the chicken in an even layer and sear 5 to 6 minutes per side, until lightly browned on the outside. Remove the chicken to a clean cutting board and let rest 5 minutes.
  • Reduce the heat to medium and add the butter. Once melted, add the chopped onion and sliced mushrooms, scraping up any browned bits from the bottom. Cook 4 to 5 minutes, until softened.
  • Stir in the minced garlic, diced tomatoes with green chiles, paprika, Italian seasoning, red pepper flakes, and the remaining seasoned salt. Cook about 20 seconds, until fragrant.
  • Chop the seared chicken into bite-size pieces. Pour the chicken broth into the pot and return the chopped chicken, along with any accumulated juices. Bring the liquid to a simmer.
  • Add the broken spaghetti, spreading it out and pressing down gently so the noodles are mostly submerged.
  • Cover with a tight-fitting lid, reduce the heat to medium-low, and simmer 8 to 10 minutes, stirring 2 to 3 times to keep the noodles separated. Cook until the pasta is tender and the chicken reaches an internal temperature of 165°F (74°C).
  • Turn the heat to low. Pour in the heavy cream and stir in 2 cups of the shredded sharp cheddar. Stir 2 to 3 minutes, until the cheese melts. Let the pot sit 5 to 10 minutes, stirring occasionally, while the sauce thickens.
  • For an optional crisp cheesy top, scatter the remaining ½ cup sharp cheddar over the surface and place the uncovered pot directly under your oven's broiler on high for 2 to 4 minutes, until the cheese is bubbling and golden brown. Serve warm.

Video

Notes

  • Thin sauce: The sauce looks thin right after the cheese melts and thickens as it sits. Give it the full 10 minutes.
  • Broiling: Only broil if your pot is oven-safe and broiler-safe, and leave it uncovered.
  • Storage: Refrigerate up to 4 days. Reheat over low heat with a splash of broth, milk, or cream. Freezing is not recommended.

Nutrition

Calories: 866kcal | Carbohydrates: 42g | Protein: 39g | Fat: 61g | Saturated Fat: 28g | Polyunsaturated Fat: 6g | Monounsaturated Fat: 20g | Trans Fat: 0.3g | Cholesterol: 220mg | Sodium: 1627mg | Potassium: 641mg | Fiber: 2g | Sugar: 4g | Vitamin A: 1538IU | Vitamin C: 2mg | Calcium: 401mg | Iron: 2mg

August 21, 2026 by Tanya Harris Leave a Comment

Pumpkin Bread (Starbucks Copycat)

pumpkin bread whole on cooling rack

This Copycat Starbucks Pumpkin Bread is moist, perfectly spiced, and great alongside a cup of coffee.

pumpkin bread whole on cooling rack

You’ll find the full recipe with ingredient amounts and instructions in the recipe card at the bottom of this post. Be sure to check out the blog post itself for extra tips and tricks!

slices of pumpkin bread on plate

About this Pumpkin Bread

  • This quick bread uses canned pumpkin puree and a host of spices that bring out that delicious Fall pumpkin flavor.
  • This bread is easy to throw together.
  • I add those little pumpkin seeds, also known as pepitas, on top. Just like they do at Starbucks.
Tanya holding slice of pumpkin bread

Any time I hit up that Starbucks drive-thru, I grab a slice of pumpkin bread whenever it's available. It's moist and full of pumpkin spice flavor, and it's a recipe I had to learn to make at home.

If you know me, you know I love easy, quick breads, just like this banana bread recipe. This pumpkin bread comes together pretty easily, and it bakes in about an hour. It's perfect for breakfast or for a cozy snack.

Happy baking, Tanya.

Ingredient List

Ingredient amounts and full recipe instructions are on the printable recipe card at the bottom of the post.

  • Light brown sugar and granulated sugar. The brown sugar carries molasses flavor and keeps the loaf moist for days. The granulated sugar keeps it from going too dark and heavy.
  • Pumpkin purée. Look for a can that says 100% pumpkin, not pumpkin pie mix. Pie mix is already sweetened and spiced and will throw the whole recipe off.
  • Neutral oil. I used vegetable oil, but canola or avocado oil works just as well.
  • Eggs. Bring them to room temperature and whisk them lightly before adding them to the batter.
  • Vanilla extract. A small amount, but it rounds out the spices.
  • All-purpose flour. Spoon it into the cup and level it off, or weigh it.
  • Cornstarch. This is the piece that gets you closest to the texture of that pastry case. It softens the flour and gives you a tender, cake-like crumb instead of a chewy one.
  • Baking soda and baking powder. I use both on purpose. The soda handles the browning and the lift, and the small amount of powder keeps the rise steady through a long bake.
  • Cinnamon, ginger, nutmeg, cloves, and salt. I chose to measure these separately rather than use a pumpkin pie spice blend so I can control the flavor. Salt helps bring out all the flavors.
  • Raw pepitas. These need to be raw, not roasted or salted. They toast during the bake, and roasted ones will scorch. I found mine at an international market, and they're the easiest thing on the list to skip if you can't track them down.

How to make Copycat Starbucks Pumpkin Bread

Please see the recipe card below for the full printable recipe, ingredients, and instructions. Here you will find step-by-step photos of how to make this recipe.

Step 1: Heat the oven to 325°F (163°C) and grease an 8-by-4-inch (20 by 10 cm) loaf pan.

Step 2: In a large bowl, whisk together the light brown sugar, granulated sugar, pumpkin, oil, eggs, and vanilla until smooth. You want no streaks of egg left and no clumps of brown sugar.

Pumpkin purée, sugar, oil, and eggs whisked smooth in a glass mixing bowl

Step 3: In a separate bowl, whisk together the flour, cornstarch, baking soda, baking powder, salt, cinnamon, ginger, nutmeg, and cloves.

Flour, cornstarch, and pumpkin bread spices whisked together in a glass bowl

Step 4: Add the dry ingredients to the pumpkin mixture and fold with a spatula just until no dry streaks remain. Stop there. Overmixing develops the gluten and gives you a tough, tunneled loaf instead of a tender one.

Thick spiced pumpkin bread batter folded together in a glass bowl with a spatula

Step 5: Transfer the batter to the prepared pan right away and smooth the surface. Scatter the pepitas edge-to-edge across the top, then press them lightly into the batter so they stick.

Bake for 55 to 65 minutes. Check around the 45-minute mark and tent loosely with foil if the top is getting too dark. The loaf is done when a tester in the center comes out with moist crumbs and no wet batter, or when an instant-read thermometer in the center reads 200°F to 205°F (93°C to 96°C).

Cool the loaf in the pan for about 15 minutes, then remove it, place it on a wire rack, and let it cool completely.

before and after of making pumpkin bread batter

Serve and enjoy 🙂

Variations

  • Skip the seeds. The pepitas are the visual signature, but the loaf is just as good on its own if you can't find raw ones.
  • Use pumpkin pie spice. If you'd rather use a blend, swap in about 1 tablespoon of pumpkin pie spice for the cinnamon, ginger, nutmeg, and cloves. You'll lose some control over the balance, but it works.
  • Add mix-ins. Fold in up to 1 cup of chocolate chips, chopped pecans, or chopped walnuts at the very end of mixing.
  • Make muffins. Divide the batter evenly among a 12-cup lined muffin tin, scatter pepitas over each, and bake at 350°F (177°C) for 18 to 22 minutes. They're done when a tester inserted in the center comes out with moist crumbs.

What to serve with Pumpkin Bread

Coffee, first and always.

A thick slice with butter melting into it is breakfast. Warmed slightly with a scoop of vanilla ice cream, it's a dessert after dinner.

If you're building a fall or holiday spread, this pairs well next to my Homemade Pumpkin Pie or a Southern Sweet Potato Pie on the dessert table.

slices of pumpkin bread on plate

Storage, Reheating, and Freezing

Room temperature. Wrapped tightly in plastic wrap or in an airtight container, this loaf keeps for 3 to 4 days on the counter. The oil and brown sugar keep it moist the whole time.

Refrigerator. Up to a week, wrapped well. It firms up cold, so let slices come to room temperature or warm them before eating.

Reheating. 10 to 15 seconds in the microwave. You can also toast a slice in a dry skillet over medium heat for about a minute per side to crisp up the cut edges.

Freezing. Freeze individual slices by wrapping each tightly in plastic wrap, then placing them in a freezer-safe zip-top bag for up to 3 months. To freeze the whole loaf, let it cool completely, wrap it in a layer of plastic wrap followed by aluminum foil, and freeze. Thaw overnight on the counter before slicing.

FAQ

What's in Starbucks pumpkin bread?

The short version is pumpkin purée, flour, sugar, oil, eggs, and warm baking spices, with pepitas across the top. Starbucks publishes the full ingredient listing for their bakery items on their website and in the app if you want the exact rundown.

I hope you love this recipe as much as we do. If you have tried this recipe or any other recipe on my blog, please rate it and let me know how it turned out in the comments below! Your feedback is invaluable and helps us grow. Thank you for your support!

pumpkin bread whole on cooling rack
Print Recipe
No ratings yet

Copycat Starbucks Pumpkin Bread Recipe

A moist, warmly spiced pumpkin loaf made to taste like the one in the Starbucks pastry case.
Prep Time15 minutes mins
Cook Time1 hour hr
Total Time1 hour hr 15 minutes mins
Course: Bread, Breakfast
Cuisine: American
Keyword: copycat starbucks pumpkin bread
Servings: 8 servings
Calories: 436kcal
Author: Tanya Harris

Equipment

  • 8x4 8x4 loaf pan

Ingredients

  • 1 cup (200 g) light brown sugar packed
  • ½ cup (115 g) granulated sugar
  • 1 cup (275 g) 100% pumpkin from the can
  • ½ cup (107 g) vegetable oil or any nuetral oil like canola, etc.
  • 2 large eggs room temperature, lightly whisked
  • 1 teaspoon (5 g) vanilla extract
  • 1¾ cups (230 g) all-purpose flour
  • 2 tablespoons (17 g) cornstarch
  • 1 teaspoon baking soda
  • ½ teaspoon baking powder
  • 1½ teaspoons ground cinnamon
  • 1 teaspoon ground ginger
  • 1 teaspoon ground nutmeg
  • ½ teaspoon ground cloves
  • ½ teaspoon salt
  • 2 tablespoons raw pepitas (pumpkin seeds), for the top

Instructions

  • Heat the oven to 325°F (163°C). Grease an 8 by 4 inch (20 by 10 cm) loaf pan and set aside.
  • In a large bowl, whisk together the light brown sugar, granulated sugar, pumpkin purée, oil, eggs, and vanilla extract until smooth.
  • In a separate bowl, whisk together the flour, cornstarch, baking soda, baking powder, salt, cinnamon, ginger, nutmeg, and cloves.
  • Add the dry ingredients to the pumpkin mixture. Fold with a spatula just until no dry streaks remain. Do not overmix.
  • Transfer the batter into the prepared pan right away. Smooth the surface, scatter the pepitas edge to edge over the top, and press them lightly into the batter so they stick.
  • Bake for 55 to 65 minutes. Check at the 45 minute mark and tent loosely with foil if the top is getting too dark. The loaf is done when a tester in the center comes out with moist crumbs and no wet batter, or when the internal temperature reaches 200°F to 205°F (93°C to 96°C).
  • Cool the loaf in the pan for about 15 minutes, then lift it out onto a wire rack and cool completely.

Notes

  • Once completely cool, wrap tightly in plastic wrap and let sit overnight before slicing for the densest, most cohesive crumb.
  • Pan size. 8 by 4 inch (20 by 10 cm). A 9 by 5 inch pan gives a flatter, wider loaf.
  • Use 1 tablespoon pumpkin pie spice in place of the individual spices.
  • Storage. Airtight at room temperature 3 to 4 days, or refrigerated up to 1 week.

Nutrition

Calories: 436kcal | Carbohydrates: 67g | Protein: 6g | Fat: 17g | Saturated Fat: 2g | Cholesterol: 53mg | Sodium: 373mg | Potassium: 188mg | Fiber: 2g | Sugar: 40g | Vitamin A: 5429IU | Vitamin C: 64mg | Iron: 3mg

August 19, 2026 by Tanya Harris 3 Comments

Flavorful Turkey Chili Recipe

Turkey chili in a bowl with toppings

My Turkey Chili is a one-pot dinner packed with flavor. It simmers turkey meat, tender kidney beans, and warm spices into a thick, cozy meal the whole family will love.

Turkey chili in a bowl with toppings

You’ll find the full recipe with ingredient amounts and instructions in the recipe card at the bottom of this post. Be sure to check out the blog post itself for extra tips and tricks!

spoon picking up turkey chili

The Best Turkey Chili Recipe

  • Best for: cozy dinners, game days, or a big batch to freeze for later
  • Total Time: 1 hour and 15 minutes
  • Yield: 6 servings
  • Good to know: one pot, freezer-friendly, and easily make it mild or spicy
close up Tanya holding bowl

I've been using ground turkey a ton in my dinner rotation, and I've been making turkey chili forever. Traditional chili made with beef is awesome, but we like to use ground turkey from time to time when we get tired of beef.

For this recipe, I add flavor with a good bit of chili powder. We eat ours with tortilla chips for scooping, and I put out cheddar, jalapeño, green onions, and sour cream so everyone can make their own specific bowl. For more chili recipes, be sure to check out my Instant Pot Chili and Chicken Chili.

A Quick Look at the Ingredients

Ingredient amounts and full recipe instructions are on the printable recipe card at the bottom of the post.

  • Olive oil: just enough to soften the vegetables at the start.
  • Yellow onion and red bell pepper: the red bell pepper adds a little sweetness that balances the chili powder. Green bell pepper works if that's what you have.
  • Fresh minced garlic: added after the vegetables so it doesn't burn.
  • Ground turkey: I use 93% lean ground turkey. It does not release much fat, so there is no draining and no greasy chili. If you use a turkey with more fat, feel free to drain it after browning it.
  • Chili powder: this is the main flavor in the pot. If you don't have chili powder, you can make your own chili powder substitute at home, made with spices you already have.
  • Ground cumin: the warm, earthy note that makes it taste like chili and not just like seasoned turkey.
  • Sea salt and black pepper: salt carries the flavor, and black pepper is just delicious.
  • Light and dark red kidney beans: you could use all light kidney beans or all dark kidney beans. I like to have both just to give my chili a bit more pizzazz.
  • Diced tomatoes: add the juices right along with the tomatoes.
  • Chicken broth: this is what makes chili spoonable instead of a thick meat sauce. Use low-sodium chicken broth for best results.
  • Very fine cornmeal: I use this to thicken my chili. I always have cornmeal at home. It dissolves right into the liquid without changing the flavor much, but it is delicious.

How to Make Turkey Chili

Please see the recipe card below for the full printable recipe, ingredients, and instructions. Here you will find step-by-step photos of how to make this recipe.

Step 1: Soften the vegetables. Heat the olive oil in your pot over medium heat. Add the chopped onion and red bell pepper, then cook for about 3-5 minutes until they soften. Add the minced garlic and cook for 1 minute more.

onions and peppers in dutch oven cooking

Step 2: Brown the turkey and toast the spices. Add the ground turkey and break it up with your spoon as it cooks until no pink remains. Add the chili powder, cumin, salt, and black pepper, then stir everything together for about 10 to 20 seconds. The pot will look a little dry, and the spices will smell stronger.

spices and ground turkey in pot cooking

Step 3: Simmer. Add both cans of rinsed kidney beans, the diced tomatoes with their juices, and the chicken broth. Stir, bring it to a boil, then reduce the heat to low to simmer.

Cover and let it simmer for about 35 to 45 minutes, stirring occasionally.

chili cooking in pot

Step 4: Thicken. Take the lid off for the last 10 minutes and let some of the liquid cook off. If you want it thicker, stir in the fine cornmeal during the final 5 minutes. Taste it and adjust your salt before you serve.

chili after thickening in pot

Tanya's Tips

  • Season with a heavier hand than you would with beef. Turkey is lean and mild, so it does need a little bit more seasoning to really amp up the flavors.
  • If you don't have cornmeal, you can substitute it with masa harina. You could also just leave it out. The chili will be a little bit more watery.
  • It's better the next day if you can make it ahead. The flavor settles overnight, and it is absolutely amazing as leftovers.

Variations

  • Make it spicy: add a diced jalapeño with the onion and bell pepper, or stir in cayenne pepper with the other spices. You can also just top each bowl with sliced jalapeños if you want some spicy bits.
  • Change the beans: black beans or pinto beans work in place of one or both cans of kidney beans.
  • Add more vegetables: diced carrots or celery can go in with the onion and pepper. Corn can be stirred in during the last 10 minutes as well.
turkey chili in a bowl with toppings

Sides for your Chili

Chili can be eaten on its own, but some of my favorite sides to serve it with are tortilla chips and good homemade cornbread.

This chili is also good spooned over a baked potato or rice.

How to Store

  • Refrigerator: Let the chili cool, then store it in an airtight container in the fridge for up to four days.
  • Reheating: Warm it gently on the stovetop over medium-low heat, stirring now and then. Add a splash of broth or water if it has thickened up too much overnight. The microwave also works for reheating a single bowl.
  • Freezer: This chili freezes well. Cool it completely, portion it into airtight containers or freezer bags, and freeze for up to three months. Thaw overnight in the fridge before reheating.

FAQs

Do I need to drain the ground turkey?

Usually not. Ground turkey is lean enough that there is very little fat to pour off. If you used a higher fat blend and see a pool of grease after browning, go ahead and spoon it off if you prefer.

Can I make this in a slow cooker or Instant Pot?

Yes, you can make chili in a slow cooker. I would suggest cooking this chili in the slow cooker after browning the vegetables and turkey. Cook this chili low for about 6 to 8 hours.
For an Instant Pot, I have a pressure-cooker turkey chili recipe just for that.

I hope you love this recipe as much as we do. If you have tried this recipe or any other recipe on my blog, please rate it and let me know how it turned out in the comments below! Your feedback is invaluable and helps us grow. Thank you for your support!

Turkey chili in a bowl with toppings
Print Recipe
5 from 2 votes

Easy Turkey Chili Recipe

This easy turkey chili is a 1-pot weeknight dinner made with lean ground turkey, 2 kinds of kidney beans, and plenty of chili powder. It's even better the next day.
Prep Time15 minutes mins
Cook Time1 hour hr
Total Time1 hour hr 15 minutes mins
Course: Main Course
Cuisine: American
Keyword: turkey chili
Servings: 6
Calories: 380kcal
Author: Tanya Harris

Ingredients

  • 2 tablespoons olive oil
  • 1 medium yellow onion chopped
  • 1 medium red bell pepper chopped
  • 4 garlic cloves minced
  • 1.5 lbs ground turkey
  • 3 tablespoons chili powder
  • 1 tablespoon ground cumin
  • 1 teaspoon salt
  • ½ teaspoon ground black pepper
  • 1 15-ounce can light red kidney beans rinsed and drained
  • 1 15-ounce can dark red kidney beans rinsed and drained
  • 1 14.5-ounce can diced tomatoes with juices
  • 3 cups chicken broth
  • 2 tablespoons fine cornmeal

Instructions

  • Heat the olive oil in a large heavy-bottom pot over medium heat. Add the onion and bell pepper and cook for about 3 to 5 minutes until softened. Add the garlic and cook for 1 more minute until fragrant.
  • Add the ground turkey and break it up with a spoon, cooking until no pink remains. Add the chili powder, cumin, salt, and black pepper. Stir for 10 to 20 seconds to toast the spices.
  • Add both cans of kidney beans, the diced tomatoes with their juices, and the chicken broth. Bring to a boil, then reduce the heat to low, cover, and simmer gently for 35 to 45 minutes, stirring occasionally.
  • Uncover during the last 10 minutes to let excess liquid evaporate for a thicker chili. Stir in the cornmeal during the final 5 minutes.
  • Serve with your favorite toppings.

Notes

  • 93% lean ground turkey does not need to be drained of grease. If using a fattier blend, drain it after browning.
  • Cornmeal is optional. Masa harina works too, or leave it out for a thinner chili.
  • Refrigerate up to 4 days; freeze up to 3 months.

Nutrition

Calories: 380kcal | Carbohydrates: 31g | Protein: 32g | Fat: 14g | Saturated Fat: 1g | Polyunsaturated Fat: 2g | Monounsaturated Fat: 4g | Trans Fat: 0.1g | Cholesterol: 89mg | Sodium: 1156mg | Potassium: 973mg | Fiber: 8g | Sugar: 4g | Vitamin A: 2068IU | Vitamin C: 34mg | Calcium: 121mg | Iron: 5mg

August 18, 2026 by Tanya Harris Leave a Comment

Easy Slow Cooker Whole Chicken

cooked whole chicken in slow cooker insert with parsley sprinkled on top

A whole chicken in the slow cooker gives you tender, fall-apart meat for about 15 minutes of real work. It’s weeknight-friendly and perfect if you like cooking up whole chickens.

cooked whole chicken in slow cooker insert with parsley sprinkled on top

You’ll find the full recipe with ingredient amounts and instructions in the recipe card at the bottom of this post. Be sure to check out the blog post itself for extra tips and tricks!

Fully cooked whole chicken in a slow cooker with browned seasoning and vegetables and juices around it.

Recipe Notes

  • Best for: hands-off dinner, meal prep, stretching one bird into a few meals
  • Prep time: 15 minutes
  • Cook time: 6 to 8 hours on LOW
  • Servings: 6
close up Tanya holding bowl

I like to buy whole chickens partly because they're cheaper per pound than pieces, but also because it’s what I grew up eating. My parents would buy a whole chicken and roast it in the oven, and it was always a part of our weekly rotation.

Now that I have a slow cooker, I like to use it from time to time to make a whole chicken. It’s pretty much hands-off, and the chicken comes out nice and moist with plenty of flavor and juices to make a gravy if you want. This is one of my preferred methods of meal prep when making a whole bird. If you like this kind of set-it-and-go cooking, my slow cooker pulled pork and slow cooker turkey breast work the same way.

Happy Cooking,
Tanya

Ingredient Notes

Ingredient amounts and full recipe instructions are on the printable recipe card at the bottom of the post.

  • Whole chicken: A 4 to 5 pound bird. I used a 4.5 pound chicken here. Thaw it completely in the refrigerator before it goes in the slow cooker. Pull the giblets and neck out of the cavity first.
  • Kosher salt and black pepper: The base of the rub. If you use table salt instead, scale it back, since it’s finer and saltier by volume.
  • Garlic powder and onion powder: Powders, not fresh. They cling to the skin and season the whole surface evenly instead of sitting in one spot.
  • Dried thyme and dried rosemary: Dried on purpose here. Over six-plus hours, fresh herbs go dull and stringy, while dried ones hold up and keep releasing flavor the whole time. Crush the rosemary between your fingers as you add it so you don’t end up with needles in the rub.
  • Paprika: I use sweet paprika, which is mostly there for color and mild flavor. Smoked paprika is a good swap if you want a smoky note closer to rotisserie chicken.
  • Onion, celery, and carrots: They lift the bird off the bottom of the insert so it isn’t sitting in liquid, and they turn the drippings into something worth saving.

How to Make Slow Cooker Whole Chicken

Please see the recipe card below for the full printable recipe, ingredients, and instructions. Here you will find step-by-step photos of how to make this recipe.

Step 1: Build the Vegetable Bed. Add the chopped onion, celery, and carrots to the bottom of a 6-quart slow cooker. This is your rack. It keeps the chicken up out of the juices it releases, which is the difference between roasted-tasting chicken and boiled-tasting chicken.

Chopped onion, celery, and carrots layered in the bottom of a black oval slow cooker insert.

Step 2: Mix the Rub and Dry the Bird. Stir the kosher salt, black pepper, garlic powder, onion powder, dried thyme, dried rosemary, and paprika together in a small bowl. Remove the giblets and neck from the cavity, then pat the chicken very dry with paper towels, outside and inside. Wet skin will not hold seasoning.

Step 3: Season Inside, Outside, and Under the Skin. Season the outside and the cavity. Then slide your fingers under the skin over the breast and rub seasoning directly onto the meat. That’s the step most people skip, and it’s the one that gets flavor past the skin instead of leaving it all on the surface.

Whole raw chicken coated in a brown herb and spice rub, resting on parchment paper.

Step 4: Cook on LOW. Set the chicken breast side up on the vegetables, cover tightly, and cook on LOW for 6 to 8 hours. Leave the lid alone while it works. Every time you lift it you dump the heat and add time.

Seasoned raw whole chicken placed breast side up on a bed of onion, celery, and carrots inside a slow cooker.

Step 5: Check the Temperature. It’s done when the thickest part of the thigh hits 165°F (74°C) and the meat is fork-tender. Push the thermometer into the thigh without touching bone, since bone reads hotter than the meat around it.

Fully cooked whole chicken in a slow cooker with browned seasoning and vegetables and juices around it.

Step 6: Rest, Then Carve. Move the chicken to a cutting board and let it rest 10 to 15 minutes before you cut into it. Use two large spatulas or a spatula and tongs, because it’s tender enough to come apart on you. Resting lets the juices settle back into the meat instead of running out onto your board.

Optional: Broil the bird for 3-5 minutes to crisp the skin.

Carved slow cooker chicken breast slices, thigh, and drumstick arranged on a dark plate with fresh parsley.

How Long to Cook a Whole Chicken in a Slow Cooker

A 4-to 5-pound chicken takes 6 to 8 hours on LOW. On HIGH it runs closer to 3 to 4 hours, though I cook mine on LOW and that’s what I’d recommend if you have the time.

The range is that wide because slow cookers are not consistent with each other. A bird that’s done at 6 hours in my cooker might need closer to 8 in yours, so the temperature matters more than the clock does.

Now, about dry chicken. Slow cooker chicken gets dry because it’s overcooked, not because a slow cooker dries chicken out. And a whole chicken is easier to overcook than people expect, since the breast is lean and it finishes well before a long cook time is up.

So check on it. Around the 4-hour mark, take a temperature reading in the thigh. It won’t be done that early, but you’ll find out how fast your cooker runs and you’ll know when to start checking for real. Once the thigh reads 165°F (74°C), it’s done. Leaving it longer isn’t making it better.

size Matters

I use a 6-quart oval slow cooker, and a 4 to 5-pound bird fits with room around it. If yours is a 4-quart, stay at the low end of that weight range or buy a smaller bird. A chicken wedged in tight won’t cook evenly, and the USDA recommends filling a slow cooker at least half full but no more than two-thirds full.

Turn the Drippings Into Gravy

Do not throw out what’s in the bottom of that insert. Because the chicken cooks over aromatics with no water added, the juices come out concentrated and already seasoned.

  1. Strain it. Pour the liquid through a fine-mesh strainer into a large measuring cup. Discard the cooked vegetables.
  2. Skim the fat. Let it sit 3 to 5 minutes so the fat rises, then spoon it off or use a fat separator. You should have roughly 2 to 2 ½ cups of broth left.
  3. Thicken it. Bring the broth to a gentle simmer in a small saucepan over medium heat. Whisk 2 tablespoons of cornstarch with 2 tablespoons of cold water until smooth, then whisk that slurry in slowly and cook 2 to 3 minutes until it thickens.
  4. Taste it. It’s usually seasoned well enough on its own from the rub. Add a pinch of black pepper if it needs it and serve hot.

If you’d rather keep it thin, skip the slurry and spoon the skimmed juices straight over the meat. Or use this over your rice. I do! It's so delicious and gives it a nice flavor. And if you ever need gravy on a day you don’t have drippings, my gravy without drippings recipe covers you.

cooked whole chicken in slow cooker insert with parsley sprinkled on top, close up

Tanya’s Top Tips

  • Buy a bird that fits. A 4 to 5 pound chicken in a 6-quart cooker leaves room for heat to move around it. Cramming in a 7-pound bird gets you uneven cooking, not more dinner.
  • Make stock out of the carcass right in the slow cooker. Put the bones and skin back in the cleaned insert, cover with water, and run it on LOW overnight.

Variations

  • Smoky: Swap the sweet paprika for smoked paprika. Same amount, and it pushes the flavor toward rotisserie chicken.
  • Spicy: Add cayenne or crushed red pepper to the rub.
  • Add potatoes: You can make this slow cooker chicken and potatoes by adding potatoes to the vegetable bed. Use baby potatoes and leave them whole, and stick with a waxy variety like baby reds or Yukon Gold. Waxy potatoes hold their shape over a long cook, while starchy ones like russets break down into mush by hour six.
  • Different rub: The method doesn’t care what’s on the bird. Any dry rub you like works here, including my homemade seasoned salt as a starting point.

What to Serve With Slow Cooker Whole Chicken

This is a Sunday-dinner kind of chicken, so I go the Sunday-dinner route with it. Slow cooker mashed potatoes or garlic mashed potatoes with that gravy poured over everything is hard to beat.

For rice, my oven baked rice or garlic butter rice both work well and soak up the juices.

Add a green vegetable and you’ve got a full plate. Smothered green beans, collard greens, turnip greens, or oven roasted broccoli.

Storage, Reheating, and Freezing

Storing: Let the chicken cool a bit, then pull the meat off the bones and refrigerate it in an airtight container within 2 hours of cooking. Use it within 3 to 4 days. Store any leftover juices or gravy separately.

Freezing: Portion the pulled meat into freezer bags or containers, press the air out, and freeze. For the best texture, use it within about 3 months. Thaw overnight in the refrigerator.

Reheating: Chicken this lean dries out fast on a second pass, so add liquid. Warm it in a covered skillet over medium-low with a splash of broth or the reserved juices, or microwave in short bursts with a damp paper towel over the top. Bring it back to 165°F (74°C).

Leftover ideas: Chopped and covered in gravy is my go-to. It’s also good in sandwiches, soup, and quesadillas, or turned into chicken salad. If you want to work it into a rice dish, my dirty rice and my Caribbean dirty rice are both good places to send it.

FAQs

Do I need to add water or broth?

No. A whole chicken releases plenty of liquid on its own, and the vegetable bed keeps it lifted out of that liquid. Adding water gets you closer to boiled chicken and a weaker gravy.

Why is my chicken still pink near the bone?

Keep cooking and check again in 30 to 45 minutes. Meat right against the bone can stay pinkish even when it’s fully cooked, so go by the thermometer. Once the thickest part of the thigh reads 165°F (74°C) away from the bone, it’s done.

Can I put a frozen chicken in the slow cooker?

No, and this one isn’t optional. Thaw it in the refrigerator first, which takes 24 to 48 hours depending on size. A frozen bird warms up too slowly in a slow cooker and spends too long in the temperature range where bacteria grow. If it’s still frozen the morning you wanted to cook it, roast it in the oven instead or wait a day.

I hope you love this recipe as much as we do. If you have tried this recipe or any other recipe on my blog, please rate it and let me know how it turned out in the comments below! Your feedback is invaluable and helps us grow. Thank you for your support!

cooked whole chicken in slow cooker insert with parsley sprinkled on top
Print Recipe
No ratings yet

Slow Cooker Whole Chicken Recipe

A hands-off whole chicken that cooks low and slow on a bed of onion, celery, and carrot until it falls apart. The drippings make a gravy worth keeping.
Prep Time15 minutes mins
Cook Time6 hours hrs
Total Time6 hours hrs 15 minutes mins
Course: Main Course
Cuisine: American
Keyword: slow cooker whole chicken, slow cooker whole chicken recipe
Servings: 6
Calories: 471kcal
Author: Tanya Harris

Ingredients

  • 1 (4-5 lb) whole chicken
  • 1 tablespoon kosher salt
  • 2 teaspoons garlic powder
  • 2 teaspoons onion powder
  • 1 teaspoon dried thyme
  • 1 teaspoon dried rosemary crushed
  • 1 teaspoon paprika
  • 1 teaspoon ground black pepper
  • 1 medium yellow onion chopped into 1 inch pieces
  • 3 stalks celery chopped into 1 inch pieces
  • 2 medium carrots chopped into 1 inch pieces

Instructions

  • Place the chopped yellow onion, celery, and carrots in the bottom of a 6-quart slow cooker. The vegetables act as a natural trivet, lifting the chicken so it does not sit directly in the liquid it releases.
  • In a small bowl, mix together the kosher salt, ground black pepper, garlic powder, onion powder, dried thyme, dried rosemary, and paprika. Set aside.
  • Remove the giblets and neck from the chicken cavity, then pat the entire bird dry with paper towels, outside and inside.
  • Season the outside and the inside of the chicken with the seasoning mixture. Lift the skin over the breast and rub some of the seasoning directly onto the meat underneath, then pat the remaining seasoning into the skin.
  • Place the seasoned chicken breast side up on top of the vegetables. Cover tightly with the lid and cook on LOW for 6 to 8 hours, until the thickest part of the thigh reaches an internal temperature of 165°F (74°C) away from the bone and the meat is fork-tender.
  • Carefully transfer the chicken to a cutting board and let it rest for 10 to 15 minutes before carving.
  • For golden skin, transfer the rested chicken to a rimmed baking sheet and broil on the middle rack for 3 to 5 minutes, watching closely. This step is optional.

Notes

  • To make gravy with the drippings in the slow cooker, strain the drippings, skim the fat, then simmer with a slurry of 2 tablespoons cornstarch whisked into 2 tablespoons cold water for 2 to 3 minutes.
  • Storage: Refrigerate pulled meat in an airtight container for 3 to 4 days, or freeze up to 3 months. Reheating: Reheat with added liquid to 165°F (74°C).

Nutrition

Calories: 471kcal | Carbohydrates: 6g | Protein: 39g | Fat: 31g | Saturated Fat: 9g | Polyunsaturated Fat: 0.1g | Monounsaturated Fat: 0.03g | Cholesterol: 155mg | Sodium: 1137mg | Potassium: 560mg | Fiber: 2g | Sugar: 2g | Vitamin A: 4190IU | Vitamin C: 3mg | Calcium: 47mg | Iron: 2mg

August 15, 2026 by Tanya Harris 13 Comments

Southern Smothered Potatoes Recipe

smothered potatoes in cast iron skillet with wooden spatula sticking out

These Smothered Potatoes are the ultimate side dish. This classic Southern dish features tender potatoes, sautéed peppers, and delicious seasonings, creating a comforting meal.

smothered potatoes in cast iron skillet with wooden spatula sticking out

You’ll find the full recipe with ingredient amounts and instructions in the recipe card at the bottom of this post. Be sure to check out the blog post itself for extra tips and tricks!

This side dish is a staple in our house because it is quick, delicious, and can be served during multiple meals. Whether for breakfast, lunch, or dinner, these smothered potatoes pair well with almost any meal.

Smothered potatoes are a classic dish from the Southern United States, particularly Louisiana. To "smother" vegetables means to cook them slowly at a low temperature until they are tender and flavorful. Some cooks add meats like bacon or sausage to the dish.

If you like smothered dishes, try my smothered green beans or smothered chicken.

5 Star Review

⭐⭐⭐⭐⭐

Karen H. says, "Wonderfully delicious! I have used buttermilk for years, but love the chicken broth flavor."

Ingredient Notes

Ingredient amounts and full recipe instructions are on the printable recipe card at the bottom of the post.

  • Potatoes: The star of this dish. Choose starchy potatoes like Russet or Yukon Gold for the best results.
  • Oil and Butter: To brown the potatoes and add that rich, buttery flavor.
  • Onion and Bell Pepper: These aromatic vegetables add flavor.
  • Seasonings: Paprika, garlic powder, salt, and black pepper. You can also use about one teaspoon of an all-purpose seasoning blend if you prefer.
  • Broth: Chicken broth. You could also use vegetable broth, beef broth, or water.
ingredients for smothered potatoes

Tools Needed

  • Large skillet or cast-iron pan
  • Spatula
  • Knife
  • Cutting board
  • Measuring spoons

How to Make Southern Smothered Potatoes

Please see the recipe card below for the full printable recipe, ingredients, and instructions. Here you will find step-by-step photos of how to make this recipe.

Step 1: Prep the Ingredients

Peel and cube the potatoes. You can also skip the peeling of the potatoes if you prefer. Chop the onion and green bell pepper.

Step 2: Heat the Pan and cook the peppers and onions

Heat the oil and butter in a large skillet over medium heat. Add the chopped onions and green bell pepper to the skillet. Cook, stirring occasionally, until they soften and become aromatic, about 5-7 minutes.

Step 3: Add Potatoes

Increase the heat to medium-high. Use a spatula and push the onions and bell peppers to the edges of the pan. Place the potatoes in a flat layer in the pan in the middle of the onions and peppers.

Allow them to cook undisturbed for about 5-6 minutes, then use a spatula and stir the potatoes. Continue cooking for another 5 minutes.

potatoes and green peppers in cast iron pan

Step 4: Season and Cook

Add garlic powder, paprika, salt, and black pepper to the skillet. Mix well to ensure the vegetables are evenly coated with the seasonings.

Lower the heat, pour in the chicken broth, cover, and cook potatoes for 10-15 minutes until tender. Stir occasionally to prevent sticking and ensure even cooking.

seasoning added to potatoes
cooked smothered potatoes  in skillet

Variations

  • For a vegetarian option, use vegetable broth instead of chicken or beef broth.
  • Add chopped bacon or sliced sausage for extra flavor and protein.
  • Mix in other vegetables such as carrots, celery, or mushrooms to add more texture and nutrients.
  • Slice the potatoes rather than chopping them if you prefer.

Tanya's Tips for the Best Smothered Potatoes

  • Use starchy potatoes like Russet or Yukon Gold. They hold their shape when cooked and have a creamy texture that pairs well with the gravy.
  • Don't overcrowd the pan. This will prevent the potatoes from browning evenly.
  • For maximum flavor, let the potatoes cook undisturbed for 5 minutes.
  • Although any large pan will work, use a cast iron skillet for best results.

How to Store Smothered Potatoes

  • Refrigerator: Store any leftovers in an airtight container in the refrigerator for up to 3 days.
  • Reheating: Reheat in a skillet over medium heat until warmed through. You can add a bit of oil or butter to keep them from sticking.

FAQs

Why are my smothered potatoes mushy?

Potatoes turn mushy if the pan is overcrowded, if they are stirred too frequently, or if too much broth is added too early. To prevent this, cook them undisturbed in a single layer to develop a crust before covering and simmering.

What are the best potatoes to use for smothered potatoes?

Medium- to high-starch varieties like Yukon Gold or Russet potatoes work best. Yukon Golds hold their shape well while providing a creamy interior, whereas Russets break down slightly to create a thicker pan gravy.

Do I need to peel the potatoes before cooking?

Peeling is optional. Russet potatoes are typically peeled due to their thicker skin, but thin-skinned varieties like Yukon Gold or red potatoes can be left unpeeled for extra texture and quicker prep.

Make these Smothered Potatoes A Meal: Serve them with these dishes

  • Smothered Chicken. Golden chicken thighs in a rich, creamy onion gravy that comes together in under an hour, and the gravy is very happy to run over into the potatoes.
  • Smothered Turkey Wings. Slow roasted turkey wings with a homemade gravy built from the pan drippings, and it is the Sunday dinner plate these potatoes were made for.
  • Baked Chicken Leg Quarters. Crispy skinned leg quarters baked at 400 degrees with the same all purpose seasoning you can use in these potatoes, so one spice blend gets you the whole plate.
  • Slow Cooker Collard Greens. Tender greens that cook low and slow for six to seven hours with a splash of apple cider vinegar to cut through all that richness.
  • Air Fryer Egg Frittata. A fluffy egg frittata loaded with ham and cheddar in about fifteen minutes, which turns these potatoes into a full weekend breakfast.

I hope you love this recipe as much as we do. If you have tried this recipe or any other recipe on my blog, please rate it and let me know how it turned out in the comments below! Your feedback is invaluable and helps us grow. Thank you for your support!

smothered potatoes in cast iron skillet with wooden spatula sticking out
Print Recipe
4.20 from 5 votes

Smothered Potatoes Recipe

These Smothered Potatoes are the ultimate side dish. This classic Southern dish features tender potatoes, sautéed peppers, and delicious seasonings, creating a comforting meal.
Prep Time15 minutes mins
Cook Time25 minutes mins
Total Time40 minutes mins
Course: Side Dish
Cuisine: American
Keyword: smothered potatoes, southern smothered potatoes
Servings: 4 people
Calories: 264kcal
Author: Tanya Harris

Ingredients

  • 1.5 pounds of potatoes Yukon Gold or Russet, chopped into medium cubes
  • 1 large yellow onion chopped
  • ½ medium green bell pepper chopped into small pieces
  • 2 Tablespoons olive oil
  • 2 Tablespoons unsalted butter
  • ½ teaspoon garlic powder
  • ½ teaspoon paprika
  • Salt and black pepper to taste I use about ½ teaspoon salt, ¼ teaspoon black pepper
  • ¼ cup chicken broth

Instructions

  • Heat the oil and butter in a large skillet over medium heat. Add the chopped onions and green bell pepper, cooking and stirring occasionally until they soften and become fragrant approximately 5-7 minutes.
  • Increase the heat to medium-high. Use a spatula and push the onions and bell peppers to the edges of the pan. Place the potatoes in a flat layer in the pan in the middle of the onions and peppers.
  • Allow them to cook undisturbed for about 5-6 minutes, then use a spatula and stir the potatoes. Continue cooking for another 5 minutes.
  • Add garlic powder, paprika, salt, and black pepper to the skillet. Mix well to ensure the vegetables are evenly coated with the seasonings.
  • Lower the heat, pour in the chicken broth, cover, and cook potatoes for 10-15 minutes until tender. Stir occasionally to prevent sticking and ensure even cooking.

Notes

  • Don't overcrowd the pan. This will prevent the potatoes from browning evenly.
  • For maximum flavor, let the potatoes cook undisturbed for 5 minutes.
  • Peel the potatoes or keep them unpeeled, depending on your preference. 

Nutrition

Calories: 264kcal | Carbohydrates: 34g | Protein: 4g | Fat: 13g | Saturated Fat: 5g | Polyunsaturated Fat: 1g | Monounsaturated Fat: 7g | Trans Fat: 0.2g | Cholesterol: 15mg | Sodium: 68mg | Potassium: 811mg | Fiber: 5g | Sugar: 3g | Vitamin A: 358IU | Vitamin C: 48mg | Calcium: 34mg | Iron: 2mg

This was originally published on July 11th, 2024. It has been updated with new information.

August 14, 2026 by Tanya Harris 2 Comments

Beef Tips with Rich Brown Gravy

beef tips with gravy with fork picking up beef

Beef tips are simmered slowly in a deep brown gravy until they are tender enough to cut with the side of a fork. It's the perfect cozy meal, especially when served over rice that can sop up all the gravy.

beef tips in bowl

You’ll find the full recipe with ingredient amounts and instructions in the recipe card at the bottom of this post. Be sure to check out the blog post itself for extra tips and tricks!

beef tips with fork sliding in to pick it up

Beef Tips at a Glance

  • Best for: a cozy Sunday dinner that reheats well.
  • Total Time: 2 hours 35 minutes
  • Yield: 6 servings
close up Tanya holding bowl

I have a real weakness for cozy beef dishes. Give me a stovetop beef stew or a pot of braised oxtail any day of the week, and I am a happy woman. Beef tips land in that same category for me.

This is a classic Southern dish that relies on low-and-slow cooking. Two hours on the stove is what turns tough little cubes of beef into something you can cut with a fork, and it gives the gravy time to thicken on its own. I serve mine over rice most nights, but a scoop of mashed potatoes underneath is never a bad idea.

Happy Cooking,

Tanya

Notes on the Ingredients

Ingredient amounts and full recipe instructions are on the printable recipe card at the bottom of the post.

  • Beef stew meat. I buy the pre-cut packages at the store because it saves me from having to break down a whole roast on a weeknight, and stew meat is almost always cut from chuck. Chuck is exactly what you want here. It comes from the shoulder, which is a hard-working muscle, so it carries a lot of connective tissue that softens into the gravy over a long simmer. If you would rather cut your own, buy a boneless chuck roast and cut it into 1-inch cubes.
  • Light brown sugar. Just a small amount goes into the seasoning mix. It helps the beef brown more deeply in the pan and rounds out the salt from the soy sauce later on. The finished gravy does not taste sweet.
  • Garlic powder, onion powder, and black pepper. These season the beef itself.
  • Kosher salt. My amounts are measured with kosher salt, which is coarser than table salt. Table salt packs more into the same spoon, so if that is what you have, start with less and taste at the end.
  • All-purpose flour. The flour goes onto the seasoned beef instead of into the pot later, so it does two jobs. It helps build the crust when you sear, then it slowly thickens the gravy across the two-hour simmer. That is why there is no cornstarch slurry at the end of this recipe.
  • Olive oil. Any neutral oil works. You just need enough to get a good sear going, and the beef will release some of its own fat as it browns.
  • Yellow onion and fresh garlic. The onion cooks down until soft and sweet and practically disappears into the gravy. Fresh garlic goes in after the onion because it burns quickly and turns bitter if it hits the hot pot too early.
  • Low-sodium beef broth. There is already salt on the beef, plus soy sauce and Worcestershire going into the pot, and the liquid concentrates as it simmers.
  • Soy sauce and Worcestershire sauce. These two do the heavy lifting on the savory depth of the gravy. Worcestershire brings tang and soy sauce brings salt and color, which together give the sauce that dark restaurant look.
  • Red wine vinegar. A little acid at the end of a rich braise keeps the gravy from tasting flat and heavy. It is not enough to taste sour, but you would notice if it were missing.
  • Dried thyme. Thyme holds up well during a long simmer and has plenty of time to soften and release its flavor into the liquid.
beef tips ingredients

Main Equipment You'll Need

  • A 6-quart Dutch oven, which is the medium size most of us have in the cabinet. The heavy bottom keeps the beef from scorching over a long simmer and a tight lid keeps the liquid from cooking away.
  • Tongs for turning the beef as it sears.
  • A plate to hold the seared beef while you cook the onions.

How to Make Beef Tips and Gravy

Please see the recipe card below for the full printable recipe, ingredients, and instructions. Here you will find step-by-step photos of how to make this recipe.

Step 1: Season and Coat the Beef. Pat the beef dry with paper towels first. Toss the beef in a large bowl with the brown sugar, salt, black pepper, garlic powder, onion powder, and flour until every piece has a light, even coating.

beef tips in bowl with seasoning and flour on it

Step 2: Sear the Beef in Batches. Heat the olive oil over medium heat and add the beef in a single layer. Sear 2 to 3 minutes per side until the pieces are deeply browned, then move them to a plate. Work in two batches if you need to. The beef is not cooked through at this stage, and it does not need to be.

beef tips searing in pot

Step 3: Cook the Onions and Garlic. Add the diced onion to the oil and drippings left in the pot, along with a tablespoon of the beef broth. Cook 5 to 6 minutes until the onions are soft and translucent, scraping the bottom of the pot as they release their liquid so all those browned bits lift up. Stir in the garlic and cook 1 minute more, just until you can smell it.

onions and garlic sauteeing in pot

Step 4: Build the Gravy. Return the beef and any juices that collected on the plate back to the pot. Pour in the rest of the beef broth, then add the Worcestershire sauce, soy sauce, red wine vinegar, and thyme, and stir it all together.

beef tips in pot covered in broth

Step 5: Simmer Low and Slow. Bring the liquid up to a simmer, cover the pot tightly, and turn the heat down to low. You are looking for a lazy simmer with a few bubbles breaking the surface. Let it go about 2 hours.

Check on it every 30 minutes or so, give it a stir so nothing catches on the bottom of the pot, and if the liquid is getting low, add a splash more beef broth. How fast it reduces depends on your pot and how tight your lid sits, so this part is worth peeking at.

It is done when a fork slides into a piece of beef with no resistance and the gravy has thickened. If the beef is still firm, it needs more time.

beef tips in pot in gravy after simmering for hours

How to Make Beef Tips in the Slow Cooker

  • Sear first: Sear the beef and sauté the onions and garlic on the stove to build flavor, then transfer everything to the slow cooker.
  • Reduce liquid: Use only 2 cups of beef broth, as the slow cooker traps moisture.
  • Cook: Cover and cook on LOW for 7–8 hours (recommended for tender meat) or HIGH for ~4 hours.
  • Thicken (optional): If the gravy is too thin, stir in a cornstarch slurry (1 tablespoon cornstarch + 2 tablespoon cold water) and cook uncovered on HIGH for 20–30 minutes.

Tanya's Top Tips

  • Do not rush the simmer. The connective tissue in these cuts starts converting to gelatin somewhere around 160°F to 180°F (71°C to 82°C), and that conversion takes hours. Tough beef at the two hour mark usually just means it needs longer on the stove.
  • Check on the pot as it simmers. Stir every half hour so the bottom does not scorch, and top it off with a little more beef broth if the liquid drops too far. Different pots reduce at different rates.
  • Taste at the very end. The gravy concentrates over two hours, so wait until you know what you actually have before you reach for more salt.

Variations

  • Add mushrooms. Sliced cremini or white mushrooms cooked with the onions turn this into beef tips with mushroom gravy. Cook them until they release their water and start to brown before you move on.
  • Use chuck roast. A boneless chuck roast cut into 1-inch cubes behaves exactly like stew meat here, and you get to control the size of the pieces.
  • Add a splash of red wine. A little dry red in place of some of the broth adds depth if you have a bottle open.
  • Make it spicy. A pinch of cayenne or a few dashes of hot sauce in the braising liquid gives the gravy some heat behind it.
beef tips with fork sliding in to pick it up

What to Serve With Beef Tips

Rice is my default because it soaks up gravy better than almost anything. Mashed potatoes are the other classic, and buttered egg noodles are right there with them. To round the plate out the Southern way, Southern green beans and a pan of classic Southern cornbread turn this into a full Sunday dinner.

If this kind of slow-cooked beef is your thing, you might also like my braised beef shanks or my oxtail soup.

Storage, Reheating, and Freezing

  • Refrigerator: Cool the beef tips and store them in an airtight container with the gravy for up to 4 days. They taste even better on day two once the flavors settle.
  • Reheating: Warm them in a saucepan over low heat, stirring now and then until heated through. The gravy thickens in the fridge, so add a splash of beef broth or water to loosen it back up.
  • Freezer: These freeze well for up to 3 months in an airtight container with the gravy covering the beef. Thaw overnight in the refrigerator before reheating.

Beef Tips FAQs

What is the best cut of meat for beef tips?

It comes down to how long you plan to cook. Chuck roast and beef stew meat are the right call for a low and slow braise like this one, because they carry the connective tissue that breaks down into a silky gravy over a couple of hours. Sirloin and tenderloin are naturally tender and lean, which makes them better for a quick stove-top version. They do not have the connective tissue to reward a long cook and will dry out if you give them one.

Can I use beef stew meat for beef tips?

Yes, and it is what I use. Stew meat has a reputation for being tough, but that is usually a timing problem rather than a meat problem. It is typically cut from chuck or a similar working muscle, so it needs the full two hours to come around. Give it that time and it is tender, flavorful, and cheaper than sirloin.

Why are my beef tips still tough?

Nine times out of ten it is one of two things. Either the beef has not cooked long enough, or the pot was at a hard boil instead of a gentle simmer. Both are fixable. Turn the heat down, put the lid back on, and keep going until a fork slides in easily.

I hope you love this recipe as much as we do. If you have tried this recipe or any other recipe on my blog, please rate it and let me know how it turned out in the comments below! Your feedback is invaluable and helps us grow. Thank you for your support!

beef tips with gravy with fork picking up beef
Print Recipe
5 from 1 vote

Beef Tips and Gravy Recipe

Tender beef simmered low and slow in a rich brown gravy with onions, garlic, and thyme. A classic Southern dinner that is made for rice or mashed potatoes.
Prep Time15 minutes mins
Cook Time2 hours hrs 20 minutes mins
Total Time2 hours hrs 35 minutes mins
Course: Main Course
Cuisine: American
Keyword: beef tips, beef tips and gravy, beef tips recipe
Servings: 6
Calories: 294kcal
Author: Tanya Harris

Ingredients

  • 2 pounds beef stew meat cut into 1-inch cubes
  • 2 teaspoons light brown sugar
  • 2 teaspoons kosher salt
  • ½ teaspoon black pepper
  • ½ teaspoon garlic powder
  • ½ teaspoon onion powder
  • 2 tablespoons all-purpose flour
  • 2 tablespoons olive oil
  • 1 large yellow onion diced
  • 4 cloves garlic minced
  • 2 ¾ cups low-sodium beef broth divided
  • 1 tablespoon Worcestershire sauce
  • 1 tablespoon soy sauce
  • 1 tablespoon red wine vinegar
  • 2 teaspoons dried thyme

Instructions

  • Pat the beef dry with paper towels. In a large bowl, toss the beef with the brown sugar, salt, black pepper, garlic powder, onion powder, and flour until every piece is lightly coated.
  • Heat the olive oil in a 6-quart Dutch oven over medium heat. Add the beef in a single layer without crowding the pan, working in two batches if needed. Sear 2 to 3 minutes per side, until deeply browned. Transfer the beef to a plate and set aside.
  • Add the diced onion to the oil and drippings in the pot along with 1 tablespoon of the beef broth. Cook 5 to 6 minutes, until the onions are soft and translucent, scraping up the browned bits from the bottom of the pot. Stir in the garlic and cook 1 minute, until fragrant.
  • Return the beef and any accumulated juices to the pot. Pour in the remaining beef broth, then add the Worcestershire sauce, soy sauce, red wine vinegar, and thyme. Stir to combine.
  • Bring the liquid to a simmer, cover tightly, and reduce the heat to low. Simmer gently about 2 hours, until the beef is fork tender and the gravy has thickened. Stir every 30 minutes so the bottom does not scorch, and add more beef broth if the liquid reduces too far. Taste and adjust salt before serving.

Notes

  • Beef Cut: Use chuck stew meat cut into 1-inch pieces. Avoid lean cuts like sirloin, which dry out during a 2-hour simmer.
  • Salt: Recipe is tested with kosher salt. If using table salt, start with half and adjust to taste at the end.
  • Liquid Level: If the gravy reduces too fast, stir in a splash of broth. If too thin, simmer uncovered for a few minutes.
  • Slow Cooker: Sear beef and onions on the stove first. Transfer to slow cooker with only 2 cups of broth and cook on LOW for 7–8 hours (or HIGH for ~4 hours).
  • Storage: Keeps up to 4 days in the fridge or 3 months in the freezer. Loosen with a splash of broth when reheating.
  •  

Nutrition

Calories: 294kcal | Carbohydrates: 8g | Protein: 37g | Fat: 12g | Saturated Fat: 3g | Polyunsaturated Fat: 1g | Monounsaturated Fat: 7g | Cholesterol: 94mg | Sodium: 1268mg | Potassium: 824mg | Fiber: 1g | Sugar: 3g | Vitamin A: 16IU | Vitamin C: 3mg | Calcium: 52mg | Iron: 4mg

August 11, 2026 by Tanya Harris 18 Comments

Sweet and Sour Cabbage (German-Style Braised Red Cabbage)

sweet and sour cabbage on plate

This sweet and sour cabbage is an easy one-pot side made with red cabbage, sweet apple, and apple cider vinegar. It braises low and slow until tender, with the right balance of sweet and tart in every bite.

sweet and sour cabbage on plate

You’ll find the full recipe with ingredient amounts and instructions in the recipe card at the bottom of this post. Be sure to check out the blog post itself for extra tips and tricks!

close up Tanya holding bowl

We love a good cabbage recipe in our house, and I’ve been searching for ways to add it to our meal rotation. I’m always drawn to red cabbage for its vibrant color, and this vinegar coleslaw is no exception. So when I made this sweet and sour cabbage, I was in love. 

Inspired by German sweet-and-sour cabbage recipes I saw online, I made this recipe, and I’ve been hooked ever since. There aren’t many ingredients, and all you’ll need is a little patience while the cabbage takes time to braise on the stovetop.

Be sure to try my Instant Pot Cabbage or Creamed Cabbage with Sausage recipes too. 

5 Star Review

⭐⭐⭐⭐⭐

Lorna. says, "This has an excellent balance of flavors. I like to saute the cabbage in a bit butter first but i give it 5 stars."

A Quick Look at the Ingredients

Ingredient amounts and full recipe instructions are on the printable recipe card at the bottom of the post.

  • Red cabbage - Choose a firm head with vibrant color; chop into large chunks so they hold their shape during the long braise. If you don't have red cabbage, feel free to use a firm green cabbage instead.
  • Sweet apple - Fuji or Honeycrisp work, adding natural sweetness that balances the vinegar's tang.
  • Apple cider vinegar - This provides the signature tangy flavor that makes the dish "sour."
  • Granulated sugar - Balances the acidity and helps create that perfect sweet-and-sour flavor profile.
  • Kosher salt and ground black pepper- Season to your taste.
  • Ground Allspice - I use a ton of allspice in my cooking, and I just had to add it to this dish. Feel free to sub with another warm spice, like cinnamon or nutmeg.
ingredients for sweet and sour cabbage

How to make sweet and sour cabbage

Step 1: First, gather your ingredients. Chop your head of cabbage into large chunks and chop a sweet apple. I like to use a Fuji apple in this recipe.

Step 2: Place the chopped cabbage, apple, apple cider vinegar, sugar, salt, black pepper, and allspice in a large heavy-bottomed pot. Cover the pot with a tight-fitting lid and place it over medium-low heat. 

cabbage, apples, salt, and pepper inside pot

Step 3: Allow the cabbage to cook over medium-low heat for about 1 hour to 1 hour and 10 minutes, stirring every 20 minutes, until the cabbage is tender enough for your liking. Serve and enjoy 🙂

cooked cabbage inside pot

Variations

This cabbage is great as written, but here are a few ways I like to switch it up.

  • Add bacon. Cook a few slices until crisp, then crumble them in at the end for a smoky, salty bite. It's one of the more popular ways to make this dish and adds a nice richness.
  • Make it meaty. Stir in sliced smoked sausage, or serve it next to browned bratwurst for a heartier plate.
  • Turn up the heat. A pinch of red pepper flakes gives it a little kick.
  • Add carrots. They bring more color and a touch of natural sweetness.
  • Add maple syrup. One reader stirred in a little maple syrup along with rice vinegar and sweet chili sauce and loved the result.

Make Ahead and Storage

  • Fridge: Store leftovers in an airtight container for 3-4 days.
  • Reheat: Warm it on the stovetop over low heat or in the microwave until heated through. Add a small splash of water if it looks dry.
  • Serve warm or at room temperature: It's good both ways, which makes it easy to make ahead for a holiday spread or a potluck.
close up photo of cabbage

Tanya's Top Tips about Sweet and Sour Cabbage

  • Use a heavy-bottomed pot with a tight-fitting lid to keep the liquid inside. Cabbage will release a good bit of liquid while it cooks.
  • Keep the heat on medium-low and stir about every 20 minutes.

What should I serve this cabbage with?

  • Air Fryer Beef Tenderloin - A rich, special-occasion main. The sweet-and-sour bite of the cabbage cuts right through it.
  • Air Fryer Fried Chicken - Crispy and savory, and the cabbage adds a little brightness to the plate.
  • Mashed Sweet Potatoes - Another sweeter side that goes great with this cabbage.
  • Smothered Turkey Wings - Hearty and gravy-heavy. The cabbage lightens things up alongside it.

I hope you love this recipe as much as we do. If you have tried this recipe or any other recipe on my blog, please rate it and let me know how it turned out in the comments below! Your feedback is invaluable and helps us grow. Thank you for your support!

sweet and sour cabbage on plate
Print Recipe
4.50 from 6 votes

Sweet and Sour Cabbage

This sweet and sour cabbage is the perfect easy yet tasty side dish. Red cabbage and a sweet apple are braised in sugar and vinegar, resulting in the most tender and delicious cabbage.
Prep Time8 minutes mins
Cook Time1 hour hr
Total Time1 hour hr 8 minutes mins
Course: Side Dish
Cuisine: American, German
Keyword: red cabbage recipe, sweet and sour cabbage
Servings: 4 people
Calories: 52kcal
Author: Tanya Harris

Equipment

  • Heavy Bottom Pot

Ingredients

  • 1 medium head red cabbage chopped into large chunks (about 6-7 cups)
  • 1 sweet apple chopped. (Fuji, honey crisp, etc)
  • ¼ cup apple cider vinegar
  • ¼ cup granulated sugar
  • 1.5 teaspoons kosher salt or to taste
  • ¼ teaspoon ground black pepper or to taste
  • ¼ teaspoon ground allspice

Instructions

  • Place the chopped cabbage, apple, apple cider vinegar, sugar, salt, black pepper, and allspice in a large heavy-bottomed pot. Cover the pot with a tight-fitting lid and place it over medium-low heat.
  • Allow the cabbage to cook, over medium-low heat, for about 1 hour to 1 hour and 10 minutes, stirring every 20 minutes, until the cabbage is tender.
  • Remove from heat, serve, and enjoy.

Notes

  • Use a heavy-bottomed pot with a tight-fitting lid so the liquid stays inside the pot. Cabbage will release a good bit of liquid while it cooks.
  • Keep the heat on medium-low and stir about every 20 minutes.

Nutrition

Calories: 52kcal | Carbohydrates: 13g | Protein: 1g | Fat: 1g | Saturated Fat: 1g | Polyunsaturated Fat: 1g | Sodium: 873mg | Potassium: 14mg | Fiber: 1g | Sugar: 13g | Vitamin A: 1IU | Vitamin C: 1mg | Calcium: 3mg | Iron: 1mg

This post was originally published on October 6, 2021. It has been updated with new information.

August 11, 2026 by Tanya Harris Leave a Comment

Easy Stuffing Recipe (Classic & Herby)

stuffing in casserole dish

My homemade stuffing recipe is a classic. Made with simple, fresh ingredients, it's the savory side dish I find myself coming back to for every holiday and weeknight meal alike. 

stuffing in casserole dish

You’ll find the full recipe with ingredient amounts and instructions in the recipe card at the bottom of this post. Be sure to check out the blog post itself for extra tips and tricks!

close up Tanya holding bowl

Stuffing is a big deal in my house. We don’t mind the boxed stuff, but I love making things homemade or semi-homemade. This stuffing is so simple to make, but the flavor is delicious. With three types of fresh herbs, the aromatics really come to life. 

This recipe is pretty straightforward, with a few tips and techniques that make the texture and flavor just right.

If you’re a fan of Thanksgiving sides, then you’ll love this cornbread dressing.

Happy Cooking,

Tanya

stuffing in casserole dish

Easy Stuffing Recipe at a Glance

  • Best for: Thanksgiving, Christmas, or any holiday spread that needs a classic bread stuffing
  • Prep time: about 25 minutes (drying the bread and prepping the vegetables)
  • Cook time: 45 to 50 minutes
  • Total time: about 1 hour 10 minutes
  • Servings: 10

Ingredient Notes

Ingredient amounts and full recipe instructions are on the printable recipe card at the bottom of the post.

  • Bread. You'll need about 1 pound (roughly 10 cups) of bread cut into ½-inch cubes. I use white sandwich bread, but sourdough or French bread work as well. Sandwich bread gives you a softer stuffing, while sourdough or French bread holds up a little firmer and adds more chew. Whatever you use needs to be cut and dried completely before it goes anywhere near the broth. 
  • Aromatics. Yellow onion, celery, and garlic are the base. Dice them small, so they cook evenly and disappear into the stuffing instead of standing out in big chunks.
  • Fresh herbs. Sage, thyme, and rosemary are what make this taste like Thanksgiving. Fresh is worth it here if you can get it. If you only have dried herbs on hand, use about a third of the amount the recipe calls for, since dried herbs are more concentrated, and add them in with the onions and celery so they have time to soften. You could also use dried poultry seasoning instead of fresh herbs.

  • Broth and eggs. Low-sodium turkey or chicken broth lets you control the seasoning, and you can swap in vegetable broth for a meatless version. The eggs are what bind everything together, so your stuffing holds its shape instead of falling apart when you scoop it.
ingredients for stuffing

How to make this Stuffing Recipe

Please see the recipe card below for the full printable recipe, ingredients, and instructions. Here you will find step-by-step photos of how to make this recipe.

Step 1: Dry the bread. Preheat your oven to 300°F (150°C). Spread the bread cubes on baking sheets in a single layer and bake for 20 to 25 minutes, until they're completely dried out and crisp. Let them cool completely before you move on.

toasted bread on sheetpan

Step 2: Cook the aromatics. Once the bread is drying, bump your oven up to 350°F (175°C) and grease a 9x13-inch (23x33 cm) baking dish. Melt the butter in a large skillet over medium heat. Add the onions and celery and cook for 8 to 10 minutes, until soft. Stir in the garlic, sage, thyme, rosemary, salt, and pepper, and cook for another 1 to 2 minutes, just until fragrant. Take it off the heat.

butter and onion, garlic, and celery with seasoning in skillet for stuffing

Step 3: Combine. Place the dried bread cubes in a large mixing bowl, then pour the warm butter and vegetable mixture over them. Toss gently to coat. In a separate bowl, whisk the broth with the eggs, then pour that over the bread mixture and fold everything together gently until the broth is absorbed.

stuffing ingredients in bowl mixed up

Step 4: Bake. Transfer to your prepared baking dish, cover tightly with foil, and bake for 30 minutes. Uncover and bake for another 15 to 20 minutes, until golden brown and crispy on top.

baked stuffing in baking dish

technique

For stuffing the bird

Want to stuff a turkey instead? Cool the stuffing completely first, then spoon it loosely into the cavity right before roasting, never ahead of time. Loose filling lets heat move through evenly, and you'll want to check with a food thermometer that the very center reaches 165°F (74°C) before serving, same as if it were baked in a dish.

Tanya's Top Tips

  • Don't rush the bread-drying step. If your bread isn't fully dry and a little crisp, your stuffing will be dense and soggy instead of that soft, custardy texture you want.
  • Fold the broth mixture in gently. You want every piece of bread moistened, but you're not trying to mash it into a paste.
  • Taste your butter and aromatic mixture before you combine everything. It's much easier to adjust salt and pepper here than after the stuffing is baked.
Variations

  • Stir in ½ to 1 cup of chopped apples or dried cranberries with the broth mixture for a little sweetness.
  • Add ½ cup toasted pecans or walnuts for crunch.
  • Swap half the bread cubes for cubed cornbread if you want something closer to my cornbread dressing. Dry or lightly toast the cornbread first so it doesn't turn mushy, and know that it'll bake up a little more crumbly and slightly sweet.
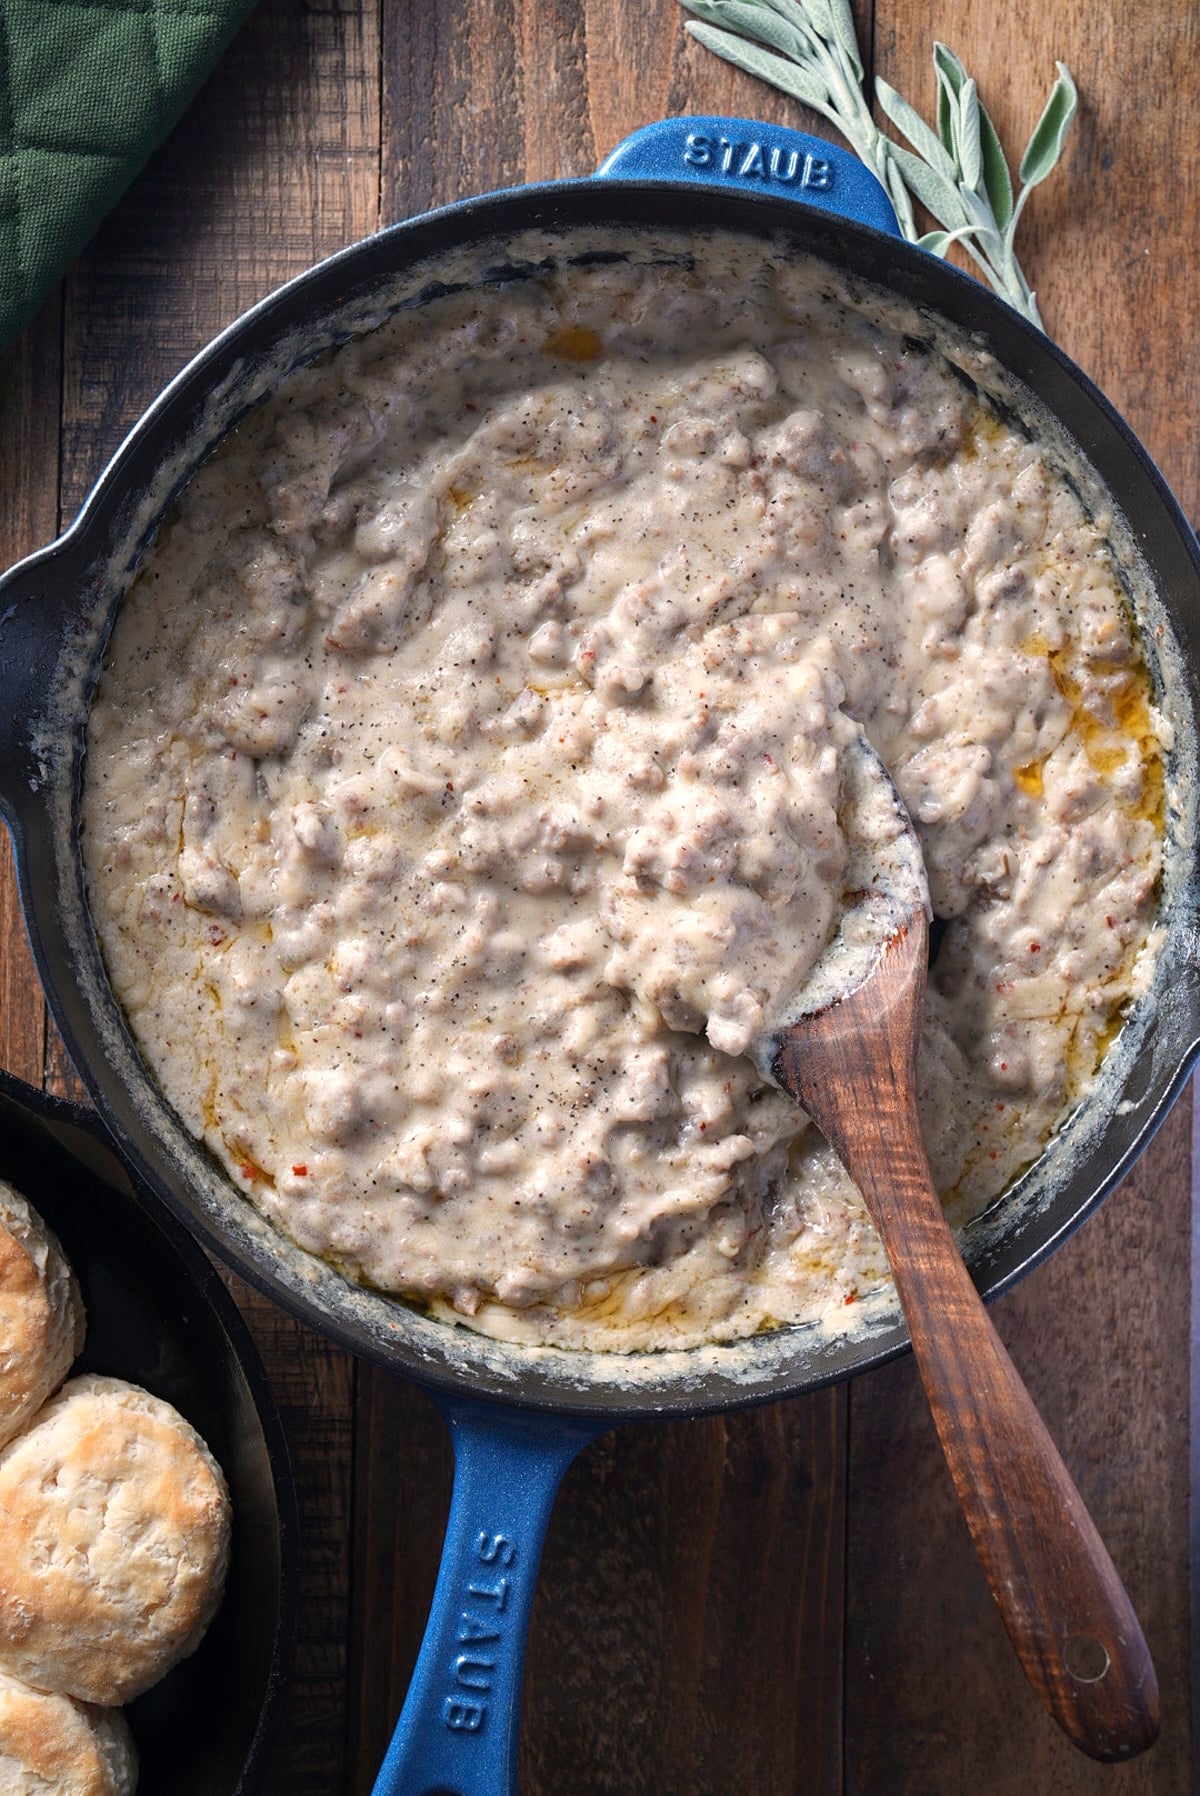
  • Leave the eggs out if you prefer a looser, more scoopable stuffing rather than one that holds together in slices.

What to Serve With Easy Stuffing

This stuffing belongs right next to the turkey and gravy, but here's what else rounds out the table:

  • Gravy from drippings of the turkey or chicken or giblet gravy poured over the top
  • Mashed red skinned potatoes or microwave mashed potatoes if you're short on stovetop space
  • Smothered green beans or southern green beans
  • Carrot soufflé for something a little sweeter on the plate
  • Cranberry sauce, for the tartness this stuffing doesn't have on its own
close up of spoon picking up stuffing

Make-Ahead, Storage & Freezing

Make ahead. You can dry the bread cubes and chop the vegetables up to 2 days ahead; store them separately in the refrigerator. Combine the stuffing just before baking. If you need to make it ahead of time, assemble it in a freezer-safe dish and freeze it unbaked immediately. Bake from frozen until the center reaches 165°F.
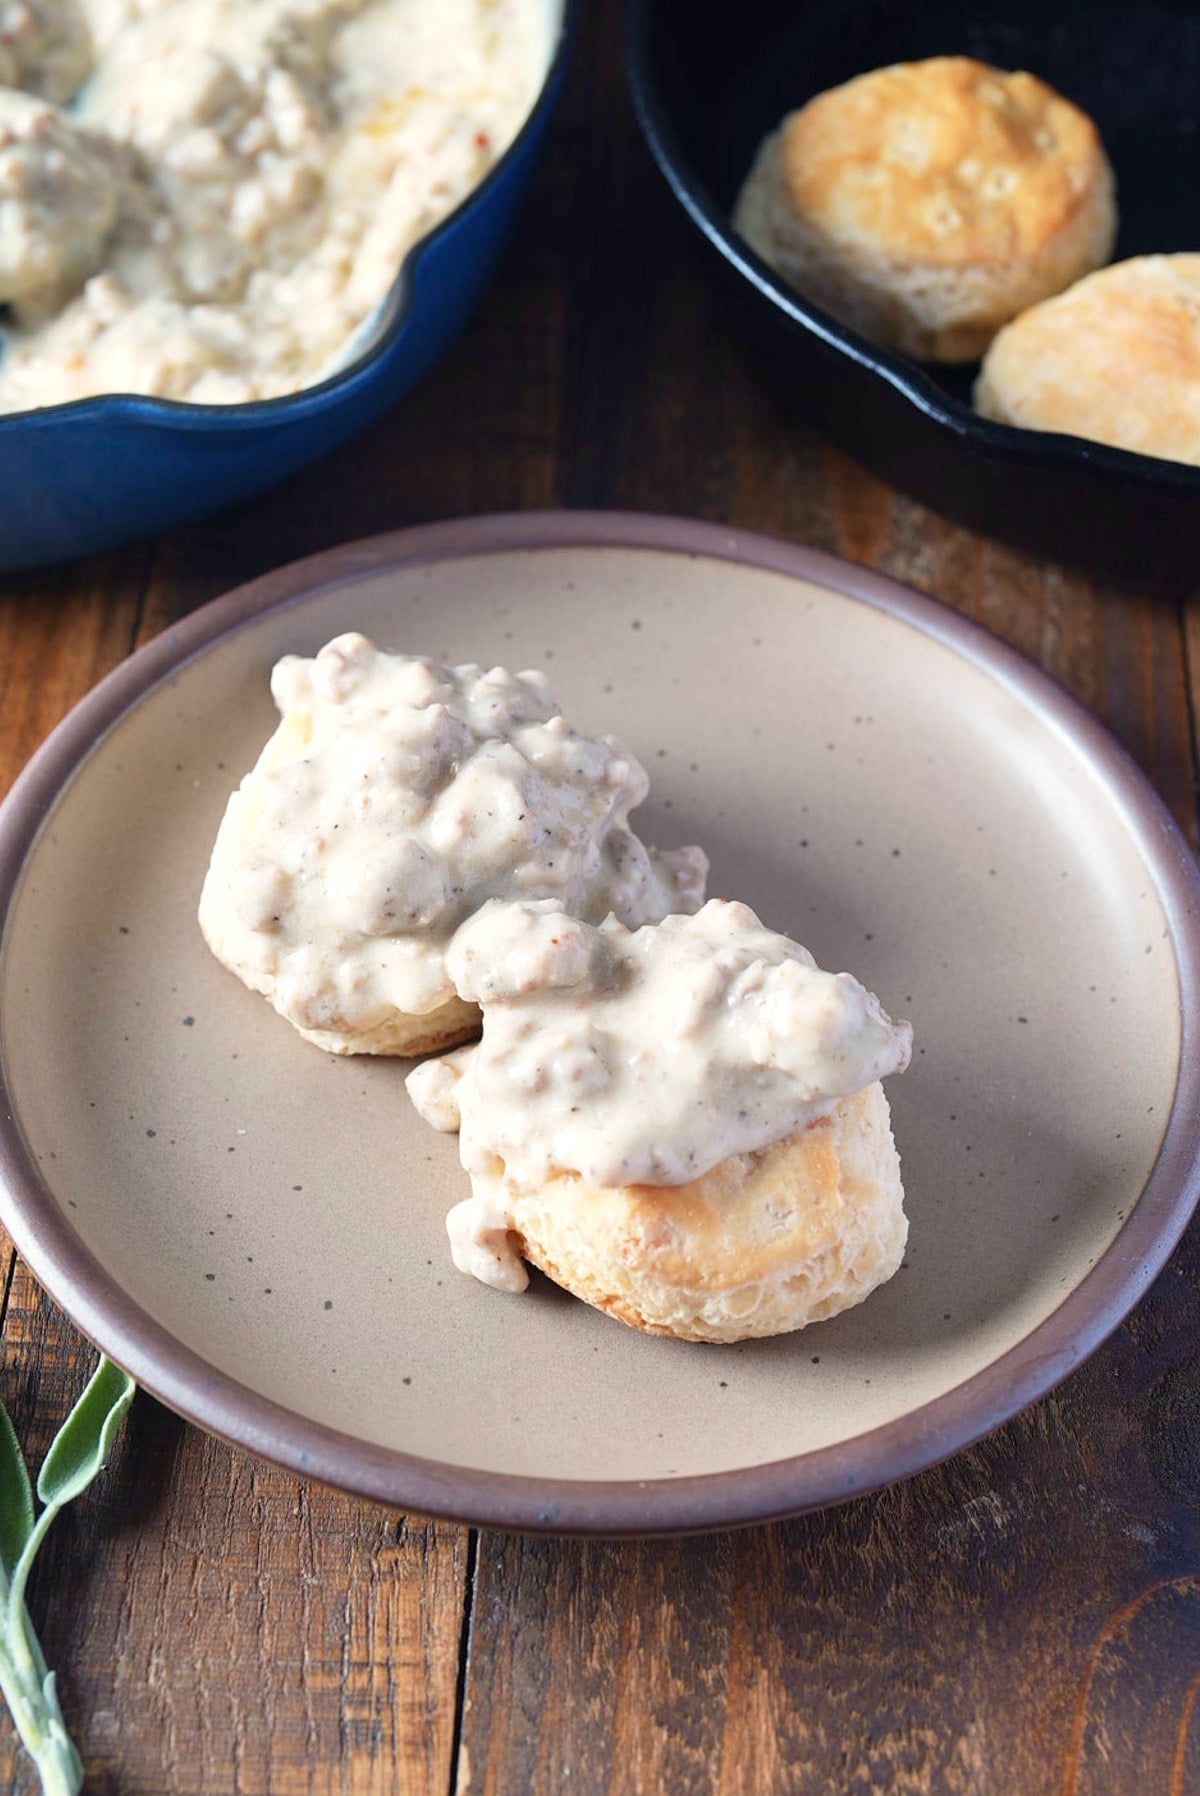
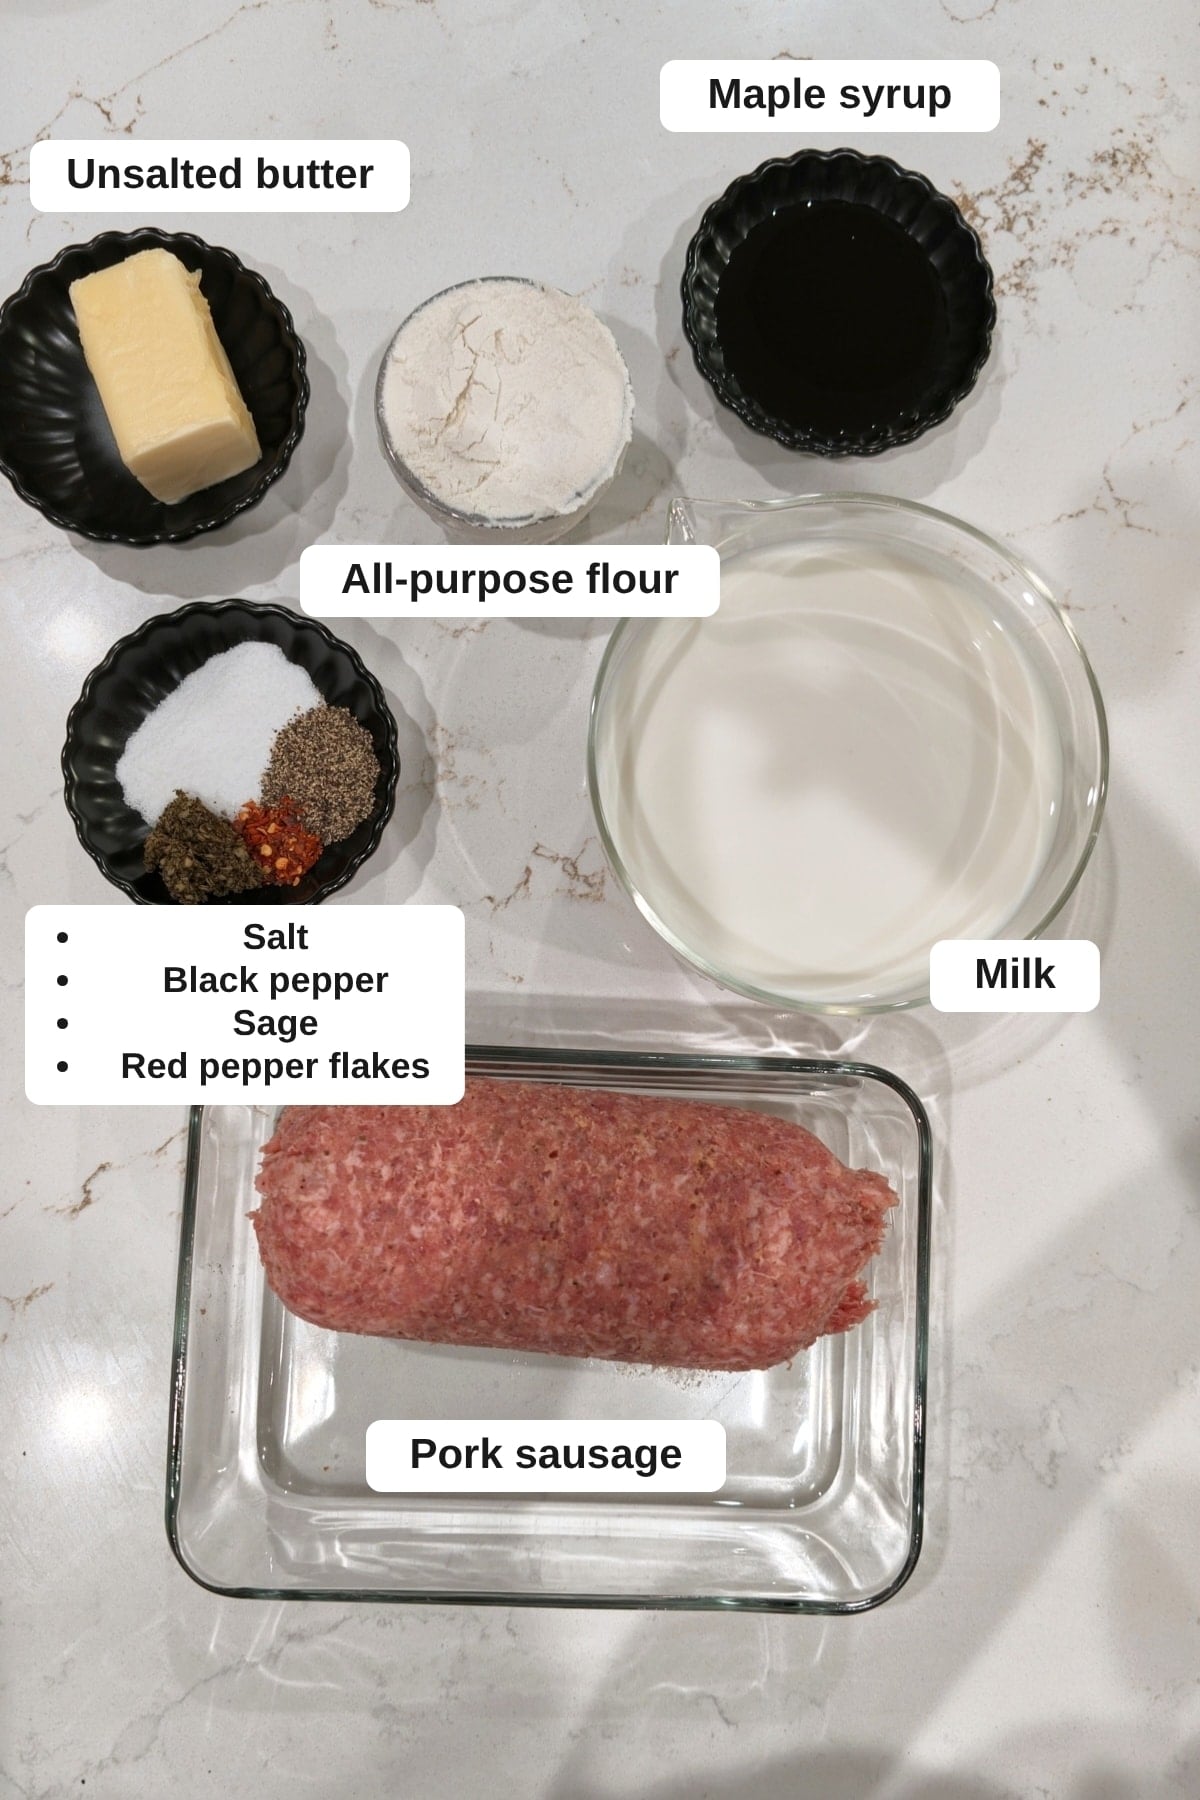
Leftovers. Refrigerate leftover stuffing in an airtight container within 2 hours and enjoy within 3 to 4 days. Reheat, covered, at 350°F (175°C) until hot throughout, then uncover for a few minutes to crisp the top. Individual portions can also be reheated in the microwave.

Freezing. Cooked stuffing freezes well for up to 1 month. Store it tightly wrapped or in a freezer-safe airtight container. Thaw overnight in the refrigerator, add a splash of broth if needed, and reheat covered at 350°F (175°C) until hot throughout.
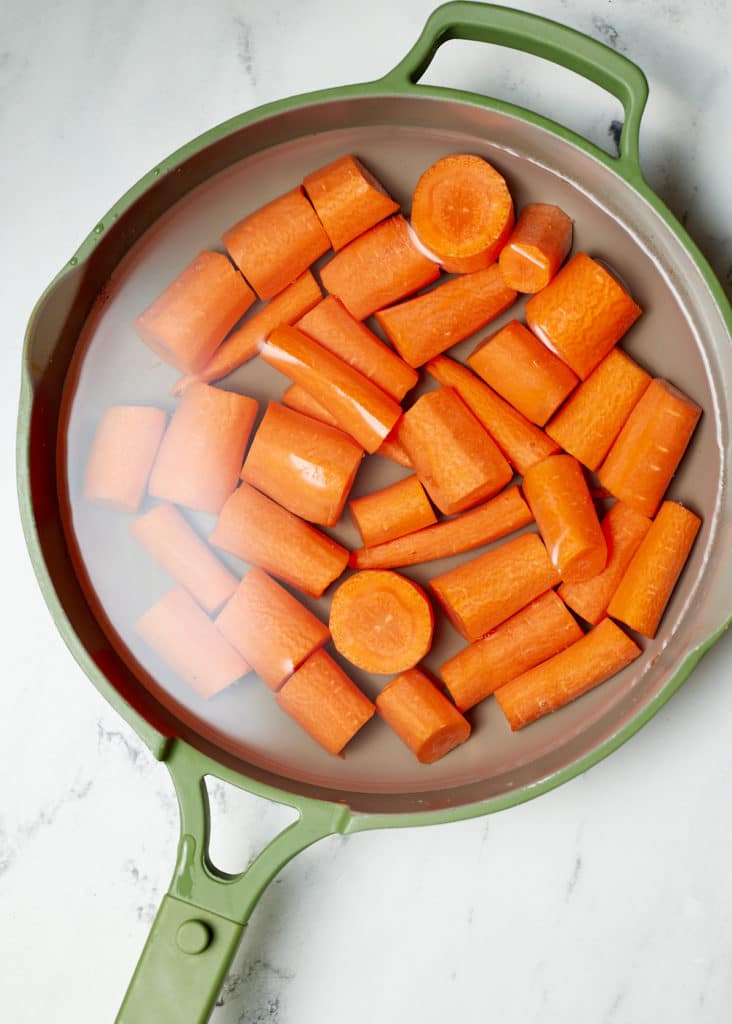
FAQs

Can I make this stuffing without eggs?

Yes. The eggs help bind everything together, but you can leave them out for a looser, more scoopable stuffing. If you skip them, add a little extra broth so the bread doesn't dry out, and bake it covered a bit longer to help it set.
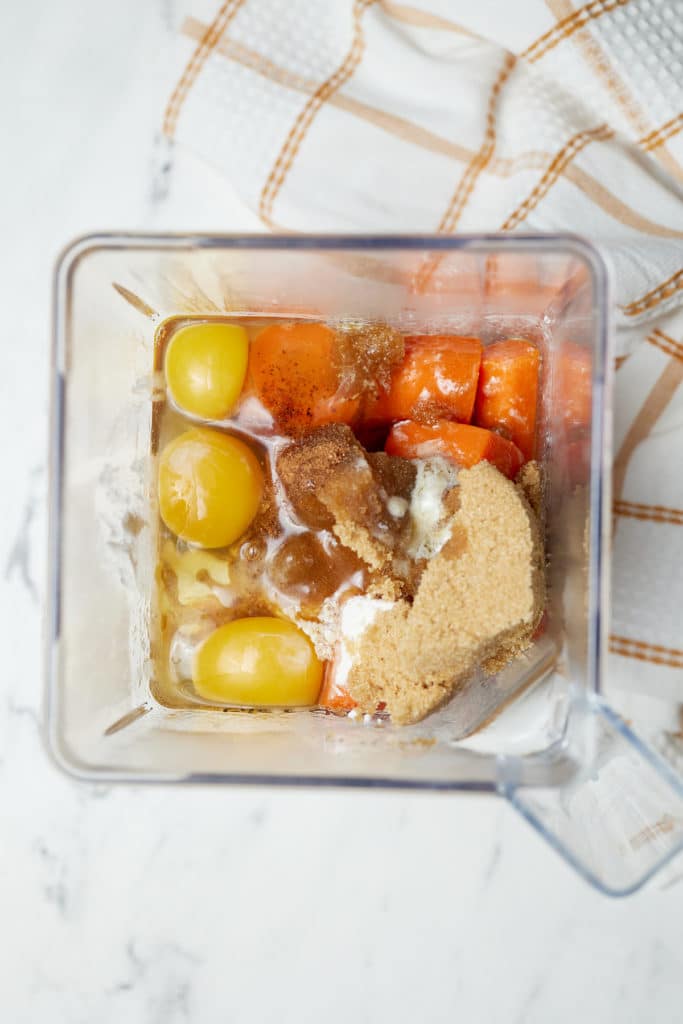
What's the difference between stuffing and dressing?

Traditionally, stuffing is cooked inside the turkey, and dressing is baked separately in its own dish, though many home cooks use the terms interchangeably. Stuffing cooked inside the bird tends to come out moister and more compact, and it needs to reach 165°F (74°C) in the center to be safe to eat. This recipe works either way, baked in a dish as written or spooned into the turkey just before roasting.
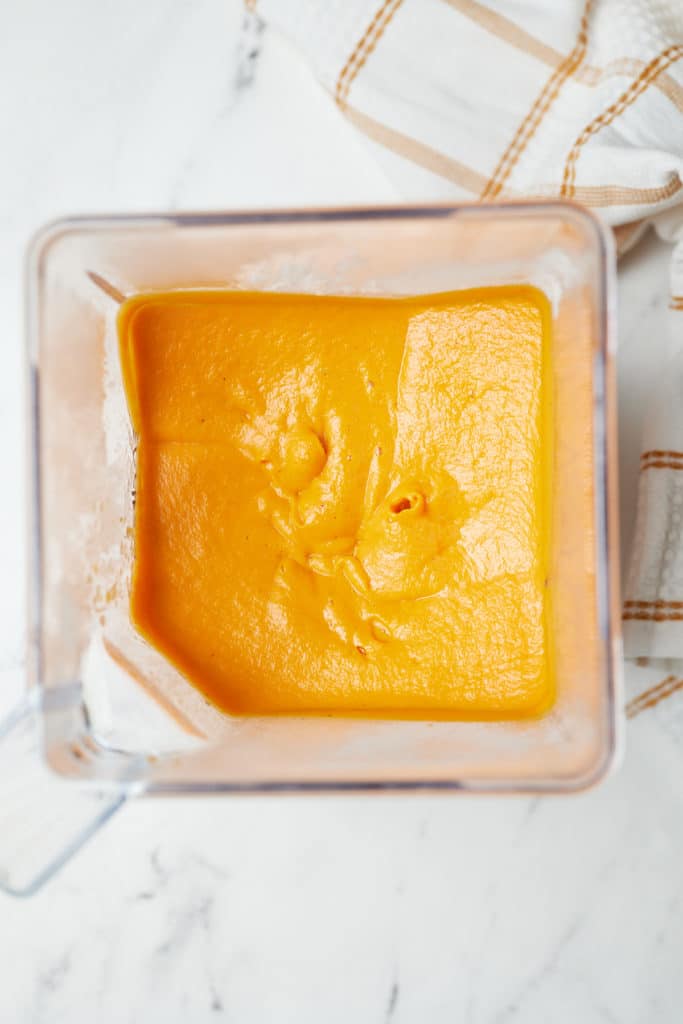
What if my stuffing turns out too dry?

Drizzle warm broth and a little melted butter over the top, cover with foil, and pop it back in a 350°F (175°C) oven for 10 to 15 minutes to rehydrate it. Dry bread cubes that weren't dried long enough, or stuffing left uncovered too long while baking, are usually the culprits. Next time, keep it covered a little longer or add a splash more broth before baking.
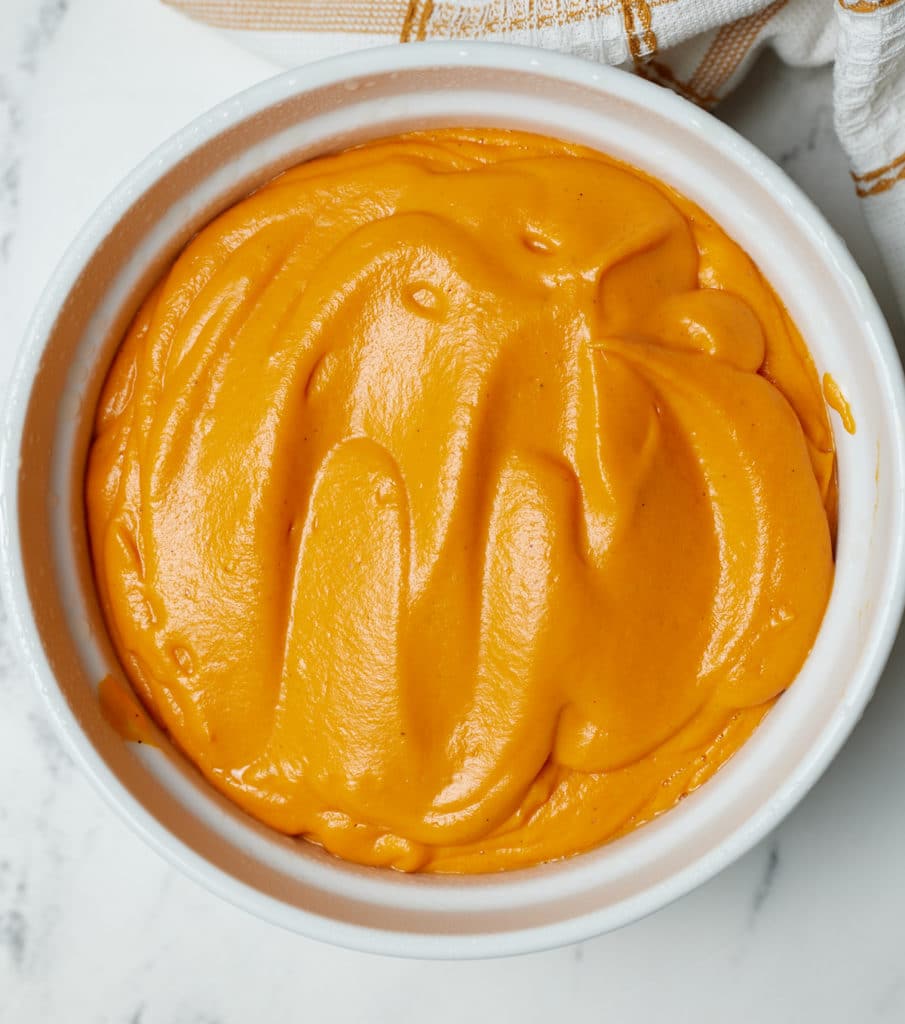
stuffing in casserole dish

I hope you love this recipe as much as we do. If you have tried this recipe or any other recipe on my blog, please rate it and let me know how it turned out in the comments below! Your feedback is invaluable and helps us grow. Thank you for your support!

stuffing in casserole dish
Print Recipe
No ratings yet

Easy Stuffing Recipe

A classic, savory stuffing made with dried bread cubes, butter, onion, celery, and fresh sage, thyme, and rosemary.
Prep Time25 minutes mins
Cook Time45 minutes mins
Total Time1 hour hr 10 minutes mins
Course: Side Dish
Cuisine: American
Keyword: stuffing recipe
Servings: 10 people
Calories: 117kcal
Author: Tanya Harris

Ingredients

  • 1 pound about 10 cups white sandwich bread, sourdough, or French bread, cut into ½-inch cubes
  • ½ cup unsalted butter 1 stick
  • 2 cups diced yellow onion about 2 medium onions
  • 1 cup diced celery about 4 stalks
  • 1 tablespoon minced garlic about 4 cloves
  • 2 tablespoons fresh sage finely chopped
  • 2 tablespoons fresh thyme leaves
  • 1 tablespoon fresh rosemary finely chopped
  • 1 teaspoon kosher salt
  • ½ teaspoon ground black pepper
  • 2¾ cups low-sodium turkey or chicken broth use vegetable broth for a meatless version
  • 2 large eggs whisked

Instructions

  • Preheat oven to 300°F (150°C). Spread bread cubes on baking sheets and bake for 20 to 25 minutes, until completely dried and crispy. Cool completely.
  • Increase oven temperature to 350°F (175°C) and grease a 9x13-inch (23x33 cm) baking dish. Set aside.
  • Melt butter in a large skillet over medium heat. Add onions and celery and cook 8 to 10 minutes, until soft. Stir in garlic, sage, thyme, rosemary, salt, and pepper. Cook 1 to 2 minutes, until fragrant, then remove from heat.
  • Place dried bread in a large mixing bowl. Pour the warm butter and vegetable mixture over the bread and toss gently.
  • Whisk broth with the eggs. Pour over the bread mixture and fold gently until absorbed.
  • Transfer stuffing to the prepared baking dish and cover tightly with foil. Bake covered for 30 minutes, then uncover and bake an additional 15 to 20 minutes, until golden brown and crispy on top.

Notes

  • Make ahead: For best texture, dry your bread cubes and sauté the vegetables up to 2 days in advance, storing them in separate airtight containers. Assemble with the broth and eggs right before baking. If you need to make it further ahead, assemble the casserole completely, cover, and freeze unbaked. Bake from frozen, adding extra time as needed until the center reaches 165°F.

Nutrition

Calories: 117kcal | Carbohydrates: 5g | Protein: 2g | Fat: 10g | Saturated Fat: 6g | Polyunsaturated Fat: 1g | Monounsaturated Fat: 3g | Trans Fat: 0.4g | Cholesterol: 58mg | Sodium: 496mg | Potassium: 119mg | Fiber: 1g | Sugar: 2g | Vitamin A: 451IU | Vitamin C: 5mg | Calcium: 38mg | Iron: 1mg
  • 1
  • 2
  • 3
  • …
  • 74
  • Next Page »
tanya holding bowl and mixing

Welcome!

Welcome to My Forking Life! Hi, I'm Tanya, an attorney, busy wife and mom, and lover of quick, easy, and delicious meals.

More about me

Popular Recipes

  • Jamaican Oxtails Recipe
  • brown stew chicken in pan
    Brown Stew Chicken
  • Air fryer fried chicken on a white platter
    Air Fryer Fried Chicken
  • Jamaican Instant Pot Rice and Beans

Holiday Favorites

  • sweet potato pie on a plate
    Southern Sweet Potato Pie Recipe
  • spoon lifting gravy out of gravy dish
    Easy Recipe for Gravy without Drippings
  • Stirring the giblet gravy with a spoon.
    Grandma's Giblet Gravy Recipe
  • creamy baked macaroni and cheese, the best baked macaroni and cheese, creamy mac and cheese
    Creamy Baked Macaroni and Cheese
as seen on...various online websites text listed

Footer

↑ back to top
  • Privacy Policy
  • Contact
  • About Tanya

As an Amazon Associate, I earn from qualifying purchases.

Copyright © 2026 My Forking Life

Rate This Recipe

Your vote:


Let us know what you thought of this recipe:

This worked exactly as written, thanks!
My family loved this!
Thank you for sharing this recipe

Or write in your own words:

A rating is required
A name is required
An email is required