• Air Fryer
  • Jamaican
  • Main Course
  • Browse Recipes
  • Breakfast
  • Side Dishes
  • About
menu icon
go to homepage
  • Air Fryer
  • Jamaican
  • Main Course
  • Browse Recipes
  • Breakfast
  • Side Dishes
  • About
search icon
Homepage link
  • Air Fryer
  • Jamaican
  • Main Course
  • Browse Recipes
  • Breakfast
  • Side Dishes
  • About
×
Home

October 27, 2025 by Tanya 2 Comments

Red Beans and Rice

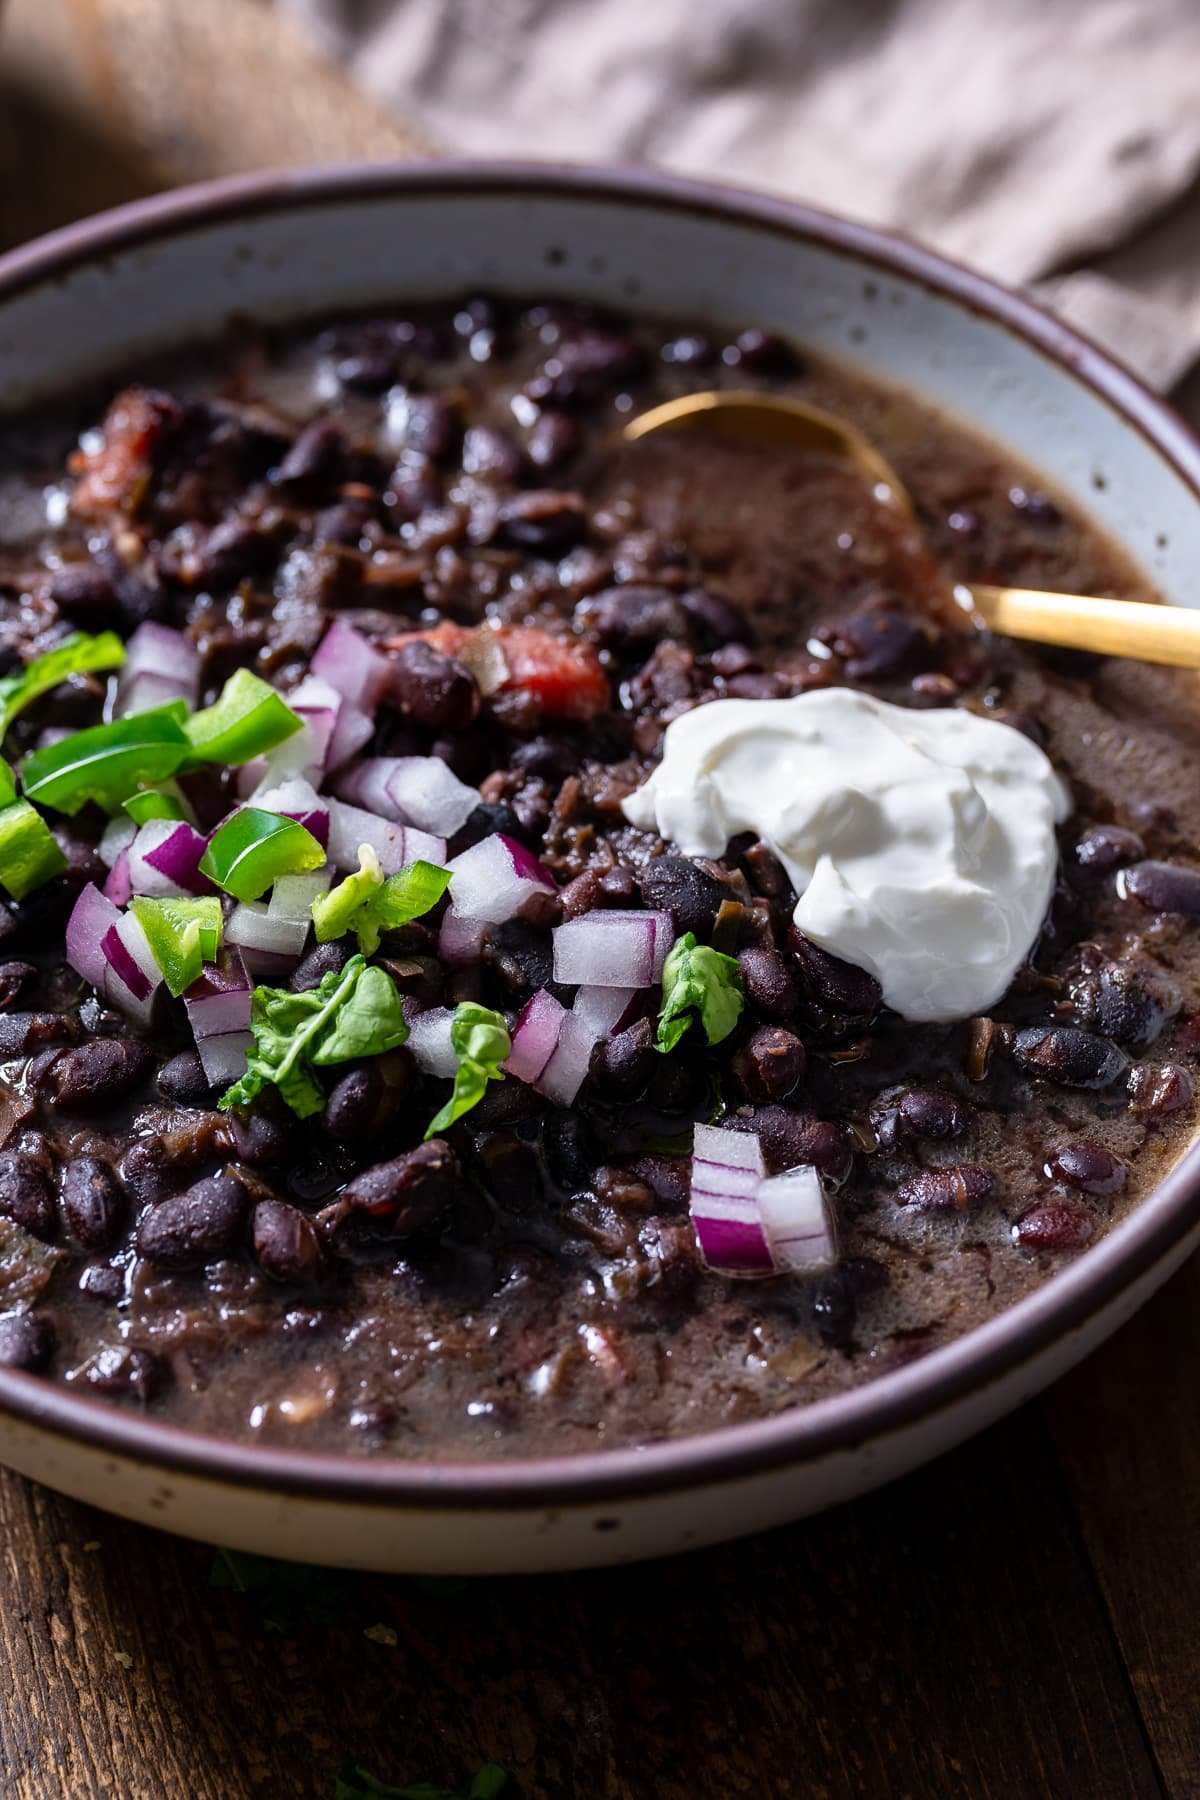
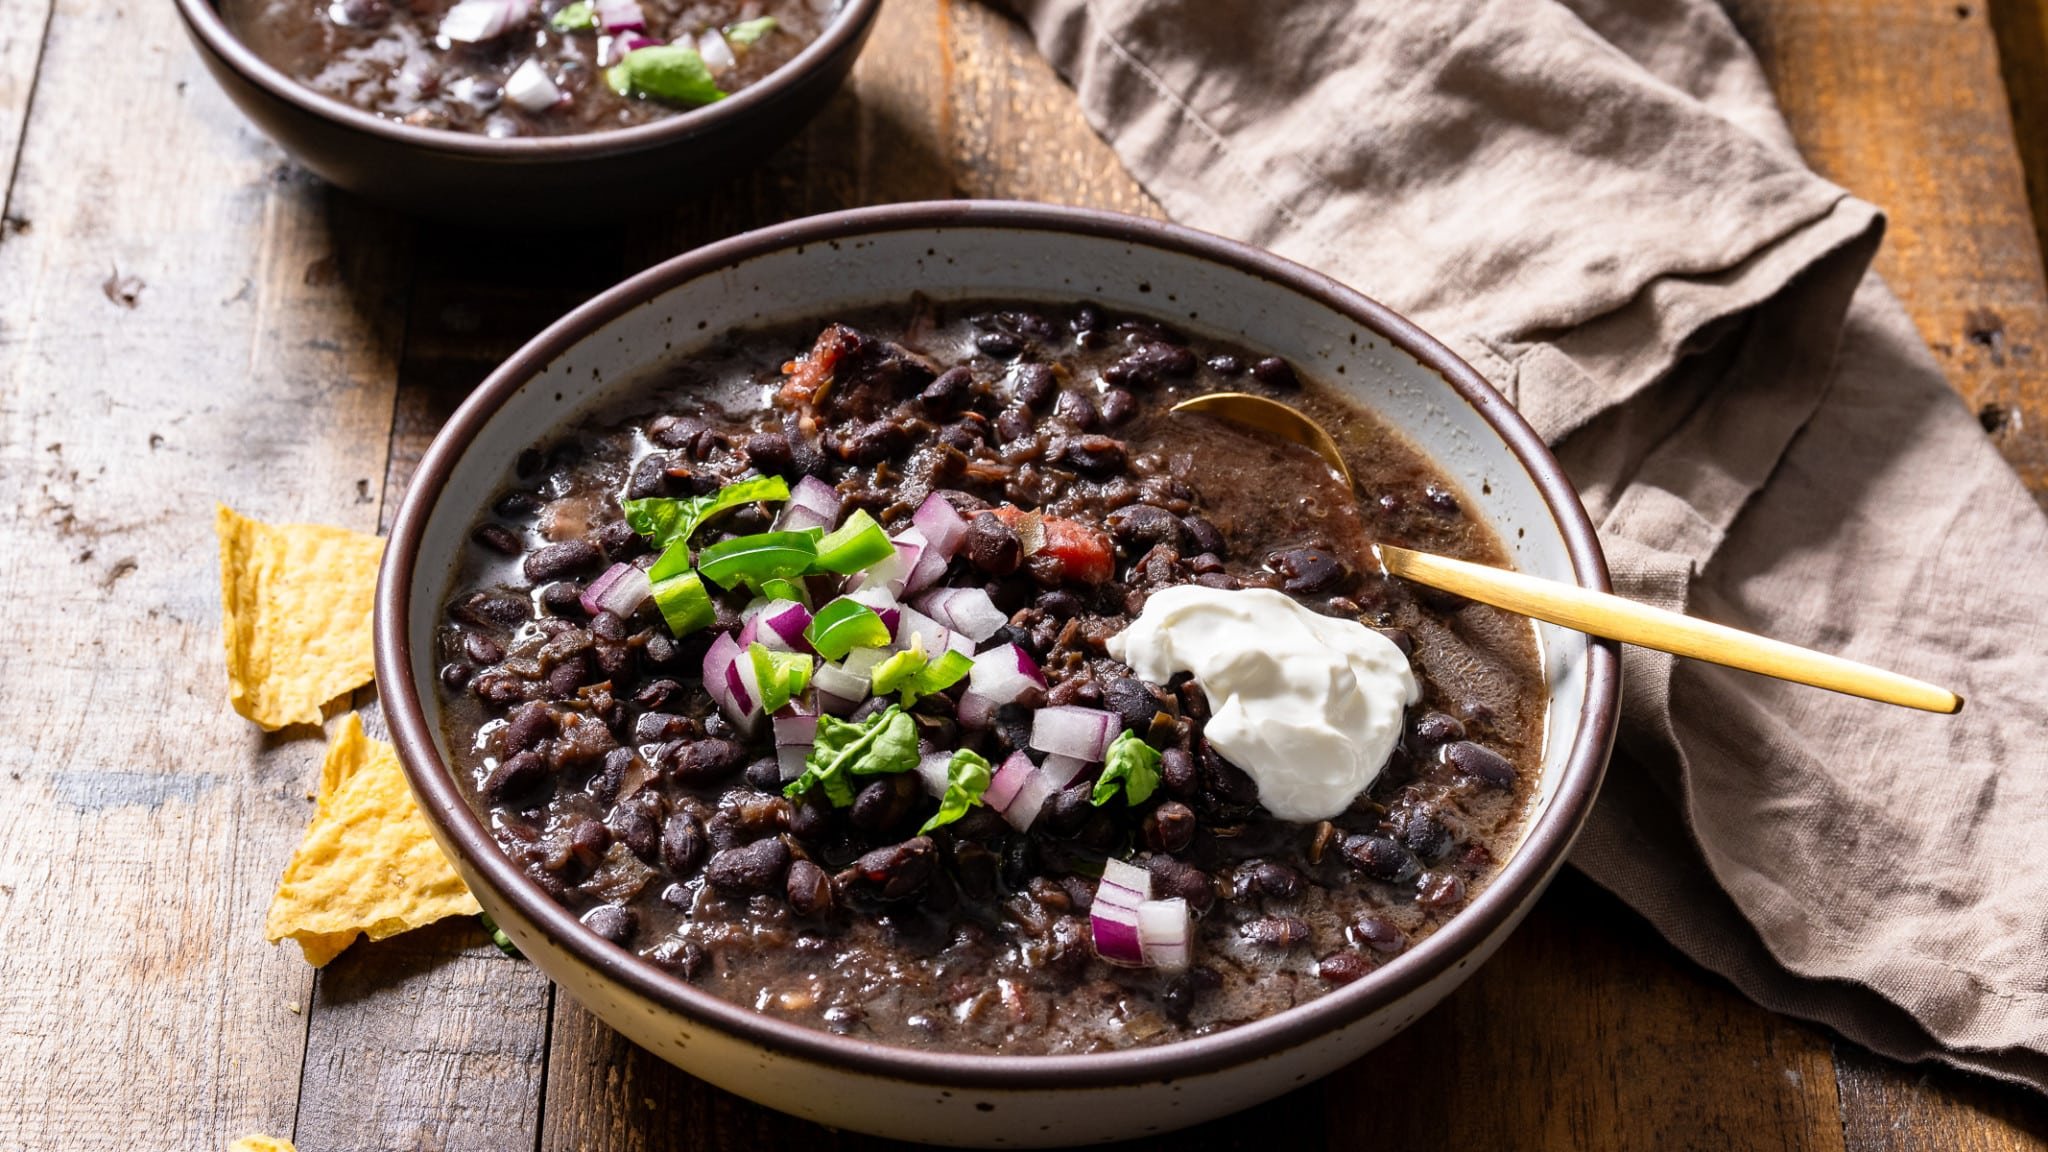
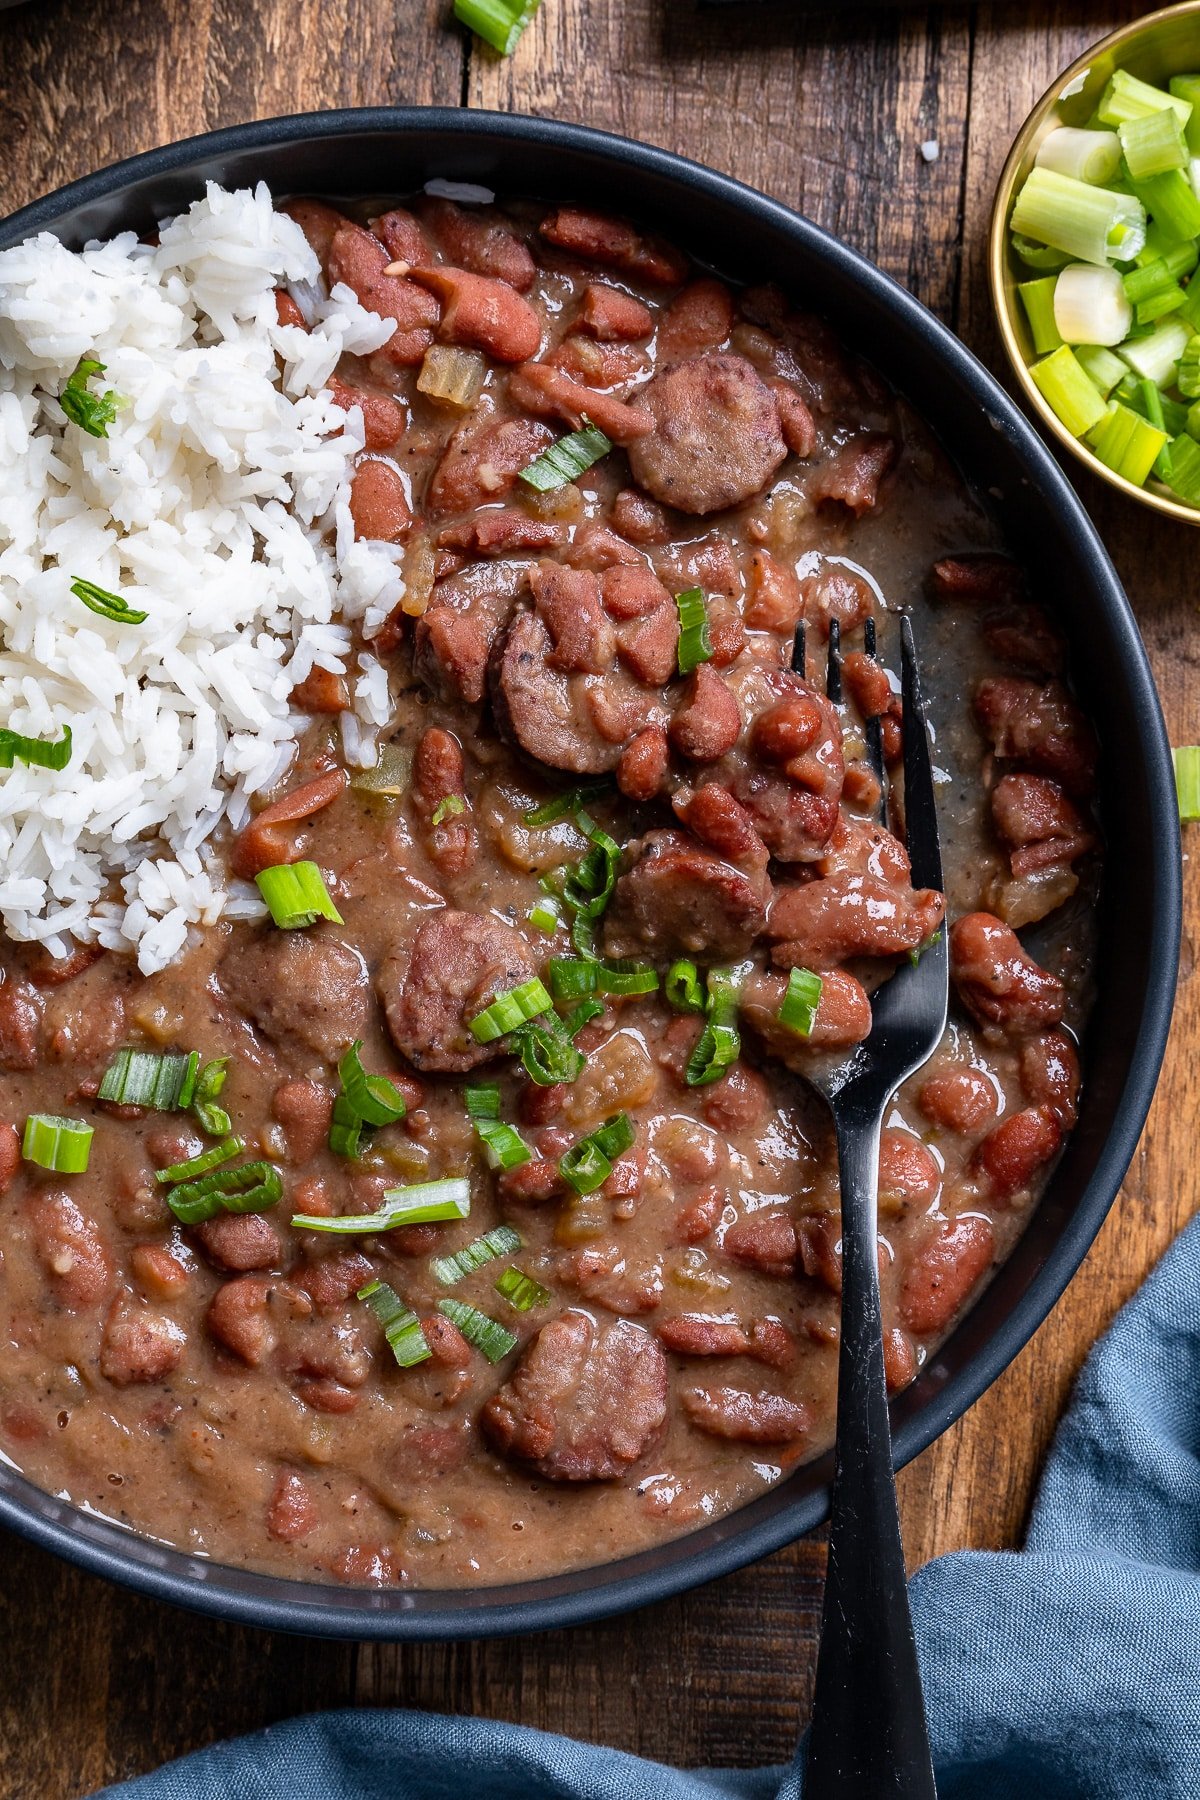
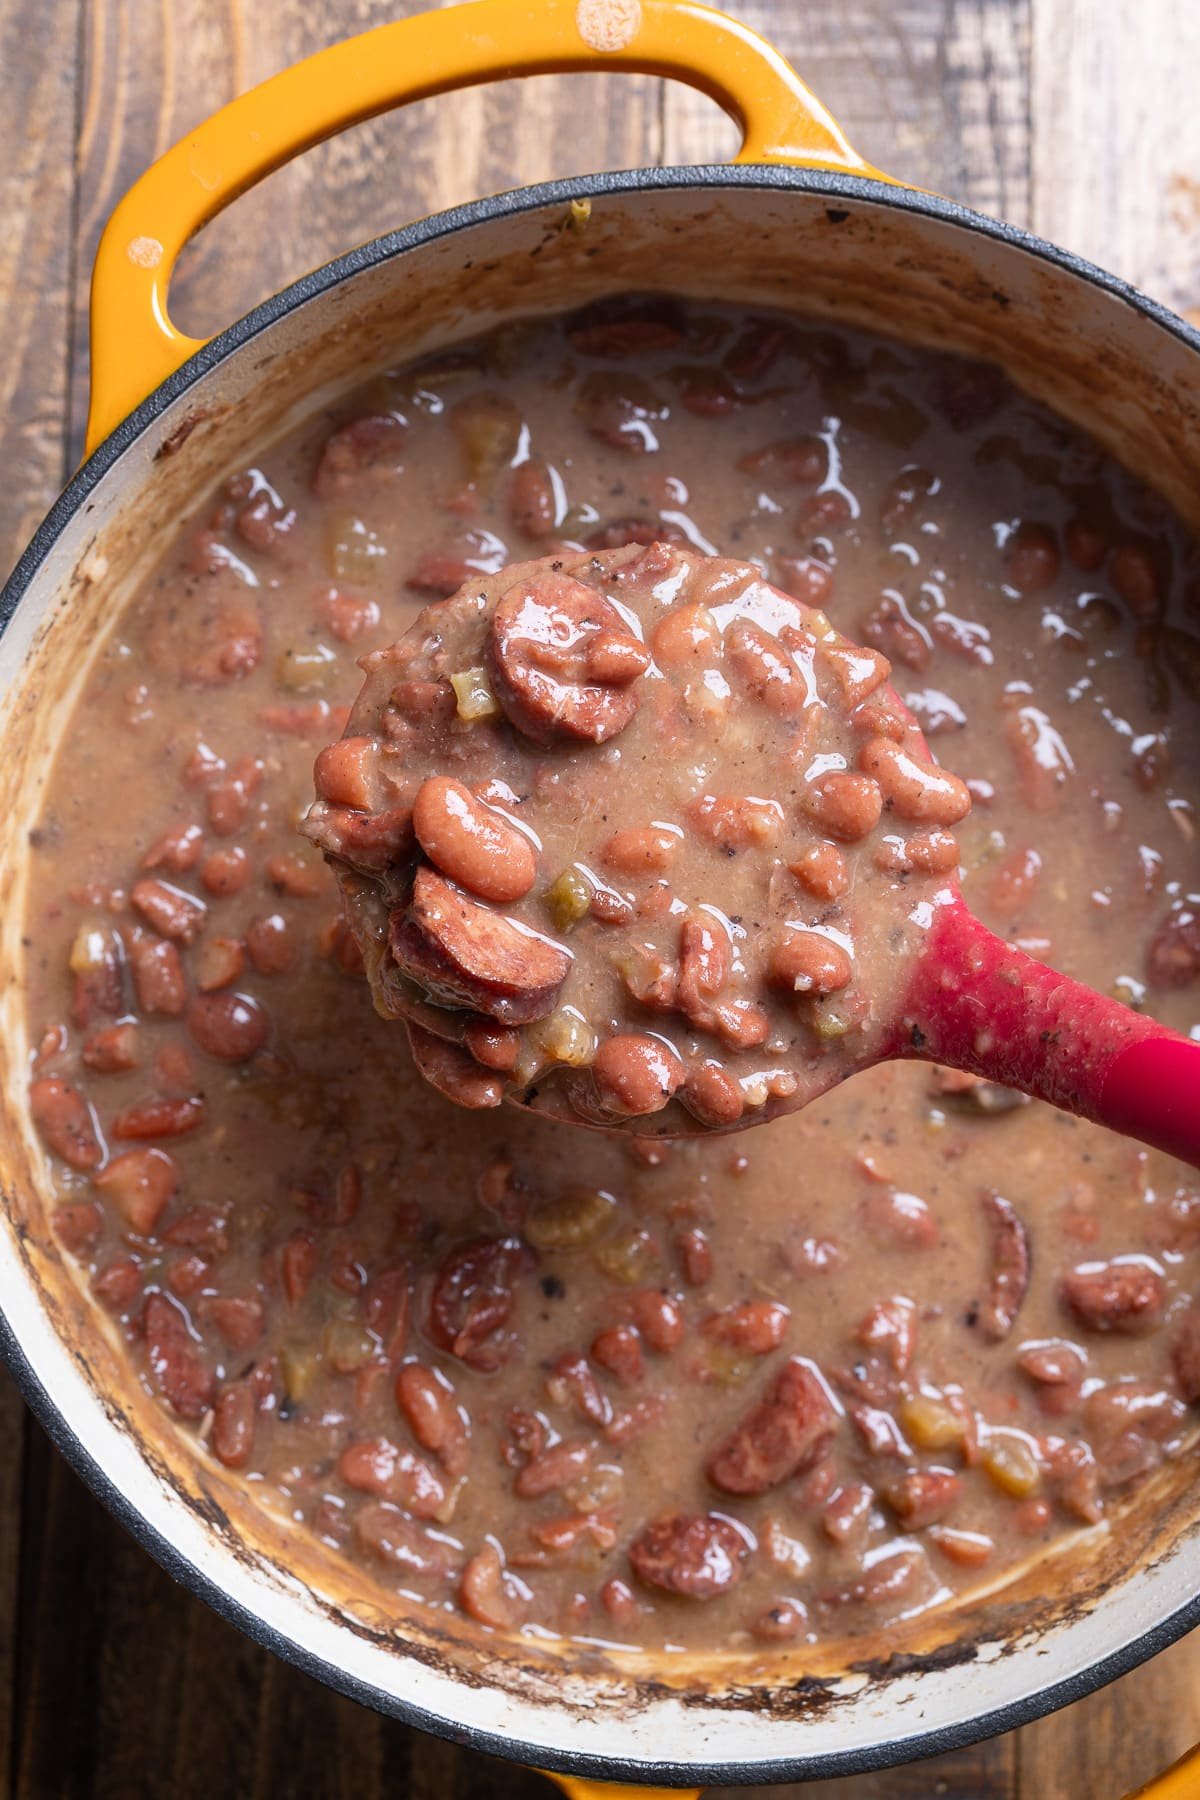
overhead of red beans and rice in black bowl with fork picking up beans

Red Beans and Rice is a classic Louisiana dish made with creamy red kidney beans, smoky andouille sausage, and the holy trinity of Cajun cooking, onions, celery, and bell pepper. This hearty, flavorful dish is perfect for a comforting weeknight dinner or Sunday supper.

overhead of red beans and rice in black bowl with fork picking up beans

You’ll find the full recipe with ingredient amounts and instructions in the recipe card at the bottom of this post. Be sure to check out the blog post itself for extra tips and tricks!

I've been to New Orleans a couple of times and have eaten at so many Cajun restaurants during my visits. I absolutely fell in love with red beans and rice. The best red beans and rice, in my opinion, are flavorful, super creamy, and just downright delicious. I've made it many times before and after my visits, and feel like I've finally nailed down a recipe I absolutely love.

pic of Tanya

My version stays true to the basics. I use water as my flavor liquid, along with some reserved bean water, Cajun seasoning, and andouille sausage. I cook this low and slow, which lets the beans become incredibly tender and creamy.

I also opted to soak my red beans overnight. I'm usually team no-soak when it comes to bean recipes, but for this red beans recipe, I felt the results were better when I soaked and used some of the soaking liquid, along with fresh water, to cook the beans. I do the same method when making my Jamaican stew peas, a somewhat similar dish, with a totally different flavor profile. Either way, you will be blown away by this classic dish.

Love, Tanya

A Quick Look at The Ingredients

Ingredient amounts and full recipe instructions are on the printable recipe card at the bottom of the post.

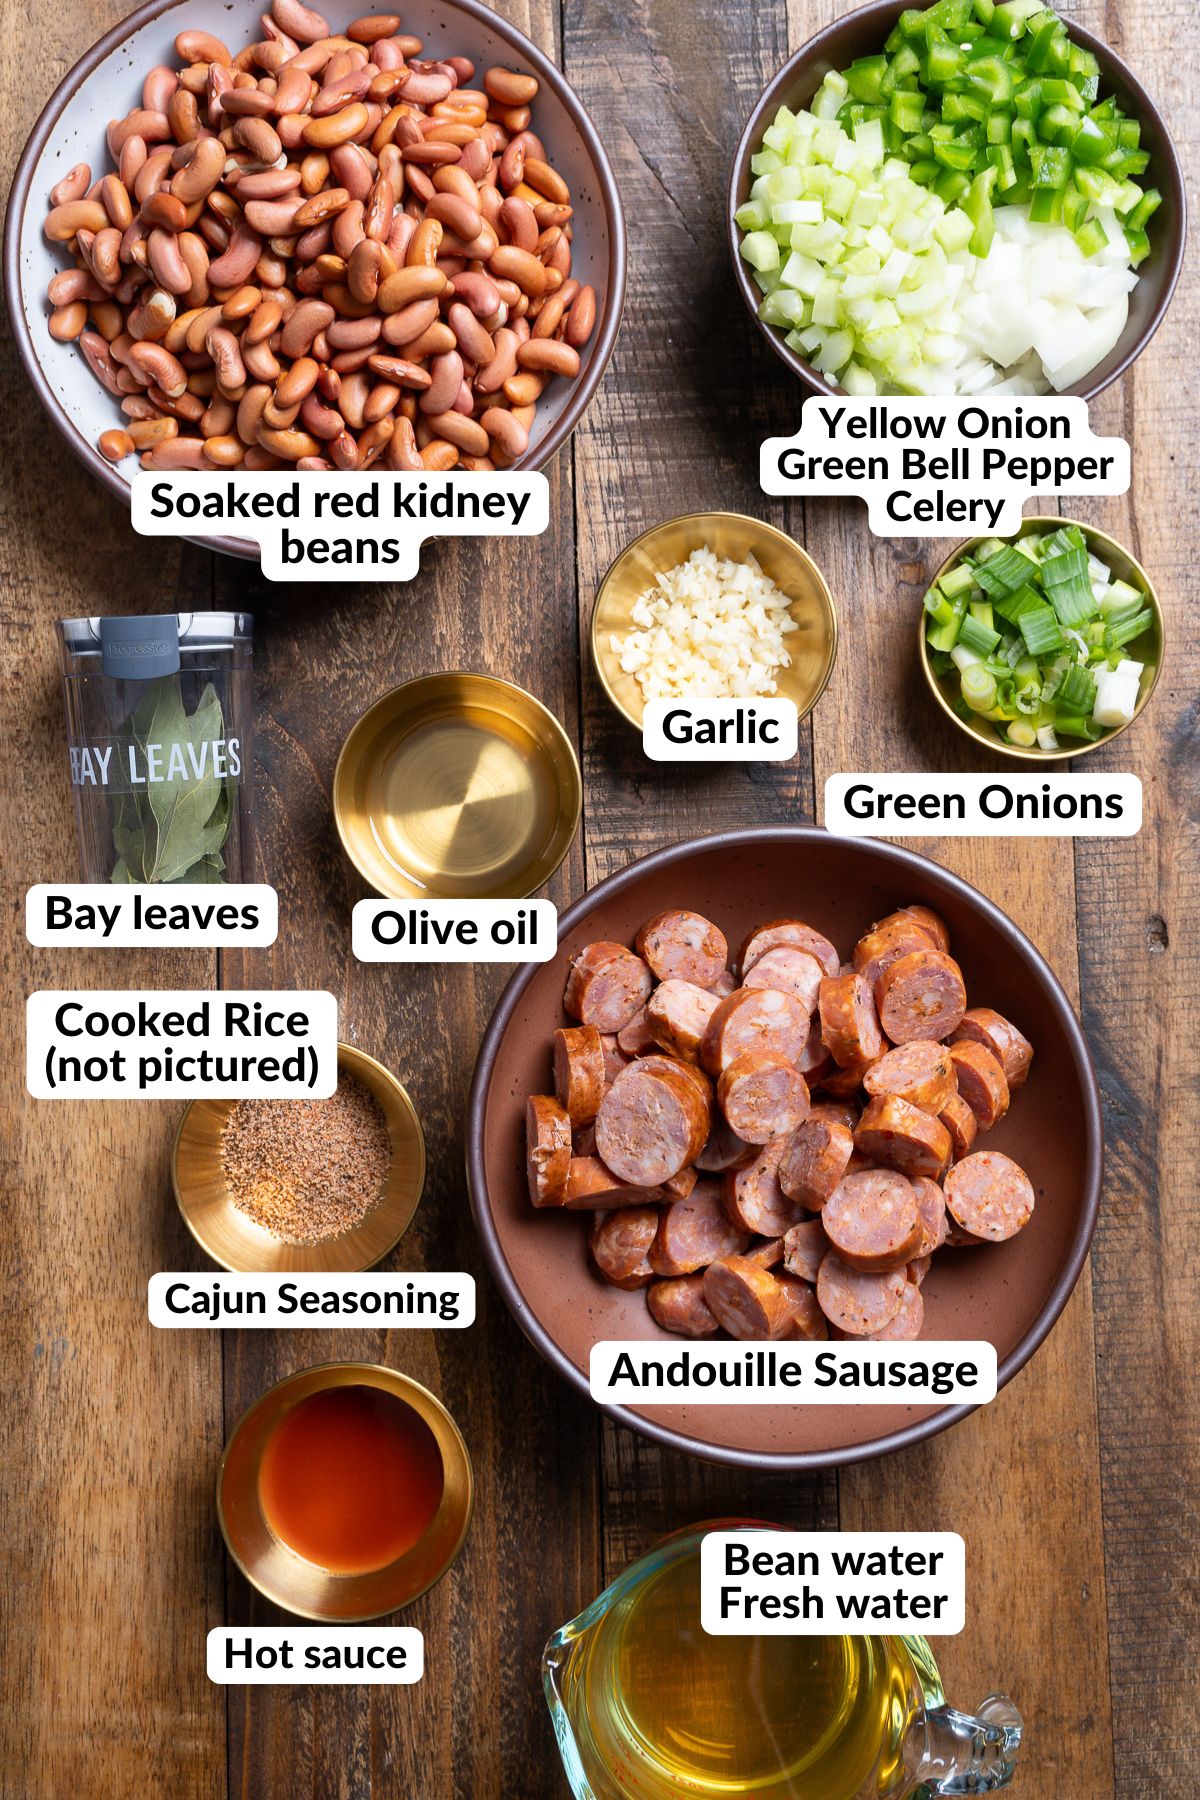
  • Oil - for sautéing the vegetables and browning the sausage
  • Yellow onion, celery, green bell pepper - chopped, the holy trinity of Cajun cooking
  • Garlic - minced. I love adding garlic to my recipes.
  • Bay leaves - essential for that authentic Louisiana flavor
  • Dried red kidney beans - soaked overnight.
  • Andouille sausage - chopped, gives the dish its signature smoky flavor
  • Bean water, fresh water - reserved from soaking and for cooking
  • Cajun seasoning - for that authentic Louisiana flavor
  • Hot sauce, green onions - to taste and for garnish
  • cooked rice - for serving with the beans.
ingredients for red beans and rice on table

How to Make this Red Beans and Rice Recipe

Step 1: Rinse and sort the kidney beans, discarding any broken pieces. Place them in a large bowl and cover with plenty of water. Soak overnight, then drain and reserve 3 cups of the soaking liquid.

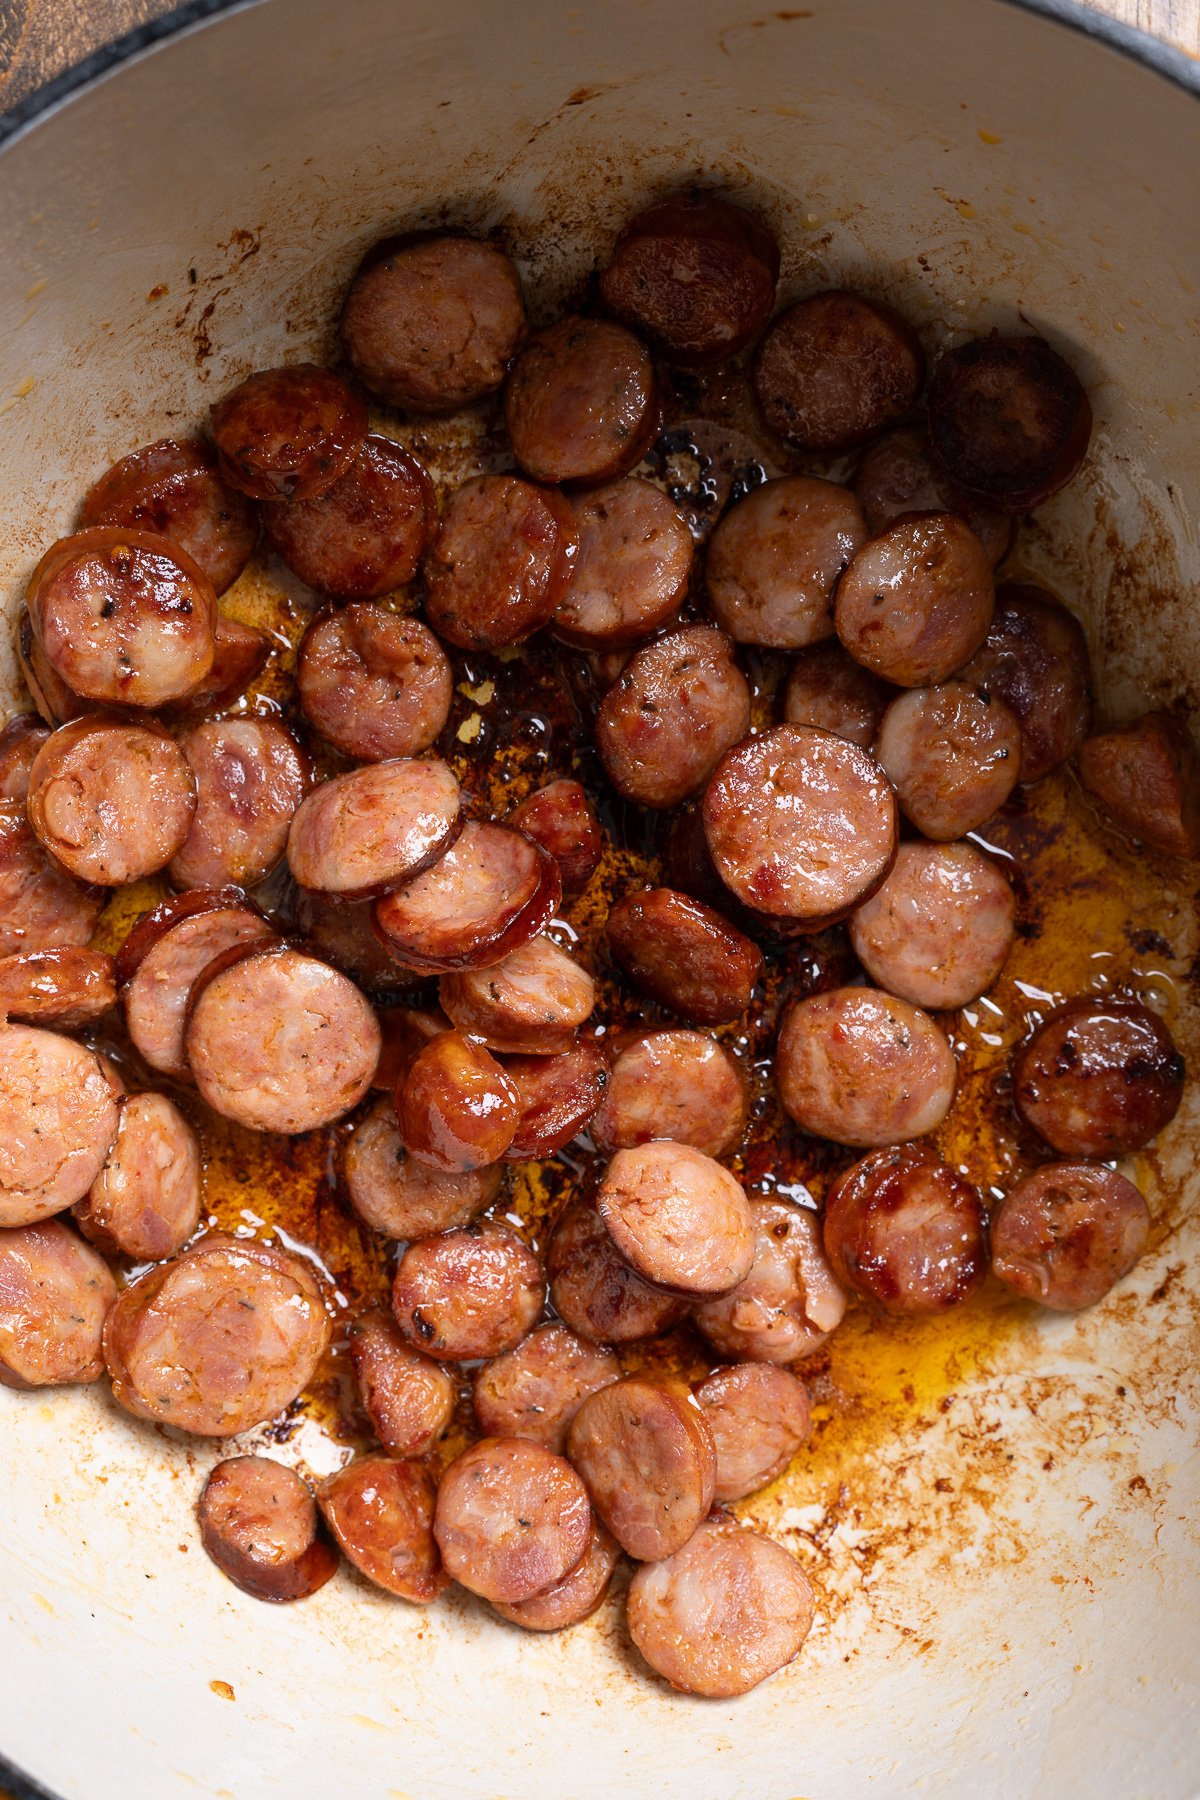
Step 2: In a large pot, heat oil over medium-high heat. Add the sausage and cook until browned, about 5-6 minutes. Remove and set aside.

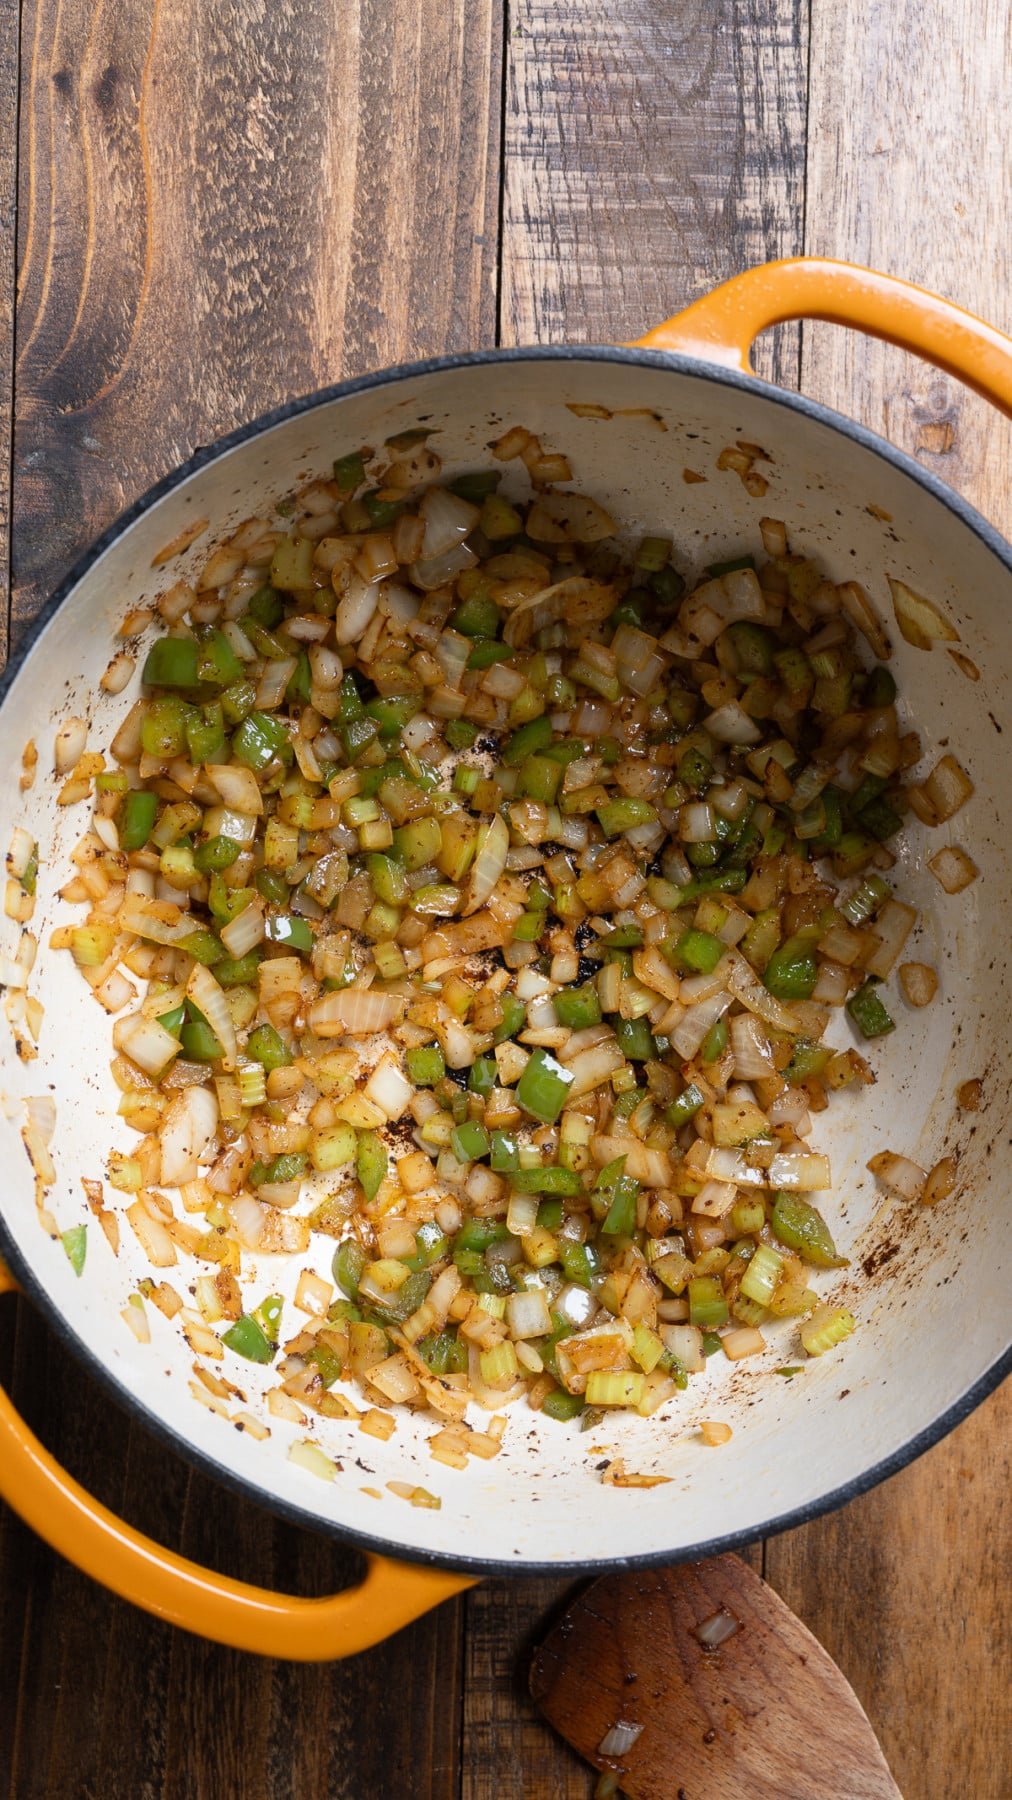
Step 3: Add onion, celery, and bell pepper to the same pot. Sauté until softened, about 5 minutes. Stir in the garlic and cook for 1 minute.

sausage cooking in pot
onion, bell pepper, celery, and garlic in pot cooking

Step 4: Add the soaked beans, the reserved sausage, Cajun seasoning, bay leaves, 3 cups reserved bean water, and about 5 cups fresh water. The liquid should cover the beans by at least 2 inches.

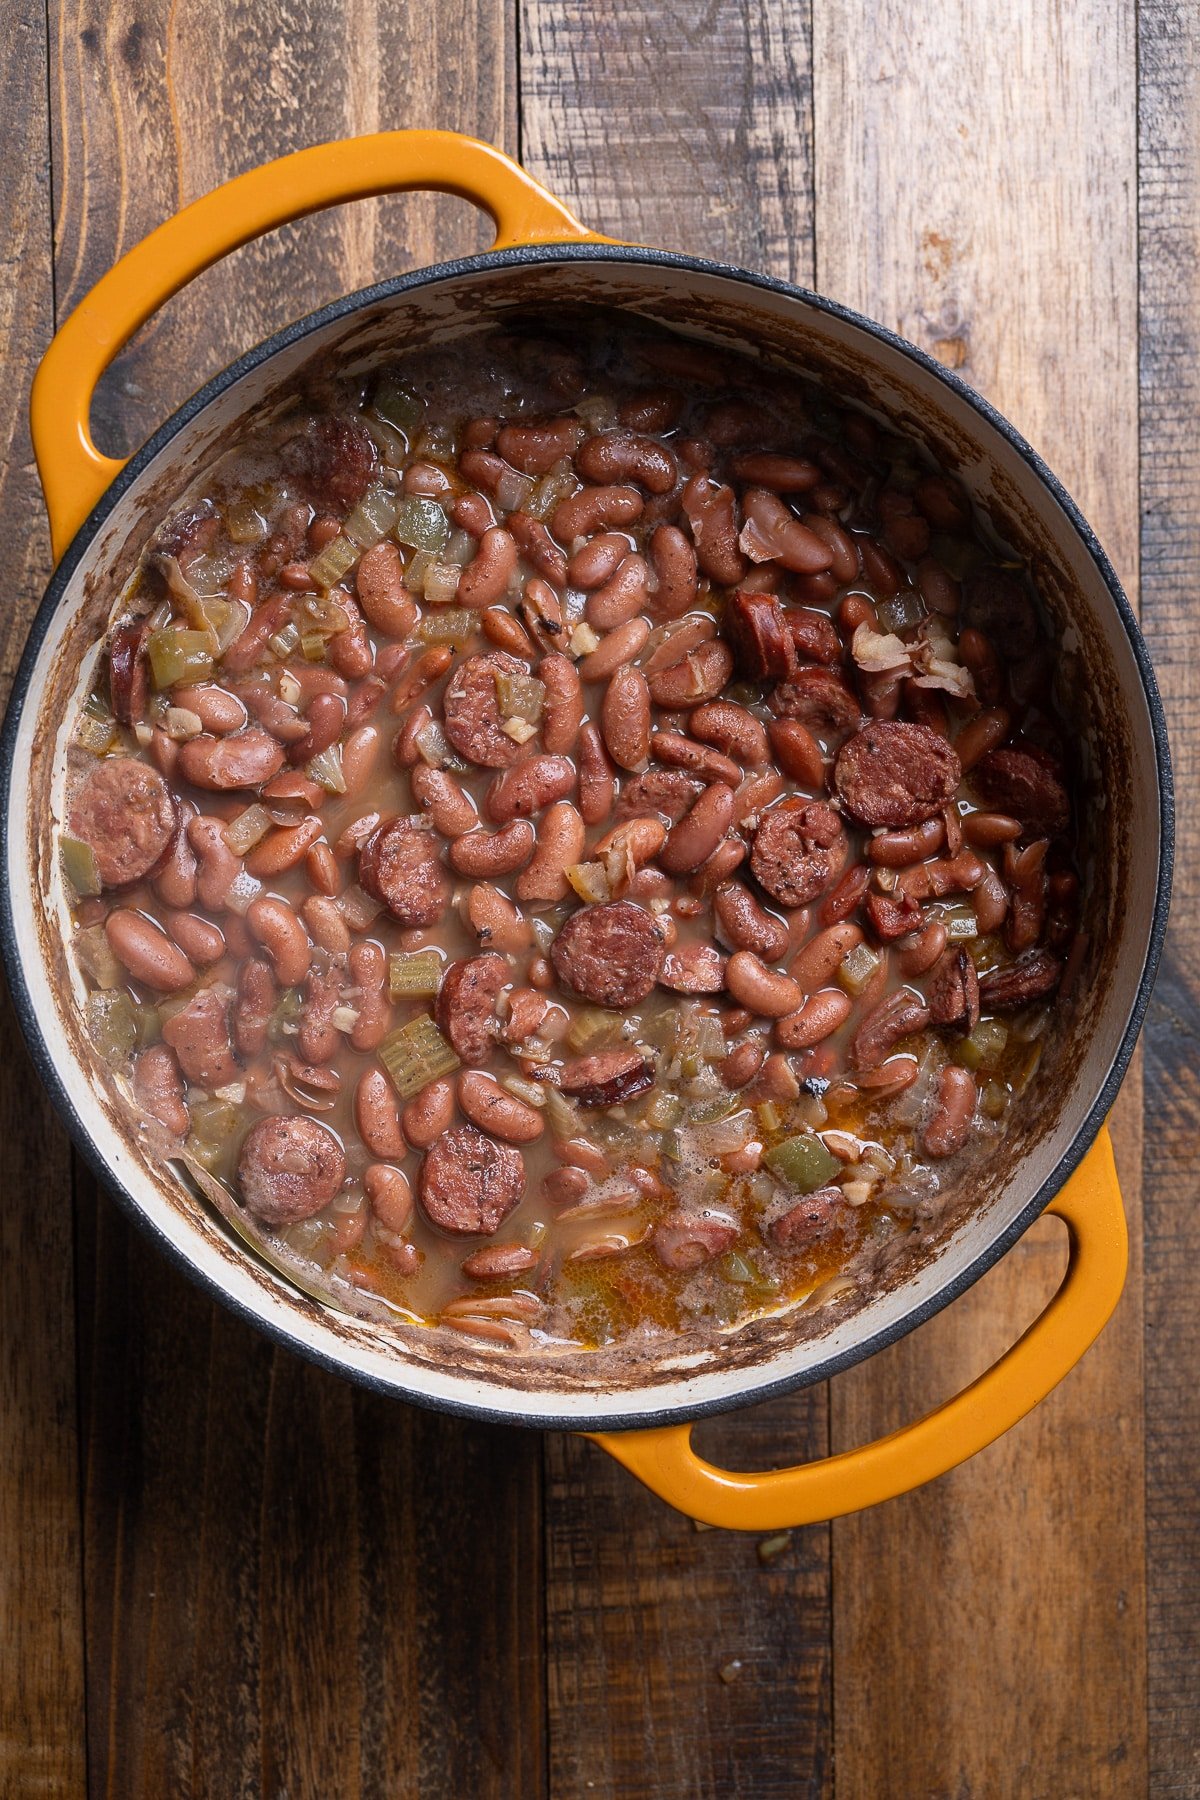
Step 5: Bring to a rolling boil and cook uncovered for 30 minutes, stirring occasionally. This step helps eliminate naturally occurring toxins in red kidney beans. Add about 2 cups of fresh water to allow the bean water to cover the beans by 2 inches.

red beans and rice in pot after boiling for 30 minutes

Step 6: Reduce the heat to low, cover, and simmer for 1-2 hours, stirring occasionally, until the beans are creamy and tender. Add more water as needed to keep them submerged.

Step 7: Mash some of the beans against the side of the pot to thicken the mixture and create that signature creamy texture.

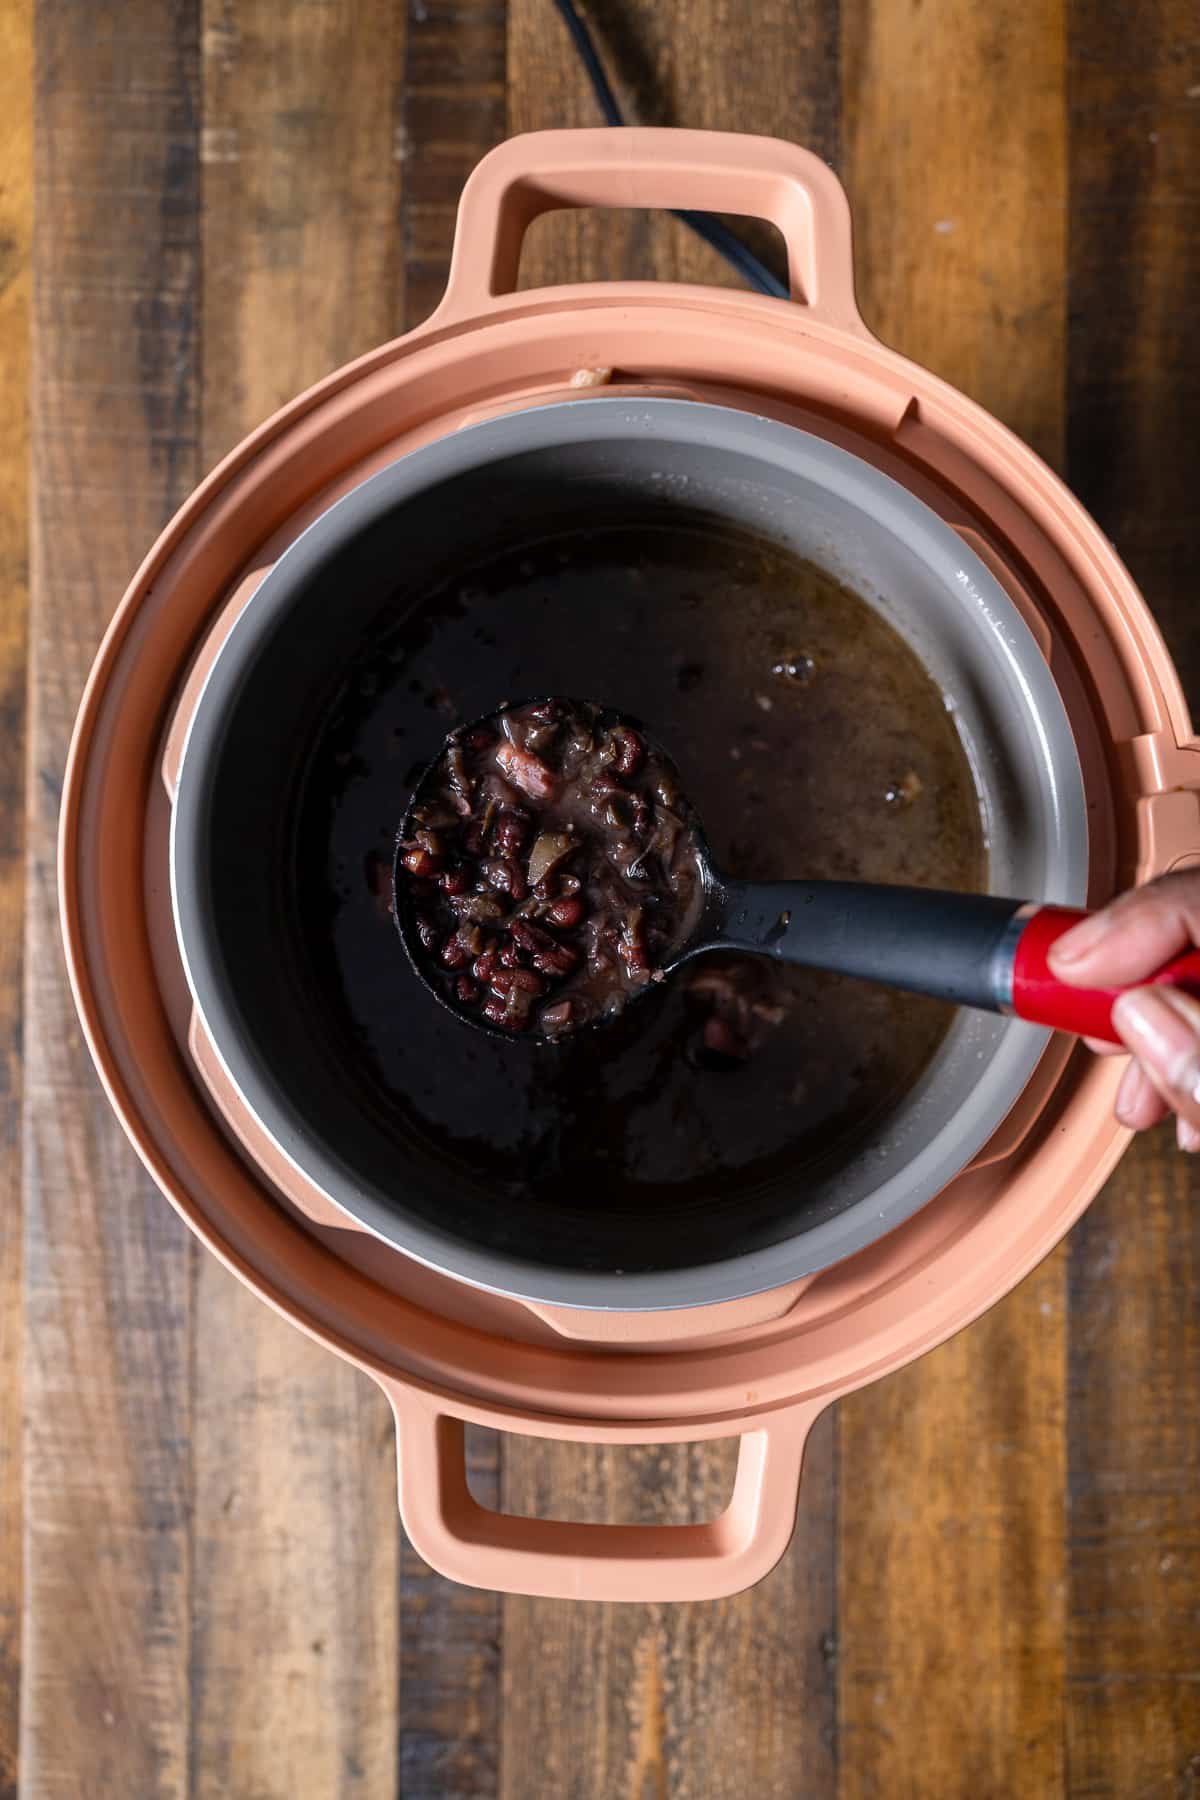
spoon picking up creamy red beans and rice

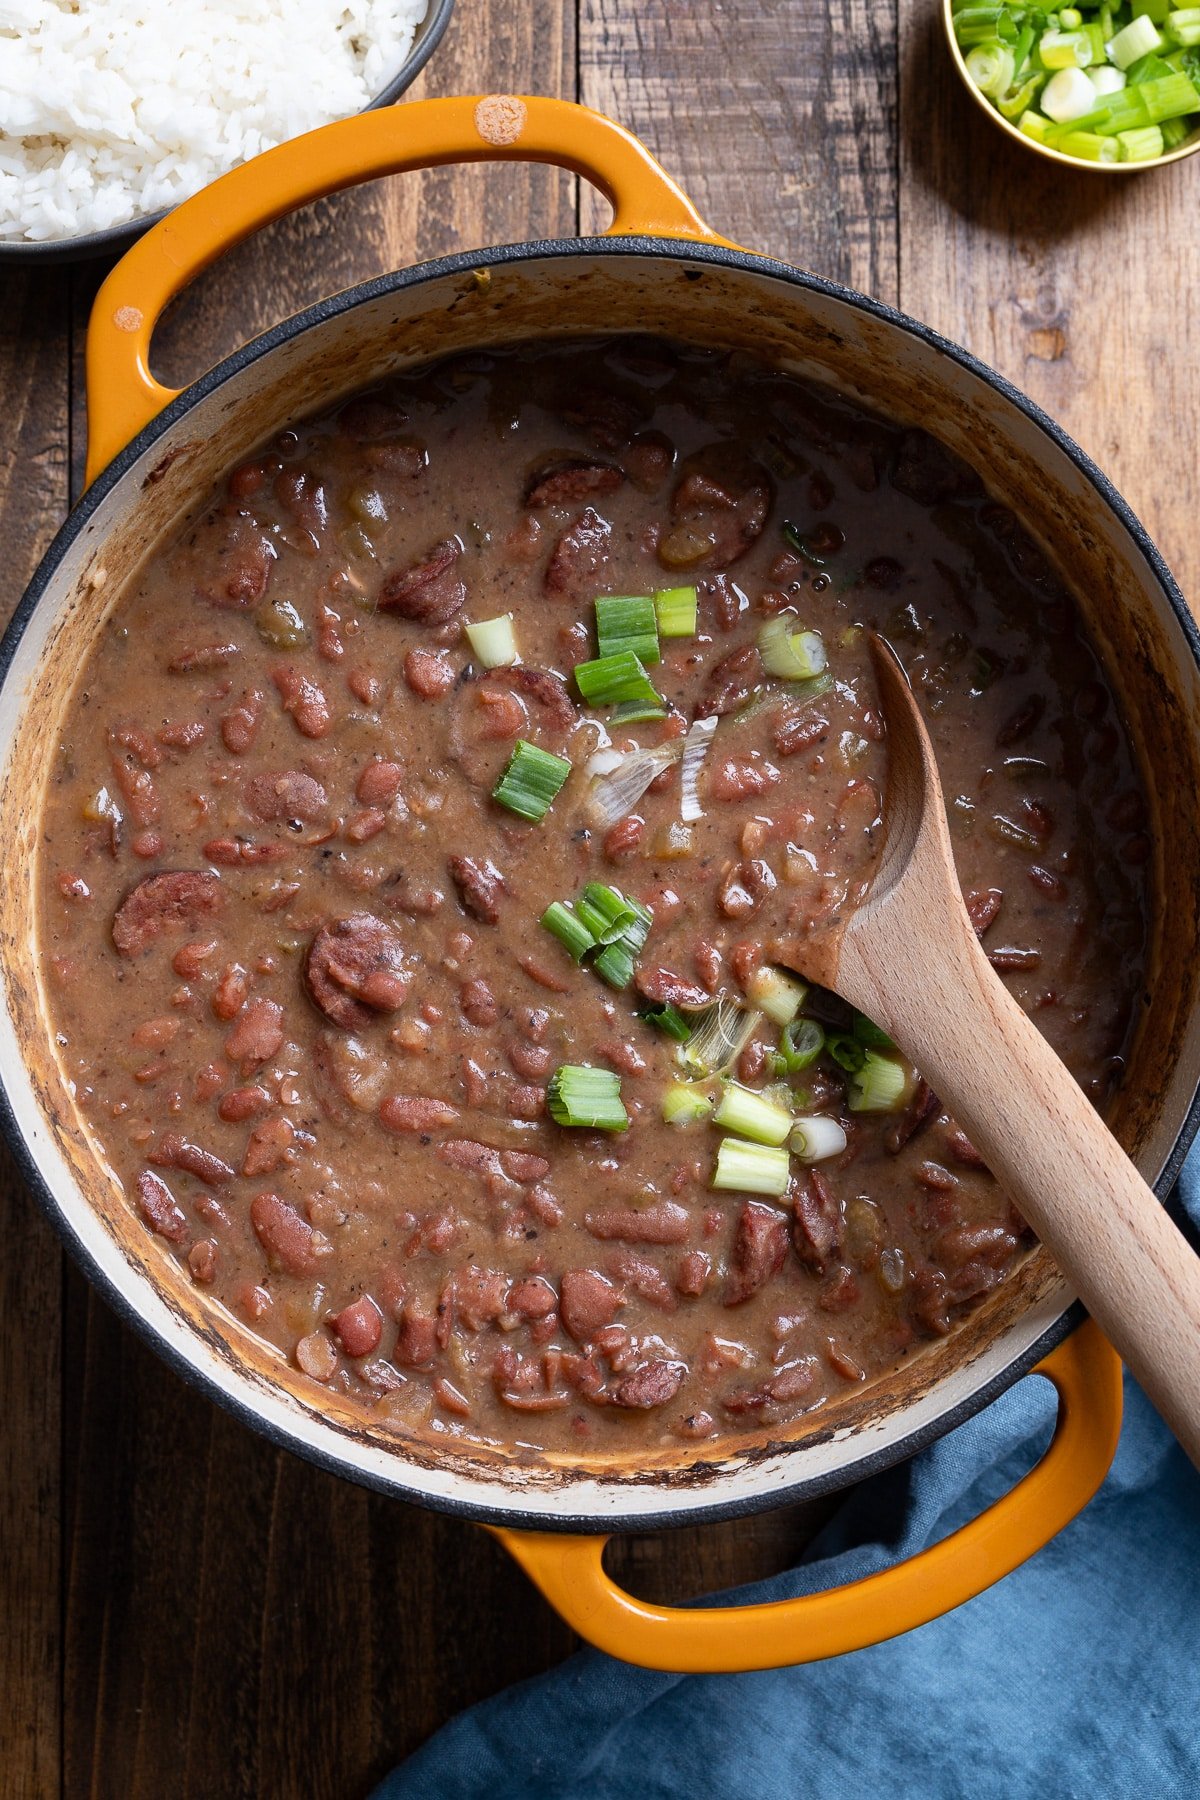
Step 8: Remove the bay leaves. Season with hot sauce to taste and serve over cooked white rice. Garnish with green onions.

spoon inside pot of red beans and rice

Tips and Variations

  • Make it vegetarian by omitting the sausage and using vegetable broth instead of some of the water. Use ingredients like smoked paprika to add smoky flavor.
  • Adjust the heat level by adding more or less hot sauce and Cajun seasoning.
  • For a thicker consistency, mash more of the beans. For a brothier dish, leave them whole.

Why Do Red Kidney Beans Need to Be Boiled for 30 Minutes?

Soaking beans overnight reduces cooking time to an hour after boiling. Boil red kidney beans for 30 minutes to destroy the toxin phytohaemagglutinin, which can cause stomach upset. The FDA advises this to ensure proper temperature throughout. Avoid using a slow cooker, as it doesn't get hot enough.

How to Store Red Beans and Rice, and How Long Does It Last?

Store red beans and rice in separate airtight containers in the refrigerator. The beans and rice will last for up to 4 days. You can also freeze the beans for up to 3 months. Just remember to defrost before reheating. When reheating, add a splash of water to the beans if they've thickened up too much. Reheat on the stovetop over medium heat or in the microwave until warmed through.
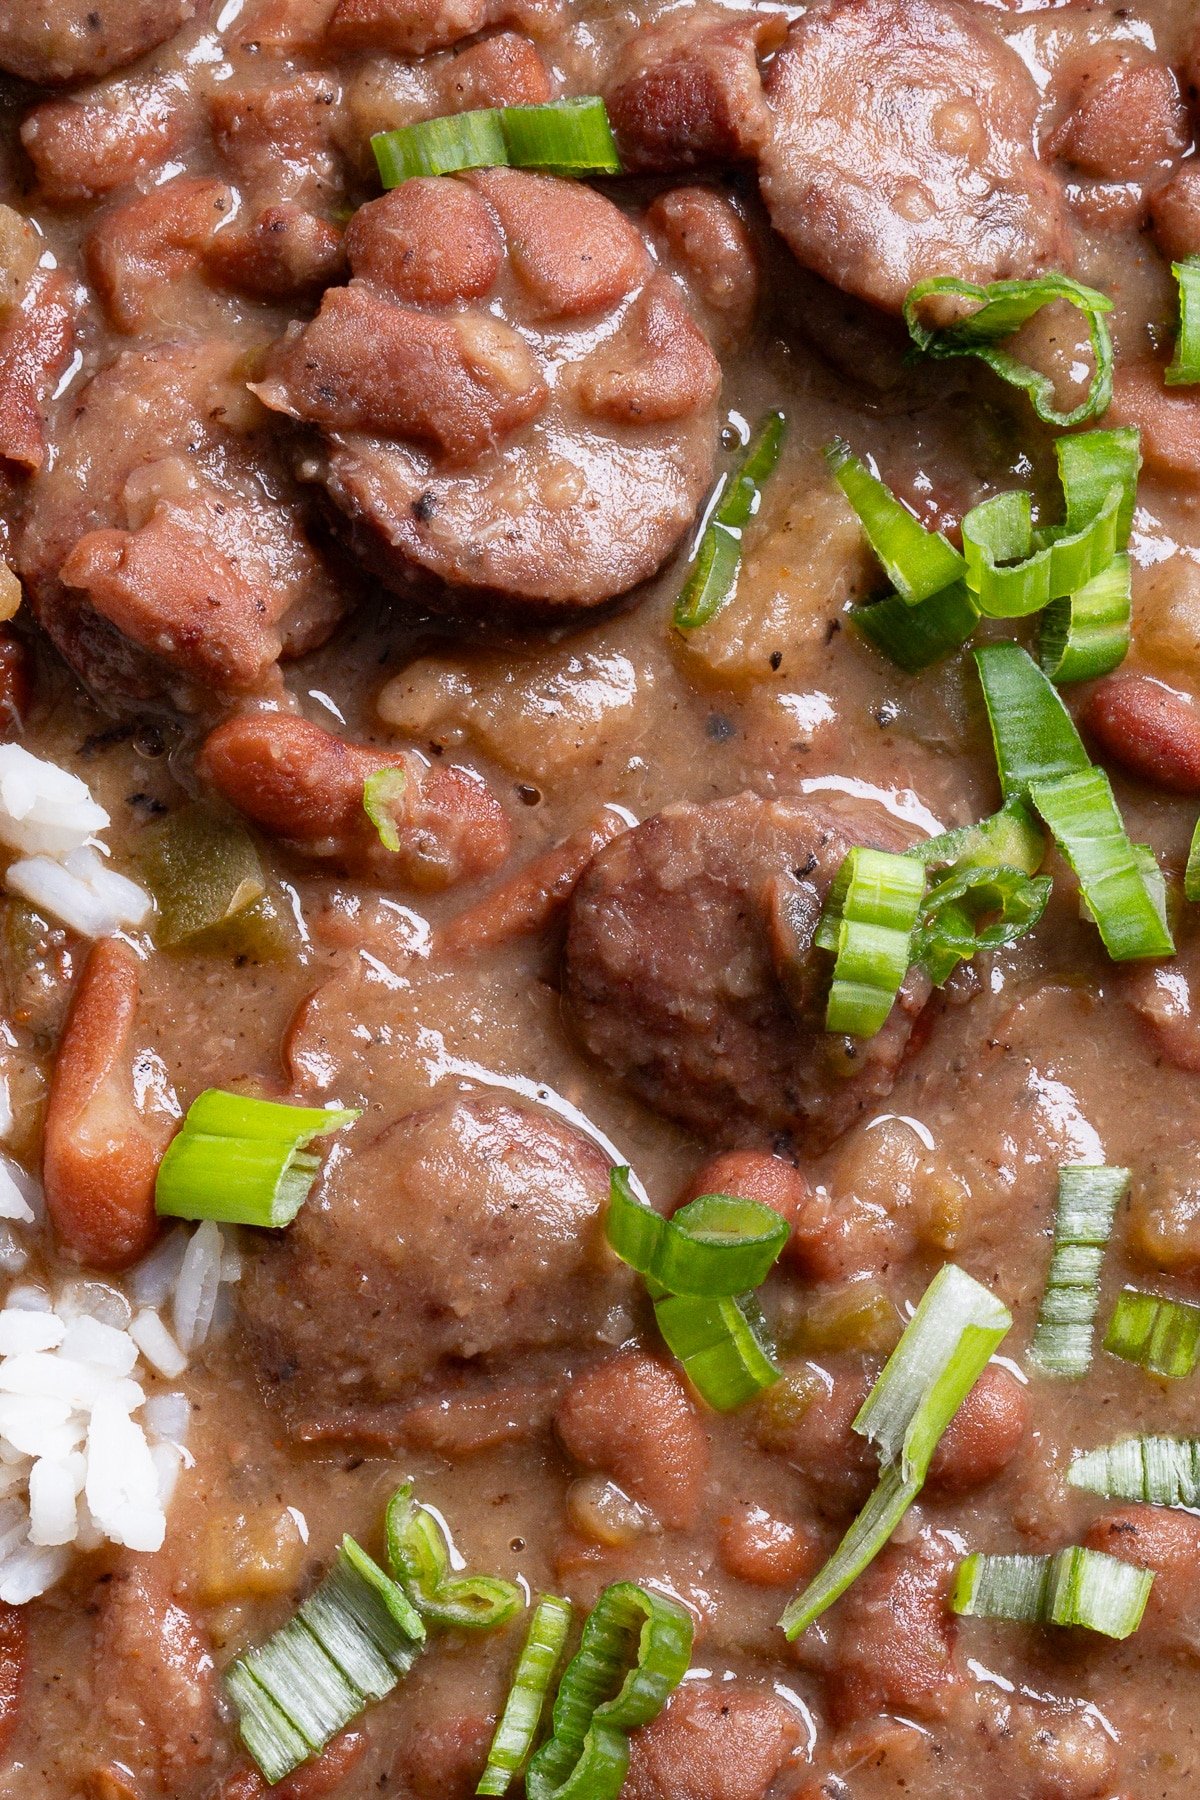
a very close up photo of red beans and rice

Tanya's Top Tips

  • Soak your beans overnight and reserve some of the soaking liquid for extra flavor. If you're not a fan of using the water the beans are soaked in, then use fresh water or chicken broth for added flavor.
  • Brown your sausage first to develop a deeper, richer flavor in the final dish.
  • Stir occasionally during the simmering phase to prevent sticking, but don't stir too much or the beans will break apart.
  • The dish tastes even better the next day, after the flavors have had time to meld.

I hope you love this red beans and rice recipe as much as we do. If you're looking for more Southern comfort food recipes, try these out:

  • Cornbread - cornbread and red beans and rice are the perfect combo. Use the cornbread to mop up some of the red bean gravy.
  • Dirty Rice - Flavorful rice cooked with ground meat and Cajun seasonings
  • Blackened Pasta - This blackened chicken alfredo is so flavorful. Alfredo sauce flavored with blackened seasoning.

If you make this red beans and rice recipe, please let me know how you like it by leaving a review. Your feedback is appreciated!

overhead of red beans and rice in black bowl with fork picking up beans
Print Recipe
5 from 2 votes

Red Beans and Rice Recipe

A classic Louisiana dish with creamy red kidney beans, smoky andouille sausage, and aromatic vegetables, cooked low and slow for maximum flavor.
Prep Time15 minutes mins
Cook Time1 hour hr 30 minutes mins
Overnight Soak8 hours hrs
Total Time9 hours hrs 45 minutes mins
Course: entree
Cuisine: American
Keyword: red beans and rice
Servings: 8
Calories: 570kcal
Author: Tanya

Ingredients

  • 1 pound dried red kidney beans soaked overnight
  • 1 tablespoon olive oil
  • 1 pound andouille sausage chopped
  • 1½ cups chopped yellow onion about 1 large onion
  • 1 cup chopped celery white parts removed, about 2 stalks
  • 1 cup chopped green bell pepper about 1 large
  • 6 cloves garlic minced
  • 3 bay leaves
  • 3 cups bean water reserved from soaking
  • 5-7 cups fresh water
  • 1 tablespoon Cajun seasoning
  • Hot sauce to taste
  • ½ cup chopped green onion for garnish
  • 6 cups Cooked rice for serving

Instructions

  • Rinse and sort the kidney beans, discarding any broken pieces. Place them in a large bowl and cover with plenty of water. Soak overnight, then drain and reserve 3 cups of the soaking liquid (bean water).
  • In a large pot, heat olive oil over medium-high heat. Add the sausage and cook until browned, about 5-6 minutes. Remove and set aside.
  • Add onion, celery, and bell pepper to the same pot. Sauté until softened, about 5 minutes. Stir in the garlic and cook for 1 minute more.
  • Add the soaked beans, the reserved sausage, Cajun seasoning, bay leaves, 3 cups reserved bean water, and 5 cups fresh water. The liquid should cover the beans by at least 2 inches.
  • Bring to a rolling boil and cook uncovered for 30 minutes, stirring occasionally. Aftter 30 minutes, add about 2 cups of fresh water to allow the water to cover the beans by 2 inches.
  • Reduce the heat to low, cover, and simmer for 1-2 hours, stirring occasionally, until the beans are creamy and tender. Add more water as needed to keep them submerged.
  • Mash some of the beans against the side of the pot to thicken the mixture.
  • Remove the bay leaves.
  • Season with hot sauce to taste and serve over cooked white rice. Garnish with green onions.

Video

Notes

  • The 30-minute boiling step is essential for food safety. Red kidney beans contain phytohaemagglutinin, a toxin that must be destroyed by boiling at high temperatures. If you don't have 30 minutes to boil, I would suggest boiling uncovered for atleast 10 minutes.
  • This dish tastes even better the next day. Store leftovers in the refrigerator for up to 4 days or freeze for up to 3 months.

Nutrition

Calories: 570kcal | Carbohydrates: 75g | Protein: 27g | Fat: 18g | Saturated Fat: 5g | Polyunsaturated Fat: 4g | Monounsaturated Fat: 8g | Trans Fat: 0.1g | Cholesterol: 49mg | Sodium: 483mg | Potassium: 1162mg | Fiber: 11g | Sugar: 4g | Vitamin A: 645IU | Vitamin C: 22mg | Calcium: 89mg | Iron: 5mg

October 25, 2025 by Tanya 50 Comments

Air Fried Macaroni and Cheese Balls

These Air-Fried Macaroni and Cheese Balls are perfect for any day of the week. Air fry them for a healthier version of your favorite appetizer.

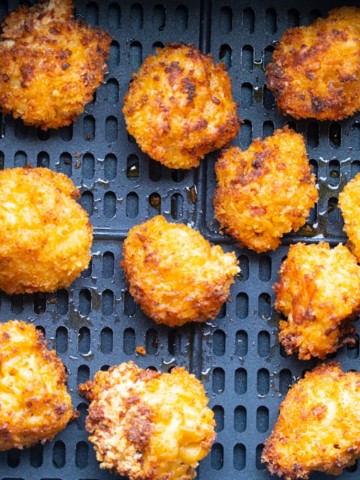
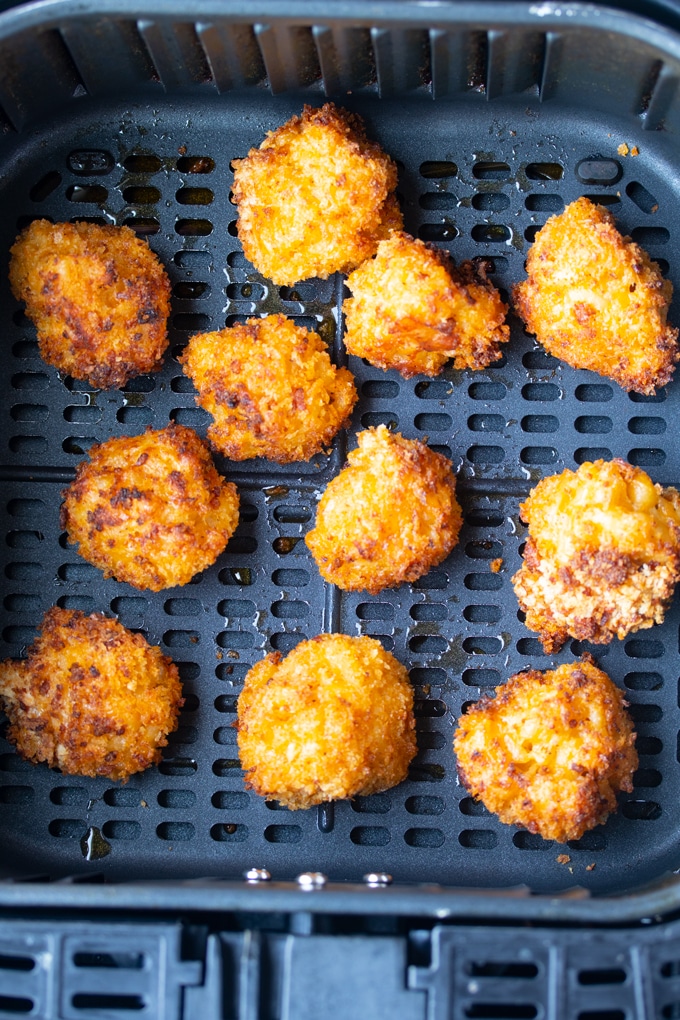
macaroni and cheese balls in air fryer basket

You’ll find the full recipe with ingredient amounts and instructions in the recipe card at the bottom of this post. Be sure to check out the blog post itself for extra tips and tricks!

The Air Fryer is pretty amazing for my fried favorites, especially appetizers. I’ve made air-fried egg rolls, chicken wings, and bacon-wrapped chicken bites. It was about time I did another favorite of mine, macaroni and cheese balls. 

pic of Tanya

Whether you call them mac and cheese bites, balls, or macaroni nuggets, these crispy air-fried treats are about to become your new favorite appetizer.

Traditionally deep-fried in hot oil, I decided to give them a healthier makeover in my Air Fryer. This resulted in golden, crunchy on the outside, creamy on the inside bites that are less messy and surprisingly easy to make. If you're into making restaurant-quality apps in your air fryer, try these air fryer crab cakes.

♡ Tanya

A Quick Look at the Ingredients

Ingredient amounts and full recipe instructions are on the printable recipe card at the bottom of the post.

  • Leftover Mac and Cheese - The star of the show! Use refrigerated, baked mac and cheese that's thick enough to hold together when rolled into balls. I do not recommend using box mac and cheese.
  • Eggs & Milk - Creates the binding wash that helps the breading stick to each ball.
  • Panko Breadcrumbs - Gives you that extra crispy, golden exterior that regular breadcrumbs can't achieve.
  • Garlic Powder - Adds savory depth and complements the cheese beautifully.
  • Paprika - A touch of smoky flavor and gorgeous color.
  • Salt - Enhances all the flavors.
  • Cooked Bacon (Optional) - Mixed into the breading for extra crunch and a salty, smoky kick. Totally optional but highly recommended!

The Kind of Mac and Cheese needed for this Recipe

Before I get into making this dish, I’d like to discuss the right kind of macaroni and cheese to make it work. You’ll need leftover mac and cheese that has been cooled and refrigerated in a bowl or pan, so it sticks together. That will make the balls easier to roll and hold together. 

You will also need mac and cheese with a cheese sauce that thickens once refrigerated. Most macaroni and cheese will do this, but some may not. Baked macaroni and cheese usually thickens up once refrigerated.

 If you’re making the macaroni and cheese the same day you make the bites, you will need to cook it, let it cool, and refrigerate it for about 4 hours.

I’ve made this recipe with both this creamy baked macaroni and cheese and this Air Fryer Mac and Cheese leftovers. 

How to Make Air-Fried Macaroni and Cheese Balls

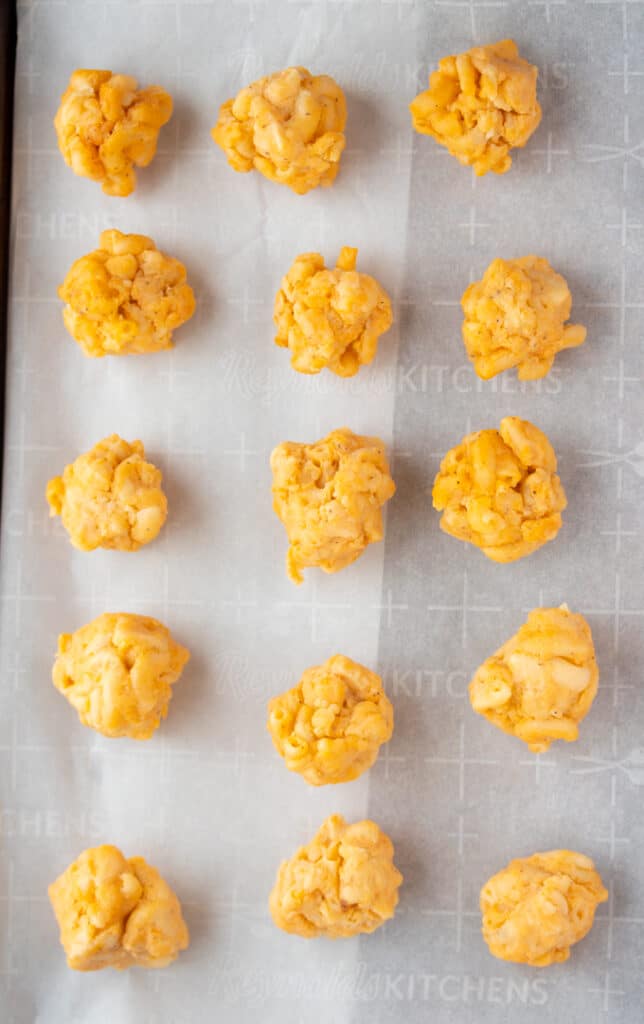
Step 1: Using your leftover refrigerated macaroni and cheese, take large chunks, about 2 Tablespoons, and roll into balls. Set aside.

rolled up macaroni balls on a baking sheet

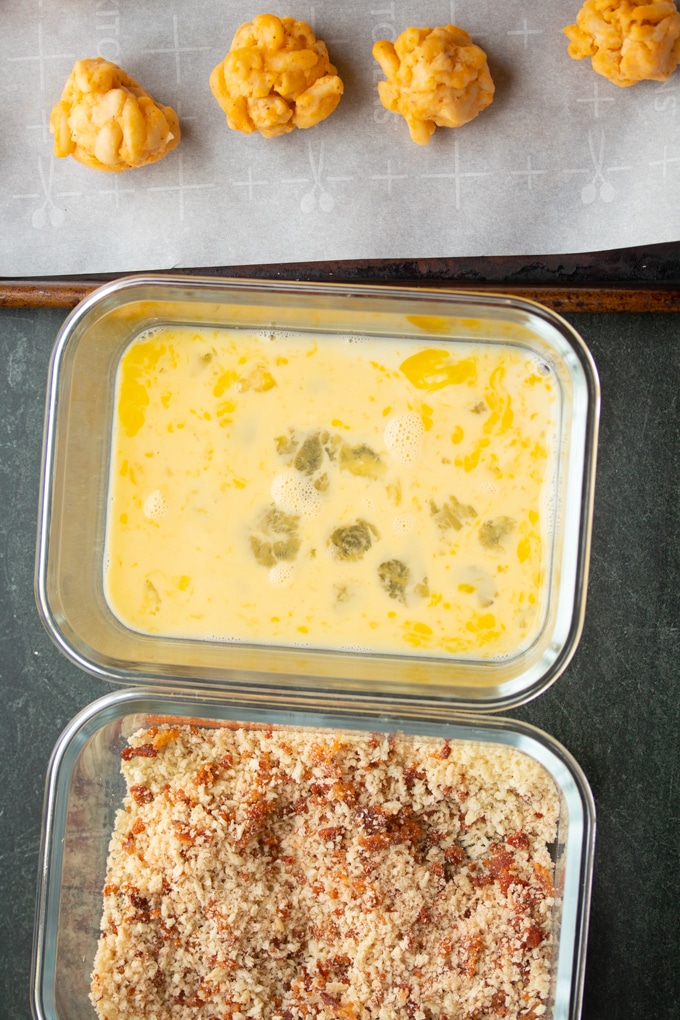
Step 2: Create a dredging station by adding the egg and milk to one bowl and whisking to combine. Then, in another bowl, add panko breadcrumbs, garlic salt, salt, and cooked chopped bacon. The bacon is optional in this recipe; I’ve made it with and without, and both are yummy. 

dredgins station of eggs, panko, and macaroni and cheese balls in front of air fryer basket

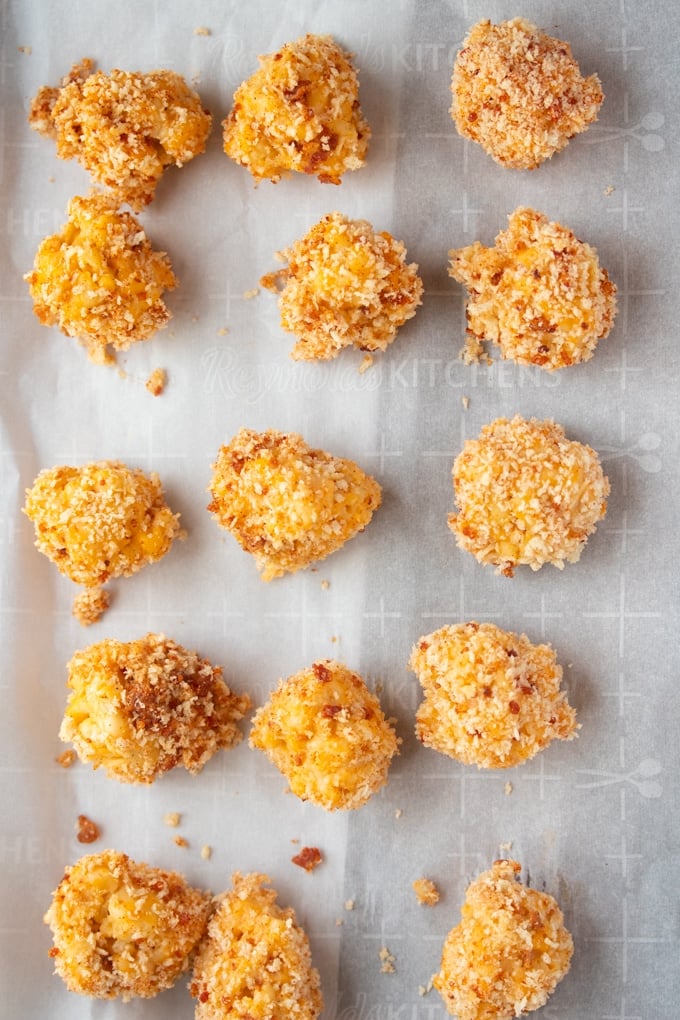
Step 3: Grab a macaroni and cheese ball, dip it in the egg and milk mixture to coat the entire ball, then add it to the panko mixture, then place it on a lined parchment paper cookie sheet. Repeat for all the balls, and then put them in the freezer and freeze for 30 minutes. 

coated macaroni and cheese balls

Step 4: When your 30 minutes are up, remove the macaroni and cheese balls from the freezer. Preheat your air fryer to 360°F. Place the macaroni and cheese balls into your air fryer basket in a single layer, making sure they don’t touch. Air fry for 8-10 minutes until light and golden on the outside. Remove, serve, and enjoy. 

ProTip: These are good on their own but are even more amazing with a dipping sauce. I like Sweet Thai Chili Sauce, while my daughters opt for BBQ. Hubby eats them as is without any dipping sauce.

Looking for Ideas of what to Serve this with? Try these out:

  • Air Fryer Fried Chicken - A classic air fryer recipe that everyone raves about. This is one of my most popular air fryer recipes on the website.
  • Sweet and Spicy Air-Fried Brussels Sprouts — When you want air-fried Brussels sprouts, I suggest making them sweet and spicy.
  • Air Fryer Meatloaf - cooks in half the time and stays juicy and tender.

Watch this video tutorial and see how I make these mac and cheese bites from start to finish.

Print Recipe
4.45 from 34 votes

Air Fried Macaroni and Cheese Balls

These Air Fried Mac and Cheese Balls are fried to perfection in the Air Fryer. A much healthier version of your favorite mac and cheese appetizer.
Prep Time10 minutes mins
Cook Time8 minutes mins
Freezer30 minutes mins
Total Time48 minutes mins
Course: Appetizer
Cuisine: American
Keyword: air fryer mac and cheese bites, macaroni and cheese balls
Servings: 4 people
Calories: 887kcal
Author: Tanya

Ingredients

  • 4 cups leftover macaroni and cheese refrigerated
  • 2 eggs
  • 2 Tablespoon milk
  • 1 cup Japanese Panko
  • 1 teaspoon salt
  • 1 teaspoon paprika
  • ½ teaspoon garlic powder
  • 2 slices cooked bacon chopped finely (optional)

Instructions

  • Using your leftover refrigerated macaroni and cheese, take large chunks, about 2 Tbsp, and roll into balls. Set aside.
  • In a bowl, add egg and milk and whisk to combine. Then in another bowl, add panko breadcrumbs, salt, garlic powder, paprika, and chopped bacon if using, and stir to combine.
  • Grab a macaroni and cheese ball and place in egg and milk mixture, coating the entire ball, then add to the panko mixture, then add to a lined parchment paper cookie sheet. Place in the freezer and freeze for 30 minutes.
  • Preheat your air fryer on 360 degrees. After the 30 minutes, remove the macaroni and cheese balls from the freezer and place them into air fryer basket in a single layer, making sure they don’t touch. Air fry for 8-10 minutes until light and golden on the outside. Remove, serve, and enjoy.

Video

Nutrition

Calories: 887kcal | Carbohydrates: 116g | Protein: 37g | Fat: 30g | Saturated Fat: 3g | Cholesterol: 96mg | Sodium: 2539mg | Potassium: 569mg | Fiber: 1g | Sugar: 1g | Vitamin A: 402IU | Calcium: 345mg | Iron: 6mg

This post was first published on August 20, 2019. It has been updated.

October 23, 2025 by Tanya 2 Comments

Southern Style Sweet Potato Casserole

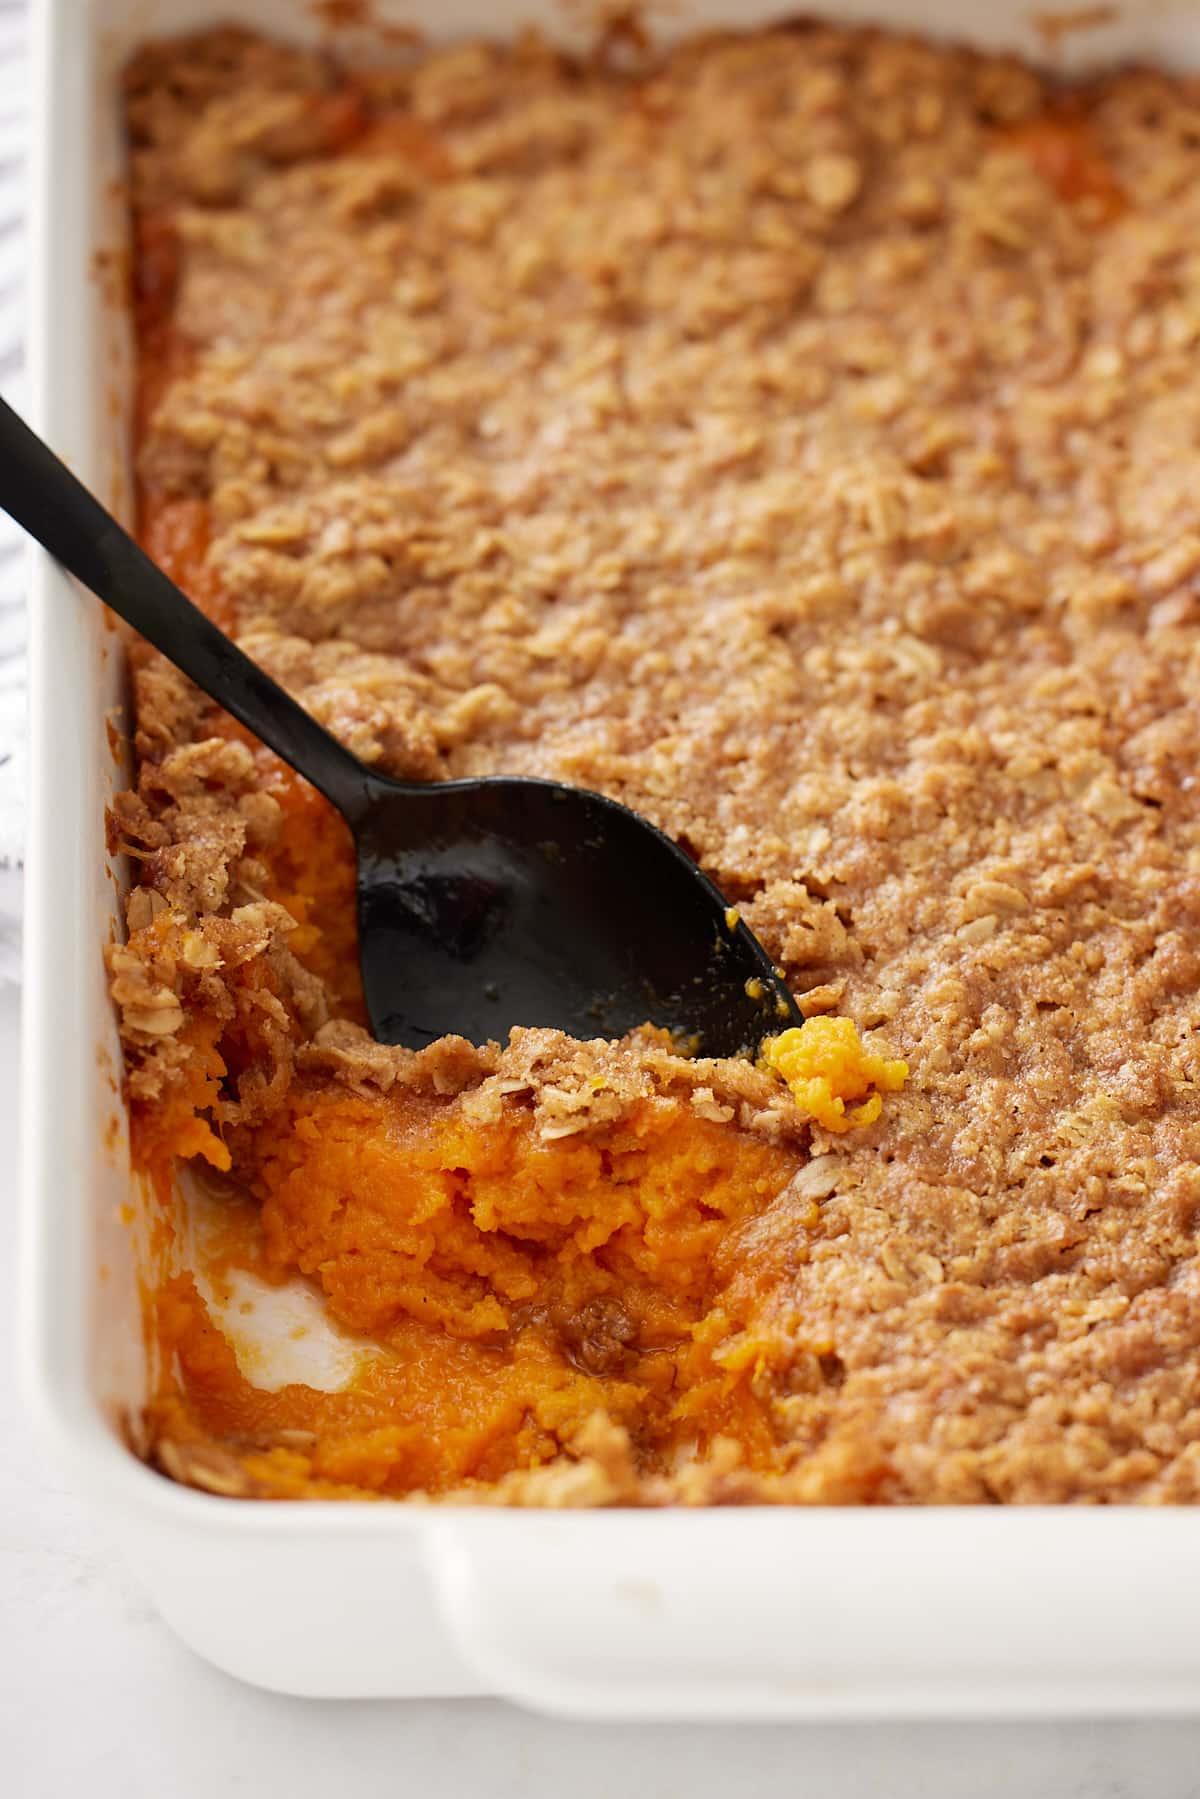
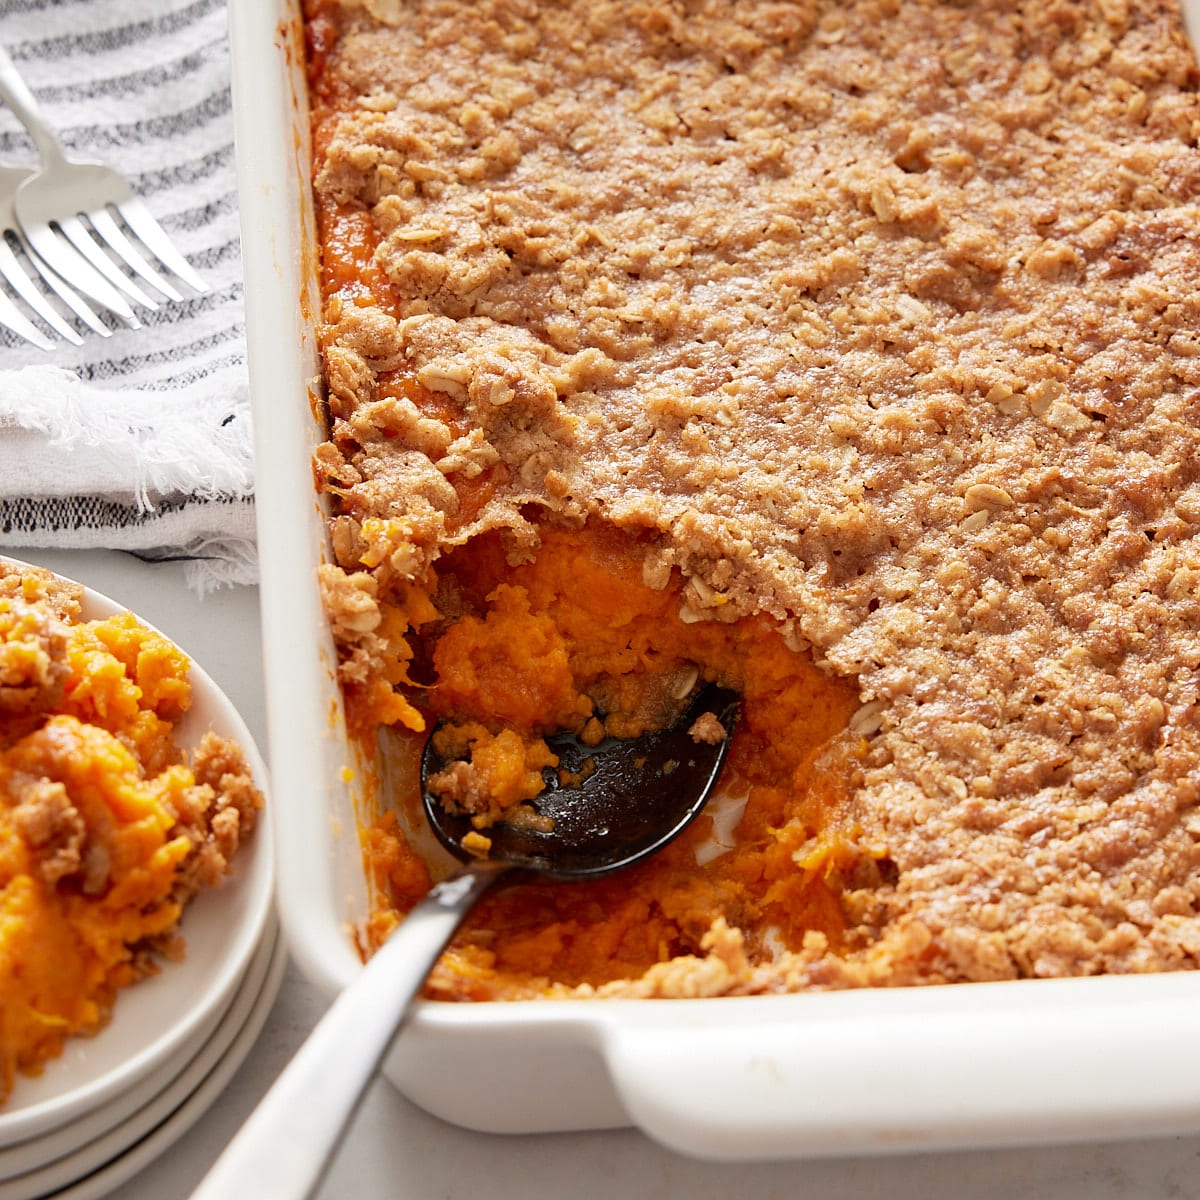
a scoop removed from the corner of the casserole dish with a spoon sticking out

Southern Sweet Potato Casserole is a delicious dish made with creamy sweet potato filling and topped with an oat and brown sugar mixture. This dish is perfect for Sunday dinner or as a side with a beautifully roasted turkey.  

a scoop removed from the corner of the casserole dish with a spoon sticking out

You’ll find the full recipe with ingredient amounts and instructions in the recipe card at the bottom of this post. Be sure to check out the blog post itself for extra tips and tricks!

When it comes to sweet potatoes, I have my favorite ways to make them. We like candied sweet potatoes, and we also love a good Southern sweet potato pie. But I had to share this delicious sweet potato casserole to round out our love of sweet potatoes. This will be your favorite way to make this southern-style casserole this year!  

pic of Tanya

My version of sweet potato casserole is lighter and made without a marshmallow topping. It's topped with light brown sugar, melted butter, oats, and cinnamon for a wonderfully warm flavor combination. I'm just not a huge fan of marshmallows on sweet potatoes.

The best part of this southern sweet potato casserole recipe is how easy it is to make and the sweet yet comforting flavors. You won't be able to put down your fork!  

♡ Tanya

A Quick Look at the Ingredients

Ingredient amounts and full recipe instructions are on the printable recipe card at the bottom of the post.

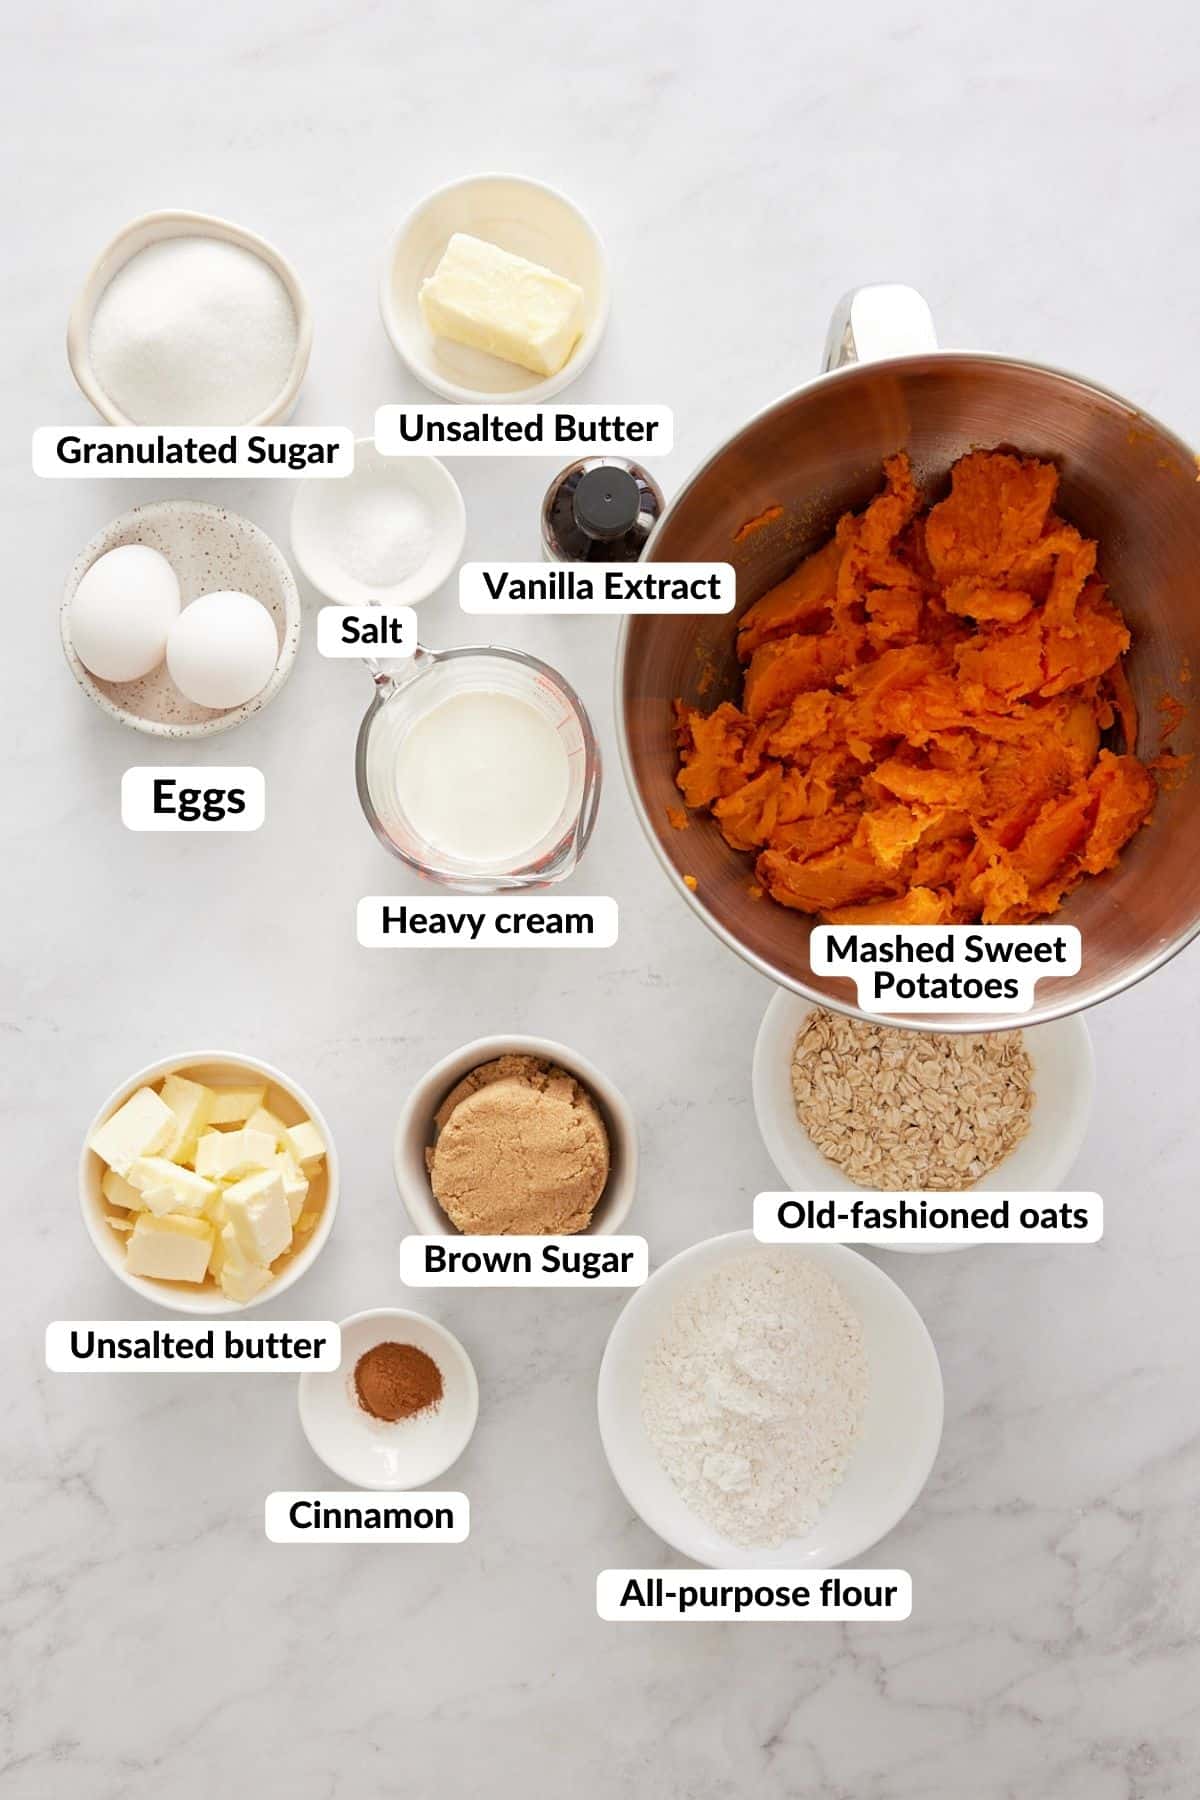
Filling: 

  • Sweet potatoes - I always roast my sweet potatoes before mashing them for this filling. Roasting caramelizes the natural sugars, giving this southern sweet potato casserole the best, most authentic flavor. You can boil them if you're short on time, but roasting is worth it.
  • Sugar, Eggs, Butter, Heavy Cream, Vanilla extract, and salt - these ingredients round out the filling, giving it a creamy and delicious base.

For the Oat Topping:

This southern sweet potato casserole uses a traditional streusel-style topping instead of marshmallows— a classic variation that lets the sweet potato flavor shine through.

  • Unsalted Butter, Light Brown Sugar, All-Purpose Flour, Oats, and Ground Cinnamon
ingredients labeled in small bowls for southern style sweet potato casserole

How to make Southern Sweet Potato Casserole 

Step 1: Preheat the oven to 425 degrees Fahrenheit (218°C). Wash and dry sweet potatoes. Use a fork and poke the sweet potatoes all over. Place the sweet potatoes on a lined sheet pan and bake in the preheated oven for 45-50 minutes, until they have softened. Remove from the oven and allow the sweet potatoes to cool. 

Step 2: Reduce the oven temperature to 350 degrees Fahrenheit. 

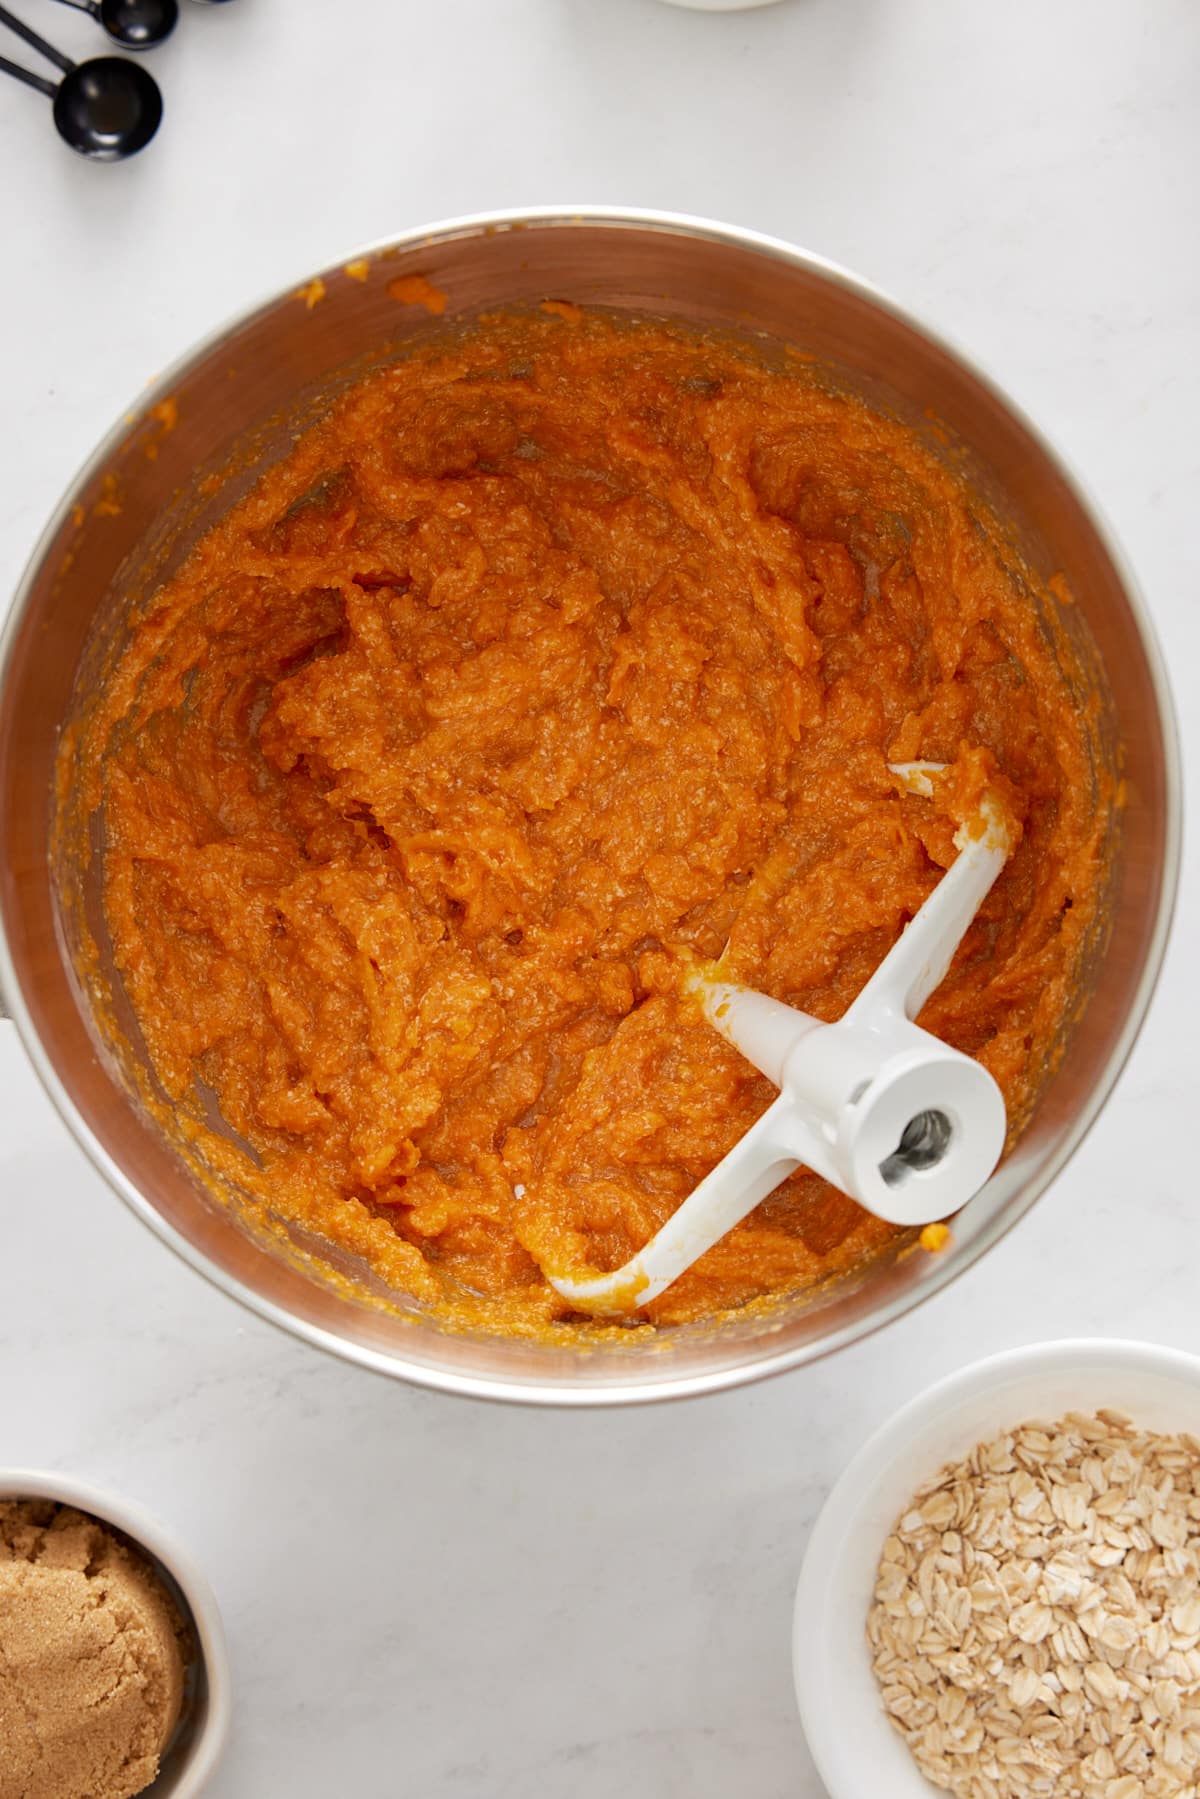
Once the sweet potatoes are cool enough to handle, remove the skins and place them in the bowl of a stand mixer. Beat the potatoes on low speed until smooth. Add white granulated sugar, eggs, unsalted butter, heavy cream, vanilla extract, and kosher salt, and beat until combined, about 1-2 minutes. Pour the mixture into a 9x13 baking dish and set aside. Rinse and dry the bowl of the stand mixer. 

sweet potatoes in a mixing bowl

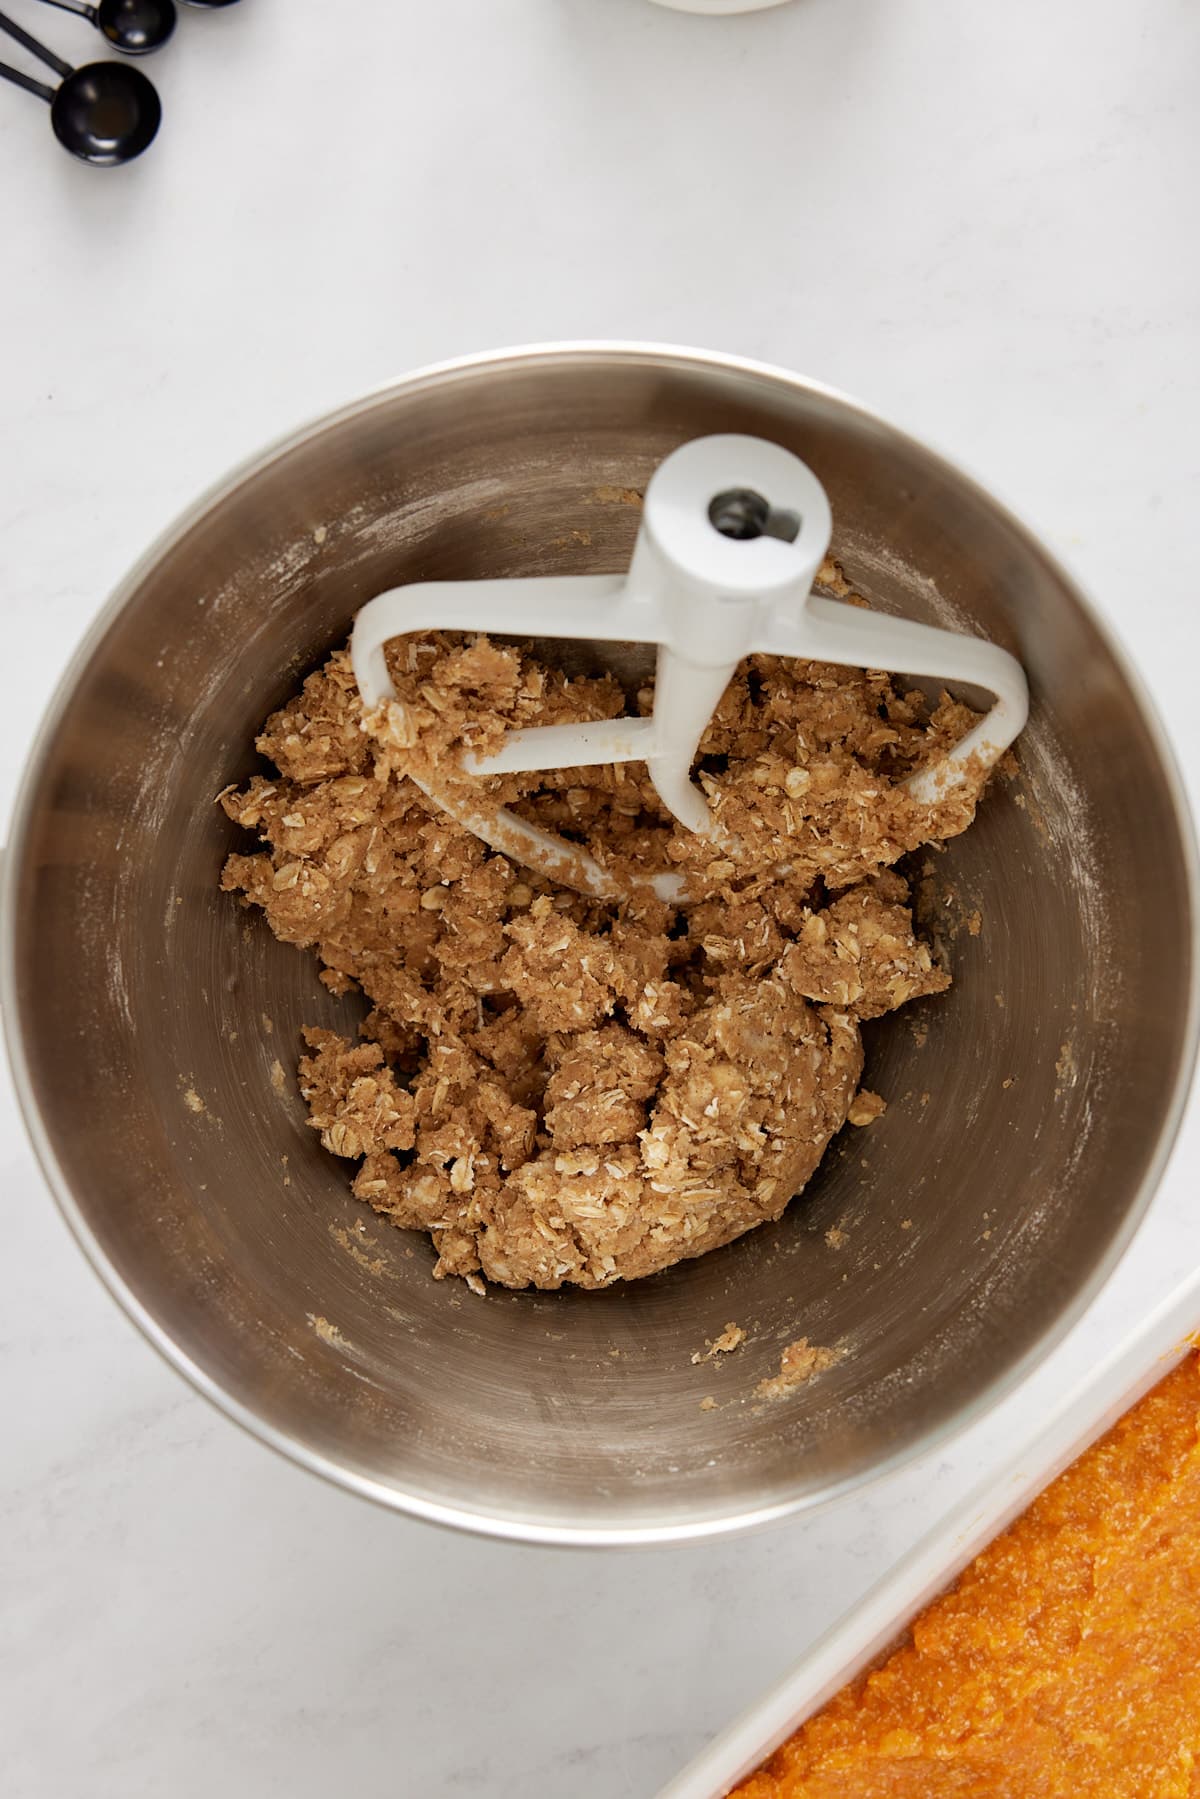
Step 3: Prepare the topping by combining cold unsalted butter, light brown sugar, all-purpose flour, old-fashioned oats, and ground cinnamon in the bowl of the stand mixer. Beat the mixture on low speed until combined, and it starts to stick together in about 1 minute.

brown sugar topping in a mixing bowl with a white paddle

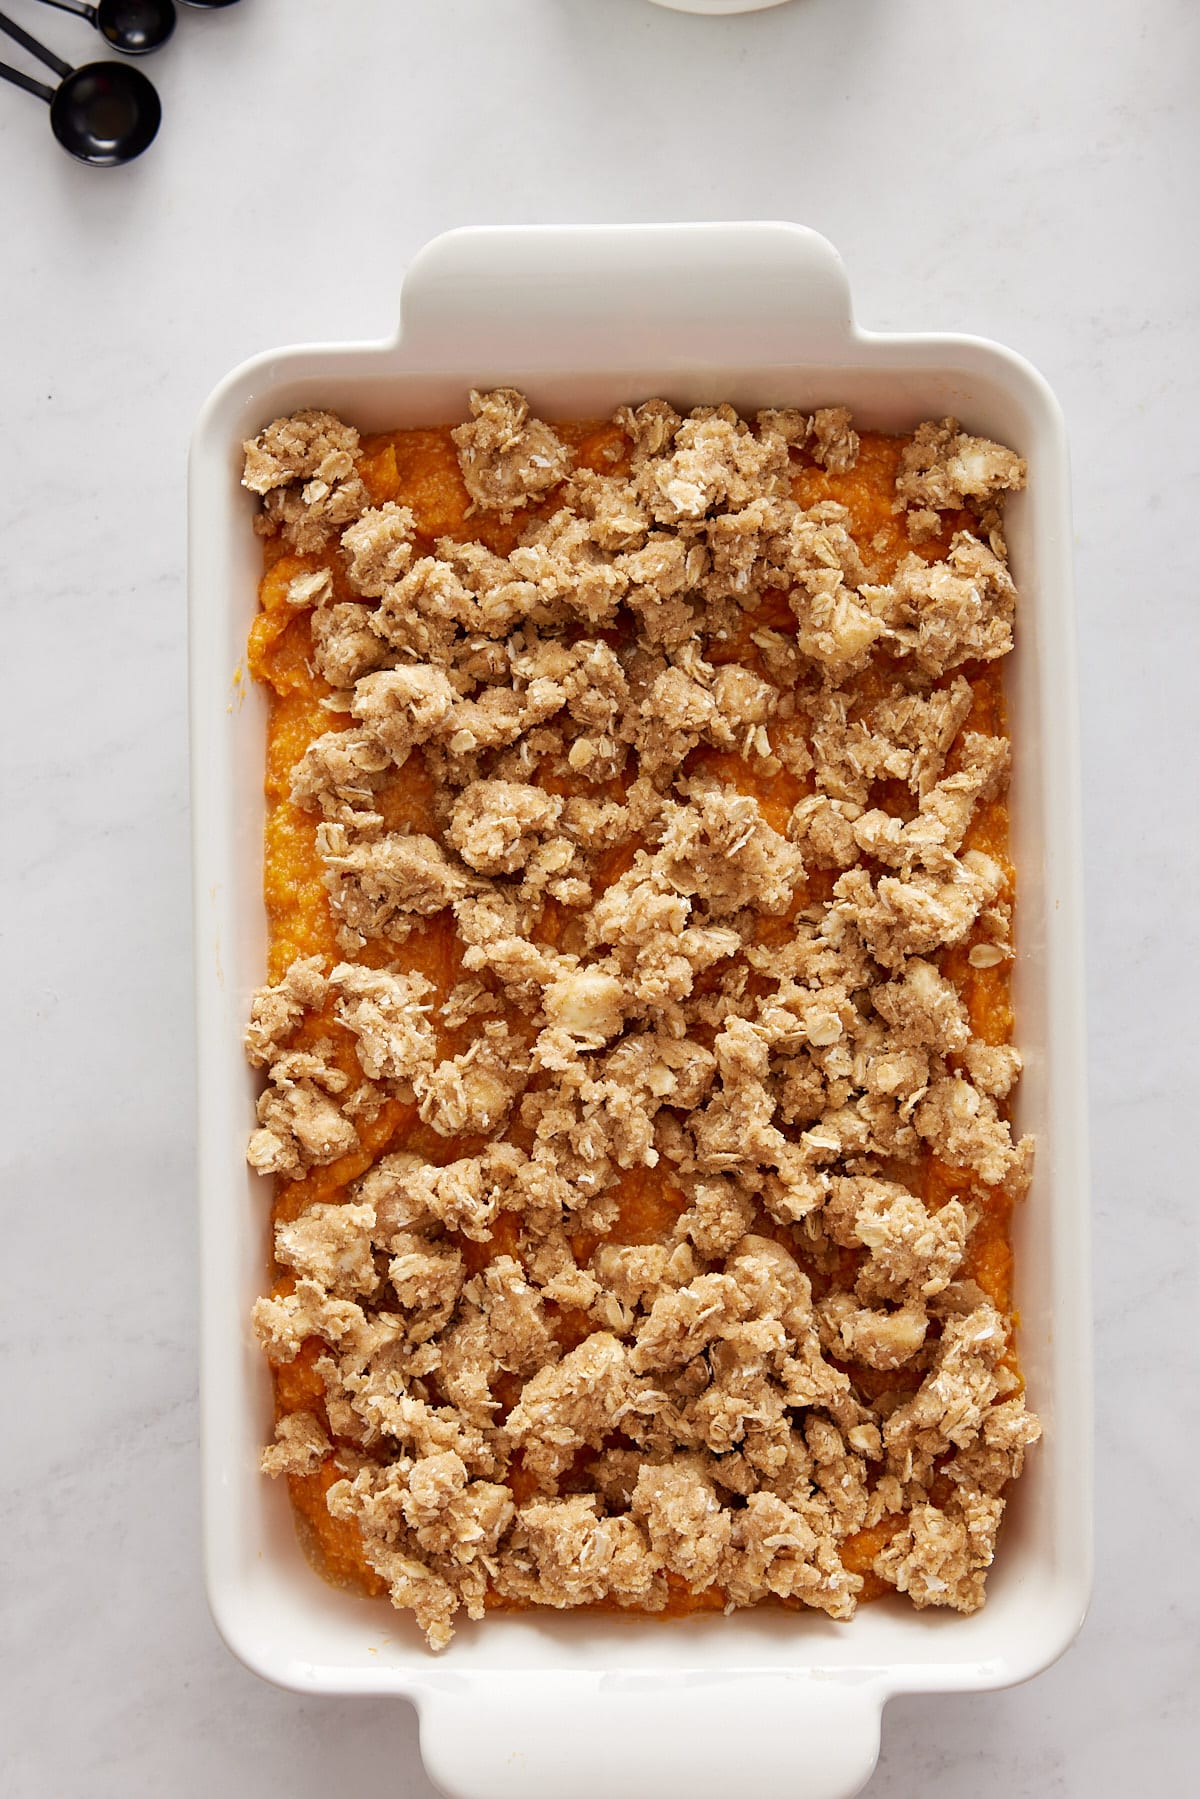
Step 4: Break the topping into pieces and place it over the sweet potato mixture in the baking dish. 

casserole sprinkled with brown sugar topping in a white casserole dish on a white background

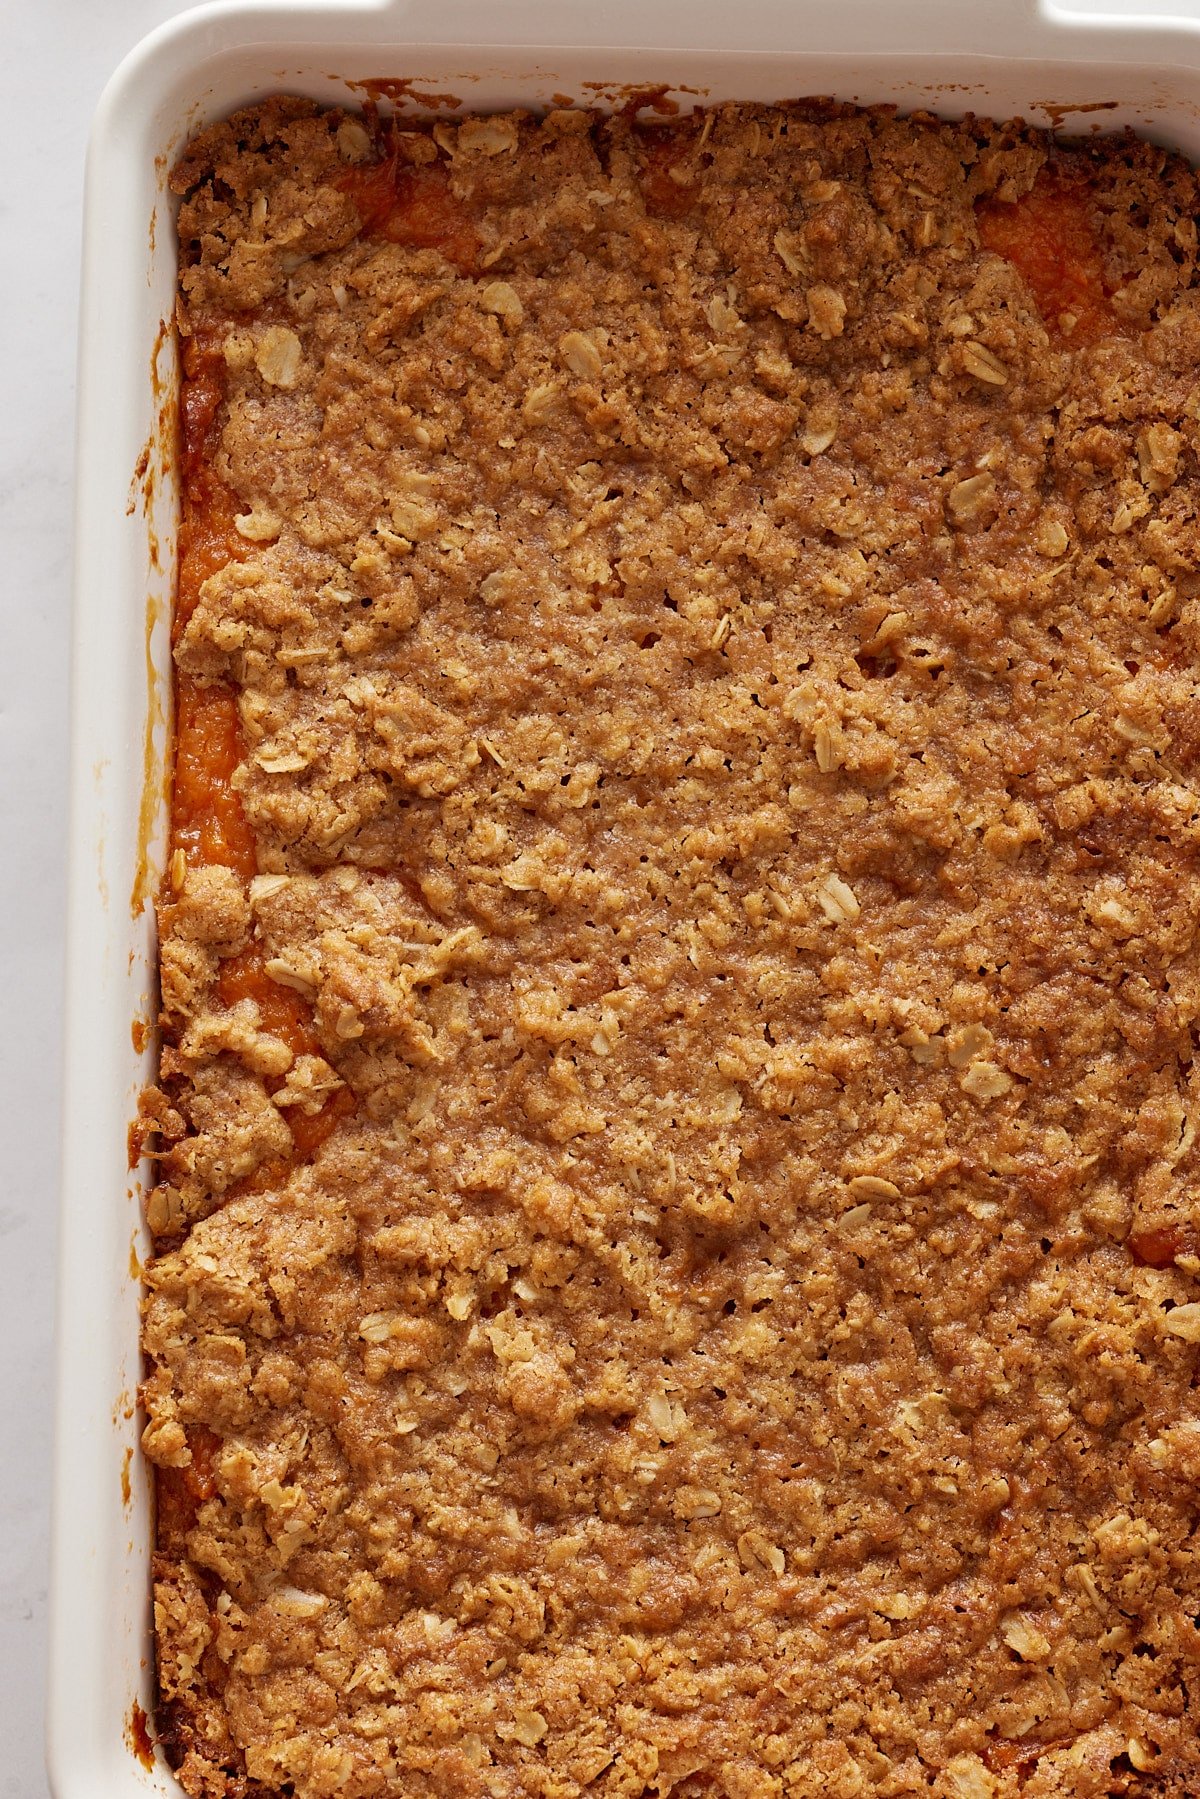
Step 5: Bake in the preheated oven for 55minutes to 1 hour, until the top is golden and the bottom is bubbly around the edges. Remove and allow to cool for 5 minutes before serving.

topping spread out over the casserole

Tanya's Top Tips

  • You can also air fry or microwave your sweet potatoes if you need them done a bit quicker. To air fry, cook them at 400° F for 35-40 minutes. To microwave, cook them for 8-10 minutes, flipping halfway, until they're fork tender.
  • You can combine the filling by hand if you don’t have a stand mixer using a large bowl, a potato masher, or a hand mixer. For the topping, use a pastry cutter, two butter knives, or your fingers to combine.
  • Use cold unsalted butter in the oat topping. It'll allow the oat topping to be nice and crunchy, which is the perfect pair to the smooth sweet potato filling.

Variations 

Here are some different options you can try when making your casserole dish.

  • Add mini marshmallows for a different topping.
  • Make a streusel topping with pecans or walnuts.  
  • Add a splash of bourbon for fun!...and taste. It's really for the flavor lol.
  • Use white or purple sweet potatoes for a fun color change.  
a scoop removed from the corner of the casserole dish with a spoon sticking out

How to serve 

Serve this easy sweet potato casserole with other side dishes depending on your traditions and your meal.

If you're making it for Sunday dinners, serve it with southern green beans, cornbread, or a beet and orange salad.   

Pair it with candied sweet potatoes, cheesy scalloped potatoes, or soft dinner rolls to serve for special occasions.

How to store Southern-style sweet potato casserole

To refrigerate leftovers: Store in an airtight container in the refrigerator for up to 4 days. Reheat individual portions in the microwave in 30-second increments until warmed through, or reheat the entire casserole covered with foil at 350°F for 20-25 minutes.

To make ahead: Prepare the casserole completely (up to adding the topping), but don't bake it. Cover tightly with plastic wrap and refrigerate for up to 2 days. When ready to serve, let it sit at room temperature for 30 minutes, add the oat topping, then bake as directed.

To freeze: Assemble the casserole (without topping), wrap tightly in plastic wrap, then aluminum foil, and freeze for up to 3 months. Thaw overnight in the refrigerator, add the topping, and bake as directed.

a scoop removed from the corner of the casserole dish with a spoon sticking out

FAQs

Why do you add eggs to sweet potato casserole?

Eggs bind the sweet potatoes together and provide a bit of liquid to help keep the casserole moist.

Can you use canned sweet potatoes?

You can use canned potatoes for this recipe; fresh sweet potatoes have the best flavor and texture. If using canned, you may need to adjust the amount of sugar in the recipe.

Can I boil the sweet potatoes for sweet potato casserole?

I recommend roasting your sweet potatoes for the best results. Sweet potatoes release natural sugars when roasting, giving this dish the best flavor. If you prefer to boil your sweet potatoes, peel and chop your sweet potatoes before placing them in a pot with water that covers the potatoes by 2 inches. Boil the sweet potatoes until tender, then drain.

a scoop removed from the corner of the casserole dish with a spoon sticking out

If you have tried this Sweet Potato Casserole recipe, or any other recipe on my blog, then please rate it and let me know how it turned out in the comments below!

a scoop removed from the corner of the casserole dish with a spoon sticking out
Print Recipe
5 from 5 votes

Southern Style Sweet Potato Casserole Recipe

Southern Style Sweet Potato Casserole is a delicous dish made with creamy sweet potato filling and topped with an oats and brown sugar mixture.
Prep Time1 hour hr
Cook Time1 hour hr
Course: Side Dish
Cuisine: American
Keyword: sweet potato casserole
Servings: 10 servings
Calories: 432kcal
Author: Tanya

Ingredients

Filling

  • 3 pounds sweet potatoes (about 6 medium-sized sweet potatoes, about 8 ounces each) or 4 cups mashed sweet potatoes
  • ¾ cup white granulated sugar
  • 2 large eggs lightly beaten
  • 4 Tablespoons unsalted butter softened
  • ½ cup heavy cream
  • 1 ½ teaspoons vanilla extract
  • 1 teaspoon kosher salt

Topping

  • 8 Tablespoons cold unsalted butter diced
  • ½ cup light brown sugar packed
  • ½ cup all purpose flour
  • ½ cup old fashioned oats
  • ½ teaspoon ground cinnamon

Instructions

  • Preheat the oven to 425 degrees Fahrenheit. Wash and dry sweet potatoes. Use a fork and poke the sweet potatoes all over. Place the sweet potatoes on a lined sheet pan and bake in the preheated oven for 45-50 minutes, until the sweet potatoes have softened. Remove from the oven and allow the sweet potatoes to cool.
  • Reduce the heat of the oven to 350 degrees Fahrenheit.
  • Once the sweet potatoes are cool enough to handle, remove the skin from the sweet potatoes and place the sweet potatoes in the bowl of a stand mixer. Beat the potatoes on low speed until smooth. Add granulated sugar, eggs, butter, heavy cream, vanilla extract, and kosher salt, and beat the mixture for about 1-2 minutes until combined. Pour the mixture into a 9x13 baking dish and set aside. Rinse and dry the bowl of the stand mixture.
  • Next, prepare the topping by combining cold butter, brown sugar, all-purpose flour, oats, and ground cinnamon in the bowl of the stand mixture. Beat the mixture on low speed until combined, and it starts to stick together, about 1 minute. Break the topping up and place the topping over the sweet potato mixture in the baking dish.
  • Bake in the preheated oven for 55 minutes to 1 hour, until the top is golden and the bottom is bubbly around the edges. Remove and allow to cool for 5 minutes before serving.

Notes

  • You can also air fry or microwave your sweet potatoes if you need them done a bit quicker. To air fry, air fry on 400 degrees Fahrenheit for 35-40 minutes. To microwave, for 8-10 minutes, flipping halfway.
  • You can mix the mixture by hand if you don’t have a stand mixer. For the topping, use a pastry cutter, two butter knives, or your fingers to combine the mixture.

Nutrition

Calories: 432kcal | Carbohydrates: 61g | Protein: 5g | Fat: 19g | Saturated Fat: 12g | Polyunsaturated Fat: 1g | Monounsaturated Fat: 5g | Trans Fat: 1g | Cholesterol: 87mg | Sodium: 330mg | Potassium: 525mg | Fiber: 5g | Sugar: 32g | Vitamin A: 19954IU | Vitamin C: 3mg | Calcium: 72mg | Iron: 2mg

This post was first published on July 26, 2022. It has since been updated.

October 20, 2025 by Tanya 48 Comments

Instant Pot Turkey Breast (Juicy & Easy!)

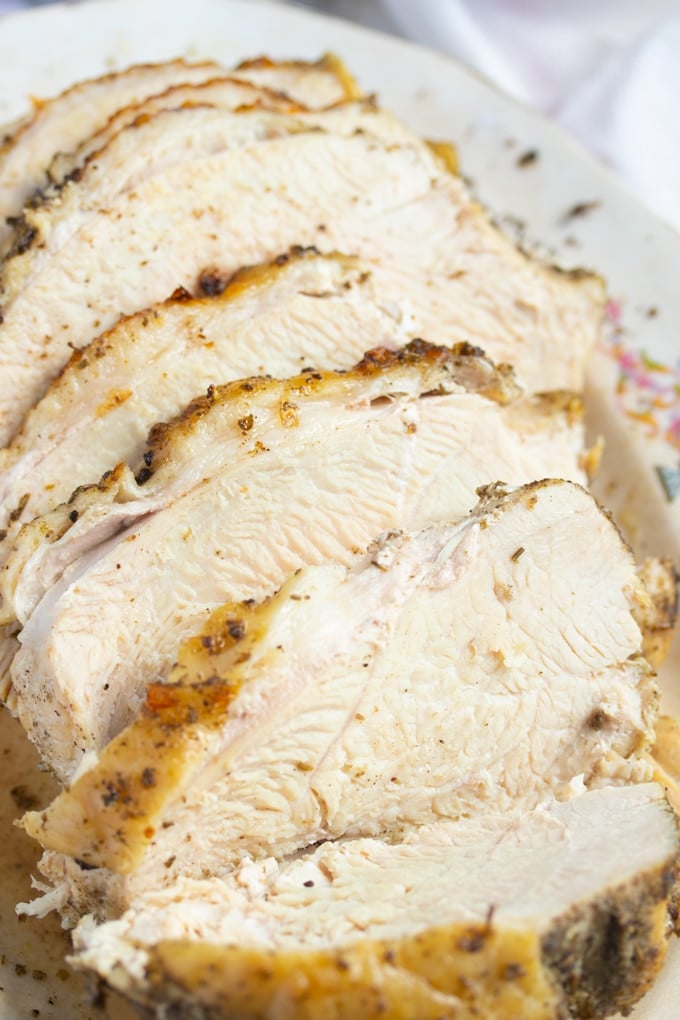
turkey breast sliced on white plate

This Instant Pot Turkey Breast recipe is the perfect way to make turkey and gravy in the Instant Pot Pressure Cooker. Whether it’s bone-in or boneless, you can have a moist and delicious turkey breast in a fraction of the time.

turkey breast sliced on a plate

You’ll find the full recipe with ingredient amounts and instructions in the recipe card at the bottom of this post. Be sure to check out the blog post itself for extra tips and tricks!

I know people generally love turkey around Thanksgiving but I can honestly eat turkey year-round. Fried for breakfast, sliced on a sandwich covered in mayo and tomato, or served with a side of stuffing. That being said, who has time to spend a few hours baking a turkey? Not I, not I at all. 

pic of Tanya

This Instant Pot aka Electric Pressure Cooker method of making a turkey breast is my kind of method. I love how much quicker this in the pressure cooker, compared to the oven.

For this recipe, I use a defrosted turkey breast. If you aren't a fan of defrosting and want to cook from frozen, this recipe shows how to cook a turkey breast from frozen in the Instant Pot.

You'll also notice I cover this turkey breast in mayonnaise and seasonings before pressure cooking. The mayo trick has been a gamechanger and it has many home cooks fall in love with this recipe over the years. I hope you love it.

♡ Tanya

A Quick Look at the Ingredients

Ingredient amounts and full recipe instructions are on the printable recipe card at the bottom of the post.

For the Turkey:

  • Bone-in turkey breast (or boneless, see notes)
  • Mayonnaise - helps create a golden, crispy skin
  • Chicken broth - for pressure cooking

The Seasoning Blend:

  • Poultry seasoning, garlic powder, onion powder, kosher salt, black pepper

For the Aromatics:

  • Onions and celery

For the Gravy:

  • All-purpose flour
  • Water
  • Salt and pepper to taste

Recommended Tool

Our Place Dream Cooker | 6-quart Multicooker

This multi cooker has so many uses, but it's my go to electric pressure cooker I use in my kitchen these days. It's functional and also gorgeous!!! No worries if you don't have this brand, this recipe will work any 6-quart electric pressure cooker.

Buy Now

How to make Bone-in Instant Pot Turkey Breast

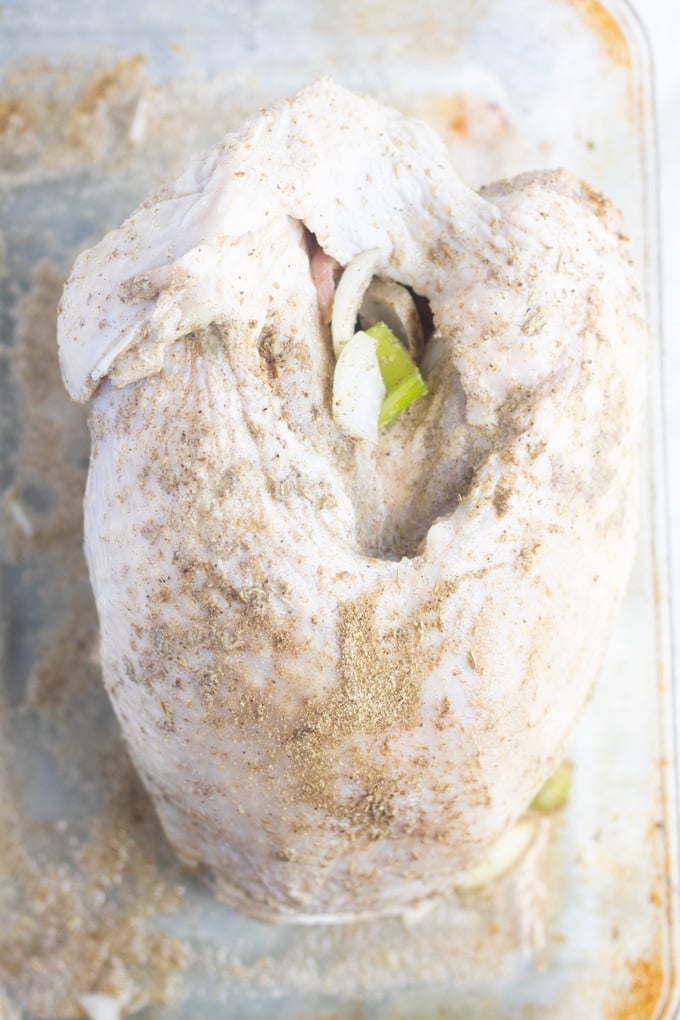
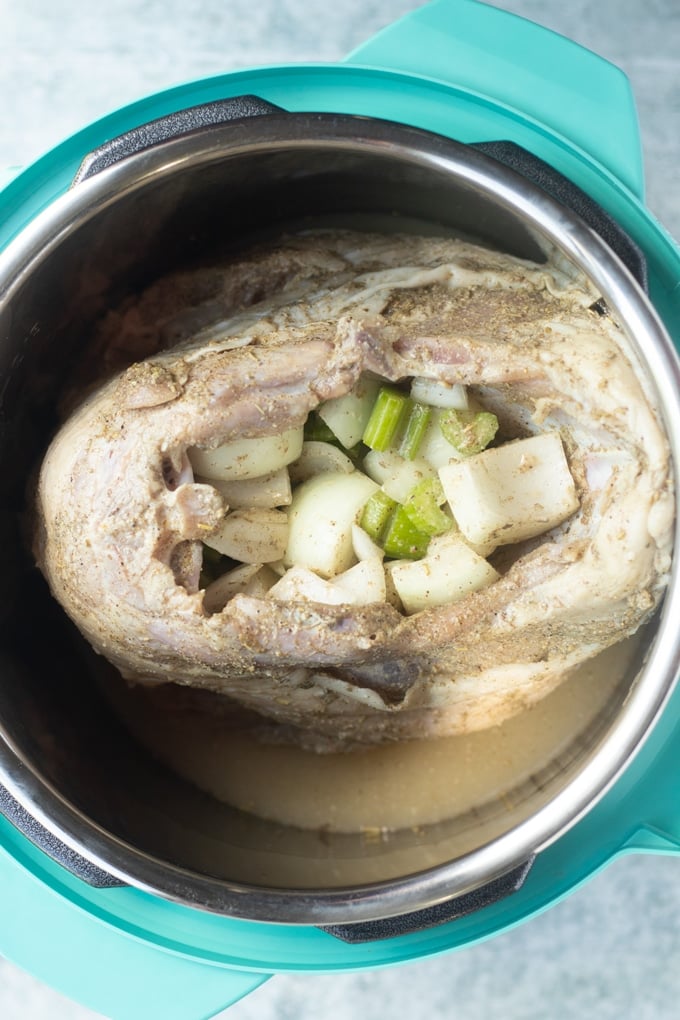
First, make sure your turkey is clean and dried and has the inner gravy packets and giblets removed. Then rub mayonnaise all over your turkey. Then season your turkey breast with poultry seasoning, garlic powder, onion powder, salt, and pepper. Make sure to rub the mayonnaise and seasoning all over the breast and under the skin. 

Place a chopped onion and a chopped celery stick into the cavity of the turkey breast. 

raw bone in turkey breast with seasoning

This next part will depend on the size of the breast and the size of the Instant Pot:

For a 6 quart Instant Pot, a bone-in turkey breast that’s under 5 pounds will likely fit in the Pot on a trivet. If it does, use the trivet when cooking. For a bone-in breast over 5 pounds, I place the breast in the Instant Pot without the trivet so it fits. 

Pour 1 cup of chicken broth into your Instant Pot. Add turkey breast into the pot, skin side facing down.

raw bone in breast with seasoning inside instant pot

Cover and cook on high pressure. The amount of time needed to cook will depend on the size of your breast. The general guideline is 6 minutes per pound. So for my 7-pound bird, I cooked a total of 42 minutes since 6x7=42.  

After the time is done, allow the Instant Pot to naturally release for 15 minutes, then quick release any remaining pressure. Open the lid and remove the turkey breast.

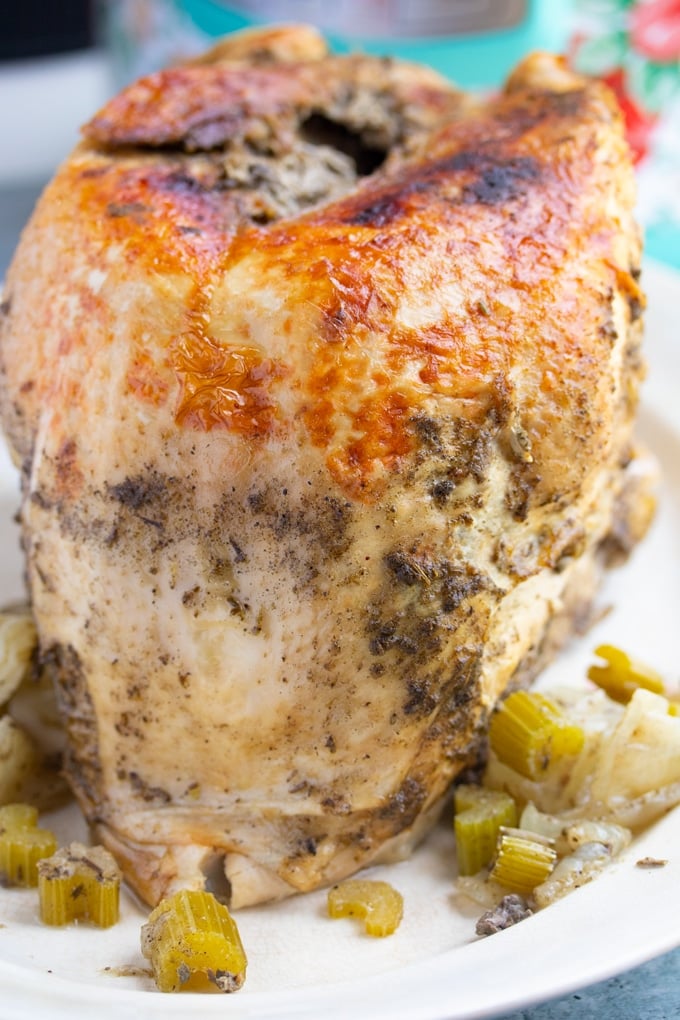
To brown the breast, broil in the oven for about 5 minutes. 

instant pot turley breast

How to make turkey gravy

In order to make the gravy, you will remove the large pieces of onion and celery that remain in the pot. Place the Instant Pot on saute. Once the liquid starts to boil, make a thickening slurry with ¼ cup flour and 6 tablespoon water. Whisk in a bowl and then whisk it into the bubbling gravy. Stir until thickened. Salt and pepper to taste.

How to make a Boneless Instant Pot Turkey Breast

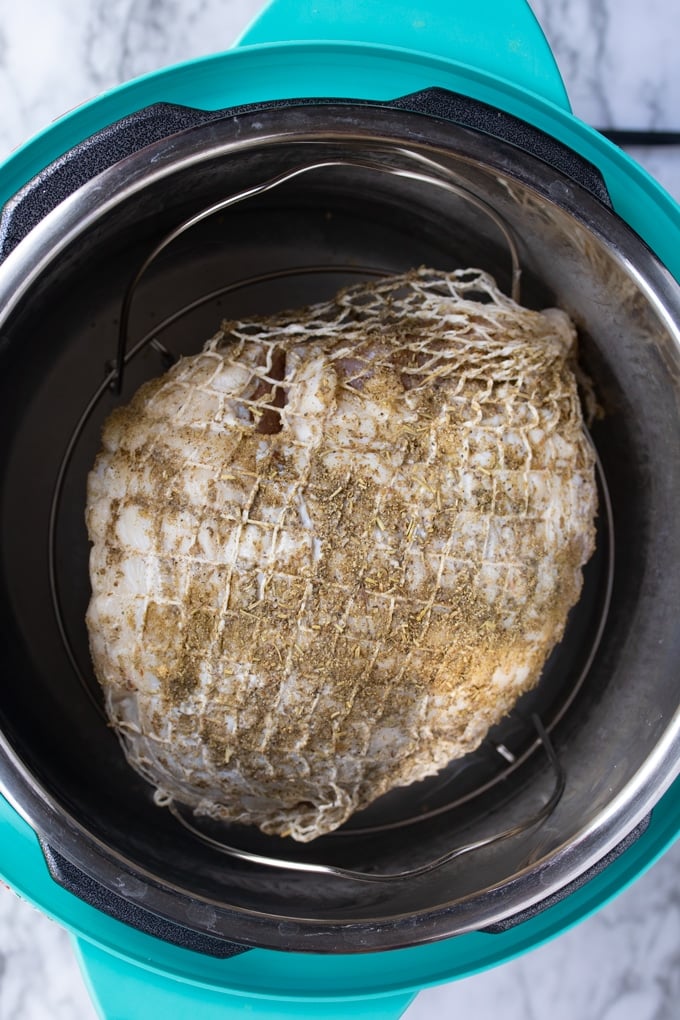
Boneless breasts are great in the Instant Pot as well. For a thawed Boneless breast, I use the trivet but use the same seasonings as a bone-in breast, just cut in half.

The 6 minutes per pound rule has to be slightly adjusted for a typical boneless breast that is cooked with the netting on. For a 3 lb breast, I cook on high pressure for 23 minutes, then naturally release any remaining pressure. Since these breasts are rolled up tightly, they need a little more time to ensure that the center gets cooked. 

Pour 1 cup of chicken broth into the Instant Pot and place a 3lb breast onto the trivet. Cover and cook on high pressure for 23 minutes.

raw seasoned boneless turley breast in instant pot

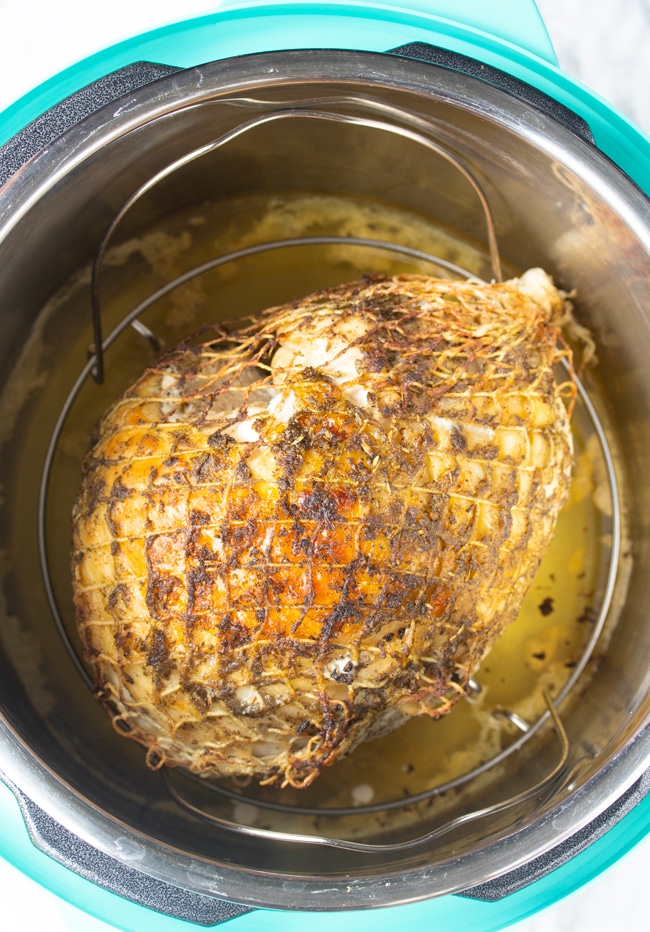
Once your breast is cooked, you can remove it and place under a broiler to brown it for about 5 minutes or until the skin is golden brown and crispy.

Why cook turkey in an Instant Pot?

As the turkey is cooked using the high pressure setting on the Instant Pot it cooks in half the time, and the results are great with turkey breast that is always tender and juicy. Also it saves valuable oven space, particularly during busy holiday celebrations where our ovens are often overloaded.

However, feel free to try my other methods, like my air fryer turkey breast or my slow cooker turkey breast.

finished boneless turkey breast inside of instant pot

And there you have it, delicious Instant Pot Turkey Breast (Bone-in or boneless) made in less time. 

Save the oven this Holiday season for baking pies and use the Instant Pot to get tender delicious turkey. 

Tanya's Top Tips

  • I like to use fresh or defrosted turkey breast so that the seasoning will stick to the meat.
  • My spice blend includes poultry seasoning, onion powder, garlic powder, black pepper and salt. However, if there are other spices you like to add, for example smoked paprika or dried thyme, then feel free to get creative.
  • If using boneless breast, take care when removing the netting from around the joint as you don't want the meat stick to the net.
  • I recommend using a probe thermometer when checking the turkey is done and cooked through.
  • Once cooked, allow the turkey breast to rest for 10 minutes before slicing and serving. This allows the juices to be absorbed back into the turkey, leaving you moist and tender slices of meat.

How to serve turkey breast

Looking for other Pressure Cooker recipes that will go great with this recipe? Try these out:

  • Instant Pot Collard Greens - a classic recipe made in the pressure, these greens use smoked turkey to flavor the meat and broth.
  • Buttered Instant Pot Cabbage - loved by many, this is one of the easiest Instant Pot recipe side dishes ever. The results are tender, buttery, and flavorful cabbage.
  • Instant Pot Mashed Potatoes - these potatoes come out so creamy and delicous.

Watch this video tutorial and see how I make this turkey breast from start to finish.

How to store leftover turkey breast

To refrigerate: Keep any leftover turkey breast in an airtight container in the fridge for 3-4 days. Leftovers make a great addition to salads, soups, pasta dishes and sandwiches the next day.

To freeze: Once cooked and cooled, place the turkey into an airtight container and store in the freezer for up to 3 months. Defrost overnight in the refrigerator when you are ready to enjoy.
FAQs:

How do you know turkey breast is cooked?

Cook turkey until it reaches an internal temperature of 165 degrees Fahrenheit.

How long do you cook turkey in an Instant Pot?

The length of cook depends on the size of the turkey breast and also whether it is a bone-in or boneless joint. So as an example, for a large 7 pound bone- in joint I would cook on high pressure for 42 minutes. Whereas a 3 pound boneless joint would be cooked on high pressure for 23 minutes.

If you have tried this turkey breast recipe, or any other recipe on my blog, then please rate it and let me know how it turned out in the comments below!

turkey breast sliced on white plate
Print Recipe
5 from 9 votes

Instant Pot Turkey Breast Recipe

Here’s the perfect way to make turkey and gravy in the Instant Pot Pressure cooker. Whether it’s bone-in or boneless, you can have a moist and delicious turkey breast in a fraction of the time.
Prep Time10 minutes mins
Cook Time47 minutes mins
Total Time57 minutes mins
Course: Main Course
Cuisine: American
Keyword: bone-in turkey breast, boneless turkey breast, instant pot turkey breast
Servings: 8 people
Calories: 564kcal
Author: Tanya

Equipment

  • 6 Qt Pressure Cooker

Ingredients

Bone-In Turkey Breast

  • 7 lb large bone-in turkey breast defrosted, inner giblets and gravy packet removed
  • ¼ cup mayonnaise
  • 2 Tablespoon Poultry Seasoning
  • 2 teaspoon kosher salt
  • 1 teaspoon Garlic Powder
  • 1 teaspoon Onion Powder
  • ¼ teaspoon Black Pepper
  • 1 yellow onion chopped
  • 1 celery stalk chopped
  • 1 cup chicken broth

For Gravy

  • ¼ cup all-purpose flour
  • 6 Tablespoon water

Boneless Turkey Breast

  • 3 lb large boneless turkey breast defrosted
  • 2 Tablespoon mayonnaise
  • 1 Tablespoon Poultry Seasoning
  • 1 teaspoon kosher salt
  • ½ teaspoon Garlic Powder
  • ½ teaspoon Onion Powder
  • ¼ teaspoon Black Pepper
  • 1 cup chicken broth

Instructions

Bone-In Turkey Breast

  • Clean and dry turkey breast. Rub mayonnaise all over breast. Season the outside of the breast with poultry seasoning, salt, garlic powder, onion powder, and black pepper until fully covered. Stuff the inside of the bird with onion and celery.
  • Pour 1 cup of chicken broth inside Instant Pot. Place turkey beast inside Instant Pot, skin side down. Cover and cook on high pressure for 42 minutes.
  • After the timer goes off, allow the pressure cooker to naturally release for 15 minutes. Quick-release any remaining pressure.
  • Remove cooked turkey breast from the pressure cooker. If you want to brown it, place it in the oven and broil it for about 5 minutes until golden.

For Gravy

  • Remove any large chunks of onion or celery that may be left behind in the Instant Pot. Press Sauté on the Instant Pot. Create a flour thickener by pouring flour and water in a bowl. Stir with a fork until the thickener is smooth and has no lumps. Once the liquid in the Instant Pot begins to simmer, whisk in the flour thickener until it’s thoroughly combined. Allow to simmer for about 5 minutes until thickened.

Boneless Turkey Breast

  • Season outside of turkey breast with mayonnaise, poultry seasoning, kosher salt, garlic powder, onion powder, and black pepper.
  • Pour 1 cup of chicken broth into Instant Pot. Place the trivet inside the Instant Pot and place turkey breast on top of the trivet. Cover Instant Pot and cook on high pressure for 23 minutes. Once Instant Pot is done the cooking, allow the pressure to naturally release for 15 minutes, quick release any remaining pressure.
  • Once your breast is cooked, you can remove it and place under a broiler to brown it for about 5 minutes or until the skin is golden brown and crispy.
  • If making gravy, follow the same directions as indicated for the bone-in breast.

Video

Notes

  • Turkey should be cooked to a minimum temperature of 165 degrees Fahrenheit.
  • I keep the netting on while pressure cooking for boneless turkey breast.
  • Nutrition information calculated is for the bone-in turkey breast.

Nutrition

Calories: 564kcal | Carbohydrates: 9g | Protein: 79g | Fat: 25g | Saturated Fat: 7g | Cholesterol: 215mg | Sodium: 1453mg | Potassium: 56mg | Fiber: 1g | Sugar: 1g | Vitamin A: 29IU | Vitamin C: 3mg | Calcium: 16mg | Iron: 1mg

This post was orginally published on September 3, 2019. It has been updated with new information.

October 16, 2025 by Tanya Leave a Comment

Braised Lamb Recipe

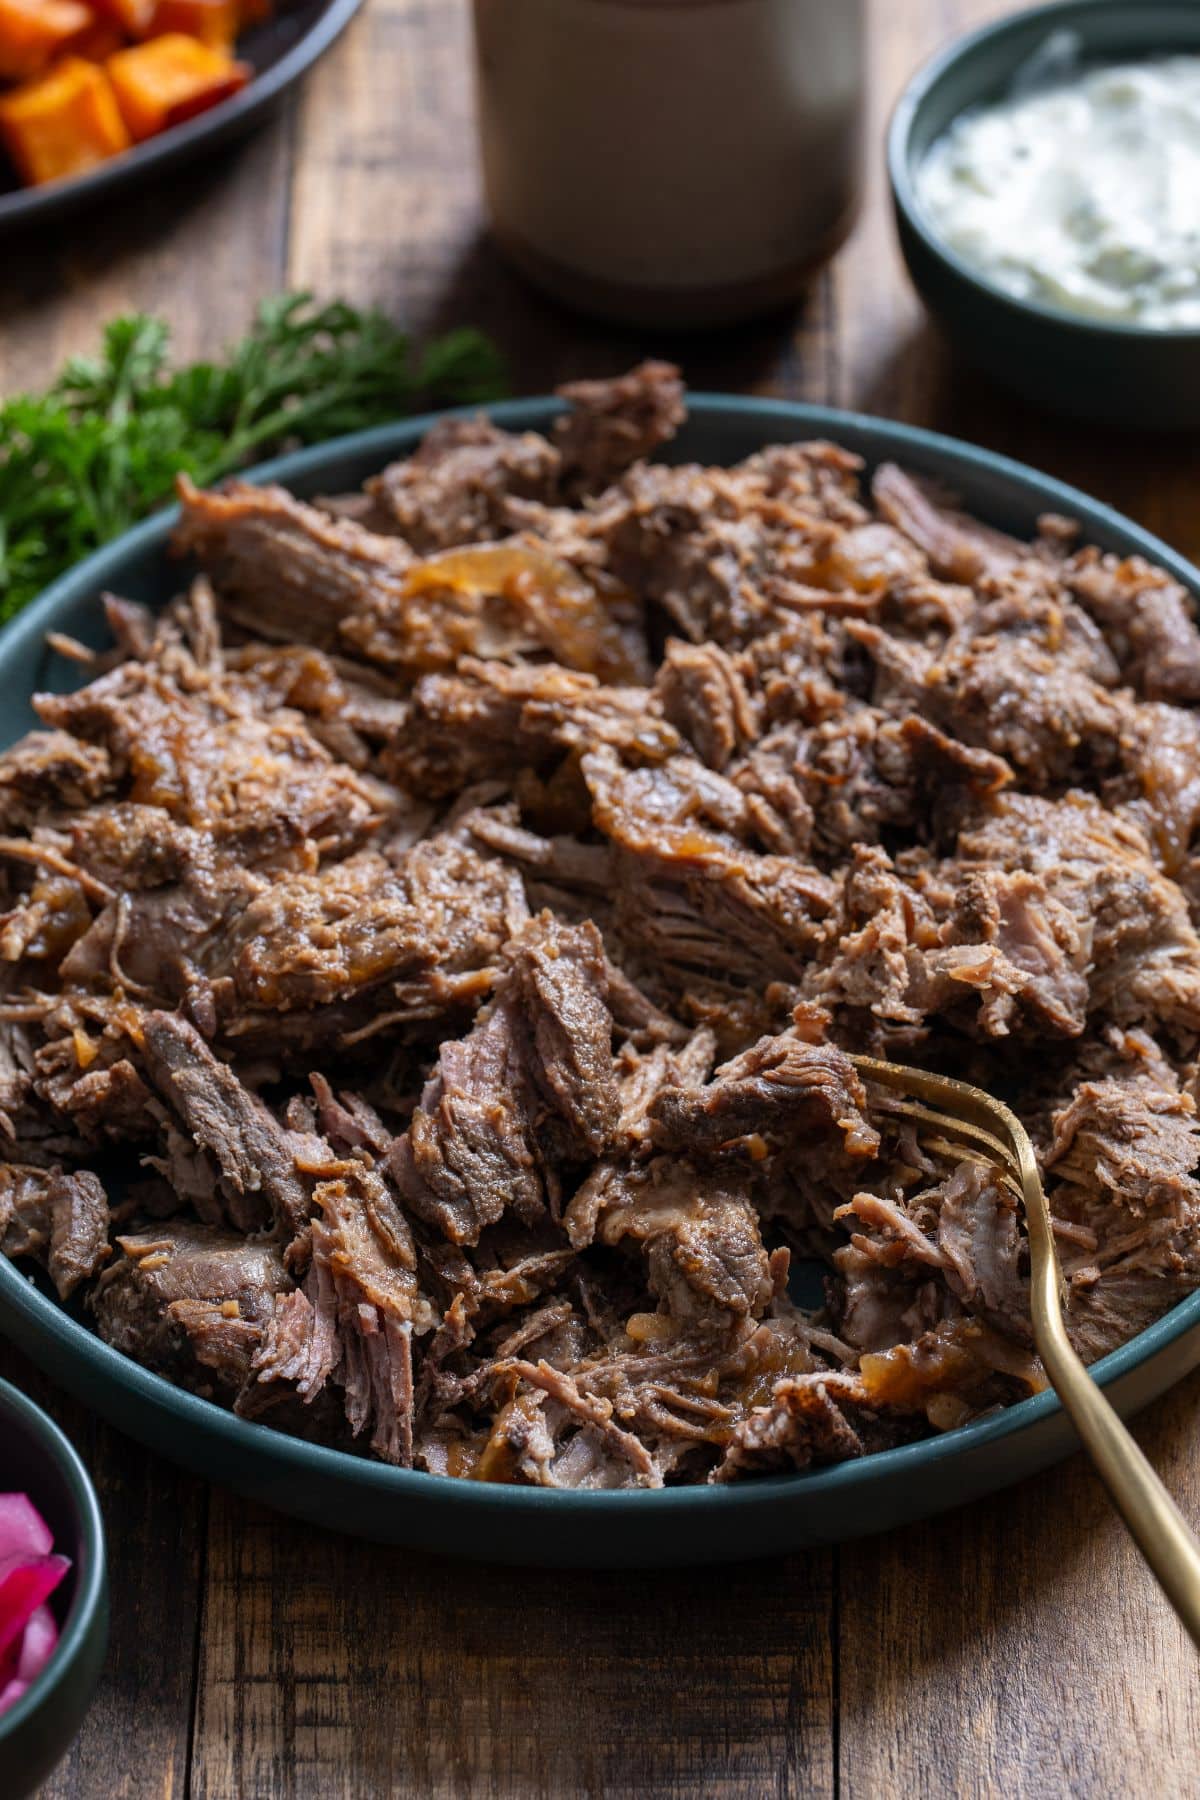
braised lamb on blue plate shredded

This Braised Lamb Recipe is slow-cooked until fall-apart tender with garlic, warm spices, and a touch of honey. It’s cozy, rich, and the kind of comforting roast that doesn’t ask for much hands-on time.

braised lamb on blue plate shredded

You’ll find the full recipe with ingredient amounts and instructions in the recipe card at the bottom of this post. Be sure to check out the blog post itself for extra tips and tricks!

When you want a showstopping dinner that practically cooks itself, this braised lamb roast delivers deep, savory flavors with minimal hands-on time. The boneless leg of lamb becomes so tender after hours in the oven that it practically falls apart at the touch of a fork.

If you're a fan of lamb cooked until tender, you'll also love this roasted leg of lamb.

pic of Tanya

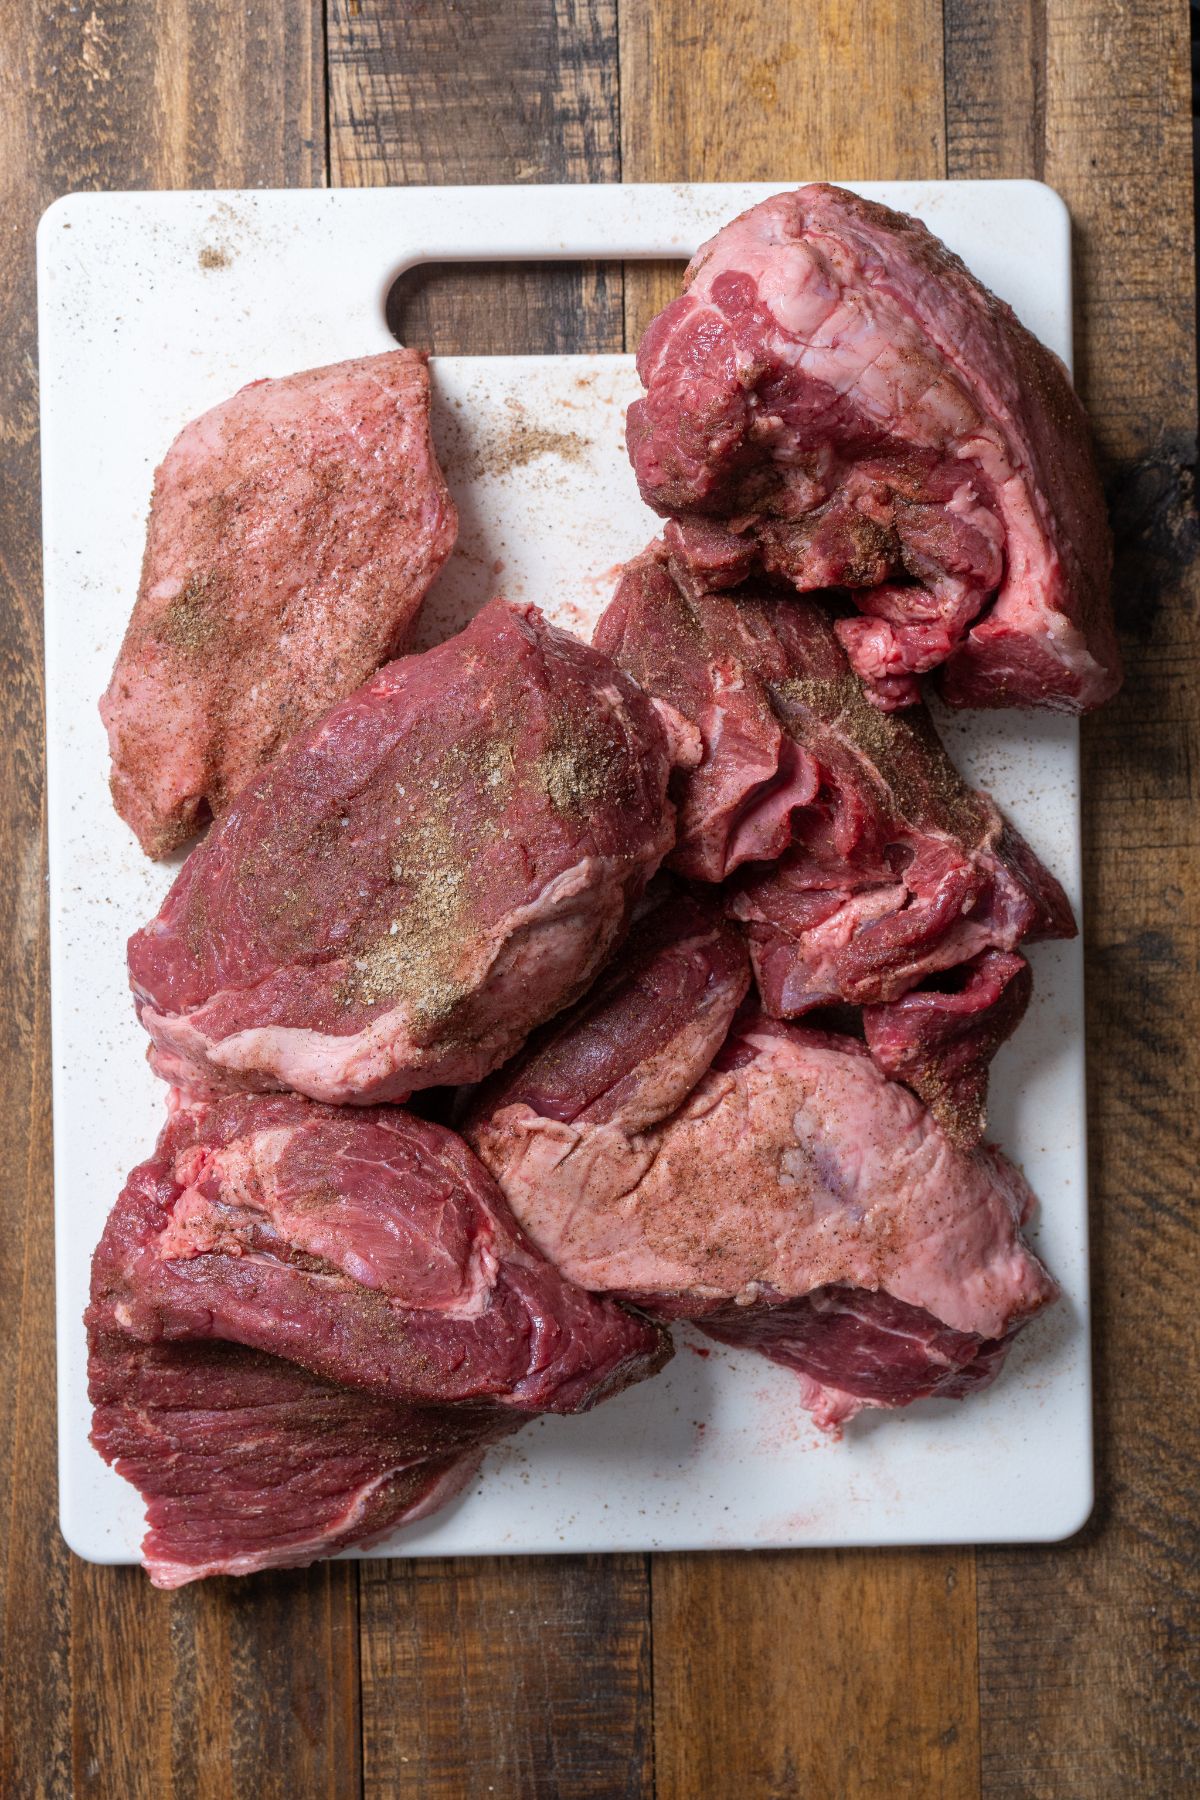
Inspired by a restaurant's braised lamb, I recreated the rich flavors at home. I cut a large boneless leg of lamb into six pieces for faster, even cooking, and sear for depth.

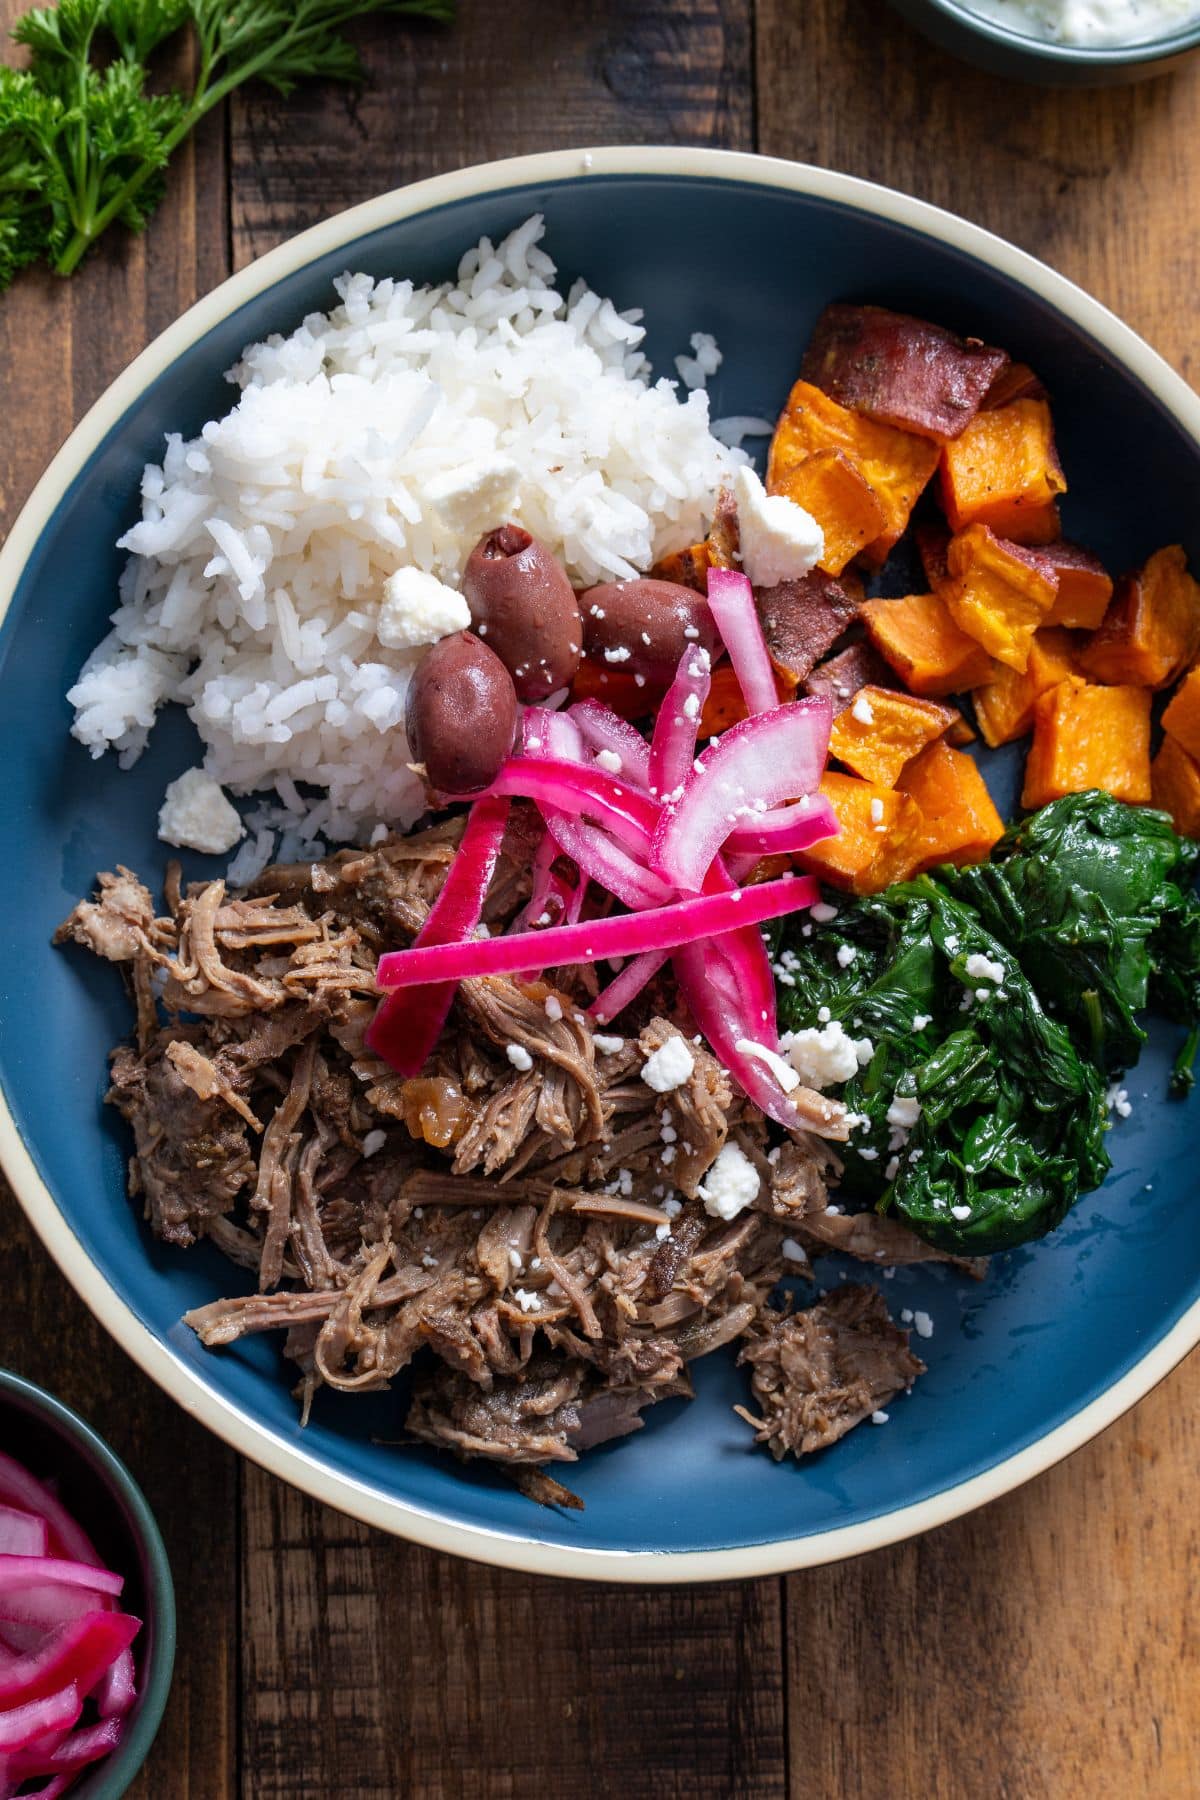
This lamb is perfect for special occasions or a cozy Sunday dinner. Serve it Mediterranean-style over rice with cucumbers, olives, and pickled onions for a flavorful meal.

♡ Tanya

A Quick Look at the Ingredients

Ingredient amounts and full recipe instructions are on the printable recipe card at the bottom of the post.

Lamb & Seasoning

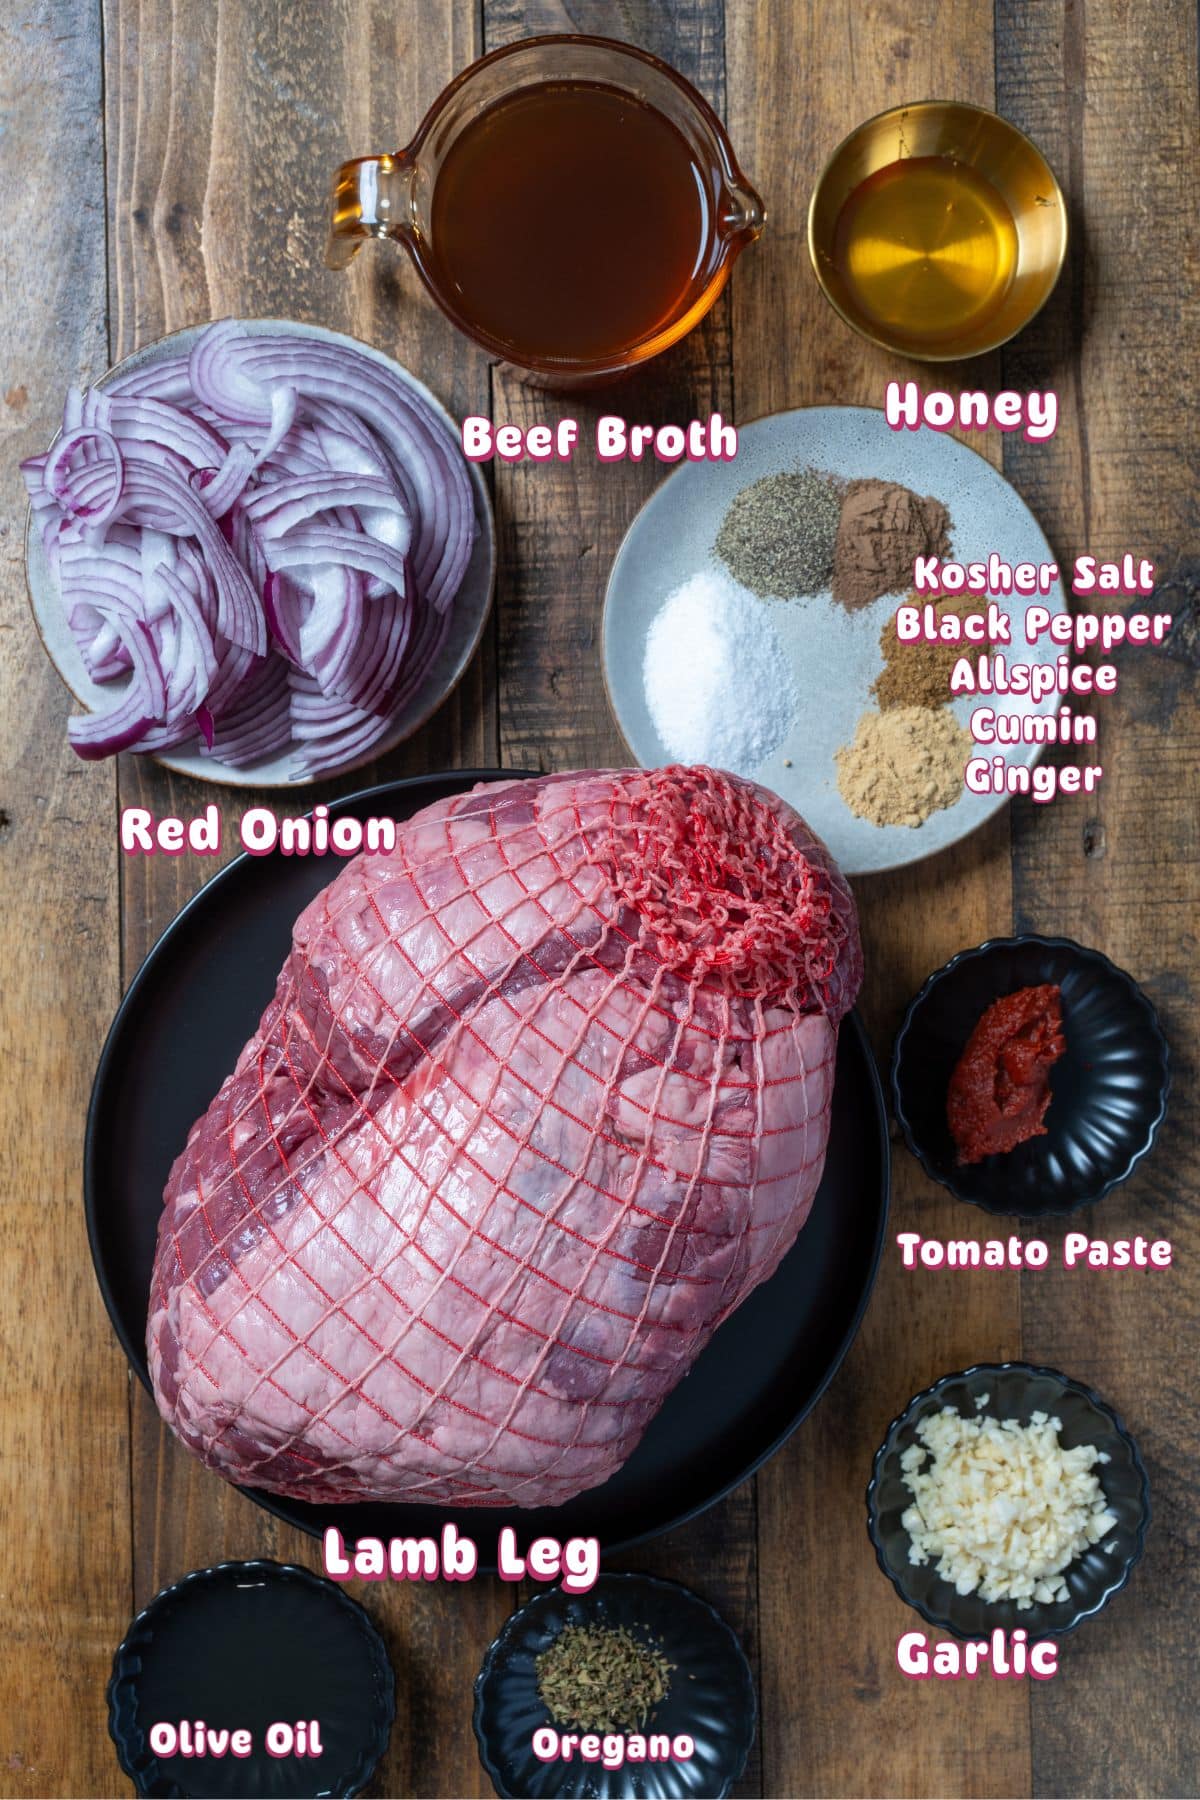
  • Boneless leg of lamb – about 6 lbs, trimmed and cut into large chunks. I usually pick one up from my local warehouse store
  • Seasonings - Kosher salt, black pepper, allspice, cumin, and ginger – the spice blend that gives the lamb its warmth and depth

Aromatics & Sauce Base

  • Olive oil – for searing and flavor. Feel free to use whatever high-heat oil you have on hand.
  • Red onion & garlic – build the savory foundation. I prefer to use red onion in this recipe.
  • Tomato paste & honey – balance acidity and sweetness.
  • Beef stock & oregano – add body and earthiness for the braise. You can use chicken stock/broth or water in place of beef stock.
ingredients for braised lamb

Recommended Tool

Mercer Culinary Enameled Cast Iron Round Dutch Oven, 6 qt., Matte Black
A sturdy Dutch oven is essential for slow braising. It holds heat evenly, sears beautifully, and transitions straight from stovetop to oven.
Buy Now

How to Make a Tender Braised Lamb Roast

Step 1: Preheat your oven to 325°F (165°C). Remove any netting from the lamb and trim excess fat. Cut into six large pieces.

Step 2: Mix together salt, black pepper, allspice, cumin, and ginger. Rub this seasoning mix evenly all over the lamb.

raw lamb leg cut into pieces and seasoned

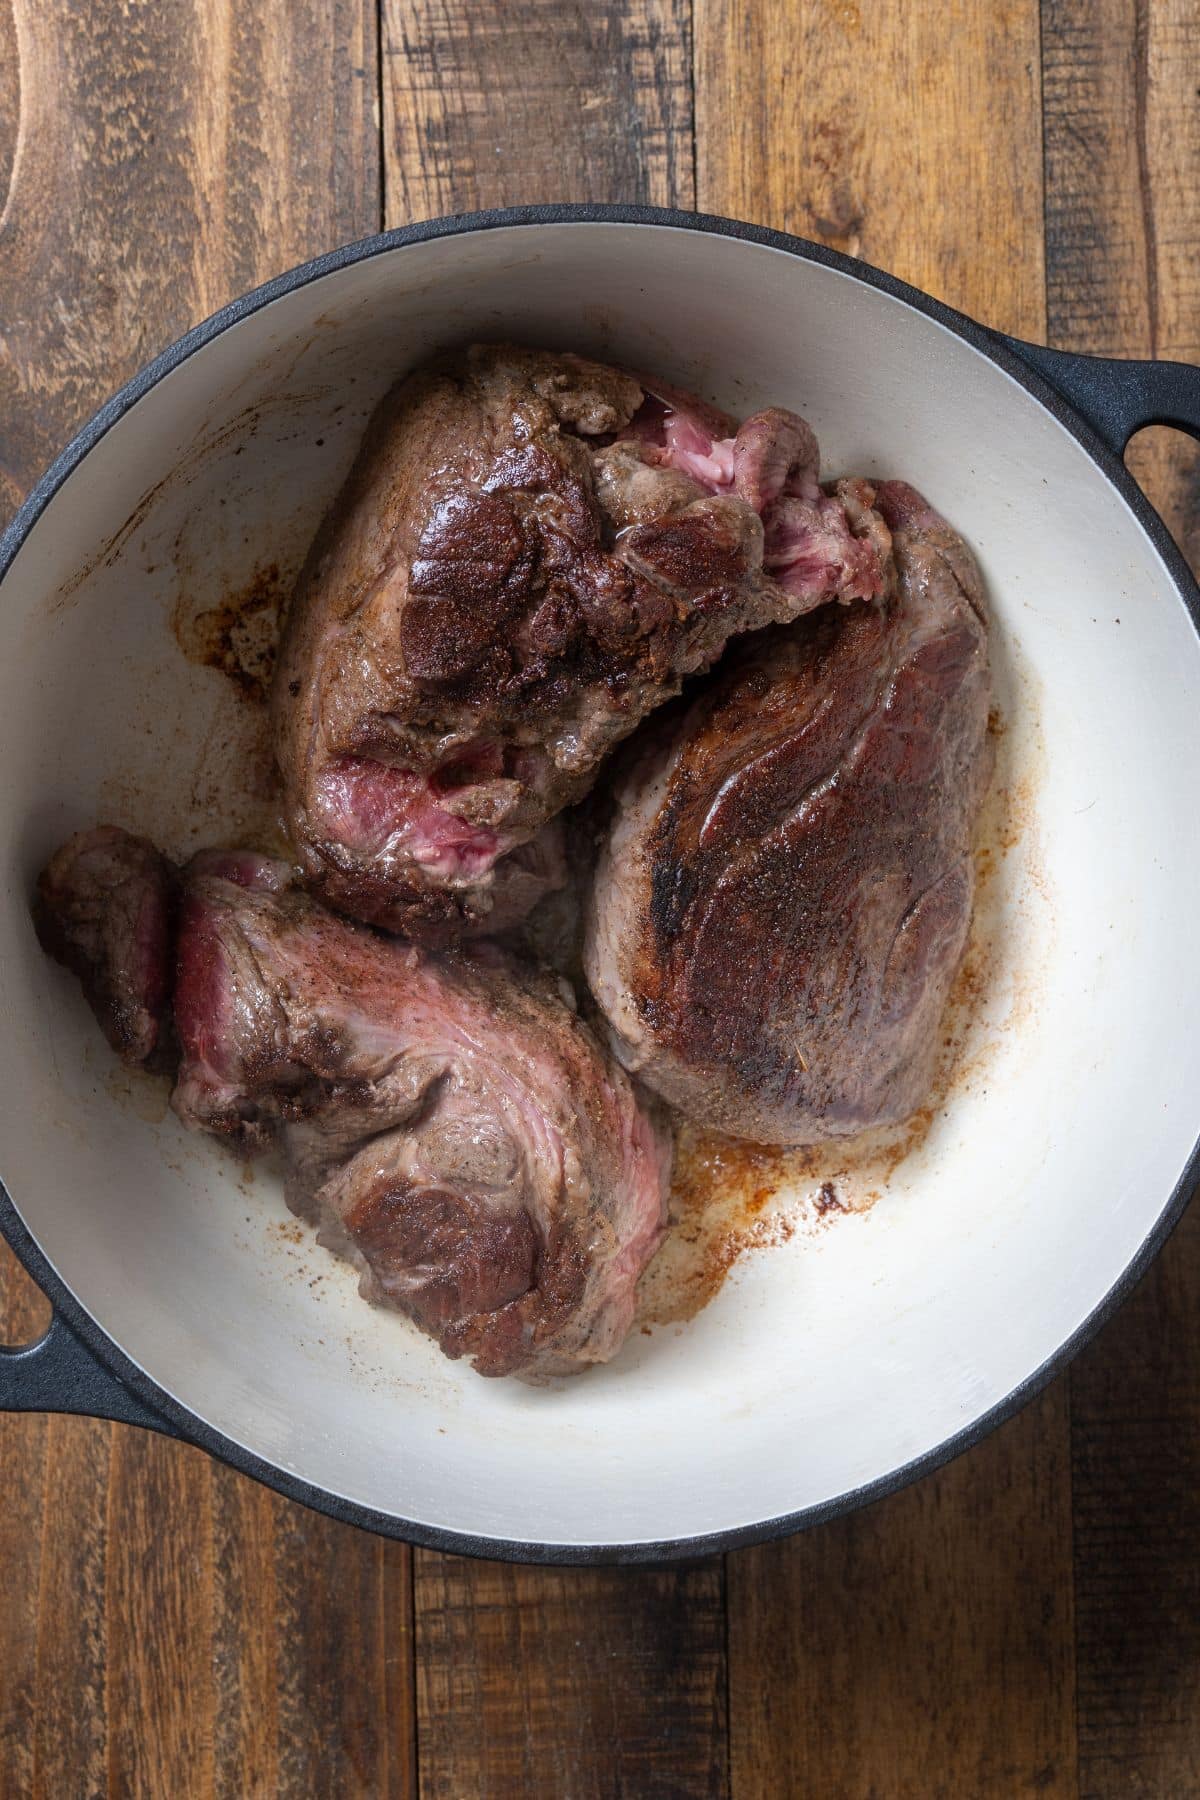
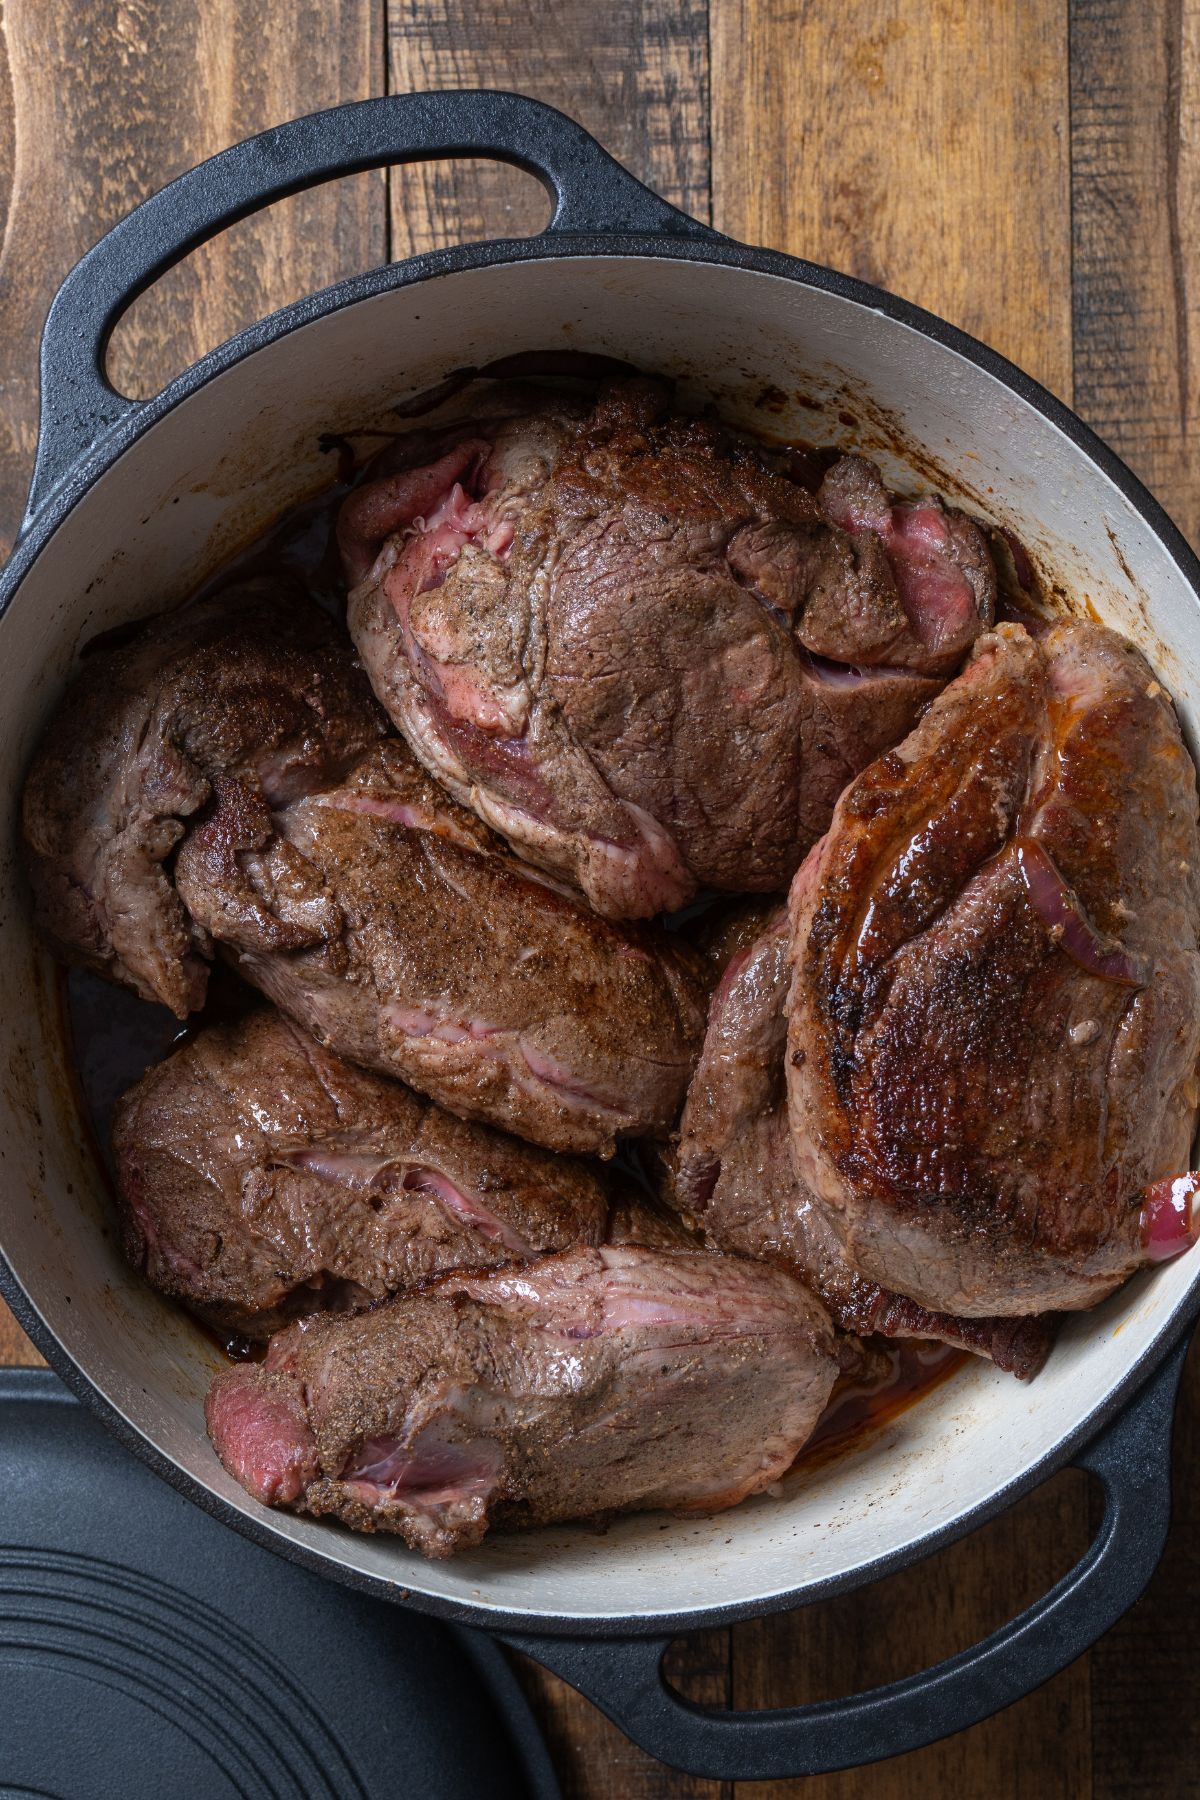
Step 3: Heat olive oil in a large Dutch oven over medium-high heat. Sear each piece of lamb for about 3-4 minutes per side, until golden brown. Don’t overcrowd the pot; work in batches if needed. Remove the lamb from the pot and set aside.

lamb searing in the dutch oven

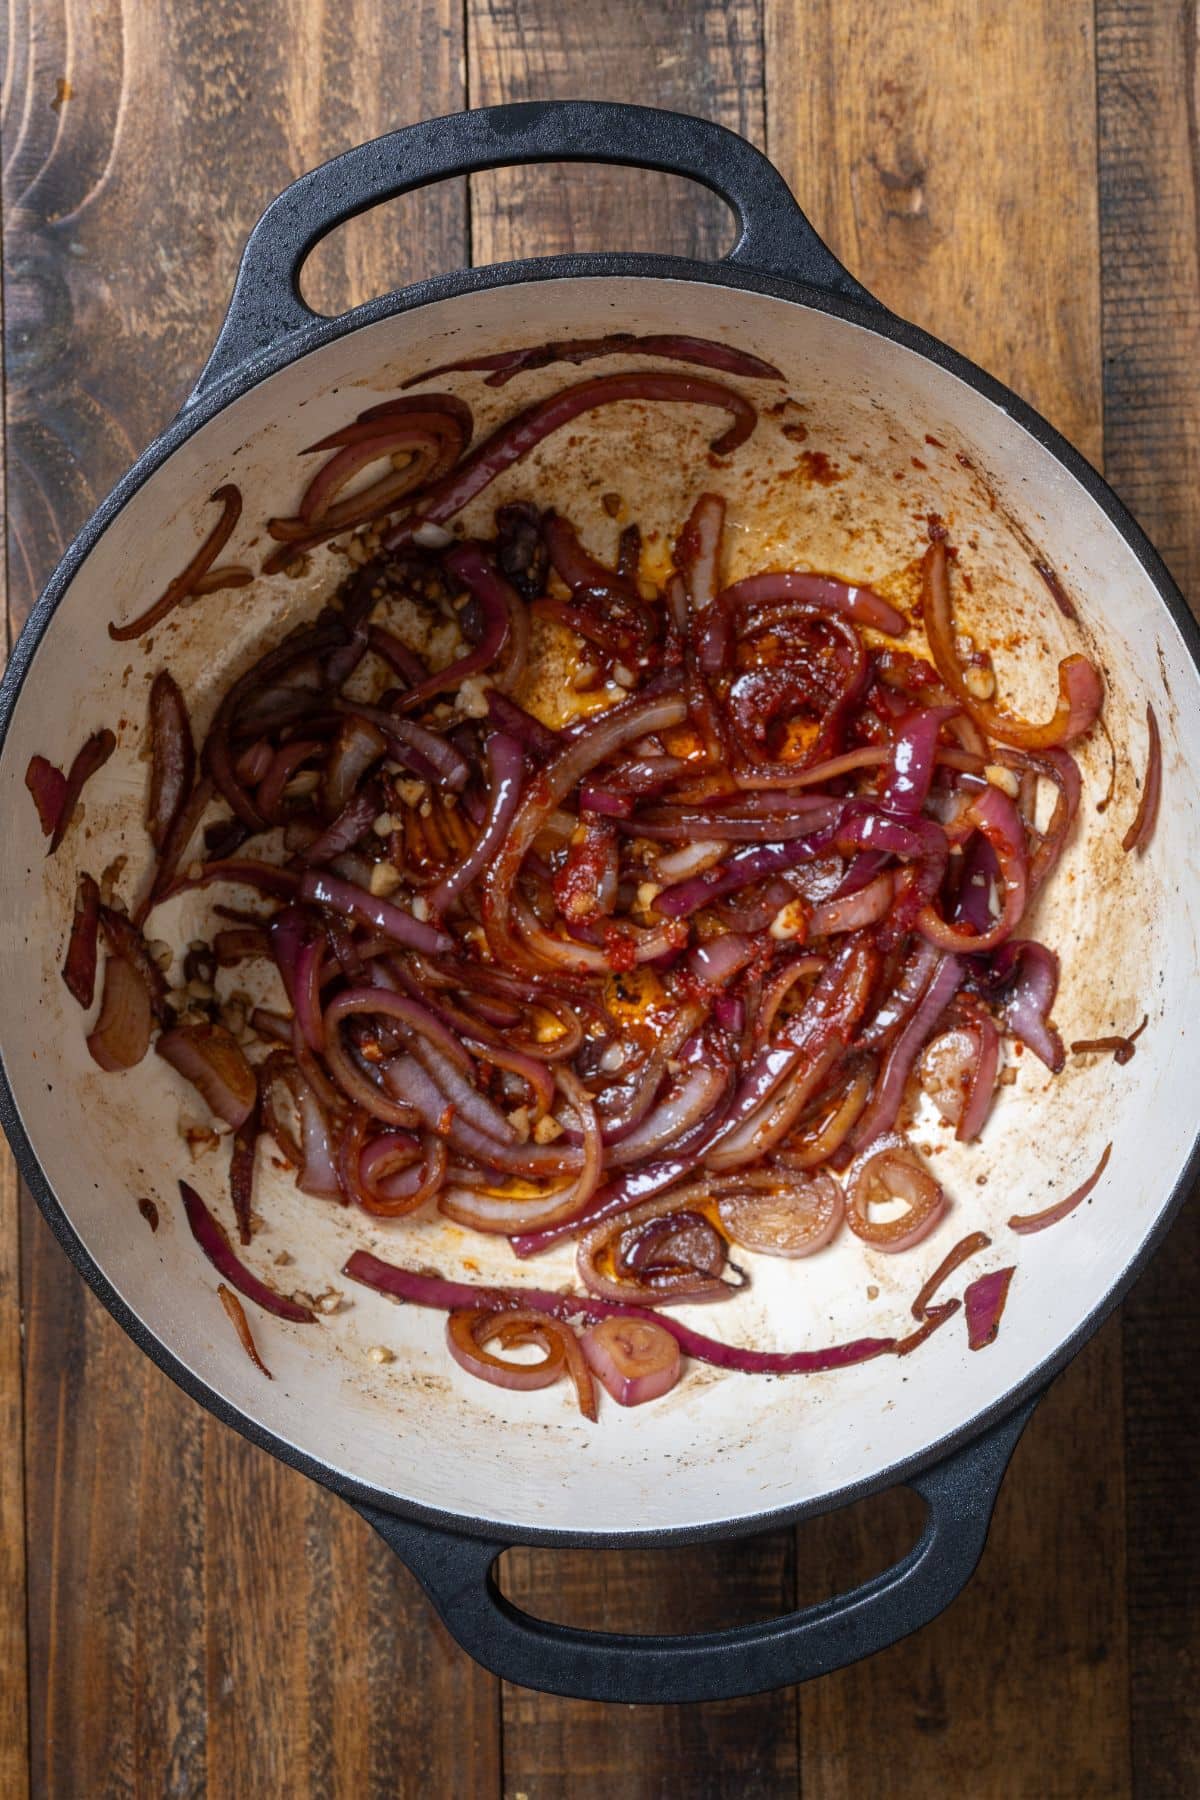
Step 4: Add the sliced onion and garlic to the pot. Sauté for 2–3 minutes until fragrant and starting to soften.

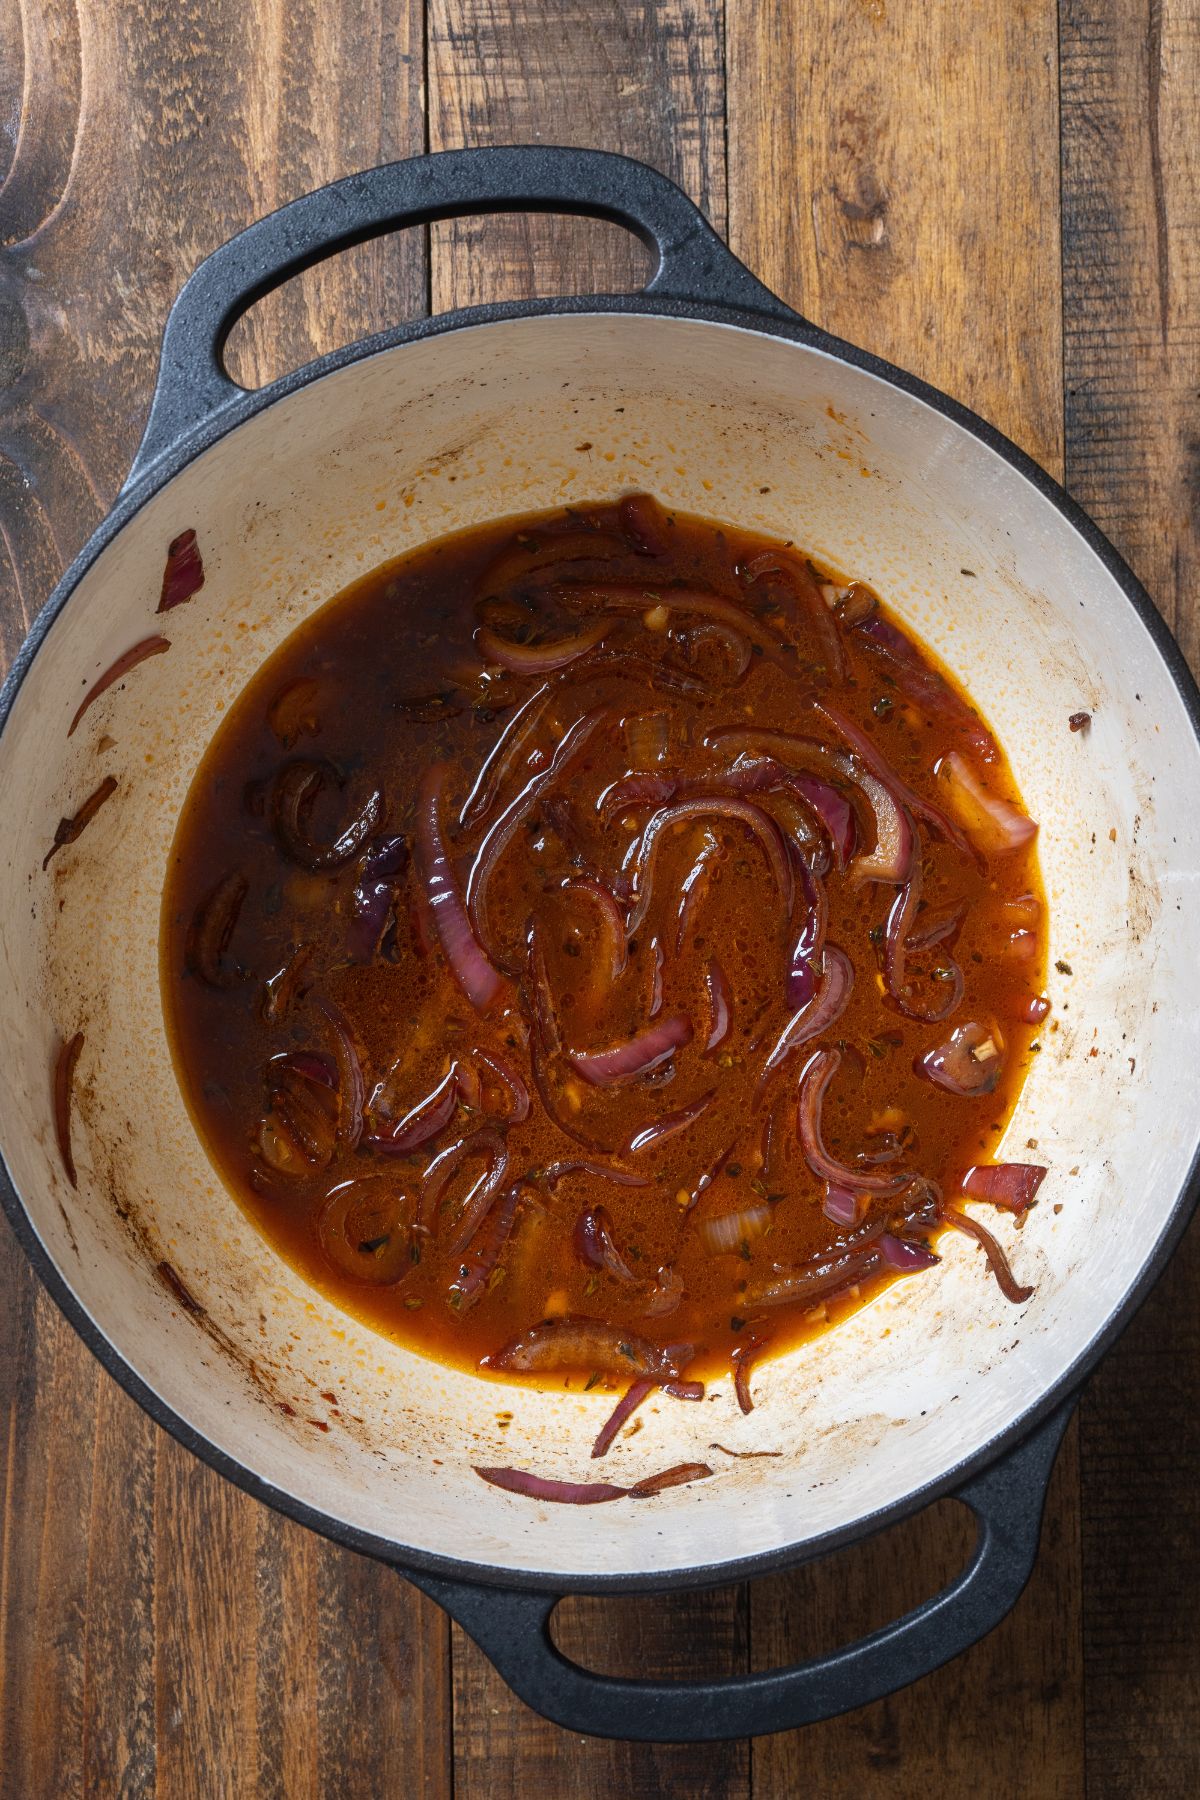
Step 5: Stir in tomato paste and cook for 30 seconds to deepen the flavor, then drizzle in honey and stir to coat everything. Pour in the beef stock and sprinkle in oregano.

onions sauteeing in pit
onions covered in broth in pot

Step 6: Return the seared lamb pieces to the pot. The sauce won't cover the meat, but that's just fine.

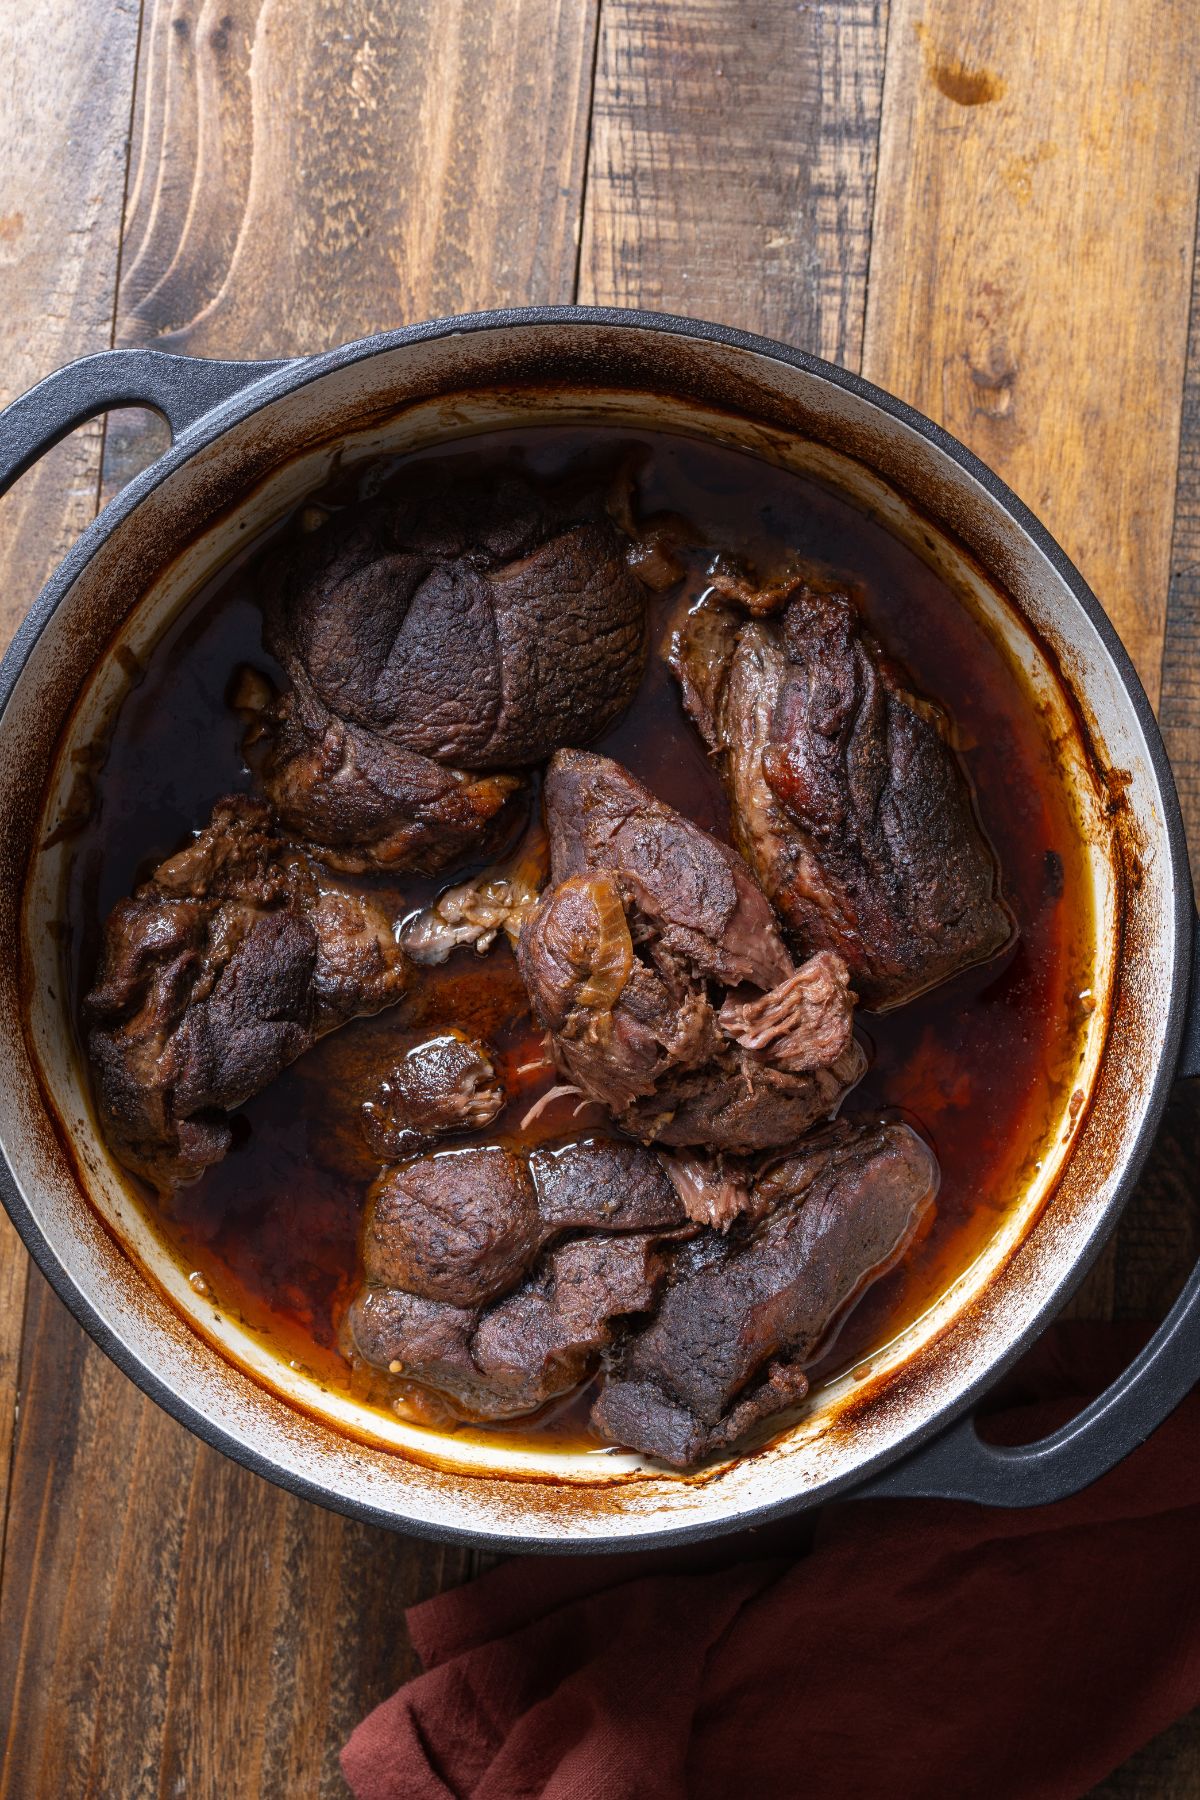
Step 7: Cover tightly with the lid and transfer to the oven. Braise for 3 to 3 hours and 30 minutes, until the lamb is fork-tender and shreds easily.

lamb pieces in pot before braising
braised lamb pieces before shredding

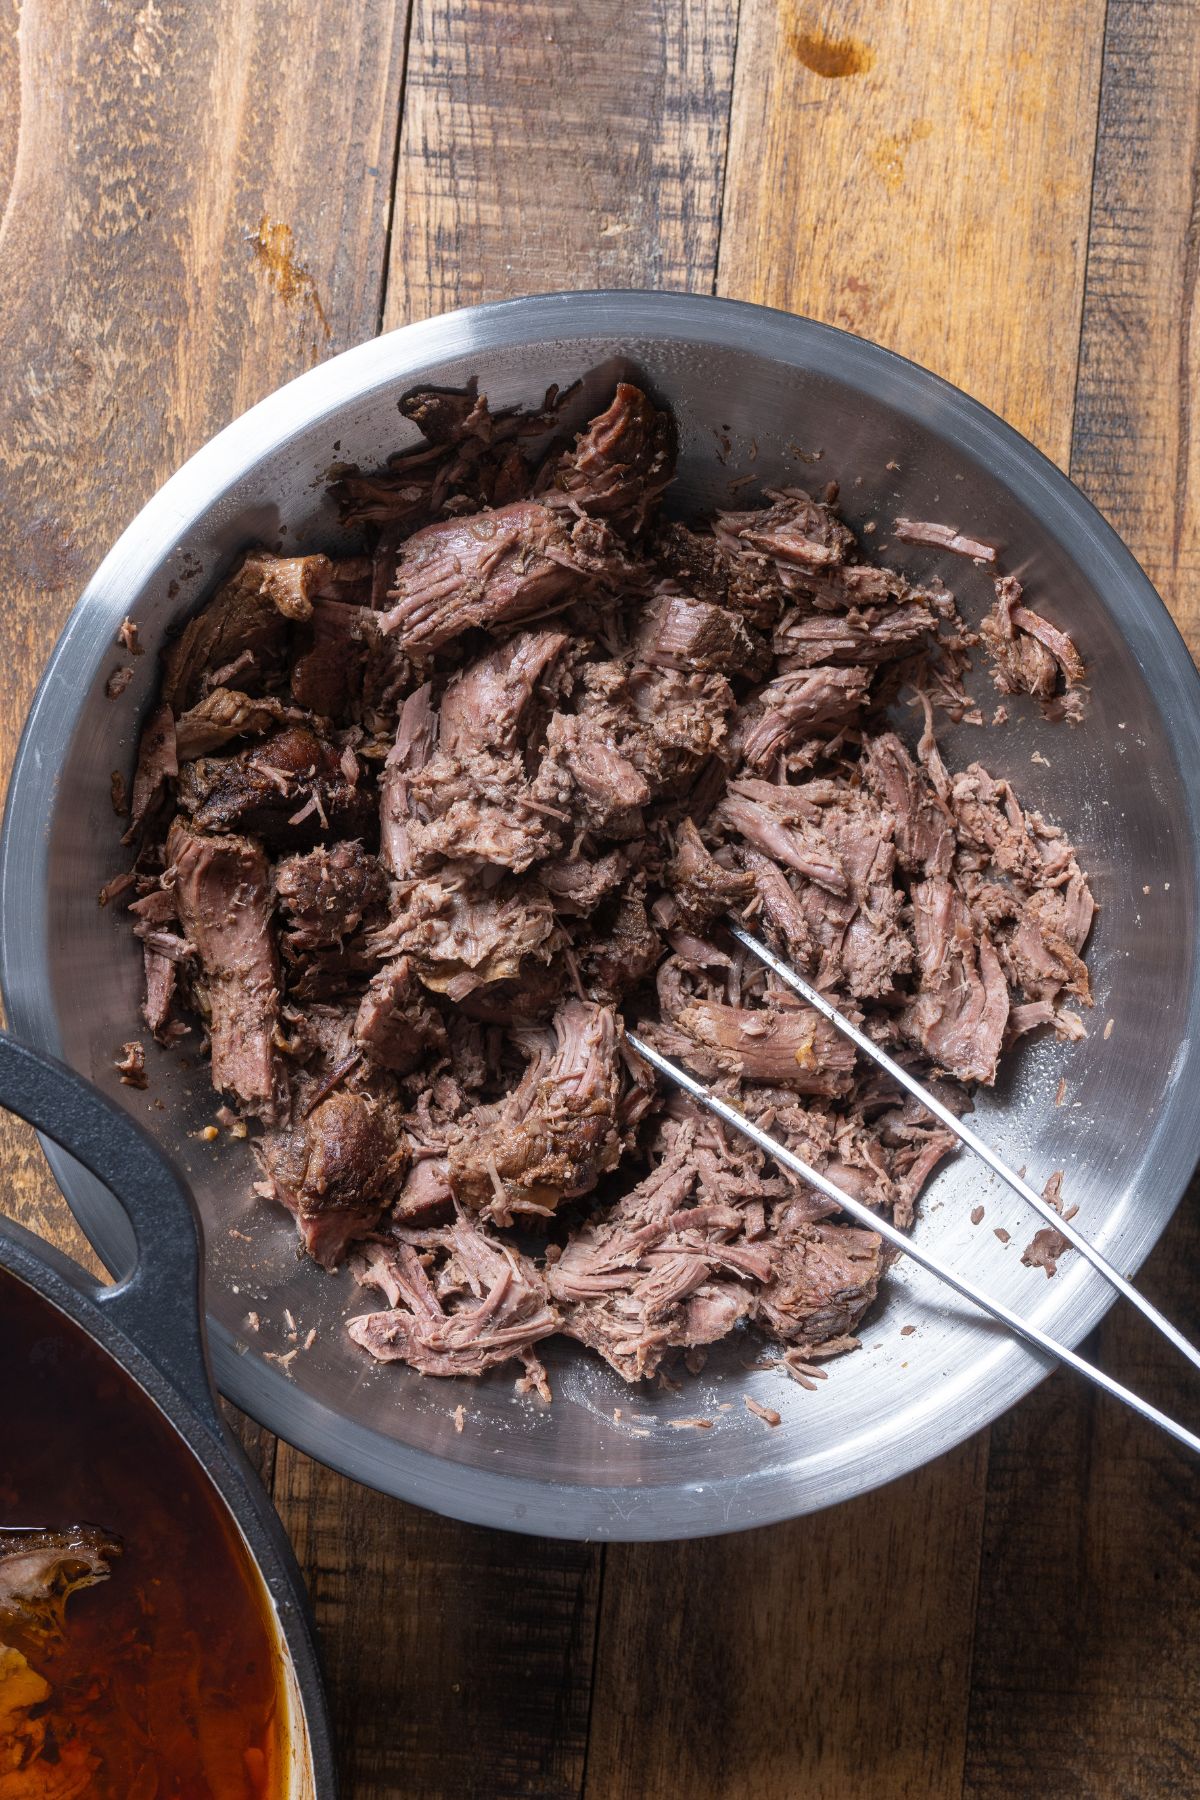
Step 8: Remove from the oven and shred the lamb in a large bowl.

shredded lamb in bowl

💡 Tip: After shredding the lamb, skim off any excess fat from the braising liquid, then spoon the flavorful liquid over the meat before serving.

Serve immediately or store for future meals.

Make Ahead and Storage Instructions

You can make this lamb roast up to 3 days in advance. Let it cool, then store it in an airtight container in the refrigerator. For more extended storage, freeze the lamb in a freezer-safe container for up to 3 months.
Reheat gently on the stovetop or in the oven at 300°F (150°C) with a splash of broth to keep it moist.

Leftovers are perfect for sandwiches, grain bowls, or tucked into flatbreads with tzatziki or pickled onions.

blue lamb bowl

Tanya’s Top Tips

  • Cut it smaller for faster cooking: Cutting the boneless leg into six pieces instead of leaving it whole reduces cooking time significantly and ensures even cooking throughout.
  • Refrigerate and skim fat: For a cleaner sauce, refrigerate the braising liquid until the fat solidifies on top, then skim it off before reheating. Serve the lamb with the rich, flavorful gravy.
refrigerated fat on top of braising liquid in glass jar

FAQs

Can I make this recipe in a slow cooker?

Yes! After searing the lamb and sautéing the aromatics, transfer everything to a slow cooker. Cook on low for 7–8 hours or high for 4–5 hours until tender.

What is Leg of Lamb?

Leg of lamb comes from the upper hindquarters of the lamb and is one of the most popular cuts for roasting and braising. It's available bone-in or boneless (which is what I use in this recipe). A boneless leg of lamb typically weighs between 4-7 pounds and is leaner than lamb shoulder, but still has enough fat and connective tissue to stay incredibly juicy when cooked low and slow.

What can I serve it with?

Mashed potatoes, yellow rice, roasted carrots, or even buttered noodles all pair beautifully.

If You Love This Recipe, Try These Next

  • Jamaican Oxtails Recipe - Tender, fall-off-the-bone oxtails braised in a rich, savory gravy with warm Caribbean spices. This recipe is sure to impress.
  • Brown Stew Chicken - This flavorful chicken simmered in brown gravy is a family favorite that never disappoints.
  • Air Fryer Lamb Chops - I love how quickly these juicy lamb chops come together in the air fryer with minimal cleanup!
  • Braised Beef Short Ribs - These melt-in-your-mouth short ribs are another slow-cooked favorite that's perfect for special dinners.

I hope you love this braised lamb roast as much as we do. If you've tried this or any other recipe on my blog, please take a moment to give it a star rating and share your feedback in the comments below! I appreciate your support.

braised lamb on blue plate shredded
Print Recipe
No ratings yet

Braised Lamb Recipe

This slow-braised lamb roast is melt-in-your-mouth tender, infused with garlic, honey, and warm spices for a rich, comforting meal perfect for Sundays or any special dinner.
Prep Time20 minutes mins
Cook Time3 hours hrs 30 minutes mins
Total Time3 hours hrs 50 minutes mins
Course: entree
Cuisine: American, Mediterranean
Keyword: braised lamb
Servings: 10
Calories: 278kcal
Author: Tanya

Ingredients

  • 6.4 lbs boneless leg of lamb trimmed and cut into 6 large pieces
  • 1 tablespoon kosher salt use 2 teaspoons if using table salt
  • 1 teaspoon ground black pepper
  • 1 teaspoon ground allspice
  • 1 teaspoon ground cumin
  • 1 teaspoon ground ginger
  • 1 teaspoon dried oregano
  • 2 tablespoons olive oil
  • 1 large red onion sliced
  • 6 cloves garlic sliced
  • 1 tablespoon tomato paste
  • 1 tablespoon honey
  • 1 cup beef broth

Instructions

  • Preheat your oven to 325°F (165°C). Remove any netting from the lamb and trim excess fat. Cut into six large pieces.
  • Mix together salt, black pepper, allspice, cumin, and ginger. Rub this seasoning mix evenly all over the lamb.
  • Heat olive oil in a large Dutch oven over medium-high heat. Sear each piece of lamb for about 3-4 minutes per side, until golden brown. Don't overcrowd the pot; work in batches if needed. Remove the lamb from the pot and set aside.
  • Add the sliced onion and garlic to the pot. Sauté for 2–3 minutes until fragrant and starting to soften.
  • Stir in tomato paste and cook for 30 seconds to deepen the flavor, then drizzle in honey and stir to coat everything. Pour in the beef stock and sprinkle in oregano.
  • Return the seared lamb pieces to the pot. The sauce won't cover the meat, but that's just fine.
  • Cover tightly with the lid and transfer to the oven. Braise for 3 to 3 hours and 30 minutes, until the lamb is fork-tender and shreds easily.
  • Remove from the oven and shred the lamb in a large bowl. After shredding the lamb, skim off any excess fat from the braising liquid, then spoon the flavorful liquid over the meat before serving.
  • Serve immediately or store for future meals.

Notes

  • Easier Fat Removal: For the cleanest sauce, refrigerate the braised lamb in its liquid overnight. The fat will solidify at the top, making it easy to lift off and discard before reheating. This method gives you a leaner, cleaner-tasting sauce.
  • Slow Cooker Method: After searing the lamb and building the sauce, transfer everything to a slow cooker. Cook on Low for 8-10 hours or High for 5-6 hours until the lamb is fork-tender.

Nutrition

Calories: 278kcal | Carbohydrates: 4g | Protein: 38g | Fat: 11g | Saturated Fat: 3g | Polyunsaturated Fat: 1g | Monounsaturated Fat: 5g | Cholesterol: 117mg | Sodium: 914mg | Potassium: 596mg | Fiber: 1g | Sugar: 2g | Vitamin A: 33IU | Vitamin C: 2mg | Calcium: 27mg | Iron: 4mg

October 8, 2025 by Tanya 2 Comments

Creamy and Rich Garlic Mashed Potatoes

A pat of butter melting on top of the garlic mashed potatoes.

Creamy, rich garlic mashed potatoes are a delicious side dish. Simple to make with a few basic ingredients, they come together in minutes.

Garlic mashed potatoes in a bowl with a spoon.

You’ll find the full recipe with ingredient amounts and instructions in the recipe card at the bottom of this post. Be sure to check out the blog post itself for extra tips and tricks!

There's really nothing more comforting than creamy mashed potatoes, and when seasoned with garlic, they truly are a wonderful treat!

pic of Tanya

I'm a fan of elevated basic side dishes, and this spin on mashed potatoes is extraordinary.

These garlic mashed potatoes are made with heavy cream and butter, making them incredibly rich and creamy. The flavors from the garlic cloves elevate your potatoes to a restaurant-style side dish. I think you'll love it with classic dishes, like roasted chicken.

♡ Tanya

A Quick Look at the Ingredients

Ingredient amounts and full recipe instructions are on the printable recipe card at the bottom of the post.

  • Yukon Gold potatoes – These have a naturally buttery texture and a golden color, making them perfect for mashing. If you don't have these, you can use russet potatoes.
  • Unsalted butter – Adds smoothness and a hint of richness without overpowering the flavor of the potatoes.
  • Garlic – Fresh cloves give just the right amount of garlicky flavor. Feel free to adjust to taste.
  • Heavy cream – I add a whole cup of heavy cream, making it rich. For a lighter version, you can substitute with half-and-half or milk.
  • Salt and pepper – Simple seasoning to bring it all together.

How to make garlic mashed potatoes

Step 1: Peel the potatoes and cut them into large chunks. Then place them in a large pot. Cover the potatoes with water and boil for 10 minutes, or until they are tender and can be easily pierced with a fork.

Step 2: While the potatoes are boiling, heat the heavy cream, garlic cloves, and butter in a large saucepan over medium heat.

Butter and milk in a pot.

Step 3: Once the potatoes are done boiling, drain them and then add them to the heavy cream mixture. Make sure to remove the pot from the heat.

The cooked potatoes added to the cream mixture.

Step 4: Mash the potatoes until you reach the desired consistency and then stir until smooth and creamy. Season with salt and pepper to taste.

Mashing the potatoes in a pot.

Step 5: Top with chives if desired. Serve and enjoy.

Garlic mashed potatoes in a bowl with a pat of butter.

Make-ahead and Storage Info for these garlic mashed potatoes

Mashed potatoes are a great make-ahead side dish, making them the perfect option for Thanksgiving or the holidays. Once you have made your garlic mash, let it cool before placing it in an airtight container in the fridge, and it will keep well for up to 3 days.

The mashed potatoes can be reheated on the stovetop over low heat, stirring occasionally to prevent sticking. You may want to add a tablespoon or two of cream or milk to loosen them back up.

You can also freeze these garlic mashed potatoes. Because this recipe includes butter and cream, it tends to freeze better than plain mashed potatoes. The fat helps preserve the texture and flavor. They can be frozen for up to 2 months in an airtight container or freezer-safe bag.

To reheat frozen mashed potatoes, thaw in the refrigerator overnight, then warm gently on the stovetop or in the microwave. Stir in a splash of milk or butter while reheating to help restore the original texture.

Note: While freezing works, the texture may not be as smooth as freshly made mashed potatoes. For the best results, consider making them ahead and refrigerating them instead of freezing, especially if serving for a special occasion.

What do you serve them with?

Mashed potatoes are a great everyday side dish as they are so easy to prep, but these are also impressive enough to serve at larger gatherings and throughout the holidays. Try them with:

  • Air Fryer Meatloaf - This meatloaf cooks a bit quicker in the air fryer. Perfect for when you want a smaller loaf in less time.
  • Salisbury Steak with Mushroom Gravy - This classic is perfect when laid over these mashed potatoes.
  • Air Fryer Steak with Garlic Herb Butter - Now, if you want a restaurant-quality dinner, pair this steak with these mashed potatoes.
  • Roasted Air Fryer Turkey Breast - a flavorful turkey breast made in the air fryer, resulting in a juicy turkey breast in less time.
  • Air-Fried Spatchcock Chicken - This chicken is perfect for busy weeknights, and its flavor pairs well with these mashed potatoes.

Tanya's Top Tips

  • Cut the potatoes into similar-sized chunks to ensure even cooking. They should be fork-tender so that they are easy to mash.
  • For an even fluffier mash, use a potato ricer instead of a hand masher.
  • Don't over-mash the potatoes. Over-mashing can cause them to become thick and gluey.
  • If making ahead of time, let them cool before refrigerating.
Mashed potatoes garnished with fresh chives.

I hope you love these garlic mashed potatoes as much as we do. If you’ve tried this or any other recipe on my blog, please take a moment to give it a star rating and share your feedback in the comments below! I appreciate your support.

Garlic mashed potatoes in a bowl with a spoon.
Print Recipe
5 from 2 votes

Garlic Mashed Potatoes Recipe

Creamy rich and indulgent, these garlic mashed potatoes are one delicious side dish. Simple to make with a few basic ingredients, they come together in minutes and are the perfect accompaniment to all of your favorite meals.
Prep Time10 minutes mins
Cook Time10 minutes mins
Total Time20 minutes mins
Course: Side Dish
Cuisine: American
Keyword: creamy garlic mashed potatoes, garlic mash, how to make garlic mash
Servings: 8 servings
Calories: 336kcal
Author: Tanya

Ingredients

  • 3 lbs yukon gold potatoes
  • 1 cup heavy cream
  • 2 garlic cloves minced
  • 1 stick of unsalted butter
  • Salt and pepper to taste
  • Chives for serving

Instructions

  • Peel the potatoes and cut them into large chunks. Then place them in a large pot. Cover the potatoes with water and boil for 10 minutes or until the potatoes are tender and you can easily pierce them with a fork.
  • While the potatoes are boiling, heat the heavy cream, garlic cloves, and butter in a large saucepan over medium heat.
  • Once the potatoes are done boiling, drain them and then add them into the heavy cream mixture. Make sure to remove the pot from the heat. Mash the potatoes until you reach the desired consistency and then stir until smooth and creamy. Season with salt and pepper to taste. Top with chives if desired.

Notes

  • Cut the potatoes into similar sized chunks so that they cook evenly. They should be fork tender so that they are easy to mash.
  • If you want even fluffier mash, use a potato ricer instead of a hand masher.
  • Don't over mash the potatoes. Over mashing can cause them to become thick and gluey.
  • If making ahead of time, let them cool before refrigerating.

Nutrition

Calories: 336kcal | Carbohydrates: 31g | Protein: 4g | Fat: 23g | Saturated Fat: 14g | Polyunsaturated Fat: 1g | Monounsaturated Fat: 6g | Trans Fat: 1g | Cholesterol: 71mg | Sodium: 27mg | Potassium: 745mg | Fiber: 4g | Sugar: 1g | Vitamin A: 794IU | Vitamin C: 34mg | Calcium: 44mg | Iron: 1mg

This recipe was originally published on July 12, 2021.

October 7, 2025 by Tanya Leave a Comment

Southern Green Beans (Tender and Full of Flavor)

white bowl with green beans and spoon

Southern Green Beans is a delicious side dish with smoked turkey, fresh green beans, and cajun seasoning. This melt-in-your-mouth dish will be your new favorite way to take your Sunday dinner or special occasion to the next level.

pot filled with green beans and smoked turkey with a wooden spoon

You’ll find the full recipe with ingredient amounts and instructions in the recipe card at the bottom of this post. Be sure to check out the blog post itself for extra tips and tricks!

I'm no stranger to making flavorful green beans. I love smothered green beans as well as making green beans in a pressure cooker. But my all-time favorite has to be southern-style green beans.

pic of Tanya

The best thing about this southern green bean recipe is the flavorful broth created by slow-cooking smoked turkey necks before simmering the green beans. They soak up all that wonderful cooking liquid and become incredibly tender and rich.

My time living in the South has taught me that vegetables, when tender and slow-cooked, produce a melt-in-your-mouth experience that's comforting and deeply satisfying. These green beans check all the Southern good cooking boxes.

♡ Tanya

A Quick Look at the Ingredients

Ingredient amounts and full recipe instructions are on the printable recipe card at the bottom of the post.

These are the ingredients needed to make this green bean recipe from scratch.

  • Butter - Butter and green beans go together real bad. If you prefer, bacon grease is a suitable substitute here. You could also use olive oil if that's what you have.
  • Onion and garlic - I call these my generals, because they are added to almost every Southern recipe to add tons of flavor.
  • Smoked turkey necks - Any smoked meat would work here. Feel free to use smoked ham hocks, turkey legs, turkey wings, and other similar options.
  • Chicken broth - this is the liquid I choose to use to amp up the flavor. I suggest using a low-sodium chicken broth so you can control the amount of salt.
  • Cajun seasoning - Another flavor booster I like to add to my slow-cooked vegetables. Seasoned salt also works here. Use about half the amount if using a seasoned salt.
  • Black pepper - I like my beans to have a little spice.
  • Green beans - The star of the show. I opt for fresh green beans in this recipe.

Recommended Tool

ingredients for southern green beans in small dishes on a white background
STAUB Cocotte Round 24cm Dark Blue

This Dutch oven is perfect for soups and stews. With a heavy bottom for even heat distribution and a tight-fitting lid to lock in moisture, it’s ideal for small-batch cooking, braising, and simmering cozy meals.

Buy Now

How to make southern green beans

Here are brief instructions on how to make this flavorful green bean recipe.

Stovetop: 

Step 1: Melt the butter in a large pot over medium heat. Add the onions and sauté until they are softened. Add the garlic and sauté for an additional minute. 

translucent onions in a saute pan

Step 2: Add the turkey necks, chicken broth, water, cajun seasoning, and black pepper, and bring the pot to a simmer. Once the broth begins to simmer, reduce the heat to medium-low and cover.

Cook on medium-low heat until turkey necks start to become tender, about 1-2 hours (depending on the size of your turkey necks). Larger turkey necks will take longer to cook. 

cooked turkey in a pot with broth

Step 3: Add the green beans to the pot and cover it. Continue to cook, stirring occasionally, until the vegetables become tender, about 35-45 minutes.

Step 4: Remove the turkey neck from the pot, shred the meat from the bone, and then add it back to the pot. Discard the bone. 

green beans in white bowl with napkin

Step 5: Serve the green beans with a slotted spoon and enjoy 🙂

white bowl with green beans and smoked turkey

Pressure cooker instructions: 

Step 1: Press “sauté” on the pressure cooker. Once the display reads “hot,” add the butter and saute the onions for 4 minutes. Add the garlic and sauté for an additional minute. Press “cancel” on the pressure cooker.

Step 2: Add the turkey necks, chicken broth, water, Cajun seasoning, and black pepper. Cover, press “pressure cook,” and set it on high pressure for 35 minutes. Once it’s done cooking, allow the pot to release pressure for 5 minutes naturally, then carefully release the remaining pressure. 

cooked turkey in an instant pot with broth

Step 3: Add the green beans, cover, and press “pressure cook.” Cook on high pressure for 10 minutes. When it’s finished, allow it to release the pressure for five minutes naturally, then carefully release the remaining pressure. 

green beans and smoked turkey in an instant pot

Step 4: Remove the lid and scoop the beans into a large serving bowl with a slotted spoon.  

cooked green beans and smoked turkey in an instant pot

Tanya's Top Tips

  • Depending on the size of the turkey necks, they may need to cook for a little longer. 
  • The beans should be perfectly soft and have a melt-in-your-mouth texture, and they shouldn’t be crunchy or mushy. 

Variations 

Old-fashioned southern green beans can be adapted to fit your tastes and preferences. Here are some tips you can use to make this one of your favorite side dishes.

  • Add red potatoes to make southern green beans with potatoes. 
  • Pour in a tablespoon of vinegar for a tangy flavor.  
  • Use garlic powder and onion powder instead of fresh garlic and onions if needed. I recommend about one teaspoon of both.
  • Make it spicy by adding red pepper flakes or cayenne pepper.  
  • Substitute the smoked turkey with other smoked meats like bacon or a ham hock. 
white bowl with green beans and smoked turkey with a wooden spoon

How to choose the best green beans 

For the best flavor and texture, use fresh green beans. Look for ones that are bright green, firm, and free of brown spots or soft spots. Fresh beans take a little longer to cook, but their texture holds up beautifully and soaks in all the flavor from the broth.

In a pinch, you can use canned or frozen green beans. Since they’re already soft, reduce the cooking time so they don’t get mushy. Just add them toward the end to let them absorb the rich, smoky broth from the turkey necks.

How to store 

Store any leftovers in an airtight container in the refrigerator for up to 3 to 4 days. Reheat gently on the stovetop or in the microwave until warmed through. For longer storage, freeze in a freezer-safe container for up to 2 months.

For holiday meal prep, you can make things easier by cooking the smoked turkey necks a day or two in advance and trimming the green beans ahead of time. Store them separately in the fridge. On the day of your big meal, simmer everything together for fresh, just-cooked flavor.

white bowl with green beans inside of it

How to serve 

This easy green bean recipe pairs perfectly with your favorite Southern dishes, such as collard greens, pork chops, air-fried chicken, a perfect air-fried steak, or southern candied sweet potatoes.     

FAQs

How can I make vegetarian southern green beans? 

You can easily cook these southern-style green beans without meat to make them vegetarian or vegan. To make them vegetarian, leave out the smoked turkey. To make them vegan, replace the chicken stock with vegetable stock as well. You can add smoky elements, like smoked paprika or liquid smoke, to get that smoky flavor without smoked meat.

Can I cook southern green beans in a slow cooker? 

Yes, you can cook this southern green beans recipe in a crockpot. The key is to get the beans to that perfect, soft texture without overcooking them.

I hope you love these green beans as much as we do. If you have tried this or any other recipe on my blog, please rate it and let me know how it turned out in the comments below!

white bowl with green beans and spoon
Print Recipe
4.67 from 6 votes

Southern Green Beans Recipe

Southern Green Beans are a savory, slow-simmered side dish made with fresh green beans, smoked turkey necks, and bold Cajun seasoning. Tender, flavorful, and deeply comforting, this melt-in-your-mouth classic is perfect for Sunday dinners, holiday feasts, or any time you want to serve a true Southern favorite.
Prep Time10 minutes mins
Cook Time2 hours hrs
Total Time2 hours hrs 10 minutes mins
Course: Side Dish
Cuisine: American
Keyword: southern green beans, southern green beans recipe
Servings: 8 people
Calories: 142kcal
Author: Tanya

Equipment

  • 6 Qt Pressure Cooker
  • Dutch Oven

Ingredients

  • 2 Tablespoon unsalted butter
  • 1 Yellow onion chopped
  • 2 Garlic cloves chopped
  • 1 lb smoked turkey necks
  • 2 cups Chicken broth
  • 1 cup water
  • 1 teaspoon cajun seasoning
  • ½ teaspoon black pepper
  • 2 lbs Green beans trimmed and snapped into pieces

Instructions

Stovetop Instructions

  • Melt butter in a large pot over medium heat. Add onion and sauté until softened, about 4 minutes. Add garlic and sauté for an additional minute.
  • Add turkey necks, chicken broth, water, cajun seasoning, and black pepper.
  • Bring to a simmer. Once the broth begins to simmer, reduce heat to medium-low and cover. Cook on medium-low heat until turkey necks start to become tender, about 1-2 hours (depending on the size of your turkey necks).
  • Add green beans to the pot and cover. Continue to cook, stirring occasionally, until the green beans become tender, about 35-45 minutes.
  • Remove from heat.
  • Remove the turkey neck and remove meat from the bone. Add meat back into the pot and discard the bone.
  • Serve the green beans with a slotted spoon. Enjoy.

Electric Pressure Cooker Instructions

  • Press “sauté” on the pressure cooker. Once the display reads “hot,” add butter. Add onions and sauté for 4 minutes. Add garlic and sauté for an additional minute. Press “cancel” on the pressure cooker.
  • Add turkey necks, chicken broth, water, cajun seasoning, and black pepper. Cover. Press “pressure cook” and pressure cook on high pressure for 35 minutes. Once pressure has been done, natural release for 5 minutes, then carefully release the remaining pressure.
  • Add green beans. Cover and press “pressure cook” and pressure cook on high pressure for 10 minutes. Once the timer is up, allow to natural release for 5 minutes. Then quickly release any remaining pressure.
  • Serve and enjoy.

Notes

The amount of time needed to cook the turkey necks initially will depend on the size of the turkey necks. Larger turkey necks will take longer to cook.

Nutrition

Calories: 142kcal | Carbohydrates: 10g | Protein: 12g | Fat: 7g | Saturated Fat: 3g | Polyunsaturated Fat: 1g | Monounsaturated Fat: 2g | Trans Fat: 0.1g | Cholesterol: 74mg | Sodium: 360mg | Potassium: 357mg | Fiber: 3g | Sugar: 5g | Vitamin A: 1020IU | Vitamin C: 15mg | Calcium: 65mg | Iron: 2mg

This post was originally published July 13, 2022.

October 6, 2025 by Tanya Leave a Comment

Cozy Homemade Apple Cider Recipe (Made from Scratch!)

two glasses of homemade apple cider in mugs

This easy homemade apple cider is made with fresh apples and warm spices. It’s cozy, fragrant, and perfect for everything from fall gatherings to quiet nights in.

two glasses of homemade apple cider in mugs

You’ll find the full recipe with ingredient amounts and instructions in the recipe card at the bottom of this post. Be sure to check out the blog post itself for extra tips and tricks!

Every holiday season, I make a big batch of homemade apple cider. My family looks forward to it all year, and the smell alone puts everyone in the holiday spirit.

You can always doctor up a store-bought bottle of apple cider, but if you want to start with fresh apples and build that flavor from scratch, this is the recipe for you. Your whole house will smell incredible while it simmers.

pic of Tanya Harris

This easy fall drink is simple and mostly hands-off. You toss everything into a large pot, let it simmer, and enjoy the sweet, spiced aroma filling the kitchen.

This recipe is for the stovetop, but I also provide instructions for the slow cooker, which is perfect for when you want to keep it warm for hours.

If you love cozy drinks like this, check out my slow cooker Holiday punch, too.

♡ Tanya

A Quick Look at the Ingredients

Ingredient amounts and full recipe instructions are on the printable recipe card at the bottom of the post.

  • Apples: Use a mix of sweet and tart apples, such as Gala, Fuji, Honeycrisp, and Granny Smith. You will need approximately 4 pounds, which is about 6-8 large apples, cored and quartered.
  • Orange: One orange, sliced (no need to peel).
  • Water: About 10 cups, or just enough to cover the apples.
  • Fresh ginger: About a 2-inch piece, sliced.
  • Whole spices: Cinnamon sticks, allspice berries, whole cloves
  • Light Brown sugar: I suggest ½ cup, but adjust to taste. You can also use maple syrup, honey, or agave.
ingredients for homemade apple cider

Recommended Tool

Caraway Stock Pot - 12 Qt Ceramic Coated With Lid

I prefer to use a large stockpot to make this apple cider. It gives you plenty of room for the apples, spices, and liquid, and you won’t have to worry about anything boiling over. A pot with a lid works best to retain heat during a long simmer.

Buy Now

How to Make Homemade Spiced Apple Cider on the Stovetop

Start by gathering all your ingredients and equipment.

Step 1: Add the apples, orange slices, cinnamon sticks, allspice berries, cloves, and ginger to a large stockpot. Pour in enough water to fully cover the fruit by about 1- inch, about 10 cups.

Step 2: Cover and bring to a boil over high heat. Once boiling, reduce the heat to low and let it simmer for 2 hours. Stir occasionally.

💡Tip: I like to cover my pot while bringing it to a boil to help it come to a boil faster. Just listen closely for the sound of the water starting to bubble, then reduce the heat.

homemade apple cider recipe ingredients in stock pot
cooked apples and seasonings

Step 3: Use a potato masher to mash the softened fruit in the pot.

Step 4: Carefully strain the liquid through a fine mesh sieve into another pot or bowl. Use the back of a spoon to gently press down on the solids to extract as much liquid as possible. Discard the solids or save them for composting. For a clearer cider, strain it again.

apples and seasonings after cooking in strainer
strained apple cider in glass container

Step 5: Stir in the light brown sugar or your preferred sweetener. Taste and adjust as needed. Serve warm or chilled. Enjoy.

2 glasses of apple cider in mugs with apples in back

Slow Cooker Instructions

To make this apple cider in a slow cooker, add the apples, orange slices, spices, ginger, and water to the slow cooker insert. Cover and cook on high for 3-4 hours or on low for 6-8 hours.

Once the apples are soft, mash everything with a potato masher. Strain the liquid through a fine-mesh sieve, then stir in the brown sugar or your preferred sweetener.

You can keep the strained cider warm in the slow cooker on the "keep warm" setting for serving.

Make Ahead and Storage Instructions

You can make this cider up to 3 days in advance. Let it cool completely before transferring it to an airtight container.

Store it in the refrigerator and reheat gently on the stovetop or in a slow cooker when ready to serve.

If you want to freeze it, be sure to leave some space in the container since the liquid will expand as it freezes. It can last up to 6 months in the freezer.

close up of homemade apple cider with apple slices on top

Tanya's Top Tips

  • Use a combination of apples for the best flavor. Sweet varieties, such as Gala, Fuji, or Honeycrisp, add body, while tart apples like Granny Smith bring brightness.
  • You do not need to peel the apples.
  • Have fun with the spices. You can also use other ingredients like star anise, cardamom pods, or a splash of vanilla extract to add your own twist to the flavor.
  • If you're serving adults and want to give them the option to add alcohol, set out a few options, such as bourbon, rum, or spiced whiskey, so that guests can add a splash to their own mug. This way, everyone can control how much they'd like and keep it kid-friendly for others.

FAQs

Can I use ground spices instead of whole spices?

Whole spices are best because they create a clean, smooth cider without cloudiness or grit. Ground spices can make the cider more difficult to strain and may leave sediment behind.

Do I need to peel the apples, orange, or ginger?

No need to peel. Just core and quarter the apples and slice the orange and ginger. The peels add extra flavor during simmering and will be strained out later.

Can I sweeten the cider without using sugar?

Yes, you can use maple syrup, honey, or agave. Start with a little, then adjust to taste after straining.

I hope you love this homemade apple cider as much as we do. If you're looking for more Holiday drinks, check these out:

  • Classic Lemonade - perfect for any gathering, any time of year. I mean, it's a classic.
  • Cranberry Lemonade - a festive drink perfect for the Holiday season.
  • Mulled wine - for an older crowd, this version, made in the slow cooker, is perfect for Holiday hosting.

If you have tried this or any other recipe on my blog, please rate it and let me know how it turned out in the comments below!

two glasses of homemade apple cider in mugs
Print Recipe
5 from 1 vote

Homemade Apple Cider Recipe

This homemade spiced apple cider is made with fresh apples, whole spices, and citrus for a cozy, flavorful drink. It’s easy to make on the stovetop or in a slow cooker and perfect for holidays, gatherings, or chilly days at home.
Prep Time15 minutes mins
Cook Time2 hours hrs
Total Time2 hours hrs 15 minutes mins
Course: Drinks
Cuisine: American
Keyword: apple cider recipe, homemade apple cider
Servings: 8 people
Calories: 187kcal
Author: Tanya

Ingredients

  • 4 lbs apples about 6-8 large apples
  • 10 cups of water enough to cover the apples
  • 4 cinnamon sticks
  • 1 tablespoon whole allspice berries
  • 2 teaspoons whole cloves
  • 1 orange sliced
  • 2 inch piece of fresh ginger
  • ½ cup light brown sugar or sweetener of choice, to taste

Instructions

  • In a large stockpot, add the apples, cinnamon sticks, allspice berries, cloves, orange slices, and ginger. Add enough water to cover the apples completely by about 1 inch.
  • Bring to a boil over high heat.
  • Reduce the heat to low, cover, and simmer for about 2 hours, stirring occasionally.
  • Once apples are softened, use a potato masher to mash the fruit and spices.
  • Strain the liquid through a fine mesh sieve. Use the back of a spoon to gently press down on the solids to extract as much liquid as possible. Discard the solids or save them for composting. For a clearer cider, strain it again.
  • Stir in the brown sugar (or sweetener) until it is dissolved.
  • Serve warm, or let it cool and refrigerate for later use.

Video

Notes

  • Adjust sugar to taste. Honey, maple syrup, or agave also work well.
  • This dish can be prepared 2–3 days in advance. Store in the fridge and reheat on the stove or in a slow cooker.
  • Keep warm in a slow cooker for parties, and let guests ladle their own cup.

Nutrition

Calories: 187kcal | Carbohydrates: 49g | Protein: 1g | Fat: 1g | Saturated Fat: 0.1g | Polyunsaturated Fat: 0.2g | Monounsaturated Fat: 0.04g | Trans Fat: 0.001g | Sodium: 23mg | Potassium: 317mg | Fiber: 7g | Sugar: 39g | Vitamin A: 170IU | Vitamin C: 20mg | Calcium: 66mg | Iron: 1mg

October 3, 2025 by Tanya 9 Comments

Juicy Slow Cooker Turkey Breast (with Gravy!)

turkey breast sliced on white plate

Cooking turkey breast in the slow cooker is hands-down the best way to get juicy, tender turkey meat! For a cozy family dinner or an easy holiday meal, a simple slow cooker recipe is the perfect choice.

turkey breast sliced on white plate

You’ll find the full recipe with ingredient amounts and instructions in the recipe card at the bottom of this post. Be sure to check out the blog post itself for extra tips and tricks!

Turkey doesn't get the appreciation it deserves, mainly because it's a lean meat that can dry out. But thanks to this slow cooker turkey breast, dry turkey is a thing of the past. This method yields a juicy turkey right in the slow cooker, and you can even make gravy from the turkey's drippings.

pic of Tanya

For this recipe, I used a boneless turkey breast. I buy them frozen and defrost them in the fridge before adding them to the slow cooker. If you prefer, you can use a bone-in turkey breast that can fit inside your slow cooker.

If you need more ways to cook a turkey breast, check out my turkey breast in the pressure cooker recipe or my air fryer turkey breast recipe.

♡ Tanya

Ingredients Needed

Ingredient amounts and full recipe instructions are on the printable recipe card at the bottom of the post.

For the Turkey

  • Boneless Turkey: Make sure to keep the netting on when using this kind of turkey. You could also use bone-in turkey breast.
  • Chicken Broth: This is the key to preventing the turkey from drying while cooking, and it helps make a delicious gravy. As it cooks, the broth will add the much-needed moisture to the lean cut of meat.
  • Seasonings and spices: Garlic powder, onion powder, paprika, dried thyme, kosher salt, rubbed sage, and black pepper add rich, savory flavors. Olive oil helps bind these spices to the turkey.
  • Vegetables: Yellow onion, carrot, and celery stalk are great for adding an aromatic base to the turkey as it cooks. They also release their own juices to help keep the turkey moist.

For the Drippings Gravy

  • Base: Unsalted butter and all-purpose flour provide the base for the roux, which thickens the gravy.
  • Chicken broth: Provides the liquid base.
  • Drippings from the turkey: these carry over the spices to provide the perfect flavor.
  • Seasonings: Salt and pepper are essential for seasoning and balancing flavors.
ingredients for turkey breast on cutting board

Tools Needed

  • Slow Cooker
  • Cutting Board
  • Knife
  • Tongs
  • Measuring Spoons and Cups
  • Whisk
  • Medium Saucepan
  • Wooden Spoon or Spatula
  • Gravy Boat or Small Serving Dish

How To Make Slow Cooker Turkey Breast w/ Gravy

Making the Turkey

Step 1: Pat the turkey breast (with the net on) dry with paper towels and rub it with olive oil. In a separate bowl, mix the garlic powder, onion powder, paprika, thyme, salt, sage, and black pepper. Rub the spice mixture all over the turkey breast.

seasoned raw turkey breast in slow cooker

Step 2: Place the turkey breast in the slow cooker and pour the chicken broth around it to keep the turkey moist while cooking. Add the onion, carrot, and celery around the turkey breast in the slow cooker.

raw ingredients for turkey breast in slow cooker

Step 3: Cover and cook on low for 4-5 hours or until the internal temperature reaches 165°F (74°C).

cooked turkey breast with net in slow cooker with onions, carrot, celery, and broth and drippings

Step 4: After cooking, remove the turkey from the slow cooker and discard the netting. Let it rest for 10 minutes before slicing.

cooked turkey breast in slow cooker

Step 5: You can serve the turkey as is or create a gravy using the drippings.

Making the gravy

Step 6: Pour the drippings from the slow cooker through a fine-mesh strainer into a bowl to remove any solids, then set the liquid aside. You should have about 2 cups of drippings.

Step 7: In a saucepan, melt the butter over medium heat. Once melted, whisk in the flour to form a roux once the butter melts. Cook for about 1-2 minutes, whisking constantly, until the mixture turns a golden brown color.

Step 8: Gradually whisk in the strained drippings from the slow cooker, whisking constantly to avoid lumps.

Taste the gravy and add salt and pepper to taste. Let it simmer for 3-5 minutes. Whisk occasionally until it thickens to your desired consistency.

How To Store

Refrigeration

Allow the turkey and gravy to cool to room temperature. Place the turkey in an airtight container and pour the gravy into a separate airtight container to prevent it from becoming soggy. Store both containers in the refrigerator. Use within 3 days.

For reheating, preheat the oven to 325°F (163°C). Place the turkey slices in a baking dish, cover with foil to retain moisture, and heat for about 15-20 minutes or until warmed through.

Frozen

For longer storage, you can freeze the turkey and gravy. Use freezer-safe containers or resealable freezer bags, removing as much air as possible before sealing.

You can store turkey and gravy in the freezer for up to 3 months.
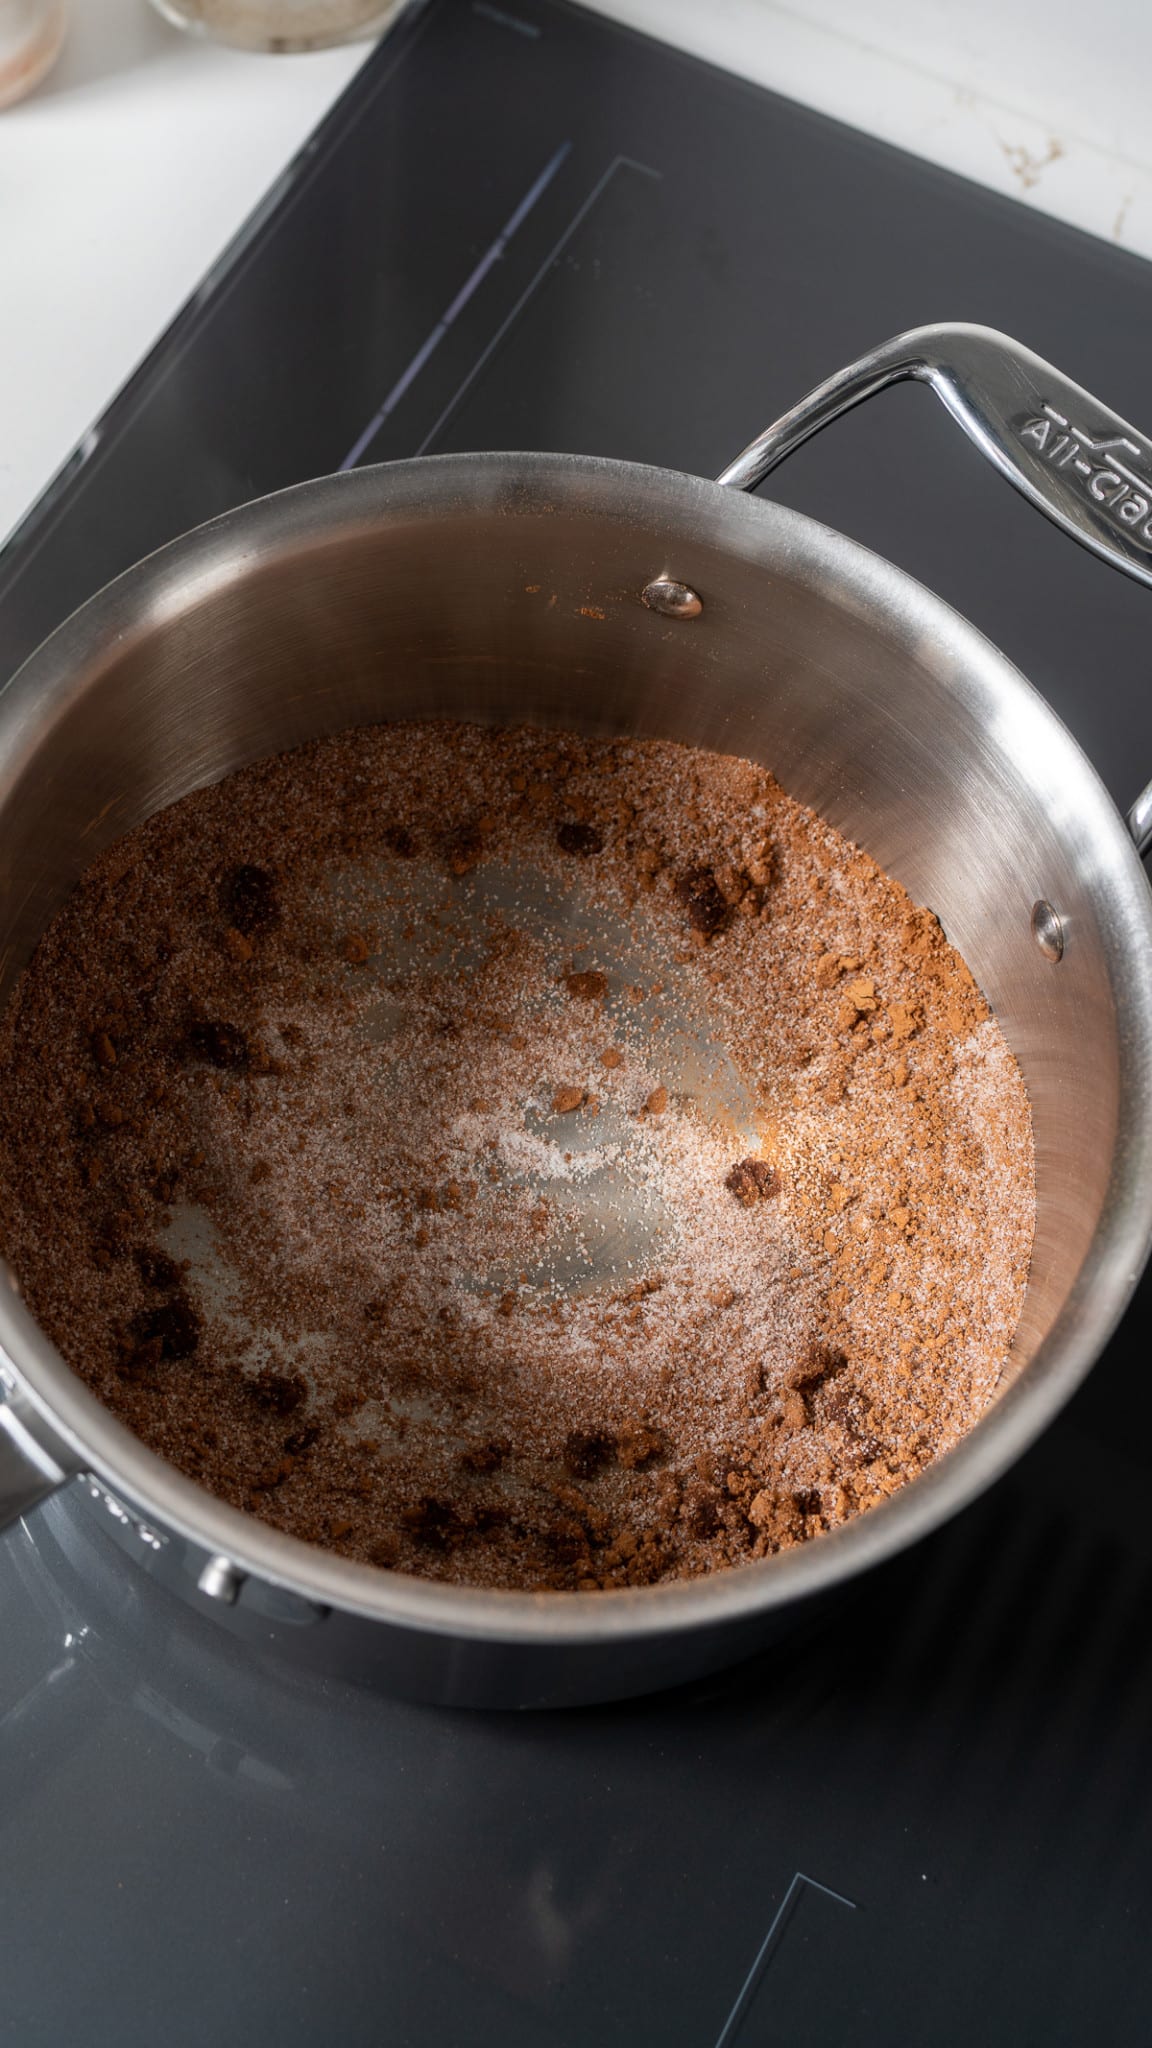
For reheating, thaw frozen turkey in the refrigerator before reheating. This can take several hours or overnight, depending on the size of the turkey slices.

Tanya’s Top Tips

  • Choose a good-quality boneless, skinless turkey breast. Picking one with a net is best. This keeps its shape and moisture while cooking.
  • For a crispier skin, remove the turkey breast, place it under the broiler for 3-5 minutes, or until golden.
  • Ensure your slow cooker is large enough to accommodate the turkey breast without crowding. 
  • Allow the turkey to rest after cooking to let the juices redistribute, ensuring the meat stays moist when sliced.
  • For a 6-8 lb bone-in turkey breast: Cook on LOW for 6-7 hours, or until a meat thermometer inserted into the thickest part registers 165°F (74°C).

FAQ

What are the benefits of slow cooking a turkey?

Using the slow cooker ensures that you get flavorful, tender, and juicy turkey breasts every time. The preparation time is minimal, and the cleanup afterward is easy.

Can I use frozen turkey breast in a slow cooker?

I do not recommend cooking a frozen turkey breast directly in a slow cooker. The slow cooker does not heat the turkey fast enough from frozen. This means it may not reach a safe internal temperature of 165°F (74°C). Thawing it in the refrigerator before cooking is best.

close up photo of sliced turkey breast

    I hope you like this slow cooker turkey breast recipe as much as we do! Looking for more slow cooker recipes? Try these out:

    • Slow Cooker Collard Greens - This green, leafy vegetable is delicious when cooked low and slow.
    • Slow Cooker Chicken Broth - My Favorite Way to Make Homemade Chicken Broth. Use it immediately or freeze some for later.
    • Slow Cooker Mac and Cheese - This mac and cheese is a mostly hands-off recipe that yields creamy, cheesy pasta.

    If you have tried this or any other recipe on my blog, please rate it and let me know how it turned out in the comments below!

    turkey breast sliced on white plate
    Print Recipe
    5 from 1 vote

    Slow Cooker Turkey Breast w/ Gravy

    Cooking turkey breast in the slow cooker is hands-down the best way to get juicy, tender turkey meat! For a cozy family dinner or an easy holiday meal, a simple slow cooker recipe is the best the way to go.
    This simple and tasty homemade turkey gravy will make this dish even better. Drizzle it on top for a mouthwatering finish. Just season the turkey and let the slow cooker do its thing!
    Prep Time10 minutes mins
    Total Time4 hours hrs 10 minutes mins
    Course: entree, Main Course
    Cuisine: American
    Keyword: Slow cooker turkey breast, Turkey gravy w/ drippings
    Servings: 10
    Calories: 599kcal
    Author: Tanya

    Equipment

    • Slow Cooker

    Ingredients

    For the Turkey

    • 3 lb boneless skinless turkey breast (with net) (like the Butterball kind)
    • 2 Tablespoons olive oil
    • 1 teaspoon garlic powder
    • 1 teaspoon onion powder
    • 1 teaspoon paprika
    • 1 teaspoon dried thyme
    • 1 teaspoon kosher salt
    • ½ teaspoon rubbed sage
    • ½ teaspoon black pepper
    • 1 cup chicken broth
    • 1 large yellow onion chopped into 1-inch pieces
    • 1 medium carrot chopped into 1-inch pieces
    • 1 medium celery stalk chopped into 1-inch pieces

    For the Drippings Gravy

    • 2 tablespoons unsalted butter
    • 2 tablespoons all-purpose flour
    • Salt and pepper to taste

    Instructions

    Making the Turkey

    • Pat the turkey breast (with the net on) dry with paper towels. Rub it with olive oil.
    • Mix garlic powder, onion powder, paprika, thyme, salt, sage, and black pepper. Rub the spice mix all over the turkey breast.
    • Place the turkey breast in the slow cooker pour the chicken broth into the slow cooker to keep the turkey moist while cooking. Add the onion, carrot, and celery into the slow cooker around the turkey breast.
    • Cover and cook on low for 4-5 hours or until the internal temperature reaches 165°F.
    • Remove the turkey from the slow cooker and let the turkey rest for 10 minutes before slicing. Be sure to remove the net before serving. Serve as is or create a gravy with drippings.

    Making the gravy

    • Pour the drippings from the slow cooker through a fine-mesh strainer into a bowl to remove any solids. Set the liquid aside. It should be about 2 cups of gravy.
    • In a saucepan, melt the butter over medium heat. Once melted, whisk in the flour to form a roux. Cook for about 1-2 minutes, whisking constantly, until the mixture turns golden brown.
    • Gradually whisk in the strained drippings from the slow cooker. Whisk constantly to avoid lumps.
    • Taste the gravy and season with salt and pepper.
    • Let the gravy simmer for 3-5 minutes, whisking occasionally, until it thickens to your liking.

    Video

    Notes

    • For crispier skin, remove the turkey breast and place it under the broiler for 3-5 minutes or until golden.
    • Check the internal temperature with a meat thermometer to ensure it reaches 165°F (74°C). Depending on your slow cooker, the turkey may need more than 4 hours to reach 165°F
    • If you prefer a thicker gravy, you can adjust the amount of flour.
    • This turkey pairs well with classic sides like mashed potatoes, green beans, carrots, or cranberry sauce for a complete meal.

    Nutrition

    Calories: 599kcal | Carbohydrates: 6g | Protein: 38g | Fat: 46g | Saturated Fat: 13g | Polyunsaturated Fat: 9g | Monounsaturated Fat: 20g | Trans Fat: 0.3g | Cholesterol: 233mg | Sodium: 722mg | Potassium: 556mg | Fiber: 1g | Sugar: 2g | Vitamin A: 2165IU | Vitamin C: 2mg | Calcium: 36mg | Iron: 2mg

    This post was originally published on October 9, 2024.

    October 1, 2025 by Tanya 12 Comments

    Southern Pinto Bean Pie (Sweet, Not Savory)

    A slice of pinto bean pie served on a white plate.

    This old-fashioned sweet pinto bean pie is the perfect fall dessert. Quick and easy to make, it's a wonderful alternative to your Thanksgiving pumpkin pie, and dare I say it, even tastier!

    A slice of pinto bean pie served on a white plate.

    You’ll find the full recipe with ingredient amounts and instructions in the recipe card at the bottom of this post. Be sure to check out the blog post itself for extra tips and tricks!

    It might sound a bit strange at first, but trust me, this old-fashioned Southern pinto bean pie is all kinds of delicious! My father-in-law, who is from North Carolina, grew up eating this pie and requested I give it a try. I must say, this pie got two thumbs up from my family.

    pic of Tanya

    This is one of those recipes that elicits concerned stares when I mention it, but anyone who tries it is pleasantly surprised. This bean pie is creamy and rich, with spices like nutmeg, cinnamon, and molasses that make it a tasty alternative to your usual pumpkin or sweet potato pie.

    It's pretty different from a savory pinto bean recipe, tasting more like pecan pie. And if you can make a pie out of fruit and nuts, surely you can create one with beans.

    ♡ Tanya

    Simple and quick to make, just mix the filling ingredients together and pour into a pie crust and bake, this is a great make-ahead Fall dessert that everyone will fall in love with!

    A Quick Look at The Ingredients

    Ingredient amounts and full recipe instructions are on the printable recipe card at the bottom of the post.

    🫘 Filling Base

    • Pinto beans – canned or home-cooked; a creamy, mild base similar to sweet potato or pumpkin
    • Eggs – provide structure and help set the custard
    • Evaporated milk – gives richness and a smooth texture
    • Unsalted butter – adds flavor and helps create a silky filling

    🍬 Sweeteners & Flavor

    • Granulated white sugar – for overall sweetness. Feel free to use brown sugar if you want a deeper molasses flavor
    • Molasses – brings depth, a touch of bitterness, and classic Southern flavor.

    🌶️ Warm Spices & Enhancers

    • Ground cinnamon – warm and cozy flavor
    • Ground nutmeg – adds a subtle nutty spice
    • Kosher salt – enhances all the other flavors
    ingredients for pinto bean pie recipe with labels

    Recommended Tool

    Mora Ceramic Classic 9 Inch Pie Pan Set of 2
    Mora Ceramic Classic 9 Inch Pie Pan Set of 2

    These ceramic pie plates are pretty amazing. They are beautiful, and they hold the perfect amount of filling for a standard pie, unlike other deeper pie pans on the market.

    Buy Now

    How to make pinto bean pie

    Step 1: Preheat the oven to 375°F 190°C.

    Step 2: Add pinto beans, evaporated milk, white granulated sugar, light brown sugar, eggs, molasses, unsalted butter, cinnamon, nutmeg, and salt to a blender. Blend until smooth, about 40 seconds.

    Ingredients in a blender.
    The ingredients blended together.

    Step 3: Pour into the pie shell. Bake in a preheated oven for 35-40 minutes, until the pie is set in the middle.

    The filling poured into the pie crust.
    A baked pinto bean pie on a cooling rack.

    Step 4: Remove pie from the oven and let it cool for about 1 hour.

    Serve and enjoy.

    A whole pinto bean pie ready to serve.

    How long does it keep?

    Once you have made your pinto bean pie, it's important to let it cool at room temperature for at least an hour, after this time you can either serve it or store it. To store, place it into an airtight container, or cover it with plastic wrap and foil and keep it in the fridge.

    It will keep well for up to 4 days but is best enjoyed in the first two.

    You can also freeze it, by allowing it cool, wrapping it in foil and placing in a freezer bag. It can freeze for up to 3 months.
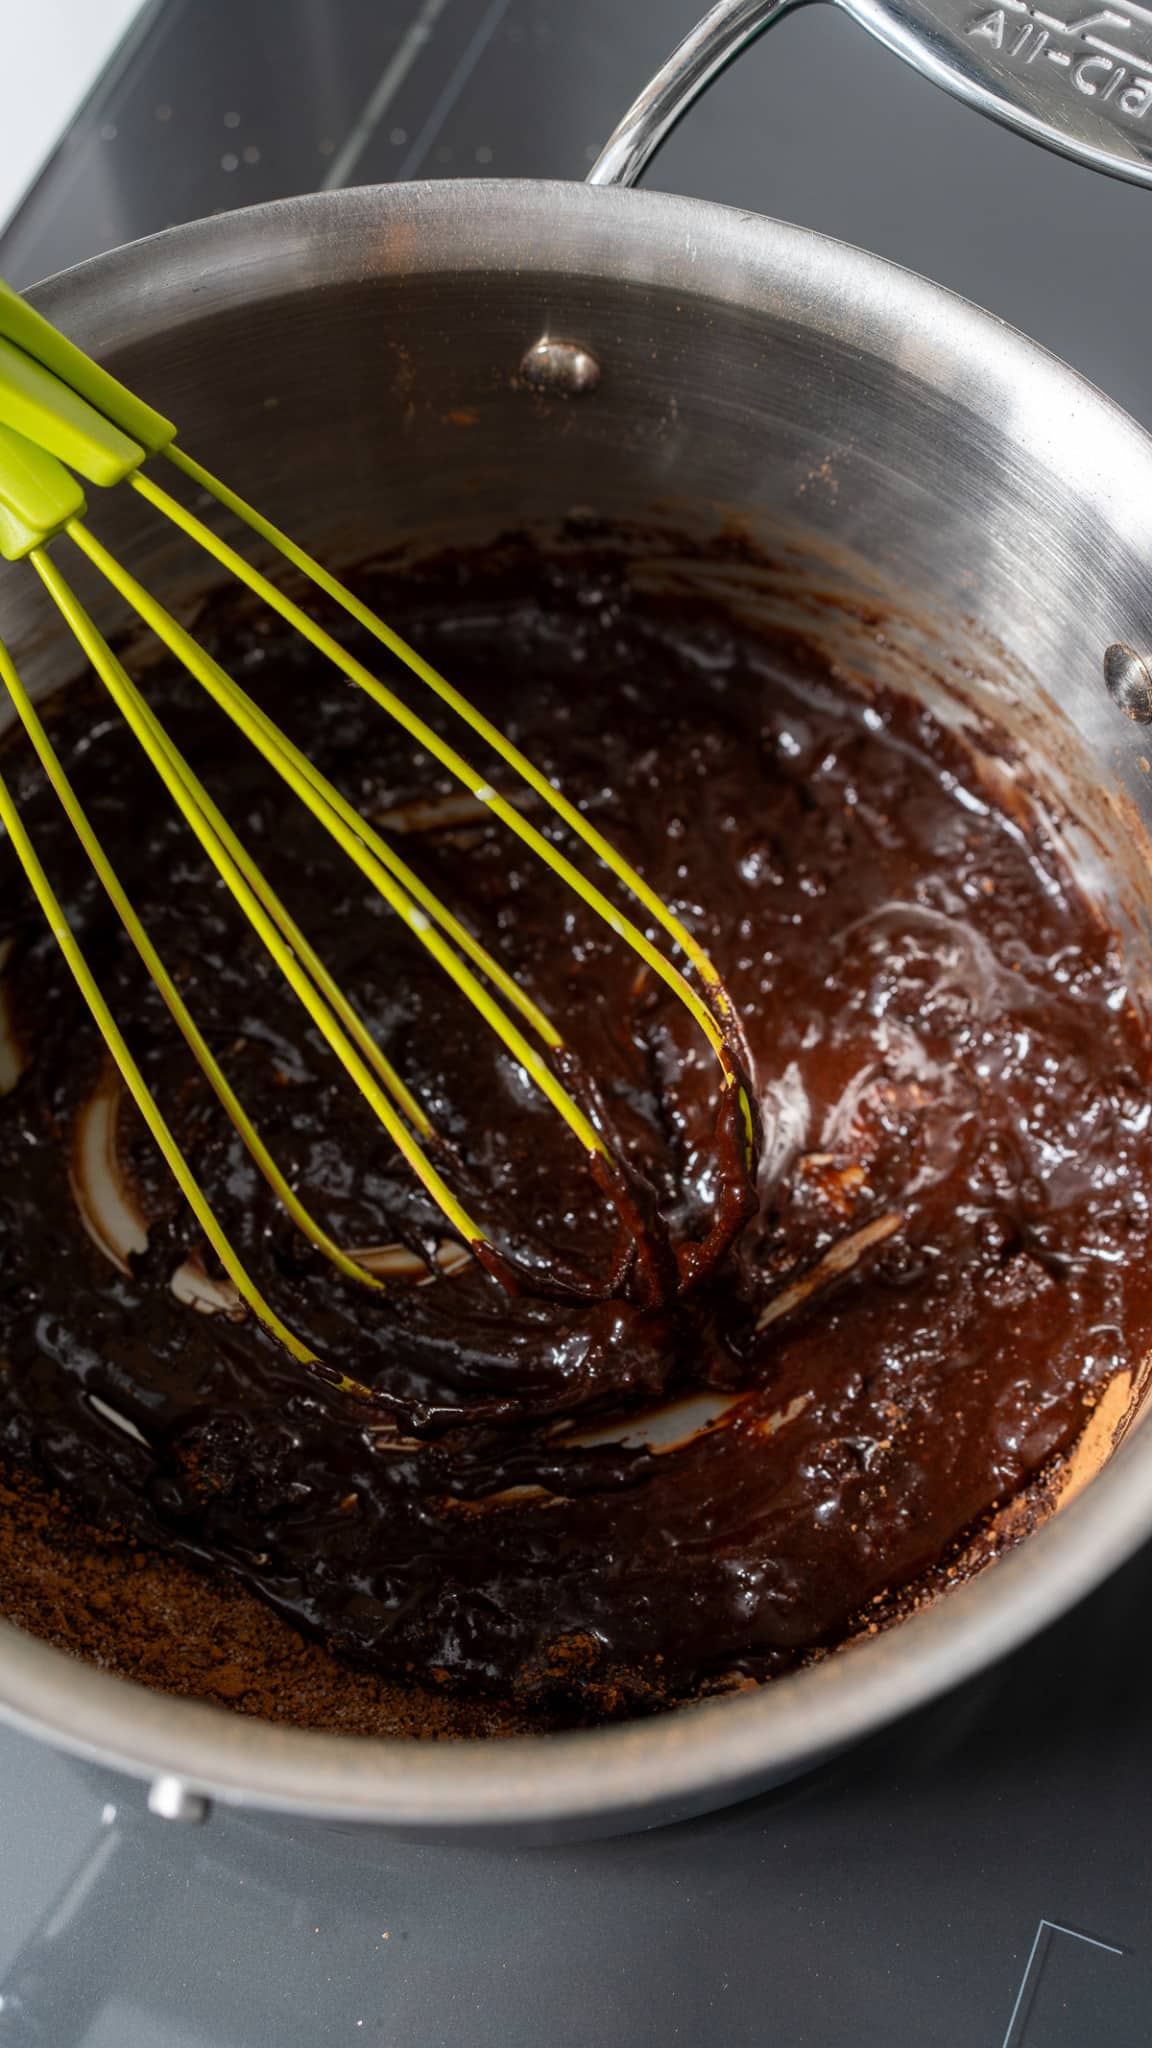
    Can you use other types of beans?

    This Southern dessert uses pinto beans which have a mild flavor, so that the spices used really stand out.

    Another great bean to use in bean pies is navy beans or Great Northern beans.
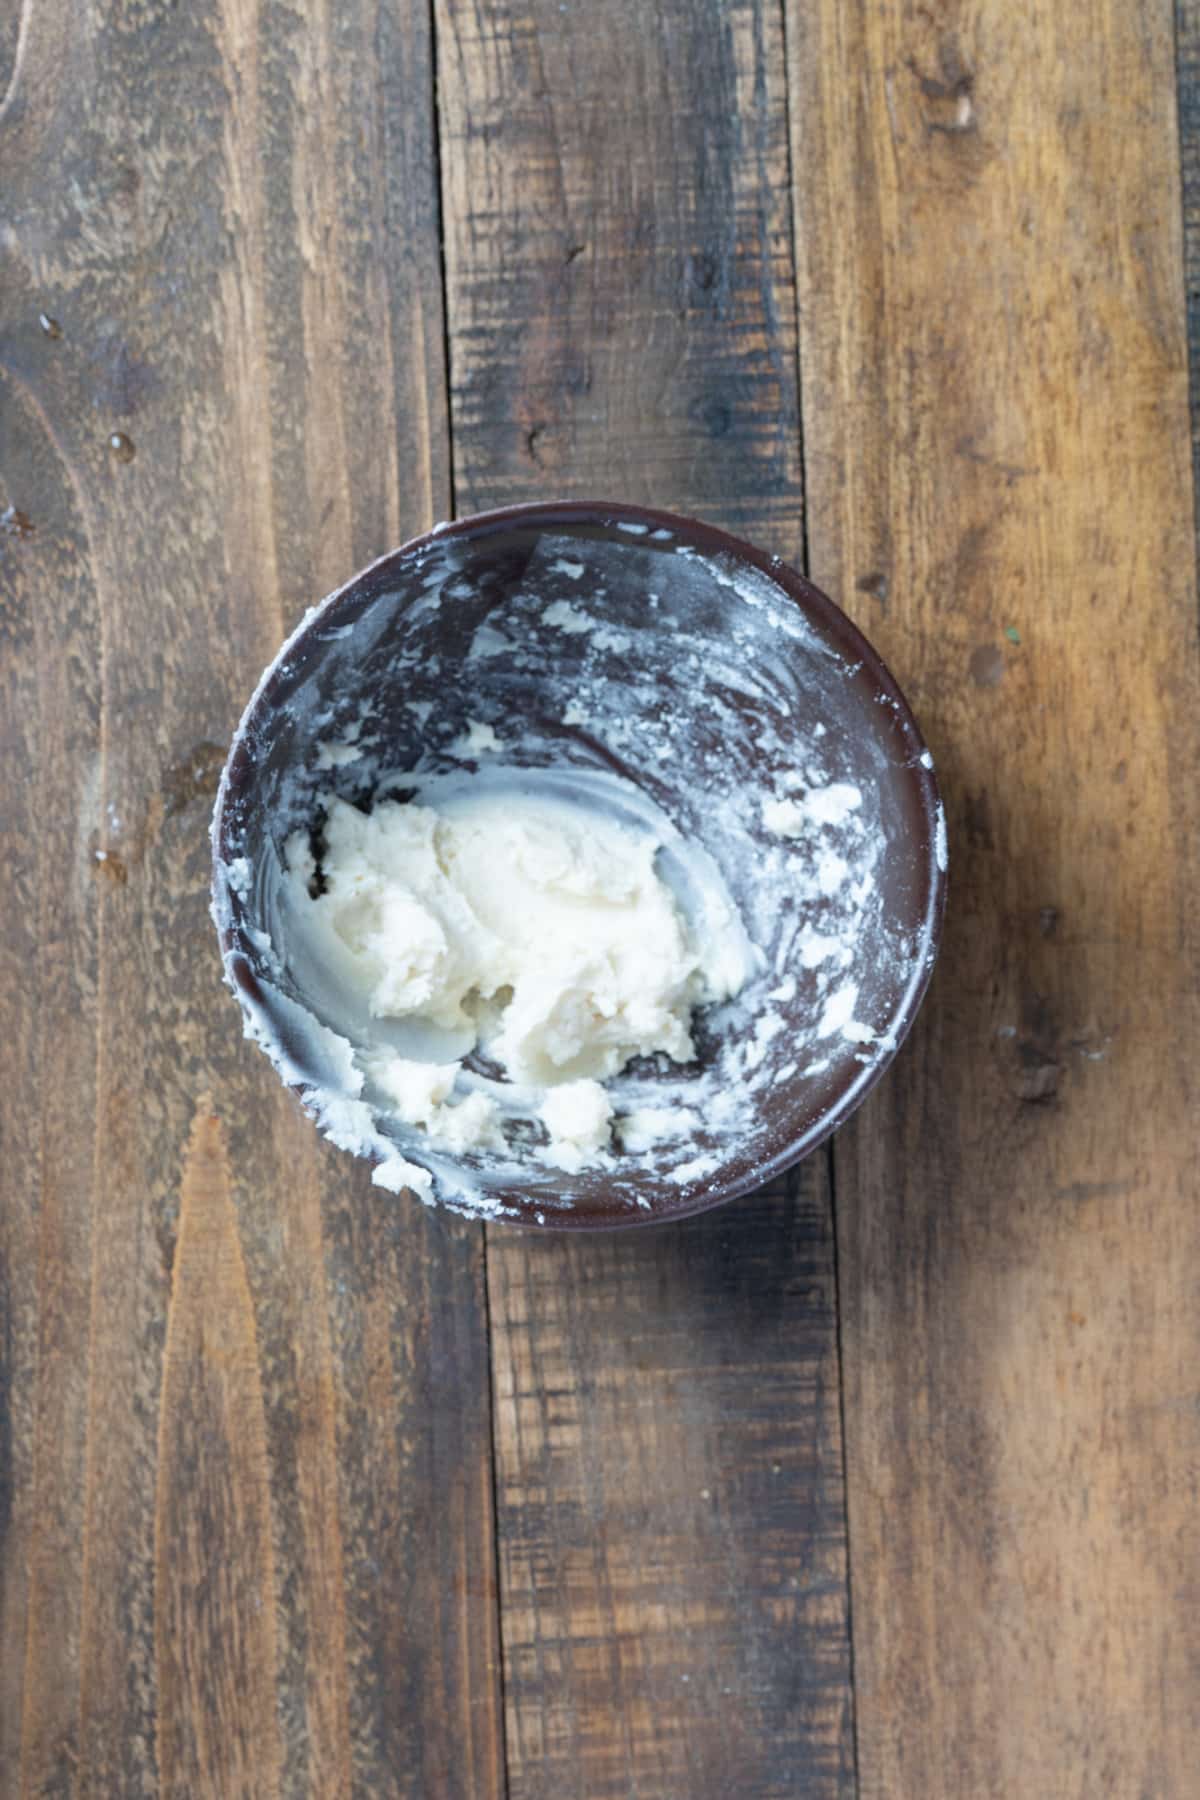
    This recipe uses canned beans for ease and convenience, but you can also use dried beans and cook them and drain them before mixing with the other ingredients.
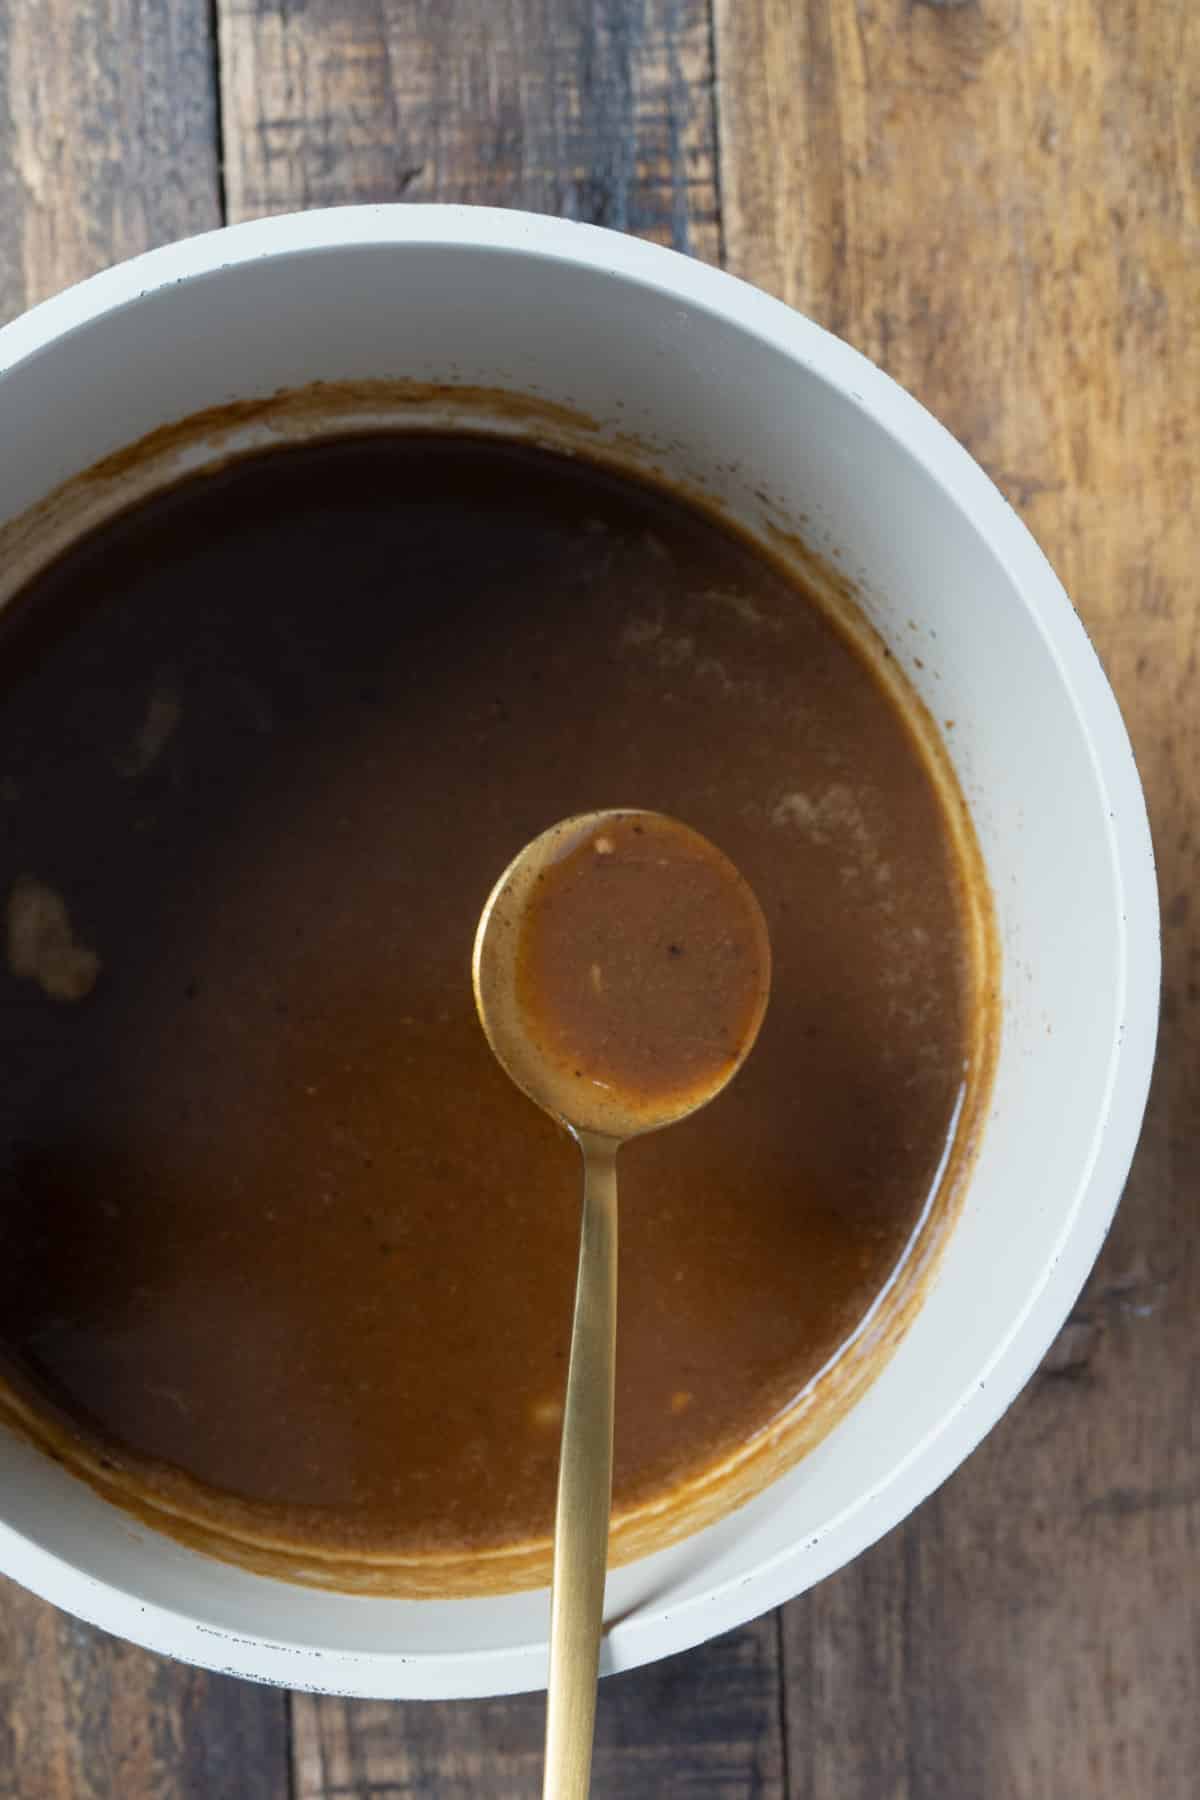
    A pinto bean pie with slices cut out of it.

    Tanya's Top Tips & Notes

    • You can use 1 ½ cups of cooked pinto beans.
    • If using canned beans, drain and rinse them well before blending with the other ingredients.
    • To make this recipe extra easy, I used a pre-made pie crust. My Homemade Pie Crust is also ideal if you want everything from scratch!
    • Let the pinto bean pie cool for at least an hour before cutting and serving. I prefer to make this pie a day ahead.

    More Pie Recipes

    • Homemade Pumpkin Pie - this is such a classic, the filling is so smooth and spiced perfectly.
    • Southern Chess Pie - a Southern treat, this pie using simple ingredients for fantastic flavor.
    • Southern Sweet Potato Pie - I love this custard pie, and it reminds me of my childhood. But it's also delicious.

    FAQs

    Do I need to par bake the crust?

    No, parbaking isn’t necessary for this pie. The filling bakes evenly without it. But if you prefer a crisper crust, you can partially blind bake it for 8 minutes at 375°F (190°C) before filling. Optional, but helpful!

    Can I make this pie dairy-free?

    Yes. Substitute with non-dairy butter and evaporated coconut milk or other plant-based alternatives. Flavor may vary slightly but still works well.

    I hope you enjoy this bean pie recipe as much as we do. If you've made this recipe, I'd love if you'd give feedback below. I appreciate your support.

    A slice of pinto bean pie served on a white plate.
    Print Recipe
    4.69 from 19 votes

    Southern Pinto Bean Pie

    This old-fashioned sweet pinto bean pie is the perfect dessert for fall. Quick and easy to make, it’s a wonderful alternative to your Thanksgiving pumpkin pie, and dare I say it, even tastier!
    Prep Time10 minutes mins
    Cook Time35 minutes mins
    Total Time45 minutes mins
    Course: Dessert
    Cuisine: American
    Keyword: easy bean pie, sweet bean pie, vinatage pinto bean pie recipe
    Servings: 12 servings
    Calories: 215kcal
    Author: Tanya

    Ingredients

    • 15.5 oz can pinto beans rinsed and drained
    • ¾ cup evaporated milk
    • ¾ cup granulated white sugar
    • ¼ cup light brown sugar
    • 2 large eggs lightly beaten
    • 2 Tablespoons unsalted butter melted
    • 1 Tablespoon molasses
    • ½ teaspoon ground cinnamon
    • ¼ teaspoon ground nutmeg
    • ¼ teaspoon salt
    • 1 9 inch prepared pie crust

    Instructions

    • Preheat the oven to 375°F (190°C).
    • Add pinto beans, evaporated milk, granulated white sugar, light brown sugar, eggs, molasses, unsalted butter, cinnamon, nutmeg, and salt to a blender and blend until smooth, about 40 seconds.
    • Pour into the pie shell and bake in a preheated oven for 35-40 minutes, until the pie is set in the middle.
    • Remove pie from the oven and let it cool for about 1 hour.
    • Serve and enjoy.

    Video

    Notes

    • You can use 1 ½ cups of cooked pinto beans.
    • If using canned beans, drain and rinse them well before blending with the other ingredients.
    • To make this recipe extra easy, I used a pre-made pie crust. My Homemade Pie Crust is also ideal if you fancy a bit of baking!
    • Let the pinto bean pie cool for at least an hour before cutting and serving.

    Nutrition

    Calories: 215kcal | Carbohydrates: 32g | Protein: 5g | Fat: 8g | Saturated Fat: 3g | Polyunsaturated Fat: 1g | Monounsaturated Fat: 3g | Trans Fat: 1g | Cholesterol: 37mg | Sodium: 234mg | Potassium: 205mg | Fiber: 2g | Sugar: 20g | Vitamin A: 137IU | Vitamin C: 1mg | Calcium: 75mg | Iron: 1mg

    This post was first published on August 30, 2021. It has been updated with new information.

    • 1
    • 2
    • 3
    • …
    • 70
    • Next Page »

    Welcome!

    Welcome to My Forking Life! Hi, I'm Tanya, attorney, busy wife and mom, and lover of quick, easy, and delicious meals.

    More about me

    Popular Recipes

    • Jamaican Oxtails Recipe
    • air fried chicken in air fryer basket
      Air Fryer Fried Chicken
    • brown stew chicken in pan
      Brown Stew Chicken
    • Pressure Cooker Shrimp Paella

    Holiday Favorites

    • sweet potato pie on a plate
      Southern Sweet Potato Pie Recipe
    • spoon lifting gravy out of gravy dish
      Easy Recipe for Gravy without Drippings
    • creamy baked macaroni and cheese, the best baked macaroni and cheese, creamy mac and cheese
      Creamy Baked Macaroni and Cheese
    • Stirring the giblet gravy with a spoon.
      Grandma's Giblet Gravy Recipe
    as seen on...various online websites text listed

    Footer

    ↑ back to top
    • Privacy Policy
    • Contact
    • About Tanya

    As an Amazon Associate, I earn from qualifying purchases.

    Copyright © 2025 My Forking Life

    Rate This Recipe

    Your vote:


    A rating is required
    A name is required
    An email is required