My Forking Life

  • Air Fryer
  • Jamaican
  • Entree
  • Browse Recipes
  • Breakfast
  • Side Dishes
  • About
menu icon
go to homepage
  • Air Fryer
  • Jamaican
  • Entree
  • Browse Recipes
  • Breakfast
  • Side Dishes
  • About
search icon
Homepage link
  • Air Fryer
  • Jamaican
  • Entree
  • Browse Recipes
  • Breakfast
  • Side Dishes
  • About
×
Home

October 20, 2020 by Tanya Harris Leave a Comment

Beet Soup Recipe

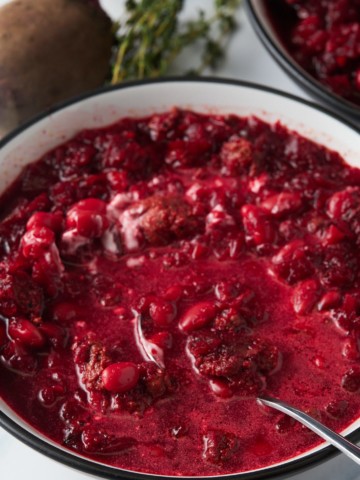
Beet soup served in a white bowl with a spoon.

Hearty, warming and full of flavor, this beet soup is a delicious way to warm up! Quick and easy to make from scratch with simple ingredients.
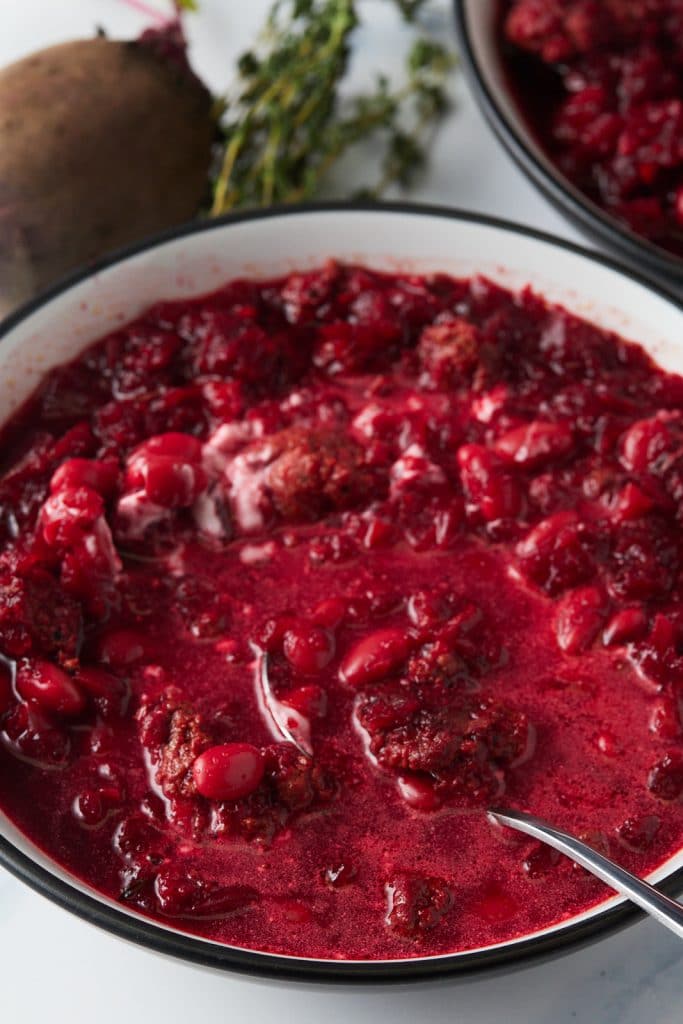
Beet soup served in a white bowl with a spoon.

You’ll find the full recipe with ingredient amounts and instructions in the recipe card at the bottom of this post. Be sure to check out the blog post itself for extra tips and tricks!

We are now well and truly into soup season, and I for one couldn't be happier! There's no better way to spend a chilly evening than a big bowl of homemade soup!

pic of Tanya

This delicious beet soup recipe is bold in color and flavor, and it is incredibly simple to make with just a few fresh and tasty ingredients. I was inspired by Borscht, a traditional Ukrainian soup primarily made with beets.

For my recipe, I add Italian sausage and navy beans for flavor and heartiness. You'll only use the beet roots for this recipe; you can sauté the beet greens for later or serve them on top.

♡ Tanya

A Quick Look at the Ingredients

Ingredient amounts and full recipe instructions are on the printable recipe card at the bottom of the post.

  • Red beets – The star of this soup! Fresh red beets bring an earthy sweetness and gorgeous color. I process them in a blender for a finer texture that blends beautifully with the sausage.
  • Carrot and yellow onion – These aromatics add natural sweetness and depth of flavor to the soup base.
  • Italian sausage – Brings savory, seasoned flavor and heartiness to the soup. You can use mild or spicy depending on your preference.
  • Chicken broth and fresh thyme – The flavorful base of the soup. You can substitute with beef broth for a richer flavor or vegetable broth to keep it vegetarian (just skip the sausage or use a plant-based alternative). The thyme sprigs add a herby, earthy note and are easy to remove before serving.
  • Northern beans – These creamy white beans add protein and make the soup more filling. Great Northern beans or cannellini beans work well.
  • Salt and pepper – Essential for bringing out all the flavors. Season to your taste at the end.
  • Sour cream – Optional, but highly recommended! A dollop adds tang and creaminess that balances the earthiness of the beets.

How to make this beet soup recipe

Step 1: Gather and prep your ingredients.
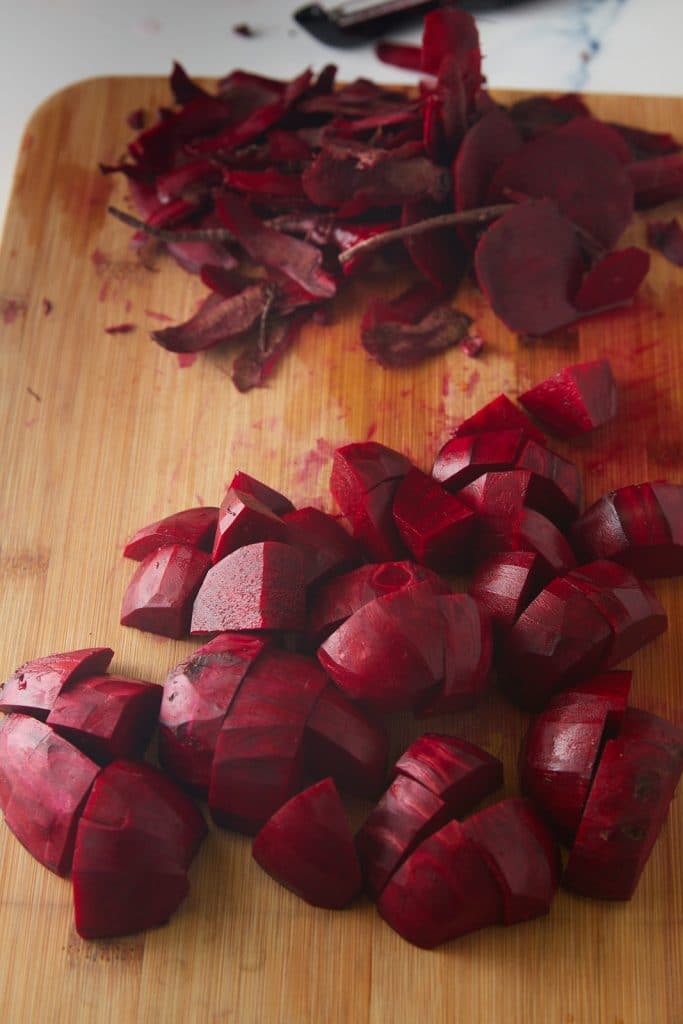
    Chopped beats on a wooden chopping board.

    Step 2: Add beets and carrots to a blender or food processor and process until finely ground. Set aside.
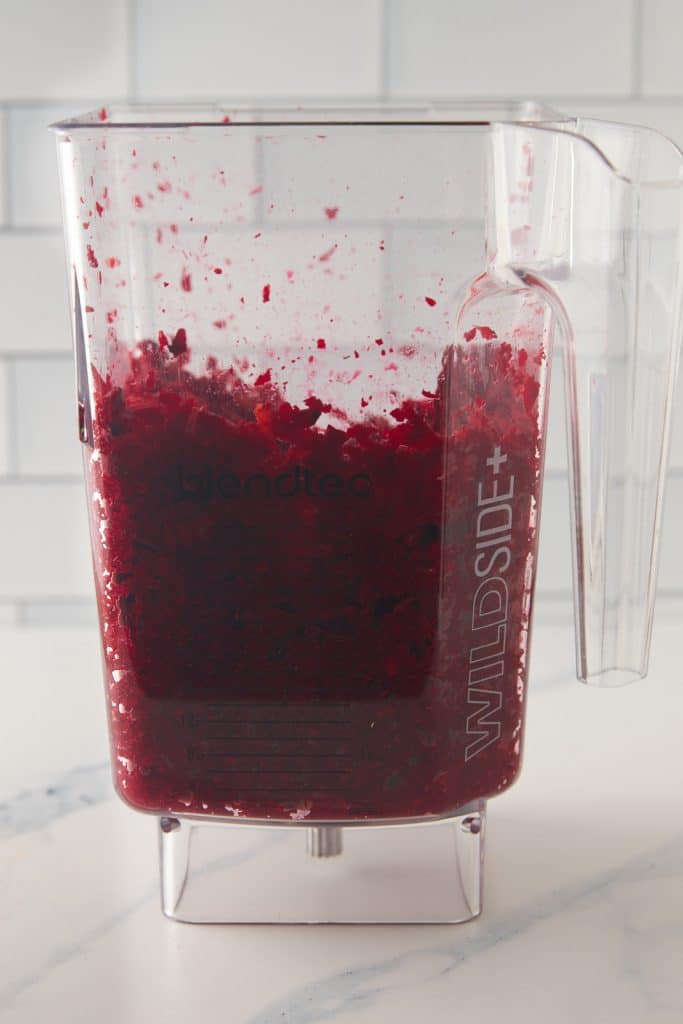
      The blended carrots and beets in a food processor.

      Step 3: Brown sausage and onions over medium-high heat in a large heavy-bottom pot.
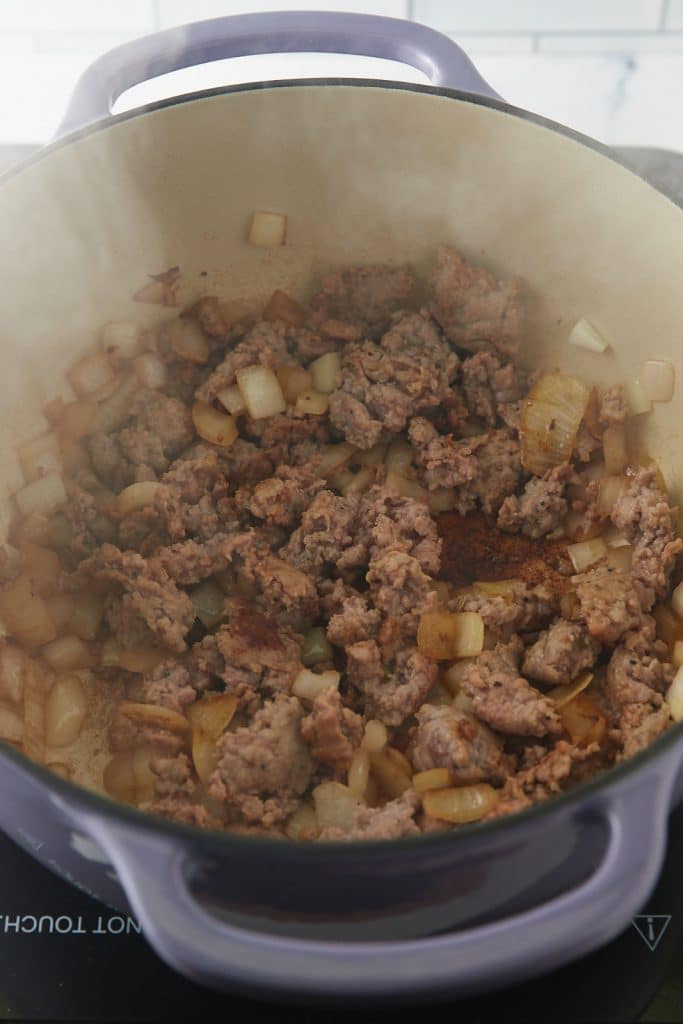
        Browning the sausage and onions in a dutch oven.

        Step 4: Add ground beets and carrots and sauté for an additional 3 minutes, stirring occasionally.
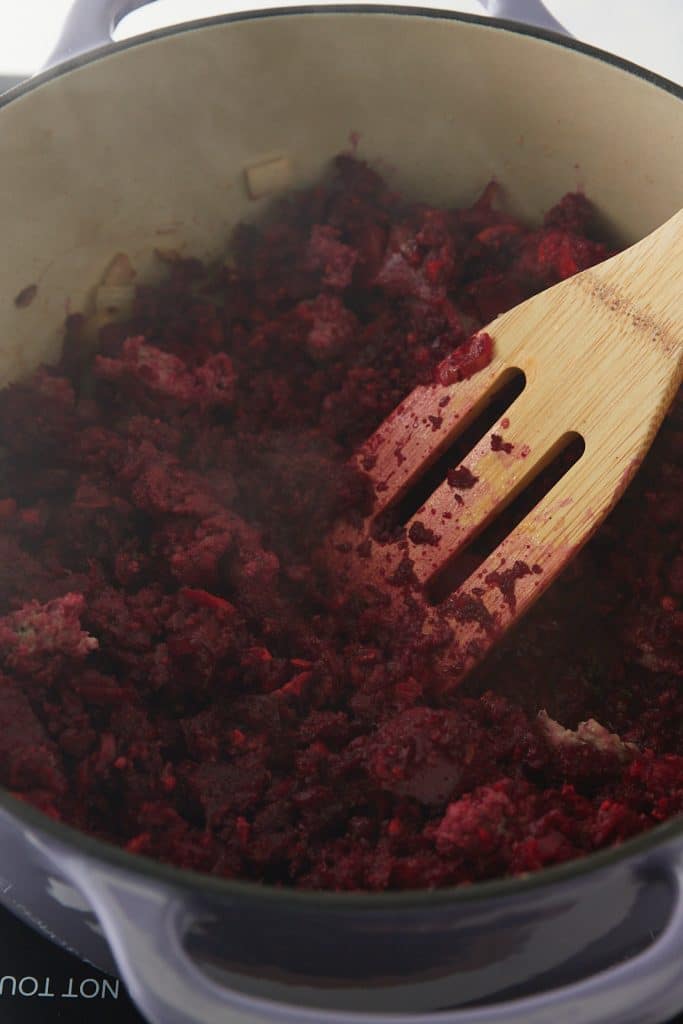
          Ground beets aded to the pot.

          Step 5: Add chicken broth, thyme, and beans. Reduce the heat to medium, cover, and bring to a simmer. Simmer for 20 minutes, stirring occasionally.
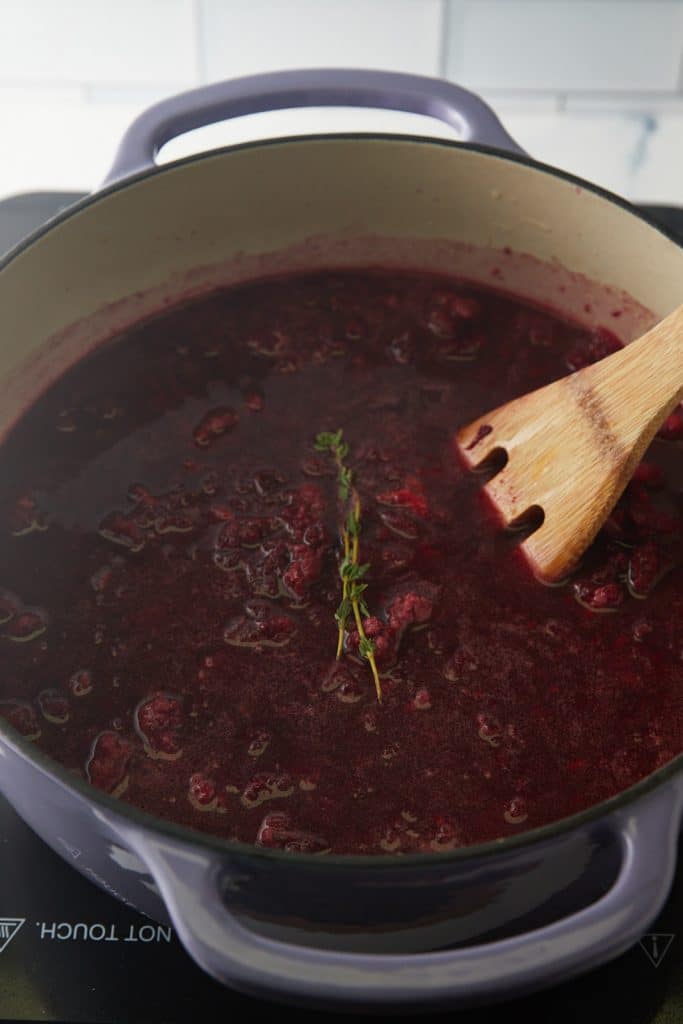
            Stirring in the broth, thyme and beans with a wooden spatula.

            Step 6: Remove from heat, remove thyme, and season to taste. Top with sour cream if using. Enjoy!
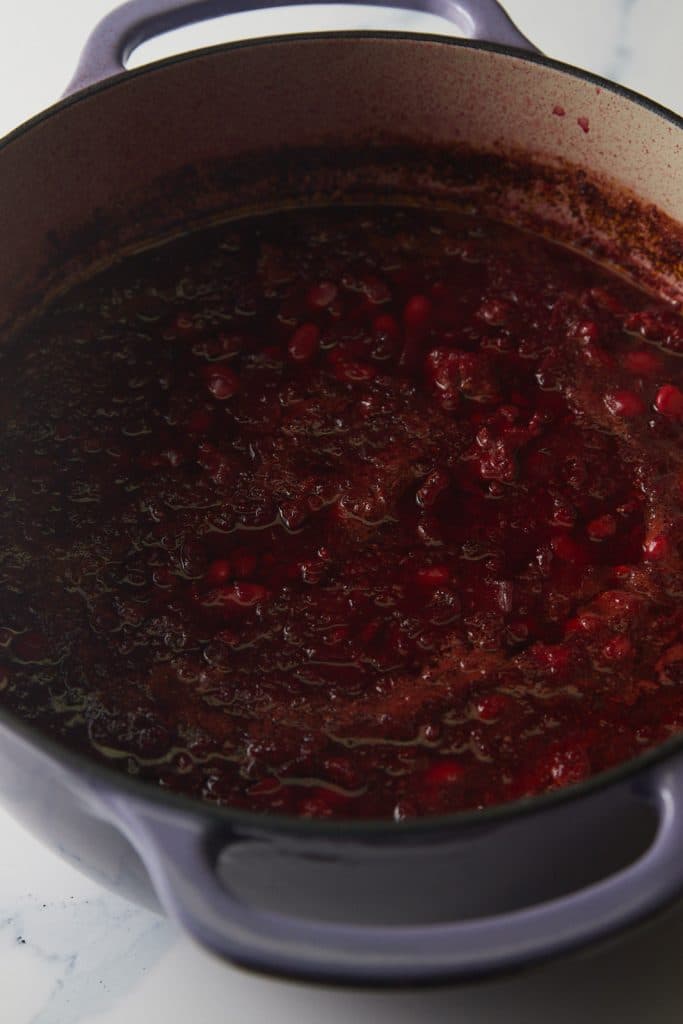
              The beet soup in a dutch oven before serving.

              How long does it keep?

              Soups are so great for make-ahead meals. I often cook up a pot on a Sunday and then enjoy it for lunches throughout the week. Once you have made the soup, let it cool to room temperature and then transfer it to an airtight container. The soup will keep well in the fridge for 3 to 4 days.

              Reheat the soup on the stovetop on medium heat, stirring occasionally to serve. You can also reheat it in the microwave for 3 minutes, stirring every 60 seconds.

              Can you freeze it?

              This beet soup recipe freezes really well. I don't know about you, but I always seem to have some soup in my freezer!

              Let the soup cool before freezing it in a container or ziplock bag, and it will keep well for 2-3 months. Thaw frozen soup in the fridge overnight before reheating.
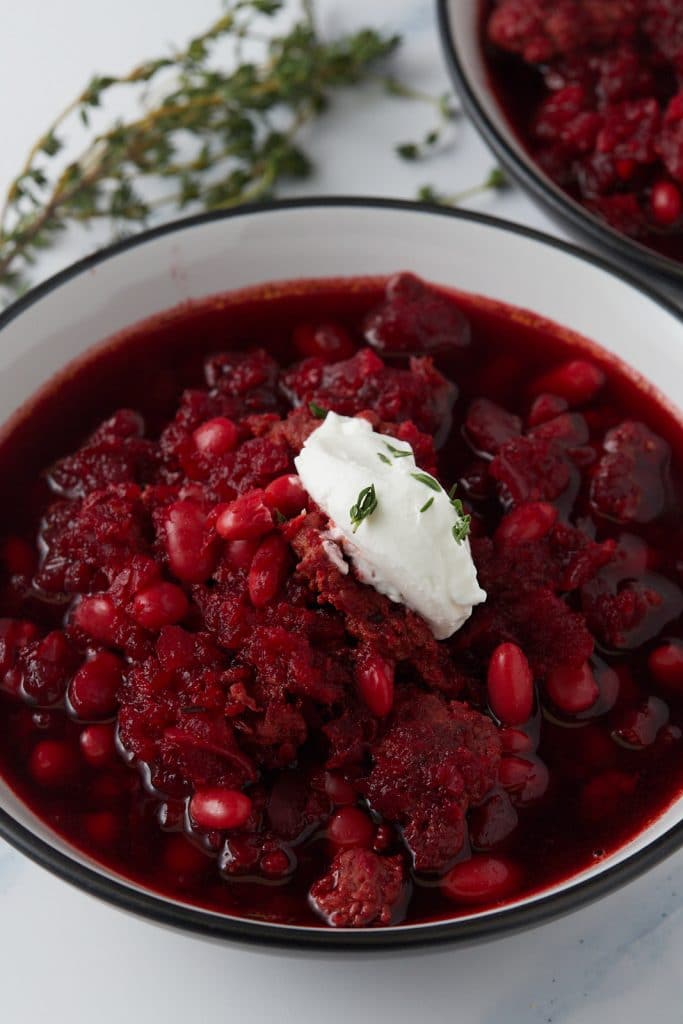
              A dollop of sour cream on top of the soup.

              Tanya's Top Tips

              • I use a blender or food processor to grind my beets and carrots, giving them a texture similar to the Italian sausage. You can skip this step and finely chop the beets and carrots or grate them on the side of a box grater.
              • You can use chicken, beef, or vegetable broth in this recipe.
              • If storing, let the soup cool completely before placing it in a container.

              More Easy Soup Recipes

              • Creamy Cream of Mushroom Soup - Rich, velvety, and packed with earthy mushroom flavor, this homemade version is so much better than the canned stuff.
              • Best Roasted Tomato Basil Soup Recipe - Classic comfort in a bowl with roasted tomatoes and fresh basil that taste like summer any time of year.
              Beet soup served in a white bowl with a spoon.
              Print Recipe
              No ratings yet

              Beet Soup Recipe

              Hearty, warming and full of flavor, this beet soup is a delicious way to warm up! Quick and easy to make from scratch with simple ingredients.
              Prep Time10 minutes mins
              Cook Time25 minutes mins
              Total Time35 minutes mins
              Course: Soup
              Cuisine: American
              Keyword: beet and bean soup, beet soup from scratch, how to make beet soup
              Servings: 6 servings
              Calories: 249kcal
              Author: Tanya Harris

              Ingredients

              • 3 large beets about 1 ½ lbs, peeled and chopped
              • 1 medium carrot chopped
              • ½ lb Italian sausage
              • 1 yellow onion chopped
              • 4 cups chicken broth
              • 2 sprigs thyme
              • 15 oz can Northern beans rinsed and drained
              • Salt and pepper to taste
              • Sour cream optional

              Instructions

              • Add beets and carrot to a blender or food processor and process until finely ground. Set aside.
              • Brown sausage and onions over medium-high heat in a large heavy bottom pot. Add ground beets and carrots and sauté for an additional 3 minutes, stirring occasionally.
              • Add chicken broth, thyme, and beans. Reduce heat to medium and bring to a simmer and simmer for 20 minutes, stirring occasionally.
              • Remove from heat, remove thyme, and season to taste. Top with sour cream if using. Enjoy.

              Video

              Notes

              • If you can, make the soup in a heavy bottomed pan or dutch oven. It will distribute heat more evenly and the bottom is less likely to catch.
              • I use the blender to grind my beets and carrots so it has a similar texture to the Italian sausage. You can skip this step and finely chop the beets and carrots or grate them on the side of a box grater.
              • You can use chicken, beef, or vegetable broth in this recipe.
              • If storing, let the soup cool completely before placing in a container.
              Nutrition

              Calories: 249kcal | Carbohydrates: 23g | Protein: 12g | Fat: 13g | Saturated Fat: 4g | Cholesterol: 29mg | Sodium: 897mg | Potassium: 662mg | Fiber: 5g | Sugar: 4g | Vitamin A: 1728IU | Vitamin C: 17mg | Calcium: 68mg | Iron: 2mg

              October 12, 2020 by Tanya Harris Leave a Comment

              Easy Teriyaki Salmon

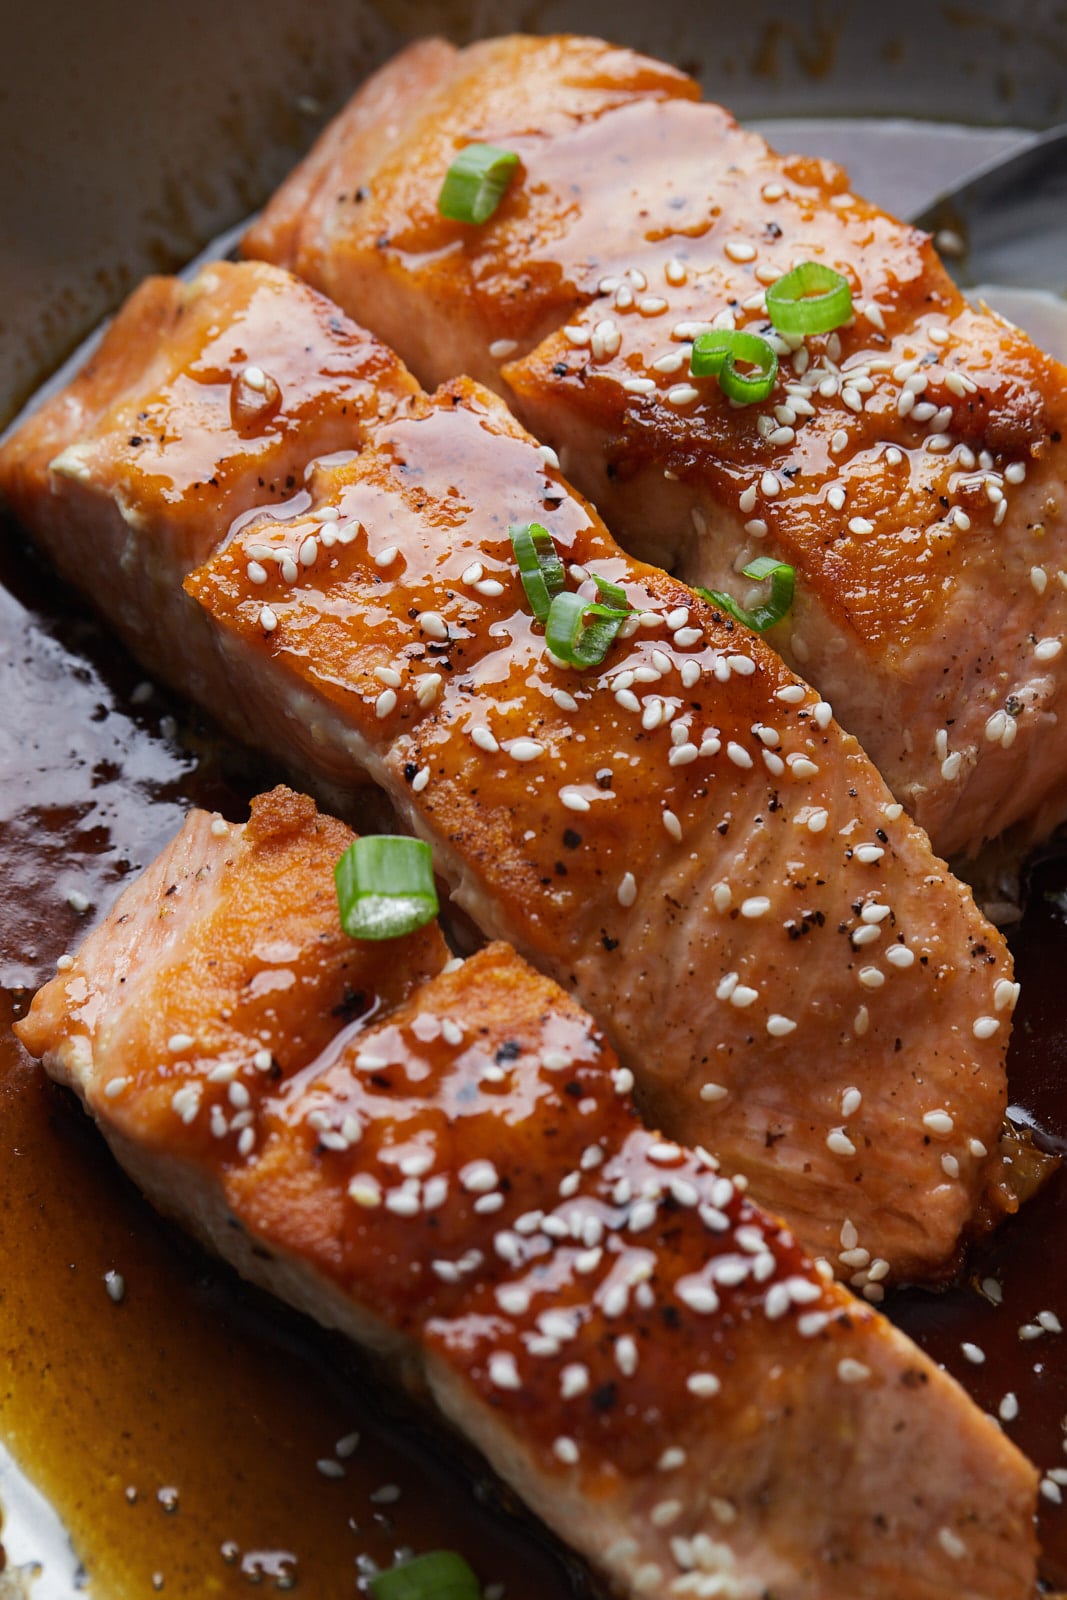
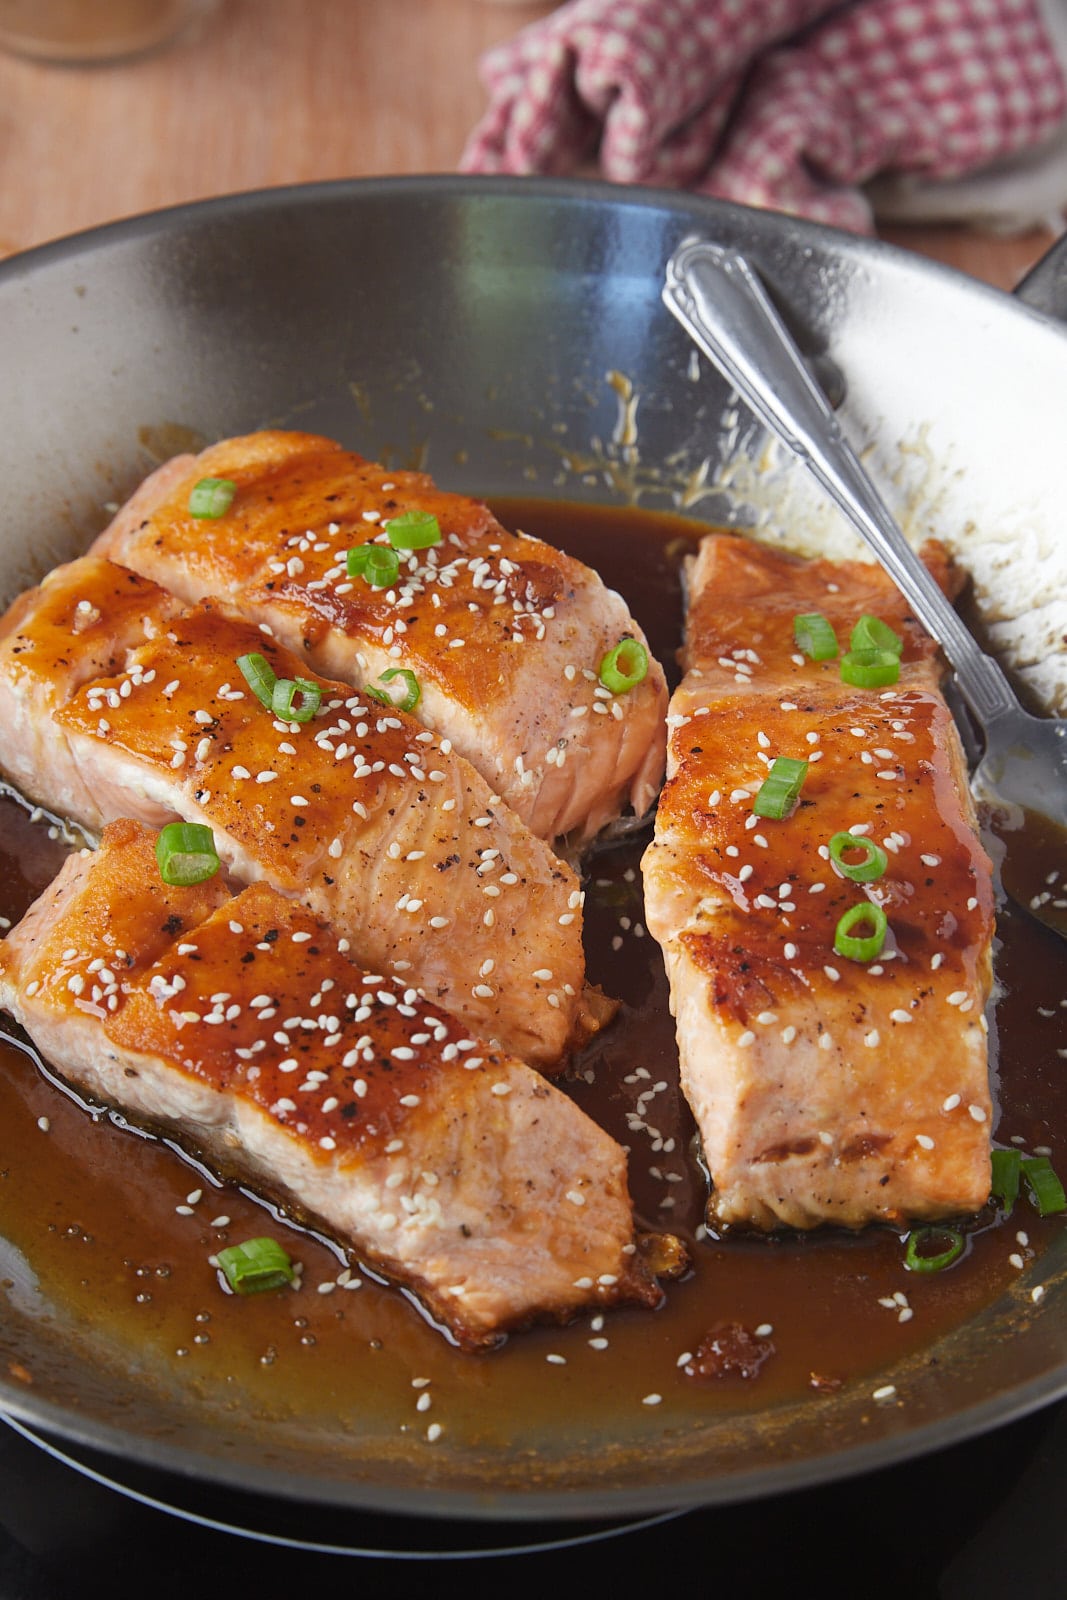
              teriyaki salmon in a pan with green onion and sesame seed on top

              Get out of your dinner rut with this quick and easy teriyaki salmon recipe. All cooked in one pan, it's ready to serve in less than 20 minutes and the rich sauce is loaded with flavor.

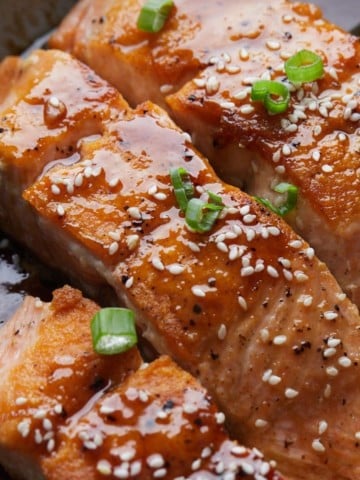
              The cooked salmon garnished with green onion slices.

              This post contains affiliate links, please read my full disclaimer here.

              You’ll find the full recipe with ingredient amounts and instructions in the recipe card at the bottom of this post. Be sure to check out the blog post itself for extra tips and tricks!

              When I'm short on time after a busy day, I often turn to fish recipes as they are so quick to prep and cook. This teriyaki salmon is so perfect for an easy and quick family meal.

              The teriyaki sauce that the salmon is cooked in is the perfect balance of sweet and salty flavors, and I promise you, you won't regret ditching the takeout for this!

              If you love salmon, be sure to try my Salmon Wellington and Marinated Air Fryer Salmon

              How to make teriyaki salmon

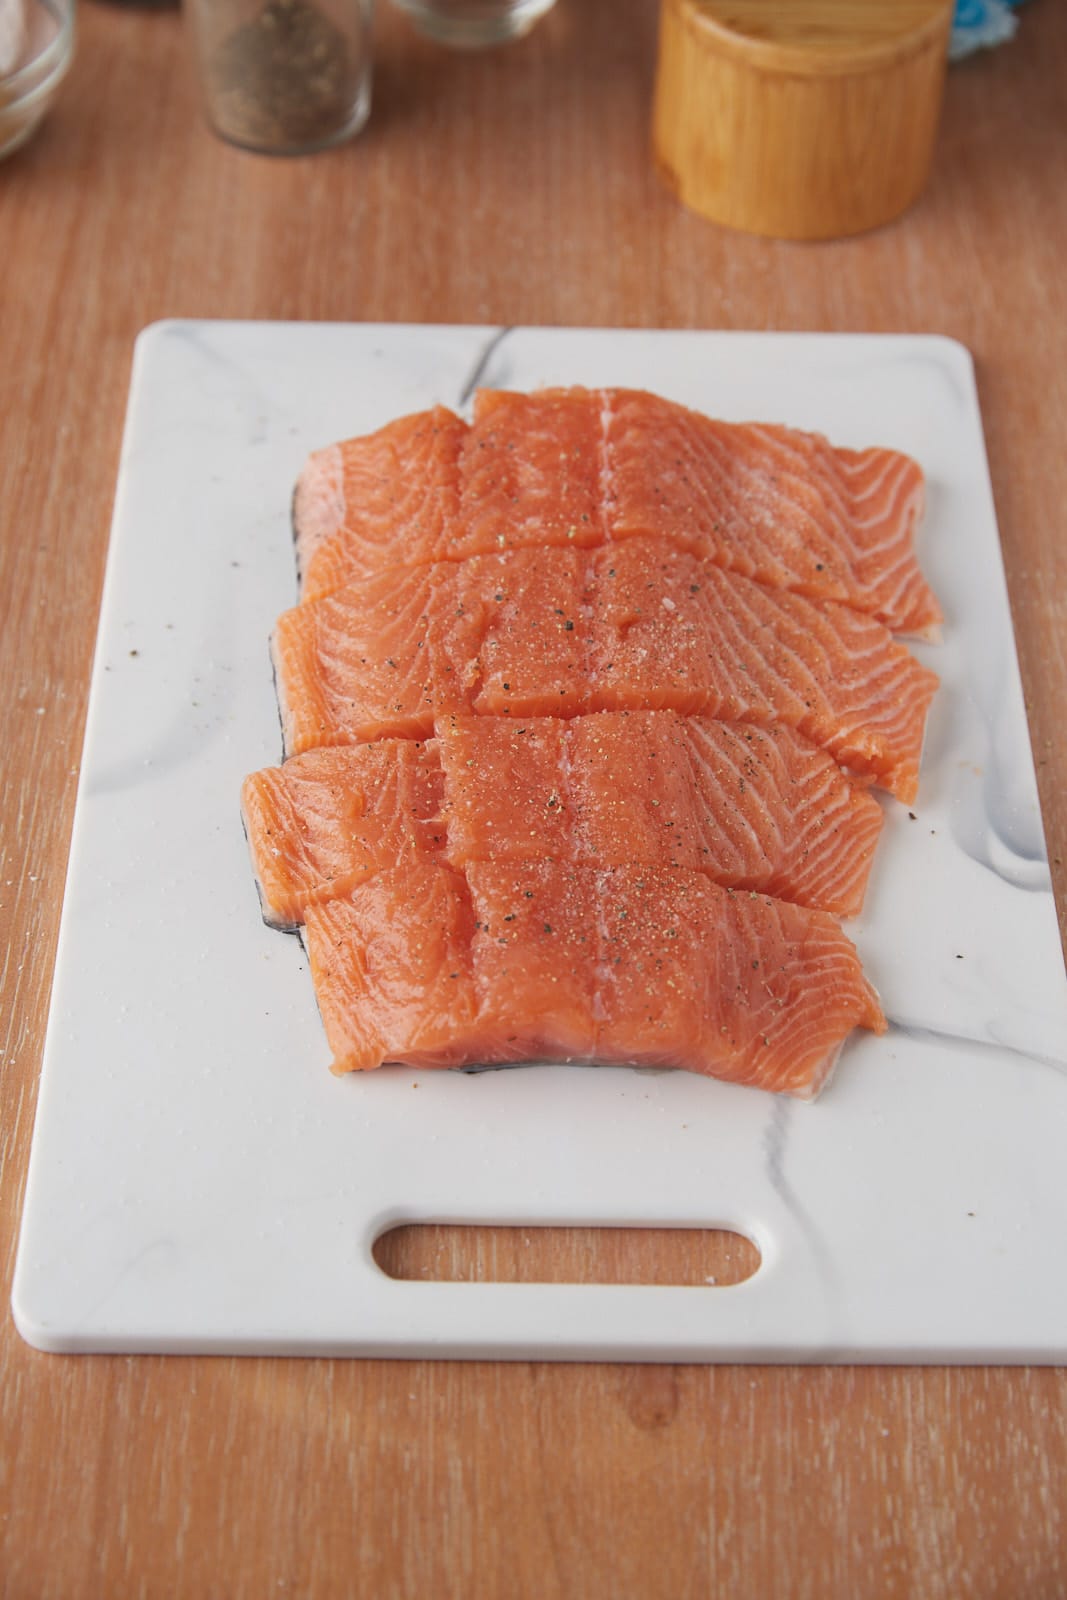
              Cut the salmon fillet into four pieces.

              A fillet of salmon cut into 4 pieces.

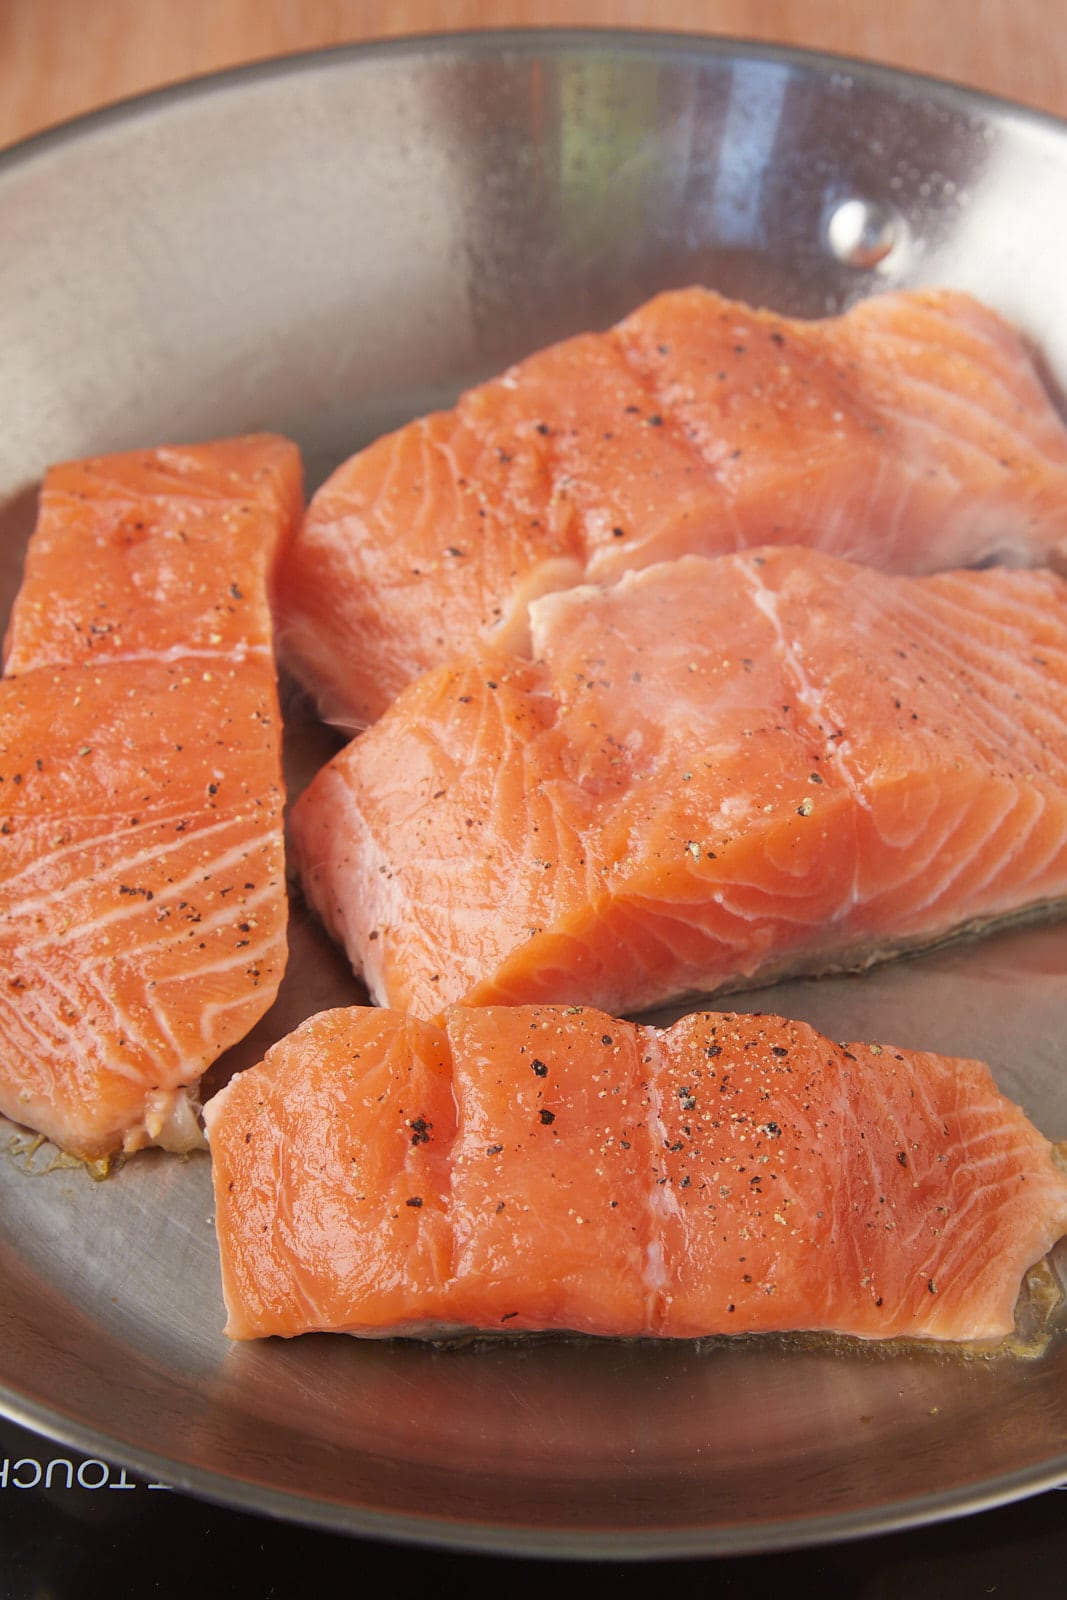
              Heat olive oil in a 12-inch skillet over medium-high heat. Place salmon, skin side down, in the skillet and cook for about 4 minutes.

              Raw salmon skin side down in a pan.

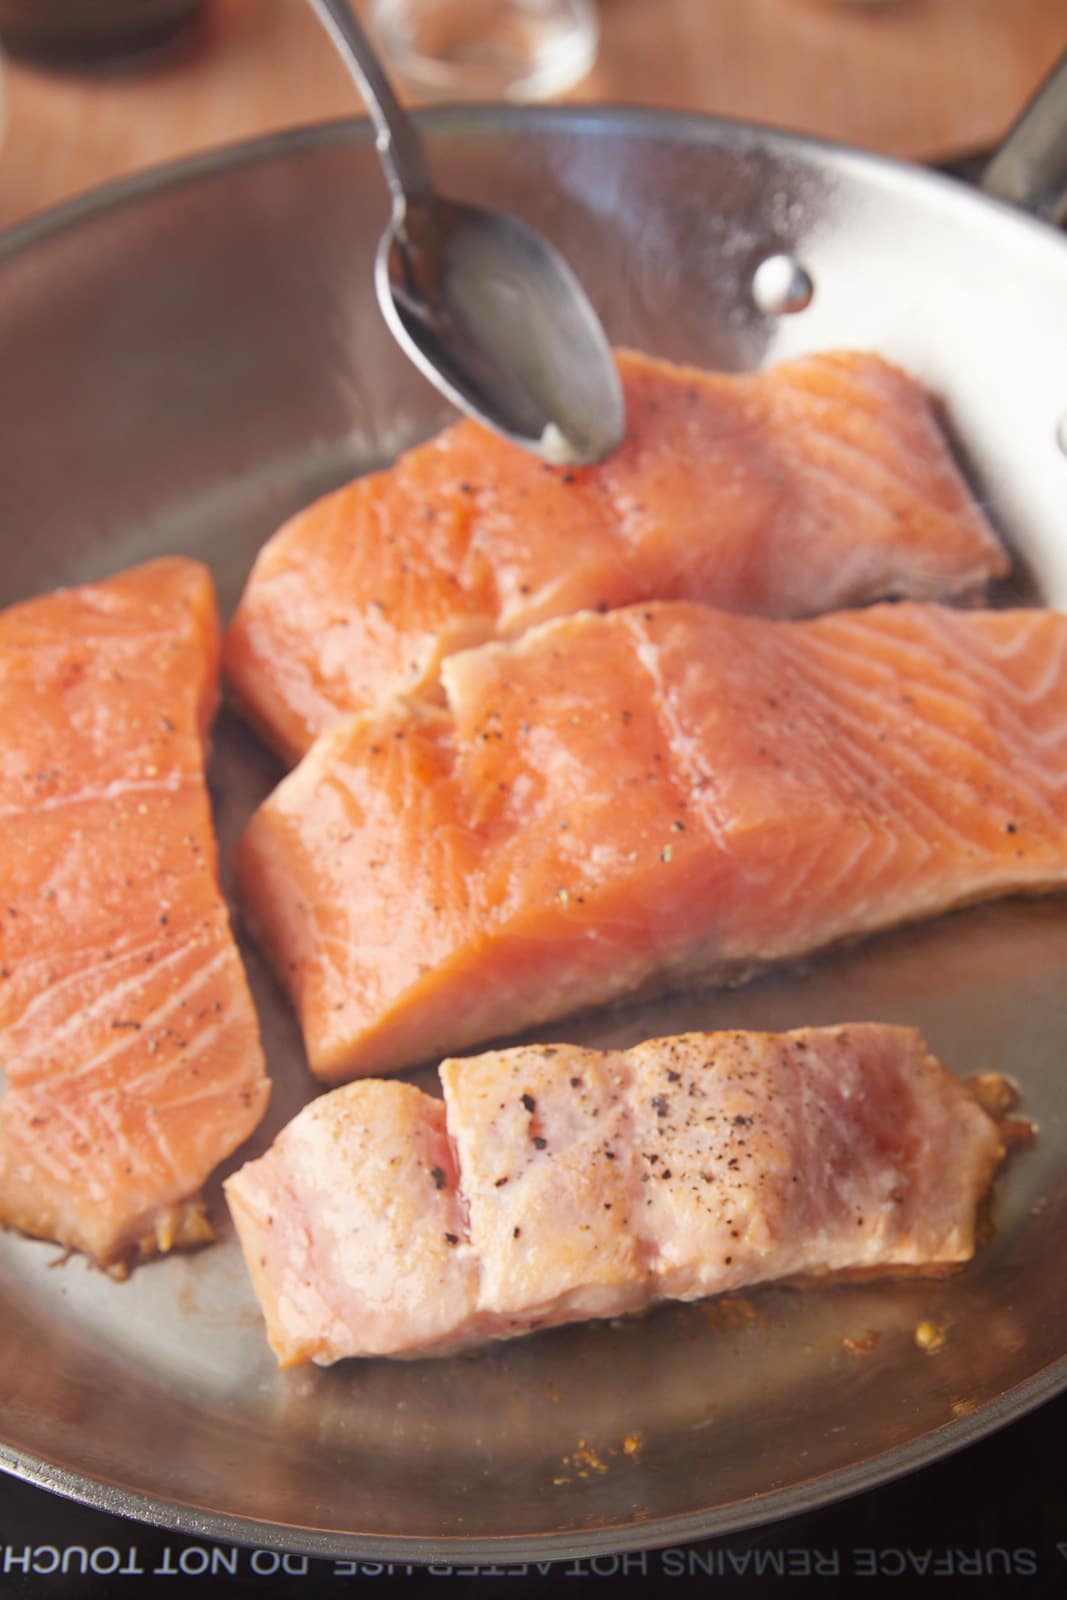
              Tilt the pan to the side and spoon the oil over the fillets. This is a trick I learned from the Thomas Keller Masterclass. It helps the salmon cook a little quicker and gives it that extra nice sear.

              Oil being spooned over the fillets.

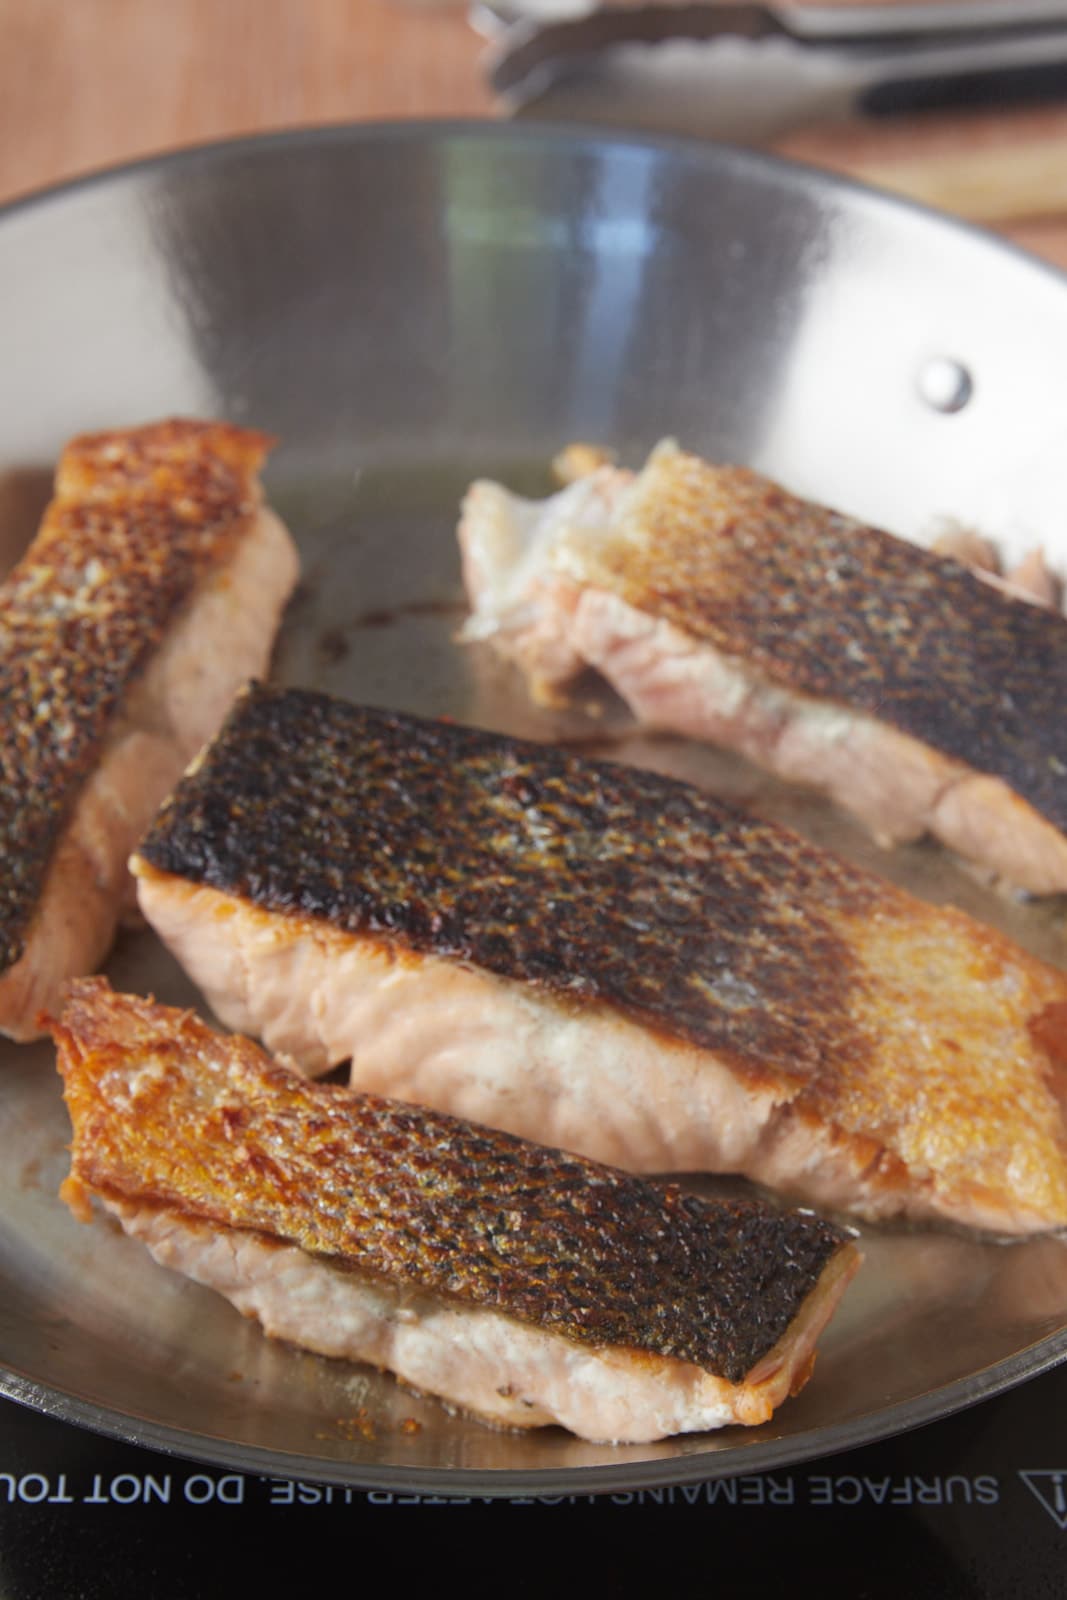
              Flip the fillets. Cook the salmon for an additional 3-4 minutes, until the salmon is cooked through.

              Cooking the salmon in the pan skin side up.

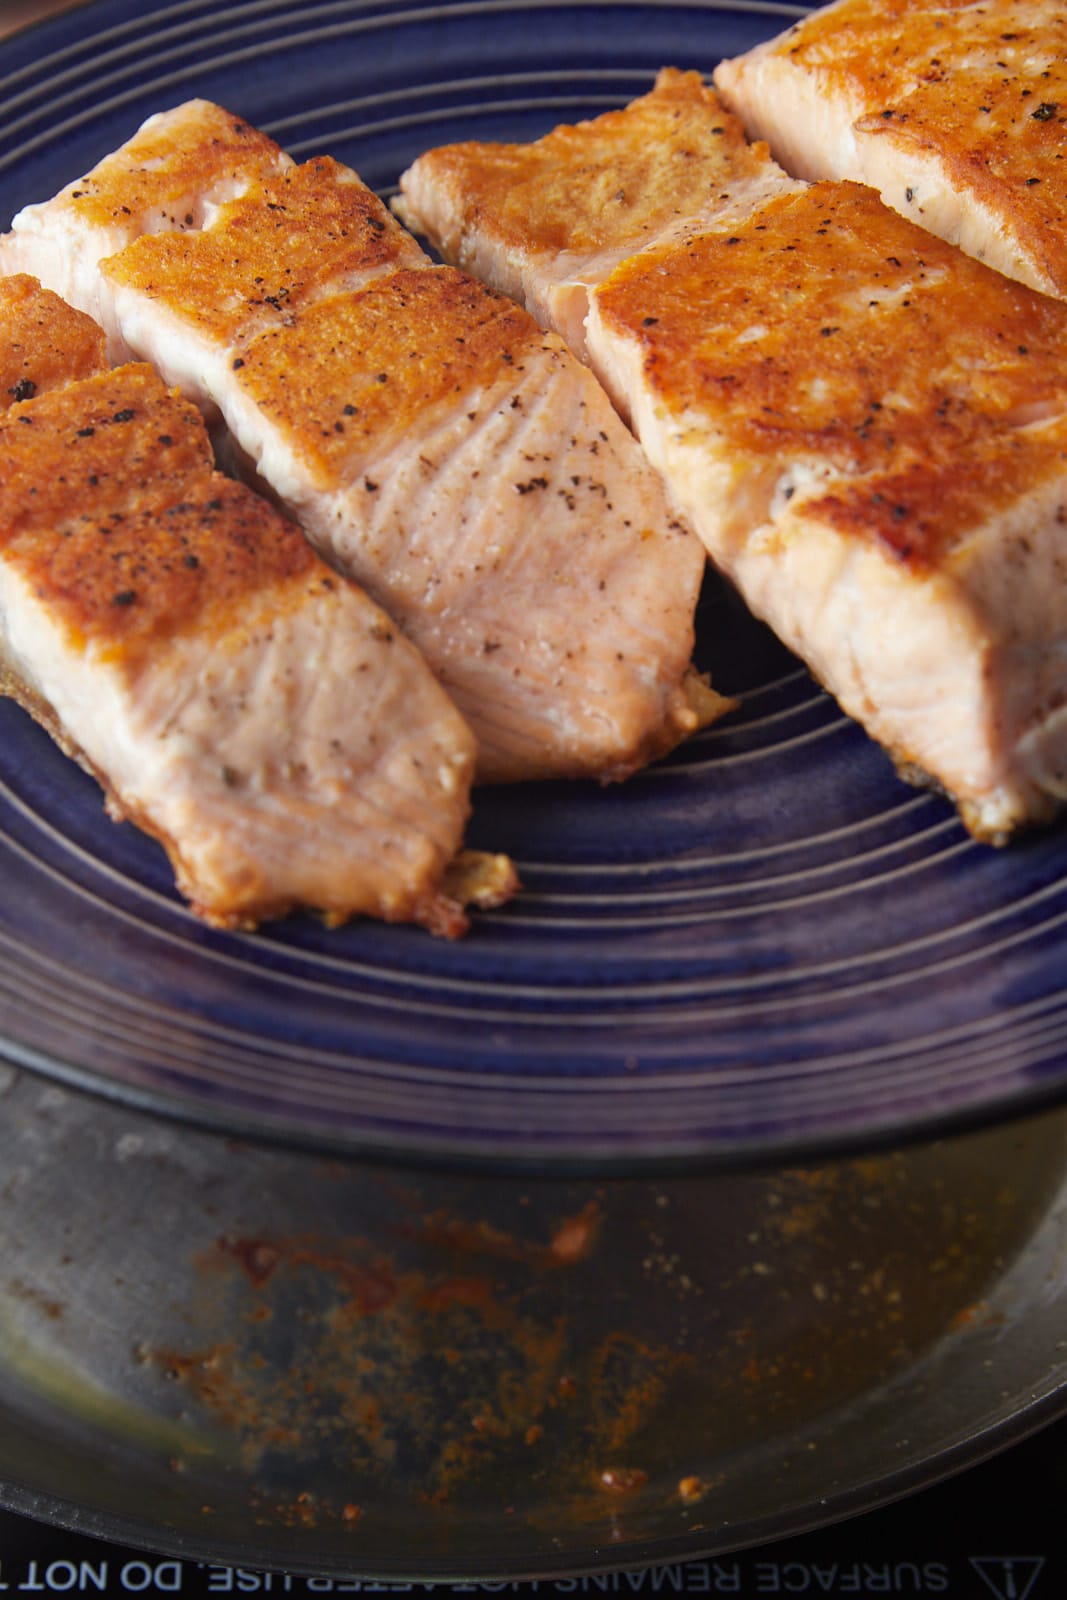
              Remove from the pan and set aside.

              Four pieces of cooked salmon on a blue plate.

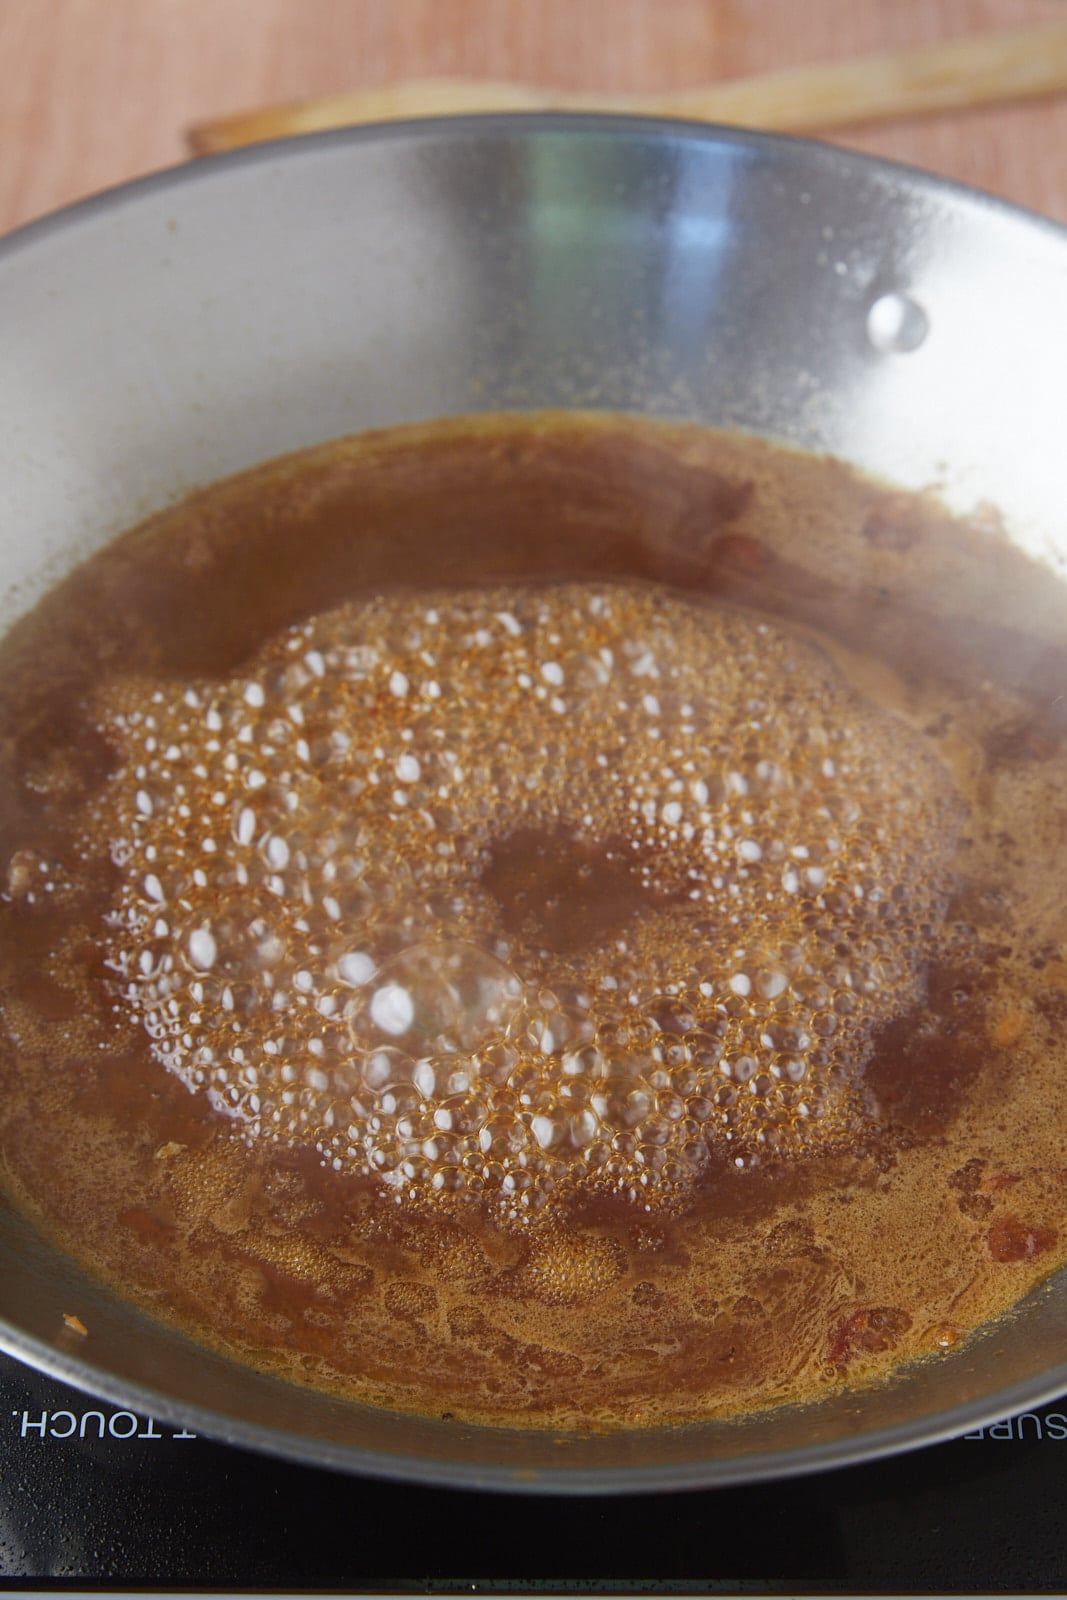
              Add soy sauce, brown sugar, rice vinegar, chicken broth, ginger powder, and garlic powder to the skillet and whisk to combine. Reduce heat to medium and allow mixture to simmer for about 2 minutes.

              The sauce simmering in the pan.

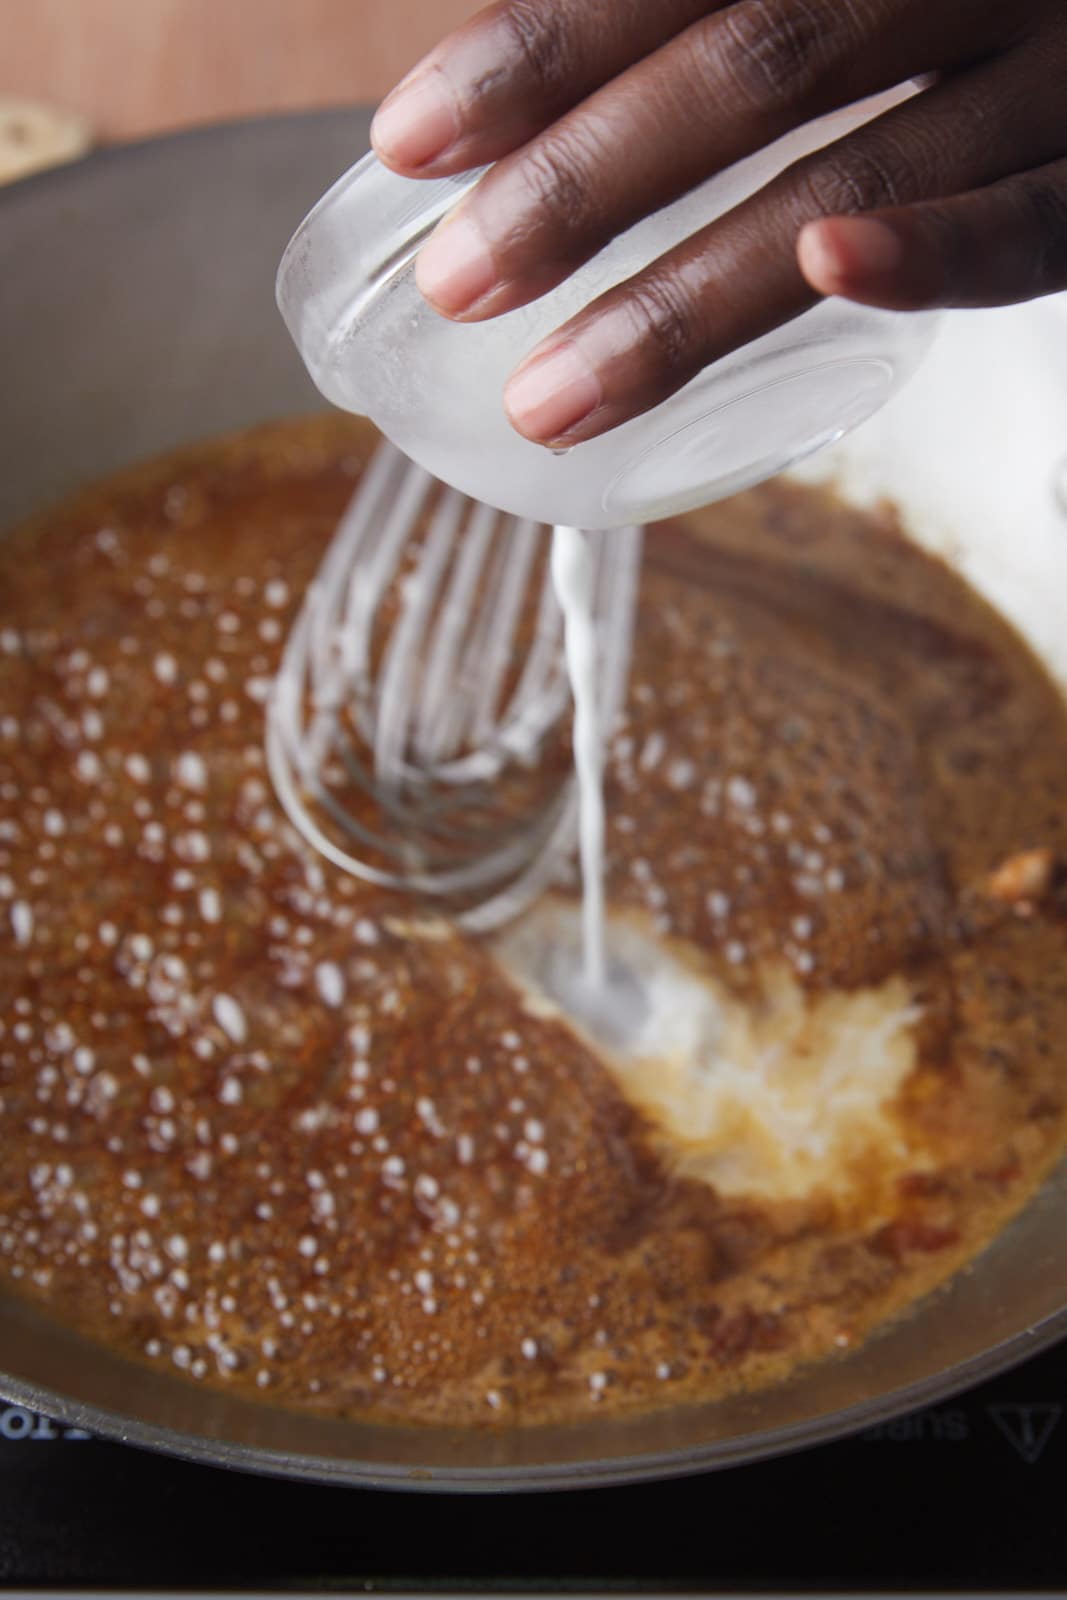
              Make a cornstarch slurry by placing cornstarch and water in a separate bowl and whisking to combine. Slowly pour the cornstarch mixture into the skillet while whisking the sauce in the skillet. Allow sauce to simmer for an additional 1-2 minutes.

              Whisking in the cornstarch mixture.

              Remove skillet from the heat and return salmon to the pan. Top salmon with sauce.

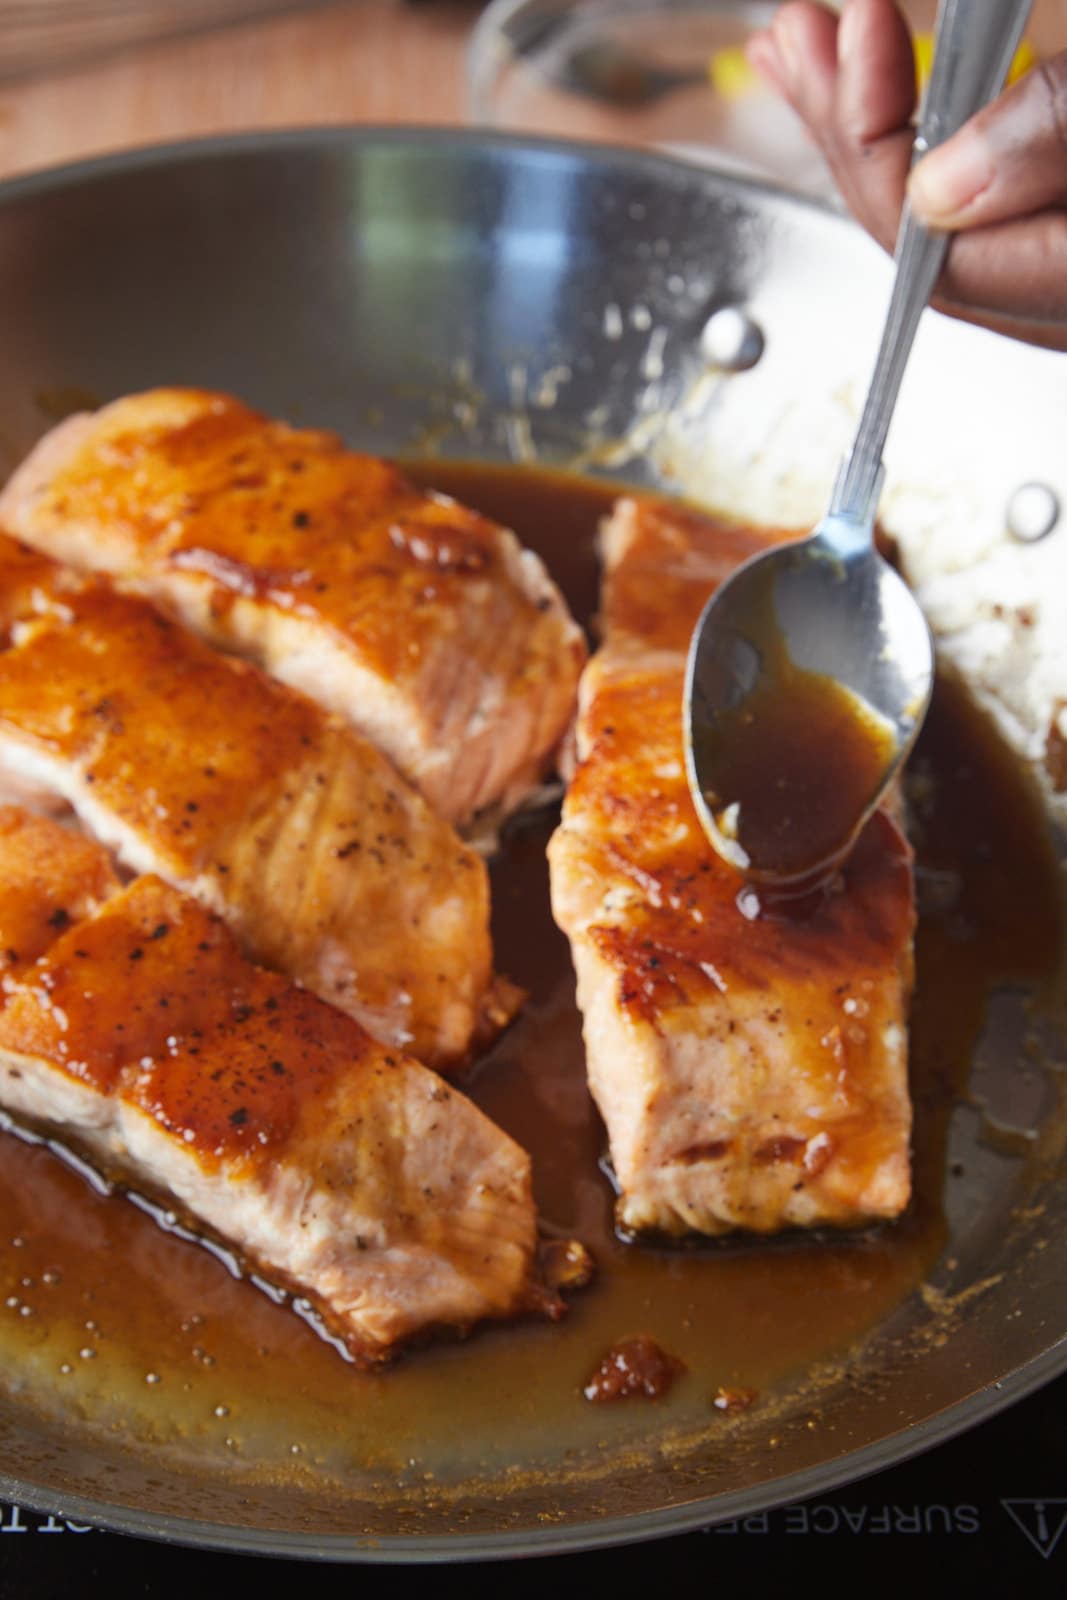
              Spooning the sauce over the salmon pieces.

              Garnish with sesame seeds, and green onions, and serve.

              The cooked salmon in a skillet ready to serve.

              What is teriyaki sauce?

              Teriyaki sauce has it's origins in Japanese cuisine. It's wonderfully rich and bold with a savory, sweet and salty taste. Many teriyaki sauces are made with mirin and/or sake but I use what I have on hand with this recipe. The flavor is still incredible.

              What do you serve it with?

              This dish is great served up on a bed of white rice, brown rice, or noodles and you can serve it as a vegetable side like Marinated Vegetables or steamed broccoli. You can keep it low carb by serving it with cauliflower rice.

              Do you need to marinate the salmon?

              This recipe doesn't require you to marinate the salmon as the sauce is so flavorful and it also means that you don't need to plan ahead! You can marinate the fillets if you prefer in a little oil, soy sauce and brown sugar for 30 minutes, but it definitely does not require it.

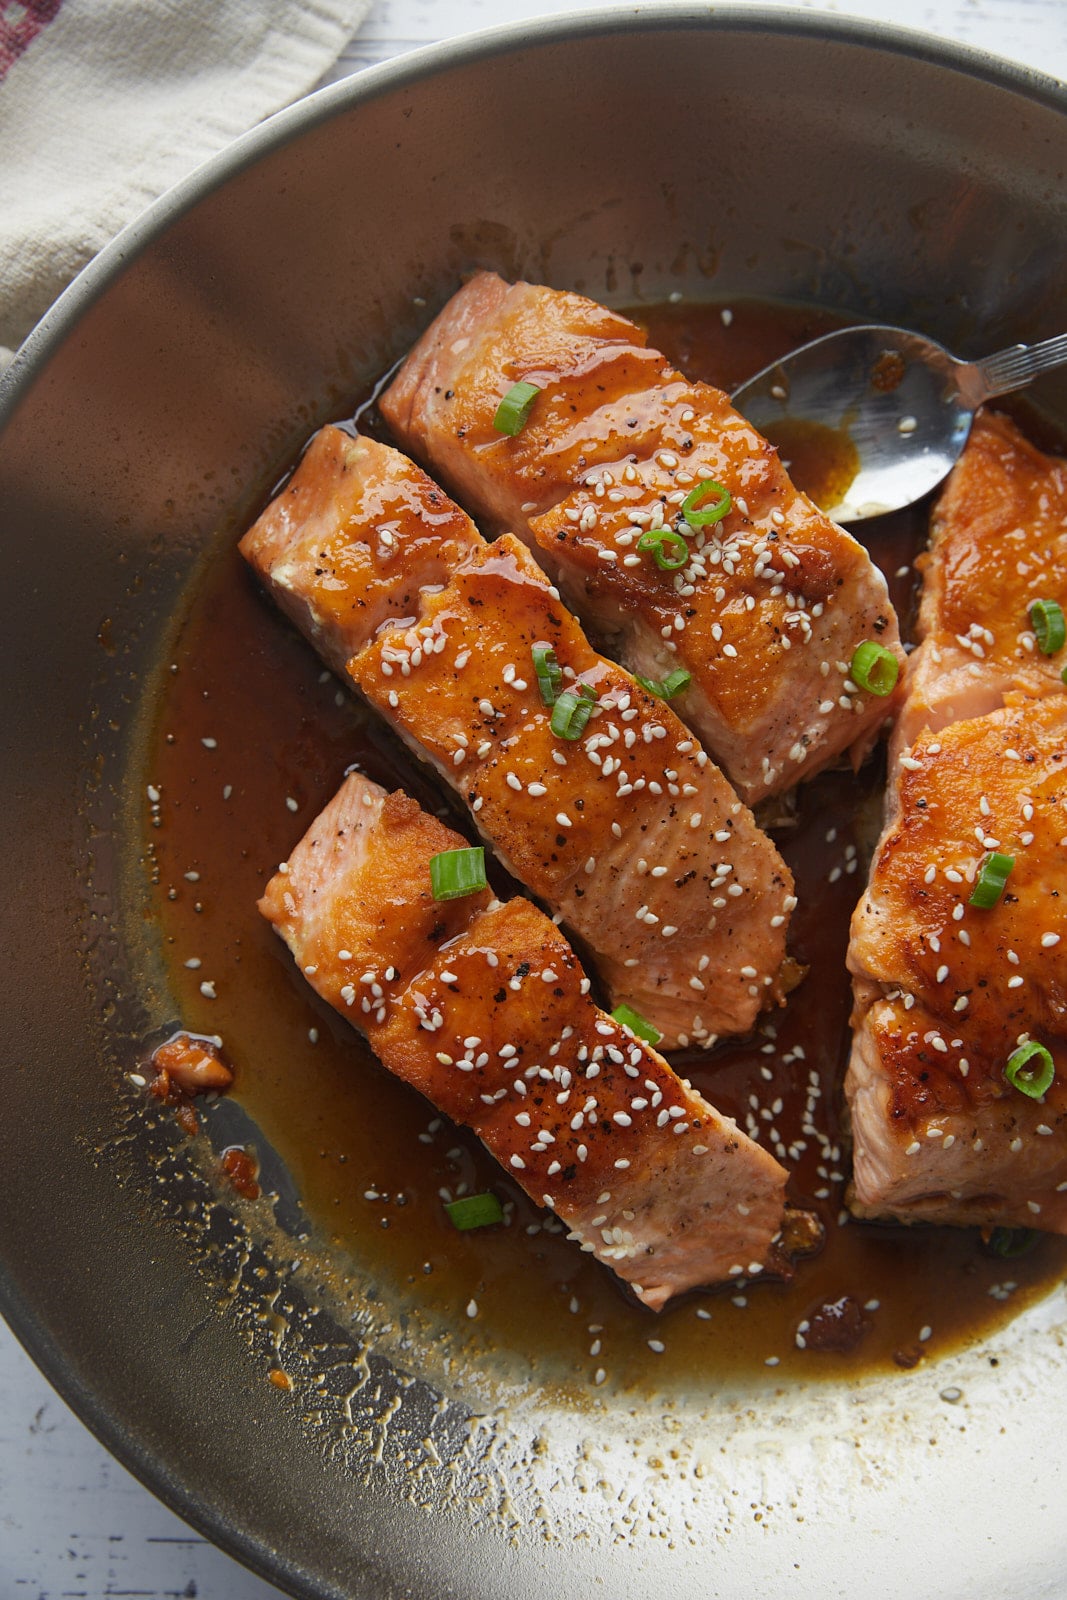
              The cooked salmon teriyaki in a skillet.

              Recipe Notes and Tips

              • Take care not to over cook the salmon. It should be an opaque pink color and flake away easily.
              • Make this dish gluten-free by using tamari sauce in place of the soy sauce.
              • This teriyaki sauce also works great with chicken and steak!

              More Easy Seafood Recipes

              • Oven Baked Salmon or Easy Oven Baked Fish
              • Jamaican Escovitch Fish
              • Pressure Cooker Salmon with Creamy Herb Parmesan Sauce
              • Air Fryer Crispy Fried Shrimp
              • Fried Catfish
              • Crispy Air Fryer Fish
              • Jerk Salmon
              Close up of four pieces of teriyaki salmon.
              Print Recipe
              5 from 2 votes

              Glazed Teriyaki Salmon

              Get out of your dinner rut with this quick and easy teriyaki salmon recipe. All cooked in one pan, it's ready to serve in less than 20 minutes and the rich sauce is loaded with flavor.
              Prep Time5 minutes mins
              Cook Time15 minutes mins
              Total Time20 minutes mins
              Course: Main Course
              Cuisine: Japanese
              Keyword: easy teriyaki salmon recipe, how to make teriyaki salmon
              Servings: 4 servings
              Calories: 352kcal
              Author: Tanya Harris

              Ingredients

              • 1 Tablespoon olive oil
              • 1.5 lb salmon cut into 4 pieces or 4 salmon fillets
              • ¼ cup soy sauce
              • ¼ cup brown sugar
              • 2 Tablespoon rice vinegar
              • 2 Tablespoon chicken broth
              • ¼ teaspoon ginger powder
              • ¼ teaspoon garlic powder
              • ½ Tablespoon cornstarch
              • 1 Tablespoon water
              • 1 Tablespoon sesame seeds optional
              • 1 green onion chopped (optional)
              • Salt and pepper to taste

              Instructions

              • Heat olive oil in a 12-inch skillet over medium-high heat. Place salmon, skin side down, in the skillet and cook for about 4 minutes.
              • Tilt the pan to the side and spoon the oil over the fillets, then flip the fillets. Cook the salmon for an additional 3-4 minutes, until the salmon is cooked through. Remove from the pan and set aside.
              • Add soy sauce, brown sugar, rice vinegar, chicken broth, ginger powder, and garlic powder to the skillet and whisk to combine. Reduce heat to medium and allow mixture to simmer for about 2 minutes.
              • Make a cornstarch slurry by placing cornstarch and water in a separate bowl and whisking to combine. Slowly pour the cornstarch mixture into the skillet while whisking the sauce in the skillet. Allow sauce to simmer for an additional 1-2 minutes.
              • Remove skillet from the heat and return salmon to the pan. Top salmon with sauce, sesame seeds, and green onions.
              • Serve and enjoy 🙂

              Video

              Notes

              • Take care not to over cook the salmon. It should be an opaque pink color and flake away easily.
              • Make this dish gluten-free by using tamari sauce in place of the soy sauce.
              • This teriyaki sauce also works great with chicken and steak!

              Nutrition

              Calories: 352kcal | Carbohydrates: 16g | Protein: 36g | Fat: 15g | Saturated Fat: 2g | Cholesterol: 94mg | Sodium: 925mg | Potassium: 892mg | Fiber: 1g | Sugar: 14g | Vitamin A: 98IU | Vitamin C: 1mg | Calcium: 54mg | Iron: 2mg

              October 8, 2020 by Tanya Harris 43 Comments

              Easy Applesauce Muffins

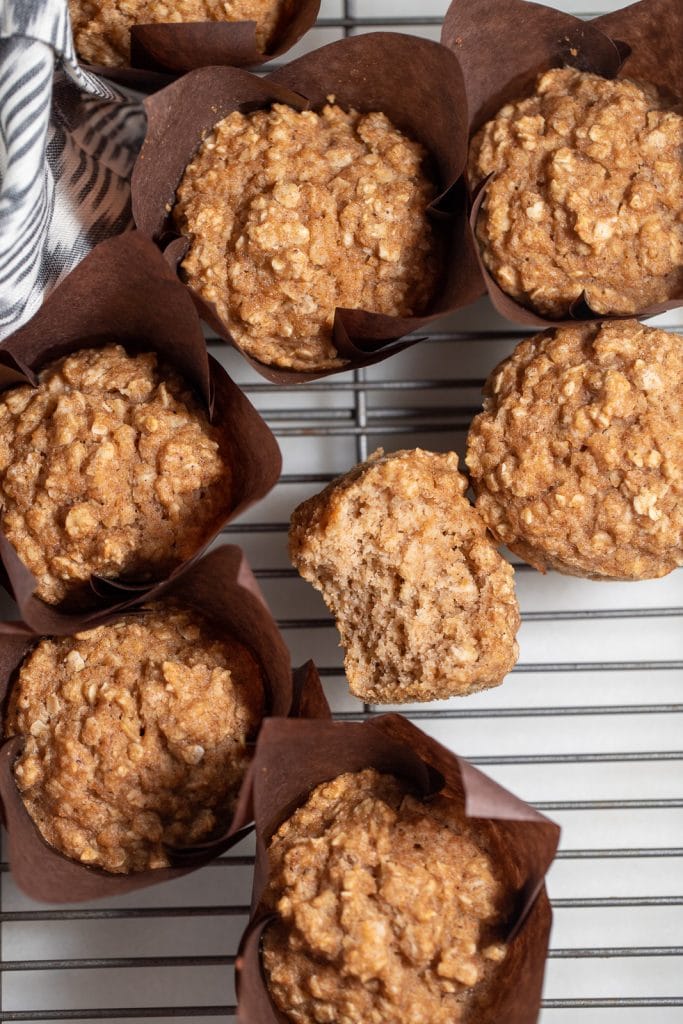
              Seven applesauce muffins on a wire rack.

              Make a batch of delicious muffins in no time at all with this easy applesauce muffin recipe. With just 10 minutes of prep time, these muffins are a great snack to make when you are short on time, and they are wonderfully sweet and moist.

              Seven applesauce muffins on a wire rack.

              This post contains affiliate links, please read my full disclaimer here.

              You’ll find the full recipe with ingredient amounts and instructions in the recipe card at the bottom of this post. Be sure to check out the blog post itself for extra tips and tricks!

              Let's be honest, there is never a bad time for a muffin! These easy applesauce muffins are super quick to make and they are quickly becoming my favorite snack to enjoy with my afternoon cup of coffee.

              They come out so soft and moist and they are flavored with my favorite fall spice combination of cinnamon and nutmeg. They are also less than 200 calories each, so snack away guilt free!

              For more easy sweet snacks, be sure to check out my Blueberry Biscuits and Crispy Air Fryer Apple Chips.

              How to make easy applesauce muffins

              • Preheat the oven to 350F degrees and line a muffin tin with paper liners.
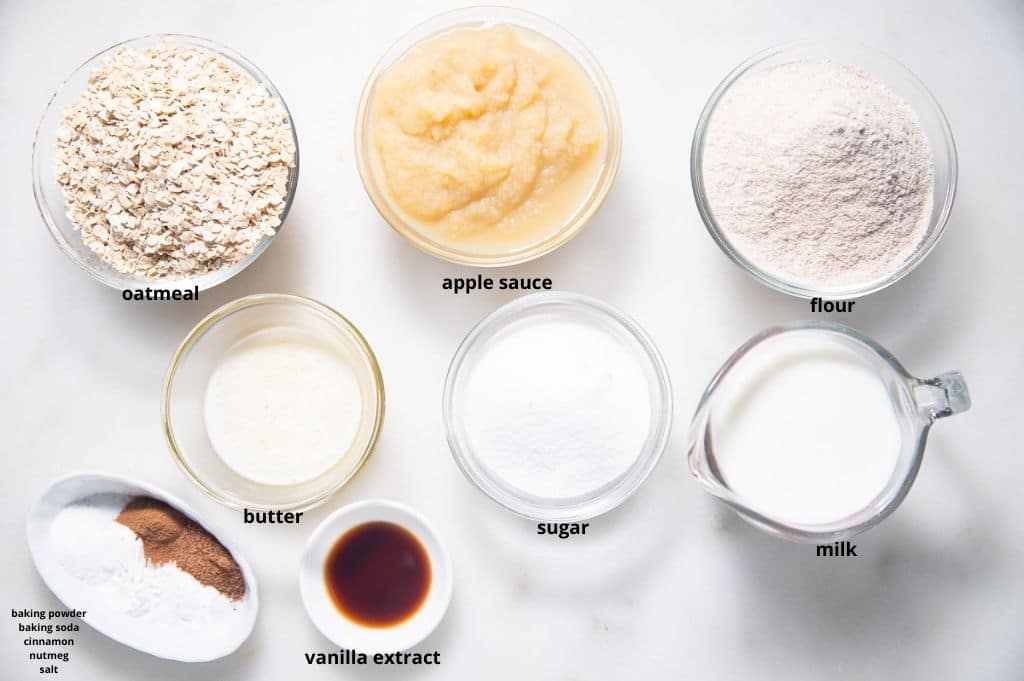
              • Gather your ingredients.
              Ingredients to make the muffins in glass bowls.
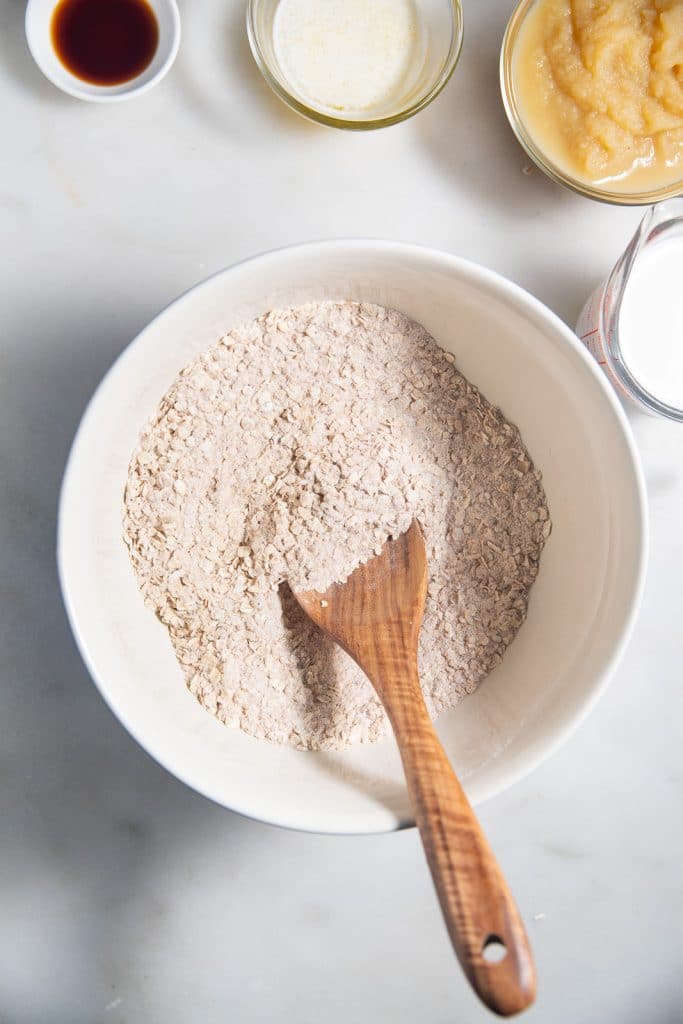
              • In a large bowl, add oats, flour, sugar, baking powder, baking soda, nutmeg, cinnamon, and salt and stir to combine.
              The dry ingredinets being mixed together into a white bowl.
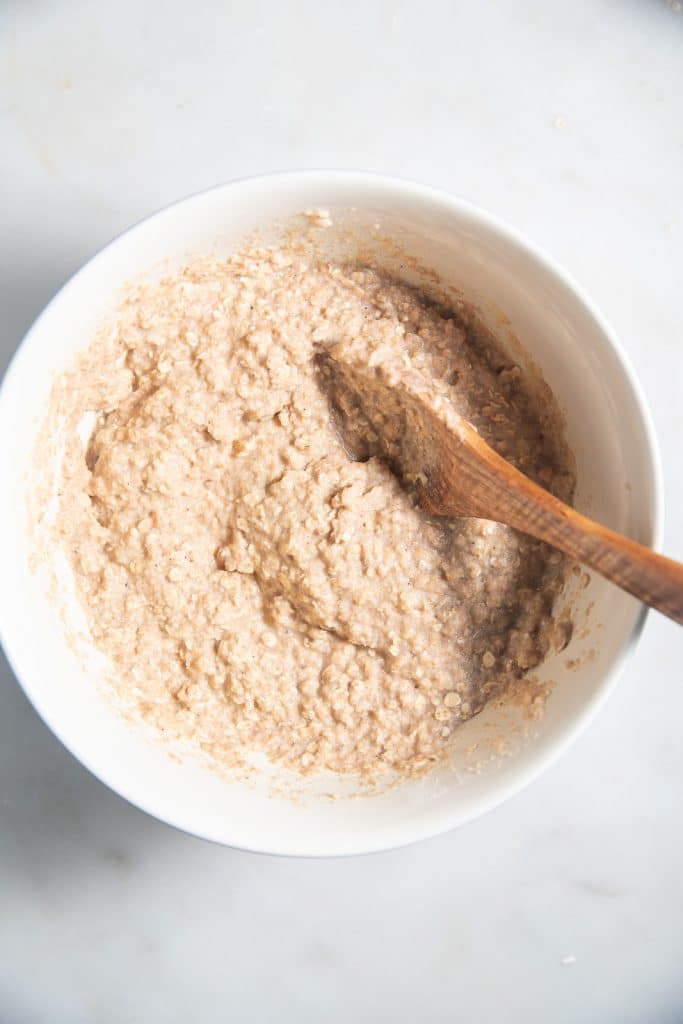
              • Pour in applesauce, milk, butter, and vanilla extract and stir until fully combined.
              Wet ingredients being stirred into the dry.
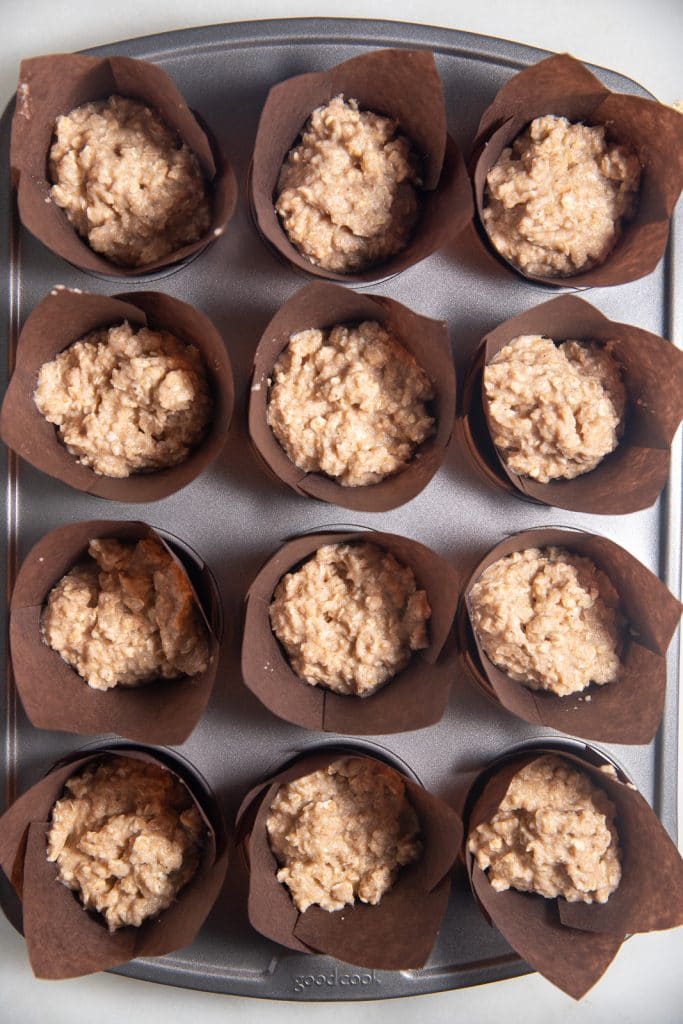
              • Place batter into muffin liners.
              The batter placed into the muffin liners ready to bake.
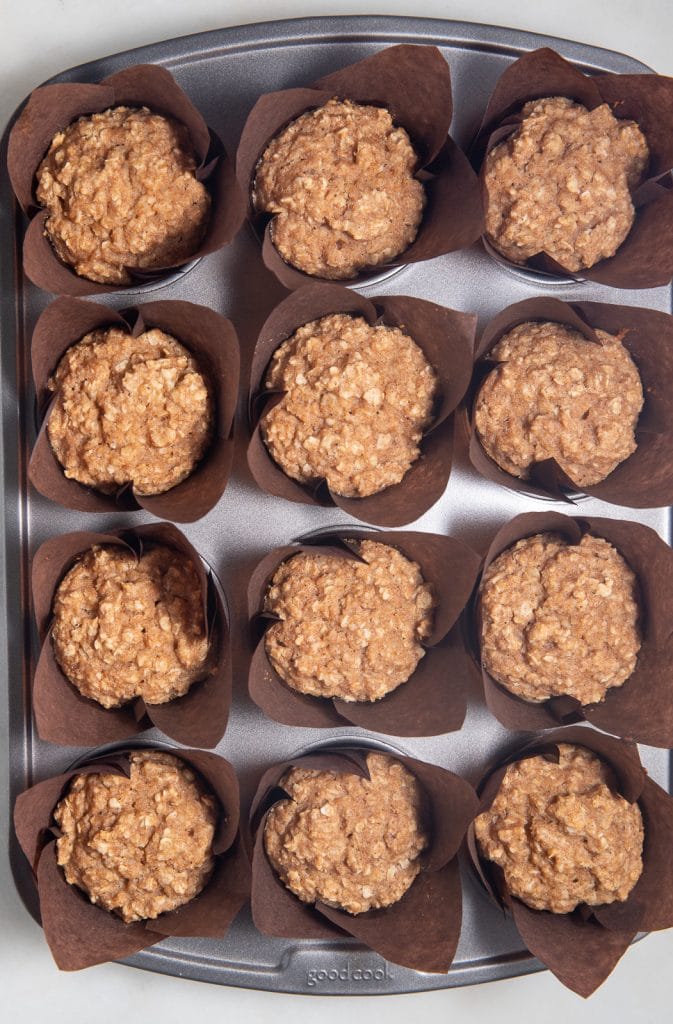
              • Bake in preheated oven for for 23-25 minutes or until a toothpick entered in the middle comes out smoothly.
              Overhead shot of twelve baked muffins.

              How long do they keep?

              Once the muffins have cooled completely, transfer them to an airtight container. They will keep at room temperature for 2 days and store them in the fridge for up to 5 days. They will still be good a day or two after this, but will start to dry out.
              Can you freeze them?

              These muffins freeze really well. Freeze them solid on a baking sheet before transferring to a freezer bag, or wrap them individually in plastic wrap and freeze them together. They will keep for up to 3 months frozen.

              Defrost the muffins at room temperature or warm them through on a low heat in the oven.

              Are they healthy?

              The applesauce in this recipe means that you don't need any oil to keep the muffins moist and you can also reduce the amount of added sugar and butter. Each muffin is around 180 calories and is low in fat and sodium. They are also made with whole wheat flour so contain whole grains. This is a healthy snack I can get behind!

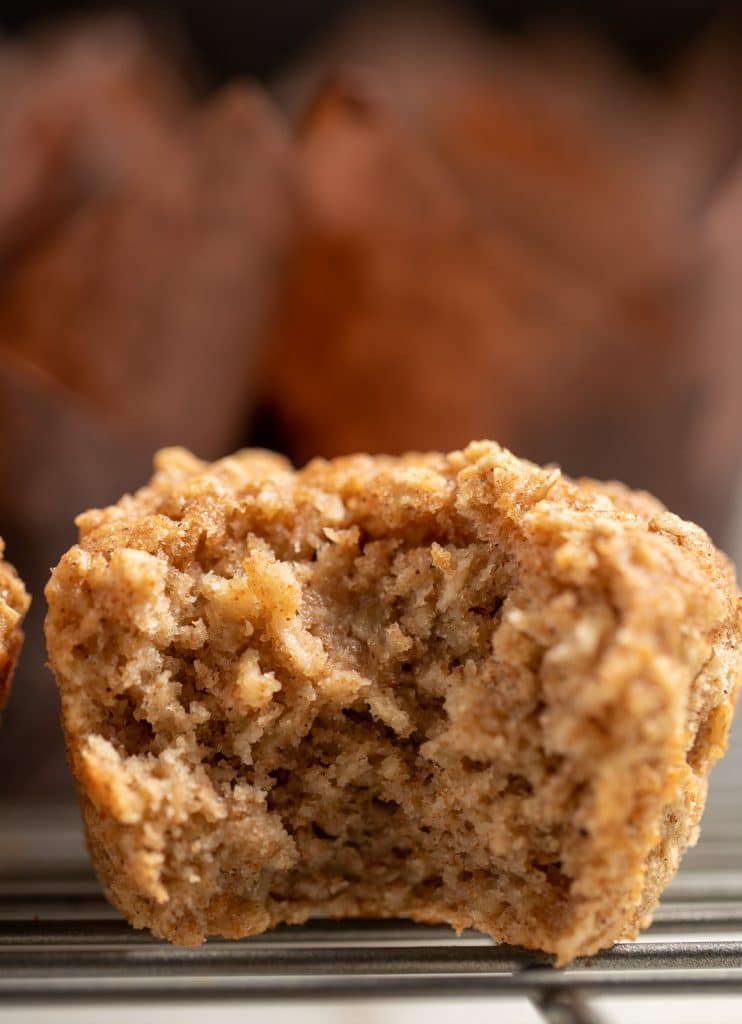
              A bite taken out of an applesauce muffin.

              Recipe Notes and Tips

              • You can also bake these in your air fryer. To make a smaller batch, cut all ingredients in half and follow the recipe as instructed. Use silicone baking liners and air fry on 320 degrees Fahrenheit for 10-12 minutes.
              • Make sure that the batter ingredients are fully combined, there should be no dry flour when you place it into the muffin cases.
              • Bake the muffins in a preheated oven so that they cook through evenly.
              • Check the muffins after 20 minutes of cooking as ovens can run at different temperatures. An inserted toothpick will come out clean when they are baked through.

              More Easy Muffin Recipes

              • Easy Cornbread Muffins
              • Zucchini Muffins
              • Easy Strawberry Muffins
              Applesauce muffins in liners ready to eat.
              Print Recipe
              4.53 from 21 votes

              Easy Applesauce Muffins

              Make a batch of delicious muffins in no time at all with this easy applesauce muffin recipe. With just 10 minutes of prep time, these muffins are a great snack to make when you are short on time, and they are wonderfully sweet and moist.
              Prep Time10 minutes mins
              Cook Time25 minutes mins
              Total Time35 minutes mins
              Course: Dessert, Snack
              Cuisine: American
              Keyword: easy applesauce muffin recipe, how. tomake applesauce muffins, recipes for applesauce
              Servings: 12 muffins
              Calories: 183kcal
              Author: Tanya Harris

              Ingredients

              • 1 ½ cup quick cooking oats
              • 1 ½ cup whole wheat flour
              • ½ cup sugar
              • 1 teaspoon baking powder
              • ½ teaspoon baking soda
              • 1 teaspoon nutmeg
              • ½ teaspoon cinnamon
              • ½ teaspoon salt
              • 1 ½ cup unsweetened apple sauce
              • 1 cup milk
              • ¼ cup unsalted butter melted and cooled
              • 2 teaspoon vanilla extract

              Instructions

              • Preheat the oven to 350F degrees and line a muffin tin with paper liners.
              • In a large bowl, add oats, flour, sugar, baking powder, baking soda, nutmeg, cinnamon, and salt and stir to combine.
              • Pour in applesauce, milk, butter, and vanilla extract and stir until fully combined. Place batter into muffin liners.
              • Bake in preheated oven for for 23-25 minutes or until a toothpick entered in the middle comes out smoothly.

              Notes

              • You can also bake these in your air fryer. To make a smaller batch, cut all ingredients in half and follow the recipe as instructed. Use silicone baking liners and air fry on 320 degrees Fahrenheit for 10-12 minutes.
              • Make sure that the batter ingredients are full combined, there should be no dry flour when you place it into the muffin cases.
              • Bake the muffins in a preheated oven so that they cook through evenly.
              • Check the muffins after 20 minutes of cooking as ovens can run at different temperatures. An inserted toothpick will come out clean when they are baked through.

              Nutrition

              Calories: 183kcal | Carbohydrates: 31g | Protein: 4g | Fat: 6g | Saturated Fat: 3g | Cholesterol: 12mg | Sodium: 160mg | Potassium: 182mg | Fiber: 3g | Sugar: 13g | Vitamin A: 160IU | Vitamin C: 1mg | Calcium: 54mg | Iron: 1mg

              October 1, 2020 by Tanya Harris 3 Comments

              Air Fried Toasted Ravioli

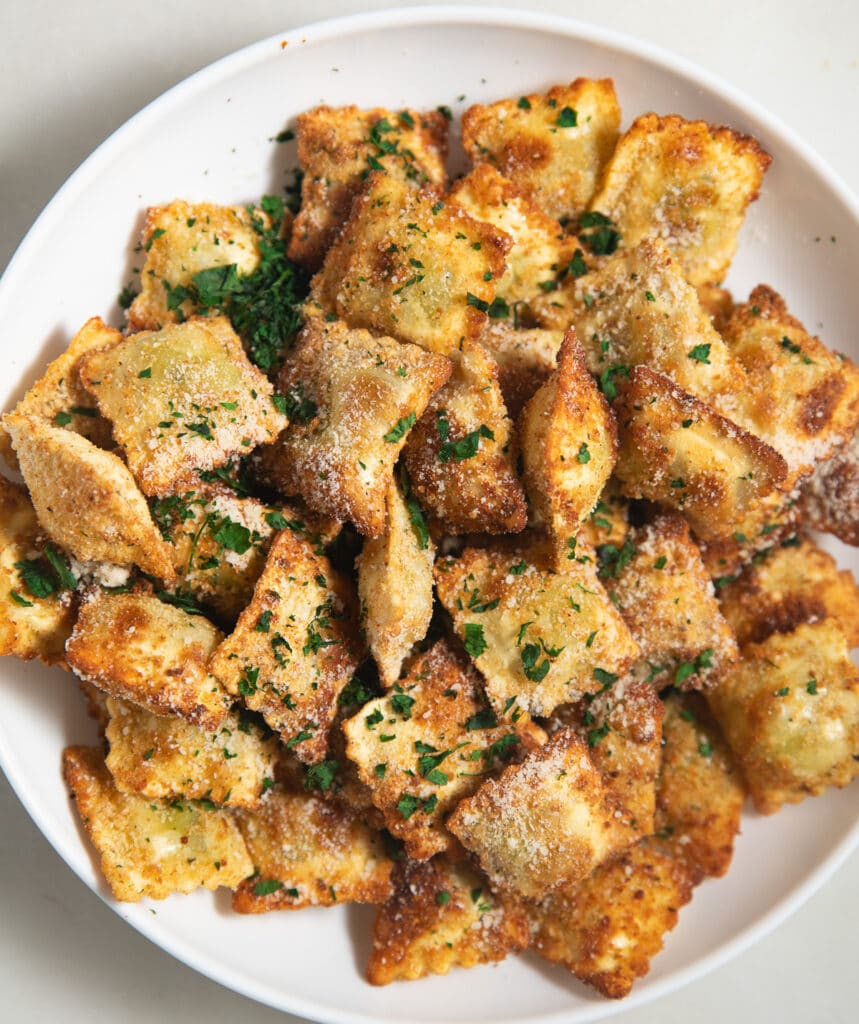
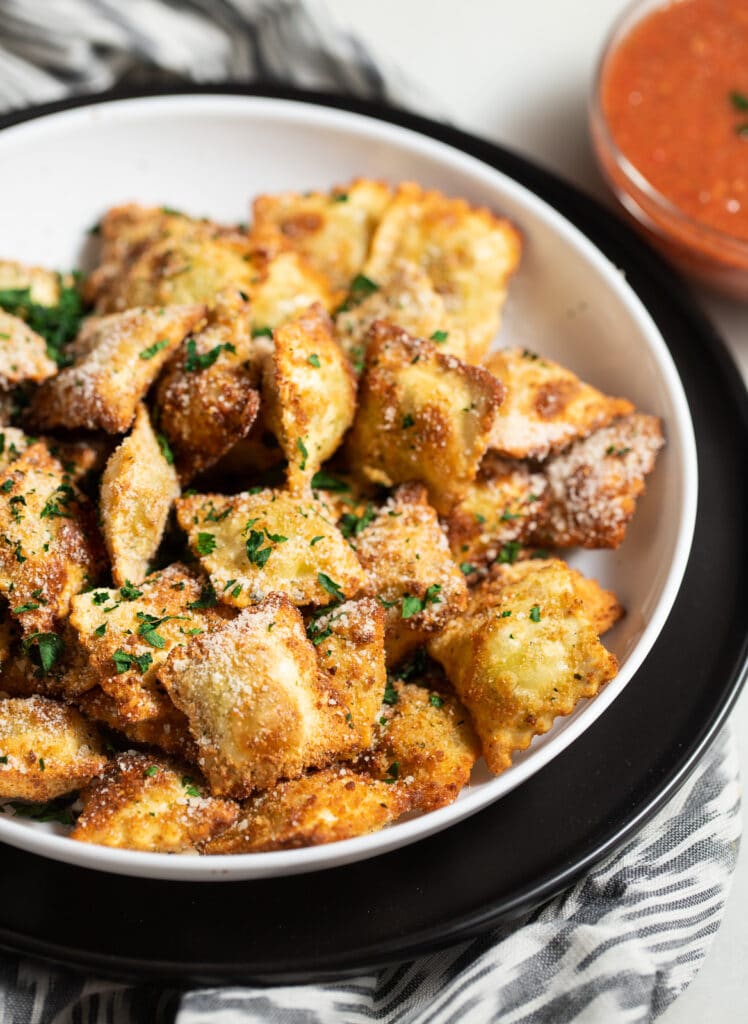
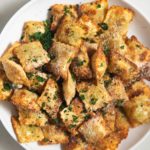
              Air fried toasted ravioli on a white plate.

              When you need an appetizer in a hurry, this delicious air fried toasted ravioli is more than perfect! Ready to serve in around 10 minutes, they are perfectly crispy and a breeze to make!

              Air fried toasted ravioli on a white plate.

              Toasted ravioli is one of my favorite appetizers and they are totally hassle free when cooked in the air fryer. They are super crispy on the inside and perfectly soft and creamy in the center.

              I love not to worry about a pot of hot oil when making these, just pop them in the air fryer and you have a batch to serve in 6 minutes. Perfect when you have a hungry crowd to feed!

              How to make Air Fried Toasted Ravioli

              • Preheat the air fryer to 380 degrees Fahrenheit.
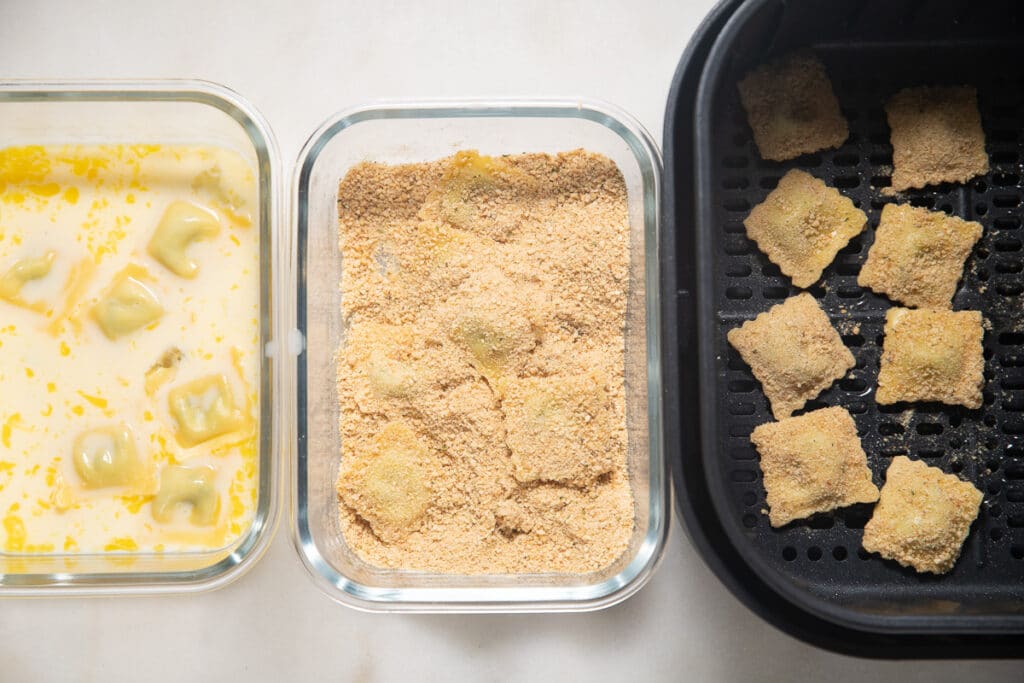
              • Place egg and milk in one bowl and whisk to combine. Place breadcrumbs in another bowl.
              • Place ravioli in the egg mixture and coat ravioli on both sides, letting any excess drip off. Then place in breadcrumb mixture, coating both sides. Place ravioli in a greased air fryer basket.
              The dredging station for the ravioli.
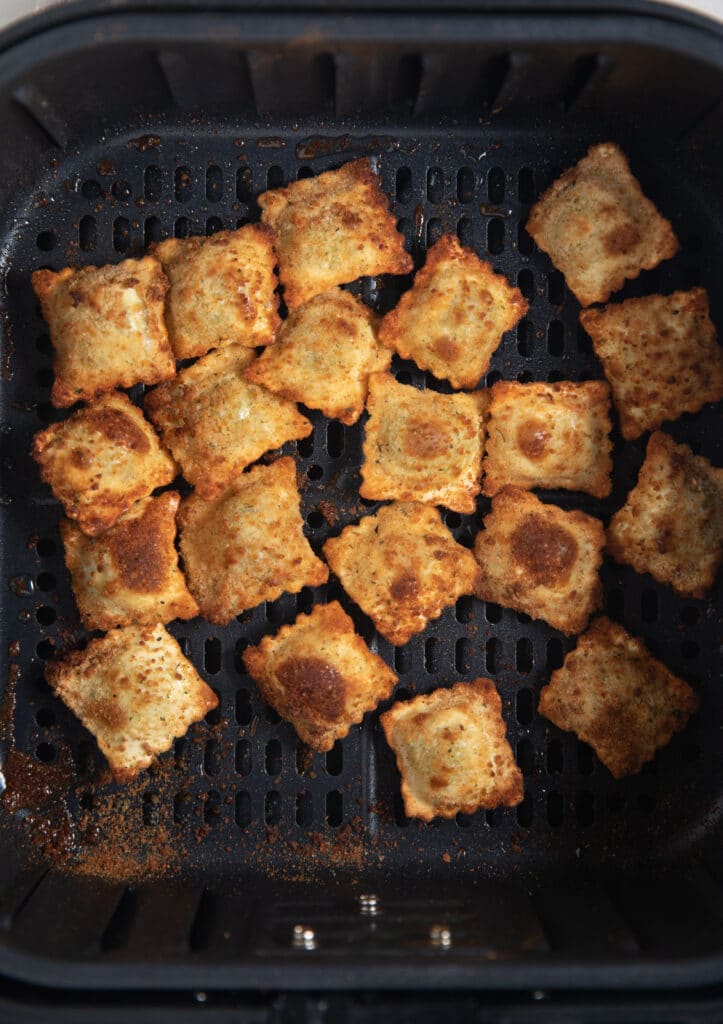
              • Air fryer on 380 degrees Fahrenheit for 5-6 minutes. Halfway through cooking, spray and flip the ravioli.
              The cooked ravioli in the air fryer basket.
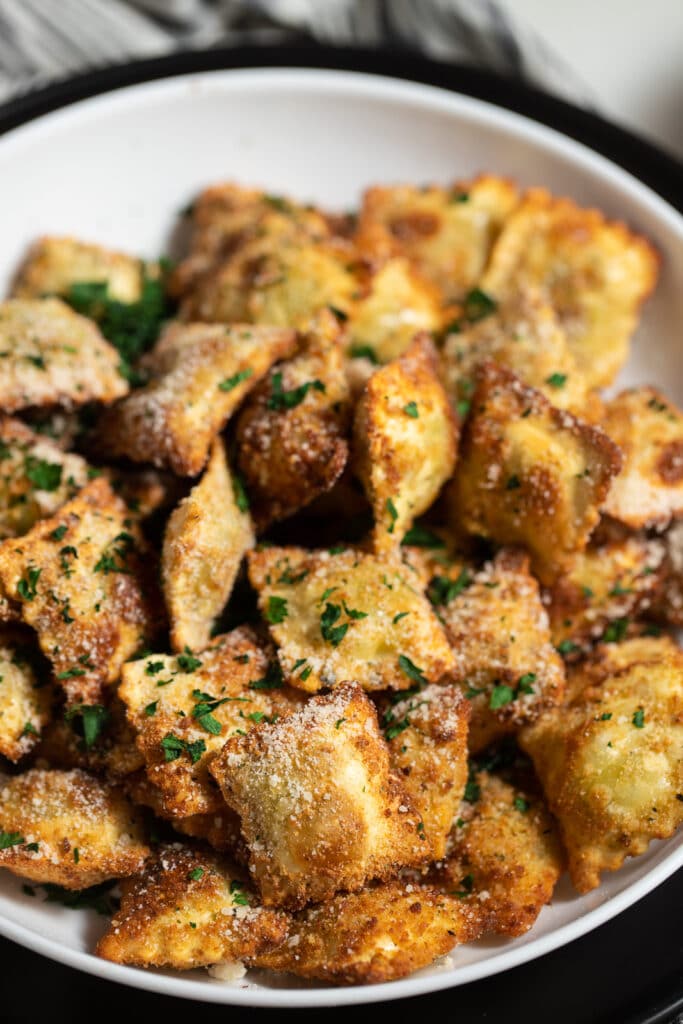
              • Place the ravioli in a bowl and toss with parmesan cheese. Garnish with parsley.

              Can you make them ahead of time?

              This air fryer ravioli is best served as soon as it's made so that it's nice and crispy. If you wan to get ahead of things, the breading can be done the day before and keep the ravioli covered with plastic wrap in the fridge.

              If you have leftovers, they can be reheated in the air fryer at 350-400F for 3 to 4 minutes and they will get nice and crispy again.

              Can you make this with frozen ravioli?

              Yes! You can make this with either frozen or fresh ravioli. There's no need to thaw frozen before cooking it, just add a few extra minutes to the cooking time.

              What do you serve it with?

              I like to serve these with some fresh parsley for freshness and a rich marinara sauce for dipping. You can serve then with your favorite dips, garlic and herb, ranch and ketchup all work well.

              Fried ravioli in a bowl served with marinara sauce.

              Recipe Notes and Tips

              • Don't overcrowd the air fryer or the ravioli won't get as crispy.
              • Spray the ravioli halfway through cooking, not at the beginning. It's a tip I use when air frying anything with breading and I discuss it more in my tips for air fryers post.
              • If using frozen ravioli, you’ll need to cook a few minutes longer, about 8-10 minutes.
              • If you want a creamier filling, make sure to purchase ravioli that has a lot of cheesy filling.

              More Air Fryer Appetizers

              • Air Fryer Roasted Shishito Peppers
              • Crispy Air Fryer Beet Chips
              • Air Fryer Egg Rolls
              • Air Fryer Crispy Fried Shrimp
              Air fried toasted ravioli on a white plate.
              Print Recipe
              5 from 1 vote

              Air Fried Toasted Ravioli

              When you need an appetizer in a hurry, this delicious air fried toasted ravioli is more than perfect! Ready to serve in around 10 minutes, they are perfectly crispy and a breeze to make!
              Prep Time5 minutes mins
              Cook Time6 minutes mins
              Total Time11 minutes mins
              Course: Appetizer
              Cuisine: American
              Keyword: air fryer ravioli, ravioli appetizer, toasted ravioli recipe
              Servings: 6 servings
              Calories: 223kcal
              Author: Tanya Harris

              Ingredients

              • 9 oz ravioli fresh or frozen
              • 1 large egg beaten
              • ¼ cup milk
              • ¾ cup Italian bread crumbs
              • 2 Tablespoon grated parmesan cheese
              • 1 Tablespoon fresh parsley for garnish
              • Marinara Sauce for Dipping

              Instructions

              • Preheat air fryer to 380 degrees Fahrenheit.
              • Place egg and milk in one bowl and whisk to combine. Place breadcrumbs in another bowl.
              • Place ravioli in egg mixture, letting any excess drip off, then place in breadcrumb mixture. Place ravioli in the air fryer.
              • Air fryer on 380 degrees Fahrenheit for 5-6 minutes, spraying and turning halfway through.
              • Toss the ravioli with parmesan cheese and garnish with fresh parsley.

              Notes

              • Don't overcrowd the air fryer or the ravioli won't get as crispy.
              • Spray the ravioli halfway through cooking, not at the beginning.
              • If using frozen ravioli, you’ll need to cook a few minutes longer, about 8-10 minutes.
              • If you want a creamier filling, make sure to purchase ravioli that has a lot of cheesy filling.

              Nutrition

              Calories: 223kcal | Carbohydrates: 28g | Protein: 10g | Fat: 7g | Saturated Fat: 3g | Cholesterol: 53mg | Sodium: 503mg | Potassium: 58mg | Fiber: 2g | Sugar: 2g | Vitamin A: 156IU | Vitamin C: 1mg | Calcium: 70mg | Iron: 5mg

              September 29, 2020 by Tanya Harris 4 Comments

              How to Spatchcock a Chicken (Video)

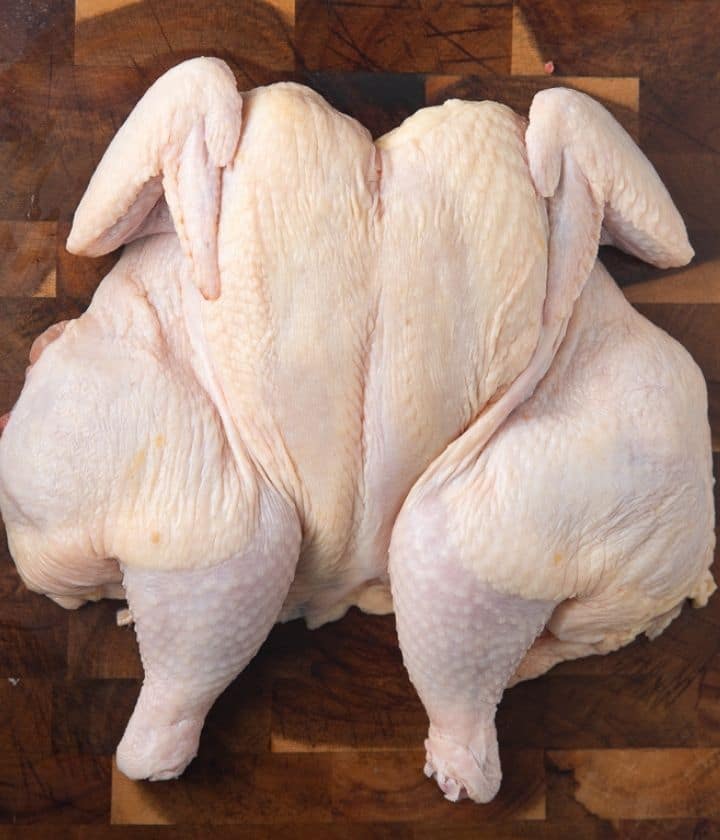
              a spatchcocked chicken on a wooden board

              Spatchcock chicken, or butterfly chicken, is an easy way to get a whole chicken prepared for cooking by removing the backbone and getting it to lay flat. This guide will teach you everything you need to know about how to get it done quickly and effortlessly. 

              a spatchcocked chicken on a wooden board

              This post contains affiliate links, please read my full disclaimer here.

              If you’ve ever seen one of those beautiful flat laying whole chickens that looks Instagram worthy and wondered how you could do the same, then look no further. It’s pretty easy to do the same thing. The popular term for this flat laying chicken is called spatchcocked or butterflied.

              So why would you spatchcock a chicken? Other than it being pretty gorgeous once done, spatchcocking a chicken allows it to cook a little quicker, cook evenly, and generally results in crispier skin. Laying a chicken flat is also good for when you want to grill a chicken.  

              Things Needed:

              1. A smaller whole chicken - You’ll want one that’s 2-4lbs. Smaller chickens are easier to spatchcock and it’s easier to cut along the backbone.
              2.  A cutting board - Make sure it’s not slippery or moving around on your counter. Use a kitchen towel underneath to keep it in place.  
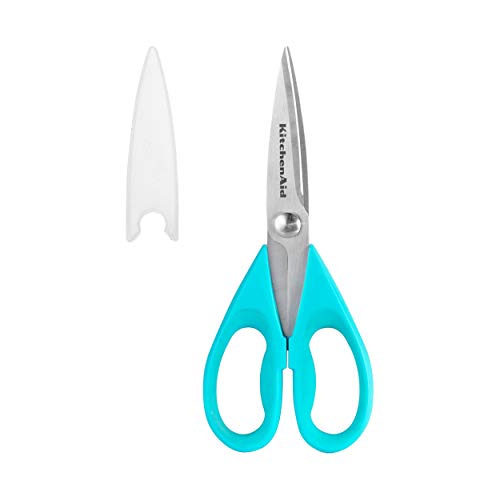
              3. Sharp Kitchen shears - Makes cutting along the backbone much easier and safer than using a knife. 
              4. A paring knife - For scoring the cartilage which makes it easier to lay the chicken flat.

              How to Spatchcock a Chicken:

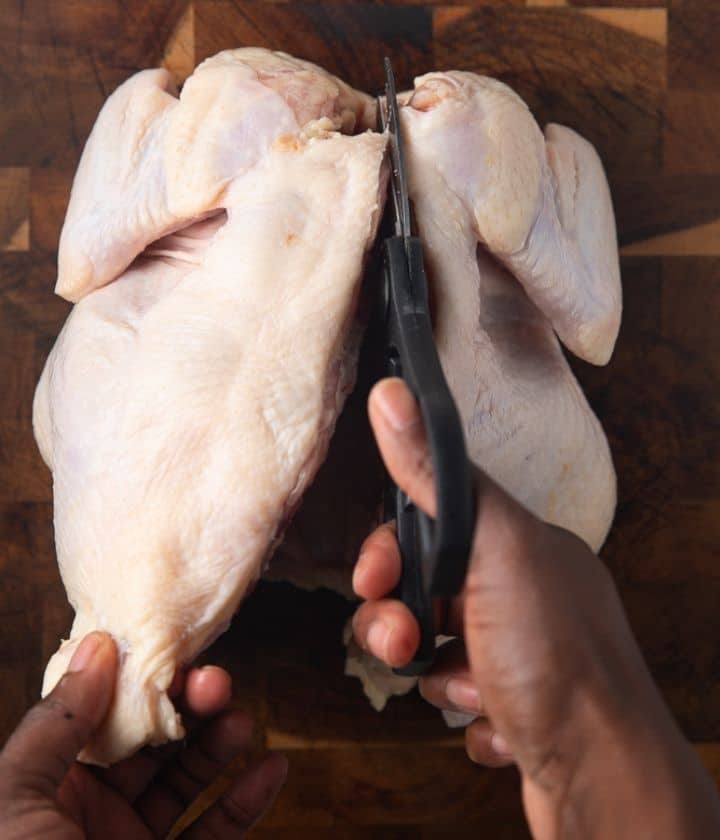
              • To Spatchcock a chicken, you'll need to place the chicken breast side down with legs toward you.
              • Use sharp kitchen shears and cut along the backbone to remove it. You'll end up cutting through the rib bones.
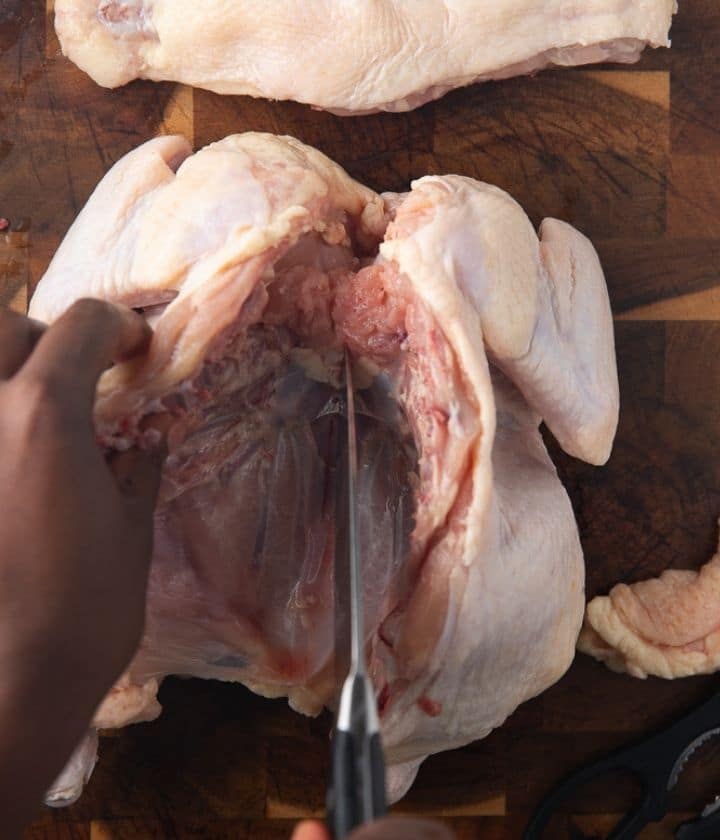
              • Slit the white cartilage that's in the middle of the breast.
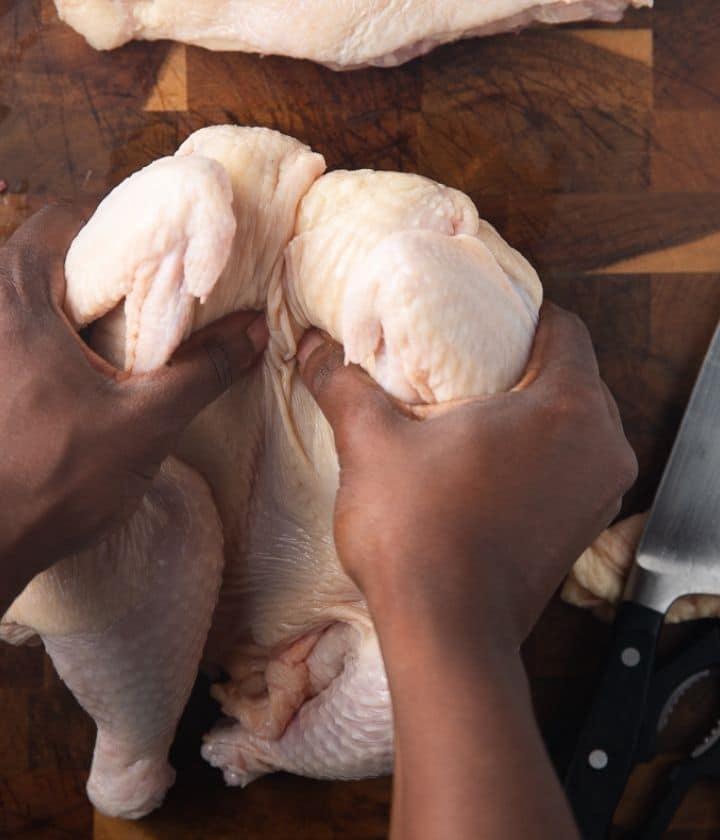
              • Turn the chicken over and use two hands to pull the breast and wings upward while pushing the middle of the breast down, until it lays flat.
              • Remove any excess fat from the chicken.

              And that's it. You can grill the chicken, air fry the chicken, or bake the chicken in the oven on 400 degrees Fahrenheit for 40-45 minutes.

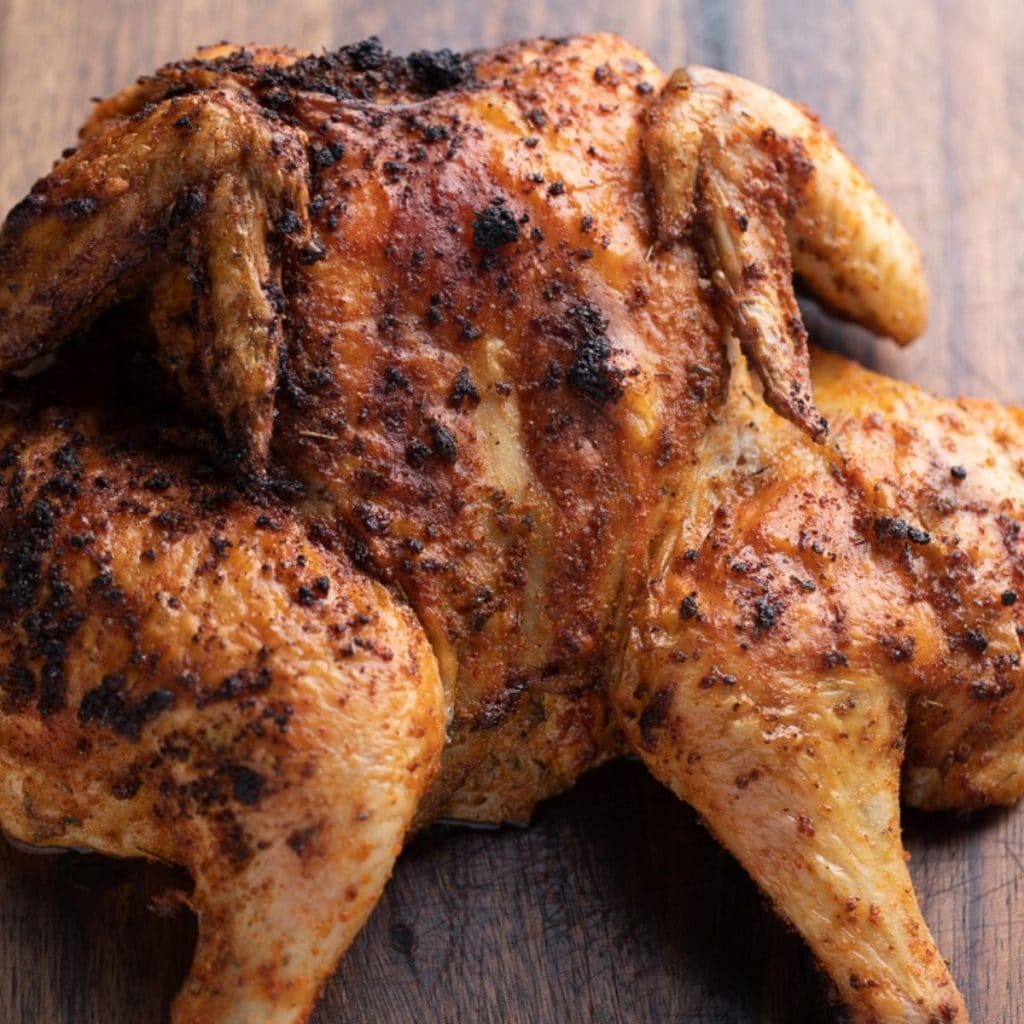
              a cooked spatchcocked chicken
              Yield: Spatchcock Chicken

              How to Spatchcock a Chicken

              a spatchcocked chicken on a wooden board

              Learn how to Spatchcock a Chicken with this easy guide.

              Prep Time 5 minutes
              Active Time 5 minutes
              Total Time 10 minutes
              Difficulty Easy

              Materials

              • A 2-4 lb chicken
              • Cutting Board
              • Kitchen Shears
              • Paring Knife

              Instructions

                1. Place the chicken breast side down with legs toward you. Cut along the backbone with sharp kitchen shears. scissors cutting along the backbone of a whole chicken
                2. Slit the cartilage that's in the middle of the breastbone. a knife cutting the cartilage of the chicken between the chicken breast
                3. Place two hands on the breast and wings and pull them apart while pushing down on the middle of the breastbone. two hands pulling the breast of the chicken apart
                4. Your chicken will lay flat. Cut off any excess fat. a spatchcocked chicken on a wooden board

              Notes

              • Smaller chickens are easier to spatchcock as it's easier to cut along the backbone. I generally use chickens that are around 2-4lbs.
              • Dry your chicken with paper towels prior to cutting. It'll make grabbing and gripping the chicken easier.

              Recommended Products

              As an Amazon Associate and member of other affiliate programs, I earn from qualifying purchases.

              • Mercer Culinary Millennia 3.5-Inch Paring Knife, Black
                Mercer Culinary Millennia 3.5-Inch Paring Knife, Black
              • KitchenAid Shears with Soft Grip Handles, Soft Blue
                KitchenAid Shears with Soft Grip Handles, Soft Blue
              • Made in USA, Large End Grain Walnut Wood Cutting Board with Built-in Compartments, Non-slip: 17x13x1.5 with Juice Groove (Gift Box Included) by Sonder Los Angeles
                Made in USA, Large End Grain Walnut Wood Cutting Board with Built-in Compartments, Non-slip: 17x13x1.5 with Juice Groove (Gift Box Included) by Sonder Los Angeles
              © Tanya
              Category: Cooking Basics

              September 28, 2020 by Tanya Harris 4 Comments

              Cauliflower Pizza Casserole

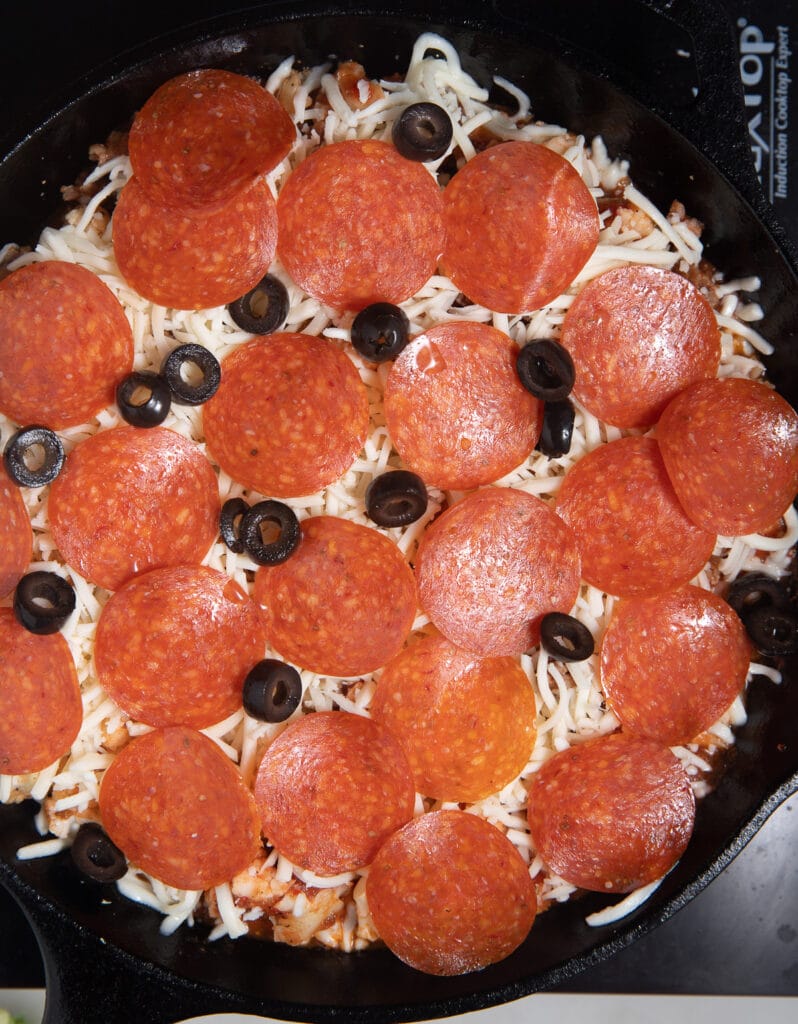
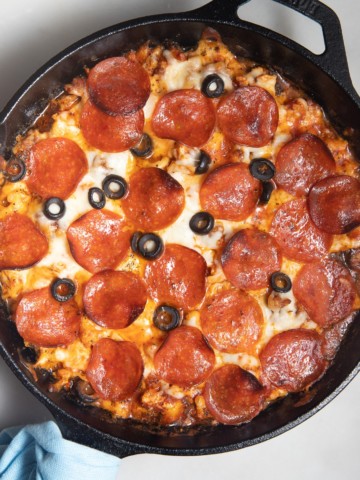
              Overhead shot of the cooked dish in a skillet.

              This low carb dinner is a delicious recipe that the whole family will love! Cauliflower pizza casserole is easy to make in a skillet, customize it with your favorite pizza toppings to make it your own!

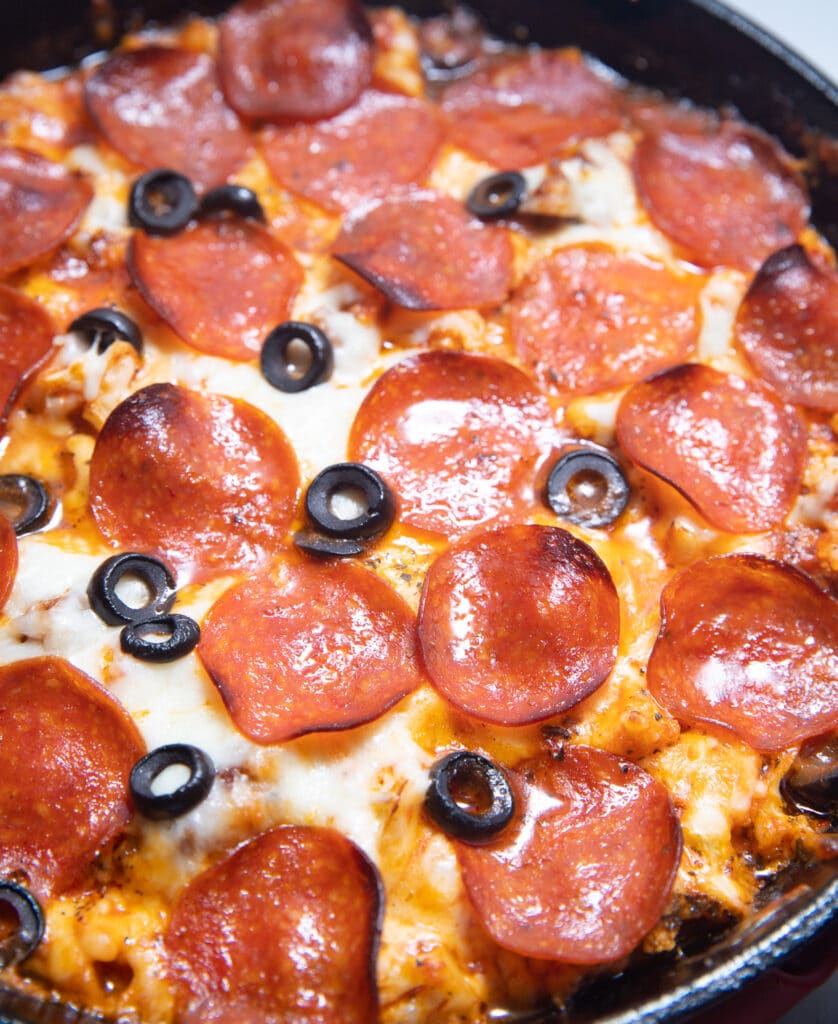
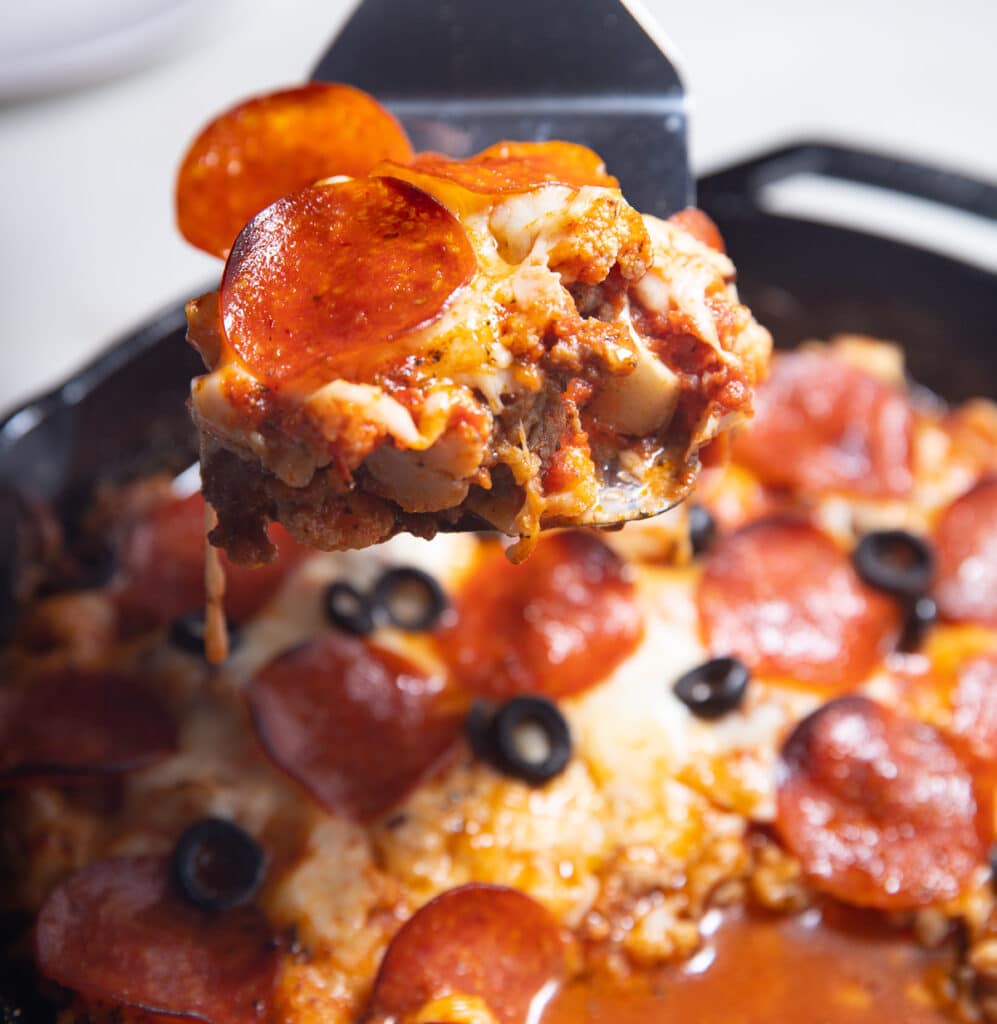
              Close up of the toppings on the cauliflower pizza casserole.

              This post contains affiliate links, please read my full disclaimer here.

              You’ll find the full recipe with ingredient amounts and instructions in the recipe card at the bottom of this post. Be sure to check out the blog post itself for extra tips and tricks!

              This cauliflower pizza casserole is a great alternative for pizza night and is an easy way to sneak some extra veggies into everyone's day! It comes together so easily with a few simple ingredients, it's sure to be a family favorite!

              This is a great recipe if you are following a low carb lifestyle, and it's delicious if you're not!

              If you are looking for more low carb recipes, be sure to check out my Chicken Patties and Air Fryer Shishito Peppers

              How to make cauliflower pizza casserole

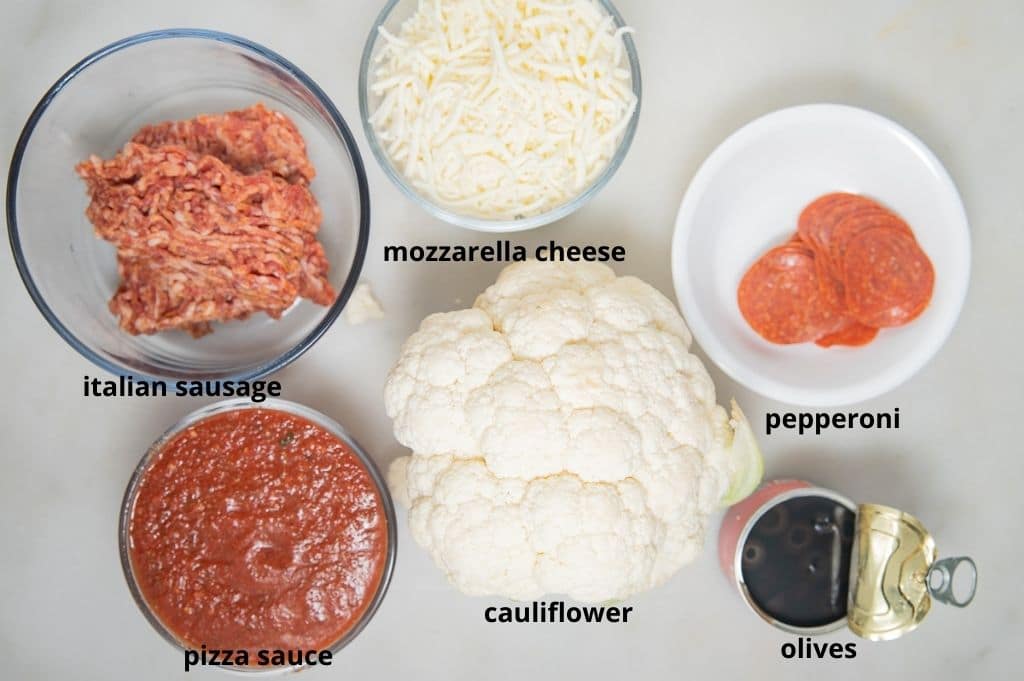
              • Gather your ingredinets and pre-heat the oven to 375 degrees.
              ingredients for cauuliflower pizza casserole on a white background with text of ingredients
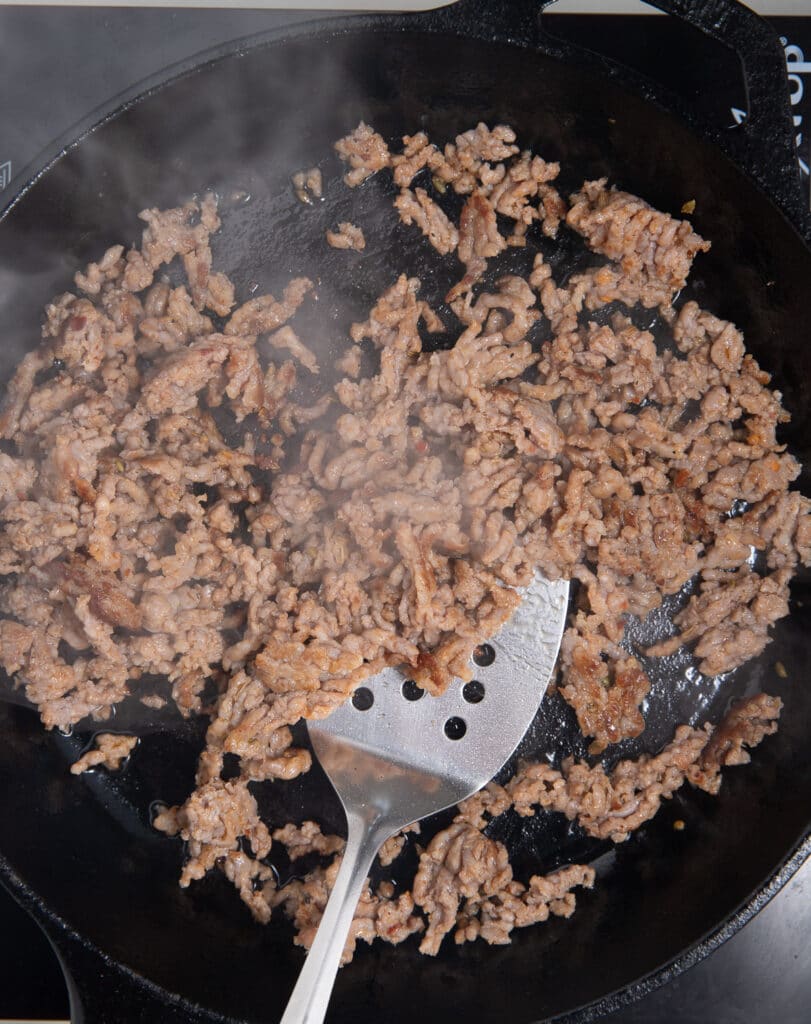
              • Heat a 10-inch ovenproof skillet over medium-high heat. Add Italian sausage and cook until browned.
              Browning the sausage in a skillet.
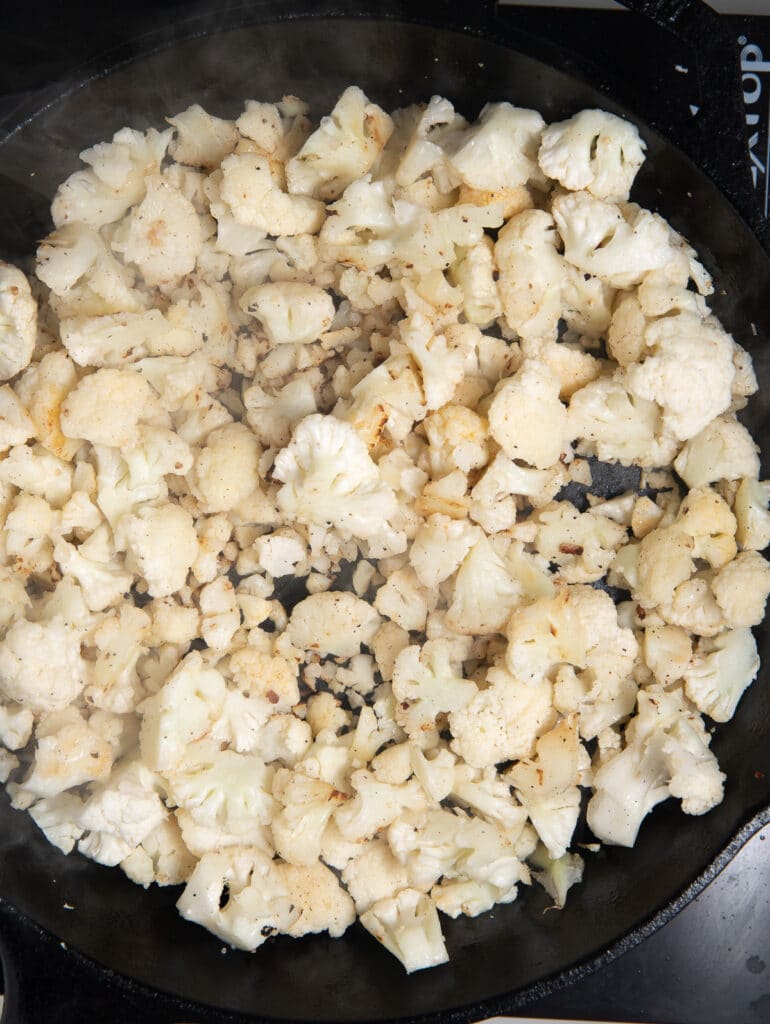
              • Remove sausage from skillet and set aside. If there is grease leftover in the pan, add cauliflower and cook until browned, about 2 minutes, stirring occasionally. If there is not any grease, add a little oil to the pan before adding cauliflower.
              Cooking the cauliflower in the skillet.
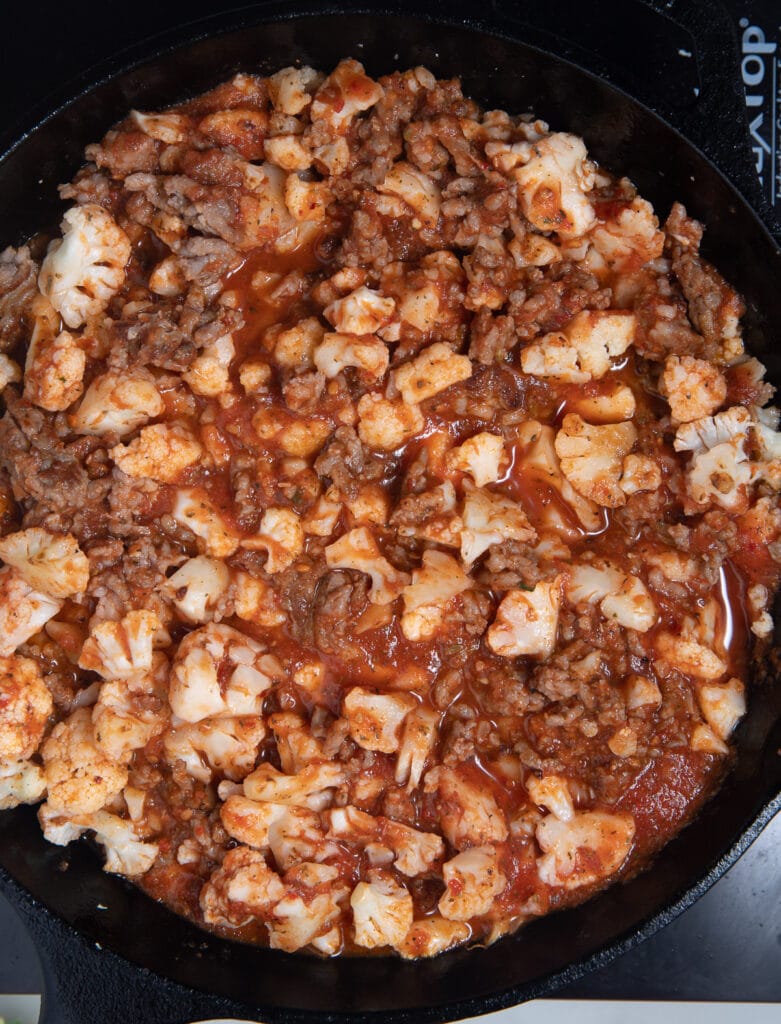
              • Remove pan from heat and add sausage back to pan along with pizza sauce and stir to combine.
              Cauliflower added to the browned sausage.
              • Sprinkle cheese, pepperoni, and other toppings across the top.
              Pepperoni and olives laid on top of the cauliflower.
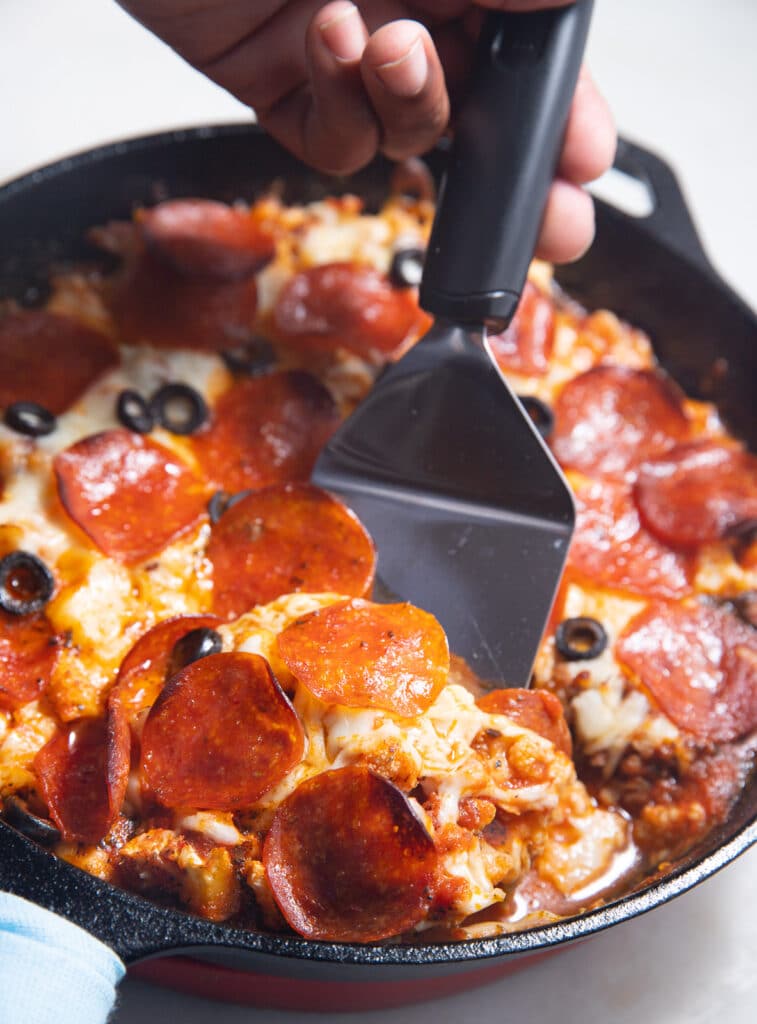
              • Place in a preheated oven and bake for 20-25 minutes, until the cheese has melted. Remove from heat and allow to cool in the skillet for 10-15 minutes before serving. Serve and enjoy.
              The cauliflower pizza casserole being served out of the skillet.

              What other toppings can you add?

              The beauty of this dish is that it's so easily customisable with all your favorite toppings. Try it with:

              • Bell peppers
              • Mushrooms
              • Pineapple
              • Bacon
              • Jalapeños
              • Blue cheese
              • And anything else you fancy!

              Can you make it ahead of time?

              You can make the pizza base a few hours ahead of time and add the toppings, then keep it covered in the fridge until you are ready to bake and serve it.

              This dish is also perfect for meal prep and taste even better the second day.

              Can you freeze it?

              It's best not to freeze the cooked casserole, but you can make the base, let it cool, add the toppings and then freeze it. Wrap it in foil and place in a freezer bag and it will keep for a couple of months.

              You can then cook it right from frozen, just add a few extra minutes to the cooking time.

              Recipe Notes and Tips

              • Use an oven-safe skillet for this recipe. I use my cast-iron.
              • This dish produces a lot of liquid due to the cauliflower. Some of the liquid will soak up while it cools.
              • Cover this skillet with your favorite toppings.

              More Easy Dinner Recipes

              • Balsamic Shrimp and Sausage Skillet Dinner
              • Air Fried Spatchcock Chicken
              • Perfect Air Fryer Pork Chops
              • Hearty Instant Pot Vegetable Soup
              Close up of the toppings on the cauliflower pizza casserole.
              Print Recipe
              5 from 1 vote

              Cauliflower Pizza Casserole

              This low carb dinner is a delicious recipe that the whole family will love! Easy to make in a skillet, customize it with your favorite pizza toppings to make it your own!
              Prep Time10 minutes mins
              Cook Time25 minutes mins
              Total Time35 minutes mins
              Course: Main Course
              Cuisine: American
              Keyword: cauliflower pizza casserole, cauliflower pizza recipes, low carb casserole recipe
              Servings: 6 servings
              Calories: 350kcal
              Author: Tanya Harris

              Ingredients

              • ½ lb Italian sausage
              • 1 Tablespoon olive oil optional
              • 1 medium head cauliflower chopped finely
              • 14 oz pizza sauce
              • 2 cups mozzarella cheese
              • 2 oz of pepperoni
              • Your favorite pizza toppings

              Instructions

              • Preheat oven to 375 F degrees.
              • Heat a 10-inch oven proof skillet over medium-high heat. Add Italian sausage and cook until browned. Remove sausage from skillet and set aside. If there is grease leftover in the pan, add cauliflower and cook until browned, about 2 minutes, stirring occasionally. If there is not any grease, add oil to the pan before adding cauliflower.
              • Remove pan from heat and add sausage back to pan along with pizza sauce and stir. Sprinkle cheese, pepperoni, and other toppings across the top.
              • Place in a preheated oven and bake for 20-25 minutes, until the cheese has melted. Remove from heat and allow to cool in the skillet for 10-15 minutes before serving. Serve and enjoy.

              Notes

              • Use an oven safe skillet for this recipe.
              • This dish produces a lot of liquid due to the cauliflower.
              • Cover this skillet with your favorite toppings.

              Nutrition

              Calories: 350kcal | Carbohydrates: 9g | Protein: 19g | Fat: 27g | Saturated Fat: 11g | Cholesterol: 68mg | Sodium: 1052mg | Potassium: 656mg | Fiber: 3g | Sugar: 5g | Vitamin A: 539IU | Vitamin C: 52mg | Calcium: 227mg | Iron: 2mg

              September 25, 2020 by Tanya Harris Leave a Comment

              Easy No-Cook Pizza Sauce

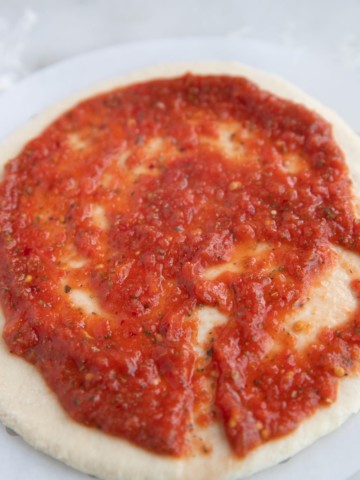
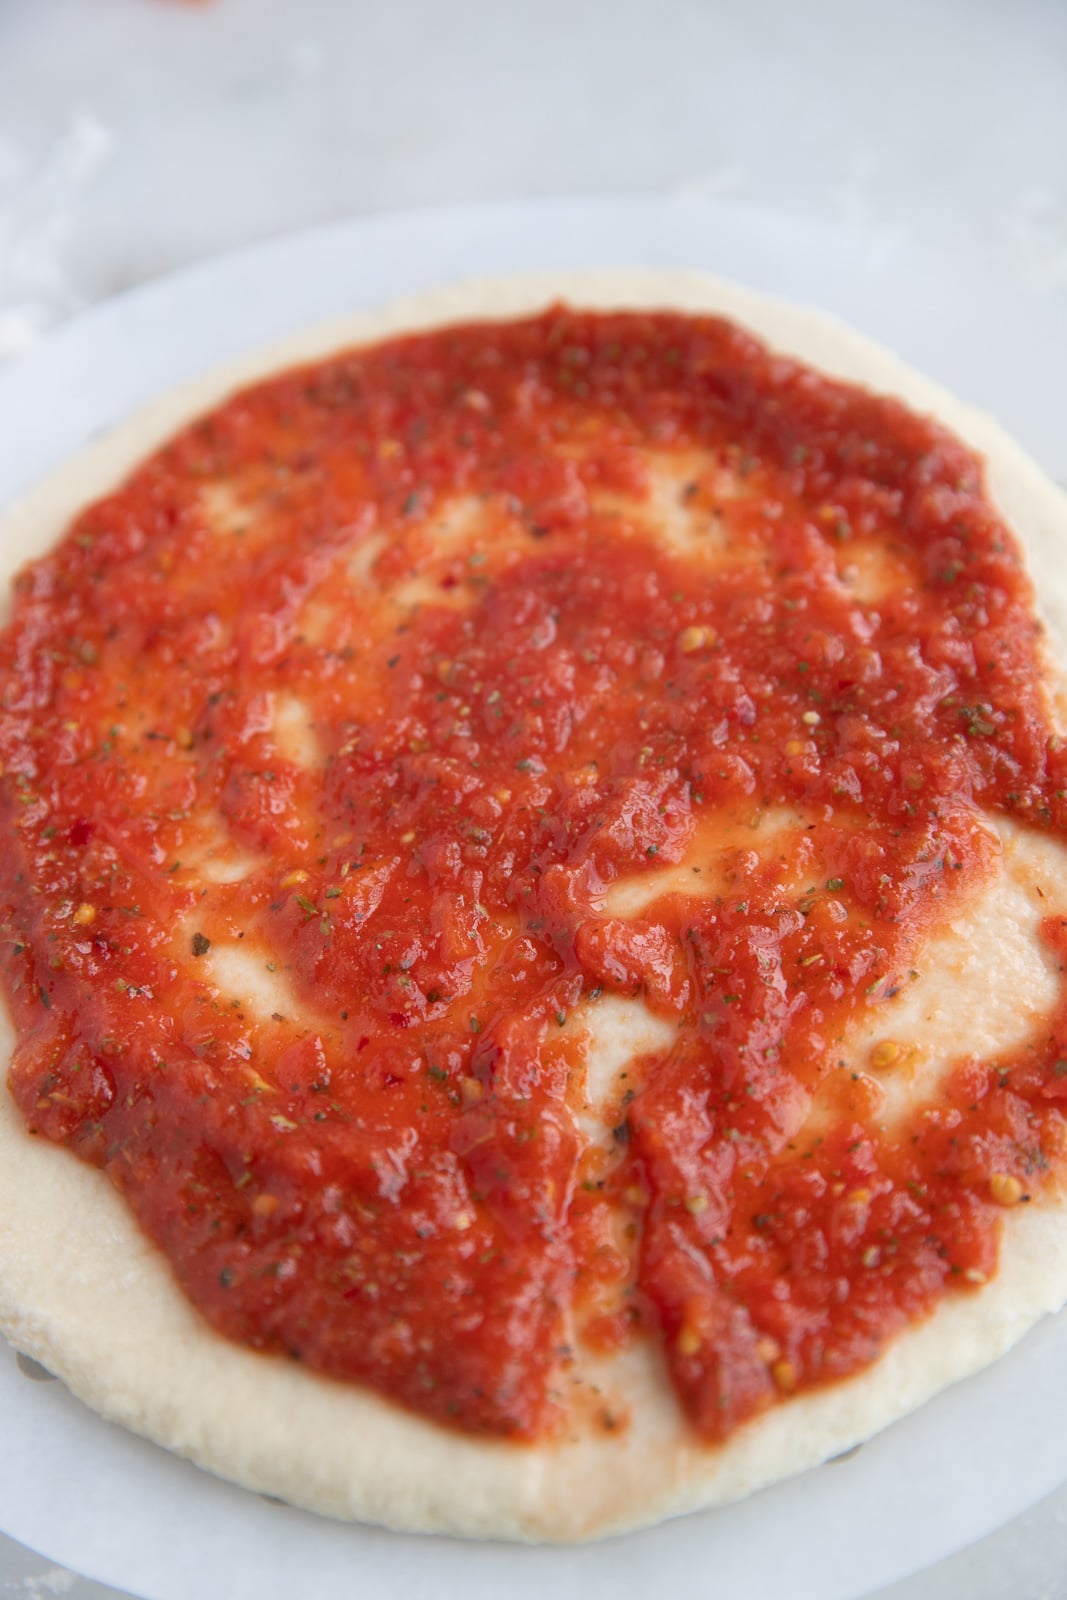
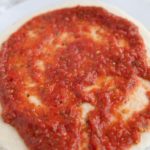
              The sauce spread on pizza dough.

              It's so easy to make your own tomato sauce for pizzas and dips! This no-cook pizza sauce takes no more than 5 minutes to make with a few simple ingredients.

              The sauce spread on pizza dough.

              This post contains affiliate links, please read my full disclaimer here.

              You’ll find the full recipe with ingredient amounts and instructions in the recipe card at the bottom of this post. Be sure to check out the blog post itself for extra tips and tricks!

              When it comes to pizza night, we love making our own pizzas instead of ordering in, and a pizza is only as good as its sauce!

              Luckily I've got you covered with this easy pizza sauce that doesn't require any cooking, just blend the ingredients and spread it all over your favorite crust. Use it in your favorite pizza recipe, like cauliflower pizza casserole, a calzone, or dip.

              This recipe is a great way to add flair and flavor to your homemade pizzas and it's great as a dip too, or stir it into some warm pasta.

              If you are after more dipping sauces, be sure to check out my Homemade BBQ Sauce and Easy Queso Dip.

              How to make easy no-cook pizza sauce

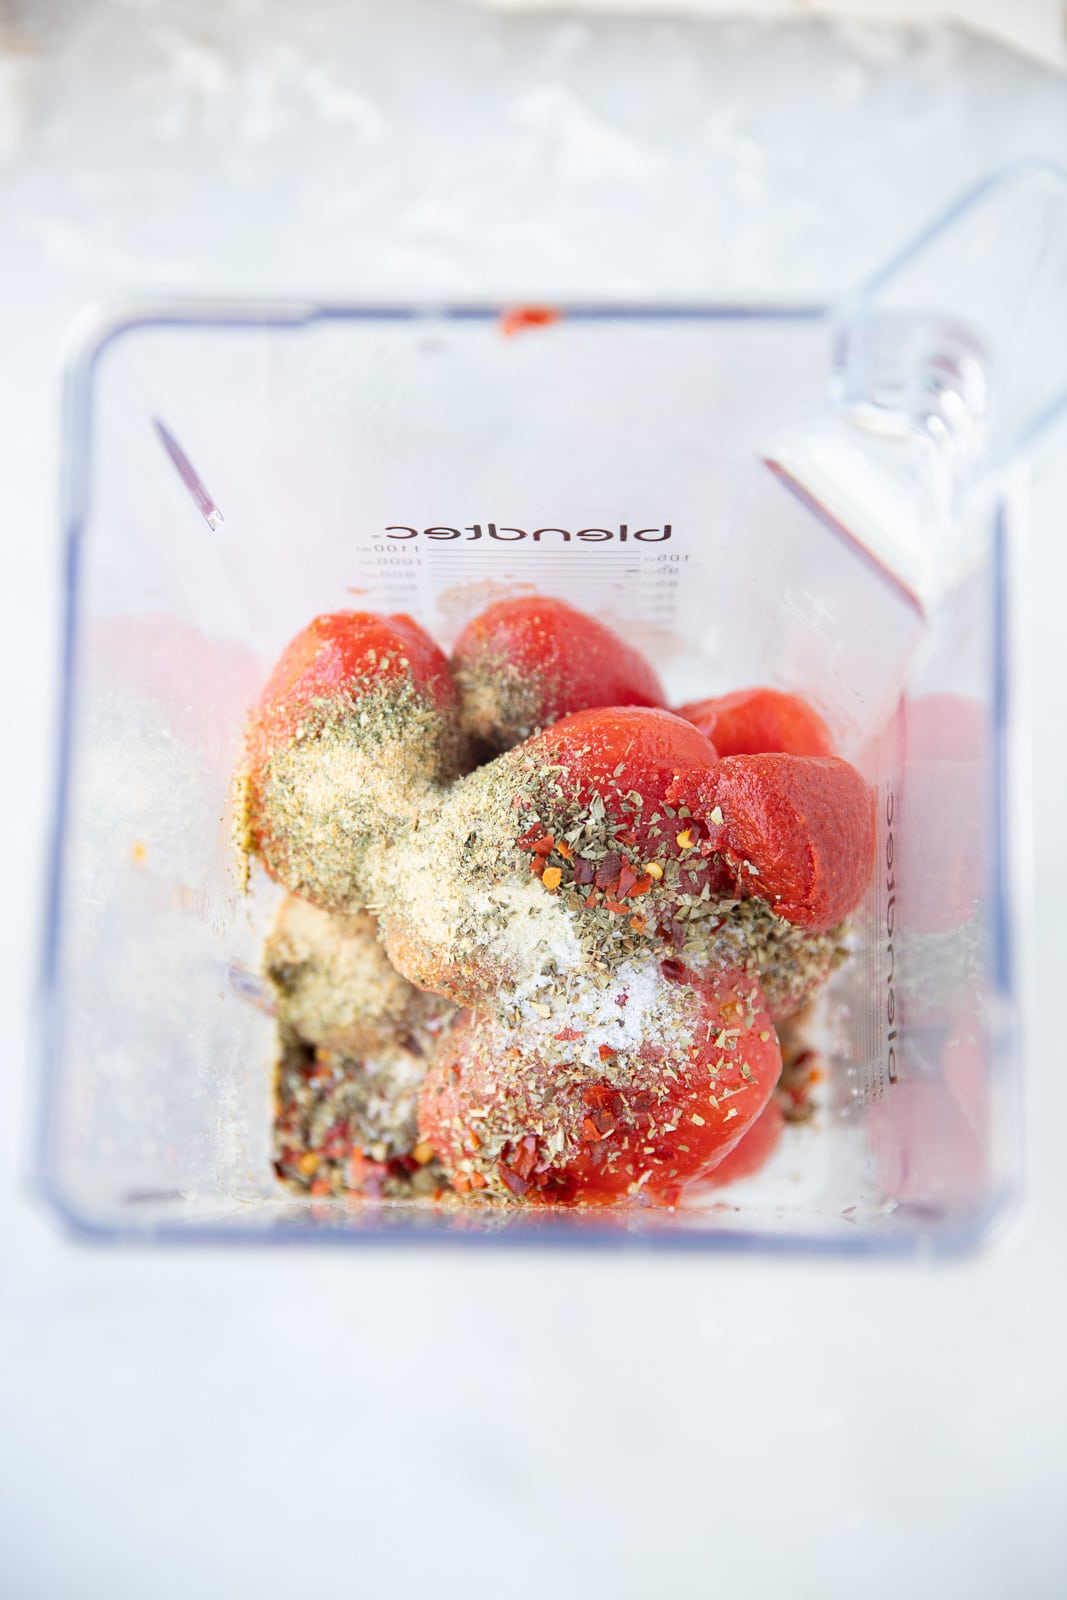
              • Add ingredients to a blender or food processor.
              The ingredients before being blended.
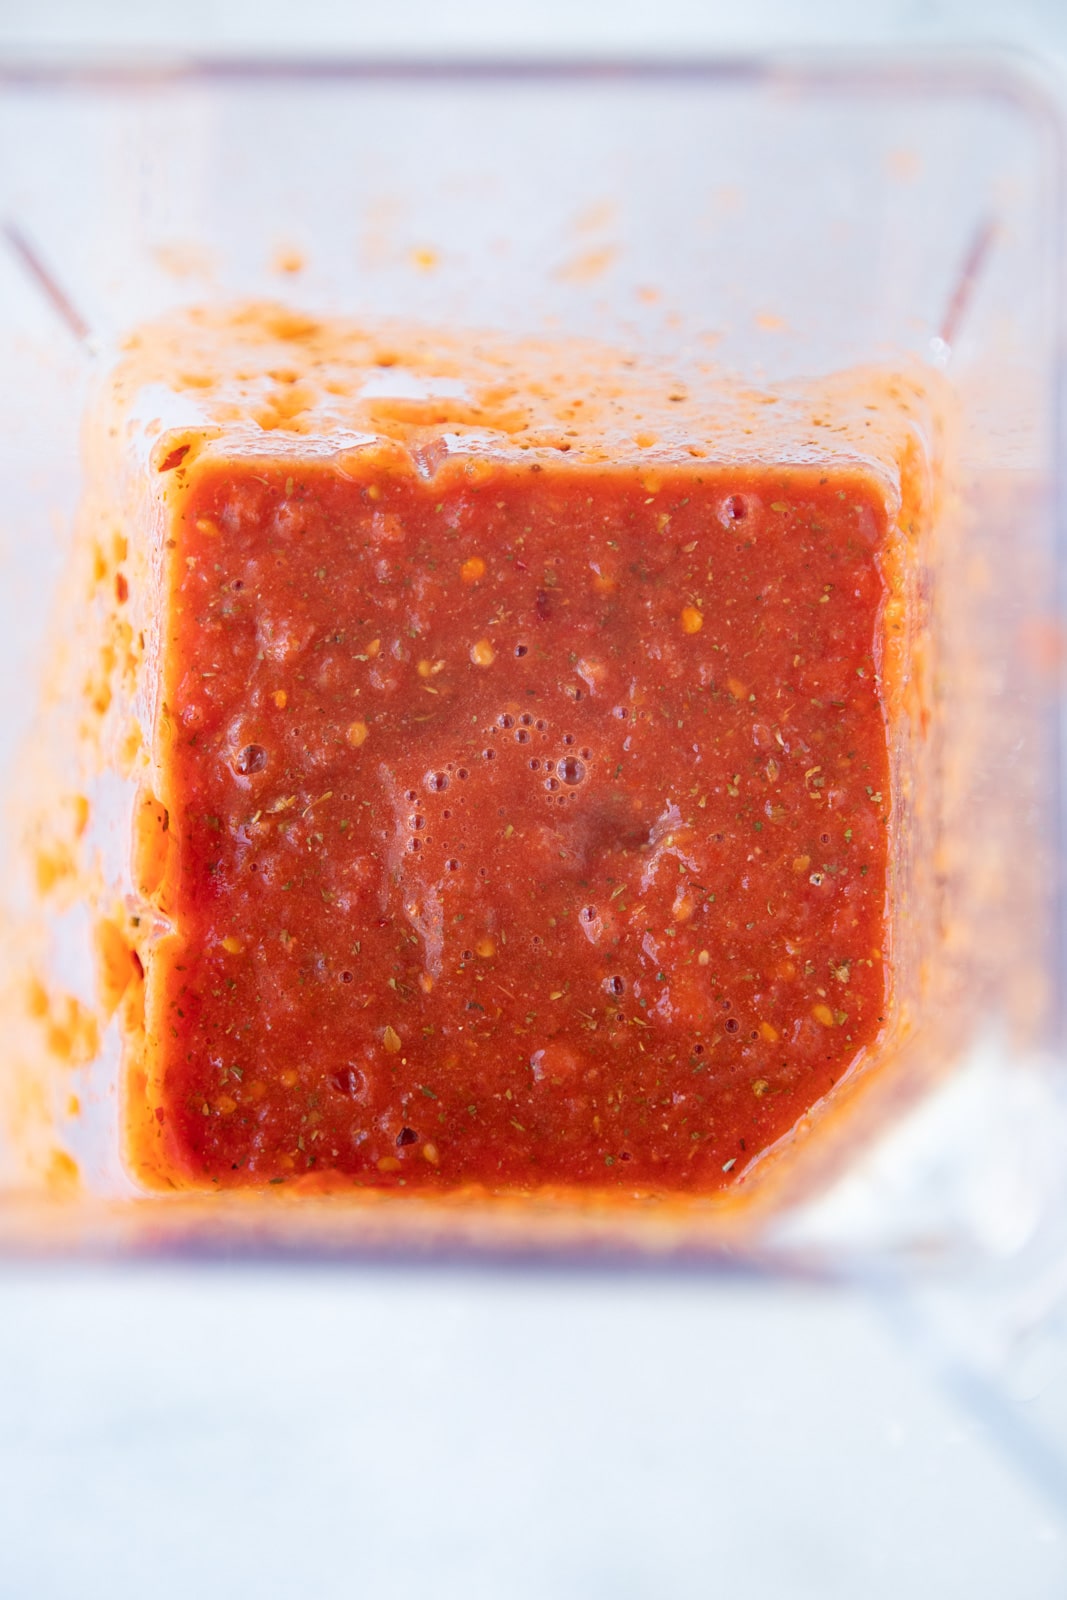
              • Pulse a few times until desired consistency.
              The ingredients after blending.

              Can you make it ahead of time?

              This recipe makes enough for two cups of sauce, so you are likely to have some leftover. Place the sauce in a sealed jar or airtight container and it will keep for up to a week. It can be used straight out of the fridge.

              Can you freeze it?

              This is a great recipe if you are looking for some batch cooking! The sauce will keep well frozen for up to 2 months. Defrost the suace in the fridge overnight before using.

              Recipe Variations

              This pizza sauce is pretty good as it is, but there are a few swaps you can make to suit your tastes.

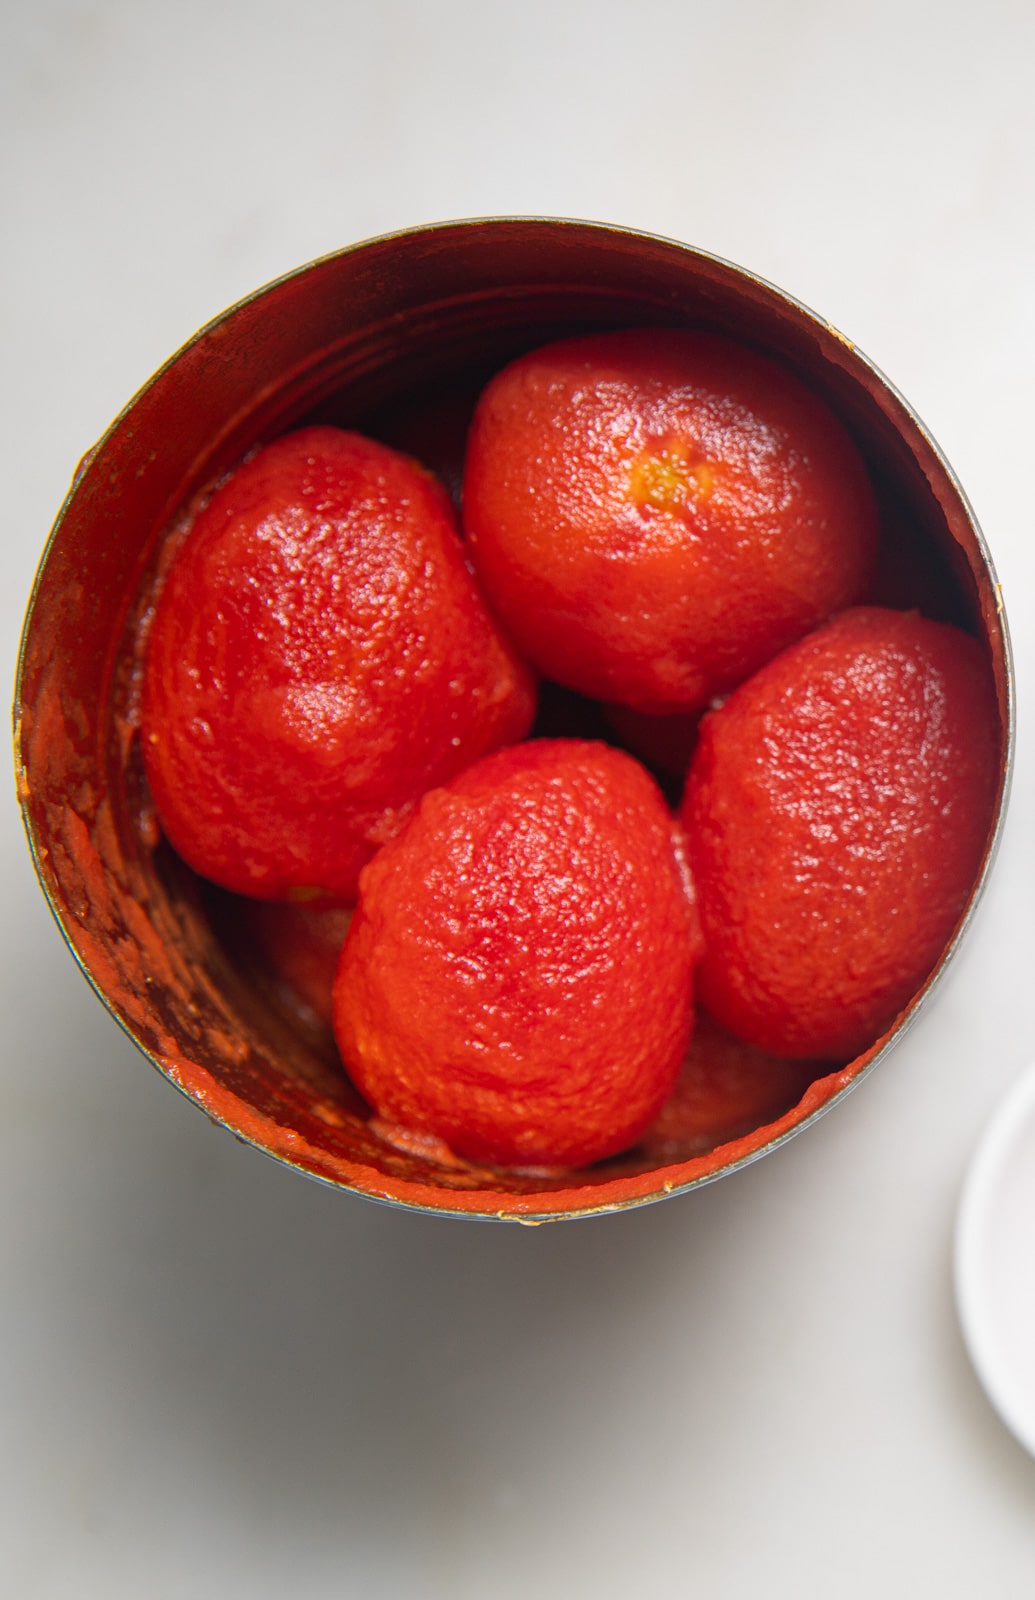
              • I like to blend whole tomatoes to make this, but you can use a thick canned pure tomato sauce and mix the other ingredients into it.
              • I like to add red pepper flakes because I like my pizza sauce a little spicy. Feel free to omit the flakes for less heat or add more for spicy pizza sauce.
              • Depending on the brand of tomatoes you use, you may need to add a little sugar to cut through the acidity, but you can omit this if you prefer. You can also substitute white sugar for coconut sugar for a paleo sauce.
              Tomatoes in a can.

              Recipe Notes and Tips

              • This recipe is easily doubled and tripled.
              • Spread the sauce evenly on the crust and don't be stingy, add a nice thick layer.
              • The tomato paste makes the sauce thicker and more spreadable, so don't skip this ingredient.

              More Easy Sauce Recipes

              • Homemade Vegetarian Spaghetti Sauce
              • Homemade Remoulade Sauce
              • Cocktail Sauce
              • Tartar Sauce
              The sauce spread on pizza dough.
              Print Recipe
              5 from 1 vote

              Easy No Cook Pizza Sauce

              It's so easy to make your own tomato sauce for pizzas and dips! This no cook pizza sauce takes no more than 5 minutes to make with a few simple ingredients.
              Prep Time5 minutes mins
              Total Time5 minutes mins
              Course: Sauce
              Cuisine: American
              Keyword: easy pizza sauce, how to make pizza sauce, tomato pizza sauce recipe
              Servings: 2 cups
              Calories: 99kcal
              Author: Tanya Harris

              Ingredients

              • 28 oz can of whole tomatoes drained
              • 1 Tablespoon tomato paste
              • 2 teaspoon italian seasoning
              • 1 teaspoon dried basil
              • 1 teaspoon dried oregano
              • 1 teaspoon sugar optional
              • 1 teaspoon red pepper flakes optional
              • 1 teaspoon garlic powder
              • ½ teaspoon onion powder
              • ½ teaspoon salt

              Instructions

              • Add ingredients to a blender or food processor.
              • Pulse a few times until desired consistency.
              • Add to pizza or use as dip.

              Notes

              • This recipe is easily doubled and tripled.
              • Spread the sauce evenly on the crust and don't be stingy, add a nice thick layer.
              • The tomato paste makes the sauce thicker and more spreadable, so don't skip this ingredient.

              Nutrition

              Calories: 99kcal | Carbohydrates: 23g | Protein: 4g | Fat: 1g | Saturated Fat: 1g | Sodium: 1231mg | Potassium: 888mg | Fiber: 6g | Sugar: 13g | Vitamin A: 913IU | Vitamin C: 39mg | Calcium: 171mg | Iron: 6mg

              September 10, 2020 by Tanya Harris 2 Comments

              Chicken Seasoning

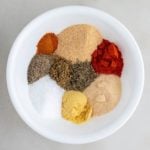
              chicken spices in white bowl

              Add some flavor to your meals with this homemade chicken seasoning. Made with nine herbs and spices, this dry rub is an easy way to elevate any chicken dinner.

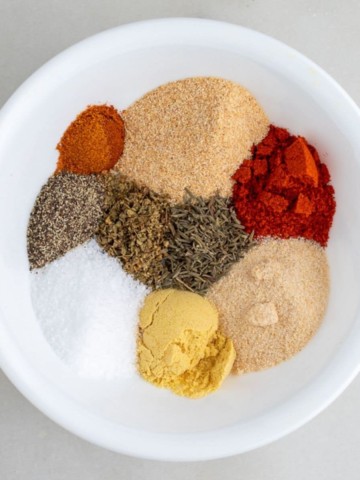
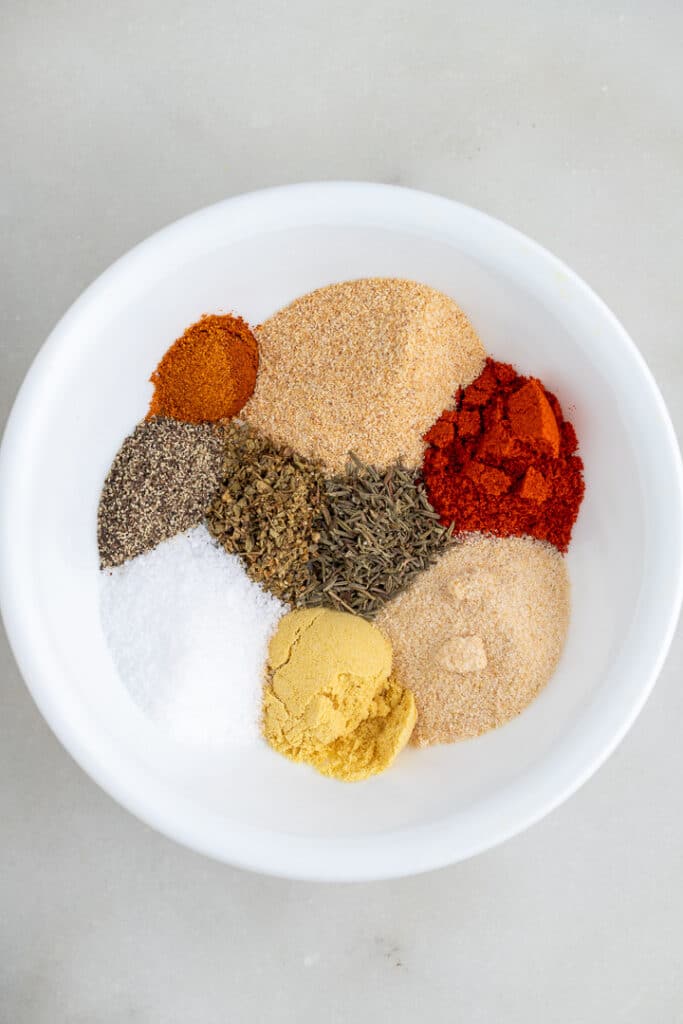
              The spices for the seasoning in a white bowl

              This post contains affiliate links, please read my full disclaimer here.

              You’ll find the full recipe with ingredient amounts and instructions in the recipe card at the bottom of this post. Be sure to check out the blog post itself for extra tips and tricks!

              When it comes to adding flavor to a dish, you can't go wrong with a homemade seasoning mix. This dry spice and herb mix is a wonderful way to season chicken and it's super quick to make a batch.

              This recipe yields enough to season one whole chicken, but it's super easy to multiply the recipe to make a big batch to have on hand whenever you need.

              Be sure to check out my other homemade seasoning recipes.

              How to make chicken seasoning

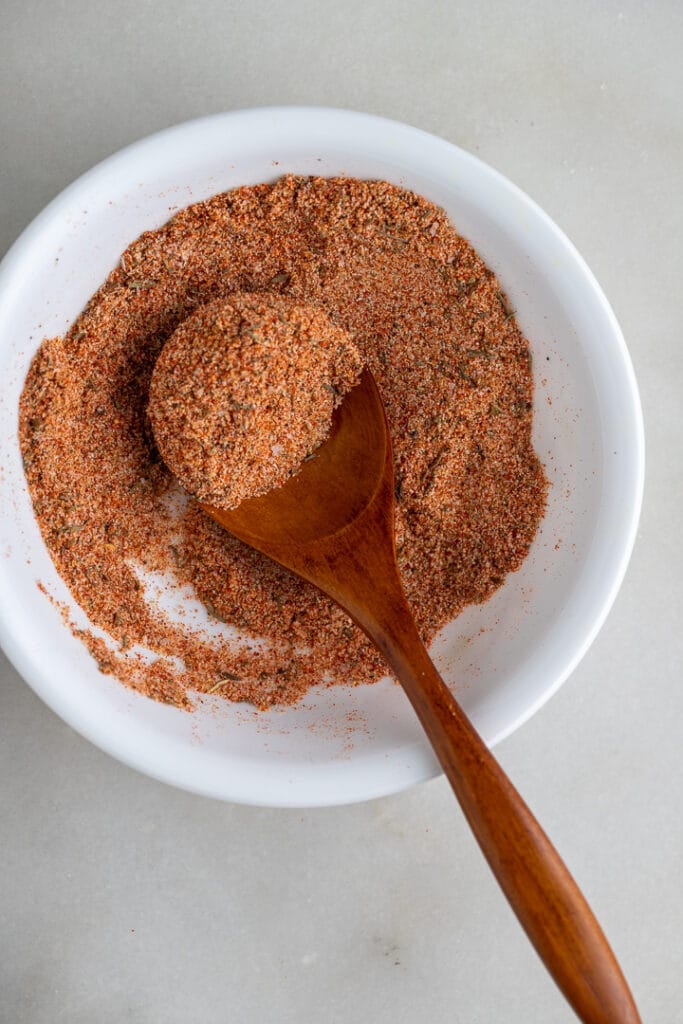
              Simply add the ingredients to a small bowl and mix together until well combined.

              Chicken seasoning in a white bowl with a spoon

              How to use it

              You can rub this spice straight onto a whole chicken or chicken breasts or thighs before cooking. You can also mix with a little oil or melted butter to help to get the chicken skin nice and crispy.

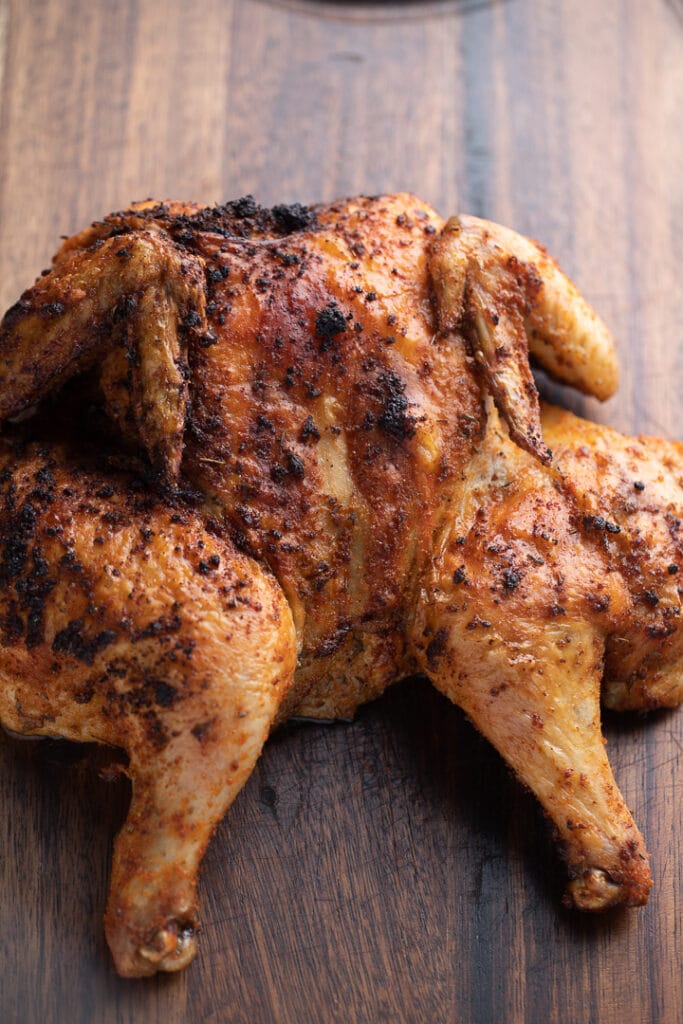
              A fried spatchcoked chicken on a wooden work top

              This seasoning rub can be used on beef or pork as well and it's delicious sprinkled over vegetables before roasting.

              How long does it keep?

              This spice mix has a pretty good shelf life if you want to make a big batch. Store it in an air tight container in a cool and dark cupboard and it will keep well for up to 6 months depending on the freshness of your ingredients.

              Make it to your taste

              I use a little cayenne in this seasoning to give it some spice. If you are particularly sensitive to heat you can reduce the amount or omit it completely. Likewise, if you like your chicken on the spicy side, feel free to add in a little extra.

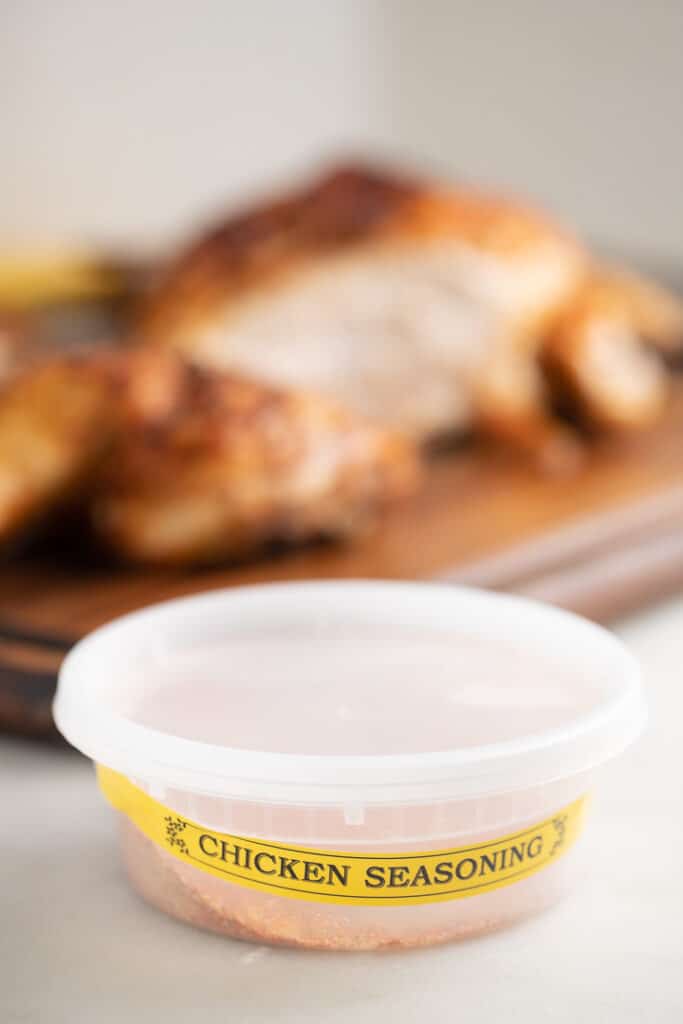
              Chicken seasoning in front of a cooked spatchcock chicken

              Recipe Notes and Tips

              • Use 3-4 tablespoon for a 4lb chicken.
              • I like to add 3 tablespoon of olive oil or butter to seasoning before roasting a whole chicken.
              • Store in a cool dark place in an airtight container

              More Easy Seasonings

              • Homemade Ranch Seasoning
              • Jamaican Jerk Seasoning
              • Homemade Taco Seasoning
              • Homemade BBQ Seasoning
              chicken spices in white bowl
              Print Recipe
              4.67 from 3 votes

              Chicken Seasoning

              Add some flavor to your meals with this homemade chicken seasoning. Made with nine herbs and spices, this dry rub is an easy way to elevate any chicken dinner.
              Prep Time5 minutes mins
              Total Time5 minutes mins
              Course: Seasoning
              Cuisine: American
              Keyword: dry rub chicken seasoning, easy chicken seasoning recipe, homemade chicken seasoning
              Servings: 4 tablespoons
              Calories: 16kcal
              Author: Tanya Harris

              Ingredients

              • 2 teaspoon paprika
              • 2 teaspoon onion powder
              • 2 teaspoon garlic powder
              • 1 teaspoon mustard powder
              • ½ teaspoon thyme
              • ½ teaspoon oregano
              • 1 ½ teaspoon kosher salt
              • ½ teaspoon black pepper
              • ¼ teaspoon cayenne pepper

              Instructions

              • Whisk ingredients until incorporated. Use to season chicken, vegetables, or any other protein.

              Notes

              • Use 3-4 tablespoon for a 4lb chicken.
              • I like to add 3 tablespoon of olive oil or butter to seasoning before roasting a whole chicken.
              • Store in a cool dark place in an airtight container

              Nutrition

              Calories: 16kcal | Carbohydrates: 3g | Protein: 1g | Fat: 1g | Saturated Fat: 1g | Sodium: 3200mg | Potassium: 57mg | Fiber: 1g | Sugar: 1g | Vitamin A: 613IU | Vitamin C: 1mg | Calcium: 7mg | Iron: 1mg

              September 1, 2020 by Tanya Harris 480 Comments

              Brown Stew Chicken

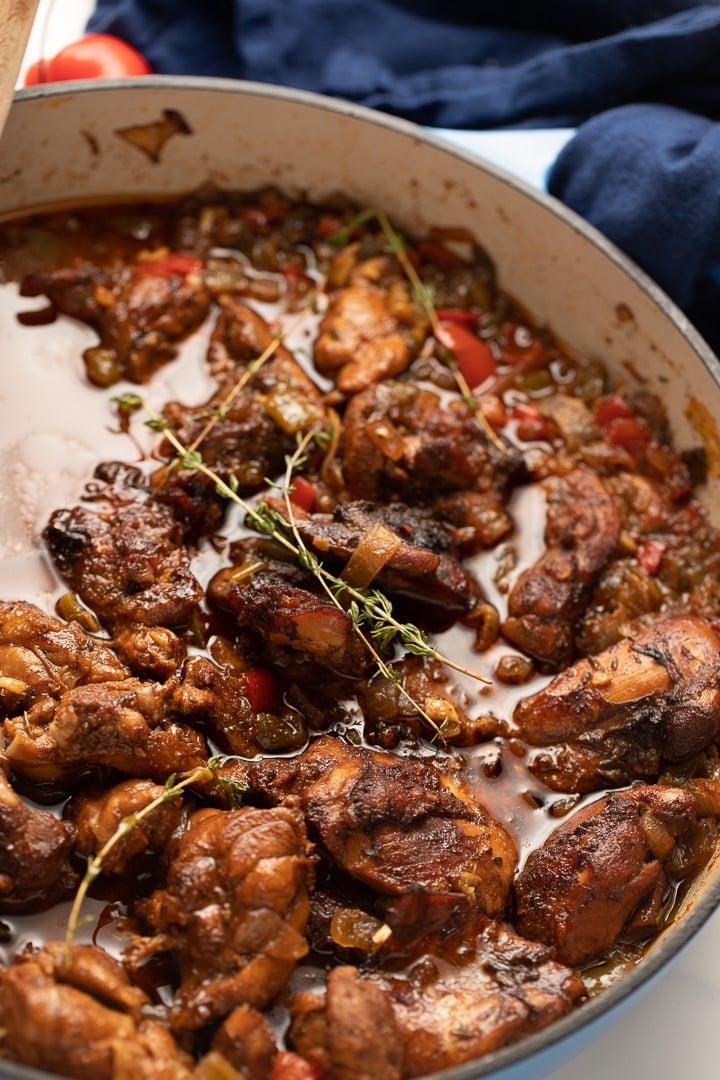
              brown stew chicken in pan

              This Jamaican Brown Stew Chicken is full of Caribbean flavor and a perfect main dish for any day of the week. It’s the perfect stewed chicken dish when you want to have a taste of the islands.

              brown stew chicken in pot with blue towel behind it

              You’ll find the full recipe with ingredient amounts and instructions in the recipe card at the bottom of this post. Be sure to check out the blog post itself for extra tips and tricks!

              We had brown stewed chicken quite often growing up, and it quickly became one of my favorite stew recipes. It was on a weekly rotation in our house, and we would have it more often than we had this amazing oxtail. 

              Brown stew chicken takes a little more time than most traditional stew recipes. The meat is washed and then marinated in “seasoning” which includes chopped aromatics and a few dry seasonings. The meat is then lightly browned on the stovetop or in the oven, then stewed for about 30-40 minutes until it falls off the bone. 

              I’ve ventured away from my parents' recipe by using boneless, skinless chicken, mainly because I’m not a fan of chicken skin in stew. You could use chicken with the skin and bone on, but expect to cook it longer. 

              How to Make Brown Stew Chicken

              First, rinse your chicken with a mixture of vinegar and water. I’m sure some will wonder why. This is just a rule from my mom and almost everyone from the Caribbean. So I do it. No questions asked. 
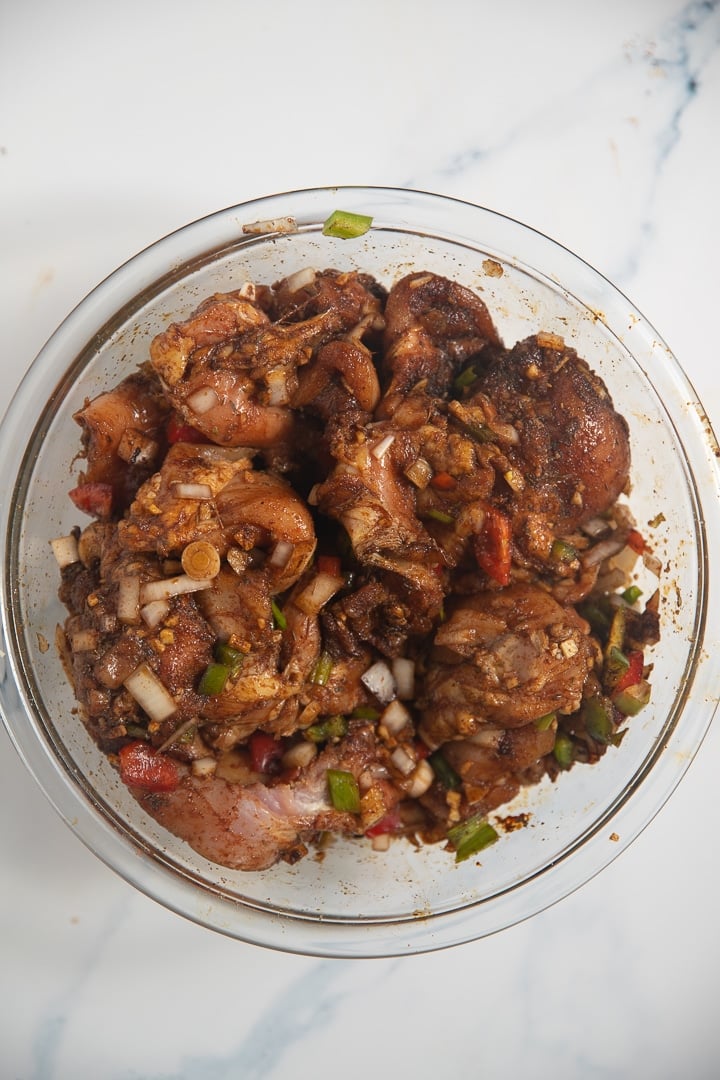
              Place your chicken pieces in a bowl along with the brown sugar, browning, garlic powder, onion powder, salt, paprika, dried thyme, black pepper, allspice, garlic cloves, ginger, onions, and peppers. That's a lot, but oh so necessary if you want those deep flavors. Mix ingredients, making sure the chicken is fully covered. Cover and place in the fridge, and allow the meat to marinate for at least 1 hour. If you can, allow it to marinate overnight. 

              raw chicken with peppers, onions, and other seasonings in glass bowl

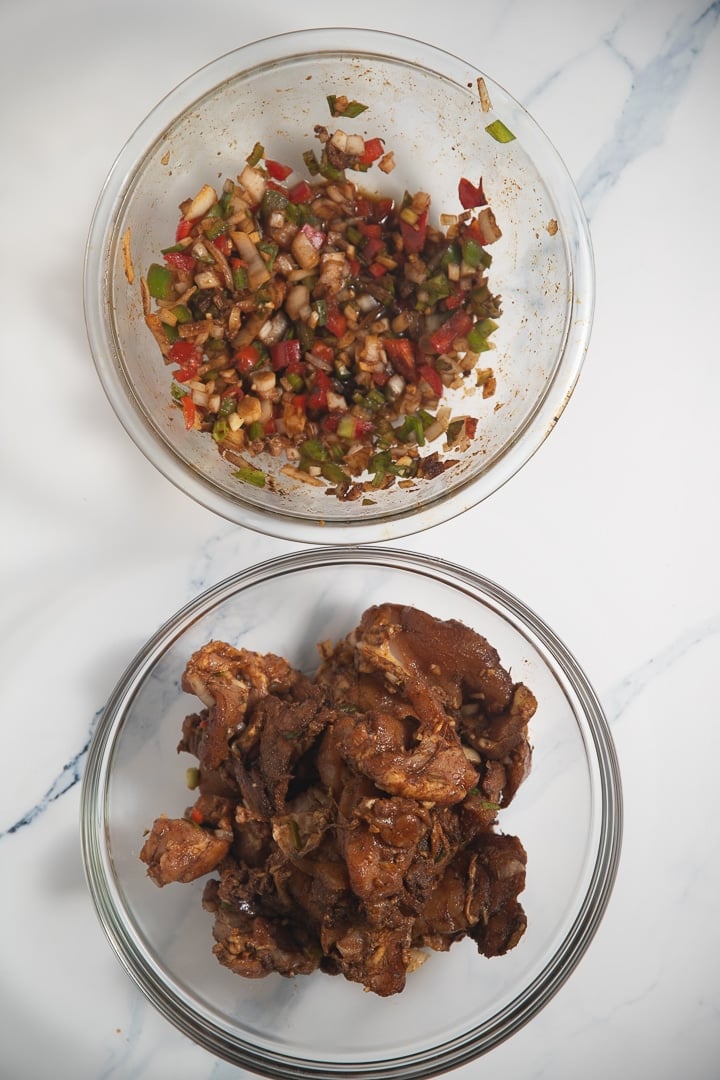
              When ready to cook, remove the onions, peppers, garlic, and ginger from the chicken and place them in a separate bowl.

              two glass bowls, one with peppers and onions and the other with raw chicken

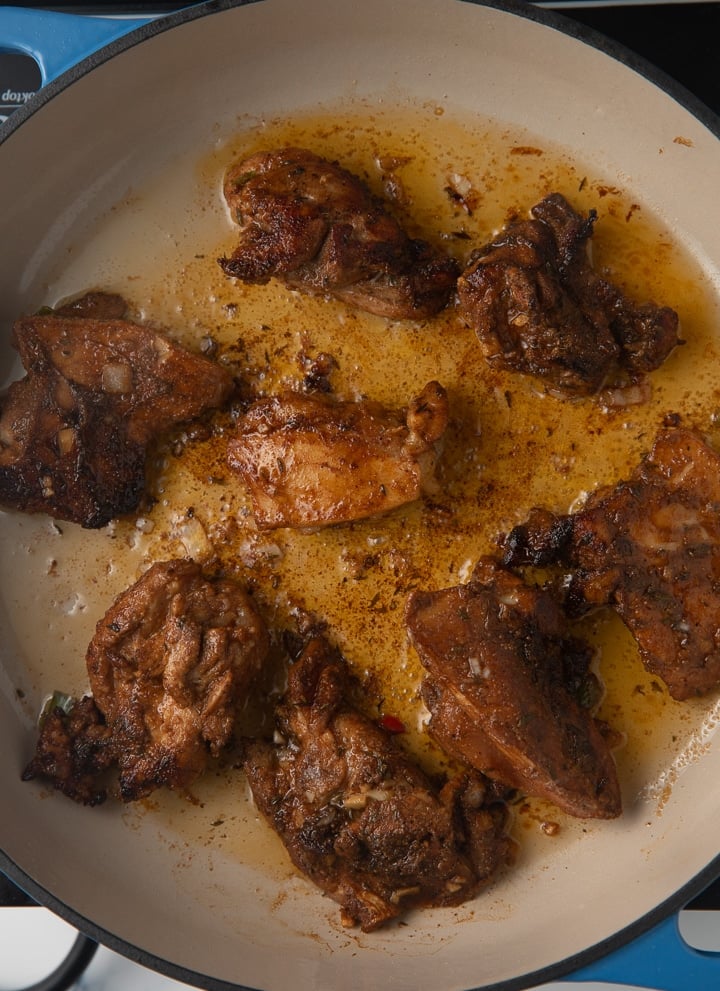
              Heat a large skillet over medium heat, add oil, and then add chicken pieces and brown on each side for about 2 minutes. 

              chicken being browned in pan

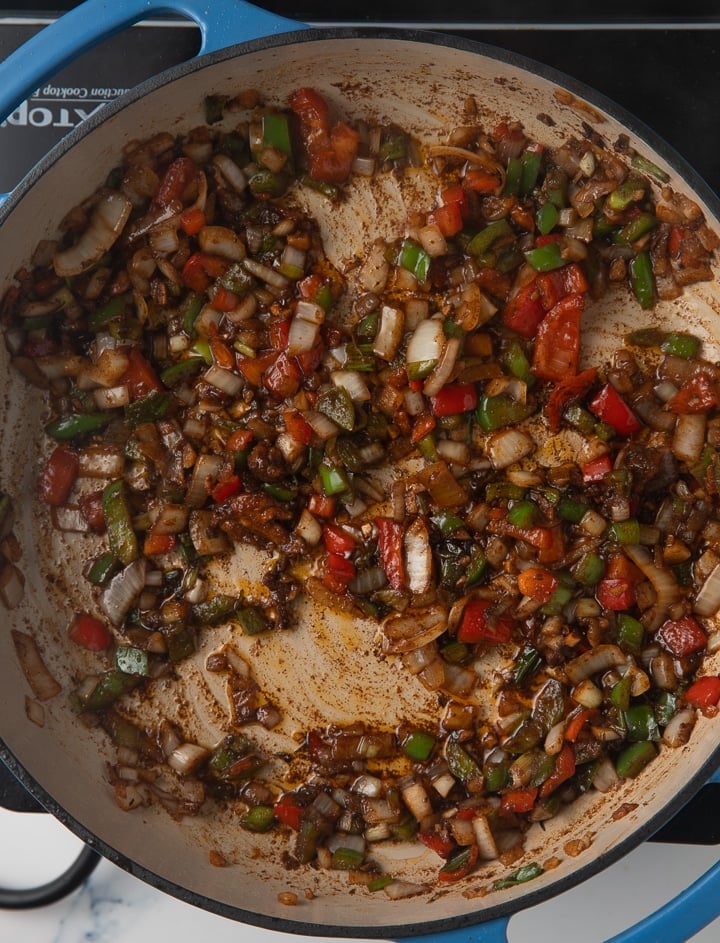
              Remove the chicken and add the reserved seasonings to the pot, then sauté until softened, about 5 minutes.

              peppers and onions being browned in pan

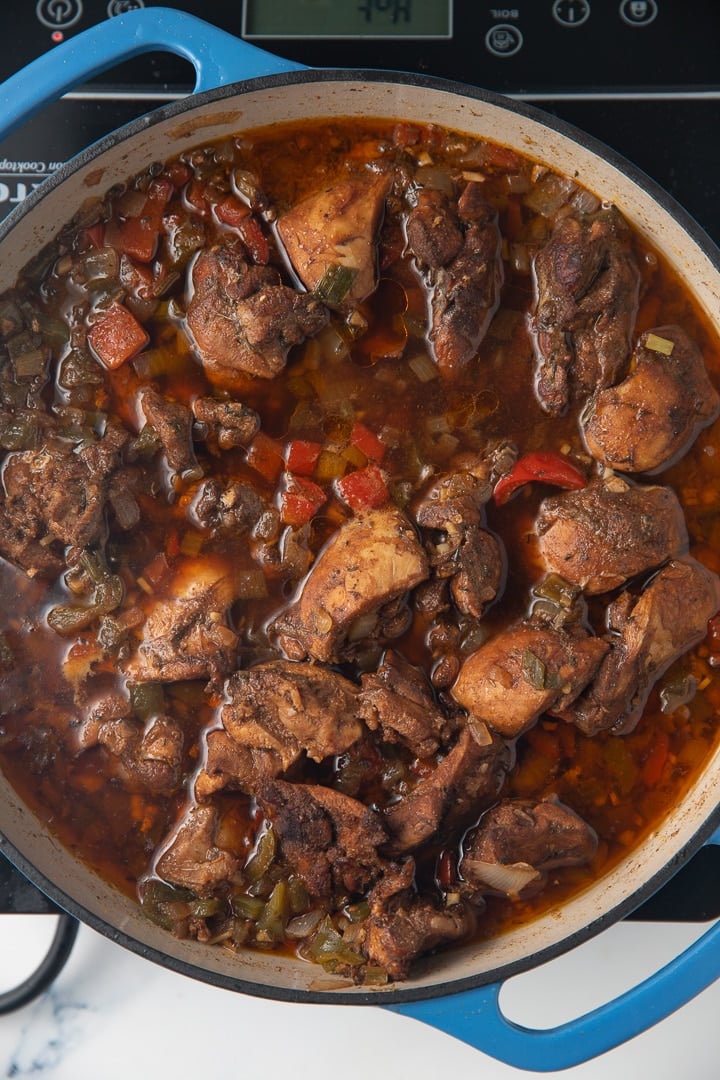
              Add chicken back to the skillet along with chicken broth, water, and ketchup. Bring the mixture to a simmer, cover, and simmer for 30 minutes, stirring occasionally. Remove the cover and simmer for an additional 10 minutes to reduce the gravy.

              chicken pieces cooking in pot

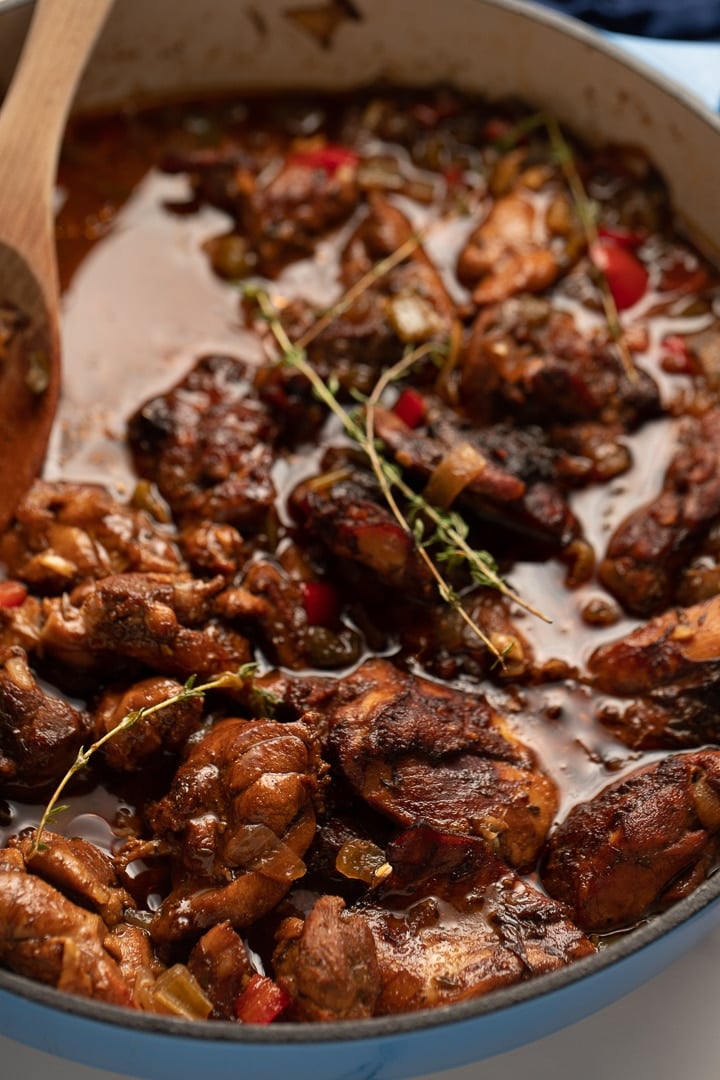
              Serve and enjoy. 

              close up photo of brown stew chicken in pan with thyme leaves on top

              Recipes to serve with:

              • Jamaican Rice and Peas (Pressure Cooker)
              • Steamed Cabbage

              Other Jamaican Recipes to Try:

              • Brown Stew Fish
              • Jamaican Curry Chicken
              • Jamaican Jerk Chicken
              • Rum Punch
              • Corned Beef and Cabbage
              • Callaloo and Saltfish
              • Jamaican Banana Fritters
              • Jamaican Stew Peas

              Or have a look at all my Caribbean-inspired recipes.

              brown stew chicken in pan
              Print Recipe
              4.88 from 429 votes

              Brown Stew Chicken

              This Jamaican Brown Stew Chicken is full of Caribbean flavor and a perfect main dish for any day of the week. It’s the perfect stewed chicken dish when you want to have a taste of the islands.
              Prep Time20 minutes mins
              Cook Time40 minutes mins
              1 hour hr
              Total Time2 hours hrs
              Course: Main Course
              Cuisine: Caribbean
              Keyword: brown stew chicken, jamaican brown stew chicken
              Servings: 6 people
              Calories: 626kcal
              Author: Tanya Harris

              Ingredients

              • 3 lbs chicken thighs boneless, skinless
              • 1 Tablespoon brown sugar
              • 2 teaspoons browning
              • 2 teaspoons garlic powder
              • 2 teaspoons onion powder
              • 2 teaspoons salt or to taste
              • 1 teaspoon paprika
              • 1 teaspoon dried thyme
              • ½ teaspoon black pepper
              • ¼ teaspoon allspice
              • 1 yellow onion chopped
              • 3 spring onions chopped
              • ½ green bell pepper chopped
              • ½ red bell pepper chopped
              • 1 scotch bonnet pepper seeds removed and chopped
              • 4 garlic cloves chopped
              • 1 inch ginger chopped
              • ¼ cup oil
              • 2 Tablespoons ketchup
              • 1 cup chicken broth
              • ½ cup water

              Instructions

              • Add chicken, brown sugar, browning, garlic powder, onion powder, salt, paprika, dried thyme, black pepper, allspice, onions, green pepper, red pepper, scotch bonnet, garlic cloves, and ginger to a bowl and mix, rubbing seasoning into the chicken. Cover and marinate in the fridge for at least 1 hour or overnight.
              • Remove peppers, onions, garlic, ginger and thyme from chicken and set aside. Heat oil in large skillet over medium heat and add chicken, brown for about 1-2 minutes per side. Remove chicken and add reserved onions and peppers to the skillet and sauté until softened, for about 5 minutes. Add chicken back to skillet along with chicken broth, water, and ketchup.
              • Bring mixture to a simmer and cover and simmer for 30 minutes, stirring occasionally. Remove cover and simmer for an additional 10 minutes, to reduce the gravy. Serve and enjoy.

              Video

              Notes

              • Brown stew chicken is traditionally cooked with a whole chicken that has been chopped into smaller pieces. Feel free to skip this by using chicken thighs or legs.
              • With any stew, dark meat works best as chicken breast can overcook and dry out. Dark meat also has more flavor. I generally opt for chicken thighs, chicken legs, and chicken wings when it comes to this recipe.

              Nutrition

              Calories: 626kcal | Carbohydrates: 11g | Protein: 38g | Fat: 47g | Saturated Fat: 11g | Cholesterol: 222mg | Sodium: 1154mg | Potassium: 633mg | Fiber: 1g | Sugar: 5g | Vitamin A: 818IU | Vitamin C: 29mg | Calcium: 39mg | Iron: 2mg

              August 13, 2020 by Tanya Harris 2 Comments

              Homemade Pumpkin Waffles

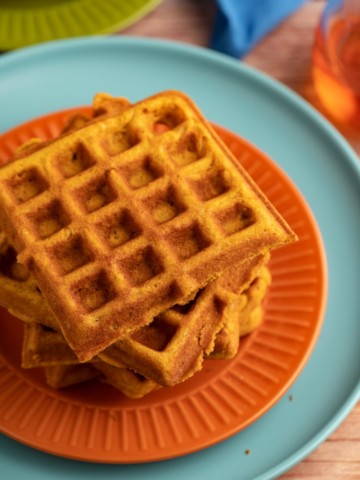
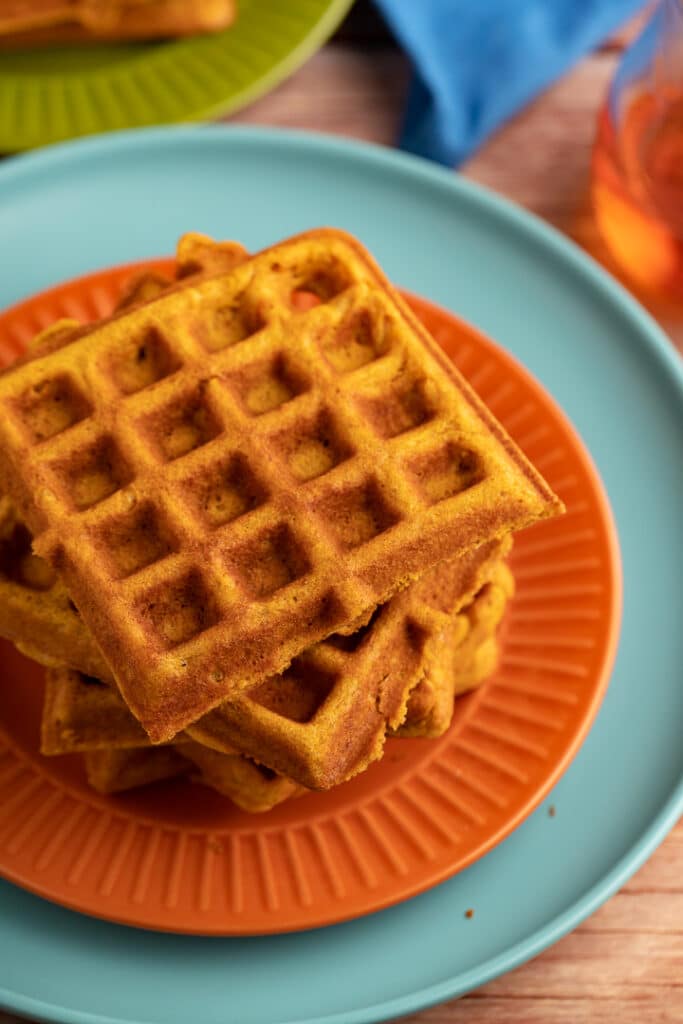
              Pumpkin waffles stacked on a plate

              These delicious homemade pumpkin waffles are perfect for a fall breakfast or brunch. Easy to make and flavored with maple syrup and brown sugar, they are a breakfast that the whole family will love!

              pumpkin waffles stacked on top of each other on orange and teal plate

              This post contains affiliate links, please read my full disclaimer here.

              You’ll find the full recipe with ingredient amounts and instructions in the recipe card at the bottom of this post. Be sure to check out the blog post itself for extra tips and tricks!

              When it comes to weekend breakfasts in our house, there's always heated discussion over whether we have pancakes or waffles! When I served up these pumpkin waffles, even the pancake lovers devoured them!

              Super quick and easy to make, they are rich in flavor and taste just like fall!

              If you love waffles, be sure to check out my Cinnabon Waffles Recipe!

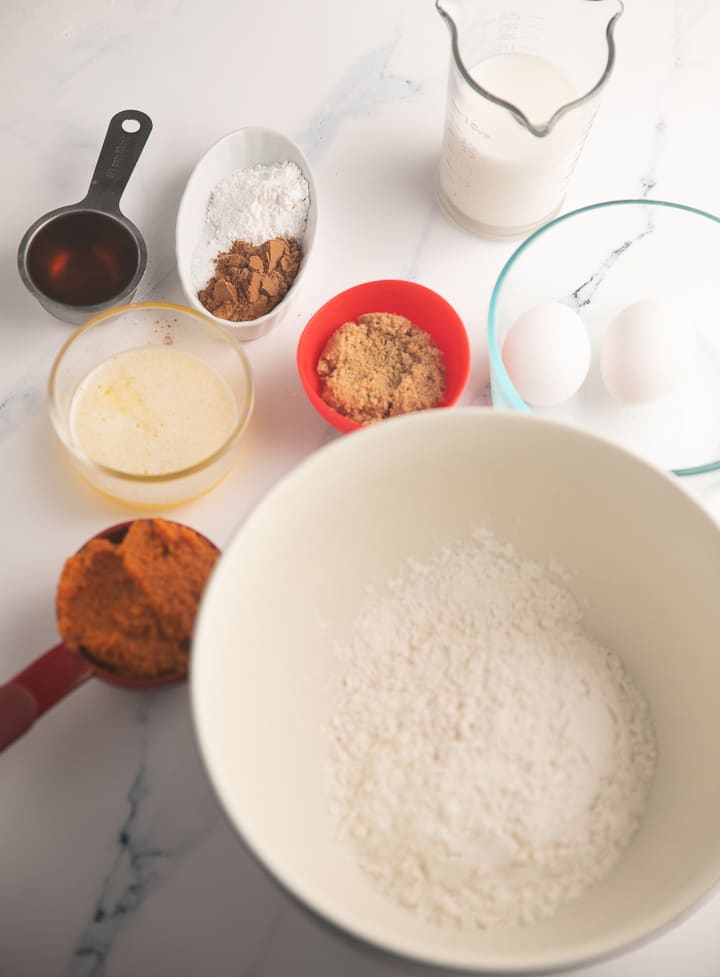
              Ingredients

              • All-purpose Flour
              • Baking Powder
              • Pumpkin Spice
              • Salt
              • Eggs
              • Milk
              • Butter
              • Maple Syrup
              • Brown Sugar
              • Pumpkin
              Ingredients to make the waffles

              How to make pumpkin waffles

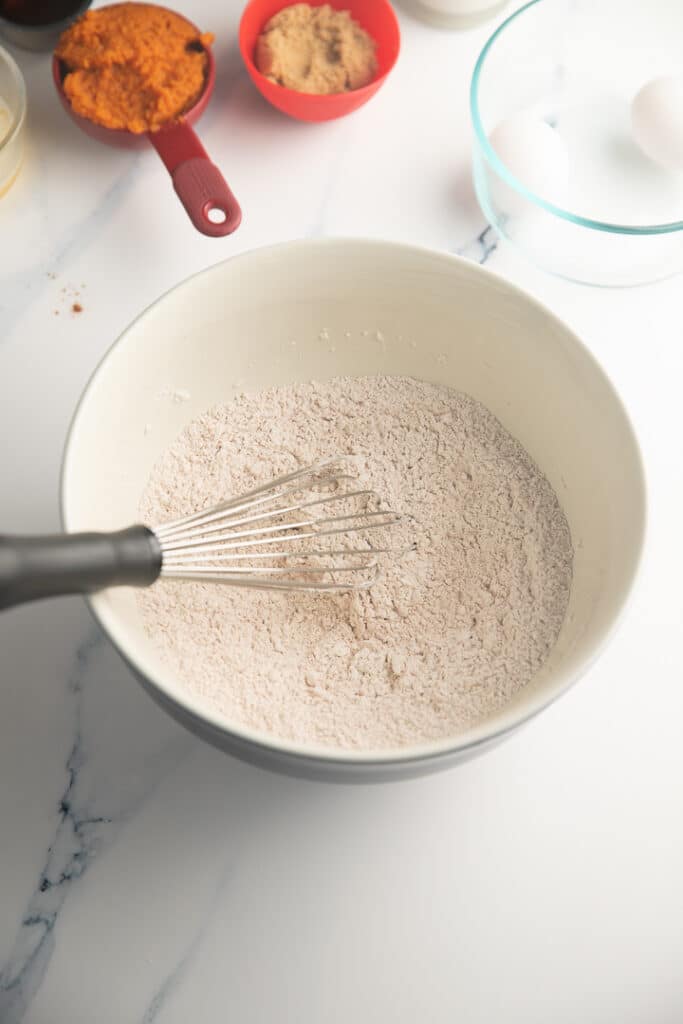
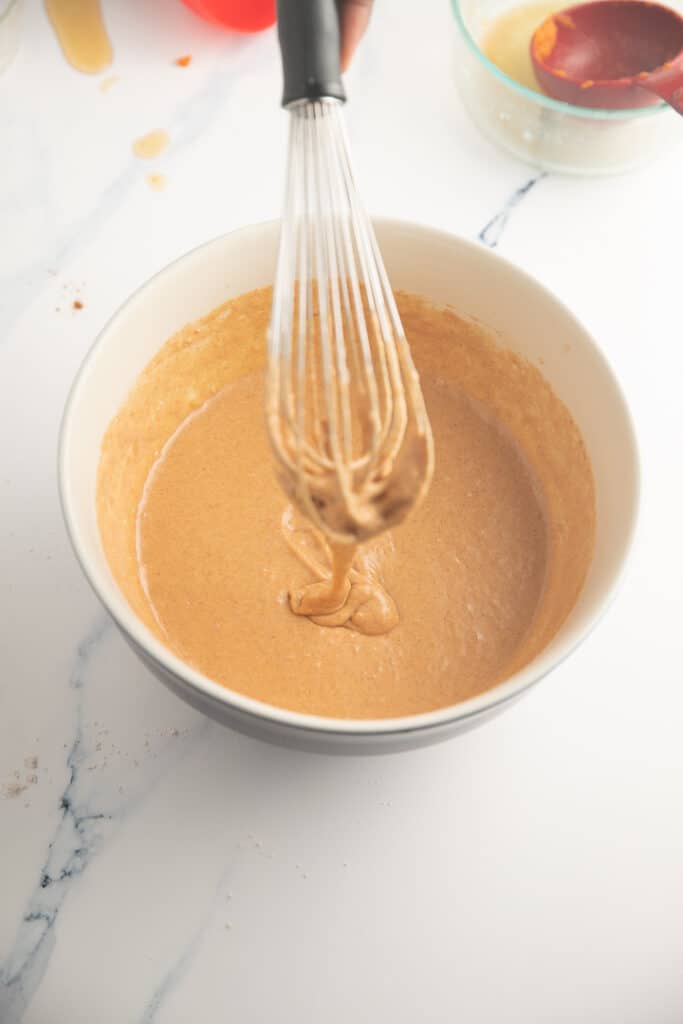
              • Whisk flour, baking powder, pumpkin spice, and salt in a large bowl until combined.
              Dry ingredients whisked together in a bowl
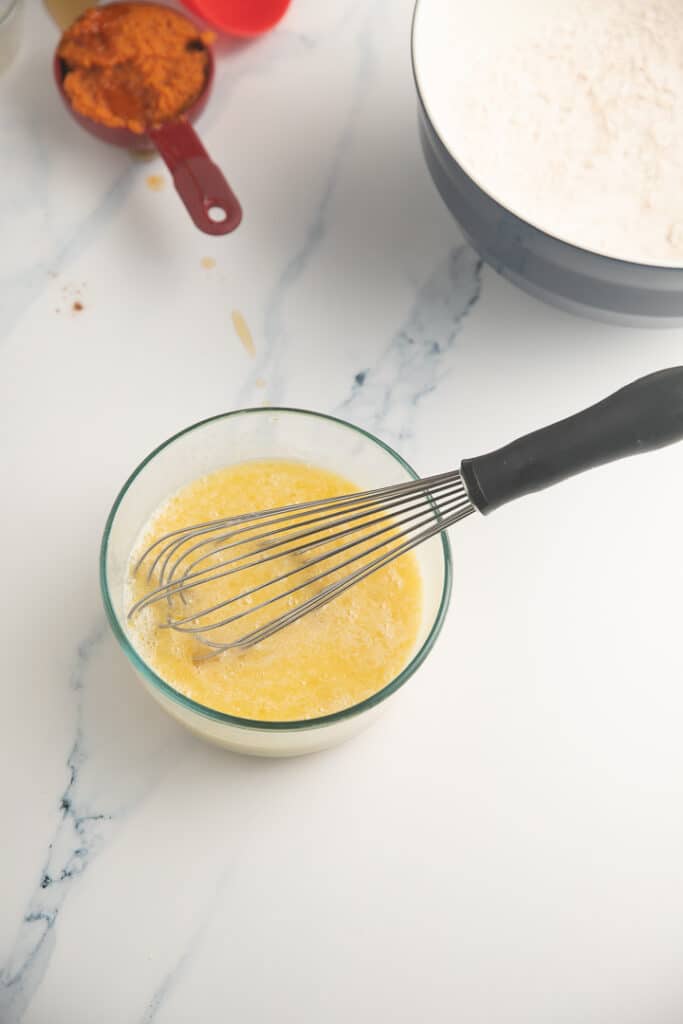
              • In a separate bowl, which eggs, milk, butter, maple syrup, and brown sugar until combined.
              Wet ingredients mixed together in a bowl
              • Pour mixture and pumpkin into the flour mixture and whisk until combined. Set aside.
              Wet and dry ingredients whisked together
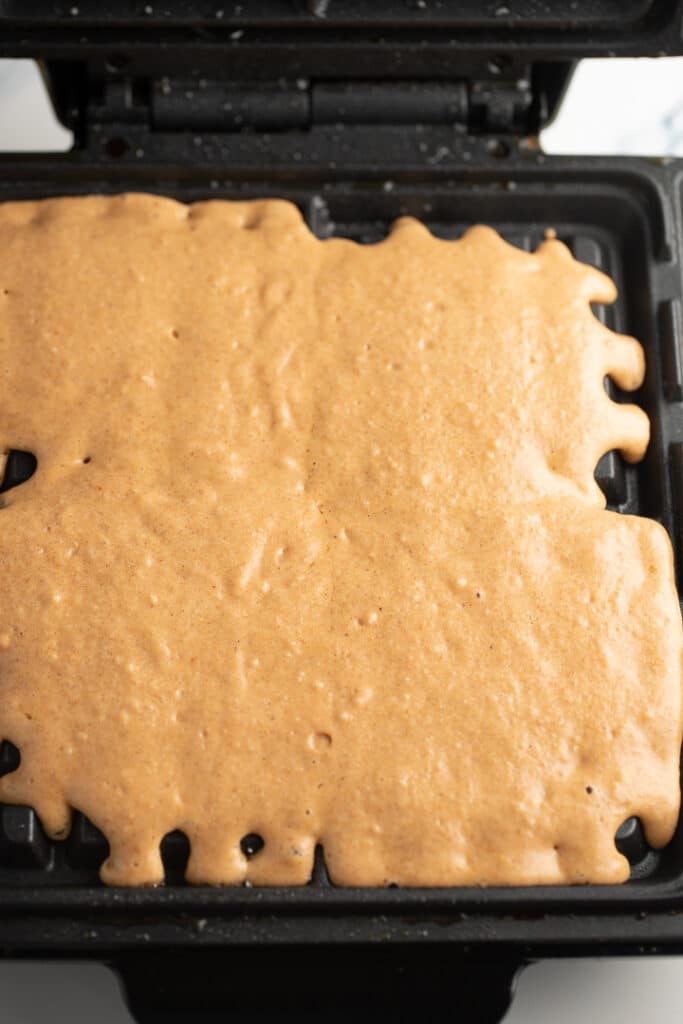
              • Heat a waffle iron until hot and ready for the batter. Spray waffle iron with oil or brush with butter.
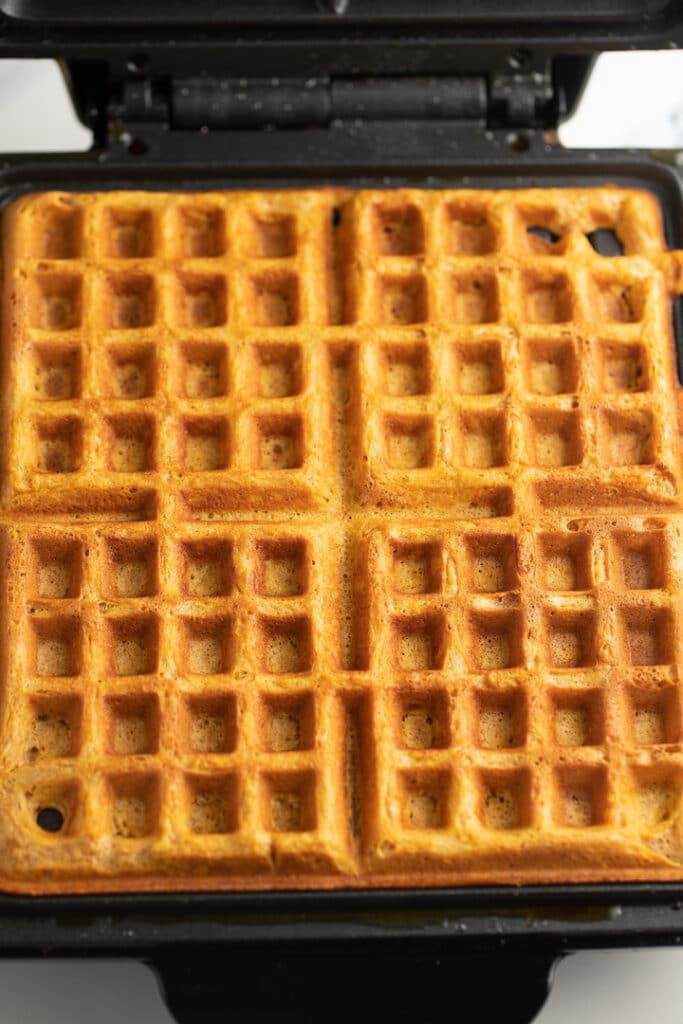
              • Pour batter into waffle iron, close, and cook until done.
              The waffle batter poured onto a waffle iron
              The cooked waffles in the waffle iron

              Can you make them ahead of time?

              It's best to serve the waffles as soon as you've made them, but if you are serving a crowd you can make them up to an hour ahead of time. Place the cooked waffles on sheet pans and you can reheat them in the oven at 300F for 7-10 minutes, flipping halfway.

              You can make the waffle batter the night before and keep it covered in the fridge.

              You can also freeze these waffles ahead of time. We cook these from frozen for busy mornings. We reheat our waffles in the air fryer on 350 for 5-7 minutes, until heated through.

              What do you serve them with?

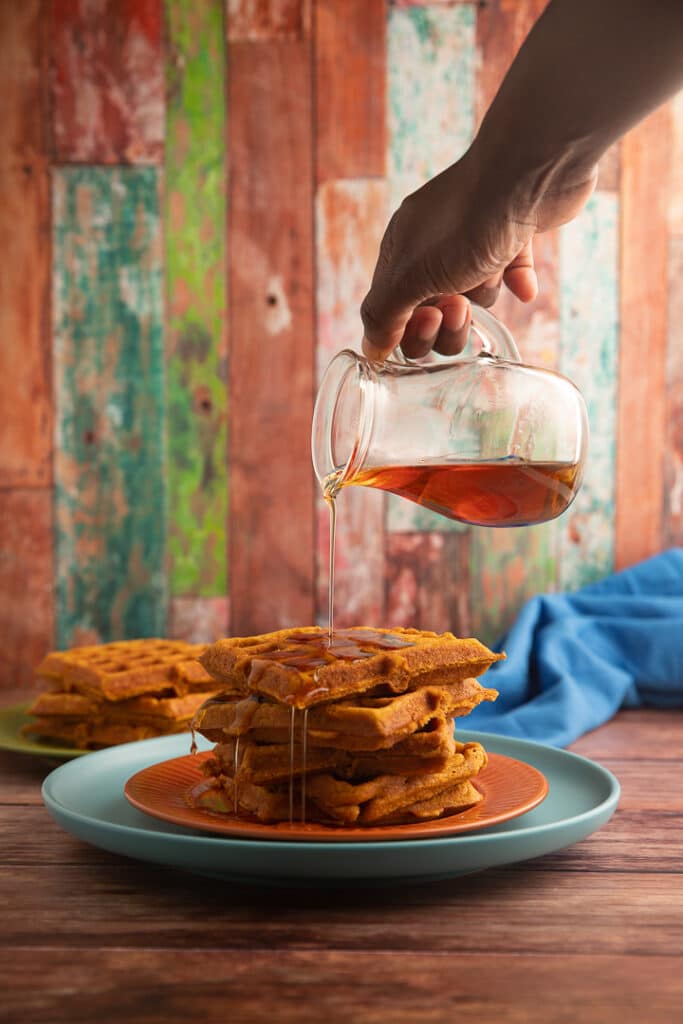
              I like to serve my waffles with a generous helping of maple syrup drizzled on top. You can also serve them with a generous helping of whipped cream, fresh fruits or with some Blueberry Compote.

              What's the difference between pancakes and waffles?

              The main ingredients for waffles and pancakes are the same, but waffles contain more sugar and fat. The sugar caramelizes and the additional fat helps to get really nice crispy edges. That is why I am firmly in the waffle camp!

              Pouring syrup over stacked waffles

              Recipe Notes and Tips

              • Do not over mix the waffle batter or they will not rise and get nice and fluffy.
              • Don't swap the brown sugar for white. The brown sugar contains molasses which gives these waffles a deep and rich flavor.
              • Use pure pumpkin puree, not spiced, or it will be too overpowering.

              More Easy Breakfast Recipes

              • Breakfast Air Fried Potatoes
              • Oatmeal Raisin Breakfast Cookies
              • Sheet Pan Pancakes
              • Cheesy Corned Beef Hash Breakfast Casserole
              • Banana Oatmeal Pancakes

              Watch this video tutorial and see how I make these waffles from start to finish.

              Maple syrup being poured over the pumpkin waffles
              Print Recipe
              5 from 1 vote

              Homemade Pumpkin Waffles

              These delicious homemade pumpkin waffles are perfect for a fall breakfast or brunch. Easy to make and flavored with maple syrup and brown sugar, they are a breakfast that the whole family will love!
              Prep Time10 minutes mins
              Cook Time15 minutes mins
              Total Time25 minutes mins
              Course: Breakfast
              Cuisine: American
              Keyword: homemade pumpkin waffles, how to make waffles, pumpkin waffles
              Servings: 10 waffles
              Calories: 168kcal
              Author: Tanya Harris

              Ingredients

              • 1 ½ cup all-purpose flour
              • 1 Tablespoon baking powder
              • 1 Tablespoon pumpkin spice
              • ½ teaspoon salt
              • 2 large eggs
              • ¾ cup milk
              • ¼ cup unsalted butter melted
              • ¼ cup maple syrup
              • 2 Tablespoon brown sugar
              • ½ cup pumpkin
              • oil or butter for waffle iron

              Instructions

              • Whisk flour, baking powder, pumpkin spice, and salt in a large bowl until combined.
              • In a separate bowl, whisk eggs, milk, butter, maple syrup, and brown sugar until combined. Pour mixture and pumpkin into the flour mixture and whisk until combined. Set aside.
              • Heat a waffle iron until hot and ready for the batter. Spray waffle iron with oil or butter. Pour batter into waffle iron, close, and cook until done.
              • Serve and enjoy.

              Video

              Notes

              • Do not over mix the waffle batter or they will not rise and get nice and fluffy.
              • Don't swap the brown sugar for white. The brown sugar contains molasses which gives these waffles a deep and rich flavor.
              • Use pure pumpkin puree, not spiced, or it will be too overpowering.

              Nutrition

              Calories: 168kcal | Carbohydrates: 24g | Protein: 4g | Fat: 6g | Saturated Fat: 4g | Cholesterol: 47mg | Sodium: 180mg | Potassium: 219mg | Fiber: 1g | Sugar: 8g | Vitamin A: 713IU | Vitamin C: 1mg | Calcium: 98mg | Iron: 1mg
              • « Previous Page
              • 1
              • …
              • 53
              • 54
              • 55
              • 56
              • 57
              • …
              • 74
              • Next Page »
              tanya holding bowl and mixing

              Welcome!

              Welcome to My Forking Life! Hi, I'm Tanya, an attorney, busy wife and mom, and lover of quick, easy, and delicious meals.

              More about me

              Popular Recipes

              • Jamaican Oxtails Recipe
              • brown stew chicken in pan
                Brown Stew Chicken
              • Air fryer fried chicken on a white platter
                Air Fryer Fried Chicken
              • Jamaican Instant Pot Rice and Beans

              Holiday Favorites

              • sweet potato pie on a plate
                Southern Sweet Potato Pie Recipe
              • spoon lifting gravy out of gravy dish
                Easy Recipe for Gravy without Drippings
              • Stirring the giblet gravy with a spoon.
                Grandma's Giblet Gravy Recipe
              • creamy baked macaroni and cheese, the best baked macaroni and cheese, creamy mac and cheese
                Creamy Baked Macaroni and Cheese
              as seen on...various online websites text listed

              Footer

              ↑ back to top
              • Privacy Policy
              • Contact
              • About Tanya

              As an Amazon Associate, I earn from qualifying purchases.

              Copyright © 2026 My Forking Life

              Rate This Recipe

              Your vote:


              Let us know what you thought of this recipe:

              This worked exactly as written, thanks!
              My family loved this!
              Thank you for sharing this recipe

              Or write in your own words:

              A rating is required
              A name is required
              An email is required