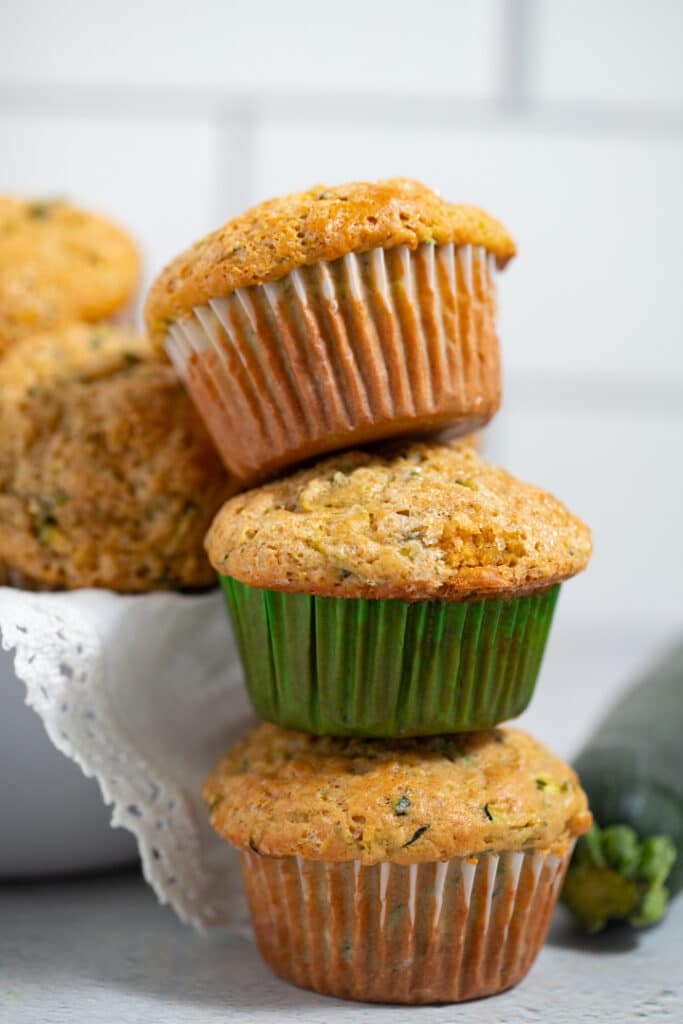
There is never a bad time for muffins! These zucchini muffins are so wonderfully fluffy and soft and it's super easy to make a batch! The zucchini adds a wonderful texture and moistness that can't be rivaled!
This post contains affiliate links, please read my full disclaimer here.
You’ll find the full recipe with ingredient amounts and instructions in the recipe card at the bottom of this post. Be sure to check out the blog post itself for extra tips and tricks!
One of the best things about summer is the abundance of zucchini! It's great to use in lots of savory dishes, but have you tried using it in baked goods before? The results are out of this world!
If you love zucchini season as much as i do, be sure to check out my air fryer zucchini fritters and zucchini mushroom chicken to make the most out of this summer vegetable!
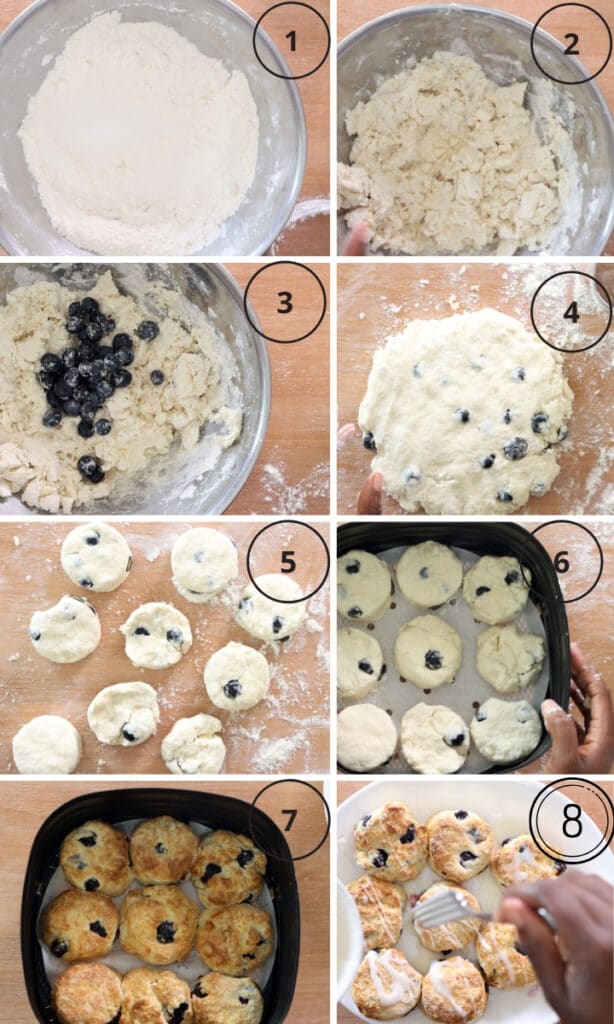
How To Make Zucchini Muffins
- Gather your ingredients and grate the zucchini. You'll need 2-3 medium sized zucchini, about 2 cups shredded.
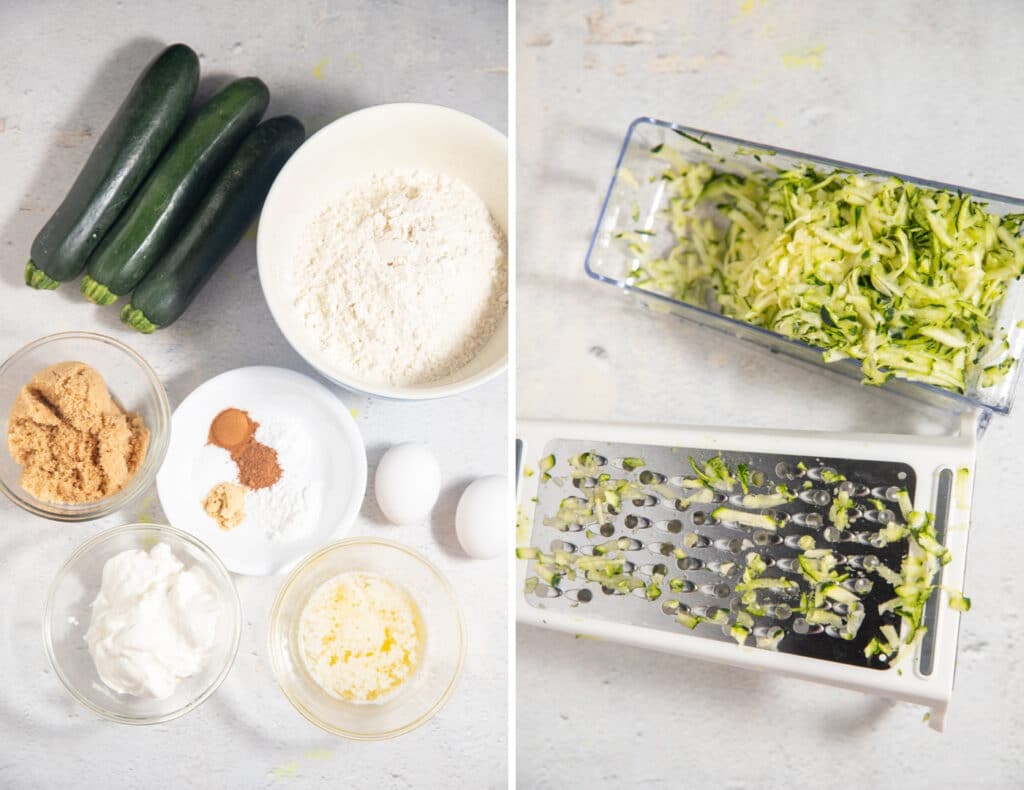
- Combine 2 ¼ cups flour, 2 teaspoon baking powder, ½ teaspoon baking soda, ½ teaspoon salt, ½ teaspoon cinnamon, ½ teaspoon ginger powder, and ¼ teaspoon nutmeg in a bowl and stir until incorporated. Set aside.
- Combine zucchini, 2 eggs (lighlty beaten), ¾ cup brown sugar, ¾ cup sour cream, ¼ cup butter, and 1 teaspoon vanilla extract in a large bowl. Stir until combined. The mixture will be wet.
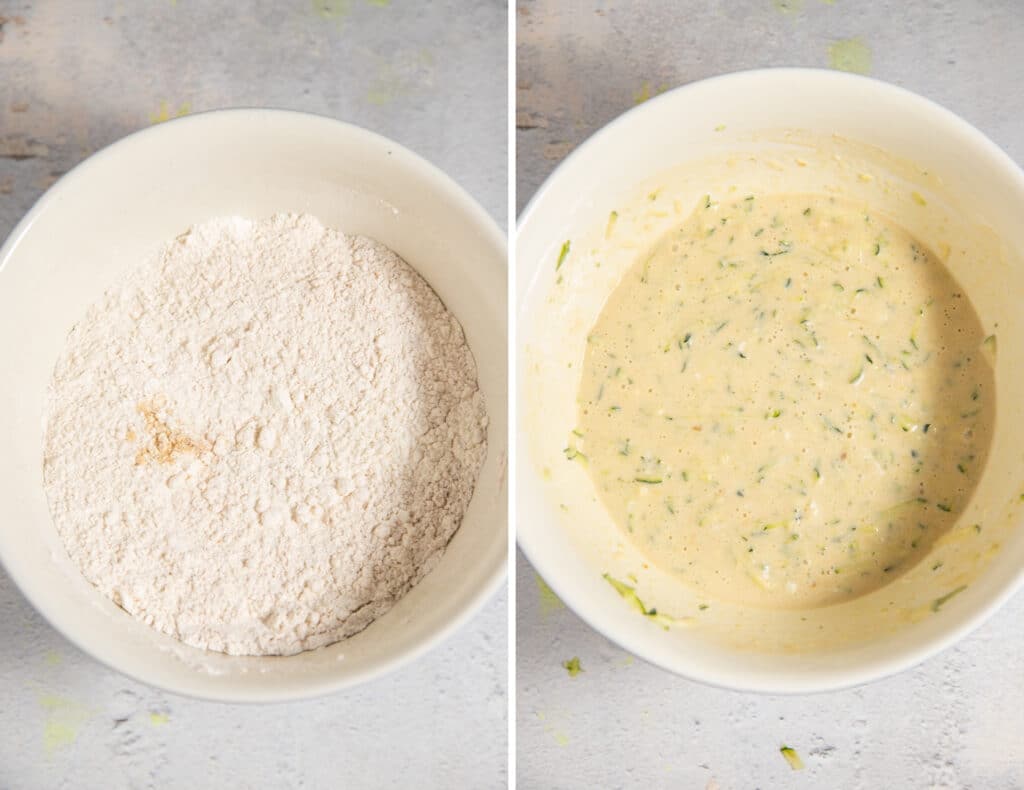
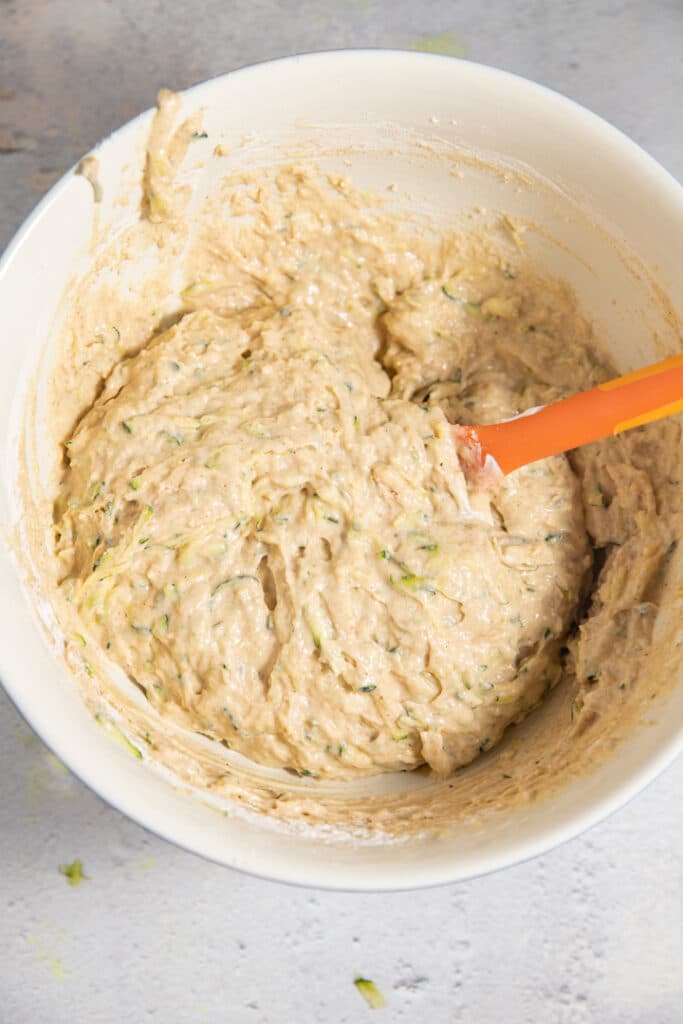
- Slowly add flour mixture to wet mixture. The mixture will be thick.
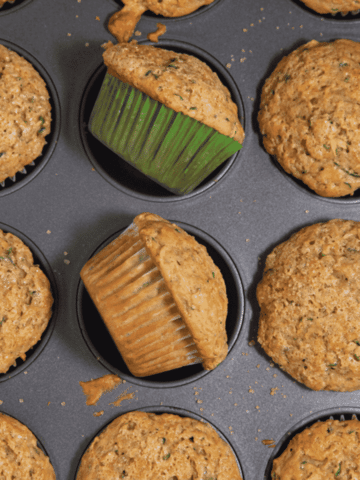
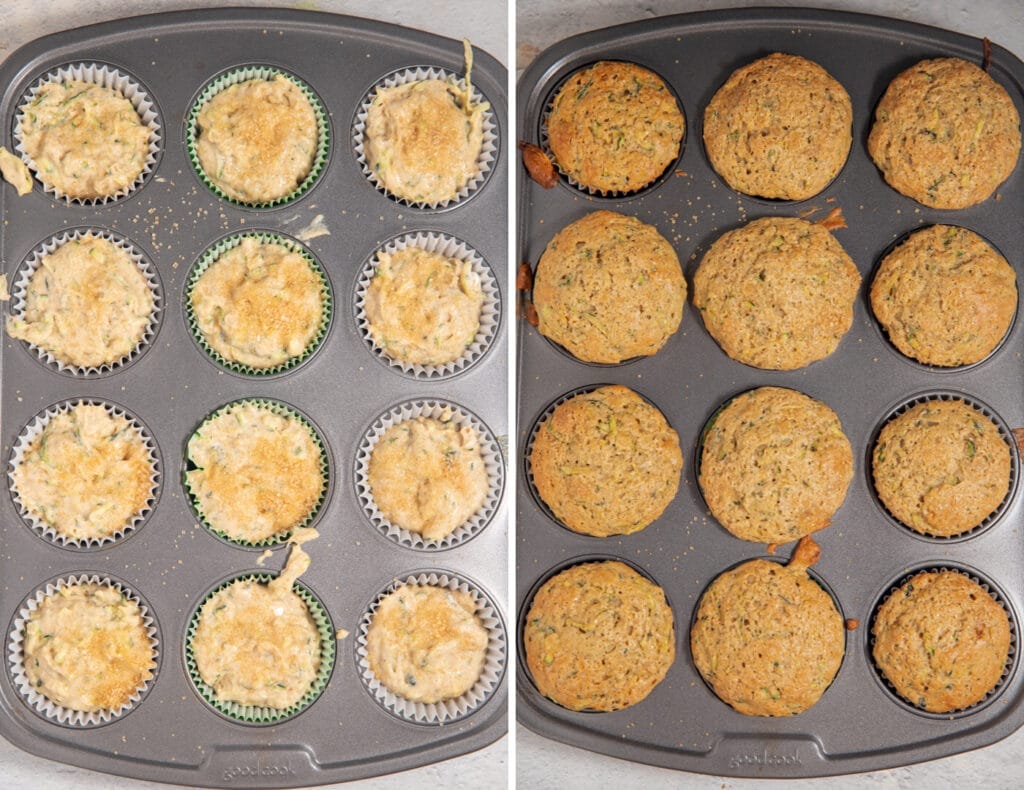
- Add mixture into cupcake pan, about ⅓ cup of batter per cupcake. Sprinkle 2 tablespoon turbinado sugar over the cupcakes.
- Bake in preheated oven until muffins are golden and a toothpick entered in the center comes out clean.
Can you taste the zucchini?
For any veggie haters out there, fear not, you cannot taste the zucchini in these muffins. Zucchini has a very mild flavor so no one will have any idea there are veggies hidden! Like applesauce, the zucchini adds wonderful moistness and texture, I urge you to give it a go!
How long do they keep?
Once the muffins are cooled, transfer them to an airtight container. They will keep for up to 2 days at room temperature and up to 5 days in the fridge.
The muffins also freeze well wrapped in foil and placed in a freezer bag. Thaw them in the fridge or at room temperature.
Muffins for breakfast!
Zucchini muffins make for a great snack, but they are also perfect for make ahead breakfast for busy mornings! They are easy to grab and go as you are running out of the door!
Recipe Notes and Tips
- Add in some chocolate chips to make chocolate zucchini muffins.
- Take care not to over mix the batter. Everything should be just combined.
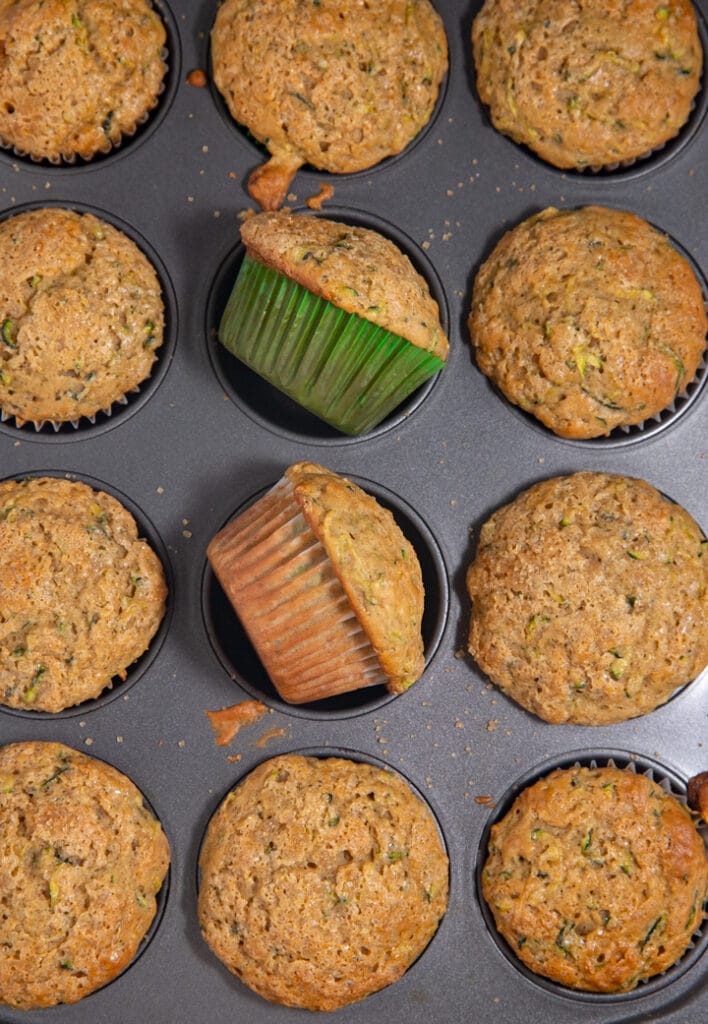
- Allow muffins to cool in the pan for about 5 minutes, then transfer to a cooling rack to complete cooling.
- Turbinado sugar is also known as “Sugar in the Raw” and can be found in the baking aisle of most grocery stores. It gives a slight crunch to the top of the muffins.
- Optional: Set aside a bit of Zucchini for sprinkling on top.
More Easy Baked Goods
Zucchini Muffins
Ingredients
- 2 ¼ cup all-purpose flour
- 2 teaspoon baking powder
- ½ teaspoon baking soda
- ½ teaspoon salt
- ½ teaspoon cinnamon
- ½ teaspoon ginger powder
- ¼ teaspoon nutmeg
- 2 medium zucchini shredded (about 2 cups)
- 2 large eggs lightly beaten
- ¾ cups brown sugar
- ¾ cup sour cream
- ¼ cup butter melted and cooled
- 1 teaspoon vanilla extract
- 2 Tablespoon turbinado sugar for topping, optional
Instructions
- Preheat oven to 350 degrees Fahrenheit. Prepare 12 cupcake pan with liners or grease.
- Combine flour, baking powder, baking soda, salt, cinnamon, ginger powder, and nutmeg in a bowl and stir until incorporated. Set aside.
- Combine zucchini, eggs, brown sugar, sour cream, butter, and vanilla extract in a large bowl. Stir until combined. The mixture will be wet.
- Slowly add flour mixture to wet mixture. The mixture will be thick.
- Add mixture into cupcake pan, about ⅓ cup of batter per cupcake. Sprinkle turbinado sugar over the cupcakes.
- Bake in preheated oven for 23-25 minutes, or until muffins are golden and a toothpick entered in the center comes out clean.
- Allow muffins to cool in the pan for about 5 minutes, then transfer to a cooling rack to complete cooling. Serve and enjoy 🙂
Video
Notes
- Add in some chocolate chips to make chocolate zucchini muffins.
- Take care not to over mix the batter. Everything should be just combined.
- Allow muffins to cool in the pan for about 5 minutes, then transfer to a cooling rack to complete cooling.
- Turbinado sugar is also known as “Sugar in the Raw” and can be found in the baking aisle of most grocery stores. It gives a slight crunch to the top of the muffins.
- Optional: Set aside a bit of Zucchini for sprinkling on top.