My Forking Life

  • Air Fryer
  • Jamaican
  • Entree
  • Browse Recipes
  • Breakfast
  • Side Dishes
  • About
menu icon
go to homepage
  • Air Fryer
  • Jamaican
  • Entree
  • Browse Recipes
  • Breakfast
  • Side Dishes
  • About
search icon
Homepage link
  • Air Fryer
  • Jamaican
  • Entree
  • Browse Recipes
  • Breakfast
  • Side Dishes
  • About
×
Home

May 12, 2026 by Tanya Harris 2 Comments

Pan Seared Lamb Chops

Lamb chops in skillet with rosemary and garlic.


Pan-seared lamb chops bring restaurant‑quality flavor to a simple weeknight dinner at home. Seared in a hot skillet and finished with garlic rosemary butter, these chops cook quickly while staying juicy and tender.

Lamb chops in skillet with rosemary and garlic.

You’ll find the full recipe with ingredient amounts and instructions in the recipe card at the bottom of this post. Be sure to check out the blog post itself for extra tips and tricks!
I cook a lot of meat in my cast-iron skillet, and lamb chops are right up there with the best things you can throw in a hot pan. They are small, they cook fast, and they have so much flavor.

I treat them a lot like I treat a good steak. 

For seasoning, I keep it simple. Salt, pepper, and a little cumin. I prefer to sear in a cast-iron skillet, but any heavy skillet that can get nice and hot will work.

If you don't have a skillet handy, my Air Fryer Lamb Chops give you a hands-off way to get delicious chops.

Pan-Seared Lamb Chops at a Glance

  • Prep Time: 20 minutes
  • Cook Time: 10 minutes
  • Total Time: 30 minutes
  • Serves: 4
  • Best For: Weeknight dinners, date night


A Quick Look at The Ingredients

Ingredient amounts and full recipe instructions are on the printable recipe card at the bottom of the post.

  • Lamb rib chops: Rib chops are the smaller, leaner cut that comes from the rack of lamb. They have that long bone sticking out, which is why people sometimes call them lamb lollipops. You can also use loin chops if that is what you have, but the cooking time may be a wee bit longer, about 1-2 minutes.
  • Kosher salt: I use Diamond Crystal kosher salt. If you are using table salt or a finer salt, use a little less.
  • Black pepper: I use pre-ground black pepper. Fresh ground black pepper works too.
  • Ground cumin: This is my little twist. A small amount goes a long way, giving the chops a warm, savory flavor.
  • Neutral oil: Canola, avocado, olive oil for cooking, or grapeseed all work. You want a high-smoke-point oil for that hard sear.
  • Unsalted butter: For basting at the end.
  • Garlic: Two cloves, smashed with the side of a knife. You don't need to mince it. Smashed cloves perfume the butter without burning as fast.
  • Fresh rosemary: Fresh rosemary holds up to the heat and infuses the butter.
Ingredients for pan-seared lamb chops


How to Make Pan-Seared Lamb Chops

Step 1: Pull the lamb chops out of the fridge and pat them very dry with paper towels. I let them sit for about 20 minutes to knock the chill off.

Step 2: Mix the salt, pepper, and cumin in a small bowl. Sprinkle the mixture evenly over both sides and the edges of the chops, pressing it in so it sticks. Let the chops sit at room temperature while you heat the pan.

Seasonings mixed in smalll bowl.
Lamb chops that have been seasoned with salt, black pepper, and cumin.

Step 3: Set a large cast-iron skillet over low heat and let it warm up for about 7 minutes. Then bump the heat to medium-high for another 3 minutes. You want the pan very hot. If you aren't using cast iron, you won't have to heat it for this long. Just bring the heat to medium-high. 

Step 4: Add the oil and swirl to coat. Lay the chops in a single layer, making sure they don't touch. Let them sear for 3 to 4 minutes on one side. Then, flip the chops and sear the other side for 2 to 4 minutes. For medium rare, cook to an internal temp of 125 to 130°F; for medium, 135°F. An instant-read thermometer helps determine the inner temperature.

Lamb chops cooking in skillet.

Step 5: Use tongs to stand the chops up on their fatty edge for about 10 to 20 seconds, just long enough to render some of the fat and crisp the sides. 

Step 6:  Drop the heat to medium-low. Add the butter, smashed garlic, and rosemary sprigs to the pan. As the butter melts and starts to foam, use a kitchen towel or oven mitt to tilt the pan toward you, then ladle the butter over the chops.

Step 7: Transfer the chops to a plate. Spoon a little of the pan juices over the top and let them rest for 5 minutes before serving. 

Lamb chops and skillet with rosemary and garlic, and spoon with butter sauce on it

Cast Iron vs Stainless Steel

I like cast iron for this recipe because it holds heat well and gives the deepest sear. Stainless steel works too and heats more quickly. A nonstick skillet will work, but you’ll get less crust.

Serving Suggestions

Lamb chops are rich, so I like to pair them with sides that have some brightness or starch to balance the plate.

  • Garlic Mashed Potatoes soak up all that rosemary butter from the pan and are the classic pairing for a reason.
  • Air Fryer Asparagus gives you a quick green side that hits the table alongside the chops.
  • Honey-Roasted Carrots add a touch of sweetness that pairs well with the cumin and rosemary.

Tanya's Top Tips

  • Use a thermometer. Lamb chops are small, and the window between perfect and overcooked is tight. An instant-read thermometer takes the guessing out. Pull at 125 to 130°F for medium rare, 135°F for medium. The temp will rise a few degrees as it rests.
  • Don't crowd the pan. If the chops are packed in, the pan loses heat, and you end up with a gray, sad sear. Cook in two batches if needed.
  • Let the pan get hot. The 7 minutes on low, followed by 3 minutes on medium-high, is what evenly heats cast iron all the way through and gives better control over the heat. Heating a cast iron to medium-high heat too fast can result in burnt meat.
Cut lamb chops on a plate with rice and vegetables.

Related Recipes

I hope you love these pan-seared lamb chops as much as we do. If you're looking for more lamb recipes or other ways to cook meat in a skillet, try these out:

  • The Best Air Fryer Lamb Chops: If you want a hands-off method, the air fryer does a great job with lamb chops, too.
  • Pan-Seared Steak: Same cast-iron method, bigger cut. Once you nail one, you can nail the other.
  • Roasted Boneless Leg of Lamb: For when you're feeding a crowd or going big for the holidays.
  • Braised Lamb Recipe: A low and slow option that gives you fall apart tender meat.
  • Lamb Meatballs with Herb Yogurt Sauce: Another way to use lamb that comes together quickly on a weeknight.
Lamb chops in skillet with rosemary and garlic.
Print Recipe
5 from 1 vote

Pan Seared Lamb Chops

These pan seared lamb chops are quick, easy, and packed with flavor. Seared in a hot cast iron skillet and finished with garlic rosemary butter, they're a restaurant quality dinner you can make at home in 30 minutes.
Prep Time20 minutes mins
Cook Time10 minutes mins
Total Time30 minutes mins
Course: entree
Cuisine: American
Keyword: pan seared lamb chops
Servings: 4 people
Calories: 356kcal
Author: Tanya Harris

Equipment

  • 1 cast iron skillet

Ingredients

  • 5 to 6 lamb rib chops about 1 ¼ pounds total
  • 1 ½ teaspoons kosher salt
  • ½ teaspoon ground black pepper
  • ½ teaspoon ground cumin
  • 2 tablespoons neutral oil canola, avocado, olive for cooking, or grapeseed
  • 2 tablespoons unsalted butter
  • 2 garlic cloves lightly smashed, skins removed
  • 3 fresh rosemary sprigs

Instructions

  • Remove lamb from the fridge and pat very dry with paper towels.
  • In a small bowl, mix the salt, black pepper, and cumin. Sprinkle evenly over both sides and edges of the chops, pressing so the seasoning sticks. Let the chops sit at room temperature while you preheat the skillet.
  • Place a large cast iron or heavy stainless steel skillet over low heat and warm it for about 7 minutes. Increase the heat to medium high and heat for 3 minutes more, until the skillet is very hot. A drop of water should sizzle on contact.
  • Add the neutral oil to the hot skillet and swirl to coat the bottom in a thin, even layer. Add the chops in a single layer and sear without moving for 3 to 4 minutes, until well browned and a crust forms.
  • Flip and sear the other side for 2 to 4 minutes, or until the internal temperature is about 125 to 130°F for medium rare, around 135°F for medium.
  • Use tongs to stand the chops up on their fatty edge for 10 to 20 seconds to render and crisp the fat cap. Lean them against each other in the pan to hold them upright.
  • Reduce heat to medium low. Add the butter, garlic, and rosemary to the pan. As the butter melts and foams, tilt the pan and spoon the butter over the chops for 30 to 90 seconds, until fragrant.
  • Transfer chops to a plate. Spoon a little of the pan juices over the top and let rest 5 minutes before serving.

Video

Notes

  • For best results, use an instant-read thermometer. Pull the lamb at about 125 to 130°F for medium rare or 135°F for medium. Temperature will rise a few degrees as it rests.
  • Store leftover lamb chops in an airtight container in the refrigerator for up to 3 days.
  • This recipe is written for a cast iron or heavy stainless steel skillet. If using stainless steel, preheat over medium heat for 2 to 4 minutes, until the oil is shimmering, before adding the chops. A nonstick skillet will work, but you may not get as deep a sear.

Nutrition

Calories: 356kcal | Carbohydrates: 1g | Protein: 28g | Fat: 26g | Saturated Fat: 9g | Polyunsaturated Fat: 3g | Monounsaturated Fat: 11g | Trans Fat: 0.3g | Cholesterol: 108mg | Sodium: 975mg | Potassium: 395mg | Fiber: 0.2g | Sugar: 0.03g | Vitamin A: 202IU | Vitamin C: 1mg | Calcium: 28mg | Iron: 3mg

May 6, 2026 by Tanya Harris 21 Comments

Southern Potato Salad Recipe

Potato salad in a white bowl on a wood table.

Creamy, tangy, and so delicious, this Southern potato salad is a must-have side dish. Simple and easy to make, it's perfect for BBQs and cookouts.

Potato salad in a white bowl on a wood table.

You’ll find the full recipe with ingredient amounts and instructions in the recipe card at the bottom of this post. Be sure to check out the blog post itself for extra tips and tricks!

Tanya holding a bowl of potato salad in the kitchen.

Living in the South, I've tried all kinds of potato salad...but this potato salad belongs on your table. Whether it's a large gathering or you need it for a side dish for a fried chicken dinner, this recipe right here is what you need.

Made with dill relish, mustard, honey, mayo, and crunchy vegetables, this Southern potato salad is creamy, sweet, and tangy with a great texture.

Simple and quick to make, every bite is truly delicious! If you're a fan of potato salads, try my dill potato salad too.

Best, Tanya

A Quick look at the ingredients

Ingredient amounts and full recipe instructions are on the printable recipe card at the bottom of the post.

  • The salad: Potatoes, boiled eggs, onion, bell pepper, and celery — make the salad hearty, creamy, and full of crunch
  • For the dressing: Mayonnaise, yellow mustard, dill relish, and honey — make the dressing creamy, tangy, and slightly sweet
  • For finishing: Salt, pepper, and paprika — add seasoning and color
    Ingredients for southern potato salad on countertop with labels

    How to make Southern potato salad

    Step 1: Place potatoes in a large pot and cover potatoes with cold water by about 2 inches. Bring to a boil and boil until tender, about 10 minutes.

    Strain the potatoes and set aside to cool.

    Boiling the potatoes.
    The cooked potatoes being drained.

    Step 2: Mix the mayonnaise, yellow mustard, dill relish, and honey in a large bowl until combined.

    The ingredients for the mayonnaise dressing mixed together in a white bowl

    Step 3: Add remaining ingredients (including the cooled potatoes).

    The ingredients added to the mayonnaise.

    Step 4: Stir until combined. Cover and refrigerate for at least 1 hour or overnight.

    Add salt and pepper to taste and garnish with paprika. Serve and enjoy.

    The potato salad mixed together in a white bowl.

    What are the best potatoes to use?

    This potato salad is best made with starchy, floury potatoes. Yukon gold and red potatoes are best to use; russet potatoes can be used as well. Avoid waxy potatoes, such as fingerlings and salad potatoes, for this.

    Can you make it ahead of time?

    This is a great make-ahead dish, so it's ideal for cookouts. Once you have made it, cover it and refrigerate it. It will keep well for up to 5 days. Don't leave the potato salad at room temperature for more than two hours.

    What do you serve it with?

    This Southern potato salad pairs well with meat, chicken, seafood, and veggie mains. It's an excellent addition to anything grilled and is perfect for cookouts, picnics, and potlucks. Try it with:

    • BBQ Air Fryer Ribs or Oven Baked Beef Ribs
    • Marinated Salmon
    • Jamaican Jerk Chicken
    • Turkey Burgers
    Close up of the potato salad garnished with paprika.

    Tanya's Notes and Tips

    • Cut the potatoes into small, even chunks so they cook through quickly and evenly.
    • Let the potatoes cool before mixing them with the mayonnaise. If they are hot, the mayonnaise can split, causing a very oily salad.
    • Let your Southern potato salad sit for at least an hour in the fridge before serving for the best flavor.

    More Southern Side Dishes

    • Southern Candied Sweet Potatoes
    • Vinegar Coleslaw
    • Yellow Rice
    • Air Fryer Asparagus
    • Southern Style Macaroni Salad
    southern potato salad in bowl topped with paprika
    Print Recipe
    4.91 from 10 votes

    Southern Potato Salad Recipe

    Creamy, tangy and so delicious, this Southern potato salad is a must have side dish. Simple and easy to make, it's perfect for BBQs and cookouts.
    Prep Time10 minutes mins
    Cook Time10 minutes mins
    Total Time20 minutes mins
    Course: Side Dish
    Cuisine: American
    Keyword: creamy potato salad, potato salad with mayonnaise, potato salad with relish
    Servings: 6 to 8 servings
    Calories: 360kcal
    Author: Tanya Harris

    Ingredients

    • 2 lbs Yukon Gold Potatoes about 4 potatoes, peeled and chopped into 1 inch chunks
    • ¾ cup of mayonnaise
    • 2 Tablespoon of yellow mustard
    • 2 Tablespoon dill relish
    • 2 teaspoon honey
    • ½ a sweet onion diced (about ½ cup)
    • ½ a red bell pepper diced (about ½ cup)
    • 1 celery stalk diced (about ½ cup)
    • 2 boiled eggs chopped
    • Salt and pepper to taste
    • Paprika to sprinkle on top for garnish optional

    Instructions

    • Place potatoes in a large pot and cover potatoes with cold water by about 2 inch. Bring to boil and boil until tender, about 10 minutes. Strain the potatoes and set aside to cool.
    • Mix the mayonnaise, yellow mustard, dill relish, and honey in a large bowl until combined. Add remaining ingredients (including the cooled potatoes) and stir until combined. Cover and refrigerate for at least 1 hour or overnight.
    • Add salt and pepper to taste and garnish with paprika. Serve and enjoy.

    Video

    Notes

    • Cut the potatoes into small and even chunks so that they cook through quickly and evenly.
    • Let the potatoes cool before mixing them with the mayonnaise. If they are hot, the mayonnaise can split causing a very oily salad.
    • Let your Southern potato salad sit for at least an hour before serving for the best flavor.
    • Yukon gold, red potatoes are best to use with this dish however russet potatoes can be used as well.

    Nutrition

    Calories: 360kcal | Carbohydrates: 33g | Protein: 6g | Fat: 23g | Saturated Fat: 4g | Trans Fat: 1g | Cholesterol: 74mg | Sodium: 327mg | Potassium: 731mg | Fiber: 4g | Sugar: 6g | Vitamin A: 434IU | Vitamin C: 44mg | Calcium: 38mg | Iron: 2mg

    This post was originally published on March 24th, 2021. It has been updated with new photos and additional information.
    May 6, 2026 by Tanya Harris 17 Comments

    Quick and Easy Mongolian Beef

    Mongolian beef in a bowl over some rice.

    If you are looking to mix up your weekly meals, this easy Mongolian beef is perfect! This rich and flavorful dish is on the table in 20 minutes, and the whole family will love it.

    Mongolian beef in a bowl over some rice.

    This post contains affiliate links, please read my full disclaimer here.

    You’ll find the full recipe with ingredient amounts and instructions in the recipe card at the bottom of this post. Be sure to check out the blog post itself for extra tips and tricks!

    Evenings in our house are so busy, and I'm always trying new recipes that I can get on the table quickly and easily, and that everyone will love! This Mongolian beef is a lifesaver! It's so full of flavor!

    Inspired by my love of the Mongolian beef at my favorite Chinese restaurant, this recipe has all the components I love.

    • Lots of onions - I use both yellow and green onions in this recipe. The yellow onions provide a nice contrast in texture with the tender beef.
    • Fried yet tender beef - This recipe calls for the beef to be quickly fried, so you get crispy, tender beef in one bite.
    • An amazing sauce - This sauce is balanced with sweet and salty.

    Serve this delicious beef dish with white rice, cauliflower rice, noodles, my Instant Pot brown rice, or my air-fried egg rolls.

    Ingredients You Will Need


    To make this quick and easy Mongolian beef recipe, you’ll need a few simple ingredients that come together to create a flavorful homemade takeout-style dinner.

    Flank steak is the best cut of beef for Mongolian beef because it cooks quickly and stays tender when sliced thin against the grain. Cornstarch helps coat the beef for that classic, lightly crispy texture.


    For the bold Mongolian beef sauce, you’ll need low-sodium soy sauce, hoisin sauce, brown sugar, and water to achieve the perfect balance of sweet and savory. Yellow onion, green onions, garlic, and fresh ginger add texture and deep flavor to the dish, while canola oil is used to quickly fry the beef.

    Add a little salt to taste before serving, and this easy beef dinner is ready in no time.

    ingredients needed for the mongolian beef on table

    How to Make This Quick and Easy Mongolian Beef Recipe

    Step 1: Slice the flank steak against the grain into thin slices, then coat the slices with cornstarch. Set aside.

    flank steak sliced and then covered in cornstarch

    Step 2: Grab the rest of your ingredients and prep and measure them out so they are ready to go.

    Ingredients prepped to make the dish

    Step 3: Heat the canola oil in a large skillet over medium-high heat. Once hot, add the flank steak to the frying pan in a single layer. Cook on 1-2 minutes per side until each side is browned. Cook in batches and set aside.

    The skirt steak cooked in a skillet in oil - before and after

    Step 4: Add the yellow onion, whites of green onions, garlic, and ginger to the skillet and stir-fry until the onions are slightly softened. Add soy sauce, water, hoisin sauce, and brown sugar, stirring.

    Step 5: Add the steak back to the pan along with the green parts of the onions. Remove from heat and serve.

    Onions and garlic sauteed and then the beef and sauces adedd

    What's the best cut of beef to use?

    I like to use flank steak for this recipe. If you can't find flank steak, skirt steak, or hanger steak will also work. Flank steak is full-flavored and a lean cut of meat. It can be tough, but by thinly slicing it correctly and quickly cooking it, it is wonderfully tender.

    Close up of the cooked Mongolian beef

    How to cut flank steak

    Before you start, freeze the beef for 30 minutes; this will make it easier to slice thinly. Be sure to cut the beef against the grain so you cut through the fibers, making it as tender as possible and easier to eat.

    A piece of Mongolian beef held with chopsticks

    Tanya's Top Tips

    • Freeze your steak before slicing it. It will make it easier and less likely to fall apart. Remember to cut against the grain.
    • Prep all of your ingredients before you start cooking. The dish comes together so quickly, so have everything to hand and ready to go.
    • If you have leftovers, they will keep in an airtight container in the fridge for 4 days. They can be reheated on the stovetop or in the microwave.
    • The Mongolian beef will also freeze really well. Thaw it in the fridge overnight before reheating.

    More Beef Recipes

    • Korean Flavored Sloppy Joes - a flavorful twist on beef sloppy joes.
    • Steak Kimchi Fried Rice - fried rice with kimchi and steak.
    mongolian beef in plate
    Print Recipe
    4.93 from 13 votes

    Easy Mongolian Beef

    Easy Mongolian beef is a rich and flavorful dish and is on the table in 20 minutes. Your favorite takeout made at home. Can also be made in the air fryer.
    Prep Time10 minutes mins
    Cook Time10 minutes mins
    Total Time20 minutes mins
    Course: Main Course
    Cuisine: Mongolian
    Keyword: air fryer Mongolian beef, easy mongolian beef, quick Mongolian beef
    Servings: 4 servings
    Calories: 303kcal
    Author: Tanya Harris

    Ingredients

    • 1 lb flank steak thinly sliced against the grain
    • 2 Tablespoon cornstarch
    • 2-4 Tablespoon canola oil
    • 1 yellow onion sliced
    • 2 green onions chopped, green and white parts separated
    • 4 garlic cloves chopped
    • 1- inch ginger chopped
    • ¼ cup low sodium soy sauce
    • ¼ cup water
    • 1 Tablespoon hoisin sauce
    • 3 Tablespoon brown sugar
    • Salt to taste

    Instructions

    • Cover the flank steak with cornstarch, making sure each piece is covered. Set aside.
    • Heat the canola oil in a large skillet over medium-high heat. Once the oil is hot, add the flank steak to the frying pan in a single layer, making sure that the pieces are not touching. Cook on 1-2 minutes per side until each side is browned. Cook in batches until all the flank steak is cooked. Set aside.
    • Add sliced yellow onion, whites of green onions, garlic, and ginger to the skillet and stir fry for about 3 minutes, until the onions are slightly softened but still have a little crunch. Add soy sauce, water, hoisin sauce, and brown sugar and stir. Add steak back to the pan along with the green parts of the onions. Remove from heat and serve.

    Air fryer Instructions:

    • This Mongolian Beef can also be made in an Air Fryer. If Air Frying, coat the flank steak in corn starch and place in a preheated air fryer of 400 degrees Fahrenheit. Cook for 15 minutes, shaking the basket halfway. Prepare the sauce on the stove with the onion, garlic, ginger, soy sauce, water, hoisin sauce, and brown sugar.
    • After multiple tests, we preferred the stovetop version but wanted to share the Air Fryer version for anyone wanting to exclude the frying component of this recipe.

    Notes

    • Freeze your steak before slicing it. It will make it easier and less likely to fall apart. Remember to cut against the grain.
    • Prep all of your ingredients before you start cooking. The dish comes together so quickly, so have everything to hand and ready to go.
    • If you have leftovers, they will keep in an airtight container in the fridge for 4 days. They can be reheated on the stove top or in the microwave.
    • The Mongolian beef will also freeze really well. Thaw it in the fridge overnight before reheating.

    Nutrition

    Calories: 303kcal | Carbohydrates: 20g | Protein: 26g | Fat: 13g | Saturated Fat: 3g | Cholesterol: 68mg | Sodium: 670mg | Potassium: 496mg | Fiber: 1g | Sugar: 11g | Vitamin A: 60IU | Vitamin C: 4mg | Calcium: 50mg | Iron: 2mg

    This post was first published on March 6, 2020. It has been updated with new photos and information.
    April 29, 2026 by Tanya Harris 8 Comments

    Fried Pork Chops (Crispy Southern Style)

    Two crispy fried pork chops served on a dark plate with fresh green beans and cherry tomatoes.

    When I'm craving crispy, perfectly golden fried pork chops, this is how I make them.

    Two crispy fried pork chops served on a dark plate with fresh green beans and cherry tomatoes.

    You’ll find the full recipe with ingredient amounts and instructions in the recipe card at the bottom of this post. Be sure to check out the blog post itself for extra tips and tricks!

    Fried Pork Chops At A Glance

    • What I'm Sharing: The technique and recipe for perfectly fried and delicious golden pork chops.
    • Prep Time: 15 minutes
    • Cook Time: 8 minutes
    • Total Time: 23 minutes
    • Serves: 4
    • Best For: Sunday dinner, weeknight comfort, and anyone who appreciates a perfectly golden-brown crust.
    Tanya holding a plate of fried pork chops

    I’ve always been a huge fan of pork chops, but a perfectly fried pork chop is the ultimate winner. Frying pork chops is a true skill because you want a crust that stays crispy while the meat remains juicy.

    I’ve spent plenty of time not just eating fried pork chops, but studying exactly how to fry them right. Now, whenever a craving hits, this is my go-to method.

    If you love pork chops as much as I do, you’ll also want to try my Juicy Pan-Seared Pork Chops or my Air Fryer Pork Chops.

    Happy cooking,

    Tanya

    A Quick Look at the Ingredients

    Ingredient amounts and full recipe instructions are on the printable recipe card at the bottom of the post.

    For the Pork Chops

    • Pork chops, about ½ inch thick - Thinner chops fry faster and stay tender. Bone-in or boneless both work, just keep the thickness consistent so they cook evenly. I use center-cut pork loin chops and trim any excess fat from the exterior.
    • Mustard - It helps the seasoning and flour grip the meat, and the flavor cooks off, so you won't taste mustard in the finished chop. I used Dijon, but yellow mustard works as well.
    • Dry Seasoning - I use All-Purpose Seasoning, but any well-balanced blend works. You can also use my Pork Chop Seasoning or Seasoned Salt.

    For the Coating

    • Eggs - Two large eggs, beaten, help build that double layer of crust.
    • All-purpose flour and cornstarch - The cornstarch is what gives you that extra crisp crust. Mix it with all-purpose flour for the best results.

    For Frying

    • Neutral oil. Vegetable, canola, or peanut oil all work - You want about ½ inch of oil in the skillet, enough to come halfway up the chops.

    How to Make Fried Pork Chops

    The method is simple, but the details matter. Follow each step and don't rush the oil temperature.

    Step 1: Pat the pork chops completely dry with paper towels. Rub them all over with yellow mustard and season both sides with 1 teaspoon of all-purpose seasoning.

    Patting raw pork chops dry with a paper towel to ensure a crispy crust
    pork chops covered in mustard

    Step 2: In a shallow bowl, whisk together the flour, cornstarch, and the remaining 2 teaspoons of all-purpose seasoning. In a second bowl, beat the egg until smooth.

    Step 3: Dredge each chop in the flour mixture, dip it into the egg, let the excess drip off, and then return it to the flour and coat evenly. Press the flour gently into the chop and shake off any excess.

    Battering station for pork chops with flour and egg wash.

    Step 4: Place the coated chops on a plate and let them sit for 10 minutes. This rest helps the coating set so it doesn't slide off in the oil.

    Step 5: Add oil to a large cast-iron skillet so it comes halfway up the sides of the chops, about ¼ inch deep. Heat it gradually over medium heat. The oil is ready when a pinch of flour dropped in sizzles steadily, or when it reaches 350°F.

    Step 6: Fry the chops for 3 to 4 minutes per side, until deep golden brown. Flip once. Don't crowd the pan; work in batches if needed, and adjust the heat to keep a steady sizzle.

    Lifting a crispy fried pork chop from a cast iron skillet with tongs.

    Step 7: Transfer to a wire rack and let rest for a few minutes before serving. The rack keeps the bottom crust from going soggy.

    Four crispy fried pork chops on a wire cooling rack.

    Serve and enjoy. Season with additional salt and pepper if desired.

    Tanya's Top Tips

    • Start with center-cut pork chops and trim off any excess fat cap. The fat curls up while the chop fries and lifts the breading right off, plus it renders into the oil and changes how everything cooks.
    • Use a cast-iron skillet. It holds heat steady and gives you the most even browning.
    • Get the oil hot enough before the chop hits it. Cold oil is what causes the breading to soak up grease rather than crisp. Bring it up gradually so it heats through evenly, then test with a pinch of flour. If it sizzles steadily, you're good.
    • Stick to 2 to 4 chops in one batch of oil. Any more than that and the oil starts getting dirty, and your later chops won't fry as cleanly as the first ones.
    • Don't crowd the pan. Adding too many chops at once drops the oil temperature fast, and that's when you get a greasy crust. Two chops at a time are plenty for a 10-inch skillet.
    • Rest the coated chops for 10 minutes before frying and rest the cooked chops on a wire rack instead of a paper towel. The rack lets steam escape so the crust stays crispy on all sides.

    Recommended Tools

    1. Lodge Cast Iron Skillet
      Lodge Cast Iron Skillet
      Buy Now
    2. Long Tweezer Tongs Professional Gold
      Long Tweezer Tongs Professional Gold
      Buy Now
    3. FryAway Cooking Oil Solidifier
      FryAway Cooking Oil Solidifier
      Buy Now

    What to Serve with these Fried Pork Chops

    These pork chops make a great dinner or breakfast option. I like to serve them with creamy mashed potatoes, a flavored rice like this garlic butter rice, and steamed vegetables. For breakfast, they're great with some creamy grits, or if you're using boneless chops, consider making a fried pork chop sandwich.

    I hope you love these fried pork chops as much as we do. If you're looking for more crispy, comforting recipes, try these out:

    Smothered Pork Chops - Tender pork chops in a rich onion gravy.

    Juicy Pan-Seared Pork Chops- A quick stovetop chop for busy weeknights.

    Two crispy fried pork chops served on a dark plate with fresh green beans and cherry tomatoes.
    Print Recipe
    5 from 3 votes

    Fried Pork Chops Recipe

    Crispy, golden fried pork chops with a juicy center. Dijon mustard helps the seasoned flour coating grip the meat for a crust that stays crunchy.
    Prep Time15 minutes mins
    Cook Time8 minutes mins
    Total Time23 minutes mins
    Course: Main Course
    Cuisine: American, Southern
    Keyword: fried pork chops
    Servings: 4 people
    Calories: 875kcal
    Author: Tanya Harris

    Equipment

    • cast iron skillet

    Ingredients

    • 4 pork chops about ½ inch thick (center cut, fat cap trimmed)
    • 1 tablespoon Dijon mustard
    • 1 tablespoon all-purpose seasoning divided
    • 1 cup all-purpose flour
    • 2 tablespoons cornstarch
    • 2 large eggs
    • 1 cup oil for frying about ¼ inch in pan

    Instructions

    • Pat pork chops dry and trim any excess fat cap. Rub all over with Dijon mustard and season both sides with 1 teaspoon of all-purpose seasoning.
    • In a shallow bowl, combine the flour, cornstarch, and remaining 2 teaspoons of all-purpose seasoning. In a second bowl, beat 2 large eggs until smooth.
    • Coat each chop in the flour mixture, dip into the egg letting the excess drip off, then return to the flour and coat evenly. Press lightly and shake off excess.
    • Place coated chops on a plate and let sit for 10 minutes.
    • Add about 1 cup of oil to a 10-inch cast iron skillet, enough to come up about ¼ inch. Heat over medium heat, bringing it up to temperature gradually. The oil is ready when a pinch of flour sizzles steadily or it hits about 350°F.
    • Fry pork chops for 3 to 4 minutes per side, until golden brown. Flip once and don't overcrowd the pan. Adjust heat as needed to maintain a steady sizzle.
    • Transfer to a clean wire rack and rest a few minutes before serving.

    Video

    Notes

    • Resting the coated chops for 10 minutes is what helps the breading stay on during frying.
    • Use a wire rack instead of paper towels for resting cooked chops so the bottom crust stays crisp.
    • For thicker chops, add 1 to 2 minutes per side.
    • Pork chops are safely cooked when the internal temperature reaches 145°F. For best results, use a quick-read thermometer to check the internal temperature.

    Nutrition

    Calories: 875kcal | Carbohydrates: 30g | Protein: 35g | Fat: 68g | Saturated Fat: 8g | Polyunsaturated Fat: 18g | Monounsaturated Fat: 40g | Trans Fat: 0.3g | Cholesterol: 172mg | Sodium: 139mg | Potassium: 616mg | Fiber: 3g | Sugar: 0.4g | Vitamin A: 190IU | Vitamin C: 0.1mg | Calcium: 88mg | Iron: 4mg

    How to Store Fried Pork Chops

    Storage: Store leftover pork chops in an airtight container in the refrigerator for up to 3 days. The crust will soften some, but the flavor holds up well.

    Freezing: Freeze cooked, cooled chops in a single layer, then transfer to a freezer bag. They keep for up to 2 months.

    Reheating: For the crispiest results, reheat in a 375°F oven or air fryer for 5 to 7 minutes. Skip the microwave if you can; it makes the crust go limp.

    April 27, 2026 by Tanya Harris 6 Comments

    Strawberry Baked Oatmeal

    Strawberry baked oatmeal in a casserole dish

    I love making Strawberry Baked Oatmeal for breakfast. It is easy to make ahead, keeps well in the fridge, and makes busy mornings so much easier.

    Strawberry baked oatmeal in a casserole dish

    You’ll find the full recipe with ingredient amounts and instructions in the recipe card at the bottom of this post. Be sure to check out the blog post itself for extra tips and tricks!

    One of my favorite breakfast meals growing up was those little packets of dry strawberries-and-cream oatmeal. I loved those things more than the real oatmeal Grandma would make on the stove. It was probably because of all the sugar in each packet. Yay sugar! It probably wasn't that good for me. I probably didn't care.

    Now, I care lol, and I find baking the oatmeal ahead of time results in oatmeal you can make for a crowd, or prep ahead for breakfast. This recipe is great because it involves fresh fruit and ingredients you likely already have in the kitchen.

    This baked oatmeal is easy to adjust for everyone in the house. Just add a little milk for a softer, creamier bowl or enjoy it as is for a heartier texture. It is a simple, delicious breakfast that works for different tastes with very little effort.

    A Quick Look at The Ingredients

    Ingredient amounts and full recipe instructions are on the printable recipe card at the bottom of the post.

    • Oats: Old-fashioned rolled oats make up the base of this baked oatmeal and give it the best texture. I would skip quick-cooking oats, as they can make the baked oatmeal too soft.
    • Fruit: Fresh strawberries add a sweet, juicy flavor in every bite.
    • Sweeteners and spices: Brown sugar and granulated sugar add the perfect amount of sweetness, while cinnamon and nutmeg bring in that cozy strawberries-and-cream flavor.
    • Baking staples: Baking powder helps the oatmeal bake up nicely.
    • Liquids: Milk and eggs help create the custardy texture that holds everything together. I use dairy milk here, but another milk you like should work just fine.
    • Flavor boosters: Melted butter, vanilla, and a little salt round out everything and add richness, depth, and balance.
    ingredients for strawberry baked oatmeal on table

    How to Make Strawberry and Cream Baked Oatmeal

    Step 1: Prepare the baking dish: Lightly grease a 7x13 casserole dish with butter or nonstick cooking spray. An 8x8 baking dish can also be used, but the oatmeal will be a little thicker.

    Step 2: Mix the dry ingredients. In a medium bowl, stir together the oats, brown sugar, cinnamon, nutmeg, baking powder, and salt.


    Step 3: Whisk the wet ingredients. In a separate bowl, whisk together the milk, eggs, melted butter, and vanilla. Stir in the granulated sugar until combined.

    dry oatmeal mixture with a spoon in it.
    Milk and eggs mixed in a bowl with a whisk in it

    Step 4: Combine everything. Pour the wet ingredients into the dry ingredients, then stir until everything is well combined. Fold in the chopped strawberries.

    Step 5: Add to the baking dish. Pour the oatmeal mixture into a prepared baking dish and spread it into an even layer.

    Wet ingredients of strawberry baked oatmeal and casserole dish before baking

    Step 6: Bake and serve. Bake in the preheated oven for 20-25 minutes, or until the oatmeal is set and lightly golden on top. Let it cool slightly before serving.

    Strawberry baked oatmeal and baking dish with spoon sticking out

    Looking for more breakfast recipes? Try these out:

    • Million Dollar Bacon
    • Pumpkin Pie Oatmeal (Pressure Cooker Recipe)
    • Egg Bites (Pressure Cooker Recipe)
    Strawberry baked oatmeal in a casserole dish
    Print Recipe
    No ratings yet

    Strawberry Baked Oatmeal Recipe

    Strawberry and Cream Oatmeal is delicious and the perfect make-ahead breakfast meal. Perfect for weekdays and weekends. Healthy, fruity, and creamy oatmeal is the perfect breakfast. 
    Prep Time10 minutes mins
    Cook Time25 minutes mins
    Total Time35 minutes mins
    Course: Breakfast
    Cuisine: American
    Keyword: strawberry cream oatmeal
    Servings: 6 people
    Calories: 293kcal
    Author: Tanya Harris

    Ingredients

    • 2 cups old fashioned rolled oats
    • ⅓ cup light brown sugar
    • ¼ cup white granulated sugar
    • 1 teaspoon cinnamon
    • ¼ teaspoon nutmeg
    • 1 teaspoon baking powder
    • ¼ teaspoon salt
    • 2 cups milk
    • 2 large eggs
    • 1.5 Tablespoons butter melted
    • ¼ teaspoon vanilla
    • 1.5 cups chopped strawberries about 10 medium sized strawberries

    Instructions

    • Preheat the oven to 375F and lightly grease a 7x13 casserole dish with butter or nonstick cooking spray.
    • In a medium bowl, combine the oats, brown sugar, granulated sugar, cinnamon, nutmeg, baking powder, and salt.
    • In a separate bowl, whisk together the milk, eggs, melted butter, and vanilla.
    • Pour the wet ingredients into the dry ingredients and stir until combined. Fold in the chopped strawberries.
    • Pour the oatmeal mixture into the prepared baking dish and spread it into an even layer.
    • Bake for 20 to 25 minutes, or until the oatmeal is set and lightly golden on top.
    • Let cool for a few minutes, then serve warm.

    Notes

    • I used a 7x13, but an 8x8 baking dish can also be used; the oatmeal will be a little thicker and may need a few extra minutes to bake.
    • For a softer, creamier bowl, add a splash of milk when serving.
    • Store leftovers in an airtight container in the refrigerator for up to 4 days. Reheat individual portions in the microwave before serving.

    Nutrition

    Calories: 293kcal | Carbohydrates: 46g | Protein: 9g | Fat: 9g | Saturated Fat: 4g | Polyunsaturated Fat: 1g | Monounsaturated Fat: 2g | Trans Fat: 0.1g | Cholesterol: 79mg | Sodium: 180mg | Potassium: 385mg | Fiber: 4g | Sugar: 26g | Vitamin A: 315IU | Vitamin C: 21mg | Calcium: 173mg | Iron: 2mg

    How to Store Strawberry and Cream Baked Oatmeal

    Let the baked oatmeal cool completely, then cover the dish or transfer leftovers to an airtight container. Store it in the refrigerator for up to 4 days. When you are ready to eat, reheat individual portions in the microwave and add a splash of milk if you want a softer, creamier texture.

    You can also freeze baked oatmeal for longer storage. Wrap individual portions tightly or place them in freezer-safe containers and freeze for up to 2 months. Thaw overnight in the refrigerator before reheating.

    Strawberry baked oatmeal in a bowl with a spoon sticking out

    Variations

    This baked oatmeal recipe is easy to make your own with a few simple swaps.

    • Swap the fruit: Try blueberries, raspberries, chopped apples, or peaches instead of strawberries.
    • Change the milk: Dairy milk works great, but almond milk, oat milk, or another favorite milk can be used.
    • Add texture: Stir in chopped pecans, walnuts, or sliced almonds for a little crunch.
    • Make it extra cozy: Add a little more cinnamon or a pinch of cardamom for a warmer flavor.
    • Add a topping: Serve it with a drizzle of maple syrup, a spoonful of yogurt, or an extra splash of milk.

    Tanya’s Top Tips

    • Watch the bake time if using an 8x8 dish, since the oatmeal may need a few extra minutes to cook through.
    • Use old-fashioned rolled oats for the best texture. Quick oats can make the baked oatmeal too soft.
    • Do not skip greasing the dish, or the oatmeal will not lift out easily after baking.
    • Use ripe, sweet strawberries for the best flavor.
    • Let it cool for a few minutes before serving so it has time to set.
    • Add milk when serving if you like your oatmeal a little softer and creamier.

    This recipe was first published on April 11, 2016. It has been updated with additional information and photos.

    April 22, 2026 by Tanya Harris 6 Comments

    Easy Garlic Butter Rice

    garlic butter rice with butter, head of garlic in background

    This garlic butter rice is the perfect way to add flavor to plain rice.

    garlic butter rice in bowl wtith spoon sticking out

    You’ll find the full recipe with ingredient amounts and instructions in the recipe card at the bottom of this post. Be sure to check out the blog post itself for extra tips and tricks!

    Tanya holding a bowl of garlic butter rice

    Rice is one of those things I keep on heavy rotation in my kitchen. Whether it's plain white rice or a flavored version like my yellow rice or cilantro lime rice.

    This garlic rice comes out perfect with my stovetop method. I like to sweat the garlic in butter before adding the rice, resulting in a mellow, sweet garlic flavor running through every grain rather than a sharp, raw garlic bite. We love this rice.

    I think you'll love this one too.

    Love, Tanya

    Garlic Butter Rice At A Glance

    • Prep Time: 5 minutes
    • Cook Time: 23 minutes
    • Rest Time: 5 minutes
    • Total Time: 33 minutes
    • Serves: 4 as a side
    • Best For: Weeknight dinners, family meals, holiday side dish

    A Quick Look at The Ingredients

    Ingredient amounts and full recipe instructions are on the printable recipe card at the bottom of the post.

    • Long grain white rice: It cooks up fluffy and separate. Jasmine rice is a great swap if that's what you have, just check the package for the liquid ratio. You could also use brown rice, but you’ll need to increase the cook time and may need to adjust the liquid based on the package directions.
    • Unsalted butter: I use unsalted so I can control the salt myself. Feel free to use salted butter if that's your preference.
    • Fresh garlic: I use fresh garlic and mince it for this recipe.
    • Low-sodium chicken broth: gives you the most control over the final seasoning. Vegetable broth works if you want to keep this meatless.
    • Salt: A small amount goes in with the garlic to season it from the start, then more goes in with the broth.
    • Parsley: Fresh parsley to garnish.
    ingredients for garlic butter rice on table


    How to Make Garlic Butter Rice

    Step 1: In a medium saucepan over medium-low heat, melt the butter until it's fully liquid and just starting to foam. You don't want it browning, just melted and ready.

    Step 2: Add the minced garlic and a small pinch of salt. Let the garlic cook gently for about 5 minutes, stirring occasionally. You're looking for soft, fragrant garlic, not browned.

    Step 3: Add the rice straight into the garlic butter and stir for about 10 seconds.

    garlic sweating in butter in pot
    rice being cooked in garlic and butter

    Step 4: Pour in the chicken broth and add the salt. Stir, then turn the heat up to medium-high and bring it to a boil.

    Step 5: Once boiling, reduce the heat to low, cover with a tight-fitting lid, and simmer for 18 minutes. Don't lift the lid. The rice needs the trapped steam to cook properly.

    broth being poured into sauce pan along with the rice
    chicken broth boiling in pot

    Step 6: Take the pot off the heat and let it sit, still covered, for 5 more minutes. This rest time is what gets you fluffy, separate grains.

    Step 7: Fluff with a fork, top with chopped fresh parsley, and serve.

    cooked garlic butter rice after being fluffed with fork

    Variations

    • Vegetarian: Use vegetable broth instead of chicken broth.
    • Cheesy garlic butter rice: Stir in 2 to 3 tablespoons of grated parmesan after fluffing for a richer, cheesier side.
    • Spicy version: Add a pinch of red pepper flakes when the garlic is cooking.

    Serving Suggestions

    Garlic butter rice pairs well with just about any protein. A few of my favorites:

    • Serve it with pan-seared pork chops, lamb chops, or juicy broiled chicken breast for an easy weeknight plate.
    • Pair it with oven-baked shrimp or marinated air fryer salmon when you want something quick.
    • Spoon a saucy main like brown stew chicken or smothered chicken right over the top.
    garlic butter rice with butter, head of garlic in background

    Make Ahead and Storage

    Storage: Let the rice cool, then store it in an airtight container in the fridge for up to 4 days.

    Freezing: Spread the cooled rice in a single layer on a sheet pan to freeze, then transfer to a freezer bag. It keeps for 2 months.

    Reheating: Add a splash of broth or water, then microwave or heat in a covered pan over low heat. The extra liquid keeps it from drying out.

    Tanya's Top Tips

    • Don't rush the garlic infusion. This is the most important step. Low and slow on the garlic is what gives this rice its flavor.
    • Keep the lid on while it simmers. Lifting the lid lets the steam escape, leaving your rice unevenly cooked.
    • Rinse the rice. I always rinse my rice, but you can skip it if you prefer, especially if your rice instructions say not to.

    I hope you love this recipe as much as we do. If you make this recipe, please leave a star rating and let me know how it turned out in the comments below.

    garlic butter rice with butter, head of garlic in background
    Print Recipe
    5 from 2 votes

    Garlic Butter Rice Recipe

    Buttery, fragrant garlic butter rice is an easy one-pot side dish made with long grain white rice simmered in slow-infused garlic butter and chicken broth. 
    Prep Time5 minutes mins
    Cook Time23 minutes mins
    Resting Time5 minutes mins
    Total Time33 minutes mins
    Course: Side Dish
    Cuisine: American
    Keyword: garlic butter rice
    Servings: 4 people
    Calories: 239kcal
    Author: Tanya Harris

    Ingredients

    • 1 cup long grain white rice
    • 2 tablespoon unsalted butter
    • 3 cloves garlic minced (about 1 tablespoon)
    • 1¾ cups low sodium chicken broth
    • ½ teaspoon salt plus a pinch for the garlic
    • 2 teaspoons fresh parsley chopped for garnish

    Instructions

    • In a medium saucepan over medium-low heat, melt the butter until it’s fully liquid and just starting to foam.
    • Add the minced garlic and a pinch of salt. Cook on low for 5 minutes, stirring occasionally, until the garlic is soft and fragrant but not browned.
    • Add the rice to the pan and stir for about 10 seconds, coating every grain in the garlic butter.
    • Pour in the chicken broth and add the ½ teaspoon salt. Stir, then increase the heat to medium-high and bring to a boil.
    • Once boiling, reduce heat to low, cover with a tight-fitting lid, and simmer for 18 minutes, until the liquid is fully absorbed.
    • Remove from heat and let the rice rest, still covered, for 5 minutes.
    • Fluff the rice with a fork, top with fresh parsley, and serve warm.

    Notes

    • If you rinse your rice first, make sure to drain it well before adding it to the garlic butter so excess water doesn’t throw off the liquid ratio.
    • Keep the heat low while cooking the garlic. You want it soft and fragrant, not browned, so the rice gets a mellow garlic flavor instead of a bitter taste.

    Nutrition

    Calories: 239kcal | Carbohydrates: 39g | Protein: 6g | Fat: 7g | Saturated Fat: 4g | Polyunsaturated Fat: 0.4g | Monounsaturated Fat: 2g | Trans Fat: 0.2g | Cholesterol: 15mg | Sodium: 325mg | Potassium: 153mg | Fiber: 1g | Sugar: 0.2g | Vitamin A: 179IU | Vitamin C: 1mg | Calcium: 23mg | Iron: 1mg

    April 20, 2026 by Tanya Harris 6 Comments

    New Orleans BBQ Shrimp Recipe

    New Orleans-style BBQ shrimp in a skillet with a spoon and bread surrounding it

    This New Orleans BBQ shrimp is a must-make if you want to impress your friends with a shrimp dish. It's not actually barbequed; it's jumbo shrimp that are simmered in a bold, buttery Cajun sauce.

    New Orleans-style BBQ shrimp in a skillet with a spoon and bread surrounding it

    You’ll find the full recipe with ingredient amounts and instructions in the recipe card at the bottom of this post. Be sure to check out the blog post itself for extra tips and tricks!

    Tanya holding a bowl of BBQ shrimp and looking at the camera smiling

    BBQ shrimp is not your typical barbecue. Tender shrimp coated in a savory, buttery broth loaded with garlic, Worcestershire sauce, and Cajun seasoning. None of that sticky-sweet stuff.

    You’ll find it on menus all over New Orleans, and every time I have it, it comes with French bread to dip straight into that broth while you eat. It's the best!

    If you love Louisiana flavors, you'll also want to try my Cajun Jambalaya or Southern Style Shrimp and Grits.

    Love, Tanya

    New Orleans BBQ Shrimp at a Glance

    • Best For: Weeknight dinners, date night
    • Prep Time: 10 minutes
    • Cook Time: 12 minutes
    • Total Time: About 22 minutes
    • Serves: 4


    A Quick Look at the Ingredients

    Ingredient amounts and full recipe instructions are on the printable recipe card at the bottom of the post.

    • Jumbo shrimp (peeled and deveined, tail-on recommended) – Tail-on shrimp look great for presentation and hold up well in the sauce. Use the largest shrimp you can find. Raw shrimp, not pre-cooked shrimp, is best for this dish. If it's frozen, thaw it first.
    • Unsalted butter – Use real butter here, not margarine. I use 1 stick of butter in my recipe, but some recipes use much, much more. Feel free to add more butter if you like.
    • Garlic – Freshly minced if you can.
    • Worcestershire sauce – Adds depth and that signature savory note that makes New Orleans BBQ shrimp what it is.
    • Fresh lemon juice – Brightens the sauce and balances the richness of the butter.
    • Cajun or Creole seasoning – My Homemade Cajun Seasoning works well in this dish, but any store-bought blend will work. Salt content varies by brand, so season to taste.
    • Dried rosemary and oregano – Adds a herby note that is very traditional in this dish.
    • Chicken broth – adds a little more body and savory flavor, and plenty of sauce for dipping.
    • Green onions – Sliced, for garnish.


    How to Make New Orleans BBQ Shrimp

    Step 1: Build the sauce base. Melt the butter in a large skillet over medium heat. Add the minced garlic and cook for about 1 minute until fragrant. Do not let it brown.

    Step 2: Season and simmer. Stir in the Worcestershire sauce, lemon juice, Cajun seasoning, rosemary, and oregano. Pour in the chicken broth and let the sauce simmer for 2 minutes, stirring occasionally, until it reduces slightly. Taste and season with salt and pepper.

    Garlic and butter melting in skillet
    Sauce for barbecue shrimp and skillet

    Step 3: Cook the shrimp. Add the shrimp to the skillet in a single layer. Cook for 2 to 3 minutes per side until pink and opaque. As soon as they curl into a C-shape, they are done. Do not overcook them.

    Shrimp cooking in skillet and sauce for barbecue shrimp.
    Bbq shrimp in a skillet on the stovetop.

    Step 4: Serve immediately. Remove the skillet from the heat, garnish with sliced green onions, and spoon into shallow bowls with plenty of that sauce. Serve with crusty French bread right away.

    close up photo of BBQ shrimp in skillet

    Variations

    • Add beer. Some New Orleans recipes call for a splash of beer in the sauce. Add about ¼ cup of a light lager when you add the broth for a slightly deeper flavor.
    • Keep the tails on. The traditional version is made with shell-on, head-on shrimp. If you can find shrimp with the heads on, use them. The heads add a lot of flavor to the sauce, and yes, you eat them the messy way.
    • Add heat. This dish is not traditionally spicy, but if you want a kick, add a few dashes of hot sauce to the sauce while it simmers.
    • Swap the broth. If you have shrimp stock on hand, use it in place of the chicken broth for a more concentrated seafood flavor. I have a Shrimp Stock recipe if you want to make your own.

    Serving Suggestions

    This dish is made to be served in shallow bowls with crusty French bread for dipping. That sauce is the whole point, and you want something to soak it all up.

    You can also serve it over creamy grits, like my Southern Style Shrimp and Grits, spooning the shrimp and sauce over a bowl of creamy grits. It works beautifully as an appetizer for a larger group as well. For a full Southern spread, pair it with my Instant Pot Cajun Dirty Rice.

    Orleans-style BBQ shrimp in a bowl surrounded by bread

    Make Ahead and Storage

    Storage: Store leftover shrimp in an airtight container in the refrigerator for 3-4 days. The sauce may solidify as it cools because of the butter. That is normal.

    Reheating: Reheat gently in a skillet over low heat with a splash of broth or water to loosen the sauce. Avoid high heat, or the shrimp will turn rubbery.

    Freezing: I do not recommend freezing this dish. Shrimp can become tough and watery after freezing and thawing, and the butter sauce does not hold up well.

    Tanya's Top Tips

    • Do not overcook the shrimp. They cook fast. Pull them as soon as they turn pink and curl into a C-shape. An overcooked shrimp is rubbery, and there is no coming back from that.
    • Taste your Cajun seasoning before adding salt. Cajun and Creole blends vary a lot in salt content. Season your sauce to taste rather than just dumping in extra salt.

    FAQs

    Why is it called BBQ shrimp?

    The name comes from the deep, reddish-brown color the butter and Worcestershire sauce take on as it simmers. It looks like barbecue.
    The dish was invented in 1953 at Pascal's Manale, an Italian-Creole restaurant in Uptown New Orleans that's still open today. Mr. B's Bistro and Emeril later put their own spin on it, but Pascal's is where it started.

    I hope you love this New Orleans BBQ Shrimp as much as we do. If you're looking for more shrimp and seafood recipes, try these out:

    • Crispy Air Fryer Fried Shrimp – Crunchy, golden, and so easy in the air fryer.
    • Creamy Shrimp Bisque – A rich, velvety soup perfect for cold nights.
    • Air Fryer Shrimp Po'Boy Sandwiches – New Orleans vibes in sandwich form.
    New Orleans-style BBQ shrimp in a skillet with a spoon and bread surrounding it
    Print Recipe
    5 from 3 votes

    New Orleans BBQ Shrimp Recipe

    Tender jumbo shrimp simmered in a rich, garlicky Worcestershire butter sauce. One skillet, 25 minutes, and a lot of crusty bread required.
    Prep Time10 minutes mins
    Cook Time12 minutes mins
    Total Time22 minutes mins
    Course: Appetizer, Main Course
    Cuisine: American
    Keyword: New Orleans BBQ Shrimp
    Servings: 4 people
    Calories: 294kcal
    Author: Tanya Harris

    Ingredients

    • 1 lb jumbo shrimp peeled and deveined (tail-on recommended)
    • 8 tablespoons unsalted butter
    • 4 garlic cloves minced
    • 2 tablespoons fresh lemon juice
    • 1 tablespoon Worcestershire sauce
    • 1 tablespoon Cajun or Creole seasoning
    • ½ teaspoon dried rosemary crushed
    • ½ teaspoon dried oregano
    • ½ cup chicken broth
    • Salt and pepper to taste
    • 1 tablespoon green onions sliced (garnish)

    Instructions

    • Melt butter in a large skillet over medium heat. Add garlic and cook for 1 minute until fragrant.
    • Stir in lemon juice, Worcestershire sauce, Cajun seasoning, rosemary, and oregano. Stir in broth and simmer for 2 minutes until slightly reduced. Taste and season with salt and pepper.
    • Add shrimp in a single layer. Cook 2 to 3 minutes per side until pink, opaque, and curled into a C-shape.
    • Remove from heat. Garnish with green onions and serve immediately in shallow bowls with crusty French bread.

    Notes

    Cajun and Creole blends vary in salt. Taste the sauce before adding extra salt.
    Do not overcook the shrimp. They are done as soon as they curl and turn opaque.
    Serve immediately with French bread to soak up the sauce.
    To reheat leftovers, warm gently in a skillet over low heat with a splash of broth.

    Nutrition

    Calories: 294kcal | Carbohydrates: 4g | Protein: 16g | Fat: 24g | Saturated Fat: 15g | Polyunsaturated Fat: 1g | Monounsaturated Fat: 6g | Trans Fat: 1g | Cholesterol: 204mg | Sodium: 817mg | Potassium: 204mg | Fiber: 0.4g | Sugar: 1g | Vitamin A: 929IU | Vitamin C: 6mg | Calcium: 86mg | Iron: 1mg

    April 17, 2026 by Tanya Harris 8 Comments

    Homemade Fruit Punch Recipe


    Making delicious fruit punch means you need the right fruit juice combo, and this is the one that my whole family loves.

    fruit punch in glass on table outside

    You’ll find the full recipe with ingredient amounts and instructions in the recipe card at the bottom of this post. Be sure to check out the blog post itself for extra tips and tricks!

    Tanya Harris holding a glass of fruit punch

    Anytime I need a non-alcoholic, fruity drink, this fruit punch is what I make. It's some of my favorite fruit juices, all combined into one.

    The real stamp of approval came from my youngest. She has never been a fan of store-bought fruit punch, so I wasn’t expecting much. She took one sip and told me it was the best fruit punch she’d ever had. That was it for me.

    If you love a refreshing non-alcoholic drink for a crowd, you might also enjoy my Green Sherbet Punch or my Slow Cooker Hot Holiday Punch.

    Fruit Punch at a Glance

    • Prep Time: 5 minutes
    • Chill Time: 1 hour
    • Total Time: 1 hour 5 minutes
    • Serves: 6 to 8
    • Best For: Parties, gatherings, make-ahead drinks

    A Quick Look at the Ingredients

    • Frozen lemonade concentrate – Thawed. This is the backbone of the punch and gives it that tart, citrusy punch (no pun intended). You could also use limeade concentrate in its place.
    • Cranberry juice, orange juice, and pineapple juice – This is my tart, acidic, and sweet juice combo. Feel free to pick other juices you may prefer, but these are the trio I love. 
    • Ginger ale or club soda – Stirred in right before serving for a little fizz. You can use one or the other, or a mix of both. Club soda keeps it less sweet; ginger ale adds a subtle spiced flavor.
    • Water – I add a little bit of water to lighten the juice up. I say taste your punch before you add it. 

    How to make Fruit Punch

    Step 1: In a large pitcher, combine the thawed lemonade concentrate, cranberry juice, orange juice, pineapple juice, and water. Stir well to combine.

    orange juice being poured into fruit punch

    Step 2: Refrigerate the punch until chilled, at least 1 hour. You can also drink it as soon as it's made, but it's best when chilled.

    Step 3: Just before serving, stir in the ginger ale or club soda.

    Step 4: Serve over ice. Garnish with orange slices or fresh pineapple chunks if you’d like.

    glasses of fruit punch in front of pitcher of fruit punch

    Variations

    Make it alcoholic: Add white rum or vodka to the punch before chilling. Start with 1 to 1.5 cups and adjust to taste. My Jamaican Rum Punch is a great reference if you want a rum-forward version.

    Less tart: Stir in more water or increase the amount of pineapple juice, which is the sweetest juice in the mix.

    Make Ahead and Storage

    Storage: Store the punch in a covered pitcher or airtight container in the refrigerator for up to 3 days. The punch won't be as fizzy, but it'll still be delicious.

    Tanya’s Top Tips

    • Don’t add the ginger ale or club soda until right before serving, or you’ll lose all the carbonation. However, if you've made a batch and want to store it, it'll still taste fine; it just won't be as carbonated.
    • For a party, double or triple the recipe and mix directly in a large bowl or punch bowl.

    glass of fruit punch on table

    I hope you love this fruit punch recipe as much as we do. If you’re looking for more drink recipes, try these out:

    • Green Sherbet Punch – A fun, colorful punch that’s perfect for parties.
    • Slow Cooker Hot Holiday Punch – A warm, spiced punch for the colder months.
    • Homemade Cranberry Lemonade – Tart, refreshing, and made from scratch.
    • Classic Lemonade – A simple, crowd-pleasing classic.
    • Jamaican Sorrel Drink – A vibrant, floral drink made with dried sorrel.
    fruit punch in glass on table outside
    Print Recipe
    5 from 3 votes

    Homemade Fruit Punch Recipe

    This homemade fruit punch is refreshing and easy to make with juices you likely already have in your fridge.
    Prep Time5 minutes mins
    Chill Time1 hour hr
    Total Time1 hour hr 5 minutes mins
    Course: Drinks
    Cuisine: American
    Keyword: fruit punch, fruit punch recipe
    Servings: 8 people
    Calories: 76kcal
    Author: Tanya Harris

    Ingredients

    • 12 oz can frozen lemonade concentrate thawed
    • 2 cups cranberry juice
    • 1½ cups orange juice
    • 1 cup pineapple juice
    • 1 cup water
    • 1 cup ginger ale or club soda or a mix of both
    • Ice for serving
    • Orange slices and fresh pineapple chunks for garnish (optional)

    Instructions

    • In a large pitcher, combine the thawed lemonade concentrate, cranberry juice, orange juice, and pineapple juice. Stir well.
    • Refrigerate until chilled, at least 1 hour.
    • Just before serving, stir in the ginger ale or club soda.
    • Serve over ice. Garnish with fruit if desired.

    Video

    Notes

    • This punch is best when stored for up to 3 days.
    • You can use 100% cranberry juice for a less sweet, more tart punch, or cranberry juice cocktail if you prefer a sweeter drink.

    Nutrition

    Calories: 76kcal | Carbohydrates: 19g | Protein: 1g | Fat: 0.2g | Saturated Fat: 0.02g | Polyunsaturated Fat: 0.1g | Monounsaturated Fat: 0.04g | Sodium: 6mg | Potassium: 180mg | Fiber: 0.2g | Sugar: 17g | Vitamin A: 123IU | Vitamin C: 32mg | Calcium: 16mg | Iron: 0.4mg

    April 15, 2026 by Tanya Harris 5 Comments

    Broccoli Rice Casserole (Made From Scratch)

    broccoli rice casserole in dish with spoon in it

    I like to make my broccoli rice casserole from scratch, starting with a rich, cheesy, flavorful sauce that comes together in one pot.

    broccoli rice casserole in dish with spoon in it

    You’ll find the full recipe with ingredient amounts and instructions in the recipe card at the bottom of this post. Be sure to check out the blog post itself for extra tips and tricks!

    Broccoli Rice Casserole At a Glance

    Creamy, cheesy broccoli and rice casserole made completely from scratch, no canned soup.

    Prep Time: 15–20 minutes
    Cook Time: 30–35 minutes
    Total Time: 45–55 minutes
    Serves: 6–8
    Best For: Holiday dinners, potlucks, family meals

    tanya holding a plate of broccoli rice casserole

    When it comes to comfort food, you can't beat a rice casserole. Hearty and warming, and I love that it's a one-pot meal to cut down on the clean-up time!

    I like to make my cheese sauce from scratch, and mushrooms! Use it in place of a can of cream of mushroom soup you find in most recipes.

    If you are in the mood for more comfort food, be sure to check out my Creamy baked mac and cheese or my sweet potato casserole.

    Love, Tanya

    A Quick Look at the Ingredients

    Ingredient amounts and full recipe instructions are on the printable recipe card at the bottom of the post.

    • Broccoli - I use fresh broccoli florets for this recipe. Frozen broccoli florets work as well; just make sure to defrost them first and pat them dry to remove any excess water.
    • Butter - Used to sauté the onions and mushrooms and build flavor for the sauce.
    • Onions and Mushrooms - The aromatics in this casserole. I use yellow onions and baby bella (cremini) mushrooms.
    • For my sauce - A simple homemade sauce made with all-purpose flour, chicken broth, and evaporated milk instead of canned soup.
    • Seasonings - Mustard powder, salt, black pepper, and garlic powder give the sauce plenty of flavor and keep it from tasting bland.
    • Cheddar cheese and cooked rice - Freshly grated shredded cheddar cheese melts into the sauce and on top of the casserole, and cooked rice makes this a hearty, filling dish.
    ingredients for broccoli rice casserole on counter

    How to make Broccoli Rice Casserole

    Step 1: Preheat your oven to 400°F. Blanch the broccoli: Bring 4 quarts of salted water to a boil. Add the broccoli and cook for about 4 minutes. Remove the broccoli from the water and set aside.

    Step 2: Melt the butter in a large ovenproof skillet over medium heat. Add the onions and mushrooms and sauté for about 5 minutes.

    Sprinkle the flour over the onions and mushrooms, then stir. Cook for about 2 minutes.

    onions and mushrooms in a skillet with flour sprinkled over and stirred

    Step 3: Slowly stir in the chicken broth, making sure to scrape up all the browned bits from the bottom of the skillet. Then slowly whisk in the evaporated milk, mustard powder, salt, black pepper, and garlic powder. Bring the mixture to a simmer and cook for about 5 minutes, until thickened, stirring often.

    cream if mushroom sauce in skillet
    thickened creamy mushroom sauce and skillet on spoon

    Step 4: Remove skillet from heat and slowly stir in 2 cups of the grated cheese until the cheese has melted and the mixture is smooth and creamy. Then stir in the broccoli and rice.

    cheese being mixed into cream sauce
    broccoli and rice and sauce in skillet

    Step 5: Sprinkle the remaining cheese over the mixture. Place in the preheated oven and bake for 15 minutes, until the cheese on top has melted. Remove and enjoy 🙂

    rice, broccoli, chese added to cream sauce in skillet
    baked broccoli and cheese casserole right out of oven

    Can you make a rice casserole ahead of time?

    Yes! This is a great make-ahead dish. You can prep it all the day before and keep it covered in the fridge until you are ready to bake it. Any leftovers can be kept for three to four days and reheated in the oven.

    Can you freeze it?

    This casserole freezes really well, and you can cook it right from frozen. Let it cool, then transfer it to freezer-safe containers; it will keep well for up to 3 months.

    Place the frozen mixture into a casserole dish and bake at 400F for 30 minutes. Give it a good stir and cook for an additional 30 to 40 minutes.

    What's the best rice to use?

    I like to use a long-grain white rice like basmati or jasmine. You can use brown rice if you prefer, just make sure it's fully cooked before adding it to the casserole.

    spoon holding broccoli rice casserole

    Tanyas Top Tips

    • If subbing frozen broccoli for fresh, make sure to defrost the broccoli and drain it before adding it to the casserole. 
    • You can use a casserole dish if you don’t have an ovenproof skillet. Just transfer the cheese mixture to a bowl, add broccoli and cheese, and transfer the mixture to a 2qt casserole dish.
    • For the best melt and flavor, use freshly grated cheddar cheese instead of pre-shredded. Pre-shredded cheese is often coated with anti-caking agents that keep it from melting as smoothly into the sauce.
    • Make it a full meal by stirring in about 2 cups of bite-sized chicken (such as rotisserie, poached, or leftover roast chicken) along with the rice and broccoli before baking.

    I hope you love this broccoli rice casserole recipe as much as we do! For more rice recipes, check these out:

    • Homemade Rice a Roni - A cozy, from-scratch version of the classic boxed rice and pasta side, packed with flavor and pantry staples.
    • Kale Rice - Fluffy rice tossed with tender kale for an easy, veggie-loaded side dish that goes with just about any main.
    • Oven Baked Rice - Perfectly fluffy, hands-off rice baked in the oven so you can set it and forget it while you prep the rest of dinner.
    • Dirty Rice - A bold and savory Cajun-style rice dish made with aromatics and meat for a hearty, one-pan side or main.
    broccoli rice casserole in dish with spoon in it
    Print Recipe
    5 from 1 vote

    Broccoli Rice Casserole

    This from scratch broccoli rice casserole is pure comfort food, creamy and cheesy and packed with broccoli and rice for a satisfying one pot dinner.
    Prep Time15 minutes mins
    Cook Time30 minutes mins
    Total Time45 minutes mins
    Course: Main Course
    Cuisine: American
    Keyword: broccoli and rice casserole, how to make broccoli rice casserole from scratch
    Servings: 8 servings
    Calories: 362kcal
    Author: Tanya Harris

    Ingredients

    • 4 cups fresh broccoli florets chopped
    • 3 Tablespoon unsalted butter
    • ¾ cup chopped onion
    • 2 cups chopped portobello mushrooms
    • 3 Tablespoon all-purpose flour
    • ½ cup chicken broth
    • 1 12 oz can evaporated milk
    • 1 teaspoon mustard powder
    • 1 teaspoon salt or to taste
    • ½ teaspoon black pepper or to taste
    • ½ teaspoon garlic powder
    • 3 cups shredded cheddar cheese separated
    • 2 cups cooked rice

    Instructions

    • Preheat the oven to 400 degrees Fahrenheit.
    • Blanch broccoli - bring 4 quarts of salted water to a boil. Once boiling, place broccoli in the water and boil for about 4 minutes. Remove broccoli from water and set aside.
    • Melt butter over medium heat in a large ovenproof skillet. Add onions and mushrooms and sauté for about 5 minutes.
    • Sprinkle flour over the onions and mushrooms and stir. Cook for about 2 minutes.
    • Slowly stir in the chicken broth, making sure to get up all the brown bits in the bottom of the skillet. Slowly stir in the evaporated milk, mustard powder, salt, black pepper, and garlic powder. Bring mixture to a simmer and allow to simmer for about 5 minutes, stirring often.
    • Remove skillet from heat and slowly whisk in 2 cups of the grated cheese, until the cheese has melted and the mixture is smooth and creamy. Stir in the broccoli and rice. Sprinkle the remaining cheese over the mixture.
    • Place in the preheated oven and bake for 15 minutes, until the cheese on top has melted. Remove and enjoy 🙂

    Notes

    • If subbing frozen broccoli for fresh, make sure to defrost the broccoli and drain it before adding it to the casserole.
    • You can use a casserole dish if you don’t have an ovenproof skillet. Just transfer cheese mixture to a bowl, add broccoli and cheese, and transfer mixture to a 2qt casserole dish.

    Nutrition

    Calories: 362kcal | Carbohydrates: 24g | Protein: 17g | Fat: 22g | Saturated Fat: 14g | Cholesterol: 69mg | Sodium: 675mg | Potassium: 451mg | Fiber: 2g | Sugar: 7g | Vitamin A: 951IU | Vitamin C: 44mg | Calcium: 456mg | Iron: 1mg

    This post was originally published on August 7th, 2020. It has been updated with new photos.

    April 14, 2026 by Tanya Harris 7 Comments

    Peruvian Green Sauce (Aji Verde)

    peruvian green sauce in bowl

    This Peruvian green sauce, also known as aji verde, is the kind of condiment you'll want to put on absolutely everything.

    peruvian green sauce in bowl
    Tanya holding chicken and green sauce

    This Peruvian green sauce, also known as aji verde, is the kind of condiment you'll want to put on absolutely everything.

    I first fell in love with it at a local Peruvian restaurant my coworkers and I used to frequent for lunch. Fun fact: when I went to Peru, I couldn't find it there. The aji verde you know from Peruvian restaurants in the US is actually a stateside creation. The traditional version uses aji amarillo peppers and huacatay (black mint). The jalapeño and cilantro swap happened here.
    It goes on everything. Peruvian chicken, pork chops, fish, steak, rice and beans. I think you'll love it too.

    Love, Tanya

    Ingredients

    Ingredient amounts and full recipe instructions are on the printable recipe card at the bottom of the post.

    • Cilantro — Use mostly leaves, but small stems are fine.
    • Jalapeños — These vary a lot in heat. Start with seeds removed if you're unsure, then adjust next time.
    • Garlic - I use whole cloves and add them to the blender.
    • Olive oil - for the marinade.
    • Cotija cheese — This adds a salty, tangy richness that mayonnaise alone can't replicate. If you can't find cotija, feta, or Parmesan, either one works.
    • Lime juice — Use fresh. Bottled won't give you the same brightness.
    • Duke's mayo — My go-to. Use your favorite.

    How to Make Peruvian Green Sauce

    Add all your ingredients to a blender and blend until smooth. That's it. Seriously.

    ingredients for green sauce in jar
    blended green sauce in jar

    The only real decision you need to make is how spicy you want it.

    Spice level:

    • Spicy: Leave the seeds and membranes in the jalapeños
    • Mild: Remove seeds and membranes before blending
    • Extra mild: Use just one jalapeño
    spoon picking up green sauce

    How long does Green Sauce last?

    In the fridge, it can last for up to one week.

    I hope you enjoy this green sauce as much as we do.

    Suggested Recipes to eat this with?

    • Peruvian Chicken - Juicy chicken that pairs perfectly with a drizzle of this bright green sauce.
    • Air Fryer Whole Chicken (Peruvian Style) - same traditional flavor, made in the air fryer.
    • Yellow rice - perfect for soaking up every drop of this bright, delicious green sauce.
    peruvian green sauce in bowl
    Print Recipe
    5 from 1 vote

    Peruvian Green Sauce (Aji Verde)

    Delicious bright and bold peruvian Green Sauce that is so easy to make and taste amazing. Serve it with chicken, rice and beans, pork, and so much more.
    Prep Time5 minutes mins
    Cook Time0 minutes mins
    Total Time5 minutes mins
    Course: Sauce
    Cuisine: Peruvian
    Keyword: Peruvian Green Sauce
    Servings: 6 people
    Calories: 190kcal
    Author: Tanya Harris

    Equipment

    • Blender

    Ingredients

    • 2 fresh jalapeños
    • 1 cup cilantro roughly chopped
    • ½ cup mayonnaise I use Duke’s
    • 2 Tablespoon cotija cheese
    • 5 cloves garlic peeled
    • 2 Tablespoon olive oil
    • 2 Tablespoon lime juice from fresh limes
    • ¼ teaspoon salt

    Instructions

    • Place ingredients in blender. Blend until smooth.

    Notes

    For spicier sauce, keep seeds and membranes of jalapeños. For a mild sauce, remove seeds and membranes.

    Nutrition

    Calories: 190kcal | Carbohydrates: 2g | Protein: 1g | Fat: 20g | Saturated Fat: 4g | Polyunsaturated Fat: 9g | Monounsaturated Fat: 7g | Trans Fat: 0.03g | Cholesterol: 13mg | Sodium: 282mg | Potassium: 49mg | Fiber: 0.3g | Sugar: 0.4g | Vitamin A: 269IU | Vitamin C: 9mg | Calcium: 37mg | Iron: 0.2mg

    This post was originally published on June 8, 2019. It has been updated with new information and photos.

    • « Previous Page
    • 1
    • 2
    • 3
    • 4
    • 5
    • 6
    • …
    • 73
    • Next Page »
    tanya holding bowl and mixing

    Welcome!

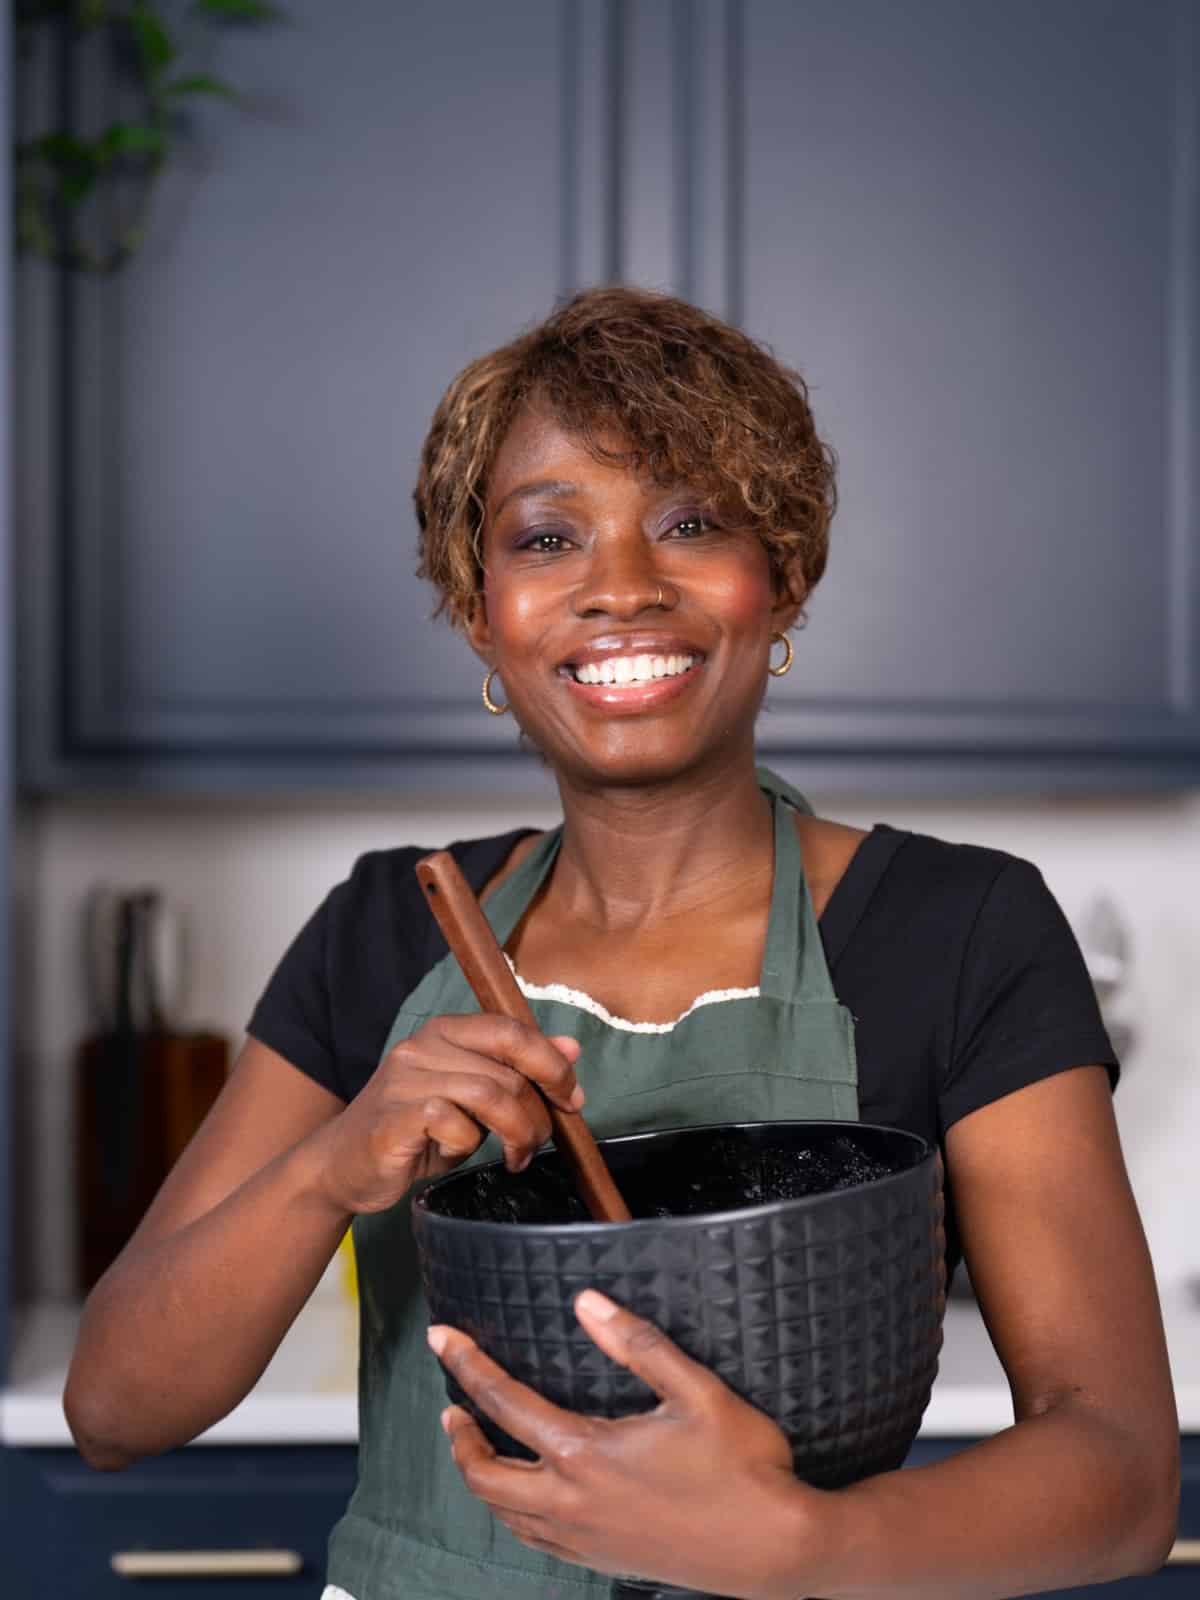
    Welcome to My Forking Life! Hi, I'm Tanya, an attorney, busy wife and mom, and lover of quick, easy, and delicious meals.

    More about me

    Popular Recipes

    • Jamaican Oxtails Recipe
    • Air fryer fried chicken on a white platter
      Air Fryer Fried Chicken
    • brown stew chicken in pan
      Brown Stew Chicken
    • Jamaican Instant Pot Rice and Beans

    Holiday Favorites

    • sweet potato pie on a plate
      Southern Sweet Potato Pie Recipe
    • spoon lifting gravy out of gravy dish
      Easy Recipe for Gravy without Drippings
    • Stirring the giblet gravy with a spoon.
      Grandma's Giblet Gravy Recipe
    • creamy baked macaroni and cheese, the best baked macaroni and cheese, creamy mac and cheese
      Creamy Baked Macaroni and Cheese
    as seen on...various online websites text listed

    Footer

    ↑ back to top
    • Privacy Policy
    • Contact
    • About Tanya

    As an Amazon Associate, I earn from qualifying purchases.
    Copyright © 2026 My Forking Life

    Rate This Recipe

    Your vote:


    Let us know what you thought of this recipe:

    This worked exactly as written, thanks!
    My family loved this!
    Thank you for sharing this recipe

    Or write in your own words:

    A rating is required
    A name is required
    An email is required