When it comes to S’mores, you don’t need a campfire when you have an Air Fryer. Here's how to make Indoor S'mores in an Air Fryer.

This post may contain affiliate links, please read my full disclosure here.
[Read more...]When it comes to S’mores, you don’t need a campfire when you have an Air Fryer. Here's how to make Indoor S'mores in an Air Fryer.
This post may contain affiliate links, please read my full disclosure here.
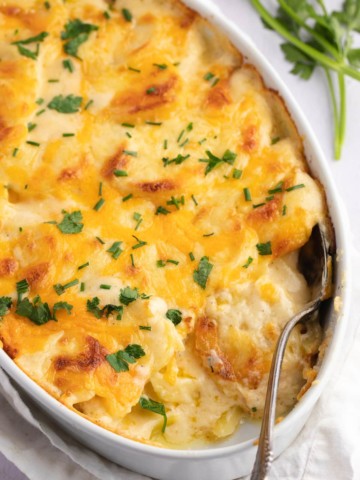
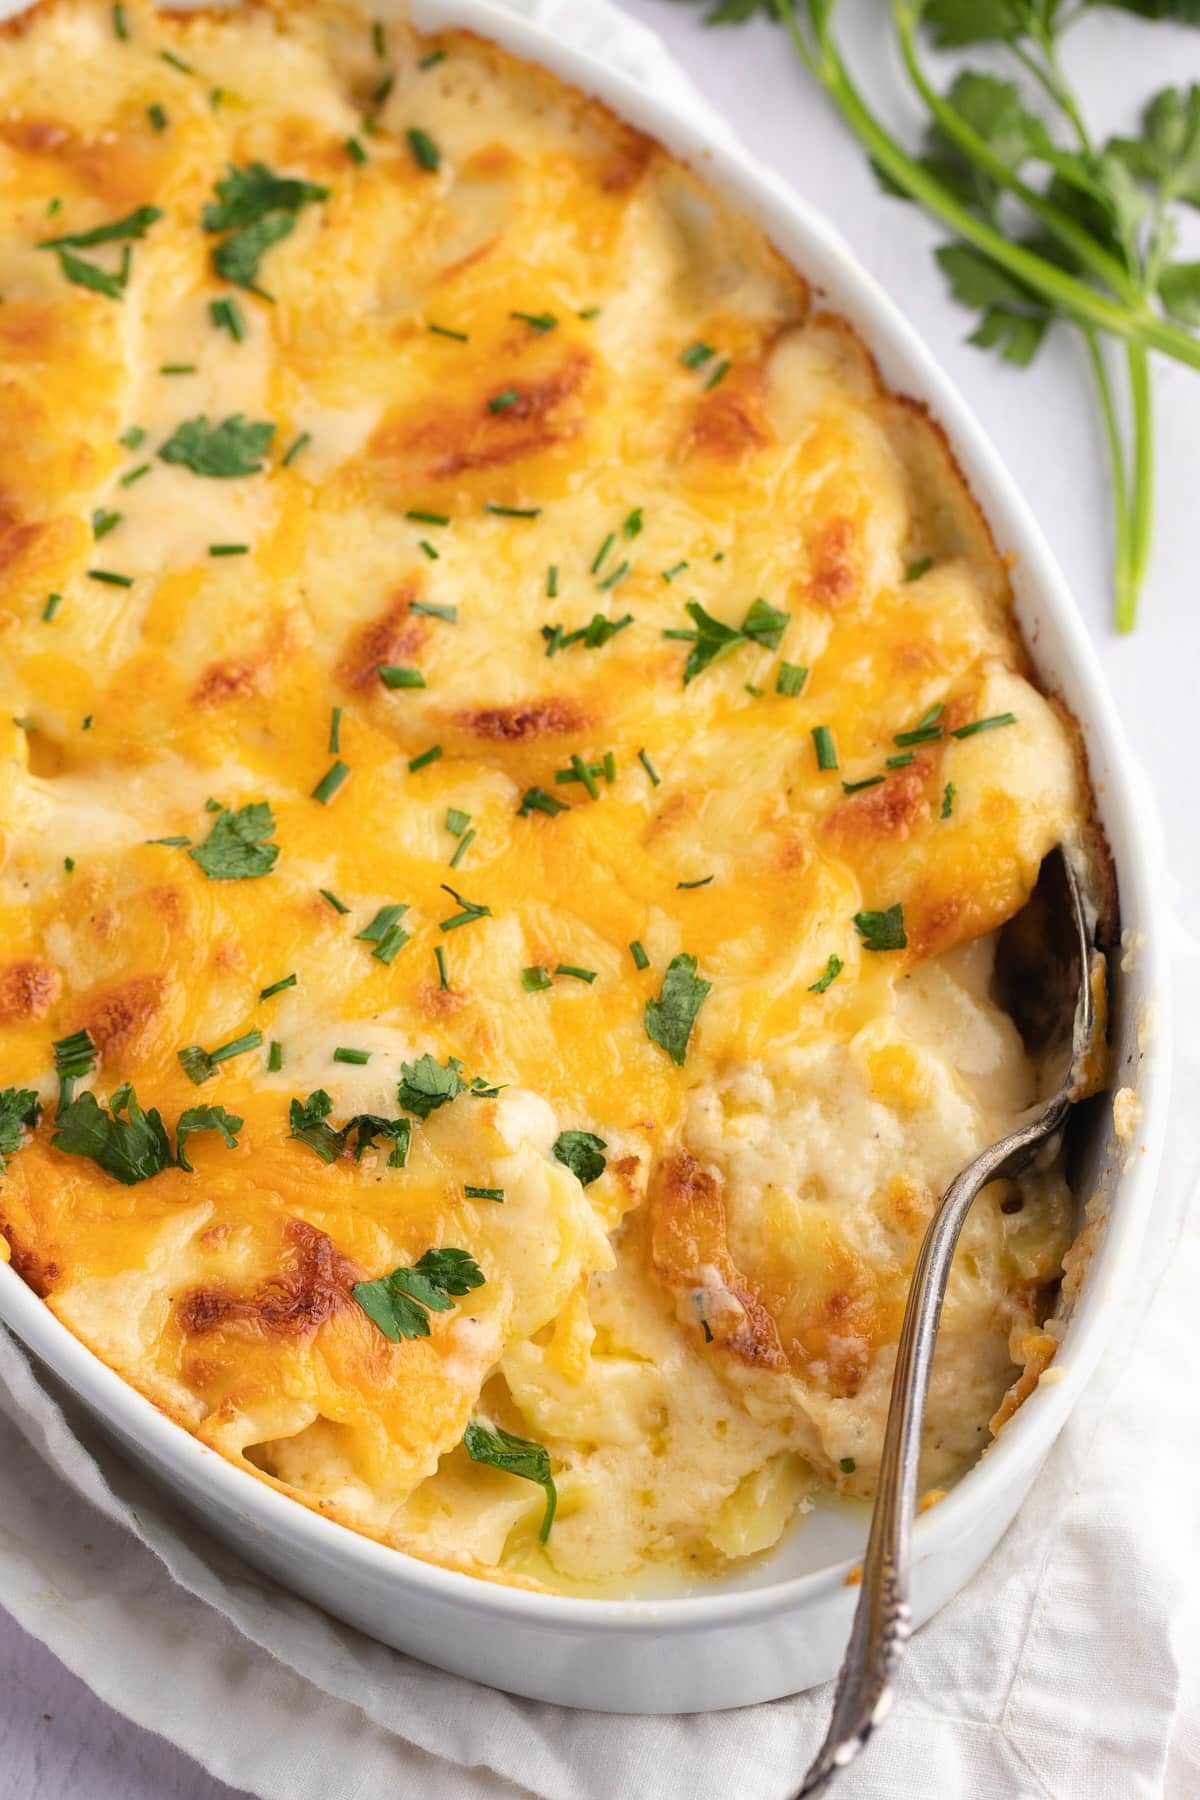
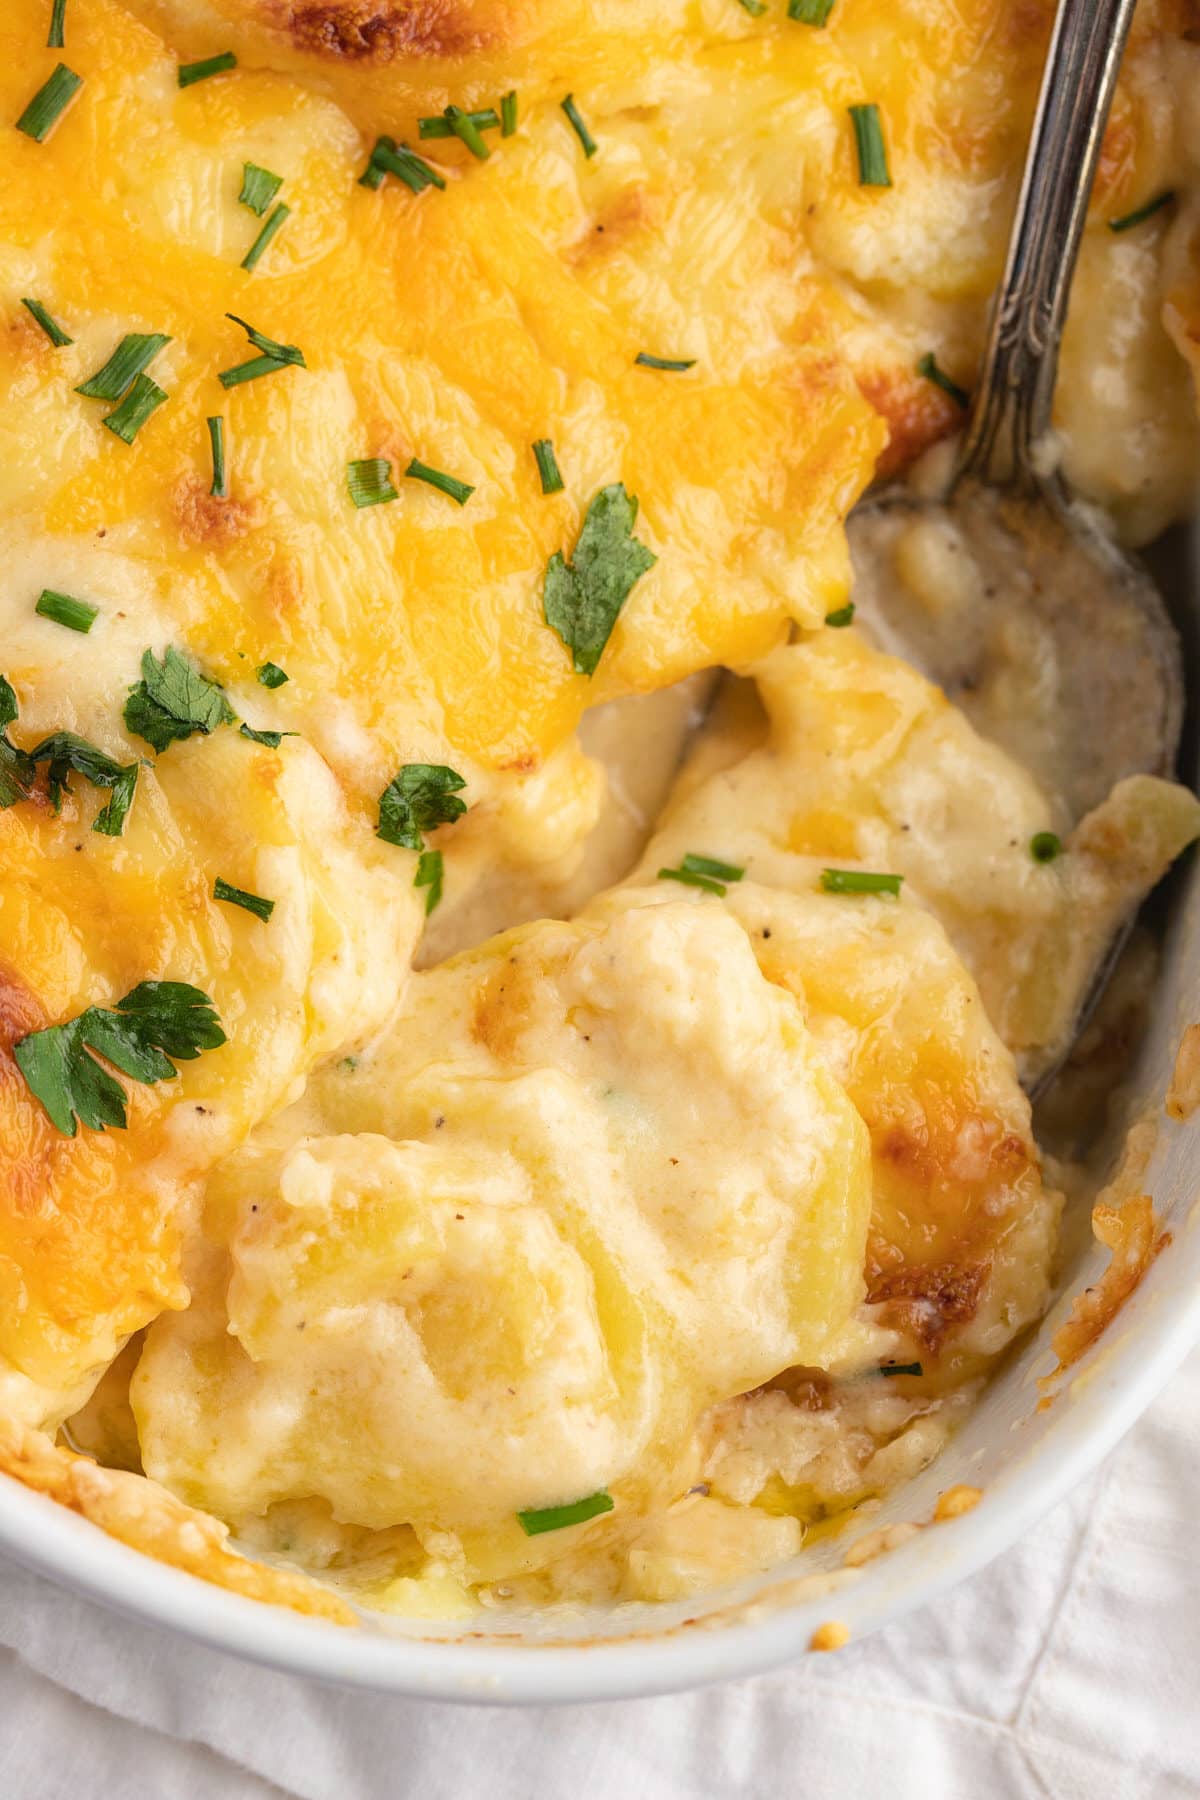
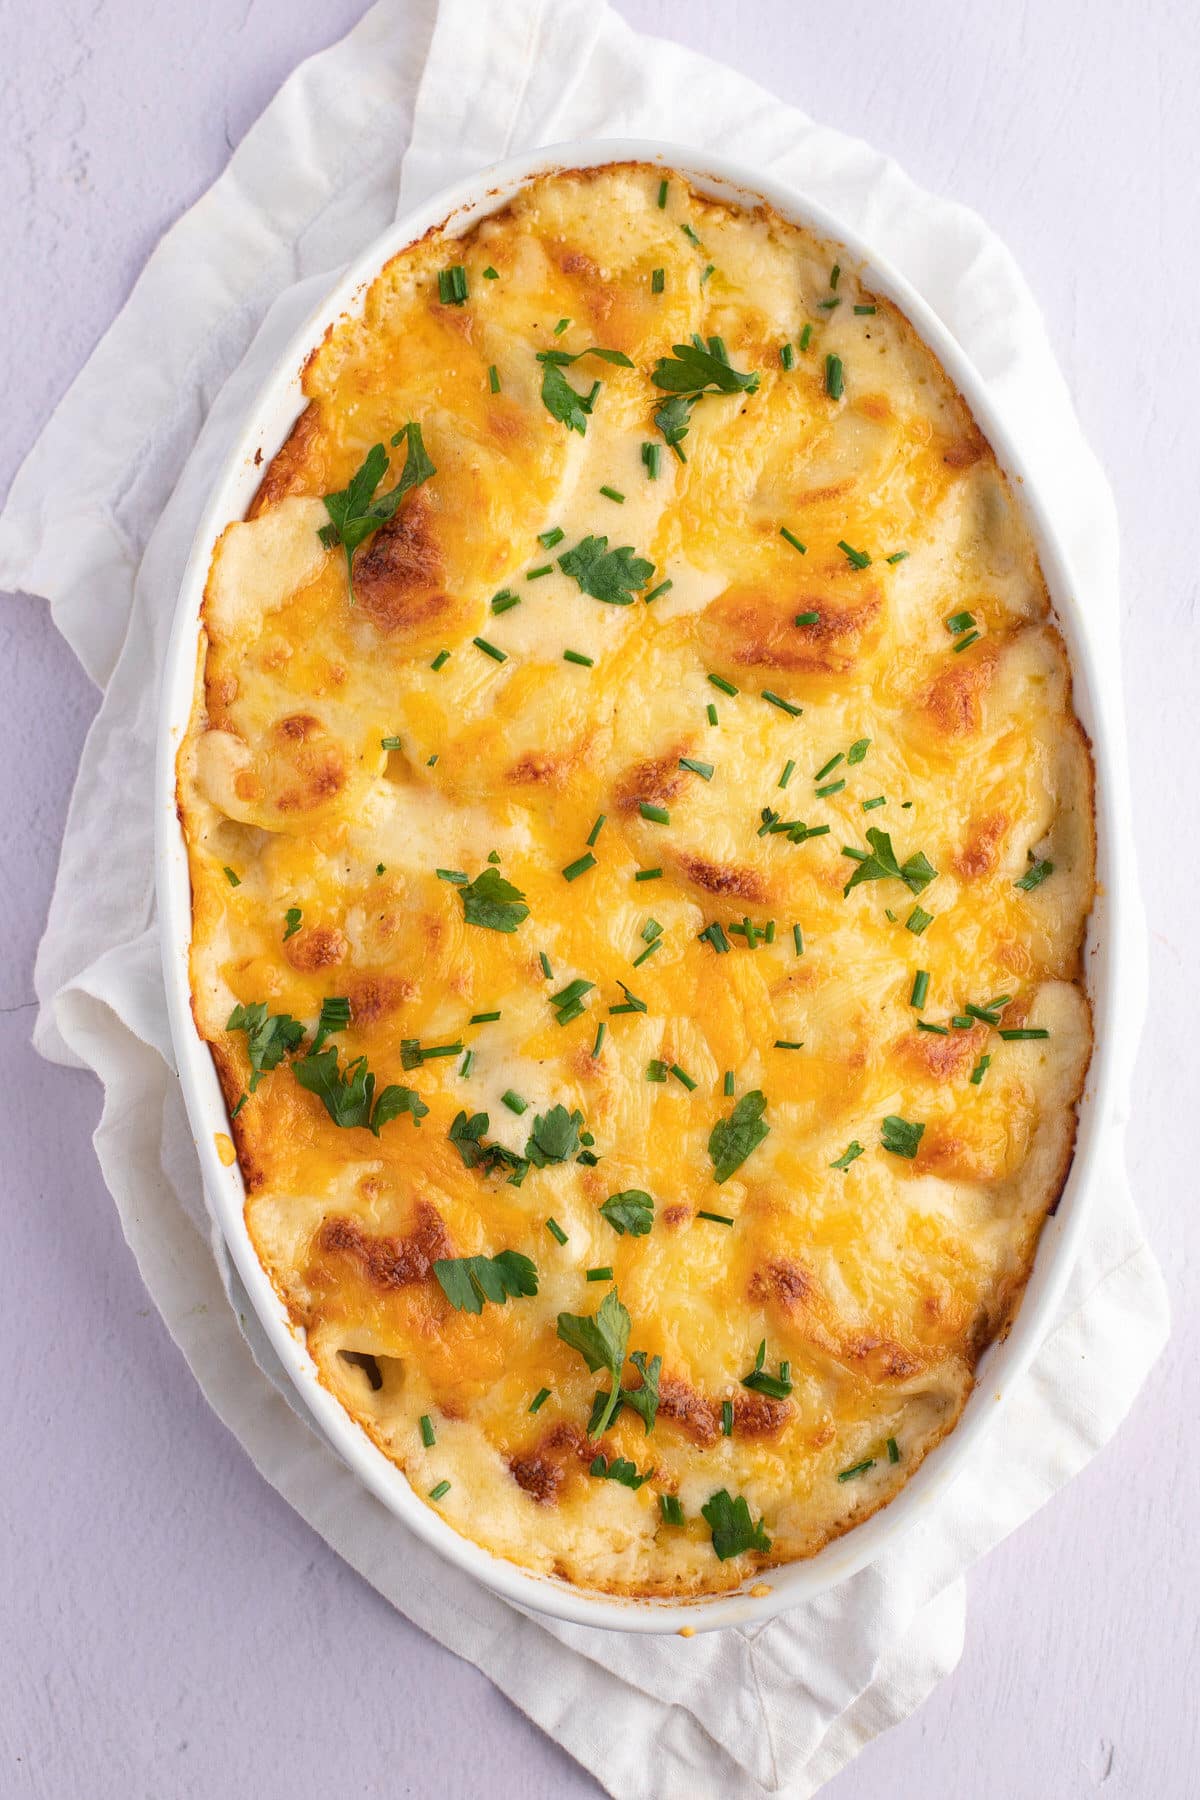
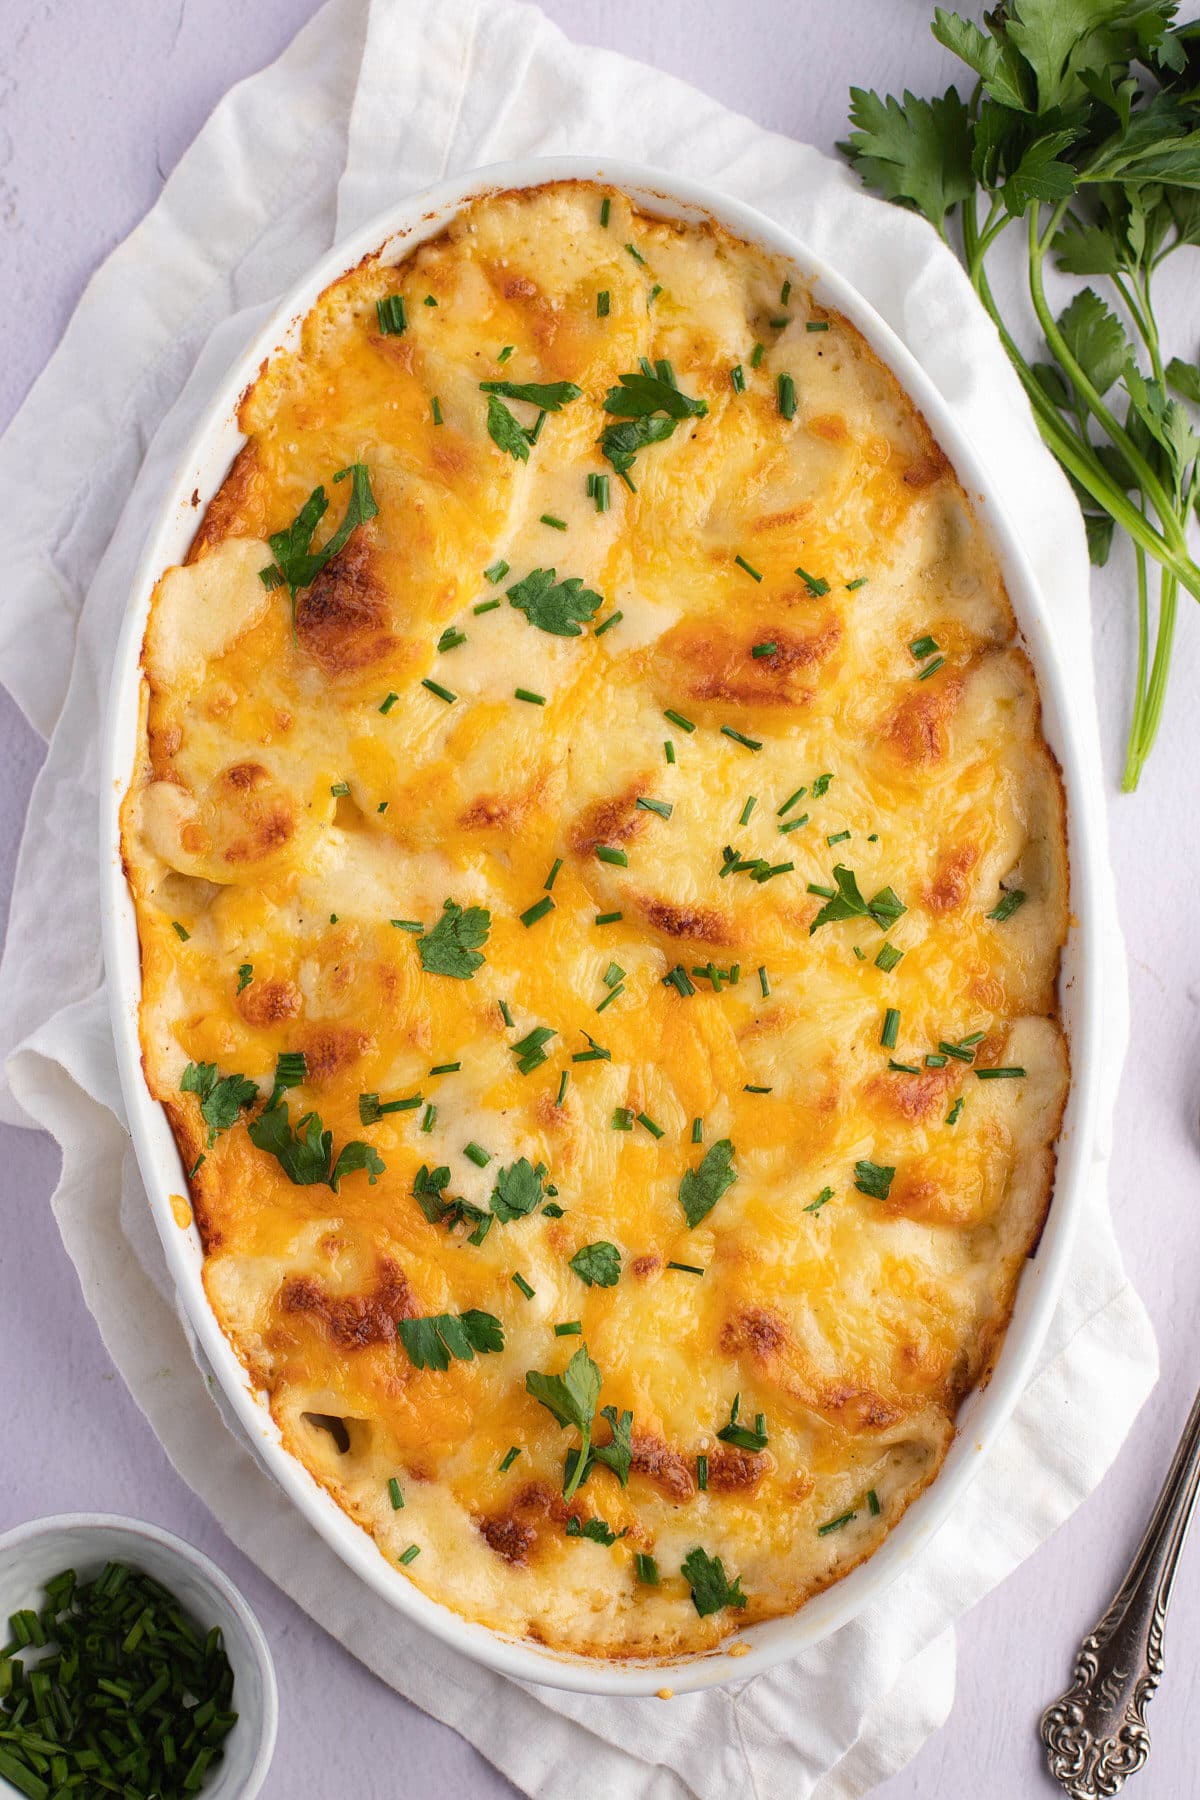
[Read more...]Indulgent, rich and super cheesy, these easy scalloped potatoes are a must make side dish. Simple to make, sliced potatoes are smothered in a cheesy and creamy sauce and then baked to gooey perfection. This classic recipe is always a crowd pleaser.
This post contains affiliate links, please read my full disclaimer here.
You’ll find the full recipe with ingredient amounts and instructions in the recipe card at the bottom of this post. Be sure to check out the blog post itself for extra tips and tricks!
There is never a bad time for some indulgent cheesy scalloped potatoes! They are perfect for special occasions like Easter, Thanksgiving and Christmas, but honestly, I love to make these whenever I get the chance!
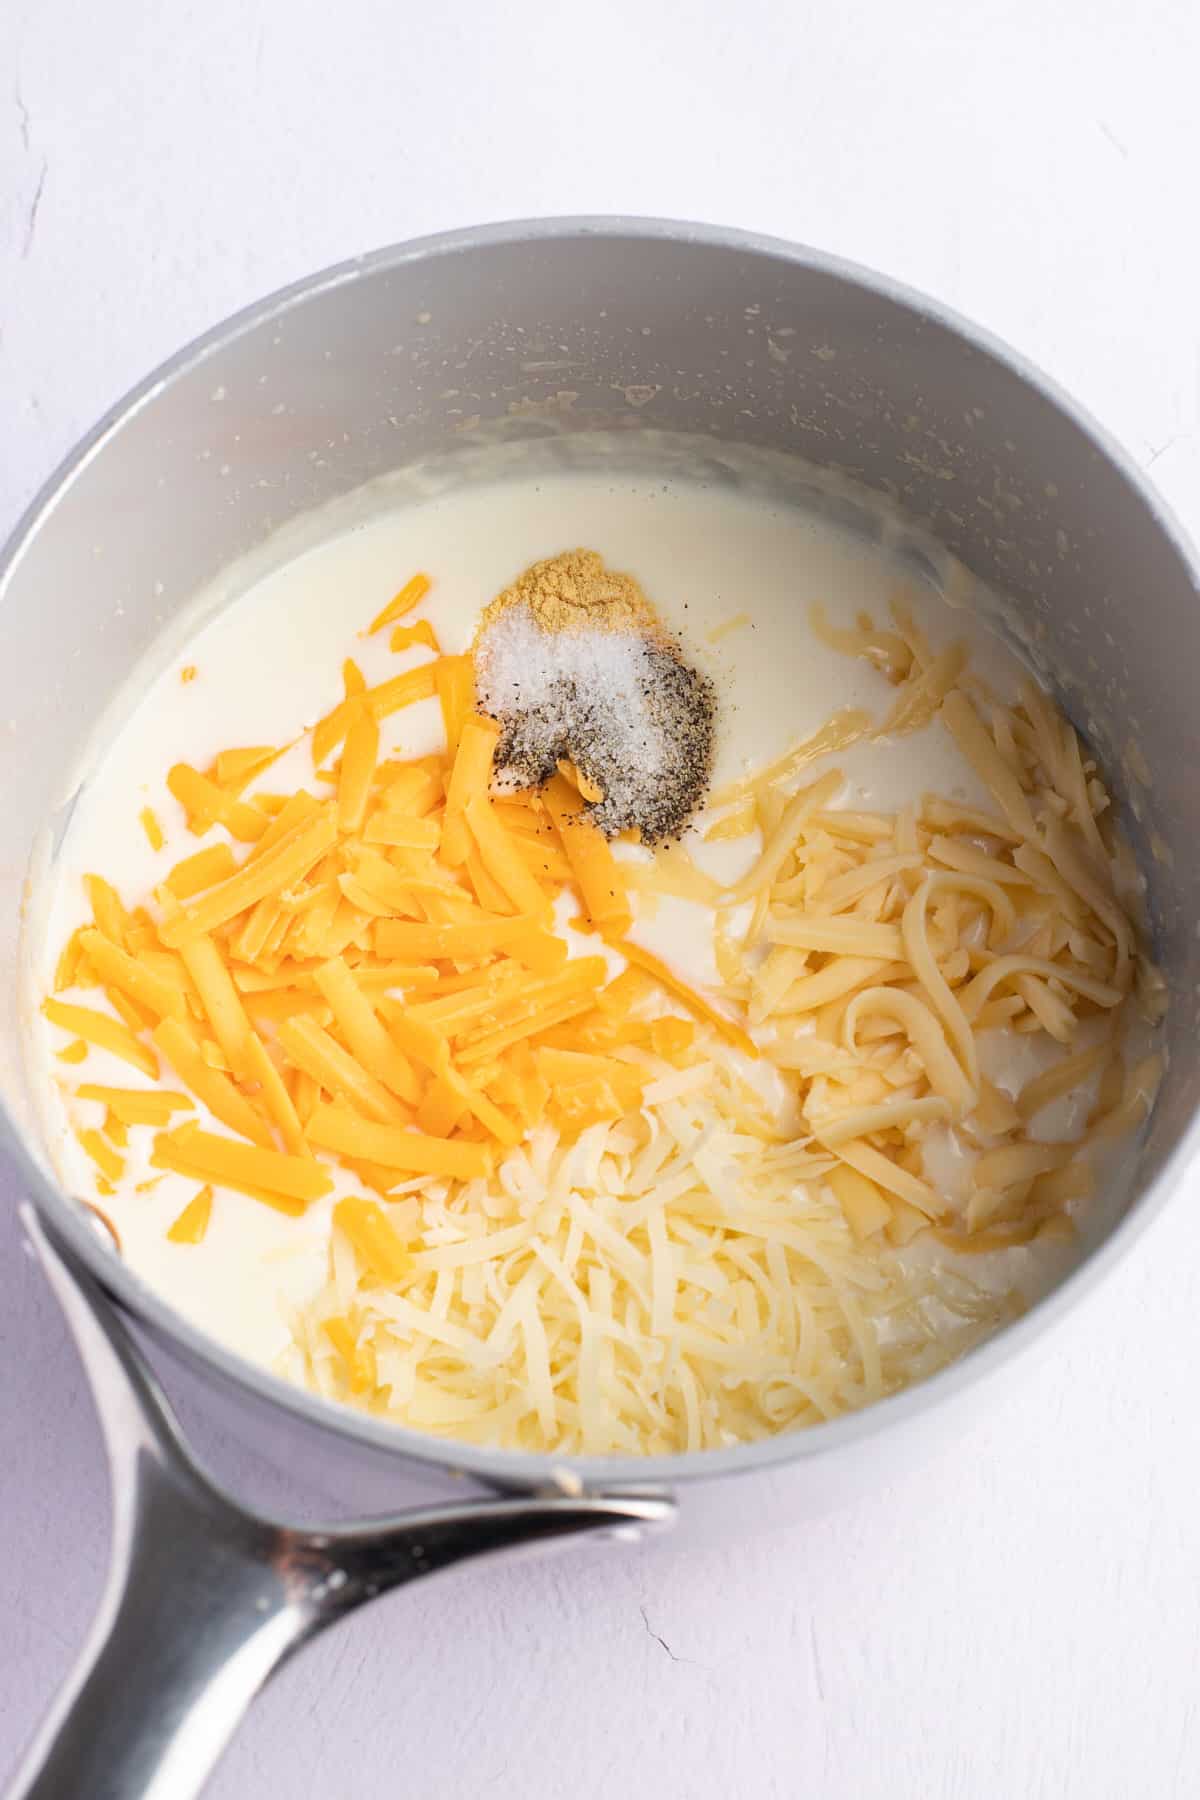
Made with three types of cheese (cheddar, gouda and parmesan) this is one cheesy and delicious side dish. The cream sauce is wonderfully seasoned and perfectly rich, and the sliced potatoes come out so tender.
Baked in the oven, the cooking time is totally hands off, and they are easy to prep with just a few basic ingredients. Find out why this recipe is a favorite with my family!
Be sure to try my Garlic Mashed Potatoes and Air Fryer Baked Potatoes too!
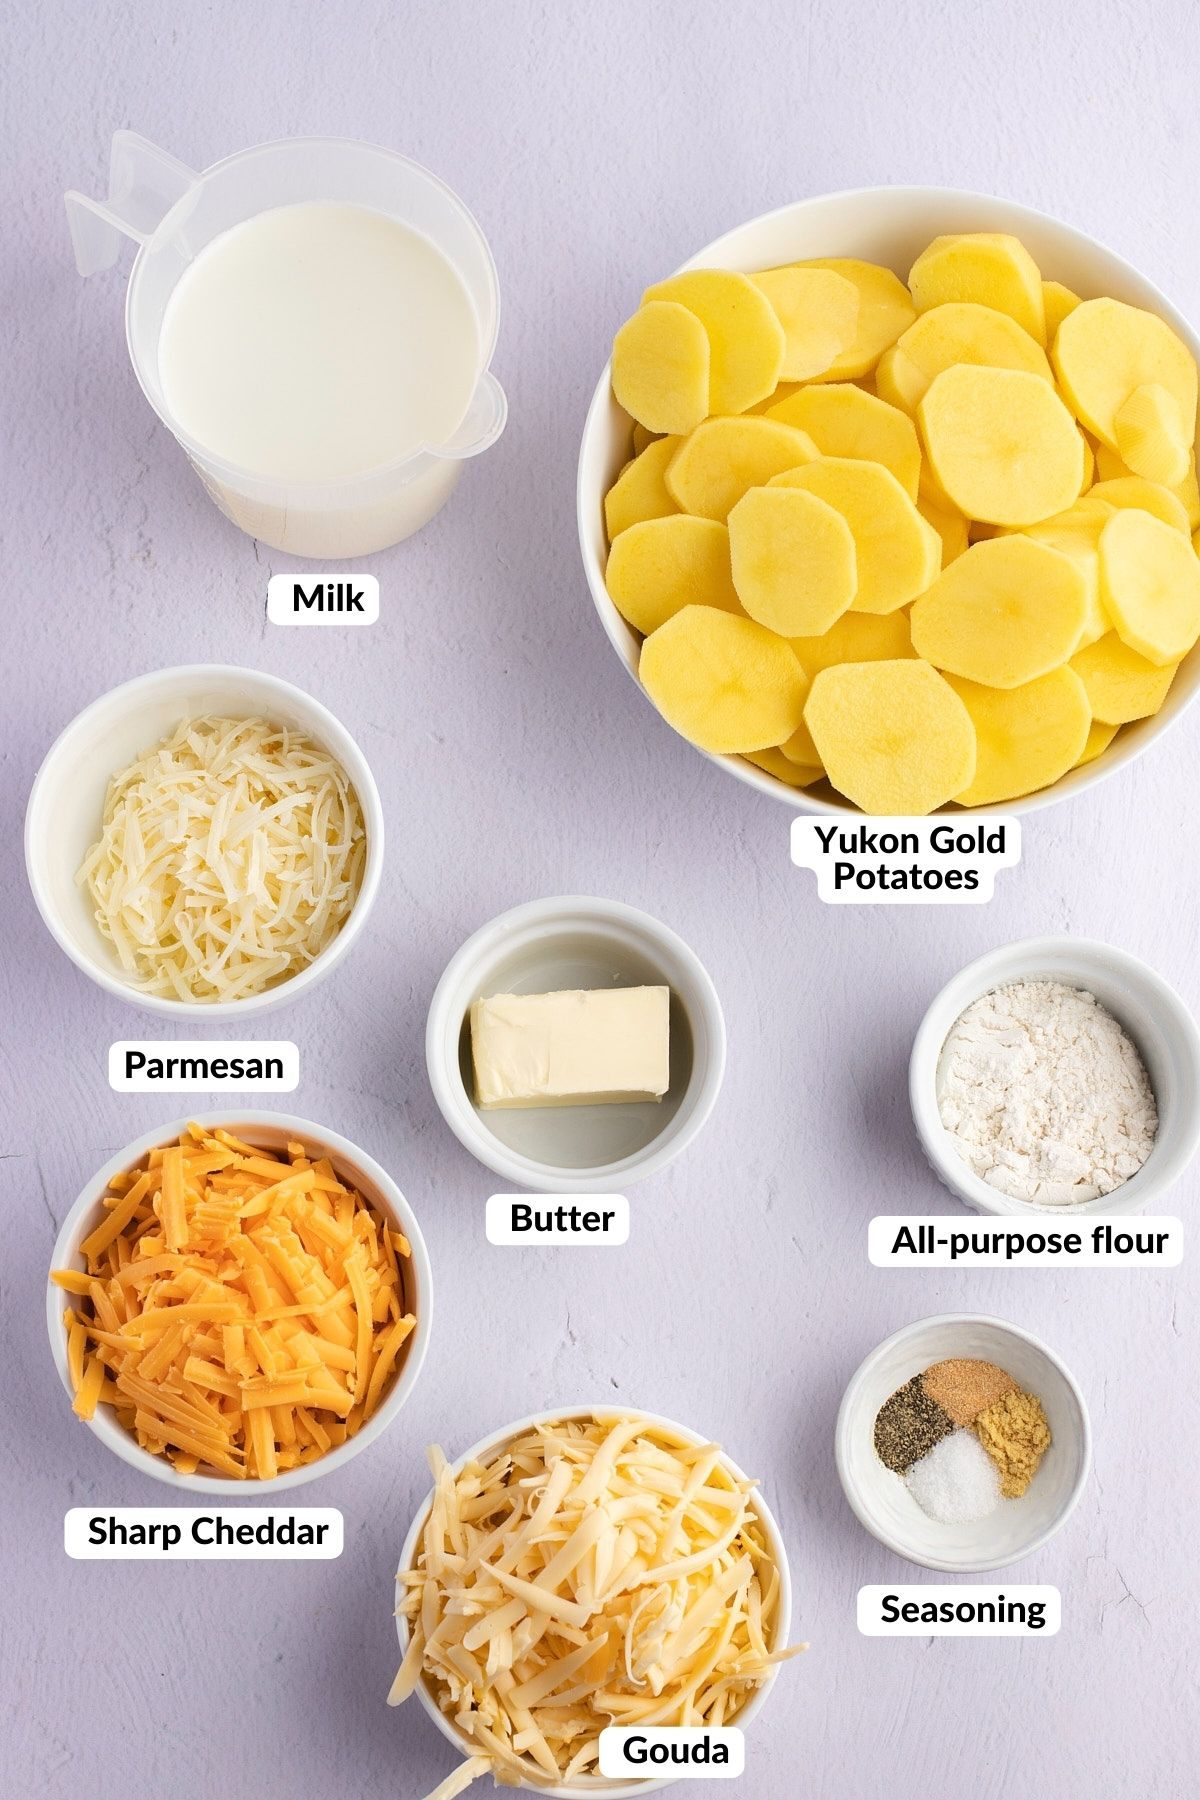

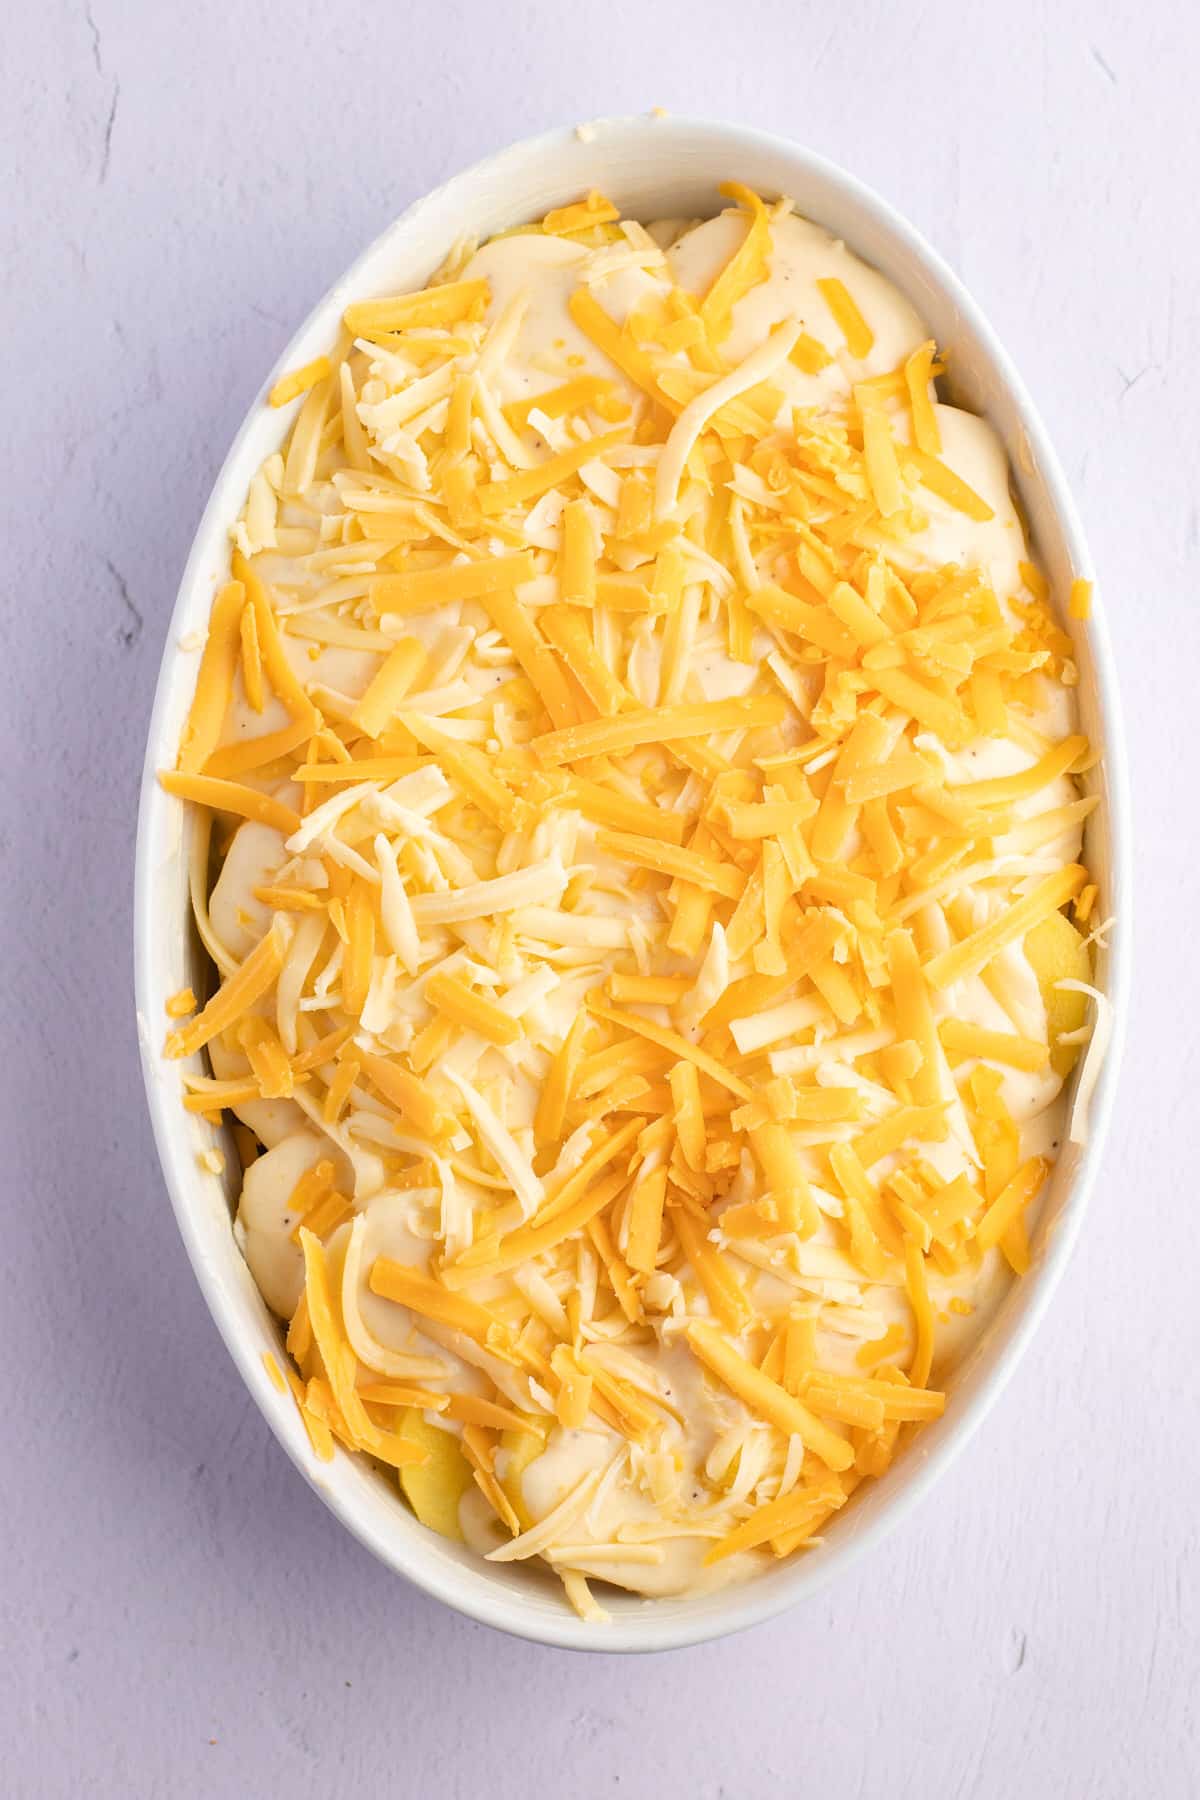
Without doubt, to make scalloped potatoes you need to use a starchy variety of potato. I love to use Yukon Gold and Russets will work well too. When baked in the cheesy creamy sauce, the potato slices get wonderfully tender and fluffy. If you use waxy potatoes like reds, they will remain fairly firm.
If you are planning to serve these cheesy scalloped potatoes as part of a big feast, then making them ahead of time is a great option. You can prep the whole dish an hour or two before you are ready to bake and keep covered in the fridge. I don't recommend you do this too early as the potatoes will start to brown.
You can bake the whole dish up to 2 days ahead of time and reheat it in the oven at 350F for 15 to 20 minutes. Cover with foil so that the cheese doesn't burn.
For the best texture, the potatoes should be thinly and evenly sliced.I like to use a mandolin for speed and ease, though you can cut them by hand too.
These cheesy scalloped potatoes are great with chicken, beef, seafood and pretty much anything! Try them with these favorite recipes:
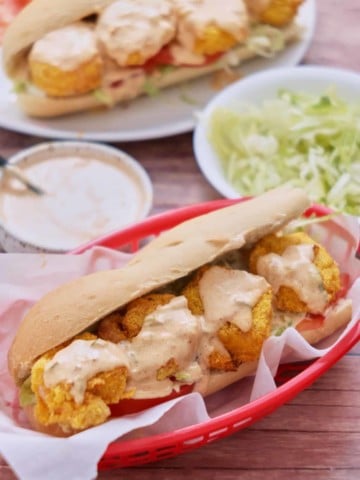
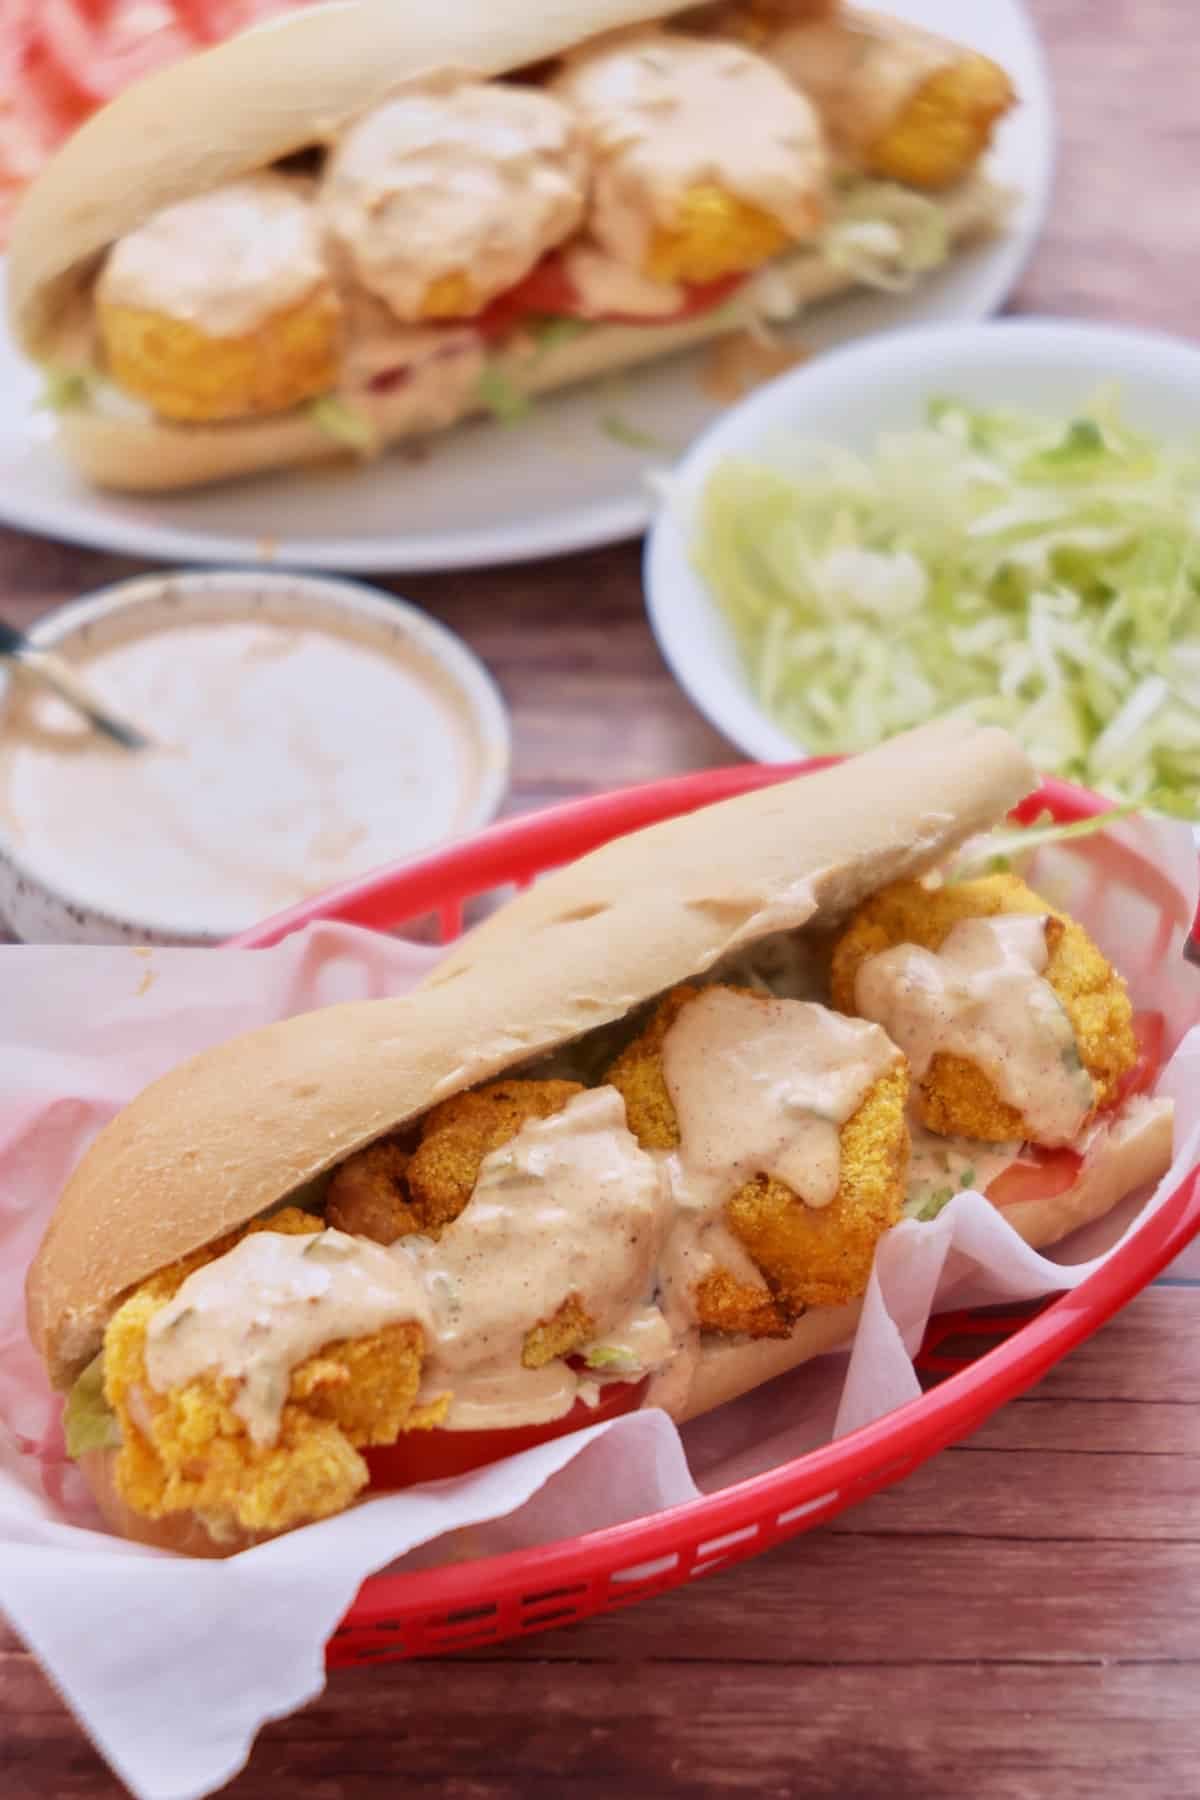
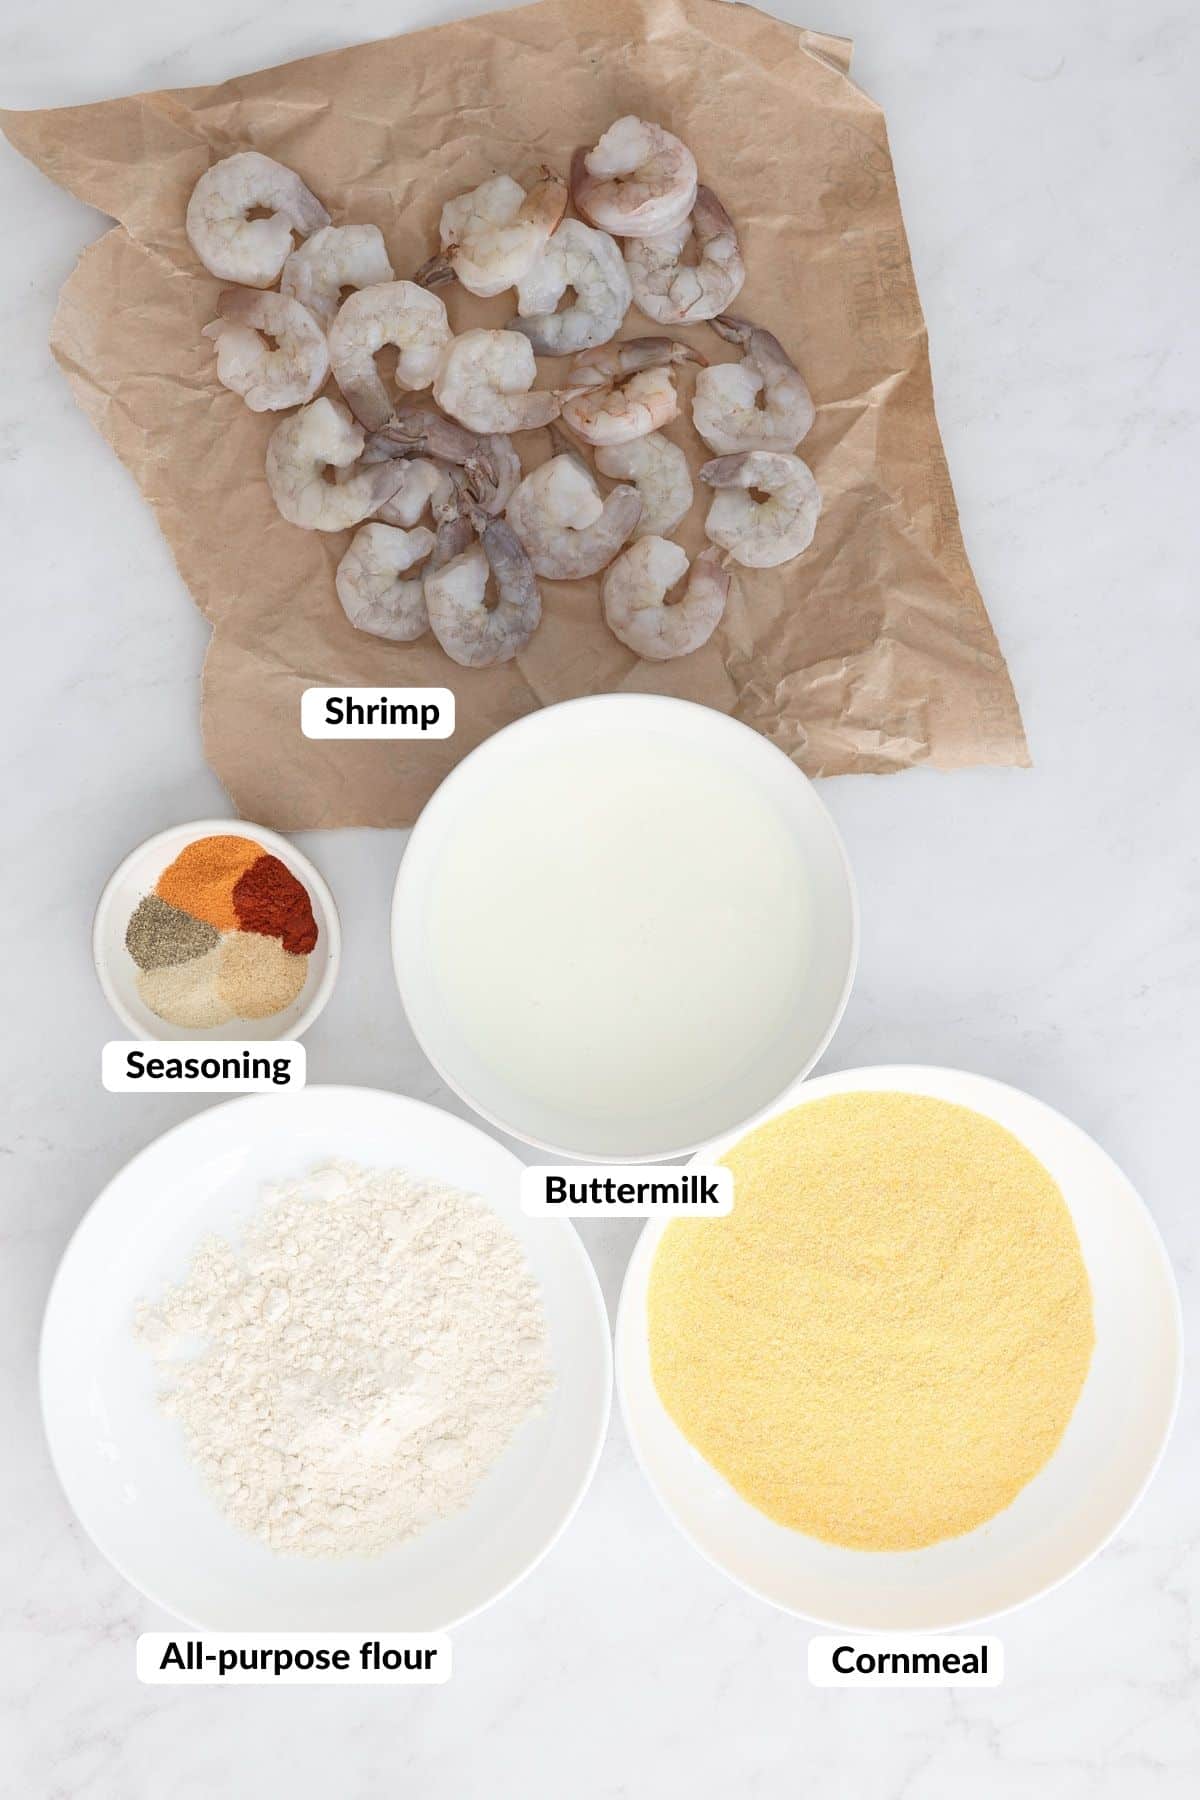
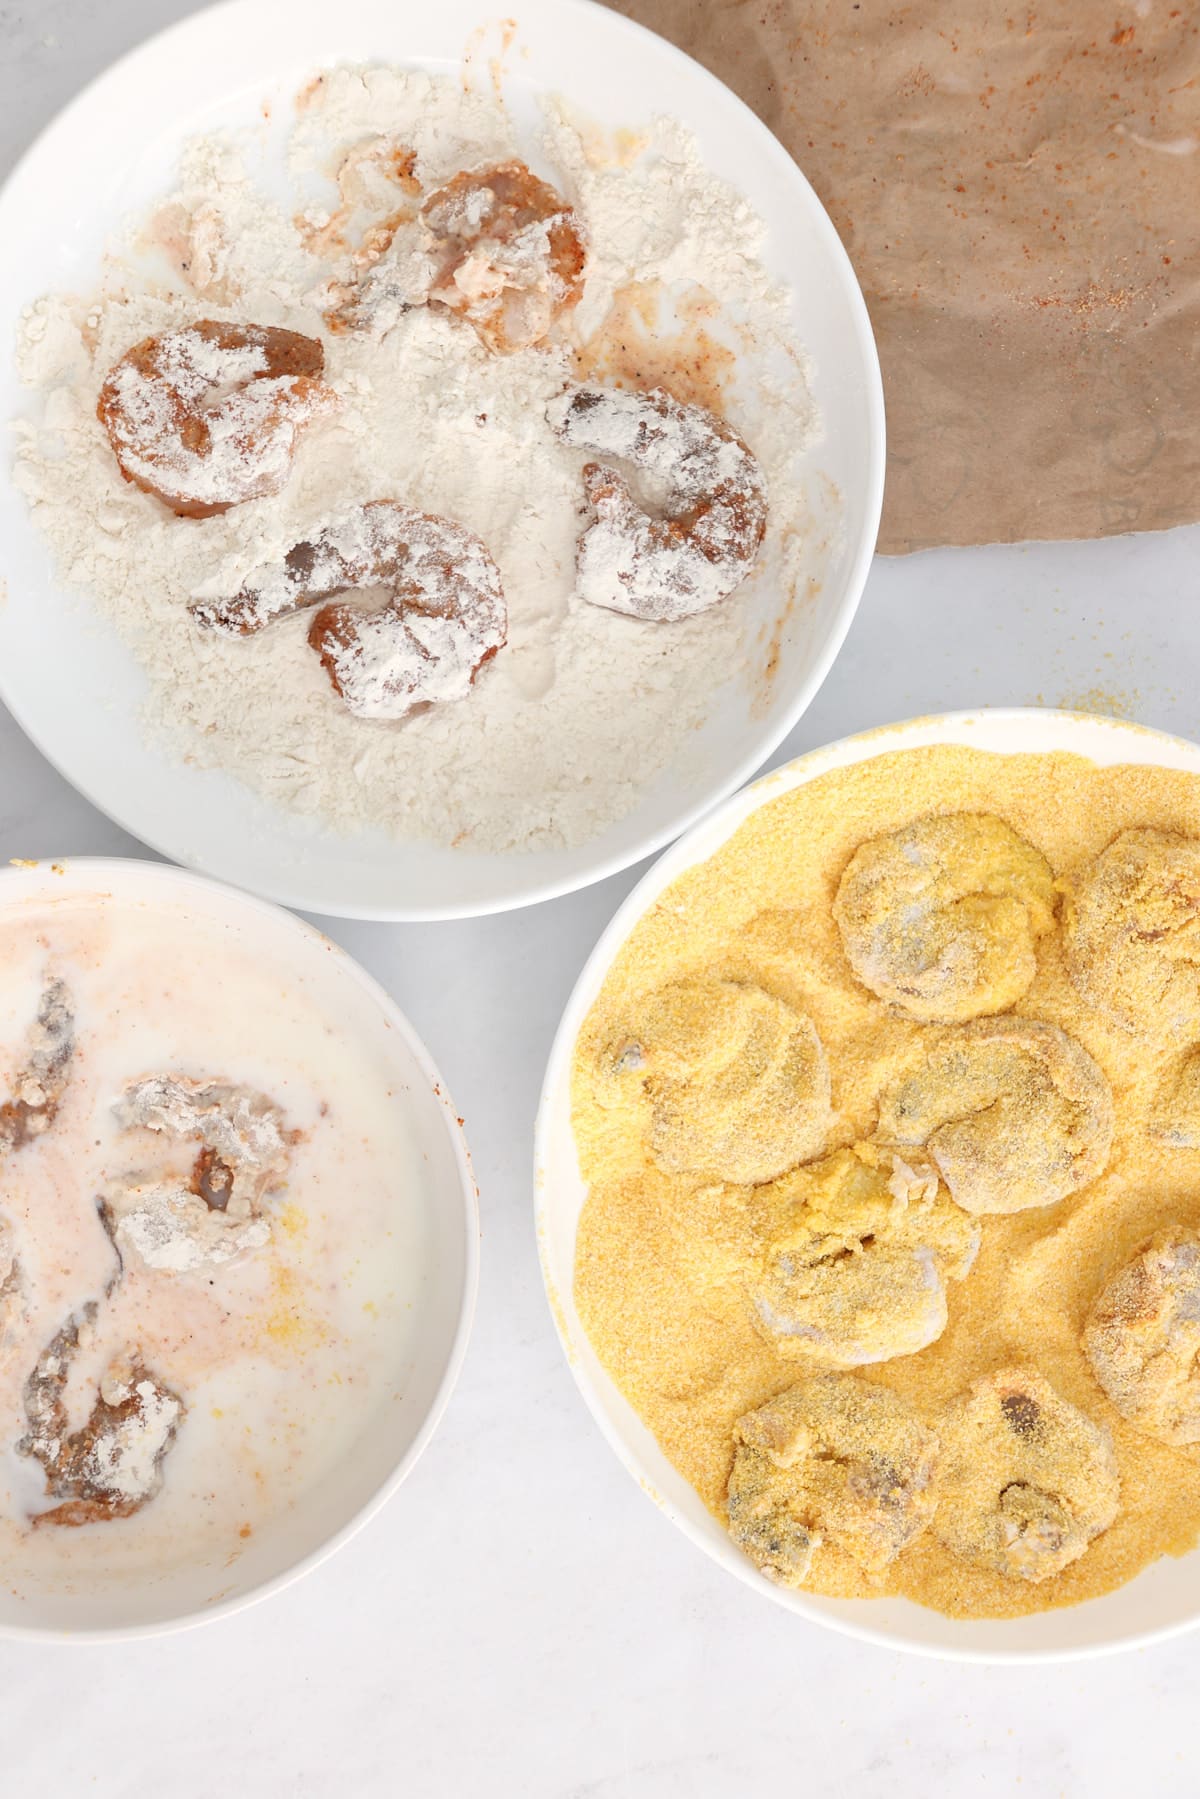
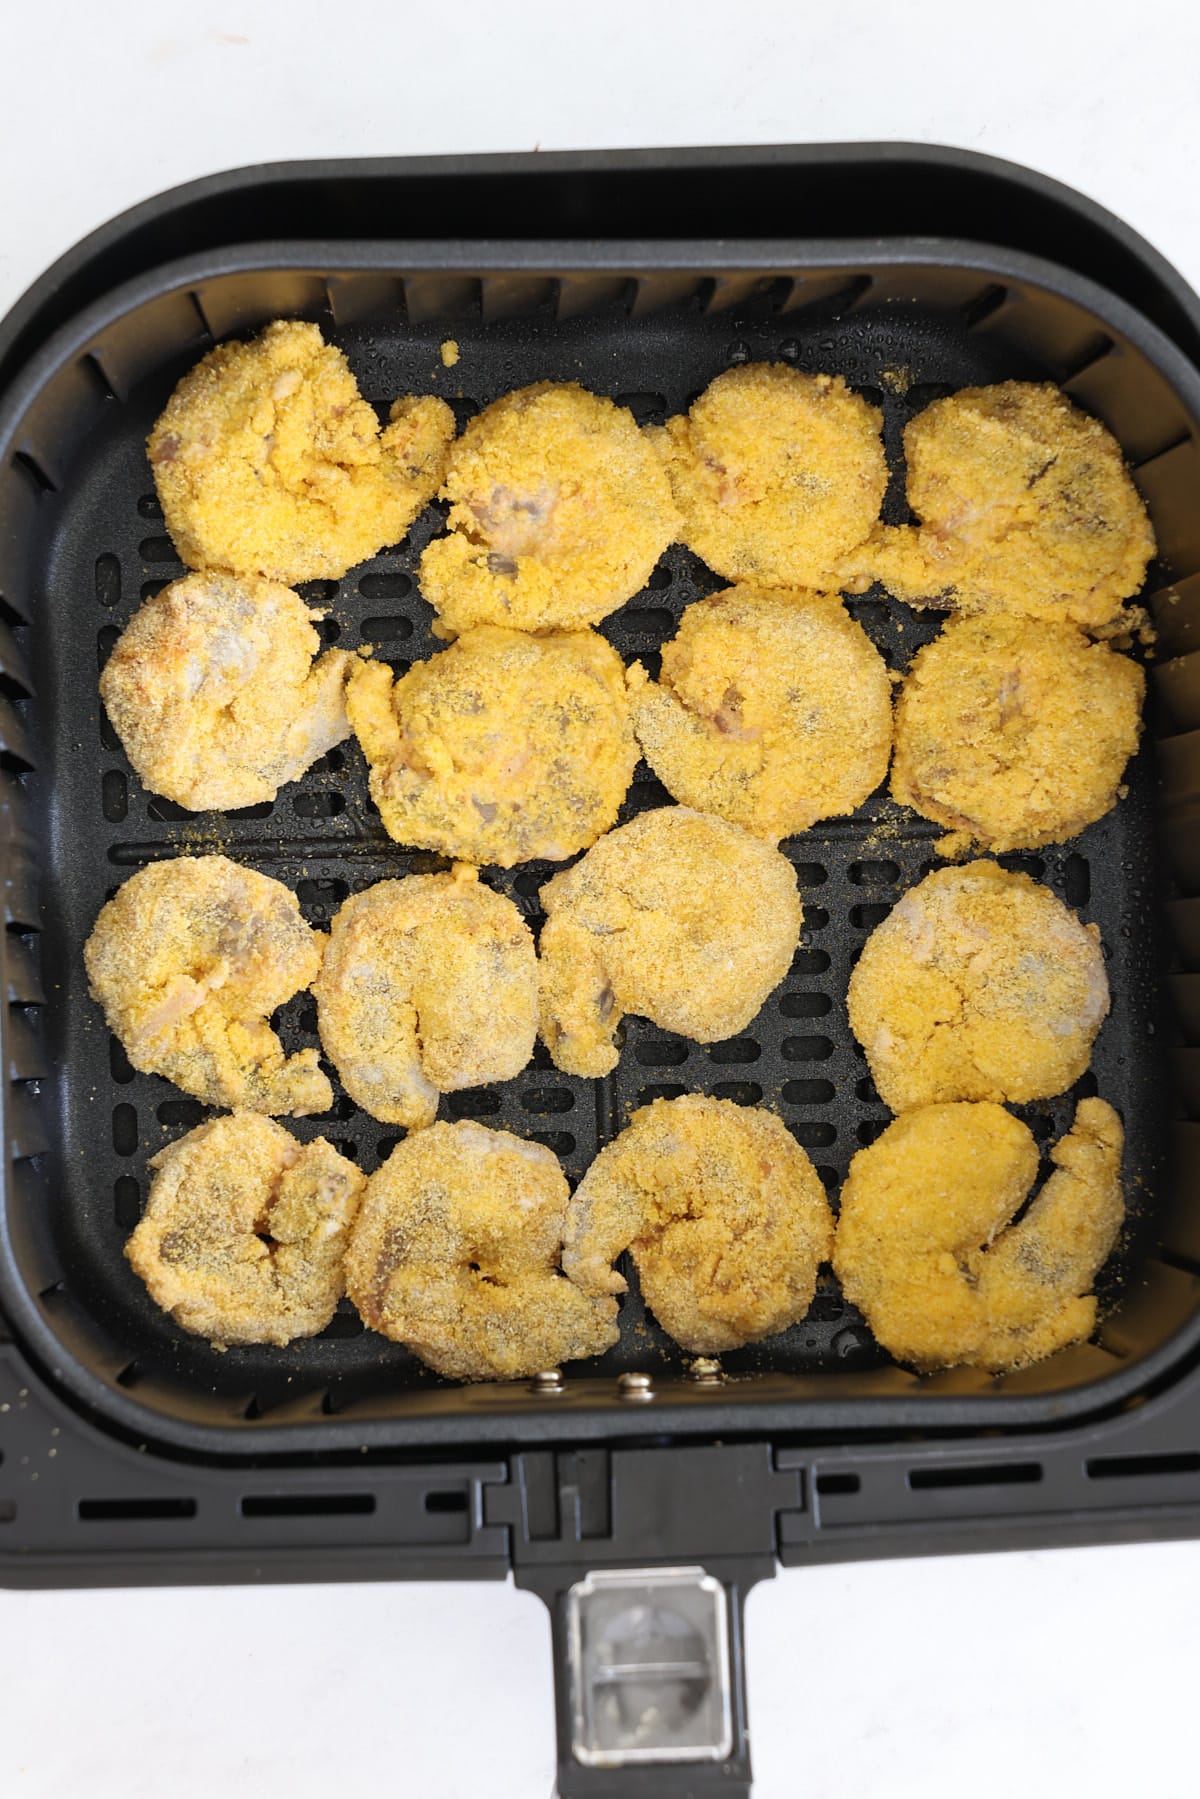
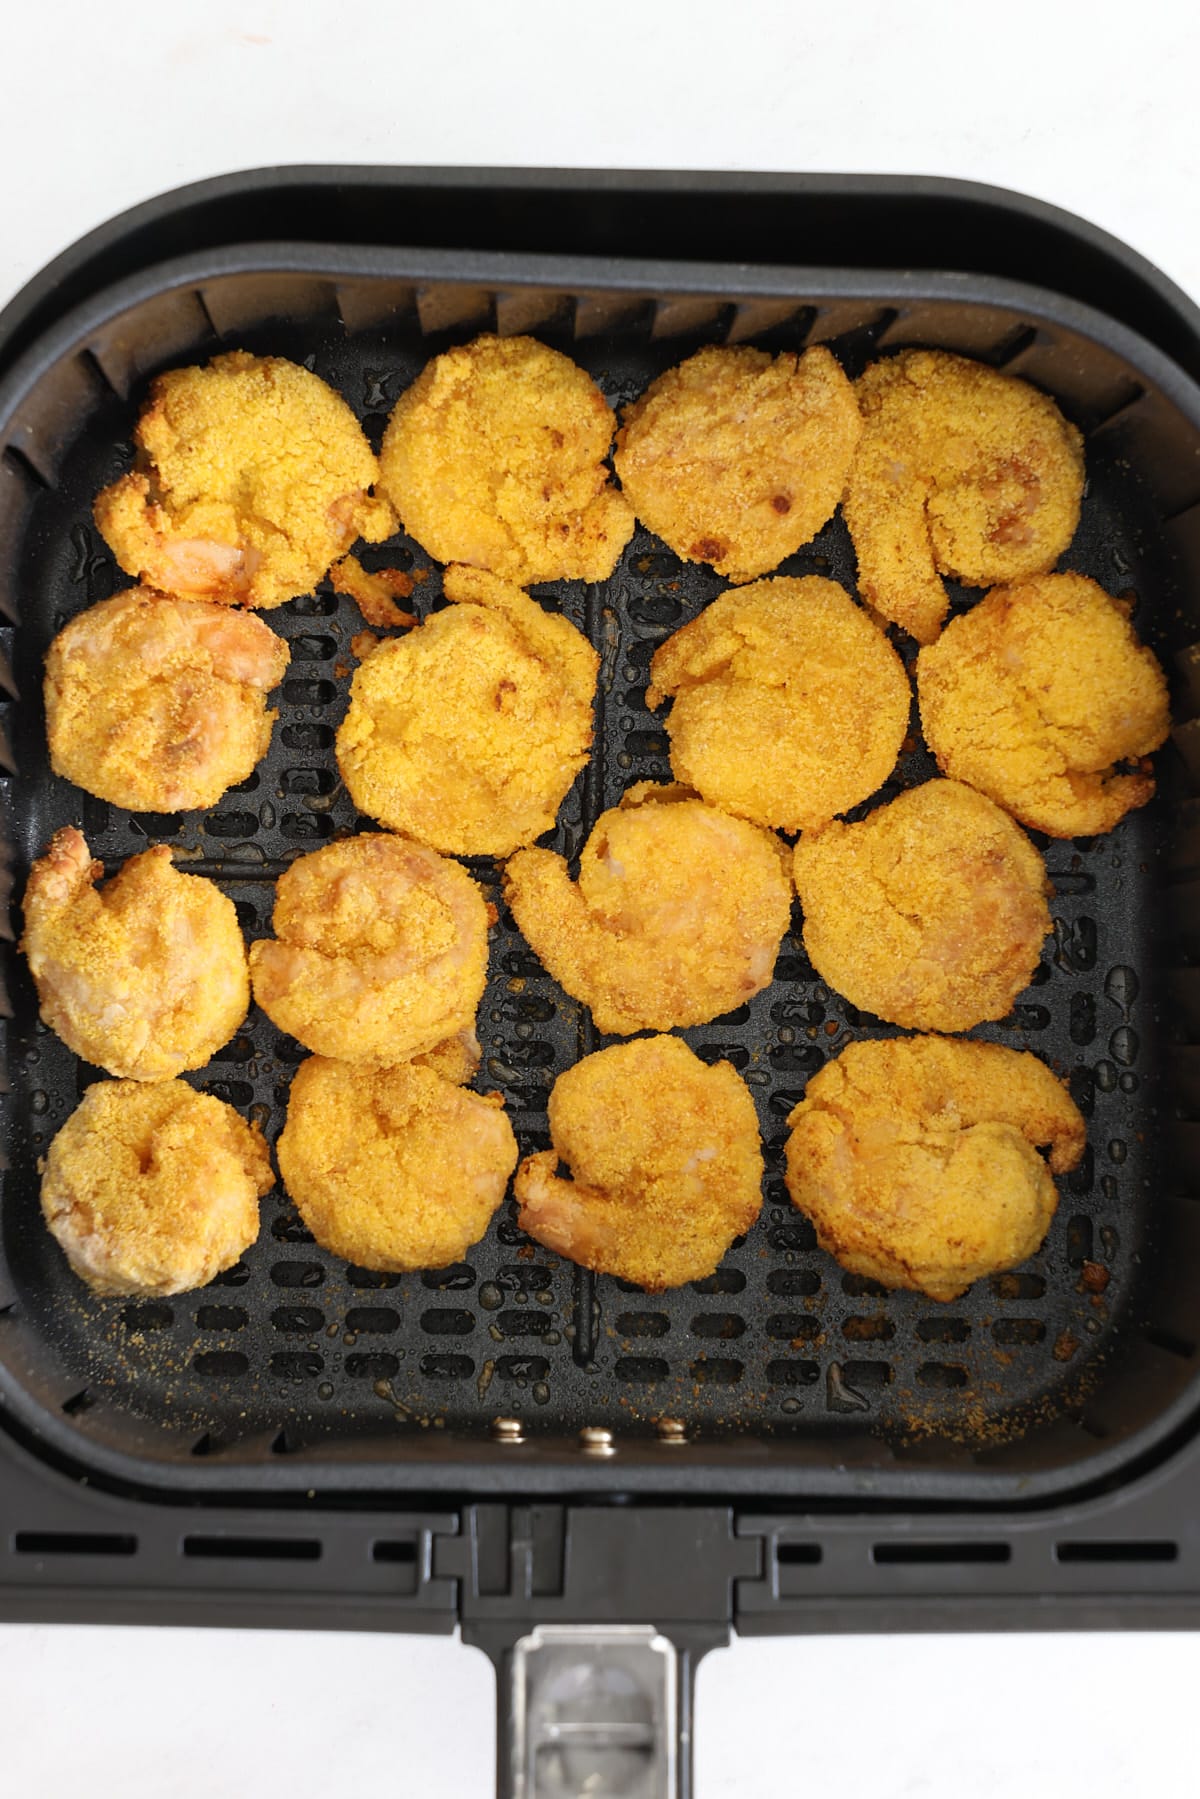
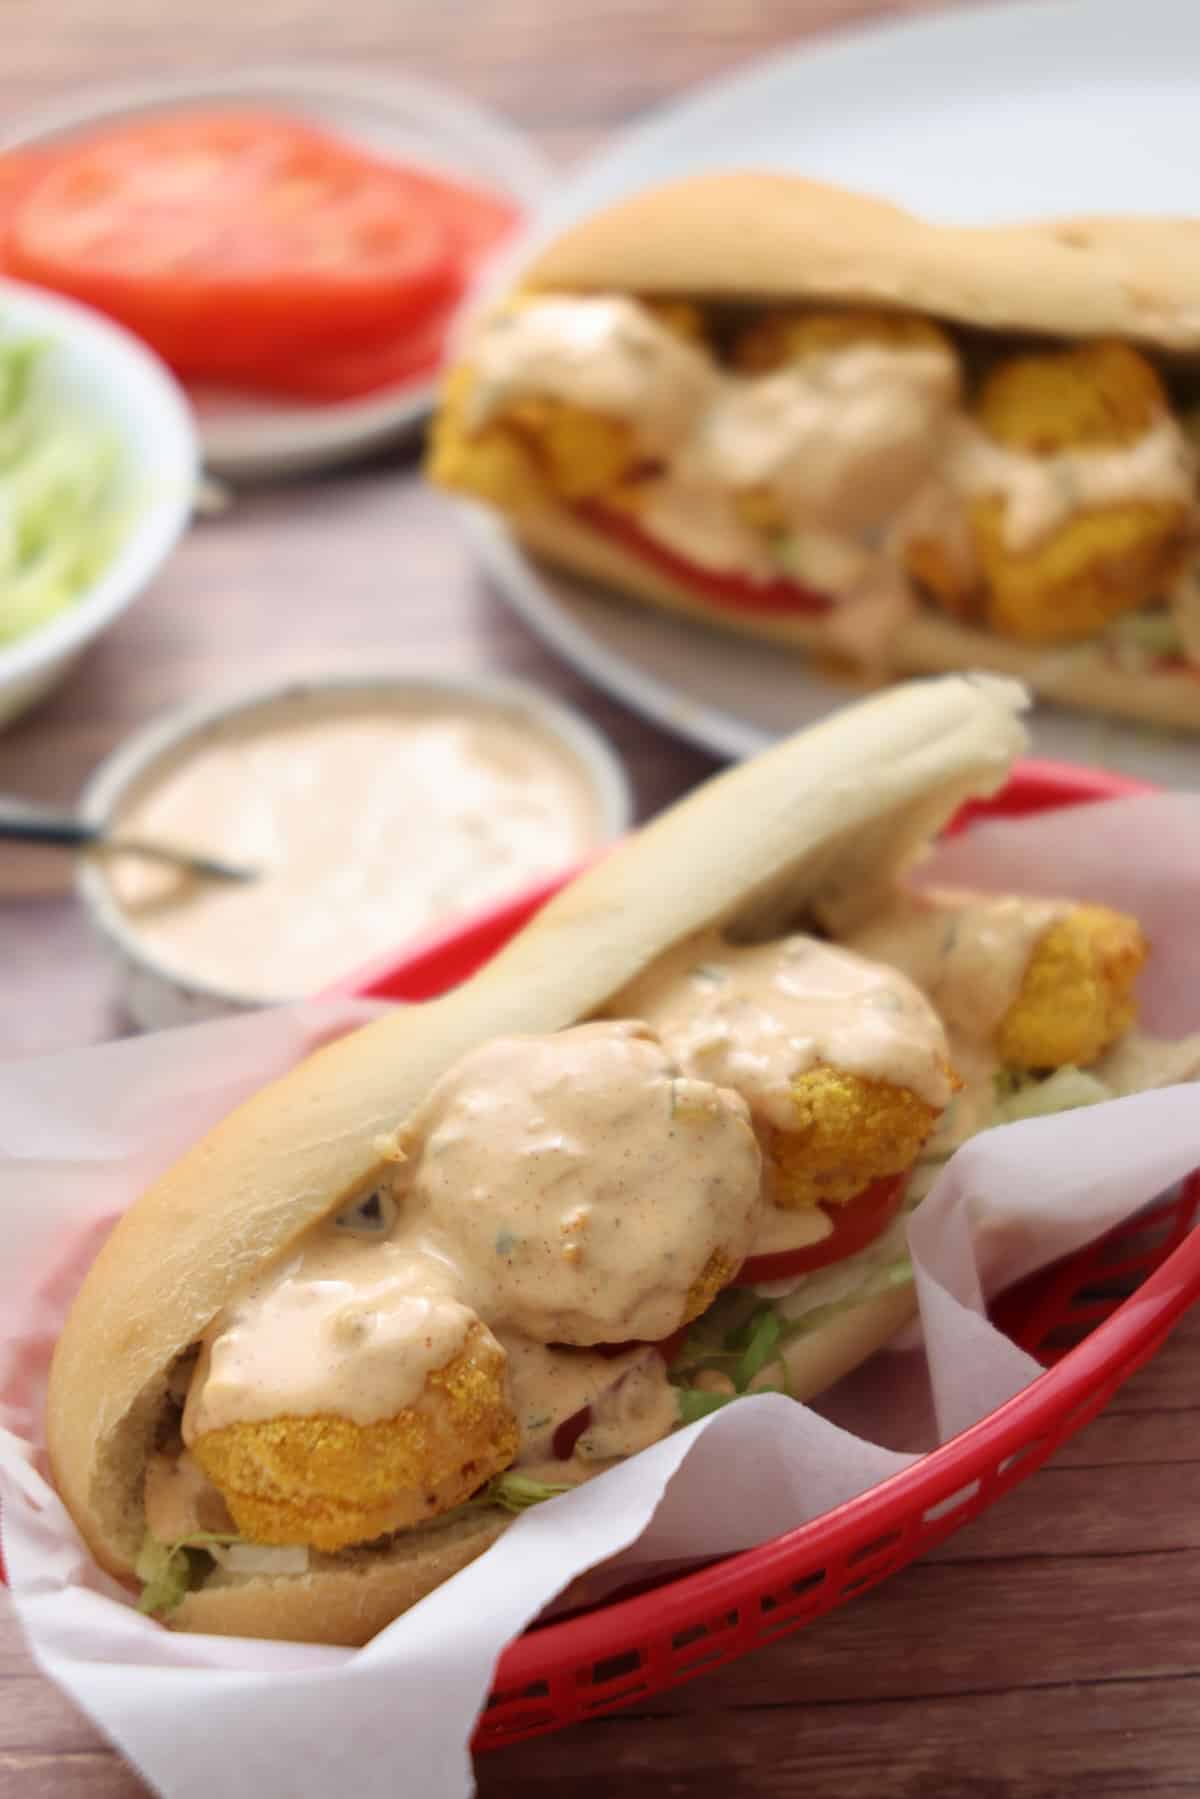
Make up a batch of shrimp po'boy sandwiches quickly and easily in your air fryer. Shrimp are dredged in buttermilk and cornmeal before being air fried to crispy perfection and loaded into sandwiches with remoulade sauce and fresh lettuce and tomato. This is one tasty bite!
This post contains affiliate links, please read my full disclaimer here.
You’ll find the full recipe with ingredient amounts and instructions in the recipe card at the bottom of this post. Be sure to check out the blog post itself for extra tips and tricks!
I am such a seafood lover, and if there is a shrimp po'boy on the menu then I am all in! I love them so much, I just had to make some at home in the air fryer. My friends, the results are amazing! You are going to love these!
These air fryer shrimp po'boy sandwiches are perfect for when you want a tasty treat with not too much effort. Easy to prep and quick to cook, they are ready to serve in less than 30 minutes. The shrimp come out so juicy and crispy, one sandwich may not be enough!
Serve them up as a tasty Friday night family dinner, or, the recipe is easily doubled if you are feeding a crowd! There's no bad time for these beauties!
Be sure to try my Crispy Air Fryer Fried Shrimp and Southern Style Shrimp and Grits too!
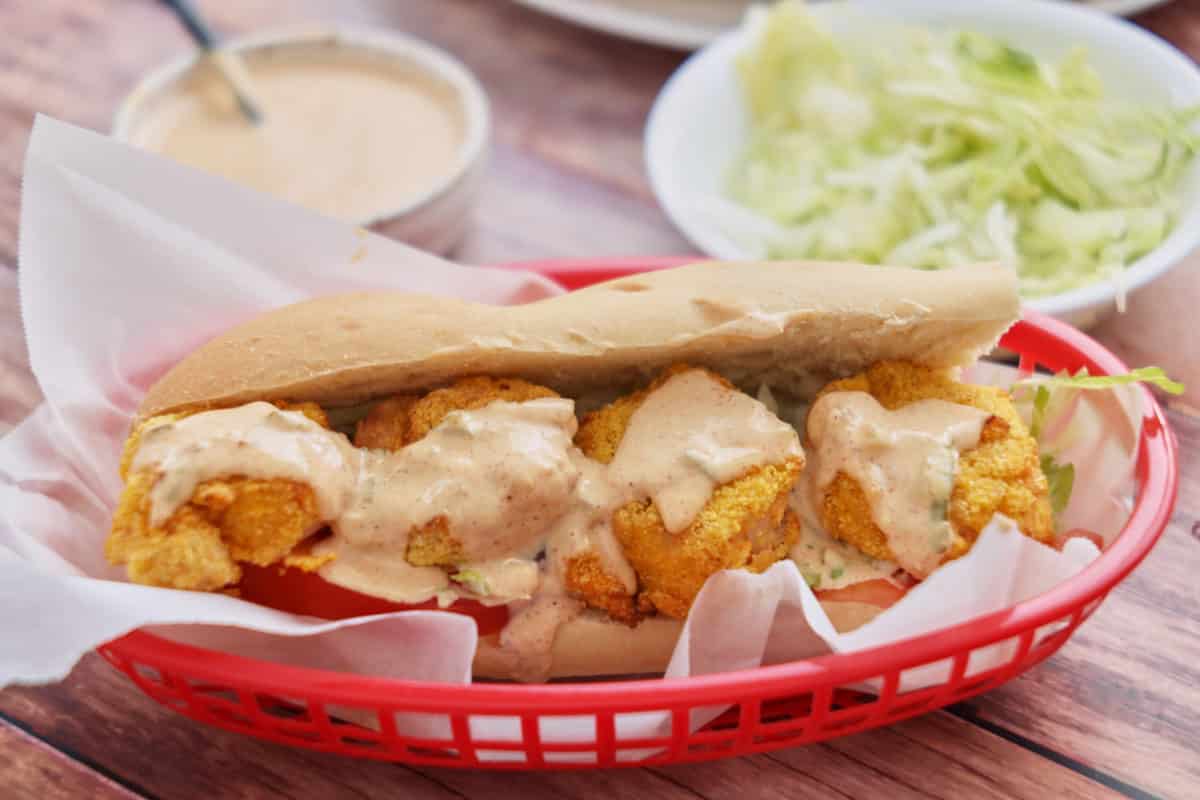

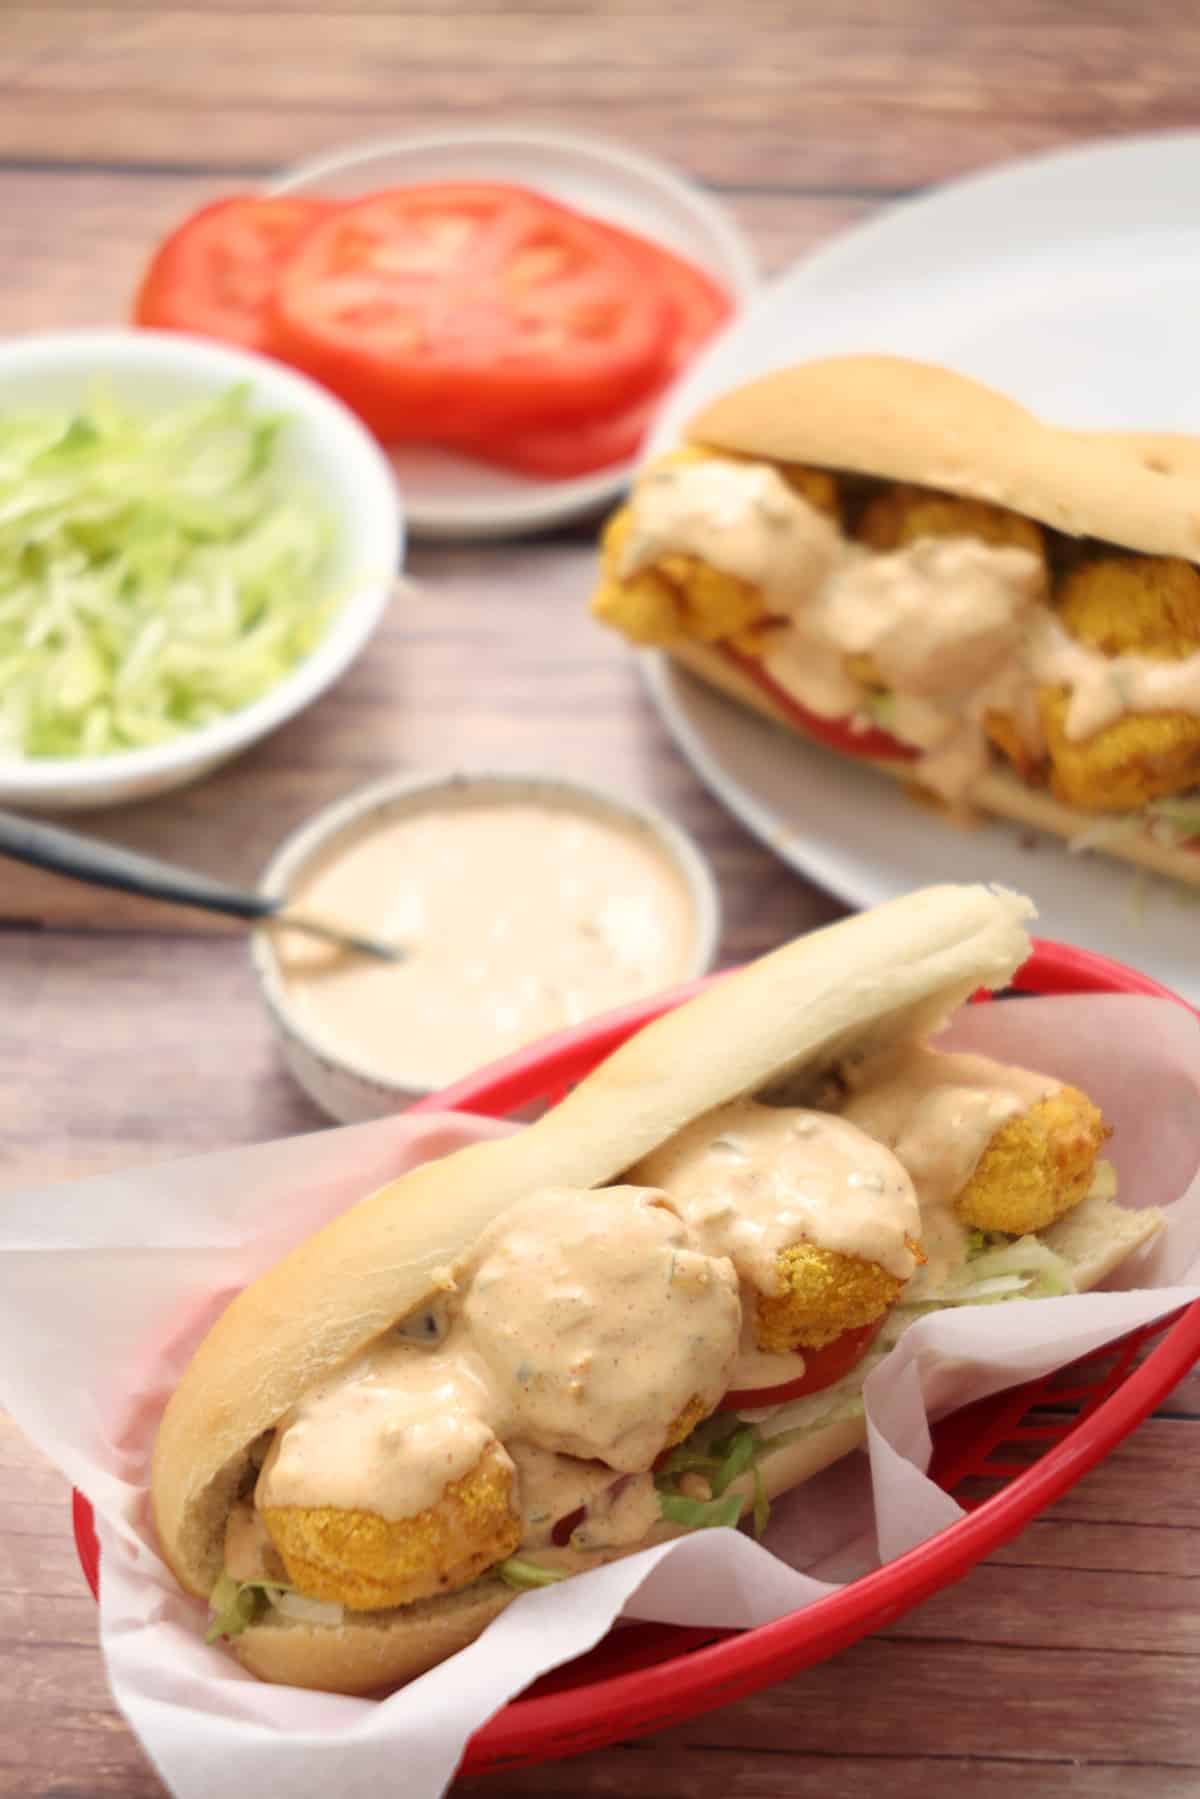
I am in no doubt that a creamy remoulade sauce, with a bit of heat and tang, is the most perfect addition to these sandwiches. I use my homemade remoulade sauce for this recipe, it's wonderfully flavorful but not too spicy, and you can easily adapt it to suit your tastes. It only takes a few minutes to make, but you can of course use store bought too.
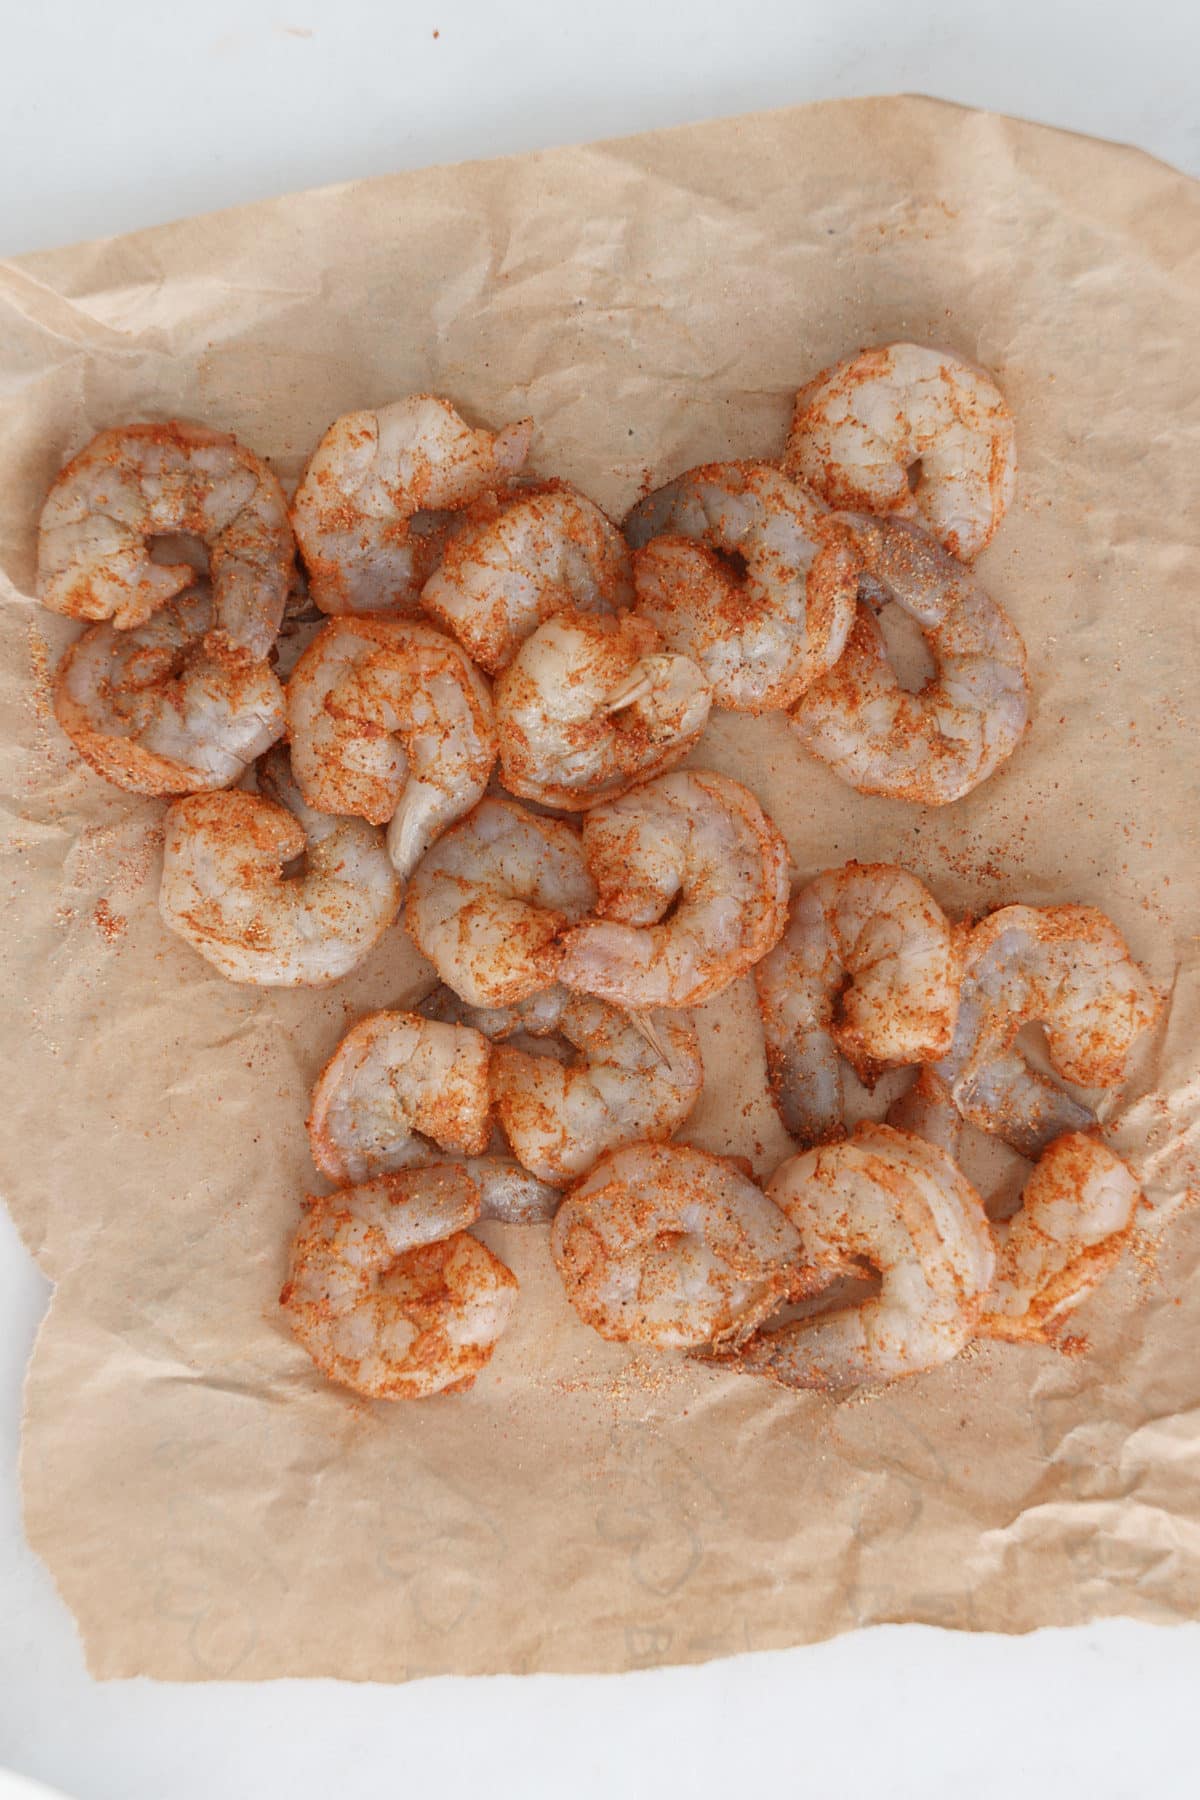
I prefer to use fresh shrimp, if using frozen, make sure that they are fully thawed before you start. The tails and shells should be removed, and they will need to be de-veined (remove the black line that runs down the back of each shrimp). Lightly pat the shrimp with kitchen paper to remove any excess water as this will help them to get nice and crispy. Then season, dredge and air fry!
These sandwiches are best built just before serving, but you can make the shrimp ahead of time and reheat them in the air fryer to serve. Once cooked, let the shrimp cool before storing in the fridge in an airtight container for up to 3 days. Reheat them in the air fryer at 360F for 4 to 4 minutes to get them nice and crispy again.
These air fryer shrimp po'boy sandwiches are nice and filling by themselves, but you can easily serve them with favorite sides like:
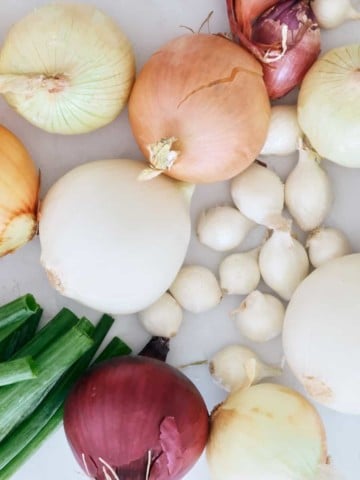
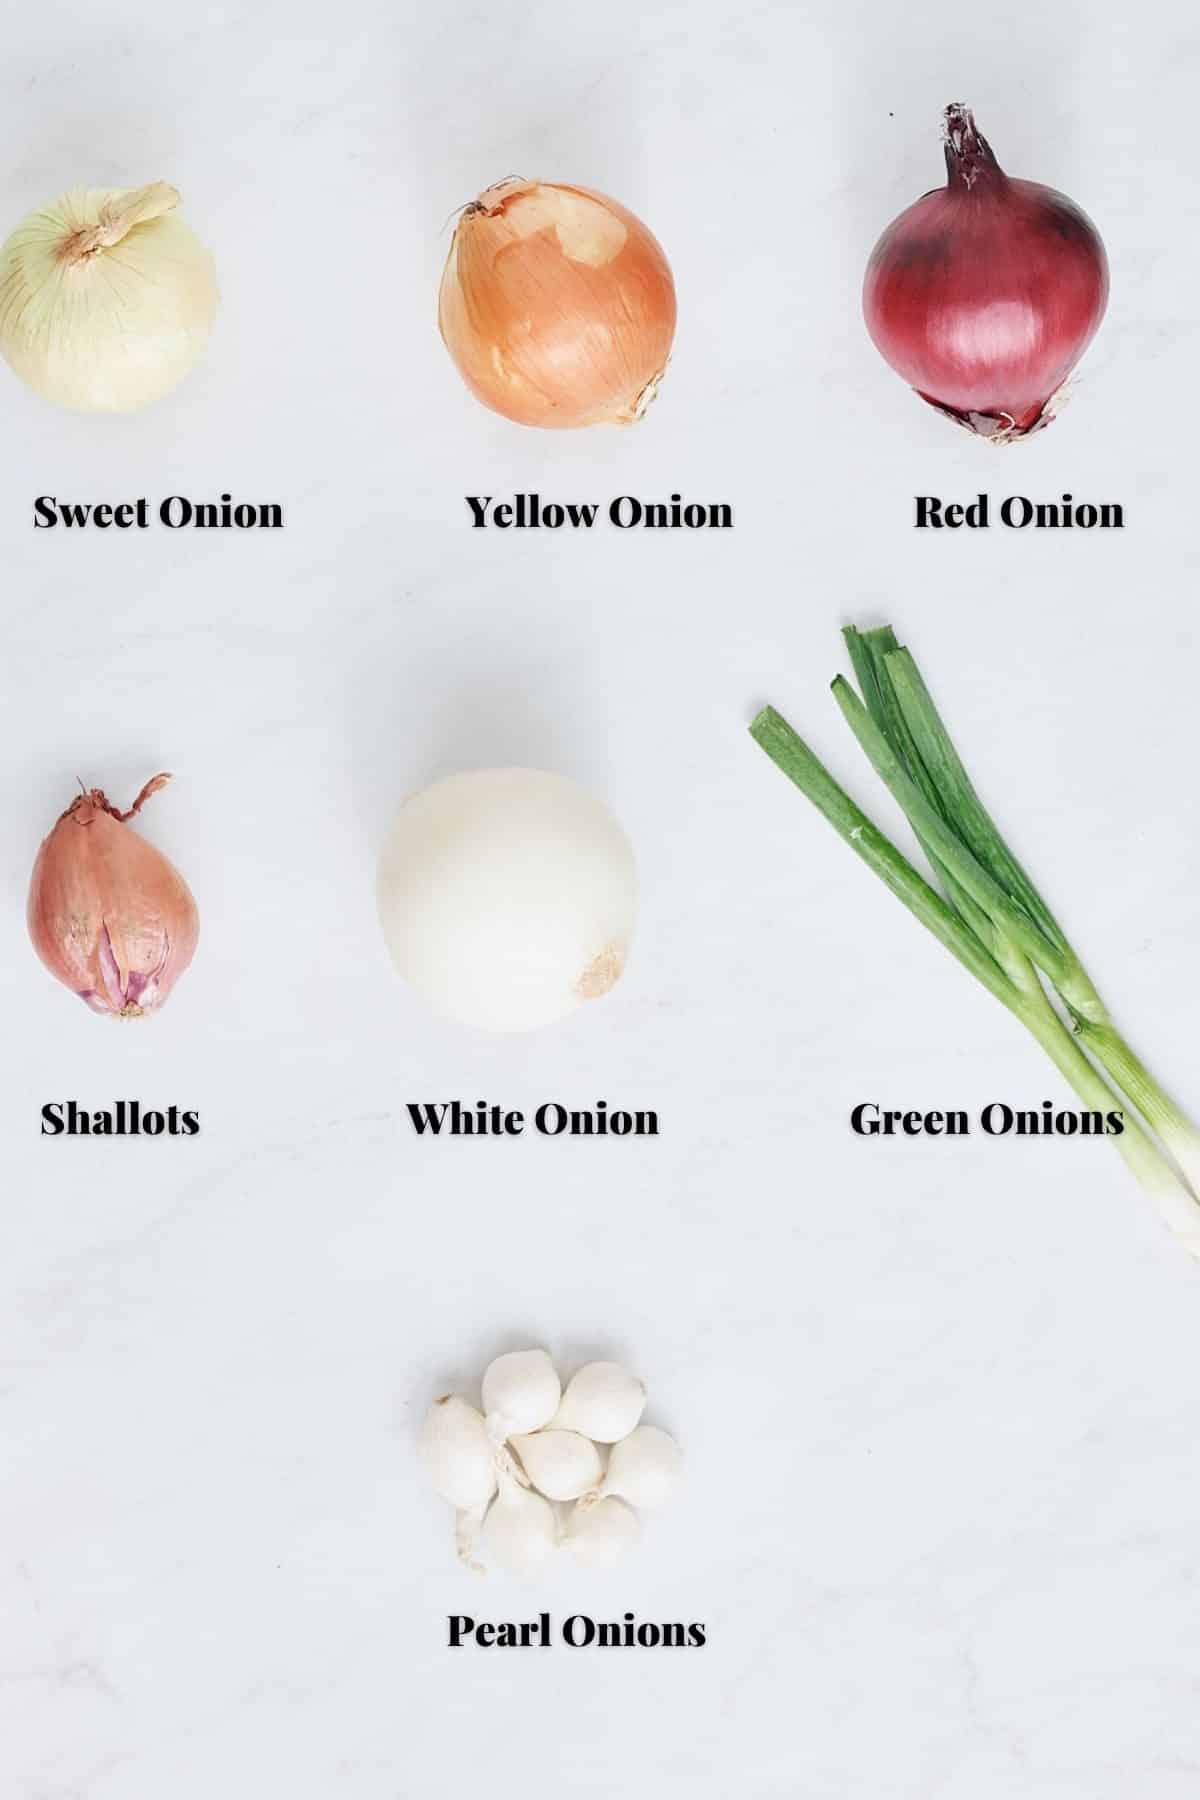
There are many types of onions and knowing which type of onion to use and when will add flavor and dimension to your cooking all season long!

Onions are a versatile ingredient used in everything from roasted meats and pasta to soups and stews. They’re even added to some cocktails! They can be sweet and mild, or savory and intense. There are dozens of types of onions out there, and each onion variety has its own unique flavor profile, and purpose in the kitchen.
Knowing which type of onion to use, and when, will give you the perfect flavor every time. Take a look at this quick guide to help you navigate onions with ease.
Sweet onions are mild onions, and they’re wildly popular in the kitchen. Different types of sweet onions include Walla Walla, Vidalia, and Texas Sweet. The softer, sweeter flavors found in sweet onion varieties are due to the lack of sulfur in these onions. The more sulfur an onion has, the more pungent its flavor - and scent.
Chefs love adding sweet onions to relish recipes, onion dips, or caramelizing them for hamburgers, roast chicken dishes, or game day hot dogs. This sweet onion dressing is also a delicious salad dressing where the sweet onion is the star.
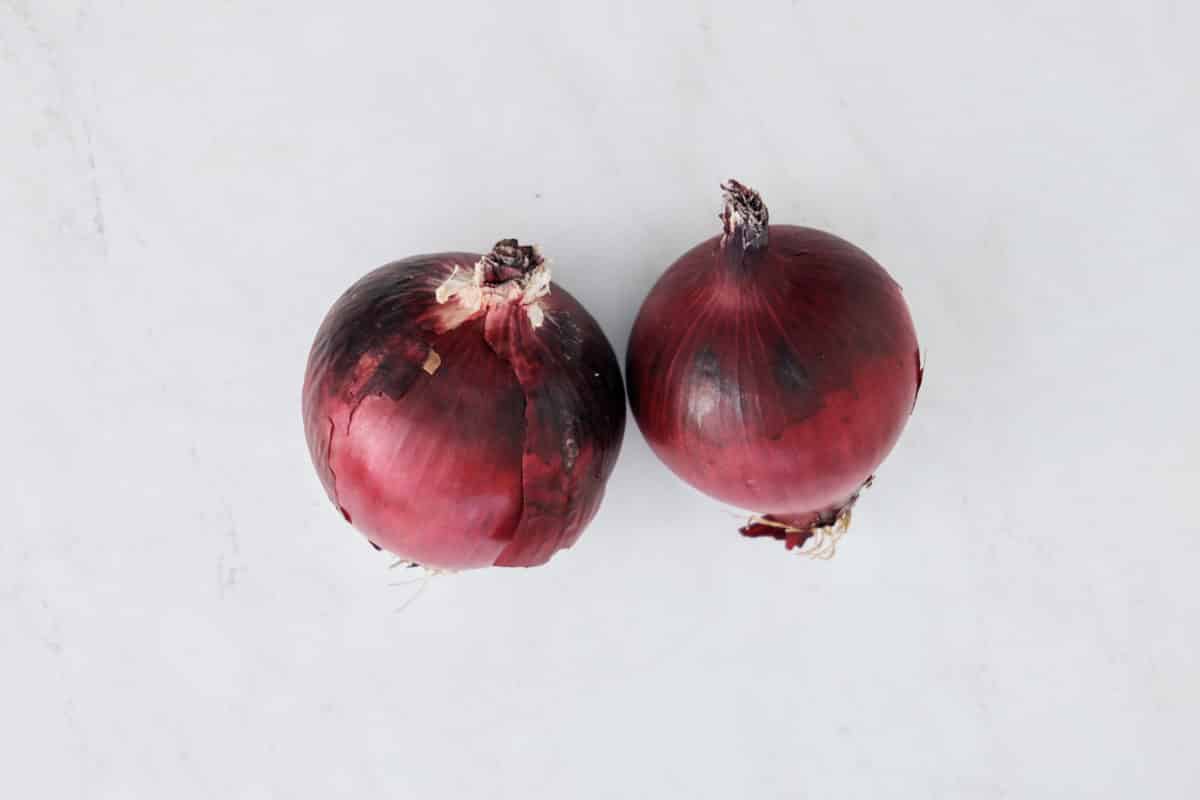
Red onions have a distinct flavor that’s intense and slightly peppery. To achieve a mellower flavor, many people make pickled red onions, or grill them for vegetable platters and sandwiches. Raw red onions can also be used in side dishes like cabbage slaws. The bright red and purple coloring of red onions doesn’t just give a flavor boost to leafy salads, it adds a nice pop of color too.
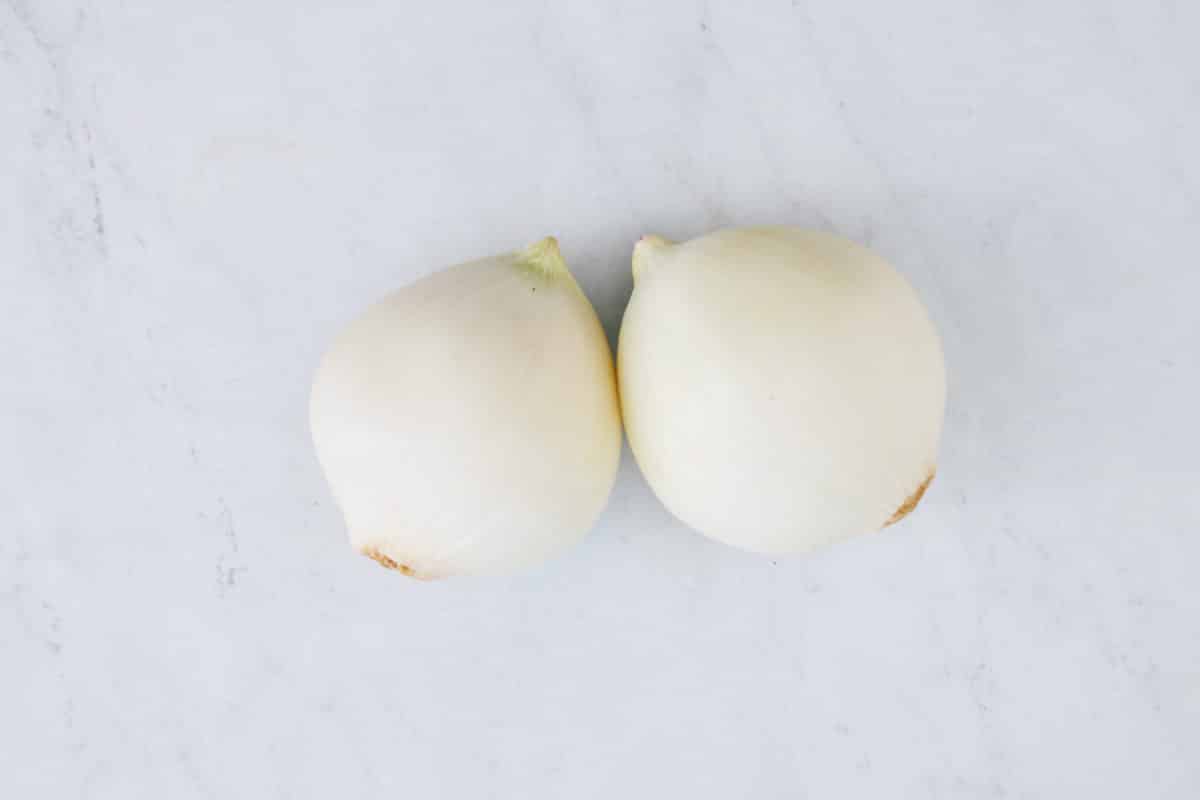
The first thing you may notice when you cut into a white onion is its crispness, which comes from this onion’s high water content. Like red onions, white onions can be pickled for use in vinaigrettes, added to Mexican dishes like guacamole and tacos, or used as a base in soups, and stir-fries. White onions are also the best onions to use for onion rings.
White onions can also be substituted for yellow onions in most recipes.
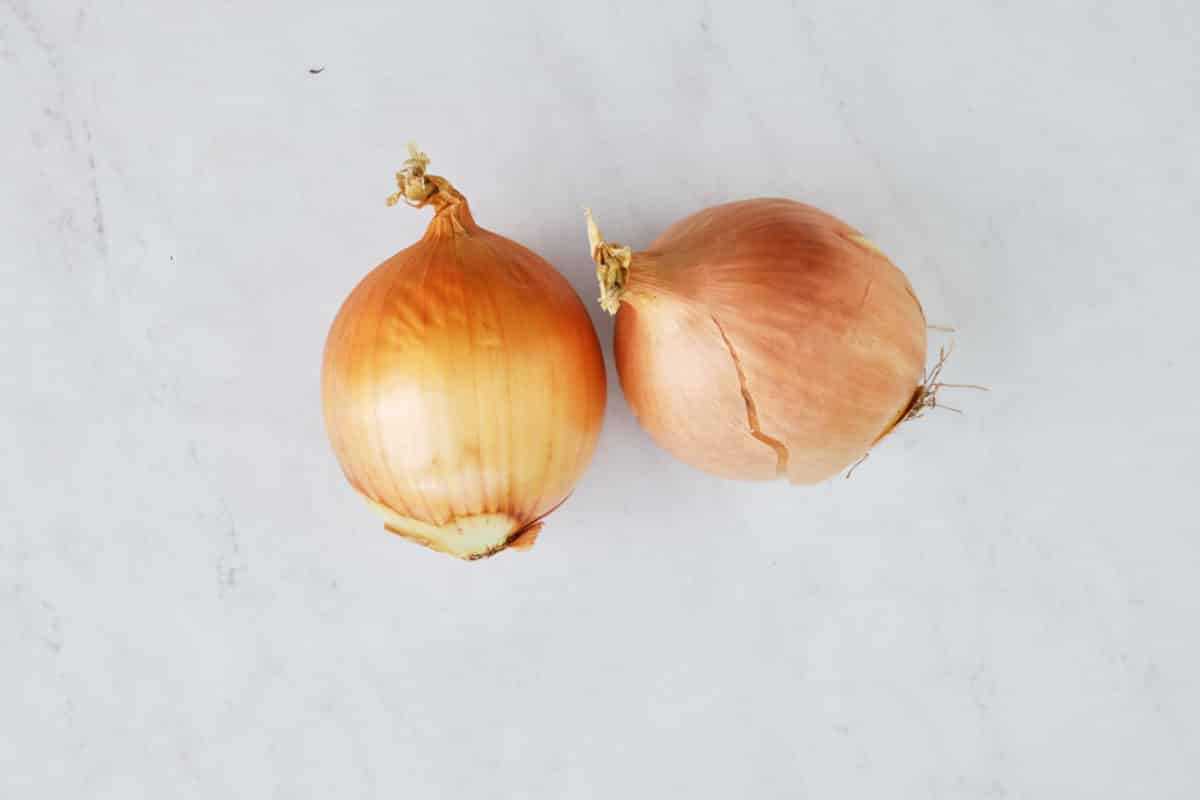
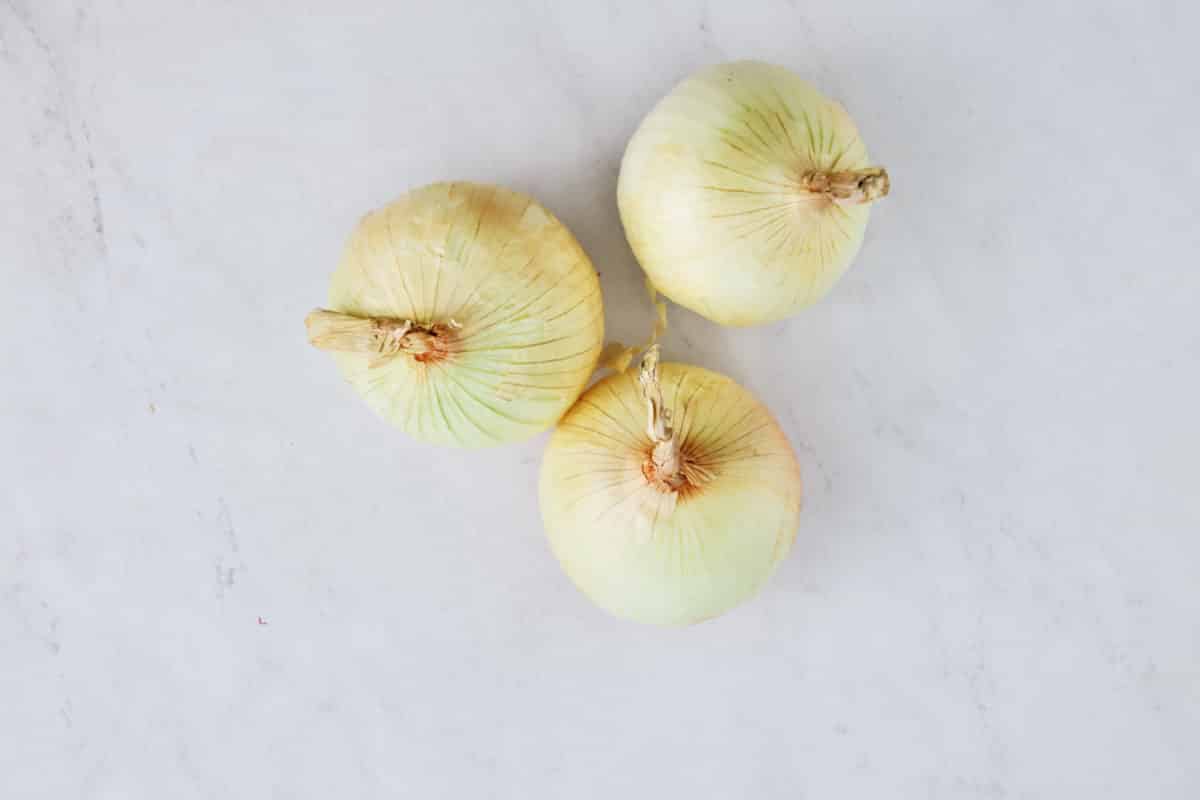
Next to white onions, yellow onions are the most popular cooking onion. You’ll find them piled high at nearly every grocery store. Like white onions, yellow onions have a higher sulfur content but, when cooked, they become sweet and mellow. This makes yellow onions great for recipes that require caramelized onions.
Yellow onions are kind of a jack-of-all-trades, so if you’re ever unsure which onion to use in a recipe, a yellow onion is the safest bet. They are great in soups, stews, and chilis, like this chicken chili.
It’s worth noting that in some places, yellow onions are called brown onions.
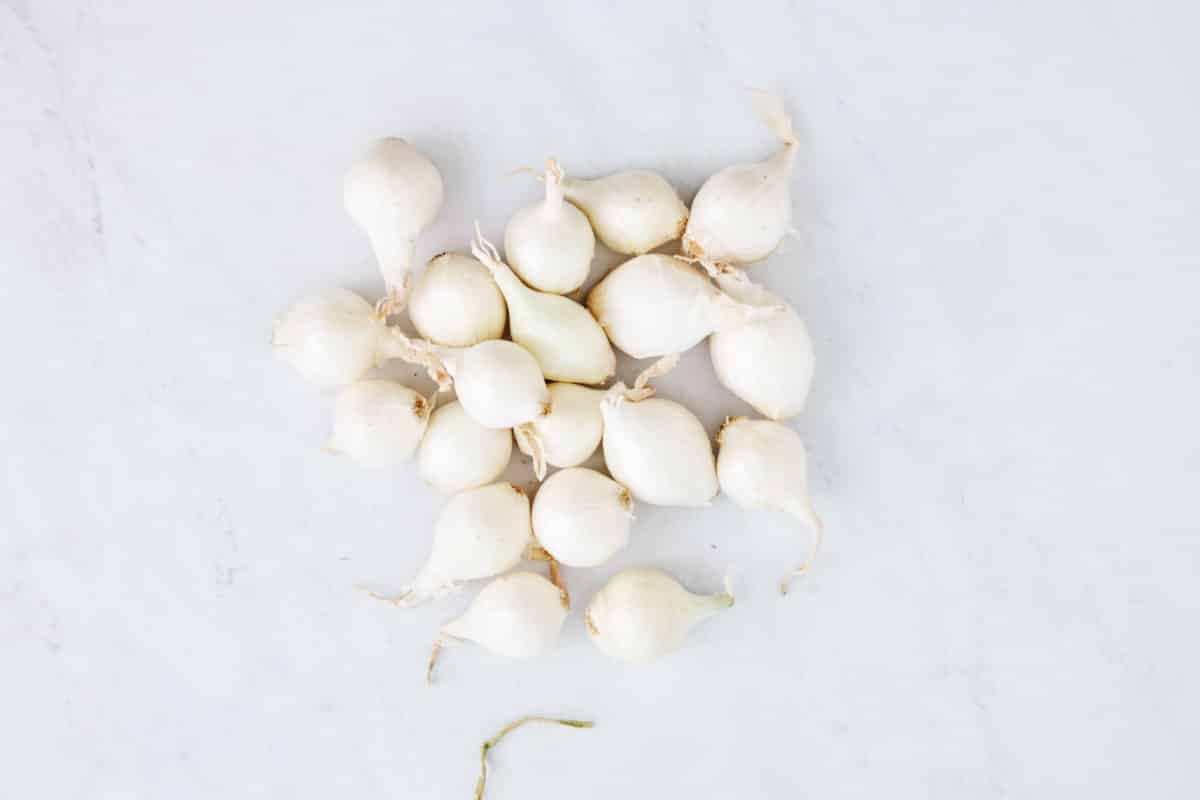
These small onions just might be the only onion that can do double duty in the kitchen, and the home bar, if you happen to enjoy a classic Gibson Martini.
They are small, bulb onions that have a soft, sweet taste. White pearl onions are the most common type of pearl onion, but you may also find red or yellow pearl onions periodically.
If you have a recipe that calls for pearl onions, but you’re short on time, you can typically find frozen packages of pearl onions at your local grocery store. These pre-peeled onions can quickly and easily be added to just about any recipe that requires pearl onions.
These onions are a crucial ingredient in everyone's favorite French bistro dish, coq au vin. These onions can also be pickled, caramelized, or creamed and served as a side dish.
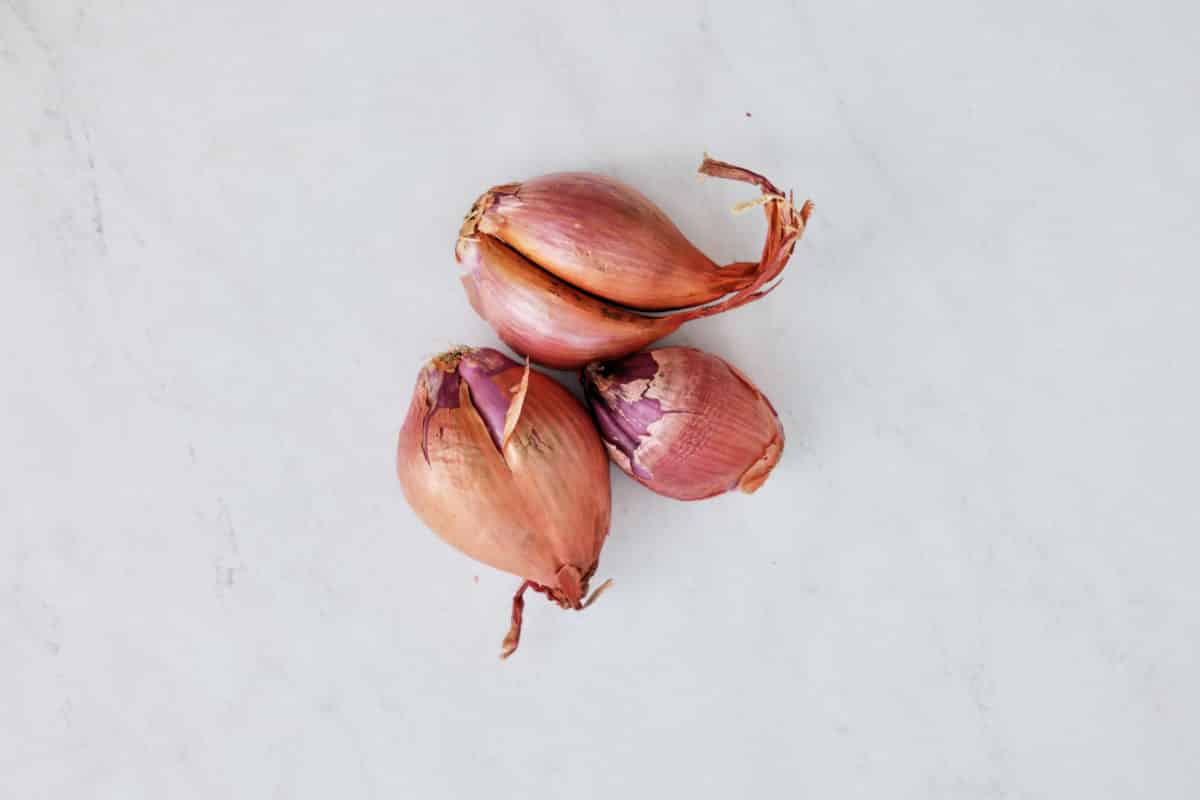
Milder and sweeter than most onion varieties, the shallot is a kitchen staple every home cook should have in their pantry. Slice shallots and serve them on top of grilled steak, or dice them for salad dressings. Shallots are frequently used in French recipes and you’ll see them in red and white wine sauces, tartins, and vinaigrette dressings.
What’s great about this type of onion is that when they’re stored properly, shallots have a long shelf life: up to two months! Place them in a cool dry area of your kitchen that gets plenty of air circulation. A cupboard or pantry shelf works great.
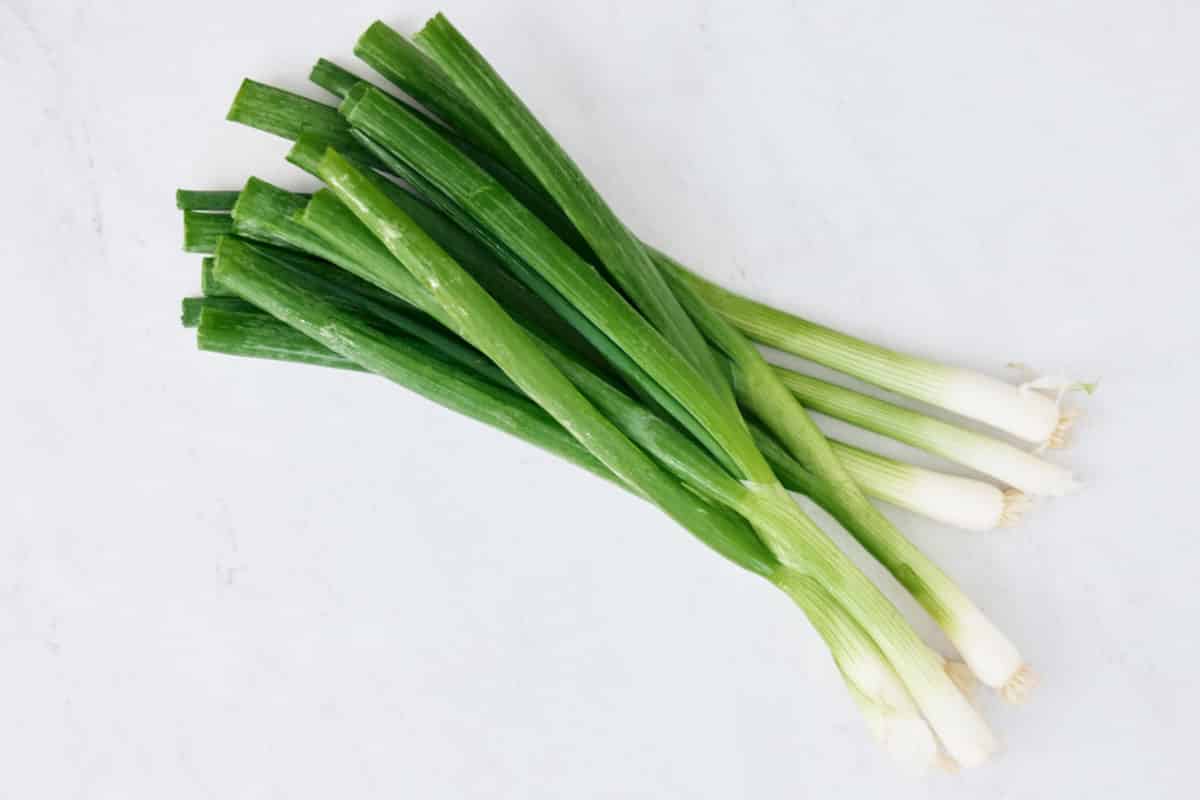
Scallions are long-necked onions with a small bulb at the end of the stalk. These onions are the result of harvesting other types of onions early. Unlike their onion counterparts, scallions are sold in bunches. Both the green shoots (or neck), and the small onion bulb, are edible and useful in the kitchen.
The bulb of the scallion has a flavor similar to a mild white onion, while the shoots have an aromatic, almost herbaceous taste.
You'll find scallions in many Caribbean-based recipes. Scallions can be slow-cooked or braised whole and served alongside chicken or fish dishes. Green scallion shoots can be sliced and added to a ton of recipes like stir-frys, soups, dips, and ramen noodles.
| Type of Onion | Best Uses |
| Sweet Onion | Carmelized. Great roasted. |
| Red Onion | Pickled. Raw in salads or as a garnish. |
| White Onion | Pickled, Raw salsas, and stir fry dishes. |
| Yellow Onion | All types of cooking. Great for soups and stews. |
| Pearl Onion | Pickled, Carmezed, or Slow Cooked. |
| Shallot | Salad Dressings or as a garnish. |
| Scallions | Raw garnish. Slow-cooked, or braised. |
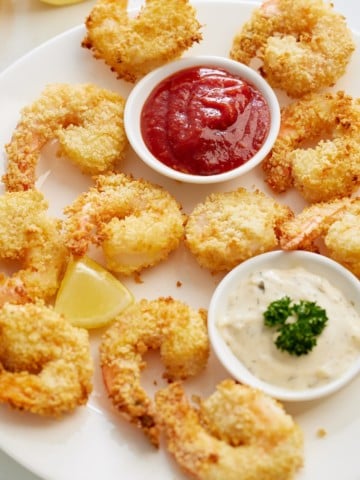
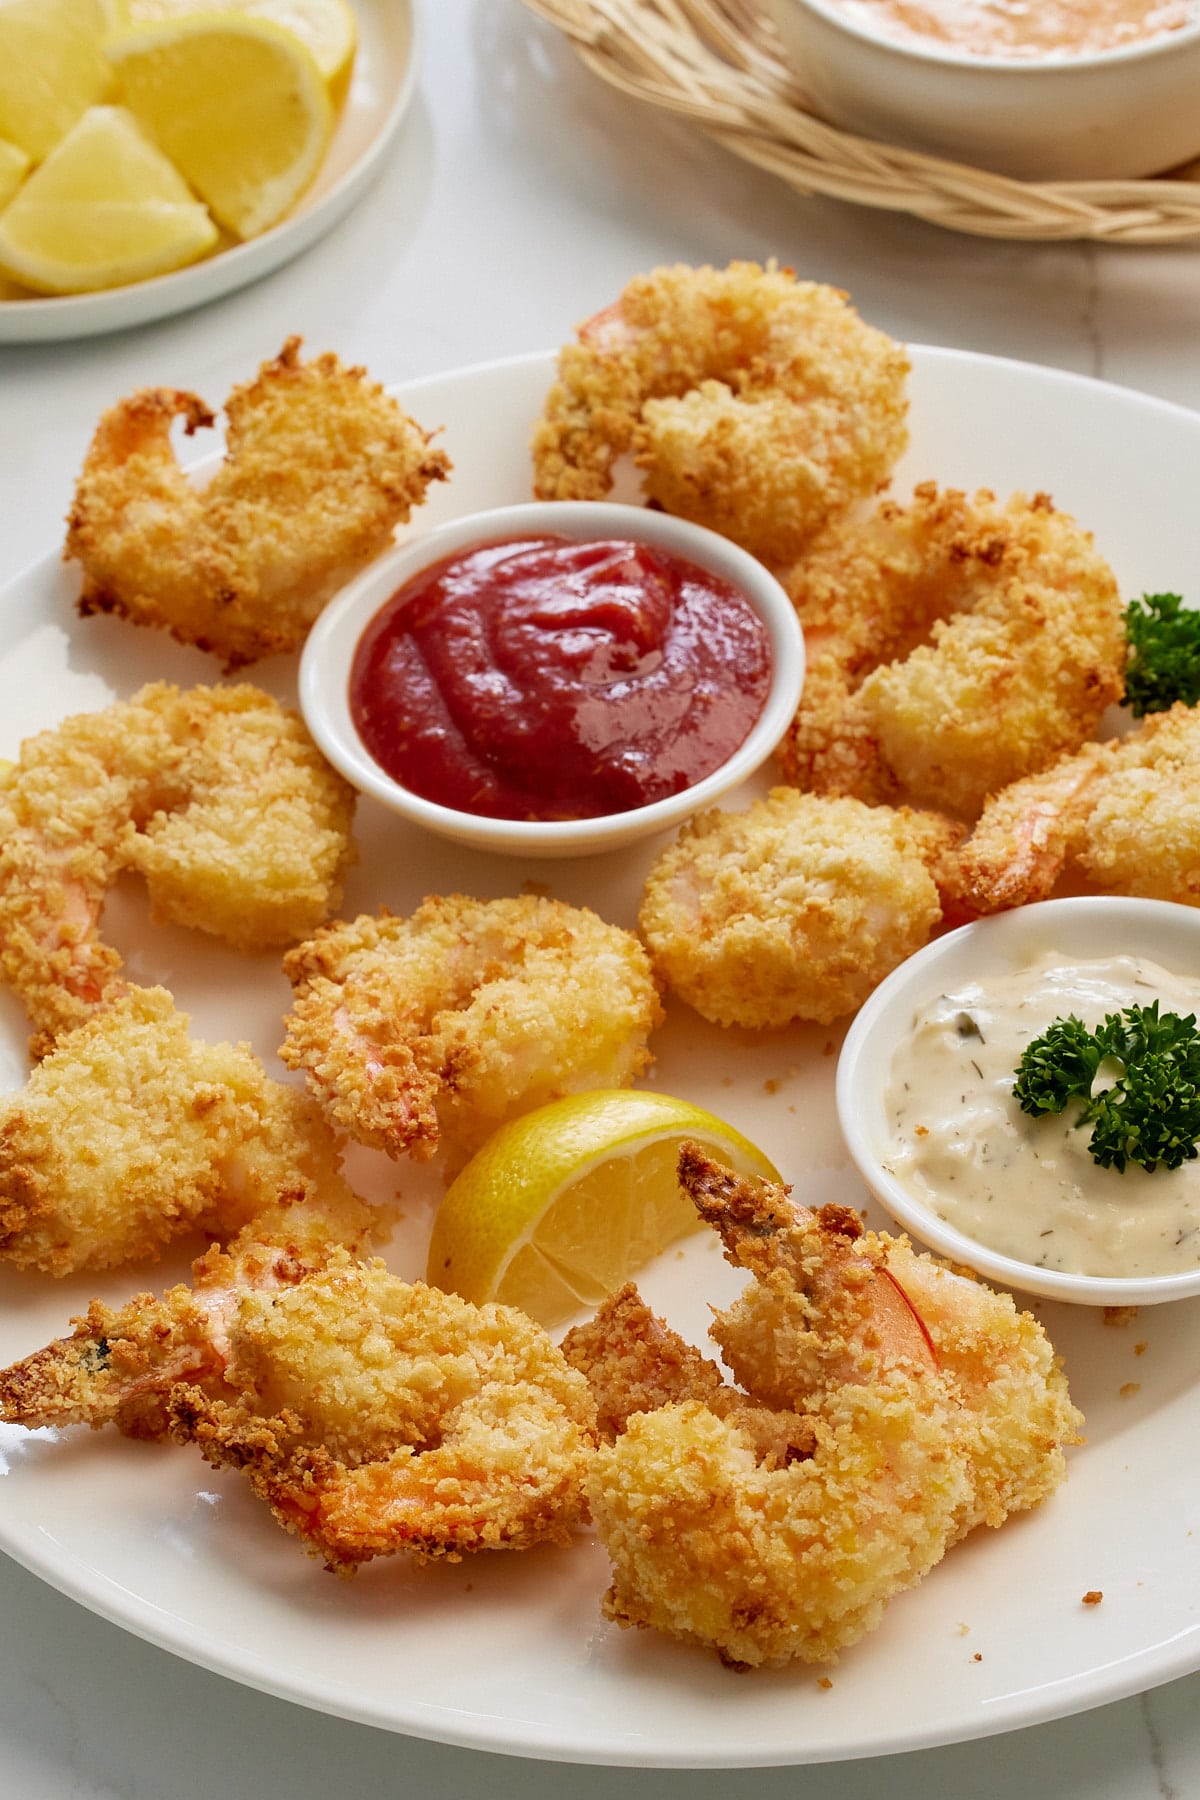
Making perfectly crispy fried shrimp in the air fryer is so easy and the results are delicious! Ready to serve in 20 minutes, they are easy to prep and made with a few simple ingredients.
This post contains affiliate links, please read my full disclaimer here.
You’ll find the full recipe with ingredient amounts and instructions in the recipe card at the bottom of this post. Be sure to check out the blog post itself for extra tips and tricks!
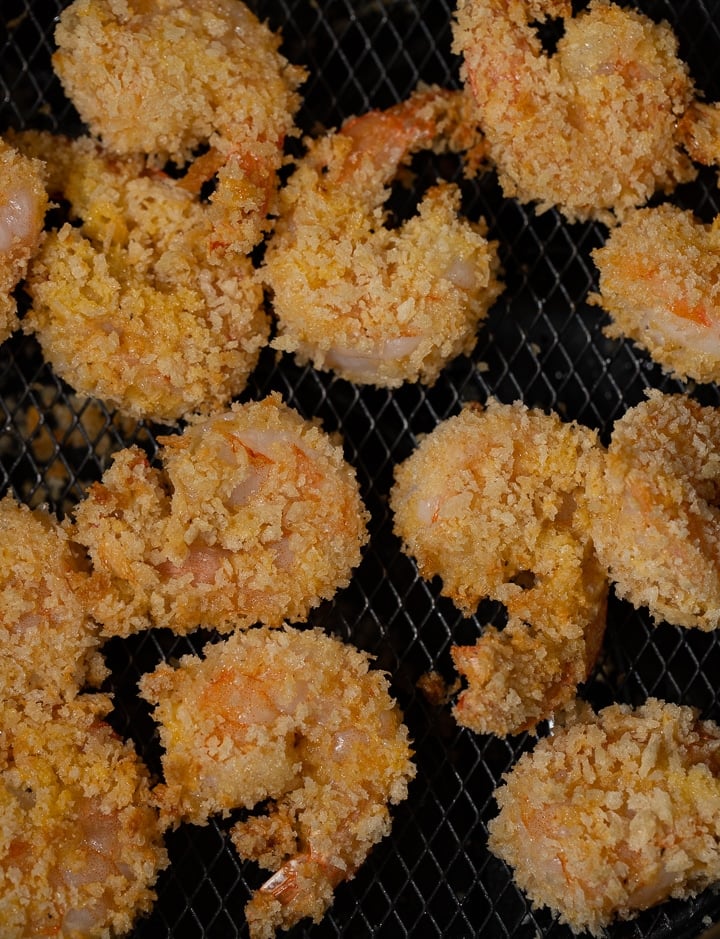
I'm so excited to bring you this new air fryer shrimp recipe! This recipe makes delicious crunchy shrimp that is perfectly cooked and juicy, and the panko breadcrumbs add a wonderful crunch to each bite!
They are great to serve as a simple appetizer with your favorite dips or make it a fuller meal and serve with a fresh salad or veggie or turn it into a Southern Po'boy sandwich. This recipe takes only a couple of minutes of prep and results in the most delicious shrimp and tender seafood.
If you love this crispy air-fried shrimp, be sure to check out my Air Fryer Lemon Garlic Shrimp and Air Fryer Coconut Shrimp.
Prepare a dredging station by placing ¾ cup of flour, ½ teaspoon seasoning salt, ¼ teaspoon garlic powder, and ¼ teaspoon black pepper in one bowl. In a separate bowl, lightly beat the eggs, and in a third bowl, place the panko breadcrumbs. You can season the breadcrumbs at this stage too.
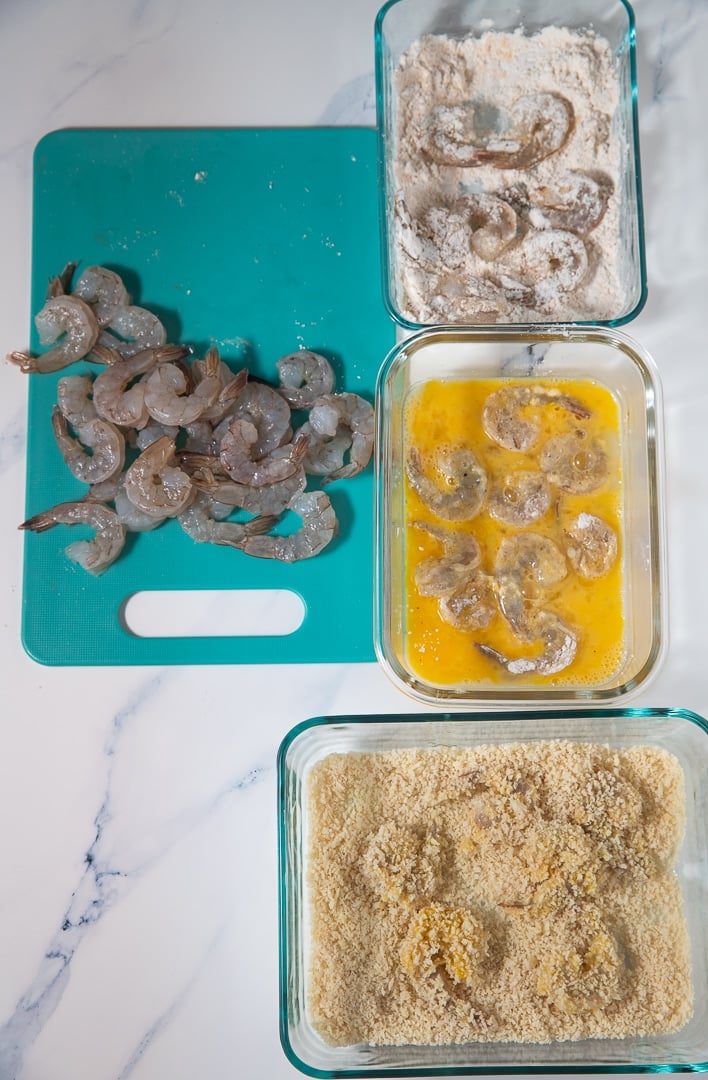
Place each shrimp in the flour, then the beaten eggs, and then the panko, making sure to shake off any excess flour and eggs before placing it in the panko.
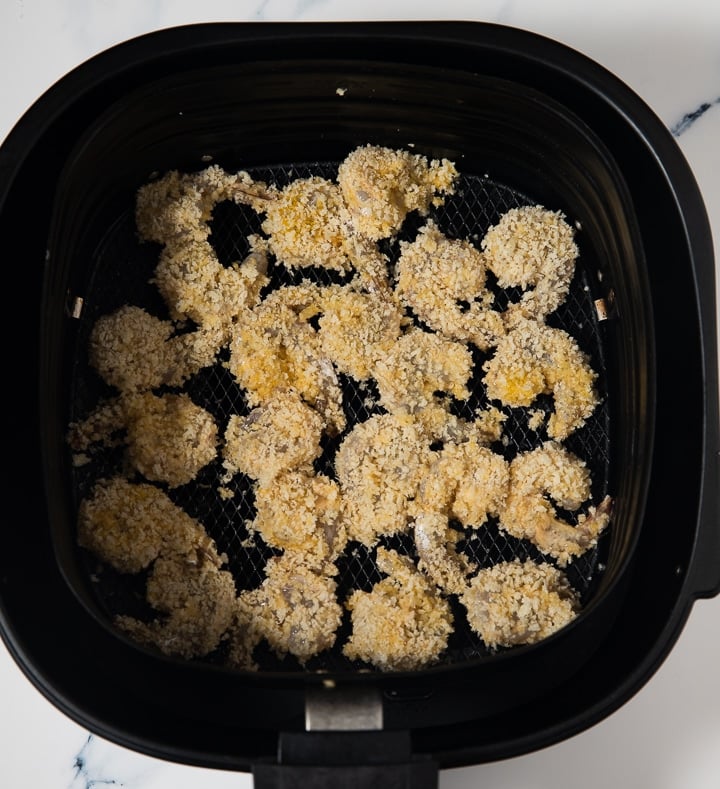
Place the shrimp in a greased air fryer basket in a single layer, making sure the shrimp are not overlapping. Do not spray the shrimp at this point.
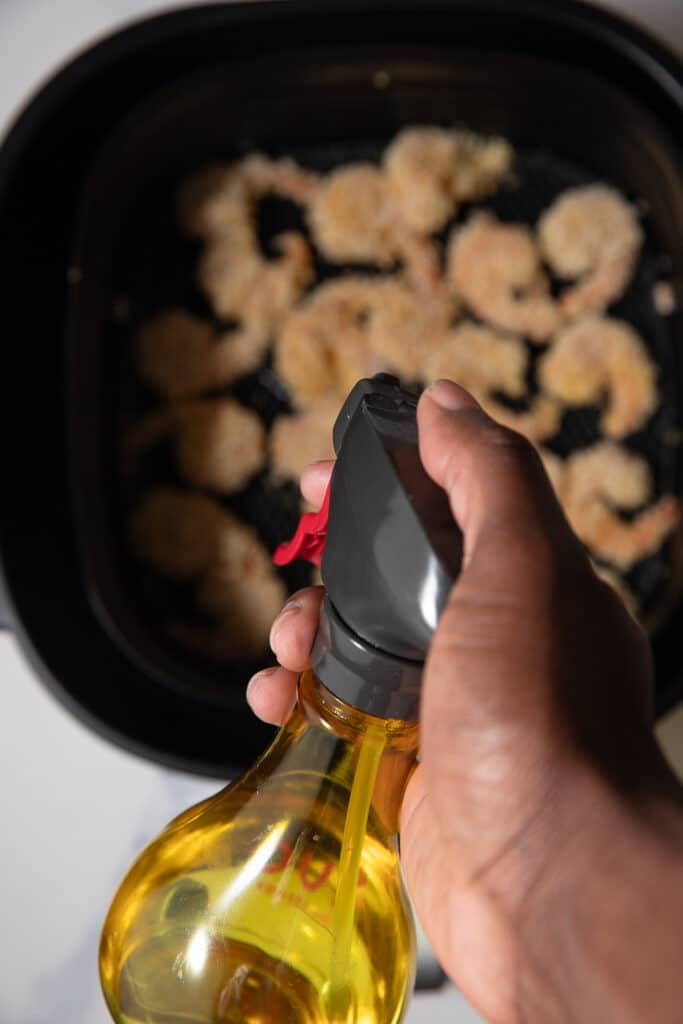
Air Fry on 400 degrees Fahrenheit for 6-9 minutes, flipping and spraying with cooking spray halfway through.
Remove when the shrimp is golden. Salt and pepper to taste.
I find it's best to use fresh raw shrimp for this recipe so that they cook all the way through and the coating isn't overcooked. If you have frozen shrimp then defrost them and pat them dry before dredging them.
I prefer to keep the tails on as they add more flavor and they are easier to dredge and dip in your sauce of choice! You can remove the tails if you prefer.
Make sure that the shrimp are shelled and deveined before dredging them.
These cooked shrimp are best served as soon as you've made them, but if you have leftovers they can be reheated in the air fryer and all that good crispiness will come right back!
Reheat the air fryer to 400F and cook the shrimp for 3 to 4 minutes until they are nice and crispy again.
Leftover fried shrimp will keep covered in the fridge for up to 3 days.
This is a base recipe and can be changed to your liking. You could use smaller shrimp and make crispy popcorn shrimp. Just make sure to adjust the cooking time a bit and cook for less time so the shrimp does not overcook.
The same goes with jumbo shrimp. Just increase the cooking time but 1 or 2 minutes for large shrimp.
You can also serve this as an appetizer or use tail-off shrimp and add these crispy shrimp to salads, shrimp and grits, or make shrimp tacos.

More of my great air fryer recipes.
Watch this video tutorial and see how I make these shrimp from start to finish.
This post was originally published on 7/9/2020 and has been updated with new photos and helpful tips.
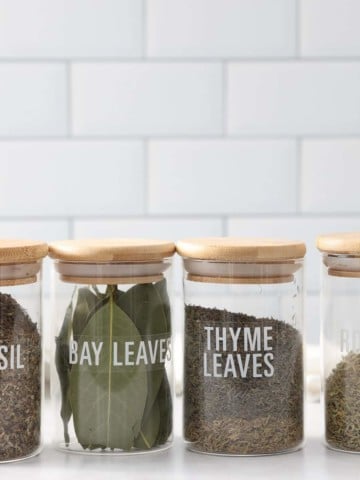
If you are wondering how to use dried herbs, then look no further. Here are the best tips for using dried herbs in all your recipes.

When it comes to herbs, it all boils down to personal preference. I love fresh herbs, but there would always be a space in my heart for dried herbs for cooking, especially for a pot of stew and other special meals!
Dried herbs are essential in any cooking space. They are budget-friendly ingredients that introduce a tasty flavor to suitable meals.
Dried herbs and fresh herbs indeed hold different flavors. They have a mucky and more savory flavor, not to mention that these herbs can be stored much longer than fresh herbs.
While cooking with dried herbs, you want to use a reduced quantity instead of what would have been used if the herbs were fresh. It means one tablespoon of fresh Rosemary will be substituted with one teaspoon of dried Rosemary. As a rule of thumb, always use ⅓ the quantity when replacing fresh herbs with dried herbs.
It's best to add fried herbs early in cooking. Dried herbs are at their best when they are rehydrated. Rehydrate your herbs by introducing them to your meal at the beginning stage of the cooking or the middle stage at most, giving the dried herb enough time to soak up the juices from the food and release flavor.
Utilize dried herbs in meals with a long to average cooking time and a suitable amount of liquids—meals such as soups, stew, pasta, and braises.
Dried herbs are the best choice when preparing smoked fish, smoked meats, or barbecued fish and meats. Make a nice spice coating for your proteins with the right dried herbs of your choice.
Blooming the herbs is when dried herbs are quickly fried in a tiny amount of oil or butter to get a deep flavor. You can also bloom your herbs and spices together. It's primarily used for sauces, marinating, or dressings. Rather than spray dried basil on a pizza, cook it in a bit of oil and drizzle on top.
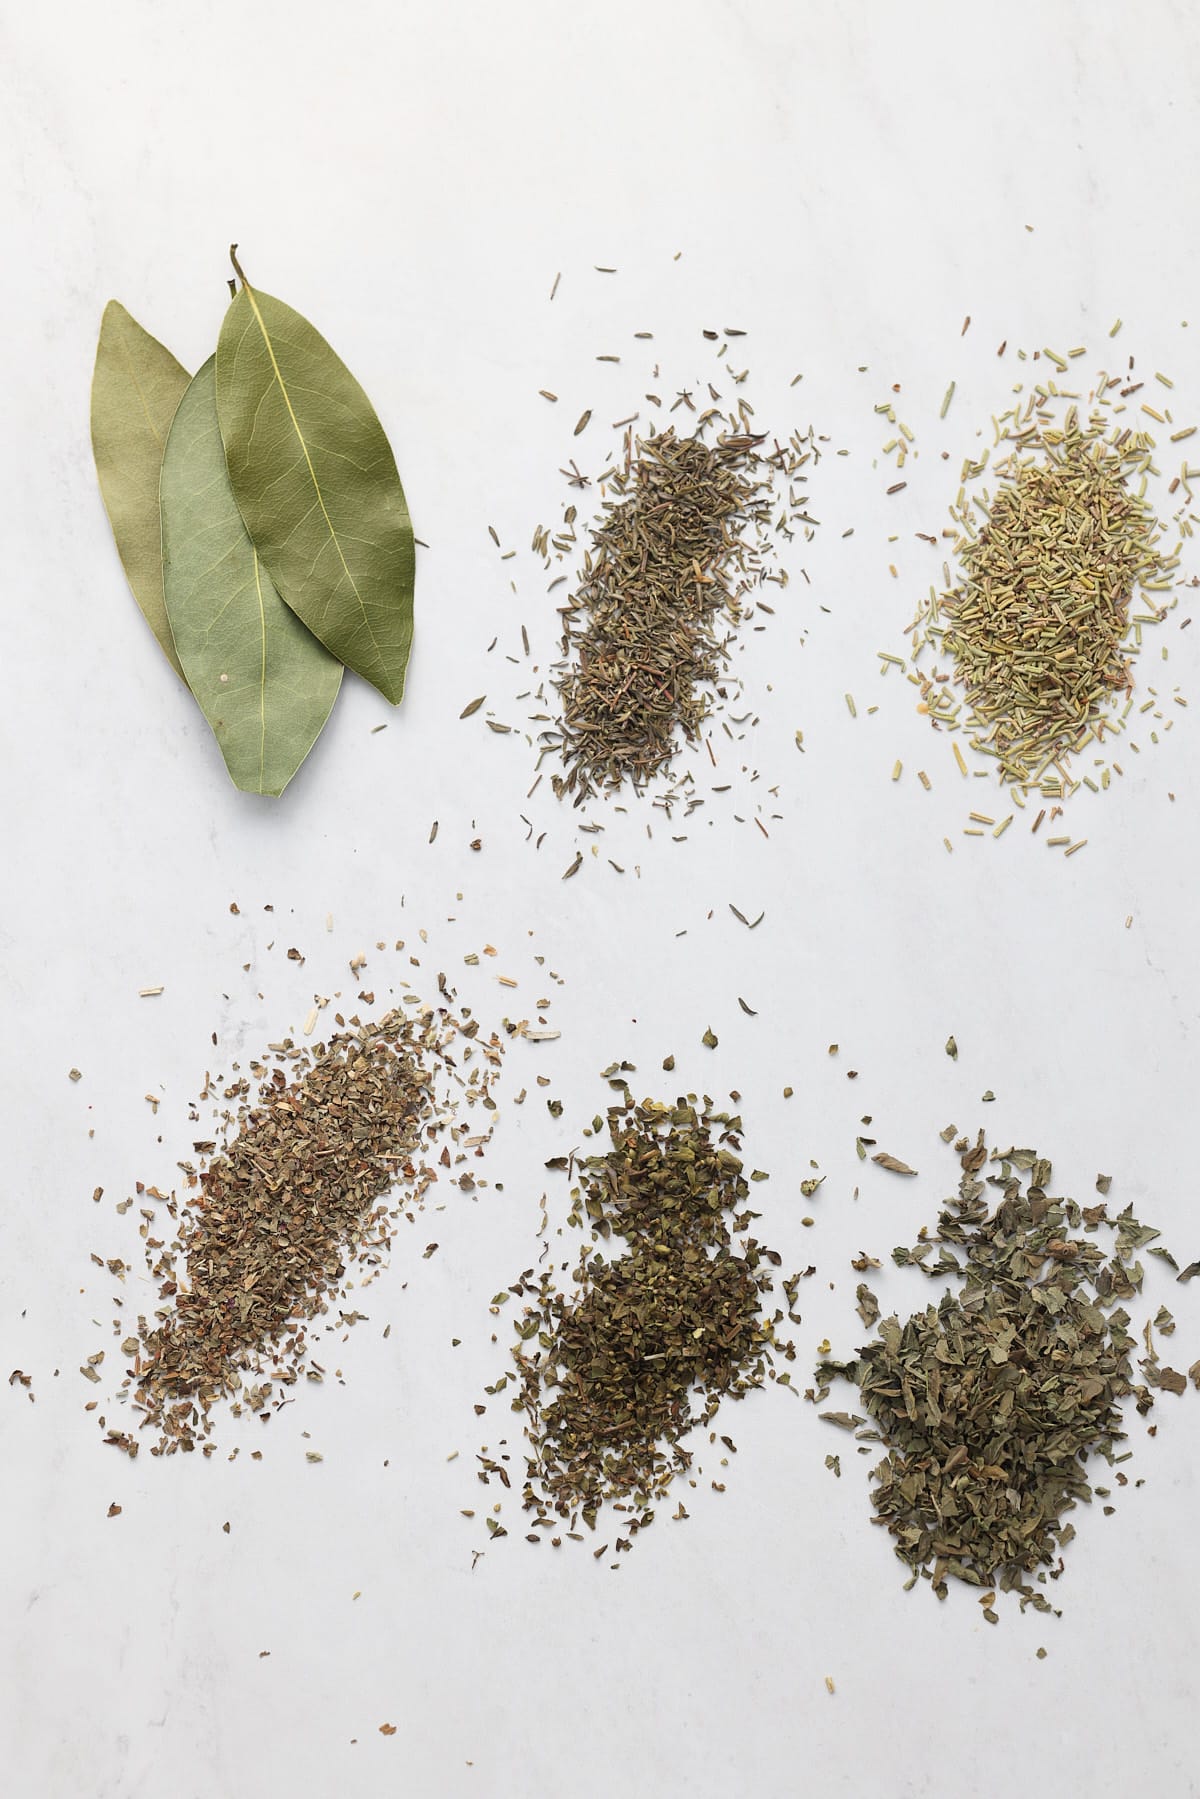
Dried oregano is an irreplaceable herb for Italian and Mexican dishes that require cheese and tomatoes. It has gained recognition and is deemed to be better dried than fresh.
It is a vital pizza topping, and it releases a beautiful flavor when used in chicken, beef, and meatballs.
Dried bay leaves are an essential dried herb that adds a subtle sweetness and aroma to pasta, rice, stews, soups, and meat stock. To get the best out of the bay leaf, split the dried leaves before tossing them into your meal.
It is also an excellent option for flavoring rice puddings and custards.
Dried Thyme is a versatile herb used for various dishes, such as soups and stews. This herb also comes in handy in different seasoning proteins, including chicken, roast fish, boiled fish, beef, lamb meat, and meatballs.
Dried thyme has a unique flavor that it gives to each meal it is used.
To get the best out of dried lavender, drop a small amount on a well-oiled fish and lamb meat, go ahead to fry or roast your proteins and be rewarded with a mouth-savoring taste. Dried lavender is also ideal as a flavoring for custard or ice cream.
Dried Rosemary releases its fragrance in slow-cooked meals, such as braises, lamb meals, Italian-style soup, and stews. You can use Rosemary at your discretion but take note to only use a little as it can be spikey and leafy in dishes. It is also used to stuff whole fish and chicken before getting fried or roasted.
Dried mint leaves are famous for making a relaxing cup of tea. But they are also an excellent choice in seasoned butter for chicken, seasoning lambs, Greek dishes, and pea soup. Dried mint has a strong and distinctive taste. Note to use sparingly.
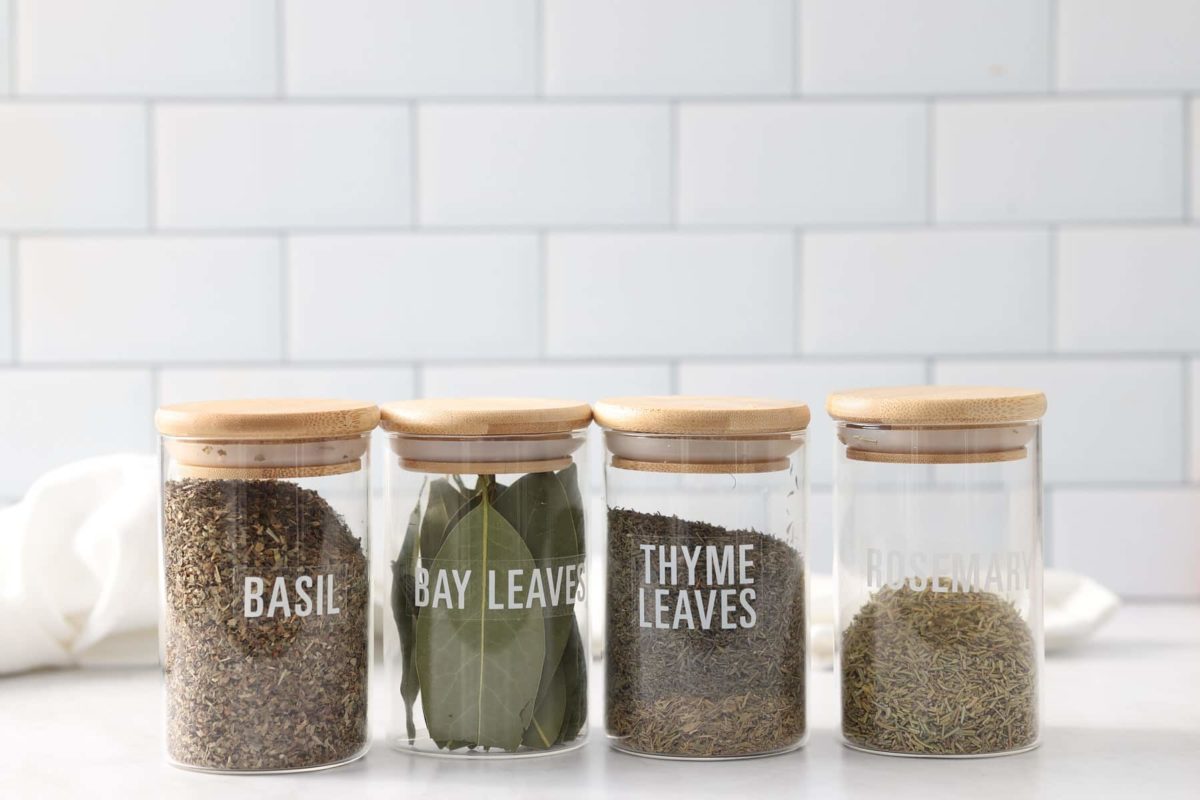
As you begin your collection of herbs, you want to ensure they are correctly stored for the highest efficiency and give off the desired taste.
Dried herbs have a longer lifespan than fresh ones. They generally last for 1-3 years, depending on the type of herb.
Herbs that last 1-3 years include:
Herbs that last 2-3 years are mostly ground herbs which include:
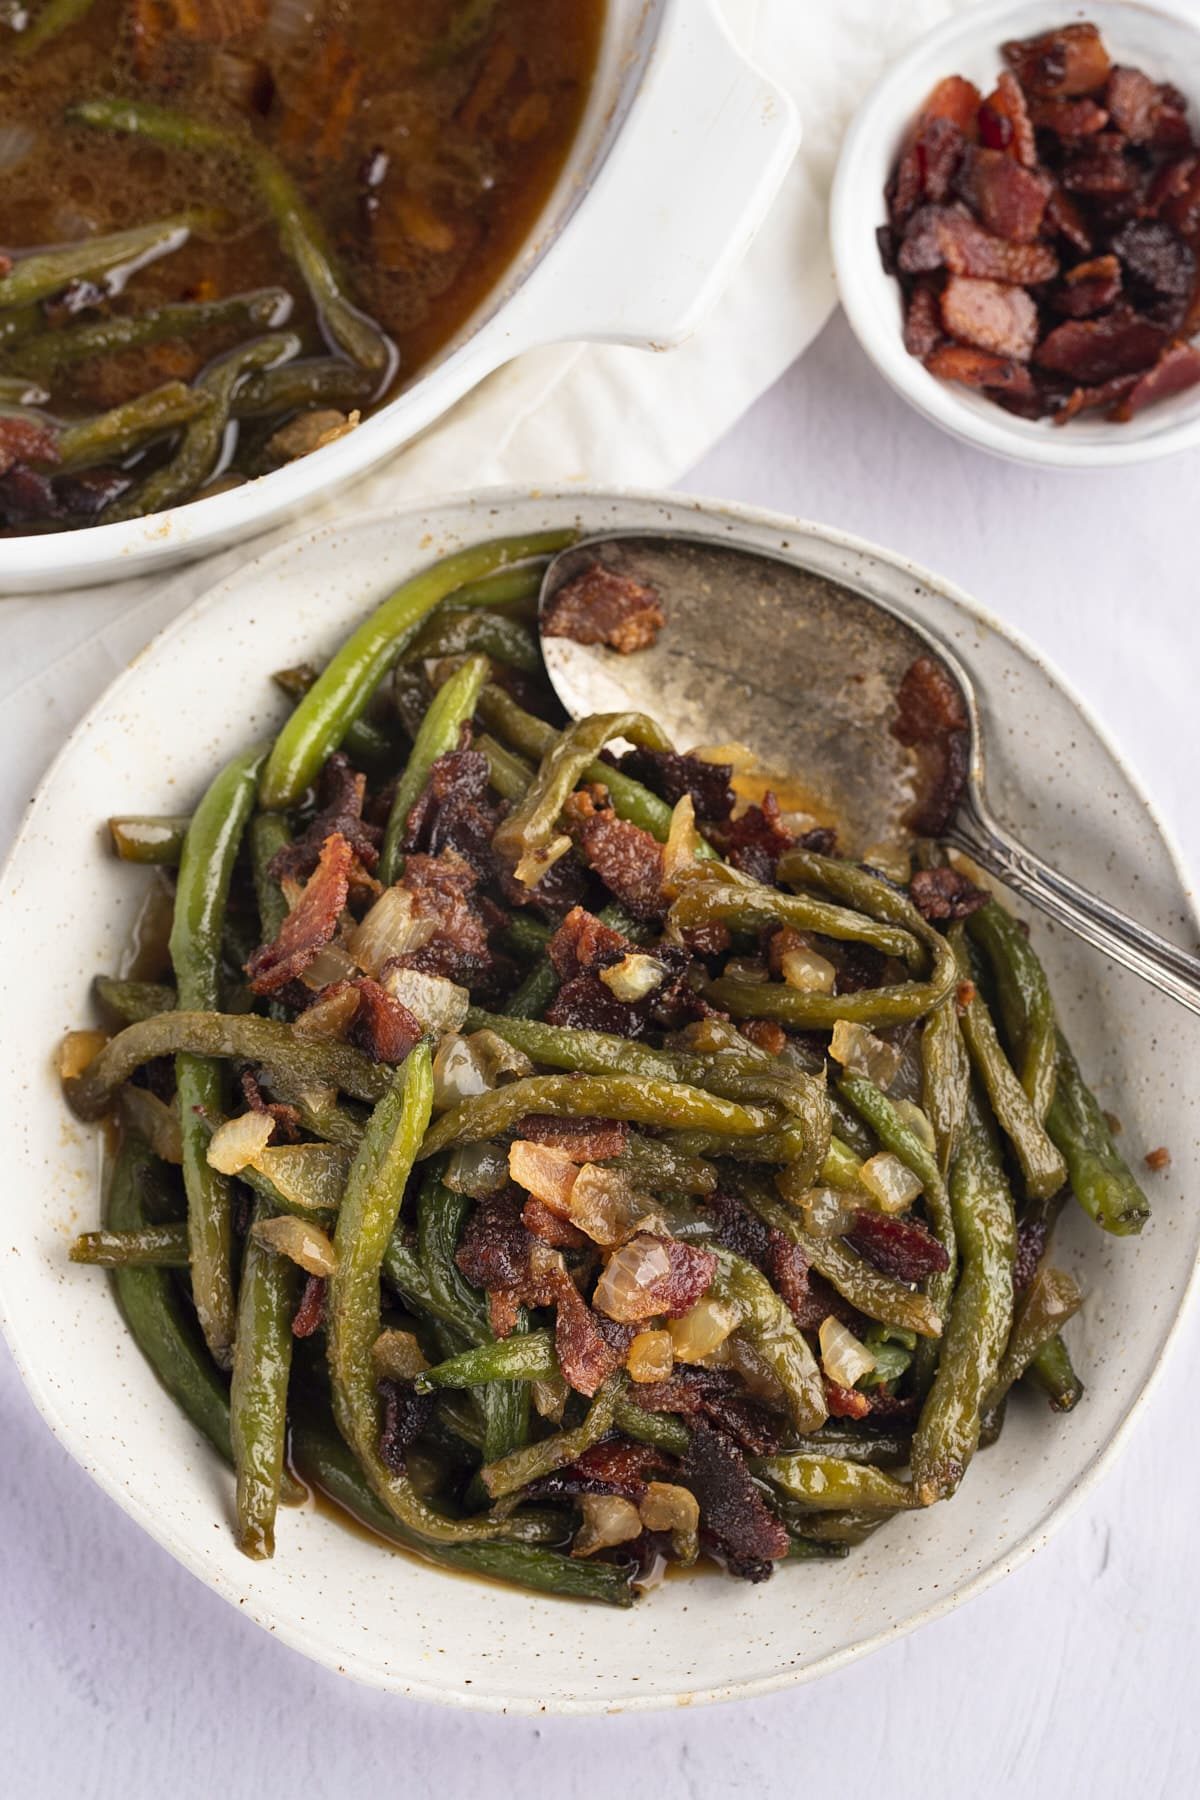
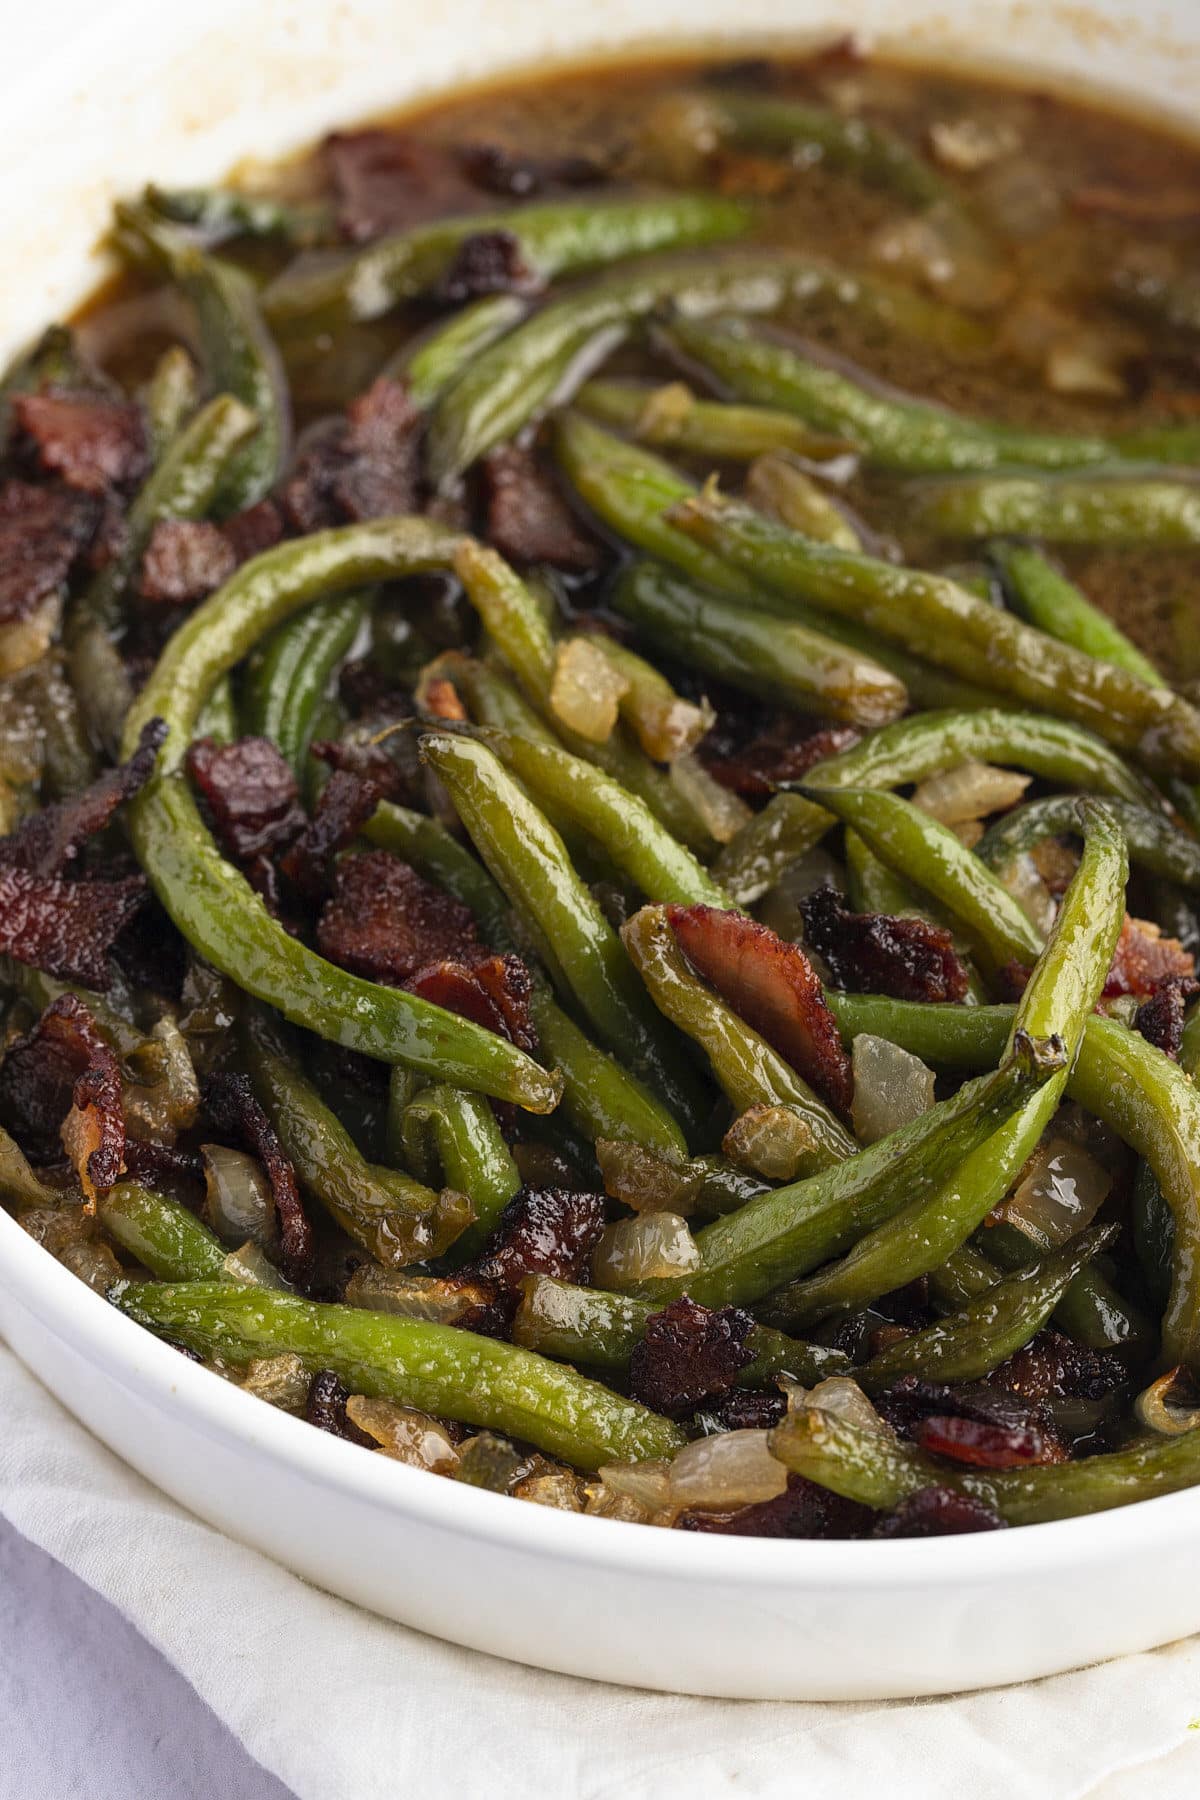
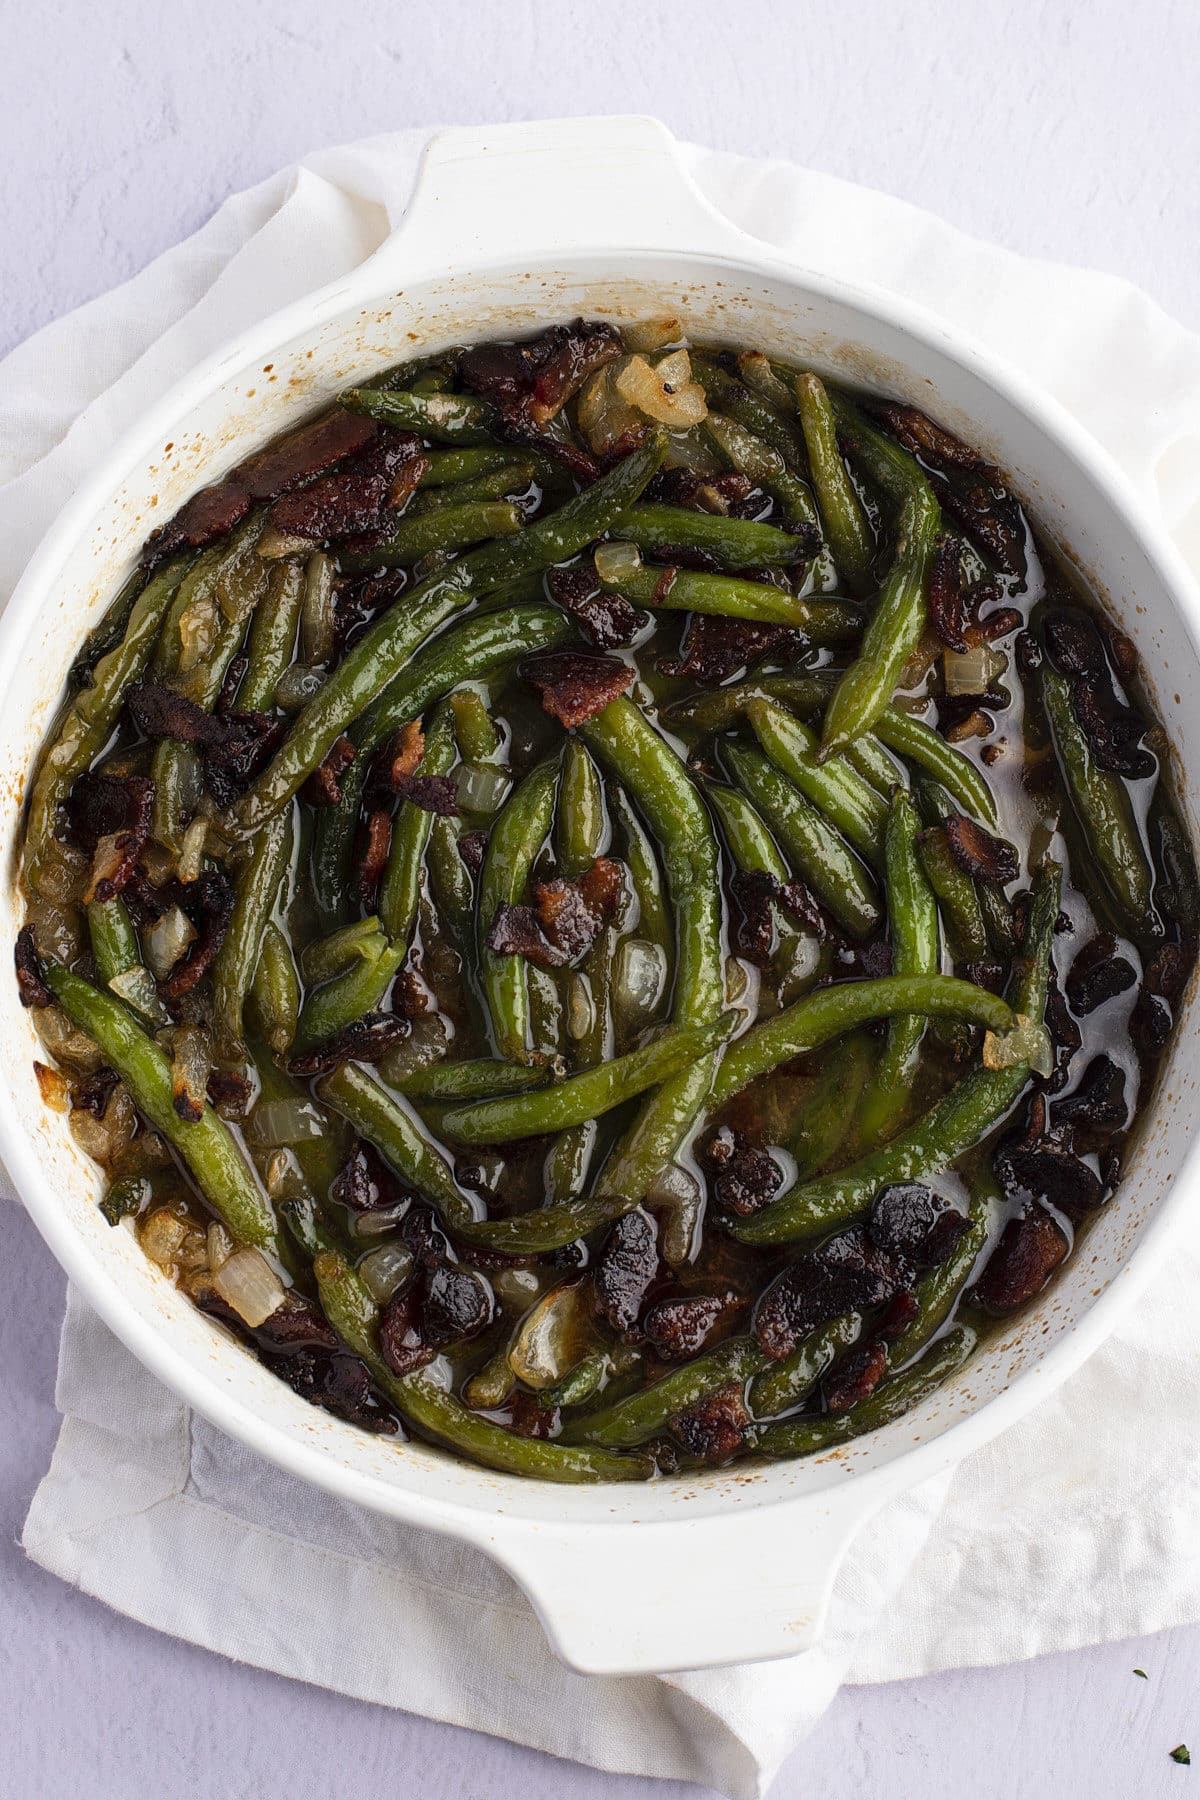
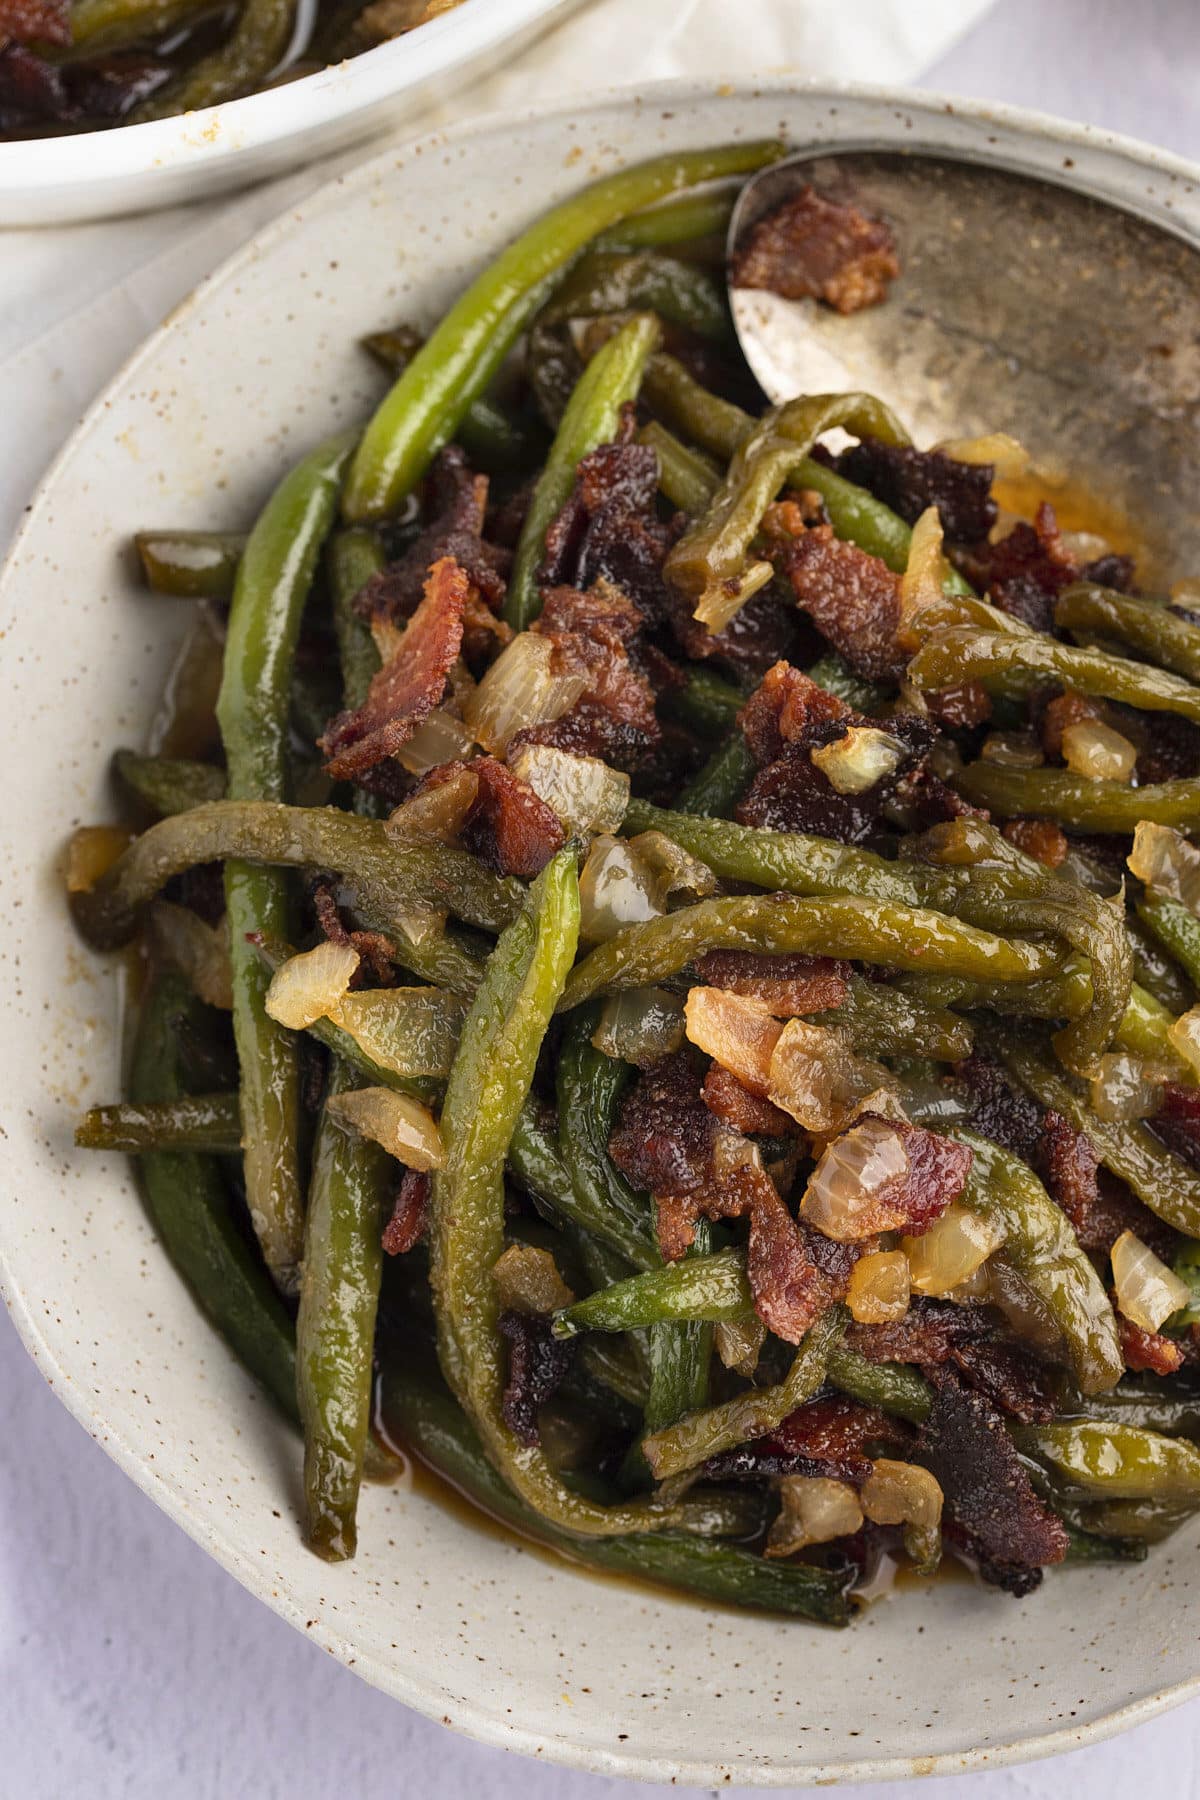
This smothered green beans recipe is one tasty way to eat your greens! Baked in a sweet and salty sauce with caramelized onions and crispy bacon, this veggie side dish is hard to resist!
You’ll find the full recipe with ingredient amounts and instructions in the recipe card at the bottom of this post. Be sure to check out the blog post itself for extra tips and tricks!
If you are looking for a delicious side dish to serve up, then you can't go wrong with these delicious smothered green beans.
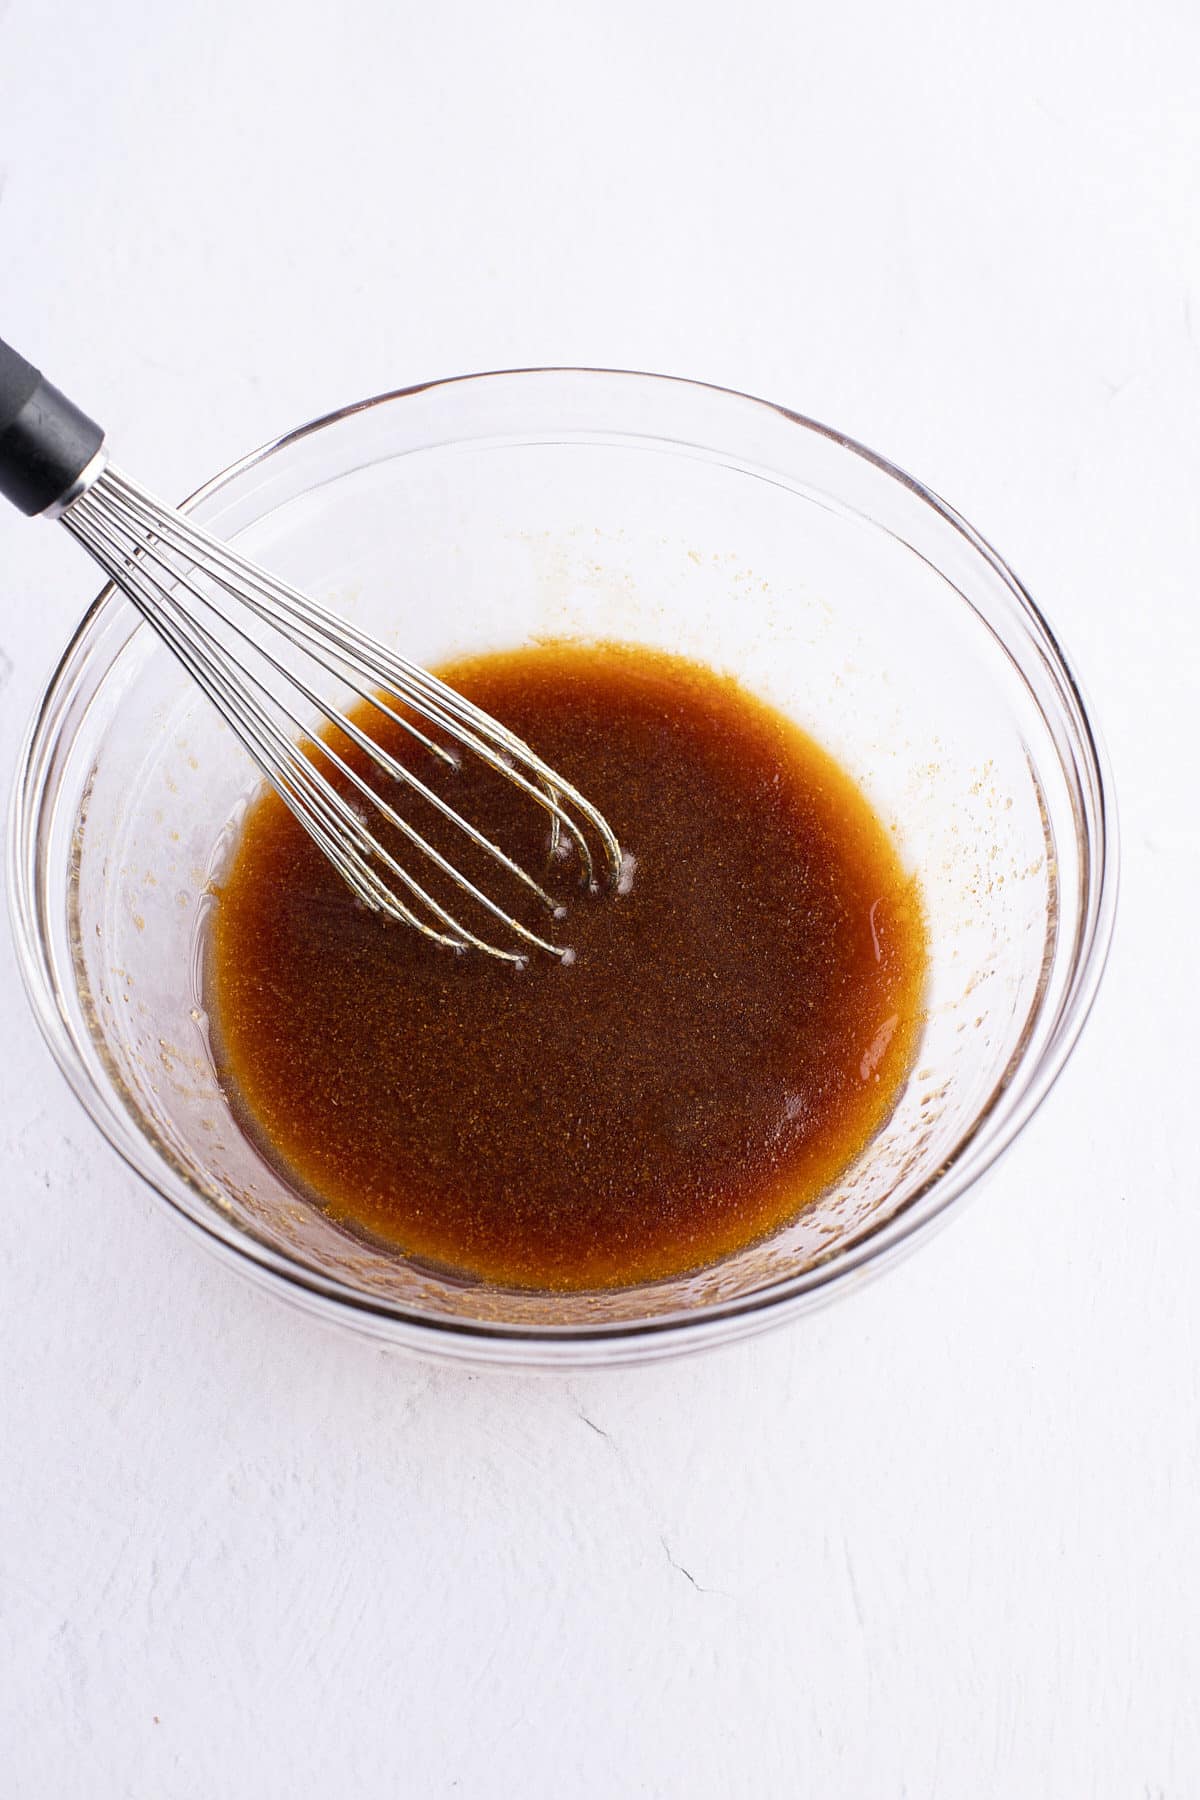
Fresh green beans are baked in soy sauce, butter, and brown sugar, along with bacon and onions, for a dish that is full of flavor. Simple to prep and the cooking time is totally hands-off, allowing you to get on with the rest of the meal.
Made with just a few simple ingredients, these green beans are a versatile side dish that will sit well alongside all of your favorite dinners.
Be sure to try my Instant Pot Green Beans and Potatoes and Chicken and Green Bean Stir Fry too!
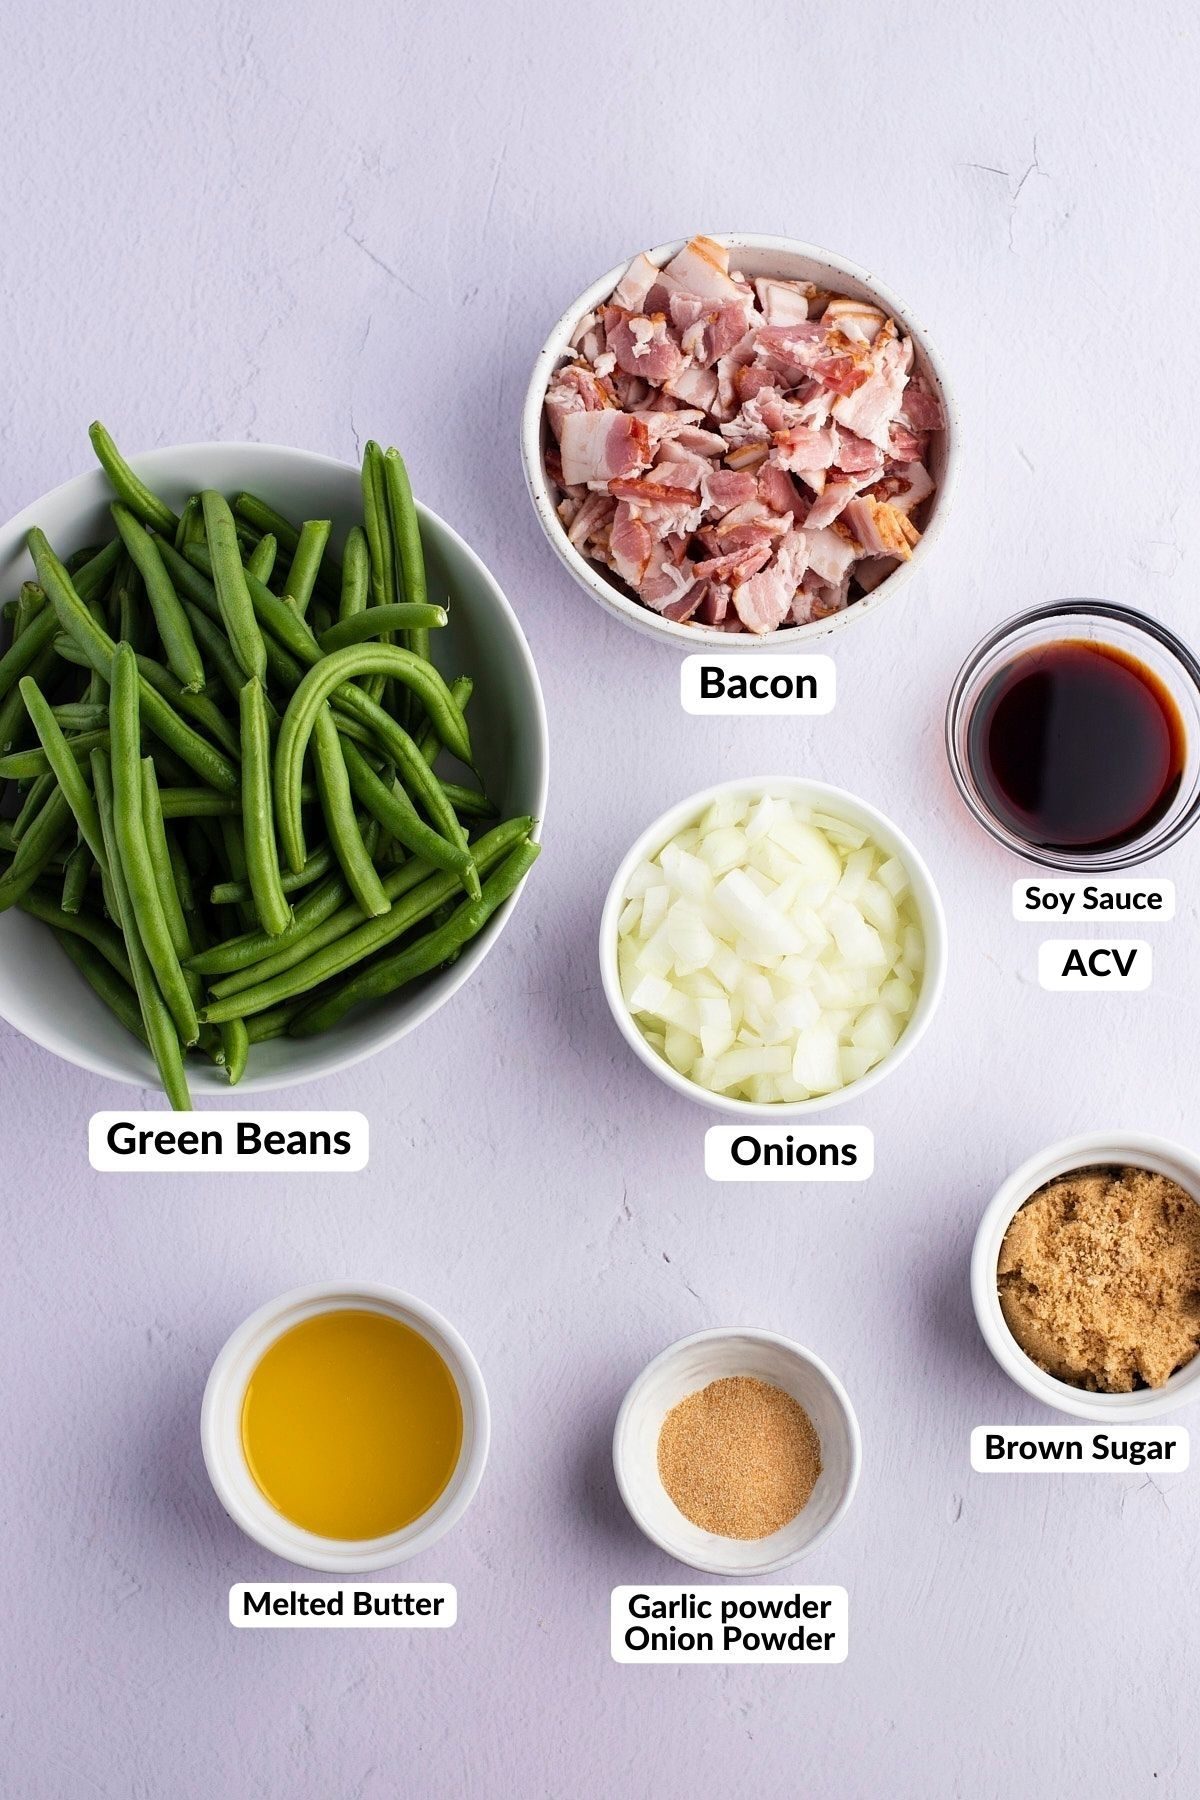
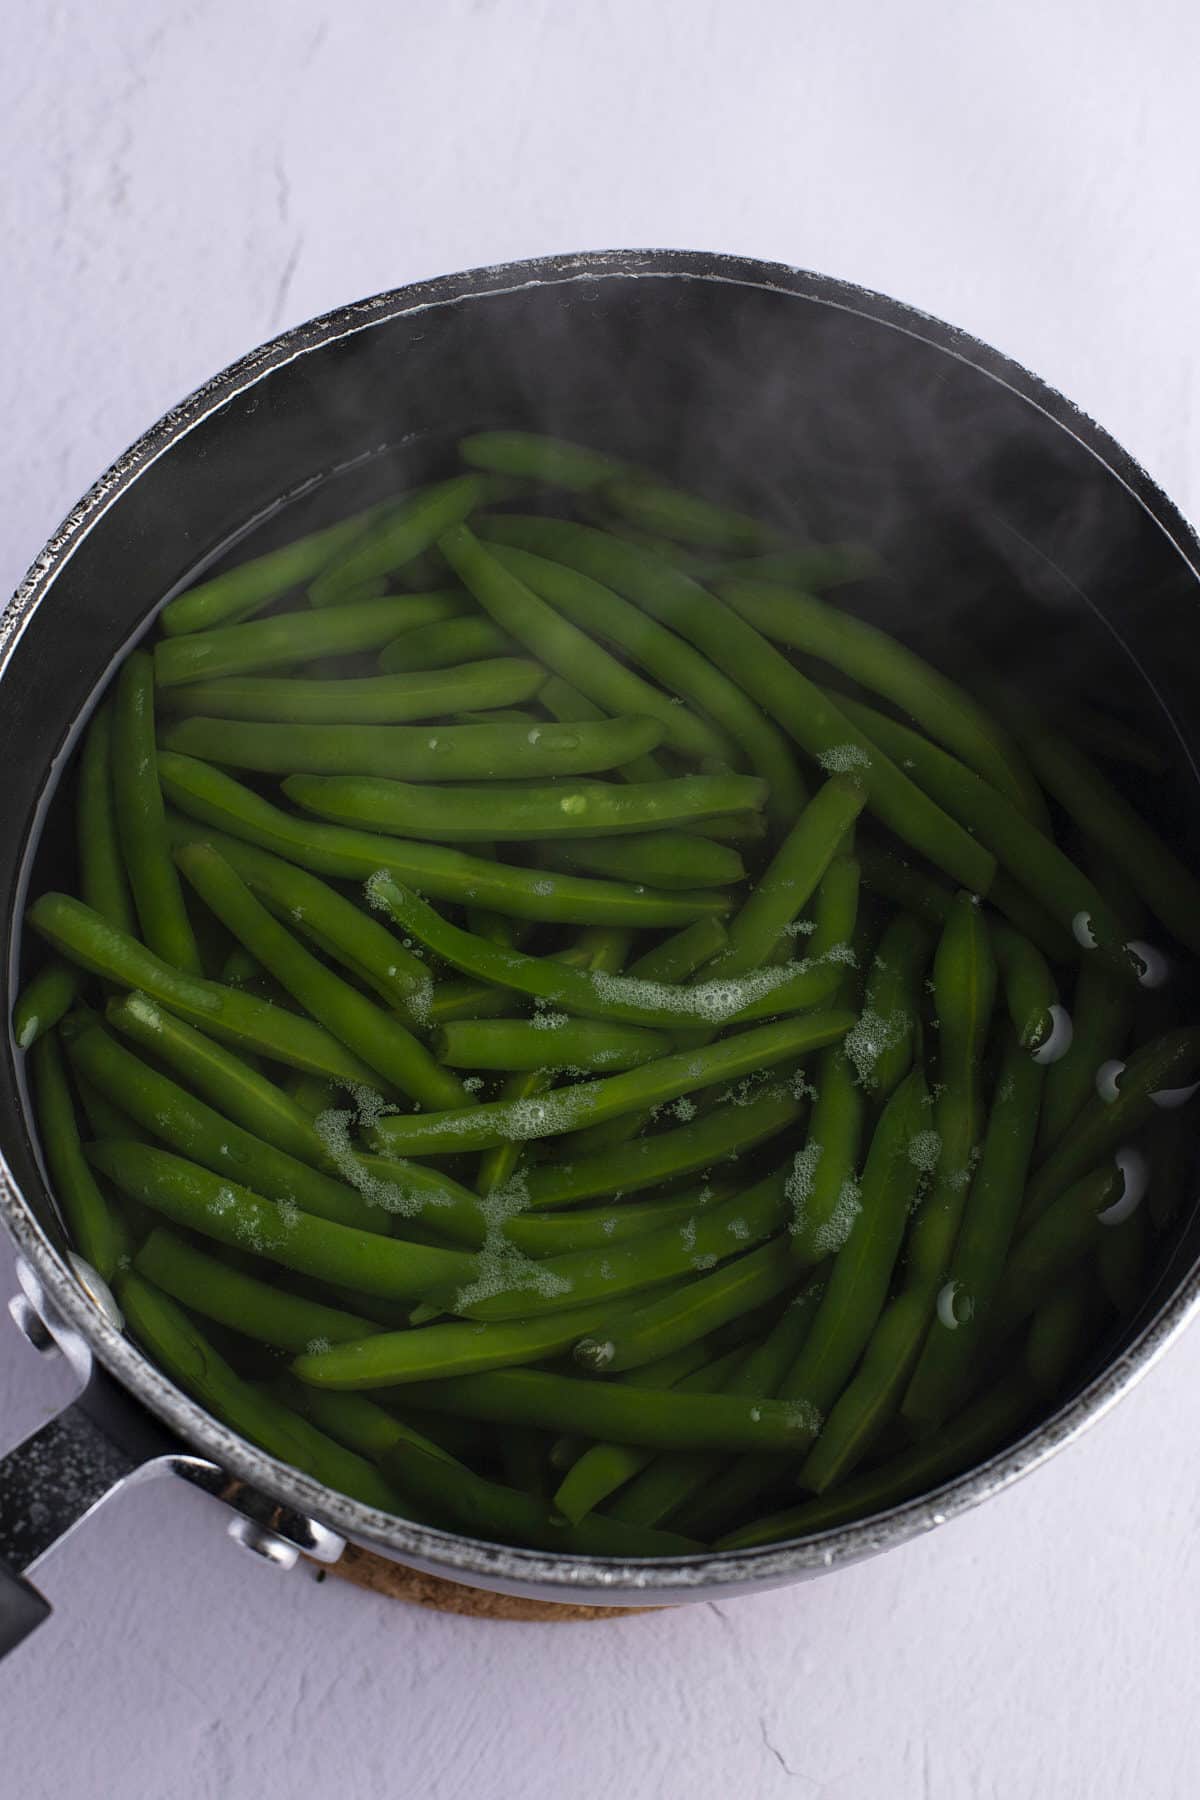
I prefer to use fresh green beans for this recipe, but you can easily adapt it to use frozen or canned too. If using frozen, simply boil them till tender and drain. Canned green beans don't need to be cooked before using, they can be added straight to the casserole dish after draining them.
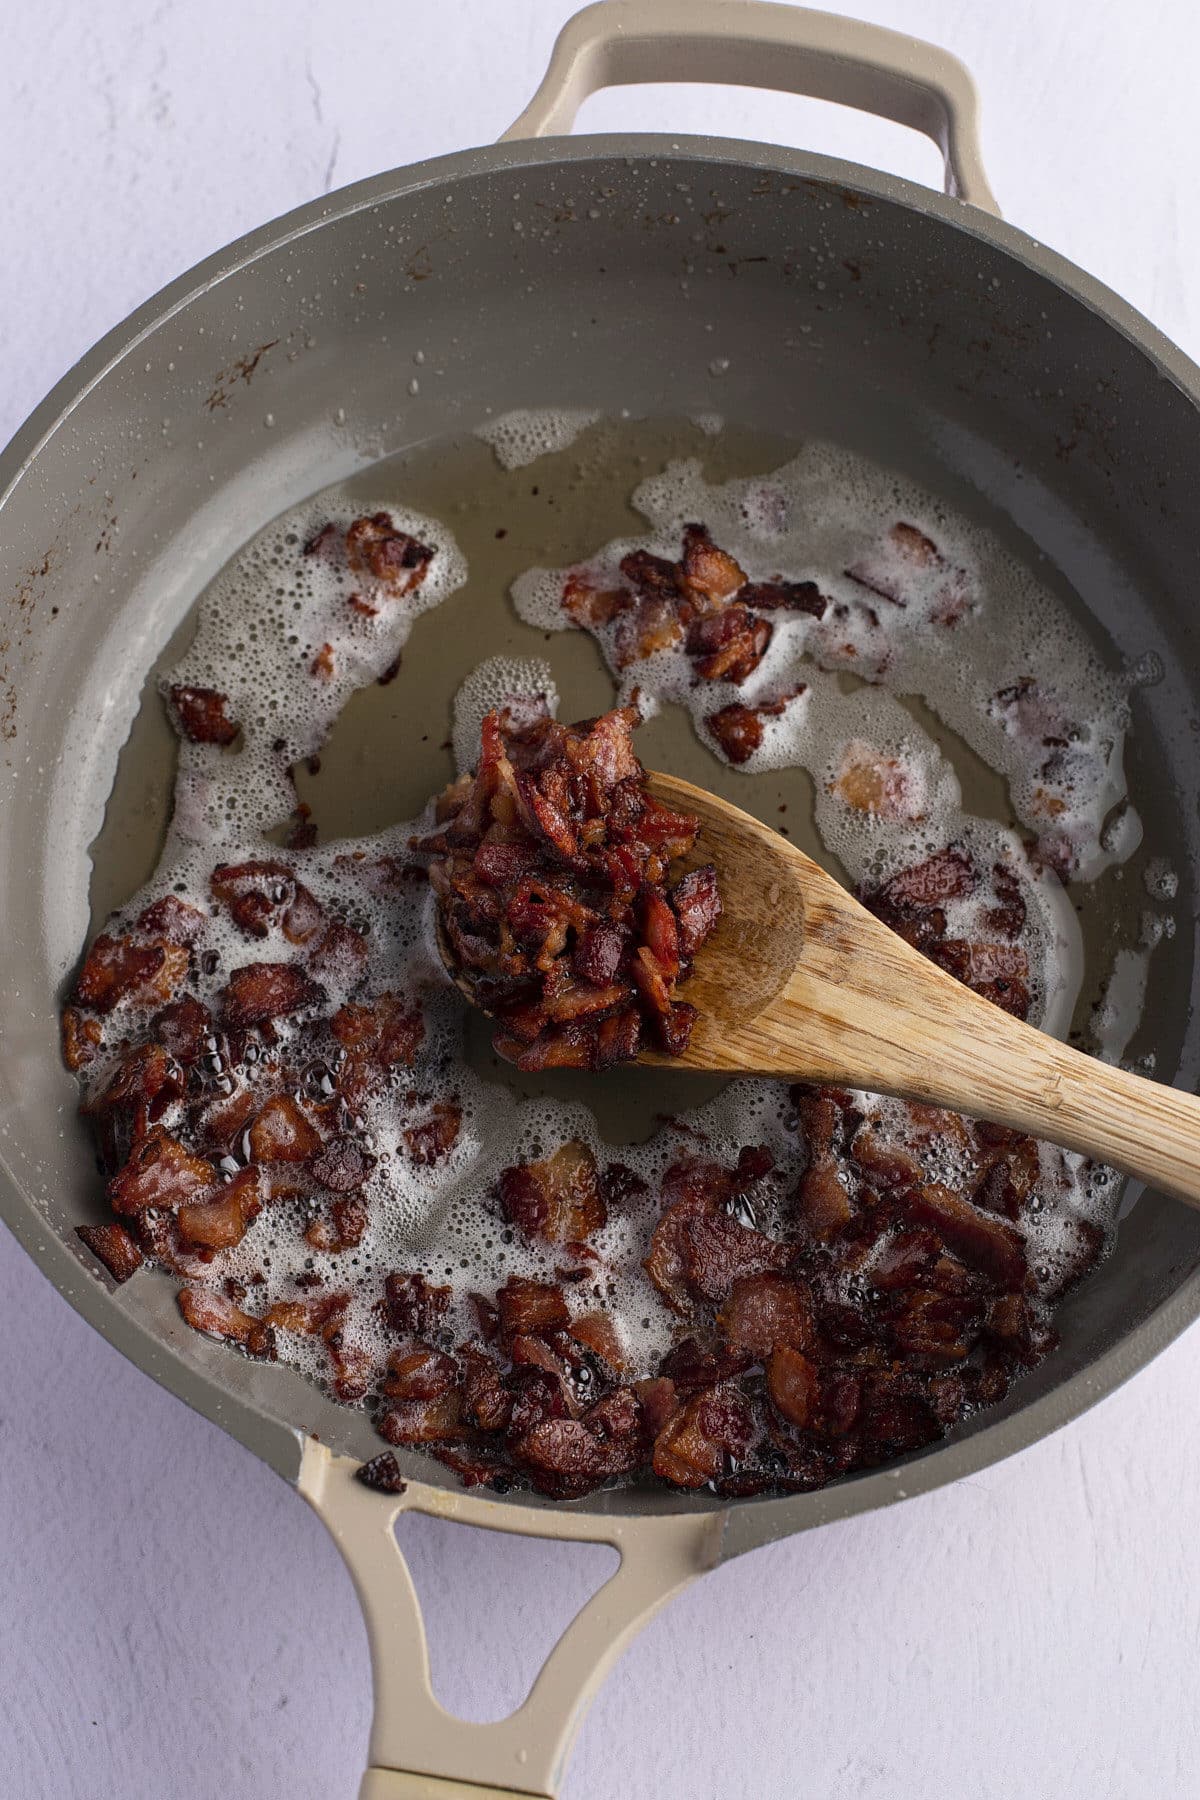
If you are planning to serve these smothered green beans as part of a big feast, like Easter or Thanksgiving, you can certainly get ahead on your prep. The bacon and onions can be cooked up a few days before and kept stored in the fridge, so you just need to build the casserole and bake it on the day.
Leftovers will keep well in the fridge for 2 to 3 days and can be reheated in the oven at 350 degrees Fahrenheit for 10 minutes to warm through to serve. Cover the baking dish with foil so that they don't dry out.
Because this green bean casserole recipe has a hands-off cooking time, you can easily serve them as part of a family weeknight meal. I love to serve them with roasted meats making them perfect for those special occasions. Try them with some of these favorites:
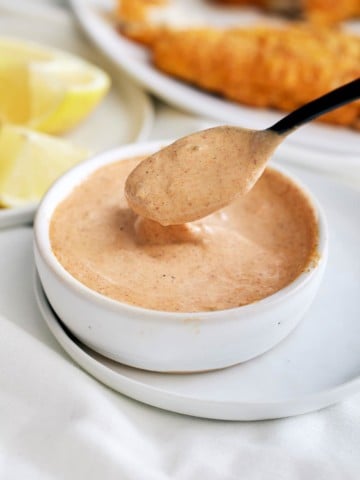
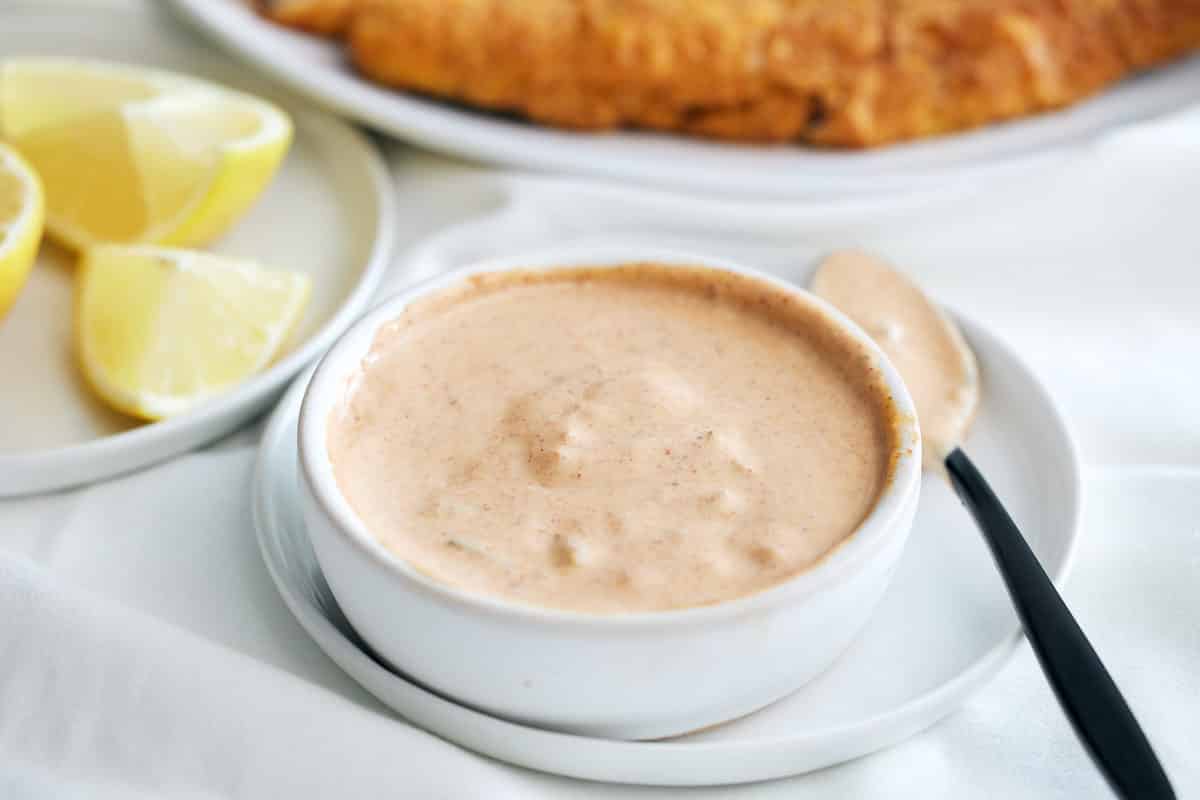
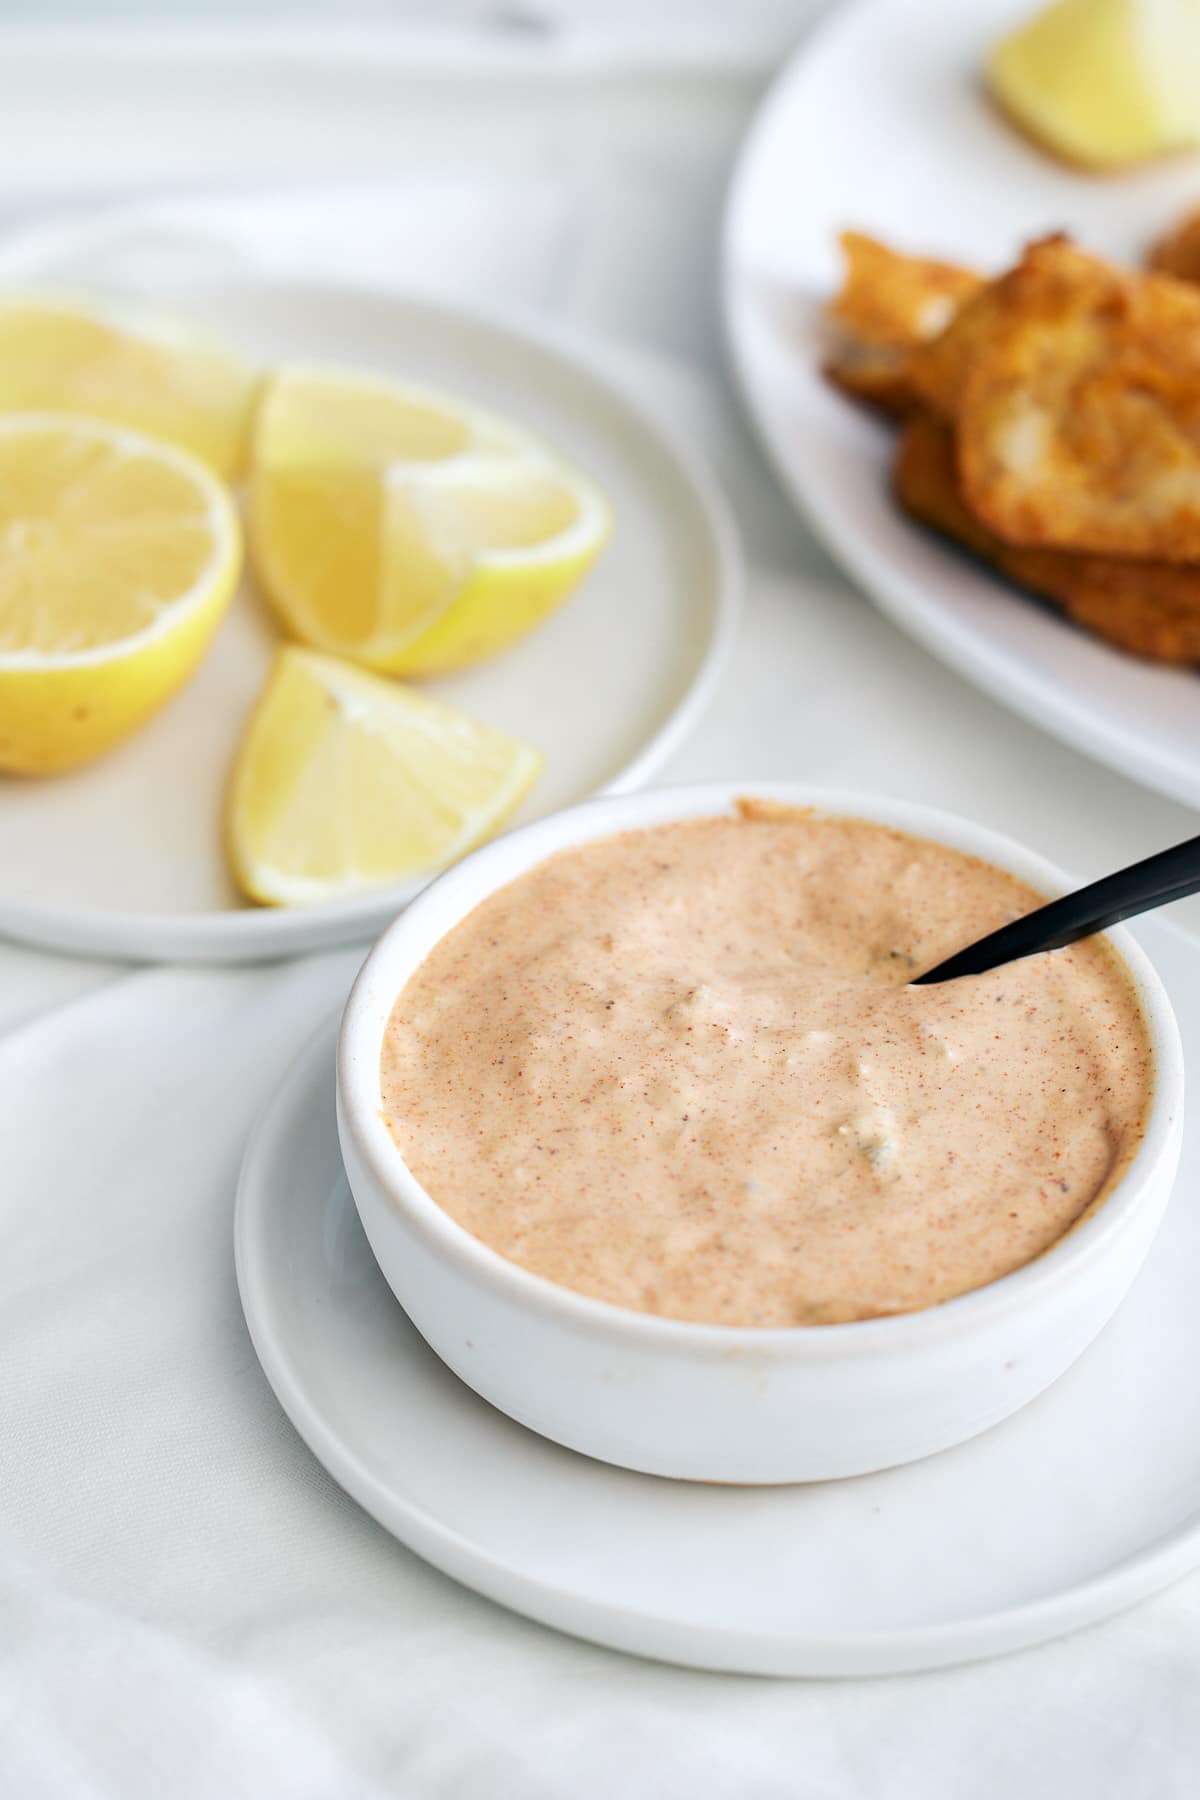
This homemade remoulade sauce recipe is so delicious, creamy, and flavorful and it’s the perfect addition to your favorite seafood, like crab cakes. Wonderfully tangy, it's made for dipping! Ready to use in minutes, this is sure to become a family favorite!
This post contains affiliate links, please read my full disclaimer here.
You’ll find the full recipe with ingredient amounts and instructions in the recipe card at the bottom of this post. Be sure to check out the blog post itself for extra tips and tricks!
Remoulade sauce, oh how I love thee! It’s a sauce that I would eat a lot of in restaurants, especially when I ordered crab cakes. Thing is, now that I make crab cakes at home, I found that I needed to learn how to make the sauce at home or find one that I loved in the stores.
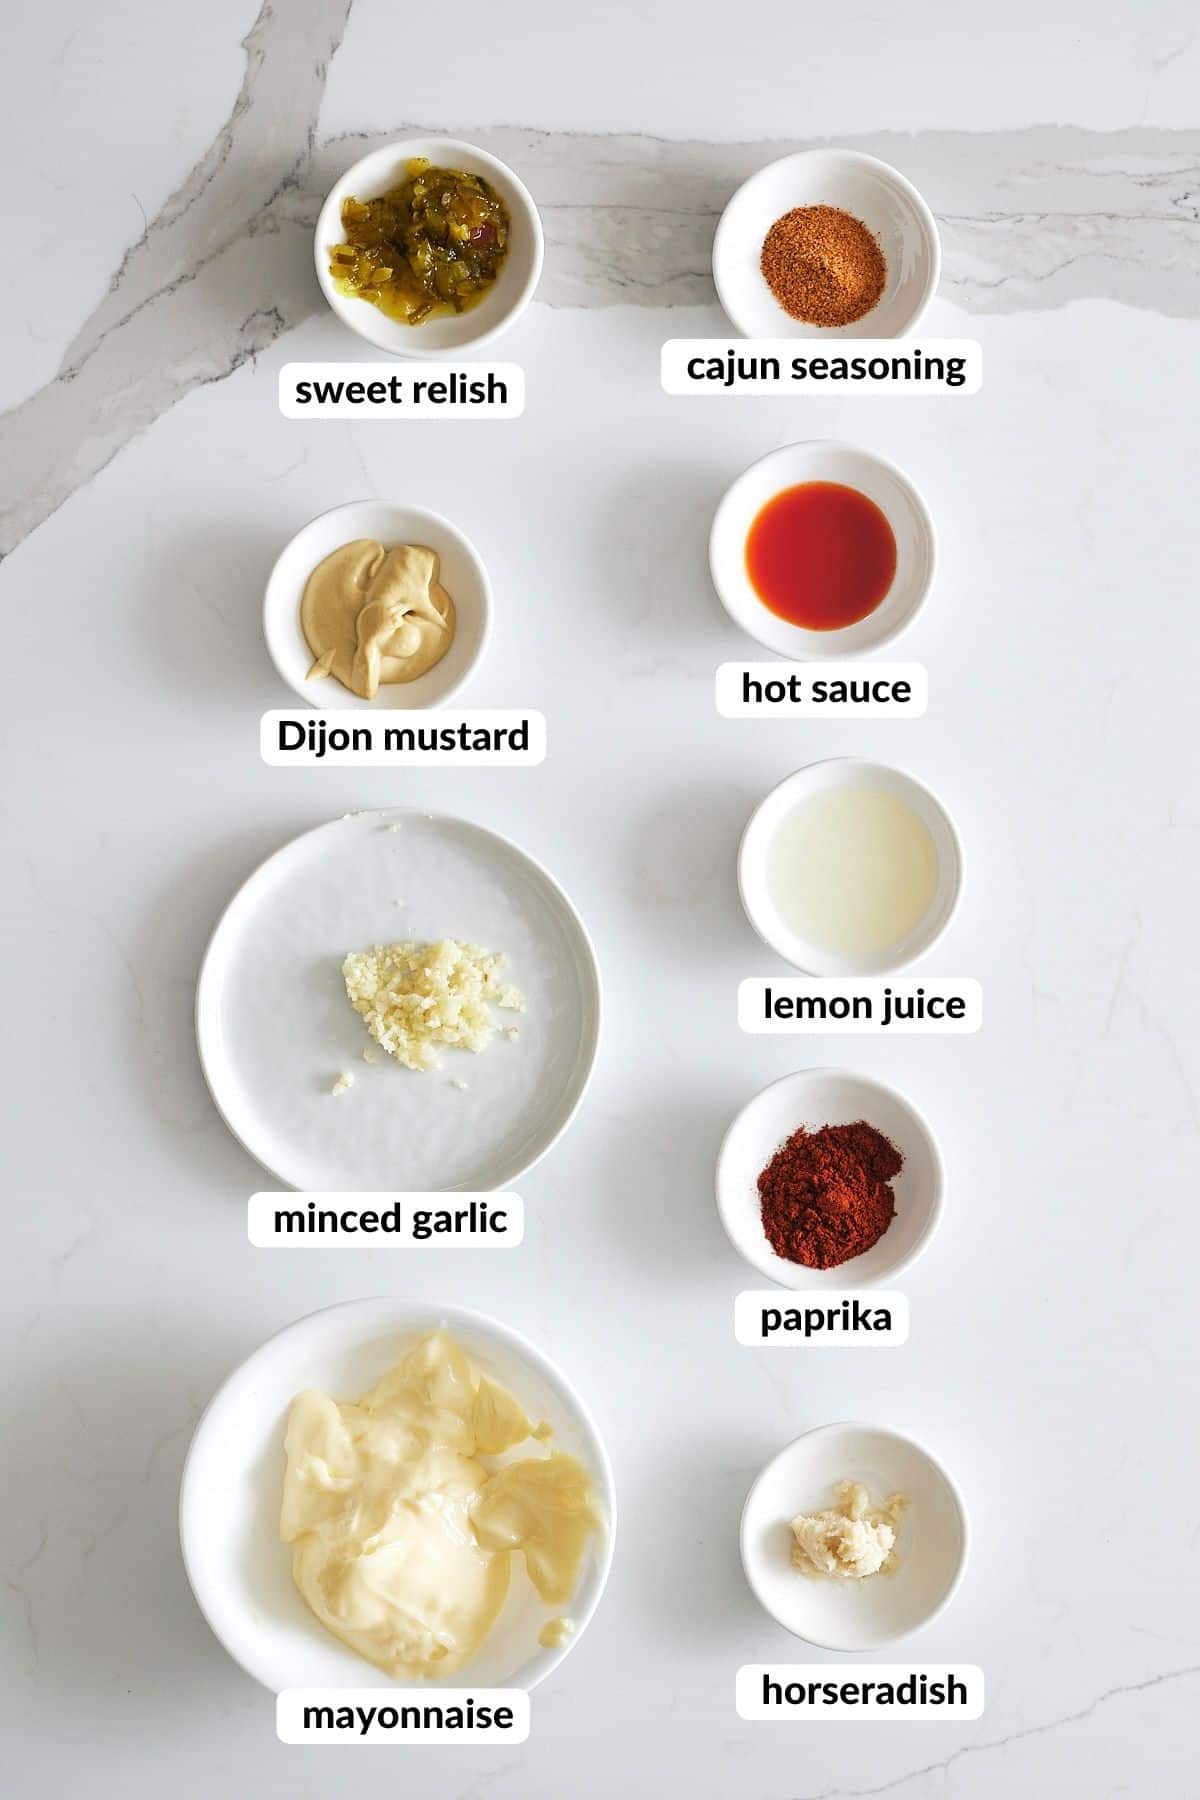
This remoulade sauce is the Louisiana-style remoulade, made with a creamy mayonnaise base with additional flavorings of sweet relish, paprika, creole seasoning, and horseradish.
It’s a sauce loved by Southerns and generally served alongside seafood dishes as well as fried dishes. I typically find it paired along with my favorite appetizers when we go out to eat.
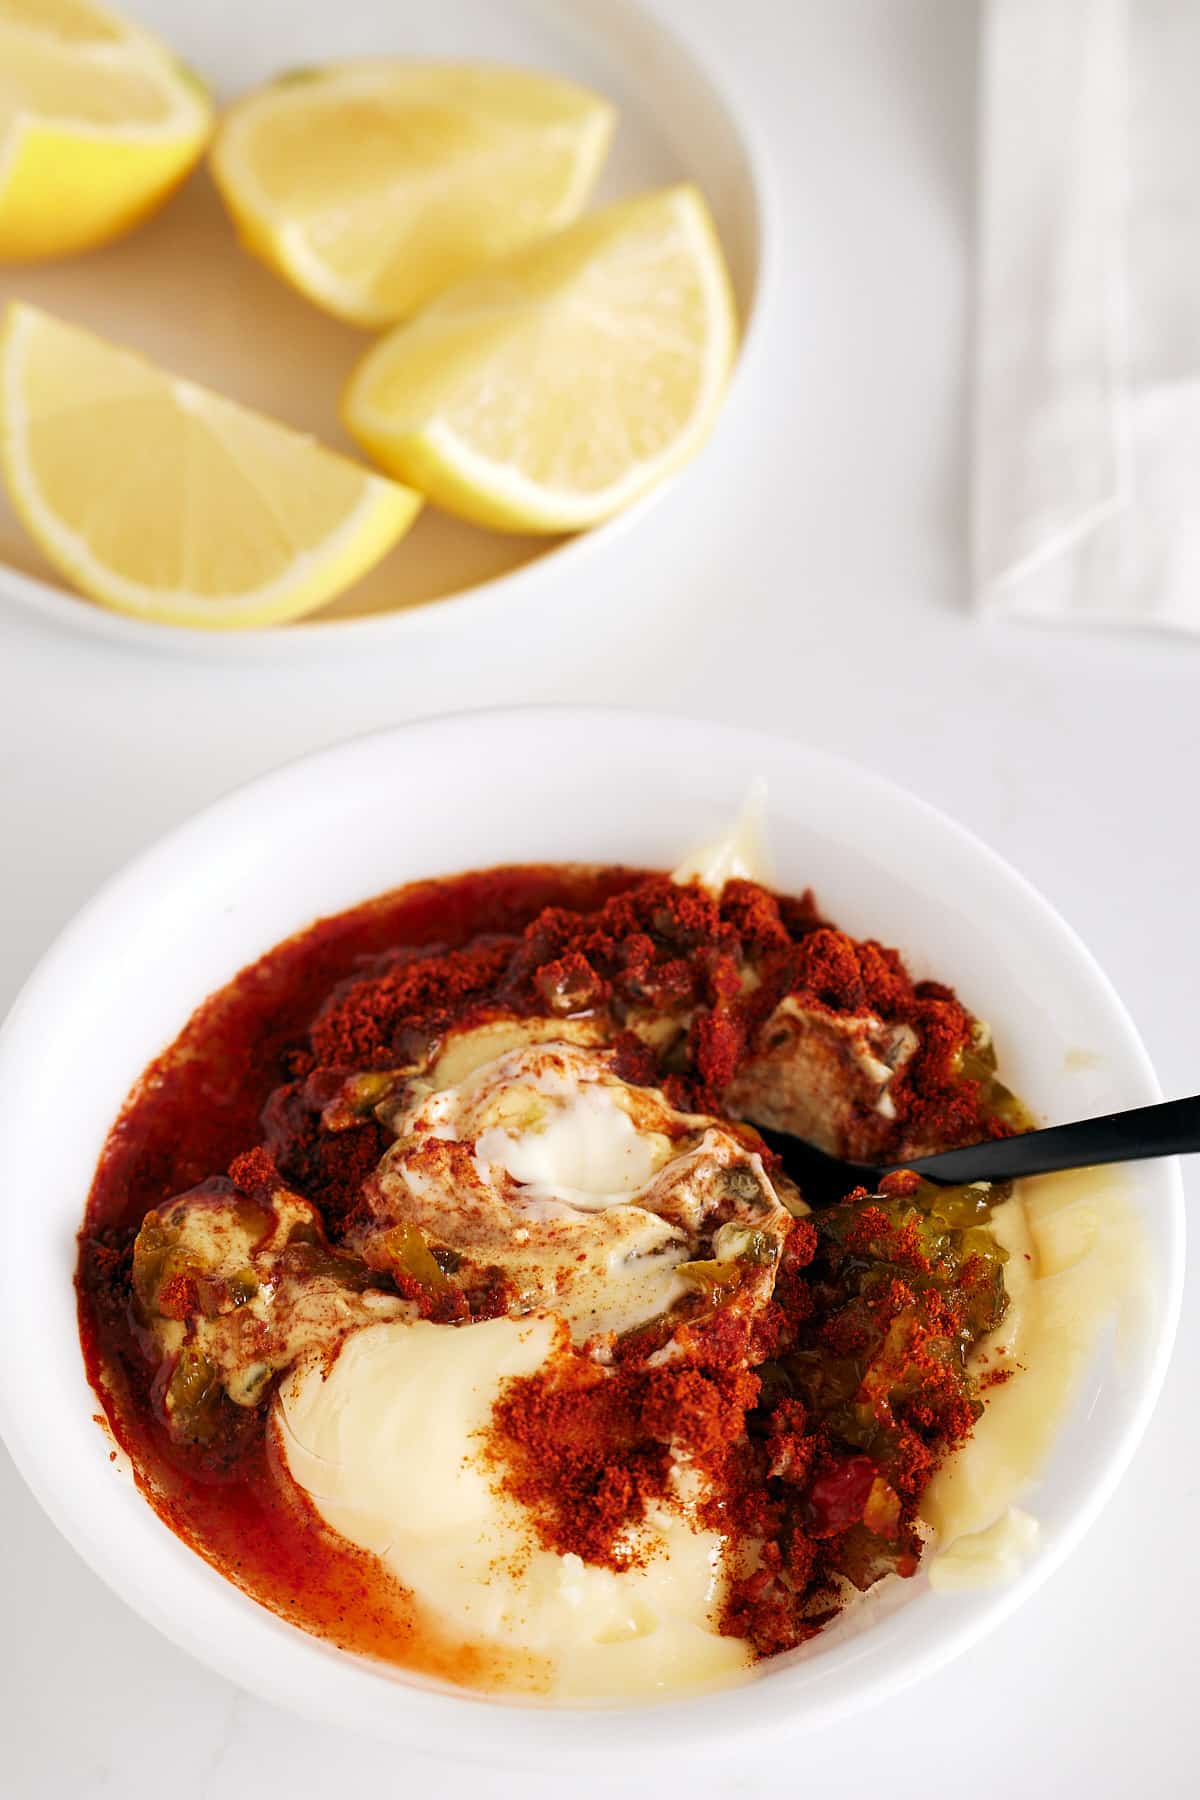
I’m a huge fan of homemade sauces and played around with ingredients until I found a remoulade I fell in love with. The flavor combination is complex, in a good way, resulting in a tangy and bright creamy sauce.
Be sure to try my Vinegar BBQ Sauce and Chimichurri Sauce too!
Once you have made up your remoulade sauce, you can use it straight away, or transfer it to a sealable glass jar or bottle and it will keep well for up to a week. Because it's made with mayonnaise it's not freezable and it's best not to leave it out at room temperature for more than a couple of hours.
This sauce is full of amazing flavors, but I prefer to not make it spicy so that it's more family friendly. If you prefer a bit more of a kick with your sauce you can easily amp it up my mixing in some cayenne pepper or chili flakes to suit your tastes.
When it comes to mayonnaise based dips, I much prefer the texture and flavor of full fat, but you can use a reduced fat one if you prefer. To reduce calories and fat, you could also swap some of the mayo for Greek yogurt so that you don't loose that creaminess.
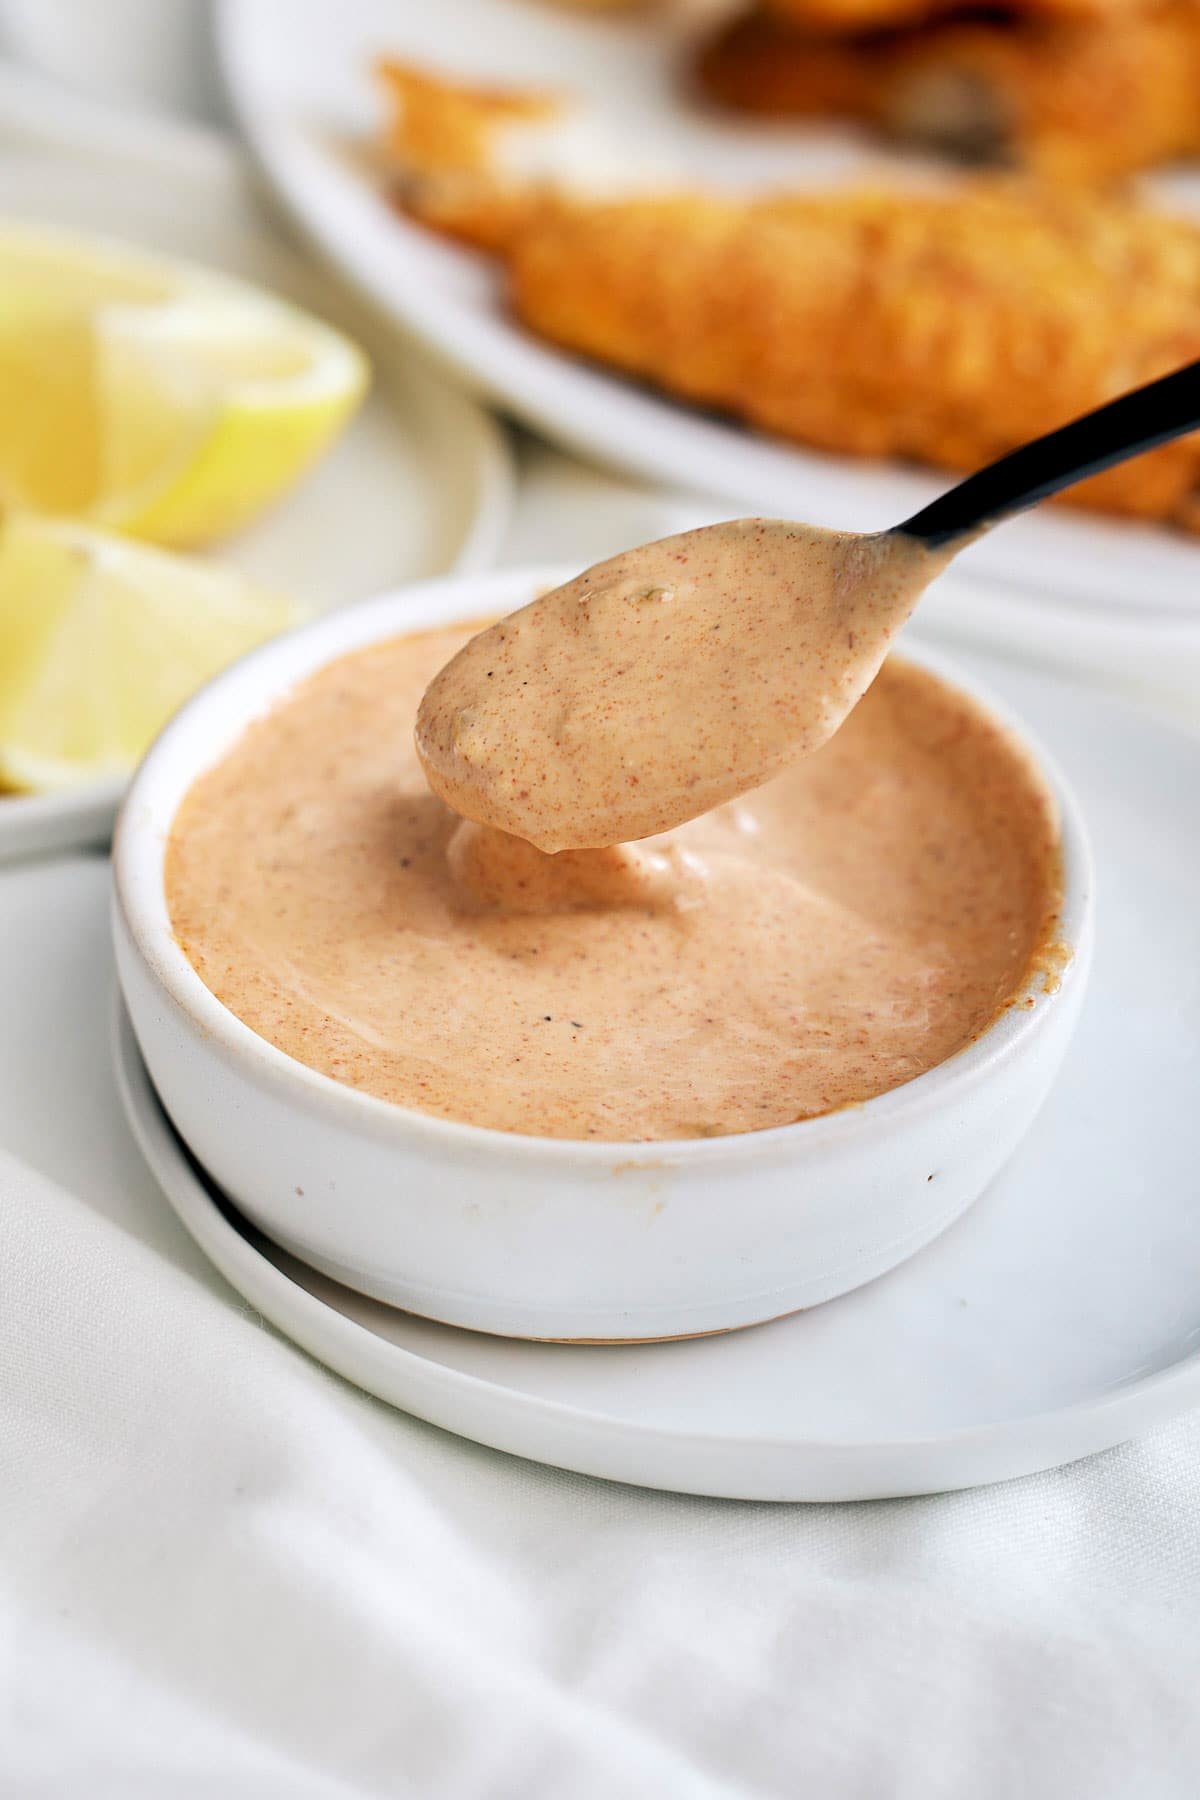
This homemade remoulade sauce is made for dipping, drizzling, and sharing! It's great with seafood and fried foods and it's a definite must-have for your next game day!
Hope you enjoy this remoulade sauce as much as we do!
This post was updated on 4/13/2022 with additional photos and helpful information.
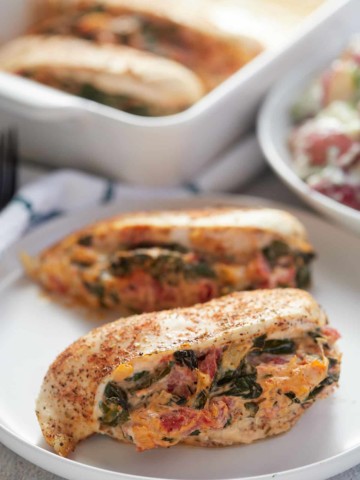
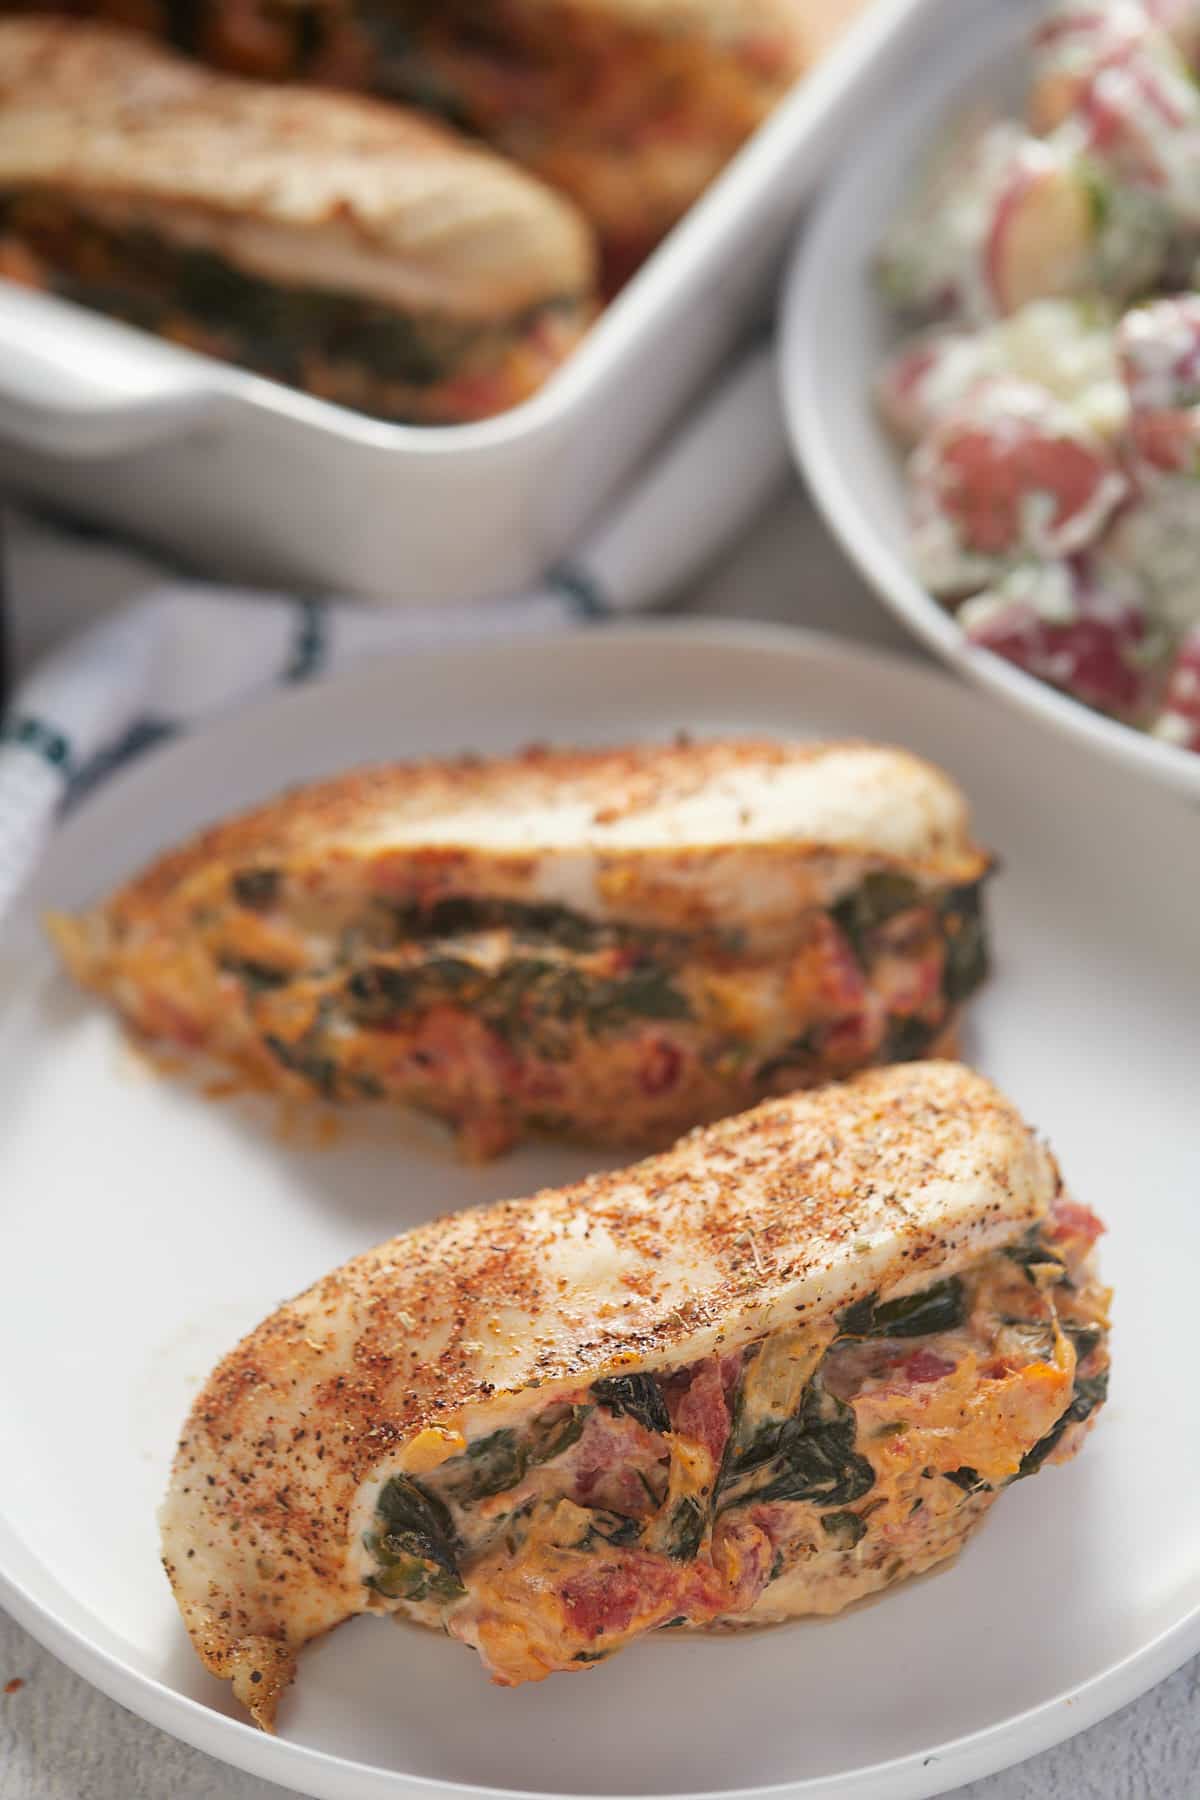
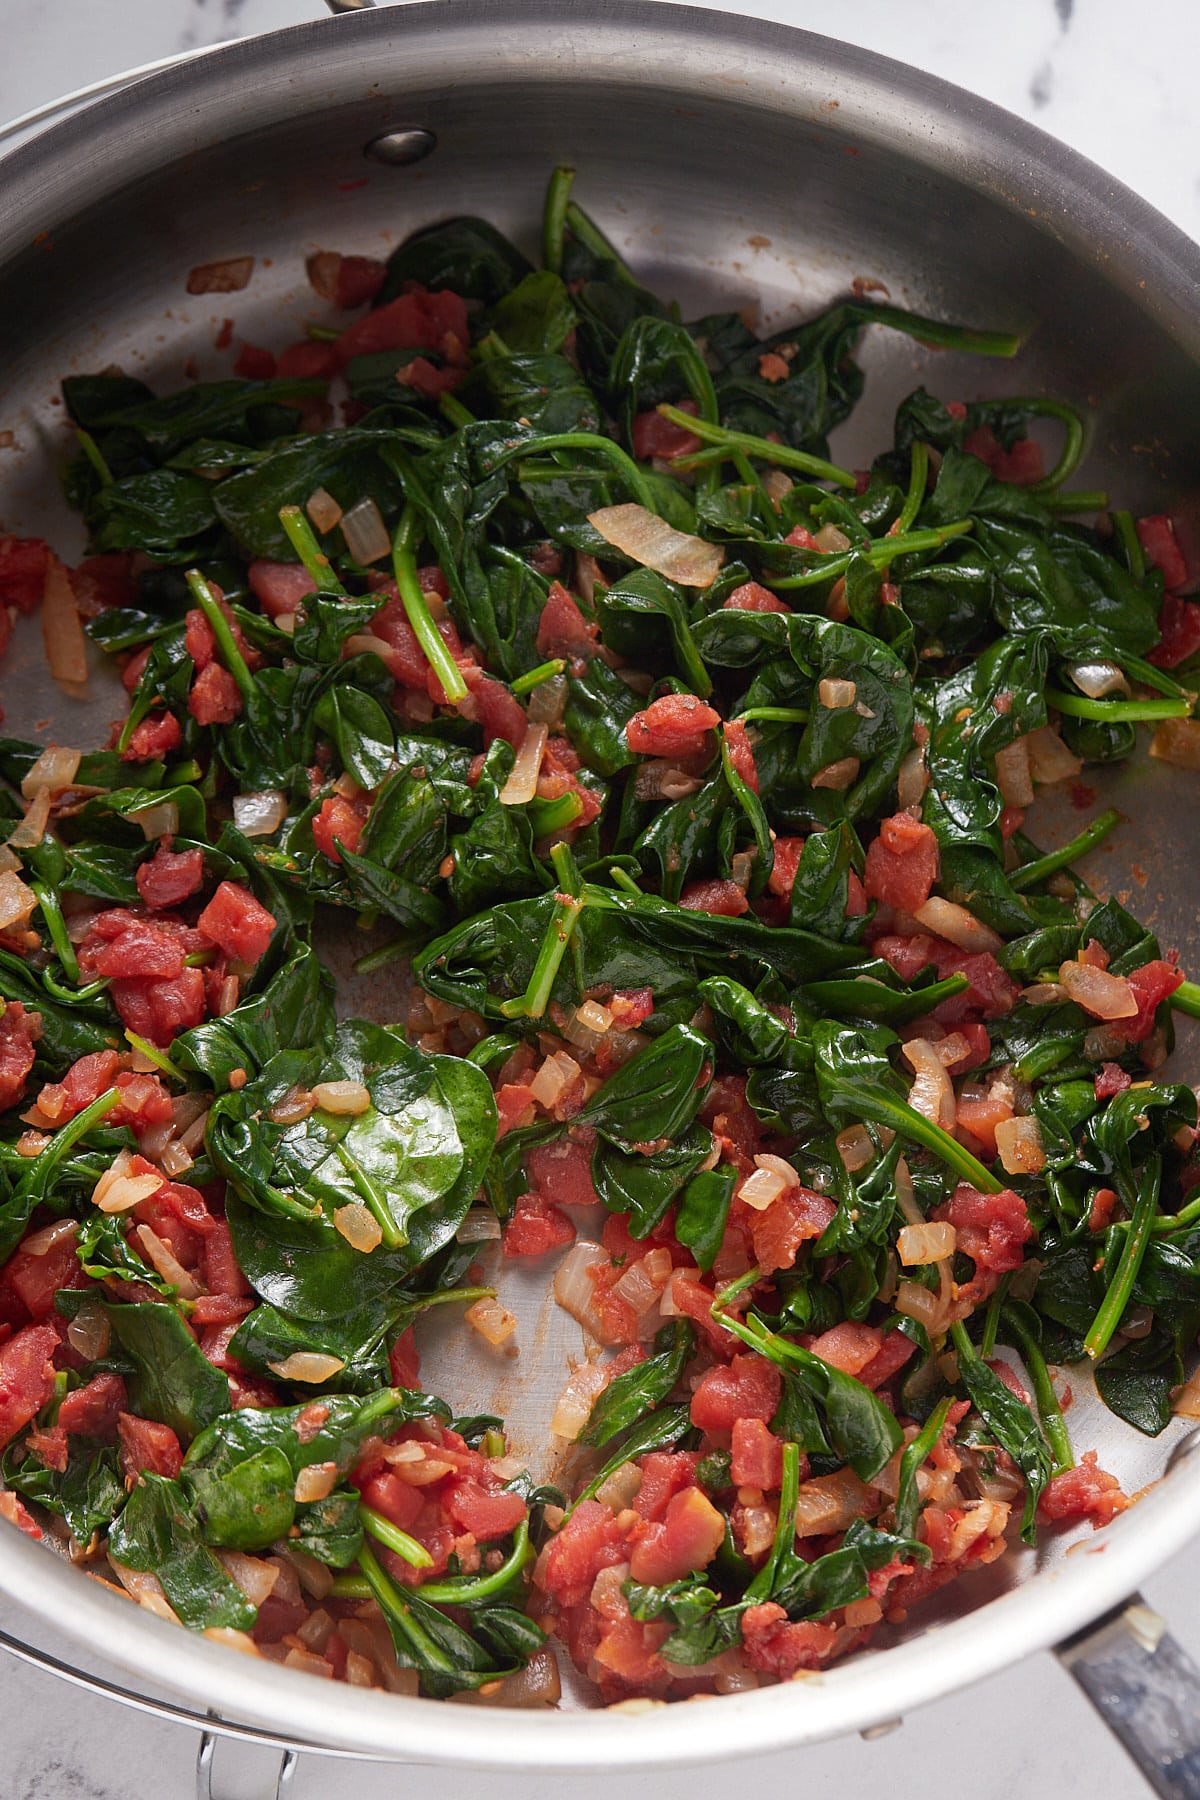
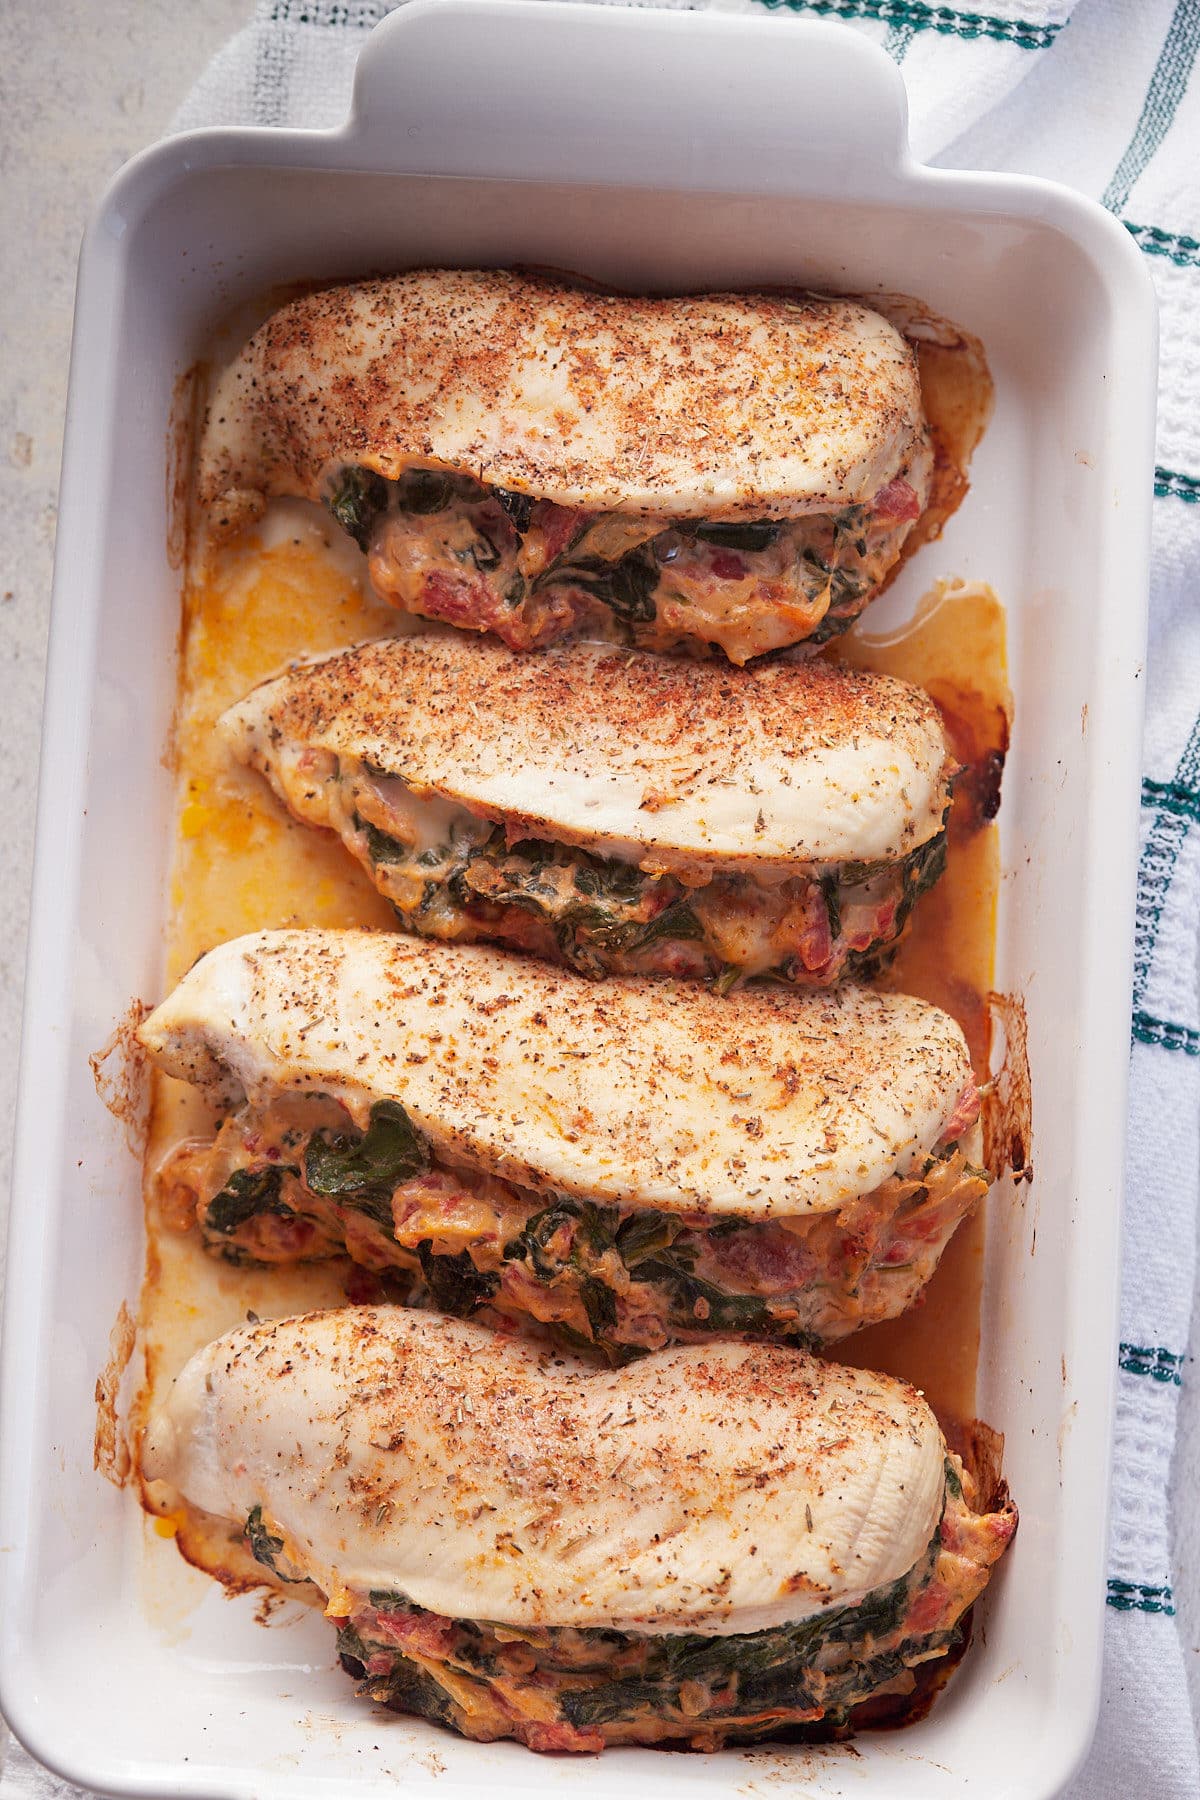
Mix up your weeknight dinners with these delicious spinach stuffed chicken breasts. Ready to enjoy in 30 minutes, they are stuffed with spinach, tomatoes, green chilies and cream cheese for one flavorful bite. Perfect for the whole family, and fancy enough to serve to company!
This post contains affiliate links, please read my full disclaimer here.
You’ll find the full recipe with ingredient amounts and instructions in the recipe card at the bottom of this post. Be sure to check out the blog post itself for extra tips and tricks!
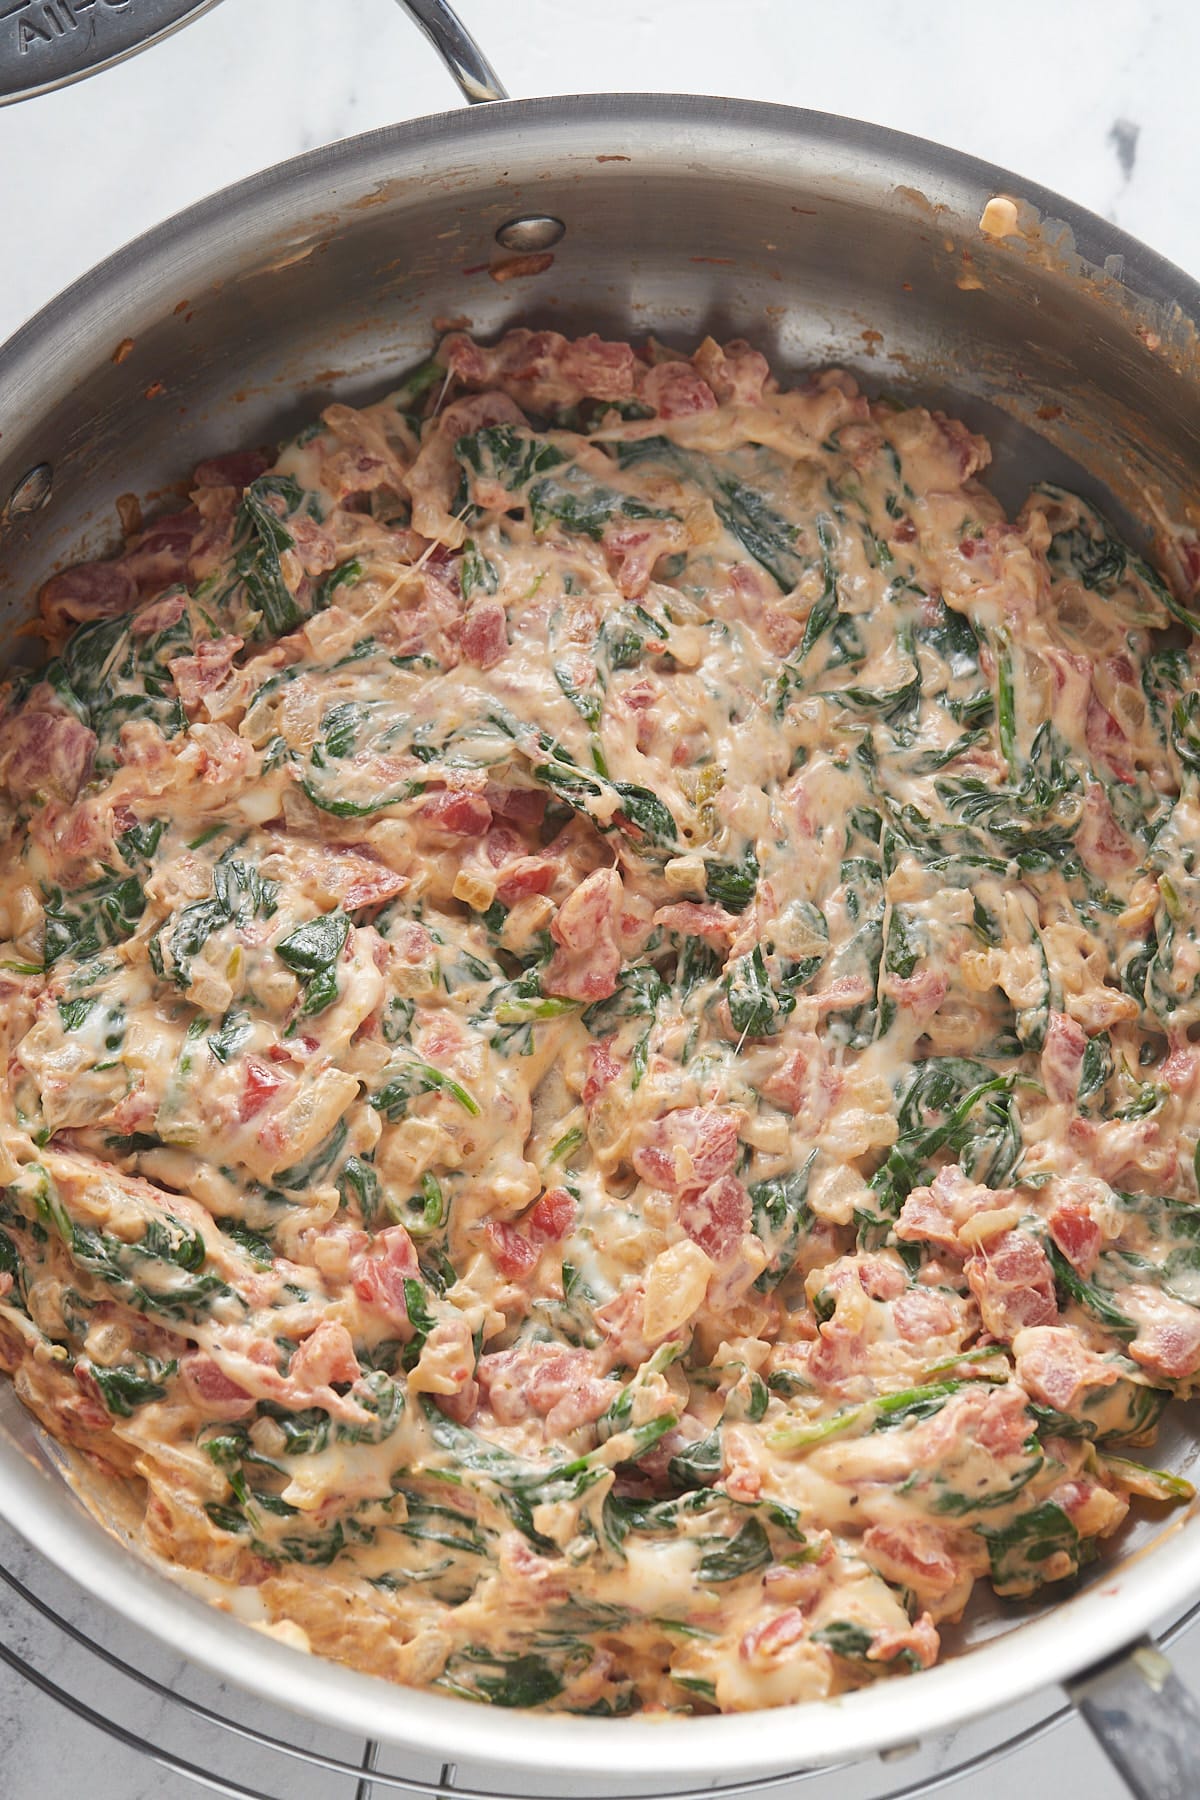
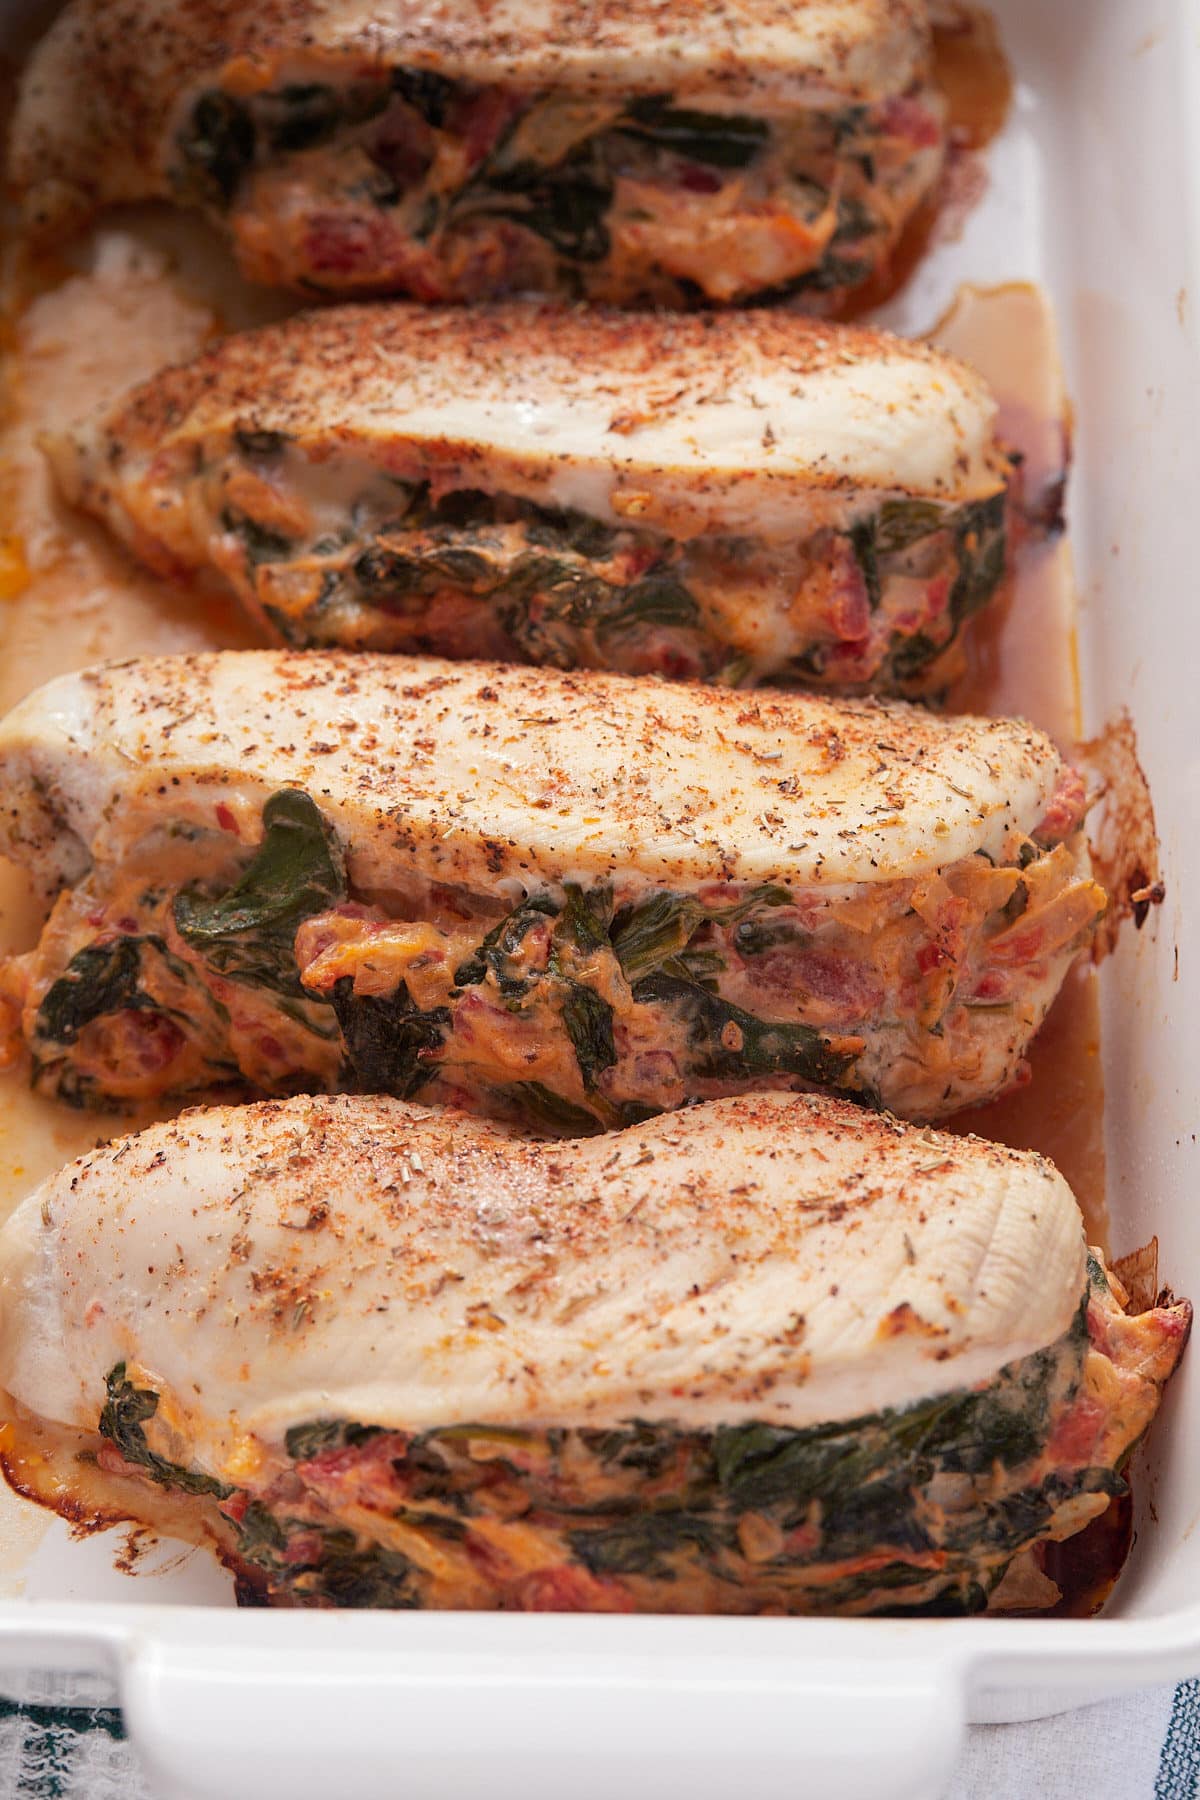
Chicken breasts are a staple in our house, and this recipe is an easy way to fancy them up! Stuffed with spinach, tomatoes and cream cheese, they are easy to make and so tasty!
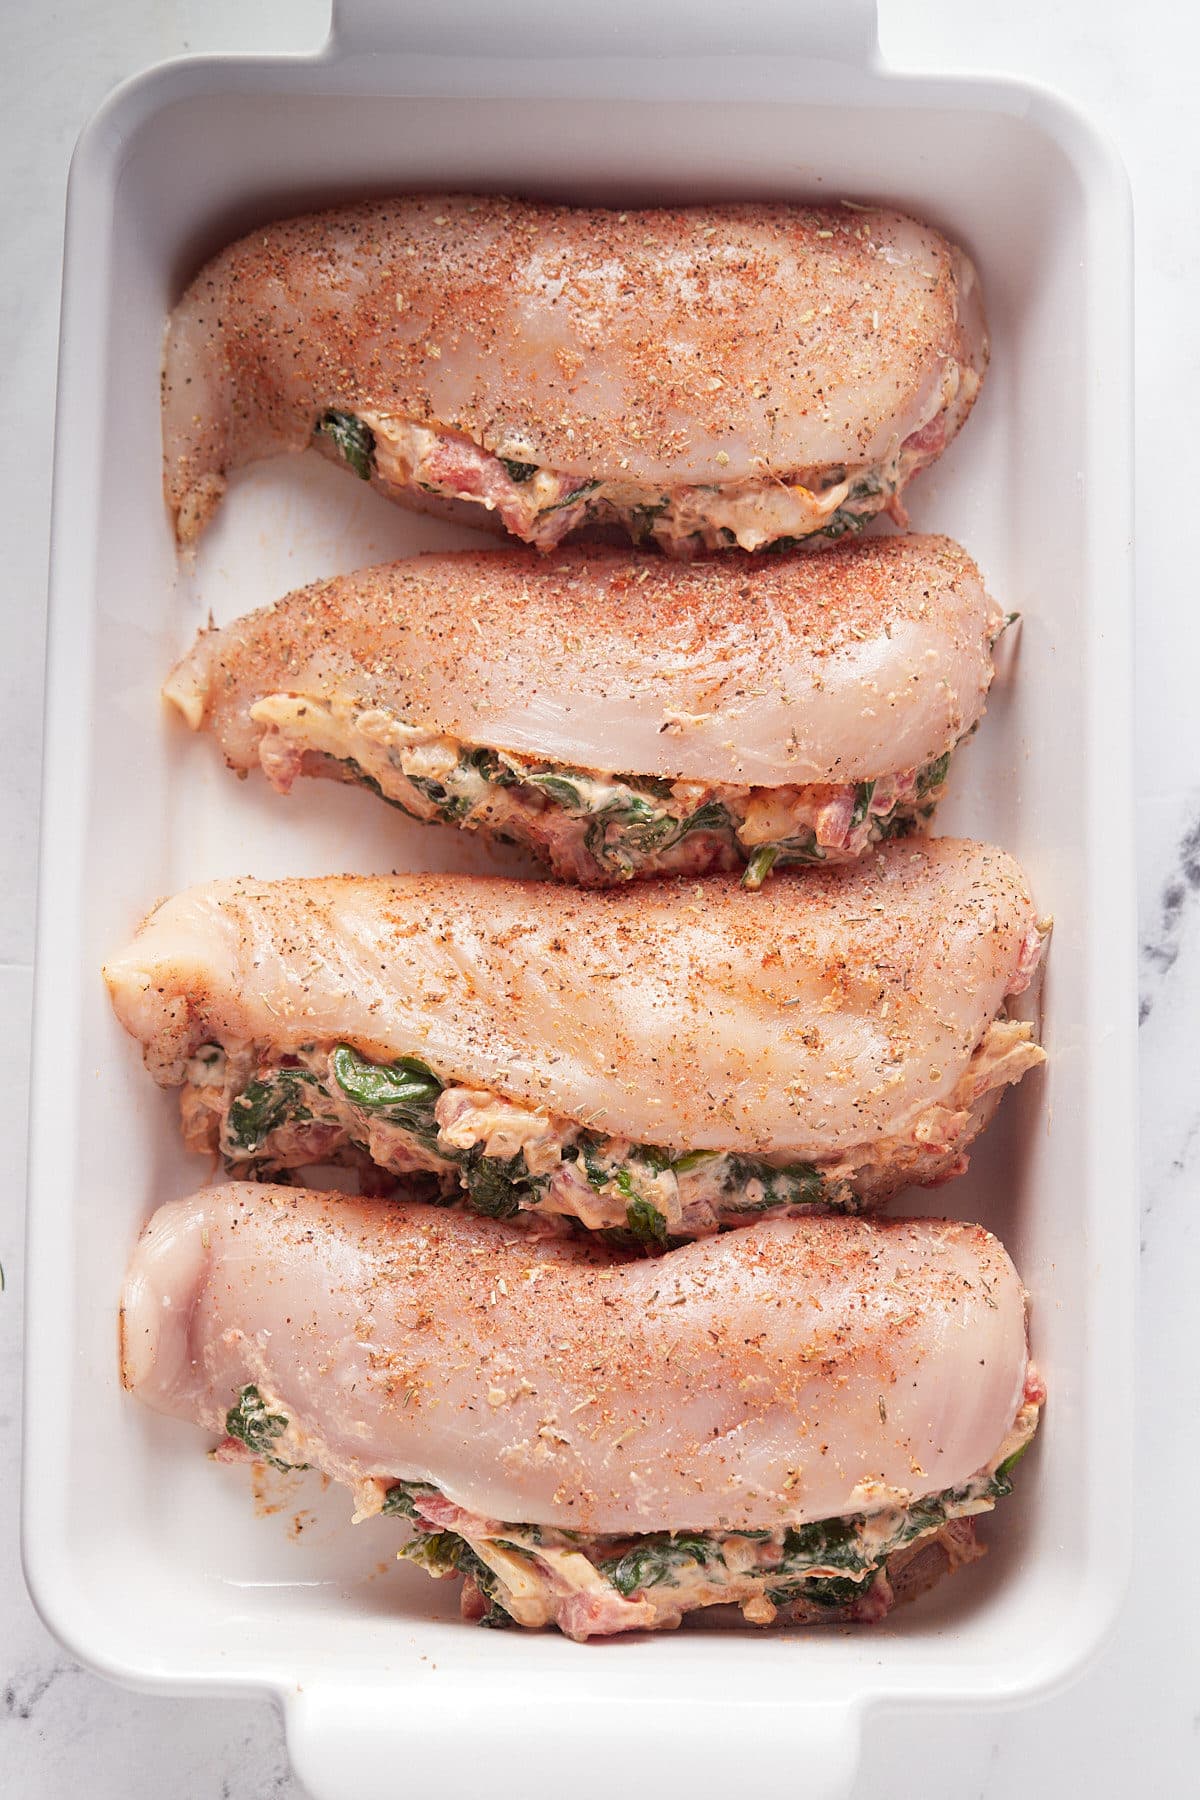
Perfectly seasoned and baked in the oven, they are ready to serve in half an hour, making them a great go to for an easy family weeknight meal, but they are easily tasty enough to serve to guests.
These spinach stuffed chicken breasts are also a great healthy choice. High in protein and low in saturated fat, carbs and calories, they are a great addition to a well balanced lifestyle. I know that you are going to love them as much as my family does!
Be sure to try my Creamy Champagne Chicken and Easy Chicken Chili too!
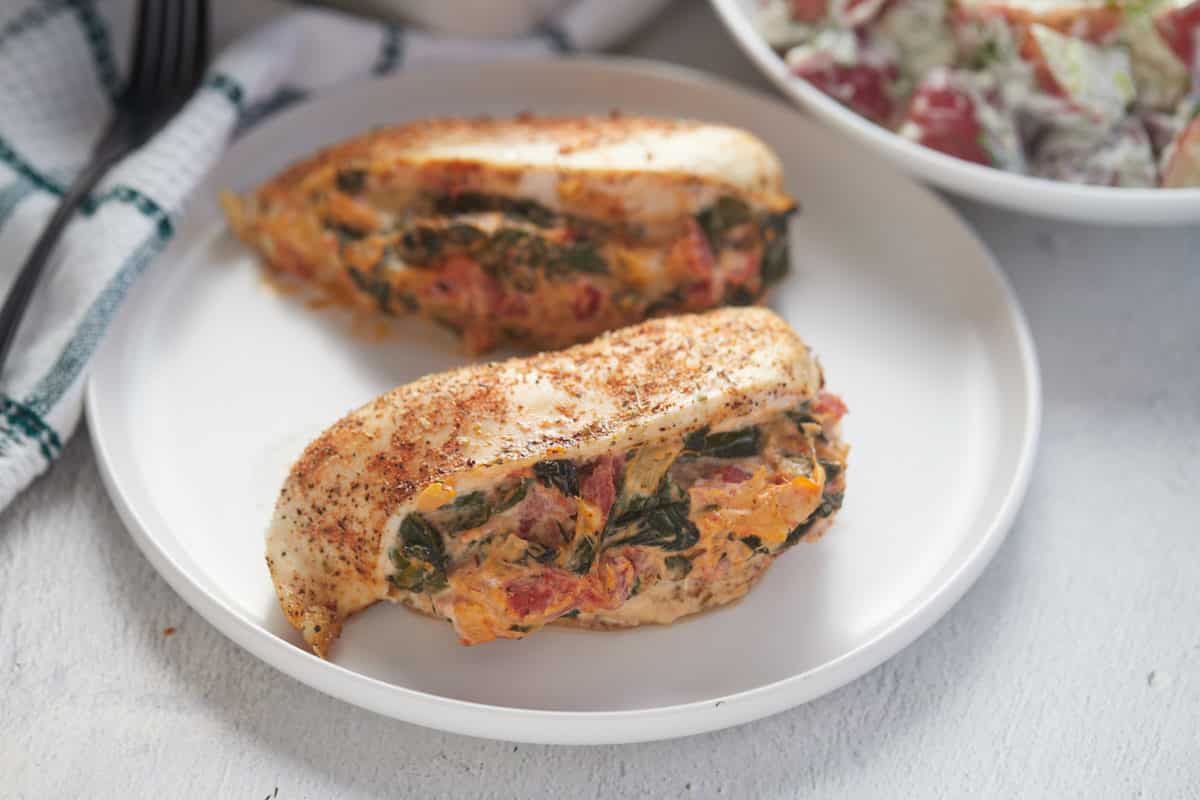

These spinach stuffed chicken breasts are best enjoyed as soon as they are baked so that they are nice and juicy, but leftovers will keep well in the fridge for 3 to 4 days and can be reheated in the oven at 360F for 10 to 15 minutes to serve.
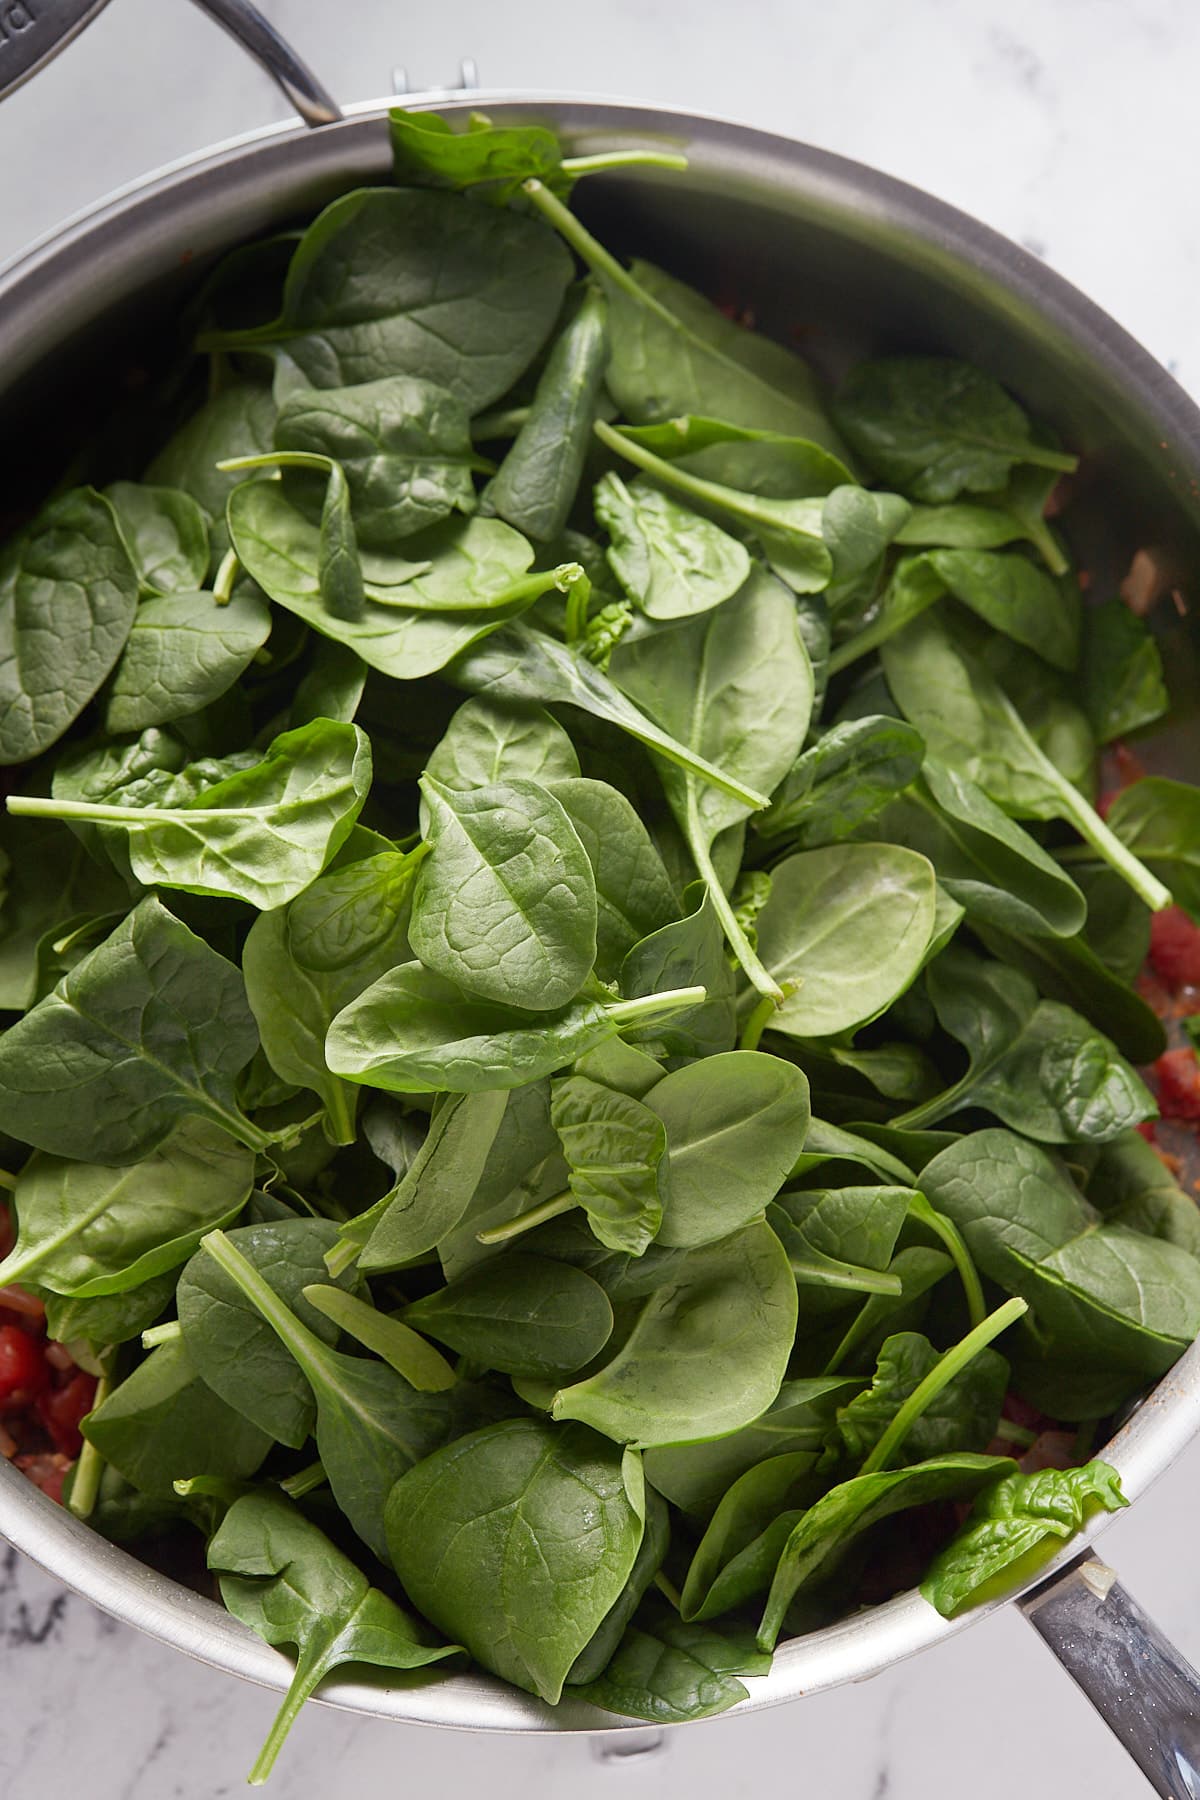
You can make the spinach and cream cheese filling a day or two before you want to make these and keep covered in the fridge. The chicken breasts can be stuffed a little ahead of time and be stored covered in the fridge.
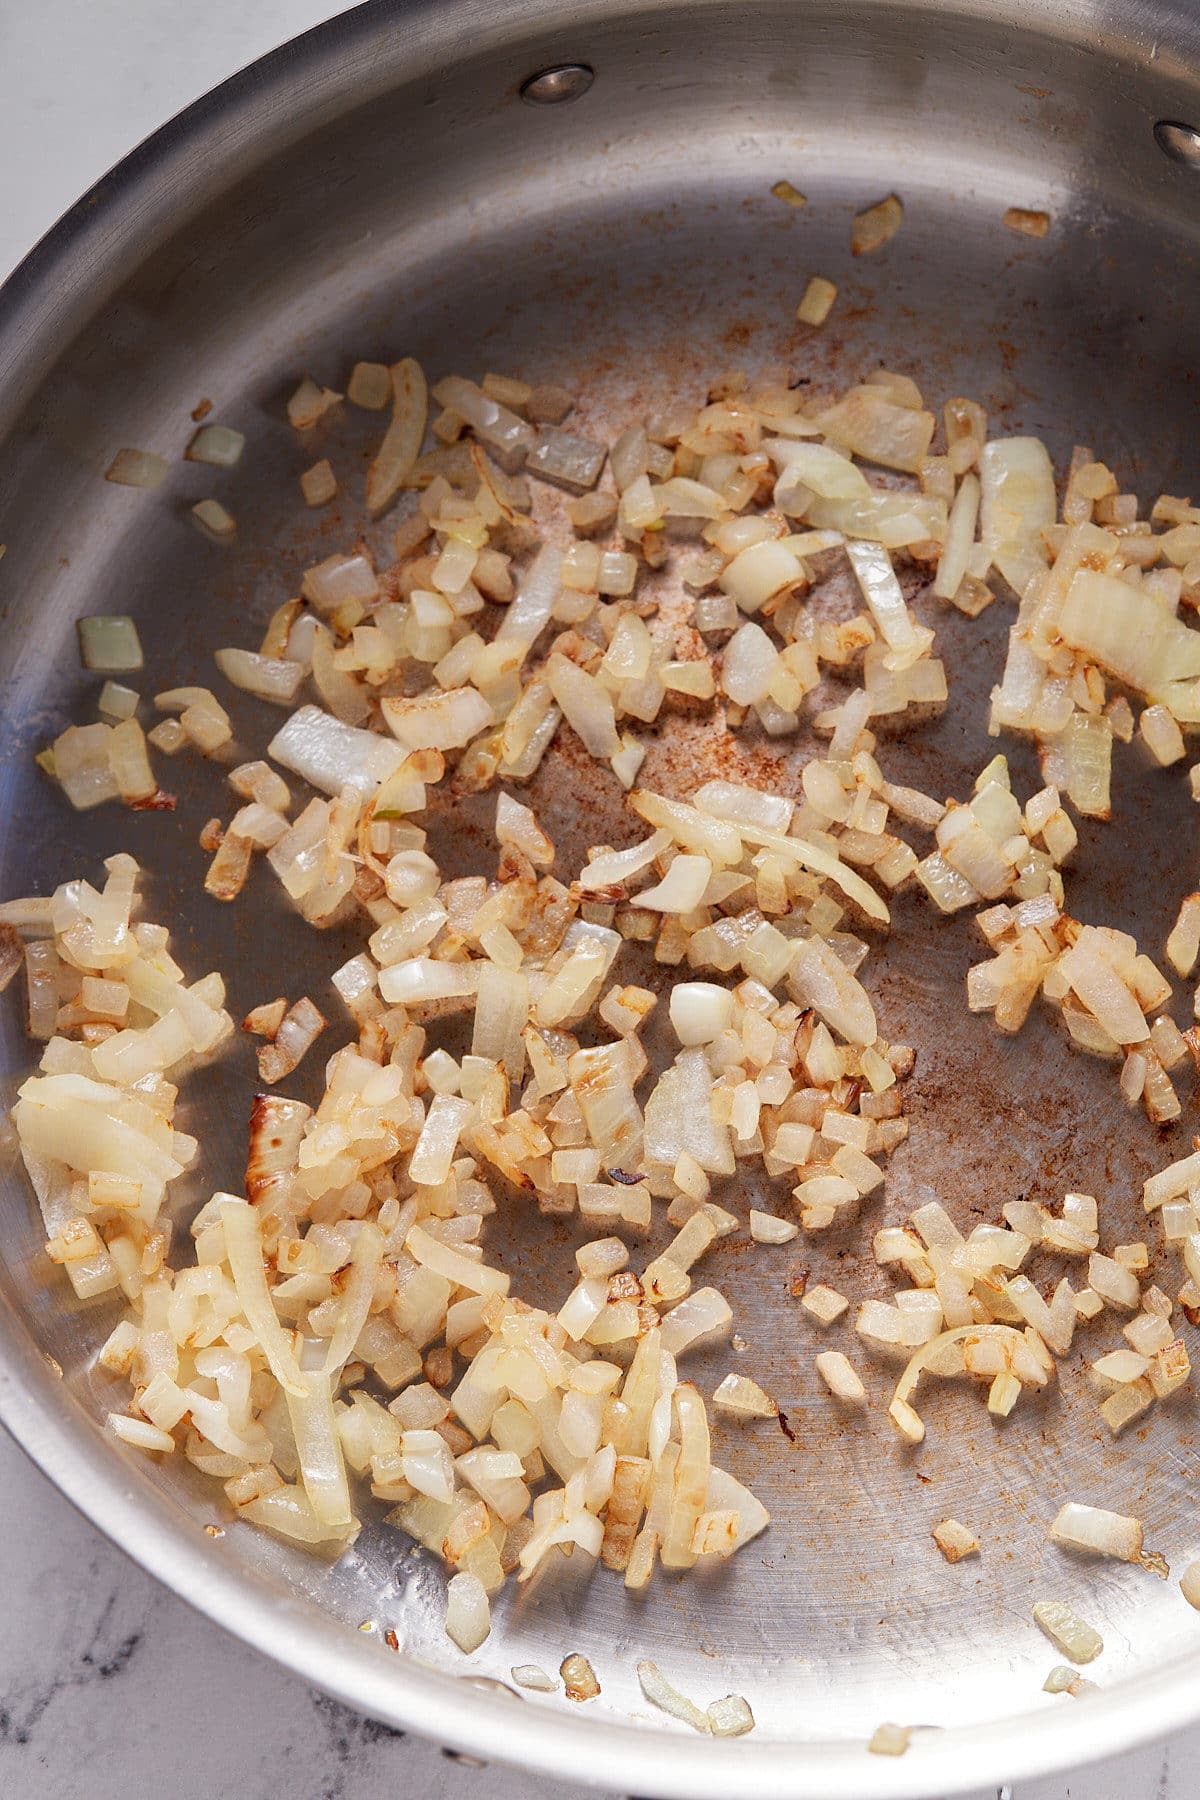
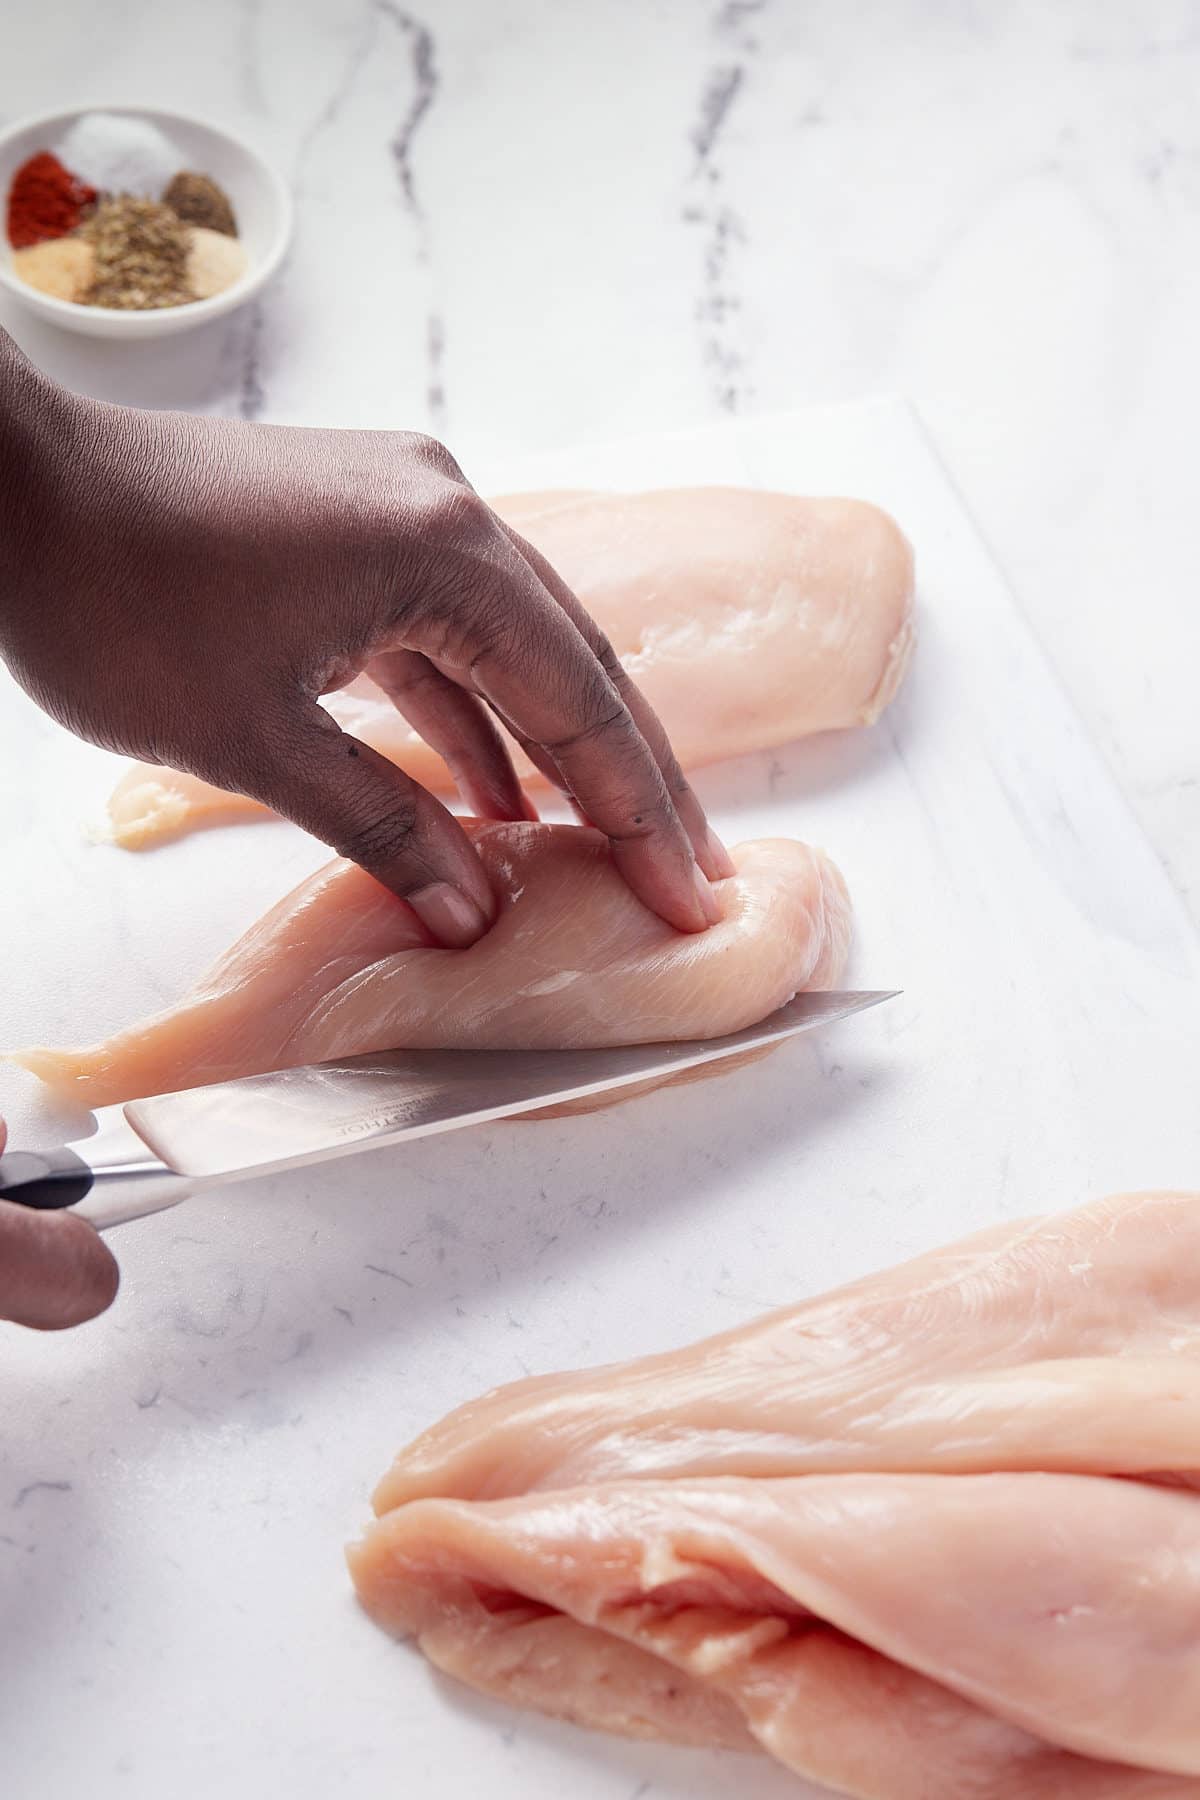
Chicken breasts are perfect for stuffing, you just make a pocket in the breasts, load in the spinach cream cheese filling and you are good to go. If you only have thighs, you can still enjoy this recipe. Pound them out and then roll them up like a pinwheel and secure them with a toothpick. They may take slightly longer to cook through compared to breasts.
These cheesy stuffed chicken breasts are perfect to serve with salad, veggie and potato side dishes. Try them with some of these favorites:
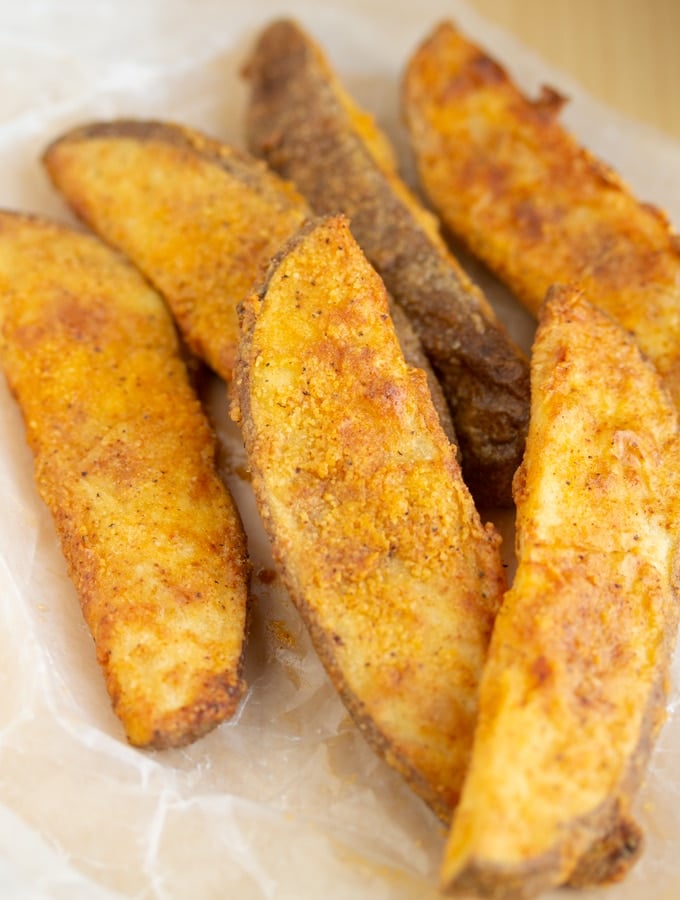
These Air Fryer Potato Wedges are air-fried for a healthier version of the breaded KFC wedges. No worry about deep frying with the Air Fryer around.
You’ll find the full recipe with ingredient amounts and instructions in the recipe card at the bottom of this post. Be sure to check out the blog post itself for extra tips and tricks!
These potato wedges aren’t your normal everyday potato wedges. They’re crispy, very well seasoned, and fluffy on the inside.
If you've been following my blog journey from week to week, you'll notice that I'm obsessed with my Air Fryer. I bought it when I was pregnant because I was craving French fries. My first air fryer recipe shared here was this Air Fryer General Tso Chicken Recipe.
These wedges take a little more effort than traditional potato wedges, but it’s so worth it in the end! They are quick and easy to cook in the air fryer, and way less messy than traditional deep frying. They come out perfectly crispy, and the seasoning is just too good!
Serve them up as an appetizer or side for one delicious bite. You’ll be so pleased you skipped KFC and made these at home instead!
Be sure to try my Air Fryer Baked Potatoes and Air Fryer Sweet Potatoes too!

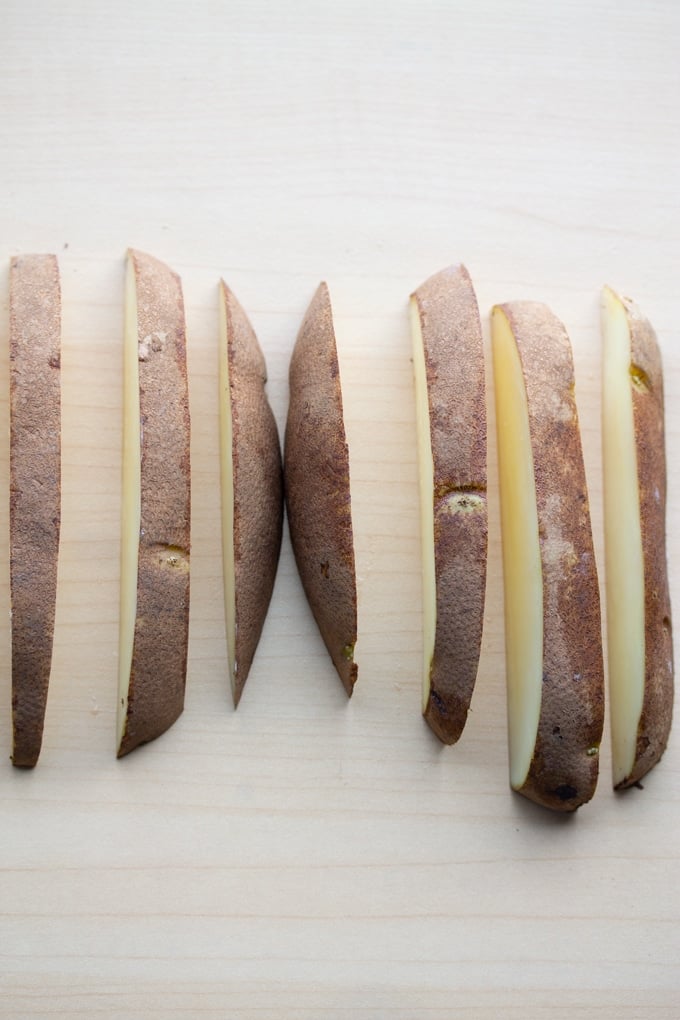
First, grab two equally sized Russet potatoes. Then, you'll cut them into equal-sized wedges. Here's a helpful graph on cutting potato wedges. Make sure the wedges are of a similar size so they cook evenly.
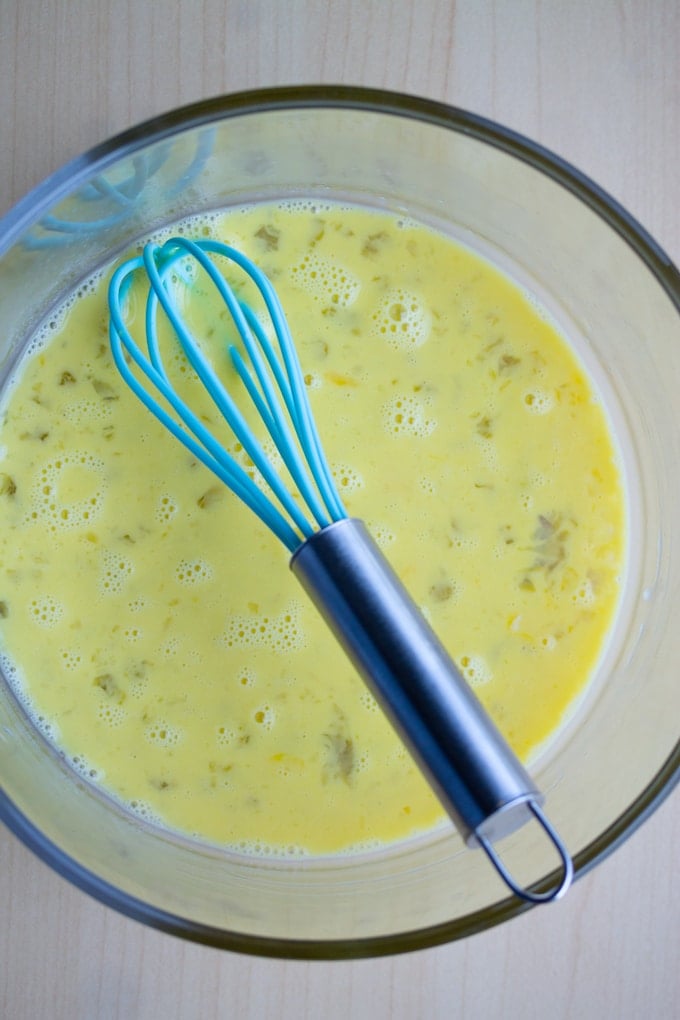
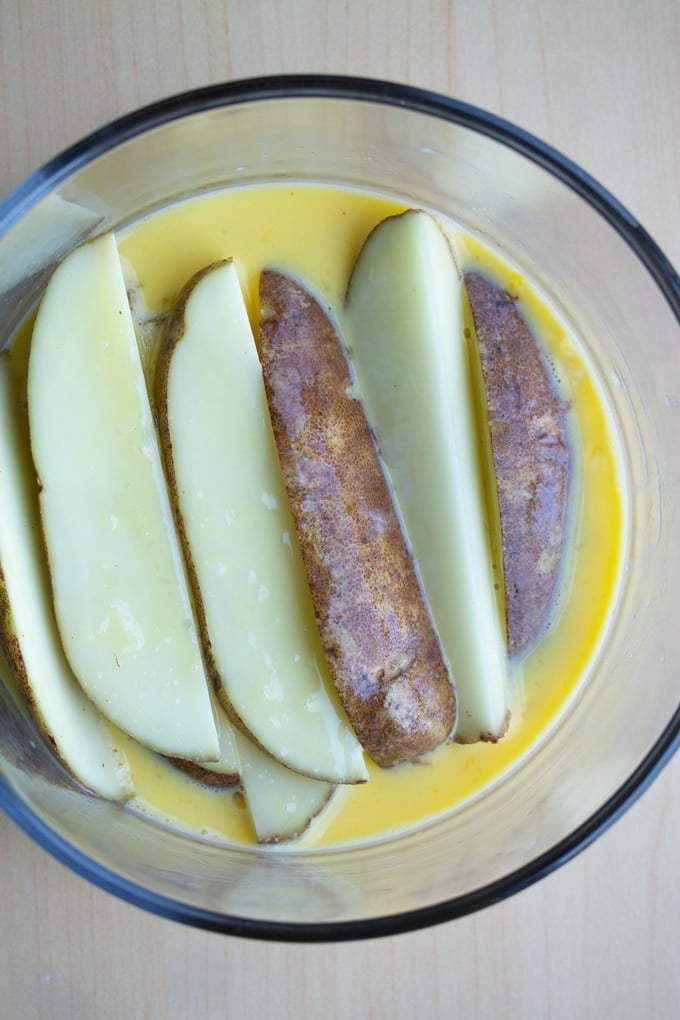
Then whisk your egg and milk in a medium-sized bowl. Place your potato wedges in the bowl and coat them with the mixture. Set aside.
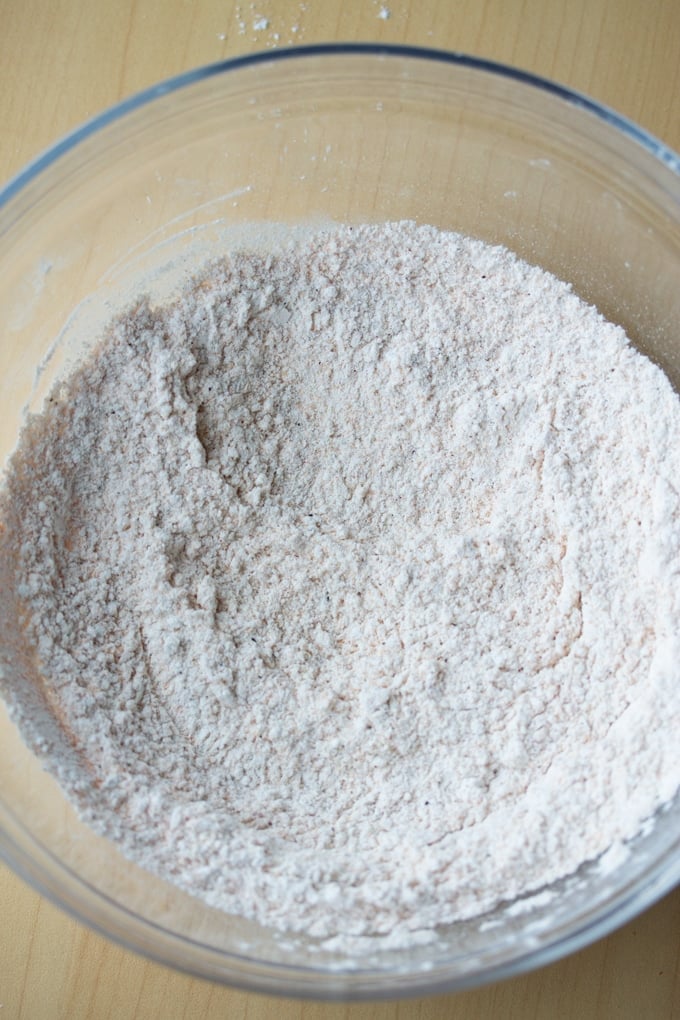
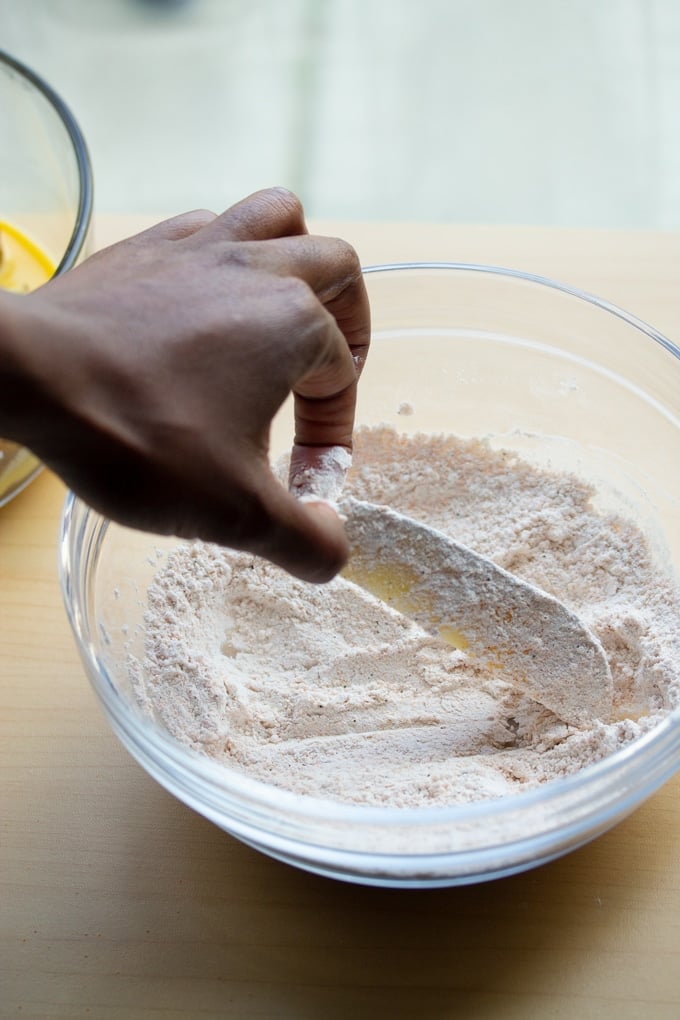
Next, in another medium bowl, combine your flour, seasoning salt, garlic powder, paprika, and black pepper in a bowl and stir until combined.
Next, take your potato wedges and coat them in the flour mixture, making sure all sides are covered. Shake off any excess flour.
Once your wedges are coated, it's time to place them in the Air Fryer basket. Spray the bottom of the Air Fryer basket with oil so your wedges won't stick. Then lay them in a single layer on the air fryer basket.
Then spray your air fryer wedges to cover any flour spots.
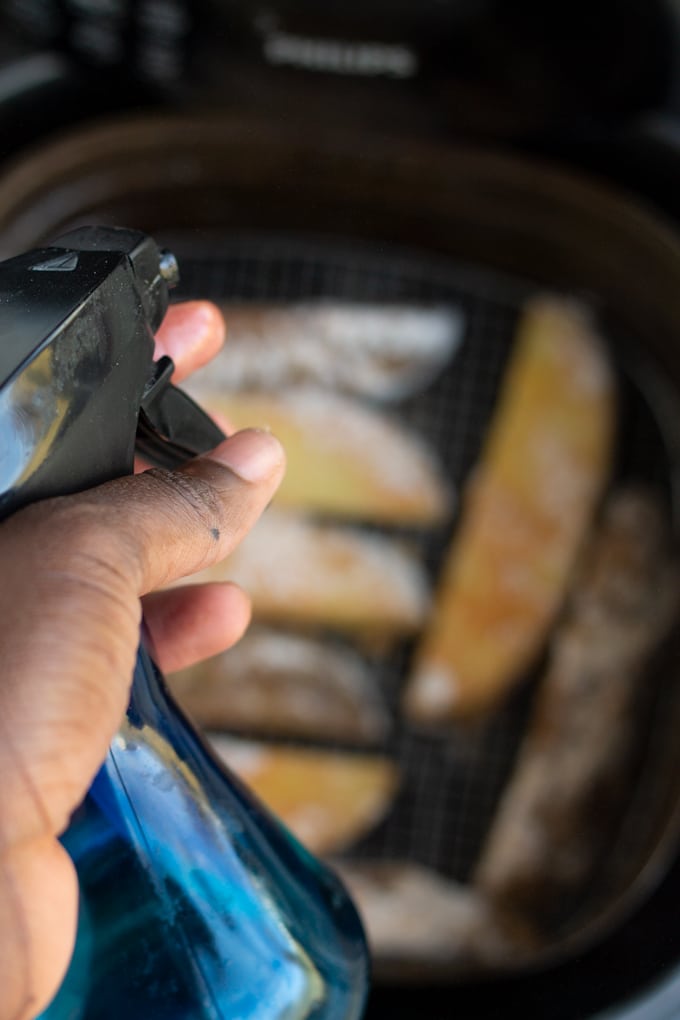

Close the air Fryer and set the temperature to 360 degrees Fahrenheit for 22 minutes. After 11 minutes, open your Air Fryer. If you see any spots of flour on these side of the wedges, spray them with oil. Then, flip your wedges and spray this side with oil. Close the air fryer and cook for the remaining 11 minutes.

And done 🙂 Once this batch of wedges is done, repeat until all your potato wedges are cooked.
Using some oil is best; it helps the wedges cook more evenly and become crispy and brown. If you don’t spray them with oil, the flour coating can remain quite dry. You’ll need a lot less than traditional deep frying for sure though!
These seasoned potato wedges are great right out of the air fryer, but if you have leftovers don’t throw them out! One of the reasons I love the air fryer so much is because it reheats so well!
Cooked wedges can be stored in an airtight container in the fridge for up to 3 days. To reheat them, preheat the air fryer to 380°F and cook them for 3 to 5 minutes, shaking halfway through. They’ll come out perfectly crispy and taste as they’ve just been cooked!
These crispy air fryer wedges are great to serve as an appetizer with dips like ketchup, spicy mayo, or Vinegar BBQ Sauce, they are an excellent addition to game day! they are also great served as a side with a main, try them with some of these favorites:
And there you have it. Delicious golden breaded potato wedges just like KFC.
If you're looking for Air Fryer tips and tricks, check out my Air Fryer Tips and Tricks.
This recipe was originally published in February 2019 and updated with new tips and additional information.