My Forking Life

  • Air Fryer
  • Jamaican
  • Entree
  • Browse Recipes
  • Breakfast
  • Side Dishes
  • About
menu icon
go to homepage
  • Air Fryer
  • Jamaican
  • Entree
  • Browse Recipes
  • Breakfast
  • Side Dishes
  • About
search icon
Homepage link
  • Air Fryer
  • Jamaican
  • Entree
  • Browse Recipes
  • Breakfast
  • Side Dishes
  • About
×
Home » Recipe Index

Simple Syrup

April 15, 2023 by Tanya Harris Leave a Comment

glass bottle filled with simple syrup with a bottle of tequila, grapefruit tonic and a fresh lime

My Homemade Simple Syrup recipe can be made in minutes by combining water and sugar. Once made it's ready to add to your favorite cocktails and mocktails, to add a touch of sweetness to lemonade, or try adding it to your favorite iced teas and coffees.
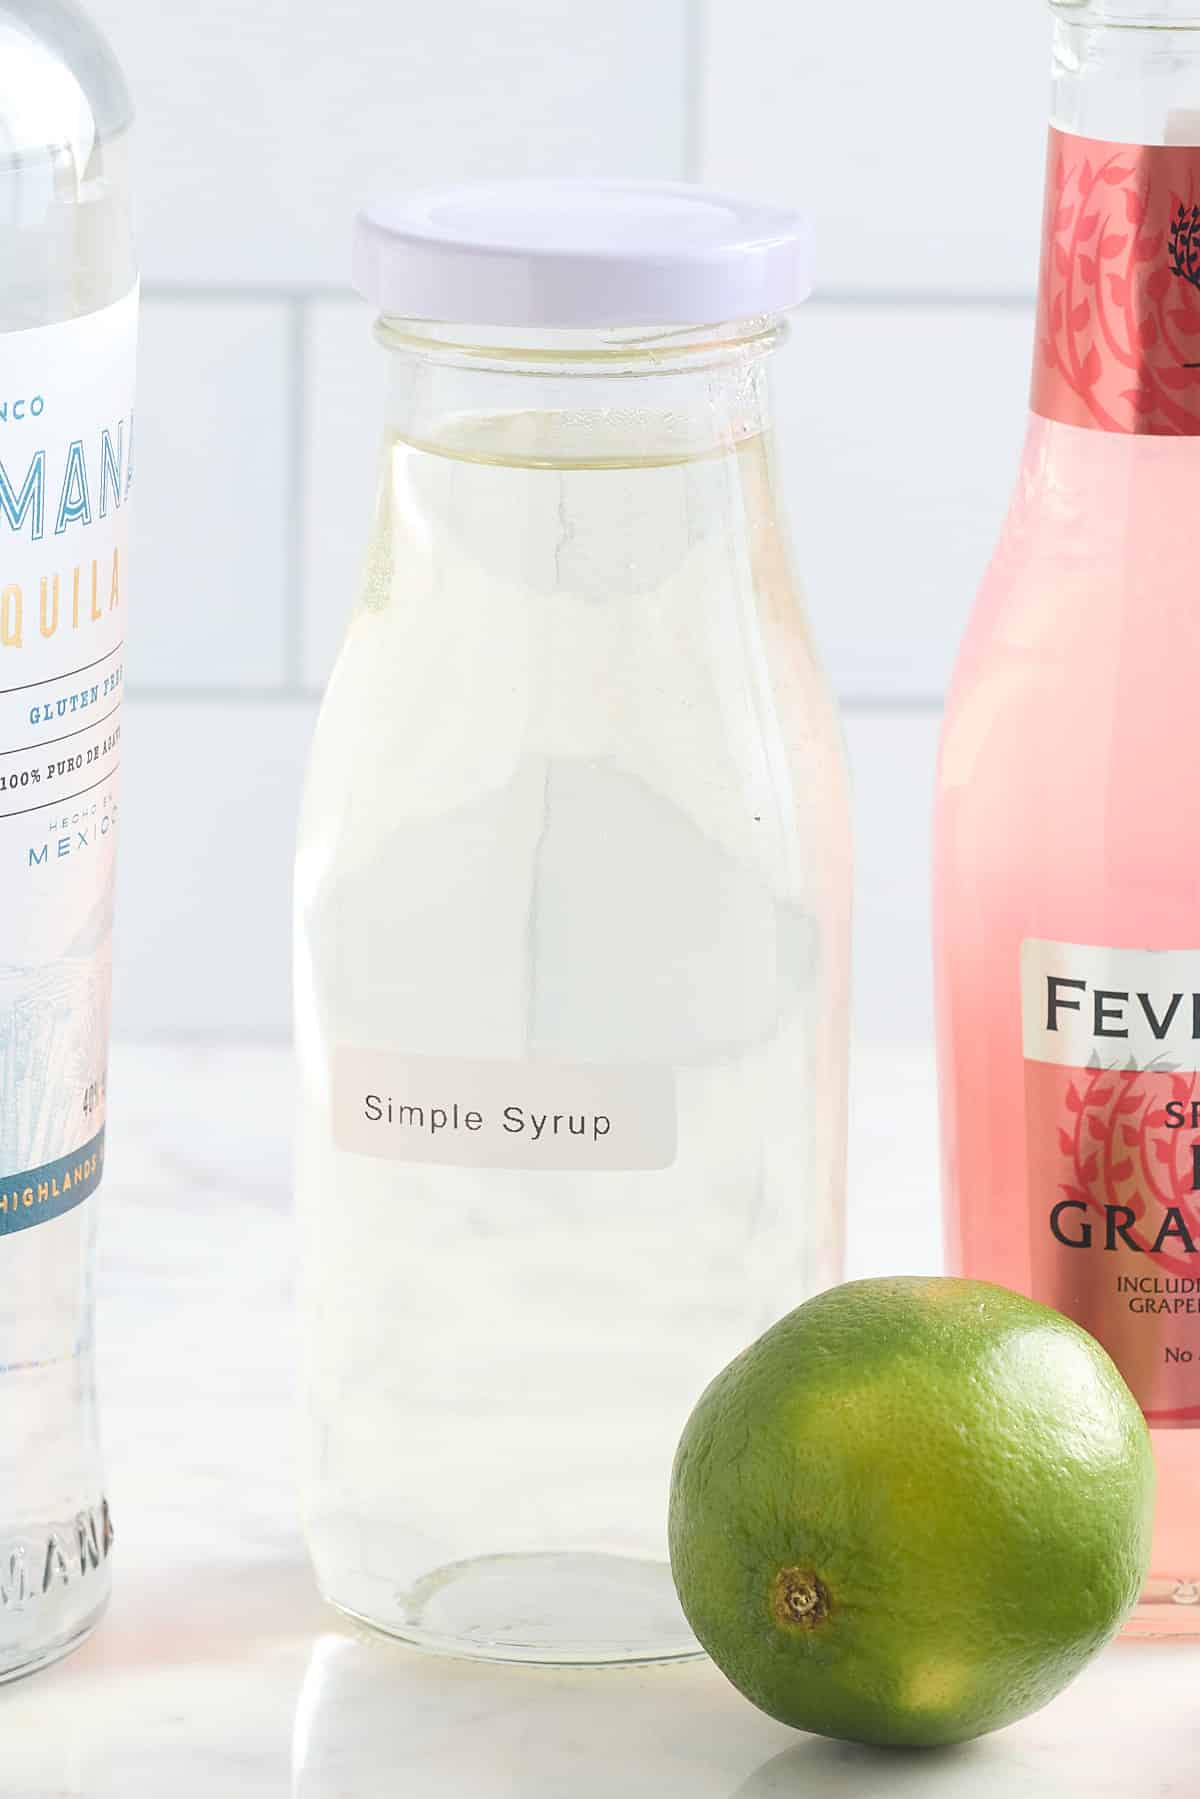
glass bottle filled with simple syrup with a bottle of tequila, grapefruit tonic and a fresh lime

This post contains affiliate links, please read my full disclaimer here.

You’ll find the full recipe with ingredient amounts and instructions in the recipe card at the bottom of this post. Be sure to check out the blog post itself for extra tips and tricks!

As summer approaches, I love sitting outdoors enjoying a cocktail with the sun on my face. This simple sugar syrup works perfectly in my Paloma Cocktail recipe. Combined with tequila and grapefruit soda it makes the perfect summer sunshine cocktail.

This is a simple syrup recipe using a basic ratio of 1:1 sugar to water and can be prepared in less than 10 minutes. Just allow it to cool and add it to your favorite cocktail or iced drink.

I've kept the recipe simple, but you can add a variety of flavors to this syrup, from fresh herbs to spices and fresh fruits. To help you out, I've included some additional flavor suggestions later in the post.

Ingredients

  • Sugar - I use white granulated sugar but you can use any type of sugar for this recipe.
  • Water - use tap water if you are lucky enough to live somewhere with good water, if not use filtered water.
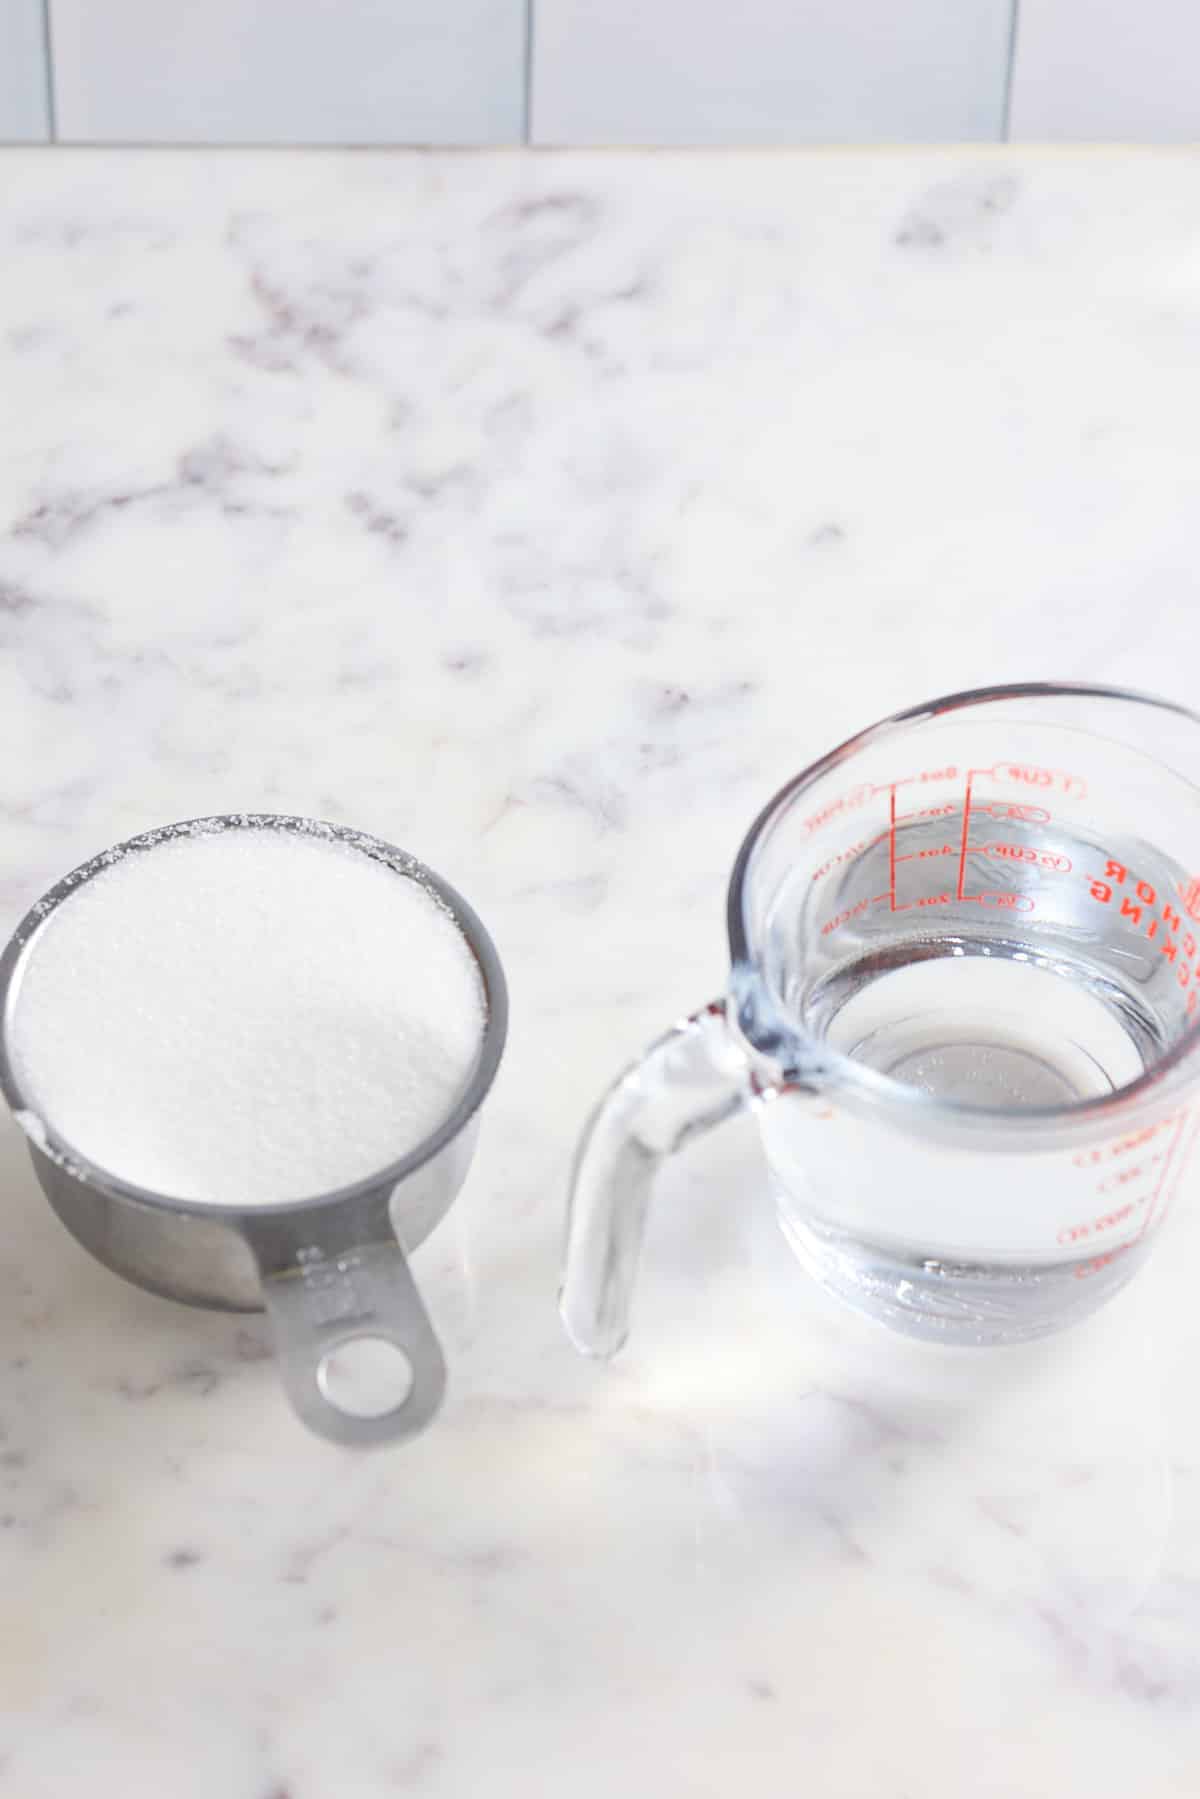
simple sugar syrup recipe ingredients

How to make Simple Syrup

Combine the sugar and water in a saucepan over medium heat and bring to a boil.
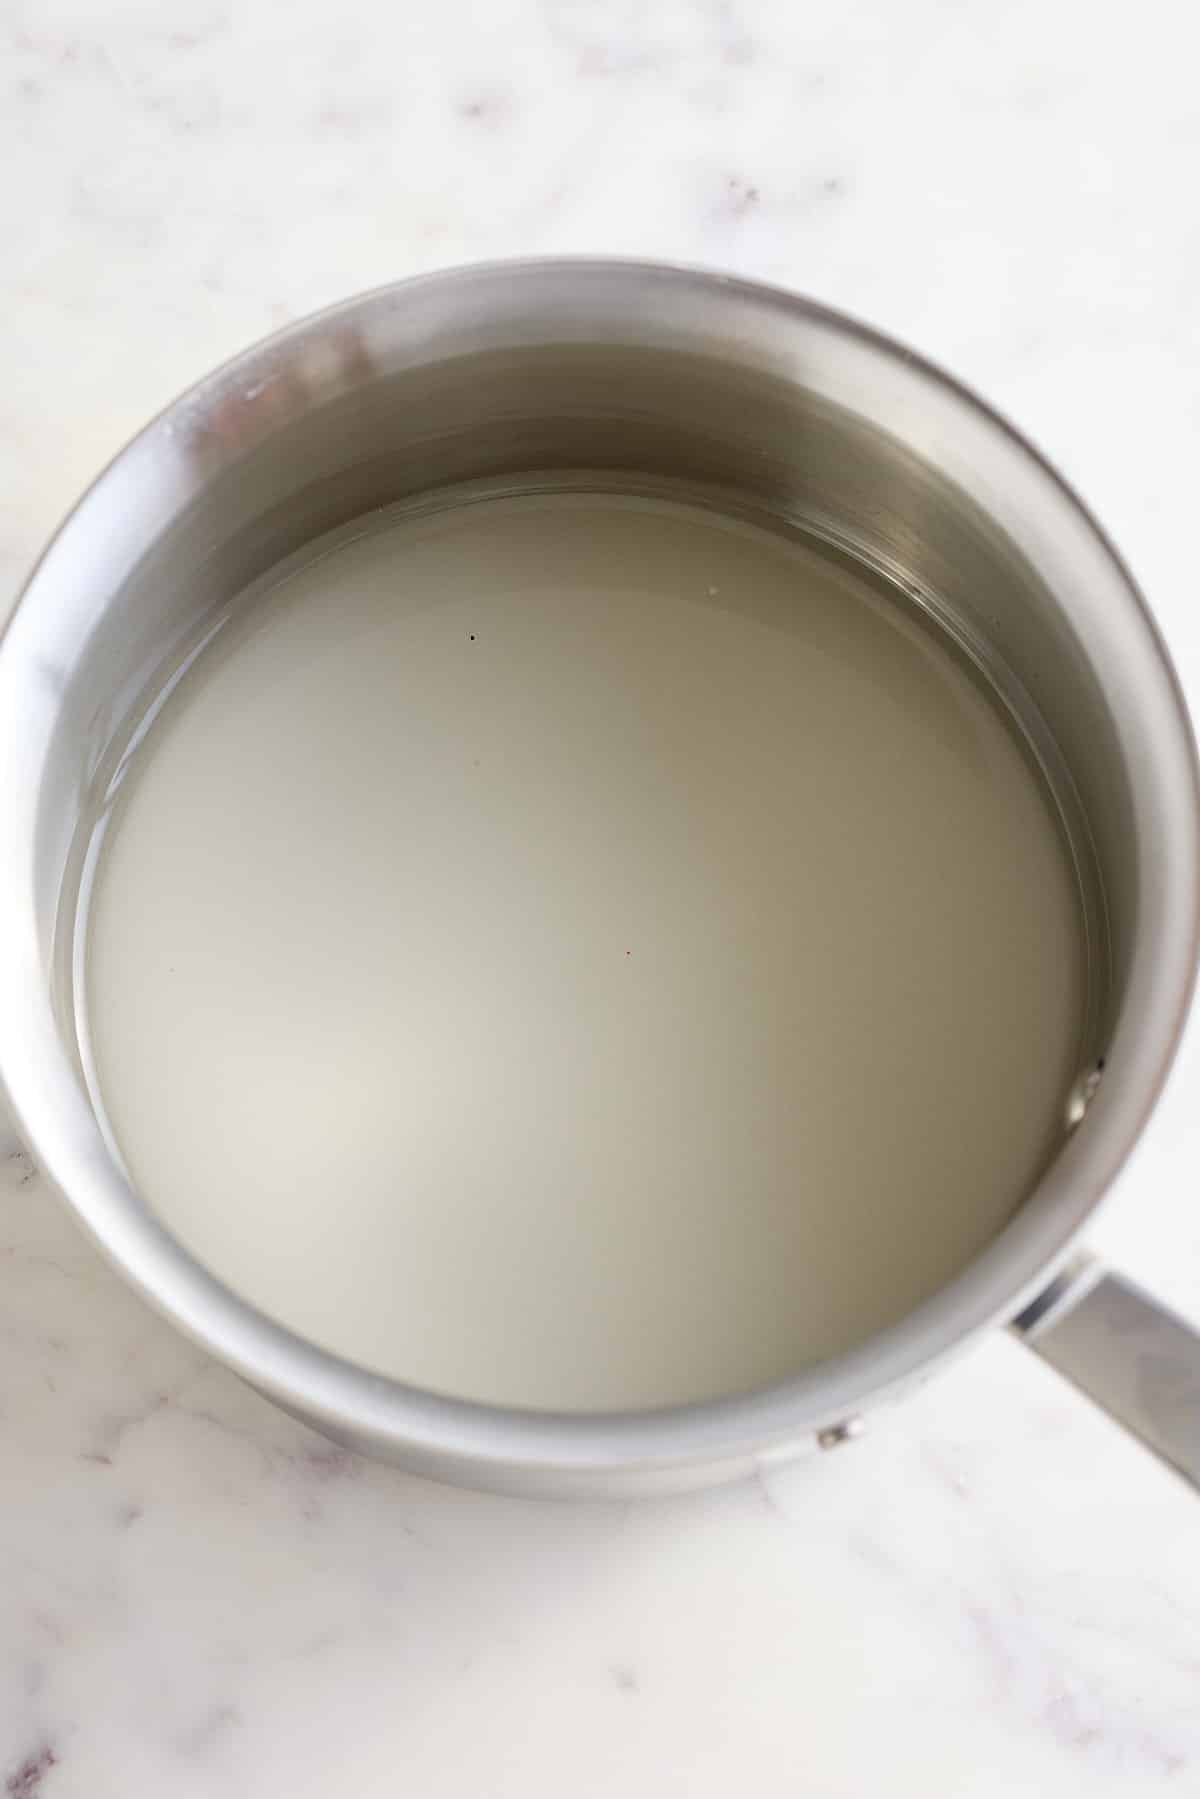
saucepan filled with granulated sugar and water for making sugar syrup

Stir and cook over medium heat until the sugar has dissolved about 3-4 minutes.
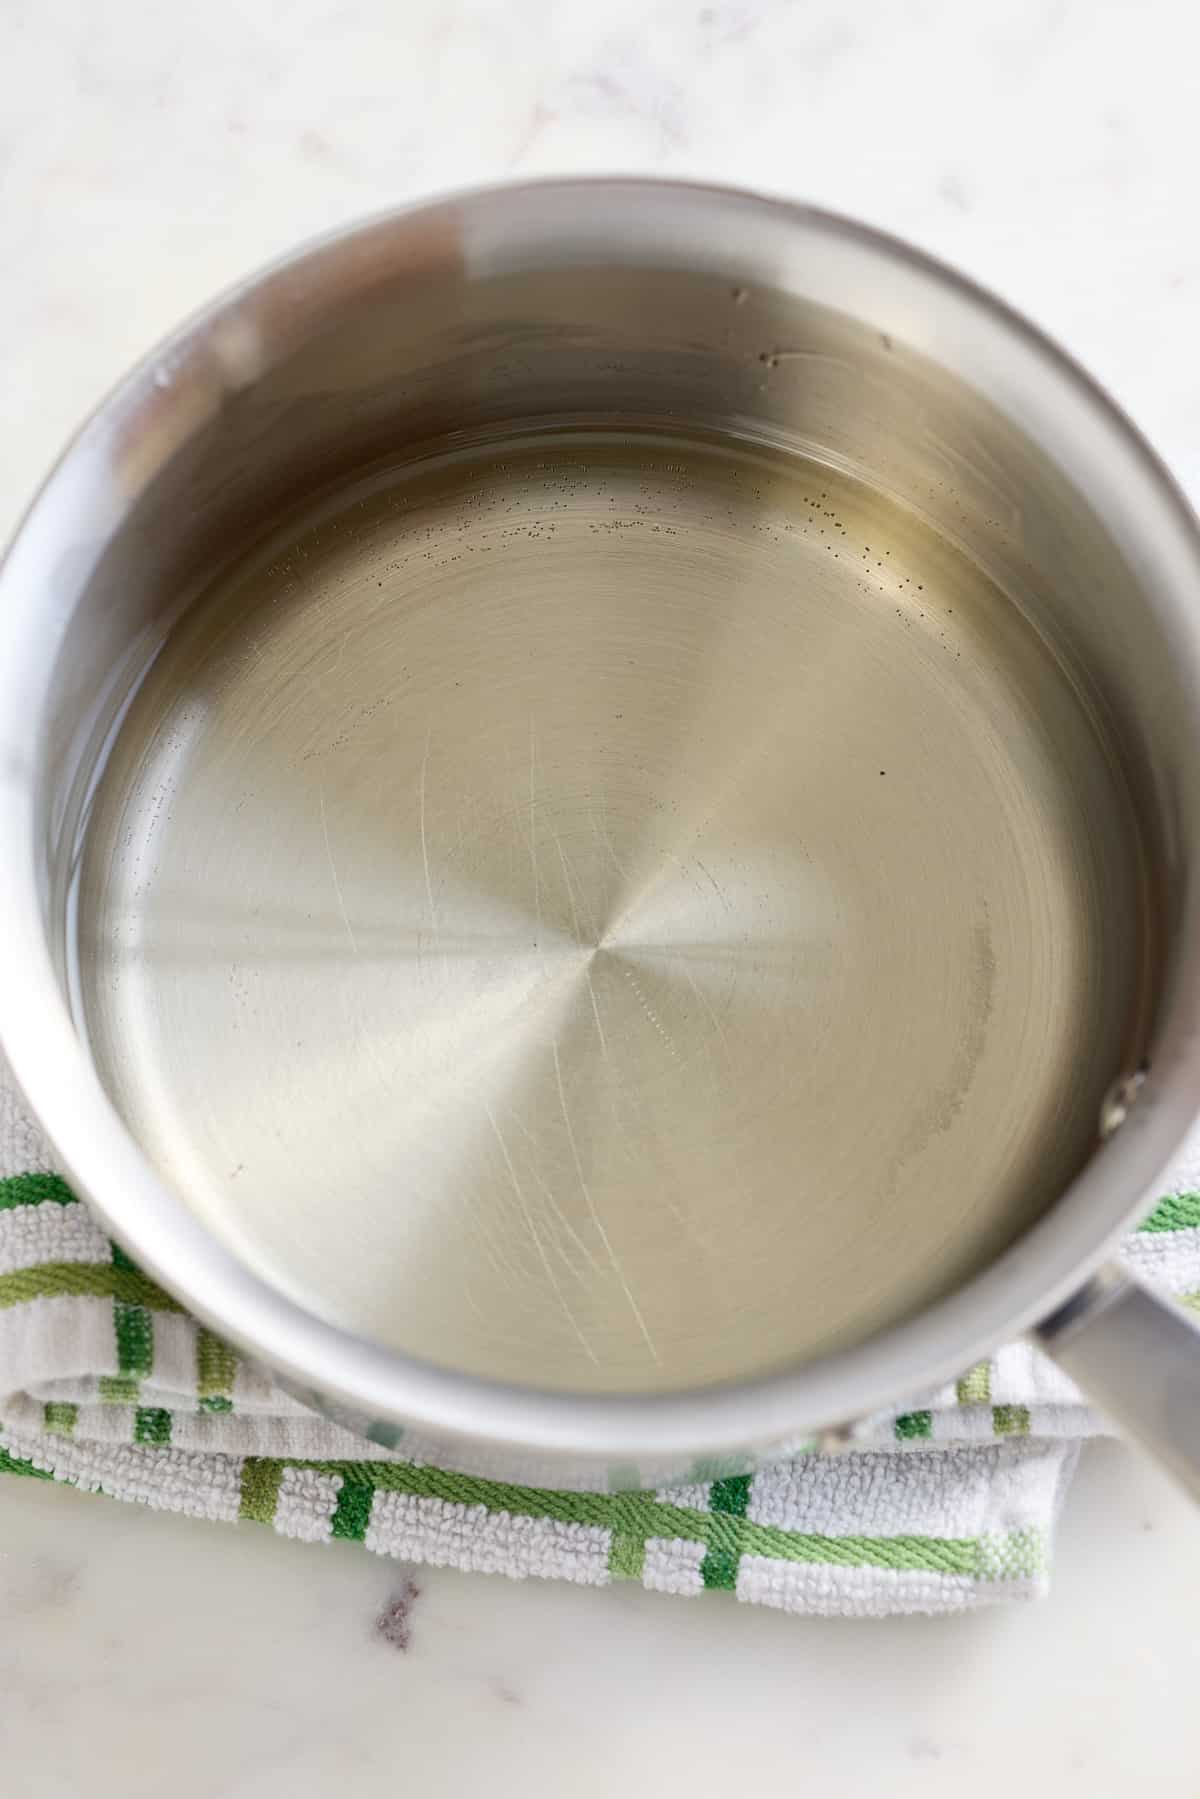
saucepan filled with simple syrup

Remove from heat and let cool completely.

Store in an airtight container and use in soft drinks or cocktail recipes, hot or iced teas, and coffees.
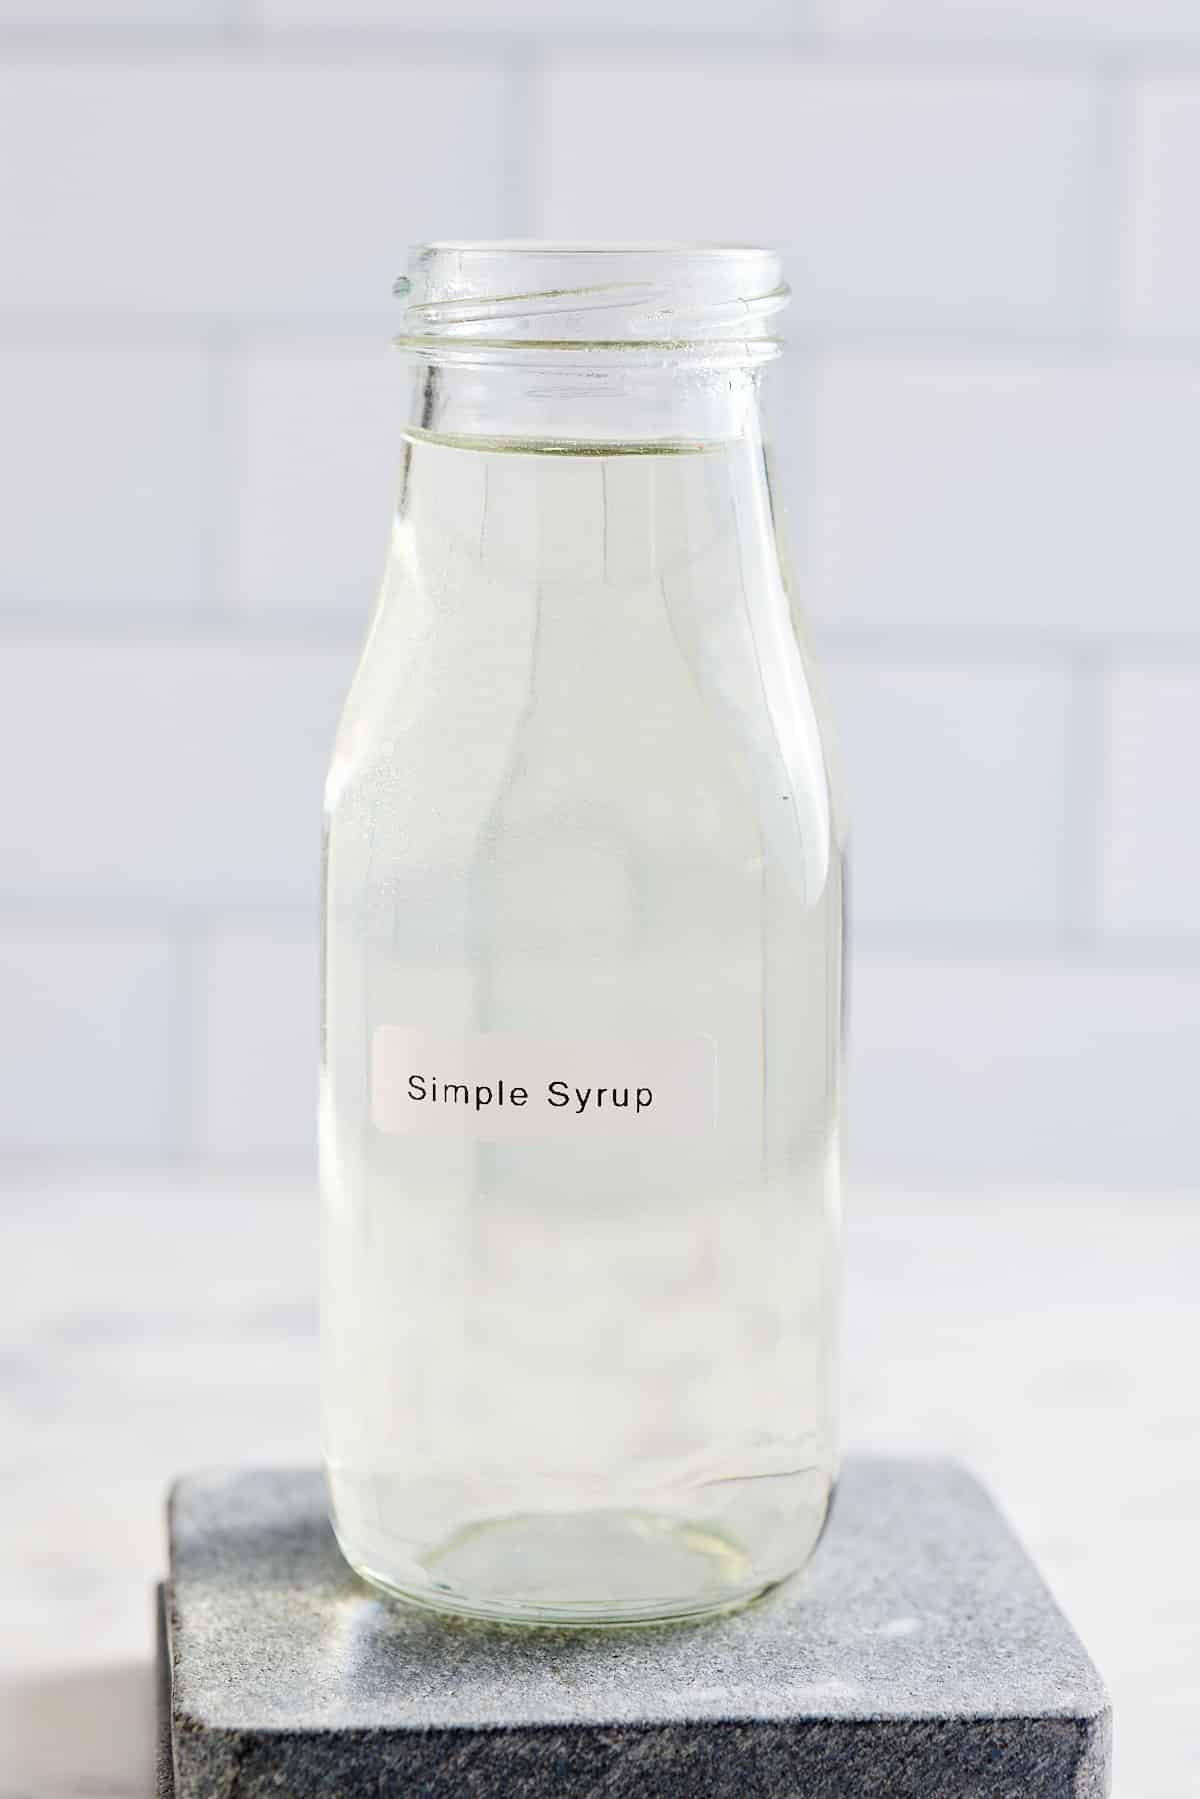
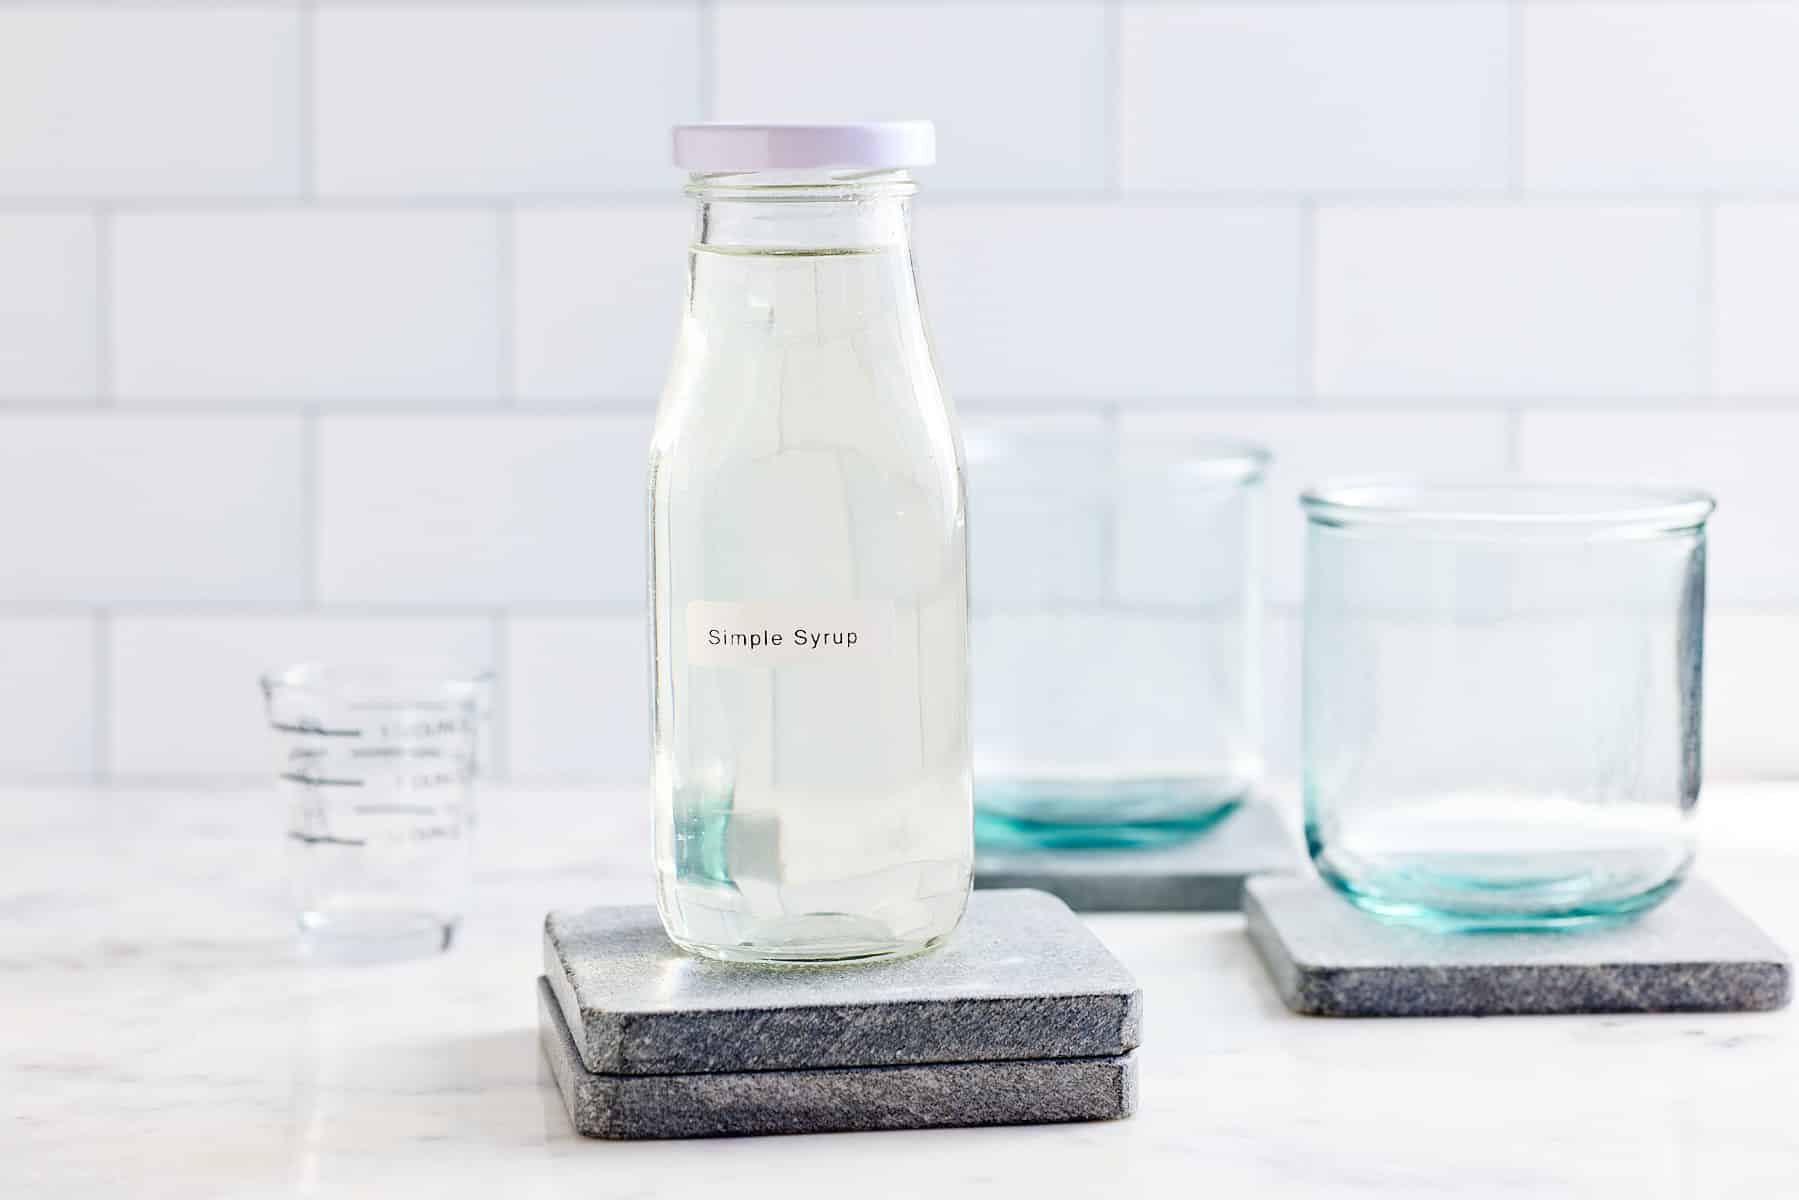
labeled glass bottle filled with simple syrup

Other ways to heat the simple syrup

You don't have to make simple syrup on the stovetop in a pan. My other two favorite methods of making a simple syrup are quick and easy and require no stovetop.

  • Simple Syrup with a Kettle - Heat your water in a kettle and add it to a heat-proof jar with a lid, like a mason jar. Add the sugar to the jar, cover, and shake it until the sugar is dissolved.
  • Microwave Simple Syrup - Combine the sugar and water in a microwave-safe bowl or glass measuring cup and stir the sugar and water mixture until thoroughly mixed. Microwave the mixture on high for approximately one minute, then remove carefully (the bowl may still be hot) and stir. Return to microwave and microwave for another 30 seconds.

Expert Tips

These tips will help you make the best simple syrup you've ever tried. 

  • Take care not to burn yourself when decanting the hot liquid into a container. I often use a funnel to avoid any spillages.
  • Sugar syrup will last in the refrigerator for up to 1 month, after that, it can start to turn cloudy which is a sign that the syrup has spoiled.
  • Allow the syrup to cool completely before adding it to cold drinks.
  • For a sugar syrup with more depth, try my brown sugar syrup or honey simple syrup.

Flavor variations

  • You can use any type of sugar you like for this recipe. I like to use white granulated sugar, but white superfine sugar, brown sugar, or coconut sugar would also be good choices.
  • Brown sugar will result in a slight caramel flavor.
  • Make a honey syrup using the same 1:1 ratio of honey to water.
  • You can also make flavored simple syrups by adding herbs, spices, or fruit to the sugar and water mixture before heating:
    • a few sprigs of fresh mint
    • cinnamon stick, a grating of nutmeg, or a vanilla pod
    • sliced root ginger
    • a few slices of lemon or orange
labeled glass jar filled with simple syrup and glasses set alongside

Serving suggestions

Add to a variety of drinks, cocktails, and mocktails, anywhere where you want to add a touch of extra sweetness.

I like to add it to a Classic Lemonade recipe or use it to sweeten my Homemade Jamaican Ginger Beer, Jamaican Sorrel Drink, Jamaican Lemonade, Green Sherbet Punch, or my Strawberry Basil Lemonade

You can also use it to sweeten hot or iced tea or coffee drinks.

How long does homemade simple syrup last?

Store in an airtight container in the refrigerator for up to 1 month.

FAQs

What is simple syrup made of?

It is made by combining and dissolving sugar in water over medium heat.

What is the difference between sugar syrup and simple syrup?

They are the same thing, simple syrup is sometimes called sugar syrup - they are both liquid sweeteners made by combining sugar and water.

What is the yield for simple syrup?

One cup of sugar and one cup of water will yield 1 ⅓ cups of syrup.

If you have tried this Simple Syrup recipe or any other recipe on my blog, then please rate it and let me know how it turned out in the comments below!

glass bottle filled with simple syrup with a bottle of tequila, grapefruit tonic and a fresh lime
Print Recipe
5 from 1 vote

Simple Syrup

My Homemade Simple Syrup recipe can be made in minutes combining water and sugar. Use simple syrup for cocktails, or to add a touch of sweetness to lemonade, or try adding it to your iced teas and coffee. This is a versatile syrup and the options are endless.
Prep Time2 minutes mins
Cook Time5 minutes mins
Total Time7 minutes mins
Course: Drinks
Cuisine: American
Keyword: cocktail sugar syrup, simple sugar syrup, simple syrup, simple syrup for cocktails, simple syrup recipe, sugar syrup recipe for cocktails
Servings: 16
Calories: 48kcal
Author: Tanya Harris

Ingredients

  • 1 cup granulated sugar
  • 1 cup water

Instructions

  • Combine the sugar and water in a saucepan over medium heat and bring to a boil. Stir and cook over medium heat until the sugar has dissolved, about 3-4 minutes.
  • Remove from heat and let cool completely.
  • Use in any drink or cocktail recipe that calls for simple syrup.

Notes

  1. This recipe will yield 1 ⅓ cups of simple syrup.
  2. Store in an airtight container in the refrigerator for up to 1 month.
  3. You can use any type of sugar you like for this recipe. I like to use white sugar, but brown sugar or coconut sugar would also be good choices.
  4. You can also make flavored simple syrups by adding herbs, spices, or fruit to the sugar and water mixture before heating. For example, you could add a few sprigs of mint, a cinnamon stick, or a few slices of lemon.
Nutrition

Calories: 48kcal | Carbohydrates: 12g | Fat: 0.04g | Sodium: 1mg | Potassium: 0.3mg | Sugar: 12g | Calcium: 1mg | Iron: 0.01mg

Coleslaw Recipe

April 14, 2023 by Tanya Harris 2 Comments

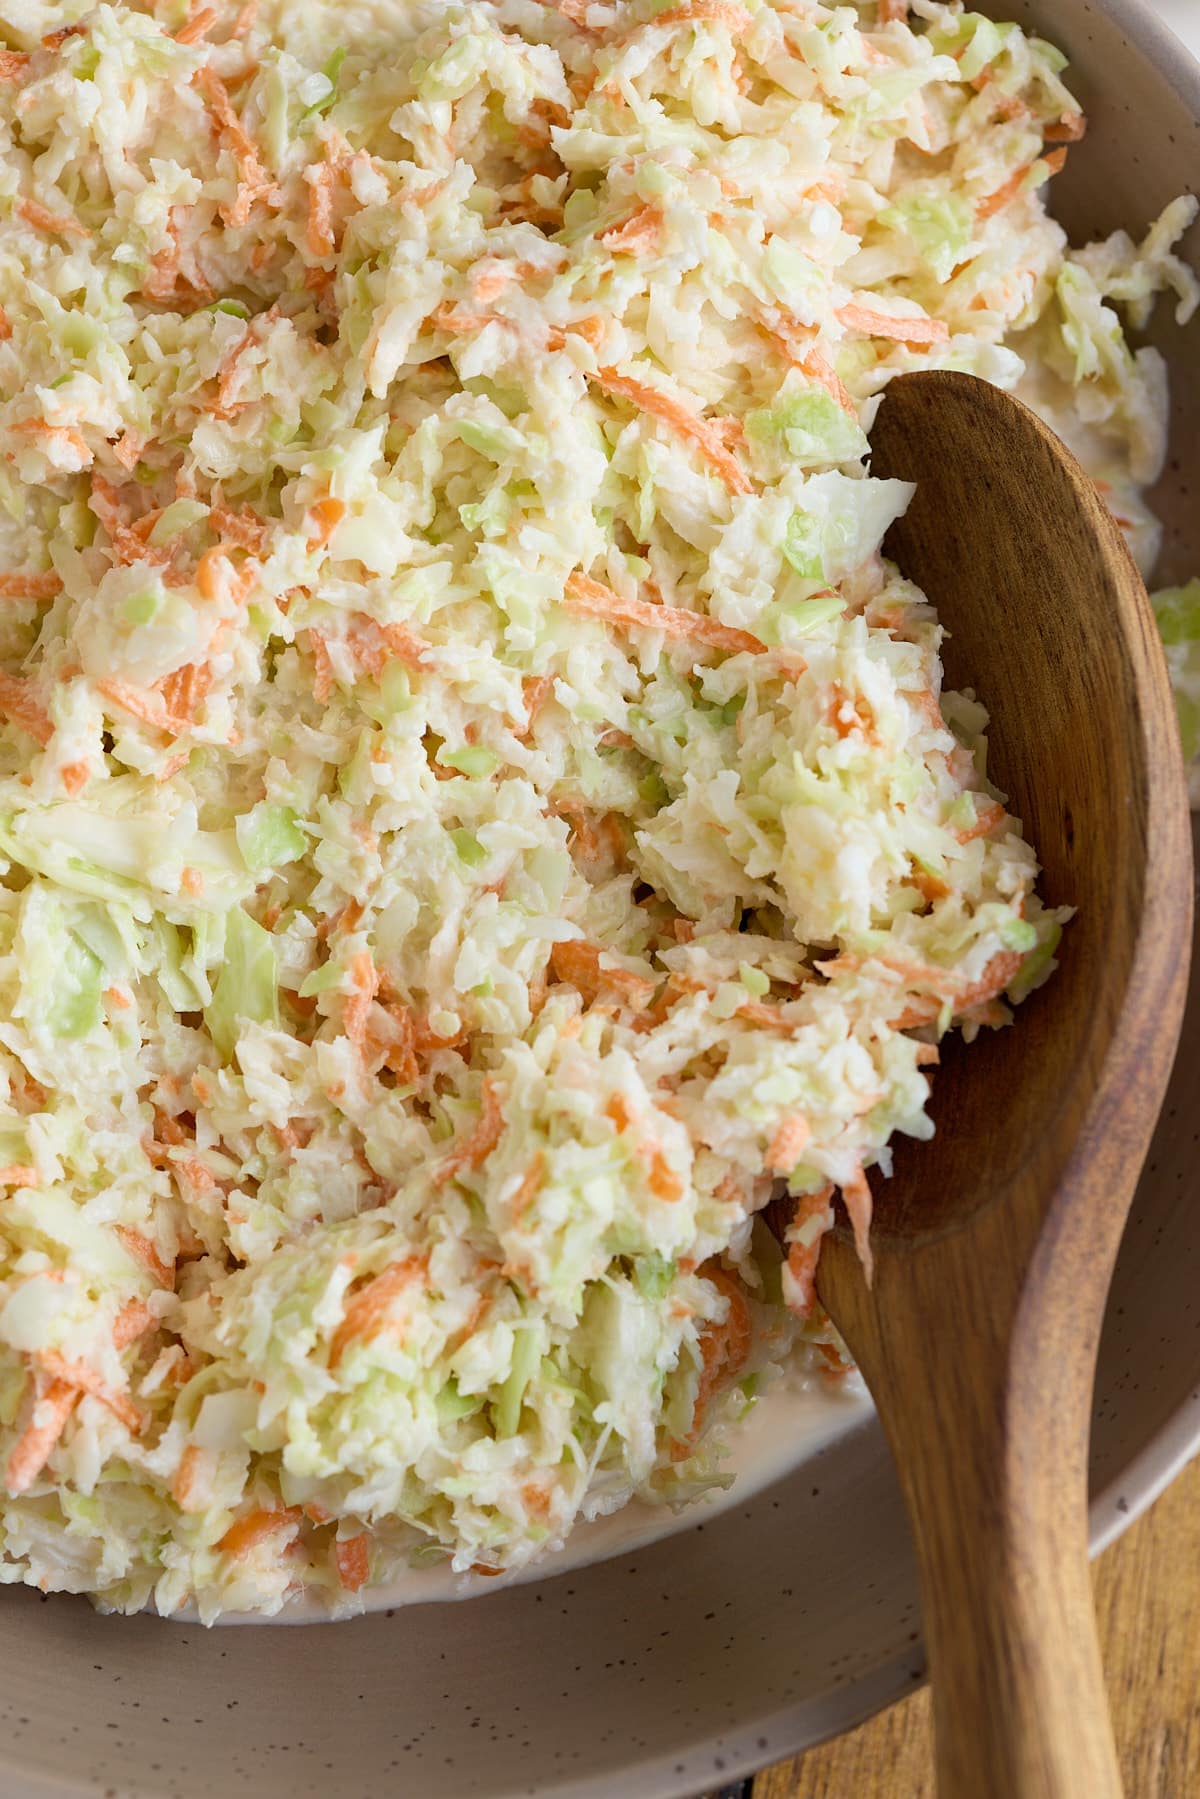
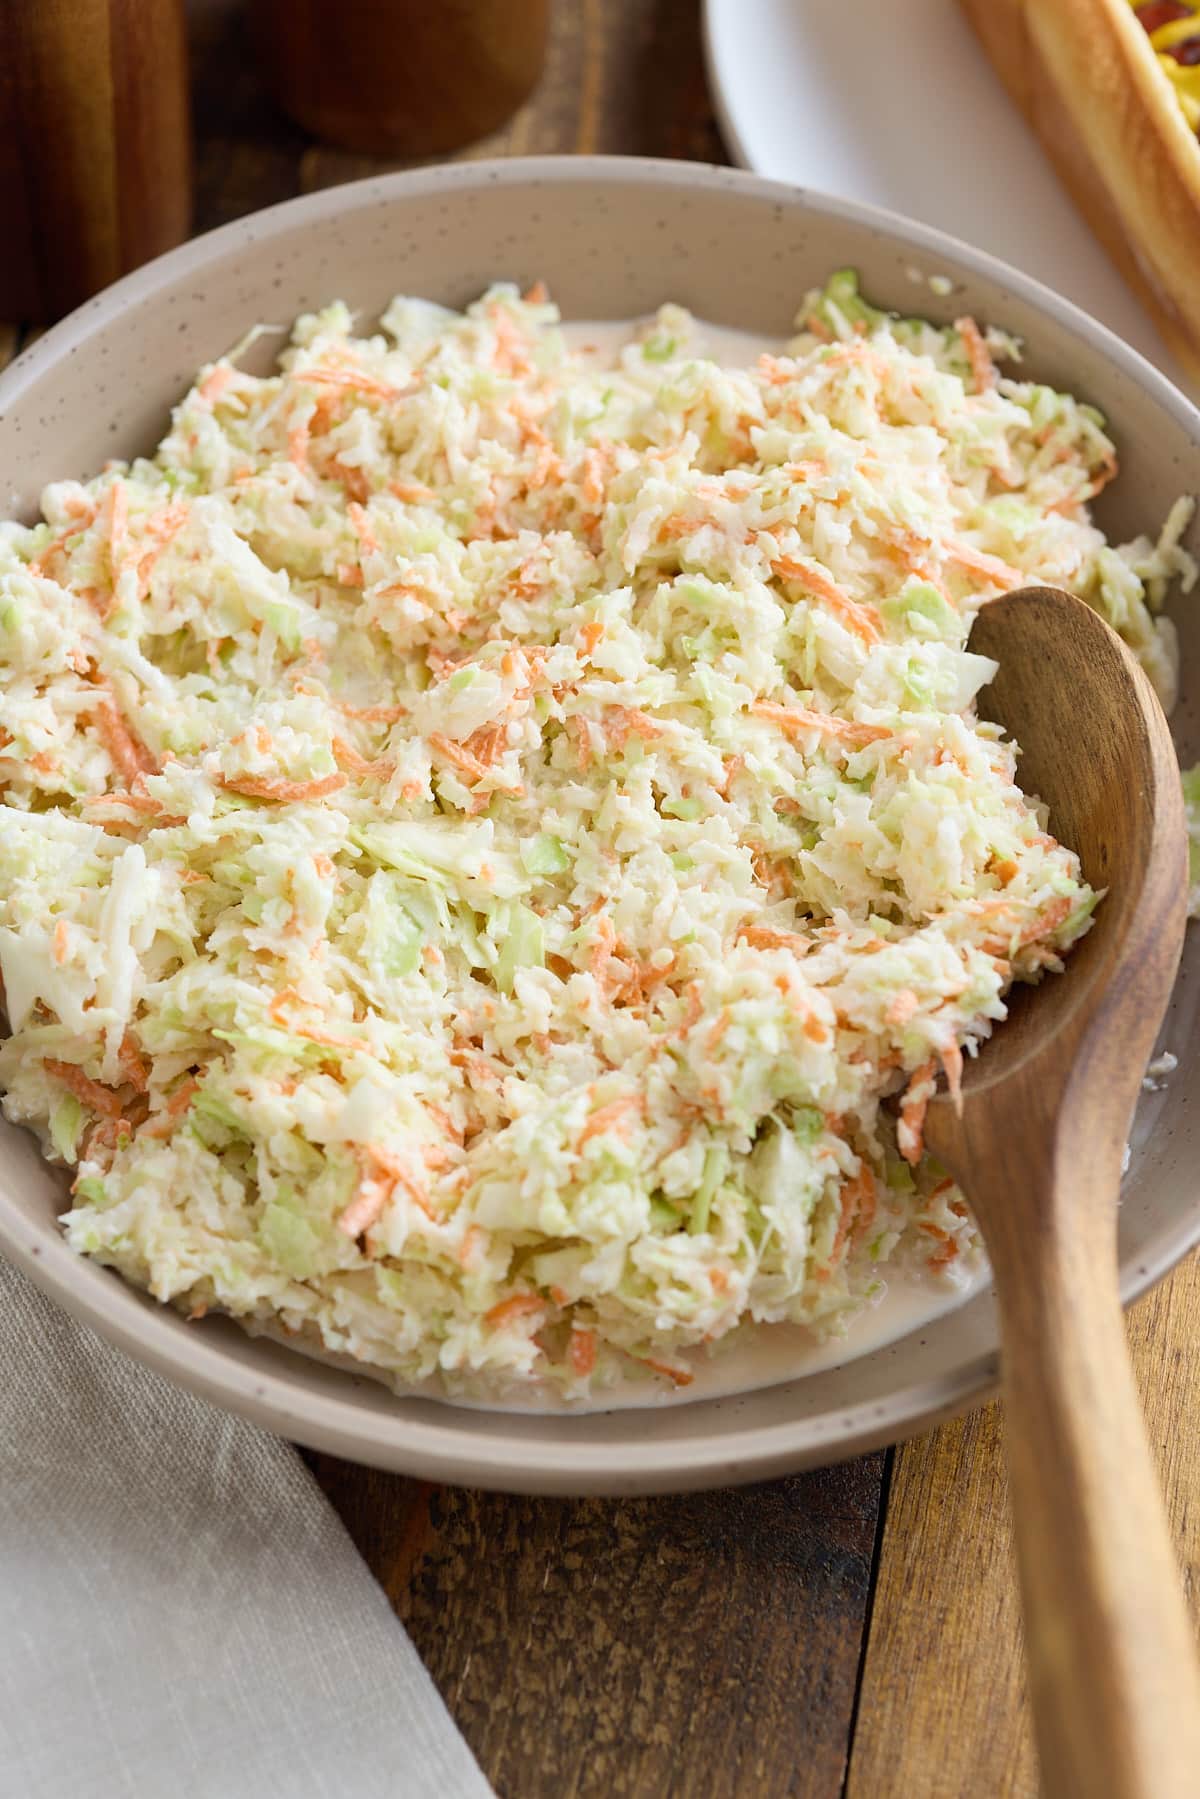
Coleslaw in a serving bowl with a wooden spoon.

If you're planning a backyard BBQ, there's no better side dish to accompany those grilled meats than our delicious coleslaw recipe. A fresh and crisp coleslaw is the perfect complement to those savory meats, and it's a great way to incorporate some veggies into your meal.

Coleslaw in a serving bowl with a wooden spoon.

This post contains affiliate links, please read my full disclaimer here.

You’ll find the full recipe with ingredient amounts and instructions in the recipe card at the bottom of this post. Be sure to check out the blog post itself for extra tips and tricks!

Coleslaw is a classic side dish that has been around for centuries, and for good reason! It's a refreshing and crisp dish that pairs well with just about anything, making it perfect for any backyard BBQ or summer potluck. My coleslaw recipe is easy to make and can be prepped ahead of time, making it a perfect addition to your next outdoor gathering.

Some of my favorite side dishes, including this one, to serve at a BBQ are a tasty Cold Seafood Salad and Creamed Corn.

Coleslaw in a serving bowl with a wooden spoon.

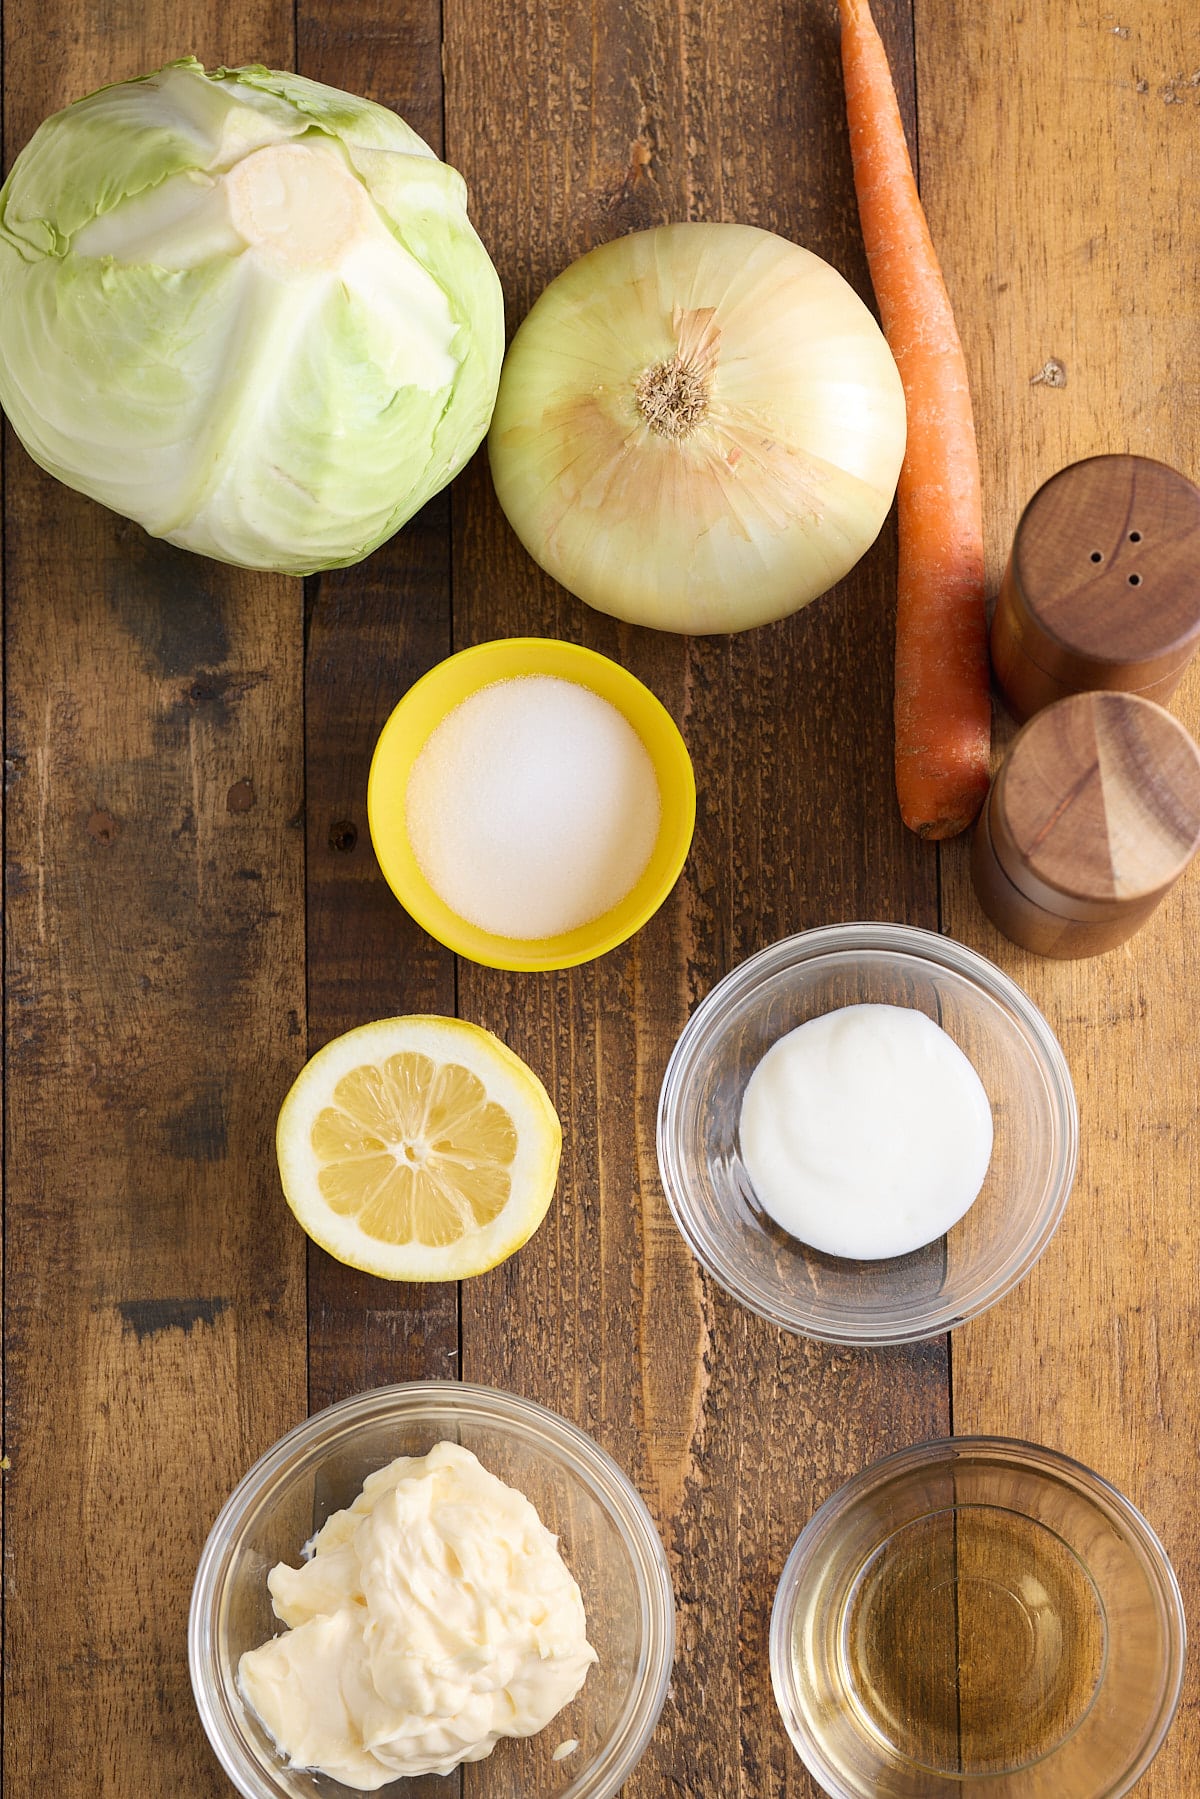
Coleslaw Recipe Ingredients

  • Cabbage - A regular green cabbage is what I used, you can use a mixture of red and green cabbage, or a napa or savoy cabbage as well.
  • Carrot - Best to shred your own carrots here, you can buy carrot matchsticks, but those will still be too big for the coleslaw.
  • Sweet Onion - Sweet onions, or Vidalia onions are mild in flavor. You can also use shallots, those are smaller in size so you'll need 2-3.
  • Mayonnaise - Use homemade mayo or you can use your favorite brand.
  • Granulated White Sugar
  • Apple Cider Vinegar - ACV has a great flavor, but regular distilled white vinegar can be used in a pinch.
  • Lemon Juice - Fresh or bottled lemon juice will work.
  • Buttermilk - If you don't have buttermilk on hand for this recipe, you can make some yourself with a few minutes and a couple of ingredients. In 1 cup of milk add 1 tablespoon of lemon juice or vinegar. Let the mixture sit for 10 minutes, and you have homemade buttermilk.
  • Salt and Pepper to taste
Coleslaw recipe ingredients.

Tools needed for this recipe

  • Food processor - Makes quick work of shredding vegetables. If you don't have a food processor a sharp knife and a cutting board, or cheese/vegetable grater will be necessary for breaking down the veggies.
  • Mixing bowls

How To Make Coleslaw

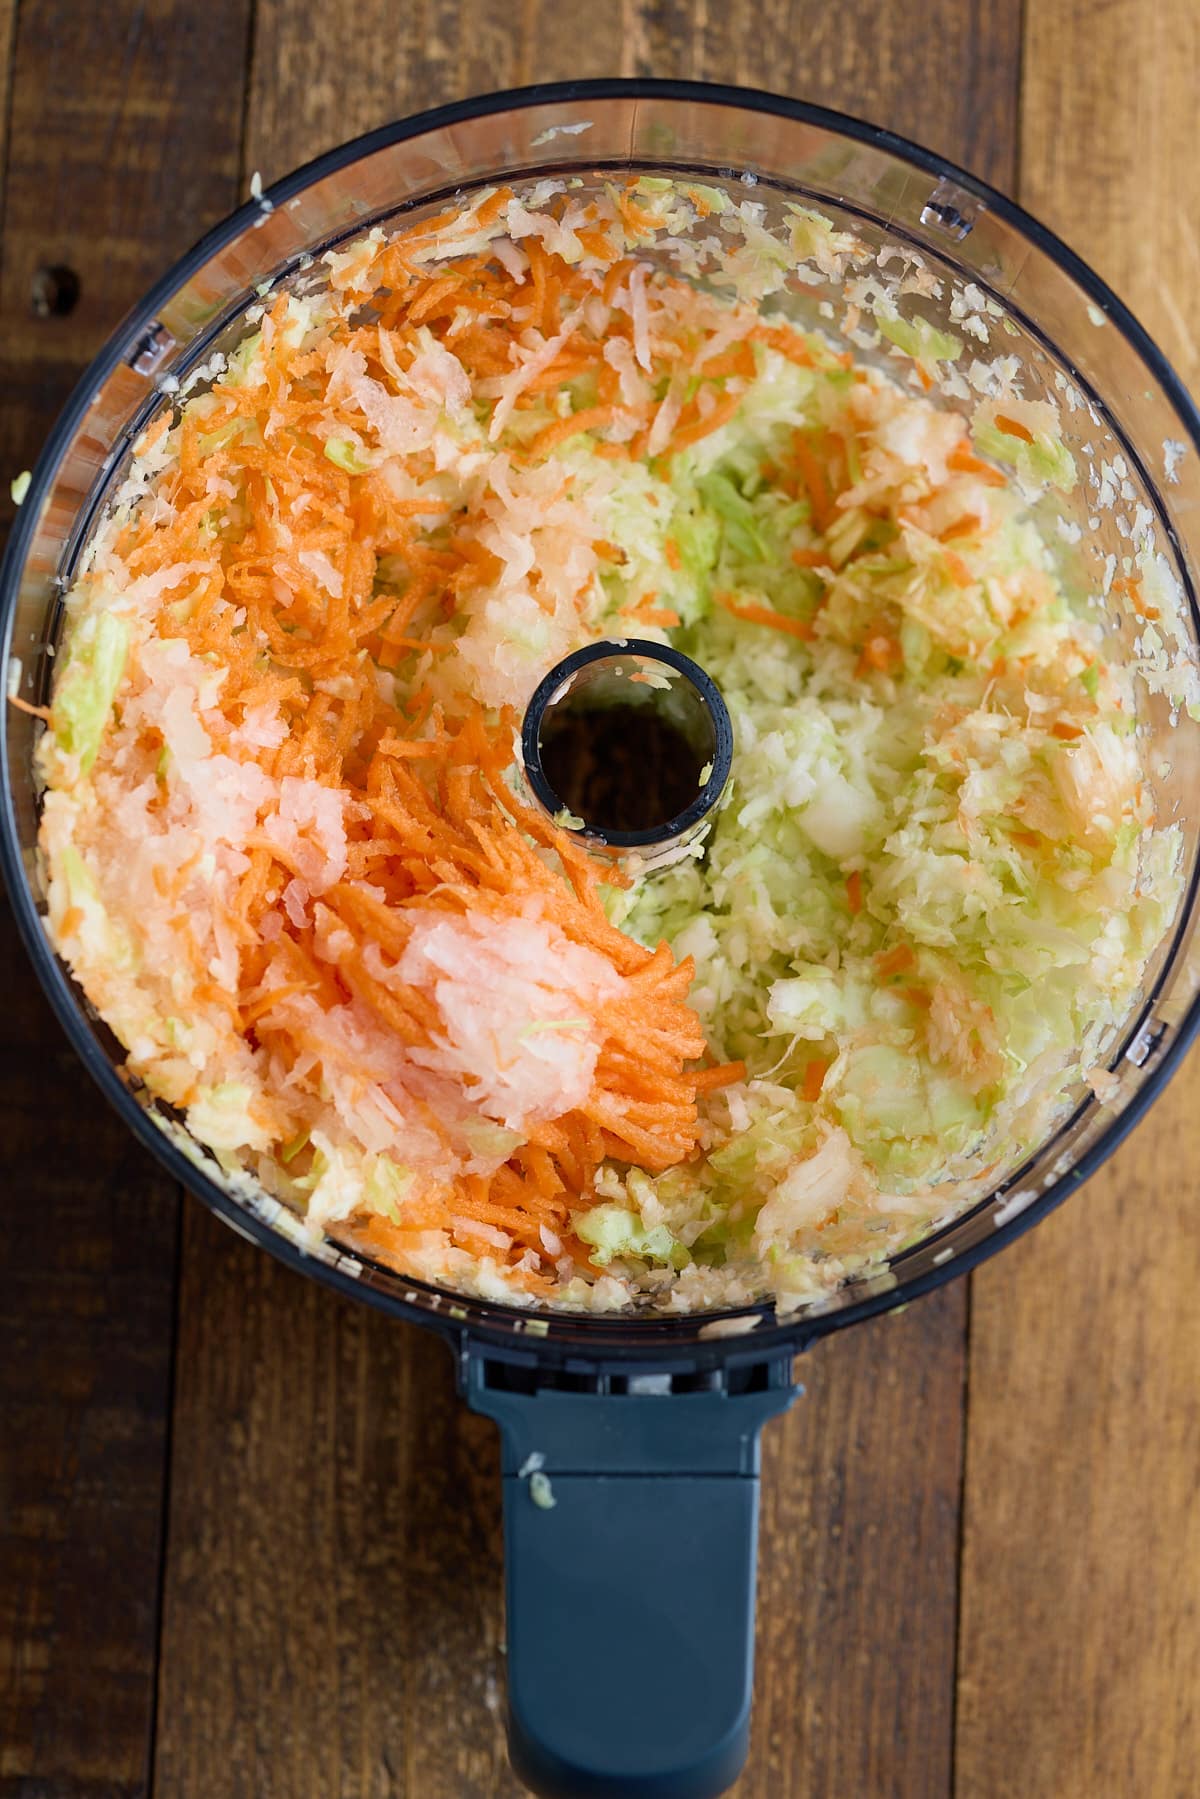
Add shredded cabbage, carrots, and sweet onion into a large bowl, and set aside. I use a food processor to shred all the vegetables.

Shredded vegetables in a food processor.

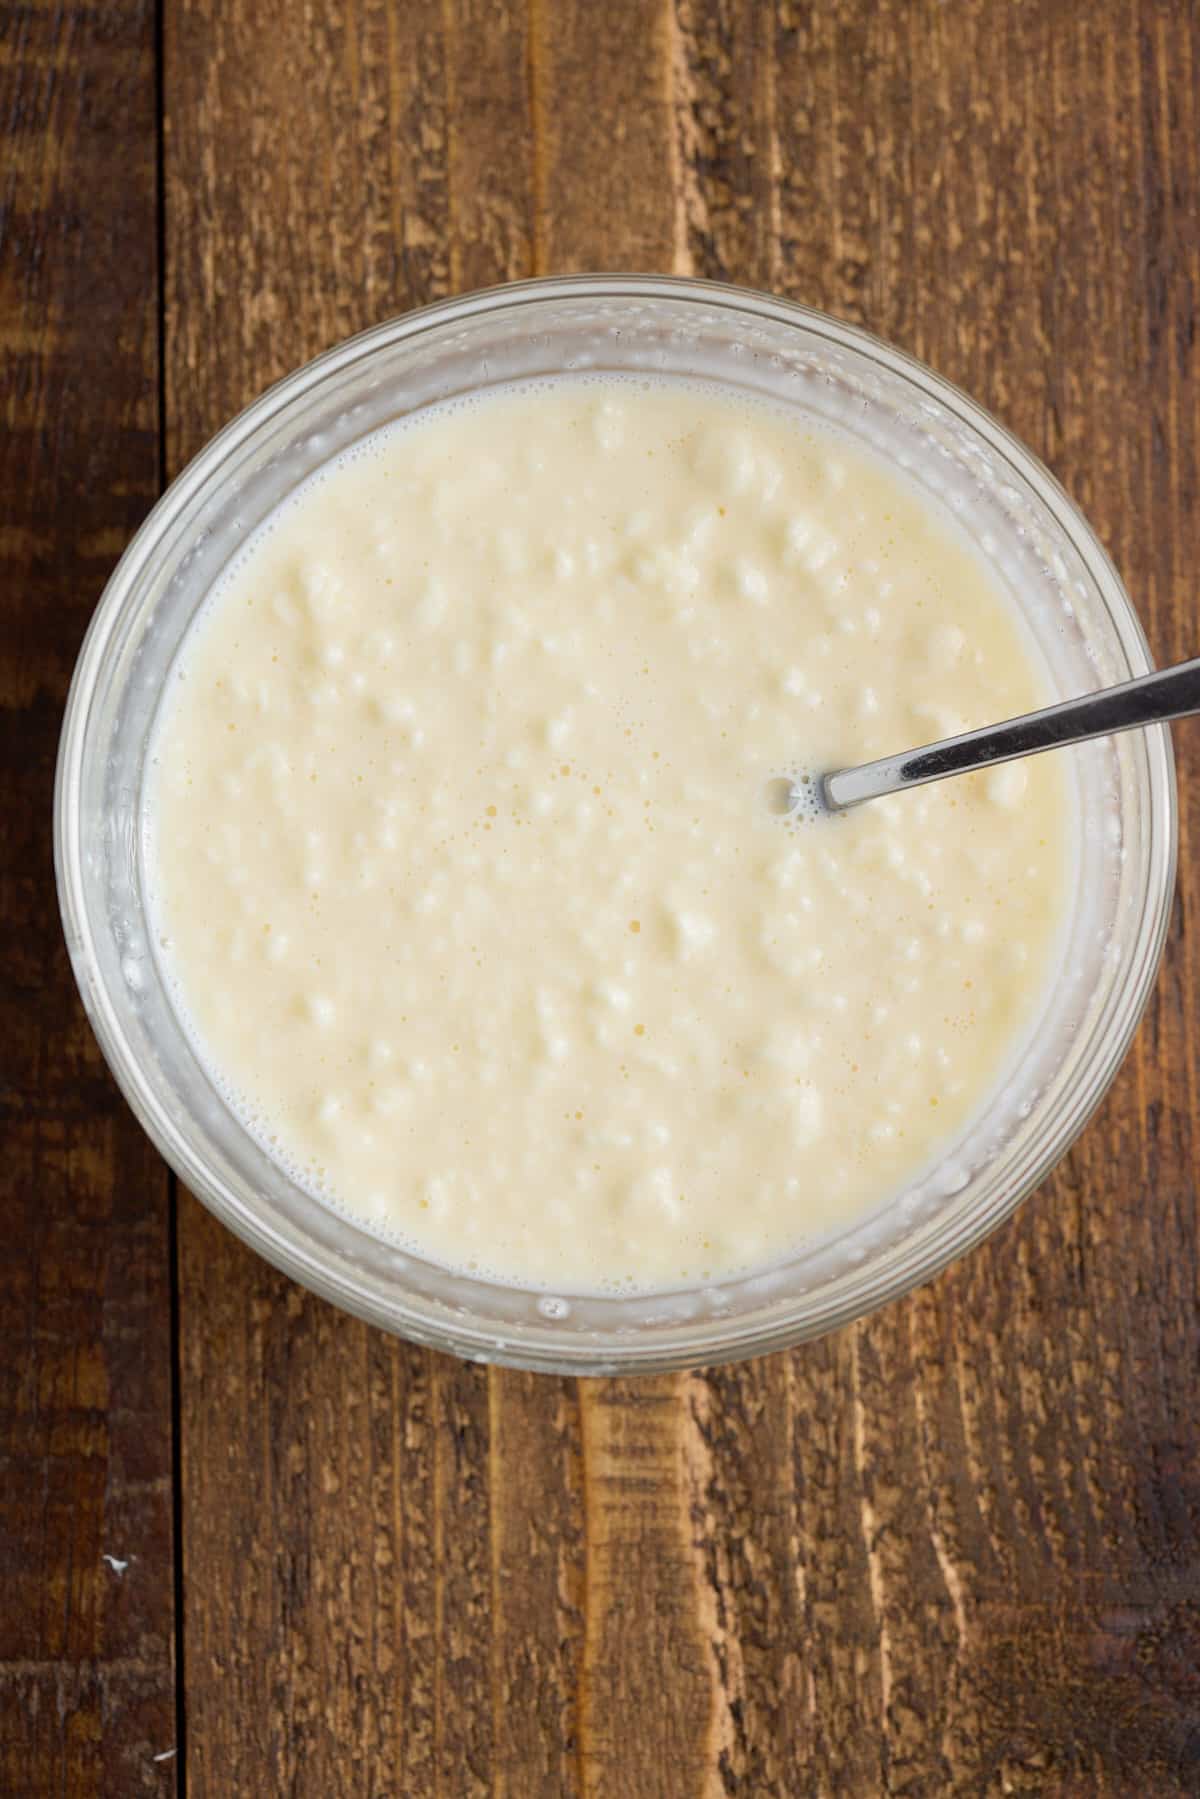
In another bowl, add mayonnaise, sugar, apple cider vinegar, lemon juice, buttermilk, salt, and pepper in another bowl.

coleslaw dressing mixed together in a bowl.

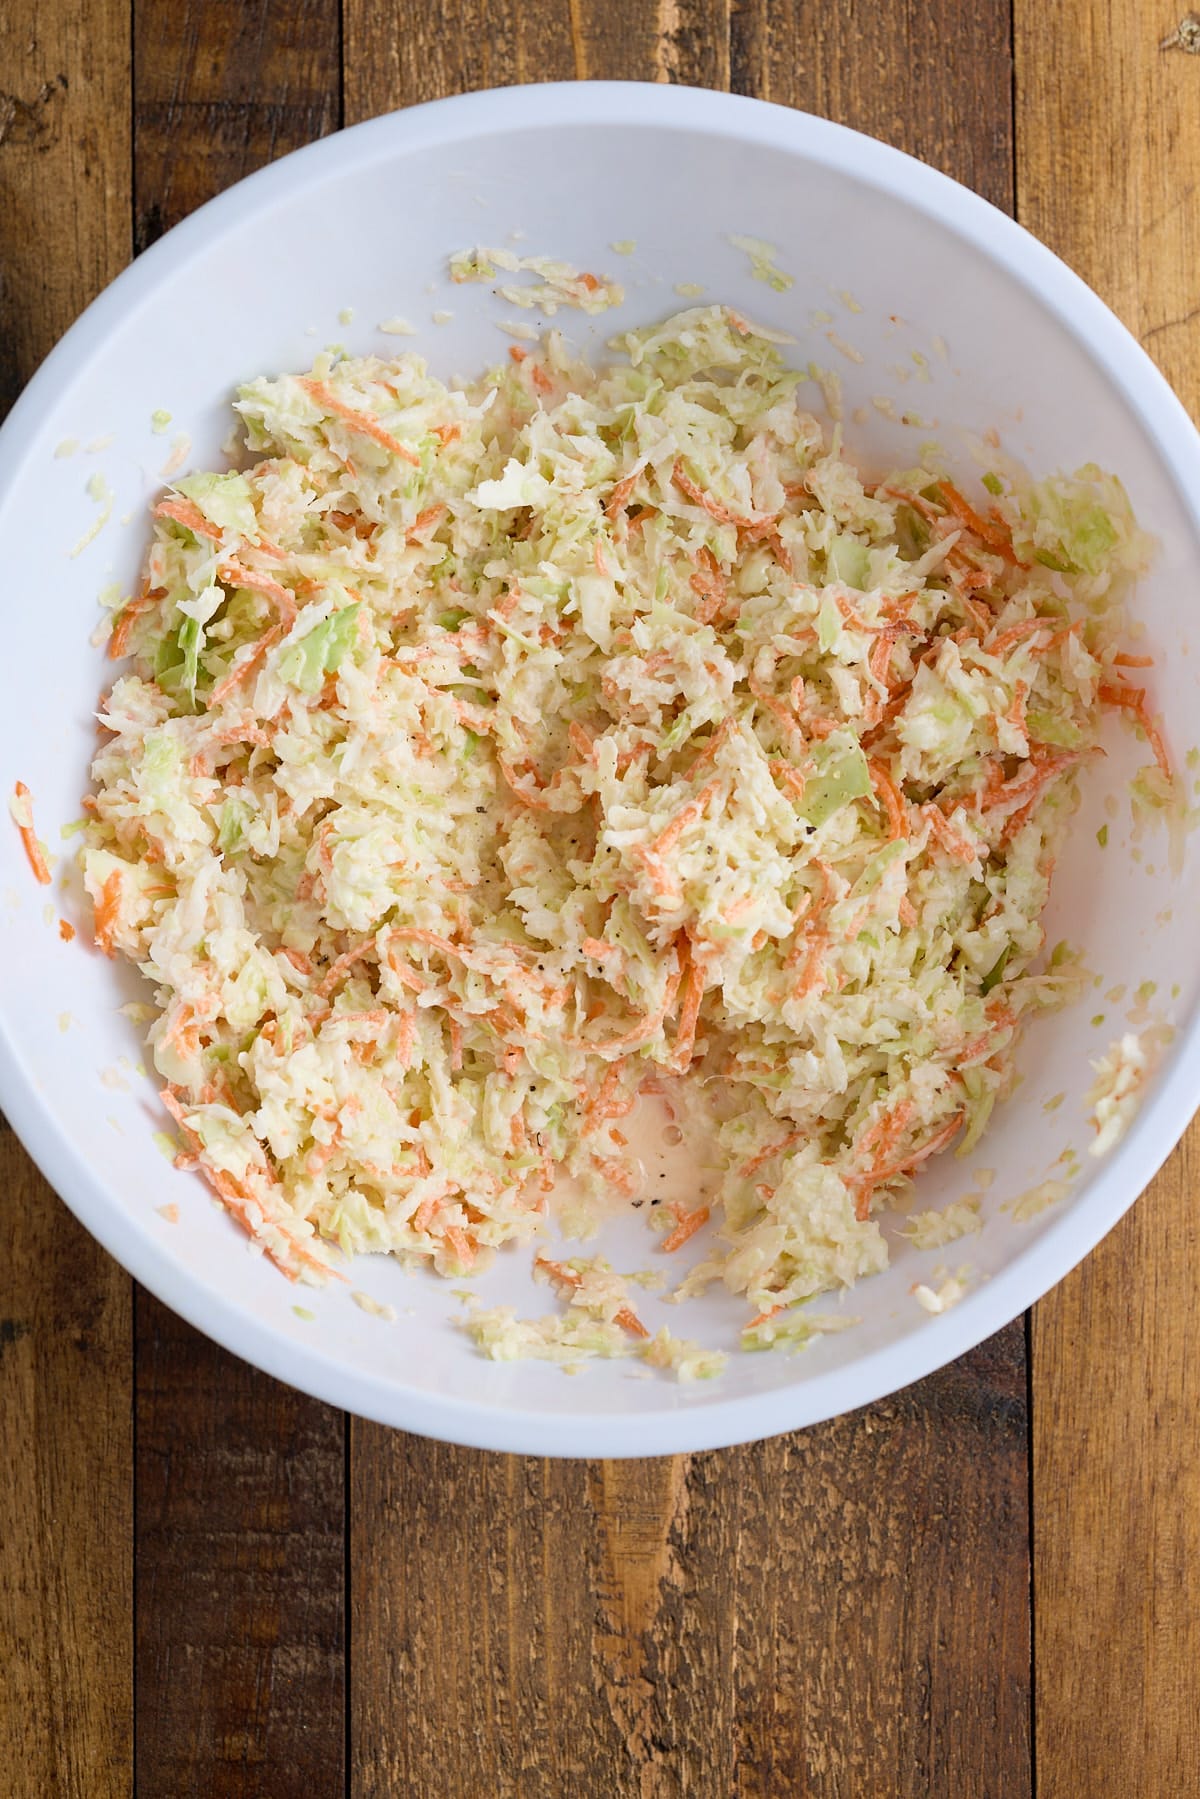
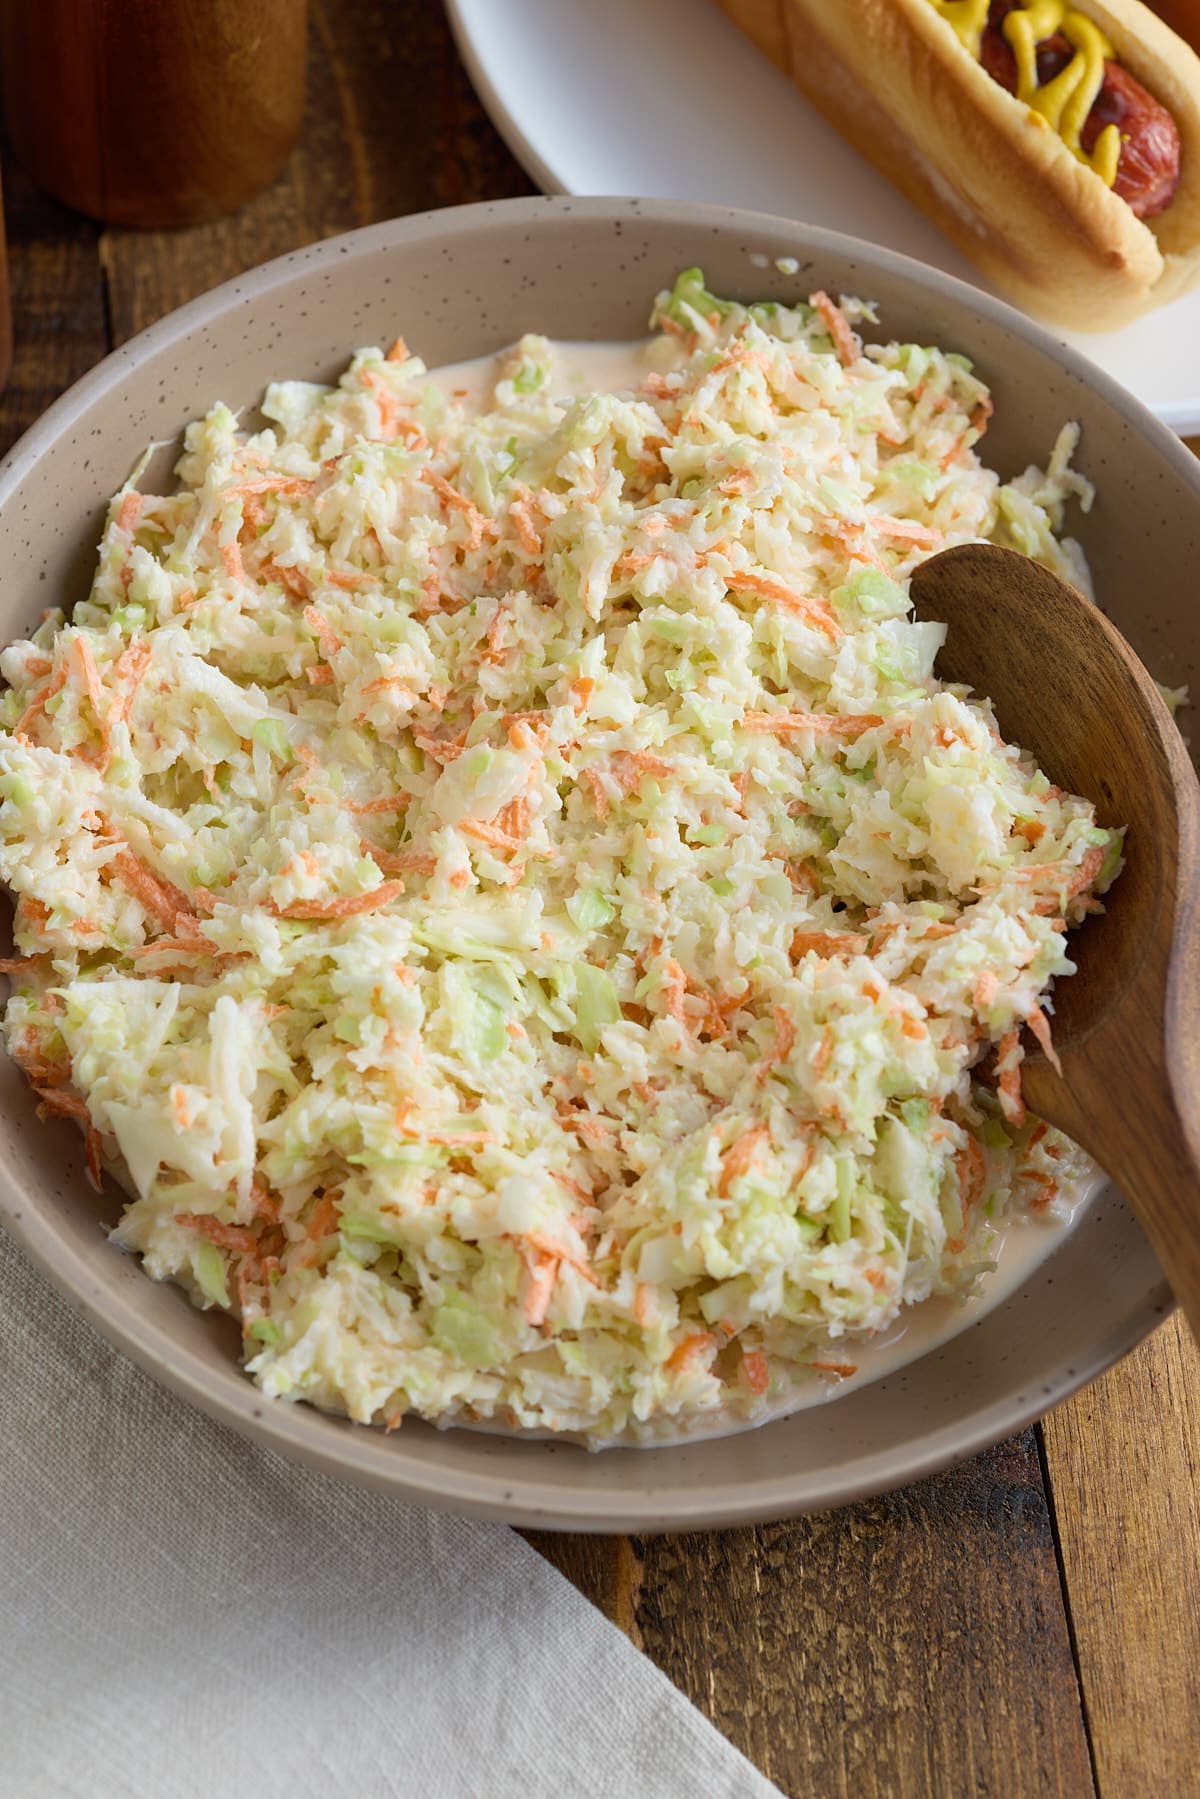
Pour this mixture over the shredded vegetables and toss to combine, ensuring the dressing covers the coleslaw.

Coleslaw recipe mixed up in a mixing bowl.

Serve immediately or cover and chill in the refrigerator for at least one hour or overnight. Serve and enjoy!

How to store our coleslaw recipe

Keep your coleslaw stored in an airtight container in the fridge for up to 5 days.

While you can serve our coleslaw right away, making this the day before and storing it in the fridge will allow the flavors to meld together.

Freezing: I wouldn't recommend freezing coleslaw that's made with mayonnaise. During the thawing process, the dressing will start to beak down.

Servings Suggestions

Coleslaw is one of those side dishes you assume will be at every backyard BBQ. It's easy, delicious, and brings brightness next to those savory meats. Serve my coleslaw alongside any of these dishes:

  • Sticky BBQ Air Fryer Chicken Legs
  • BBQ Air Fryer Ribs
  • BBQ Air Fryer Chicken Breast
  • Oven-Baked Hot Dogs
Coleslaw in a serving bowl with a wooden spoon.

Why is it called coleslaw?

Coleslaw as we know it, comes from the Dutch term 'kool sla'. Kool is cabbage, and Sla is salad, cabbage salad. There are many variations of coleslaw depending on what part of the world you're in. The use of buttermilk, as we use it here, is mainly found in coleslaw made in the southern US. Other regions' recipes add other various ingredients like shredded apples, celery seeds, grated cheese, peppers, nuts, and dried fruits.

FAQ's

What cabbage is best for coleslaw?

Green, red, napa, or savoy cabbage are all great options for coleslaw. Using red cabbage may result in some color bleeding into the dressing, but is great for added color contrast. Purely preference or what you have access to with do.

How far ahead of time can I prep coleslaw?

Shred your cabbage and carrots for at most, three days before mixing your coleslaw mixture. Keep them in a storage bag or container in the fridge until you're ready to use them.

What is the best tool for shredding cabbage and carrots?

Any of these tools will shred cabbage, each might offer a different texture, however:
-Mandolin
-Food processor
-Manual press chopper
-Box shredder
Whichever tool your use, take care to use it safely to avoid any unnecessary cuts.

Looking for more side dish recipes? Try these out:

  • Broccoli Slaw
  • Seasoned Air Fryer Asparagus
  • Fresh Corn Salad Recipe
  • Southern Potato Salad Recipe
  • Zesty and Easy Grilled Marinated Vegetables

 If you have tried this recipe or any other recipe on my blog, please rate it and let me know how it turned out in the comments below!

Coleslaw in a serving bowl with a wooden spoon.
Print Recipe
5 from 2 votes

Coleslaw Recipe

If you're planning a backyard BBQ, there's no better side dish to accompany those grilled meats than a delicious coleslaw. A fresh and crisp coleslaw is the perfect complement to those savory meats, and it's a great way to incorporate some veggies into your meal.
Prep Time15 minutes mins
Resting Time1 hour hr
Total Time1 hour hr 15 minutes mins
Course: Side Dish
Cuisine: American
Keyword: coleslaw recipe
Servings: 6 servings
Calories: 181kcal
Author: Tanya Harris

Ingredients

  • ½ Medium Cabbage finely shredded (about 4 cups)
  • 1 medium Carrot shredded
  • ¼ Sweet Onion finely shredded
  • ½ cup Mayonnaise
  • 3 tablespoons Granulated Sugar
  • 2 tablespoons Apple Cider Vinegar
  • 1 tablespoon Lemon Juice
  • 1 tablespoon Buttermilk
  • Salt and Pepper to taste

Instructions

  • Add cabbage, carrots, and sweet onion into a large bowl, set aside.
  • In another bowl, add mayonnaise, sugar, apple cider vinegar, lemon juice, buttermilk, salt, and pepper in another bowl. Pour this mixture over the shredded vegetables and toss to combine, ensuring the dressing covers the coleslaw.
  • Serve immediately or cover and chill in the refrigerator for at least one hour or overnight. Serve and enjoy!

Notes

  • Use a food processor for easy shredding of the vegetables.

Nutrition

Serving: 1g | Calories: 181kcal | Carbohydrates: 13g | Protein: 1g | Fat: 14g | Saturated Fat: 2g | Polyunsaturated Fat: 8g | Monounsaturated Fat: 3g | Trans Fat: 0.03g | Cholesterol: 8mg | Sodium: 148mg | Potassium: 191mg | Fiber: 2g | Sugar: 10g | Vitamin A: 1789IU | Vitamin C: 30mg | Calcium: 41mg | Iron: 0.5mg

Boiled Green Bananas

April 13, 2023 by Tanya Harris 3 Comments

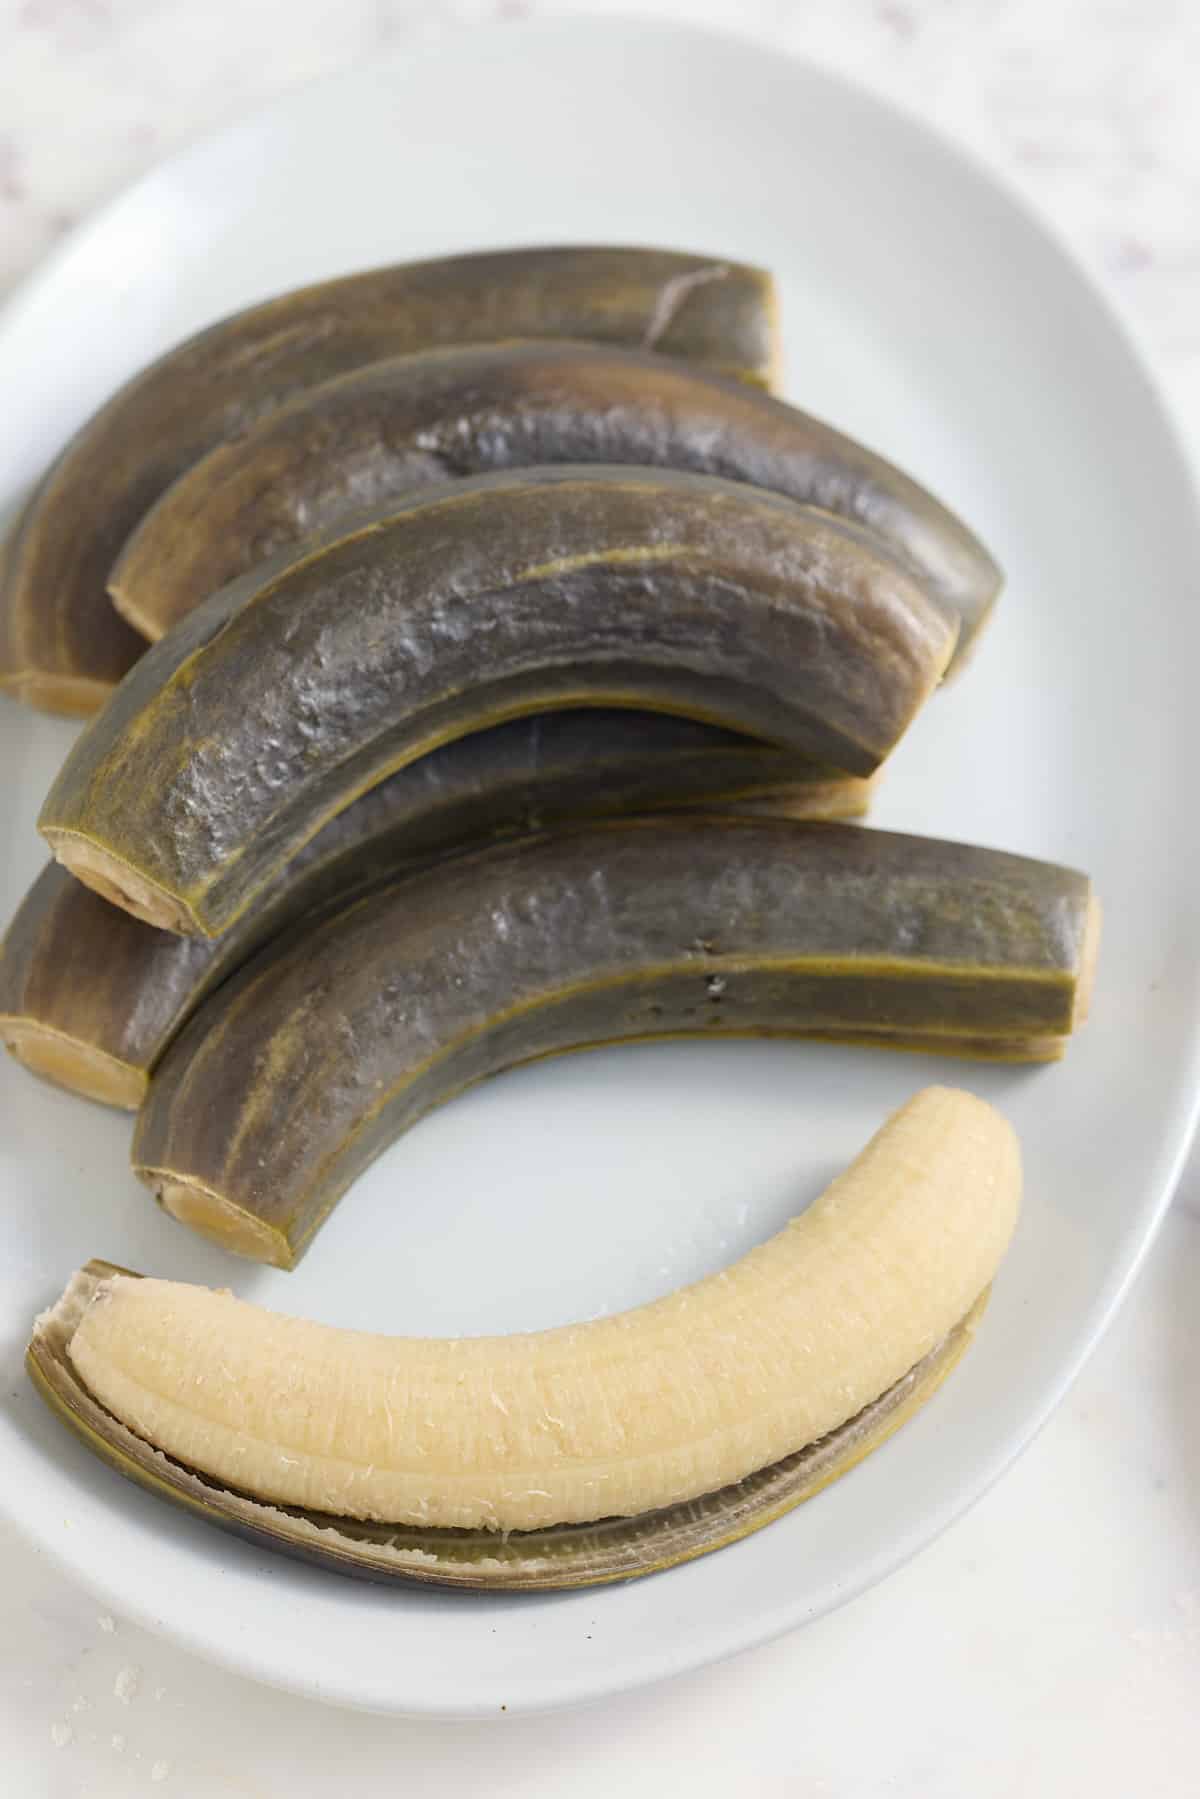
boiled green banana on white plate

Boiled Green Banana is an accompaniment to many Caribbean dishes. This healthy fruit has many benefits and is the perfect base for many delicious meals.

boiled green banana on white plate

This post contains affiliate links, please read my full disclaimer here.

You’ll find the full recipe with ingredient amounts and instructions in the recipe card at the bottom of this post. Be sure to check out the blog post itself for extra tips and tricks!

Whenever I have a traditional Jamaican meal, whether it's mackerel rundown, ackee and saltfish, or callaloo, cooked green bananas on the plate are a must. It's a popular dish among the Caribbean islands, and you can easily find unripe bananas in many Caribbean markets.

While ripe yellow bananas are a popular and well-known fruit, their unripe counterparts, green bananas, are often overlooked. However, these bananas are not only packed with essential nutrients, but they also offer a versatile and delicious alternative to traditional carbohydrate sources.

Green bananas are an excellent source of dietary fiber, which aids digestion and promotes regularity. Consuming boiled green bananas can help you meet your daily fiber intake goals and support gut health.

How to Choose and Prepare Green Bananas for Boiling

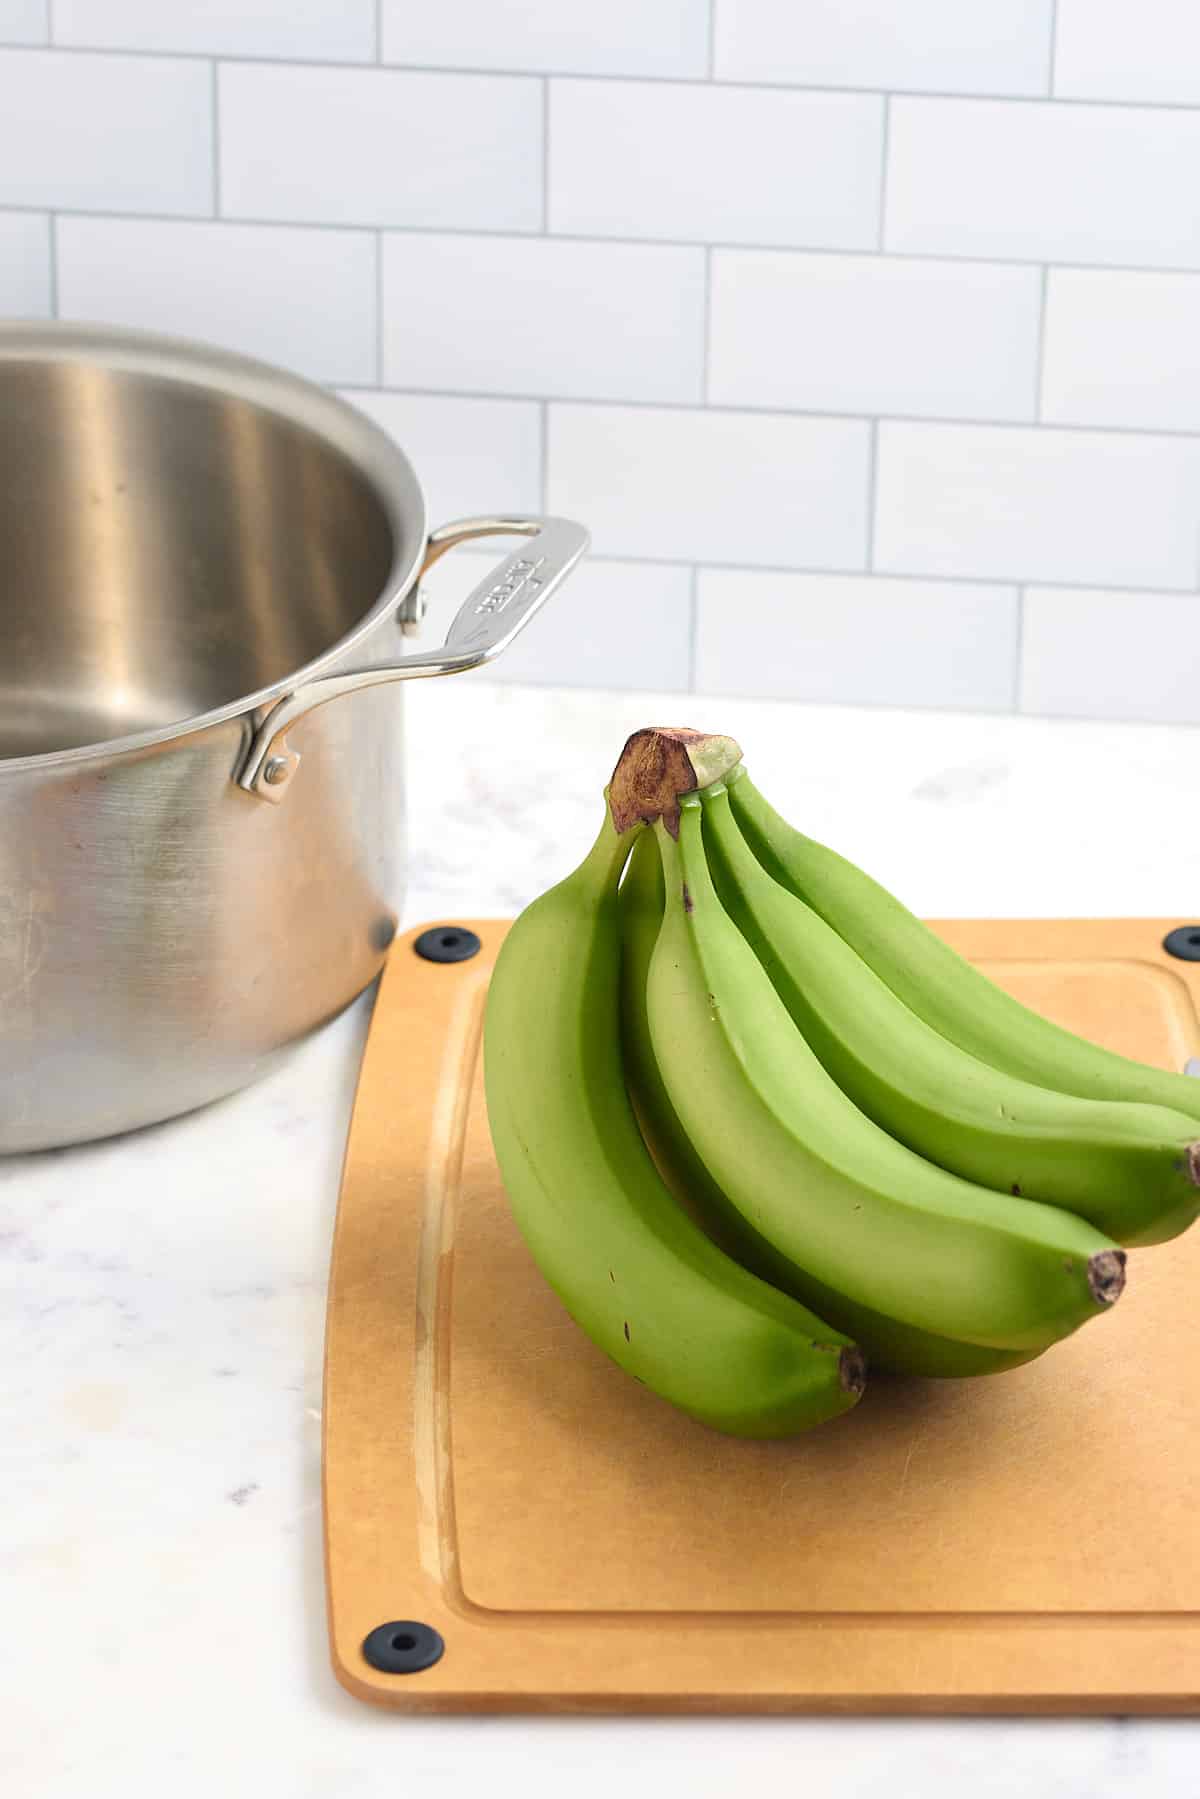
Look for firm, unblemished bananas that are not too ripe or too unripe. They should have a slight give when pressed gently. Rinse the bananas in water before boiling them to remove any dirt or grime that may be on the bananas.

green banana on cutting board in front of large pot

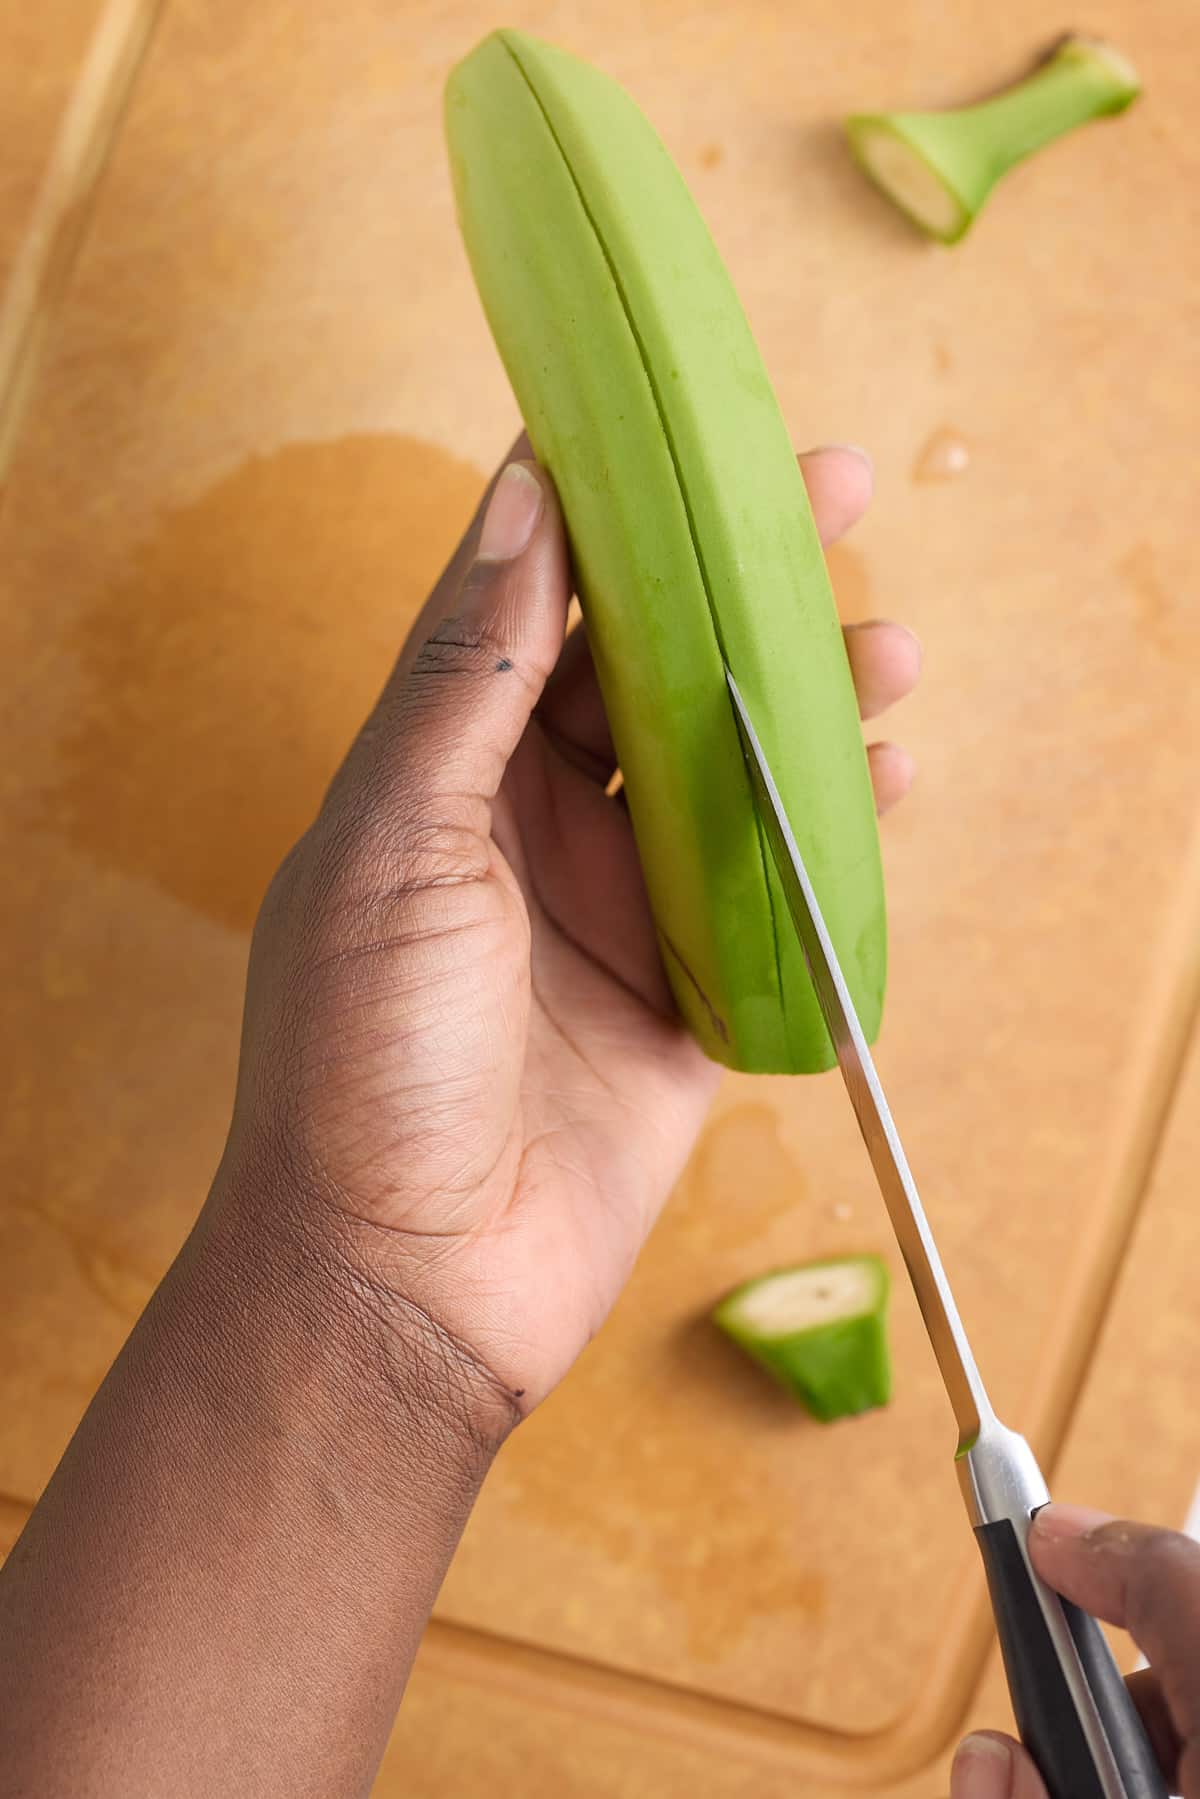
Cut the ends off the bananas. Then using a pairing knife, slice into the flesh of the banana alongside the long side of the banana. Be careful not to cut into the inside of the banana. Do not peel the banana at this stage.

This step will make it easier to remove the skin from the bananas after boiling.

hand cutting slits down the side of a green banana

Boiling Process

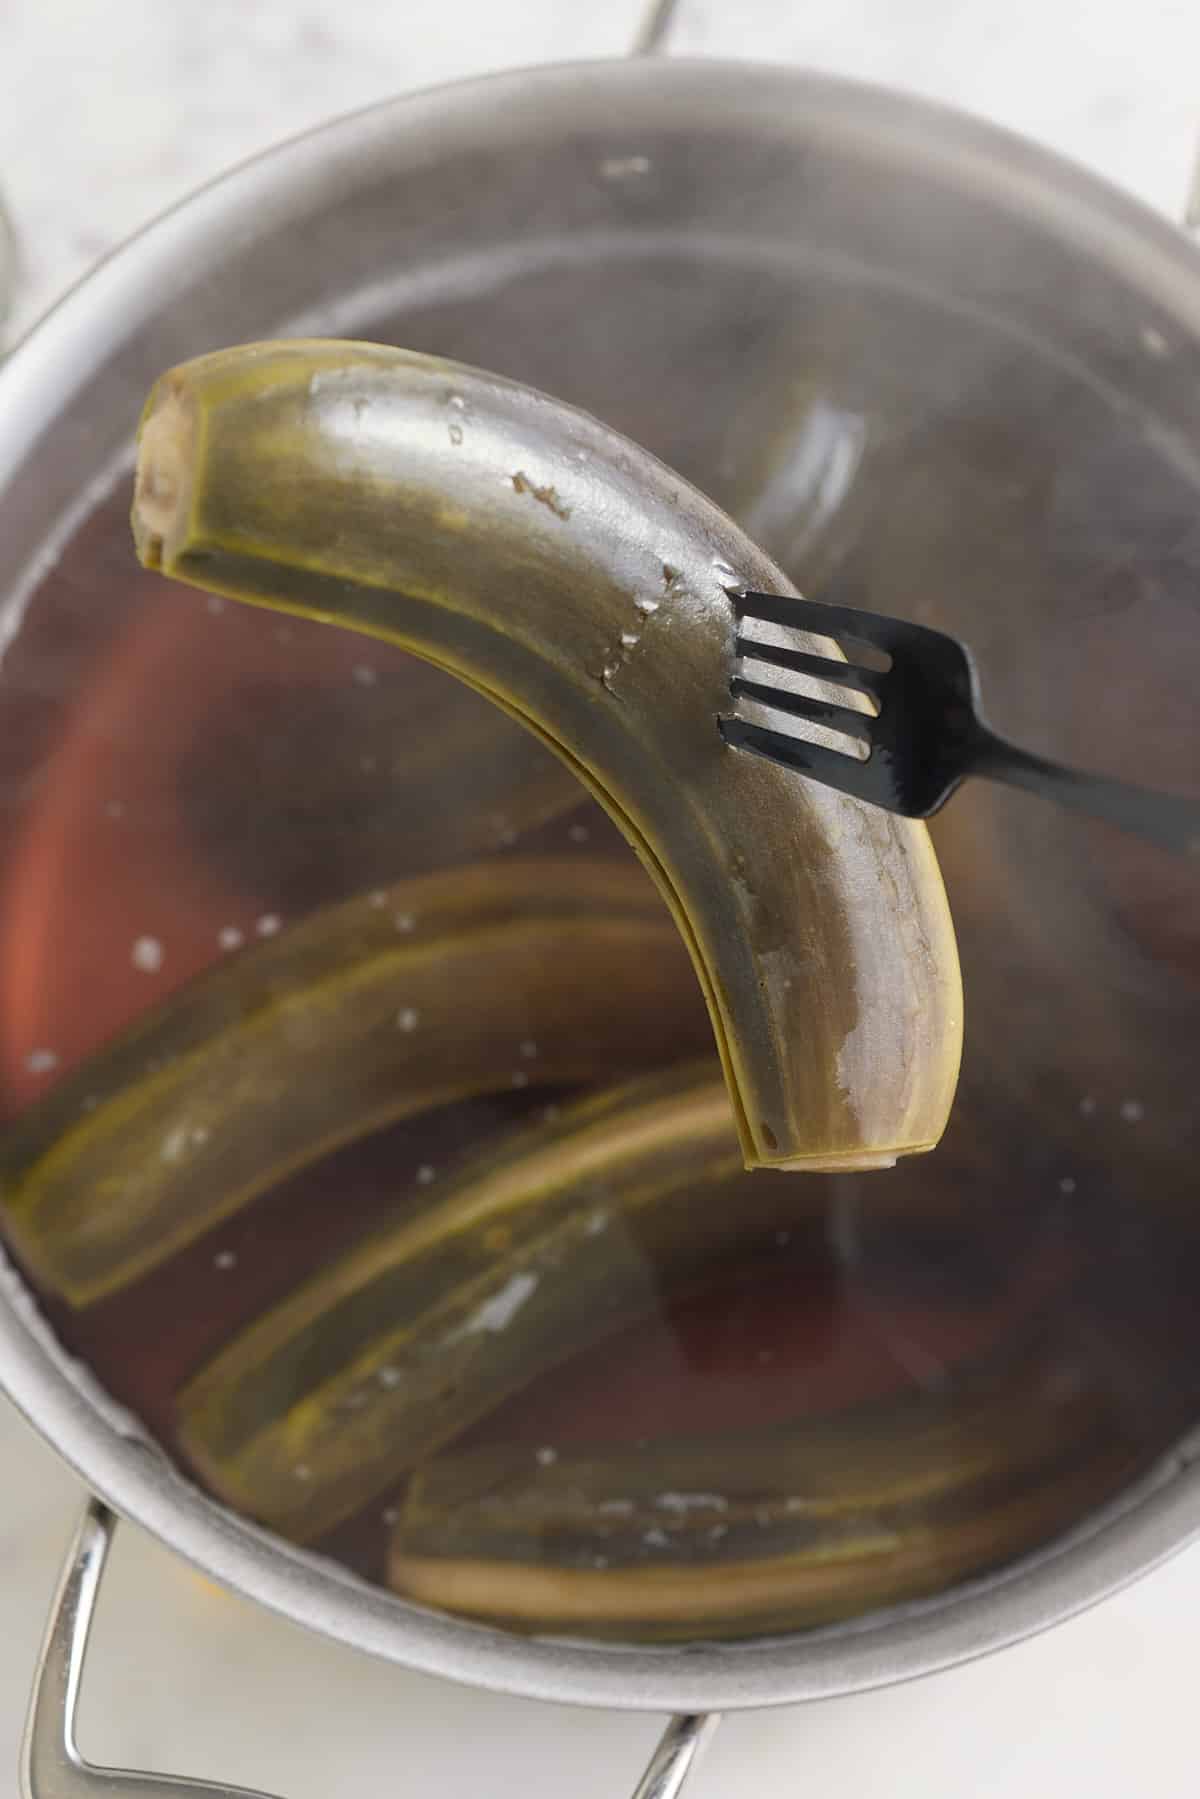
Bring water to a boil in a large pot and a little salt. Carefully add the bananas to the pot, ensuring that they are fully submerged in the salted water. Boil for 25-30 minutes or until they are tender but not mushy.

boiled green banana after being cooked, being picked up with fork

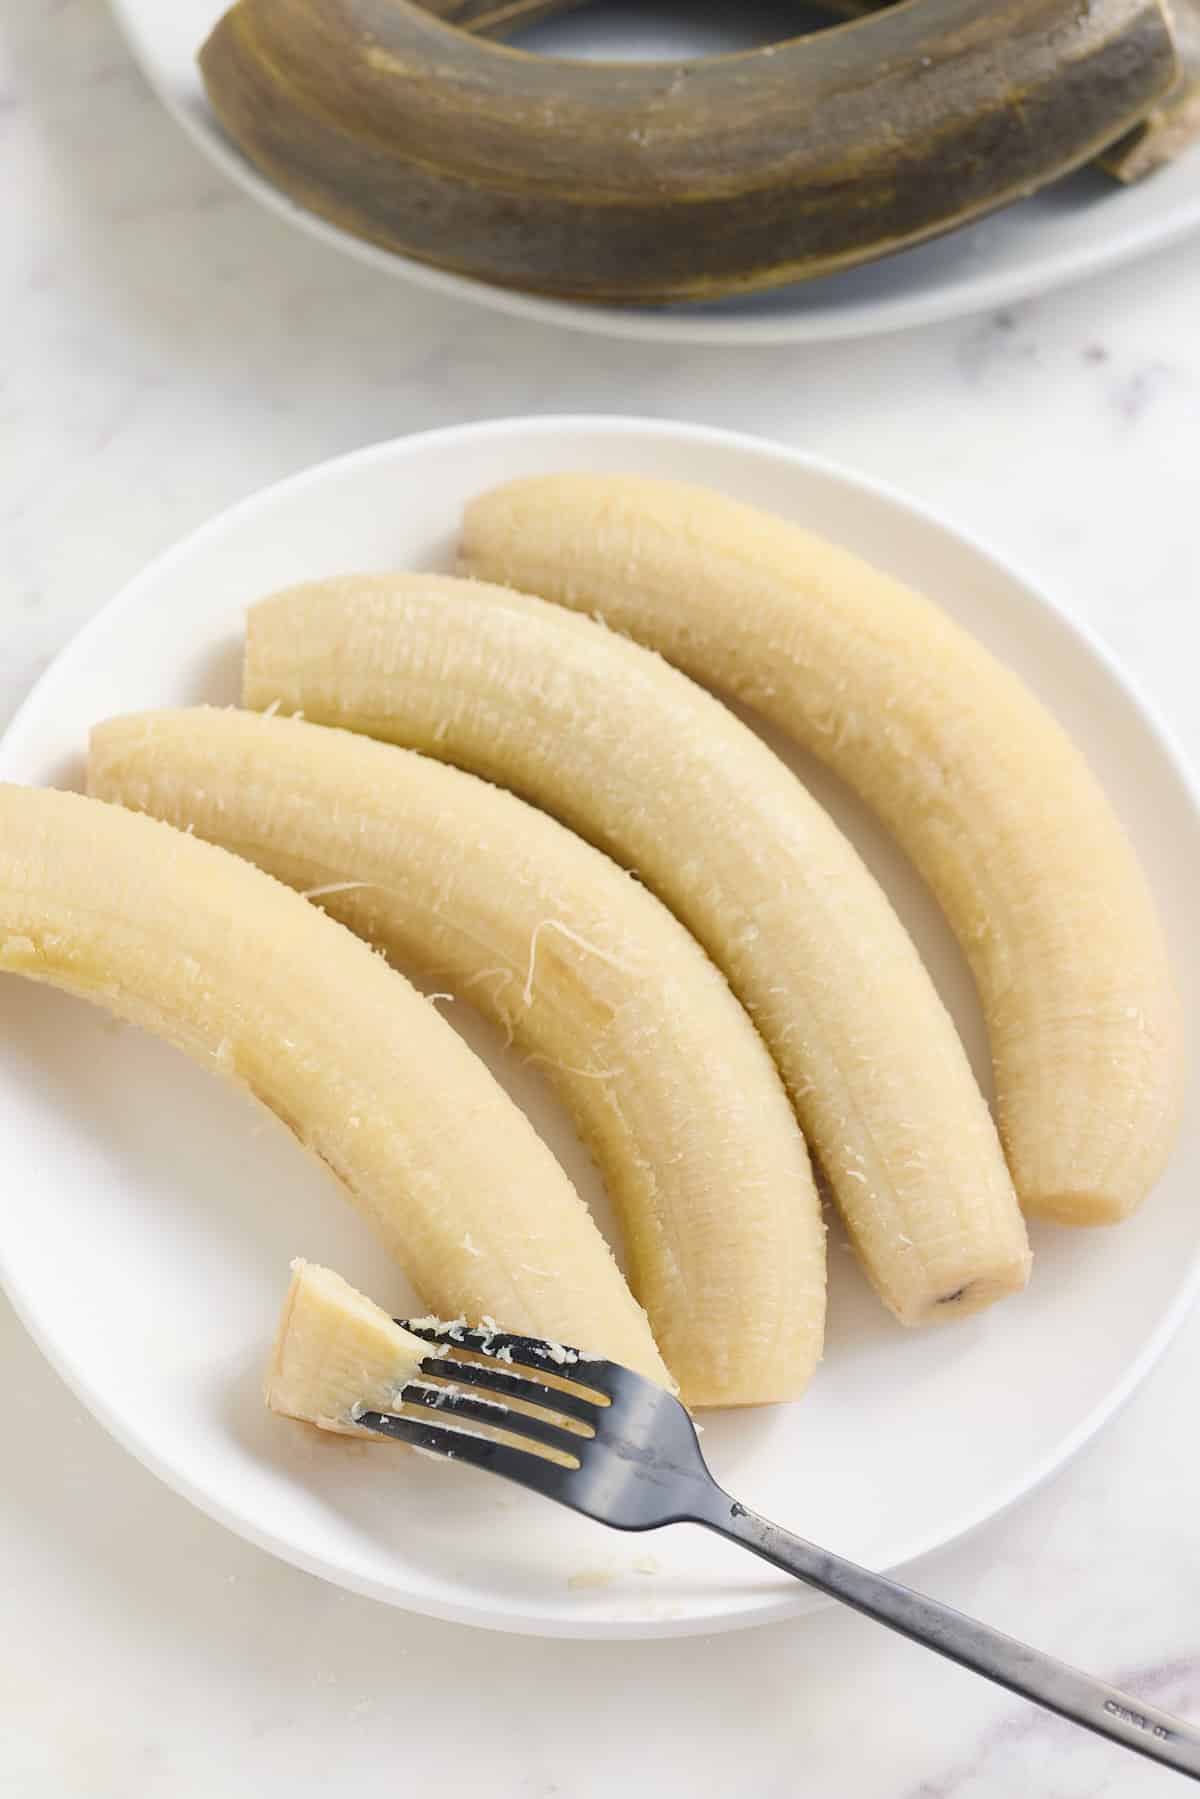
Remove from heat, drain, and let them cool slightly before peeling and serving.

What to serve with Green Bananas

There are many uses for cooked green bananas. Try these delicious recipes:

  • Simple boiled green bananas with a twist: Serve them with a drizzle of olive oil, a sprinkle of salt, and a squeeze of lime for a zesty and refreshing side dish.
  • Boiled green banana salad: Combine sliced boiled green bananas with diced avocado, mango, red onion, and cilantro. Toss with a citrus vinaigrette for a tropical and nutritious salad.
  • Green banana mash: Mash boiled bananas with butter, garlic, and a touch of cream for a satisfying alternative to mashed potatoes.
  • Green banana curry: Create a fusion of Caribbean and Indian flavors by simmering boiled green bananas in a tomato-based curry sauce with spices like turmeric, cumin, and coriander.
  • Boiled green banana is usually served with boiled dumplings in many Caribbean meals.
boiled green banana with one peeled on white plate

Incorporating them into your Diet

  • Pair with protein: Serve boiled green bananas alongside grilled or baked chicken, fish, or tofu for a balanced and satisfying meal.
  • Replace traditional carbohydrates: Use them as a substitute for starchy staples like potatoes, rice, or pasta in your favorite dishes.
  • Meal planning and prep: Boil a batch of green bananas at the beginning of the week and store them in the refrigerator for easy meal additions throughout the week.

We hope you love these boiled green bananas as much as we do. If you give this recipe, please leave a comment and let us know how you like it.

boiled green banana on white plate
Print Recipe
5 from 4 votes

Boiled Green Bananas

Boiled Green Banana is an accompaniment to many Caribbean dishes. This healthy fruit has many benefits and is the perfect base for many delicious meals.
Prep Time10 minutes mins
Cook Time25 minutes mins
Total Time35 minutes mins
Course: Side Dish
Cuisine: Caribbean
Keyword: boiled green bananas, green bananas
Servings: 6 people
Calories: 88kcal
Author: Tanya Harris

Ingredients

  • 5-6 green bananas
  • 10-12 cups of water
  • 2 teaspoons salt

Instructions

  • Rinse the bananas in water before boiling them to remove any dirt or grime that may be on the bananas.
  • Cut the ends off the bananas. Then using a pairing knife, slice into the flesh of the banana alongside the long side of the banana. Be careful not to cut into the inside of the banana. Do not peel the banana at this stage.
  • Bring water to a boil in a large pot and a little salt. Carefully add the bananas to the pot, ensuring that they are fully submerged in the salted water. Boil for 25-30 minutes or until they are tender but not mushy.
  • Remove from heat, drain, and let them cool slightly before peeling and serving.

Notes

Boiled green bananas can be served with a variety of dishes, such as stews, curries, and grilled meats. They can also be served as a side dish with butter, salt, or other seasonings.

Nutrition

Calories: 88kcal | Carbohydrates: 22g | Protein: 1g | Fat: 0.3g | Saturated Fat: 0.1g | Polyunsaturated Fat: 0.1g | Monounsaturated Fat: 0.03g | Sodium: 796mg | Potassium: 352mg | Fiber: 3g | Sugar: 12g | Vitamin A: 63IU | Vitamin C: 9mg | Calcium: 17mg | Iron: 0.3mg

Oven Baked Hot Dogs (Ready in 15 Minutes!)

March 31, 2023 by Tanya Harris 2 Comments

oven baked hot dogs in hot dog buns with a variety of toppings and sauces

My Oven-Baked Hot Dogs recipe is quick and easy to prepare. Simply place the hot dogs into the hot oven, while you get on with preparing your favorite hot dog toppings.

oven baked hot dogs in hot dog buns with a variety of toppings and sauces

You’ll find the full recipe with ingredient amounts and instructions in the recipe card at the bottom of this post. Be sure to check out the blog post itself for extra tips and tricks!

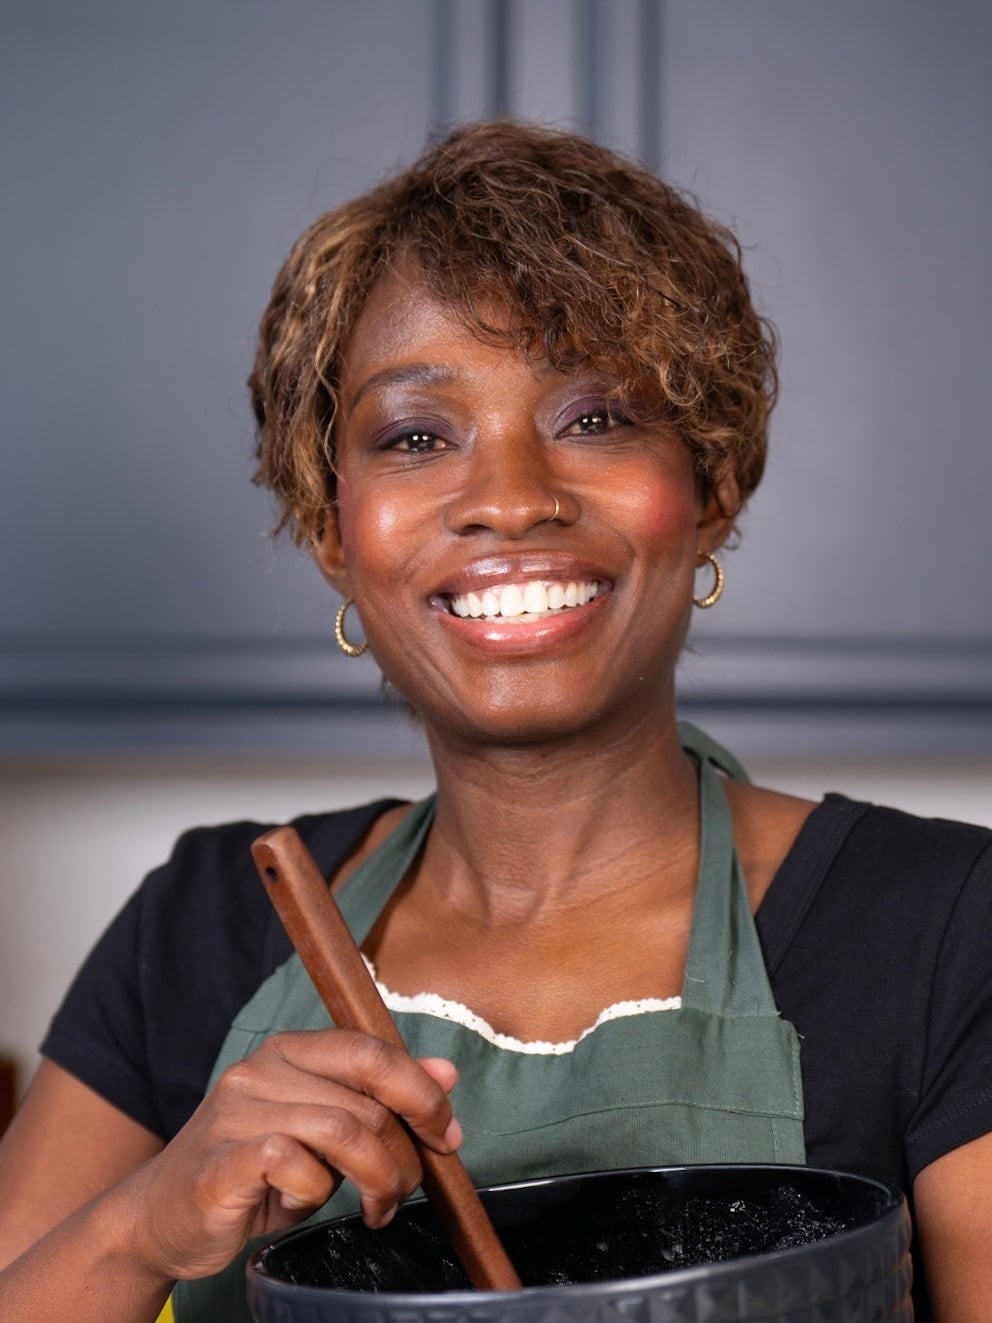
close up Tanya holding bowl

There are a variety of methods for cooking hot dogs, but if you want flavorful hot dogs, try roasting them in the oven. The preparation is minimal, and there's no need to stand over a hot stove.

These delicious oven-roasted hot dogs are the perfect weeknight dinner or game day snack. I like to serve the hot dogs in buns, then set out a variety of toppings, so that everyone can help themselves and load the hot dogs the way they want.

And for my friends with air fryers, you'll love these air fryer hot dogs, especially if you are making just a few.

A Quick Look at the Ingredients

Ingredient amounts and full recipe instructions are on the printable recipe card at the bottom of the post.

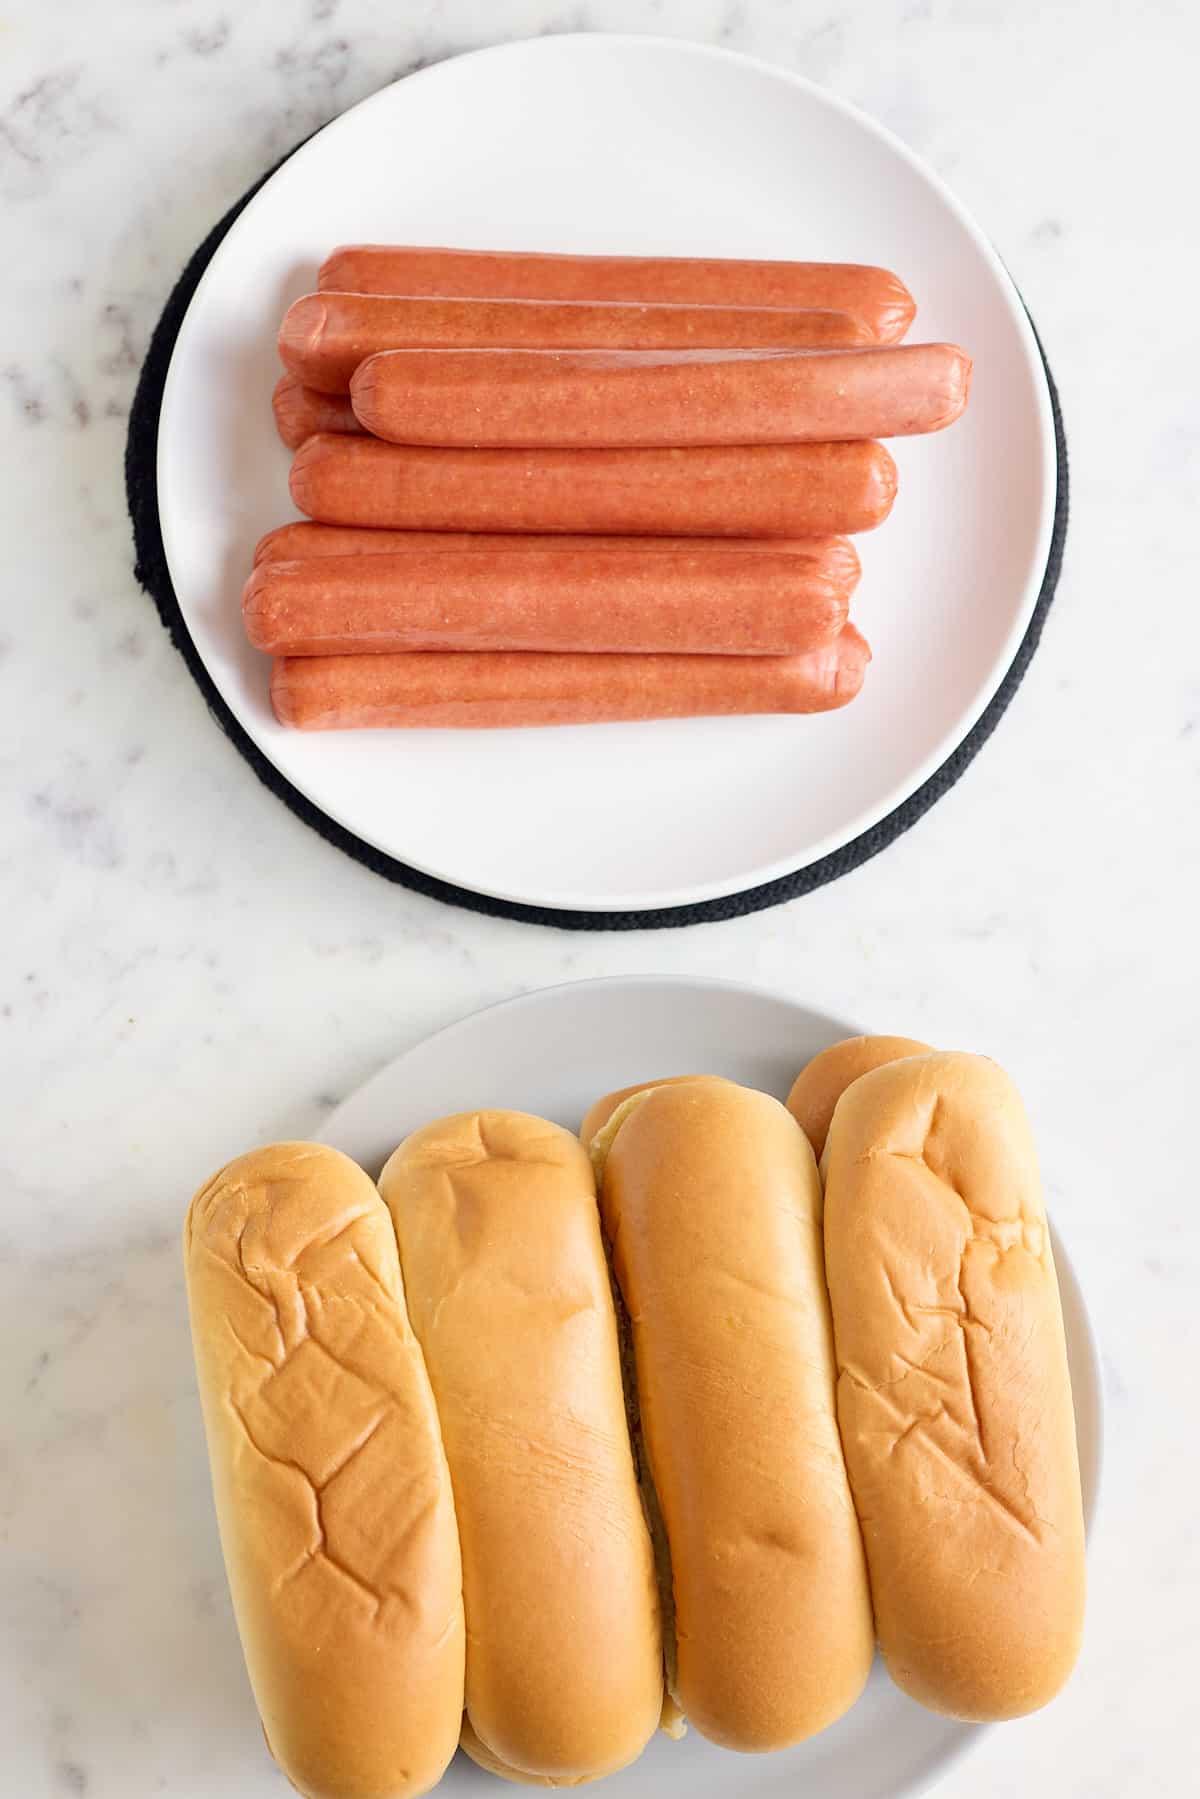
  • Hot Dogs - Use any variety of hot dogs that you enjoy eating. I prefer all-beef hot dogs.
  • Hot Dog Buns - I use regular hot dog buns.
oven baked hot dogs recipe ingredients

How to make Oven-Baked Hot Dogs

Step 1

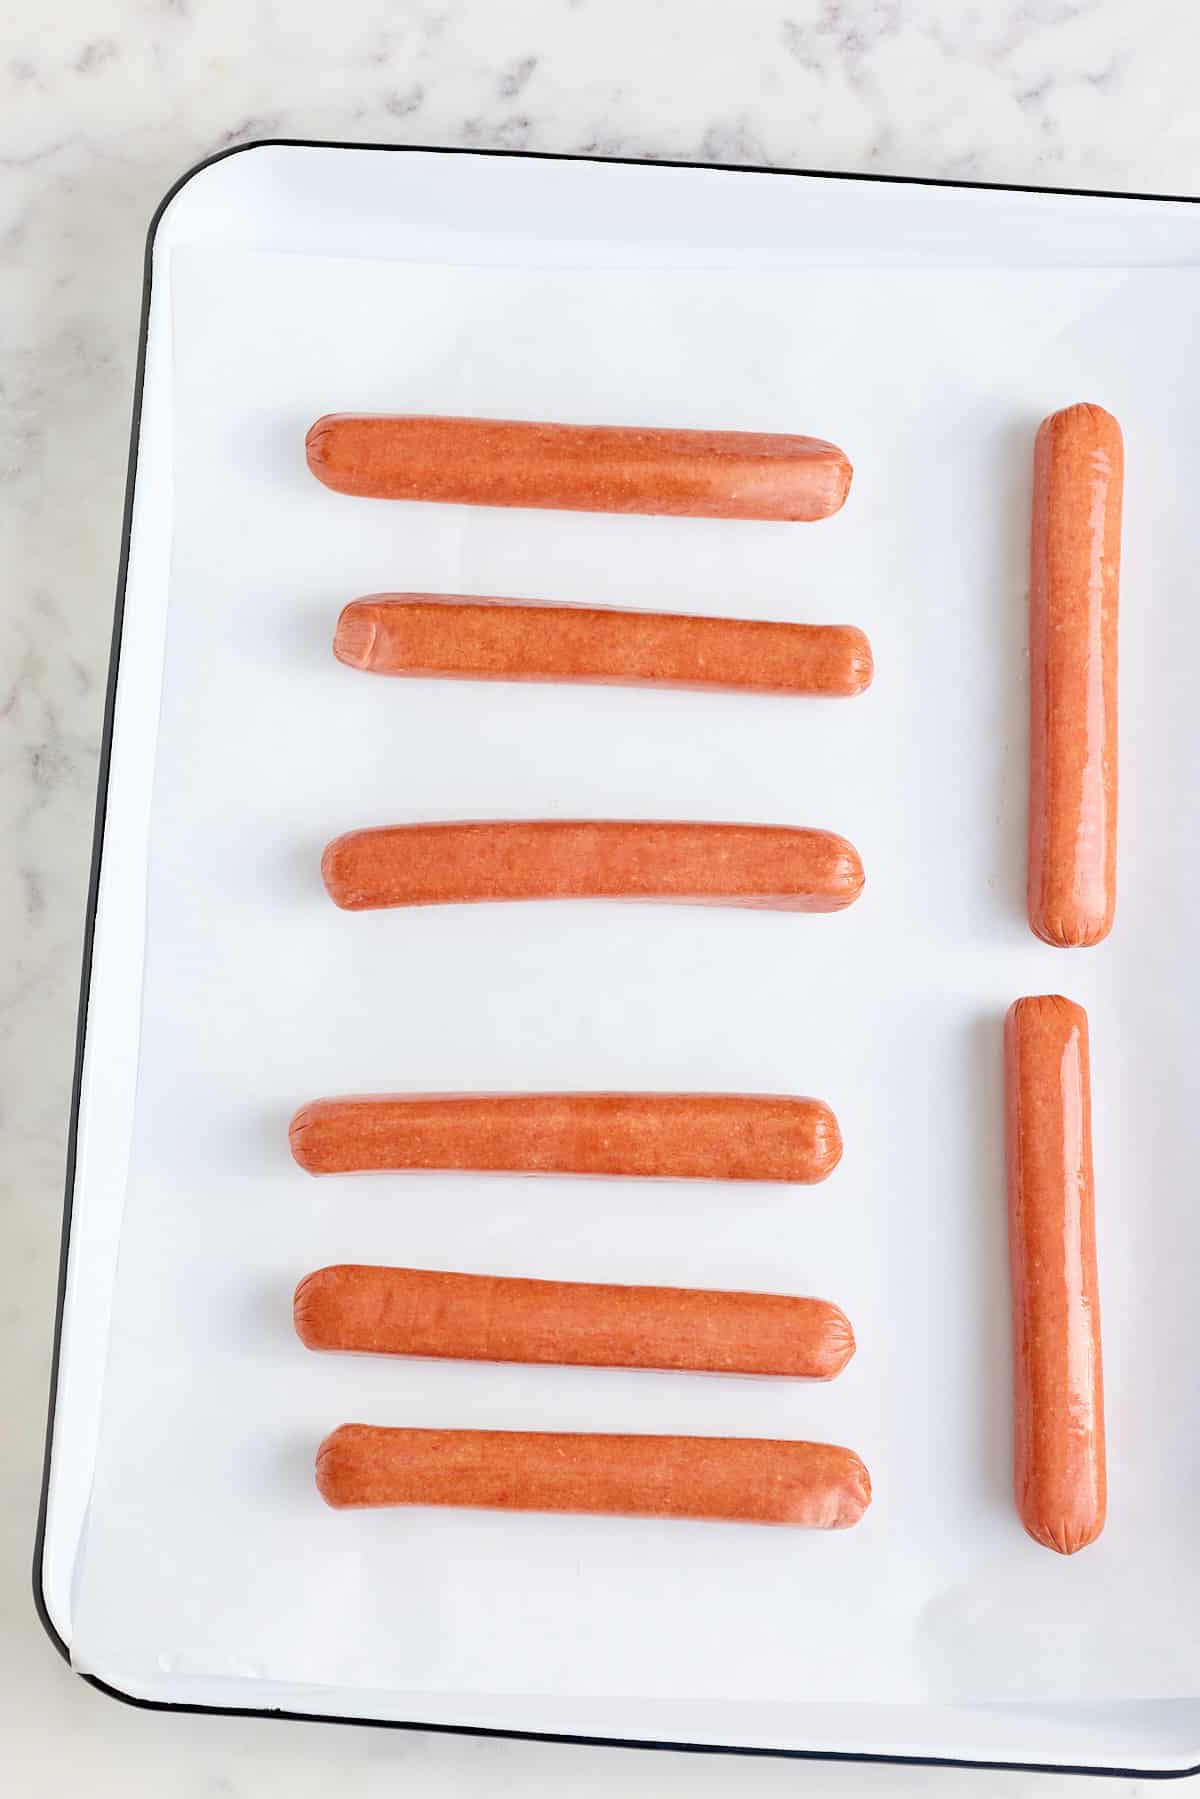
Preheat your oven to 400°F (200°C). Arrange the hot dogs in a single layer on a baking sheet.

white baking sheet lined with baking parchment and hot dogs laid on top

Step 2

Bake the hot dogs in the oven for 10-15 minutes, or until heated through and lightly browned.

white baking sheet with cooked hot dogs

Step 3

Remove the hot dogs from the oven and place them in hot dog buns. Remove from the oven and add your desired toppings, such as ketchup, mustard, relish, onions, or cheese.

Expert Tip: If you like crispy buns, add the hot dogs to the buns and place them back in the oven for 2 minutes. Then remove and add your desired toppings.

white baking tray with oven baked dogs in hot dog buns

Oven Temperature Guide

Not all ovens are the same, and sometimes you just need a little flexibility. Here's a quick guide to help you get perfectly cooked hot dogs every time:

  • 400°F (200°C) — 10 to 15 minutes — My preferred temperature. Hot dogs come out lightly browned with a slight snap to the skin.
  • 350°F (175°C) — 15 to 20 minutes — A lower, slower option if your oven runs hot or you're cooking alongside something else at a lower temp. Still delicious, just a little less browning.
  • Frozen hot dogs — 400°F (200°C) for 15 to 20 minutes — No need to thaw first! Just add a few extra minutes and check that they're heated all the way through before serving.
  • Broil finish — 230°C (450°F) for 2 to 3 minutes — Want extra char and a crispy skin? Once your hot dogs are cooked through, switch to broil for the last few minutes. Keep a close eye on them; they can go from perfect to overdone fast.

Hot Dog Toppings

I like to get really creative with the toppings. What I do is serve oven-baked hot dogs with lots of toppings in separate bowls. This allows everyone to load their hot dog exactly how they like it!

Here are some hot dog topping ideas, but feel free to get as creative as you want.

  • Sauces - use any flavor of sauce, tomato ketchup, hot sauce, chili sauce, chimichurri, or try my homemade BBQ sauce.
  • Mustard - yellow or brown mustard will work; go as hot as you like with mustard.
  • Relish - use any flavor of relish: dill, cucumber, or sweet relish.
  • Onions - use any color onion, white, green, or even a shallot. I like to add red onions as they have a milder flavor; you can cook them or leave them raw. Or try my Quick Pickled Red Onions.
  • Cheese - I love sharp cheddar cheese, but Monterey Jack, Swiss, or Mexican cheese would work too.
  • Chili - add some sliced jarred jalapeno peppers, or try adding a spoon or two of my Hot Dog Chili. Make it a Carolina-style hot dog and add chili and slaw.
  • Herbs - add some freshly chopped herbs, like parsley, chives, or cilantro.

Tanya's Top Tips

  • I recommend lining the baking sheet with baking parchment to stop the hot dogs from sticking. It also cuts down on washing up.
  • Give the baking sheet a shake mid-way through cooking to ensure the hot dogs brown all the way round.
  • This recipe is easily doubled if you are feeding a crowd.

What to serve with Oven-baked Hot Dogs

Hot dogs make a delicious snack, however, if you are going for a more substantial meal, serve them with a few easy vegetable sides. Try my Air Fryer Baked Sweet Potato with Hot Honey Butter, Sweet Potato Wedges, French Fries, and Cheddar and Sour Cream Corn on the Cob.

white tray with oven baked hot dogs in hot dog buns with a variety of toppings and sauces

How to store

To refrigerate: Leftovers hot dogs can be stored in an airtight container in the refrigerator for up to 3-4 days. When ready to enjoy, either place them in a hot oven to warm through or pop them into the microwave for a minute or two.

FAQs

Can hot dogs be cooked in the oven?

Yes, absolutely. Hot dogs can be baked in the oven, cooked on the bbq or under the broiler, or heated in a pan of boiling water.

Do hot dogs taste better in the oven?

I like to cook hot dogs in the oven, as the roasting from the oven gives the hot dogs more flavor than you get from boiling hot dogs in water. However, it all comes down to personal preference.

Are hot dogs usually beef or pork?

Although most hot dogs are beef, pork, or a combination of the two; you will also find hot dogs made with turkey and chicken. So, use the variety of hot dogs you enjoy eating.

If you have tried this Oven-baked Hot Dogs recipe or any other recipe on my blog, then please rate it and let me know how it turned out in the comments below!

oven baked hot dogs in hot dog buns with a variety of toppings and sauces
Print Recipe
4.34 from 3 votes

Oven-Baked Hot Dogs

One of the easiest ways to cook hot dogs is in the oven. My Oven-Baked Hot Dogs recipe is quick and easy to prepare, simply place the hot dogs into the hot oven, while you get on with preparing your favorite hot dog toppings.
Cook Time15 minutes mins
Total Time15 minutes mins
Course: Main Course, Snack
Cuisine: American
Keyword: Easy Oven-Baked Hot Dogs, Oven Baked Hot Dogs, Oven Baked Hotdogs, Oven Roasted Hot Dogs
Servings: 8
Calories: 230kcal
Author: Tanya Harris

Ingredients

  • 8 hot dogs
  • 8 hot dog buns
  • optional toppings see notes below for suggestions

Instructions

  • Preheat your oven to 400°F (200°C).
  • Arrange the hot dogs in a single layer on a baking sheet.
  • Bake the hot dogs in the oven for 10-15 minutes or until heated through and lightly browned.
  • Remove the hot dogs from the oven and place them in hot dog buns. Remove from the oven and add your desired toppings, such as ketchup, mustard, relish, onions, or cheese.
  • Serve immediately and enjoy!

Notes

I recommend lining the baking sheet with baking parchment to stop the hot dogs from sticking.
Suggested toppings - ketchup, mustard, relish, onions, or cheese.

Nutrition

Calories: 230kcal | Carbohydrates: 30g | Protein: 9g | Fat: 8g | Saturated Fat: 3g | Polyunsaturated Fat: 2g | Monounsaturated Fat: 3g | Cholesterol: 20mg | Sodium: 518mg | Potassium: 118mg | Fiber: 1g | Sugar: 3g | Vitamin A: 0.4IU | Vitamin C: 1mg | Calcium: 72mg | Iron: 3mg

Quick Pickled Red Onions

March 30, 2023 by Tanya Harris Leave a Comment

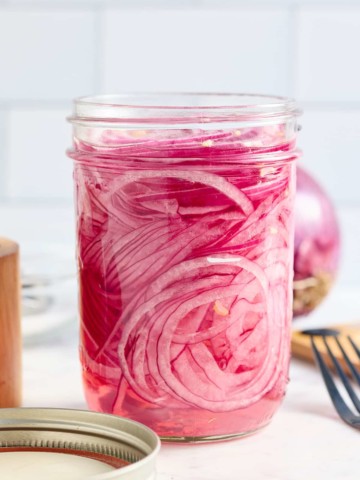
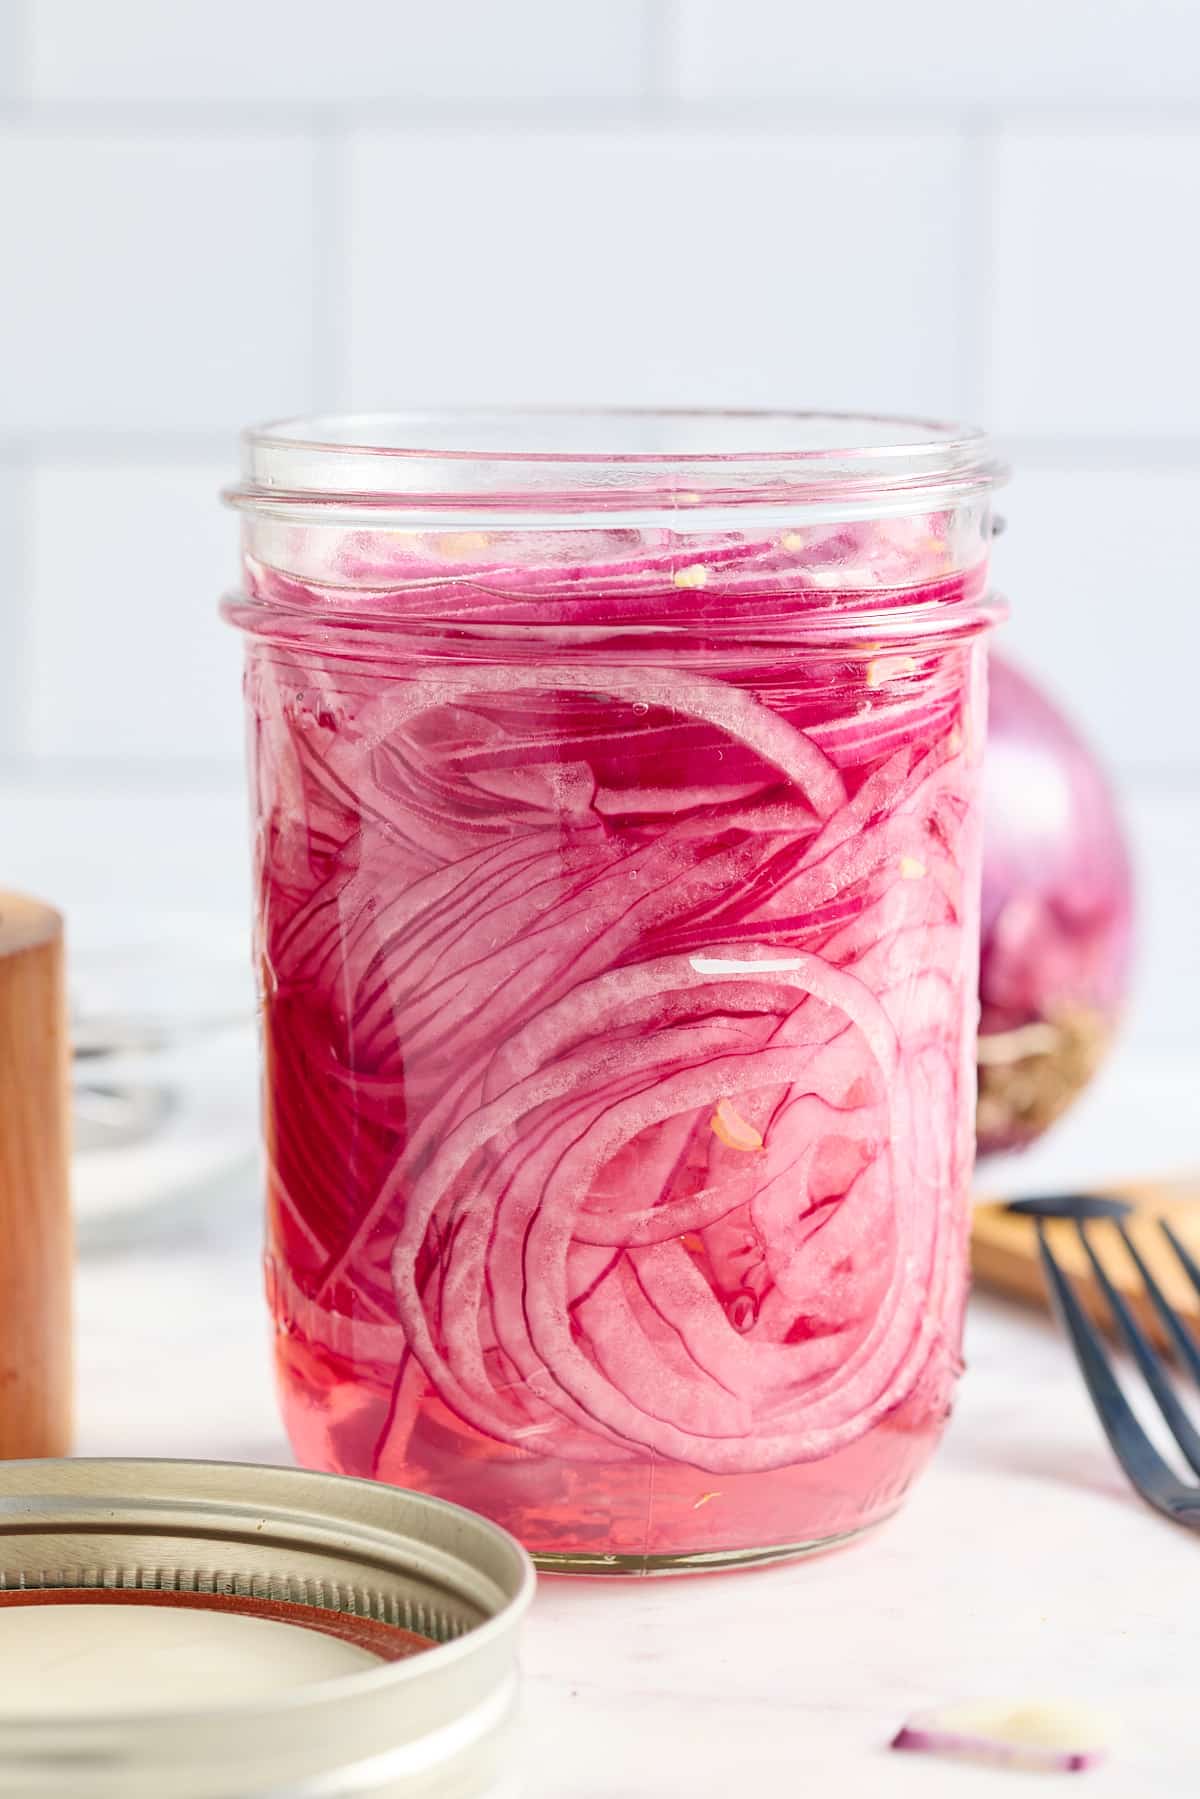
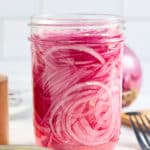
a jar filled with quick pickled red onions

Quick Pickled Red Onions add great flavor, texture, and crunch to any dish you add them to. Pickled Red Onions are the perfect balance of sweet, sour, and salty flavors, adding a great tangy topping to accompany your favorite recipe.

a jar filled with quick pickled red onions

This post contains affiliate links, please read my full disclaimer here.

You’ll find the full recipe with ingredient amounts and instructions in the recipe card at the bottom of this post. Be sure to check out the blog post itself for extra tips and tricks!

This Quick Pickled Red Onions recipe can be made in minutes, using ingredients you will have in your stores at home.

Thinly sliced red onions are combined with a quick pickling liquid combining water, white vinegar, salt, and sugar. My Quick Pickled Red Onions no-cook recipe does not require the liquid to be heated in a pot, so it could not be any easier!

That's not to say you can't add other flavors, you can, and I've made some suggestions for those later in the post.

I love making my own quick pickles as they really elevate a dish, adding a real hit of flavor.

Ingredients

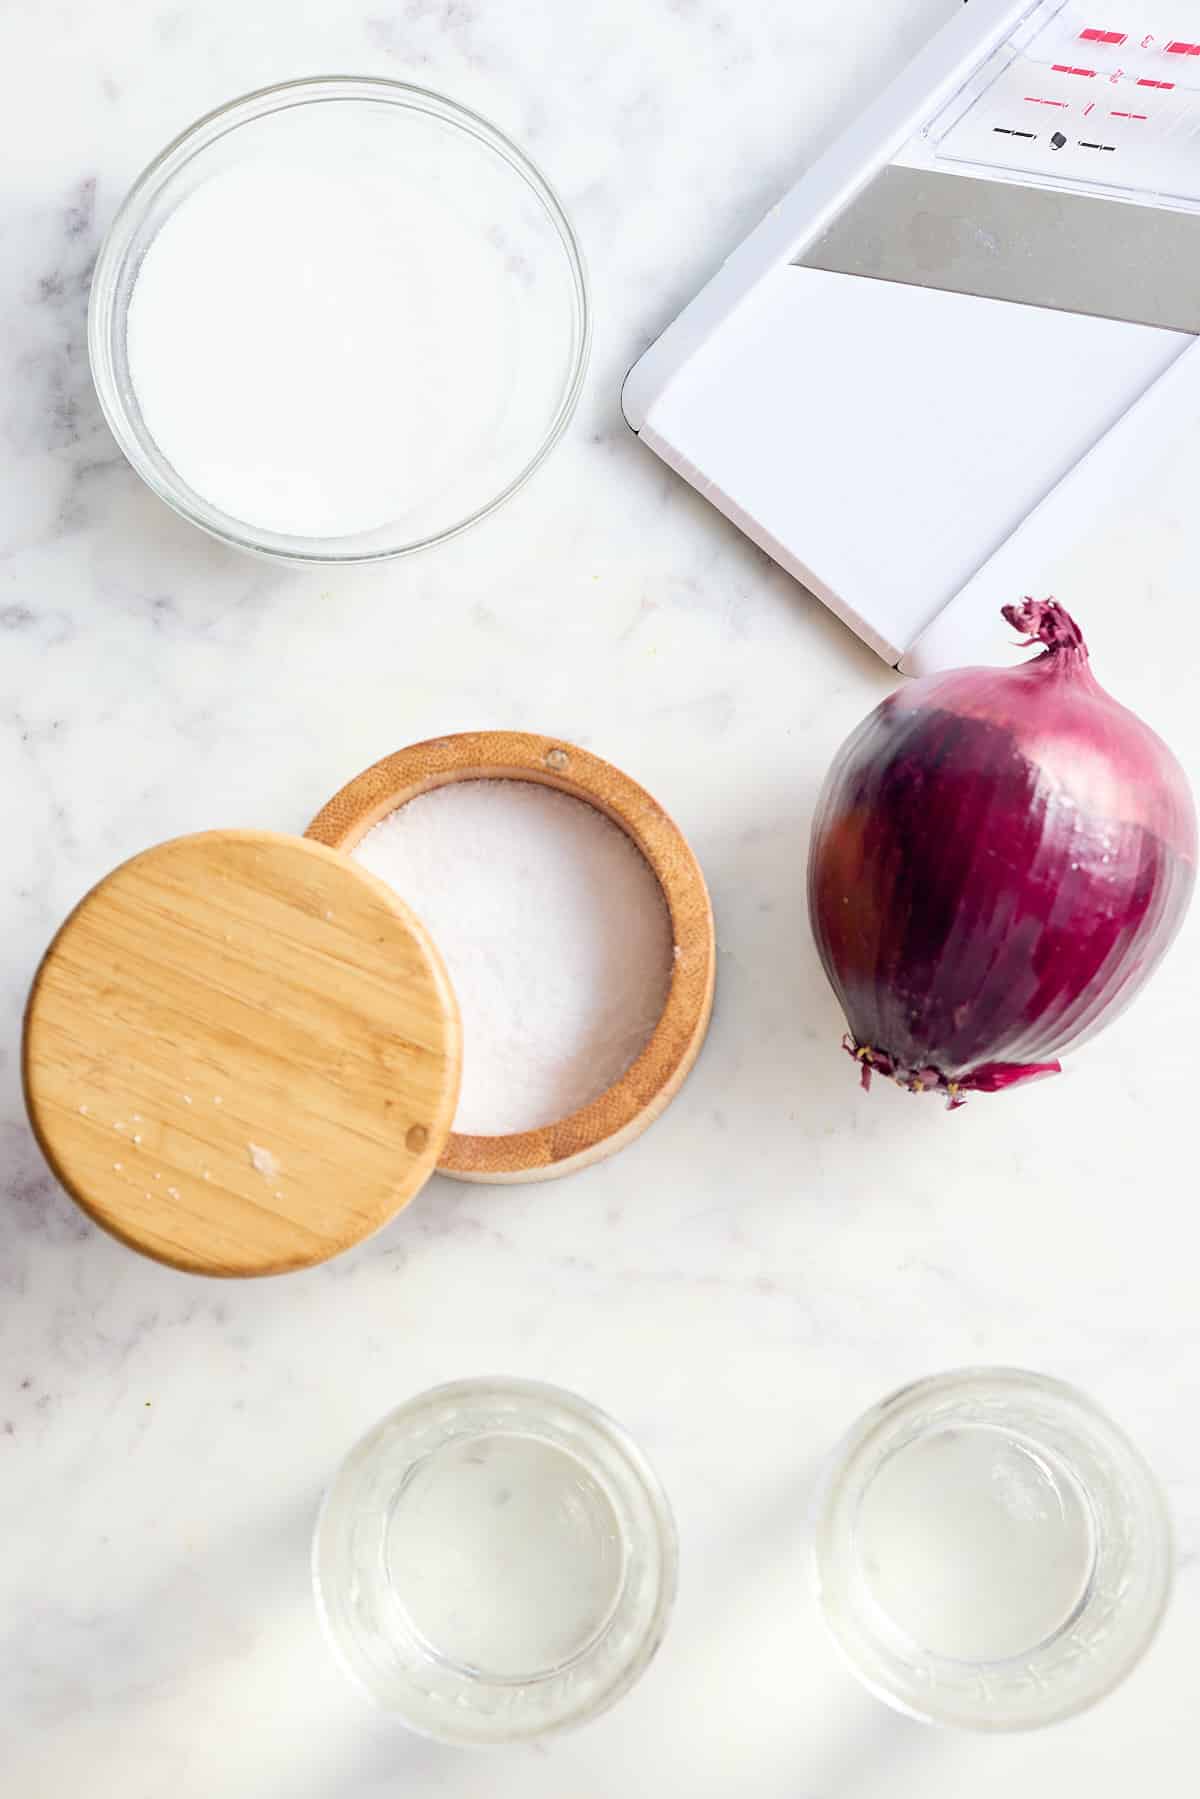
Here's what you will need to make quick pickled red onions:

  • Vinegar - I use both hot water and white vinegar to make the pickling liquid.
  • Sugar - granulated sugar is added to the pickling liquor to get a balance of sweet and sour.
  • Kosher Salt - I add salt to balance out the sweet and sour flavors in this pickle.
  • Onion - I've used red onion as it has a lovely mild onion flavor. Slice the onions thinly on a mandolin.
quick pickled red onions recipe ingredients

How to make Quick Pickled Red Onions

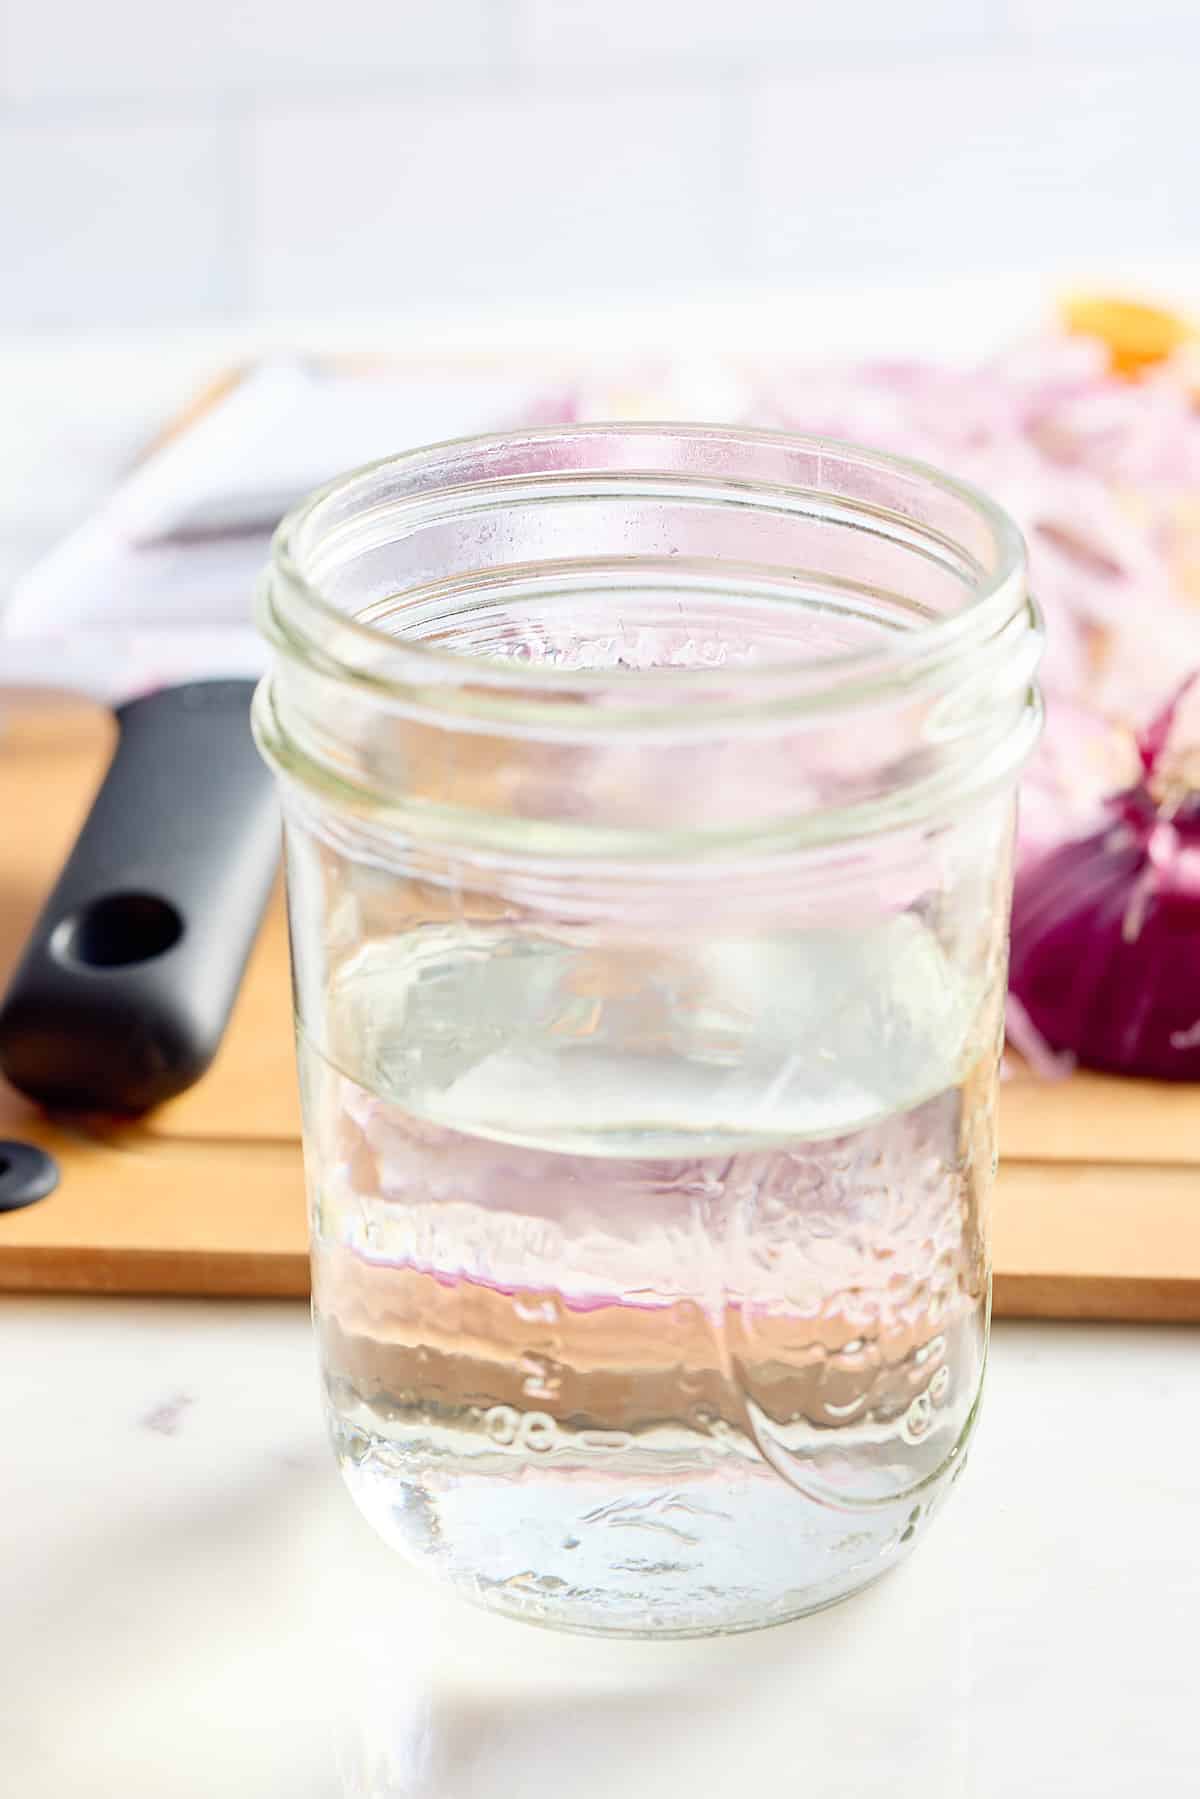
Thinly slice your red onions and set aside. Then, add hot water, white vinegar, granulated sugar, and kosher salt into a heat-proof jar and stir to combine until the sugar and salt are dissolved.

a jar filled with water, white vinegar, sugar and salt

Next, add the red onions into the jar until the mixture covers the onions.

a jar filled with sliced red onions in a pickling liquid

Then, let the onions sit in the pickling liquid for at least 30 minutes before serving, but preferably for a few hours or overnight in the refrigerator.

a jar of quick pickled red onions and a fork full of onions

When ready to serve, remove onions with a fork or slotted spoon and use them in your favorite recipes.

Expert Tips

These tips will help you make the best quick pickled red onions you've ever tried. 

  • I suggest using a mandolin to get thin sliced red onions. However, take care when using a mandolin to avoid slicing your hand and fingers.
  • If you don't have a mandolin, a sharp kitchen knife will work well too.
board with a mandolin, a red onion and a pile of finely sliced red onions

Flavor variations

  • White vinegar can be replaced with white wine, apple cider, or sherry vinegar.
  • Swap red onions for white onions or shallots.
  • If you like pickles, use the same process to pickle other vegetables. Try thinly sliced cucumber, red chili peppers or jalapenos, carrots, radish, or zucchini.
  • Add some spices to the pickling vinegar, like black or pink peppercorns, coriander seeds, red pepper flakes, fennel seeds, or mustard seeds.

Serving suggestions

Quick Pickled Red onions go with just about any savory dish. I add them to curries like my Jamaican Curry Chicken or Jamaican Curry Shrimp.

They work a real treat with the most savory Mexican dishes. Try them over chilies like my Instant Pot Chili or with Slow Cooker Black Beans. Scatter some over your favorite tacos, like my Air Fryer Fish Tacos or my Air Fryer Chicken Tacos. Great with Air Fryer Steak Fajitas and Sweet Potato & Black Bean Nachos.

I also love them over seasoned fish, like my whole oven-roasted fish.

quick pickled red onions on top of a bowl of black beans

They'll add a great zing to your hot dogs, burgers, salads, and sandwiches too.

How to store quick pickled onions

Store the onions in an airtight jar or container, fully submerged in the pickling liquid. Keep the container in the refrigerator for up to 2-3 weeks for optimal freshness and flavor.

Tools You'll want to Use

This handheld mandolin is a dream when it comes to thinly slicing vegetables. It also doesn't take much storage space.

FAQs

What is a quick pickle?

Quick pickling is a great process for preserving fruits and vegetables as it can be prepared in minutes and is ready to enjoy in under an hour. This differs from traditional pickling where you have to store the pickles in a dark cool place for at least a month before enjoying them.

What vinegar is best for pickling?

You can use pretty much any vinegar for pickling, it all comes down to the flavors you like. I've used white vinegar as I like it's strong, sharp flavor. However you could use red wine, white wine, apple cider or sherry vinegar too.

How long do quick pickled onions last?

These pickled onions can be stored in an airtight container in the refrigerator for up to two weeks.

Looking for other quick pickle recipes? Try these out:

  • Refrigerator Pickles
  • Quick Pickled Asparagus

If you have tried this Quick Pickled Red Onions recipe or any other recipe on my blog, then please rate it and let me know how it turned out in the comments below!

a jar filled with quick pickled red onions
Print Recipe
5 from 1 vote

Quick Pickled Red Onions

Quick Pickled Red Onions add great flavor, texture and crunch to dishes. Try them on top of your hot dogs, burgers, curries, chili, tacos, salads or sandwiches.
Prep Time5 minutes mins
Resting time30 minutes mins
Total Time35 minutes mins
Course: Condiment
Cuisine: American
Keyword: best pickled onions recipe, Easy Pickled Onions, pickled red onions, Quick Pickled Onions, Quick Pickled Red Onion, Quick Pickled Red Onions no cook
Servings: 8
Calories: 14kcal
Author: Tanya Harris

Equipment

  • handheld mandolin

Ingredients

  • ½ cup hot water
  • ½ cup white vinegar
  • 1 tablespoon granulated sugar
  • 1 teaspoon kosher salt
  • 1 medium red onion thinly sliced

Instructions

  • Add hot water, white vinegar, granulated sugar, and kosher salt into a heat-proof jar and stir to combine until the sugar and salt are dissolved.
  • Add the red onions into the jar until the mixture covers the onions.
  • Let the onions sit in the pickling liquid for at least 30 minutes before serving, but preferably for a few hours or overnight in the refrigerator.
  • When ready to serve, remove onions with a fork or slotted spoon and use them in your favorite recipes.

Notes

  • I suggest using a mandolin to get thin sliced red onions.
  • These pickled onions can be stored in an airtight container in the refrigerator for up to two weeks.

Nutrition

Calories: 14kcal | Carbohydrates: 3g | Protein: 0.2g | Fat: 0.02g | Saturated Fat: 0.01g | Polyunsaturated Fat: 0.003g | Monounsaturated Fat: 0.001g | Sodium: 292mg | Potassium: 20mg | Fiber: 0.2g | Sugar: 2g | Vitamin A: 0.3IU | Vitamin C: 1mg | Calcium: 5mg | Iron: 0.04mg

Split Pea Soup with Ham

March 29, 2023 by Tanya Harris 4 Comments

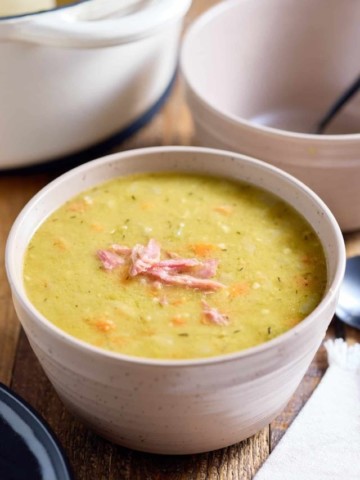
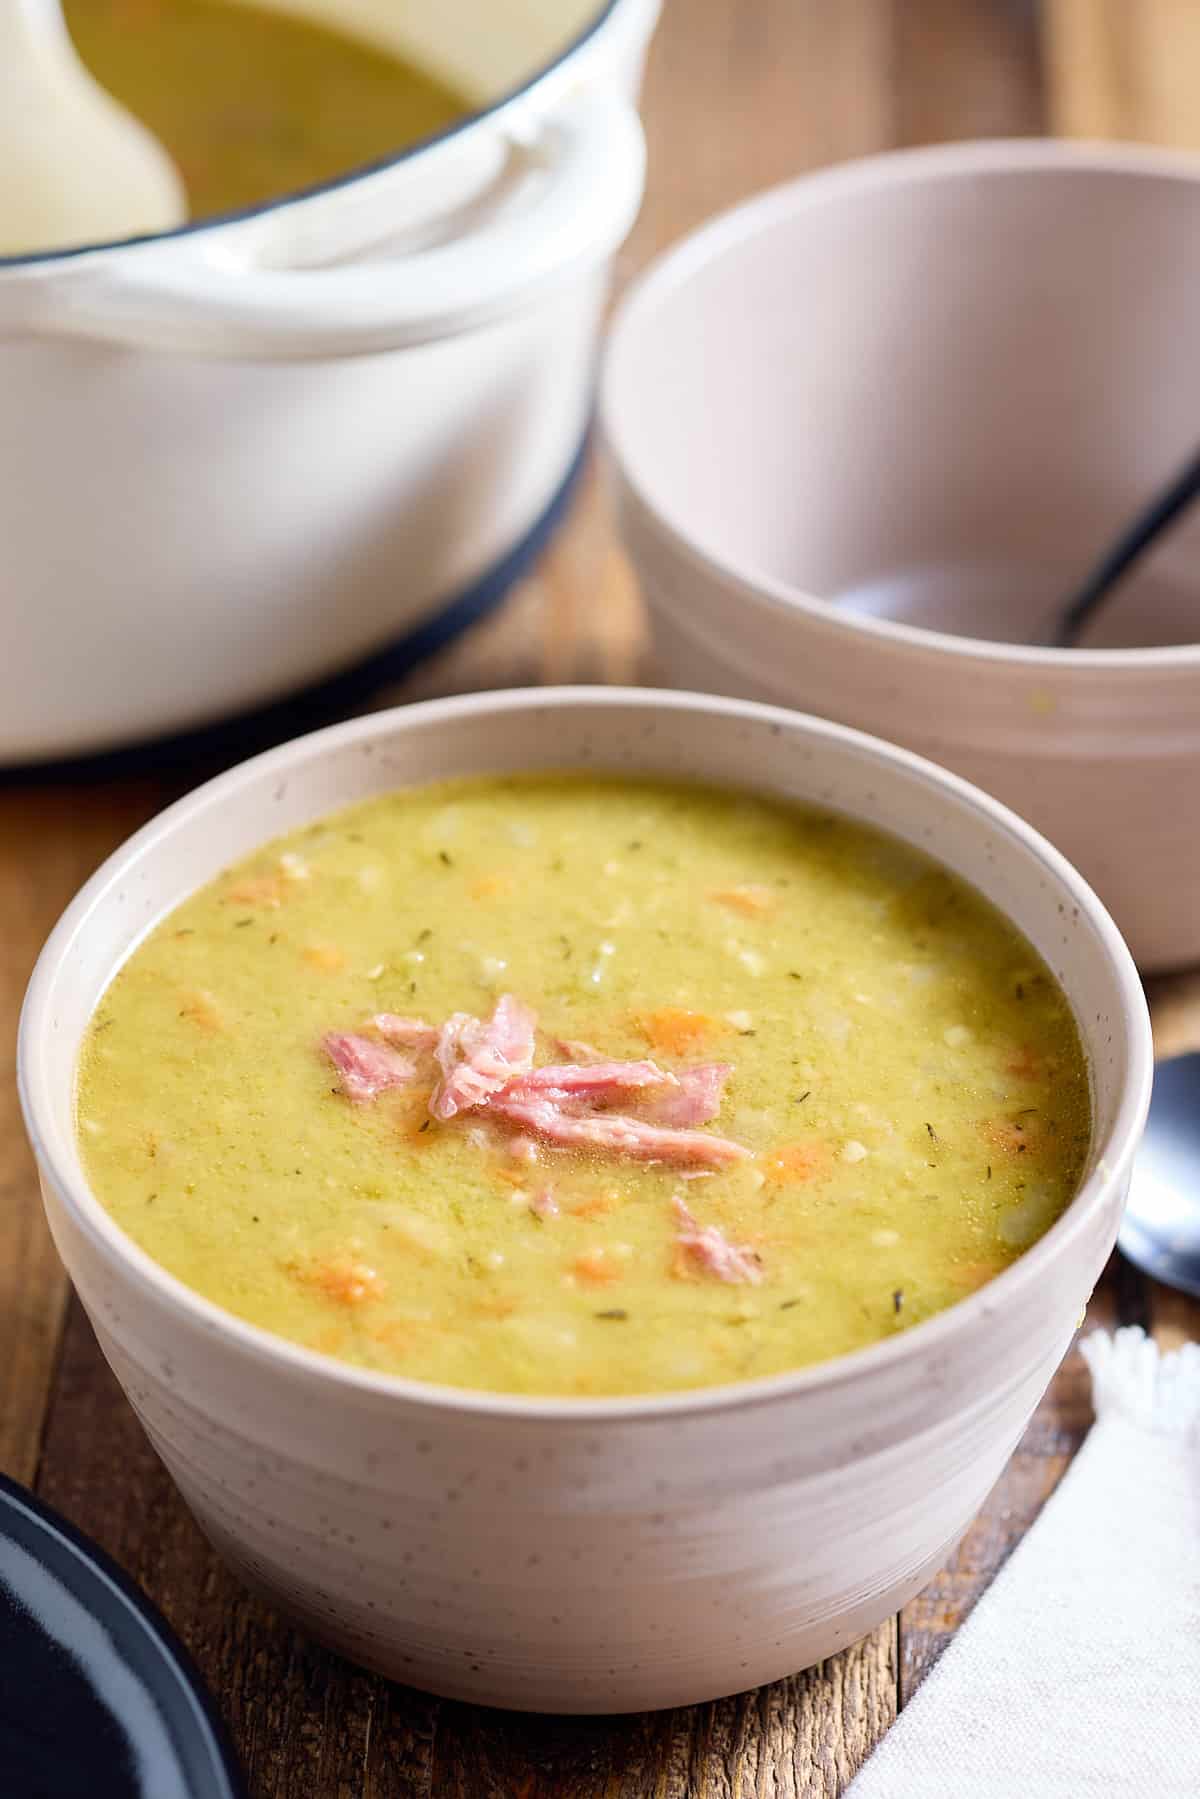
A bowl served with split pea soup topped with bits of ham.

Split pea soup with ham is a hearty and comforting soup that is packed with flavor. The split peas provide a subtle earthiness and nuttiness while the ham adds a smoky, salty and savory flavor that complements the sweetness of the peas. A wonderful recipe for leftover ham thats packed with veggies.

A bowl served with split pea soup topped with bits of ham.

This post contains affiliate links, please read my full disclaimer here.

You’ll find the full recipe with ingredient amounts and instructions in the recipe card at the bottom of this post. Be sure to check out the blog post itself for extra tips and tricks!

You'll often find yourself the day after a holiday with lots of leftover ham. Extend the life of that delicious smokey meat and make a pot of rich split pea soup with ham. A one pot meal to make your weeknight dinner stress free.

Do you need some inspiration for your next holiday ham? Try my Air Fryer Holiday Ham thats done in 30 minutes! If you have more time on your hands my Baked Spiral Ham with pineapple is worth the wait. Both should provide plenty of leftovers to make this soup and more!

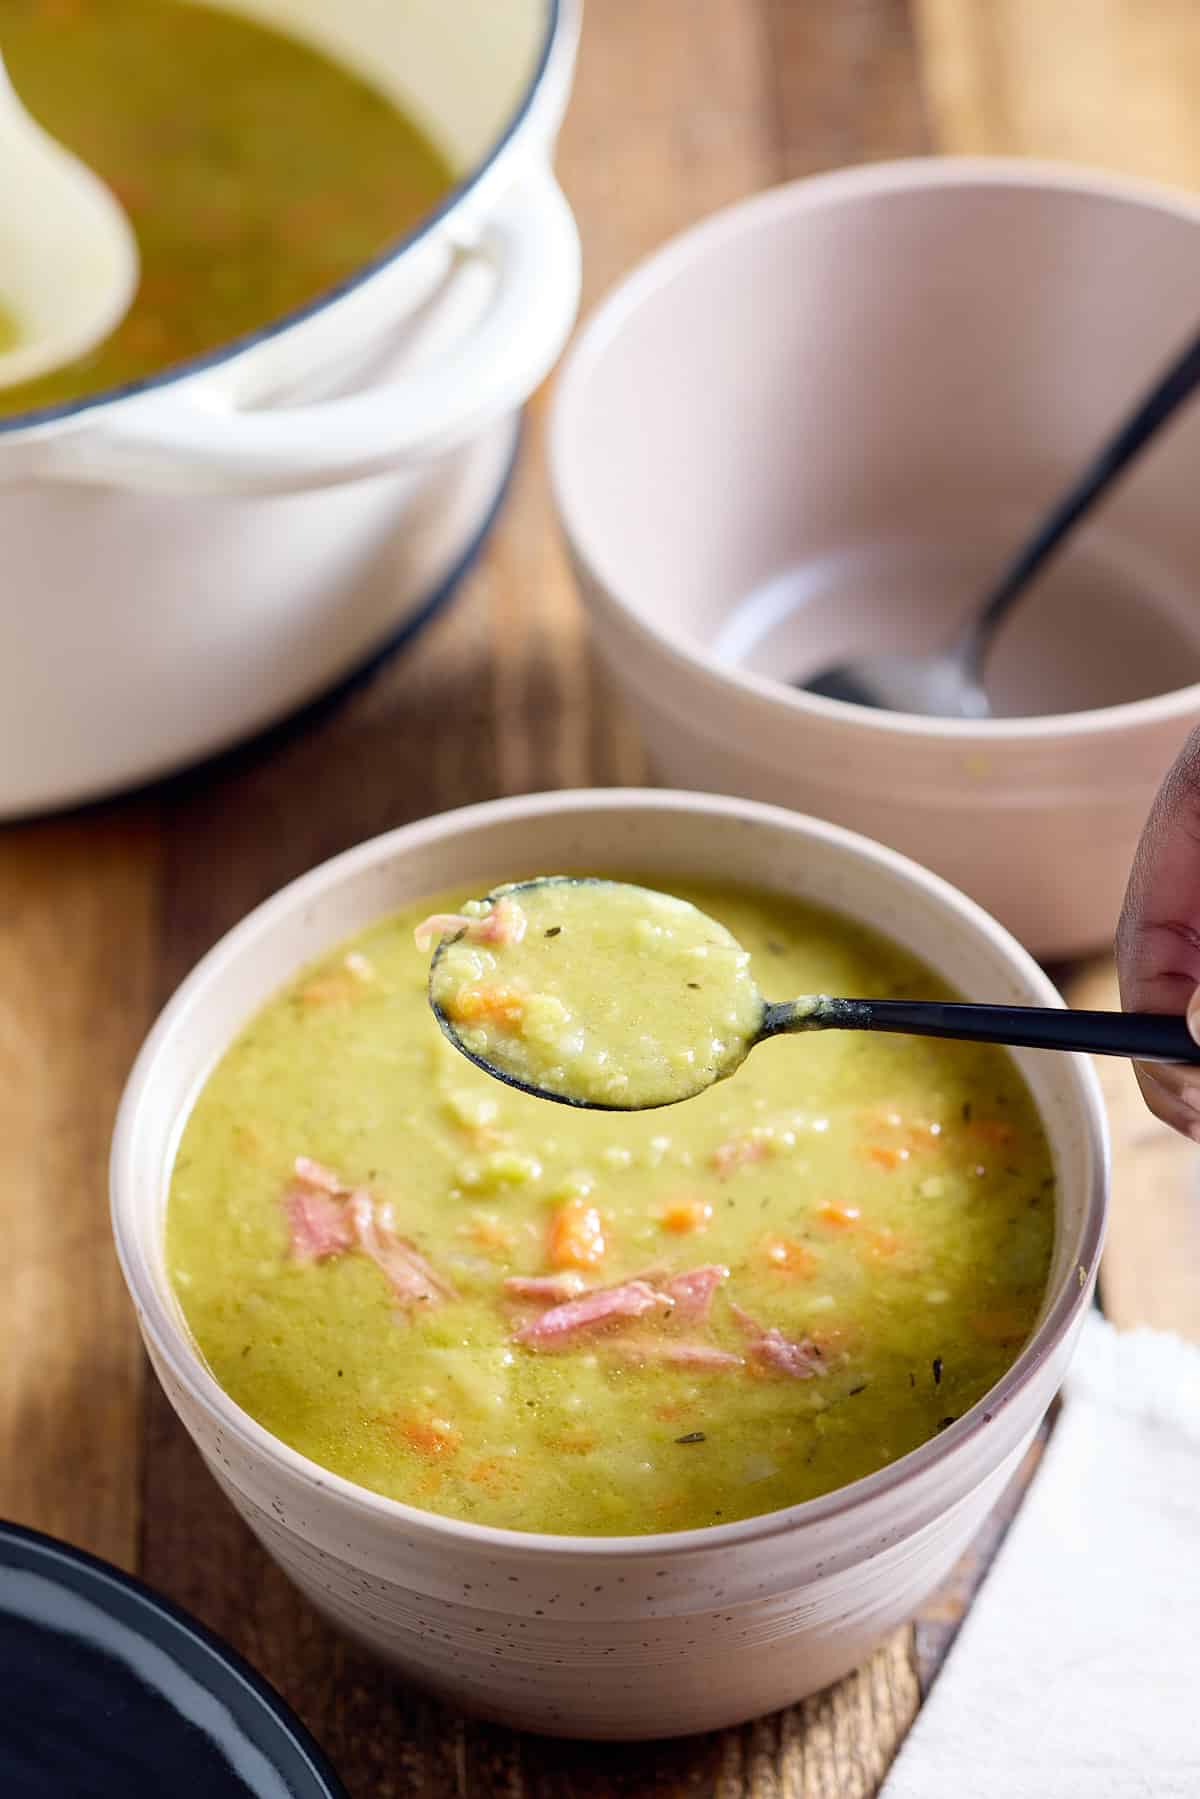
Ladling out split pea and ham soup.

Ingredients

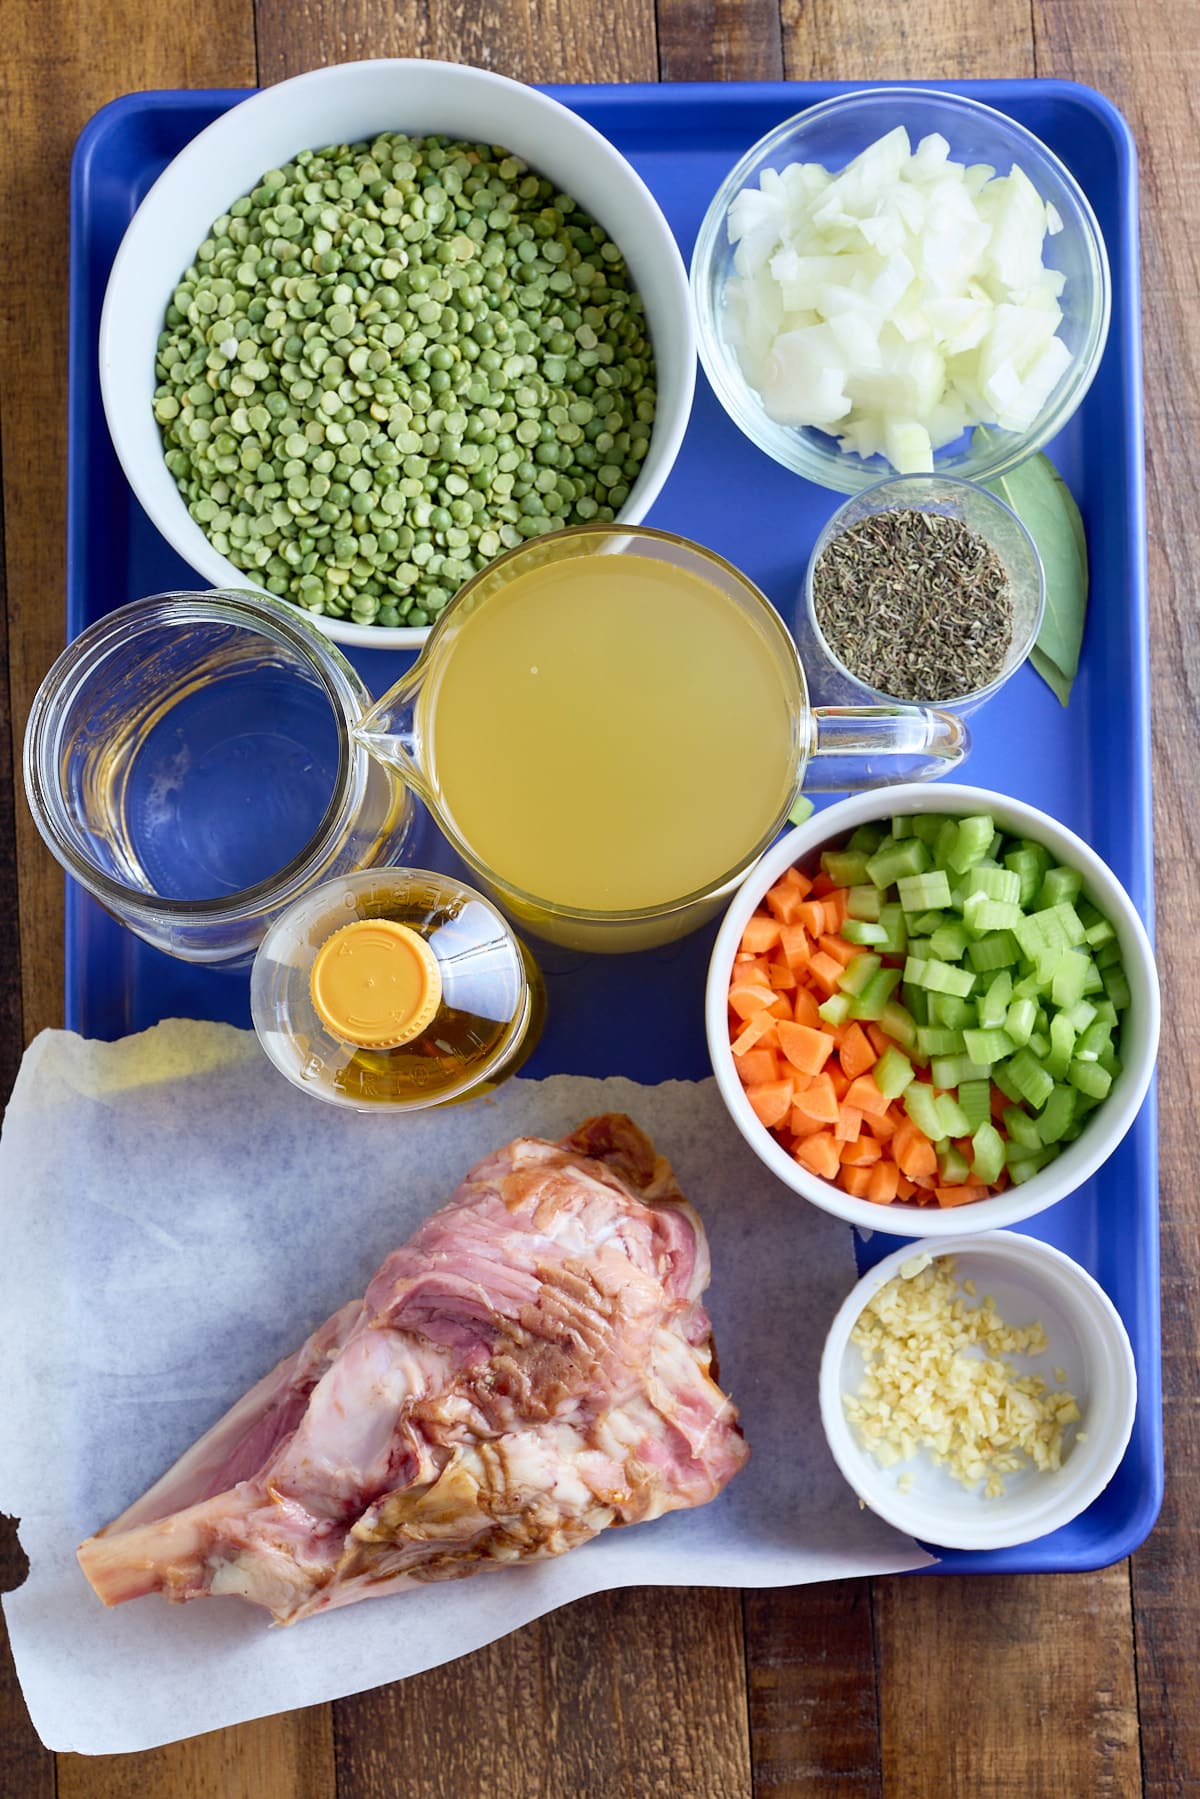
Here is what you'll need for this delicious soup:

Split pea soup with ham ingredients.
  • Olive Oil
  • Vegetables - A fragrant melody of onions, carrots, and celery all chopped before sauteing.
  • Garlic - Freshly chopped or jarred minced garlic.
  • Dried thyme leaves
  • Chicken Broth or vegetable broth - Whichever you have on hand will be great!
  • Water
  • Dried Green Split Peas - You'll be able to find these in or around where you'd get dried beans or rice. Make sure they've been rinsed and sorted before adding them to your pot.
  • Ham Bone with ham meat attached - Your local grocery store butcher should be able to acquire a ham bone for you if there isn't one readily available.
  • Bay Leaves
  • Salt and Pepper to taste

Tools needed for this recipe

  • Heavy-bottomed pot like a dutch oven or similar.

How To Make Split Pea Soup with Ham

In a large heavy-bottomed pot, heat the oil over medium heat. Add the onion, garlic, carrots, and celery. Sauté until the vegetables have softened. About 8-10 minutes.

Sautéing vegetables in a pot.

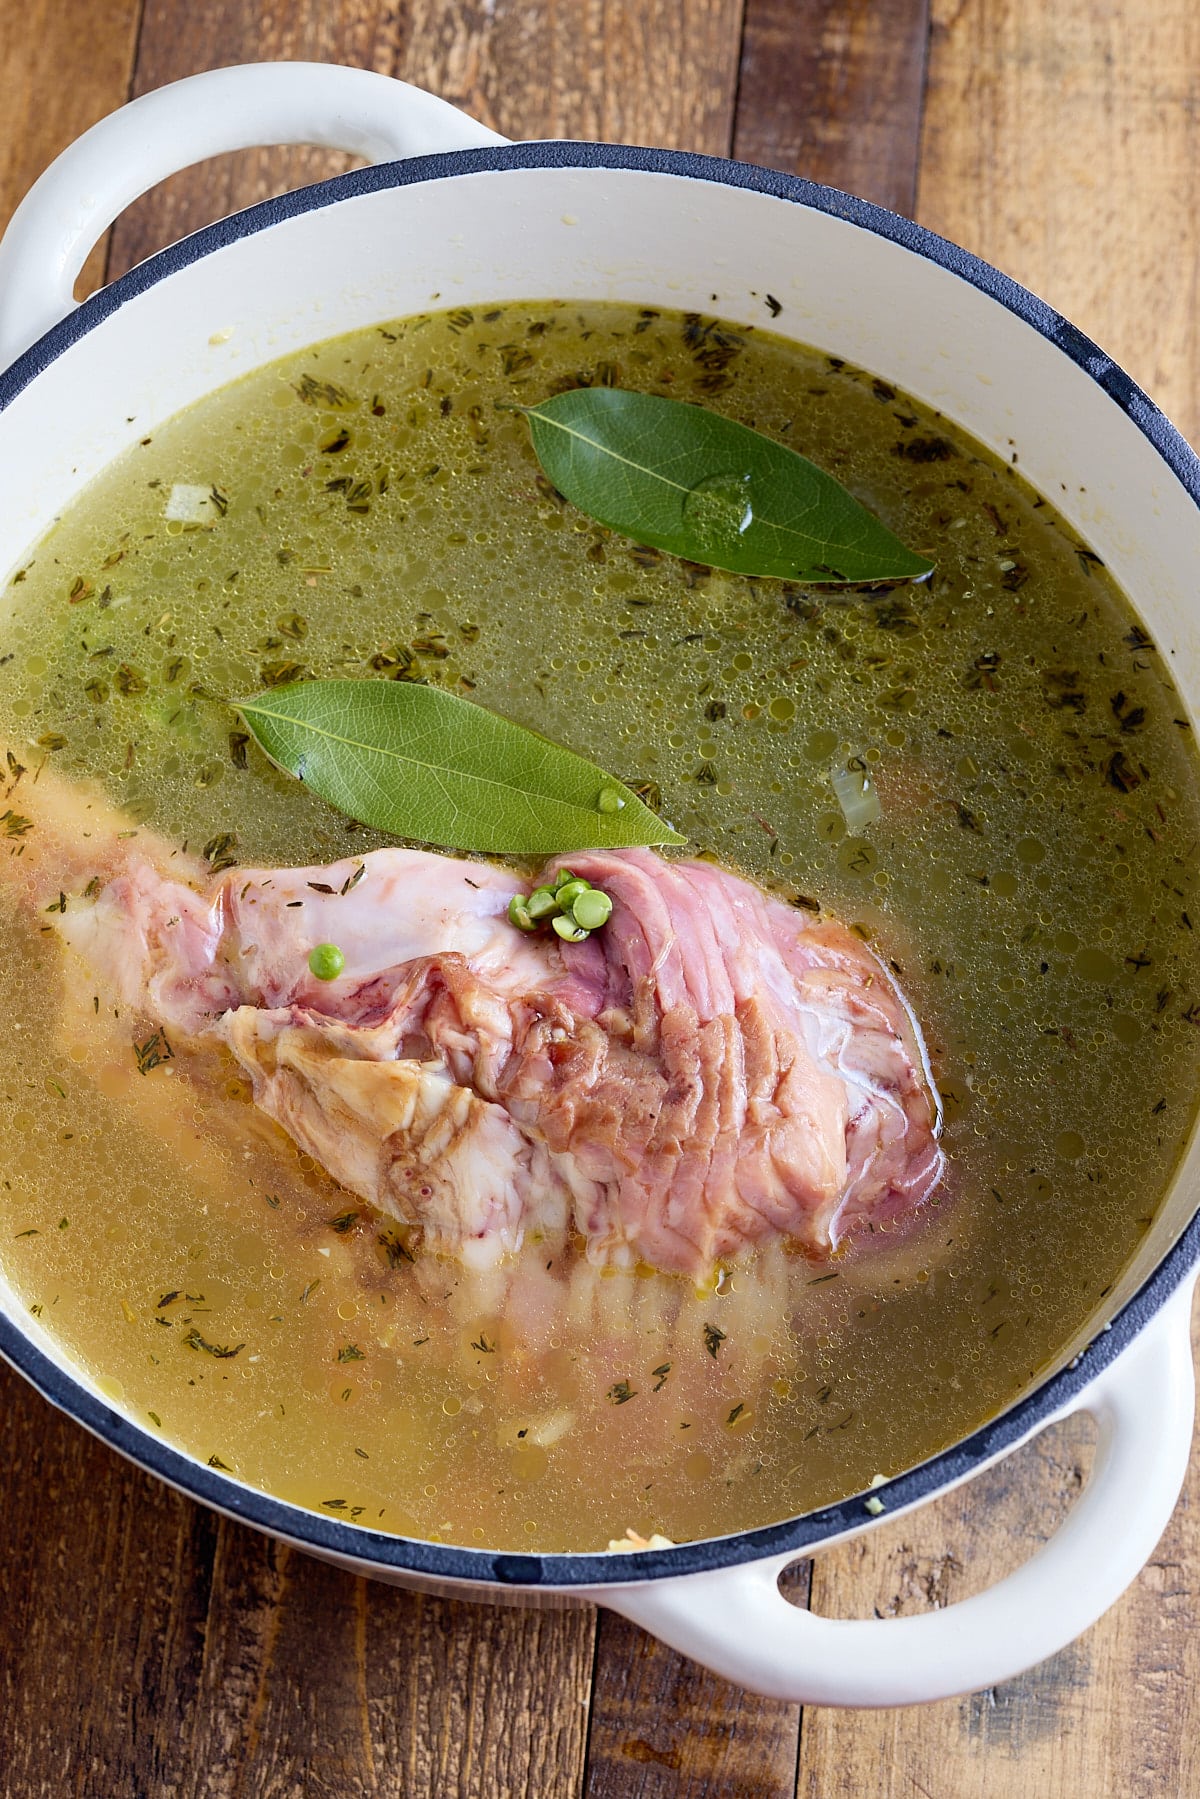
Add the dried thyme leaves and stir. Add chicken broth, water, green split peas, ham bone, and bay leaves. Cover and bring to a boil.

Reduce the heat to low and allow to simmer, covered, stirring occasionally. Cook for about 1 hour, until the soup is thick and the peas have disintegrated.

The soup ingredients including the ham bone added to the pot.

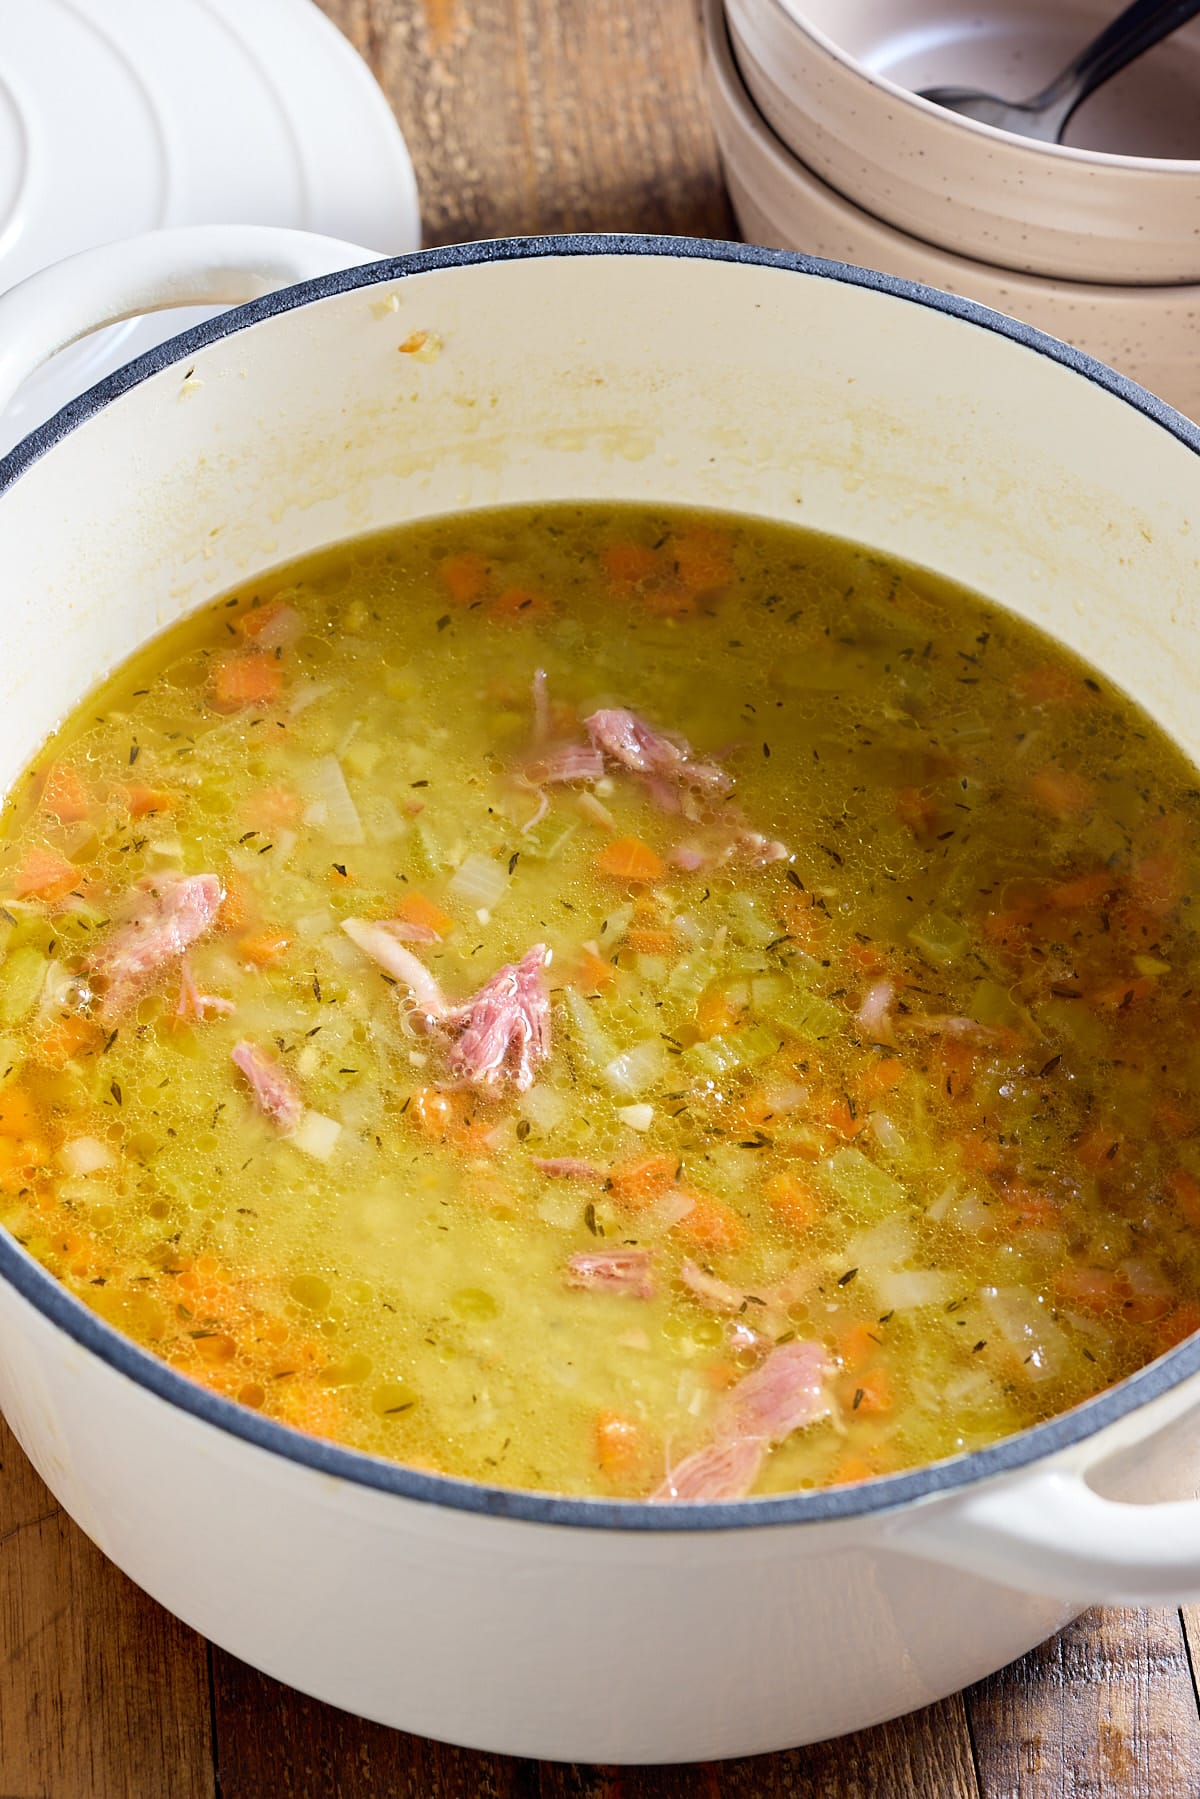
Remove the bay leaves and ham bone. Remove any ham from the ham bone and add the ham meat back to the pot. Season with salt and pepper to taste.

split pea soup with meat from the ham bone in the pot.

How to store leftover split pea and ham soup

Store your leftover split pea soup with ham in an airtight container and in the fridge for up to 1 week.

Freezing leftover soup is a great option if you'd like to keep it for longer. Portion the soup in Souper Cubes for up to 3 months. Souper Cubes are such an easy way to store liquid and even easier to remove and thaw the perfect amount.

Slow Cooker or Instant Pot Split Pea Soup

Crockpot or Slowcooker: Prep your ingredients and place them in a slow cooker. Place the lid on and cook on low for 6-8 hours, or high for 4-5 hours, until the peas are tender and falling apart. Remove the bay leaves and the ham bone. Add any meat still on the bone back to the soup.

Instant Pot: Use the saute function of your Instant Pot to sweat the vegetables. Once softened add the remaining ingredients to the instant pot. Lock on the lid and seal the valve. Cook on high pressure for 15 minutes, and naturally release for 10 minutes. Remove the bay leaves and ham bone.

For either recipe you can leave the soup chunky or before adding the ham back in use an immersion blender for a pureed split pea soup. Top with ham and salt and pepper to taste.

A bowl full of warm split pea soup with ham and a spoon.

Split Pea and Ham Soup Serving Suggestions

This soup is rich and hearty on its own, but can absolutely be dressed up or paired with tasty sides. I like to top mine with extra smoked ham and freshly shaved parmesan.

Bread: Soup is always delicious when served with a crusty bread or croutons. Try our Classic Southern Cornbread Recipe or these Easy Cornbread Muffins

Roasted Vegetables: Serve a medly of roasted carrots and onions on top of your soup. Try these Air Fryer Carrots, make them sweet or savory.

Salad: They don't call it soup and salad for nothing. A simple side salad or cobb salad would be refreshing next to a hearty savory soup.

FAQ's

What meat other than a ham bone can I use in Split Pea Soup?

Ham hocks: Ham hocks are a great substitute for ham bones as they also add flavor and richness to the soup. You can use them in the same way you would use a ham bone.
Bacon: If using bacon, cook the bacon beforehand and add it to the soup when the soup is finished cooking. If using chopped ham, add it to the soup when there are about 10 minutes left to cook.
Smoked sausage: Smoked sausage like kielbasa or andouille can also add flavor to the soup.

Can I make this recipe Vegetarian?

Yes! Instead of chicken broth, use your favorite vegetable broth. Omit the ham altogether but feel free to replace it with additional veggies.

Notes

  • I use a ham bone from a fully cooked smoked ham that has about ½ cup to 1 cup of meat still attached to the bone.
  • If you don't have a ham bone, feel free to substitute it with chopped ham or bacon. If using bacon, cook the bacon beforehand and add it to the soup when the soup is finished cooking. If using chopped ham, add it to the soup when there are about 10 minutes left to cook.

Looking for more soup recipes? Try these out:

  • Zuppa Toscana Recipe
  • Lentil Spinach Soup
  • 15 Bean Soup
  • Oxtail Soup
  • Sweet Potato Soup Recipe

 If you have tried this recipe or any other recipe on my blog, please rate it and let me know how it turned out in the comments below!

A bowl served with split pea soup topped with bits of ham.
Print Recipe
5 from 2 votes

Split Pea Soup with Ham

Split pea soup with ham is a hearty and comforting soup that is packed with flavor. The split peas provide a subtle earthiness and nuttiness while the ham adds a smoky, salty and savory flavor that complements the sweetness of the peas. A wonderful recipe for leftover ham thats packed with veggies.
Prep Time10 minutes mins
Cook Time1 hour hr 10 minutes mins
Total Time1 hour hr 20 minutes mins
Course: Soup
Cuisine: American
Keyword: split pea soup with ham
Servings: 9 servings
Calories: 220kcal
Author: Tanya Harris

Equipment

  • Dutch Oven

Ingredients

  • 2 tablespoons Olive Oil
  • 1 medium Onion chopped
  • 4 cloves Garlic chopped
  • 2 Carrots chopped
  • 2 stalks Celery chopped
  • 1 teaspoon Dried thyme leaves
  • 4 cups Chicken Broth or vegetable broth
  • 2 cups Water
  • 1 pound Dried Green Split Peas rinsed and sorted
  • 1 Ham Bone with ham meat attached (see note)
  • 2 Bay Leaves
  • Salt and Pepper to taste

Instructions

  • In a large heavy bottomed pot, heat the oil over medium heat. Add the onion, garlic, carrots, and celery. Sauté until the vegetables have softened. About 8-10 minutes.
  • Add the dried thyme leaves and stir. Add chicken broth, water, green split peas, ham bone, and bay leaves. Cover and bring to a boil. Reduce the heat to low and allow to simmer, covered, stirring occasionally. Cook for about 1 hour, until the soup is thick and the peas have disintegrated.
  • Remove the bay leaves and ham bone. Remove any ham from the ham bone and add the ham meat to the pot. Season with salt and pepper to taste.

Notes

  • I use a ham bone from a fully cooked smoked ham that has about ½ cup to 1 cup of meat still attached to the bone.
  • If you don't have a ham bone, feel free to substitute it with chopped ham or bacon. If using bacon, cook the bacon beforehand and add it to the soup when the soup is finished cooking. If using chopped ham, add it to the soup when there are about 10 minutes left to cook.

Nutrition

Serving: 1g | Calories: 220kcal | Carbohydrates: 34g | Protein: 13g | Fat: 4g | Saturated Fat: 1g | Polyunsaturated Fat: 1g | Monounsaturated Fat: 2g | Cholesterol: 2mg | Sodium: 673mg | Potassium: 604mg | Fiber: 14g | Sugar: 6g | Vitamin A: 2394IU | Vitamin C: 4mg | Calcium: 48mg | Iron: 2mg

Air Fryer Egg Frittata

March 28, 2023 by Tanya Harris 25 Comments

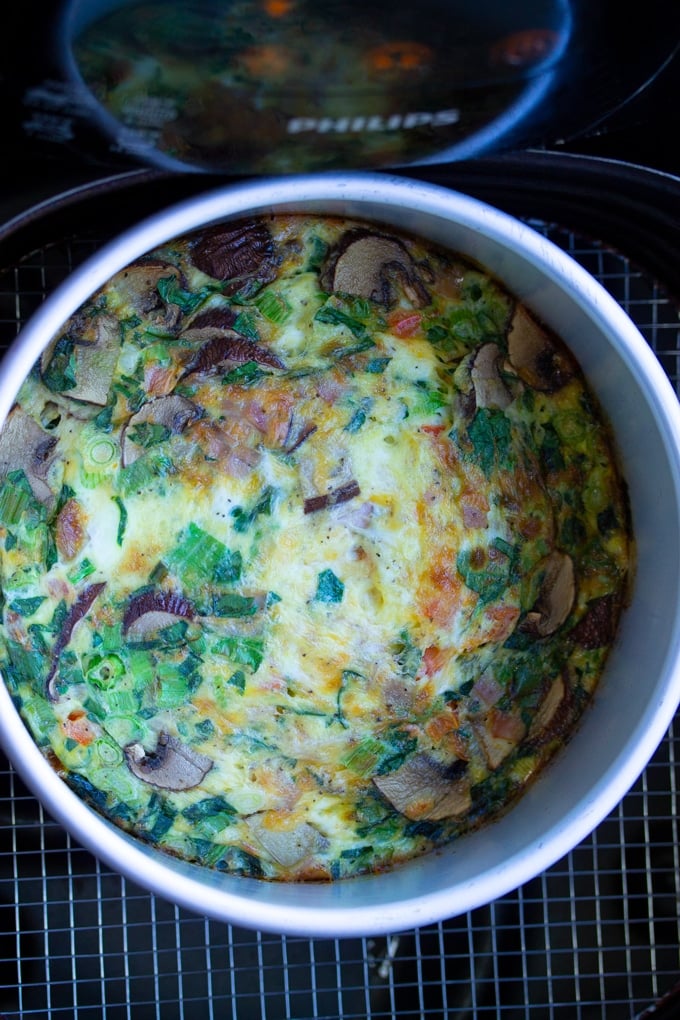
air fryer egg frittata in pan

This Air Fryer Egg Frittata recipe is the easiest way to make a delicious breakfast frittata in your Air Fryer. It's loaded with veggies and tons of flavor. It's the perfect Air Fryer Breakfast.

air fryer egg frittata in air fryer basket

 This post contains affiliate links, please read my full disclosure here.

Full Recipe/Instructions are available in the 
recipe card at the bottom of the post. 
You can find important tips/tricks in the
blog post.


[Read more...]

Slow Cooker Black Beans

March 24, 2023 by Tanya Harris 8 Comments

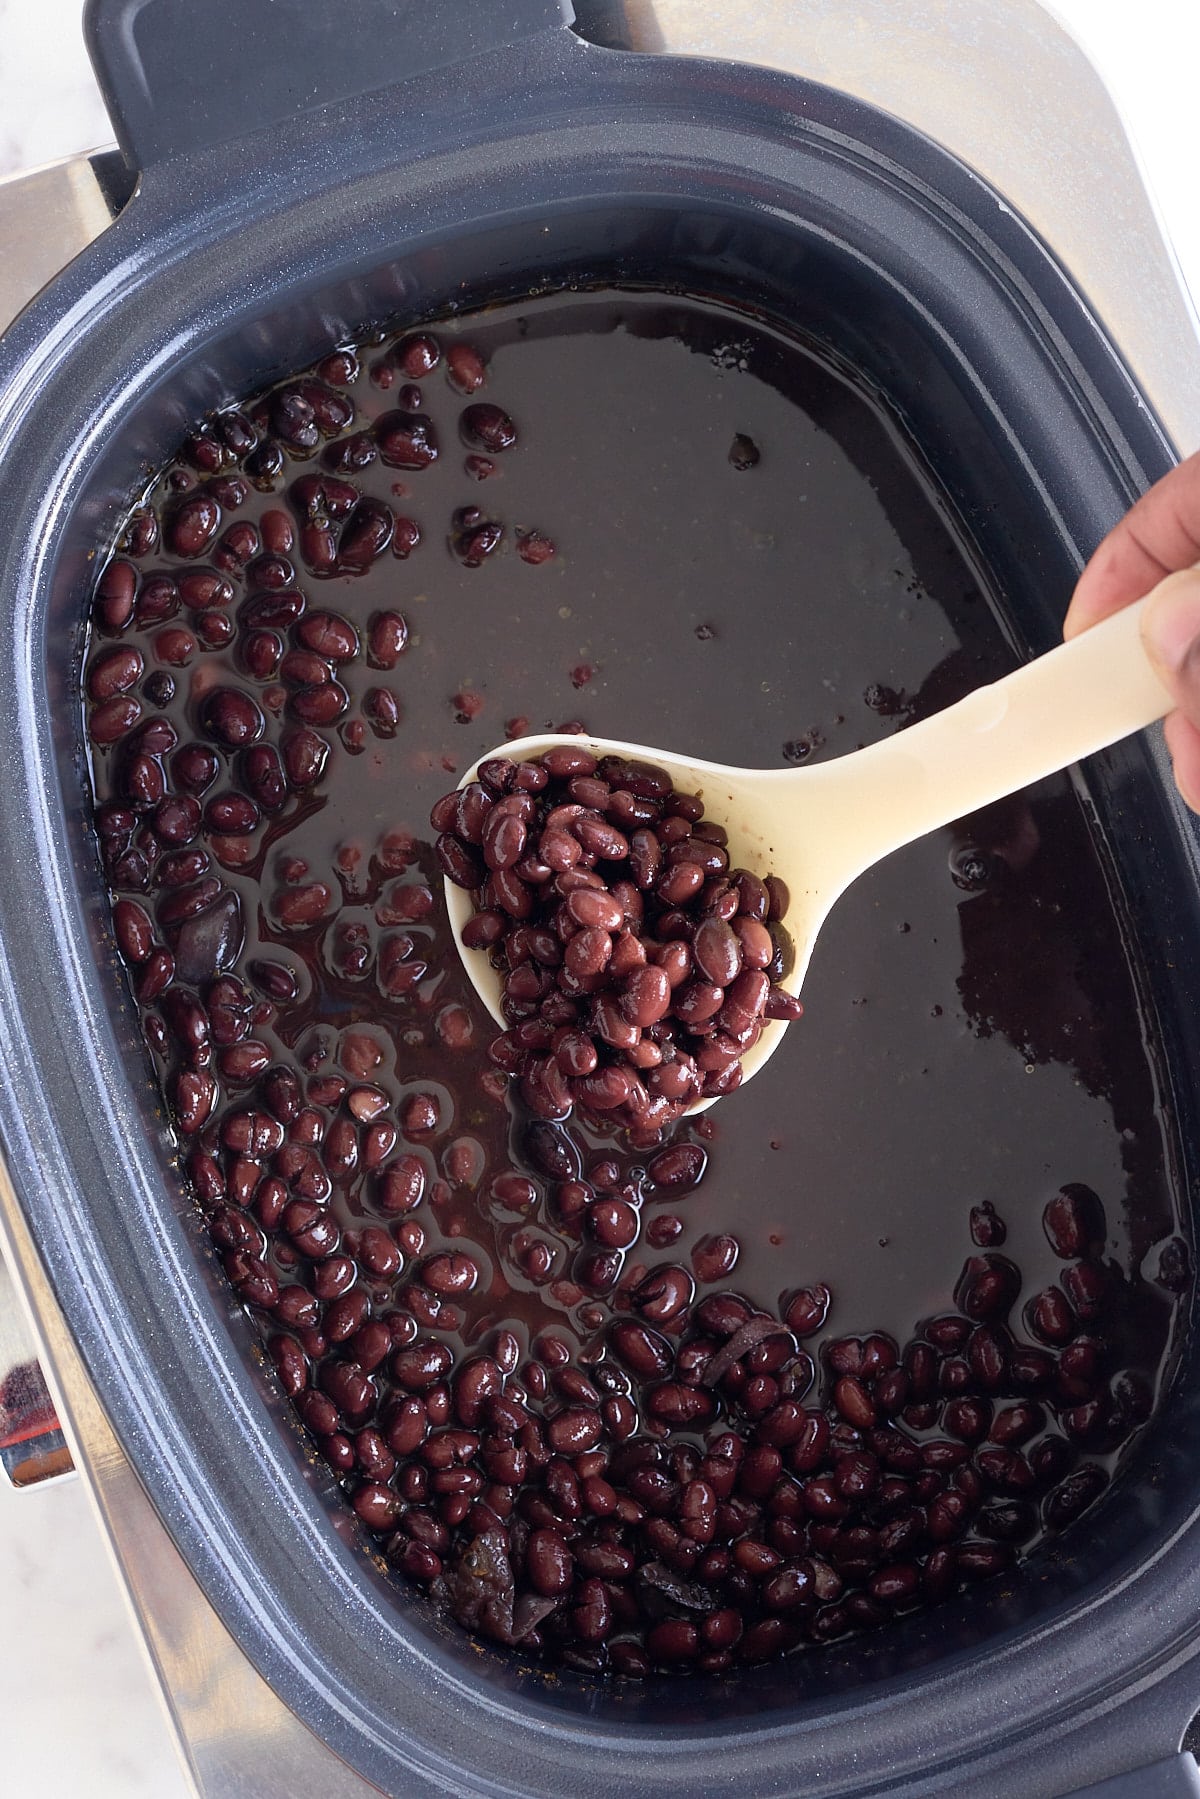
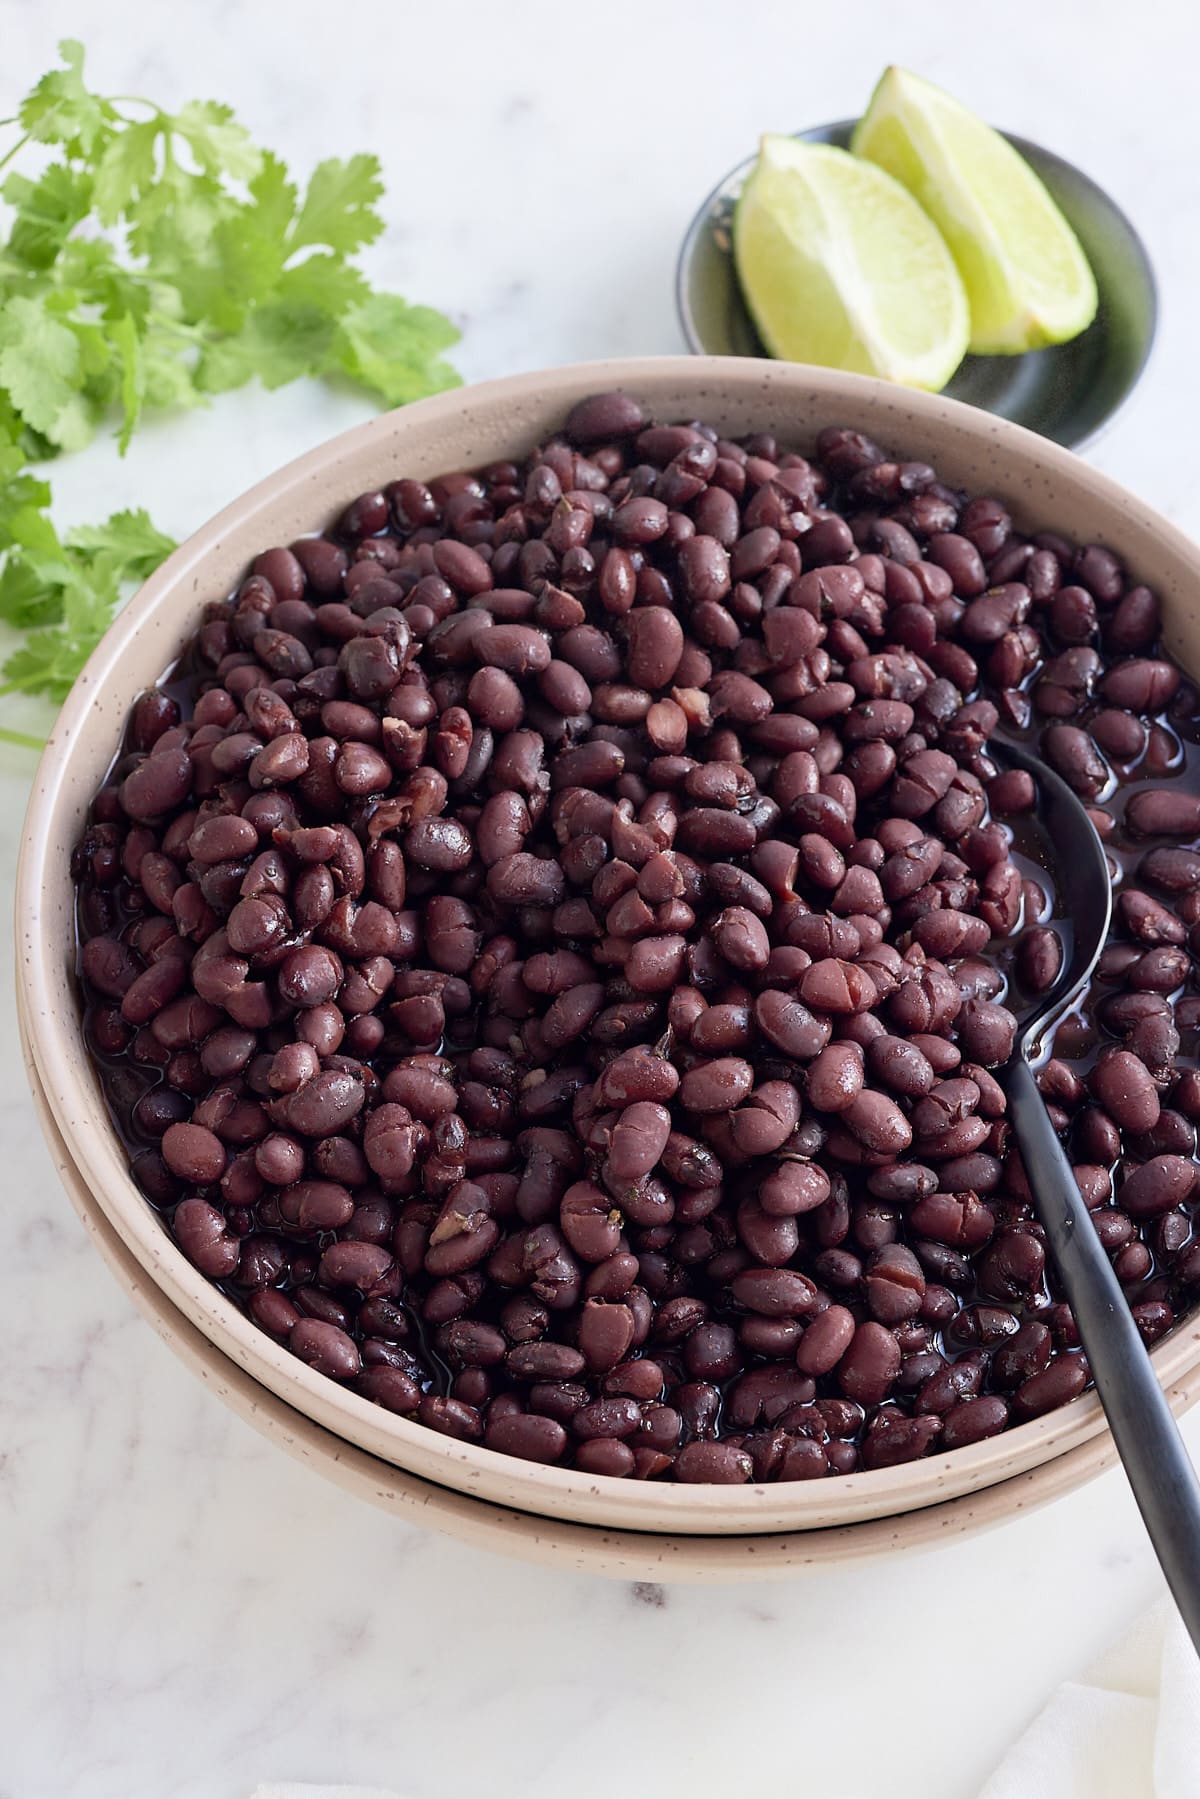
A scoop of black beans being lifted out of the slow cooker.

Experience the incredible taste and convenience of slow cooker black beans! Perfect for any occasion, homemade slow cooker black beans can be prepped in no time with little effort. Get ready to savor the flavor that only slow-cooked black beans can bring!

A scoop of black beans being lifted out of the slow cooker.

You’ll find the full recipe with ingredient amounts and instructions in the recipe card at the bottom of this post. Be sure to check out the blog post itself for extra tips and tricks!

When made in the slow cooker, black beans become infused with flavor and develop an incredibly creamy texture. Also, slow cooker black beans are a healthy and versatile dish that can be used in a variety of recipes, like burritos, tacos, salads, soups, stews, and more!

If you love making black beans with your own added flavors, you'll especially enjoy these with my Sweet Potato & Black Bean Nachos or this tasty Black Bean Salsa! And if you prefer soups, you gotta try my black bean soup recipe.

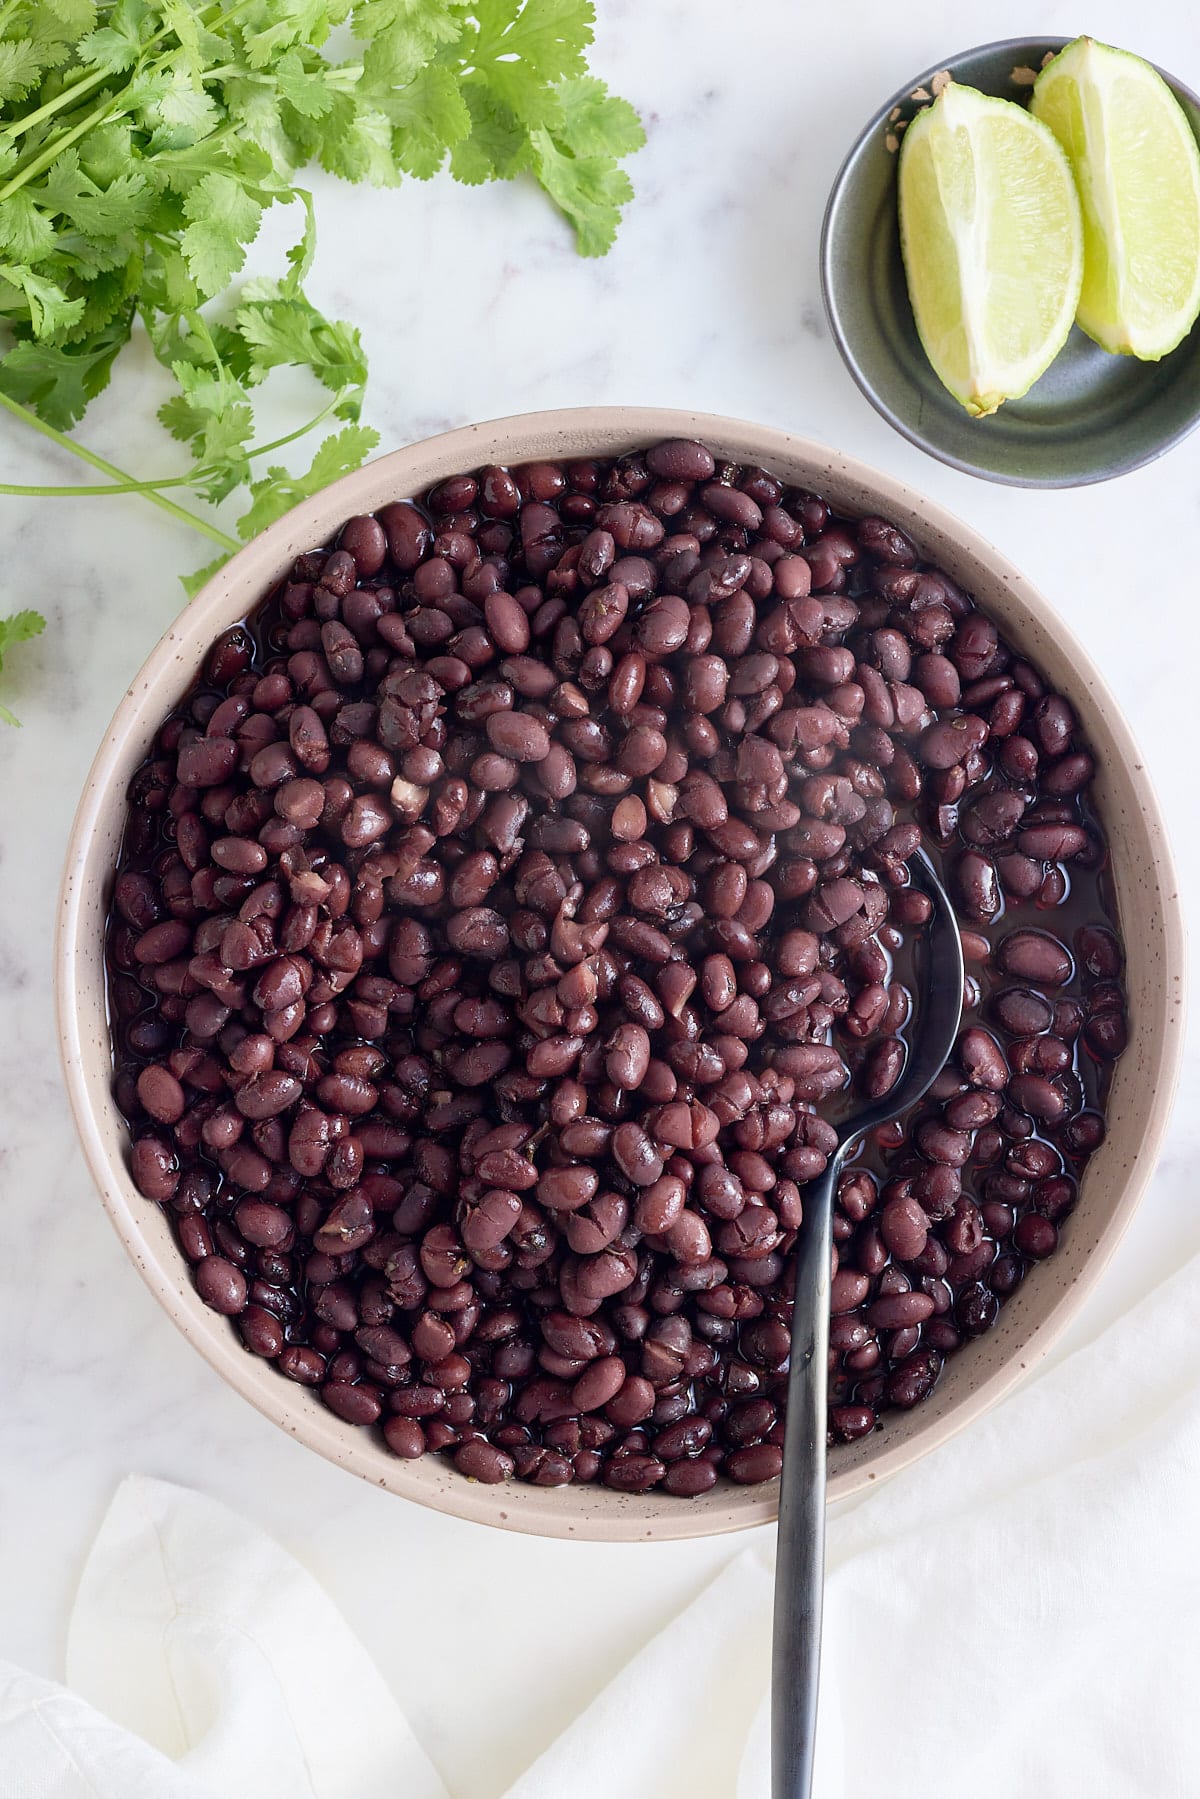
Large serving bowl of freshly cooked black beans.

Ingredients

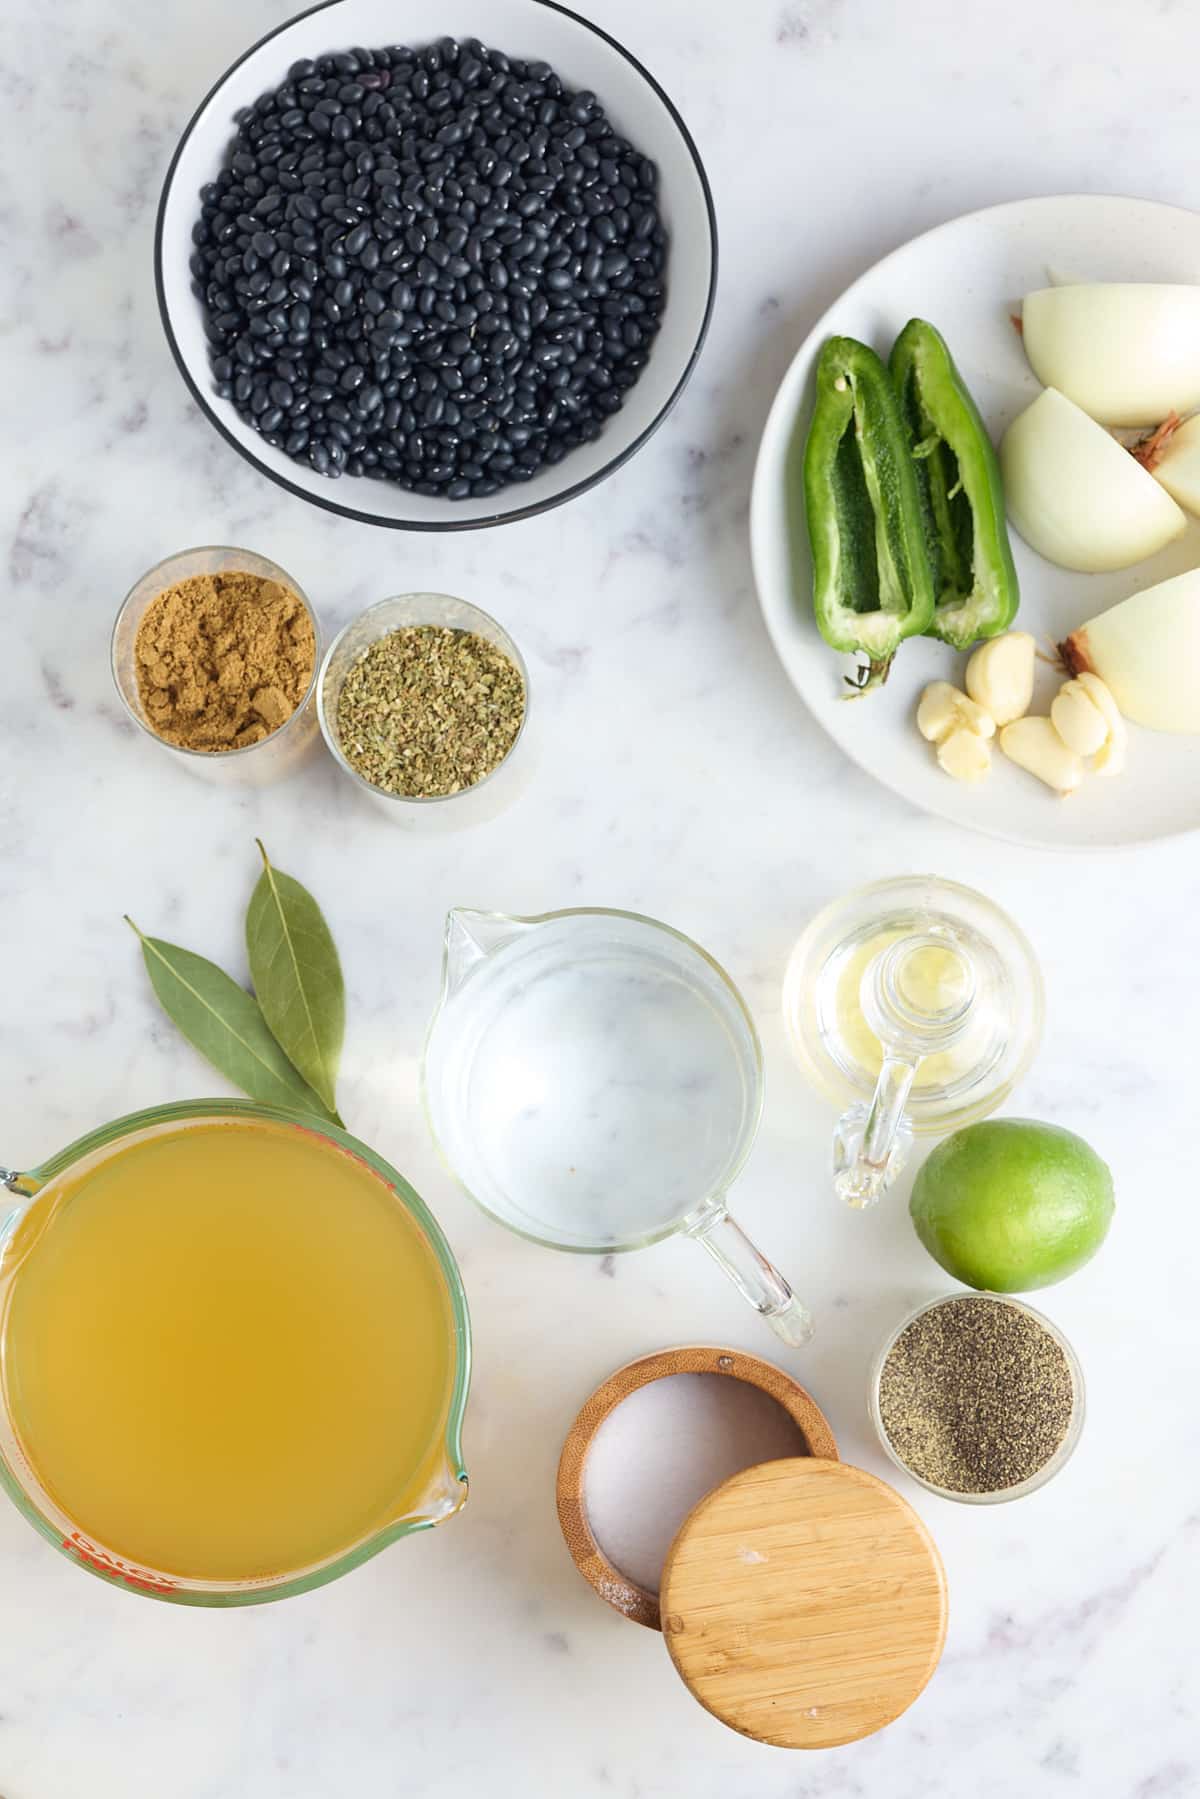
  • Dried black beans - Before adding your beans to the slow cooker, rinse your dried beans and remove any bits that don't belong.
  • Seasoning Ingredients - A delicious combination of herbs, spices, broth, and veggies makes these black beans really stand out. For this recipe, you'll need chicken broth, olive oil, cumin, oregano, onion, jalapeno pepper, garlic, bay leaves, and salt and pepper to taste.
Slow cooker black bean ingredients.

Tools needed for this recipe

  • Slow Cooker
  • Knife and cutting board for vegetable prep.

How To Make Slow Cooker Black Beans

Place the sorted and rinsed black beans in the slow cooker.

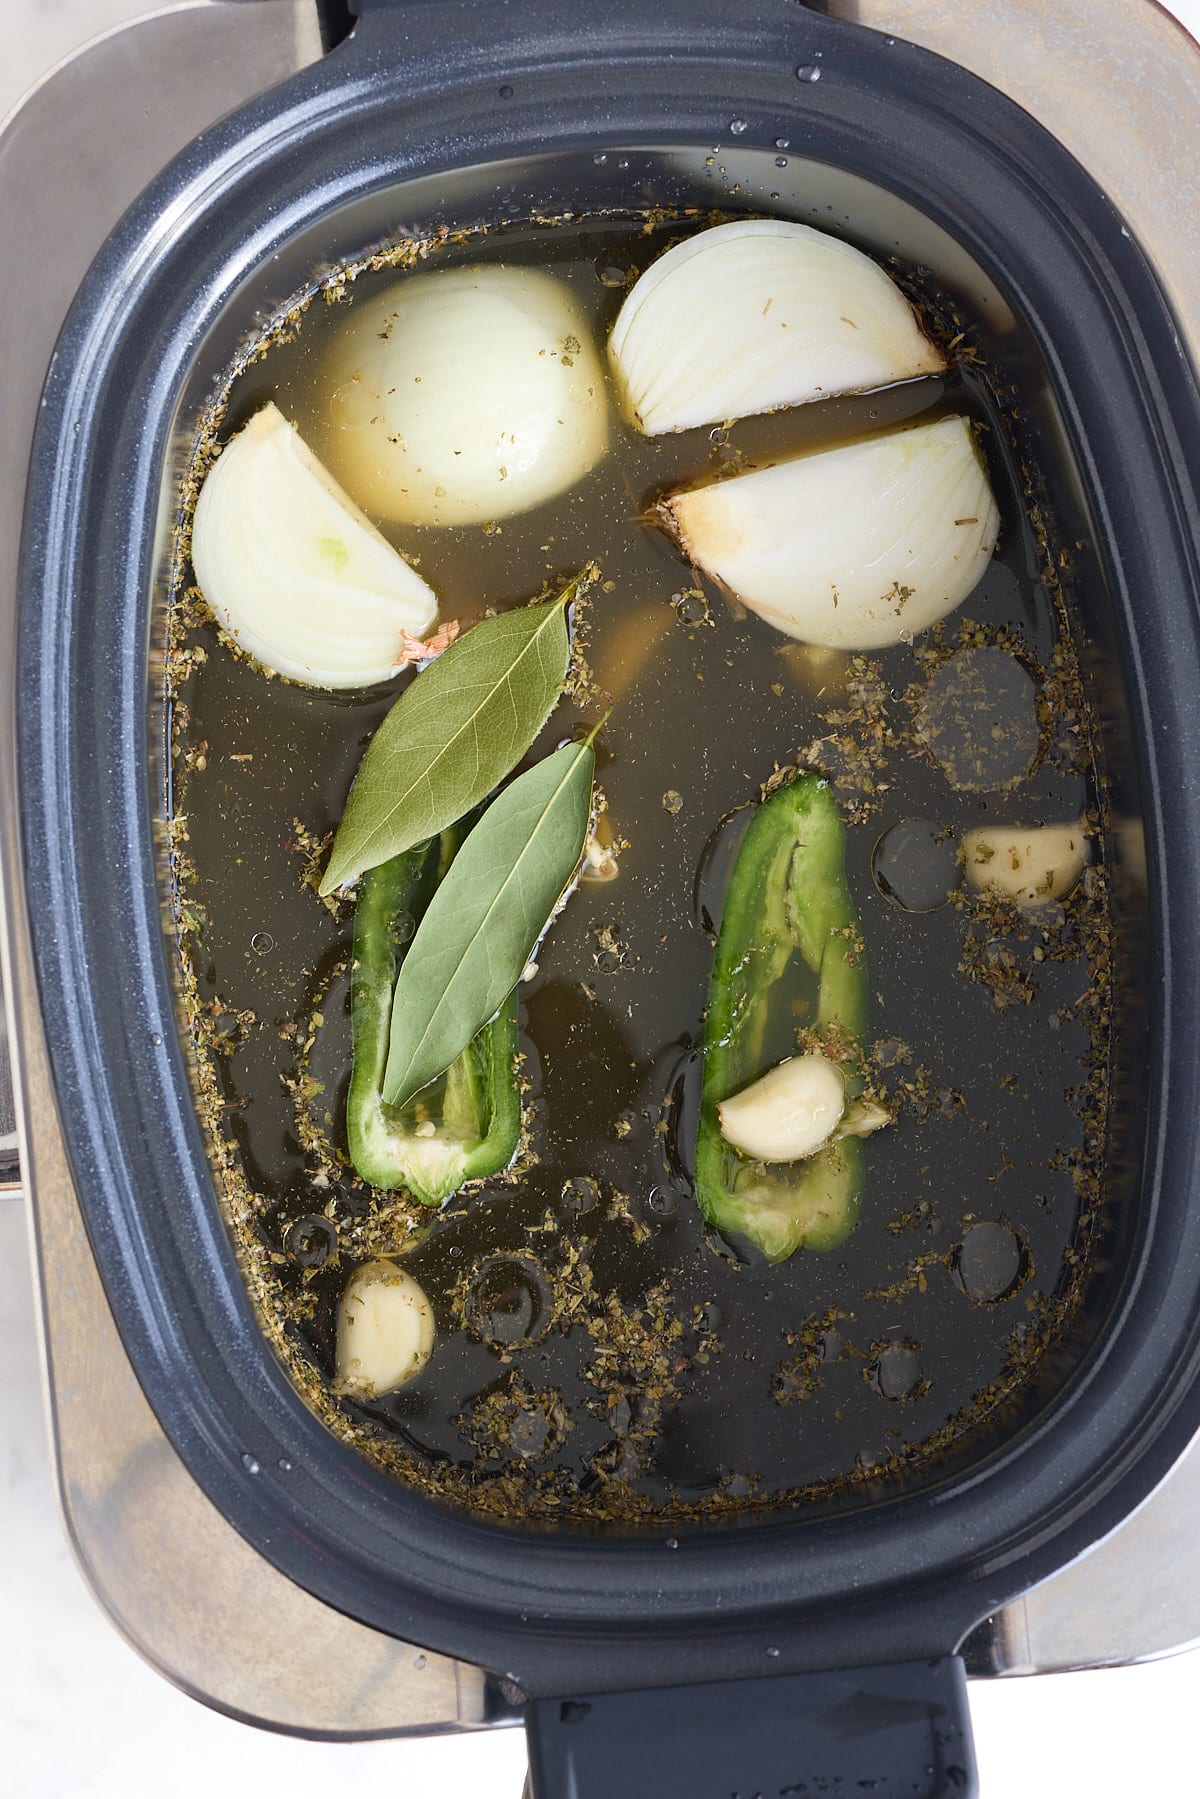
Add the chicken broth, water, olive oil, cumin, and oregano and stir. Lay the onion, jalapeno, smashed garlic, and bay leaves on the beans.

All ingredients added to a slow cooker.

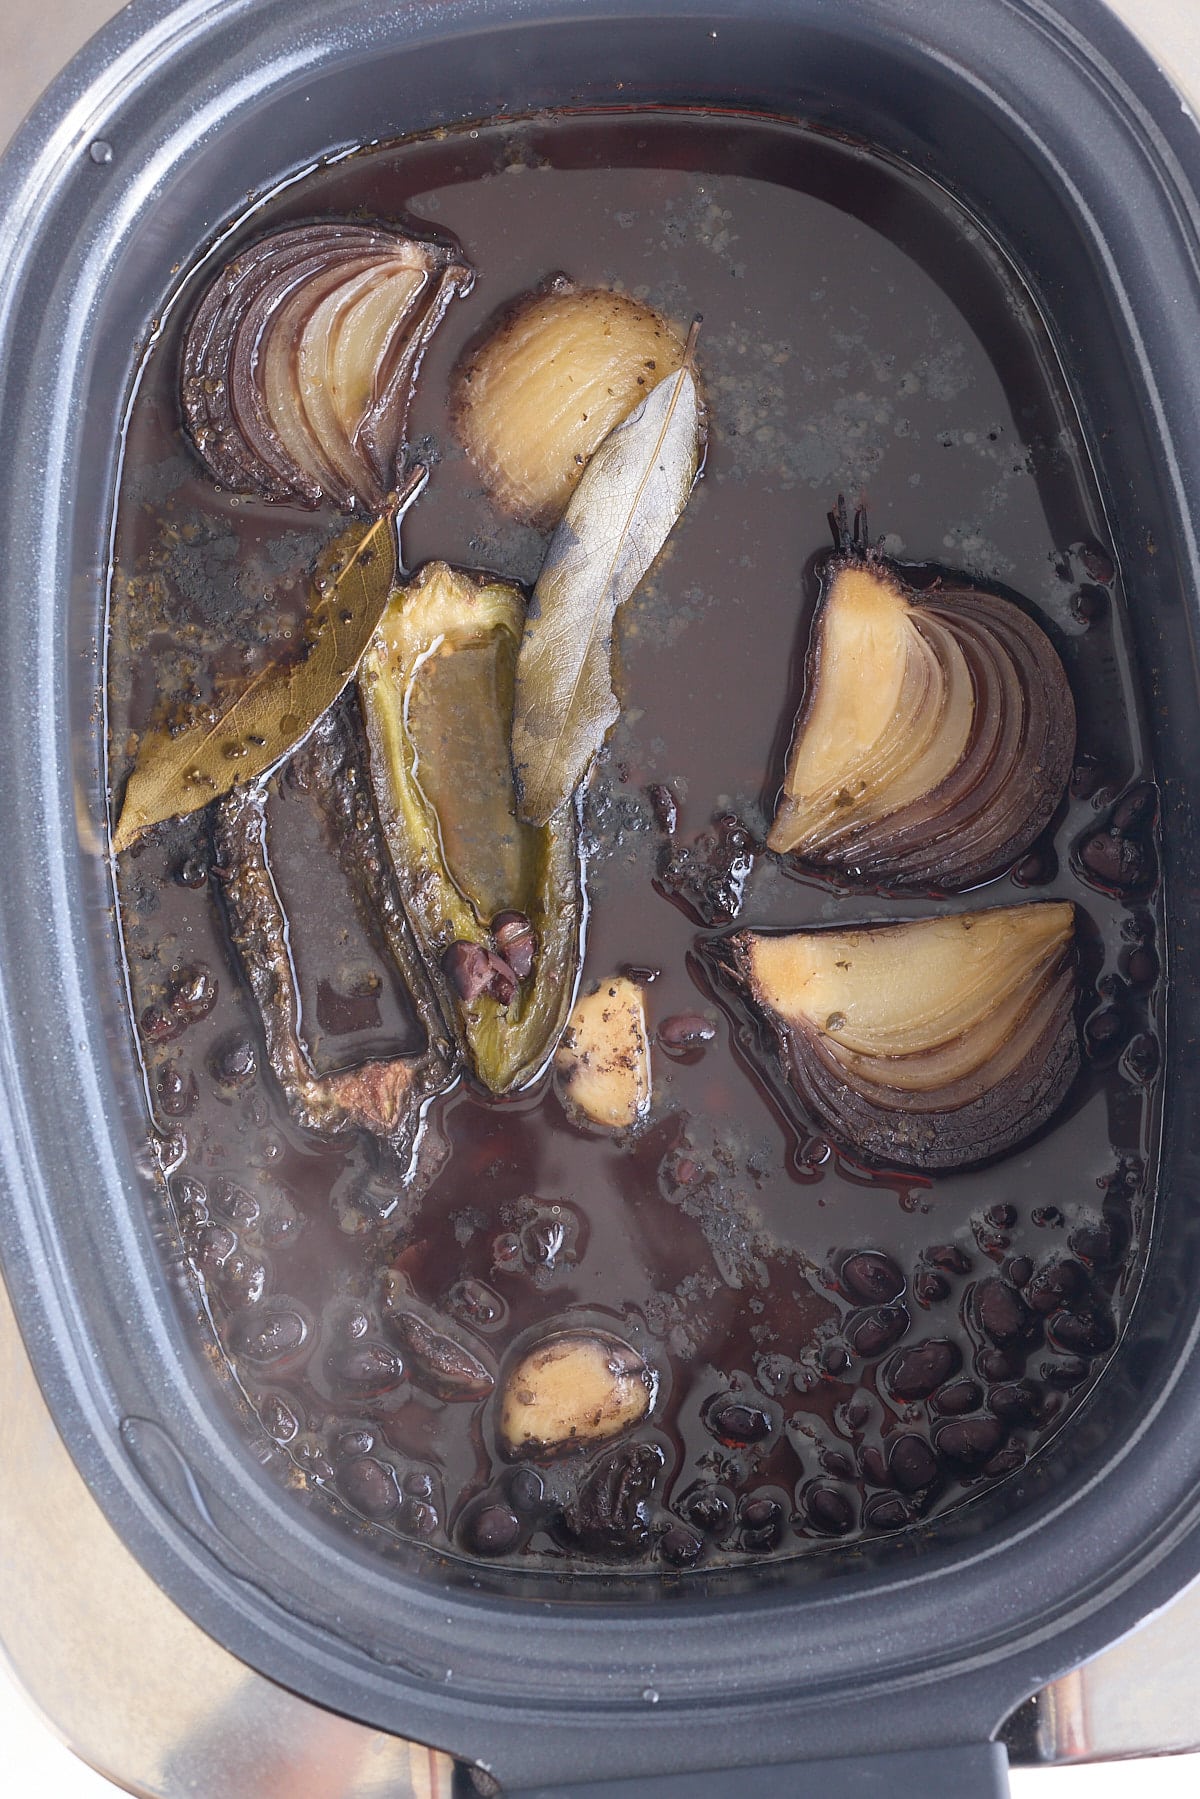
Cover the slow cooker and cook on low for 6-8 hours or high for 3-4 hours until the beans are tender.

Black beans and spices having been cooked over time still in the slow cooker.

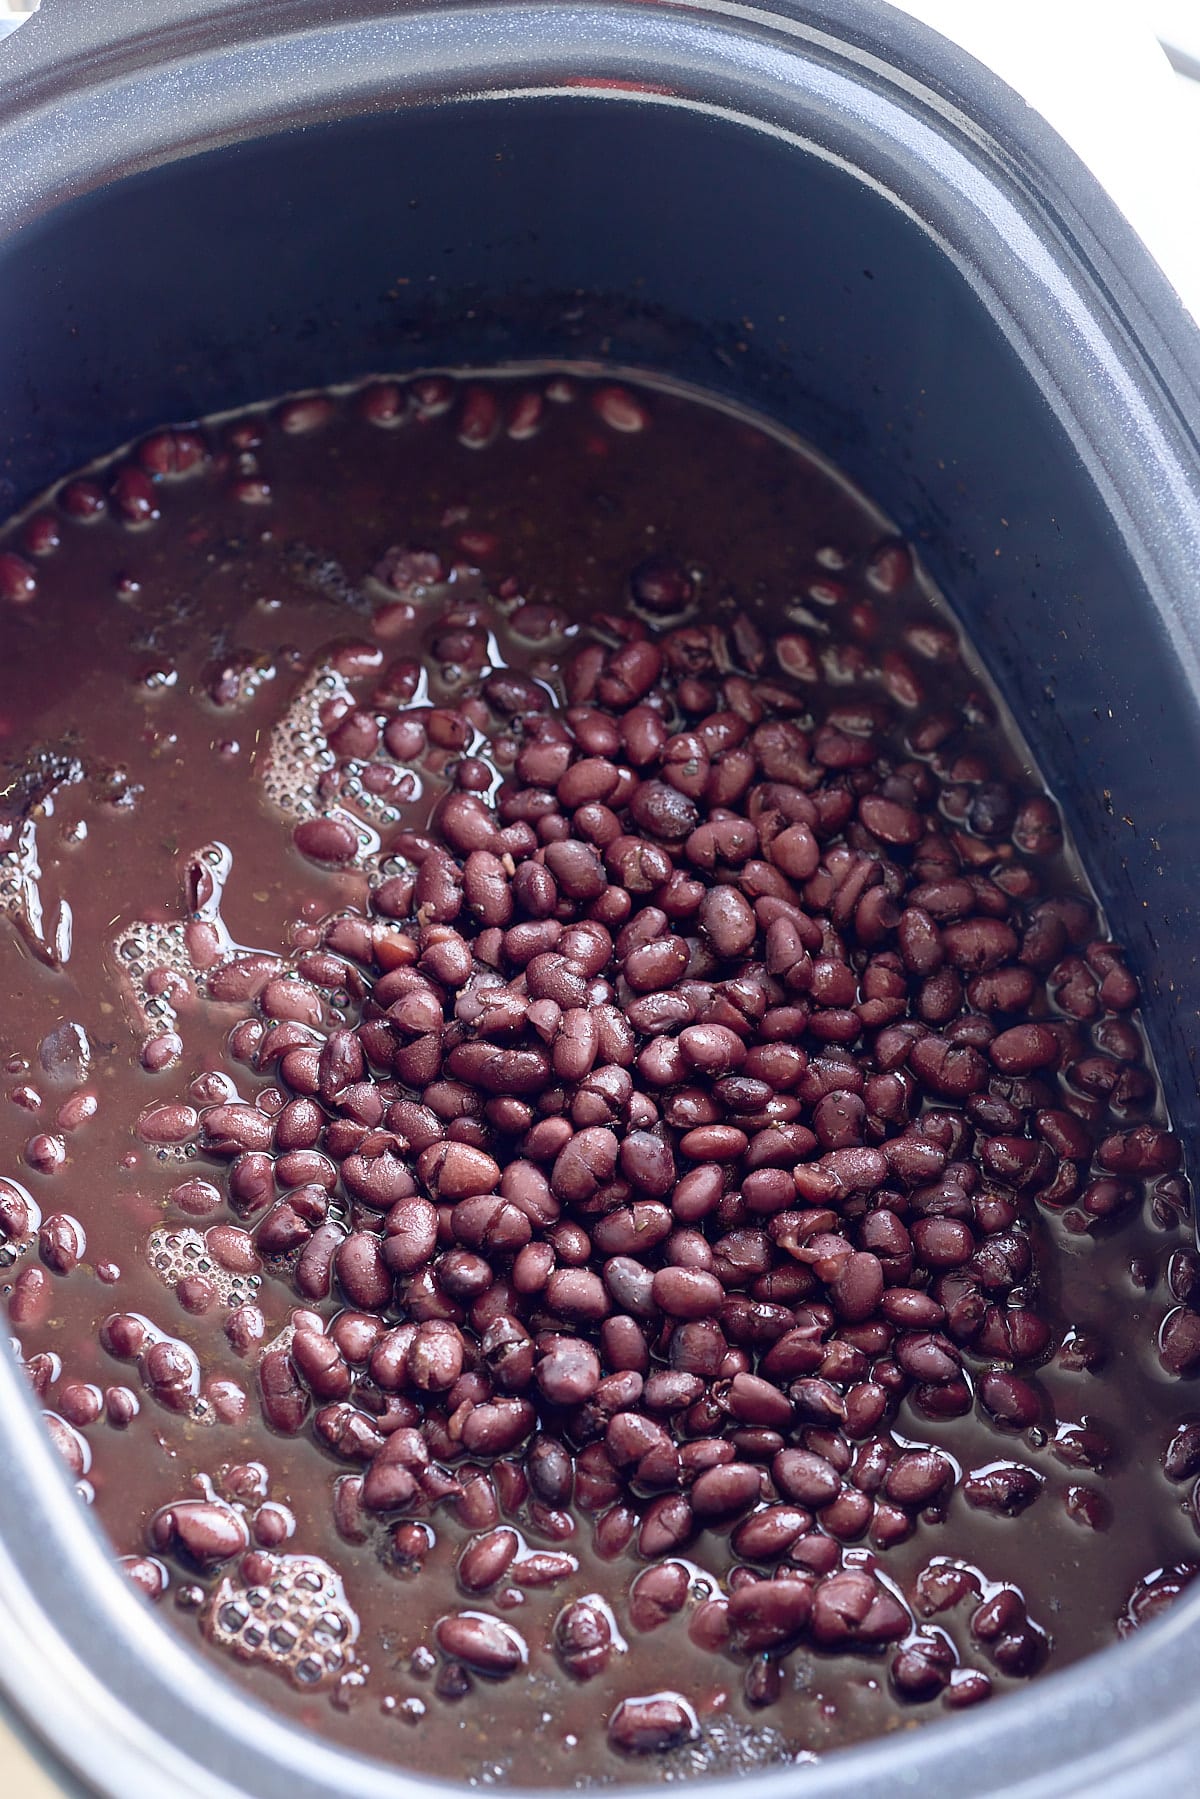
Once the beans are cooked, remove the bay leaves, onion, jalapeno, and smashed garlic.

Freshly cooked black beans in the slow cooker with extra ingredients removed.

Serve and enjoy!

How To Store Crock Pot Black Beans

Storing black beans: Let the black beans cool to room temperature before storing them. Transfer the black beans to an airtight container. Store for up to 5 days.

Freezing black beans: Allow them to cool to room temperature before transferring the black beans to an airtight freezer-safe container. Before freezing, divide your cooked beans into separate servings and transfer each one into separate freezer bags or containers. Place them in the freezer, and store them for up to 6 months!

Large serving bowl of freshly cooked black beans.

How To Serve Black Beans

As a side: Serve with rice, chicken, peppers, and onions for a quick fajita.

As a topping: Serve seasoned slow cooker black beans on top of nachos, a crisp salad, on top of rice

A tasty spread: Use refried black beans as a spread on your avocado toast and eggs for breakfast.

As a yummy addition to recipes: Use these black beans in dishes like my Jamaican Rice & Beans or Black Bean Salsa.

FAQ's

How long does it take to cook black beans in a slow cooker or crockpot?

It usually takes 6-8 hours on low heat to cook black beans in a slow cooker or crockpot, but this time can vary based on the size of your slow cooker.

Can I use canned black beans instead of dried beans?

Yes, if you are short on time you can replace the dried beans with 2 cans of precooked and unseasoned black beans that have been drained and rinsed.

Do I need to soak my black beans first?

Nope, after rinsing toss the beans into the slow cooker and start cooking.

Do I need to add any water when cooking the beans?

Yes, you need to add enough water so that the beans are covered by at least 1-2 inches of liquid while they are cooking.

How many cans of black beans does 1 pound of dried beans equal out to?

One pound of dry black beans makes roughly 3 to 4 cans of cooked black beans.

Notes

  • Rinse the beans thoroughly before cooking to remove any dirt or debris.
  • Check on the cooked beans regularly and add more liquid if needed.
  • Adjust the seasonings as you need. Taste and re-season them with pepper, cumin, chili powder, garlic, and onion powder.
  • Add salt at the end of cooking to control the salt content. The saltiness of the broth will increase as it cooks. Salt to taste at the end.
  • For a savory flavor profile, add smoked meats like bacon, ham hock, or smoked turkey. Add these meats at the beginning of the slow cooking process.

Looking for more slow cooker recipes? Try these out:

  • Super Easy Slow Cooker Sweet Potatoes
  • Slow Cooker Mac and Cheese
  • Slow Cooker Garlic Herb Mushrooms
  • Slow Cooker Cheesy Hot Shrimp Dip
  • Slow Cooker Pork Carnitas

 If you have tried this recipe or any other recipe on my blog, please rate it and let me know how it turned out in the comments below!

Large serving bowl of freshly cooked black beans.
Print Recipe
5 from 3 votes

Slow Cooker Black Beans

Experience the incredible taste and convenience of slow cooker black beans! Perfect for any occasion, homemade slow cooker black beans can be prepped in no time with minimal effort. Get ready to savor the flavor that only slow-cooked black beans can bring!
Prep Time5 minutes mins
Cook Time3 hours hrs
Total Time3 hours hrs 5 minutes mins
Course: Side Dish
Cuisine: American
Keyword: slow cooker black beans
Servings: 9 servings
Calories: 202kcal
Author: Tanya Harris

Equipment

  • Slow Cooker

Ingredients

  • 1 pound Dried black beans sorted and rinsed
  • 4 cups Chicken broth
  • 2 cups Water
  • 1 tablespoon Olive oil
  • 2 teaspoons Cumin
  • 1 teaspoon Oregano
  • 1 yellow onion peeled, cut into 4ths, root attached
  • 1 Jalapeno pepper seeded and halved
  • 4 cloves Garlic smashed
  • 2 Bay leaves
  • Salt and pepper to taste

Instructions

  • Place the sorted and rinsed black beans in the slow cooker.
  • Add the chicken broth, water, olive oil, cumin, and oregano and stir. Lay the onion, jalapeno, smashed garlic, and bay leaves on the beans.
  • Cover the slow cooker and cook on low for 6-8 hours or high for 3-4 hours until the beans are tender.
  • Once the beans are cooked, remove the bay leaves, onion, jalapeno, and smashed garlic. Season the beans with sale and pepper to taste, adding the salt at the end to avoid over-salting. Serve and enjoy.
  • Serve and enjoy.

Notes

  • Add salt at the end of cooking to control the salt content. The saltiness of the broth will increase as it cooks. Salt to taste at the end.
  • Adjust the seasonings as you need. Taste and re-season them with pepper, cumin, chili powder, garlic, and onion powder.
  • Check on the cooked beans regularly and add more liquid if needed.

Nutrition

Serving: 1g | Calories: 202kcal | Carbohydrates: 34g | Protein: 12g | Fat: 3g | Saturated Fat: 0.4g | Polyunsaturated Fat: 1g | Monounsaturated Fat: 1g | Cholesterol: 2mg | Sodium: 397mg | Potassium: 804mg | Fiber: 8g | Sugar: 2g | Vitamin A: 39IU | Vitamin C: 3mg | Calcium: 81mg | Iron: 3mg

Whole Roasted Fish

March 23, 2023 by Tanya Harris 2 Comments

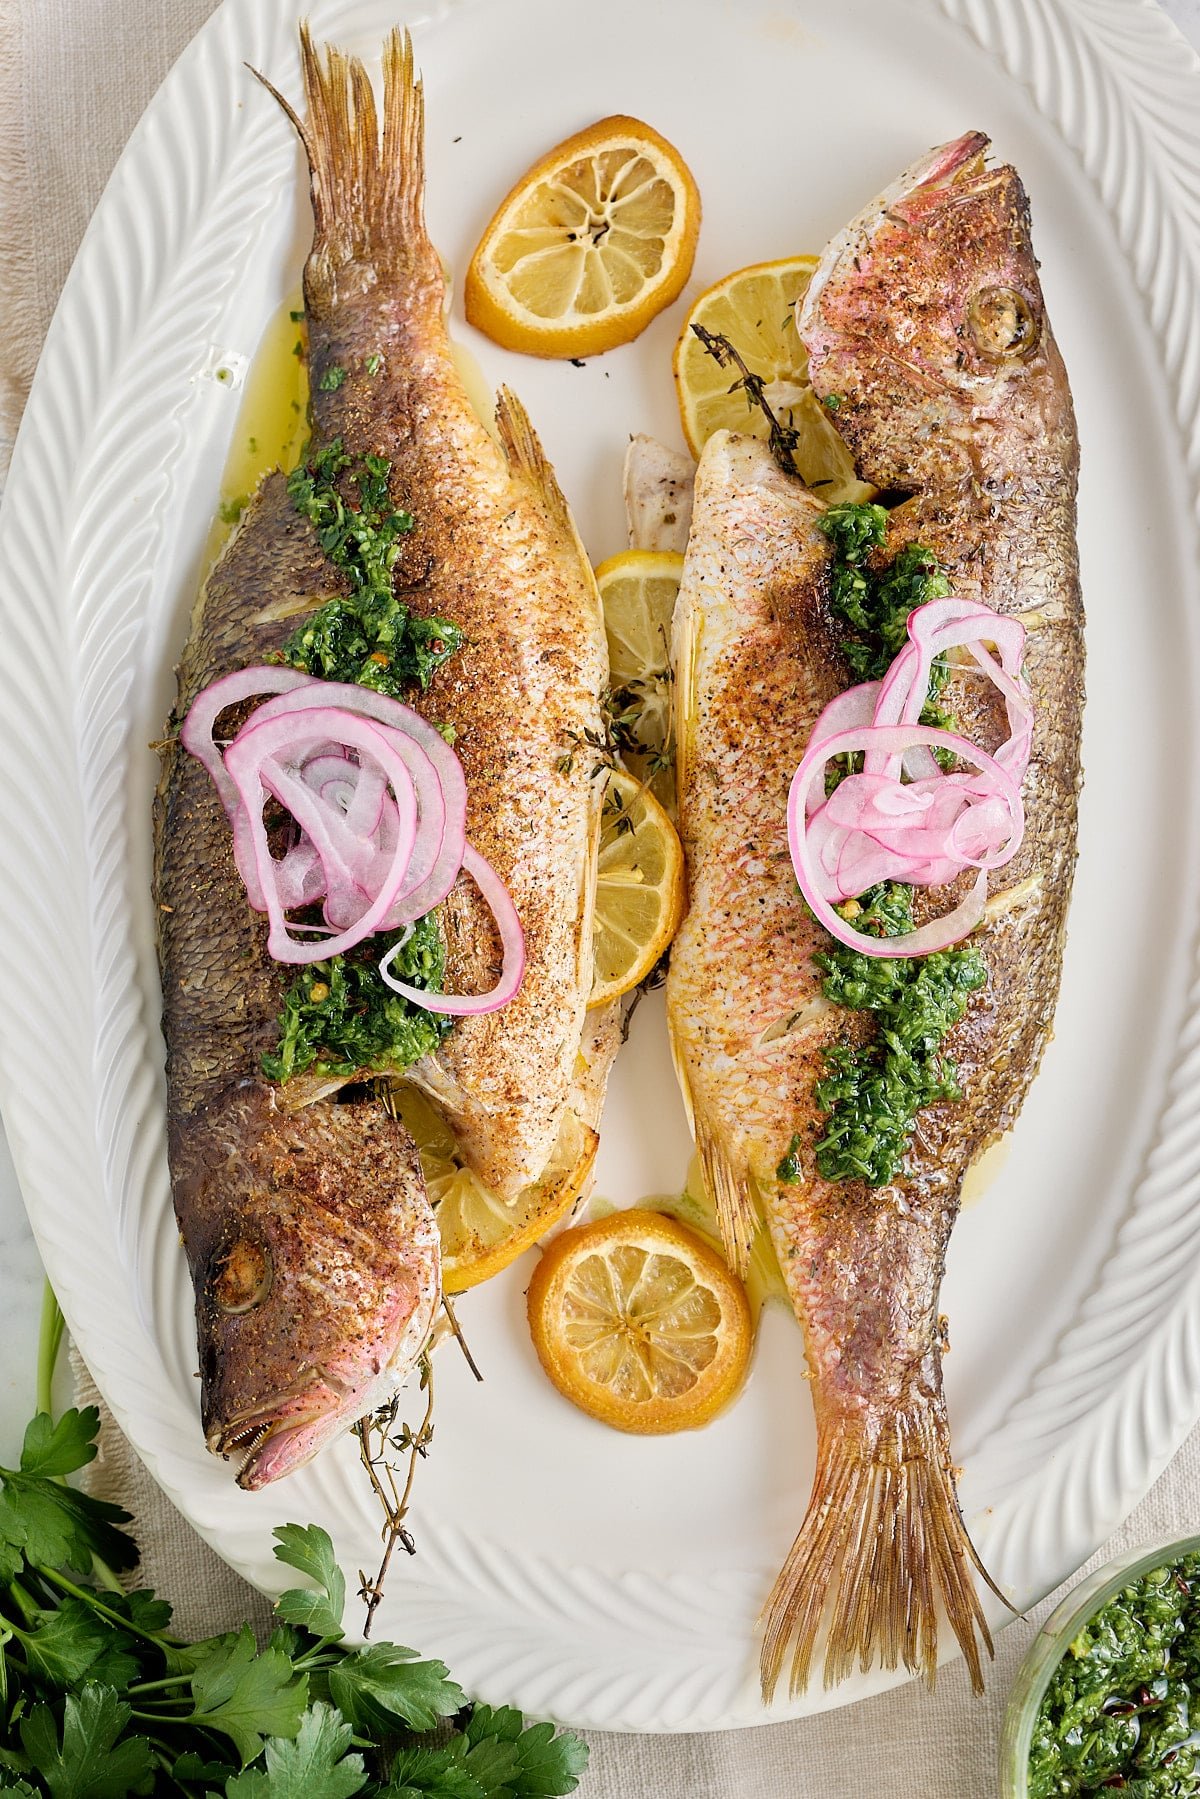
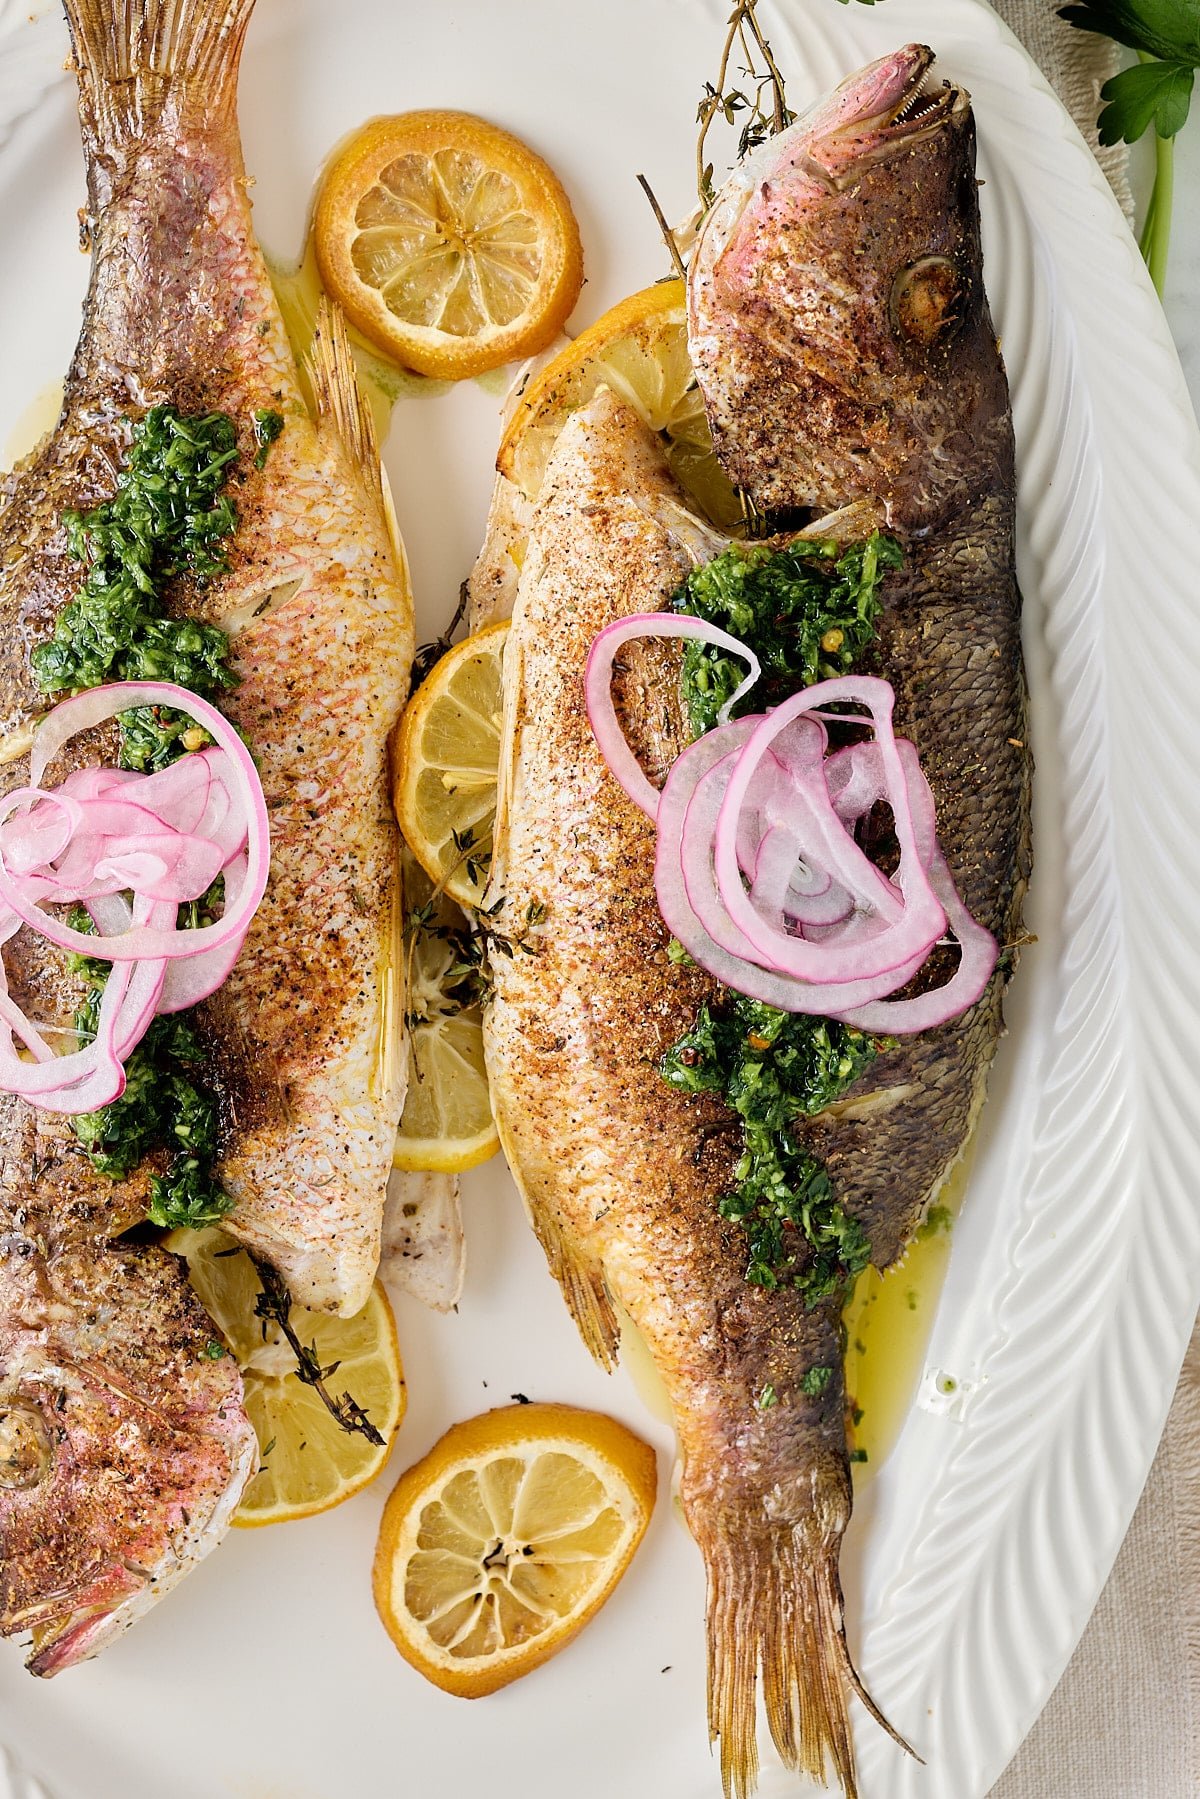
white serving platter with 2 cooked whole fish stuffed with fresh thyme and lemon slices and garnished with red onion and a drizzle of olive oil

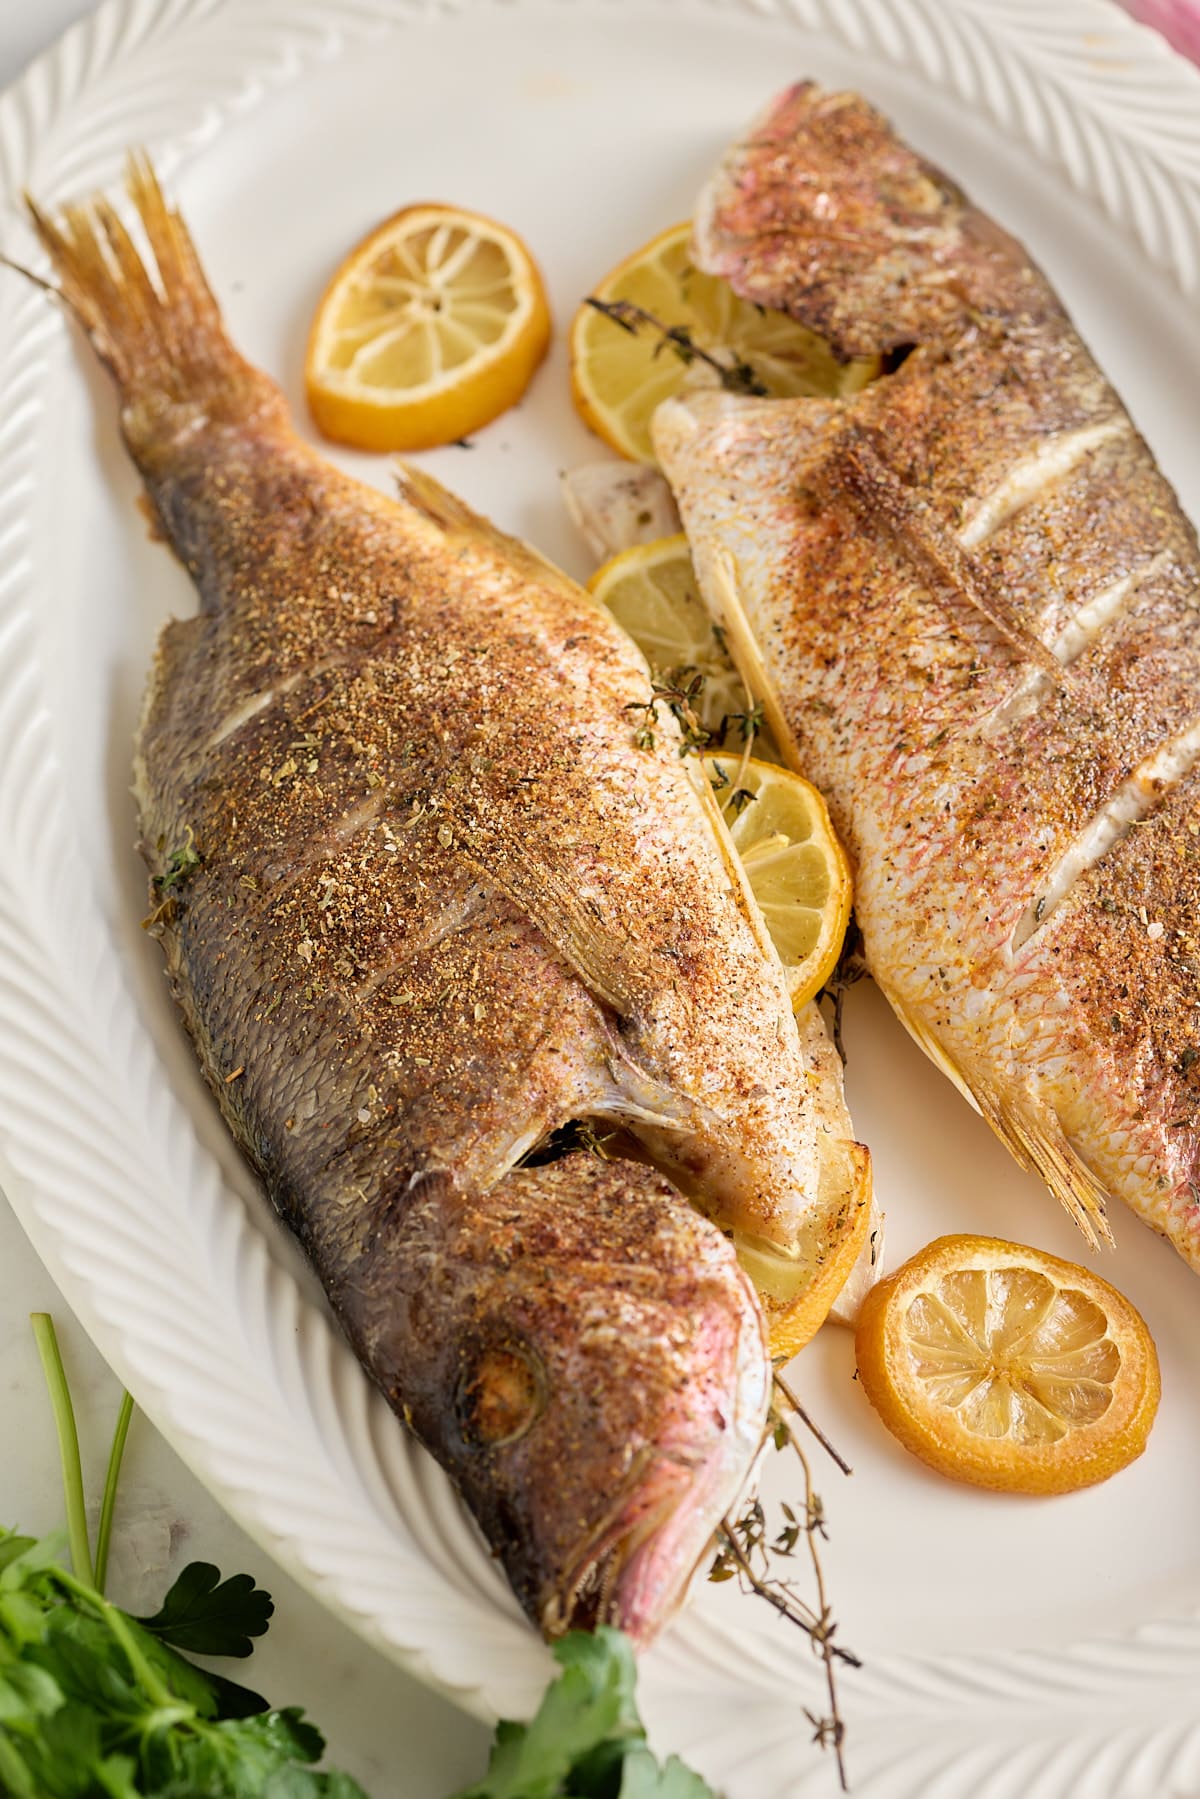
If you like to keep things simple, my Whole Roasted Fish recipe is for you. Whole fish, seasoned with fish seasoning and stuffed with slices of fresh lemon, garlic, and a few sprigs of thyme, before being placed into a searingly hot oven to roast.

white serving platter with 2 cooked whole fish stuffed with fresh thyme and lemon slices and garnished with red onion and a drizzle of olive oil

This post contains affiliate links, please read my full disclaimer here.

You’ll find the full recipe with ingredient amounts and instructions in the recipe card at the bottom of this post. Be sure to check out the blog post itself for extra tips and tricks!

Roasting a whole fish in the oven is one of the easiest and tastiest things you can do. Growing up, my stepdad would go fishing every other weeknight, and whole roasted fish was a common dinner occurrence in our house.

What I like most about cooking whole fish is how easy it is to add flavor. Lemon, garlic, and thyme are flavors that work together and, when paired together, complement the fish beautifully.

However, this easy fish recipe can be adapted to suit the flavors you and your family enjoy. If you want to swap the thyme for parley, dill, or rosemary, feel free to do that.

Be sure to check out my Air Fryer Whole Fish, Easy Oven-Baked Fish, Crispy Air Fryer Fish, and Brown Stew Fish recipes too!

Ingredients

Here's what you will need to make oven-roasted fish:

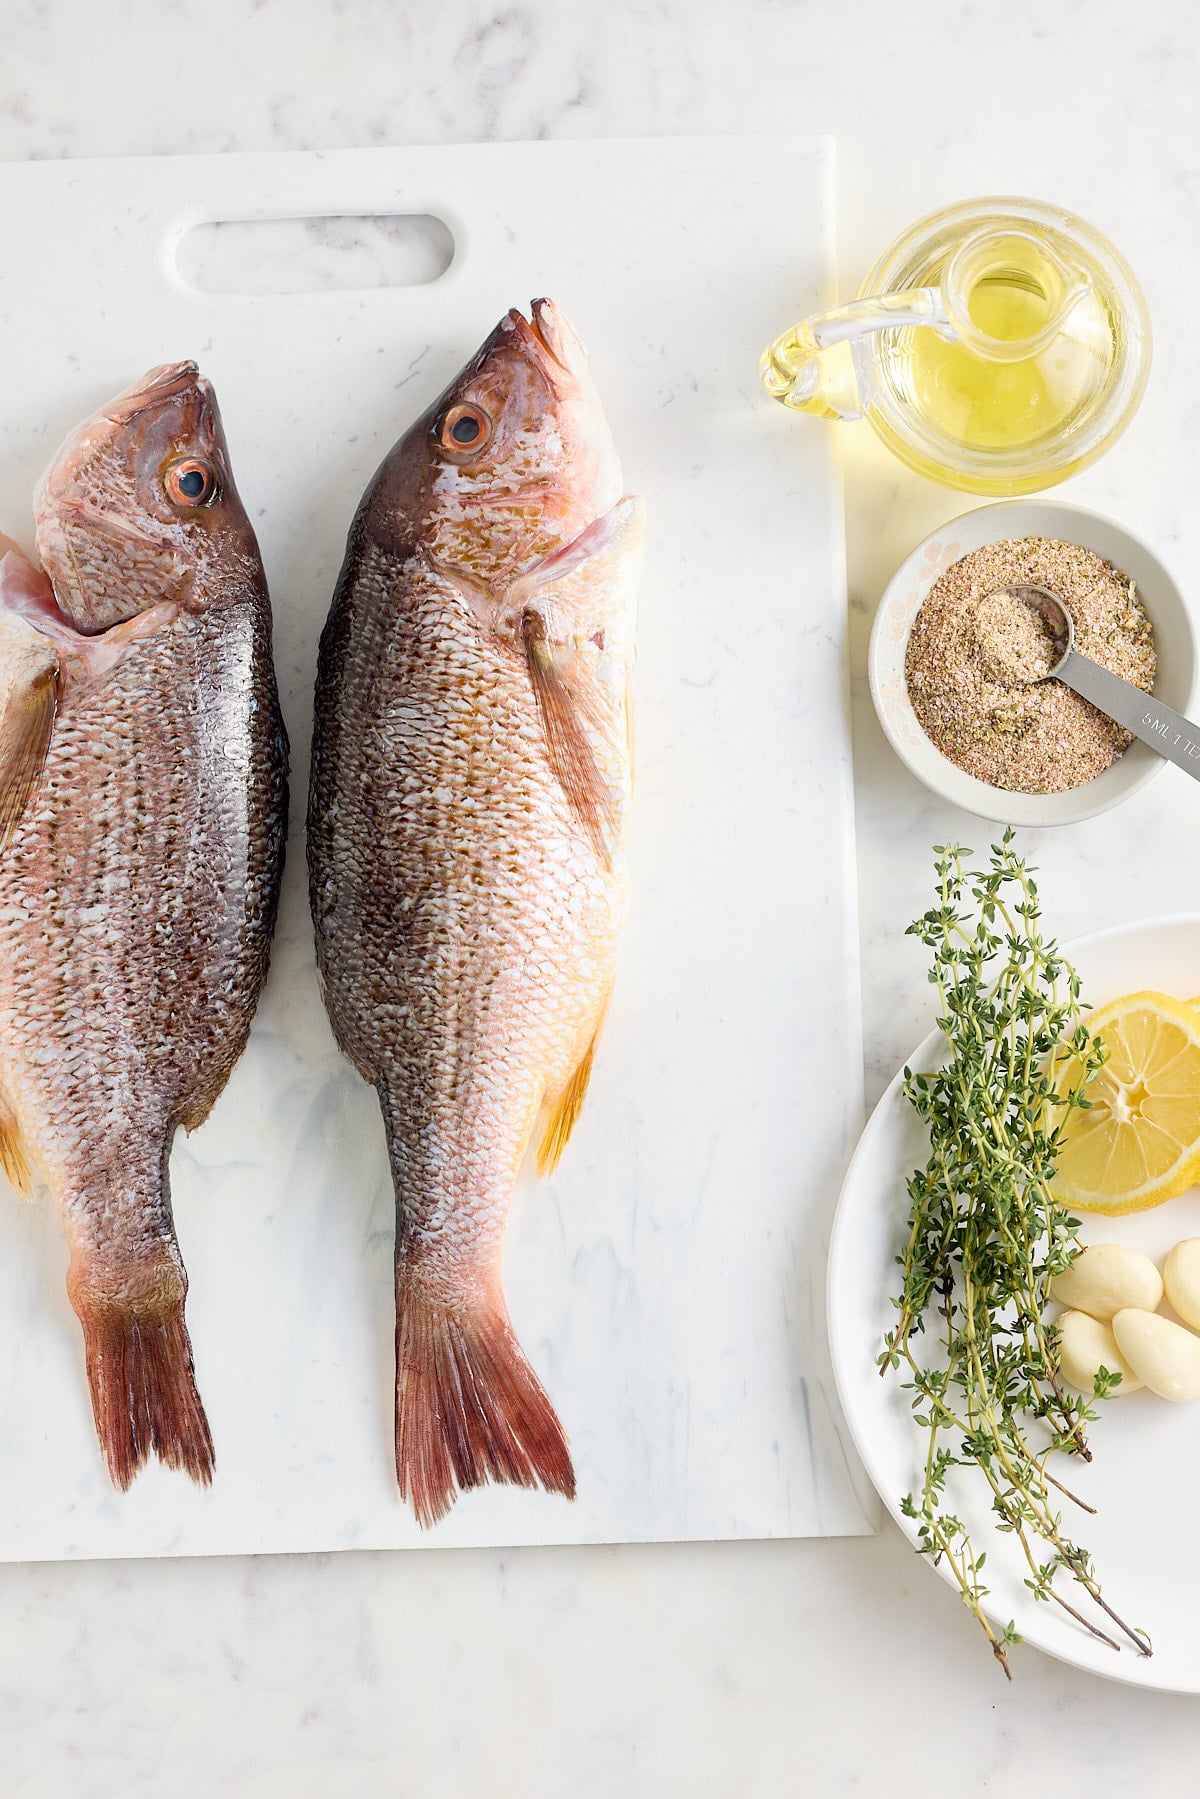
whole roasted fish recipe ingredients
  • Whole fish - I used 2 whole fish, gutted and scaled, weighing roughly 1lb each. Red snapper, sea bass, tilapia, or trout would be ideal.
  • Oil - I use olive oil as it has the best flavor, but any other light-flavored oil will work here too.
  • Seasoning - I season the fish with fish seasoning, a dry rub mixture that tastes delicious on fish.
  • Fresh herbs - 3-4 sprigs of fresh herbs are added to the cavity of the fish. I've used sprigs of thyme, but rosemary, dill, or parsley would work equally well.
  • Garlic - fresh sliced garlic is added to the cavity of the fish.
  • Lemon - is sliced and added to the cavity of the fish.

How to cook whole fish in the oven

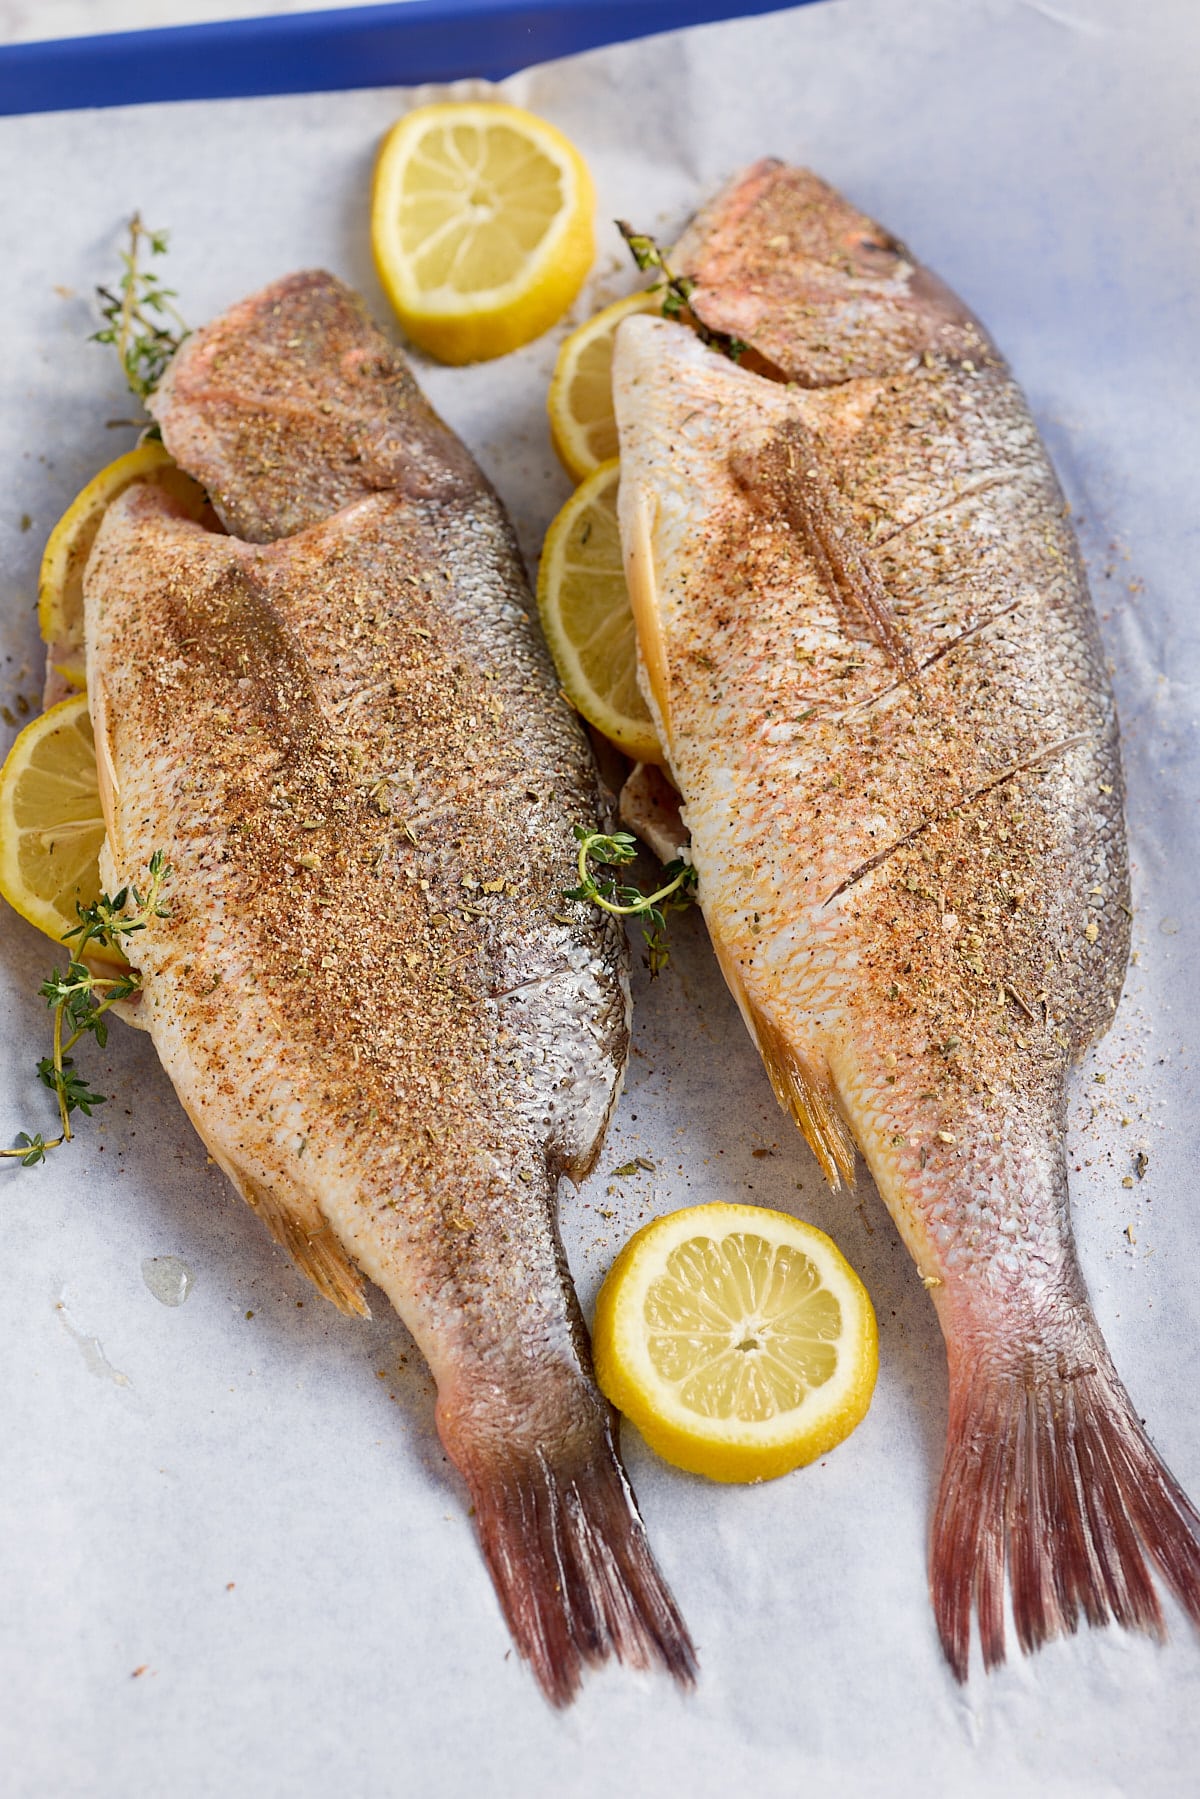
2 whole fish seasoned and set onto parchment paper stuffed with fresh thyme and lemon slices

Preheat the oven to 425°F (220°C).

Rinse the fish under cold water and pat it dry with paper towels.

Make 3-4 diagonal cuts on both sides of the fish to help it cook more evenly and to allow the flavors to penetrate the fish.

Rub the fish with olive oil and season it inside and out with fish seasoning.

Stuff the cavity of the fish with sliced lemon, garlic, and fresh herbs.

Place the fish on a baking sheet or sheet lined with parchment paper.

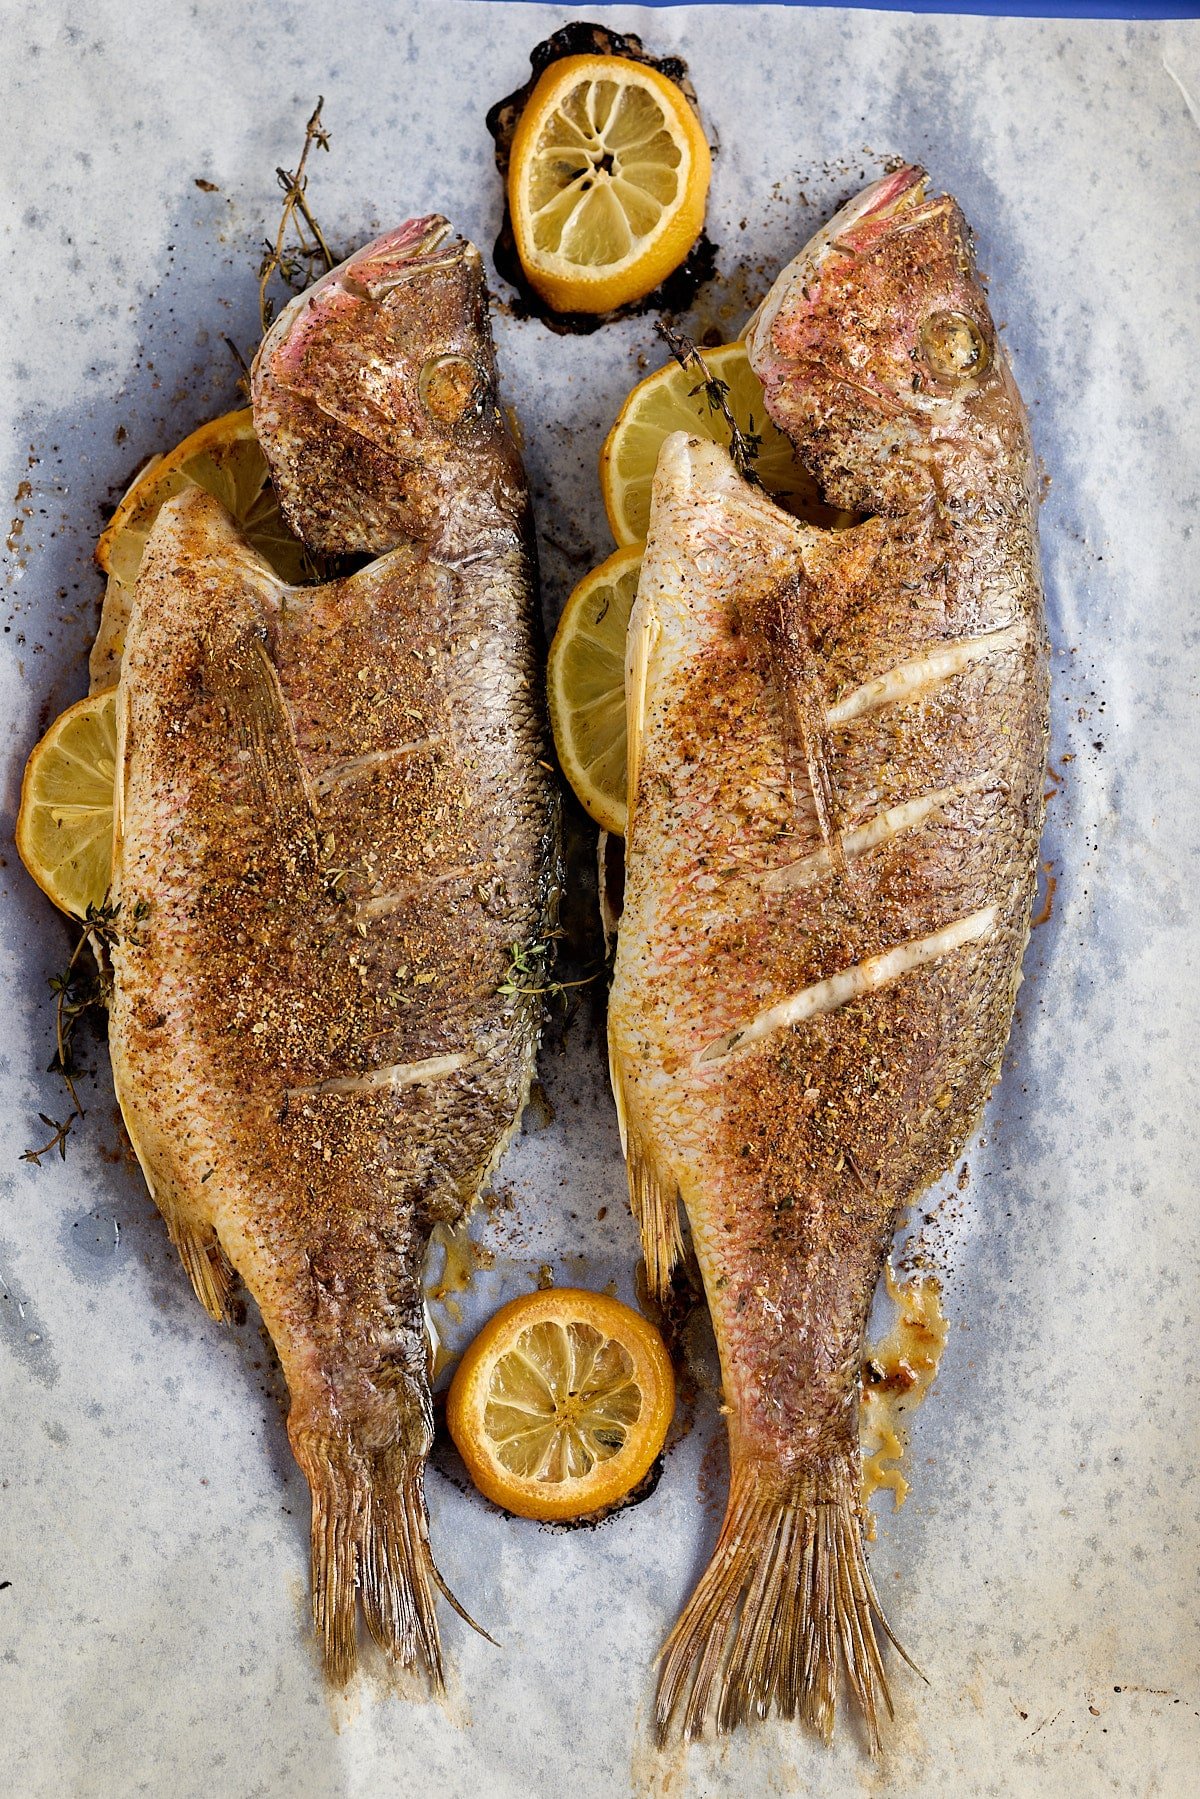
cooked whole fish stuffed with fresh thyme and lemon slices set on parchment paper

Bake the fish in the oven for 25-27 minutes or until the internal temperature reaches 145°F (63°C). The cooking time may vary depending on the size of the fish.

Once cooked, remove the fish from the oven and let it rest for a few minutes before serving.

Serve the fish on a platter, garnished with fresh herbs and lemon wedges if desired.

Expert Tips

These tips will help you make the best whole-roasted fish you've ever tried. 

  • Pat the fish dry before seasoning it. This helps remove excess moisture that can cause the fish to steam and become mushy, rather than roast.
  • I recommend scoring the fish by cutting diagonal lines in the skin before you season it. This ensures you get maximum flavor into the fish.
  • If you want to check the internal temperature of the fish once it's cooked, a probe thermometer is the easiest way to do this.
  • The parchment paper pictured is not mandatory, but I like to use it as it stops the fish from sticking to the baking sheet.

Flavor variations

  • Swap the thyme I've used in this dish for other herbs like rosemary, dill, or parsley.
  • Season and spice this fish dish the way you like it. Want to add some chili heat? Add some red pepper flakes or sliced red chili.
  • Try adding some finely shredded fresh ginger to the cavity of the fish.
  • Add extra citrus by finely grating some lemon zest and mixing it with the fish seasoning before rubbing it over the fish.
close up image of white serving platter with 2 cooked whole fish stuffed with fresh thyme and lemon slices

What to serve with Whole Roasted Fish

I like to serve whole roasted fish garnished with some pickled red onions and a spoon of chimichurri for a burst of added freshness. Alongside, I'll add some rice or potatoes and a couple of my favorite veggie sides.

Additionally, you can bake your fish with vegetables. Lay the vegetables on the base of your baking sheet and place the fish on top.

For potatoes, try my Instant Pot Green Beans and Potatoes, Air Fryer French Fries, or my Southern Potato Salad. When it comes to vegetable sides, try my Marinated Air Fryer Vegetables, Oven Roasted Cauliflower, or Oven Roasted Broccoli.

How to pick whole fresh fish from the market

Don't be intimidated about buying whole fish from the market. Here are my tips for buying fresh whole fish.

  1. Look for clear eyes: The eyes of the fish should be clear, bright, and bulging, indicating that the fish is fresh.
  2. Check for firm flesh: The flesh of the fish should be firm to the touch and should spring back when pressed.
  3. Smell the fish: Fresh fish should have a mild smell, not a strong or unpleasant odor. If it smells overly fishy, it may not be fresh.
  4. Look for bright and shiny skin: The skin of the fish should be bright and shiny, indicating that it was recently caught and is fresh.

How to store

To refrigerate: Fish is a dish that is best served warm from the oven, as it overcooks really quickly when you try and reheat it. If you do have leftovers, they can be stored in an airtight container in the refrigerator for 1-2 days. When ready to enjoy, place in a hot oven to warm through, taking care not to overcook the fish and dry it out.

To freeze: I don't recommend freezing this whole roasted fish; it's a dish best served straight from the oven.

white serving platter with 2 cooked whole fish stuffed with fresh thyme and lemon slices

FAQs

Which fish is best for roasting?

If roasting fish in the oven, I like to cook the whole fish on the bone. I recommend fish weighing roughly 1 lb each, and red snapper, sea bass, tilapia, or trout would be my top choices.

How long will it take to bake a whole fish?

The length of time will depend a lot on the size and thickness of the fish. I cook my fish at 425°F (220°C) and check it after 25 minutes until the internal temperature reaches 145°F (63°C). If it needs a little longer, I'll put it back into the oven for another 2-3 minutes. A cooked fish should be flaky and come apart easily when gently prodded with a fork.

Is roasting fish healthy?

Yes, roasting is a healthy way to cook fish, as you add very little oil to the dish when roasting it.

Do you cover fish when roasting?

No, don't be tempted to cover the fish when roasting in the oven, as the fish will steam rather than roast.

If you have tried this Whole Roasted Fish recipe or any other recipe on my blog, please rate it and let me know how it turned out in the comments below!

white serving platter with 2 cooked whole fish stuffed with fresh thyme and lemon slices and garnished with red onion and a drizzle of olive oil
Print Recipe
5 from 1 vote

Whole Roasted Fish

Whole fish, seasoned with fish seasoning, and stuffed with slices of fresh lemon, garlic and a few sprigs of thyme, before being placed into a searingly hot oven to roast. The result, beautifully cooked fish with a delicious crispy skin.
Prep Time15 minutes mins
Cook Time25 minutes mins
Total Time40 minutes mins
Course: Main Course
Cuisine: American
Keyword: how to cook a whole fish, oven roasted fish, whole roasted fish
Servings: 4
Calories: 482kcal
Author: Tanya Harris

Ingredients

  • 2 whole fish (such as red snapper, sea bass or trout) gutted and scaled, about 1 lb each
  • 1 tablespoon olive oil
  • 2.5 teaspoon fish seasoning
  • 3-4 sprigs fresh herbs (such as thyme or rosemary)
  • 2 cloves garlic sliced
  • 1 lemon sliced

Instructions

  • Preheat the oven to 425°F (220°C).
  • Rinse the fish under cold water and pat it dry with paper towels.
  • Make 3-4 diagonal cuts on both sides of the fish to help it cook more evenly and to allow the flavors to penetrate into the fish.
  • Rub the fish with olive oil and season it inside and out with fish seasoning.
  • Stuff the cavity of the fish with sliced lemon, garlic and fresh herbs.
  • Place the fish on a baking sheet, or sheet lined with parchment paper.
  • Bake the fish in the oven for 25-27 minutes, or until the internal temperature reaches 145°F (63°C). The cooking time may vary depending on the size of the fish.
  • Once cooked, remove the fish from the oven and let it rest for a few minutes before serving.
  • Serve the fish on a platter, garnished with fresh herbs and lemon wedges if desired.

Notes

  • Feel free to add other flavors using different herbs, seasonings, or spices.
  • Additionally, you can bake your fish with vegetables. Lay the vegetables on the base of your baking sheet and place the fish on top.

Nutrition

Calories: 482kcal | Carbohydrates: 4g | Protein: 80g | Fat: 14g | Saturated Fat: 3g | Polyunsaturated Fat: 4g | Monounsaturated Fat: 6g | Cholesterol: 360mg | Sodium: 312mg | Potassium: 1210mg | Fiber: 1g | Sugar: 1g | Vitamin A: 491IU | Vitamin C: 17mg | Calcium: 94mg | Iron: 5mg

Classic Lemonade

March 16, 2023 by Tanya Harris 2 Comments

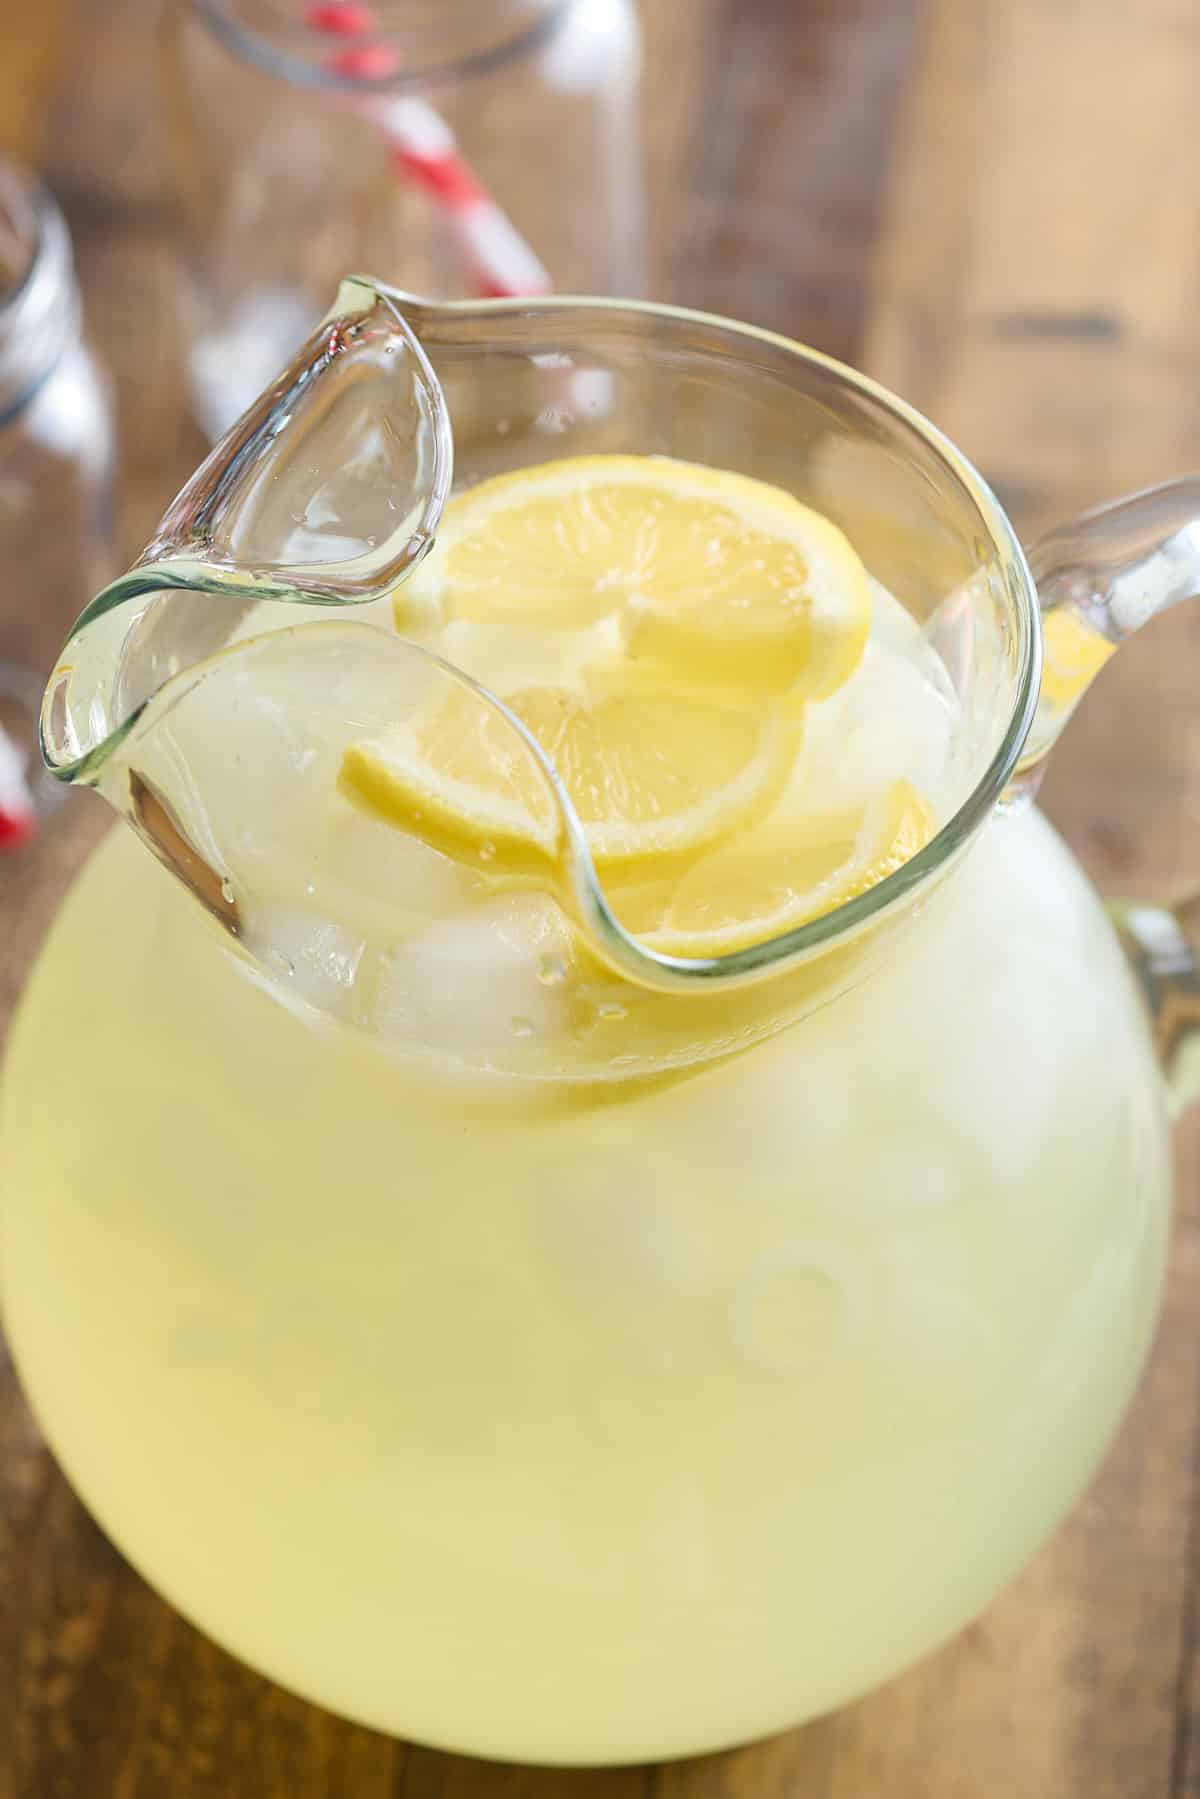
a pitcher filled with classic lemonade, topped with slices of fresh lemon

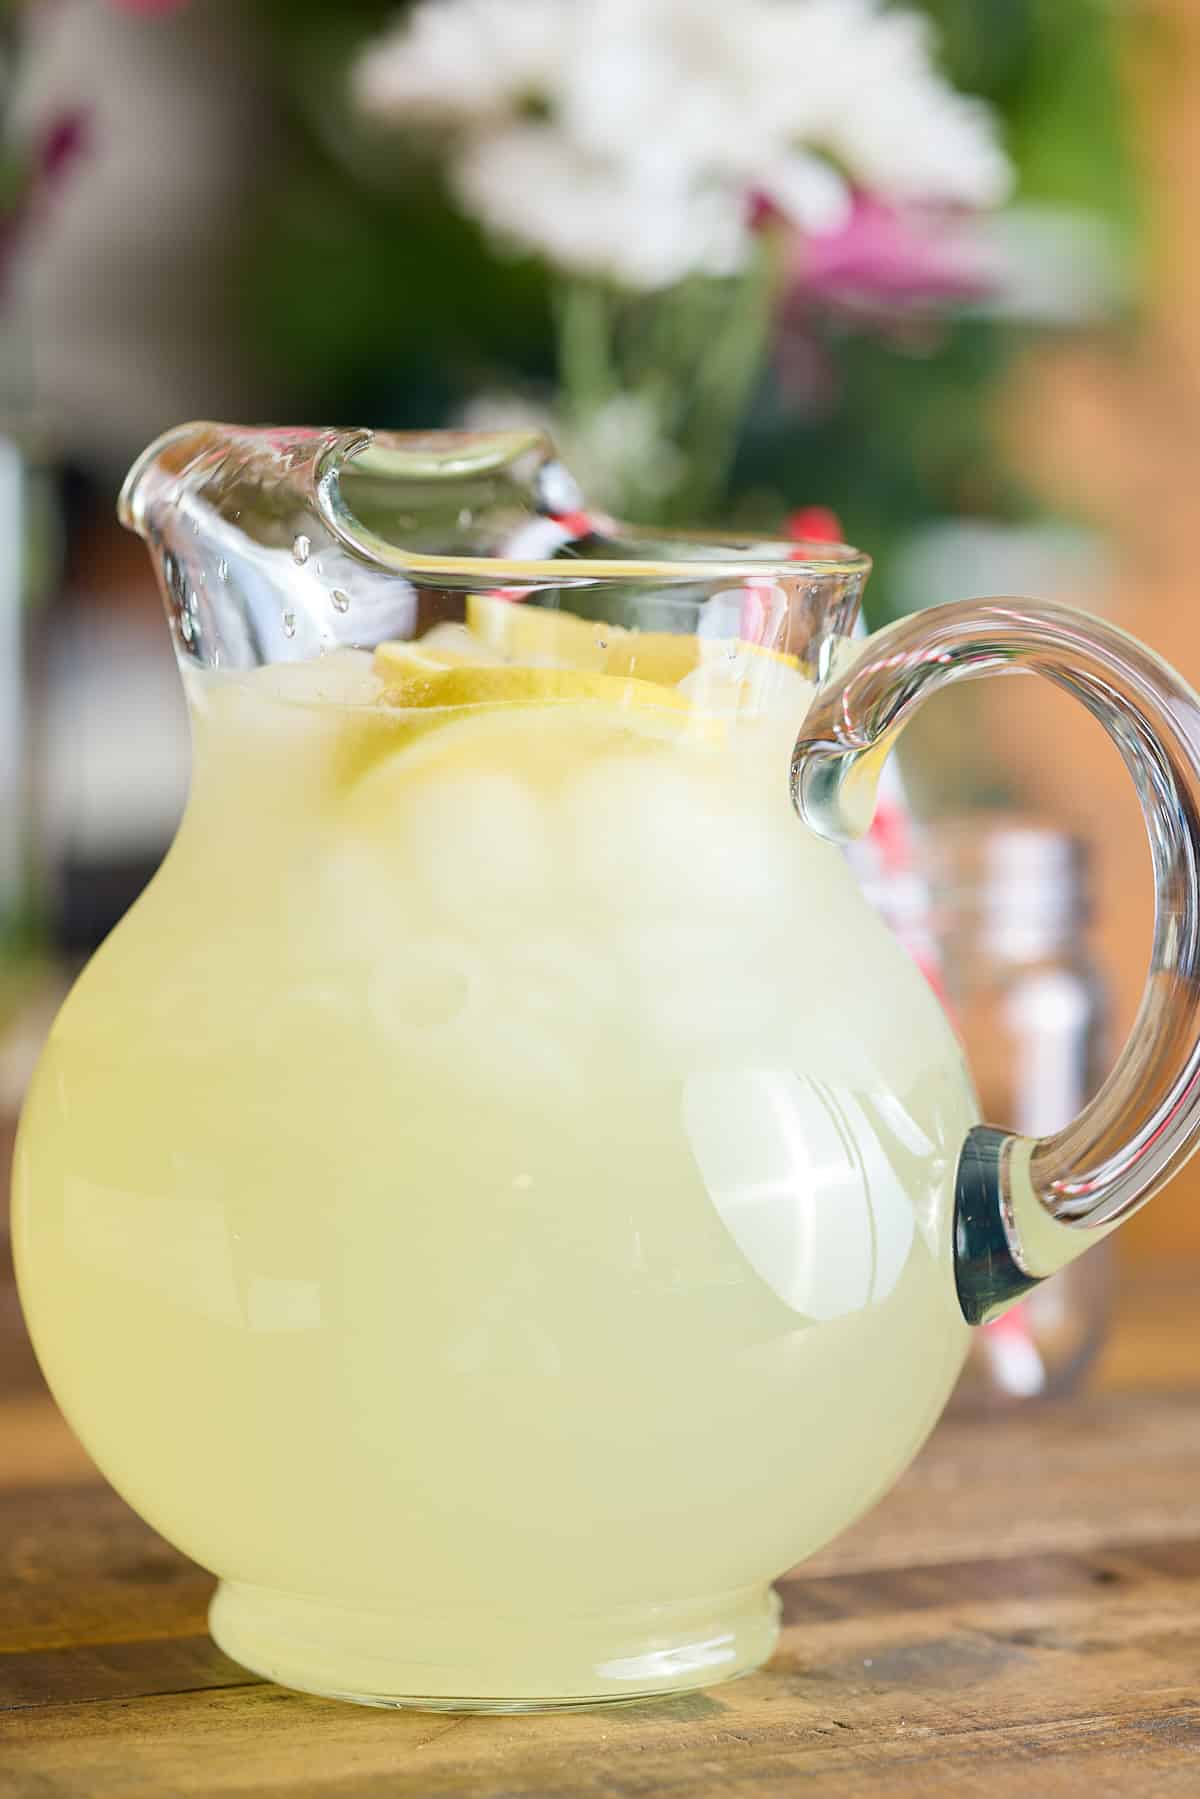
On a warm and sunny day, nothing is quite as refreshing as a pitcher of Classic Lemonade. Fresh lemon juice is combined with granulated sugar and fresh water, then served over ice. My Homemade Lemonade recipe beats overly sweet, store-bought soft drinks, any day of the week.

a pitcher filled with classic lemonade, topped with slices of fresh lemon

You’ll find the full recipe with ingredient amounts and instructions in the recipe card at the bottom of this post. Be sure to check out the blog post itself for extra tips and tricks!

Lemonade is one of those drinks that I will happily drink all year round. Made with freshly squeezed juice from 5 or 6 lemons, this thirst-quenching drink is bursting full of lemony flavor.

This is the ideal easy lemonade recipe for kids, only 2 simple ingredients and some water, so the kids can make it themselves.

I like making my own lemonade, and this healthy lemonade recipe is far better than store-bought lemonade. No artificial preservatives, flavorings, or excess sugars and syrup. With this traditional lemonade recipe, you adjust the sugar to your own tastes, making the lemonade as sweet or as sour as you like.

If you like to make your own homemade no-alcohol drinks, try these great-tasting recipes. My Tamarind Juice, Homemade Jamaican Ginger Beer, Jamaican Sorrel Drink, Jamaican Lemonade, Green Sherbet Punch, or my Fruit Punch.

Ingredients

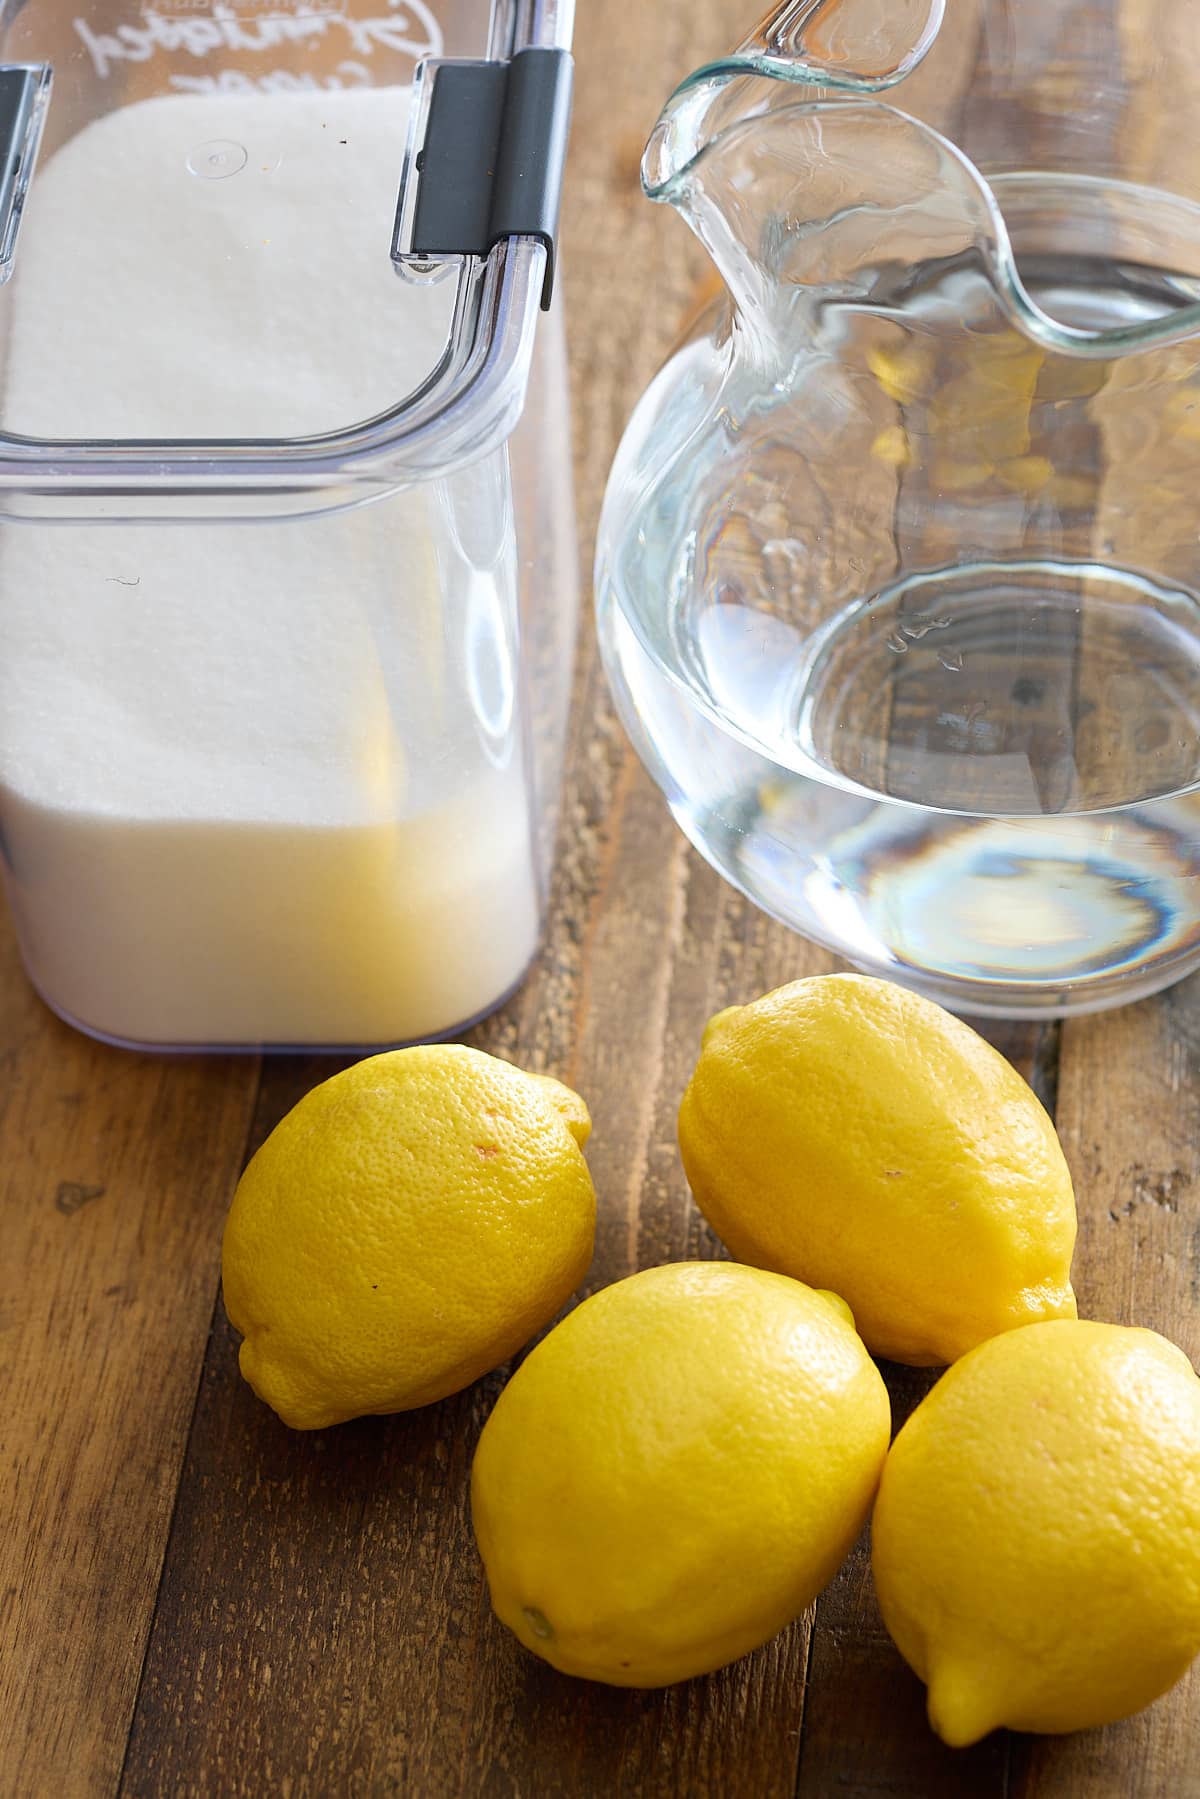
classic lemonade recipe ingredients

Here's what you will need to make homemade lemonade:

  • Lemon - you need 1 ½ cups of freshly squeezed lemon juice, this is roughly 5-6 lemons.
  • Sugar - white granulated sugar sweetens the lemonade.
  • Water - I use 6 cups of water. You could use carbonated water to make a slightly fizzy lemonade.

How to make Classic Lemonade

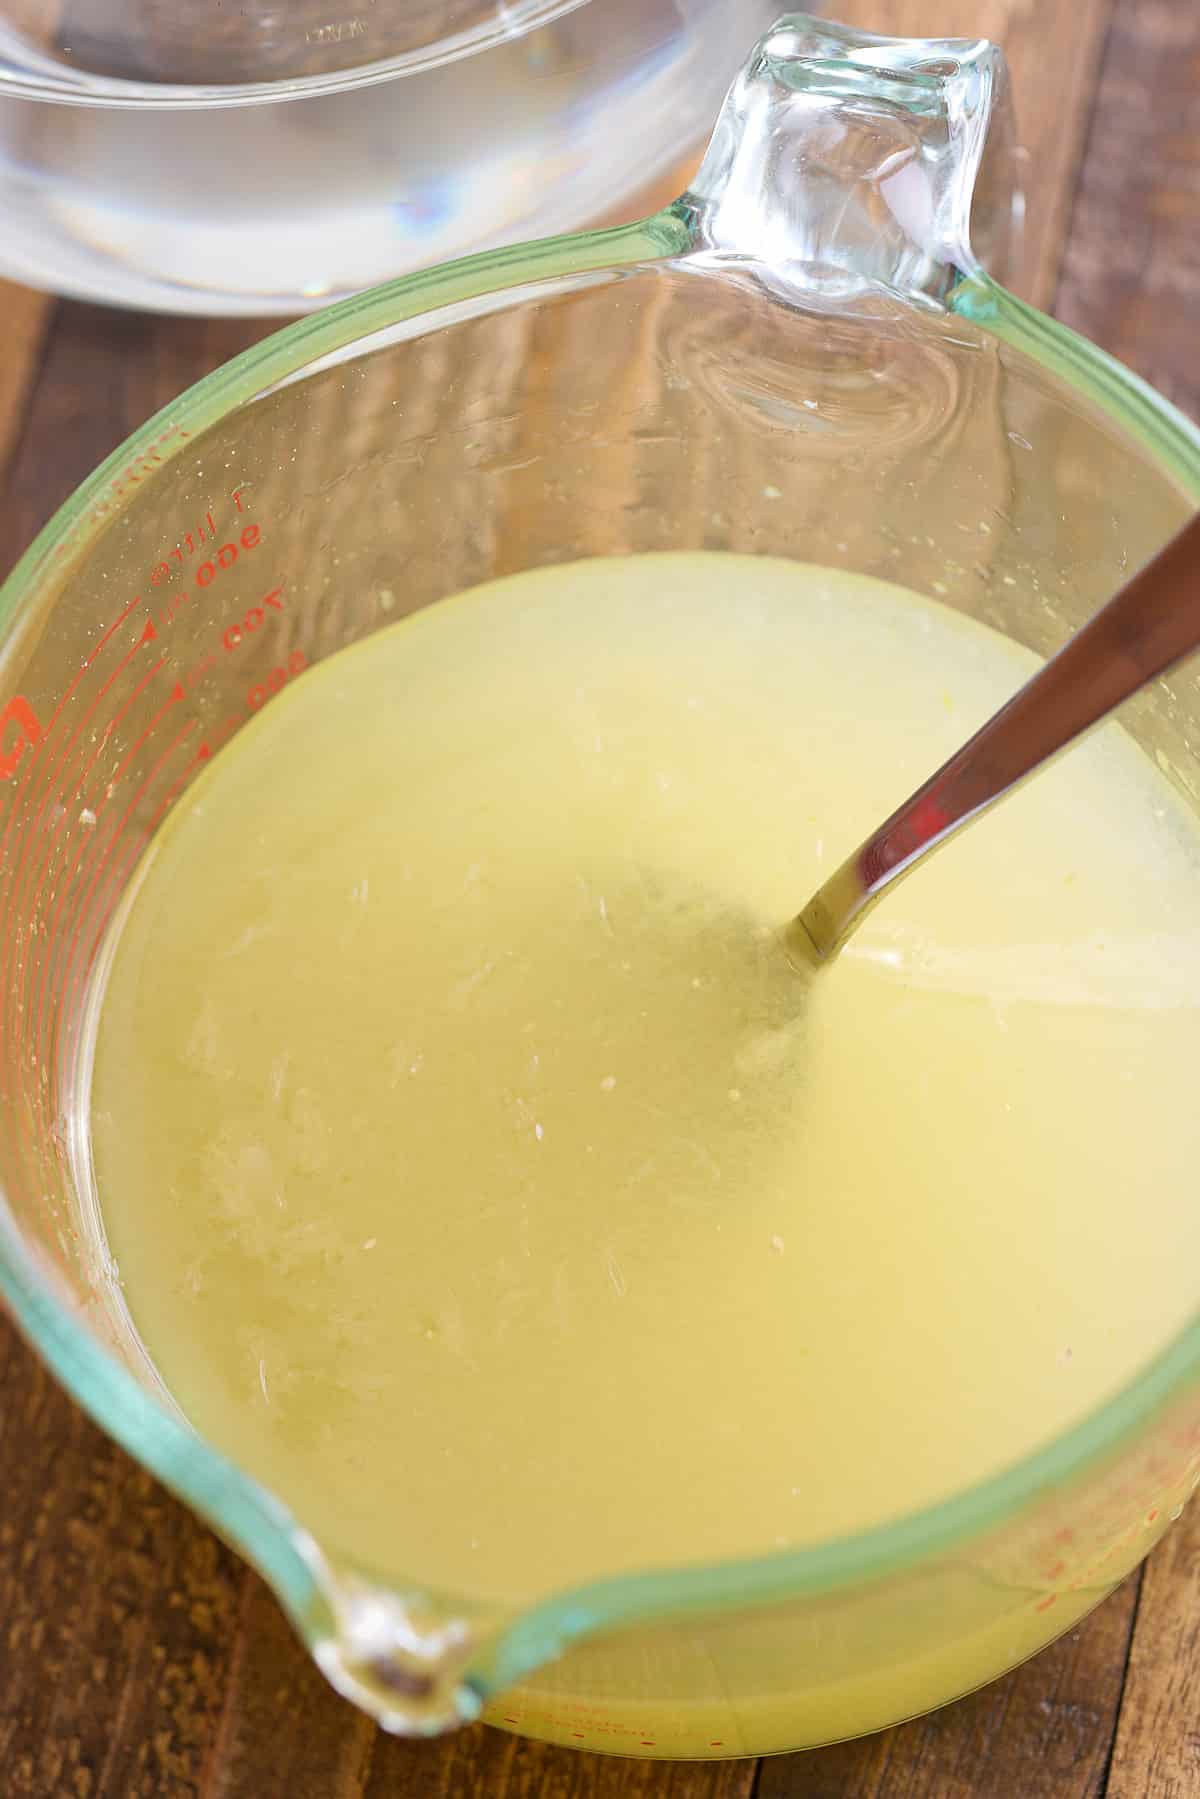
a measuring jug filled with lemon juice and sugar

Squeeze fresh lemons until you have approximately 1.5 cups of lemon juice, ensuring that any seeds or pulp are discarded. Transfer the juice to a pitcher.

Add granulated sugar to the lemon juice and stir until it completely dissolves.

pitcher filled with classic lemon and topped with fresh lemon slices

Pour water into the pitcher and stir everything together well. Taste and adjust the amount of sugar for your desired sweetness level if needed.

Serve over ice.

Do I need to make a simple syrup for lemonade?

I skip the simple syrup when it comes to making lemonade. Simply adding the sugar to the lemon juice first will allow the sugar to dissolve.

Expert Tips

These tips will help you make the best homemade lemonade recipe you've ever tried. 

  • I always use freshly squeezed lemon juice. If you're using bottled juice, use 100% lemon juice, not from concentrate, for the best flavor.
  • Adjust the amount of sugar to your taste, by starting with a small amount and adding more until it's as sweet as you like. Remember you can always add, but you can't take away!
  • This recipe is easily doubled or tripled if you are serving a crowd.
  • Don't add the ice cubes until you are ready to serve, otherwise, you risk them melting and diluting the lemonade.

Flavor variations

  • Swap the lemon juice for orange, lime, or grapefruit, or try a combination of citrus flavors.
  • I've topped the lemon juice with slices of fresh lemon, but you could also add some fresh herbs like mint, rosemary, or basil too.
  • Lemonade works a treat with berries, so add some freshly sliced strawberries; or whole raspberries, blackberries, or blueberries.
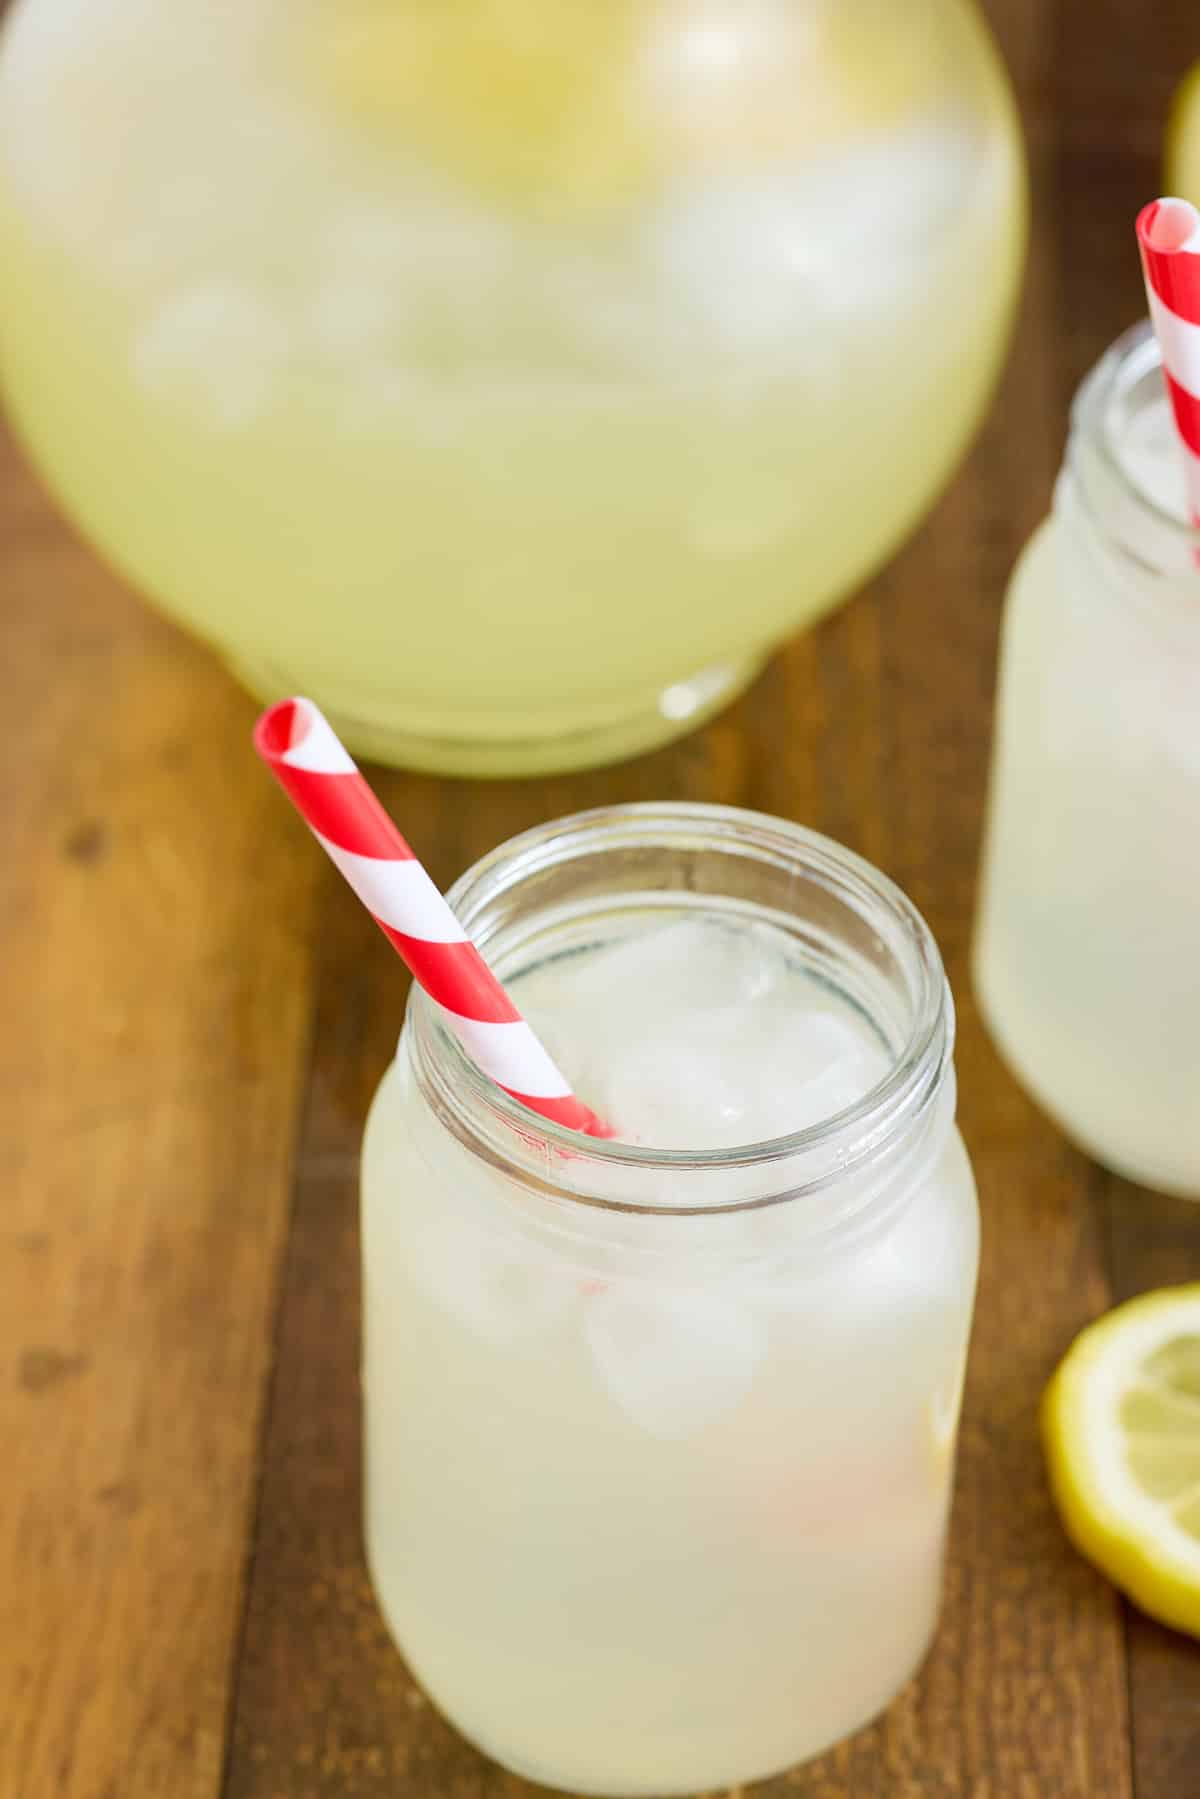
glass filled with classic lemonade with a red and white drinking straw

How to store 

Make ahead: Prepare fresh homemade lemonade in advance then store it in the refrigerator until you are ready to serve.

To refrigerate: Leftover lemonade can be stored in the refrigerator for up to 5-7 days.

FAQs

Can I make lemonade with bottled lemon juice?

Yes, absolutely. Just make sure you use 100% lemon juice and not lemon juice from concentrate.

Do I use tap or bottled water to make lemonade?

If you have good tap water, use that, if not, then I suggest using bottled or filtered water. To add a little added sparkle, add carbonated bottled water.

If you have tried this Classic Lemonade recipe, or any other recipe on my blog, then please rate it and let me know how it turned out in the comments below!

a pitcher filled with classic lemonade, topped with slices of fresh lemon
Print Recipe
No ratings yet

Classic Lemonade

Fresh lemon juice is combined with granulated sugar and fresh water and then served over ice. My Homemade Lemonade recipe beats overly sweet, store-bought soft drinks any day of the week.
Prep Time10 minutes mins
Total Time10 minutes mins
Course: Drinks
Cuisine: American
Keyword: best homemade lemonade, classic lemonade, easy lemonade, traditional lemonade
Servings: 6 people
Calories: 142kcal
Author: Tanya Harris

Ingredients

  • 1 ½ cups lemon juice from 5-6 lemons
  • ¾ - 1 cup granulated sugar or to taste
  • 6 cups water

Instructions

  • Squeeze fresh lemons until you have approximately 1.5 cups of lemon juice, ensuring that any seeds or pulp are discarded. Transfer the juice to a pitcher.
  • Add granulated sugar to the lemon juice and stir until it completely dissolves.
  • Pour water into the pitcher and stir everything together well. Taste and adjust the amount of sugar for your desired sweetness level if needed.
  • Serve over ice.

Notes

  • For the best flavor, use freshly squeezed lemon juice. If you're using bottled juice, use 100% lemon juice, not from concentrate, for the best flavor.
  • Adjust the amount of sugar to your taste by starting with a small amount and adding more until it's as sweet as you like.

Nutrition

Calories: 142kcal | Carbohydrates: 37g | Protein: 0.2g | Fat: 0.3g | Saturated Fat: 0.02g | Polyunsaturated Fat: 0.01g | Monounsaturated Fat: 0.003g | Sodium: 13mg | Potassium: 63mg | Fiber: 0.2g | Sugar: 35g | Vitamin A: 4IU | Vitamin C: 24mg | Calcium: 11mg | Iron: 0.1mg

Jamaican Guinness Punch

March 15, 2023 by Tanya Harris 2 Comments

Two glasses filled with Jamaican Guinness punch served over ice with bottles of Guinness in the background

Bring the flavors of the Caribbean to your next party with my Jamaican Guinness Punch. Guinness is combined with milk, condensed milk, vanilla and a hint of nutmeg for a spicy twist. Rolled oats are also added, which once blitzed up, gives this punch its thick and creamy texture. This post is meant for an audience 21 and over.

Two glasses filled with Jamaican Guinness punch served over ice with bottles of Guinness in the background

This post contains affiliate links, please read my full disclaimer here.

You’ll find the full recipe with ingredient amounts and instructions in the recipe card at the bottom of this post. Be sure to check out the blog post itself for extra tips and tricks!

This Jamaican Guinness Punch recipe could not be any easier. Place everything into a blender, blitz together, pour over ice and serve.

I like to make my Jamaican Guinness punch with oats to give it that thick and creamy texture. If you like yours a little smoother, leave the oats out.

Guinness punch is enjoyed all over the Caribbean, and the recipe changes from country to country. Some add eggs, others a splash of Irish whisky or rum to the recipe. Some add Nutriment or Supligen as well, an energy nutrition drink. However, what you have here is my version that uses ingredients I always have on hand.

If you like to make your own homemade drinks, try these great-tasting Jamaican-inspired drinks recipes. My Jamaican Rum Punch, Homemade Jamaican Ginger Beer, Jamaican Sorrel Drink, and my Jamaican Style Carrot Juice.

Jamaican Guinness Punch Ingredients

Here's what you will need to make homemade Jamaican Guinness Punch:

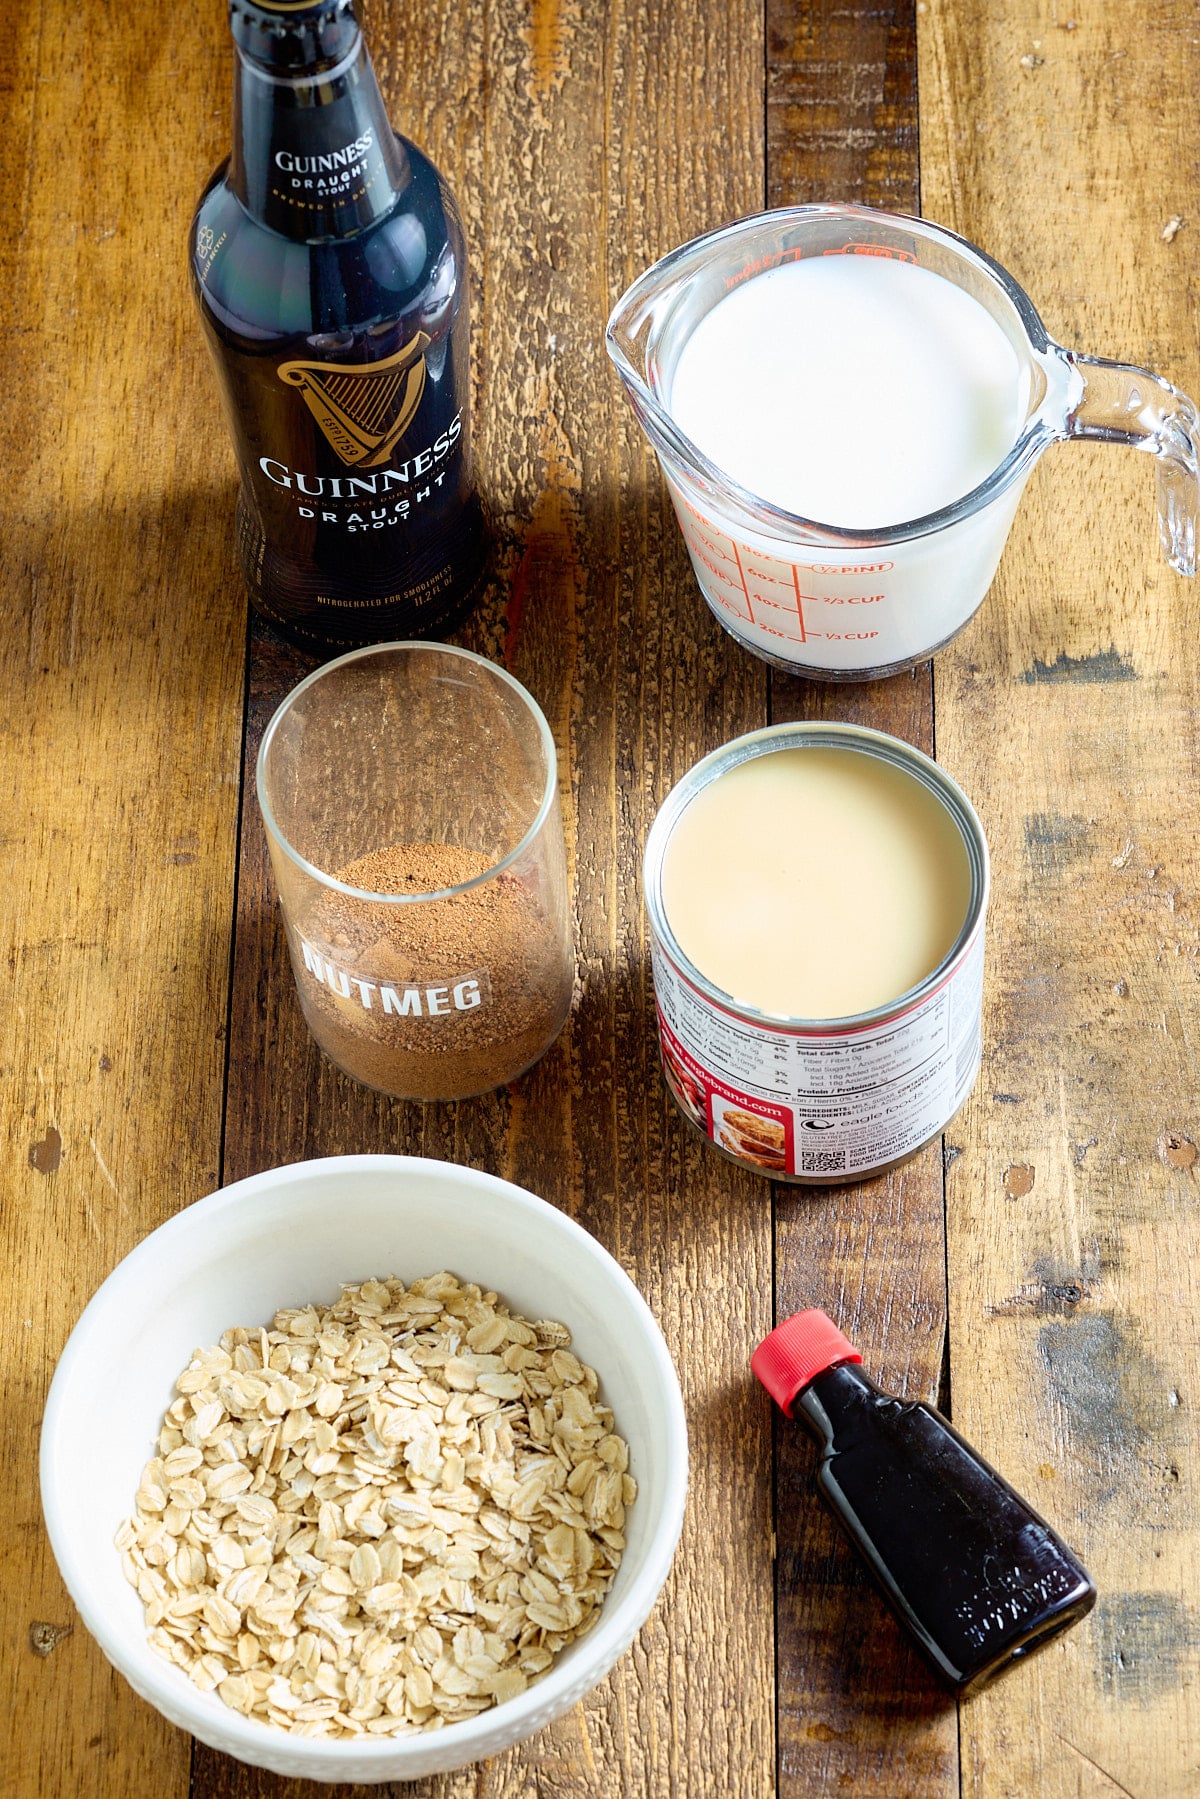
Jamaican Guinness punch recipe ingredients
  • Guinness - I use a 11.2 oz bottle of Guinness to make 2 servings of punch.
  • Milk - I recommend full-fat or reduced-fat milk.
  • Rolled oats - adds thickness to the punch, you can leave them out if you prefer a smoother punch. Or drain the punch after blending.
  • Condensed milk - sweetens the punch and balances out the bitterness of the stout.
  • Vanilla extract - I always use vanilla extract as it has a better depth of flavor and essence.
  • Spices - I add ground nutmeg to add a touch of warming spice to the punch.

How to make Jamaican Guinness Punch

A glass of Jamaican Guinness punch topped with ground nutmeg

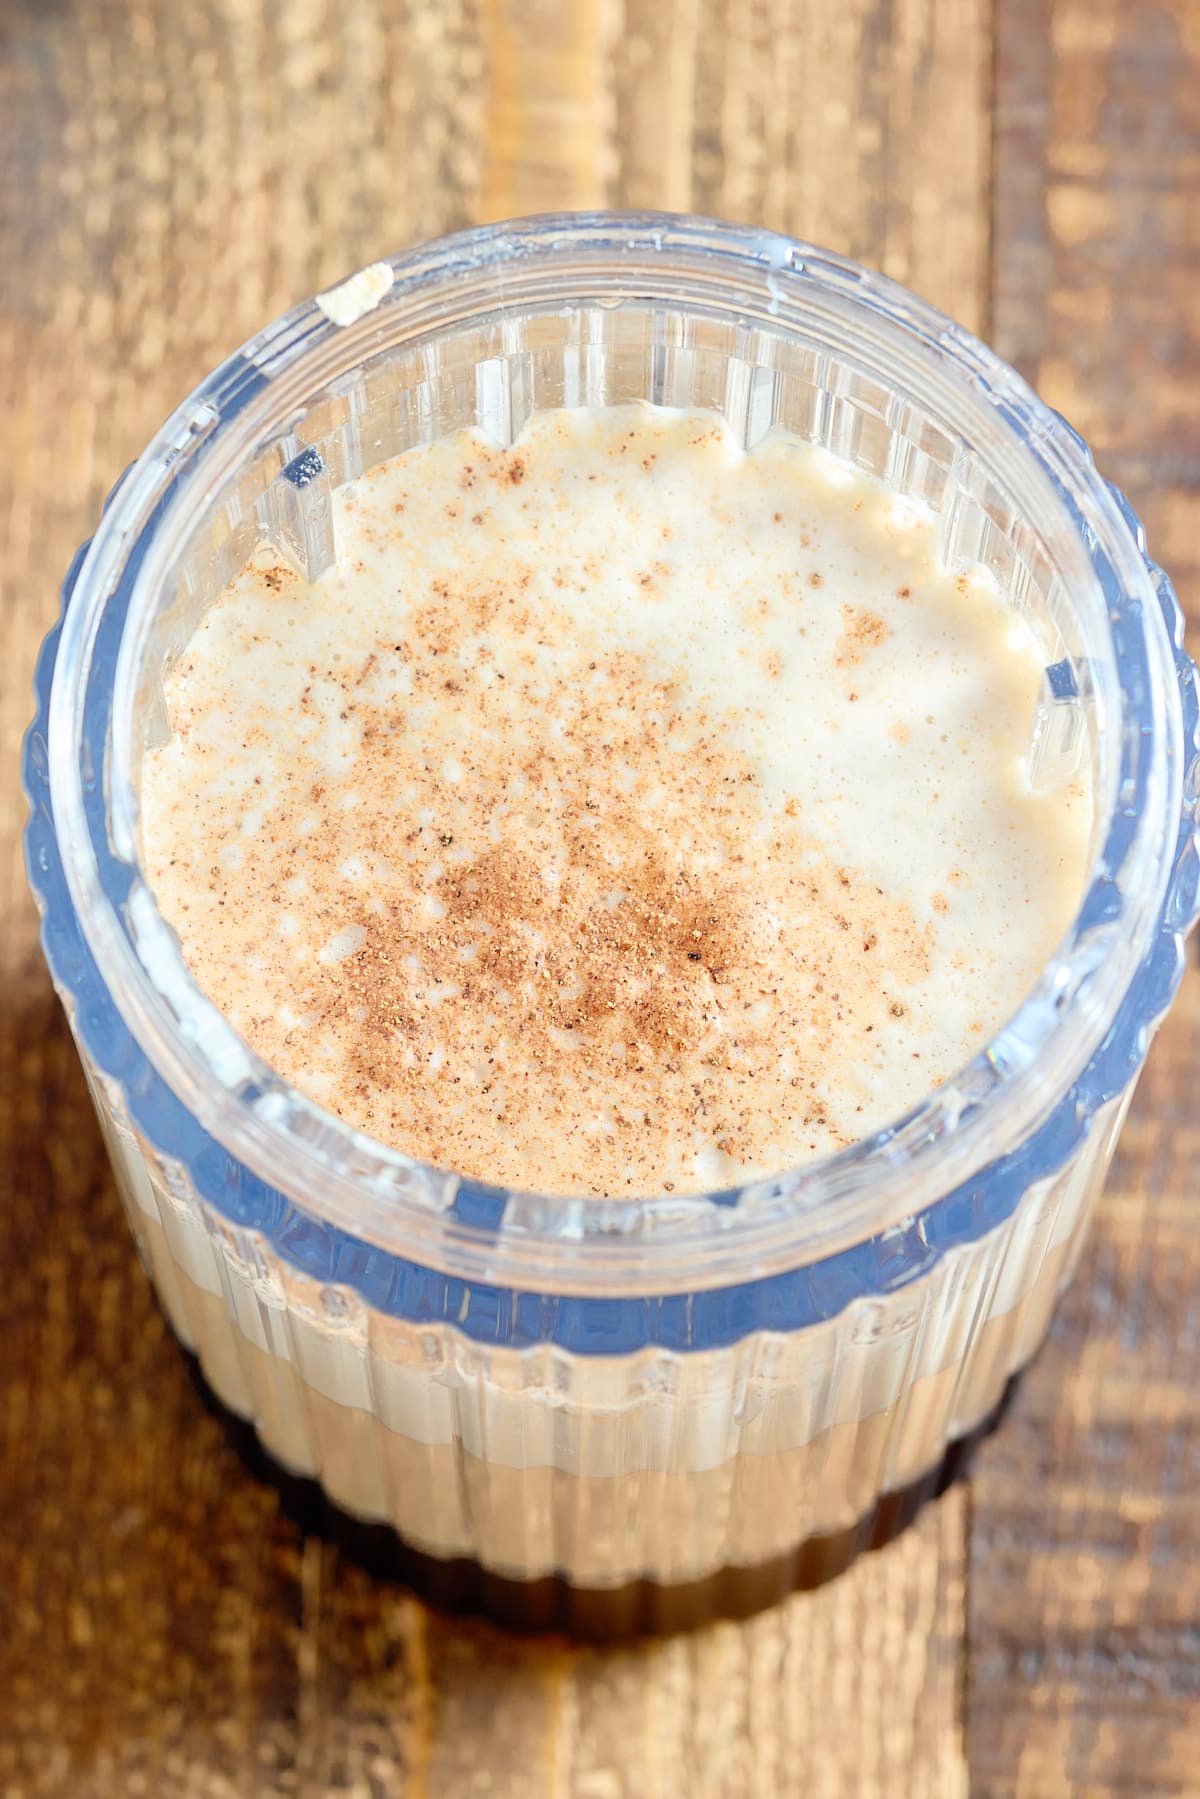
Add the Guinness, milk, rolled oats, condensed milk, vanilla extract, and nutmeg in a blender. Blend until all of the ingredients are combined and smooth.

A glass of Jamaican Guinness Punch

Pour the punch into glasses or punch cups over ice and serve immediately.

A tall glass of Jamaican Guinness Punch served over ice

Expert Tips

These tips will help you make the best homemade Jamaican Guinness Punch recipe you've ever tried. 

  • The oats thicken the punch. To make the drink a bit smoother, strain the liquid through a strainer.
  • Guinness punch is best cold, so chill in the refrigerator and serve over ice.
  • Don't add the ice cubes until you are ready to serve, otherwise, you risk them melting and diluting the punch.
  • This recipe can be doubled up to serve a larger group.

Flavor variations

  • I've used regular Guinness, but this recipe will work with low-alcohol Guinness too.
  • The rolled oats do make this punch thick, so if you still want the taste, but would prefer to have it a little smoother, leave the rolled oats out and replace the whole milk with oat milk instead. This would also make a great vegan or dairy-free Guinness punch.
  • If you love spice, add some ground cinnamon along with the nutmeg.
Two glasses filled with Jamaican Guinness punch served over ice with bottles of Guinness in the background

FAQs

Can Guinness punch be made ahead?

Yes, in fact it tastes even better if it's left to sit in the refrigerator for a couple of hours. This allows the punch to chill properly and for the spice flavors to infuse the drink.

How long does Guinness punch last in the fridge?

Once made, Guinness punch can be stored in the refrigerator for up to 2 days. Just ensure you don't add any ice to the punch, until you are ready to serve, otherwise, you will dilute the drink.

If you have tried this Jamaican Guinness Punch recipe or any other recipe on my blog, then please rate it and let me know how it turned out in the comments below!

Two glasses filled with Jamaican Guinness punch served over ice with bottles of Guinness in the background
Print Recipe
4.75 from 4 votes

Jamaican Guinness Punch

Bring the flavors of the Caribbean to your next party with my Jamaican Guinness Punch. Guinness is combined with milk, condensed milk, vanilla and a hint of nutmeg for a spicy twist. Rolled oats are also added, which once blitzed up, gives this punch its thick and creamy texture.
Prep Time5 minutes mins
Total Time5 minutes mins
Course: Drinks
Cuisine: Caribbean, Jamaican
Keyword: Jamaican Guiness punch, Jamaican Guiness punch with oats
Servings: 2
Calories: 332kcal
Author: Tanya Harris

Ingredients

  • 11.2 oz bottle of Guinness
  • 1 cup milk
  • ½ cup rolled oats
  • ¼ cup condensed milk
  • ½ teaspoon vanilla extract
  • ⅛ teaspoon ground nutmeg

Instructions

  • Add the Guinness, milk, rolled oats, condensed milk, vanilla extract and nutmeg into a blender. Blend until all of the ingredients are well combined and smooth.
  • Pour the punch into glasses or punch cups over ice. Serve immediately.

Notes

  • The oats make this drink thick. To make the drink a bit smoother, strain the liquid through a strainer.

Nutrition

Calories: 332kcal | Carbohydrates: 45g | Protein: 10g | Fat: 9g | Saturated Fat: 5g | Polyunsaturated Fat: 1g | Monounsaturated Fat: 2g | Cholesterol: 28mg | Sodium: 96mg | Potassium: 400mg | Fiber: 2g | Sugar: 27g | Vitamin A: 300IU | Vitamin C: 1mg | Calcium: 270mg | Iron: 1mg

Baked Ham

March 13, 2023 by Tanya Harris Leave a Comment

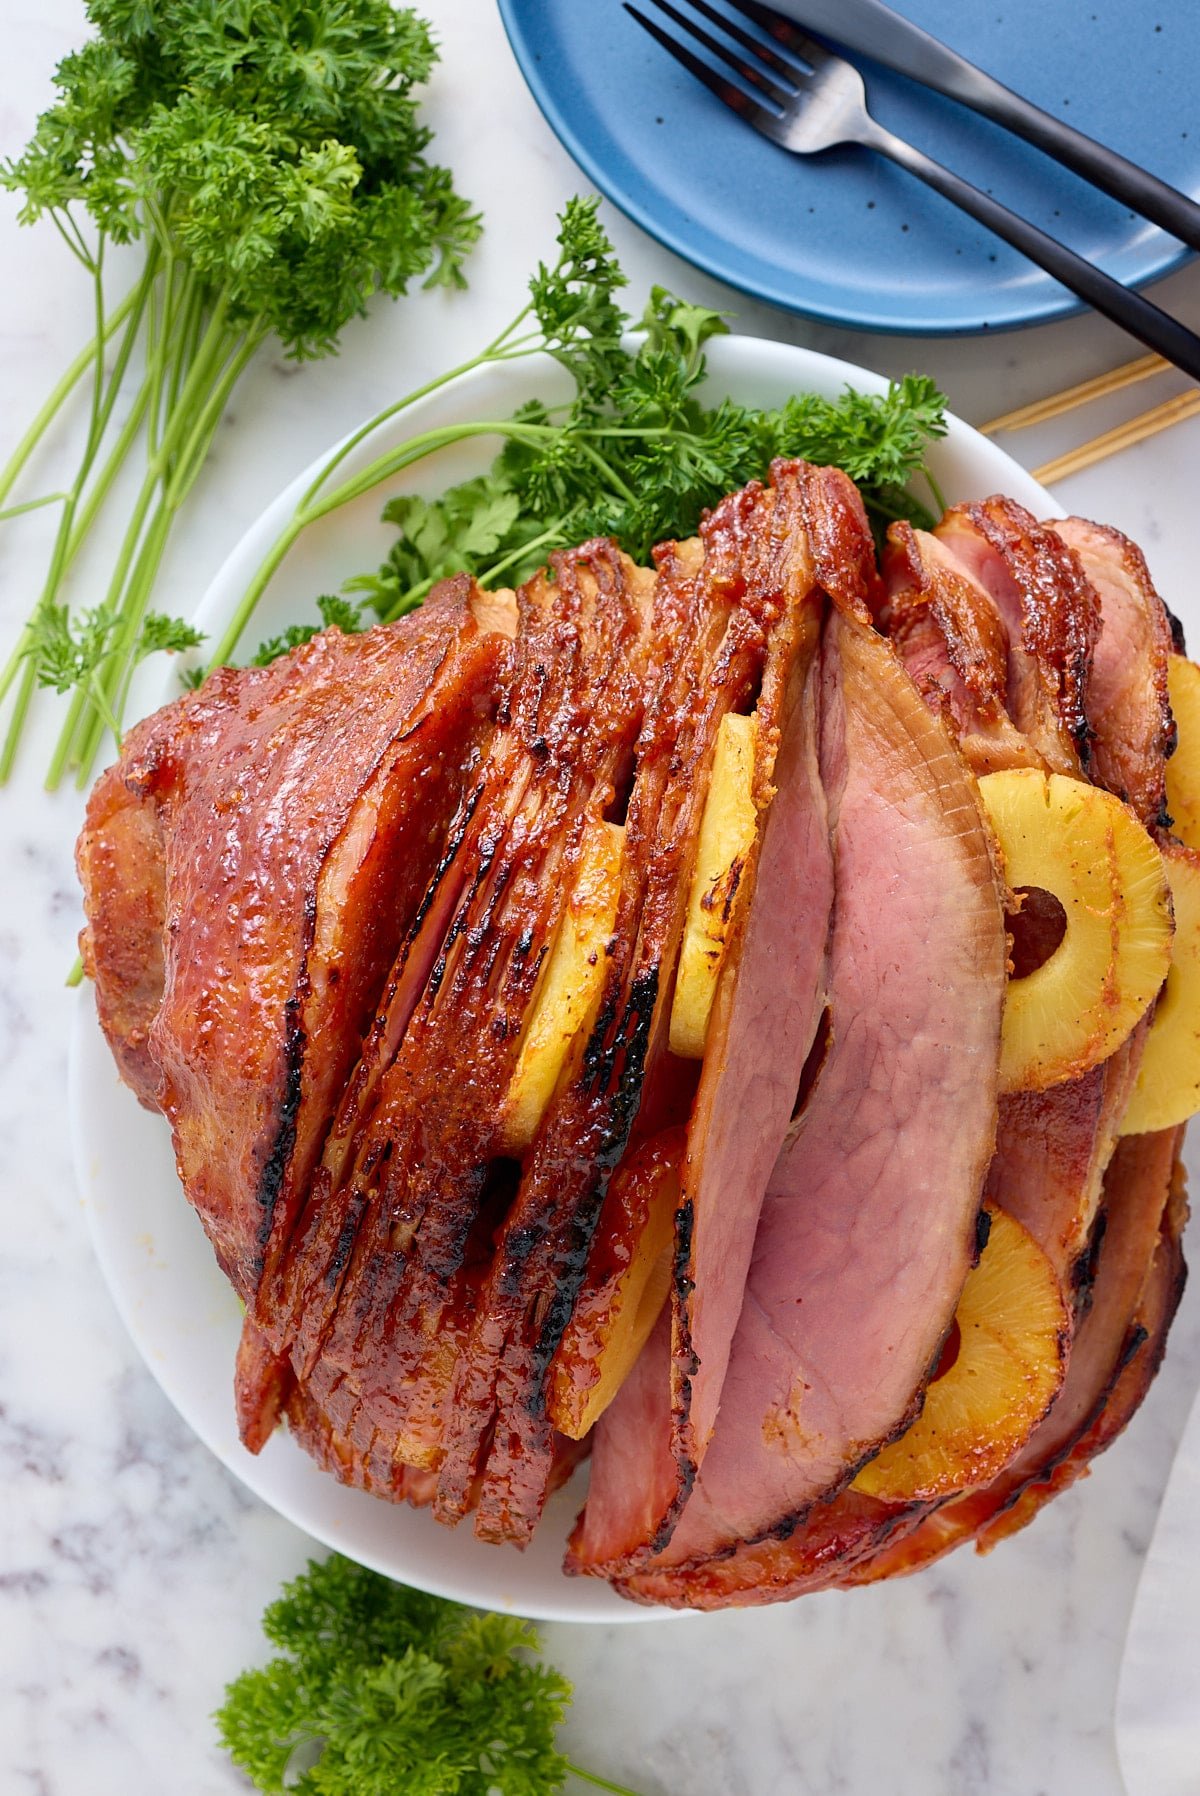
Fresh baked ham plated on a platter on the table.

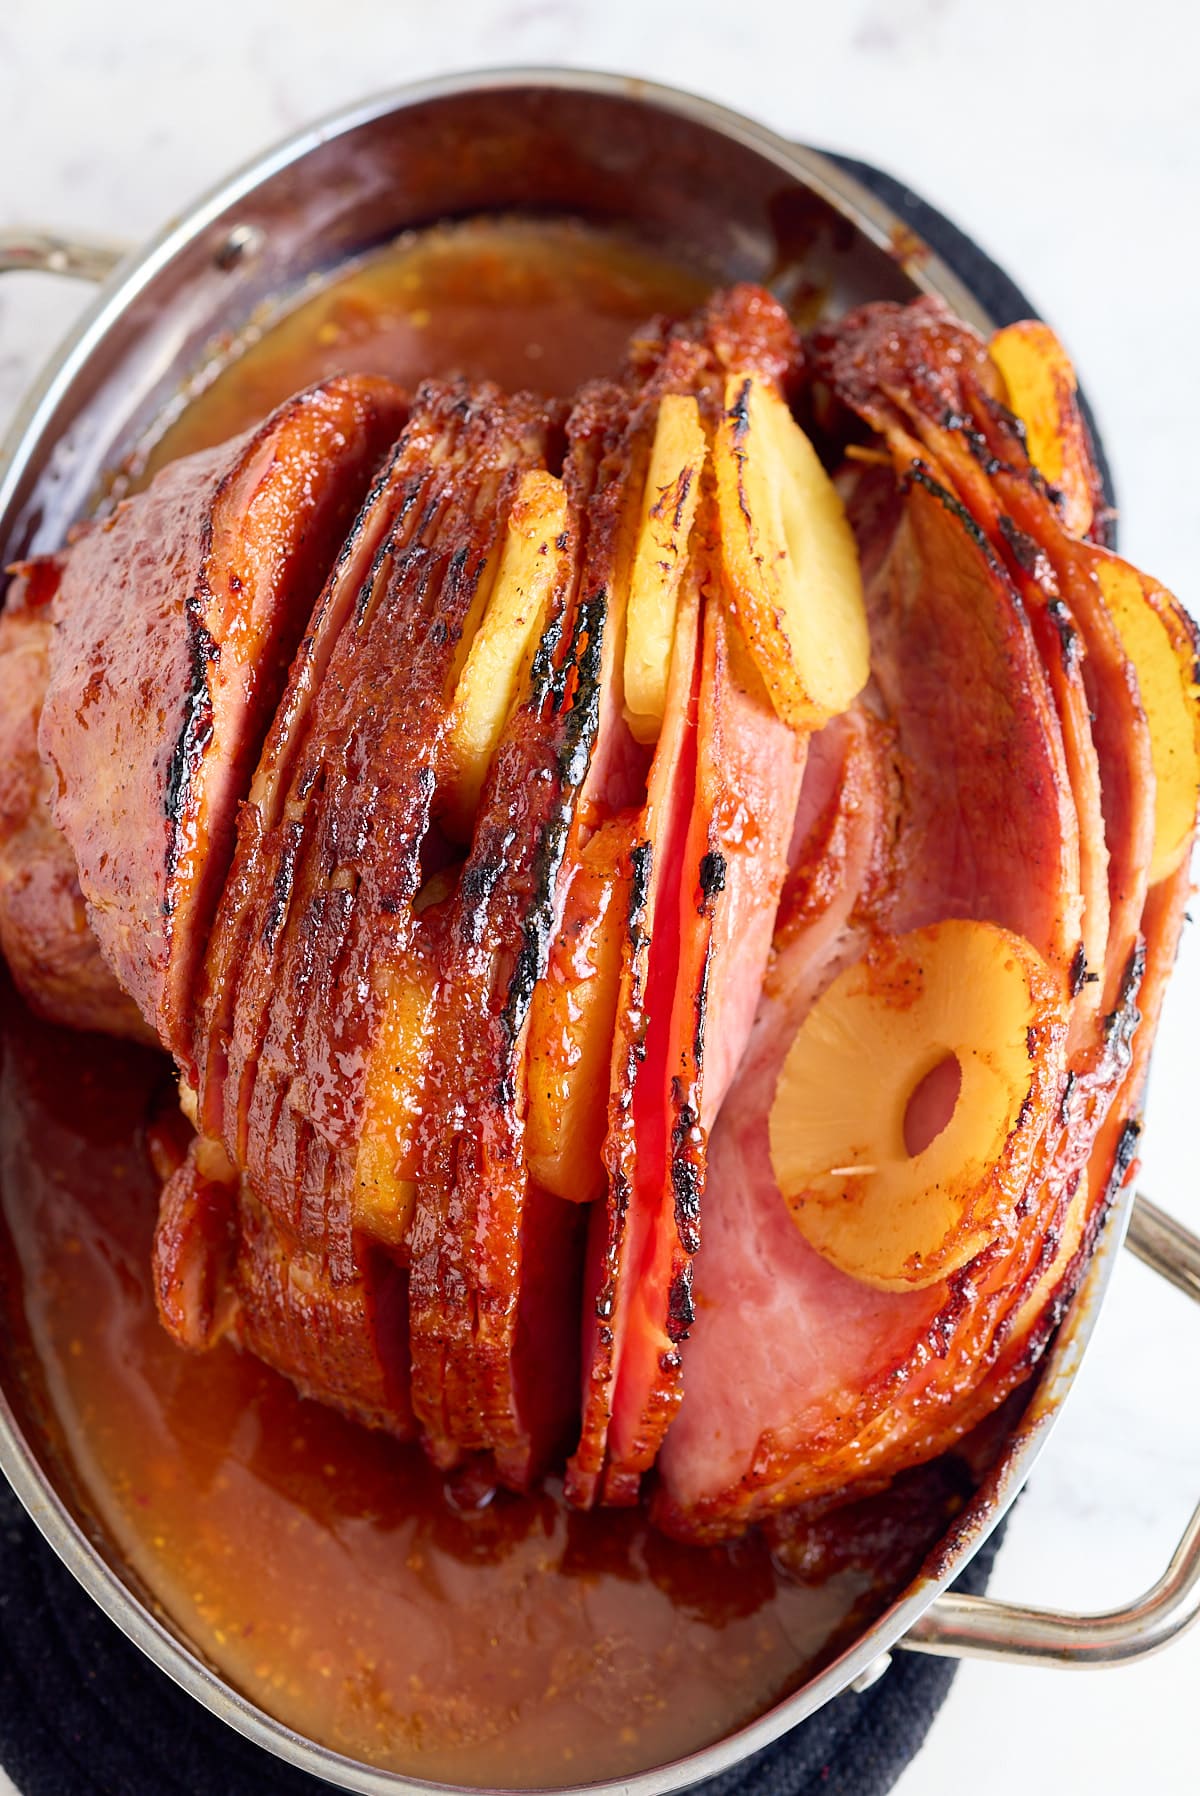
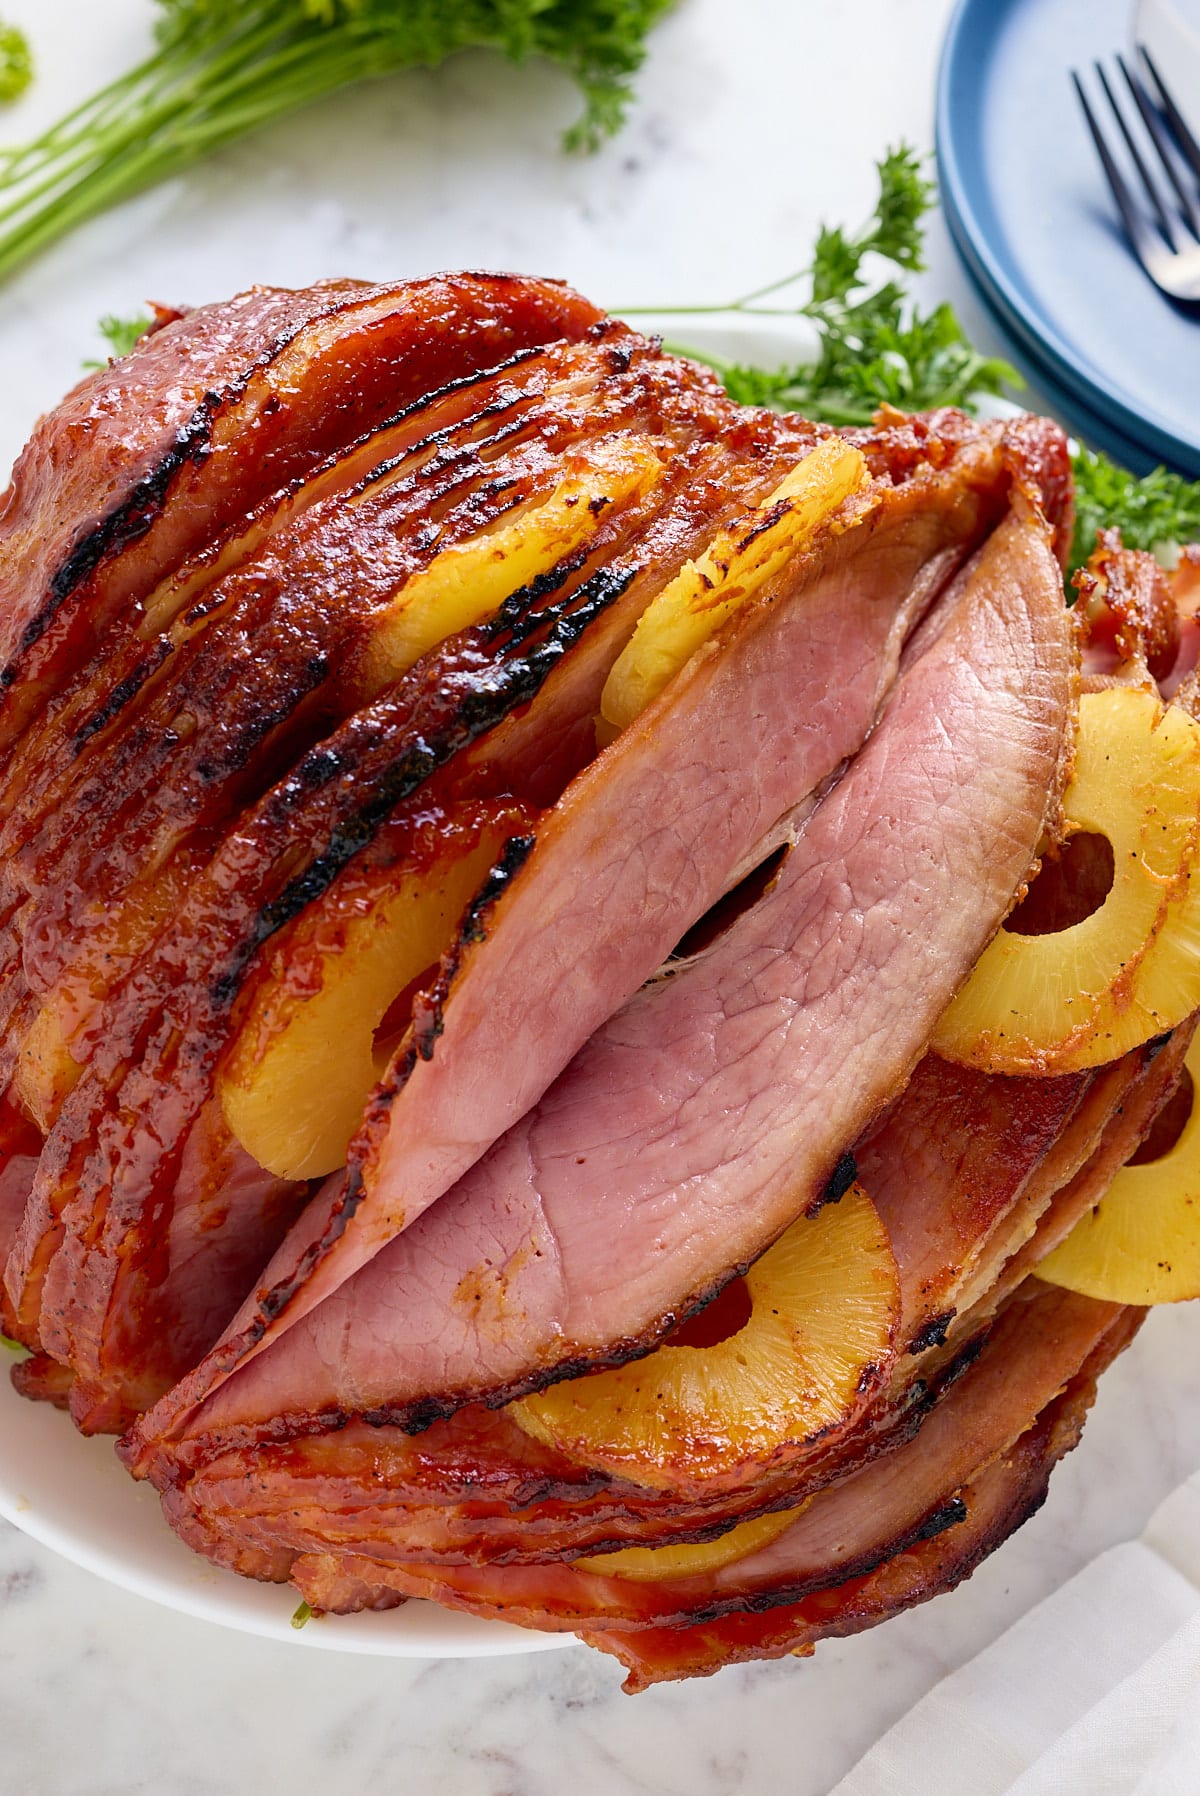
Experience a sweet and savory spiral baked ham recipe like no other! The juicy slices of pineapple add a delightful flavor, while the sauce brings it all together. Enjoy this flavorful feast as an exquisite holiday entrée or a special Sunday supper. Paired with your favorite sides, you're sure to have a meal that will please the whole family!

Fresh baked ham plated on a platter on the table.

This post contains affiliate links, please read my full disclaimer here.

You’ll find the full recipe with ingredient amounts and instructions in the recipe card at the bottom of this post. Be sure to check out the blog post itself for extra tips and tricks!

Are you in charge of the ham for this year's Easter dinner? This recipe is a delicious and foolproof way to ensure your ham is yummy and seasoned perfectly. Let your ham be a showstopping centerpiece this spring. You could even be serving this for Thanksgiving or Christmas! Ham truly is delicious any time of the year.

For those important holidays and special occasions try my Spatchcock Turkey Recipe, Roasted Boneless Leg of Lamb, or Boneless Roast Beef in addition to this baked ham. Check below for delicious side dish ideas!

Ingredients

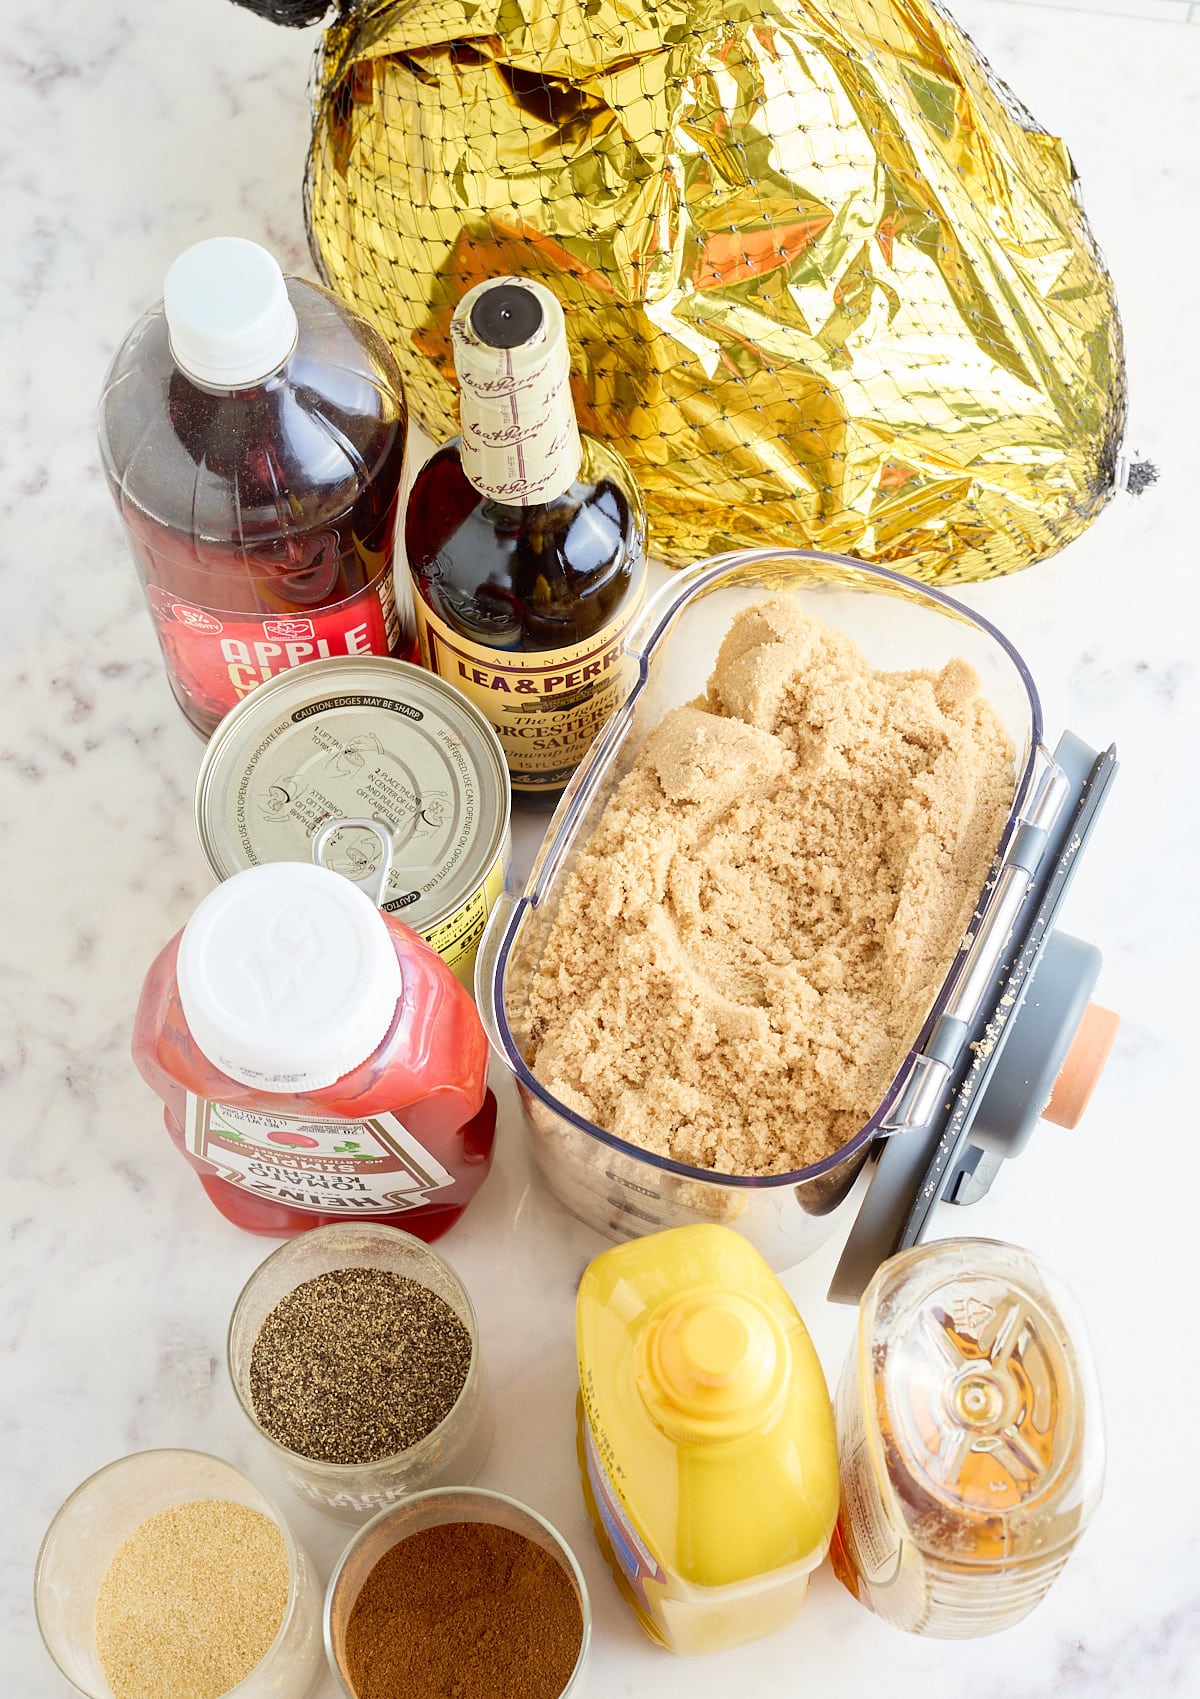
  • Glaze ingredients - Ketchup, canned pineapple slices and juice, brown sugar, yellow mustard, apple cider vinegar, Worcestershire sauce, honey, black pepper, onion powder, and ground cloves
  • Hickory-smoked spiral ham - I like to use a bone-in ham so I can use the hambone for other recipes.
Baked ham ingredients.

Tools needed for this recipe

  • An oven-safe dish, large enough to fit your spiral ham.
  • Saucepan to prepare the sauce in.

How To Make Oven-Baked Spiral Ham

Preheat oven to 325 degrees Fahrenheit.

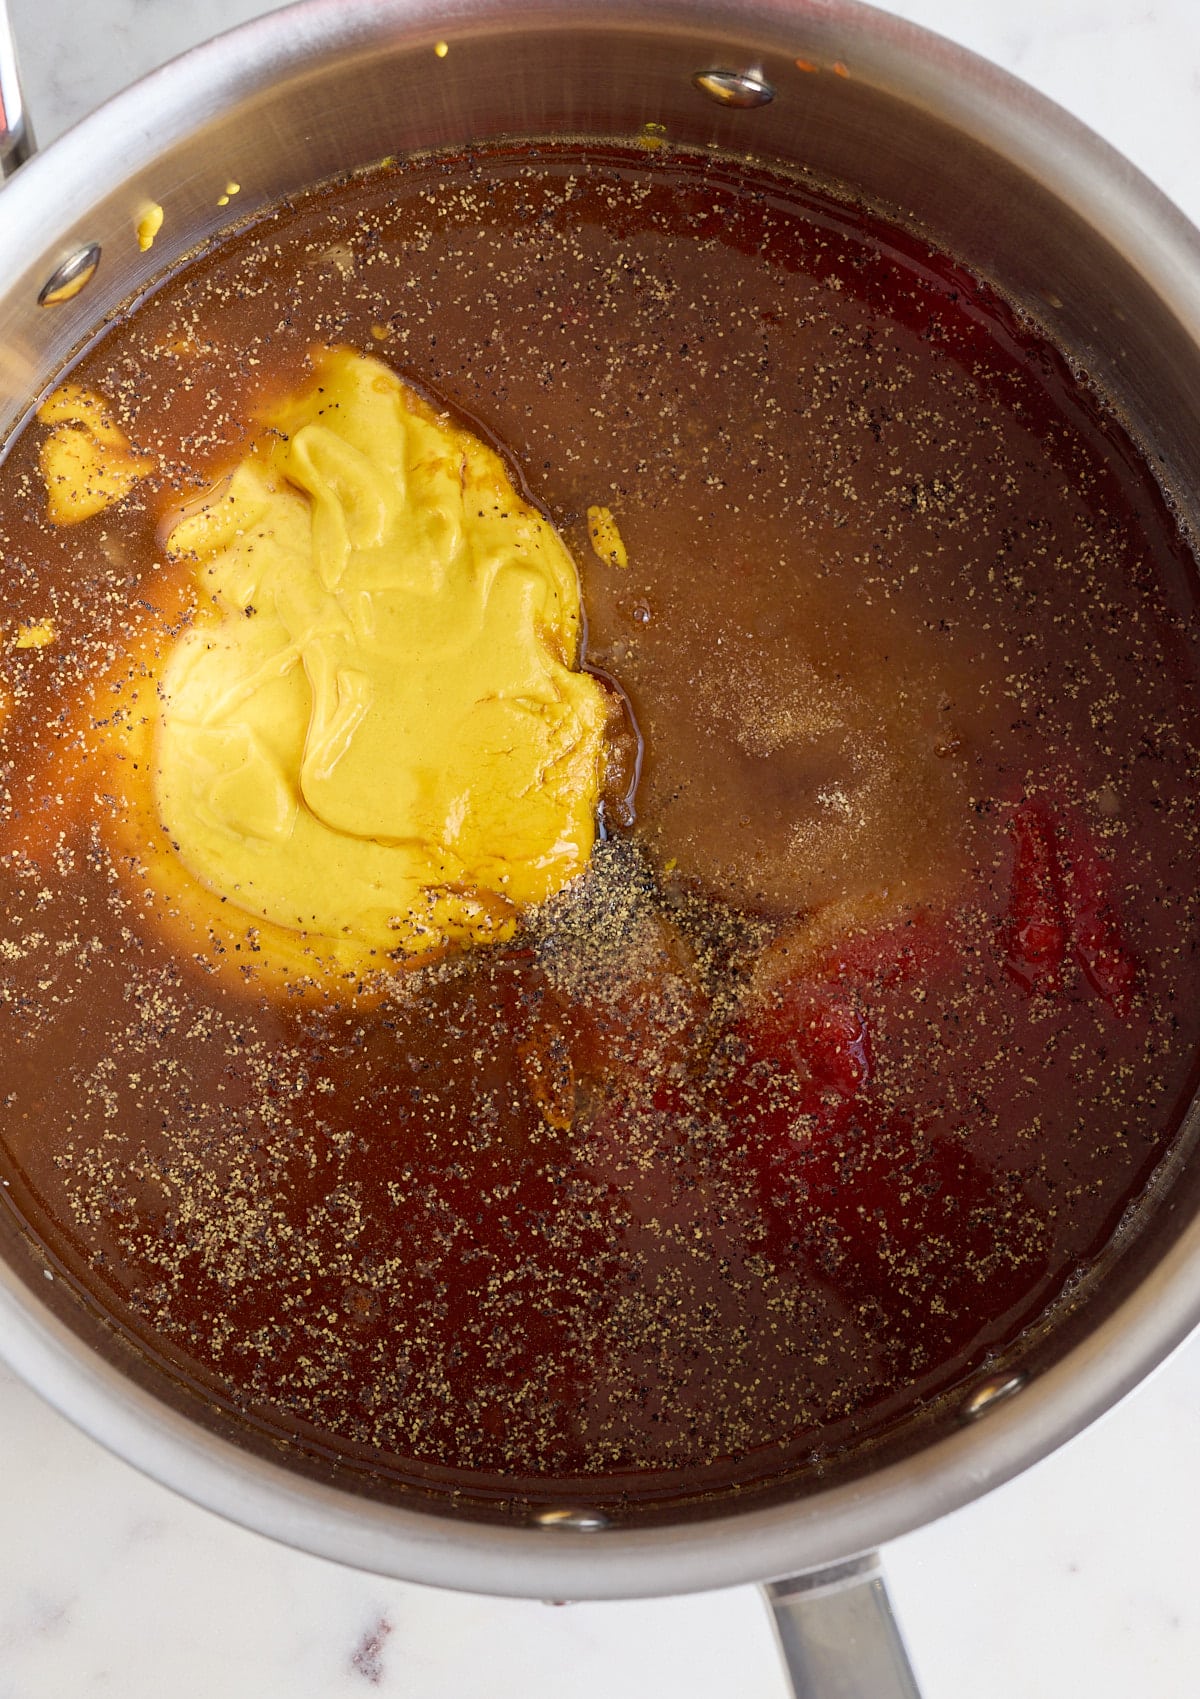
Combine ketchup, juice from the canned pineapple, brown sugar, yellow mustard, apple cider vinegar, Worcestershire sauce, honey, black pepper, onion powder, and ground cloves in a medium saucepan over medium-high heat.

Ingredients poured into the pot, minus the ham.

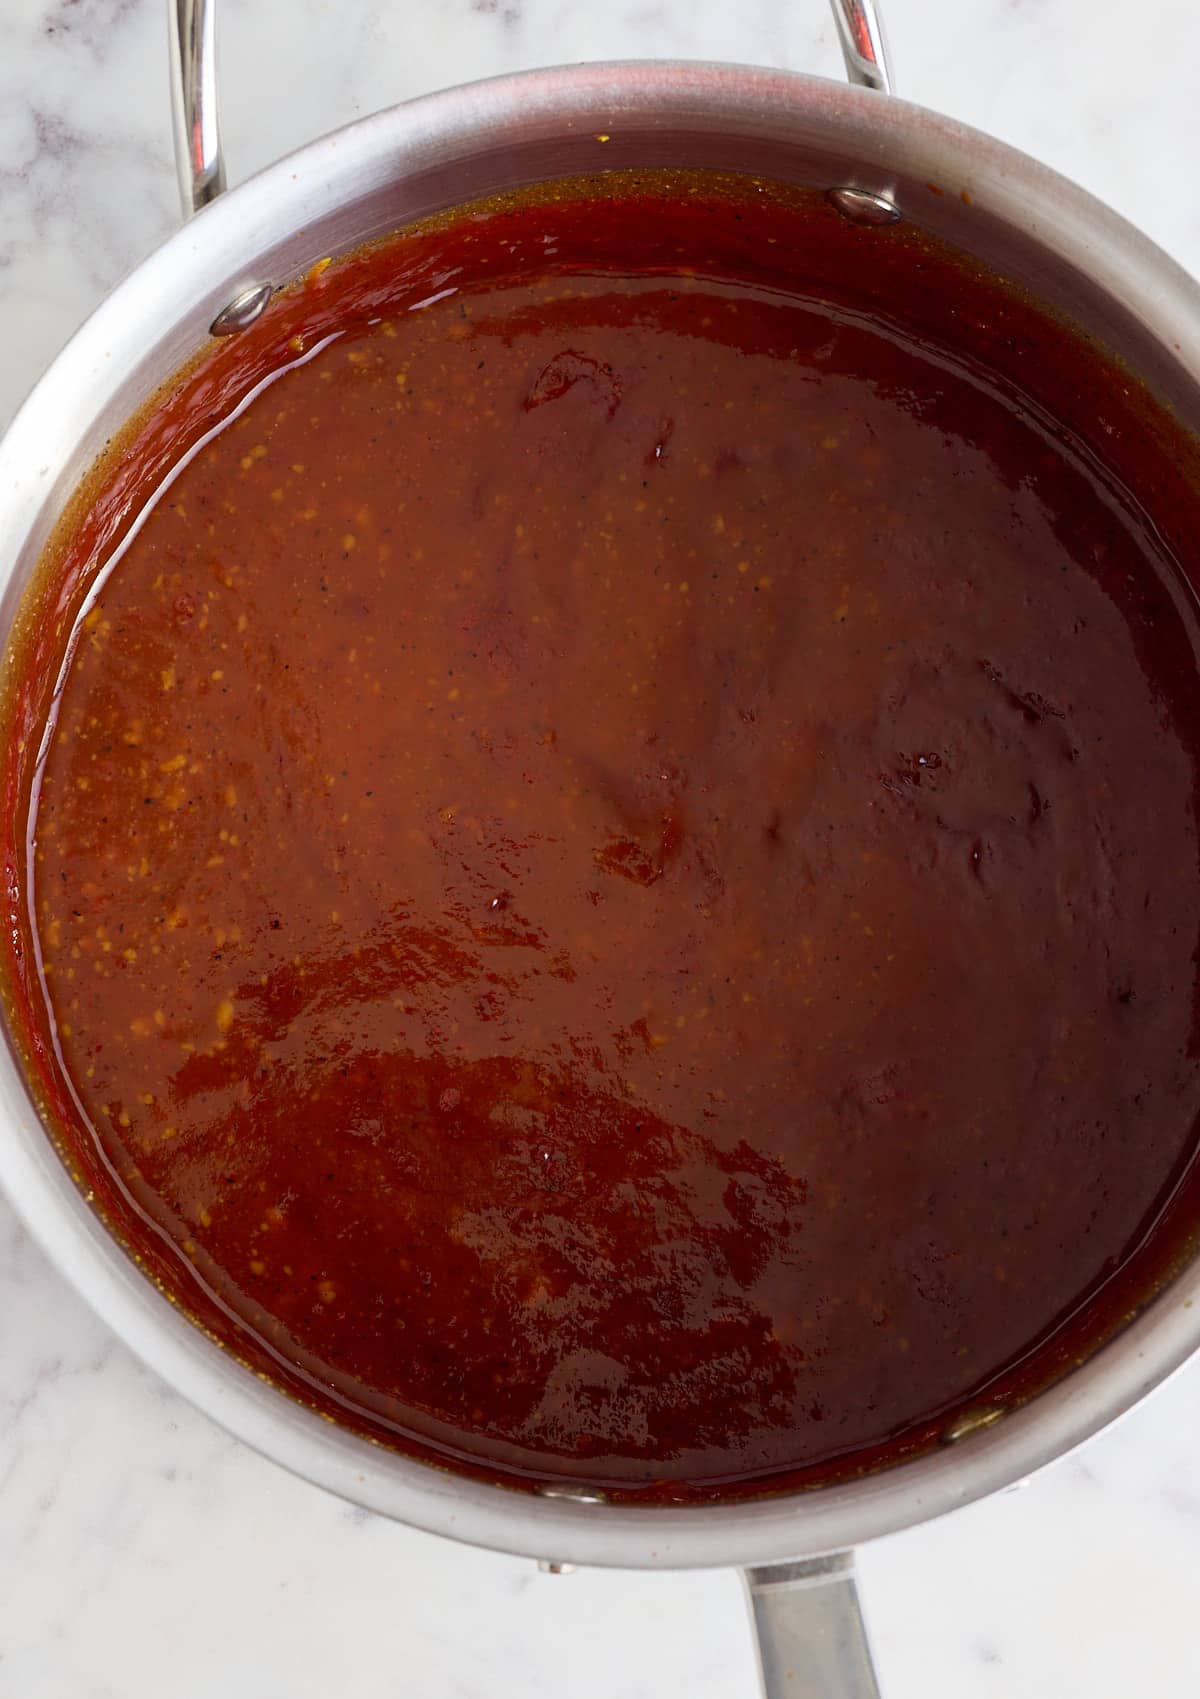
Bring the mixture to a bowl and then reduce the heat to low. Allow the mixture to simmer for 25-30 minutes until the sauce has thickened and reduced. 

All ingredients stirred together in the pot.

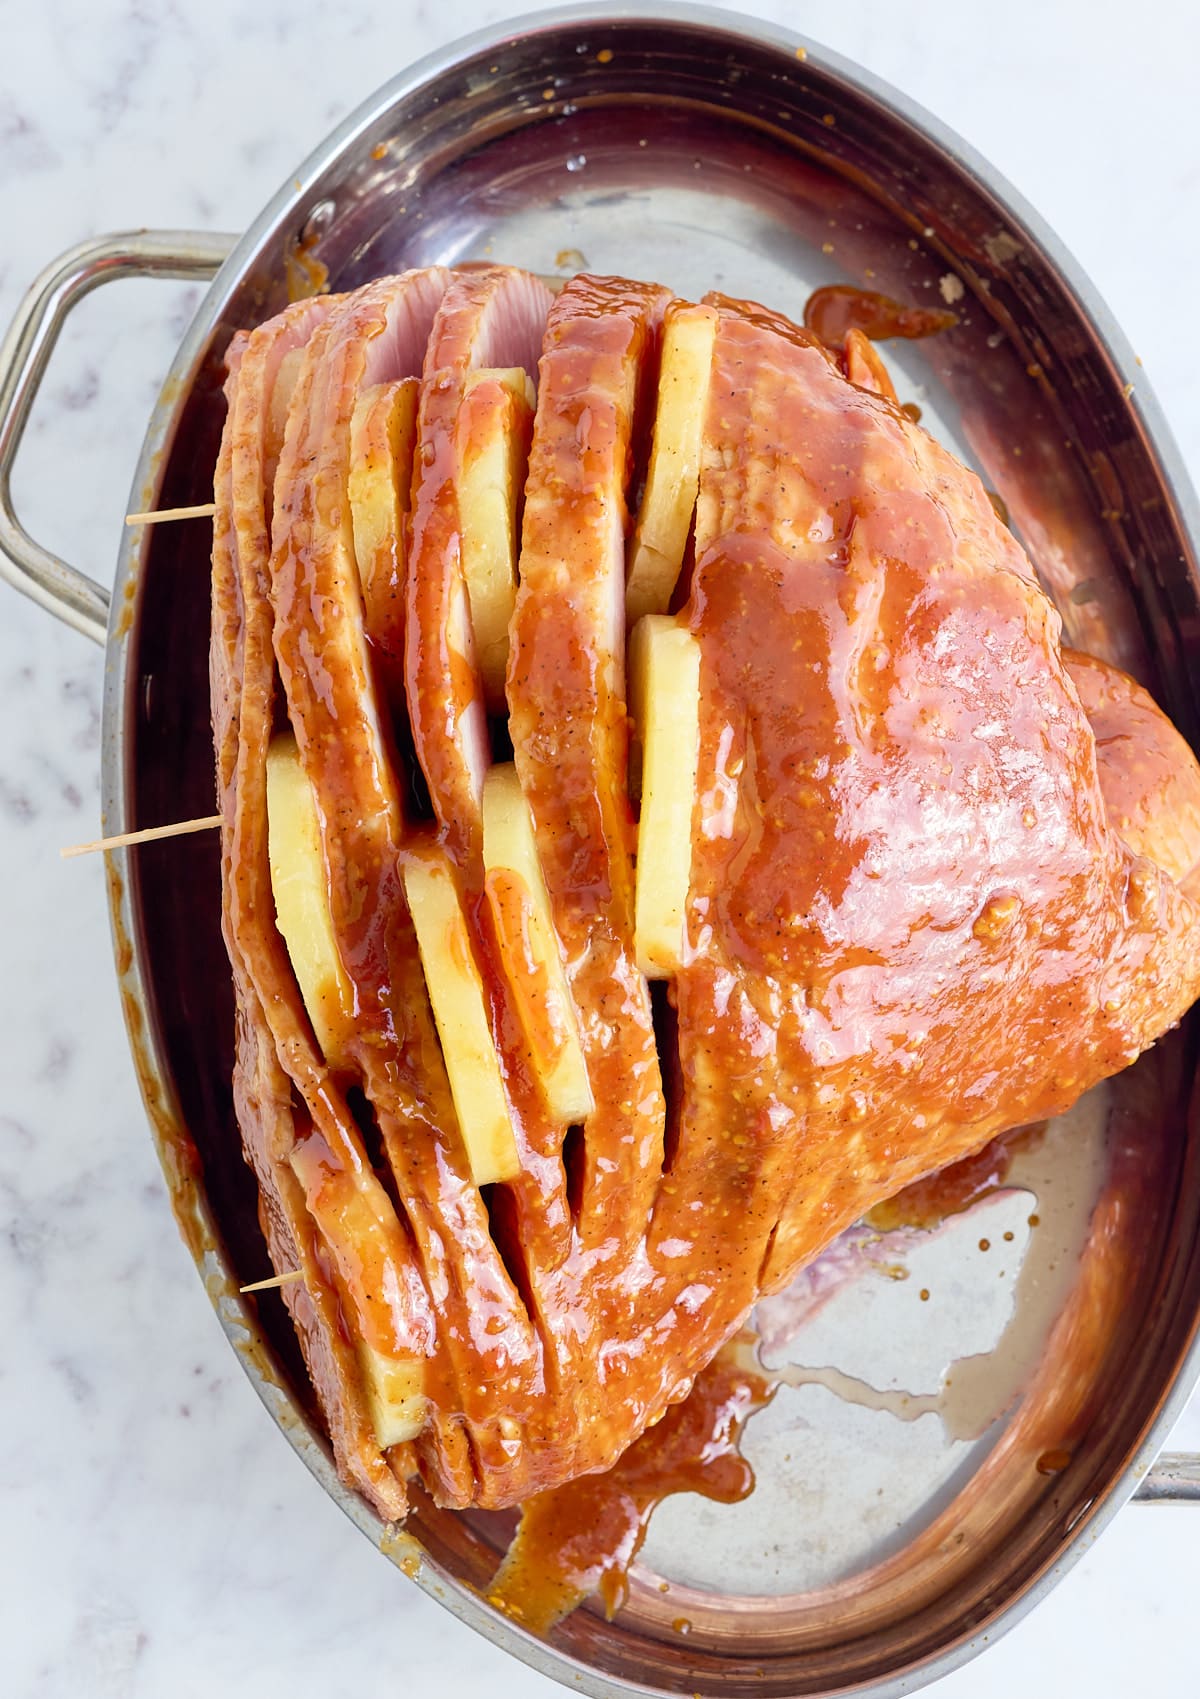
Place the sliced pineapple in between the slices of ham. You can use toothpicks to ensure the ham stays upright.

The spiral ham is added to the pot with slices of pineapple in the spirals.

Pour the glaze on top of the ham and cover the ham with foil. Place the ham in the preheated oven and bake for 1 hour and 20 minutes, about 10-12 minutes per pound.

The dish is covered in foil.

Once done, remove the ham from the oven and remove the foil. If you want a crispy glaze, add the ham back in the oven and broil for about 2-3 minutes. Serve and enjoy.

Fresh baked ham with a few bits of char on top.

How To Store Baked Ham

Store any leftover baked ham in an airtight container in the fridge for up to 3 days for the best flavor.

To reheat the baked ham for another meal, place on a baking sheet in a 350-degree Fahrenheit preheated oven until heated through. Add extra pineapple and sauce on top!

Meal Ideas For Leftover Baked Ham

A delicious baked ham with all of those caramel sweet bits is so delicious when added to savory dishes. Use your leftovers in any of these wonderful recipes:

  • Southern Green Beans
  • Butter Beans
  • Collard Green Soup

In addition, slice up some ham for the next morning's breakfast then serve warm on sandwiches for lunch. Dice up ham and add to potato soup, stews, omelets, rice, or mac & cheese. With such a versatile protein, ham really works with almost anything.

Fresh baked ham plated on a platter on the table.

Baked Ham Sides

Baked ham with pineapple is best paired with roasted potatoes, asparagus, and a simple green salad. The combo of the sweet and savory main dish with the earthy flavors of roasted veggies and the crispness of a refreshing salad makes for a fantastic combination. Any of these dishes will be a hit next to your baked ham.

  • Creamy Slow Cooker Mashed Potatoes
  • Air Fryer Sweet Potatoes with Hot Honey Butter
  • Southern Style Pressure Cooker Collard Greens
  • Creamy Broccoli Cauliflower Salad

FAQ's

Can you freeze a spiral ham?

Yes, spiral-baked ham can be frozen. To freeze, wrap the cooled baked ham tightly in plastic wrap or aluminum foil. When you're ready to prepare the frozen ham, thaw it in the refrigerator overnight and heat it on a baking sheet in a 350°F oven until warm throughout.

Notes

  • If you broil your baked ham at the end, keep a very close eye on it as it only needs 2-3 minutes to create a lovely crispy glaze.

Looking for more ham and oven-baked related recipes? Try these out:

  • Air Fryer Holiday Ham
  • Easy Oven-Baked Fish
  • Oven Roasted Cauliflower
  • Juicy Oven Roasted Chicken Pieces

 If you have tried this recipe or any other recipe on my blog, please rate it and let me know how it turned out in the comments below!

Fresh baked ham plated on a platter on the table.
Print Recipe
No ratings yet

Baked Ham

Experience a sweet and savory spiral baked ham recipe like no other! The juicy slices of pineapple add a delightful flavor, while the sauce brings it all together. Enjoy this flavorful feast as an exquisite holiday entrée or a special Sunday supper. Paired with your favorite sides, you're sure to have a meal that will please the whole family!
Prep Time19 minutes mins
Cook Time1 hour hr 20 minutes mins
Total Time1 hour hr 39 minutes mins
Course: Main Course
Cuisine: American
Keyword: baked ham
Servings: 10 people
Calories: 2080kcal
Author: Tanya Harris

Ingredients

  • 1 cup Ketchup
  • 20 ounces Canned pineapple slices in juice slices and juices separated
  • ¾ cup Brown sugar packed
  • ⅓ cup Yellow mustard
  • ¼ cup Apple cider vinegar
  • 1 tablespoon Worcestershire sauce
  • 1 tablespoon Honey
  • 1 teaspoon Black pepper
  • 1 teaspoon Onion powder
  • ⅛ teaspoon Ground cloves
  • 1 Hickory smoked spiral ham about 10 pounds

Instructions

  • Preheat oven to 325 degrees Fahrenheit.
  • Combine ketchup, juice from the canned pineapple, brown sugar, yellow mustard, apple cider vinegar, Worcestershire sauce, honey, black pepper, onion powder, and ground cloves in a medium saucepan over medium-high heat. Bring the mixture to a bowl and then reduce the heat to low. Allow the mixture to simmer for 25-30 minutes until the sauce has thickened and reduced. 
  • Place the sliced pineapple in between the slices of ham. You can use toothpicks to ensure the ham stays upright. Pour the glaze on top of the ham and cover the ham with foil.
  • Place the ham in the preheated oven and bake for 1 hour and 20 minutes, about 10-12 minutes per pound.
  • Once done, remove the ham from the oven and remove the foil. If you want a crispy glaze, add the ham back in the oven and broil for about 2-3 minutes. Serve and enjoy.

Nutrition

Serving: 1g | Calories: 2080kcal | Carbohydrates: 34g | Protein: 174g | Fat: 135g | Saturated Fat: 48g | Polyunsaturated Fat: 15g | Monounsaturated Fat: 63g | Trans Fat: 0.001g | Cholesterol: 496mg | Sodium: 9833mg | Potassium: 2484mg | Fiber: 1g | Sugar: 31g | Vitamin A: 160IU | Vitamin C: 7mg | Calcium: 92mg | Iron: 8mg

Smothered Chicken Recipe

March 12, 2023 by Tanya Harris 18 Comments

Dutch oven filled with smothered chicken thighs

Jam-packed with flavor, my Best Smothered Chicken recipe is food to warm the soul. Chicken thighs are first coated in seasoned flour and then sauteed, before being cooked in a rich and creamy onion gravy.

Dutch oven with smothered chicken thighs and 2 plates with steamed white rice and sauteed greens set alongside

You’ll find the full recipe with ingredient amounts and instructions in the recipe card at the bottom of this post. Be sure to check out the blog post itself for extra tips and tricks!

Southern Smothered Chicken with gravy, is comfort food at its best, a filling dinner guaranteed to put a smile on everyone's face. This easy-smothered chicken is super tasty as everything is cooked in one pot, meaning you keep all the flavor in the dish.

This dish impressed my mom, who is Caribbean and gets her exposure to Southern food through me. She couldn't stop talking about this gravy and the tender chicken. The hands-on prep time for this dish is minimal, with only 15 minutes to pull the dish together. Then you simply leave the sauce to bubble away gently until the chicken is cooked through.

I've served my smothered chicken with rice, but that gravy works just as well with a bowl of creamy mashed potatoes or mashed turnips for a lighter option. In fact, as this recipe makes a good bit of gravy, I like to save the leftovers and serve it over rice and mashed potatoes.

If you like this technique be sure to try my Smothered Turkey Wings, Smothered Pork Chops, Creamy Champagne Chicken, or my Smothered Green Beans.

Ingredients You Will Need

Ingredient amounts and full recipe instructions are on the printable recipe card at the bottom of the post.

  • Flour - all-purpose flour is used to make seasoned flour to coat the chicken.
  • Seasoning - onion powder, garlic powder, paprika, seasoned salt, and black pepper season the flour.
  • Olive oil - or any oil made for high-heat cooking will do. I usually use light-tasting olive oil, canola oil, or avocado oil.
  • Chicken - I used bone-in, skin-on chicken thighs as they add great flavor to the finished dish. Feel free to use other chicken cuts or boneless, skinless chicken.
  • Butter - unsalted butter; if using salted butter, reduce the seasoned salt slightly.
  • Aromatics - onion and garlic for flavor. Red onion or shallots will also work.
  • Broth - chicken broth, but vegetable broth can work too.
  • Cream - heavy cream results in a rich and creamy sauce. You can use a lighter cream, but it won't give you the same velvety texture as heavy cream.
  • Fresh herbs - add some freshly chopped parsley to garnish the dish before serving (optional)
Smothered chicken recipe ingredients

How to make the Best Smothered Chicken recipe

Combine the all-purpose flour, onion powder, garlic powder, paprika, seasoned salt, and black pepper in a shallow dish or plate. Mix until well combined.

Place the chicken in the mixture and coat it evenly on both sides. Set the chicken aside and reserve the seasoned flour for later use.

Heat a large pan over medium-high heat and add the olive oil.

Once heated, add the chicken thighs and cook each side for 4-7 minutes, or until golden brown. Remove from heat and set aside on a plate.

Bone-in skin-on chicken thighs coated in seasoned flour
Dutch oven with cooked bone-in skin-on chicken thighs

Add in the butter and onions and sauté until softened, about 3-4 minutes. Next, add the garlic and sauté for an additional 1 minute.

Now add the seasoned flour to the pan, stir, and cook for about 1 minute. Slowly stir in the chicken broth.

Dutch oven with sauteed onions
Dutch oven with sauteed onions in a seasoned flour

Place the chicken back into the pan along with any juices from resting on the plate earlier.

Dutch oven with sauteed chicken thighs, seasoned flour, onions and stock

Cover the pan, reduce the heat to medium-low, and let simmer, covered, for about 25-28 minutes or until cooked through and tender.

Remove the lid and add heavy cream to the pan, and stir the cream into the gravy.

Remove from heat and serve. Top with parsley if desired.

Dutch oven filled with smothered chicken thighs

Tanya's Top Tips

These tips will help you make the best smothered chicken recipe you've ever tried. 

  • Take your time to cook out the onions, and almost caramelize them, as this will make the sweetest gravy.
  • If using boneless and skinless chicken breast, reduce the cooking time to prevent the chicken from drying out. 
  • The easiest way to check if the chicken is done is to use a meat thermometer inserted into the thickest part of the chicken thigh.
  • This is a great make-ahead dish and can be made a day ahead of time. Allowing the chicken to sit in the gravy intensifies the flavor, making it even better the next day.

Flavor variations

  • Add some extra aromatics, such as finely chopped celery and carrots, to the onions and garlic.
  • Try adding fresh herbs to the sauce while the chicken is cooking, such as thyme, rosemary, or parsley.
  • If you like a little extra kick to your food, try adding some cayenne pepper or red pepper flakes to the seasoned flour.
  • Add a splash of white wine to the sauce once the onions have cooked, before adding the chicken broth. Cook the wine out for a couple of minutes to reduce it a little first.
White plate with smothered chicken served with steamed white rice and sauteed greens

What to serve with Smothered Chicken

This is a great comfort food dish, packed full of flavor, so I like to keep the side dishes simple. Serve it with steamed rice, or try my Oven-BakedRice or my garlic butter rice.

If you prefer a potato side, mashed potatoes would be my go-to choice, as they pair perfectly with the creamy gravy. Try my Creamy Slow Cooker Mashed Potatoes or my Garlic Mashed Potatoes.

One or two extra vegetable sides never go amiss; my Oven Roasted Cauliflower, Roasted Okra, Oven Roasted Broccoli, Turnip Greens, or Collard Greens would all work a treat.

How to store 

Make ahead: This is a great make-ahead dish. Cook the smothered chicken earlier in the day or the day before, then let it cool completely before covering and storing it in the refrigerator.

To refrigerate: Leftovers can be stored in an airtight container in the refrigerator for up to 3 days. When ready to enjoy, reheat the chicken and sauce on the stovetop until piping hot.

To freeze: Once cooked and cooled, place the smothered chicken into an airtight container and store it in the freezer for up to 3 months. Defrost in the refrigerator before reheating to a piping hot temperature.

Close up image of white plate with smothered chicken served with steamed white rice and sauteed greens

FAQs

Where did smothered chicken come from?

The technique of smothering meat is a Cajun and Creole cooking style that originated in Louisiana. It is used to smother meat, most commonly chicken and pork, as well as seafood or vegetables in a sauce.

What is the difference between stewed chicken and smothered chicken?

The main difference is that stewed chicken is boiled/braised in the gravy, whilst with smothered chicken, the chicken is dredged in flour, then fried first, before being smothered in the sauce.

If you have tried this Smothered Chicken recipe, or any other recipe on my blog, then please rate it and let me know how it turned out in the comments below!

Dutch oven filled with smothered chicken thighs
Print Recipe
4.96 from 21 votes

Smothered Chicken

Best Smothered Chicken recipe where chicken thighs are coated in seasoned flour and sauteed, then cooked in a rich and creamy onion gravy.
Prep Time15 minutes mins
Cook Time40 minutes mins
Total Time55 minutes mins
Course: Main Course
Cuisine: American, Southern
Keyword: best smothered chicken, easy smothered chicken, smothered chicken recipe, smothered chicken with gravy
Servings: 4
Calories: 946kcal
Author: Tanya Harris

Ingredients

  • ⅓ cup all-purpose flour
  • 2 teaspoons onion powder
  • 1 teaspoon garlic powder
  • 2 teaspoons paprika
  • 1.5 teaspoons seasoned salt
  • 1 teaspoon black pepper
  • 3 lbs chicken thighs bone-in, skin-on
  • 3 Tablespoons olive oil
  • 2 Tablespoons unsalted butter
  • 1 yellow onion halved and sliced
  • 4 cloves garlic chopped
  • 1.5 cups chicken broth
  • ½ cup heavy cream
  • freshly chopped parsley optional garnish

Instructions

  • Combine the all-purpose flour, onion powder, garlic powder, paprika, seasoned salt, and black pepper in a shallow dish or plate. Mix until well combined. Place the chicken in the mixture and coat it evenly on both sides. Set the chicken aside and save the seasoned flour for later.
  • Heat a large pan over medium-high heat and add in the olive oil. Once heated, add the chicken thighs and cook each side for 4-6 minutes or until golden brown. Remove from heat and set aside on a plate.
  • Add in the butter and onions and sauté until softened, about 3-4 minutes. Add garlic and sauté for an additional 1 minute.
  • Add the seasoned flour to the pan, stir, and cook for about 1 minute. Slowly stir in the chicken broth.
  • Place the chicken back into the pan along with any juices from resting on the plate earlier. Cover the pan, reduce heat to medium-low, and let simmer, covered, for about 25-28 minutes or until cooked through and tender.
  • Remove the lid and add heavy cream to the pan and stir the cream into the gravy.
  • Remove from heat and serve. Top with parsley if desired.

Notes

  • I used bone-in, skin-on chicken thighs for this recipe. Feel free to use other chicken cuts or boneless skinless chicken. If using boneless and skinless chicken breast, reduce the amount of cooking time to avoid the chicken from drying out. 
  • This recipe makes a good bit of gravy. I like to save the leftovers and serve it over rice and mashed potatoes.

Nutrition

Calories: 946kcal | Carbohydrates: 16g | Protein: 50g | Fat: 75g | Saturated Fat: 25g | Polyunsaturated Fat: 12g | Monounsaturated Fat: 32g | Trans Fat: 0.5g | Cholesterol: 334mg | Sodium: 1434mg | Potassium: 750mg | Fiber: 2g | Sugar: 3g | Vitamin A: 1336IU | Vitamin C: 3mg | Calcium: 71mg | Iron: 3mg

Zuppa Toscana (Olive Garden Copycat) Recipe

March 6, 2023 by Tanya Harris 2 Comments

Filled bowl of zuppa toscana soup.

Satisfy your Italian cravings without having to travel to Italy with this delicious zuppa toscana recipe! This easy-to-replicate dish is savory, flavorful, and sure to please the whole family. With just a few ingredients, you can make this copycat of Olive Garden's classic dish right in your own kitchen - no reservations required!

Filled bowl of zuppa toscana soup.

This is an Olive Garden's soup that my husband and I love. We started making it at home years ago and love this at-home copycat version. It’s perfect for meal prep as it’s a soup we can prepare ahead of time and eat a few days later. The flavor is even better when it sits in the fridge for a day or two. 

Do you love a copycat recipe? So do we! Check out my awesome recipe for copycat KFC potato wedges, or our copycat rice-a-roni recipe.

A bowl of zuppa toscana soup.

A Quick Look at the Ingredients

Ingredient amounts and full recipe instructions are on the printable recipe card at the bottom of the post.

  • Bacon - Crispy bacon adds a next-level flavor to this delicious soup.
  • Ground Italian sausage - Try spicy Italian sausage for a kick. To make your own, add ½- 1 teaspoon of crushed red pepper flakes to the meat. You can also purchase hot Italian sausage or mild Italian sausage, depending on your preference.
  • Yellow onion - A nice, mild cooking onion.
  • Garlic - Minced garlic is ideal; in a pinch, use garlic powder or freeze-dried minced garlic.
  • Chicken broth - A chicken stock concentrate also works great, just measure according to the recipe.
  • Water
  • Russet potato - Russet potatoes work really well in this recipe, as they will soak up a lot of liquid and slowly lose their shape. Helping to make the soup thicker and creamier.
  • Kale - Feel free to sub swiss chard, fresh spinach, or other greens in place of kale.
  • Heavy cream - Half-and-half or even whole milk can be swapped out for heavy cream.
  • Salt and Pepper to taste
Zuppa toscana soup recipe ingredients.

Recommended Tool

STAUB Cocotte Round 24cm Dark Blue

This Dutch oven is perfect for soups and stews. With a heavy bottom for even heat distribution and a tight-fitting lid to lock in moisture, it’s ideal for small-batch cooking, braising, and simmering cozy meals.

Buy Now

    How To Make Zuppa Toscana Soup

    In a large pot or Dutch oven over medium-high heat, cook the bacon until crispy, about 8 minutes. Once cooked, remove with a slotted spoon and set aside on a plate lined with paper towels. Drain any excess bacon grease from the pot, reserving about 1 Tablespoon in the pot.

    Bacon being fried in a dutch oven.

    Add the Italian sausage to the same pot and cook, breaking it up into small pieces as you go, brown sausage until fully cooked through.

    Sausage, onions, and garlic being cooked in the dutch oven.

    Add the onion and garlic to the pot and cook until softened, about 2 minutes.

    Cooked sausage and onions in the dutch oven.

    Pour in the chicken broth, water, and chopped potatoes. Bring to a boil over high heat then reduce heat to low-medium heat and simmer until the potatoes are fork tender, about 20 minutes.

    Broth and potatoes added to the pot.

    Add in the kale and heavy cream and simmer for an additional 2 minutes, or until the kale is just wilted.

    Kale and cream added to the soup.

    Remove from heat and season with salt and pepper to taste. Place in serving bowls and top with bacon. Serve warm. Enjoy!

    spoon holding up soup

    How to store this Zuppa Toscana recipe

    This soup is truly so delicious served right away! Often times we don't even have leftovers, it's that good.

    To store, let the soup cool to room temperature, and store in an airtight container in the refrigerator for 3-5 days.

    Freeze zuppa toscana soup in a freezer safe container, like Souper Cubes! Perfectly portioned for easy thawing and serving.

    A bowl of zuppa toscana soup with someone take a bite with a spoon.

    What can I serve with Zuppa Toscana Soup?

    While this zuppa toscana copycat recipe is incredible on its own, serve it with a generous sprinkle of freshly grated parmesan cheese on top.

    Soak up this creamy soup with crusty bread or breadsticks like they do at Olive Garden.

    FAQ's

    What does Zuppa Toscana mean in Italian?

    The literal translation of "zuppa toscana" means Tuscan Soup. An absolutely delicious traditional Italian soup.

    How can I make this recipe healthier?

    In place of pork sausage use ground turkey sausage or ground turkey with Italian seasoning. Turkey bacon is also a great swap for regular bacon. Using less cream or replacing cream with regular milk should help as well. Cauliflower florets are a great swap for potatoes, making this a keto version. I've tried all of these swaps, and the flavor of your favorite soup has not gone away, still one of the most delicious recipes.

    Tanya's Notes

    • Feel free to sub swiss chard, spinach, or other greens in place of kale
    • For a thicker soup, reduce the amount of chicken broth by 1 cup. 
    • For a spicy soup, use spicy Italian ground sausage.

    Looking for more soup recipes? Try these out:

    • Sweet Potato Soup Recipe
    • Collard Green Soup
    • Creamy Cauliflower Soup
    • Creamy Carrot and Lentil Soup
    • Pressure Cooker Moroccan Spiced Soup

     If you have tried this recipe or any other recipe on my blog, please rate it and let me know how it turned out in the comments below!

    Filled bowl of zuppa toscana soup.
    Print Recipe
    4.80 from 5 votes

    Zuppa Toscana Recipe

    Satisfy your Italian cravings without having to travel to Italy with this delicious zuppa toscana recipe! This easy-to-replicate dish is savory, flavorful, and sure to please the whole family. With just a few ingredients, you can make Olive Garden's classic dish right in your own kitchen - no reservations required!
    Prep Time15 minutes mins
    Cook Time25 minutes mins
    Total Time40 minutes mins
    Course: Main Course, Soup
    Cuisine: Italian
    Keyword: zuppa toscana recipe
    Servings: 6 servings
    Calories: 500kcal
    Author: Tanya Harris

    Equipment

    • Dutch Oven

    Ingredients

    • 4 slices Bacon chopped into 1-inch pieces
    • 1 pound Ground Italian sausage
    • 1 Yellow onion diced
    • 4 cloves Garlic minced
    • 4 cups Chicken broth
    • 1 cup Water
    • 1 large Russet potato chopped
    • 2 cups Kale chopped
    • ¾ cup Heavy cream
    • Salt and Pepper to taste

    Instructions

    • In a large pot or Dutch oven over medium heat, cook the bacon until crispy, about 8 minutes. Once cooked, remove with a slotted spoon and set aside on a plate lined with paper towels. Drain any excess bacon grease from the pot, reserving about 1 Tablespoon in the pot.
    • Add the Italian sausage to the same pot and cook, breaking it up into small pieces as you go, until it’s browned and fully cooked through.
    • Add the onion and garlic to the pot and cook until softened, about 2 minutes.
    • Pour in the chicken broth, water, and chopped potatoes. Bring to a boil over high heat then reduce heat to low-medium and simmer until the potatoes are cooked through, about 20 minutes.
    • Add in the kale and heavy cream and simmer for an additional 2 minutes, or until the kale is just wilted.
    • Remove from heat and season with salt and pepper to taste. Place in serving bowls and top with bacon. Serve warm. Enjoy!

    Video

    Notes

    • Feel free to sub swiss chard, spinach, or other greens in place of kale
    • For a thicker soup, reduce the amount of chicken broth by 1 cup. 
    • For a spicy soup, use spicy Italian ground sausage.
    • Feel free to top with parmesan cheese if you like cheese on your soup. 

    Nutrition

    Serving: 1g | Calories: 500kcal | Carbohydrates: 17g | Protein: 17g | Fat: 41g | Saturated Fat: 17g | Polyunsaturated Fat: 5g | Monounsaturated Fat: 16g | Trans Fat: 0.02g | Cholesterol: 104mg | Sodium: 1262mg | Potassium: 646mg | Fiber: 2g | Sugar: 3g | Vitamin A: 2678IU | Vitamin C: 28mg | Calcium: 114mg | Iron: 2mg

    Oven Roasted Cauliflower

    March 3, 2023 by Tanya Harris Leave a Comment

    oven roasted cauliflower on a plate with a fork.

    Roasted cauliflower is an easy, delicious way to enjoy a lazy healthy meal. This simple recipe packs a lot of flavor and nutrition into one dish. The nutty flavor of the cauliflower with the crunchy texture makes for an irresistible snack.

    oven roasted cauliflower on a plate with a fork.

    This post contains affiliate links, please read my full disclaimer here.

    You’ll find the full recipe with ingredient amounts and instructions in the recipe card at the bottom of this post. Be sure to check out the blog post itself for extra tips and tricks!

    This low-carb option is incredibly versatile: use it as a side dish, add some meat to make it into a main course, or top it with your favorite sauce for extra flair. So if you're looking for a healthy, tasty low-carb alternative, try this roasted cauliflower - you won't regret it!

    If you're a fan of cauliflower you'll love my Creamy Cauliflower Soup, Roasted Cauliflower Dip or this Cauliflower Pizza Casserole.

    oven roasted cauliflower still on the baking sheet.

    Ingredients for Oven Roasted Cauliflower

    • Cauliflower florets: Fresh cauliflower florets, should be rinsed and patted dry before preparing.
    • Avocado oil: Oil helps to prevent burning, allows the seasoning to stick, and provides flavor. Olive oil would also work here.
    • Garlic powder: For flavor!
    • Kosher salt: Also for flavor.
    • Crushed red pepper flakes: Optional for a bit more bite!
    oven roasted cauliflower ingredients.

    Tools needed for this recipe

    • Cutting board and sharp knife
    • Large mixing bowl
    • Large baking sheet
    • Parchment paper

    How To Make Oven-Roasted Cauliflower

    Preheat oven to 450 degrees Fahrenheit (232C). Prepare a baking sheet by lining it with parchment paper. Set aside. 

    cauliflower on a glass bowl.

    In a large bowl, combine the cauliflower florets with avocado oil, garlic powder, salt, and crushed red pepper florets. Stir to combine, ensuring all the florets are covered with oil and seasoning. 

    Seasoned cauliflower on a parchment lined baking sheet.

    Spread the cauliflower on the baking sheet in a single layer.

    Cooked oven roasted cauliflower still on the baking sheet.

    Place in oven and bake for 20-25 minutes, turning the baking tray halfway through. The cauliflower is ready when lightly browned. Remove from the oven and serve. 

    How to store leftovers

    Store leftovers in an airtight container in the refrigerator for up to a week.

    It isn't recommended to freeze steamed, or softened cauliflower, as their texture will change and become mushy after thawing due to the additional moisture added.

    Roasted Cauliflower Variations

    Almost any dish can be elevated with the addition of spices. Any of these seasonings are sure to be a hit!

    Italian seasoned cauliflower - Add Italian seasoning, parmesan cheese, or oregano to your seasoning mixture.

    Mexican cauliflower - Cumin and chili powder will add a bit of flare to this recipe. Spritz with a squeeze of lime to finish.

    Extra spice - Try my Homemade Cajun Seasoning or Jamaican Jerk Seasoning to spice up this mild vegetable.

    Let this recipe be a base for Creamy Cauliflower Soup, or simply serve it on top of a baked potato with cheese!

    oven roasted cauliflower on a baking sheet.

    Serving Suggestions

    Cauliflower itself is a great stand-alone vegetable, lending itself to be paired alongside almost any protein.

    While roasting your cauliflower, try any of these delicious proteins in your air fryer:

    • Perfect Air Fryer Pork Chops
    • Air Fryer Turkey Meatballs
    • Air Fryer Chicken Drumsticks
    • Air Fryer Bacon Wrapped Shrimp Recipe

    FAQ's

    Why is my roasted cauliflower mushy?

    Overcrowding your baking sheet will result in steamed or mushy cauliflower. Leaving plenty of room between each piece will allow the moisture to evaporate and the vegetable to cook evenly. If necessary, use two baking sheets for even roasting.

    What color cauliflower is the most nutritious?

    Cauliflower can come in white, orange, purple, and green. While they all taste the same, the orange and purple varieties contain more antioxidants, with the orange carrying more beta-carotene than the rest.

    Notes

    • Turning the baking sheet halfway through will ensure that your roasted cauliflower has cooked evenly over every piece.

    Looking for more oven-roasted recipes? Try these out:

    • Oven Roasted Broccoli
    • Roasted Cauliflower Dip
    • Roasted Cauliflower and Sweet Potato Recipe
    • Juicy Oven Roasted Chicken Pieces

     If you have tried this recipe or any other recipe on my blog, please rate it and let me know how it turned out in the comments below!

    oven roasted cauliflower on a plate with a fork.
    Print Recipe
    5 from 1 vote

    Oven Roasted Cauliflower

    Roasted cauliflower is an easy, delicious way to enjoy a lazy healthy meal. This simple recipe packs a lot of flavor and nutrition into one dish. The nutty flavor of the cauliflower with the crunchy texture makes for an irresistible snack.
    Prep Time10 minutes mins
    Cook Time20 minutes mins
    Total Time30 minutes mins
    Course: Side Dish
    Cuisine: American
    Keyword: oven roasted cauliflower
    Servings: 6 servings
    Calories: 119kcal
    Author: Tanya Harris

    Ingredients

    • 8 cups Cauliflower florets rinsed and patted dry
    • 4 tablespoons Avocado oil
    • 2 teaspoons Garlic powder
    • 1 teaspoon Kosher salt
    • ¼ teaspoon Crushed red pepper flakes optional

    Instructions

    • Preheat oven to 450 degrees Fahrenheit (232C). Prepare a baking sheet by lining it with parchment paper. Set aside. 
    • In a large bowl, combine the cauliflower florets with avocado oil, garlic powder, salt, and crushed red pepper florets. Stir to combine, ensuring all the florets are covered with oil and seasoning. 
    • Spread the cauliflower on the baking sheet in a single layer.
    • Place in oven and bake for 20-25 minutes, turning the baking tray halfway through. The cauliflower is ready when lightly browned. Remove from the oven and serve. 

    Nutrition

    Serving: 1g | Calories: 119kcal | Carbohydrates: 7g | Protein: 3g | Fat: 10g | Saturated Fat: 1g | Polyunsaturated Fat: 1g | Monounsaturated Fat: 7g | Sodium: 430mg | Potassium: 412mg | Fiber: 3g | Sugar: 3g | Vitamin A: 25IU | Vitamin C: 64mg | Calcium: 31mg | Iron: 1mg

    Sweet Potato Soup Recipe

    February 27, 2023 by Tanya Harris Leave a Comment

    two bowls of sweet potato soup garnished with chopped cilantro and a drizzle of coconut milk

    My family love the flavor of sweet potato, so this Sweet Potato Soup recipe with coconut milk is always popular and a hit every time I serve it. This mildly spicy sweet potato soup recipe has curry powder and ground coriander added to it, taking the flavor to another level.

    two bowls of sweet potato soup garnished with chopped cilantro and a drizzle of coconut milk

    You’ll find the full recipe with ingredient amounts and instructions in the recipe card at the bottom of this post. Be sure to check out the blog post itself for extra tips and tricks!

    I love a good sweet potato recipe, as it's one of my favorite tubers. So it's no surprise that I've made this delicious curry-flavored sweet potato soup recipe to share with you all.

    I like to add apple to this healthy sweet potato soup recipe as the apple adds just a touch of sharpness to balance out the sweetness of the potato. This is also a great dairy-free and vegan sweet potato soup, as I use coconut milk, rather than cream. If you use gluten-free vegetable stock it makes a great tasting gluten-free soup too.

    Depending on portion size, soup makes a great appetizer or main dish served with some crusty bread.

    Ingredients

    • Olive oil - or any oil made for high-heat cooking will do. I usually use light-tasting olive oil, canola oil, or avocado oil.
    • Aromatics - onion and garlic for flavor.
    • Seasoning - flavor with curry powder and ground coriander, then add salt and black pepper to taste once the soup has cooked.
    • Sweet potatoes - use any color sweet potato.
    • Apple - I suggest a large sweet apple, something like Honeycrisp or Fuji would be ideal.
    • Broth - vegetable broth, but chicken broth can work too.
    • Coconut milk - full-fat unsweetened coconut milk adds a creamy element. You can use lite coconut milk if you prefer, but the soup will have a thinner texture.
    • Cilantro - for garnish, you can sub with chives or sliced green onions.
    Sweet potato soup recipe ingredients

    How to make Sweet Potato Soup recipe

    Heat the olive oil in a large pot over medium heat. Add the onions and sauté gently until softened, about 3-5 minutes.

    Now add the garlic and sauté for an additional minute.

    Add the curry powder and ground coriander to the pot and sauté for an additional 20 seconds, to bloom the spices.

    Dutch oven with olive oil, sauteed onions, garlic and spices

    Now add the sweet potatoes, apple, and vegetable broth to the pot, ensuring that the broth covers the sweet potatoes and apples.

    Dutch oven filled with chopped sweet potato, apple and vegetable broth

    Bring the mixture to a boil, then reduce the heat to medium-low, and cover the pot with a lid.

    Allow the soup to simmer, covered, for about 15 minutes, until the sweet potatoes and apples are soft.

    Dutch oven filled with cooked sweet potato soup prior to being blended

    Remove the pot from the heat. Blend the soup using an immersion blender (or a regular blender), until it’s smooth.

    Dutch oven of sweet potato soup being blended using a stick blender

    Stir in coconut milk and add salt and pepper to taste.

    Dutch oven filled with sweet potato soup

    Serve the soup and top with chopped cilantro if desired.

    Expert Tips

    These tips will help you make the best sweet potato soup you've ever tried. 

    • Take care when sautéing the onion, you only want to soften it, not color it. Only add the garlic for the final minute, otherwise, you risk burning it.
    • The amount of salt and pepper added will depend if your curry powder has salt or pepper in the mixture. I suggest tasting the soup and then adding any salt and or pepper if desired.
    • If you don’t have an immersion blender, you can use a stand blender. Carefully transfer the soup to the blender and blitz to smooth. Work in batches and take care as the soup will be very hot.
    • For a gluten-free sweet potato soup, ensure the vegetable stock you are using is gluten-free.
    • This recipe is easily doubled up so is great for batch cooking. Enjoy some now and freeze some for a quick and easy meal another day.
    bowl of sweet potato soup with a soup spoon

    Flavor variations

    • Butternut squash would be a great substitution for the sweet potato.
    • Increase the number of vegetables in this soup; for example, add some chopped carrots or parsnips. Just ensure you add a little extra broth too.
    • If you like chili heat, saute some freshly chopped red chili along with the onion and garlic.
    • Try serving with a wedge of lime to add a burst of zesty freshness.

    How to store 

    To refrigerate: Leftovers can be stored in an airtight container in the refrigerator for up to 3 days. When ready to enjoy, reheat the soup on the stove top until piping hot.

    To freeze: Once cooked and cooled, place the soup into an airtight container and store it in the freezer for up to 3 months.

    Frozen soup can either be defrosted overnight in the refrigerator then reheated to piping hot. Alternatively, you can heat it straight from frozen, just place the soup in the pot and heat up gently over low-medium heat.

    bowl of sweet potato soup garnished with chopped cilantro and a drizzle of coconut milk

    FAQs

    Do you peel sweet potatoes before adding them to this soup?

    I prefer to peel sweet potatoes when making soup as it results in smooth soup that has a great velvety texture once blended.

    Can I use chicken broth instead of vegetable broth?

    Yes, provided you are not serving this soup to vegan or vegetarian diners, you can easily substitute the vegetable broth for chicken.

    How long to boil sweet potatoes in soup?

    As the sweet potatoes have been peeled and chopped into smaller chunks, it only takes around 15 minutes to simmer in the broth to cook the potatoes. Just always check the potatoes are soft before you blitz the soup.

    More Delicious Soup Recipes

    • Creamy Crab Bisque
    • Easy Seafood Chowder
    • Cream of Mushroom Soup
    • Vegetable Soup
    • Moroccan Spiced Soup
    • Roasted Tomato Basil Soup

    If you have tried this Sweet Potato Soup recipe, or any other recipe on my blog, then please rate it and let me know how it turned out in the comments below!

    bowl of sweet potato soup garnished with chopped cilantro and a drizzle of coconut milk
    Print Recipe
    No ratings yet

    Sweet Potato Soup Recipe

    Sweet Potato Soup recipe with coconut milk and apple in a vegetable broth and mildly spiced with curry powder and ground coriander.
    Prep Time15 minutes mins
    Cook Time20 minutes mins
    Total Time35 minutes mins
    Course: Soup
    Cuisine: American
    Keyword: healthy sweet potato soup recipe, spicy sweet potato soup, sweet potato soup coconut milk, sweet potato soup recipe
    Servings: 4
    Calories: 377kcal
    Author: Tanya Harris

    Equipment

    • 1 Dutch Oven or large pot

    Ingredients

    • 2 tablespoon olive oil
    • 1 small onion chopped
    • 3 cloves garlic chopped
    • ¾ teaspoon curry powder
    • ½ teaspoon ground coriander
    • 2 lbs sweet potatoes peeled and chopped
    • 1 large sweet apple like honeycrisp or fuji - peeled and chopped
    • 4 cups vegetable broth
    • ½ cup full-fat unsweetened coconut milk
    • salt & pepper to taste
    • chopped cilantro garnish

    Instructions

    • Heat the olive oil in a large pot over a medium heat. Add the onions and sauté gently until softened, about 3-5 minutes. Add the garlic and sauté for an additional minute.
    • Add the curry powder and ground coriander to the pot and sauté for an additional 20 seconds, to bloom the spices.
    • Now add the sweet potatoes, apple, and vegetable broth to the pot, ensuring that the broth covers the sweet potatoes and apples. Bring the mixture to a boil, then reduce the heat to medium-low, and cover the pot with a lid. Allow the soup to simmer, covered, for about 15 minutes, until the sweet potatoes and apples are soft.
    • Remove the pot from the heat. Blend the soup using an immersion blender (or a regular blender), until it’s smooth. Stir in coconut milk. Salt and pepper to taste.
    • Serve the soup and top with chopped cilantro if desired.

    Notes

    The amount of salt and pepper added will depend if your curry powder has salt or pepper in the mixture. I suggest tasting the soup and then adding any salt and or pepper if desired.

    Nutrition

    Calories: 377kcal | Carbohydrates: 60g | Protein: 5g | Fat: 14g | Saturated Fat: 7g | Polyunsaturated Fat: 1g | Monounsaturated Fat: 5g | Sodium: 1072mg | Potassium: 947mg | Fiber: 9g | Sugar: 18g | Vitamin A: 32706IU | Vitamin C: 11mg | Calcium: 88mg | Iron: 2mg

    The Difference between Sweet Potatoes and Yams

    February 26, 2023 by Tanya Harris Leave a Comment

    cut raw sweet potato on the left, cut raw white yam on the right

    If you're tired of wondering whether you're eating sweet potatoes or yams, then you're not alone. The confusion between these two root vegetables has been around for years, but it's important to know the difference between the two.

    sweet potatoes on the left and yams on the right, with txt that says sweet potatoes vs. yams

    Let's start with the basics. These two vegetables are not the same thing, despite what you may have heard. They come from two different plant families and have distinct differences in taste, texture, and appearance.

    The Difference between yams and sweet potatoes

    There's a lot of confusion out there about yams and sweet potatoes. People often use the terms interchangeably, but they're actually two different vegetables.

    Yams are tubers that grow in tropical climates and have a tough, dark-brown skin. They come in various shapes and sizes, from round to cylindrical. The flesh of yams can range from white to purple, yellow, or pink. They have a fibrous texture and they tend to be dryer than sweet potatoes.

    On the other hand, sweet potatoes tend to be sweeter and moister than yams. They have thin, smooth skin and the flesh can range from white to yellowish-orange or even purple. Sweet potatoes are mostly found in temperate climates in North America and Europe.

    Where are sweet potatoes and yams from?

    In order to understand the difference between yams and sweet potatoes you must know where they come from. The sweet potato is believed to have been first grown somewhere in Central South America. And made its way through Mexico and then to the United States where now 50% of America’s sweet potatoes are grown in the state of North Carolina.

    cut raw sweet potato on the left, cut raw white yam on the right

    The starch content

    The sweet potato is a sweet, starchy vegetable. Some sweet potatoes soften while they cook, and some stay hard. Sweet potatoes on the outside can be white, yellow, red, purple, and brown. And on the inside can be white, yellow, orange, and reddish. In fact, there are over 400 varieties of sweet potatoes with various tastes.

    Yams are starchier and drier than sweet potatoes and have a more bitter taste to them.

    cut sweet potato and cut yams in white bowls sittin side by side

    Which cuisines use yams and sweet potatoes

    Yams are used in Latin American, Caribbean, and African cuisines where The U.S. is known for more sweet potato usage.

    Recipes

    Although yams and sweet potatoes can get confused with one another there are some meals that know the difference between the two.

    sweet potatos with spoon sticking out

    Sweet Potato Recipes

    Sweet potatoes are etched so much in America that many are willing to switch out traditional fries with that sweet potato fries or wedges. The starchiness of them makes a perfect substitute for regular potatoes.

    Ironically enough named, candied yams are made with sweet potatoes and are also known as a staple in American households. The sweetness of brown sugar and butter pairs very well with sweet potatoes. But many recipes for candies yams are actually made with sweet potatoes.

    There are many more mouth-watering recipes for sweet potatoes, but you don’t have to take my word for it just go to sweet potato recipes for more information.

    Yam Recipes

    Yams also have a meal that is exclusive to them. Golden Yam cake is a hit on the international food scene. All you need is basic cooking ingredients for cake. And the addition of the yams makes this cake light and fluffy. And all you need to top this sweet treat off is some powdered sugar.  The natural sweetness of chopped-up yams will give any stir fry the extra kick that you may be looking for.  

    Yams are also often used in many soup recipes, such as chicken or goat soup.

    Cultural Differences

    Sweet Potatoes hold a special place in the United States whereas yams hold some American value and are mostly seen as an international dish. Many Americans use sweet potatoes as substitutes when dieting in hopes of slimming down.  And bring them out specifically for the holidays. 

    Whereas in Africa which was mentioned earlier as the world’s biggest supplier of yams, they are seen as life-giving and have festivals in their honor. They are so revered in some African nations that all of the crops must be wiped out and discarded from the previous season so the new harvest can start also symbolizing a new beginning for that town or village.

    Conclusion

    Sweet potatoes and yams hold some type of value no matter where they are in the world.  Their makeup is similar and often confused with one another. But these two vegetables are different enough to satisfy anyone who is looking for a delicious treat.   

    Yams and sweet potatoes are both nutritious root vegetables that can make a healthy addition to any diet. While they may look similar and can often be used interchangeably in recipes, there are distinct differences between them in terms of flavor, nutrition, and texture.

    Creamy Polenta Recipe

    February 24, 2023 by Tanya Harris Leave a Comment

    creamy polenta in a bowl with a spoon topped with butter, salt, and pepper.

    Creamy polenta is a comfort food like no other. This simple yet tasty dish is incredibly versatile and can be eaten as a breakfast, lunch, or dinner. Not only is it delicious and nourishing, but making it takes almost no effort at all.

    creamy polenta in a bowl with a spoon topped with butter, salt, and pepper.

    This post contains affiliate links, please read my full disclaimer here.

    You’ll find the full recipe with ingredient amounts and instructions in the recipe card at the bottom of this post. Be sure to check out the blog post itself for extra tips and tricks!

    With creamy polenta, you can enjoy a satisfying meal with minimal preparation and cleanup, what's not to love? The best part? You can top it with your favorite veggies, meat, or sauce to make an amazing meal that will leave you feeling satisfied. Try out this easy recipe and discover why creamy polenta should be a staple on your meal plan!

    Looking for a breakfast version? My Jamaican Cornmeal Porridge or Jamaican Green Banana Porridge are both a perfect breakfast treat.

    Creamy Polenta Recipe in a bowl with a spoon.

    Ingredients

    • Water: Water can also be swapped with a mixture of water and chicken or vegetable stock for added flavor.
    • Milk: Whole milk will create a thick and creamy polenta.
    • Polenta: Course grain yellow cornmeal is the polenta you'll be wanting for this recipe.
    • Grated parmesan cheese: Freshly grated parmesan cheese will yield a stronger flavor.
    • Butter: Adds to the creamy buttery flavor.
    • Salt and pepper: For seasoning, add to taste.
    Polenta ingredients.

    Tools needed for this recipe

    • Large pot
    • Measuring cup

    How To Make Creamy Polenta

    In a medium heavy-bottom saucepan, bring water and milk to a boil over medium-high heat.

    Whisk the polenta into the boiling water, then reduce the heat to low.

    In a medium heavy-bottom saucepan, bring water and milk to a boil over medium-high heat.

    Cover and simmer for 30 minutes, stirring occasionally. 

    In a medium heavy-bottom saucepaWhisk the polenta into the boiling water, then reduce the heat to low.

    Once the polenta is thick and creamy, remove from the heat and stir in the Parmesan cheese, butter, salt, and pepper. Serve and enjoy. 

    Cooked creamy polenta with butter and cheese added.

    How to store

    Allow the polenta to cool completely before storing. Refrigerate in an airtight container for up to 5 days. Or freeze in a freezer-safe container for up to 3 months.

    Creamy Polenta Variations

    This classic creamy polenta recipe is a wonderful base for any variation you throw at it. Enjoy!

    More cheese! - Grated parmesan cheese is great, but why not try fresh? Get creative with the cheese, try gorgonzola, sharp white cheddar, or fontina cheese.

    Sauteed mushrooms & spinach - Top your creamy polenta with a generous helping of beautifully seasoned sauteed mushrooms and spinach.

    Salisbury Steak with Mushroom Gravy - Use in place of mashed potatoes for this delicious Salisbury steak with gravy.

    creamy polenta in a bowl with a spoon topped with butter, salt, and pepper.

    Creamy Polenta Serving Suggestions

    Polenta can really take place of any pasta, potato, or rice dish. Make this recipe a hearty addition to any balanced protein and vegetable dish.

    freshly cooked creamy polenta being stirred with a spoon.

    Serve this creamy polenta with any of these delicious greens!

    • Turnip Greens
    • Sautéed Beet Greens
    • Southern Style Pressure Cooker Collard Greens Recipe

    FAQ's

    Is polenta better with milk or water?

    Polenta with milk will create a thicker and creamier texture, while water can be easily flavored with stock concentrates. Using water will let the natural corn flavor shine through.

    Notes

    • Polenta will thicken as it cools.  Once cooled, it can be sliced and served as well. 
    • If slicing, saute or grill for extra flavor.

    Looking for more side dish recipes? Try these out:

    • Baked Sweet Potatoes
    • Oven Roasted Broccoli
    • Turnip Greens
    • Creamy Baked Macaroni and Cheese
    • Air Fryer Brussels Sprouts

     If you have tried this recipe or any other recipe on my blog, please rate it and let me know how it turned out in the comments below!

    creamy polenta in a bowl with a spoon topped with butter, salt, and pepper.
    Print Recipe
    5 from 1 vote

    Creamy Polenta Recipe

    Creamy polenta is a comfort food like no other. This simple yet tasty dish is incredibly versatile and can be eaten as a breakfast, lunch, or dinner. Not only is it delicious and nourishing, but making it takes almost no effort at all.
    Prep Time10 minutes mins
    Cook Time30 minutes mins
    Total Time40 minutes mins
    Course: Side Dish
    Cuisine: Italian
    Keyword: creamy polenta recipe
    Servings: 4 servings
    Calories: 287kcal
    Author: Tanya Harris

    Ingredients

    • 3 cups Water
    • 1 cup Milk
    • 1 cup Polenta
    • ½ cup Grated parmesan cheese
    • 2 tablespoons Butter
    • Salt and pepper to taste

    Instructions

    • In a medium heavy-bottom saucepan, bring water and milk to a boil over medium-high heat. Whisk the polenta into the boiling water, then reduce the heat to low.
    • Cover and simmer for 30 minutes, stirring occasionally. 
    • Once the polenta is thick and creamy, remove from the heat and stir in the Parmesan cheese, butter, salt, and pepper. Serve and enjoy. 

    Notes

    • Polenta will thicken as it cools.  Once cooled, it can be sliced and served as well. 

    Nutrition

    Serving: 1g | Calories: 287kcal | Carbohydrates: 36g | Protein: 9g | Fat: 12g | Saturated Fat: 7g | Polyunsaturated Fat: 1g | Monounsaturated Fat: 3g | Trans Fat: 0.2g | Cholesterol: 33mg | Sodium: 878mg | Potassium: 171mg | Fiber: 1g | Sugar: 3g | Vitamin A: 467IU | Calcium: 194mg | Iron: 0.5mg

    Butter Beans Recipe

    February 23, 2023 by Tanya Harris 12 Comments

    spoon and bowl filled with butter beans, topped with shredded smoked turkey

    My Southern Butter Beans recipe is pure comfort food in a bowl. This smoky butter beans recipe is made by adding a smoked turkey drumstick to the pot, which adds great depth of flavor, and once cooked I like to shred the turkey and add it to the beans.

    spoon and bowl filled with butter beans, topped with shredded smoked turkey

    This post contains affiliate links, please read my full disclaimer here.

    You’ll find the full recipe with ingredient amounts and instructions in the recipe card at the bottom of this post. Be sure to check out the blog post itself for extra tips and tricks!

    This is the best butter beans recipe as it is packed full of flavor and it makes a great addition to any meal, and can be served alongside a whole variety of different main dishes.

    I've kept this recipe really simple, but you can add in other flavors and I've made some suggestions on how to do that later in the post. I've added a popular seasoning ingredient, smoked turkey meat, but I've also added a touch of hot sauce to the cooking liquor, just enough to add flavor but not too much chili heat.

    The butter beans, or lima beans as they are also known, require very little hands-on preparation making this easy butter beans recipe one you will come back to again and again.

    Ingredients

    Here's what you will need to make this easy butter beans recipe:

    • Beans - I use dried butter beans (also known as lima beans) which I quickly soak in just over 1 hour.
    • Olive oil - or any oil made for high-heat cooking will do. I usually use light-tasting olive oil, canola oil, or avocado oil.
    • Aromatics - onion and garlic for flavor. White onion or sweet onion will also work.
    • Broth - chicken broth, but vegetable broth can work too.
    • Turkey - for real depth of flavor a smoked turkey drumstick is cooked along with the beans.
    • Hot sauce - hot sauce is added to the cooking liquor, I recommend Texas Pete or Frank's Hot Sauce.
    • Seasoning - salt and black pepper is added to taste at the end of the cook.
    butter beans recipe ingredients

    How to make the Best Butter Beans recipe

    How to cook butter beans:

    Quick soak the beans by placing the beans and water in a large stockpot and bringing to a boil.

    Boil for 5 minutes uncovered. Remove from heat and cover. Set the beans aside to sit for 1 hour.

    Dutch oven containing dry butter beans

    Heat the olive oil in a large pot over a medium heat. Add the onions and sauté until softened, about 3-5 minutes.

    Now add garlic and sauté for an additional minute.

    Dutch oven with sauteed onion and garlic in olive oil

    Add the chicken broth, smoked turkey, and hot sauce to the pot.

    Dutch oven filled with butter beans, turkey drumstick and chicken broth

    Bring to a simmer, then cover the pot and reduce the heat to low.

    Allow the beans to cook on low heat, stirring occasionally, until the beans are tender. This will take somewhere from 1.5-2 hours.

    Dutch oven filled with cooked butterbeans and smoked turkey drumstick

    Once the beans are tender, remove the drumstick from the pot, and remove the turkey meat from the bone.

    close up image of bowl of butter beans topped with shredded smoked turkey

    Return the meat to the pot and stir through the beans.

    Season the beans with salt and pepper to taste. Serve and enjoy.

    Expert Tips

    These tips will help you make the best butter beans recipe you've ever tried. 

    • I prefer to quickly soak my beans for this recipe in 4 cups of water. You can also soak the beans overnight in 6-8 cups of water if you prefer. 
    • You can skip soaking of the beans, they will just take a little longer to cook. 
    • I prefer to use a milder flavored hot sauce, like Texas Pete or Frank’s Hot sauce in this recipe. They give the beans flavor and they don’t make them spicy. Avoid using very spicy hot sauces.

    Flavor variations

    • Add some extra aromatics like finely chopped celery and carrot to the onions and garlic.
    • Try adding some fresh herbs like thyme, rosemary, or bay when you are cooking the beans.
    • Swap the smoked turkey drumstick for some smoked ham or bacon instead.
    spoon and bowl filled with butter beans, topped with shredded smoked turkey and a separate bowl of steamed white rice

    What to serve with Butter Beans

    This classic southern side dish is a great comfort food dish, ideal to serve alongside any main. Try it with my Classic Southern cornbread. Or serve it along with these main dishes, like Air Fryer Pork Chops, Garlic Parmesan Spatchcock Chicken, Air Fryer Steak with Garlic Herb Butter, or my Air Fryer Fried Chicken.

    How to store 

    To refrigerate: Leftovers can be stored in an airtight container in the refrigerator for up to 5 days. When ready to enjoy, reheat the butter beans on the stove-top until piping hot.

    To freeze: Once cooked and cooled, place the butter beans into an airtight container and store in the freezer for up to 3 months. Defrost in the refrigerator before reheating to piping hot.

    spoon and bowl filled with butter beans, topped with shredded smoked turkey

    FAQs

    Are butter beans healthy?

    Yes, butter beans are are really good for you. They are packed full of protein and fiber, and low in fat. These nutritious beans are also rich in vitamins and minerals, and a great source of iron, zinc, potassium, magnesium and folate.

    What's the difference between butter beans and lima beans?

    Nothing, they are the same bean. What you call them depends largely on where you live.

    Can I make gluten-free butter beans?

    Yes, absolutely, just ensure the chicken broth you use is a gluten-free broth.

    If you have tried this Butter Beans recipe, or any other recipe on my blog, then please rate it and let me know how it turned out in the comments below!

    spoon and bowl filled with butter beans, topped with shredded smoked turkey
    Print Recipe
    5 from 2 votes

    Butter Beans Recipe

    Southern Butter Beans recipe is a pure comfort food in a bowl. This smoky butter beans recipe is made by adding a smoked turkey drumstick to the pot, which adds great depth of flavorand a touch of hot sauce, just enough to add flavor but not too much chili heat.
    Prep Time1 hour hr
    Cook Time1 hour hr 30 minutes mins
    Total Time2 hours hrs 30 minutes mins
    Course: Side Dish
    Cuisine: American
    Keyword: best butter beans recipe, butter beans recipe, easy butter beans recipe, smoky butter beans recipe
    Servings: 6
    Calories: 401kcal
    Author: Tanya Harris

    Equipment

    • 1 Dutch Oven or large pot

    Ingredients

    • 1 lb dried butter beans picked over and rinsed
    • 4 cups water
    • 2 Tablespoons olive oil
    • 1 medium yellow onion chopped
    • 2 cloves garlic chopped
    • 2 cups chicken broth
    • 1 lb smoked turkey drumstick
    • 2 Tablespoons hot sauce eg Texas Pete
    • salt and pepper to taste

    Instructions

    • Quick soak the beans by placing the beans and water in a large stockpot and bringing to a boil. Boil for 5 minutes uncovered. Remove from heat and cover. Set the beans aside to sit for 1 hour.
    • Heat the olive oil in a large pot over a medium heat. Add the onions and sauté until softened, about 3-5 minutes. Add garlic and sauté for an additional minute.
    • Add the chicken broth, smoked turkey, and hot sauce to the pot. Bring to a simmer, then cover the pot and reduce the heat to low. Allow the beans to cook on a low heat, stirring occasionally, until the beans are tender. This will take somewhere from 1.5-2 hours.
    • Once the beans are tender, remove the drumstick from the pot, and remove the turkey meat from the bone. Return the meat to the pot and stir through the beans.
    • Season the beans with salt and pepper to taste. Serve and enjoy.

    Notes

    • I prefer to quickly soak my beans for this recipe in 4 cups of water. You can also soak the beans overnight in 6-8 cups of water if you prefer.  You can also skip soaking of the beans, they will just take a little longer to cook. 
    • I prefer to use a milder flavored hot sauce, like Texas Pete or Frank’s Hot sauce in this recipe. They give the beans flavor and they don’t make them spicy. Avoid using very spicy hot sauces.

    Nutrition

    Calories: 401kcal | Carbohydrates: 50g | Protein: 29g | Fat: 10g | Saturated Fat: 2g | Polyunsaturated Fat: 2g | Monounsaturated Fat: 5g | Cholesterol: 46mg | Sodium: 862mg | Potassium: 1526mg | Fiber: 15g | Sugar: 8g | Vitamin A: 11IU | Vitamin C: 5mg | Calcium: 86mg | Iron: 7mg

    Creamy Crab Bisque

    February 15, 2023 by Tanya Harris 49 Comments

    crab bisque in bowl with hands holding it

    This delicious crab bisque is wonderfully rich and flavorful and will warm you from the inside out. Simple to make in one pot, it's a hearty dish the whole family will love!

    crab bisque in a bowl with spoon in it

    This is hands down one of my favorite seafood soup recipes! It's pretty easy to throw together and makes one delicious bowl of soup.

    This crab bisque is made with crab meat, heavy cream, sherry, fresh vegetables and seasonings

    If you are looking for more recipes with crab, try my air fryer crab cakes.

    How to make crab bisque

    Gather your ingredients.

    • Unsalted butter: for sautéing the aromatics.
    • Aromatics: onion, celery, garlic - for flavor!
    • All-purpose flour: to thicken the bisque
    • Fire Roasted Tomatoes: this adds flavor and color.
    • Liquids: Seafood stock and sherry cooking wine: You could also use clam juice instead of seafood stock if you don't have seafood stock or can't find it in stores. You can also use my easy shrimp stock recipe as well.
    • Seasoning: bay leaves and old bay seasoning
    • Crab meat: I use lump crab meat. You can use lump claw meat; however, the texture will not be the same.
    • Heavy cream: for texture and flavor.
    • Chives: for garnish. Feel free to sub with green onions.
    ingredients of the crab biswue

    Melt butter in a large pot over medium heat. Add onion, celery, and garlic and sauté for about 10 minutes.

    onions and celery in pot

    Stir in the flour and allow it to cook for a few minutes.

    onions and celery in pot with flour

    Add canned tomatoes, seafood stock, sherry wine, bay leaves, and old bay. Bring to simmer and allow to simmer for 15 minutes, stirring occasionally.

    crab bisque ingredients in pot cooking

    Remove bay leaves and blend the soup with an immersion blender or carefully blend in a blender until smooth.

    Return pot to heat and stir in heavy cream and add crab meat.

    heavy cream being poured in crab bisque

    Continue to heat for 3-5 minutes, until crab meat is heated through.

    finished crab bisque in pot

    What is a bisque?

    A bisque is a soup of French origin. It's known to be smooth and creamy, hence the use of heavy cream. You can use milk instead of cream if you want to lessen the fat content, but it won't be as creamy.

    Can you make it ahead of time?

    This crab bisque is a great make-ahead meal and will keep well in the fridge for up to 4 days. Make the soup, let it cool, then transfer it to an airtight container. You can reheat the soup gently on the stovetop to serve.

    Can you freeze it?

    Yes. If you have to freeze it, it's best not to keep it frozen for more than a month. Reheat it on low and stir it well before and during heating so that the cream doesn't separate. I like to use Soupers for freezing soup.

    What's the best crab to use?

    Traditionally, freshly picked Dungeness crab meat is used in this soup, but to make it more accessible, you can easily use tinned crab lump meat. The seafood stock (or clam juice) boosts all those flavors, so you don't need to get fresh crab meat for this dish.

    Recipe Notes and Tips

    • Make the soup in a heavy-bottomed pot. This will distribute the heat more evenly so you don't get hotspots.
    • If you don't have an immersion blender, you can use a stand blender. Transfer it to the blender in batches carefully as it will be very hot.
    • Make this soup gluten-free by using 1:1 gluten-free flour.

    FAQ

    Can I use chicken broth in place of seafood stock in crab bisque?

    Yes. It'll taste a little different so I strongly urge the use of seafood, shrimp, fish, stock, or clam juice.

    What if I don't have a sherry-cooking wine? Can I leave it out, or is there a substitute?

    Sure, add a little more broth to accommodate the absence of the sherry cooking wine. For a substitute, try another adequate sherry wine substitute.

    https://www.tiktok.com/@myforkinglife/video/7200567508250725674

    More Soup Recipes

    • Easy Seafood Chowder
    • Cream of Mushroom Soup
    • Vegetable Soup
    • Moroccan Spiced Soup
    • Roasted Tomato Basil Soup
    crab bisque in bowl with hands holding it
    Print Recipe
    4.74 from 82 votes

    Crab Bisque

    This delicious crab bisque is wonderfully rich and flavorful and it will warm you from the inside out. Simple to make in one pot, it's a hearty dish the whole family will love!
    Prep Time10 minutes mins
    Cook Time30 minutes mins
    Total Time40 minutes mins
    Course: Soup
    Cuisine: American
    Keyword: crab bisque, how to make she-crab soup, seafood soup recipe
    Servings: 4 servings
    Calories: 734kcal
    Author: Tanya Harris

    Equipment

    • Dutch Oven

    Ingredients

    • 4 Tablespoon unsalted butter
    • 1 sweet onion, diced about 1 cup
    • 1 celery stalk, diced about ½ cup
    • 1 Tablespoon garlic chopped, about 4 small cloves
    • 4 Tablespoon all-purpose flour
    • 1 14.5 Oz can fire roasted tomatoes undrained
    • 2 cups seafood stock or clam juice
    • ½ cup sherry cooking wine
    • 2 bay leaves
    • ½ teaspoon old bay seasoning
    • 2 cups heavy cream
    • 1 lb crab lump meat
    • 2 Tablespoon chives for garnish

    Instructions

    • Melt butter in a large pot over medium heat. Add onion, celery, and garlic and sauté for about 10 minutes.
    • Stir in the flour and let it cook for a couple of minutes.
    • Add tomatoes, seafood stock, sherry wine, bay leaves, and old bay. Bring to simmer and allow to simmer for 15 minutes, stirring occasionally.
    • Remove bay leaves and blend the soup with an immersion blender or carefully blend in a blender until smooth.
    • Return pot to heat and Stir in heavy cream and add crab meat, Continue to heat for 3-5 minutes, until crab meat is heated through.
    • Serve in bowls and top with chives.

    Notes

    • Make the soup in a heavy bottomed pan. This will distribute the heat more evenly so you don't get hotspots.
    • If you don't have an immersion blender, you can use a stand blender. Transfer it to the blender in batches carefully as it will be very hot.
    • Make this soup gluten free by using a 1:1 GF flour.

    Nutrition

    Calories: 734kcal | Carbohydrates: 23g | Protein: 28g | Fat: 57g | Saturated Fat: 35g | Trans Fat: 1g | Cholesterol: 241mg | Sodium: 1561mg | Potassium: 574mg | Fiber: 2g | Sugar: 7g | Vitamin A: 2651IU | Vitamin C: 16mg | Calcium: 231mg | Iron: 2mg

    This post was originally published on January 28, 2021. It has been updated with additional helpful information.

    Lentil Spinach Soup

    February 9, 2023 by Tanya Harris 2 Comments

    lentil spinach soup in a bowl

    You'll love this lentil spinach soup! It's the perfect, easy one-pot dinner for Meatless Monday - packed full of protein from lentils. With bold seasonings and a touch of hot sauce, this lentil spinach soup will tantalize your taste buds!

    lentil spinach soup in a bowl

    This post contains affiliate links, please read my full disclaimer here.

    You’ll find the full recipe with ingredient amounts and instructions in the recipe card at the bottom of this post. Be sure to check out the blog post itself for extra tips and tricks!

    Lentils are my go-to ingredient when I want a fulfilling meat-free dish. Sometimes I'll add them to a flavourful sausage soup, and other times, I keep the dish meatless, like this Creamy Carrot and Lentil Soup. No matter which soup you make, lentils are sure to provide deliciousness, nutrition, and convenience in every pot!

    Lentil spinach soup being ladled out of the pot

    Ingredients

    • Olive oil - Canola oil, or avocado oil will work here as well.
    • Yellow onion - White onion or sweet onion will also work. The onion should be chopped.
    • Carrots & Celery - Brings flavor!
    • Garlic - Minced garlic
    • Seasonings - Salt and pepper to taste. Additional flavor is added with ground cumin and oregano.
    • Brown lentils - Lentils do not need to be soaked, simply rinse and pick over to remove any debris.
    • Vegetable broth - Your favorite will work here. For a different flavor profile, try other broth flavors.
    • Fresh spinach leaves - Larger spinach leaves or baby spinach leaves will work.
    • Hot sauce - Choose your favorite!
    lentil spinach soup ingredients

    Tools needed for this recipe

    • Large pot or Dutch oven
    • Wooden spoon
    • Cutting board and sharp knife

    How To Make Lentil Spinach Soup

    Heat the olive oil in a large pot over medium heat. Add the onion, carrots, celery, and garlic. Sauté for 5 minutes or until vegetables are tender. Add the cumin and oregano.

    Vegetables and seasonings sauteing in a dutch oven.

    Add the lentils and vegetable broth. Bring to a boil, reduce heat, and simmer for 35-40 minutes or until the lentils are softened.

    Broth added to the dutch oven.

    Add the spinach leaves, salt, and pepper. Simmer for another 5 minutes or until spinach is wilted and soup is heated through. Stir in hot sauce.

    Spinach added to the dutch oven and allowed to wilt.

    Taste and adjust seasonings as desired. Serve hot. Enjoy!

    How to store

    Before storing it in the refrigerator, allow your soup to cool. Store any leftovers in an airtight container for up to a week.

    The soup freezes incredibly well. I like to freeze soups in smaller portions, as this makes it easier to reheat. Souper Cubes are a perfect solution for portioning and freezing soup. Simply pop out a frozen block of soup and warm it on the stove.

    Serving suggestions

    This hearty and veggie-filled lentil soup is amazing on its own, but to round out this dish into a perfect meal try any of these ideas:

    Salad - Make a fresh crisp spinach salad with any leftover spinach you have. For even more protein try my Vietnamese Chicken Salad Recipe. Serving this in the cooler months, try Cranberry Pecan Apple Salad Recipe.

    Warm cornbread or dinner rolls - A must-have with soups and stews! My Classic Southern Cornbread Recipe or Golden Sweet Potato Cornbread is always a hit. Honey Whole Wheat Dinner Rolls and Soft Air Fryer Dinner Rolls are perfect for soaking up the broth.

    Hot Sandwich - A warm sandwich with soup is a match made in heaven. Air Fryer Shrimp Po’Boy Sandwiches are delicious! Want a heartier sandwich, try my Garlic Butter Cheese Steak Sandwiches, and don't skimp on the garlic butter!

    cooked lentil and spinach soup in a dutch oven

    Recipe Substitutions

    Lentils - This recipe contains brown lentils. Swap those out for the more nutrient-dense black lentil, or a softer red lentil.

    Spinach - Kale is an easy substitute for spinach, a bit more on the bitter side, but the flavors of the soup will easily overpower.

    Stock - We use vegetable stock, which keeps this dish meatless. Chicken stock or even garlic stock would taste great in this lentil soup.

    Optional Ingredients:

    • Small diced potatoes or sweet potatoes
    • Ham hock or smoked turkey
    • Spritz of lemon juice at the end

    FAQs

    Do lentils need to be soaked before making soup?

    Thankfully lentils do not need to be soaked before making soup. It is recommended that they be rinsed and picked over to remove any debris. Depending on the type of lentil used, uncooked lentils will be done in 15-30 minutes.

    Which color lentils are the healthiest?

    One-half cup of uncooked black lentils is an incredibly nutrient-dense food, providing 26g of protein, 18g of dietary fiber, 100mg of calcium, 8mg of iron, and 960mg of potassium according to the USDA. That's the same amount of iron found in three cups of spinach and a whopping four times more potassium than one banana!

    Notes

    • For a thicker soup, use less vegetable stock/broth or mash some of the lentils with a wooden spoon while they are cooking. If you want to add more protein, feel free to add in cooked diced chicken or sausage.
    • For a smooth creamy soup, use an immersion blender. Blend completely or partially depending on how smooth you want it.

    Looking for more soup recipes? Try these out:

    • 15 Bean Soup
    • Collard Green Soup
    • Creamy Cauliflower Soup
    • Oxtail Soup
    • Creamy Yellow Squash Soup

     If you have tried this recipe or any other recipe on my blog, please rate it and let me know how it turned out in the comments below!

    lentil spinach soup in a bowl
    Print Recipe
    5 from 2 votes

    Lentil Spinach Soup

    You'll love this lentil spinach soup! It's the perfect, easy one-pot dinner for Meatless Monday - packed full of protein from lentils.
    Prep Time10 minutes mins
    Cook Time25 minutes mins
    Total Time35 minutes mins
    Course: Soup
    Cuisine: American
    Keyword: lentil spinach soup
    Servings: 2 people
    Calories: 557kcal
    Author: Tanya Harris

    Ingredients

    • 2 tablespoons Olive oil
    • 1 cup Yellow onion chopped
    • ½ cup Carrots diced
    • ½ cup Celery chopped
    • 2 cloves Garlic minced
    • 2 teaspoons Ground cumin
    • 1 teaspoon Dried oregano
    • 1 cup Brown lentils rinsed and picked over
    • 4 cups Vegetable broth
    • 2 cups Fresh spinach leaves
    • 1 tablespoon Hot sauce
    • Salt and pepper to taste

    Instructions

    • Heat the olive oil in a large pot over medium heat. Add the onion, carrots, celery, and garlic. Sauté for 5 minutes or until vegetables are tender. Add the cumin and oregano.
    • Add the lentils and vegetable broth. Bring to a boil, reduce heat, and simmer for 35-40 minutes or until the lentils are softened.
    • Add the spinach leaves, salt, and pepper. Simmer for another 5 minutes or until spinach is wilted and soup is heated through. Stir in hot sauce.
    • Taste and adjust seasonings as desired. Serve hot. Enjoy!

    Notes

    • For a thicker soup, use less vegetable stock/broth or mash some of the lentils with a wooden spoon while they are cooking. If you want to add more protein, feel free to add in cooked diced chicken or sausage.

    Nutrition

    Serving: 1g | Calories: 557kcal | Carbohydrates: 79g | Protein: 28g | Fat: 16g | Saturated Fat: 2g | Polyunsaturated Fat: 2g | Monounsaturated Fat: 11g | Sodium: 2146mg | Potassium: 1439mg | Fiber: 33g | Sugar: 12g | Vitamin A: 9366IU | Vitamin C: 27mg | Calcium: 163mg | Iron: 10mg

    What Fruits and Vegetables are in Season in February

    February 8, 2023 by Tanya Harris Leave a Comment

    graph of produce that is in season in february

    If you want to eat seasonally this February, you may wonder what fruits and vegetables are in season. Here in the United States, there are various seasonal produce options to choose from. Whether you are looking for something sweet or savory, there is bound to be a seasonal fruit or vegetable that will suit your taste.

    graph of produce that is in season in february

    This post contains affiliate links, please read my full disclaimer here.

    Happy February! You will find that February's produce is quite similar to the produce you will find in January. These winter fruits and vegetables typically are the same and only change a little once we start getting into spring.

    Either way, February is the perfect time to take advantage of winter fruits and vegetables before spring arrives.

    It's best to look up what's in season based on your location, as many different States will have different produce that's in season. I like to refer to the seasonal food guide to determine what's in season in my area.

    Why eat in-season produce?

    Eating fruits and vegetables in season is a great way to ensure you're getting the most flavor, nutrition, and cost-effectiveness out of your produce. Eating seasonally is also a fantastic way to support local farmers as well as reduce food waste - as seasonal produce is typically fresher than off-season products.

    Fruits in season in February

    Apples

    Apples are a great seasonal fruit to enjoy in February. They can be enjoyed as a snack or added to salads, desserts, and side dishes for meals. They are also packed with fiber, vitamins, and minerals, making them a great nutritional addition to any diet. There's no shortage of delicious varieties, from tart Granny Smiths to sweet Honeycrisps.

    Try my Cranberry pecan apple salad, air fryer apple chips, or toss some apples with apple pie seasoning and bake them for a yummy treat.

    apple chips on white background

    Pears

    Pears are another great fruit to enjoy in February. There are so many varieties of pears to choose from, like the sweet and crisp Anjou pear or the juicy Bartlett. Pears can also be enjoyed as a snack or added to salads, desserts, and side dishes for meals. They are also packed with fiber, vitamins, and minerals.

    Pears can be enjoyed on their own or cooked for a yummy dessert, like this poached pears recipe.

    Citrus

    February is the perfect time to get your fill of fruity goodness! Citrus fruits like oranges, lemons, and grapefruits are all in season. Since these fruits typically contain a lot of vitamin C, you can enjoy a delicious snack that also helps keep you healthy. Whether you opt for an orange, a lemon, or a grapefruit, February is the time to savor these refreshing treats.

    Use that citrus to make a refreshing glass of lemonade or this lemon curd recipe. 

    Vegetables in season in February

    Collards

    Collards are a great vegetable to enjoy in February. They're packed with nutrients like vitamins A and C, calcium, and iron. Collards can be enjoyed cooked or raw, making them incredibly versatile. You can simply sauté collard greens with some garlic and olive oil for a simple side dish, or you can use them in more creative recipes like collard green soup.

    And of course, braising collards until they're nice and tender is also a win. To speed up the process, try making these Instant Pot collard greens for a delicious tender dish.

    Herbs

    Fresh herbs are always a great way to add flavor to any dish. Herbs that you can find in season in February include rosemary, parsley, thyme, sage, and oregano. These herbs can be used to add flavor to a variety of dishes like soups and stews. They're also great when added to salads or marinades for an extra flavorful punch.

    Knowing how to store fresh herbs will allow your herbs to stay fresh for 1-2 weeks.

    rosemary and thyme on damp paper towel

    Potatoes

    February is the perfect time to enjoy some potatoes! Potatoes come in a variety of shapes and sizes, from small red potatoes to large white ones. Potatoes are incredibly versatile as well – you can roast them, mash them, or even make french fries with them.

    Try out my Air Fryer Baked Potato or Air Fryer Fries recipes for some tasty potato dishes.

    Peanuts

    February is also a great time to enjoy some of the many varieties of peanuts. Peanuts are high in protein and packed with healthy fats, vitamins and minerals like zinc and magnesium. Peanuts can be enjoyed on their own as a snack or added to salads, stir-fries, and desserts. They're also great when roasted and lightly salted for an extra flavor boost.

    For an amazing snack, try my Southern Boiled peanuts recipe. 

    Three plastic cups filled with flavored boiled peanuts.

    Spinach

    Spinach is another wonderful vegetable to enjoy in February. It's packed with vitamins, fiber, and minerals like iron. Spinach can be enjoyed cooked or raw, making it incredibly versatile. Try my creamed spinach for a delicious way to enjoy spinach this month.

    Sweet Potatoes

    February is also the perfect time of year to enjoy sweet potatoes! Sweet potatoes are packed with vitamins A and C, as well as dietary fiber and potassium. They're incredibly versatile – you can roast them, mash them, or even make sweet potato fries with them. My slow cooker sweet potato recipe is an easy, hands-free way to prepare this delicious veggie. 

    No matter what type of fruit or vegetable you opt for this month, there are plenty of ways to enjoy seasonal produce in February. From citrus fruits to potatoes and peanuts, you can enjoy a delicious snack or meal packed with nutrients. 

    As always, I hope you find this guide helpful. Check out our other produce guides:

    January Seasonal Produce Guide

    Oven Roasted Broccoli

    February 7, 2023 by Tanya Harris Leave a Comment

    oven roasted broccoli on a baking sheet

    This oven roasted broccoli is a simple and healthy side dish that requires minimal preparation and cooking time but offers a big crunchy bite. Enjoy it with a hint of garlic powder, salt, pepper, and a squirt of lemon.
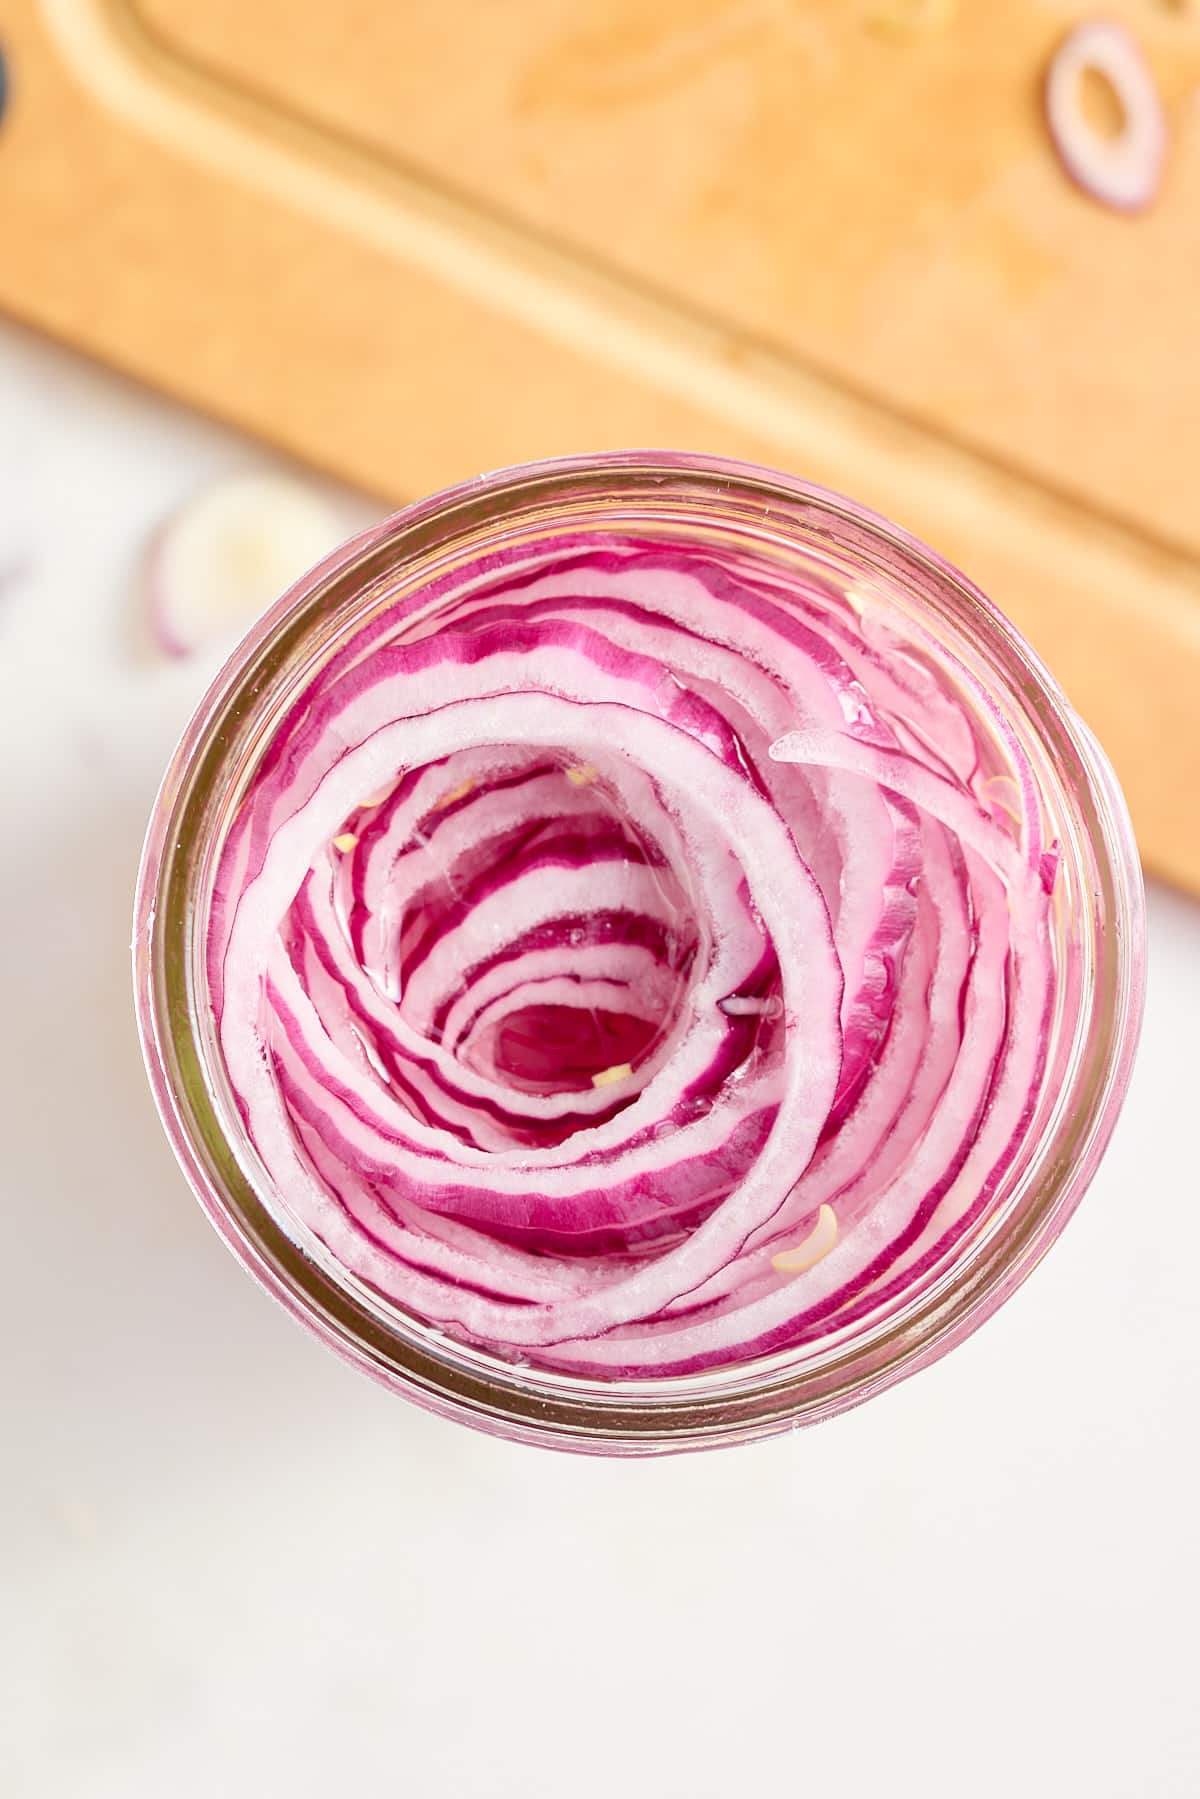
    oven roasted broccoli on a baking sheet

    This post contains affiliate links, please read my full disclaimer here.

    You’ll find the full recipe with ingredient amounts and instructions in the recipe card at the bottom of this post. Be sure to check out the blog post itself for extra tips and tricks!

    If you're looking for more ways to treat broccoli, try air fryer broccoli for an even crisper version of this vegetable powerhouse. So why wait? Serve up your next meal with oven roasted or air fried broccoli - take a bite & savor the flavor.

    oven roasted broccoli on a baking sheet with a fork

    Ingredients

    • Broccoli florets - from 2 medium heads, rinsed and patted dry. Check out How to Cut Broccoli to get the most out of each head. If frozen broccoli is what you're working with that's perfectly fine.
    • Olive oil - Or any oil made for high-heat cooking will do. I usually use light-tasting olive oil, canola oil, or avocado oil.
    • Garlic powder - You can also season with your favorite seasonings. Try my Homemade All-Purpose Seasoning.
    • Kosher salt and black pepper - To season the broccoli.
    • A squeeze of lemon juice - Bring a hint of lemon to the dish, which helps to brighten the flavors.
    oven roasted broccoli ingredients

    Tools needed for this recipe

    • Large bowl
    • Large baking sheet
    • Parchment paper

    How To Make Oven-Roasted Broccoli

    Preheat oven to 450 degrees Fahrenheit (232°C). 

    In a large bowl, combine the broccoli florets with olive oil, garlic powder, salt, and pepper. Stir to combine, ensuring all the florets are covered with oil and seasoning.

    broccoli florets in a bowl

    Spread the broccoli on a baking sheet in an even layer.

    broccoli florets on a large baking sheet

    Place in oven and bake for 17-20 minutes, turning the baking tray halfway through. The broccoli is ready when lightly browned and crispy on the outside. Remove from oven. Squeeze fresh lemon juice over the broccoli if you want extra flavor. 

    oven roasted broccoli florets on a baking sheet

    Serve oven-roasted broccoli hot as a side dish alongside your favorite entree!

    How to store

    Roasted broccoli is best served immediately after cooking. Let any leftovers cool completely before storing them in an airtight container in the refrigerator for up to 4 days.

    Serving suggestions

    Oven-roasted broccoli is a quick and easy side dish for any occasion. Broccoli is one of those side dishes that truly pairs well with almost anything. If your dish is a bit on the heavier side, serve broccoli with it. Broccoli also adds a lovely punch of color to an otherwise bland-looking dish.

    • Roast your broccoli alongside other hearty vegetables like carrots, brussels sprouts, red potatoes, cauliflower, sweet potatoes, and cabbage steaks.
    • Oven-roasted broccoli is light and perfect when served with Blackened Chicken Alfredo.
    • Share the pan with this beautifully flaky Easy Oven-Baked Fish or Oven Baked Cod for a light and healthy meal.
    • These Perfect Air Fryer Pork Chops and Air Fryer Fried Chicken are my go-to recipes to serve roasted broccoli with.
    baked broccoli florets on a baking sheet

    Oven Roasted Broccoli Variations

    Oven-roasted broccoli on its own is amazing, but you can level up this dish in many ways!

    • Toss with parmesan cheese
    • Add bits of crispy bacon and caramelized onions
    • Make with roasted carrots and toss with a drizzle of honey
    • Serve on top of a baked potato with melted cheese

    However you choose to serve it, this base recipe will be a perfect addition to your weeknight meal plans.

    FAQs:

    How do you stop broccoli from burning when roasting?

    Coating your broccoli florets well in olive oil is essential in preventing them from burning. Using a bowl for this step makes it easier as the broccoli will sit in the oil while being tossed around, creating a good oil coverage, especially on the tops, which tend to burn first.

    How long do you roast broccoli florets?

    Of course not everyone's oven is the same, some run hot, and some run cold. Maybe you only have so many minutes to prepare this dish. Here are some heating and cooking recommendations based on temperature. Time is based on using medium-sized broccoli florets.
    425 F 14-18 minutes
    400 F 18-22 minutes
    375 F 25-30 minutes
    350 F 30-35 minutes

    If you're looking for a bit of crispiness on top, turning the broiler on for a minute or two will achieve this.

    How do you reheat roasted broccoli?

    Reheating broccoli in the microwave will likely result in mushy and soft broccoli. To maintain its crispness, reheat in a 350 F preheated oven on a baking sheet for 5-8 minutes.

    Notes

    • Rather than flip the broccoli, rotate the baking sheet, turning the back of the baking sheet to the front of the oven to ensure even cooking. 
    • Check on the broccoli after 15 minutes to see how much char the broccoli has. The broccoli will char quickly after 15-17 minutes. Keep an eye on it. 
    • Use your favorite seasonings. 
    • Save the broccoli stalks in a freezer bag for future vegetable stock!

    Looking for more oven-roasted recipes? Try these out:

    • Juicy Oven Roasted Chicken Pieces
    • Easy Roasted Cabbage Steaks Recipe
    • Roasted Cauliflower and Sweet Potato Recipe
    • Roasted Cauliflower Dip
    • Broccoli Rice Casserole

     If you have tried this recipe or any other recipe on my blog, please rate it and let me know how it turned out in the comments below!

    oven roasted broccoli on a baking sheet
    Print Recipe
    5 from 1 vote

    Oven Roasted Broccoli

    This oven roasted broccoli is a simple and healthy side dish that requires minimal preparation and cooking time but offers a big crunchy bite. Enjoy it with a hint of garlic powder, salt, pepper, and a squirt of lemon.
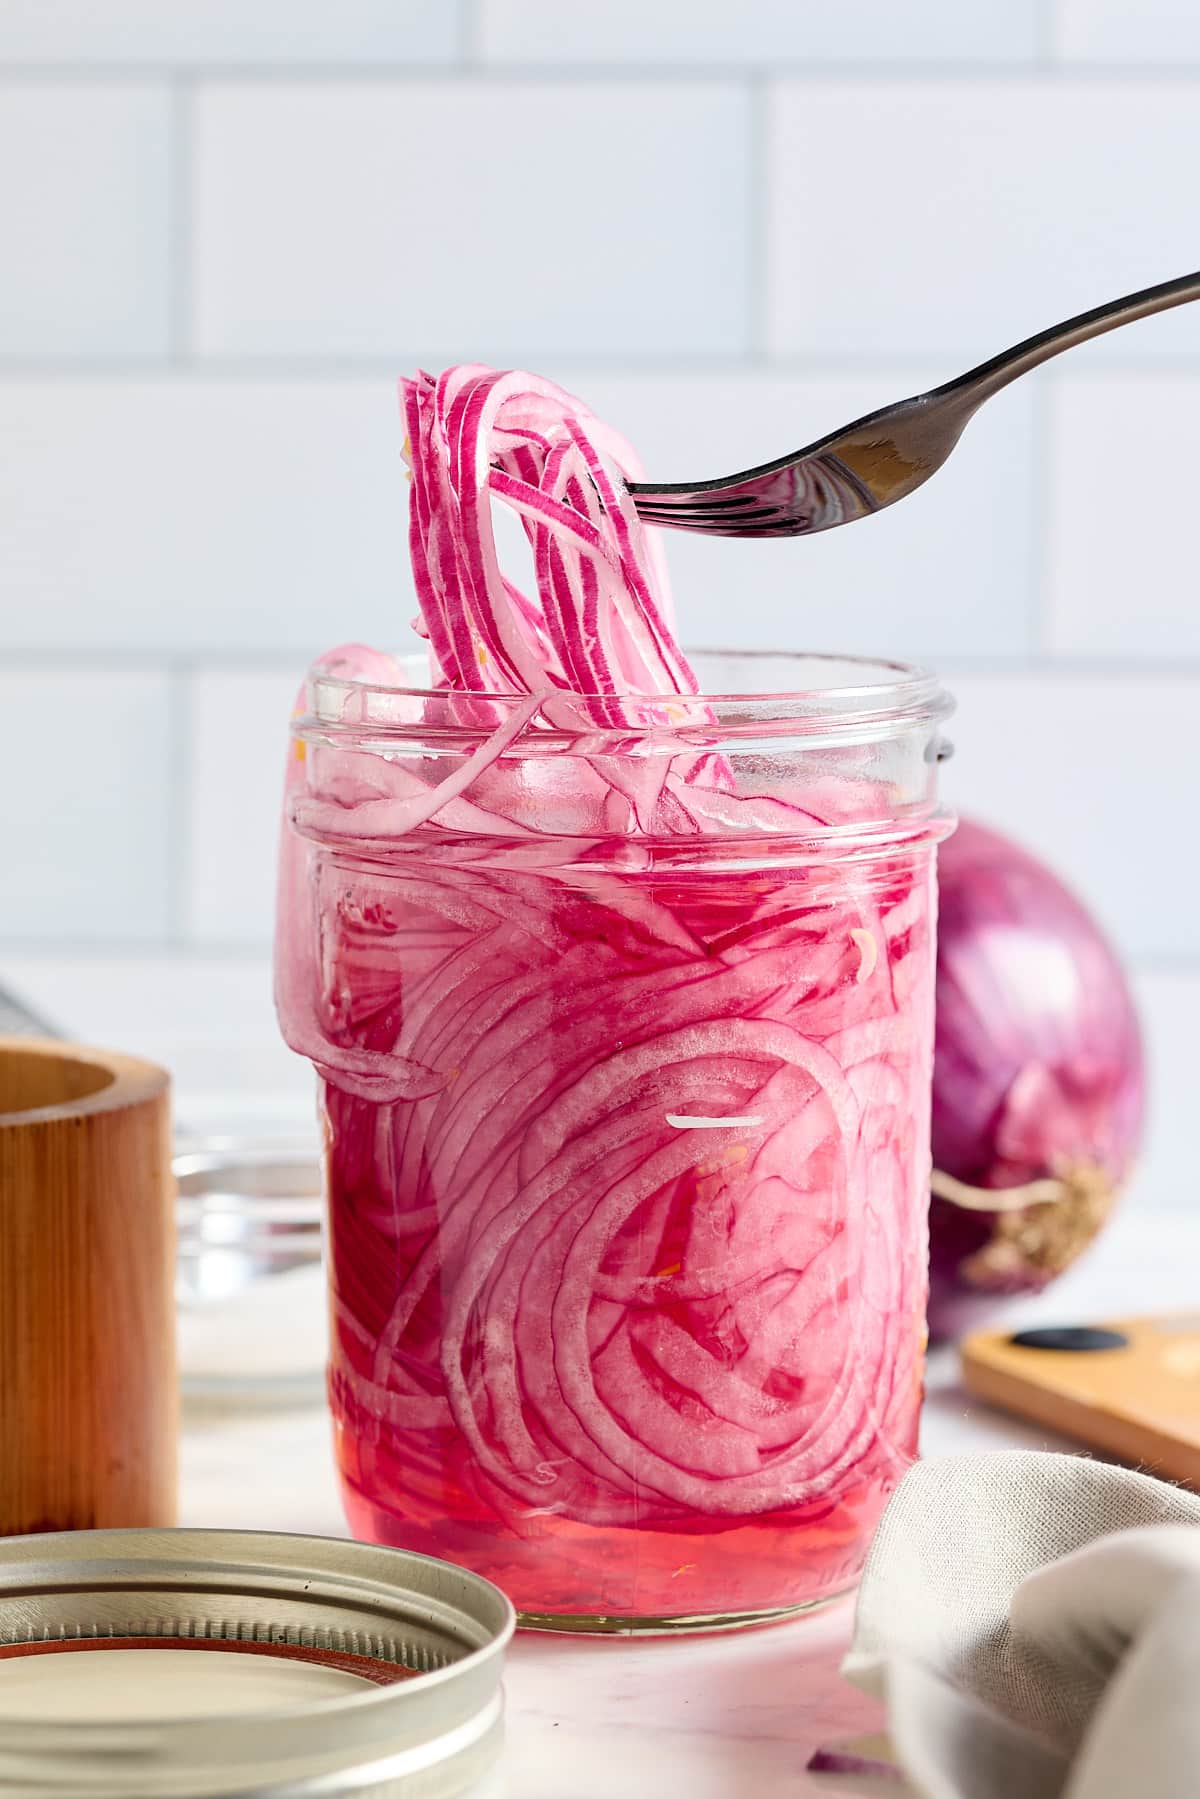
    Prep Time15 minutes mins
    Cook Time20 minutes mins
    Total Time35 minutes mins
    Course: Side Dish
    Cuisine: American
    Keyword: oven roasted broccoli
    Servings: 6 servings
    Calories: 94kcal
    Author: Tanya Harris

    Ingredients

    • 6 cups Broccoli florets from 2 medium heads, rinsed and patted dry.
    • 3 tablespoons Olive oil
    • ¾ teaspoon Garlic powder
    • Kosher salt and black pepper to taste
    • Squeeze of lemon juice optional

    Instructions

    • Preheat oven to 450 degrees Fahrenheit (232°C). 
    • In a large bowl, combine the broccoli florets with olive oil, garlic powder, salt, and pepper. Stir to combine, ensuring all the florets are covered with oil and seasoning.
    • Spread the broccoli on a baking sheet in an even layer.
    • Place in oven and bake for 17-20 minutes, turning the baking tray halfway through. The broccoli is ready when lightly browned and crispy on the outside. Remove from oven. Squeeze fresh lemon juice over the broccoli if you want extra flavor. 
    • Serve oven-roasted broccoli hot as a side dish alongside your favorite entree!

    Notes

    • Rather than flip the broccoli, rotate the baking sheet, turning the back of of the baking sheet to the front of the oven, to ensure even cooking. 
    • Check on the broccoli after 15 minutes to see how much char the broccoli has. The broccoli will char quickly after 15-17 minutes. Keep an eye on it. 
    • Use your favorite seasonings. 

    Nutrition

    Serving: 1g | Calories: 94kcal | Carbohydrates: 6g | Protein: 3g | Fat: 7g | Saturated Fat: 1g | Polyunsaturated Fat: 1g | Monounsaturated Fat: 5g | Sodium: 30mg | Potassium: 292mg | Fiber: 2g | Sugar: 2g | Vitamin A: 567IU | Vitamin C: 81mg | Calcium: 43mg | Iron: 1mg

    Jamaican Curry Powder Recipe

    January 25, 2023 by Tanya Harris 2 Comments

    jamaican curry powder in bowl with spoon sticking out

    Jamaican curry powder is a key ingredient in many traditional Jamaican dishes. This homemade version is easy to make, and the resulting flavor is well worth the effort.

    jamaican curry powder in bowl with spoon sticking out

    This post contains affiliate links, please read my full disclaimer here.

    You’ll find the full recipe with ingredient amounts and instructions in the recipe card at the bottom of this post. Be sure to check out the blog post itself for extra tips and tricks!

    I've shared some of my favorite Jamaican dishes, from oxtail to brown stew chicken, and of course, curry chicken. 

    Curry is quite popular in Jamaica and requires curry powder to get that unique flavor and yellow color many curry dishes have. You can find many different kinds and brands of curry powder in the stores, but sometimes a good one is hard to find. 

    I have my favorite store-bought brands, like Blue Mountain Country and Betapac,but this homemade version can compete with the best of them. Made with a few spices, this homemade curry powder has only eight ingredients and is relatively easy to make. It’s the perfect blend to have on hand if you love authentic Jamaican curry. 

    spoon taking out jamaican curry powder out of glass

    Ingredients for Jamaican Curry Powder

    My homemade version includes the following ingredients:

    • Whole spices - I like to use whole spices in this recipe because I toast them before making the powder. The whole spices I use are coriander, cumin, allspice berries, fenugreek, and black peppercorn.
    • Ground spices - turmeric, ground ginger, ground scotch bonnet pepper. 
    ingredients for Jamaican curry powder

    How to make Jamaican Curry Powder

    Toast the coriander, cumin, allspice, fenugreek, and black peppercorn seeds in a medium-sized skillet over medium heat until fragrant, about 2 minutes. Be careful not to burn the spices. 

    whole spices in a skillet toasting

    Remove the seeds from the skillet and transfer them to a spice grinder. Grind the seeds until they are a fine powder. If you don’t have a spice or coffee grinder, use a mortar and pestle to grind the spices. 

    Add the turmeric powder, ground ginger, and scotch bonnet pepper and grind for a few seconds more to combine the spices.

    whole spiced in a grinder
    spices in grinder that has alread been turned to powder

    Transfer the curry powder to an airtight container and store it in a cool, dry place. Use in your favorite curry recipes. 

    How do I use Jamaican Curry Powder?

    You’ll want to use this curry powder in any recipe that calls for curry powder. Here are a few of the most popular Jamaican recipes using curry powder

    • Jamaican curry chicken
    • Jamaican curry goat
    • Jamaican curry shrimp
    jamaican curry chicken in blue pot with a wooden spoon on the side

    How much curry powder should I use?

    I recommend using 1 Tablespoon of curry powder per 1 pound of meat or vegetable. 

    Should I burn the curry?

    Burning the curry is a phrase that means to cook the curry in fat, usually oil, to allow it to bloom and darken a little. You don’t actually burn it. I find it makes your dish taste a little more flavorful. You can do this if your recipe calls for it. 

    Is there salt in curry powder?

    This homemade version does not have salt as an ingredient. Some store-bought Jamaican curry powders do add salt. I’ve chosen to keep this curry powder salt-free so you can control the salt. Please add salt to the recipe when you’re cooking. 

    How long does curry powder last?

    This spice blend can be stored in an airtight container for up to 6 months. 

    Pro Tips:

    • When toasting the spices, only toast them for 2-3 minutes. Toasting it any longer can burn the spices, and it will cause your curry to taste bitter. 

    FAQ

    Why should I make my curry powder at home?

    Making your own curry powder at home has several benefits. First, you can customize the flavor to suit your taste by adjusting the measurements of each spice. Second, homemade curry powder is fresher and more flavorful than store-bought versions since it hasn't been sitting on a shelf for months. Finally, making your own spice blend is a great way to save money since you can buy the ingredients in bulk.

    What is the difference between Jamaican Curry and Indian Curry Powder?

    The main difference between Jamaican curry and Indian curry is the number of ingredients used and the fact that Jamaican curry powder has certain spices added, like allspice and fenugreek. 

    Is curry powder spicy?

    Although this curry powder has a hint of scotch bonnet pepper added, it is not spicy. If you are not a fan of any heat, omit the pepper. If you cannon find scotch bonnet pepper, use cayenne pepper instead. 

    jamaican curry powder in bowl with spoon sticking out
    Print Recipe
    5 from 3 votes

    Jamaican Curry Powder Recipe

    Jamaican curry powder is a key ingredient in many traditional Jamaican dishes. This homemade version is easy to make, and the resulting flavor is well worth the effort.
    Prep Time5 minutes mins
    Cook Time2 minutes mins
    Total Time7 minutes mins
    Course: spices
    Cuisine: Caribbean
    Keyword: jamaican curry powder, jamaican curry powder recipe
    Servings: 28
    Calories: 6kcal
    Author: Tanya Harris

    Equipment

    • Spice Grinder

    Ingredients

    • 1 Tablespoon whole Coriander seeds
    • 1 Tablespoon whole Cumin seeds
    • 1 Tablespoon whole Allspice berries
    • ½ Tablespoon Fenugreek seeds
    • ½ Tablespoon whole black peppercorns
    • 3 Tablespoons ground turmeric
    • ½ teaspoon ground ginger
    • ½ teaspoon ground scotch bonnet pepper

    Instructions

    • Toast the coriander, cumin, allspice, fenugreek, and black peppercorn seeds in a medium-sized skillet over medium heat until fragrant, about 2 minutes. Be careful not to burn the spices.
    • Remove the seeds from the skillet and transfer them to a spice grinder. Grind the seeds until they are a fine powder.
    • Add the turmeric powder, ground ginger, and scotch bonnet pepper and grind for a few seconds more to combine the spices.
    • Transfer the curry powder to an airtight container and store it in a cool, dry place. Use in your favorite curry recipes.

    Notes

    • This recipe makes about ½ cup of Jamaican curry powder. This version is salt-free. I like to add salt to the dish I’m cooking. If you’d like to add salt to this curry powder, I recommend about 1 teaspoon of kosher salt.
    • While toasting, as soon as you smell the spices, remove them from the stove and the skillet. Be careful not to burn the spices when toasting them in the skillet. Only toast for up to 2 minutes, or your curry may taste bitter.
    • Cayenne pepper can be subbed if you can’t find scotch bonnet pepper. Or simply leave the pepper out.
    • This curry powder can be stored for 3-6 months.

    Nutrition

    Calories: 6kcal | Carbohydrates: 1g | Protein: 0.2g | Fat: 0.2g | Saturated Fat: 0.04g | Polyunsaturated Fat: 0.04g | Monounsaturated Fat: 0.1g | Sodium: 1mg | Potassium: 32mg | Fiber: 0.4g | Sugar: 0.03g | Vitamin A: 5IU | Vitamin C: 0.4mg | Calcium: 7mg | Iron: 1mg

    Air Fryer Cauliflower

    January 24, 2023 by Tanya Harris Leave a Comment

    bowl filled with roasted air fryer cauliflower garnished with shredded Parmesan cheese

    Crispy Air Fryer Cauliflower is fast becoming a favorite side dish with my family. Cauliflower florets are coated in olive oil, garlic powder and Parmesan cheese, then seasoned with a little salt before being roasted to crisp perfection.

    bowl filled with roasted air fryer cauliflower garnished with shredded Parmesan cheese

    This post contains affiliate links, please read my full disclaimer here.

    You’ll find the full recipe with ingredient amounts and instructions in the recipe card at the bottom of this post. Be sure to check out the blog post itself for extra tips and tricks!

    I love cauliflower and cheese, so I've flavored my air fryer cauliflower with Parmesan. It just makes sense. The Parmesan cheese adds a cheesy flavor and a touch of seasoning as it's a salty cheese.

    Air fryer cauliflower is an easy vegetable side that takes less than 15 minutes from prep to plate. Any dish that can be on the table this quickly is a winner any night of the week.

    This is a versatile dish too, as it can be served as a delicious appetizer with your favorite dip or as a flavorful side with any main dish. If you like cauliflower, you'll love my seasoned air fryer broccoli or my air fryer cauliflower wings.

    Ingredients

    You can find these simple ingredients in your local grocery store:

    • Cauliflower florets - I usually buy a medium cauliflower head and cut it into florets.
    • Olive oil - Or any oil made for high-heat cooking will do. I usually use light-tasting olive oil, canola oil, or avocado oil.
    • Seasoning - Kosher salt, garlic powder, and parmesan cheese - my favorite way to season this cauliflower.
    air fryer cauliflower recipe ingredients

    How to make Air Fryer Cauliflower 

    Here are the directions; you can also print this out using the recipe card below.

    Preheat the air fryer to 400 degrees Fahrenheit. 

    Add the cauliflower florets, olive oil, kosher salt, garlic powder, and Parmesan cheese in a large bowl and stir until fully combined. 

    Once preheated, add the cauliflower to the air fryer basket in a single layer. Close the air fryer basket and air fry at 400 degrees Fahrenheit for 8-10 minutes, stirring and flipping halfway.

    raw cauliflower in air fryer basket

    Remove and enjoy.

    roasted cauliflower florets in air fryer basket

    Expert Tips

    These tips will help you make the best air fryer cauliflower you've ever tried. 

    • Cut the cauliflower into even-sized florets; that way, they will all cook simultaneously.
    • Take time to ensure that every floret is covered in the olive oil mixture; this will result in maximum flavor with every bite.
    • Don't overcrowd your air fryer basket. You want to cook the florets in a single layer, so that it roasts rather than steams. So, depending on the size of your air fryer basket, work in batches.
    • To ensure an even cook, turn the florets over mid-way through.

    Flavor variations

    I've flavored my cauliflower with salt, garlic powder, and Parmesan cheese, but you can add other flavors to this versatile veggie. Here are some ideas to get you started:

    • Ground chili or red pepper flakes
    • Onion or garlic powder
    • Ground cumin or a pinch of ground nutmeg
    close up image of roasted cauliflower florets in air fryer basket

    How to serve Air Fryer Cauliflower  

    Serve these tasty bites as an appetizer with your favorite dip. Try my Easy Queso Dip, or my BBQ Black-Eyed Pea Dip.

    Cauliflower is a versatile vegetable that works well with seafood, chicken, turkey, pork and beef. Try them with my Spinach Stuffed Chicken Breasts, Garlic Parmesan Spatchcock Chicken, Air Fryer Steak with Garlic Herb Butter, Air Fryer Turkey Burgers, or my Marinated Air Fryer Salmon,

    If you enjoy cauliflower as much as I do, try my Roasted Cauliflower & Sweet Potato, Cauliflower Wings, or my Creamy Broccoli Cauliflower Salad.

    How to store 

    To refrigerate: Keep any leftover cauliflower in an airtight container, in the fridge, for up to 3 days. You can reheat it in a small bowl in the microwave in 30-second increments until it's warm all the way through.

    Make ahead: You can prepare the cauliflower and place it into the olive oil coating earlier in the day. Then cover the bowl and place it into the refrigerator until you are ready to start cooking.

    roasted cauliflower in air fryer basket

    FAQs

    How long does cauliflower take to cook in an air fryer?

    Cooking times may vary depending on the air fryer brand, the size of the cauliflower florets, and how many florets are placed in the basket.

    How to make crispy cauliflower?

    The trick is to get the air fryer nice and hot. I cook the cauliflower at 400 degrees Fahrenheit. Then work in batches to cook the cauliflower in a single layer; this ensures that the cauliflower becomes crispy. Do not be tempted to load up the air fryer basket, or you will just steam the cauliflower, and it will become mushy.

    Is roasted cauliflower healthy?

    Roasting vegetables adds an extra depth of flavor to this healthy vegetable. Cauliflower is full of antioxidants and has a high fiber content which helps keep you fuller for longer.

    If you have tried this Air Fryer Cauliflower recipe, or any other recipe on my blog, then please rate it and let me know how it turned out in the comments below!

    bowl filled with roasted air fryer cauliflower garnished with shredded Parmesan cheese
    Print Recipe
    5 from 1 vote

    Air Fryer Cauliflower

    Crispy Air Fryer Cauliflower a simple side dish, where cauliflower florets are coated in olive oil, garlic powder and Parmesan cheese, then seasoned with a little salt before being roasted to crisp perfect in the air fryer.
    Prep Time4 minutes mins
    Cook Time10 minutes mins
    Total Time14 minutes mins
    Course: Side Dish
    Cuisine: American
    Keyword: air fryer cauliflower bites, air fryer cauliflower parmesan, crispy air fryer cauliflower, easy vegetable side
    Servings: 4
    Calories: 83kcal
    Author: Tanya Harris

    Equipment

    • 1 Air Fryer

    Ingredients

    • 4 cups cauliflower florets
    • 1 Tablespoon olive oil
    • ½ teaspoon kosher salt
    • ½ teaspoon garlic powder
    • ¼ cup grated Parmesan cheese

    Instructions

    • Preheat the air fryer to 400 degrees Fahrenheit.
    • Add the cauliflower florets, olive oil, kosher salt, garlic powder, and parmesan cheese in a large bowl and stir until fully combined.
    • Once preheated, add the cauliflower to the air fryer basket in a single layer. Close the air fryer basket and air fry at 400 degrees Fahrenheit for 8-10 minutes, stirring and flipping halfway. Remove and enjoy.

    Notes

    Cooking times may vary depending on air fryer brand, the size of the cauliflower florets, and how many florets are placed in the basket.

    Nutrition

    Calories: 83kcal | Carbohydrates: 6g | Protein: 4g | Fat: 6g | Saturated Fat: 2g | Polyunsaturated Fat: 0.5g | Monounsaturated Fat: 3g | Cholesterol: 5mg | Sodium: 430mg | Potassium: 315mg | Fiber: 2g | Sugar: 2g | Vitamin A: 54IU | Vitamin C: 48mg | Calcium: 78mg | Iron: 0.5mg

    Baked Sweet Potatoes

    January 23, 2023 by Tanya Harris Leave a Comment

    close up image of oven baked sweet potatoes topped with butter and seasoning

    When it comes to simplicity, you cannot beat my Oven Baked Sweet Potatoes. The sweet potatoes are baked in a searingly hot oven to ensure a crispy baked sweet potato skin, with the softest center.

    close up image of oven baked sweet potatoes topped with butter and seasoning

    This post contains affiliate links, please read my full disclaimer here.

    You’ll find the full recipe with ingredient amounts and instructions in the recipe card at the bottom of this post. Be sure to check out the blog post itself for extra tips and tricks!

    I top my easy baked sweet potatoes simply, with some butter and a sprinkle of salt and freshly ground black pepper. However, sweet potatoes are really great at holding up to flavor. So, you can be as creative you like with the baked sweet potato fillings and I've made some suggestions later in the post.

    What I love most about baking sweet potatoes is that hands on prep time is minimal, scrub the potatoes and dry them, then leave the oven to do all the hard work.

    Because of this, sweet potatoes are the ideal side when you have friends around for games night or a backyard BBQ as you can prepare them ahead of time and pop them in the oven when you are ready to eat.

    Also, this recipe is easily doubled up when you are feeding a crowd!

    Ingredients

    You can find these simple ingredients in your local grocery store:

    • Sweet potatoes - Try to get sweet potatoes that are about the same size. This will ensure that they finish cooking around the same time.
    • Unsalted butter - I always use unsalted butter. If using salted butter, omit the salt in this recipe.
    • Kosher salt and freshly ground black pepper - to season the baked sweet potatoes.

    How to bake Sweet Potatoes 

    Here are the directions for baking sweet potatoes; you can also print this out using the recipe card below.

    four sweet potatoes on a pink baking tray lined with parchment paper

    Preheat the oven to 425 degrees Fahrenheit. Prepare a baking sheet by lining it with parchment paper or foil paper. Set aside. 

    Add sweet potatoes to the baking sheet in a single layer. Poke holes in the sweet potatoes if desired. 

    Bake in the preheated oven for 40-45 minutes, or until the potatoes have softened. 

    four baked sweet potatoes on a pink baking tray lined with baking parchment

    Remove the tray from the oven and allow to cool before slicing and serving. 

    Top with your favorite toppings, like butter and salt and pepper.

    Expert Tips

    These tips will help you make the best-baked potatoes you've ever tried. 

    • Scrub and properly dry the sweet potatoes before baking. Drying the skin is important as this will result in the perfect crispy baked sweet potato skin.
    • You can poke a few holes in the skin before baking, to allow the steam to escape from the potato. There is always the possibility that the sweet potato can splatter in the oven if you don't poke it first. I usually don't poke the potato and haven't had a potato explode yet.
    • Towards the end of the bake, check to see if the potatoes are cooked through by inserting a sharp knife into the center. You don't want to over-bake the potatoes or the skin becomes too dry and the center will be mushy.

    Baked Sweet Potato Fillings

    I love the simplicity of a baked sweet potato filled with butter, salt and pepper. However, this is a versatile side and you can add all sorts of fillings to make this a delicious main dish too. Here are some ideas to get you stared:

    • Dairy - butter, sour cream, Greek yogurt
    • Cheese - blue cheese, cream cheese, feta cheese, shredded cheddar or mozzarella
    • Fresh herbs - chives, basil, parsley, cilantro
    • Spices - ground cinnamon, smoked paprika, red pepper flakes
    • Salads - vegetable salads, mixed bean salad, fresh salsas
    • Meat - crispy bacon pieces, fried cubes of chorizo
    close up image of baked sweet potato topped with melted butter and salt and pepper

    How to serve Baked Sweet Potatoes  

    Baked sweet potatoes are really versatile and can be filled and served on their own as a light main dish or a great-tasting side. They work with seafood, chicken, turkey, pork, and beef.

    Try them with my Air Fryer Fried Chicken, Spinach Stuffed Chicken Breasts, Air Fried Jamaican Jerk Pork, Air Fryer Steak Bites, Air Fryer Steak with Garlic Herb Butter, Easy Oven Baked Salmon, or my Air Fryer Turkey Burgers.

    If you love sweet potato as much as I do, try my Air Fryer Sweet Potato Wedges, Mashed Sweet Potatoes, and Southern Candied Sweet Potatoes.

    How to store 

    To refrigerate: Keep any leftover sweet potatoes in an airtight container, in the fridge, for up to 3 days. You can reheat it in a small bowl in the microwave in 30-second increments until it's warm all the way through.

    To freeze: Once baked, allow the potatoes to cool completely, and don't add any fillings. Then wrap the sweet potatoes in kitchen foil and place them in a Ziploc bag and store them in the freezer for up to 6 months. When ready to enjoy, defrost them in the refrigerator before placing them into a hot oven or the microwave to heat through. 

    four baked sweet potatoes topped with butter and seasoning

    FAQs:

    How long do sweet potatoes take to bake?

    The cooking time for sweet potatoes will vary depending on the size of the sweet potatoes you are baking:
    Small sweet potato (8 oz) - 45 minutes
    Medium sweet potato (10-12 oz) - 50 minutes 
    Large sweet potato (12-14 oz) - 60 minutes
    Extra large sweet potato (16 oz or larger) - 65 or more minutes

    What temperature do you cook sweet potatoes?

    When cooking any potato, I find it best to use a really hot oven. I preheat my oven to 425 degrees Fahrenheit when baking potatoes.

    Is it better to wrap sweet potatoes in foil?

    This comes down to personal preference. I like my sweet potatoes to have crispy skin, so I don't cover them in foil. If you cover them in foil, they steam, rather than bake, and the skin will become really soft.

    Why do you poke holes in sweet potatoes before baking?

    When you are baking any variety of potato you should poke a few holes in the skin before baking. Piercing the skin allows the steam to escape during the cook, and stops the potato from bursting open.

    Is baked sweet potato healthy?

    Sweet potatoes are a healthy option, as this complex carbohydrate is packed full of vitamins, minerals and fiber which will keep you fuller for longer.

    Baking vs Roasting sweet potatoes?

    In this method, we cook the sweet potatoes at a higher temperature in the oven, which means we are technically roasting the sweet potatoes whole in the oven.

    If you have tried this Baked Sweet Potato recipe, or any other recipe on my blog, then please rate it and let me know how it turned out in the comments below!

    close up image of baked sweet potato topped with melted butter and salt and pepper
    Print Recipe
    5 from 2 votes

    Baked Sweet Potatoes

    When it comes to simplicity, you cannot beat my Baked Sweet Potatoes. The sweet potatoes are baked in a searingly hot oven to ensure a crispy baked sweet potato skin, with the softest center. They make a great tasting side dish, or fill them up for a delicious and nutritious main.
    Prep Time15 minutes mins
    Cook Time45 minutes mins
    Total Time1 hour hr
    Course: Side Dish
    Cuisine: American
    Keyword: baked sweet potato, baked sweet potato fillings, baked sweet potatoes, crispy baked sweet potato, how long to bake a sweet potato
    Servings: 4
    Calories: 230kcal
    Author: Tanya Harris

    Ingredients

    • 4 sweet potatoes scrubbed clean and patted dry
    • salt & pepper
    • 4 teaspoon butter

    Instructions

    • Preheat the oven to 425 degrees Fahrenheit. Prepare a baking sheet by lining it with parchment paper or foil paper. Set aside.
    • Add sweet potatoes to the baking sheet in a single layer. Poke holes in the sweet potatoes if desired.
    • Bake in the preheated oven for 40-45 minutes, or until the potatoes have softened.
    • Remove and allow to cool before slicing and serving.
    • Top with your favorite toppings, like butter and salt and pepper.

    Notes

    How long to bake a sweet potato:
    The cooking time of your sweet potatoes will vary depending on the size of sweet potato. 
    • Small sweet potato (8 oz) - 45 minutes
    • Medium sweet potato (10-12 oz) - 50 minutes 
    • Large sweet potato (12-14 oz) - 60 minutes
    • Extra large sweet potato (16 oz or larger) - 65 or more minutes

    Nutrition

    Calories: 230kcal | Carbohydrates: 45g | Protein: 4g | Fat: 4g | Saturated Fat: 3g | Polyunsaturated Fat: 0.2g | Monounsaturated Fat: 1g | Trans Fat: 0.2g | Cholesterol: 11mg | Sodium: 156mg | Potassium: 763mg | Fiber: 7g | Sugar: 9g | Vitamin A: 32188IU | Vitamin C: 5mg | Calcium: 69mg | Iron: 1mg

    The Easiest Buffalo Sauce (5 Ingredients)

    January 21, 2023 by Tanya Harris Leave a Comment

    white bowl filled with buffalo sauce

    My Best Buffalo Sauce recipe is made by warming hot sauce, butter, vinegar, Worcestershire sauce, and garlic powder in a saucepan and reducing it a little. Ready to pour over your favorite chicken wings recipe, or for something a little different, how about trying it with some cauliflower wings.

    white bowl filled with buffalo sauce

    This post contains affiliate links, please read my full disclaimer here.

    You’ll find the full recipe with ingredient amounts and instructions in the recipe card at the bottom of this post. Be sure to check out the blog post itself for extra tips and tricks!

    Original buffalo sauce combines hot sauce with butter and cayenne pepper. I've added some extra flavors, like Worcestershire sauce and garlic powder, to make it my own.

    I love to make my own homemade sauces, that way I have total control over what I put into them, and you can adapt them to suit your own and your family's tastes.

    What I love most is that I can prepare this sauce in 5 minutes, which means I can make it fresh every time my family wants to enjoy wings.

    If you love making your own sauces, try some of these great tasting recipes, my Jerk BBQ Sauce, Homemade BBQ Sauce, Cocktail Sauce, Vinegar BBQ Sauce, and my Homemade Remoulade Sauce.

    Why is it called Buffalo Sauce?

    Buffalo sauce does not take its name from the animal, it takes its name from the place where it was created, in a small family-run restaurant in Buffalo, New York.

    Ingredients

    buffalo sauce ingredients on table with text of each ingredient name

    Here are the ingredients you will need to make this sauce:

    • Hot sauce - I like to use the Frank's cayenne hot sauce for this recipe. Just know the spicier the hot sauce, the spicier your sauce will be.
    • Unsalted butter - I like to use unsalted butter in this recipe. I find the hot sauce has enough salt in it.
    • White vinegar - adds an extra pop of flavor.
    • Worcestershire sauce - For a savory hint of flavor.
    • Garlic powder - I love garlic, so adding a tiny bit of garlic powder is a must.

    How to make homemade buffalo sauce

    Combine the hot sauce, unsalted butter, white vinegar, Worcestershire sauce, and garlic powder in a saucepan over medium-high heat and bring to a simmer.

    saucepan filled with ingredients to make buffalo sauce

    Reduce heat to medium-low and allow to simmer for about 5 minutes, stirring occasionally. 

    saucepan filled with buffalo sauce

    Remove from heat and use in your favorite recipes that call for buffalo sauce.

    Expert Tips

    These tips will help you make the best sauce you've ever tasted:

    • I use Frank’s Original hot sauce in this recipe. Not to be confused with Frank's buffalo sauce, that sauce is already made.
    • Don't walk away from the stove when you are reducing the sauce, you don't want the sauce to stick to the bottom of the pan.
    • I recommend using a non-stick saucepan if you have one.

    Variations

    The ingredients in this sauce are staples in my kitchen; however, feel free to adapt the recipe to suit your tastes. I recommend tasting the sauce and adapting it to suit your palette.

    • If you want to make this sauce spicier, add some cayenne pepper or chili powder.
    • Like it slightly sourer, then add a little more vinegar.
    • If you prefer a little sweeter sauces, add a touch of runny honey or maple syrup.
    jug of buffalo sauce being poured over fried cauliflower wings

    What do you serve it with?

    This is a versatile sauce, and you can serve it with alongside many dishes. But the classics always work for me and I serve it with my chicken wings, Air Fryer Chicken Drumsticks, Honey Garlic Chicken Wings, Jerk Chicken Wings, or my Lemon Pepper Chicken Wings.

    Don't just think chicken either, as this sauce works a treat with veggies too. Try it with my Air Fryer Cauliflower Wings or my Oven Baked Cauliflower Wings.

    How to store

    To refrigerate: This delicious sauce can be made and stored in an airtight container in the refrigerator for up to 1 month. Reheat over low heat so that the sauce doesn't separate.

    To freeze: This sauce freezes well. Place it in an airtight container in the freezer for up to 6 months. When ready to serve, defrost in the refrigerator before warming up in a saucepan.

    fried cauliflower wings coated in buffalo sauce

    FAQs:

    How to make gluten-free buffalo sauce?

    It's really easy to make gluten-free buffalo sauce. Just ensure that the hot sauce and Worcestershire sauces that you use are gluten-free varieties.

    How do I fix thin buffalo sauce?

    If your sauce is too thin, continue simmering it until it reduces a little more.

    How do I fix thick buffalo sauce?

    If your sauce is too thick, whisk in a little water to loosen it a little. Then remember to taste and check the balance of flavors and adjust if necessary.

    What makes buffalo sauce different from hot sauce?

    Hot sauce is an ingredient in buffalo sauce, however, buffalo sauce also has the addition of butter. Buffalo sauce has a richer depth of flavor than hot sauce.

    Is buffalo sauce spicy?

    This is a spicy sauce, but not as intense as hot sauce. Adding butter to a buffalo sauce tones down the heat, giving it more balance rather than fiery heat.

    Why do you add butter to buffalo sauce?

    The butter balances out the chili heat and adds a silky smooth texture to the sauce.

    If you have tried making my Buffalo Sauce recipe, or any other recipe on my blog, then please rate it and let me know how it turned out in the comments below!

    white bowl filled with buffalo sauce
    Print Recipe
    5 from 1 vote

    The Easiest Buffalo Sauce (5 Ingredients)

    Best Buffalo Sauce recipe, made by warming hot sauce, butter, vinegar, Worcestershire sauce, and garlic powder in a saucepan and reducing it a little. Ready to pour over your favorite chicken or cauliflower wings.
    Prep Time5 minutes mins
    Cook Time5 minutes mins
    Total Time10 minutes mins
    Course: Condiment, Sauce
    Cuisine: American
    Keyword: best buffalo sauce recipe, classic buffalo sauce, easy buffalo sauce, original buffalo wings sauce
    Servings: 30
    Calories: 15kcal
    Author: Tanya Harris

    Ingredients

    • 1 ½ cups hot sauce
    • ¼ cup unsalted butter
    • 1 Tablespoon white vinegar
    • ½ teaspoon Worcestershire sauce
    • ¼ teaspoon garlic powder

    Instructions

    • Combine hot sauce, unsalted butter, white vinegar, Worcestershire sauce, and garlic powder in a saucepan over medium-high heat and bring to a simmer. Reduce heat to medium-low and allow to simmer for about 5 minutes, stirring occasionally.
    • Remove from heat and use in your favorite recipes that call for buffalo sauce.

    Notes

    • I use Frank’s Original hot sauce in this recipe.
    • This recipe yields about 1.5 cups of sauce. 

    Nutrition

    Calories: 15kcal | Carbohydrates: 0.2g | Protein: 0.1g | Fat: 2g | Saturated Fat: 1g | Polyunsaturated Fat: 0.1g | Monounsaturated Fat: 0.4g | Trans Fat: 0.1g | Cholesterol: 4mg | Sodium: 319mg | Potassium: 19mg | Fiber: 0.04g | Sugar: 0.2g | Vitamin A: 67IU | Vitamin C: 9mg | Calcium: 2mg | Iron: 0.1mg

    Pepperoni Pizza Sliders

    January 20, 2023 by Tanya Harris Leave a Comment

    pizza sliders set onto a plate

    Pepperoni pizza sliders can be assembled in minutes, so they are a great mid week dinner option or party appetizer. Start by topping sweet bread rolls with sliced mozzarella cheese, your favorite pizza sauce and slices of pepperoni, before brushing with a herb butter and baking in a hot oven until the cheese is gooey and molten.

    pizza sliders set onto a plate

    This post contains affiliate links, please read my full disclaimer here.

    You’ll find the full recipe with ingredient amounts and instructions in the recipe card at the bottom of this post. Be sure to check out the blog post itself for extra tips and tricks!

    Easy pizza sliders are my go to for an easy dinner or quick weekend lunch, and they are ideal when you are feeding a crowd as this recipe is easily doubled or tripled when catering for friends and family.

    Oven-baked pizza sliders are less cooking, and more of an assembly job. They make a great party or games night snack as they can be prepared ahead and popped in the oven when you are ready to serve.

    If like my family, you love pizza, then try my Air Fryer Pizza, Air Fryer Calzones or for something a little different try my Cauliflower Pizza Casserole.

    Ingredients

    You can find these simple ingredients in your local grocery store:

    ingredients for pepperoni pizza sliders
    • Hawaiian sweet rolls - the sweetness of these rolls go well with the savoriness of the pizza sauce and pepperoni.
    • Sliced mozzarella cheese - I prefer sliced mozzarella cheese rather than shredded so I can get the ultimate cheese pull. Plus, using sliced cheese ensures all pieces of the bread gets covered.
    • Pizza sauce - I love using my homemade pizza sauce in this recipe.
    • Pepperoni - The star of the show. But feel free to omit or add other meats, like sausage, instead.
    • Topping - Unsalted butter, Italian seasoning, Kosher salt, Ground black pepper.

    How to make Pepperoni Pizza Sliders

    white oven proof dish with base of bread rolls

    Preheat oven to 350 degrees Fahrenheit. Spray a 13x9-inch baking dish with cooking spray or line it with parchment paper. Set aside. 

    Take rolls and use a bread knife to slice the rolls in half, separating the tops from the bottoms. Place the bottom layer of rolls in the prepared baking dish. 

    white oven proof dish with base of bread rolls topped with sliced mozzarella cheese and a spoon of pizza sauce

    Lay the mozzarella cheese slices on the bottom layer of the rolls in a single layer. Then spread pizza sauce on top of the cheese.

    white oven proof dish with base of bread rolls topped with slices of pepperoni

    Then lay the pepperoni slices on top of the sauce. Cover the pepperoni slices with the top layer of rolls.  

    white oven proof dish filled with pizza sliders and a bowl over melted butter with Italian seasoning

    In a small bowl, melt the butter. Stir in the Italian seasoning, salt, and pepper.

    Brush the melted butter over the tops of the rolls. 

    white oven proof dish filled with baked pizza sliders

    Bake in the oven for 12-15 minutes, until the tops are golden and the cheese has melted. 

    Remove from oven and serve while hot.

    Expert Tips

    These tips will help you make the best pizza sliders you've ever tried. 

    • Make sure to add the layer of cheese on top of the bread roll base, before adding the sauce in this recipe. Adding the sauce to the bread first will result in soggy sliders.
    • Glaze the rolls with the herb butter just before you place them into the hot oven, otherwise, you risk the tops becoming too wet.

    Flavor variations

    You can add other flavors to the these sliders, and here are some ideas to get you started:

    • I've used sliced pepperoni, but you could substitute with sliced salami, thin slices of ham or cooked bacon strips.
    • Swap the pepperoni for some roasted or sauteed vegetables like sliced mushrooms, bell peppers or zucchini.
    • Add some sliced black olives.
    • If you don't have Italian seasoning, use some dried oregano and a pinch of garlic powder in the herb butter.
    • To make the rolls extra cheesy, once you've glazed the rolls with the herb butter, sprinkle over some finely shredded Parmesan.
    portion of pizza sliders on a palate knife

    What to serve with Pizza Sliders

    This recipes serves 6 as a main meal, allowing 2 sliders per person. However, it also makes a great tasting snack for games night. I like to serve sliders with some of my favorite salads, try my Southern Cucumber Salad, Fresh Corn Salad or my Creamy Dill Potato Salad.

    How to store 

    To refrigerate: These sliders are best served hot, straight from the oven. However, leftovers can be stored in an airtight container in the refrigerator for 3 days. When ready to heat up, place it back into a hot oven to warm through.

    To freeze: You can assemble these sliders, leaving off the herb butter, then wrap in kitchen foil and place them into a Ziploc bag. Store in the freezer for up to 3 months. When ready to enjoy, place into an oven-proof dish and cook from frozen, although they will take a little extra time in the oven. Just remember to glaze the rolls with the herb butter before baking.

    Make ahead: You can assemble the sliders earlier in the day, then pop them in the oven when you are ready to enjoy. Just ensure that you layer them up exactly as I've suggested in the recipe card, as this will stop the pizza sauce from running into the bread and making it soggy. Also, only glaze the sliders with the herb butter just before popping them into the hot oven.

    portion of pizza sliders on a palate knife

    FAQs

    What type of cheese should I use in a Pizza Slider?

    I like to use sliced of mozzarella as it cooks well and becomes gooey and molten, perfect for pizza. However, you could also use sliced cheddar or provolone cheese.

    Do I need to cover the pizza sliders with foil?

    No need to cover with foil, they're not in the oven that long and you want the sliders to become golden on top when baking in the oven.

    If you have tried this Pizza Sliders recipe, or any other recipe on my blog, then please rate it and let me know how it turned out in the comments below!

    pizza sliders set onto a plate
    Print Recipe
    5 from 2 votes

    Pepperoni Pizza Sliders (So Easy)

    Pepperoni pizza sliders are simple to make, layer sweet rolls and top with slices of mozzarella cheese, pizza sauce and pepperoni, before baking in a hot oven.
    Prep Time15 minutes mins
    Cook Time15 minutes mins
    Total Time30 minutes mins
    Course: Main Course, Snack
    Cuisine: American
    Keyword: easy pizza sliders, pepperoni pizza sliders, pizza sliders
    Servings: 6
    Calories: 431kcal
    Author: Tanya Harris

    Ingredients

    • 1 package Hawaiian sweet rolls
    • 8 oz sliced mozzarella cheese
    • 1 cup pizza sauce
    • 4 oz sliced pepperoni
    • 2 Tablespoons unsalted butter
    • 1 teaspoon Italian seasoning
    • salt & pepper to taste about ⅛ teaspoon each

    Instructions

    • Preheat the oven to 350 degrees Fahrenheit. Spray a 13x9 baking dish with cooking spray or line it with parchment paper. Set aside.
    • Take rolls and use a bread knife to slice the rolls in half, separating the tops from the bottoms. Place the bottom layer of rolls in the prepared baking dish.
    • Lay the mozzarella cheese slices on the bottom layer of the rolls in a single layer. Then spread pizza sauce on top of the cheese. Then lay the pepperoni slices on top of the sauce. Cover the pepperoni slices with the top layer of rolls.
    • In a small bowl, melt the butter. Stir in the Italian seasoning, salt, and pepper. Brush the melted butter over the tops of the rolls.
    • Bake in the oven for 12-15 minutes, until the tops are golden and the cheese has melted.
    • Remove from oven and serve while hot. Enjoy.

    Notes

    Make sure to add a layer of cheese before adding the sauce in this recipe. Adding sauce to the bread will result in soggy sliders.

    Nutrition

    Calories: 431kcal | Carbohydrates: 33g | Protein: 19g | Fat: 25g | Saturated Fat: 13g | Polyunsaturated Fat: 1g | Monounsaturated Fat: 7g | Trans Fat: 0.5g | Cholesterol: 78mg | Sodium: 956mg | Potassium: 207mg | Fiber: 1g | Sugar: 10g | Vitamin A: 555IU | Vitamin C: 3mg | Calcium: 207mg | Iron: 1mg

    Creamy Cauliflower Soup

    January 19, 2023 by Tanya Harris Leave a Comment

    creamy cauliflower soup in a bowl

    If you're looking for a creamy, delicious soup that's quick to put together, look no further than this homemade creamy cauliflower soup. You only need one pot and it takes less than 30 minutes from start to finish.

    creamy cauliflower soup in a bowl

    This post contains affiliate links, please read my full disclaimer here.

    You’ll find the full recipe with ingredient amounts and instructions in the recipe card at the bottom of this post. Be sure to check out the blog post itself for extra tips and tricks!

    The creamy texture and delicious flavors are sure to make it an instant family favorite - and with healthy veggies, you won't feel guilty about serving it either.

    Cauliflower soup is perfectly paired with Easy Cornbread Muffins or these Air Fryer Carrots. Or both! I already can't wait to make these! Feeling ambitious, or have a few more minutes on your hands, try roasting the cauliflower before making this recipe.

    a bowl of cauliflower soup with a spoon in it

    Ingredients for creamy cauliflower soup

    • Cauliflower - Leaves removed and chopped, about 6 cups. For added smokiness, roast your cauliflower before starting this recipe.
    • Garlic - Minced
    • Fresh Thyme - ½ teaspoon dried thyme works as well if fresh thyme isn't available to you.
    • Almond Milk - Dairy milk or any other milk you prefer will work as well.
    • Low-Sodium Chicken Broth -A vegetable broth is a great substitute for chicken broth.
    • Grated Parmesan Cheese - this adds a little umami to this dish.
    • Salt and Pepper - To taste, see note for suggested amounts.
    cauliflower soup ingredients

    Tools you'll need for this recipe

    • Cutting board & sharp knife
    • Immersion blender or blender for processing hot soup
    • Large pot or Dutch oven

    How to make cauliflower soup

    After removing the leaves and the stem, chop cauliflower into bite-sized pieces.

    chopped cauliflower on a cutting board

    Place cauliflower, garlic, and thyme in a large pot. Cover with the milk and chicken broth. 

    large pot full of cauliflower soup ingredients

    Bring the mixture to a boil over medium-high heat. Once boiling, reduce the heat to medium-low and allow to simmer, while occasionally stirring, until the cauliflower has softened, about 10 minutes. 

    softened cauliflower soup before blending

    Remove the pot from the heat and remove the thyme stems. Blend the cauliflower and liquid with an immersion blender or standing blender until smooth. Stir in parmesan cheese. Season with salt and pepper to taste. 

    Cauliflower soup being blended in the pot with an immersion blender

    Storage Instructions

    Storage: Store any leftover cauliflower soup in an airtight container in the refrigerator for 3-4 days.

    To reheat: Microwave for 1 ½ - 2 minutes, or warm on the stovetop in a saucepan.

    Freeze: Once cooled completely you can freeze leftovers in a freezer-safe container for 3-6 months. Thaw for a few hours in the fridge before heating and serving.

    Can I make cauliflower soup in a Crock Pot or Instant Pot?

    Of course, either application will still yield a really delicious soup. Do you have too much time on your hands or not enough? A slow cooker or instant pot may be just what you need to get this cauliflower soup on the table tonight!

    Crock Pot: Add ingredients to a slow cooker and cover. Cook on low for 6-8 hours, and blend with an immersion blender. Top with parmesan cheese, salt, and pepper.

    Instant Pot: Add the ingredients to your Instant Pot, and cook on high pressure for 8 minutes. Quick release, then blend with the immersion blender. Serve hot topped with parmesan cheese, salt, and pepper to taste.

    cauliflower soup being ladled out

    Dressing up your cauliflower soup

    There isn't anything wrong with keeping it simple with freshly grated parmesan, salt, and pepper. But if you want to add some extra flair to your dinner tonight feel free! Try these topping ideas:

    • Crispy bacon
    • Caramelized onions
    • Fresh thyme leaves
    • Croutons
    • Roasted cauliflower
    • Sprinkle of nutmeg

    Pro Tips

    • I use about 1 teaspoon of kosher salt and ¼ teaspoon of pepper. The amount of salt and pepper added will depend on the broth's saltiness. 
    • Avoid covering the pot while cooking, or the soup may boil over. If you see the mixture start to foam up, stir it. 
    • To keep this recipe Vegan, use vegetable broth instead of chicken broth and omit the parmesan cheese. 

    Looking for more recipes that include cauliflower? Try these:

    • Cauliflower Wings (3 Flavors)
    • Creamy Broccoli Cauliflower Salad
    • Cauliflower Pizza Casserole
    • Roasted Cauliflower Dip
    • Roasted Cauliflower and Sweet Potato Recipe

    Looking for more soup recipes? Try these out:

    • 15 Bean Soup
    • Creamy Yellow Squash Soup
    • Creamy Carrot and Lentil Soup
    • Creamy Cream of Mushroom Soup
    • Cream of Asparagus Soup
    • Oxtail Soup

     If you have tried this recipe or any other recipe on my blog, please rate it and let me know how it turned out in the comments below!

    creamy cauliflower soup in a bowl
    Print Recipe
    5 from 1 vote

    Creamy Cauliflower Soup

    If you're looking for a creamy, delicious soup that's quick to put together, look no further than this homemade creamy cauliflower soup. You only need one pot and it takes less than 30 minutes from start to finish.
    Prep Time10 minutes mins
    Cook Time15 minutes mins
    Total Time25 minutes mins
    Course: Appetizer, Main Course, Side Dish, Soup
    Cuisine: American
    Keyword: creamy cauliflower soup
    Servings: 4 servings
    Calories: 74kcal
    Author: Tanya Harris

    Ingredients

    • 1 head Cauliflower leaves removed and chopped, about 6 cups
    • 1 clove Garlic minced
    • 2 sprigs Fresh Thyme or ½ teaspoon dried thyme
    • 2 cups Almond Milk or dairy milk
    • 1 ½ cups Low-Sodium Chicken Broth
    • 1 tablespoon Grated Parmesan Cheese
    • Salt and Pepper to taste see note for suggested amounts

    Instructions

    • Place cauliflower, garlic, and thyme in a large pot. Cover with the milk and chicken broth. 
    • Bring the mixture to a boil over medium-high heat. Once boiling, reduce the heat to medium-low and allow to simmer, while occasionally stirring, until the cauliflower has softened, about 10 minutes. 
    • Remove the pot from the heat and remove the thyme stems. Blend the cauliflower and liquid with an immersion blender or standing blender until smooth. Stir in parmesan cheese. Season with salt and pepper to taste. 

    Notes

    • I use about 1 teaspoon of kosher salt and ¼ teaspoon pepper. The amount of salt and pepper added will depend on the broth's saltiness. 
    • Avoid covering the pot while cooking, or the soup may boil over. If you see the mixture start to foam up, stir it. 
    • To keep this recipe Vegan, use vegetable broth in place of chicken broth and omit the parmesan cheese. 

    Nutrition

    Serving: 1g | Calories: 74kcal | Carbohydrates: 9g | Protein: 6g | Fat: 3g | Saturated Fat: 1g | Polyunsaturated Fat: 1g | Monounsaturated Fat: 1g | Cholesterol: 1mg | Sodium: 261mg | Potassium: 514mg | Fiber: 3g | Sugar: 3g | Vitamin A: 35IU | Vitamin C: 70mg | Calcium: 200mg | Iron: 1mg

    Turnip Greens

    January 18, 2023 by Tanya Harris 7 Comments

    turnip greens in a bowl alongside corn bread

    Turnip greens are a delicious and healthy way to liven up dinner time. Unlike some turnip greens, which can be a bit bitter, this easy one-pot dish helps turn those turnip greens into flavorful and tender bites that you'll love.

    turnip greens in a bowl alongside corn bread

    You’ll find the full recipe with ingredient amounts and instructions in the recipe card at the bottom of this post. Be sure to check out the blog post itself for extra tips and tricks!

    Did you just enjoy my Mashed Turnips? Now you're wondering what to do with the greens I had you save? Whether you serve these turnip greens as a side dish or the main meal, your family will be thankful either way!

    I'm a huge fan of greens, from collards, kale, spinach, you name it...and these turnip greens needed their time to shine. I usually add smoked meat to my greens, but this meatless version is just as good.

    If you want a bit of protein added, feel free to add any leftover turkey, ham, or pork to this recipe!

    close up of turnips greens in a bowl

    Ingredients for tasty turnip greens

    • Turnip Greens - The dark leafy tops of the turnip root. You can usually find the leaves sold in grocery stores, either bagged or bunched together in the produce department. Turnip greens can be a little bitter.
    • Olive Oil - to sauté my aromatics, like the onion and garlic.
    • Yellow Onion and garlic cloves - My favorite aromatics to use in greens. Or in any recipe, I'm always adding onions and garlic.
    • Light Brown Sugar - Turnip greens can be bitter so the light brown sugar balances it out.
    • Seasonings (Seasoned Salt, Ground Mustard, Ground Black Pepper, Red Pepper Flakes) - the seasonings I use to flavor these greens! I prefer seasoned salt because it's a combination of seasonings, like paprika, sugar, turmeric, and onion powder. If you don't have seasoned salt, feel free to use plain salt.
    • Chicken Broth - Chicken broth adds a ton of flavor to this dish. I suggest using a low-sodium chicken broth so you can control the amount of salt. Vegetable broth or water can also be used.
    • Apple Cider Vinegar - We always add a bit of vinegar to our cooked greens. It really brightens the dish.
    ingredients for turnip greens

    Tools you'll need for this recipe

    • Large pot or Dutch oven - with a tightly fitted lid.
    • Collinder for draining washed turnip greens - You'll need to make sure your greens are cleaned before cooking.

    How to prepare your turnip greens

    Washing your greens will greatly reduce any chance of dirt or sand ending up in your dish.

    1. Fill your sink or a large bowl with water.
    2. Use water, or a mixture of water and vinegar to thoroughly clean the greens.
    3. Swish them around a bit, agitating any dirt that's been stuck on. You may even have to rub dirt off.
    4. Rinse and repeat until your greens are cleaned!

    How to make Turnip Greens

    Heat a large pot over medium-high heat. Add oil and onions and sauté until the onions begin to soften about 3-5 minutes. Then add garlic and sauté for an additional 30 seconds. 

    onions sautéing in a dutch oven

    Add light brown sugar, seasoned salt, ground mustard, black pepper, and red pepper flakes, and sauté for about 10 seconds. Then add the chicken broth, apple cider vinegar, and turnip greens. Reduce the heat to medium-low and cover the pot with a tight-fitting lid. 

    turnip greens ingredients in the large pot
    turnip greens in a strainer

    Continue to cook the greens covered over medium-low heat, occasionally stirring until the greens and stems become tender, about 45 minutes to an hour. 

    cooked turnip greens in a pot

    Serve the greens hot along with the liquid. Enjoy.

    Storage

    Any leftover turnip greens should be stored in an airtight container in the refrigerator for 3-4 days.

    You can even freeze your leftovers! Allow to cool completely and store in a freezer-safe container for up to 6 months, thawing overnight before serving.

    How to prevent bitter turnip greens

    Yes, turnip greens are bitter! But they can be SO delicious, we just have to give them a little extra love. A couple of ways our recipe helps to prevent bitterness is by adding the sweetness of the sauteed onion and brown sugar. Then we're hitting it with a bit of spice from the black pepper, and red pepper flakes.

    turnip greens in a pot with a wooden spoon

    Serving suggestions:

    Pair these flavorful greens with cornbread; you won't be disappointed! Here are a few of my favorite cornbread recipes that will go perfectly with turnip greens:

    • Golden Sweet Potato Cornbread
    • Classic Southern Cornbread Recipe
    • Easy Cornbread Muffins

    Still cooking? Try a few of these dishes to make alongside your greens.

    • Super Easy Slow Cooker Sweet Potatoes
    • Southern Candied Sweet Potatoes
    • Southern Green Beans
    • Southern Style Macaroni Salad Recipe

    Tanya's Pro Tips

    • The liquid in the pot is known as “pot likker” and is great to sip while eating the greens. Do not toss this out.
    • Add smoked turkey, thick bacon, or ham hock for an extra depth of flavor.
    • Removing the stems is common but not necessary. If you prefer to remove the stems, it may add a few minutes to the overall prep time.

    Looking for more greens? Try these out:

    • Sautéed Beet Greens
    • Collard Green Soup
    • Fried Cabbage

     If you have tried this recipe or any other recipe on my blog, please rate it and let me know how it turned out in the comments below!

    turnip greens in a bowl alongside corn bread
    Print Recipe
    4.60 from 5 votes

    Turnip Greens

    Turnip greens are a delicious and healthy way to liven up dinner time. Unlike some turnip greens, which can be a bit bitter, this easy one-pot dish helps turn those turnip greens into flavorful and tender bites that you'll love.
    Prep Time10 minutes mins
    Cook Time45 minutes mins
    Total Time55 minutes mins
    Course: Side Dish
    Cuisine: American
    Keyword: turnip greens
    Servings: 4 Servings
    Calories: 101kcal
    Author: Tanya Harris

    Ingredients

    • 1 tablespoon Olive Oil
    • 1 medium Yellow Onion chopped
    • 2 cloves garlic chopped
    • 1 tablespoon Light Brown Sugar
    • 1 ½ teaspoon Seasoned Salt
    • 1 teaspoon Ground Mustard
    • ¼ teaspoon Ground Black Pepper
    • ¼ teaspoon Red Pepper Flakes
    • 2 cups Chicken Broth
    • 1 tablespoon Apple Cider Vinegar
    • 1 pound Turnip Greens chopped

    Instructions

    • Heat a large pot over medium-high heat. Add oil and onions and sauté until the onions begin to soften, about 3-5 minutes. Add garlic and sauté for an additional 30 seconds. 
    • Add light brown sugar, seasoned salt, ground mustard, black pepper, and red pepper flakes, and sauté for about 10 seconds. Add the chicken broth, apple cider vinegar, and turnip greens. Reduce the heat to medium-low and cover the pot with a tight-fitting lid. 
    • Continue to cook the greens covered over medium-low heat, occasionally stirring until the greens and stems become tender, about 45 minutes to an hour. 
    • Serve the greens hot along with the liquid. Enjoy.

    Notes

    • The liquid in the pot is known as “pot likker”and is great to sip while eating the greens. 

    Nutrition

    Serving: 1g | Calories: 101kcal | Carbohydrates: 14g | Protein: 3g | Fat: 4g | Saturated Fat: 1g | Polyunsaturated Fat: 1g | Monounsaturated Fat: 3g | Cholesterol: 2mg | Sodium: 1358mg | Potassium: 412mg | Fiber: 4g | Sugar: 6g | Vitamin A: 13180IU | Vitamin C: 70mg | Calcium: 232mg | Iron: 2mg

    Super Easy Slow Cooker Sweet Potatoes

    January 12, 2023 by Tanya Harris Leave a Comment

    three cooked sweet potatoes on a plate topped with butter

    A no-fuss sweet potato recipe that cooks itself! Use your slow cooker to prepare warm, fluffy sweet potatoes for dinner tonight. Top with butter, salt, and pepper, and enjoy!

    three cooked sweet potatoes on a plate topped with butter

    You’ll find the full recipe with ingredient amounts and instructions in the recipe card at the bottom of this post. Be sure to check out the blog post itself for extra tips and tricks!

    Let your slow cooker work for you, and clear out your oven for Juicy Oven Roasted Chicken Pieces or even Baked Turkey Thighs & Vegetables. Enjoy these sweet potatoes as a side to a wonderful meat dish. Enjoy them whole or mash the sweet potatoes for a delicious creamy side.

    Sweet potatoes are a versatile ingredient, and you can make different dishes like my Golden Sweet Potato Cornbread, Sweet Potato Salad Recipe, and even Southern Sweet Potato Pie for dessert!

    Just know that this method for making sweet potatoes is one of the easiest. Just rinse the sweet potatoes, place them in the slow cooker, cover them, and come back to perfectly cooked sweet potatoes.

    three cooked sweet potatoes on a plate topped with butter

    Ingredients for slow-cooked sweet potatoes

    • Sweet potatoes - Medium-sized sweet potatoes are best.
    • Salt and pepper - Change up the seasoning to fit your meal; add some spice, or brown sugar for a sweeter dish.
    • Butter - Use sour cream or cheese instead of butter.
    6 sweet potatoes

    Tools needed for this recipe

    • Slow cooker - I use a 6-quart Crock-Pot to accommodate 6 sweet potatoes.

    How to make whole sweet potatoes in a slow cooker

    Rinse and scrub sweet potatoes with a produce brush. 

    Place sweet potatoes in the slow cooker insert.

    six whole sweet potatoes in a slow cooker

    Cover and cook on low for 6-8 hours or on high for 3-4 hours, until the sweet potatoes are tender. 

    Serve hot and add toppings. 

    sweet potatoes in a slow cooker. a fork poking holes in them

    Storing leftover sweet potatoes

    Store your leftover sweet potatoes in an airtight container, refrigerated for 3-5 days.

    Can I make these sweet potatoes ahead of time?

    Slow-cooking sweet potatoes is a perfect option for those who want to meal prep for the week. I wouldn't plan on using these to meal prep for longer than a week, as they'll start to go bad. If prepped and stored properly, they'll last you a week.

    Make as directed, then dice, slice, or mash your sweet potatoes to fit whatever meal you're planning.

    To reheat, microwave for 1-2 minutes or bake at 350 degrees Fahrenheit until warmed through.

    Topping ideas!

    I've kept it simple here in this recipe to let the sweet potato flavor speak for itself. Which is delicious by the way! Here are a few sweet potato topping ideas:

    • Marshmallows
    • Chili
    • Broccoli and cheese
    • Brown sugar
    • Sour cream and chives
    • Taco meat and toppings

    Pro Tips

    • I add the sweet potatoes into the slow cooker without drying them or poking holes in them. I found that step to be unnecessary.
    • Making sure the sweet potatoes are similar in size will help them cook evenly.

    Looking for more slow cooker recipes? Try these out:

    • Slow Cooker Mac and Cheese
    • Creamy Slow Cooker Mashed Potatoes
    • Slow Cooker Garlic Herb Mushrooms
    • Slow Cooker Cheesy Hot Shrimp Dip
    • 15 Bean Soup

     If you have tried this recipe or any other recipe on my blog, please rate it and let me know how it turned out in the comments below!

    three cooked sweet potatoes on a plate topped with butter
    Print Recipe
    5 from 1 vote

    Super Easy Slow Cooker Sweet Potatoes

    A no-fuss sweet potato recipe that cooks itself! Utilize your slow cooker to prepare warm and fluffy sweet potatoes for dinner tonight. Top with butter, salt, and pepper, and enjoy!
    Prep Time10 minutes mins
    Cook Time6 hours hrs
    Total Time6 hours hrs 10 minutes mins
    Course: Side Dish
    Cuisine: American
    Keyword: slow cooker sweet potatoes
    Servings: 6 servings
    Calories: 194kcal
    Author: Tanya Harris

    Equipment

    • Slow Cooker

    Ingredients

    • 6-8 Sweet potatoes medium-sized
    • Salt and Pepper to taste
    • Butter

    Instructions

    • Rinse and scrub sweet potatoes with a produce brush. 
    • Place sweet potatoes in the slow cooker insert.
    • Cover and cook on low for 6-8 hours or on high for 3-4 hours, until the sweet potatoes are tender. 
    • Serve hot and add toppings. 

    Notes

    • I add the sweet potatoes into the slow cooker without drying them or poking wholes in them. 
    • I use a 6-quart slow cooker to accommodate the 6 sweet potatoes. 

    Nutrition

    Serving: 1g | Calories: 194kcal | Carbohydrates: 45g | Protein: 4g | Fat: 0.1g | Saturated Fat: 0.04g | Polyunsaturated Fat: 0.03g | Monounsaturated Fat: 0.002g | Sodium: 512mg | Potassium: 762mg | Fiber: 7g | Sugar: 9g | Vitamin A: 32063IU | Vitamin C: 5mg | Calcium: 68mg | Iron: 1mg

    Classic Mashed Turnips Recipe

    January 10, 2023 by Tanya Harris Leave a Comment

    Bowl of mashed turnips with a spoon

    Mashed turnips are a Southern holiday staple, creamy and simple, and a welcome break from all the heavy hitters on the table. This easy recipe is ready in 30 minutes and goes with just about everything.

    Bowl of mashed turnips with a spoon

    You’ll find the full recipe with ingredient amounts and instructions in the recipe card at the bottom of this post. Be sure to check out the blog post itself for extra tips and tricks!

    close up Tanya holding bowl

    Every time we have a Holiday at my in-laws', there's a bowl of mashed turnips on the table. It's a Southern tradition.

    When mashed, turnips become a light vegetable that pairs nicely with heartier dishes like my Southern Candied Sweet Potatoes or Creamy Baked Macaroni and Cheese. Serve alongside a tasty Air Fryer Fried Chicken or Baked Turkey Thighs & Vegetables.

    Mashed turnips are a lighter side dish, giving a nice, refreshing break between all the other heavy foods.

    Ingredients For Mashed Turnips

    Ingredient amounts and full recipe instructions are on the printable recipe card at the bottom of the post.

    • Turnips - peeled and cut into 1-inch pieces. If your turnips come with greens, don't toss them; you can cook those too!
    • Salt and Pepper -  to taste
    mashed turnip ingredients

    How to make Mashed Turnips

    Peel and dice the turnip into 1-inch pieces.

    peeling and cutting turnips

    Place the turnip pieces into a large pot and cover them with 2 inches of water.

    pot of diced turnips in water

    Bring to a boil, then reduce heat to medium and simmer until the turnips are tender about 20-25 minutes. 

    testing for fork tenderness

    Drain the turnips and return them to the pot.

    Use a potato masher or electric hand mixer until they are smooth. Season with salt and pepper to taste. Serve hot. 

    mashing cooked turnips

    How do I choose a turnip?

    The size of the turnip you buy determines whether it gives off a bitter or sweet flavor. Larger turnips tend to be more bitter, while smaller turnips are sweeter. Bigger isn't always better in this situation; I'd pick a small to medium-sized turnip.

    Storing leftovers

    Store leftover mashed turnips in an airtight container in the refrigerator for 3-5 days. Mashed turnips can be frozen for up to 3 months in a freezer-safe container, though they may release some water when thawed.

    Are mashed turnips healthier than mashed potatoes?

    Yes, and it's not even close. Turnips have fewer calories and carbs than potatoes. We're talking 18 calories and 4 grams of carbs per cup compared to 59 calories and 13.5 grams of carbs in mashed potatoes. So if you're watching your carbs or just want a lighter side dish, mashed turnips are the move.

    Why are my mashed turnips watery?

    Turnips have a much higher water content than potatoes, about 94% compared to 80%, so some extra liquid is totally normal. To avoid a soupy mash, drain them well, then put them back in the hot pot with the burner off for a few minutes before you start mashing. That extra time lets the steam do the work and dries them out nicely. If they still seem too wet after mashing, just stir them over low heat for a minute or two until they tighten up.

    Pro Tips

    • You can add milk, cream, or butter to make it creamy, similar to mashed potatoes. If adding milk or cream, add about ½ cup of milk and 2-3 Tablespoons of butter. 
    • You can also add fresh herbs, like chives or parsley, for additional flavor or garnish. 

    Looking for more side dish recipes? Try these out:

    • Slow Cooker Mac and Cheese
    • Air Fryer Carrots (Sweet or Savory)
    • Jamaican Rice and Peas
    • Creamy Instant Pot Mashed Potatoes
    • Collard Green Soup

    If you have tried this recipe or any other recipe on my blog, please rate it and let me know how it turned out in the comments below!

    Bowl of mashed turnips with a spoon
    Print Recipe
    5 from 1 vote

    Mashed Turnips Recipe

    Looking for a low-carb mashed starchy side dish? Smooth and creamy and lightly seasoned these mashed turnips will turn up your dining table this new year.
    Prep Time10 minutes mins
    Cook Time20 minutes mins
    Total Time30 minutes mins
    Course: Side Dish
    Cuisine: American
    Keyword: mashed turnips
    Servings: 4 servings
    Calories: 64kcal
    Author: Tanya Harris

    Ingredients

    • 2 pounds Turnips peeled and cut into 1-inch pieces
    • Salt and Pepper to taste

    Instructions

    • Place the turnip pieces into a large pot and cover it with 2 inches of water. Bring to a boil, then reduce heat to medium and simmer until the turnips are tender, about 20-25 minutes. 
    • Drain the turnips and return them to the pot. Use a potato masher or electric hand mixer until they are smooth. Season with salt and pepper to taste. Serve hot. 

    Notes

    • You can add milk, cream, or butter to make it creamy, similar to mashed potatoes. If adding milk or cream, add about ½ cup of milk and 2-3 Tablespoons of butter. 
    • You can also add fresh herbs, like chives or parsley, for additional flavor or garnish. 

    Nutrition

    Serving: 1g | Calories: 64kcal | Carbohydrates: 15g | Protein: 2g | Fat: 0.2g | Saturated Fat: 0.03g | Polyunsaturated Fat: 0.1g | Monounsaturated Fat: 0.01g | Sodium: 733mg | Potassium: 433mg | Fiber: 4g | Sugar: 9g | Vitamin C: 48mg | Calcium: 68mg | Iron: 1mg

    Blackened Mahi Mahi

    January 9, 2023 by Tanya Harris 2 Comments

    blackened mahi mahi on a plate with broccoli an mashed potatoes

    Our homemade blackened seasoning really gives a punch to this tender Mahi Mahi. Have this dish ready and on the table in under 15 minutes. An easy weeknight meal.

    blackened mahi mahi on a plate with broccoli an mashed potatoes

    This post contains affiliate links, please read my full disclaimer here.

    You’ll find the full recipe with ingredient amounts and instructions in the recipe card at the bottom of this post. Be sure to check out the blog post itself for extra tips and tricks!

    A fresh and flaky fish without the fishy flavor. Mahi Mahi is tender and toothsome and lends itself to being blackened very nicely. The crunchy crust a cast iron pan brings to the table is perfect.

    Give my Blackened Chicken Alfredo a try too, if you love this method as much as I do. Have your own blackening seasoning? Awesome, if not, try my Homemade Blackened Seasoning.

    Close up of mahi mahi in the cast iron pan

    Ingredients Needed

    • Mahi Mahi filets - I usually find these frozen in my local freezer section.
    • Unsalted butter - I choose to use unsalted butter to control the salt content.
    • Blackened seasoning - I use a homemade blend, but storebought will work as well.
    • Olive oil - for searing and cooking the fish on the stovetop.
    • lemon juice - Adds an extra pop of flavor to the fish.
    Blackened mahi mahi ingredients

    Tools Needed:

    • Cast iron pan
    • Meat thermometer
    • Fish spatula

    How To Make Blackened Seasoning

    I love to use my Homemade Blackened Seasoning, which I've used in this recipe. Blackened seasoning is a tasty combination of the following spices:

    Smoked paprika, cayenne pepper, onion powder, ground black pepper, kosher salt, dried oregano, dried thyme, and garlic powder. Some recipes include a little bit of brown sugar. My homemade version does not.

    How To Make Blackened Mahi Mahi

    Dip the Mahi Mahi filets in melted butter, covering both sides of each filet.

    two mahi mahi fillets in a shallow dish

    Then season both sides of the Mahi Mahi filets with blackened seasoning. 

    4 mahi mahi fillets covered in blackened seasoning on a plate

    Place a large skillet pan over medium-high heat and add the olive oil once the pan is hot. Add the fish to the skillet and cook for about 2-3 minutes per side. Remove Mahi Mahi from the skillet. 

    blackened mahi mahi being cooked in a cast iron pan

    Squeeze lemon juice over the Mahi Mahi filets before serving. 

    Storing Leftover Mahi Mahi

    Store any leftover Mahi Mahi in an airtight container in the refrigerator for up to 2 days.

    Freeze your fish in a tightly sealed freezer-safe bag in the freezer for up to 2 months. Thaw by running water over the bag.

    What Makes A Fish Blackened?

    Making a fish blackened is simply the process we follow here. Coating your fish in butter, then generously covering the whole fish in our blackened seasoning.

    Cooking on a hot cast iron pan gets that delicious blackened crust we love. If you don't have one, I highly recommend investing in one.

    mahi mahi being cut with a fork

    What To Serve With Blackened Mahi Mahi

    Serve a creamy mashed potato in the Instant Pot or Slow Cooker alongside this light and flakey fish.

    Utilize your air fryer to whip up some equally delicious veggies: my favorite Air Fryer Carrots (Sweet or Savory) or Air Fryer Green Beans.

    Notes

    • The length of time for cooking the Mahi Mahi will depend on the thickness of the fish. 
    • Mahi Mahi filets are cooked when the fish has reached an internal temperature of 145 degrees Fahrenheit. 
    • If you prefer to bake fish in the oven, brush the filets in melted butter, sprinkle with the seasoning, and bake at 375 degrees Fahrenheit for about 15-20 minutes.

    Looking for more seafood recipes? Try these out:

    • Oven Baked Cod
    • Air Fryer Fish Tacos
    • Creamy Crab Bisque
    • Air Fried Lobster Tail Recipe (Fast & Easy)
    • Easy Teriyaki Salmon

     If you have tried this recipe or any other recipe on my blog, please rate it and let me know how it turned out in the comments below!

    blackened mahi mahi on a plate with broccoli an mashed potatoes
    Print Recipe
    5 from 1 vote

    Blackened Mahi Mahi

    Our homemade blackened seasoning really gives a punch to this tender Mahi Mahi. Have this dish ready and on the table in under 15 minutes. An easy weeknight meal.
    Cook Time10 minutes mins
    Total Time10 minutes mins
    Course: Main Course
    Cuisine: American
    Keyword: blackened mahi mahi
    Servings: 4 servings
    Calories: 249kcal
    Author: Tanya Harris

    Ingredients

    • 4 Mahi Mahi filets 4-6 oz each, patted dry
    • 4 tablespoons Unsalted butter melted
    • 2 ½ tablespoons Blackened seasoning
    • 2 tablspoons Olive oil
    • Juice from 1 lemon

    Instructions

    • Dip the mahi mahi filets in the melted butter, covering both sides of each filet. Then season both sides of the mahi mahi filets with blackened seasoning. 
    • Place a large skillet pan over medium-high heat and add the olive oil once the pan is hot. Add the fish to the skillet and cook for about 2-3 minutes per side. Remove mahi mahi from the skillet. 
    • Squeeze lemon juice over the mahi mahi filets before serving. 

    Notes

    • The length of time for cooking the Mahi Mahi will depend on the thickness of the fish. 
    • Mahi Mahi filets are cooked when the fish has reached an internal temperature of 145 degrees Fahrenheit. 

    Nutrition

    Serving: 1g | Calories: 249kcal | Carbohydrates: 0.01g | Protein: 32g | Fat: 13g | Saturated Fat: 8g | Polyunsaturated Fat: 1g | Monounsaturated Fat: 4g | Trans Fat: 0.5g | Cholesterol: 154mg | Sodium: 817mg | Potassium: 711mg | Sugar: 0.01g | Vitamin A: 656IU | Calcium: 29mg | Iron: 2mg

    Fried Chicken Sliders

    January 3, 2023 by Tanya Harris Leave a Comment

    fried chicken slider on plate with other sandwiches in background

    Fried chicken sliders are a delicious and convenient way to enjoy the classic flavor of fried chicken sandwiches in mini form. These mini sandwiches are perfect for a quick snack or as part of a larger meal, and they are sure to be a hit for kids and adults alike.

    fried chicken slider on plate with other sandwiches in background

    This post contains affiliate links, please read my full disclaimer here.

    You’ll find the full recipe with ingredient amounts and instructions in the recipe card at the bottom of this post. Be sure to check out the blog post itself for extra tips and tricks!


    The first I made these sliders, I got a standing ovation from my family at the dinner table. I’m exaggerating here a bit, but my oldest told me it was the best chicken sandwich she’s ever had. I’d count that as a huge win!


    These little sandwiches are perfect for a weeknight dinner or serve as an appetizer at a dinner party. For this recipe, I’ve provided instructions for deep frying or air frying the chicken on the sandwiches. Both turned out delicious, so I’d suggest using whichever method you prefer.


    Serve these alongside our Vinegar Coleslaw, Creamy Coleslaw, or Southern Potato Salad.

    Ingredients for Fried Chicken Sliders

    • Fried Chicken - buttermilk, hot sauce, all-purpose flour, seasoned salt, garlic powder, onion powder, Italian seasoning, and cayenne pepper. This is my go-to fried chicken recipe ingredients.
    • Spicy Mayo - mayonnaise, hot sauce, paprika, garlic powder, onion powder.
    • Sandwich Ingredients - Hawaiian rolls and dill pickle slices. I prefer the sweetness of the Hawaiian rolls, but any other dinner rolls will do here.
    ingredients for fried chicken sandwiches
    dinner rolls, spicy mayo, and pickles on white background

    How to make Fried Chicken Sliders

    Marinate the chicken

    Combine buttermilk and hot sauce in a bowl and whisk to combine. Add chicken pieces and stir, making sure all pieces are covered. Cover and marinate in the fridge for 1 hour. 

    Bread the chicken

    In a bowl, combine all-purpose flour, seasoned salt, garlic powder, onion powder, Italian seasoning, and cayenne pepper. Mix thoroughly. 

    Remove each piece of chicken from the buttermilk mixture and drain off any excess milk. Dip the chicken pieces into the flour mixture, shaking off any excess flour.

    Place the chicken pieces on a wire rack or plate. Place in the fridge for 15 minutes. This will help the flour stick to the chicken.

    chicken pieces being dredged in flour

    Fry the chicken pieces. 

    To air fry

     Preheat your air fryer to 360 degrees Fahrenheit.

    Place the chicken pieces in a single layer and close the air fryer basket. Air fry for 6 minutes. 

    raw chicken pieces in air fryer basket

    After 6 minutes, open the air fryer basket and lightly spray the chicken with oil. Flip the pieces and spray. Continue to air fry for an additional 6-7 minutes, or until the chicken has reached an internal temperature of 165 degrees Fahrenheit.

    cooked fried chicken pieces in air fryer basket

    To deep fry

    In a large, heavy bottom pot, heat 2-3 inches of oil over medium-high heat until the oil reaches 350 degrees Fahrenheit. Add the floured chicken pieces to the pot, about 4-5 pieces at a time, and fry for 6-8 minutes, until chicken pieces are golden and have reached an internal temperature of 165 degrees Fahrenheit. Remove and set aside on a wire rack to cool.  

    fried chicken being pulled out of oil with spoon

    Assemble sandwich

    Add pickle slices and fried chicken to the bottom of each slider bun. 

    Make the spicy mayo by combining mayonnaise, hot sauce, paprika, garlic powder, and onion powder. Add the mayo on the top of each slider bun. Place the top on the sandwiches. Serve and enjoy. 

    fried chicken slider on plate with other sandwiches in background

    Can I make these sliders ahead of time?

    These sliders are best served the day they are made. However, you can soak the chicken in the buttermilk mixture up to 24 hours ahead of time. You can also combine the flour mixture and prepare the spicy mayo ahead of time. 

    Why soak the chicken in buttermilk?

    Buttermilk is a great way to add moisture and flavor to the chicken. It helps tenderize the meat, making it extra juicy and flavorful when cooked. Soaking chicken in buttermilk also helps keep it from drying out during cooking.

    Pro Tips

    • Make sure to slice the breast before cutting it into 3-inch pieces. You want the chicken pieces to be thin rather than thick. 
    • Serve the sandwiches warm.

    Variations

    • You can use chicken thighs rather than breasts if you prefer. 
    • Top the sliders with buffalo sauce for a buffalo chicken slider. 
    • Top the sliders with lettuce and tomato. 

    I hope you enjoy these sliders as much as we do. Looking for other fried chicken recipes? Try these out:

    • Nashville hot chicken tenders (Air Fryer)
    • Air fryer fried chicken
    • Air Fryer Chicken Nuggets
    fried chicken slider on plate with other sandwiches in background
    Print Recipe
    5 from 1 vote

    Fried Chicken Sliders

    Fried chicken sliders are a delicious and convenient way to enjoy the classic flavor of fried chicken sandwiches in mini form. These mini sandwiches are perfect for a quick snack or as part of a larger meal, and they are sure to be a hit for kids and adults alike.
    Prep Time1 hour hr 15 minutes mins
    Cook Time12 minutes mins
    Total Time1 hour hr 27 minutes mins
    Course: Appetizer
    Cuisine: American
    Keyword: fried chicken sliders
    Servings: 6 people
    Calories: 517kcal
    Author: Tanya Harris

    Ingredients

    Fried Chicken

    • 2 8 oz chicken breasts sliced in half and cut into 3-inch pieces
    • ½ cup buttermilk
    • ½ cup hot sauce
    • ¾ cup All-Purpose Flour
    • 2 teaspoon seasoned salt
    • 1 teaspoon garlic powder
    • 1 teaspoon onion powder
    • 1 teaspoon Italian seasoning
    • ½ teaspoon cayenne pepper
    • Canola oil for frying*

    Spicy Mayo

    • 1 cup mayonnaise
    • 2 Tablespoon hot sauce
    • 1 teaspoon paprika
    • 1 teaspoon garlic powder
    • 1 teaspoon onion powder

    Sandwich

    • 12 Hawaiian rolls
    • ½ cup dill pickle slices

    Instructions

    Marinate Chicken

    • Combine buttermilk and hot sauce in a bowl and whisk to combine. Add chicken pieces and stir, making sure all pieces are covered. Cover and marinate in the fridge for 1 hour.

    Bread Chicken

    • In a bowl, combine all-purpose flour, seasoned salt, garlic powder, onion powder, Italian seasoning, and cayenne pepper. Mix thoroughly.
    • Remove each piece of chicken from the buttermilk mixture and drain off any excess milk. Dip the chicken pieces into the flour mixture, shaking off any excess flour. Place the chicken pieces on a wire rack or plate. Place in the fridge for 15 minutes.

    To use the Air Fryer

    • Preheat your air fryer to 360 degrees Fahrenheit.
    • Place the chicken pieces in a single layer and close the air fryer basket. Air fry for 6 minutes.
    • After 6 minutes, open the air fryer basket and lightly spray the chicken with oil. Flip the pieces and spray. Continue to air fry for an additional 6-7 minutes, or until the chicken has reached an internal temperature of 165 degrees Fahrenheit.

    To Deep Fry

    • In a large, heavy bottom pot, heat 2-3 inches of oil over medium-high heat until the oil reaches 350 degrees Fahrenheit. Add the chicken pieces to the pot, about 4-5 pieces at a time, and fry for 6-8 minutes, until chicken pieces are golden and have reached an internal temperature of 165 degrees Fahrenheit. Remove and set aside on a wire rack to cool.

    Assemble Sandwiches

    • Add pickle slices and fried chicken on the bottom of each slider bun.
    • Make the spicy mayo by combining mayonnaise, hot sauce, paprika, garlic powder, and onion powder. Add the mayo on the top of each slider bun. Place the top on the sandwiches. Serve and enjoy.

    Notes

    • How much canola oil is used will determine whether you air fryer or deep fry. You will only need a light spray of oil if using the air fryer. For deep frying, you will need about 2-3 cups of canola oil. 

    Nutrition

    Calories: 517kcal | Carbohydrates: 45g | Protein: 9g | Fat: 33g | Saturated Fat: 7g | Polyunsaturated Fat: 17g | Monounsaturated Fat: 7g | Trans Fat: 0.1g | Cholesterol: 38mg | Sodium: 1943mg | Potassium: 135mg | Fiber: 1g | Sugar: 10g | Vitamin A: 358IU | Vitamin C: 19mg | Calcium: 47mg | Iron: 1mg

    15 Bean Soup

    December 26, 2022 by Tanya Harris 14 Comments

    close up of 15 bean soup

    A warm and hearty dish to make during the winter season, this 15-bean soup is packed full of protein, Cajun spice, and sweet tomatoes.

    bean soup on a plate with pot in background

    You’ll find the full recipe with ingredient amounts and instructions in the recipe card at the bottom of this post. Be sure to check out the blog post itself for extra tips and tricks!

    pic of Tanya

    The 15 Bean Soup is perfect for bean lovers, and I love that this soup pack contains such a wide variety of beans. That's one of the reasons it's so tasty. My version uses added meat, but I like to add Italian sausage because it is already seasoned meat. It makes your beans so flavorful. It helps lessen the amount of ingredients needed for this soup. It's such a hearty soup.

    My other favorite hearty winter-month soups are Oxtail Soup and my Brunswick Stew. I hope you love these just as much as I do!

    Love, Tanya

    15 Bean Soup at a Glance

    • Prep Time: 10 minutes
    • Cook Time: 2 hours
    • Total Time: 2 hours 10 minutes
    • Serves: 16
    • Best For: Weeknight dinners, feeding a crowd, meal prep, cozy winter cooking

    A Quick Look at the Ingredients

    Ingredient amounts and full recipe instructions are on the printable recipe card at the bottom of the post.

    • Bag of 15 bean soup mix – A 20-ounce bag of mixed dried beans you’ll find in the dry bean aisle. Tons of texture and flavor in one bag.
    • Italian sausage – I use mild or hot ground Italian sausage. It’s already seasoned, so it adds a ton of flavor without needing a bunch of extra spices.
    • Onion and garlic – Build the flavor base for the soup. Don’t skip these.
    • Cajun seasoning – Use your favorite Cajun blend and adjust to taste, depending on how spicy you like it.
    • Chicken broth and water – Broth adds flavor, and the extra water gives the beans plenty of liquid to get nice and tender.
    • Diced tomatoes – A can of diced tomatoes (undrained) adds a little sweetness and acidity to balance the rich beans and sausage.
    • Sour cream (optional) – A dollop on top makes the soup extra creamy and delicious. It's not optional for me, but I know some people aren't fans.
    15 bean soup ingredients

    Tools Needed:

    • Dutch pot
    • Wooden spoon

    How To Make 15-Bean Soup

    You can choose to soak the beans overnight or skip the step altogether. Soaking the beans will allow them to cook a bit faster.

    Step 1: In a large pot, brown Italian sausage over medium-high heat. Add onions and garlic and sauté for an additional 3-4 minutes. Add Cajun seasoning and stir. 

    sausage and onion browning in a large pot

    Step 2: Reduce the heat to medium-low and add beans, chicken broth, and water. Cover and cook for an additional 1-2 hours, until the beans are tender.

    Step 3: Add tomatoes and cook for an additional 10 minutes. Remove from heat and serve in soup bowls. 

    Cooked 15-bean soup with a wooden spoon showing that it's done

    Step 4: Enjoy as is, or top each bowl with a dollop of sour cream. Enjoy. 

    To Make these Beans in an Instant Pot Pressure Cooker

    This recipe can easily be made in the Instant Pot as well. For this option, there isn't any need to soak your beans overnight, just simply rinse and remove any bean debris.

    1. First, reduce the amount of chicken broth by 1 cup. So you’ll use 5 cups of chicken broth instead of 6.
    2. Brown Italian sausage in the Instant Pot insert. Add onions and garlic and sauté for an additional 3-4 minutes. Add Cajun seasoning and stir. 
    3. Turn off the Instant Pot and add beans, chicken broth, and water.
    4. Then pressure cook on high pressure for 20 minutes. After the time is up, allow the pressure to release manually for 10 minutes before slowly releasing the remaining pressure. 
    5. Open the lid and stir in the tomatoes. Serve and enjoy.
    close up of 15 bean soup in a bowl

    Making 15-Bean Soup In A Slow Cooker?

    Yes, but you will need to do a bit of prep beforehand. First, place the beans in a large pot and cover with about 3 inches of water. Bring to a boil for about 10 minutes. Drain the beans and set them aside.

    1. Brown your meat, onions, and garlic first before adding them to your slow cooker.
    2. Add the rest of the ingredients to your slow cooker except the canned tomatoes and seasoning.
    3. Secure the lid and cook on high for 7 hours without removing the lid.
    4. Remove the lid, add your seasoning and canned tomatoes, and stir to mix through.
    15 bean soup served up in a bowl

    How to Store

    Store leftover bean soup in an airtight container in the refrigerator for 3-4 days.

    Freezing leftover bean soup is also another great option if you have lots of leftovers. Freeze in a freezer-safe bag or container for up to 6 months. Allow it to thaw overnight in the refrigerator before reheating.

    What To Serve With This Soup

    For topping your 15-bean soup, I recommend:

    • A dollop of sour cream
    • Shredded cheddar cheese
    • Scallions
    • Diced avocado
    • Sliced Jalapeños

    To serve alongside your bean soup, I recommend:

    • Classic Southern Cornbread Recipe or Easy Cornbread Muffins
    • Mayonnaise Biscuits or Homemade Air Fryer Biscuits
    • Honey Whole Wheat Dinner Rolls or Soft Air Fryer Dinner Rolls 

    Need more bean recipes?

    Check out An Easy to Follow Guide for How to Cook Dried Beans. Or try these out:

    • Pinto Bean Pie
    • Beef and Bean Stew
    • Homemade Baked Beans
    • Black Bean Soup

    If you're looking for more soup recipes? Try these out:

    • Oxtail Soup - Rich, slow-cooked oxtail in a deeply flavored broth with tender veggies.
    • Collard Green Soup - All the flavors of Southern collards turned into a hearty, sippable soup.
    • Creamy Cream of Mushroom Soup - Better than canned, with mushrooms and a silky, creamy base. Perfect on its own or as a base for casseroles.
    • Vegetable Beef Soup - Classic veggie-packed beef soup with a rich broth and tender chunks of meat. Great for an easy, filling family dinner.

     If you have tried this recipe or any other recipe on my blog, please rate it and let me know how it turned out in the comments below!

    close up of 15 bean soup
    Print Recipe
    5 from 3 votes

    15 Bean Soup

    A warm and hearty dish to make during the winter season. Packed full of protein, Cajun spice, and sweet tomatoes. Top with a dollop of sour cream and serve with crusty bread.
    Prep Time10 minutes mins
    Cook Time2 hours hrs
    Total Time2 hours hrs 10 minutes mins
    Course: Main Course, Soup
    Cuisine: American
    Keyword: 15 bean soup
    Servings: 16 servings
    Calories: 230kcal
    Author: Tanya Harris

    Ingredients

    • 20 ounce Bag of 15 bean soup mix soaked overnight
    • 1 pound Mild or hot italian sausage
    • 1 large Onion chopped
    • 4 cloves Garlic chopped
    • 3 tablespoons Cajun seasoning
    • 6 cups Chicken broth
    • 2 cups Water
    • 1 14.5 oz Can diced tomatoes undrained
    • Sour cream for topping optional

    Instructions

    • In a large pot, brown Italian sausage over medium-high heat. Add onions and garlic and sauté for an additional 3-4 minutes. Add Cajun seasoning and stir. 
    • Reduce the heat to medium-low and add beans, chicken broth, and water.
    • Cover and cook for an additional 1-2 hours, until the beans are tender. Add tomatoes and cook for an additional 10 minutes. Remove from heat and serve in soup bowls. 
    • Enjoy as is, or top each bowl with a dollop of sour cream. Enjoy. 

    Notes

    • This recipe can also be prepared in a pressure cooker or slow cooker. 

    Nutrition

    Calories: 230kcal

    Blackened Chicken Alfredo

    December 19, 2022 by Tanya Harris 2 Comments

    finished blackened chicken alfredo

    Slightly spicy and creamy, everything you want in blackened chicken alfredo. Top with freshly grated parmesan, warm rolls, and a glass of wine. A perfect date night dinner!

    finished blackened chicken alfredo

    This post contains affiliate links, please read my full disclaimer here.

    You’ll find the full recipe with ingredient amounts and instructions in the recipe card at the bottom of this post. Be sure to check out the blog post itself for extra tips and tricks!

    This is such a quick and delicious meal, you'll love it. Full disclosure, it has a good bit of ingredients but when you make this dish, you'll realize every single ingredient was needed. From the homemade Alfredo sauce, to the pops of freshness the spinach and red pepper give.

    Making your own Alfredo sauce is a lot easier, and much tastier than buying a jar of premade sauce. With the added blackened seasoning on the chicken, this isn't just any chicken Alfredo, but kicked up a notch with those delicious blackening spices.

    Ingredients For Blackened Chicken Alfredo

    • Pasta - I used Fettuccini pasta for this recipe, but any pasta that can hold a nice creamy sauce will work, like penne and bowtie.
    • Chicken breast - slice the breast in half for best results.
    • Blackened seasoning - I use my homemade version. You can also use cajun seasoning in place of blackened.
    • For the sauce - pasta water, heavy cream, parmesan cheese
    • Other ingredients - Olive oil, unsalted butter, minced garlic, red bell pepper, baby spinach, and green onions.
    blackened chicken alfredo ingredients

    Tools Needed

    • Large skillet
    • Large pot for boiling noodles

    How To Make Blackened Seasoning

    I love to use my Homemade Blackened Seasoning, which is what I've used in this recipe. Blackened seasoning is a tasty combination of the following spices:

    • Smoked paprika
    • Cayenne pepper
    • Onion powder
    • Ground black pepper
    • Kosher salt
    • Dried oregano
    • Dried thyme
    • Garlic powder

    How To Make Blackened Chicken Alfredo

    Prepare pasta according to the directions on the box. Drain and set aside ½ cup of pasta water.

    Prepare your chicken breast by slicing them in half. You'll want thin chicken breast for this recipe. Slicing them in half is much easier than pounding them thin.

    hand slicing the chicken breast in half

    Sprinkle chicken breast with 1 Tablespoon of blackened seasoning, seasoning both sides. 

    4 chicken breasts covered in blackened seasoning

    Heat oil in a large skillet over medium heat. Add the chicken breast to the skillet and cook for about 5-7 minutes per side, until cooked through. Transfer to a plate and set aside.

    seasoned chicken being cooked in a pan

    Add butter, garlic cloves, and red bell pepper to the skillet and stir. Cook for about 3 minutes, until the red peppers have softened. 

    peppers and garlic added to the pan to cook

    Add pasta water, heavy cream, the remaining blackened seasoning, and spinach, and simmer for about 3 minutes. Remove from heat and add cooked pasta and parmesan cheese. Stir until coated.

    remaining ingredients added and stirred together to combine

    Meanwhile, slice the cooked chicken and place it on top of the pasta. Garnish with chopped green onions. Serve and enjoy. 

    plated blackened chicken Alfredo on a plate

    Storing Leftover Blackened Chicken Alfredo

    Should you have any leftovers, store them in an airtight container in the refrigerator for up to 3 days. To reheat in a microwave, add about 1 Tablespoon of water to the pasta, cover with a damp paper towel, and reheat for about 1-2 minutes. This will allow the pasta to get creamy again.

    I don't recommend freezing this recipe, as the pasta and cheese will break down and separate.

    What To Serve With Blackened Chicken Alfredo

    There are some lovely veggies in this dish already, but you may enjoy serving your chicken alfredo up with some Air Fryer Green Beans or Brussels sprouts.

    Enjoy a Kale and Broccoli Salad with Sweet and Sour Dressing as a first course.

    For dessert, this Easy Southern Peach Cobbler Cake is amazing!

    Notes

    • For a different option, substitute the chicken with seafood, like shrimp. You could also substitute the chicken for tofu for a meatless option. 
    • For a similar recipe, try my rasta pasta made with jerk seasoning and shrimp.
    • Or try my Cajun Chicken Instant Pot Pasta Recipe for a one pot alfredo recipe.

    Looking for more Chicken recipes? Try these out:

    • Jamaican Curry Chicken
    • Spinach Stuffed Chicken Breasts
    • Juicy Oven Roasted Chicken Pieces

     If you have tried this recipe or any other recipe on my blog, please rate it and let me know how it turned out in the comments below!

    finished blackened chicken alfredo
    Print Recipe
    5 from 1 vote

    Blackened Chicken Alfredo

    Slightly spicy and creamy, everything you want in blackened chicken alfredo. Top with freshly grated parmesan, warm rolls, and a glass of wine. A perfect date night dinner!
    Prep Time10 minutes mins
    Cook Time12 minutes mins
    Total Time22 minutes mins
    Course: Main Course
    Cuisine: American
    Keyword: blackened chicken alfredo
    Servings: 4 servings
    Calories: 477kcal
    Author: Tanya Harris

    Ingredients

    • 8 ounces Fettucini pasta
    • 2 8 ounce Chicken breast sliced in half
    • 2 tablespoons Blackened seasoning seperated
    • 2 tablespoons Olive oil
    • 4 tablespoons Unsalted butter
    • 4 cloves Garlic minced
    • 1 Red bell pepper thinly sliced
    • ½ cup Reserved pasta water *
    • 1 cup Heavy cream
    • 1 cup Fresh baby spinach
    • 1 cup Parmesan cheese
    • 2 Green onions chopped, for garnish

    Instructions

    • Prepare pasta according to the directions on the box. Drain and set aside ½ cup of pasta water.
    • Sprinkle chicken breast with 1 Tablespoon of blackened seasoning, seasoning both sides. 
    • Heat oil in a large skillet over medium heat. Add the chicken breast to the skillet and cook for about 5-7 minutes per side, until cooked through. Transfer to a plate and set aside.
    • Add butter, garlic cloves, and red bell pepper to the skillet and stir. Cook for about 3 minutes, until the red peppers have softened. 
    • Add pasta water, heavy cream, the remaining blackened seasoning, and spinach, and simmer for about 3 minutes. Remove from heat and add cooked pasta and parmesan cheese. Stir until coated.
    • Slice the cooked chicken breast and top the pasta with it. Garnish with chopped green onions. Serve and enjoy. 

    Notes

    • For a different option, sub the chicken with seafood, like shrimp. You could also sub the chicken for tofu for a meatless option. 
    • I like to use my homemade blackened seasoning for this recipe. 

    Nutrition

    Serving: 1g | Calories: 477kcal | Carbohydrates: 6g | Protein: 11g | Fat: 46g | Saturated Fat: 26g | Polyunsaturated Fat: 2g | Monounsaturated Fat: 15g | Trans Fat: 0.5g | Cholesterol: 114mg | Sodium: 954mg | Potassium: 174mg | Fiber: 1g | Sugar: 3g | Vitamin A: 2411IU | Vitamin C: 41mg | Calcium: 351mg | Iron: 1mg

    Perfect Oven Baked Cod

    December 9, 2022 by Tanya Harris 23 Comments

    oven baked cod being cut by a fork

    A flaky oven-baked cod that's buttery and garlicky with a burst of lemon. This refreshing and light main course is perfect for a weeknight dinner. These baked cod fillets will be a family favorite!
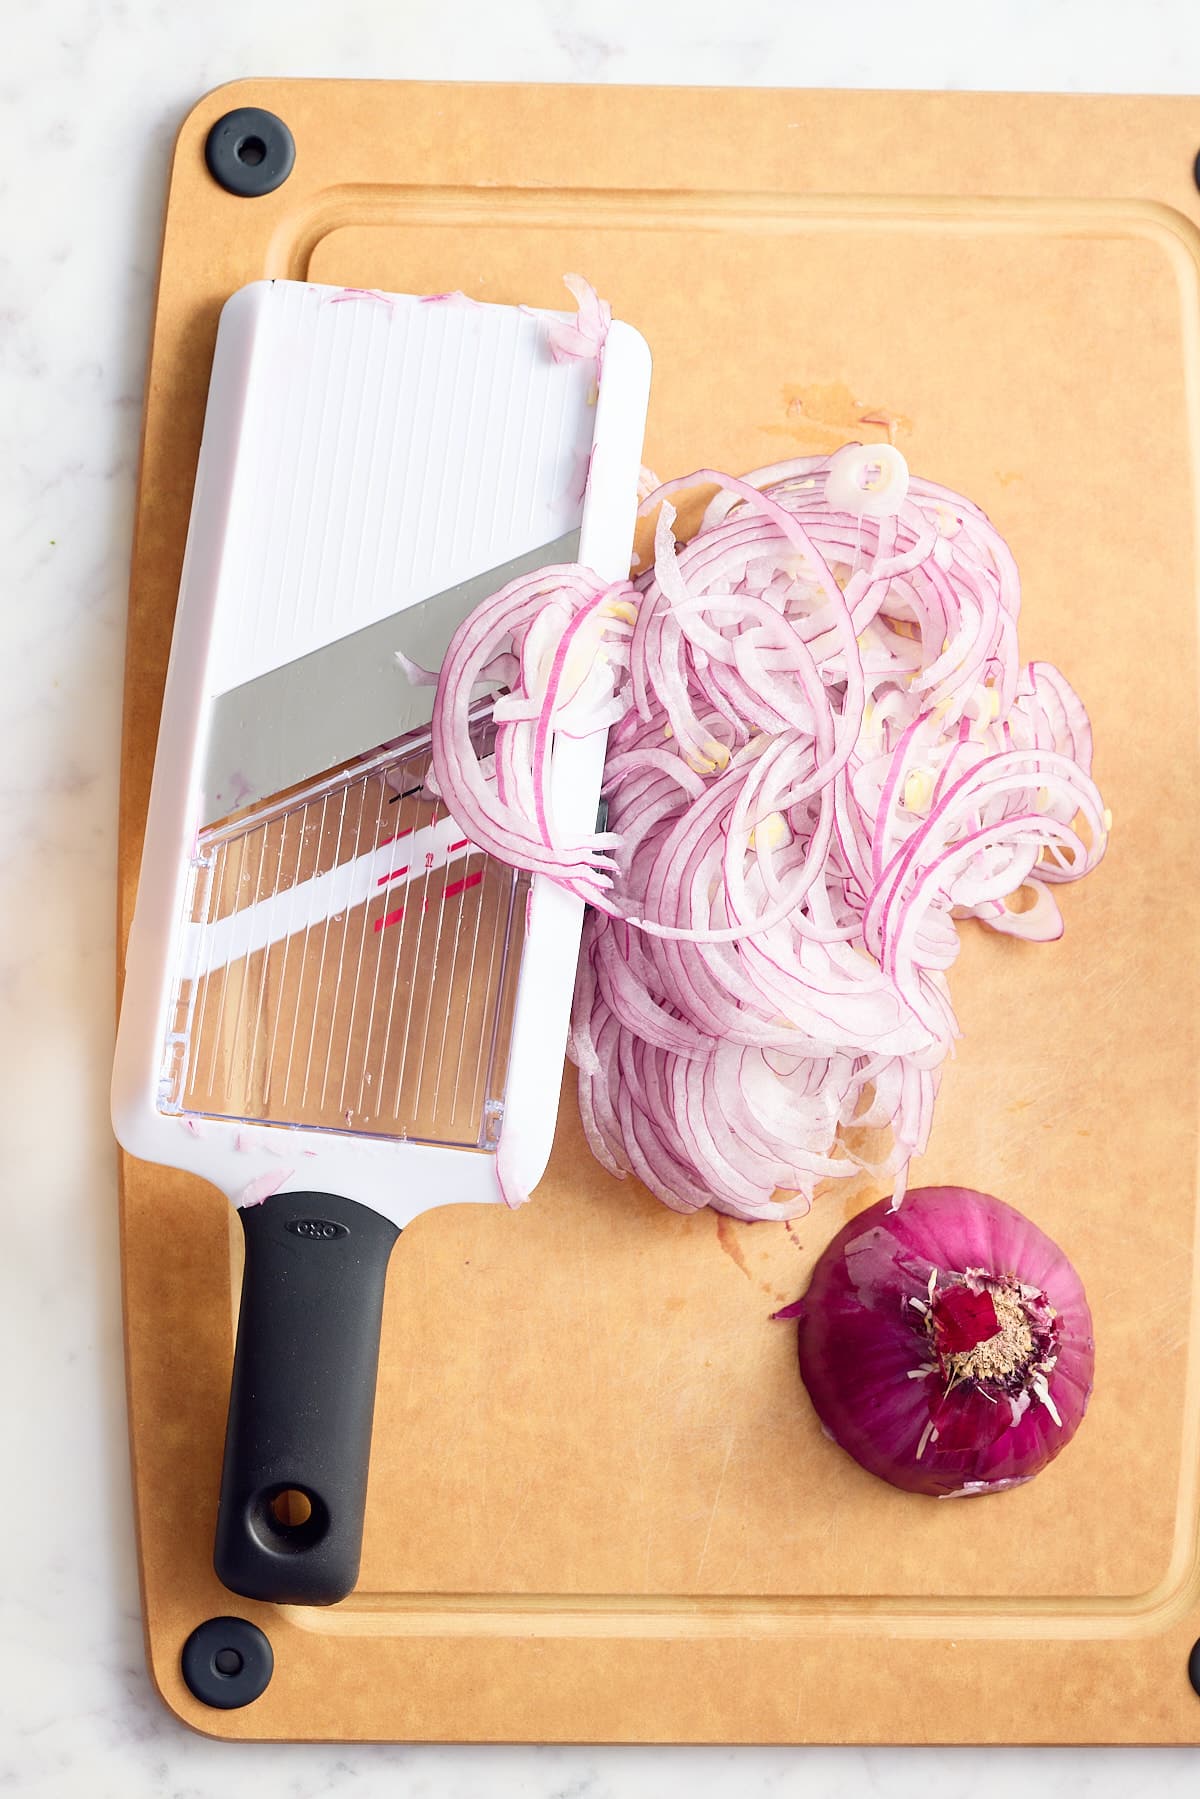
    close up of freshly baked oven baked cod

    This post contains affiliate links, please read my full disclaimer here.

    You’ll find the full recipe with ingredient amounts and instructions in the recipe card at the bottom of this post. Be sure to check out the blog post itself for extra tips and tricks!

    If you usually go for cod deep-fried with fries on the side, you’re not alone—fish and chips are a classic for a reason. But this baked version is something else. It’s tender, full of flavor, and shows just how good cod can be when you keep it simple and let the seasoning shine.

    Baking fish in the oven is one of my go-to weeknight dinners because it's healthy and easy. Whether it's baked salmon, tilapia, or cod, this recipe is one you'll use again and again.

    a spatula picking up a piece of oven baked cod topped with lemon

    Ingredients and Tools Needed

    • Codfish fillets - defrosted and patted dry.
    • Dry Seasoning - Garlic powder, Kosher salt, Paprika, Black pepper
    • Unsalted butter, Lemon, and Parsley for serving.
    Oven baked cod ingredients

    Tools Needed For Oven-Baked Cod

    • 3-quart baking dish
    • Knife & Cutting board
    • Fish spatula

    How To Make The Perfect Oven-Baked Cod

    Preheat the oven to 375 degrees Fahrenheit. Dry fish fillets with a paper towel or a clean kitchen towel. Place fillets in a 3-quart baking dish. 

    Sprinkle the fillets with kosher salt, garlic powder, paprika, and black pepper. Add butter and sliced lemon over the top of the fillets. 

    cod prepared in the baking dish with butter slices and sliced lemons

    Place in the preheated oven for 15-20 minutes until the fish is flaky and reaches an internal temperature of 145 degrees Fahrenheit.

    Remove fish from oven and sprinkle with chopped parsley before serving. 

    oven baked cod covered in fresh parsley

    Can I Use Frozen Cod?

    If you don't have a local fish market near you with fresh fish, buying frozen cod is the next best thing. I would recommend buying a wild-caught cod versus a farm-raised cod. Wild-caught cod will have a fresher flavor, leaner meat, and no fishy aftertaste.

    I suggest defrosting frozen fish before baking. If you prefer to bake from frozen, bake the fish for 20-25 minutes.

    What To Serve With Baked Cod

    Oven-baked cod can truly be served with almost anything! If you want it with vegetables, asparagus or broccoli would nicely complement baked cod.

    If a salad side is more your speed, serve your fish alongside a fresh Quinoa Avocado Salad or Beet and Orange Salad.

    My go-to grain with this dish is rice because it soaks up all that buttery, lemony sauce from the fish. So good!

    oven baked cod being cut by a fork

    Different Ways To Season Oven-Baked Cod

    Want to change up the flavor profile of your oven-baked cod? Any of the spices listed below will taste equally amazing.

    • Homemade Fish Seasoning: Use 1.5 - 2 teaspoons of fish seasoning per pound of cod.
    • Blackened Cod: Want a little kick? Swap out the spices with blackened seasoning.
    • Cajun Baked Cod: A deliciously spicy baked dish with this added cajun seasoning.
    • All-purpose seasoning: This flavor combo is an all-around winner when it comes to any recipe.

    Notes

    • The thickness of your fillets will determine how long they need to be baked. Thinner fillets will cook faster in the oven.
    • Leftovers will keep well in the fridge for 3 to 4 days.

    Looking for more fish recipes? Try these out:

    • Air Fryer Fish Tacos
    • Crispy Air Fryer Fish
    • Homemade Fish Seasoning
    • Brown Stew Fish
    • Fried Catfish

     If you have tried this recipe or any other recipe on my blog, please rate it and let me know how it turned out in the comments below!

    oven baked cod being cut by a fork
    Print Recipe
    4.93 from 28 votes

    Oven Baked Cod Recipe

    A flaky oven-baked cod that's buttery and garlicky with a burst of lemon. This refreshing and light main course is perfect for a weeknight dinner. These baked cod fillets will be a family favorite!
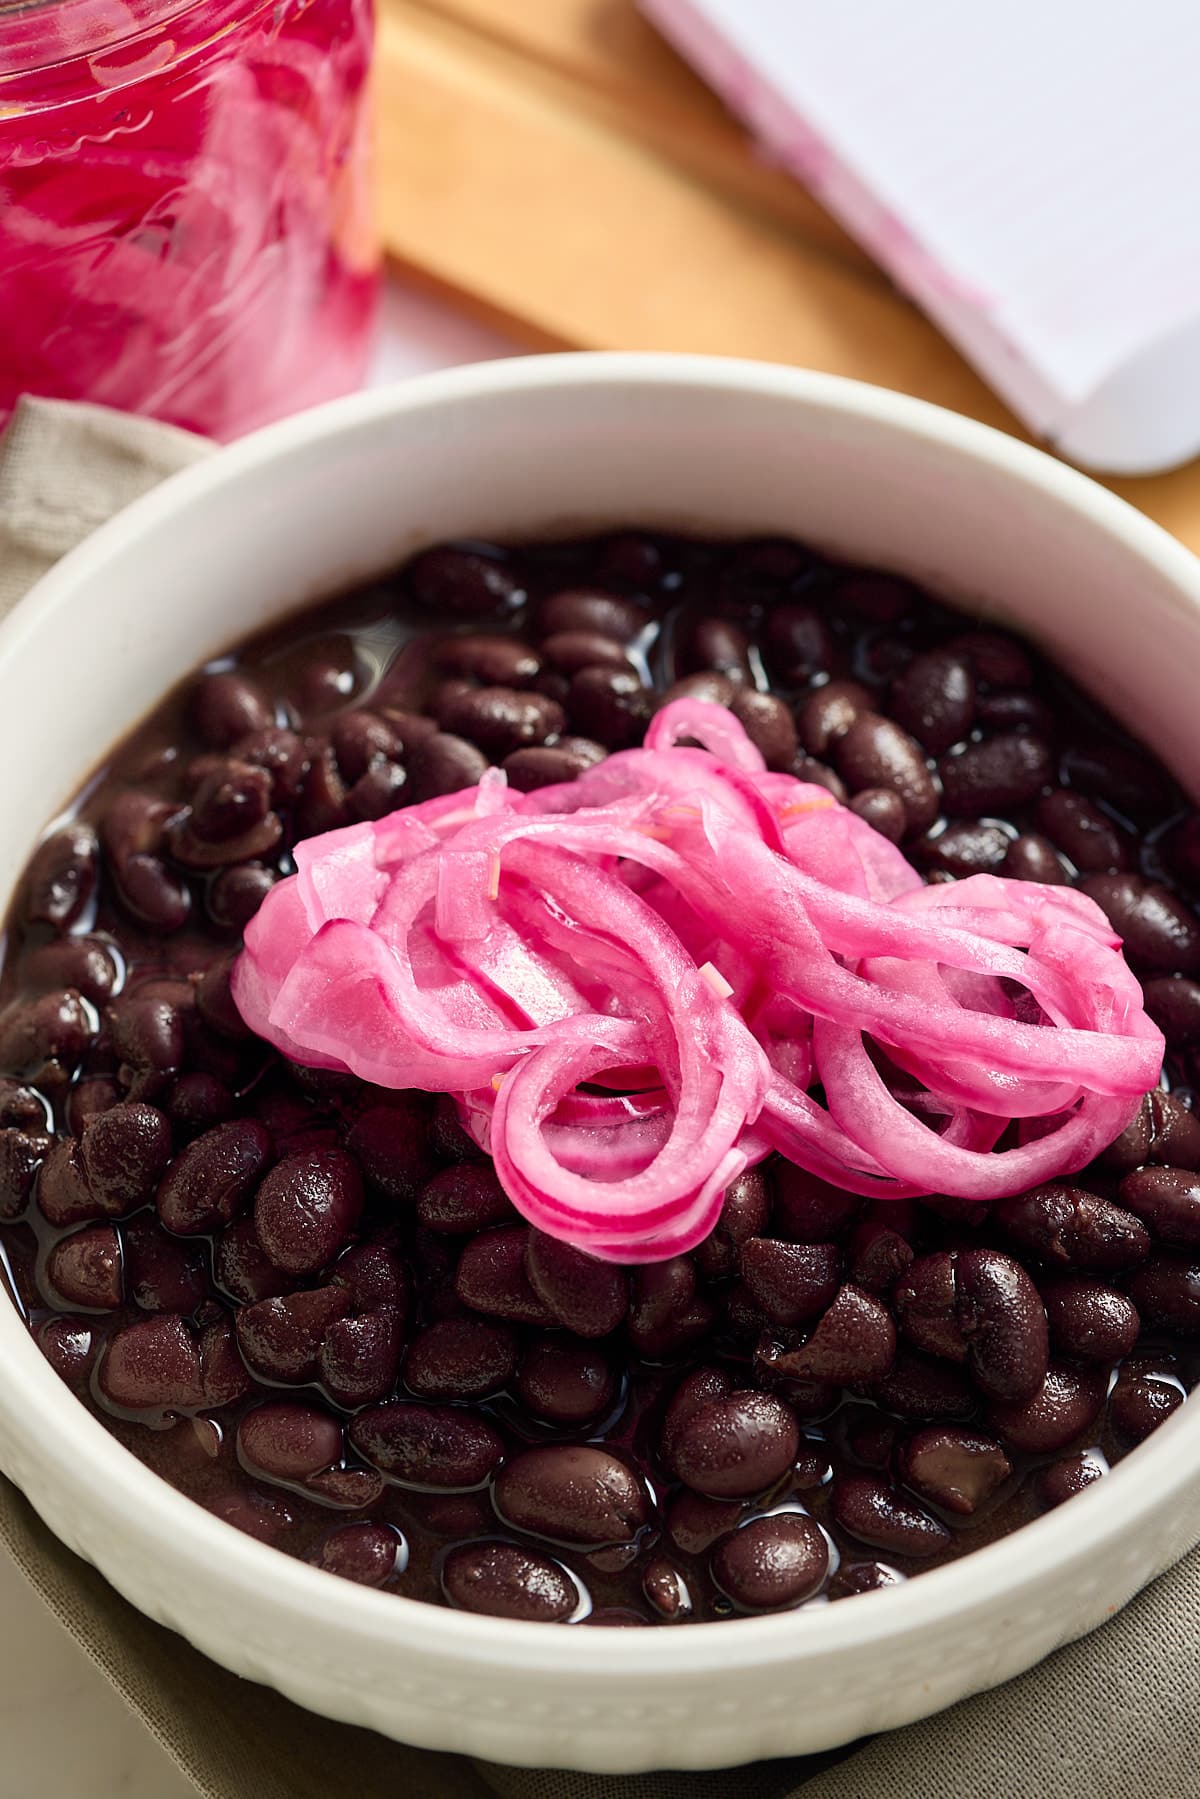
    Prep Time15 minutes mins
    Cook Time20 minutes mins
    Total Time35 minutes mins
    Course: Main Course
    Cuisine: American
    Keyword: oven baked cod
    Servings: 2 servings
    Calories: 307kcal
    Author: Tanya Harris

    Ingredients

    • 1 pound Codfish fillets
    • 1 teaspoon Kosher salt
    • ½ teaspoon Garlic powder
    • ½ teaspoon Paprika
    • ¼ teaspoon Black pepper
    • 2 tablespoons Unsalted butter sliced
    • 1 Lemon sliced
    • Parsley for serving chopped

    Instructions

    • Preheat oven to 375 degrees Fahrenheit.
    • Dry fish fillets with a paper towel or a clean kitchen towel. Place fillets in a 3-quart baking dish. 
    • Sprinkle the fillets with kosher salt, garlic powder, paprika, and black pepper. Add butter and sliced lemon over the top of the filets. 
    • Place in the preheated oven for 15-20 minutes, until the fish is flaky and reaches an internal temperature of 145 degrees Fahrenheit.
    • Remove fish from oven and sprinkle with chopped parsley before serving. 

    Notes

    • The thickness of your filets will determine how long they need to be baked. Thinner filets will cook faster in the oven.
    • Leftovers will keep well in the fridge for 3 to 4 days.

    Nutrition

    Serving: 1g | Calories: 307kcal | Carbohydrates: 6g | Protein: 41g | Fat: 13g | Saturated Fat: 8g | Polyunsaturated Fat: 1g | Monounsaturated Fat: 3g | Trans Fat: 0.5g | Cholesterol: 128mg | Sodium: 1289mg | Potassium: 1038mg | Fiber: 2g | Sugar: 1g | Vitamin A: 700IU | Vitamin C: 31mg | Calcium: 57mg | Iron: 1mg

    Jamaican Rum Punch Recipe

    December 3, 2022 by Tanya Harris 20 Comments

    jamaican rum punch in glass with ice

    This Jamaican Rum Punch Recipe is the perfect drink for when you want a taste of the islands. It's delicious and refreshing and the perfect drink to bring you to the Caribbean. This post is meant for an audience 21 and over.

    jamaican rum punch in glass with ice

    You’ll find the full recipe with ingredient amounts and instructions in the recipe card at the bottom of this post. Be sure to check out the blog post itself for extra tips and tricks!

    Oh Jamaica! Jamaica! How I miss thee! I've got to say that I loved growing up in a Jamaican household and I love everything about Jamaica, especially the food! Which is why I really should share more Jamaican recipes with you all. Noted! More Caribbean recipes to come in the future will be added to my Caribbean recipes page. But for now, I must share this Jamaican rum punch recipe with you.

    So what's in a Jamaican Rum Punch?

    Ingredient amounts and full recipe instructions are on the printable recipe card at the bottom of the post.

    • Good Jamaican Rum - I use dark and white rum, Myers's and Wray & Nephew.
    • Jamaican fruit punch syrup - You can find this in specialty stores, but it's just flavored syrup. You can use grenadine as a substitute.
    • Delicious juices - Orange, pineapple, and lime give this tropical drink so much flavor.
    • Sparkling wine - an optional addition if you like your drink to have a little fizz.
    ingredients for jamaican rum punch

    I sometimes add sparkling wine to my punch because I'm a huge fan. This recipe is delish, with or without it.

    How to make Jamaican Rum Punch

    Add your ingredients to a pitcher and stir. Serve over ice. It's as simple as that.

    rum punch in pitcher

    Can I make this drink one serving?

    Absolutely! I've included the full amounts in the recipe card if you are serving punch for a crowd. For one serving, you need the following amounts:

    • 2.5 ounces of pineapple juice
    • 2 ounces of orange juice
    • 1.5 ounces of dark rum
    • 1.5 ounces of white rum
    • 1.5 ounces fruit punch syrup
    • a squeeze of lime juice

    Add the ingredients to a cocktail shaker with ice and shake the ingredients. Pour it into a single serving glass.

    What's the best rum to use in rum punch?

    For this Jamaican version, I suggest using Jamaican rum. I suggest using Jamaican Appelton Rum or Myers's rum as the dark rum in this punch. For the white rum, I suggest Wray & Nephew. Be warned, Wray & Nephew is nice and strong, so reduce the amount if you need to.

    This drink is perfect for a crowd and super easy to prepare. I hope you love this drink recipe as much as we do.

    What food should I serve with this rum punch?

    This rum punch is great for social settings but goes well served with many dishes. Try it with my jerk chicken, escovitch fish, or fried chicken.

    How to store rum punch, and how long does it last?

    Store rum punch in the refrigerator without any ice. It will last for 3-4 days.

    rum punch in glass with flamingo on top

    Other Drink Recipes

    • Jamaican Lemonade
    • Jamaican Sorrel Drink
    • Easy Red Sangria
    • Fruity Martini
    • Cranberry Lemonade
    • Planter's Punch

    Looking for more Jamaican recipes??? Head to the Recipe Category of Caribbean or try my Corned Beef and Cabbage, Rasta Pasta, or Callaloo and Saltfish recipes.

    jamaican rum punch in glass with ice
    Print Recipe
    4.75 from 20 votes

    Jamaican Rum Punch

    This Jamaican Rum Punch Recipe is the perfect drink for when you want a taste of the islands. It's delicious and refreshing and the perfect drink to bring you to the Caribbean.
    Prep Time5 minutes mins
    Total Time5 minutes mins
    Course: Drinks
    Cuisine: Caribbean
    Keyword: jamaican rum punch, rum punch, rum punch recipe
    Servings: 6 people
    Calories: 234kcal
    Author: Tanya Harris

    Ingredients

    • 2 cups pineapple juice
    • 1 ½ cup orange juice
    • 1 cup dark rum
    • 1 cup white rum
    • 1 cup fruit punch syrup
    • ¼ cup fresh lime juice

    Instructions

    • Mix it all in your favorite pitcher and enjoy over ice 🙂

    Video

    Notes

    • Fruit Punch flavored syrup is hard to find in some grocery stores in the States. I found mine at an International Grocery Store. I use Grace Fruit Punch Syrup. Grenadine or Strawberry flavored syrup would work as a good substitute. 
    • If adding sparking wine, use about ½ cup. 
    • Suggested Tools
      • Glass Pitcher
      • Flamingo Drinking Straws
      • Pineapple Drinking Straws

    Nutrition

    Calories: 234kcal | Carbohydrates: 17g | Protein: 1g | Fat: 0.2g | Saturated Fat: 0.02g | Polyunsaturated Fat: 0.1g | Monounsaturated Fat: 0.03g | Sodium: 3mg | Potassium: 239mg | Fiber: 0.3g | Sugar: 13g | Vitamin A: 133IU | Vitamin C: 42mg | Calcium: 18mg | Iron: 0.4mg

    Pin this Rum Punch for Later

    This post was originally published June 7, 2018. It has been updated with new helpful information and photos.

    Roasted Boneless Leg of Lamb

    November 29, 2022 by Tanya Harris 2 Comments

    sliced leg of lamb on cutting board

    This easy roasted boneless leg of lamb recipe is quick to prepare. The lamb leg is flavored with a marinade of olive oil, garlic, lemon juice and fresh rosemary leaves, before being roasted in the oven.

    sliced leg of lamb on white plate

    You’ll find the full recipe with ingredient amounts and instructions in the recipe card at the bottom of this post. Be sure to check out the blog post itself for extra tips and tricks!

    Lamb is a great-tasting meat, with a robust, almost gamy flavor. For this reason, it and can take on strong flavors like the garlic, lemon, and rosemary I've used in the marinade. I like to marinate the meat before roasting as it really intensifies the flavor of the meat and also stops the joint from drying out while roasting.

    I have marinated this leg of lamb for as little as 30 minutes, but a 24-hour marination works well with this cut. The longer the marinade, the more intense the flavor.

    Roasted leg of lamb is a great meat to serve, as a 5-pound boneless leg of lamb will easily serve eight people. This makes it a great alternative to more traditional roasts like turkey, chicken or beef during Thanksgiving, Christmas, or other holiday gatherings.

    If you love to cook with lamb, be sure to try my Braised Lamb, Air Fryer Lamb Chops or my Moroccan Soup!

    Ingredients

    Here is what you will need for this recipe:

    ingredients for roasted leg of lamb
    • Marinade- Olive oil, Garlic, Fresh rosemary leaves, Fresh Lemon juice, Kosher salt, and black pepper.
    • Boneless leg of lamb (netted or wrapped in twine - get your butcher to do this)

    How to roast boneless leg of lamb

    Add olive oil, garlic cloves, rosemary leaves, lemon juice, kosher salt, and black pepper to a mini food processor and process until smooth. 

    Pat the lamb dry and rub the mixture over the lamb, getting the mixture into the netting. Cover and let the lamb marinate in the refrigerator for up to 24 hours.

    marinade in food processor
    marinade rubbed over the lamb

    When ready to roast, preheat the oven to 450 degrees Fahrenheit. Optional step: In a large cast iron skillet, add onion, garlic cloves, rosemary, and oil. Place the cast iron skillet in the oven for 10 minutes to get it nice and hot. When ready to roast the lamb, place the lamb on top of the hot skillet. This will give you delicious melted onions and garlic when done. You could also skip this step and roast your lamb in a roasting pan.

    vegetables in cast iron skillet after roasting

    Place the lamb in the cast iron skillet on top of the onions, fat cap facing up. Roast the lamb at 450 degrees Fahrenheit for 15 minutes. 

    ProTip - use a leave-in probe themomter when roasting this lamb. It'll monitor the temperature of your meat while it cooks, helping to ensure you remove the roast at the right temperature.

    lamb in cast iron skillet with thermometer inserted

    After 15 minutes, reduce the oven temperature to 325 degrees and continue roasting until the internal temperature of the lamb reaches your desired temperature (about 1 hour and 20 minutes for medium). 

    Remove the lamb from the oven and allow it to sit for 10-15 minutes. Then remove the netting, slice, and serve.

    finished lamb with net in cast iron skillet

    Boneless leg of lamb cooking time

    When cooking lamb, the internal temperature varies depending on how you like your lamb cooked. The internal temperatures are as follows:

    • Rare: 115-120F
    • Medium rare: 125F
    • Medium: 130F
    • Medium-well: 145F
    • Well-done: 150F
    sliced leg of lamb on cutting board

    Expert Tips

    These tips will help you make the best-roasted lamb leg you've ever tasted. 

    • If time allows, you can marinate the lamb for more flavor. Marinate in the fridge for up to 24 hours as a longer marinade time will improve the flavor.
    • A probe thermometer is the easiest method of checking the internal cooking temperature of lamb, or any other meat, to ensure it is done.
    • Once the lamb leg has finished cooking, remove it from the oven and set it aside to rest for 10-15 minutes before slicing and serving. This will allow the juices to be absorbed back into the lamb and results in moist and tender slices of meat.

    Variations for this Boneless Leg of Lamb recipe

    I make a simple marinade for the lamb using garlic, lemon, and fresh rosemary along with some salt and pepper. However, lamb is a great meat to add flavor to so here are some other suggestions if you want to mix things up.

    • Ground spices: anise, cardamon, cinnamon, cumin, nutmeg
    • Herbs: dill, garlic, mint, parsley, rosemary, thyme.
    • Citrus: as well as the lemon juice, add some finely shredded lemon zest.
    Whole roasted boneless leg of lamb sliced on a serving platter with fresh lemon and rosemary garnish

    How to serve my roasted leg of lamb  

    When I'm served a roasted joint of meat, like this boneless leg of lamb, I like to serve a potato side and at least 2 other vegetable sides.

    When it comes to great-tasting potato sides, you can't beat my Creamy Instant Pot Mashed Potatoes, Garlic Mashed Potatoes, or my Cheesy Scalloped Potatoes. For a great alternative to regular potatoes, try my Mashed Sweet Potatoes or my Southern Candied Sweet Potatoes.

    For vegetable sides try my Sweet & Spicy Air Fryer Brussels Sprouts, Instant Pot Buttered Cabbage, Southern Green Beans, Air Fryer Carrots or Marinated Air Fryer Vegetables.

    How to store roasted leg of lamb

    To refrigerate: Keep any leftover lamb in an airtight container in the fridge for 3-4 days.

    To freeze: Once cooked and cooled, slice the leg of lamb and place it into an airtight container and store in the freezer for up to 3 months. Defrost overnight in the refrigerator when you are ready to enjoy.

    Whole roasted boneless leg of lamb sliced on a serving platter with fresh lemon and rosemary garnish

    FAQs:

    Which is better bone in or boneless leg of lamb?

    Either cut can be roasted, however I prefer to use a boneless leg of lamb is it cooks faster than a bone-in joint as a bone acts as an insulator, meaning you have to cook a bone-in leg longer.

    What is best temperature to cook a leg of lamb?

    I start with a high roasting temperature of 450 degrees Fahrenheit for the first 15 minutes of the cook. Then I reduce the oven temperature to 325 degrees Fahrenheit for the remainder of the cook.

    How do you keep lamb moist when roasting?

    The marinade of olive oil and lemon juice not only flavors the lamb, but helps to keep it moist during the cooking process.

    Do I need to marinate the lamb leg before cooking?

    You don't need to marinate the lamb leg before you roast it, however it will add great flavor to the finished meat and also stops the joint from drying out. A short marinade of 30 minutes will do if you are pushed for time, but allow longer for a more intense flavor.

    Should you cover lamb when roasting?

    No, you don't need to cover a leg of lamb while it is roasting as this is a fairly quick roast and you want the skin to crisp up nicely.

    How do you slice a leg of lamb?

    I recommend slicing the meat across the grain as this cuts across the muscle fibers. This ensures the most tender slices of roast lamb and avoids the meat being chewy.

    If you have tried this Roasted Boneless Leg of Lamb recipe, or any other recipe on my blog, then please rate it and let me know how it turned out in the comments below!

    sliced leg of lamb on cutting board
    Print Recipe
    5 from 2 votes

    Roasted Boneless Leg of Lamb

    This easy roasted boneless leg of lamb recipe is quick to prepare. The lamb leg is flavored with a marinade of olive oil, garlic, lemon juice and fresh rosemary leaves, before being roasted in the oven.
    Prep Time10 minutes mins
    Cook Time1 hour hr 20 minutes mins
    Marinate30 minutes mins
    Total Time2 hours hrs
    Course: Main Course
    Cuisine: American
    Keyword: boneless leg of lamb recipe, roasted boneless leg of lamb
    Servings: 8
    Calories: 294kcal
    Author: Tanya Harris

    Ingredients

    • ¼ cup olive oil
    • 6 cloves garlic
    • 3 Tablespoons fresh rosemary leaves
    • 2 Tablespoons lemon juice
    • 2 teaspoons kosher salt
    • ½ teaspoon black pepper
    • 5 lb boneless leg of lamb netted or wrapped in twine
    • yellow onion, garlic cloves, additional rosemary optional

    Instructions

    • Add olive oil, garlic cloves, rosemary leaves, lemon juice, kosher salt, and black pepper to a mini food processor and process until smooth.
    • Pat the lamb dry and rub the mixture over the lamb, getting the mixture into the netting. Cover and let the lamb marinate in the refrigerator for up to 24 hours.*
    • Preheat the oven to 450 degrees Fahrenheit.
    • Place the lamb in a roasting pan, fat cap facing up. Roast the lamb at 450 degrees Fahrenheit for 15 minutes.
    • After 15 minutes, reduce the oven temperature to 325 degrees and continue roasting until the internal temperature of the lamb reaches your desired temperature (about 1 hour and 20 minutes for medium).
    • Remove the lamb from the oven and allow it to sit for 10-15 minutes. Remove the netting, slice, and serve.

    Notes

    • Optional step: In a large cast iron skillet, add some onion, garlic cloves, rosemary, and about 2 Tablespoons of oil. Place the cast iron skillet in the oven for 10 minutes to get it nice and hot. When ready to roast the lamb, place the lamb on top of the hot skillet. This will give you delicious melted onions and garlic when done. You could also skip this step and roast your lamb in a roasting pan.
    • You can skip the long marination and allow the lamb to marinate for as little as 30 minutes. 
    • I recommend using a probe thermometer to monitor the temperature of the lamb while it is in the oven. 
    • Lamb Cooking Temps are as follows:
      • Rare: 115-120F
      • Medium rare: 125F
      • Medium: 130F
      • Medium-well: 145F
      • Well-done: 150F

    Nutrition

    Calories: 294kcal | Carbohydrates: 1g | Protein: 37g | Fat: 15g | Saturated Fat: 4g | Polyunsaturated Fat: 1g | Monounsaturated Fat: 8g | Cholesterol: 114mg | Sodium: 693mg | Potassium: 536mg | Fiber: 0.2g | Sugar: 0.1g | Vitamin A: 23IU | Vitamin C: 2mg | Calcium: 18mg | Iron: 3mg

    Collard Green Soup

    November 28, 2022 by Tanya Harris 16 Comments

    collard greens placed into the dutch oven

    Smoked turkey, fire-roasted tomatoes, garlic, and collard greens all together in a warm and comforting bowl of delicious soup. Serve this collard green soup with a side of buttery cornbread.

    Bowl of warm collard green soup

    This post contains affiliate links, please read my full disclaimer here.

    You’ll find the full recipe with ingredient amounts and instructions in the recipe card at the bottom of this post. Be sure to check out the blog post itself for extra tips and tricks!

    Start off this soup season with a flavor-packed collard green soup. If you love this soup you'll also love my Hearty Instant Pot Vegetable Soup, Pressure Cooker Lentil Soup with Sausage, or Beet Soup Recipe.

    Serve any of these delicious soups with Golden Sweet Potato Cornbread, Classic Southern Cornbread Recipe, or Easy Cornbread Muffins. Seriously, cornbread is the perfect accompaniment to soup.

    fresh pot of collard green soup with ladle

    Ingredients and Tools Needed

    • Olive Oil - for softening the aromatics.
    • Yellow onion, Garlic - can I make soup without these???
    • Smoked turkey wings - this helps bring flavor to this soup. You'll notice I used smoked meat in my traditional collard greens as well.
    • Cajun seasoning - for a little bit of a kick.
    • Low-sodium Chicken broth - keep it low sodium, or homemade with little salt, to control the salt content.
    • Dry black-eyed peas - you can also use canned if need be; add close to the end of cooking if using canned.
    • Fire-roasted tomatoes - I add this for added color and flavor. Regular diced tomatoes will work as well.
    • Bunch of Collard greens
    • Apple cider vinegar - helps balance the dish.
    • Salt and pepper to taste - always.
    collard green soup ingredients

    Tools needed for collard green soup:

    • Large pot with a lid, 5+ quarts
    • Sharp knife
    • Cutting board

    How to make Collard Green Soup

    Place oil in a large pot over medium heat and add chopped onions. Cook and stir until softened, about 4-5 minutes. Add chopped garlic and stir for an additional minute.

    veggies sauteing in a dutch oven pot

    Add smoked turkey, cajun seasoning, chicken broth, and black-eyed peas. Increase heat to medium-high heat and bring the mixture to a quick simmer. Allow to simmer for 2 minutes, then reduce heat to medium-low. Cover with a tightly fitting lid and allow to simmer on medium-low heat for about 1 hour, until the turkey wing meat becomes tender.

    dutch oven pot with broth and smoked turkey

    Remove the smoked turkey wing from the pot and shred the meat from the bone. Set aside the meat.

    Add roasted tomatoes and collard greens to the pot. Allow it to simmer for an additional 20 minutes until the greens are tender.

    collard greens placed into the dutch oven

    Return the meat to the pot and add the apple cider vinegar. Salt and pepper to taste.

    finished collard green soup still in the pot

    How should I chop up my Collard Greens?

    Isn't cutting up collard greens pretty straightforward? Sure! But just a couple of tips to ensure a perfect soup.

    • Wash and dry collard greens.
    • Fold the leaves over themselves, and cut the stems out.
    • With the stems cut out, you can roll the leaves into a bundle and cut them into thin strips.

    You can also use bag collard greens, which are prewashed and cut. If using bagged greens, make sure to chop these a little finer as well.

    collard greens chopped into thin strips

    Easy substitutions for this soup

    Smoked Turkey Legs: Smoked ham hocks are a perfect substitute. Using ham will obviously raise the fat content, but still just as delicious.

    Collard Greens: If collard greens are not readily available to you, kale is the most similar and will be just as tasty.

    Apple Cider Vinegar: Regular white vinegar is a good replacement for ACV.

    Black-eyed Peas: Great northern beans are a good replacement for black-eyed peas in this recipe.

    collard green soup in a bowl topped with cheese

    What does adding vinegar do?

    When cooking collard greens, or even if you have to supplement kale, adding vinegar to either of these greens will be beneficial. Adding vinegar will cut the bitterness and toughness of these particular greens.

    Apple cider vinegar is the more popular option, but white vinegar can work in a pinch as well. Don't be afraid of your soup tasting like vinegar! The flavors we add to the soup will shine through.

    Notes

    • Try and get smaller-sized smoked turkey wings to ensure they become tender in about an hour. Large pieces will take longer to cook. 
    • If subbing canned black-eyed peas for the dried ones, add the black-eyed peas during the last 10 minutes of cooking.

    Looking for more soup recipes? Try these out:

    • Creamy Carrot and Lentil Soup
    • Creamy Yellow Squash Soup
    • Oxtail Soup
    • Beet Soup Recipe
    • Pressure Cooker Moroccan Spiced Soup

     If you have tried this recipe or any other recipe on my blog, please rate it and let me know how it turned out in the comments below!

    collard greens placed into the dutch oven
    Print Recipe
    4.75 from 8 votes

    Collard Green Soup

    Smoked turkey, fire-roasted tomatoes, garlic, and collard greens all together in a warm and comforting bowl of delicious soup. Serve with a side of buttery corn bread.
    Prep Time15 minutes mins
    Cook Time1 hour hr 30 minutes mins
    Total Time1 hour hr 45 minutes mins
    Course: Appetizer, Main Course, Side Dish, Soup
    Cuisine: Southern
    Keyword: collard green soup
    Servings: 6 servings
    Calories: 226kcal
    Author: Tanya Harris

    Ingredients

    • 2 tablespoons Olive Oil
    • 1 Yellow onion chopped
    • 4 cloves Garlic chopped
    • 1 pound Smoked turkey wings
    • 1 teaspoon Cajun seasoning
    • 6 cups Low-sodium Chicken broth
    • 1 cup Dry black-eyed peas rinsed
    • 15 ounce Fire-roasted tomatoes undrained
    • 1 large Bunch of Collard greens leaves only, thinly sliced (8 cups)
    • 1 tablespoon Apple cider vinegar
    • Salt and pepper to taste

    Instructions

    • Place oil in a large pot over medium heat and add chopped onions. Cook and stir until softened, about 4-5 minutes. Add chopped garlic and stir for an additional minute.
    • Add smoked turkey, cajun seasoning, chicken broth, and black-eyed peas. Increase heat to medium-high heat and bring the mixture to a quick simmer. Allow to simmer for 2 minutes, then reduce heat to medium-low. Cover with a tightly fitting lid and allow to simmer on medium-low heat for about 1 hour, until the turkey wing meat becomes tender.
    • Remove the smoked turkey wing from the pot and shred the meat from the bone. Set aside the meat.
    • Add roasted tomatoes and collard greens to the pot. Allow it to simmer for an additional 20 minutes until the greens are tender. Return the meat to the pot and add the apple cider vinegar. Salt and pepper to taste.

    Notes

    • Try and get smaller-sized smoked turkey wings to ensure they become tender in about an hour. Large pieces will take longer to cook. 
    • If subbing canned black-eyed peas for the dried ones, add the black-eyed peas during the last 10 minutes of cooking.

    Nutrition

    Serving: 1g | Calories: 226kcal
    • « Previous Page
    • 1
    • …
    • 7
    • 8
    • 9
    • 10
    • 11
    • …
    • 19
    • Next Page »
    tanya holding bowl and mixing

    Welcome!

    Welcome to My Forking Life! Hi, I'm Tanya, an attorney, busy wife and mom, and lover of quick, easy, and delicious meals.

    More about me

    Popular Recipes

    • Jamaican Oxtails Recipe
    • brown stew chicken in pan
      Brown Stew Chicken
    • Air fryer fried chicken on a white platter
      Air Fryer Fried Chicken
    • Jamaican Instant Pot Rice and Beans

    Holiday Favorites

    • sweet potato pie on a plate
      Southern Sweet Potato Pie Recipe
    • spoon lifting gravy out of gravy dish
      Easy Recipe for Gravy without Drippings
    • Stirring the giblet gravy with a spoon.
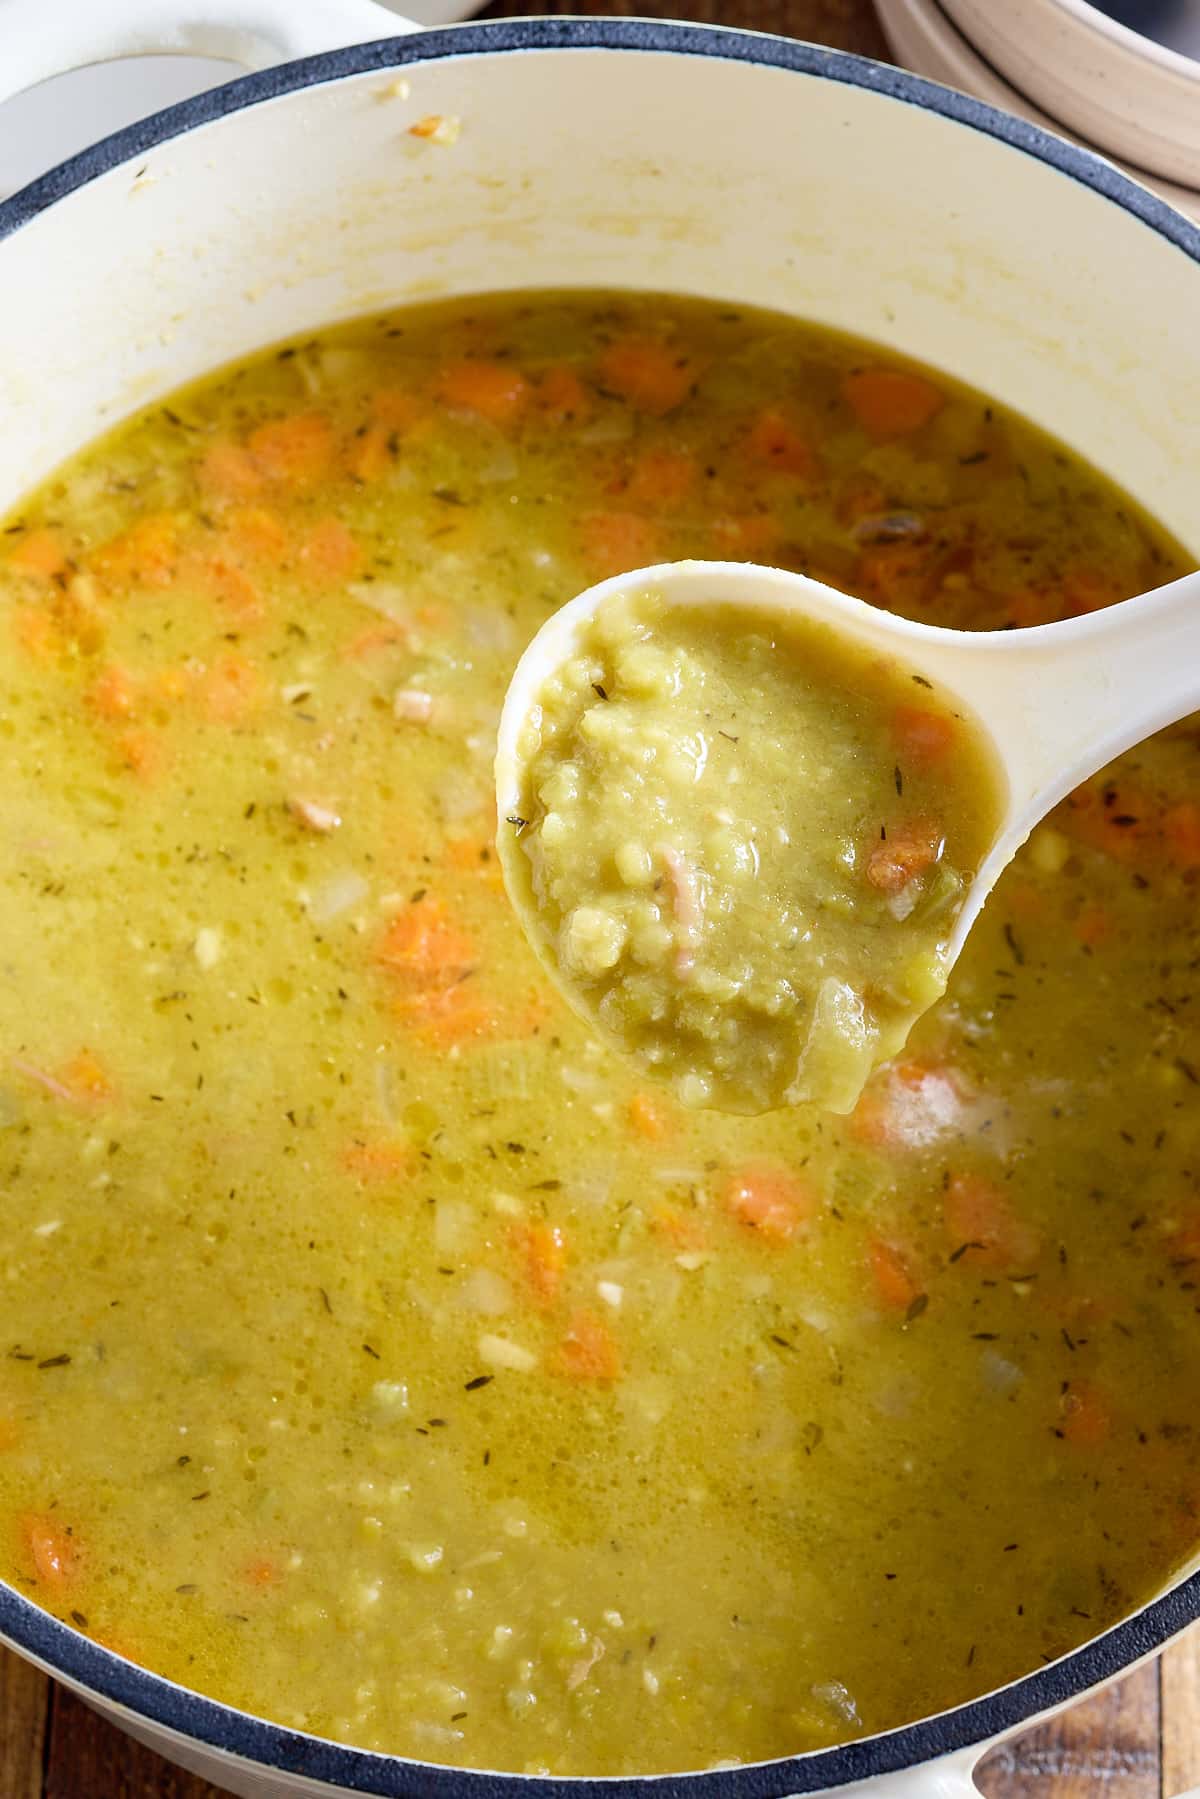
      Grandma's Giblet Gravy Recipe
    • creamy baked macaroni and cheese, the best baked macaroni and cheese, creamy mac and cheese
      Creamy Baked Macaroni and Cheese
    as seen on...various online websites text listed

    Footer

    ↑ back to top
    • Privacy Policy
    • Contact
    • About Tanya

    As an Amazon Associate, I earn from qualifying purchases.
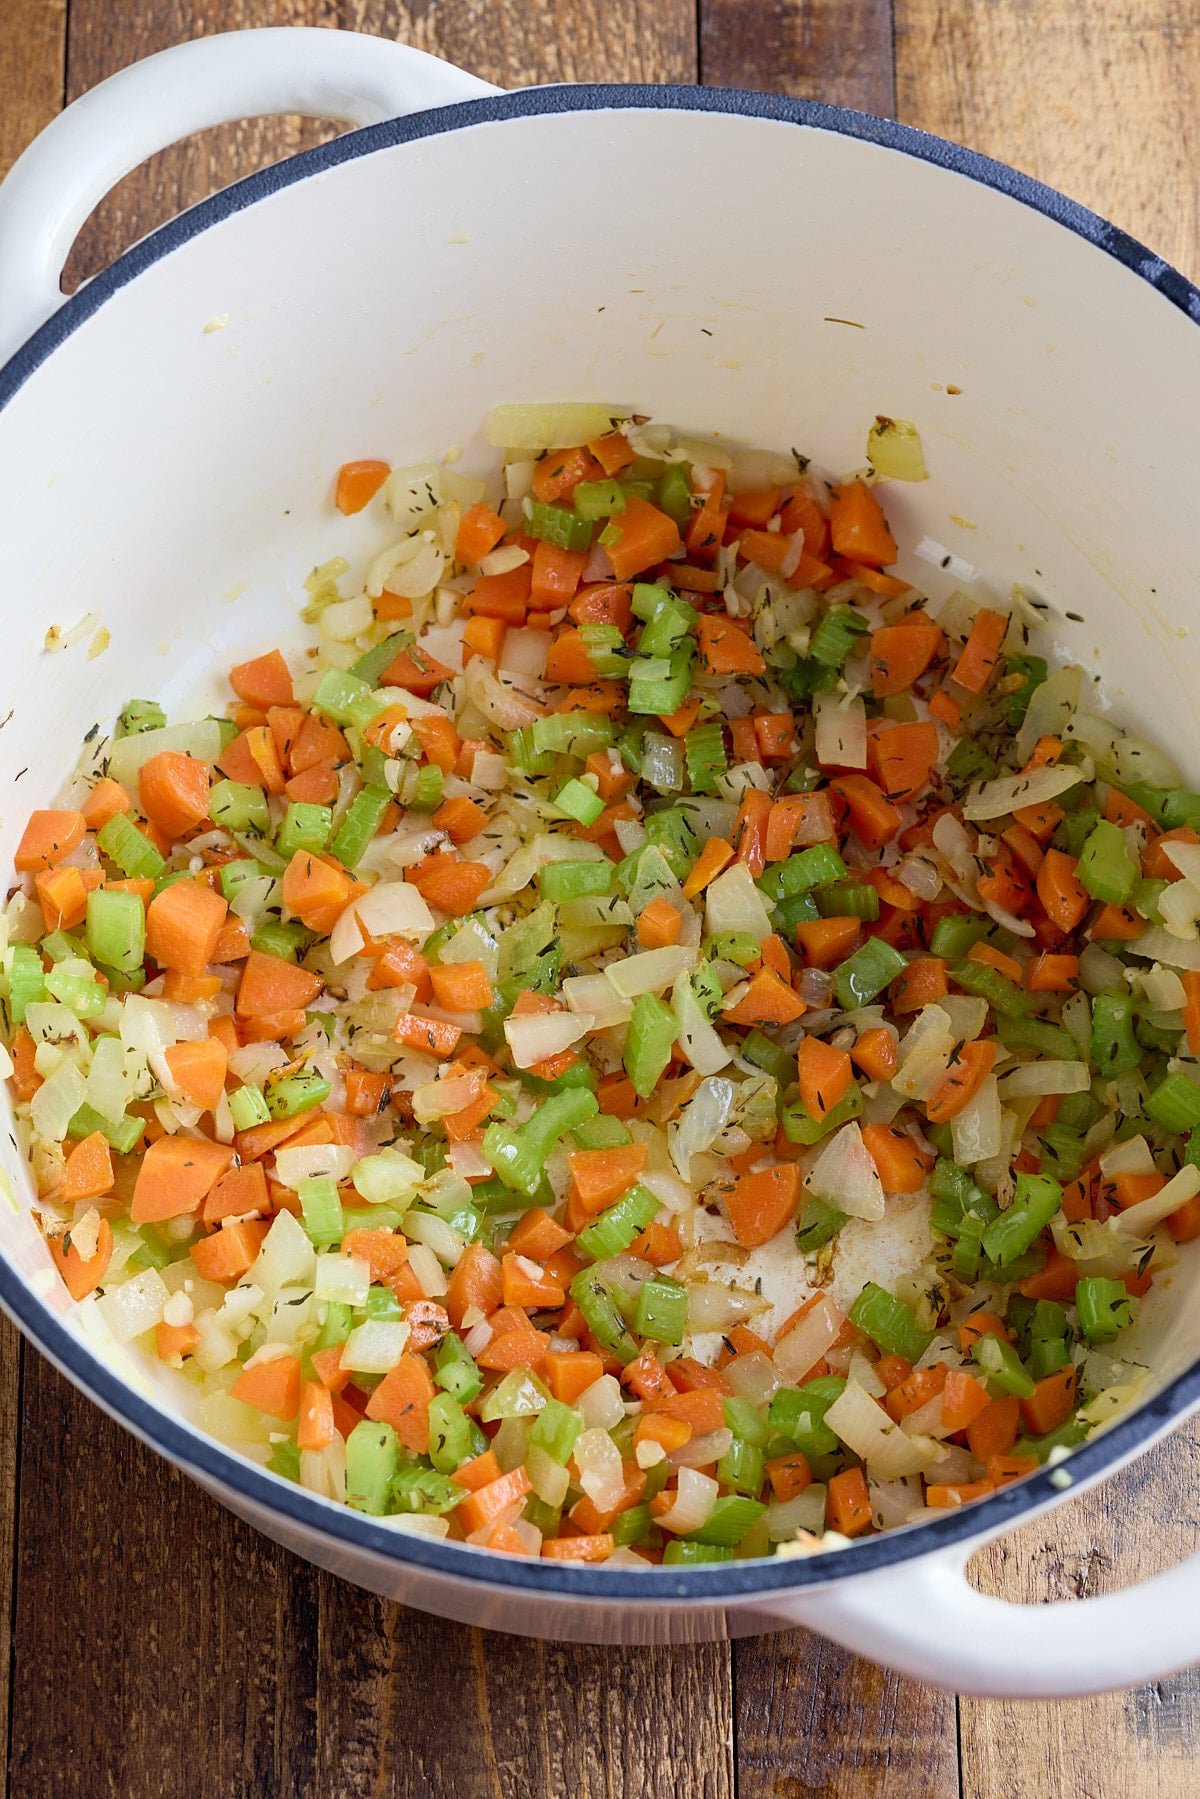
    Copyright © 2026 My Forking Life

    Rate This Recipe

    Your vote:


    Let us know what you thought of this recipe:

    This worked exactly as written, thanks!
    My family loved this!
    Thank you for sharing this recipe

    Or write in your own words:

    A rating is required
    A name is required
    An email is required