My Forking Life

  • Air Fryer
  • Jamaican
  • Entree
  • Browse Recipes
  • Breakfast
  • Side Dishes
  • About
menu icon
go to homepage
  • Air Fryer
  • Jamaican
  • Entree
  • Browse Recipes
  • Breakfast
  • Side Dishes
  • About
search icon
Homepage link
  • Air Fryer
  • Jamaican
  • Entree
  • Browse Recipes
  • Breakfast
  • Side Dishes
  • About
×
Home » Recipe Index

Air Fryer Scallops with Garlic Herb Butter

May 6, 2021 by Tanya Harris 9 Comments

Cook scallops on a white plate next to slices of lemon.

Quick and easy to make with a few simple ingredients, these air fryer scallops are perfect to serve as a sit down appetizer or light meal. Perfectly seared and seasoned with a herb, lemon and garlic butter, these are the real deal!
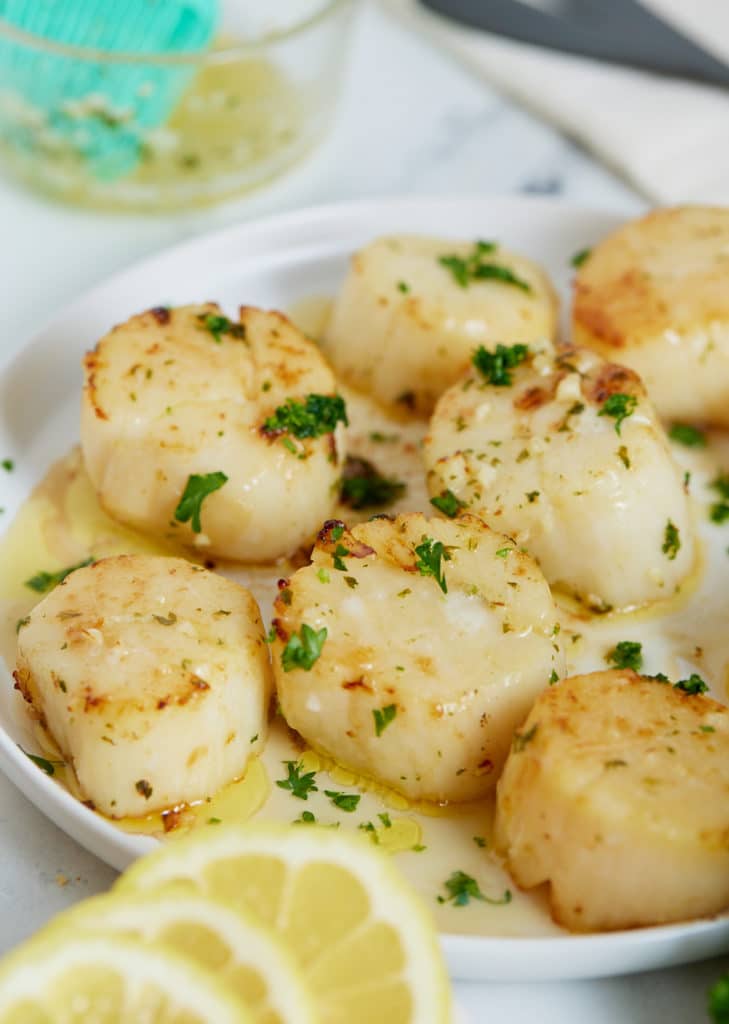
Cooked scallops on a white plate next to slices of lemon.

This post contains affiliate links, please read my full disclaimer here.

You’ll find the full recipe with ingredient amounts and instructions in the recipe card at the bottom of this post. Be sure to check out the blog post itself for extra tips and tricks!

If you're a little nervous about cooking scallops perfectly on the stovetop, this method has you covered and feeling like a pro in the kitchen! I first learned all about scallops (I literally spent hours researching them) when I made this pan-seared scallop recipe but decided to give them a go in my air fryer. I'm glad I did, because they're so good and easy.

These fresh scallops are cooked in a delicious lemon, herb, and garlic butter. They're simple enough to serve as part of an easy weeknight meal and fancy enough to serve to guests for a sit down appetizer.

Be sure to also try my Air Fryer Salmon Patties and Air Fryer Crab Legs too!

How to make air fryer scallops

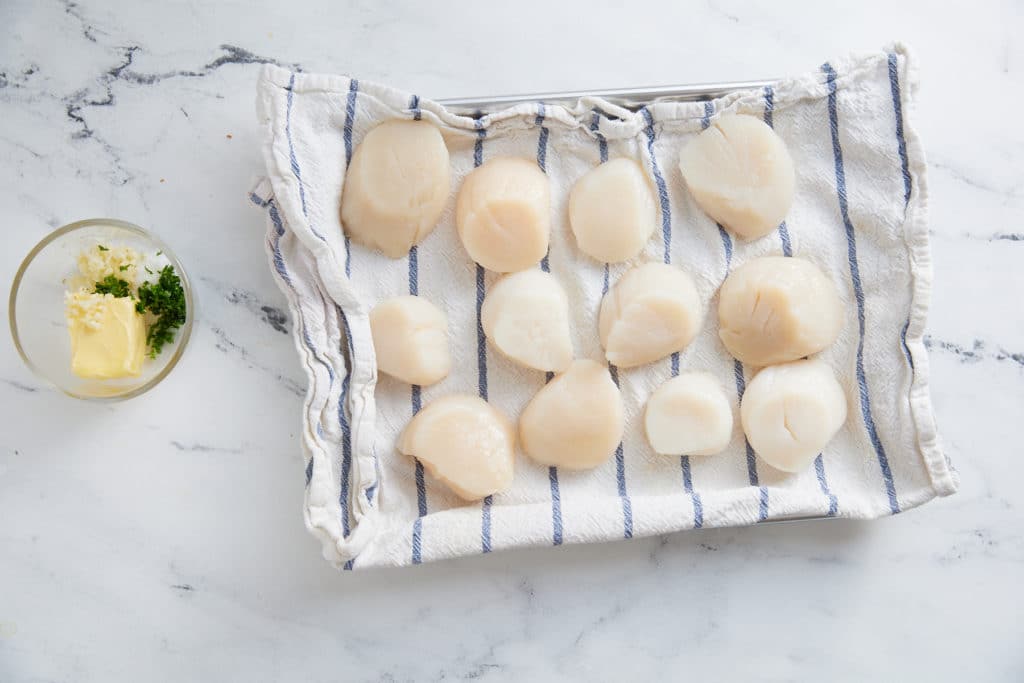
  • Gather your ingredients.
Scallops on a baking sheet next to the garlic herb butter mix.
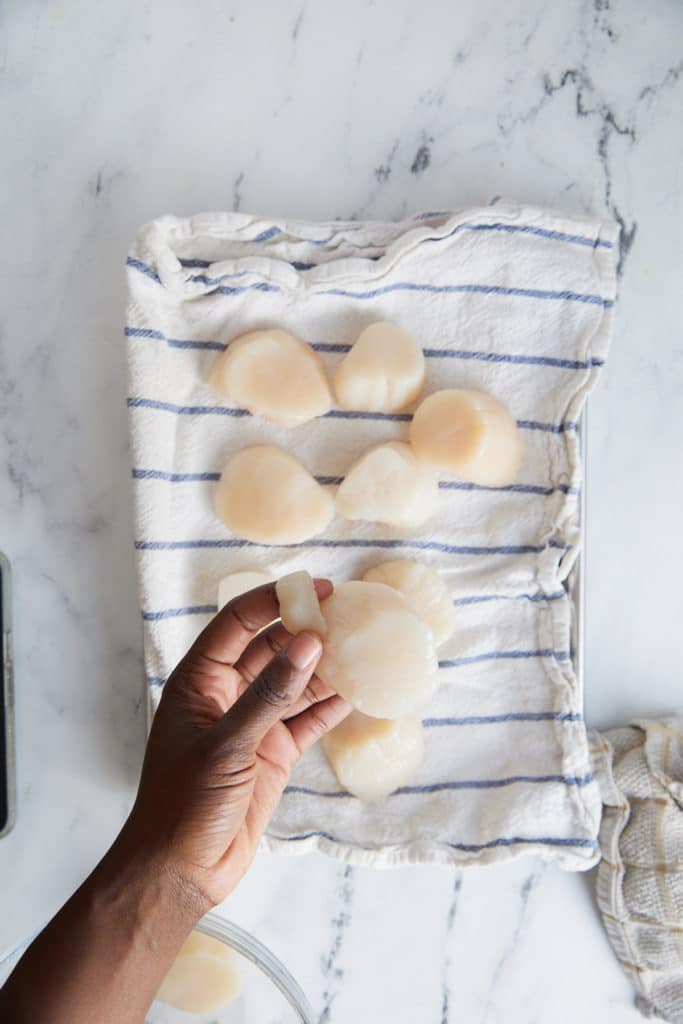
  • Pat dry the scallops and set aside.
Patting dry the scallops.
  • If your scallops have a little side muscle (sometimes called the foot), remove it.
  • Preheat the air fryer to 400 degrees Fahrenheit.
  • Combine melted butter, garlic, salt, parsley, and lemon juice in a bowl.
  • Once the air fryer is preheated, brush the air fryer basket with some of the butter mixture. Place scallops in the air fryer basket, making sure they don’t overlap. Brush butter mixture on top of scallops.
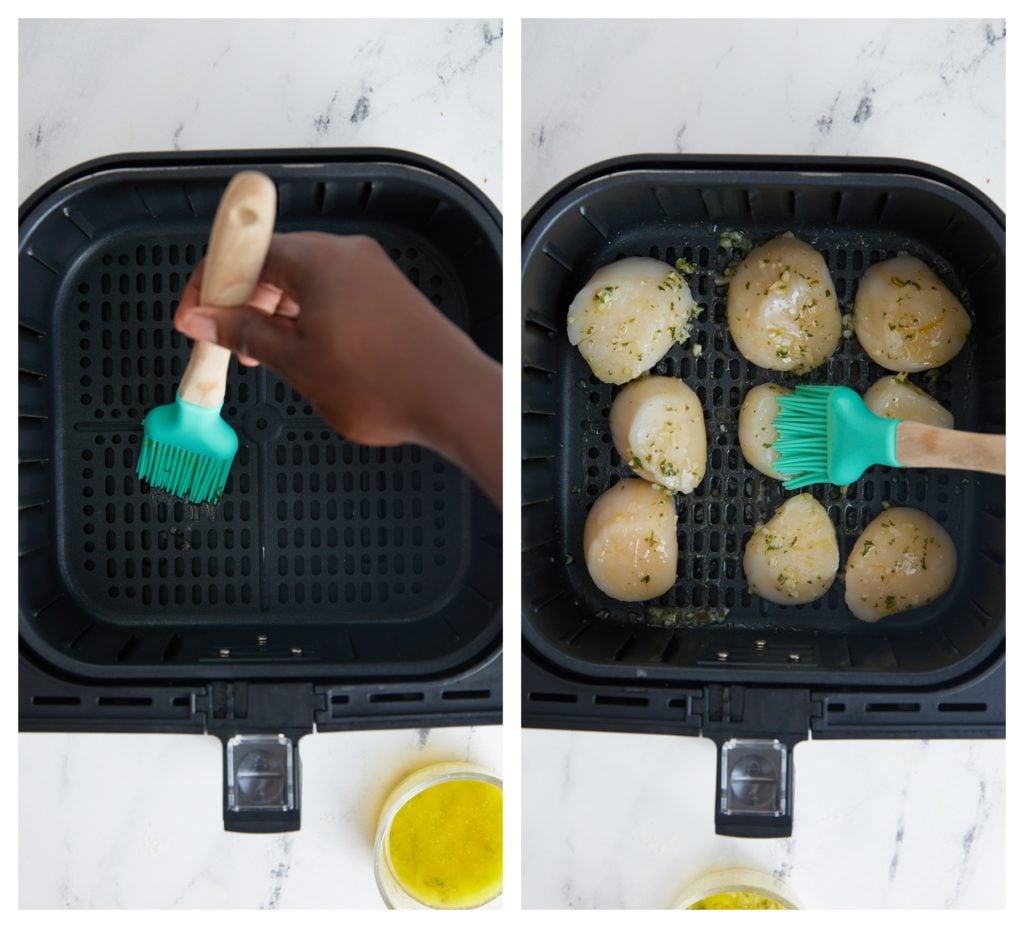
Brushing the air fryer basket and scallops with butter.
  • Cook scallops for 8-10 minutes, flipping halfway.
  • Serve and enjoy. Sprinkle additional parsley on top to fancy it up.
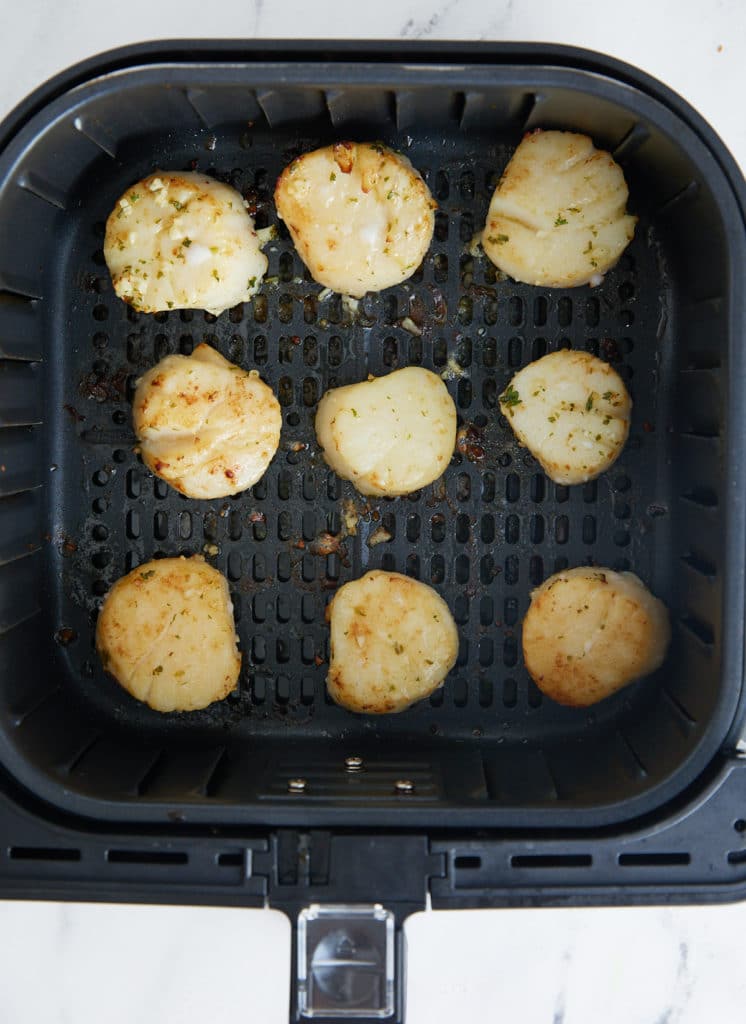
The cooked scallops in the air fryer basket.

What are the best scallops to use?

For the best results use dry scallops, 'dry' simply means natural. Wet scallops are treated with a solution when they are caught to help keep the fresh for longer, where as dry scallops are left untreated. Wet scallops release more water when they are cooked, which means that you won't get that brown crispy sear on the edges.

It's best to use fresh scallops if you can, if you use frozen be sure to thaw them fully before using them and make sure they are really patted well to remove as much excess water as you can.

I also suggest using U10 scallops. These are larger scallops that have about 9-10 scallops per pound. These tend to brown the best in the air fryer and are nice, plump, and juicy.

Can you make them ahead of time?

Scallops are so quick to cook, so it's always best to cook them when you are ready to serve. If you do need to reheat them, it's important that you don't cook them any further or they can become tough and chewy. I find the best way to reheat them is in a microwave on a half heat to warm them through.

What do you serve them with?

These scallops are great to serve by themselves as a sit down appetizer with a garnish of fresh herbs, or serve them with a small salad or salsa. They are great to enjoy tossed on some freshly cooked pasta too for a main meal.
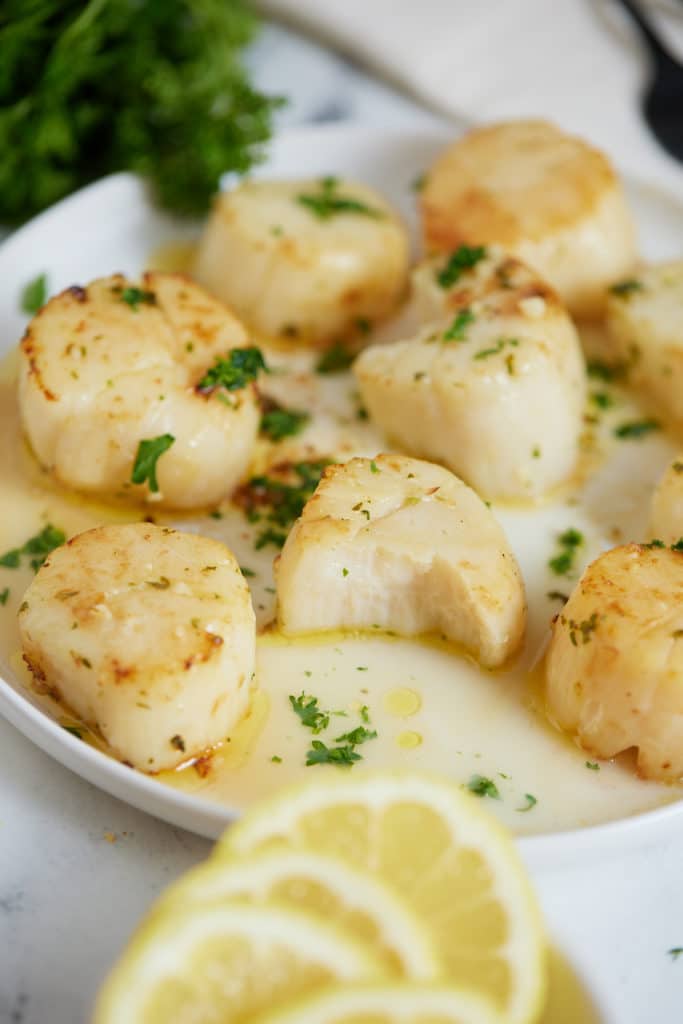
Air fryer scallops on a serving plate with a bite taken out of one.

Recipe Notes and Tips

  • Fresh scallops will keep in your fridge for up to two days. If they develop a strong fishy smell then they are past their best.
  • Make sure to use dry scallops in this recipe as wet scallops won’t brown.
  • If using smaller scallops, reduce the cook time.

More Air Fryer Recipes

  • Air Fryer Steak
  • Lamb Chops
  • Air Fryer Asparagus
  • Grilled Cheese
  • Air Fried Crispy Shrimp
Nine cooked scallops on a white plate.
Print Recipe
5 from 1 vote

Air Fryer Scallops with Garlic Herb Butter

Quick and easy to make with a few simple ingredients, these air fryer scallops are perfect to serve as a sit down appetizer or light meal. Perfectly seared and seasoned with a herb, lemon and garlic butter, these are the real deal!
Prep Time5 minutes mins
Cook Time10 minutes mins
Total Time15 minutes mins
Course: Appetizer
Cuisine: American
Keyword: air fried scallops, how to cook scallops in an air fryer, scallops with herbs and garlic
Servings: 3 servings
Calories: 176kcal
Author: Tanya Harris

Equipment

  • Large Air Fryer
  • Basting Brush

Ingredients

  • 1 lb scallops U10 dry scallops
  • 2 Tablespoon unsalted butter melted
  • 1 Tablespoon minced garlic
  • 1 teaspoon kosher salt or to taste
  • 1 teaspoon chopped parsley
  • 1 teaspoon lemon juice

Instructions

  • Pat dry the scallops and set aside.
  • Preheat the air fryer to 400 degrees Fahrenheit.
  • Combine melted butter, garlic, salt, parsley, and lemon juice in a bowl.
  • Once the air fryer is preheated, brush the air fryer basket with some of the butter mixture. Place scallops in the air fryer basket, making sure they don’t overlap. Spread mixture on top of scallops.
  • Cook scallops for 8-10 minutes, flipping halfway.
  • Serve and enjoy.

Notes

  • Make sure to use dry scallops in this recipe as wet scallops won’t brown.
  • If using smaller scallops, reduce the cook time.
Nutrition

Calories: 176kcal | Carbohydrates: 6g | Protein: 18g | Fat: 8g | Saturated Fat: 5g | Trans Fat: 1g | Cholesterol: 56mg | Sodium: 1369mg | Potassium: 325mg | Fiber: 1g | Sugar: 1g | Vitamin A: 241IU | Vitamin C: 2mg | Calcium: 17mg | Iron: 1mg

15 Easy Air Fryer Chicken Recipes

April 1, 2021 by Tanya Harris 11 Comments

photos of chicken recipes that were made in the air fryer with text that says air fryer chicken recipes

Over the years I have turned to my Air Fryer again and again to make chicken. I love the way it cooks in the Air Fryer and your reviews of my recipes indicate that you love poultry, like chicken and turkey, in the Air Fryer as well! I wanted to share some of the amazing easy-to-make chicken recipes I have created in the Air Fryer.

Easy Air Fryer Chicken Recipes

These chicken recipes come out perfect in the air fryer. From classic Fried Chicken, Jamaican Jerk Chicken, and chicken wings. The air fryer has got you covered.

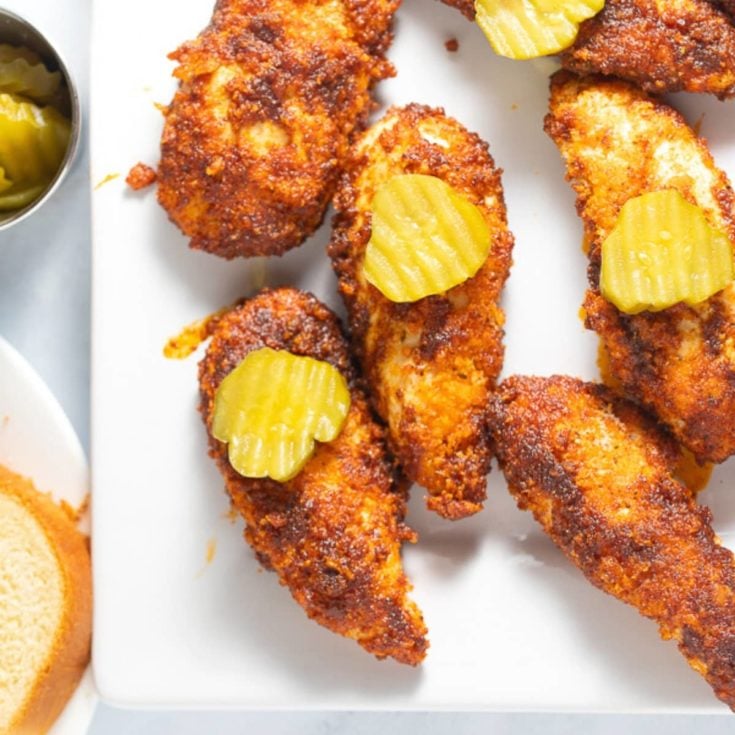
finished hot chicken tenders in a plate with pickles on top

Nashville Style Hot Chicken Tenders (Air Fryer Recipe)

These Nashville style hot chicken tenders are so easy to make in the air fryer! These tenders are so wonderfully crispy and juicy, they rival any you’ve had in a restaurant! Ready to serve in less than half an hour.

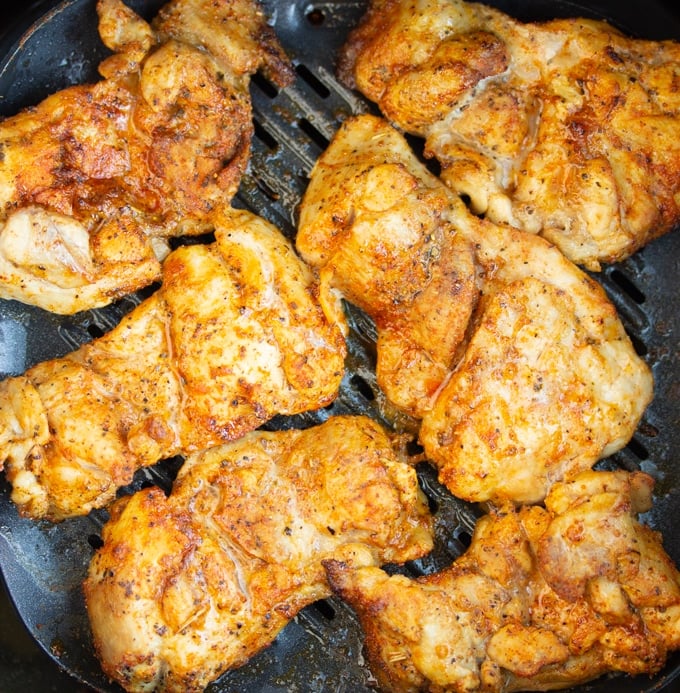
Image for Lemon Pepper Air Fryer Chicken Thighs

Lemon Pepper Air Fryer Chicken Thighs

This Lemon Pepper Air Fryer Chicken Thigh recipe is so easy and results in juicy moist full of flavor chicken. It's the perfect weeknight recipe full of flavor.

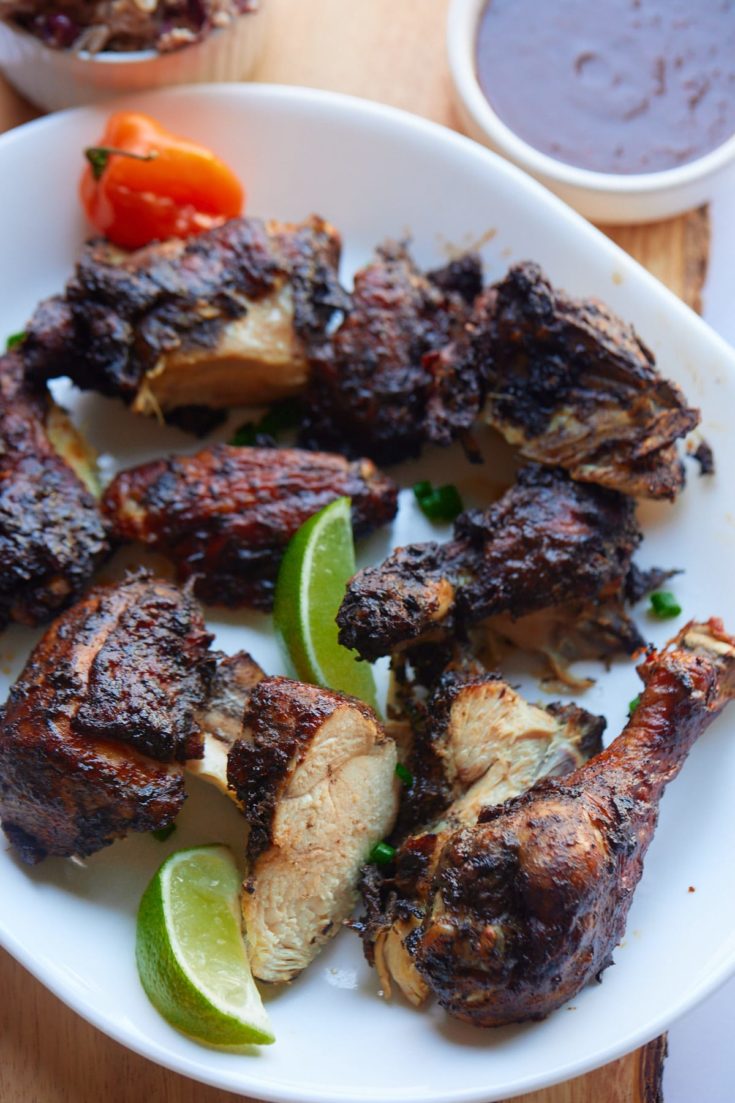
Jerk chicken served on a plate with lime wedges.

Jamaican Jerk Chicken (Air Fryer, Oven, or Grill)

Add some flavor to your dinner with this delicious Jamaican jerk chicken recipe. It takes minutes to prep and can be cooked in the air fryer, oven, or grill for a delicious bite to suit any occasion.

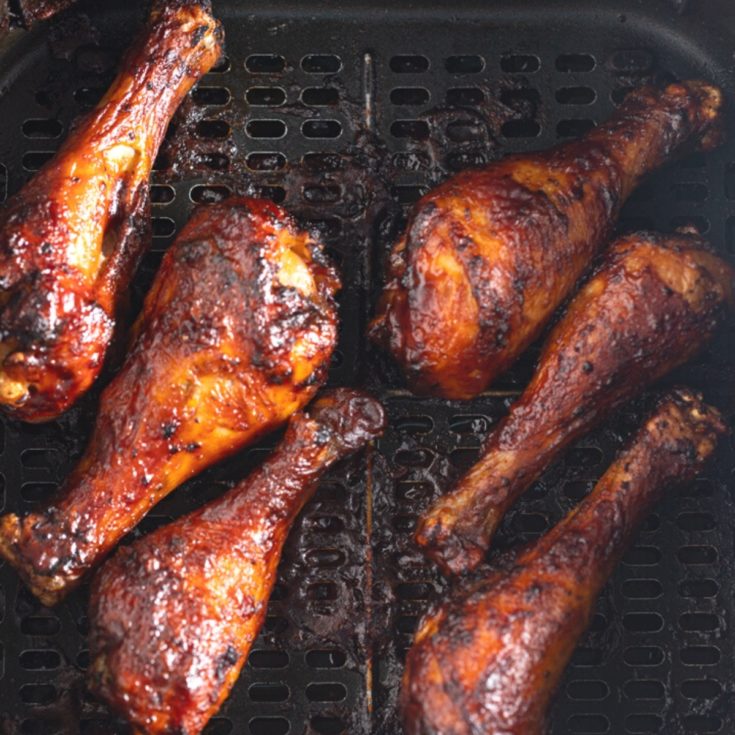
Image for Sticky BBQ Air Fryer Chicken Legs

Sticky BBQ Air Fryer Chicken Legs

These air fryer chicken legs are so simple to make with just 3 ingredients! Perfect to serve as an appetizer or part of a main meal, they require very minimal prep and are ready to serve in about half an hour. Deliciously sticky and made with my homemade BBQ sauce.

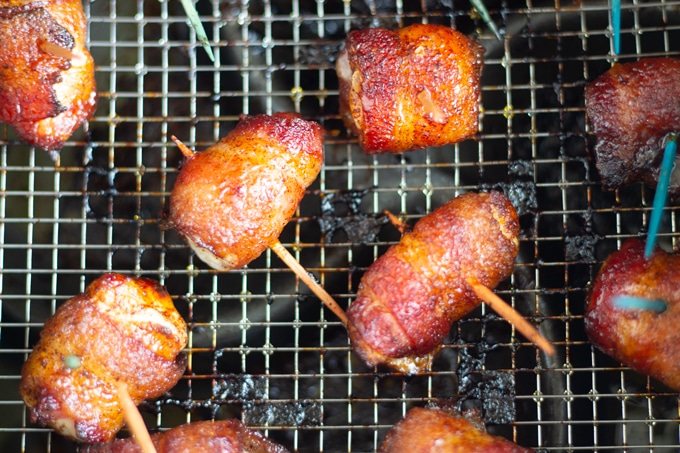
bacon wrapped in chicken in air fryer basket

Air Fryer Sweet and Spicy Bacon Wrapped Chicken Bites

These air fryer bacon-wrapped chicken bites are the perfect quick and easy appetizer. They're the perfect play on sweet, salty, and spicy wrapped into one bite.

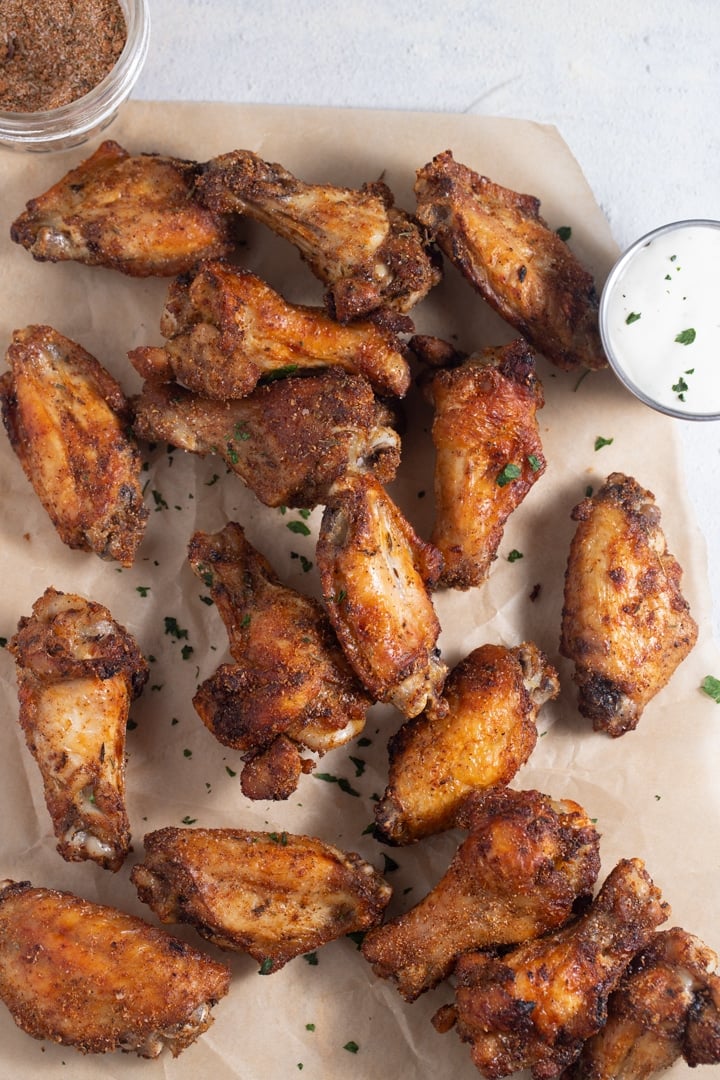
Jerk chicken wings on parchment served with a dip

Jerk Chicken Wings

These Jerk Chicken Wings are cooked in the air fryer and are made with just 3 ingredients! These spicy wings are easy to prep and make and perfect to serve as an appetizer or main.

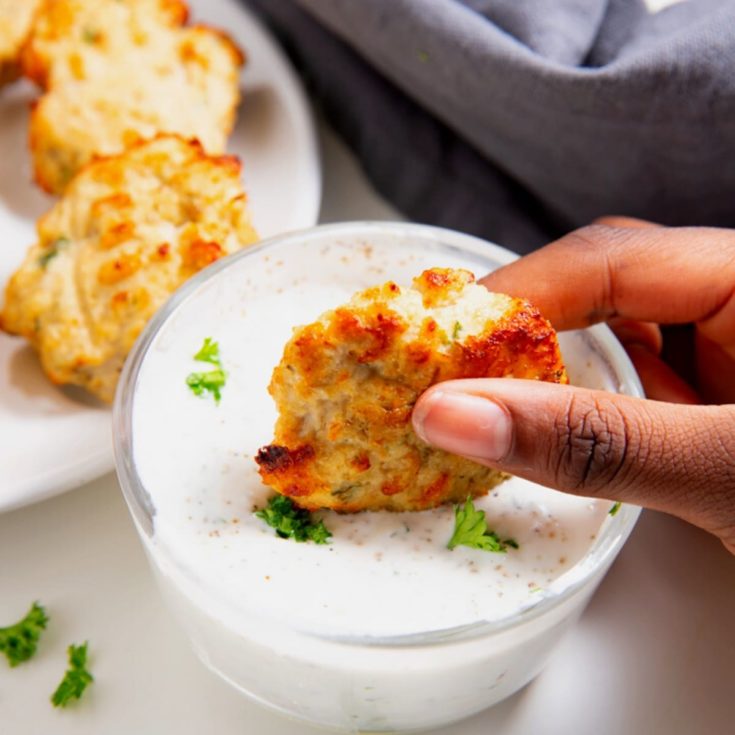
Image for Chicken Patties with Garlic Aioli

Chicken Patties with Garlic Aioli

These delicious Chicken Patties are quick and easy to make and can be made in the air fryer or shallow fried on the stovetop. Served with a creamy garlic aioli dipping sauce, they can be served as a main or an appetizer.

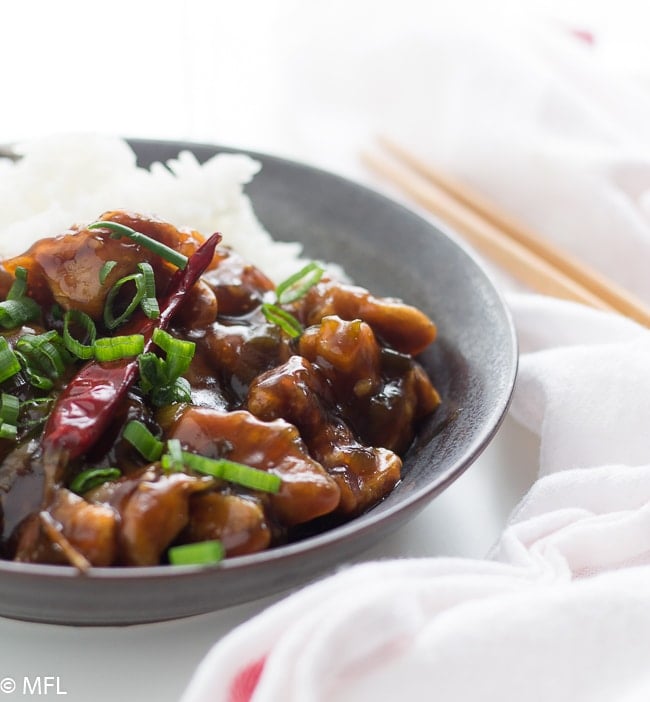
This healthy general tso's chicken recipe is made in the air fryer for a healthier take on the dish. Have dinner ready in 30 minutes or less. #weeknightdinner #asiandinner #healthydinner #healthy #airfryerrecipes #airfryer #airfryerchicken #quickdinner #dinnerforbusypeople healthy general tso chicken recipe.

Healthier General Tso's Chicken Recipe in the Air Fryer

General Tso's chicken is usually coated and fried first to that awesome crunchy chicken that's covered in sauce. This air fried version skips the frying and the excess oil to get the same crunchiness.

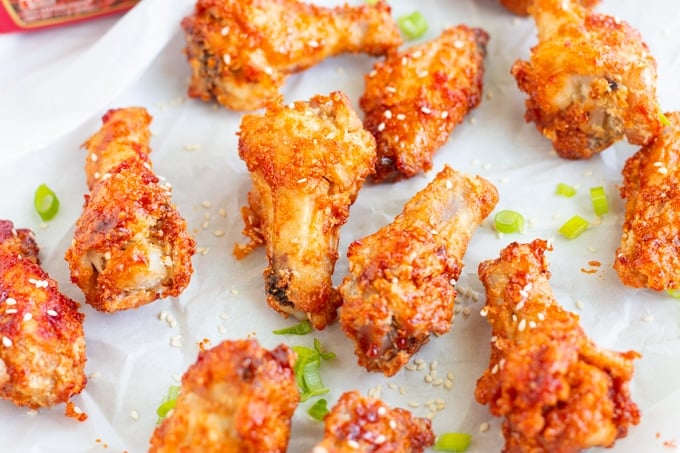
air fried chicken wing with green onion

Crispy Korean Air Fried Chicken Wings

Using the air fryer and a little cornstarch gets these wings are extra crunchy. Once cooked, they are covered in a delicious gochujang sauce.

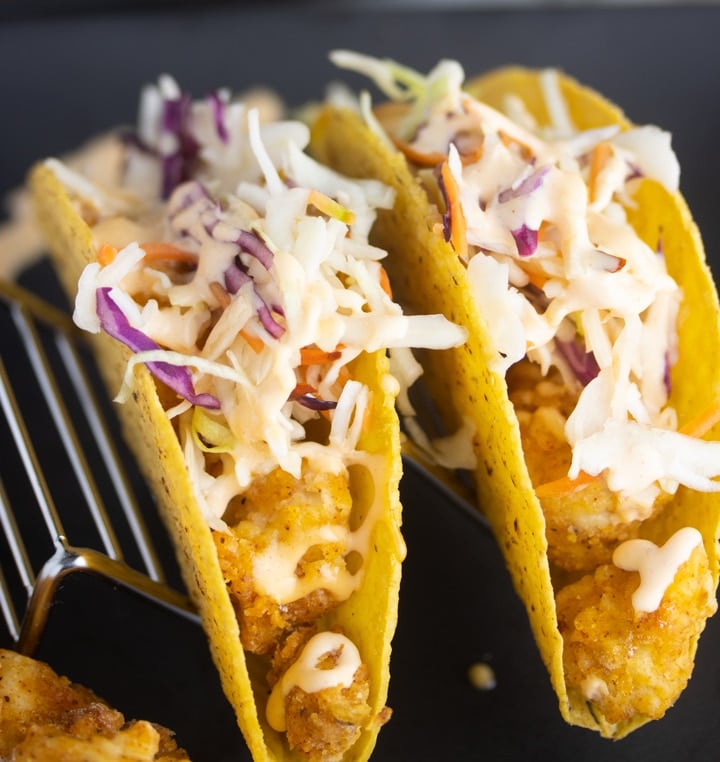
Image for Fried Chicken Tacos (Air Fryer)

Fried Chicken Tacos (Air Fryer)

These Fried Chicken Tacos are absolutely delicious and ready in less than 20 minutes thanks to the Air Fryer. Golden air fried chicken breast fried to perfection, topped with a vinegar-based slaw and spicy mayo wrapped up into a crispy taco.

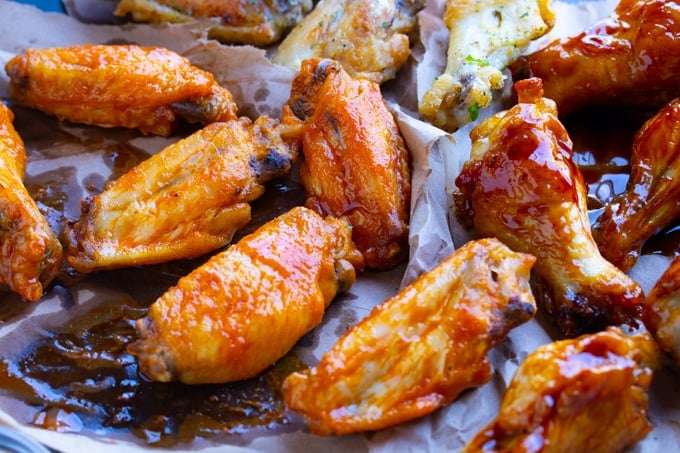
Image for How to Make Air Fryer Chicken Wings (Fresh or Frozen)

How to Make Air Fryer Chicken Wings (Fresh or Frozen)

If you’re looking for all the tips and tricks to perfect Air Fryer Chicken Wings, I’ve got you covered. Here’s how to make perfectly crispy chicken wings in your Air Fryer from fresh or frozen, sauced or dry-rubbed.

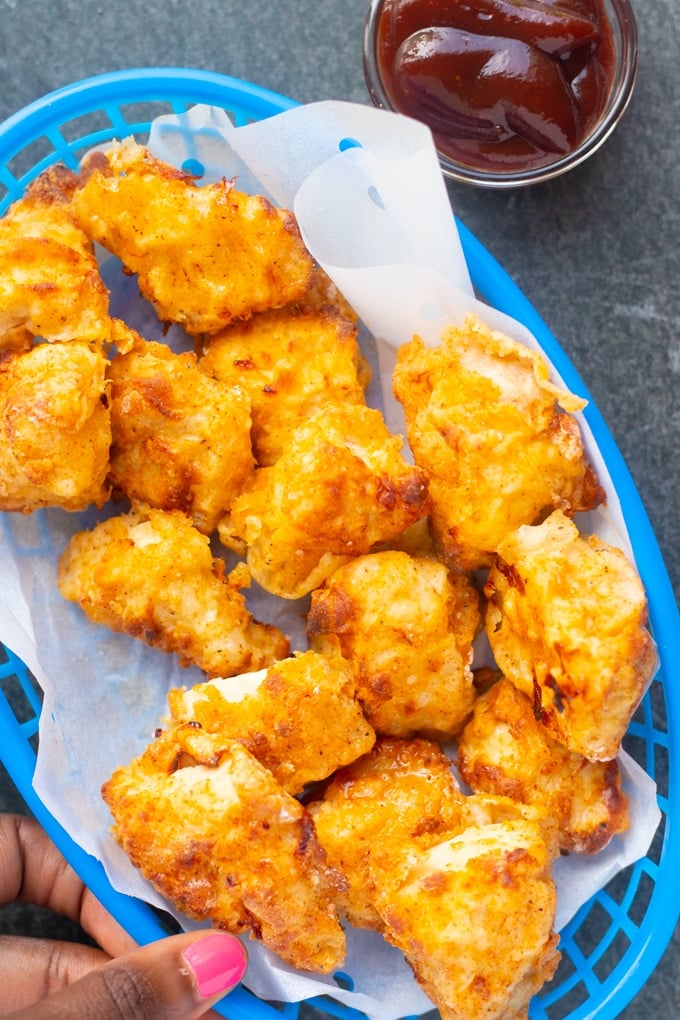
Image for Air Fryer Chicken Nuggets (Chick-fil-A Copycat)

Air Fryer Chicken Nuggets (Chick-fil-A Copycat)

These Air Fryer Chicken Nuggets are golden, delicious, and full of amazing flavor. Your family will love this copycat version of the Chic-fil-A nuggets.

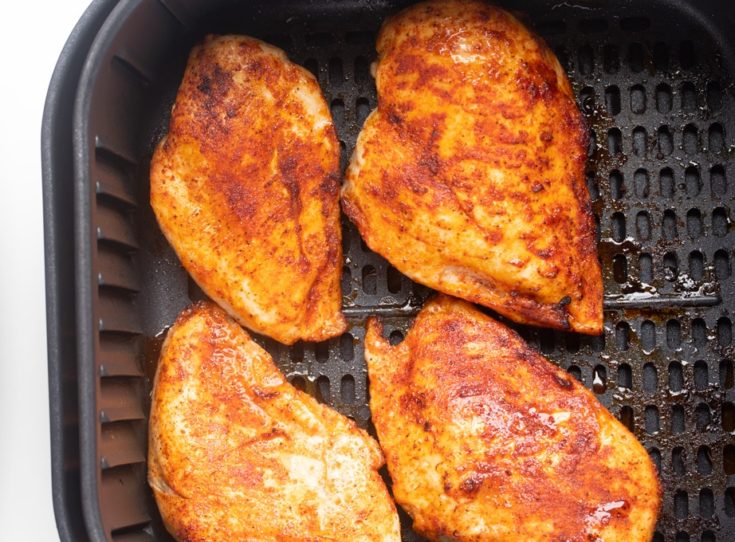
Image for BBQ Air Fryer Chicken Breast

BBQ Air Fryer Chicken Breast

This delicious and juicy chicken breast is made right in your Air Fryer after being covered with bbq seasoning. It’s perfect as a main course with a side or on a salad.

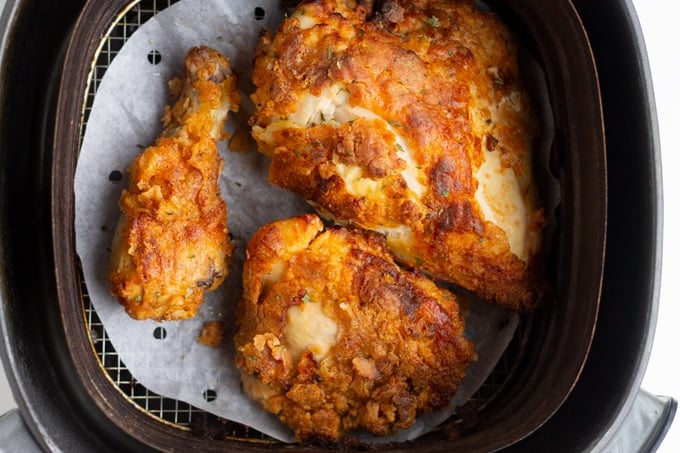
Image for Air Fryer Fried Chicken

Air Fryer Fried Chicken

This Air Fryer Fried Chicken is golden brown, juicy, and full of flavor. It’s one recipe you have to try in your Air Fryer.

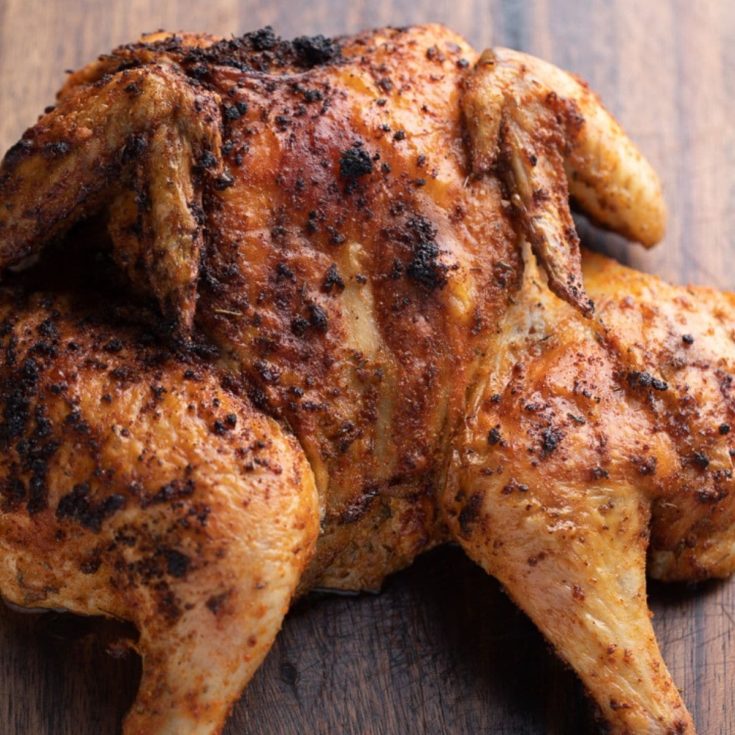
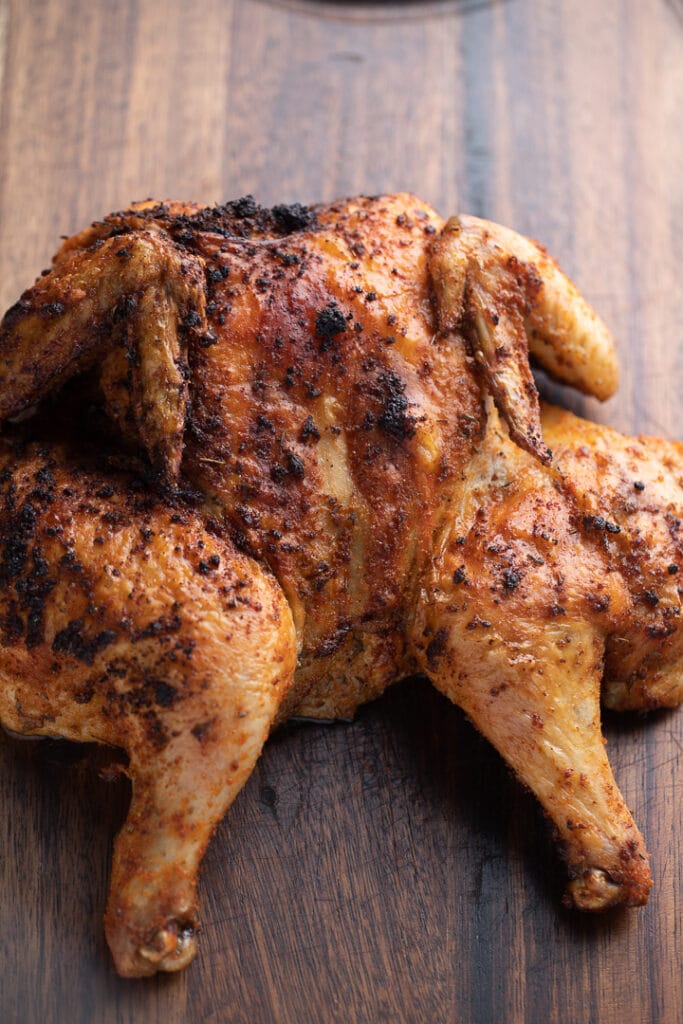
roasted chicken on cutting board

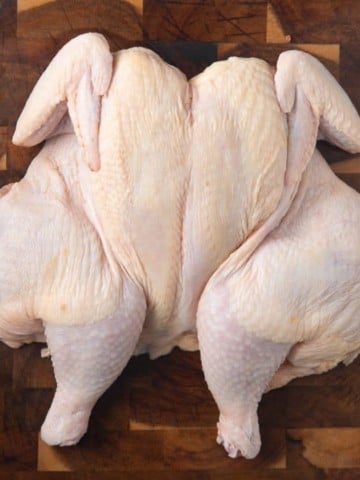
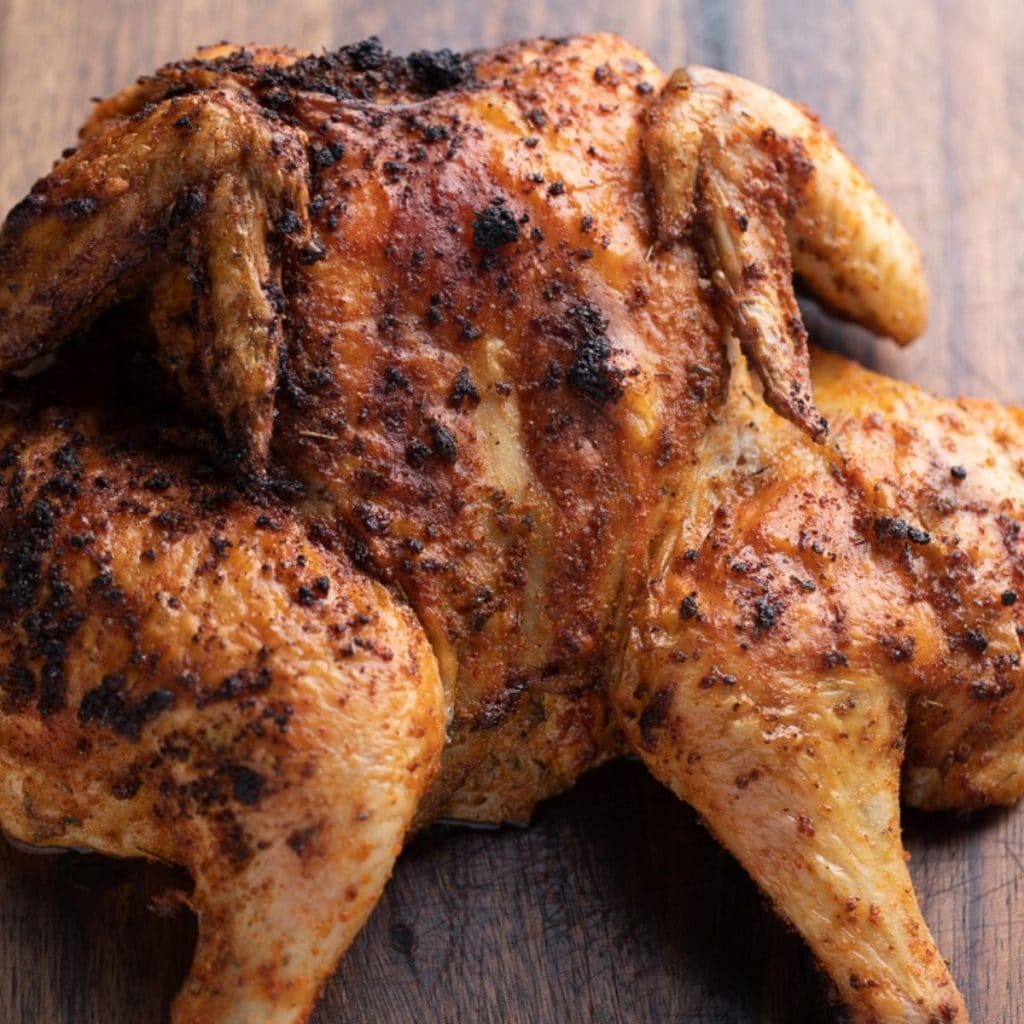
Air Fried Spatchcock Chicken

It’s so easy to cook spatchcock chicken in the air fryer and the results are out of this world! The skin is perfectly crispy and the meat is tender and juicy. Ready to serve in about 45 minutes and made with 3 ingredients.

Bonus recipes!!!

If you also like turkey meat, you'll love these turkey recipes made in the air fryer.

Easy Air Fryer Turkey Recipes

These recipes for air fryer turkey are so delicious and quite easy. From turkey breast to turkey legs, and even turkey burgers.

Image for Roasted Air Fryer Turkey Breast (Bone-In or Boneless)

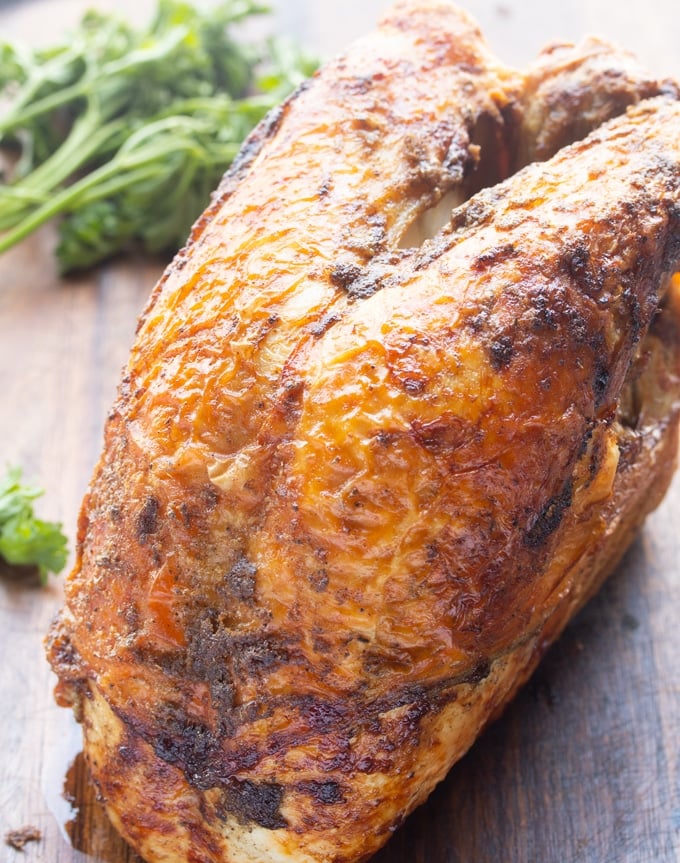
Roasted Air Fryer Turkey Breast (Bone-In or Boneless)

This Air Fryer Roasted Turkey Breast is juicy and moist and so easy to make. Use bone-in or boneless turkey breast to make this beautiful golden roasted turkey in less than an hour. 

Image for Juicy Air Fryer Turkey Burgers

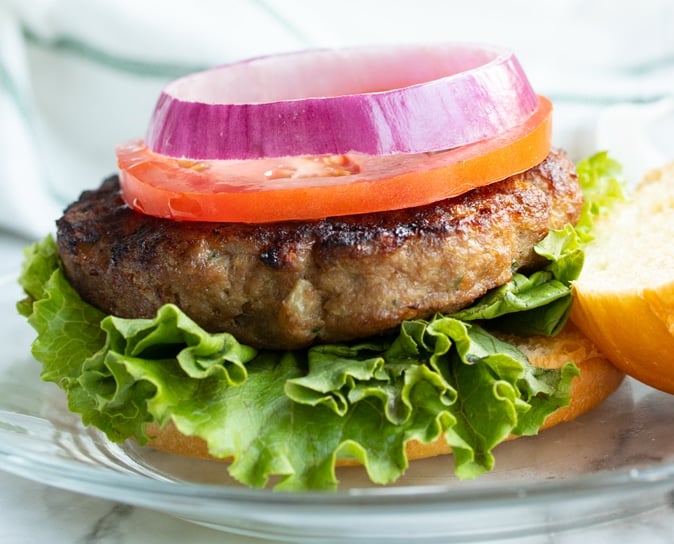
Juicy Air Fryer Turkey Burgers

These Air Fryer Turkey Burgers are juicy, delicious, and full of amazing flavor. I use my healthy secret ingredient to keep these turkey burgers nice and juicy with no added oil or butter.

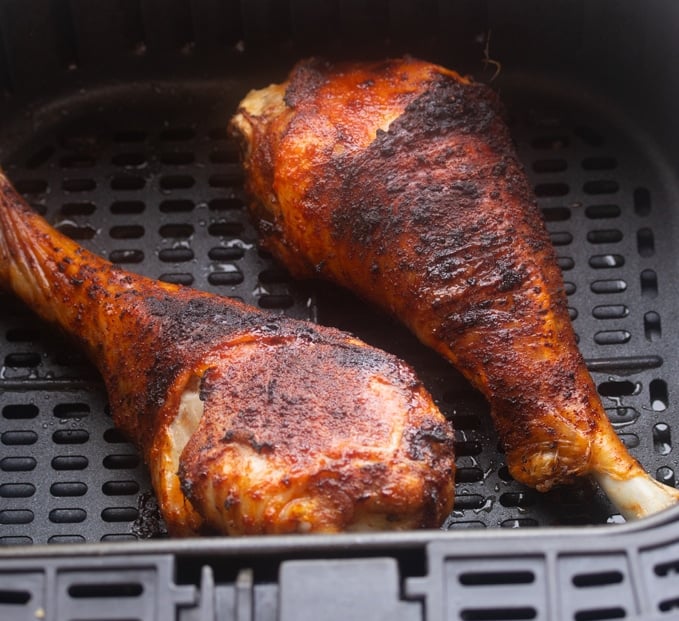
roasted turkey legs in air fryer basket

Air Fryer Roasted Turkey Legs

These Air Fryer Turkey Legs are roasted in the Air Fryer and are nice and crisp on the outside while perfectly juicy on the inside. Take a trip to your favorite fair with this easy recipe. 

BBQ Nachos Recipe

March 31, 2021 by Tanya Harris 8 Comments

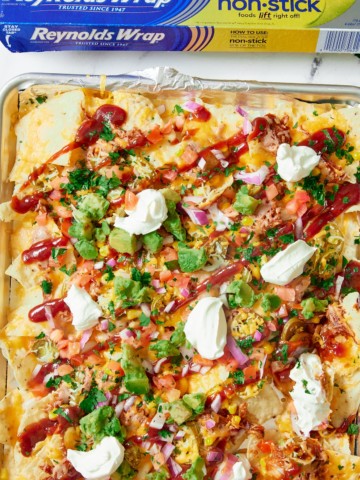
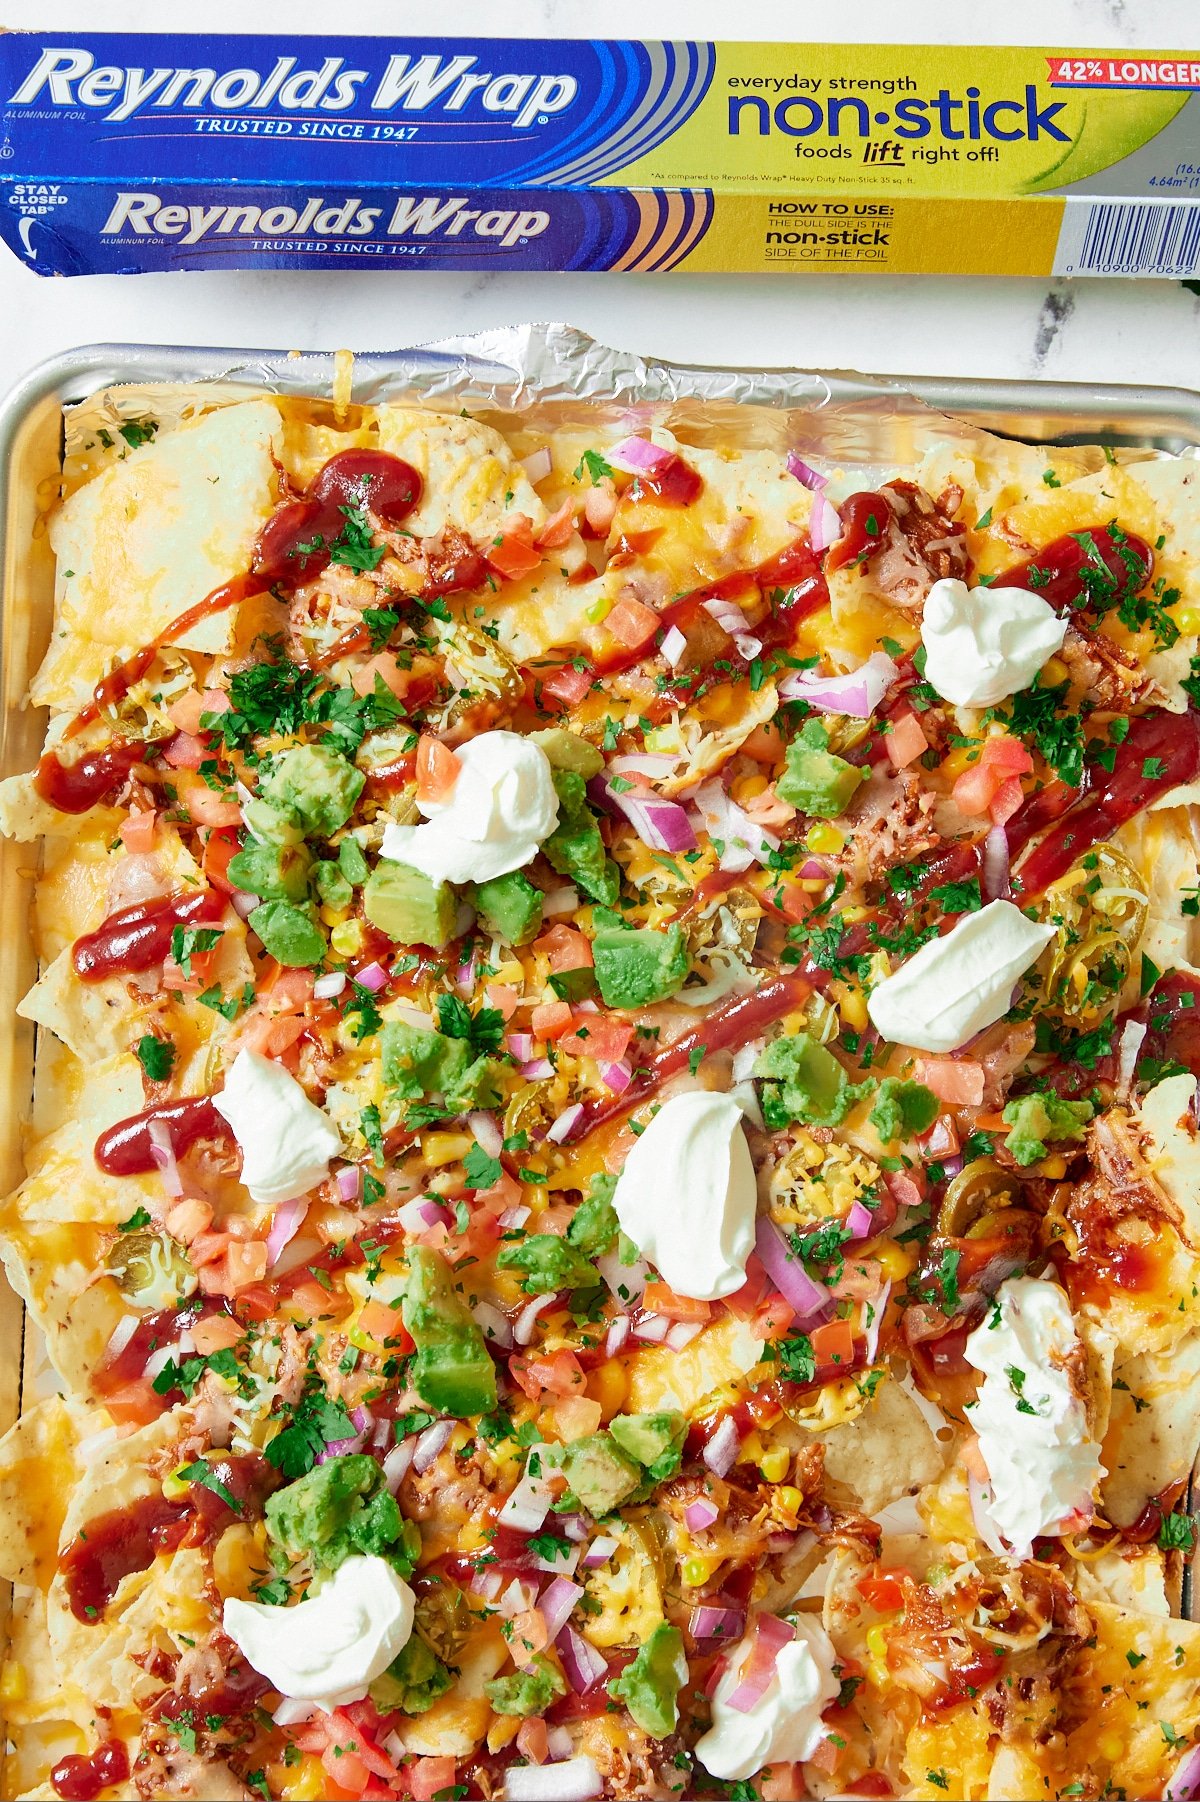
bbq nachos with Reynolds® Wrap Non-Stick Foil box at the top.

Level up your nacho game with these BBQ Nachos topped with delicious BBQ pork, jalapeño slices, corn, and other delicious toppings. It’s a quick and easy dinner idea that’s full of bold and amazing flavors.

bbq nachos with Reynolds® Wrap Non-Stick Foil box at the top.

This post contains affiliate links, please read my full disclaimer here.

I’m excited to partner with Reynolds Wrap® for this post.

I love nachos because they’re quick to make, full of flavor, and cheesy. I also love BBQ….so of course, this combo of BBQ and cheesy nachos was bound to happen. I first tried this combo on a trip to Virginia and I was in love with the flavors. It’s now on our dinner rotation when I need a quick and easy meal.

Although they're both delicious, nachos and BBQ can both get very messy.

That’s why I use Reynolds Wrap® Non-Stick Foil for easy cleanup and to keep my pans nice and shiny. No one wants to scrub burnt cheese off their pans and the cheese belongs in your belly rather than stuck to the pan.

Reynolds Wrap® Non-Stick Foil is made with a non-stick coating on one side (the dull side), so there’s no need to add cooking spray or oil, even for sticky foods like these cheesy nachos. Just add your ingredients right on the foil and watch the non-stick magic happen.

How to make BBQ Nachos:

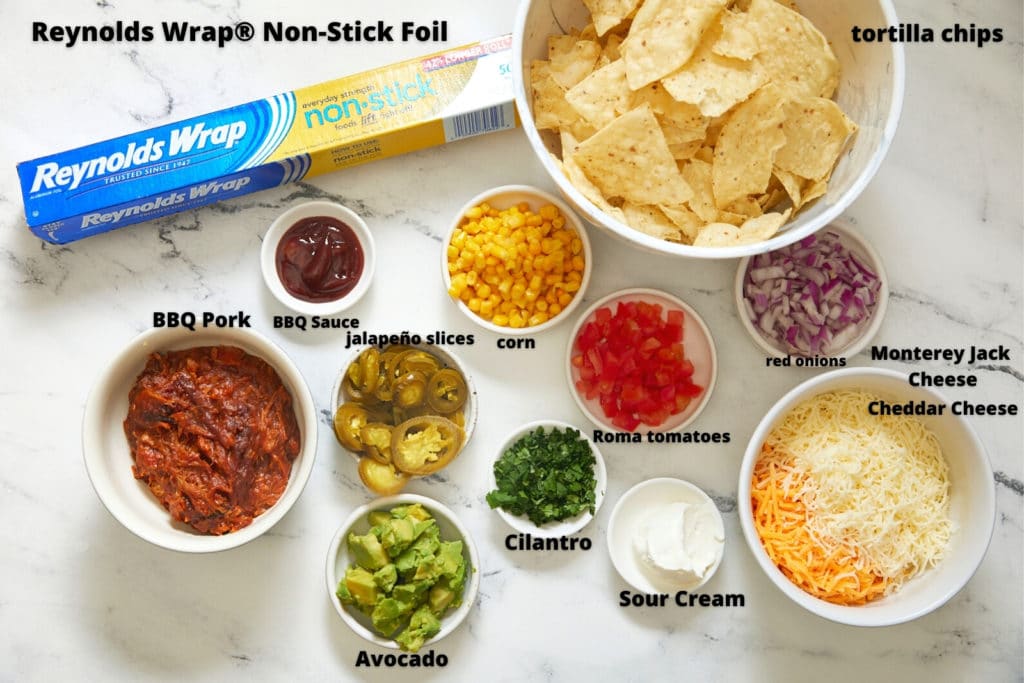
Preheat your oven to 375 degrees Fahrenheit and gather your ingredients.

ingredients for bbq nachos on white background

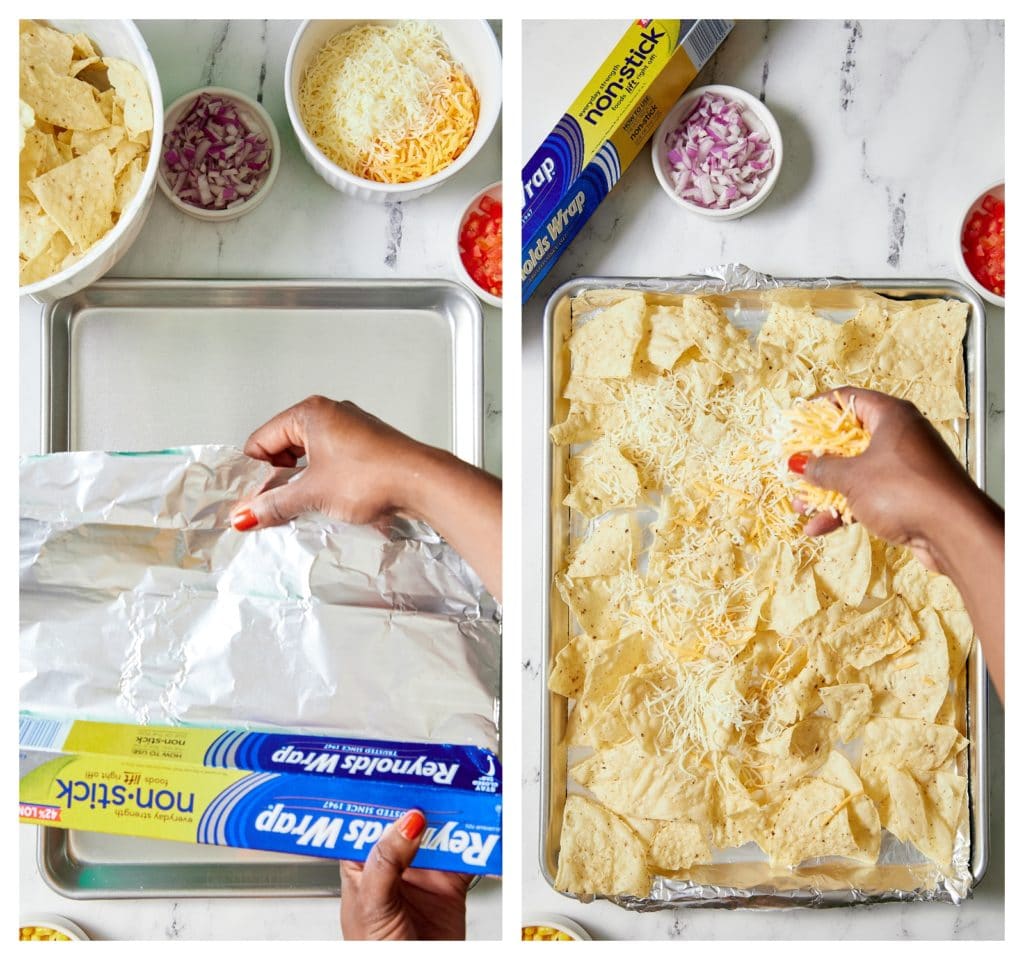
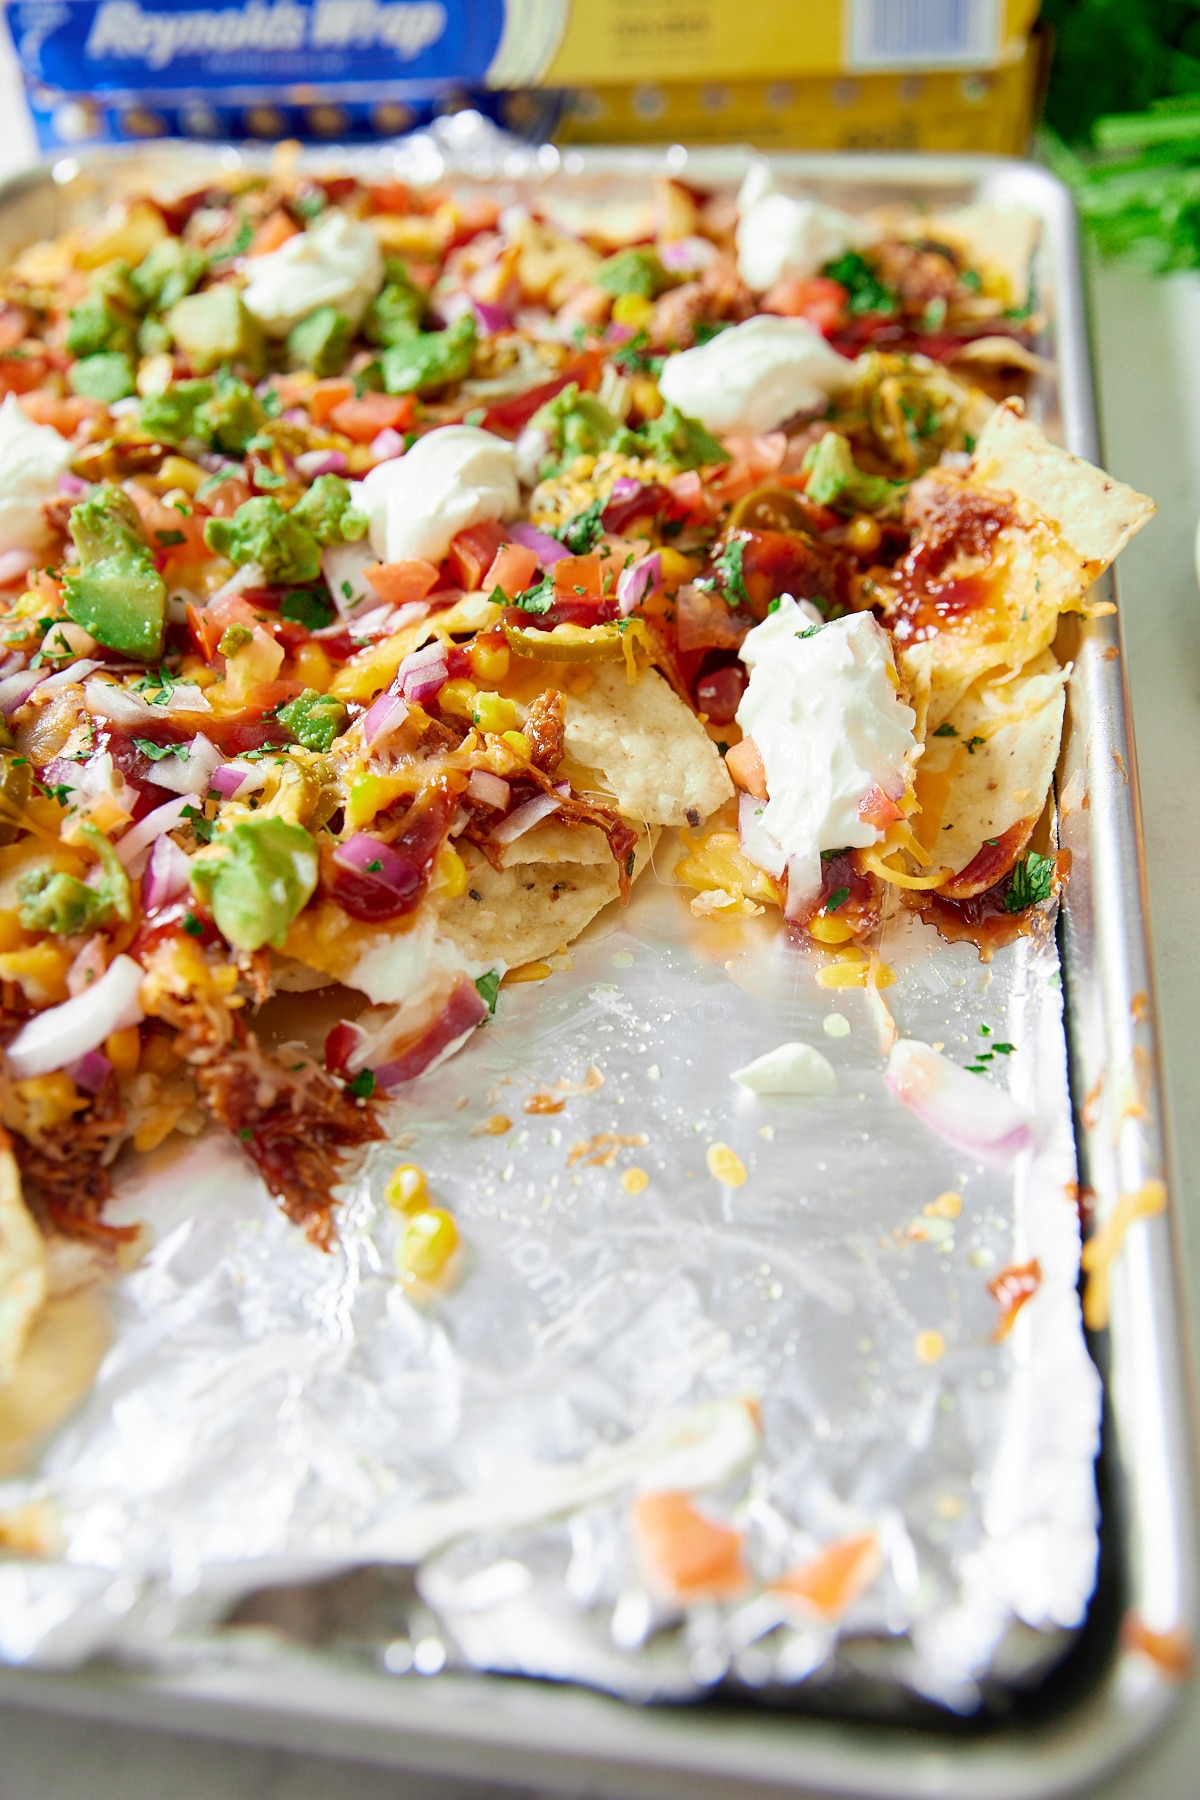
Prepare a large sheet pan by spreading Reynolds Wrap® Non-Stick Foil on it. Make sure the dull side is up as this is the side that is non-stick, and the nachos will lift right off after baking.

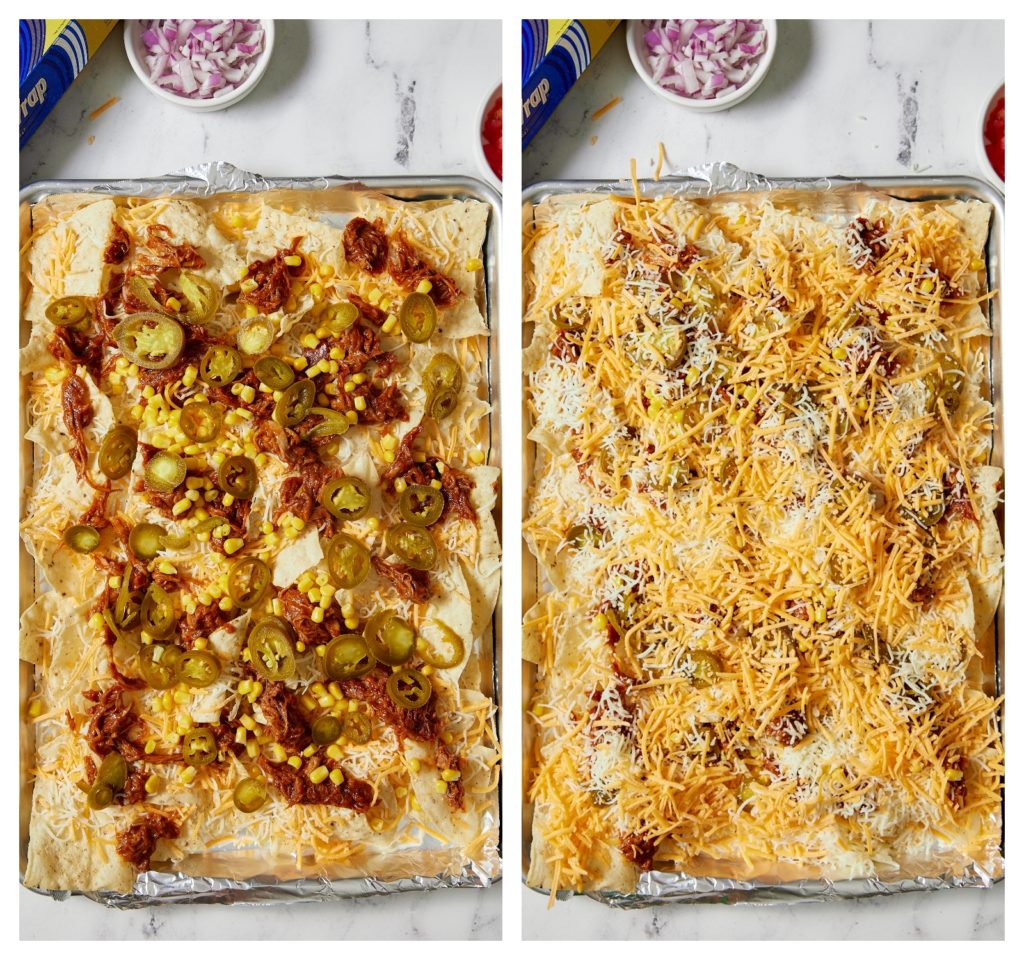
Then lay a single layer of chips and half of the cheese. I use both Monterey Jack and Cheddar.

collage of hand laying down foil and then chips and cheese being placed on it

Then, add your BBQ Pork (or chicken or beans), corn, and jalapeño slices. Top with the remainder of your cheese.

collage of nacho ingredients on sheet pan with foil

Bake in the oven for 7-9 minutes or until the cheese has melted.

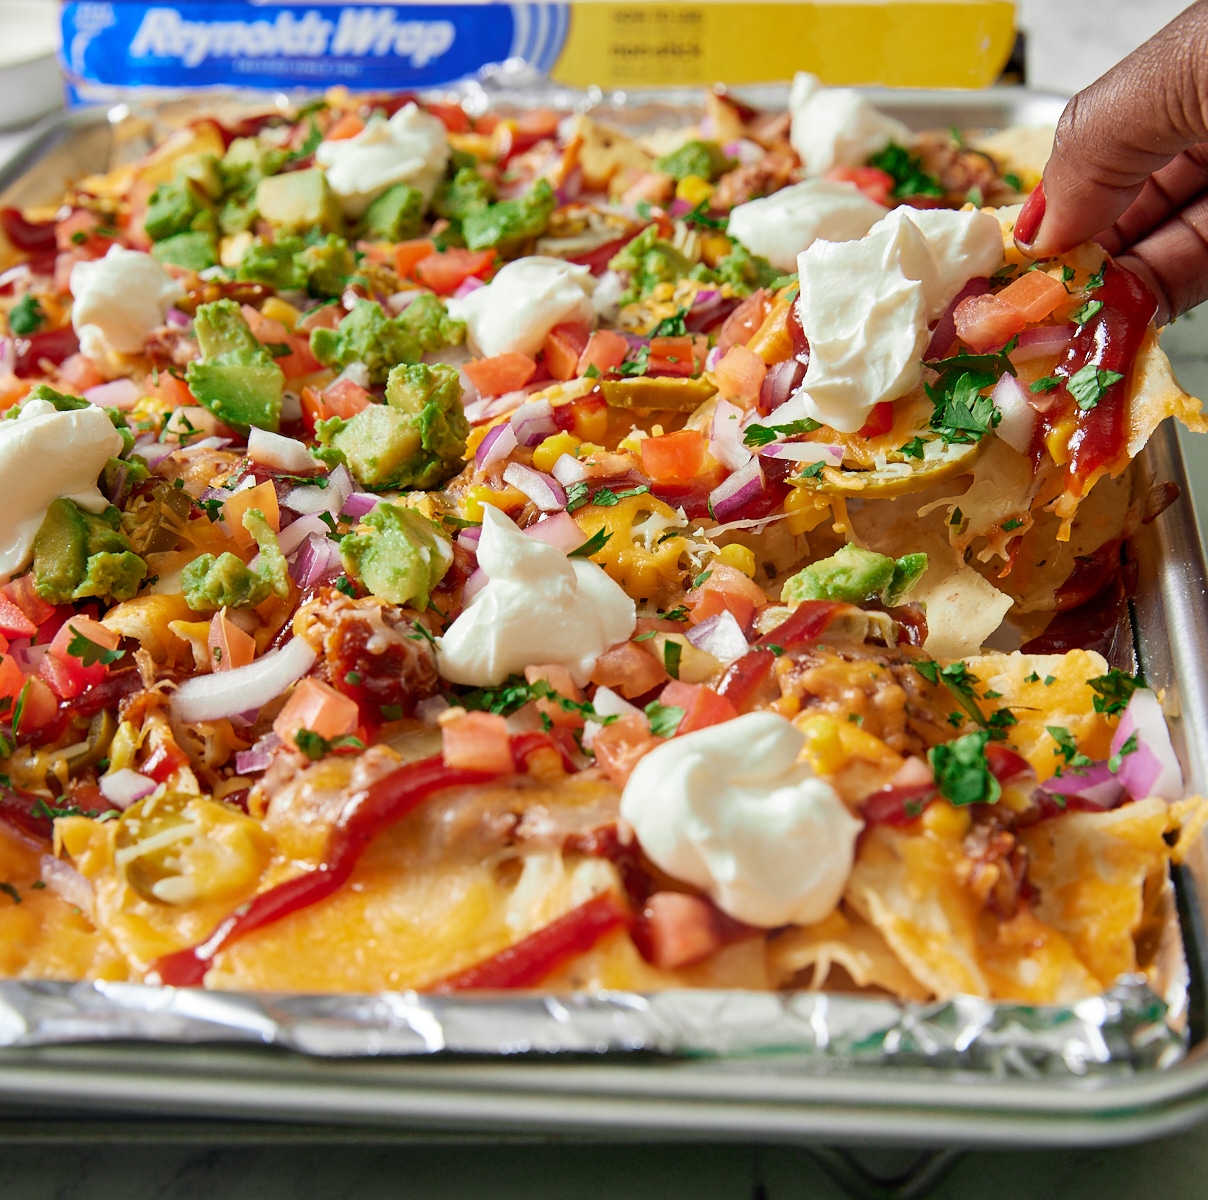
Top with red onion, tomatoes, cilantro, sour cream, and more BBQ sauce. Serve and enjoy.

finished bbq nachos with some removed and foil showing

Tips on How to Layer your Nachos

There’s an art to layering nachos to ensure that every chip has an equal amount of topping. Start with Reynolds Wrap® Non-Stick Foil to prevent sticking. Then, place your chips in a single layer. Do not overlap them. Cover that layer with cheese and toppings like meat, beans, and corn, then finish it with cheese before baking.

Once it’s done cooking, add your cold ingredients like chopped onions, tomatoes, sour cream, and avocado.

Other Important tips for making nachos

●      Use Reynolds Wrap® Non-Stick Foil for easy cleanup - Melted cheese can be a nightmare to scrub off of pans and I like my cheese to be on my plate rather than stuck to the pan. Lining the pan with non-stick foil is a must to keep your pans nice and clean. Reynolds Wrap® Non-Stick Foil is perfect for this recipe as nothing sticks to the foil, so you can enjoy every single bit of nachos and cheese. When using Reynolds Wrap® Non-Stick Foil, make sure the dull side is facing up. There’s also text that says non-stick side, so you know which side to use.

●      Only bake the chips, cheese, meat, and corn - Add toppings like sour cream, red onions, cilantro after you take the nachos out of the oven. This will give you that perfect combo of hot and cold ingredients.

●      Have fun with the toppings - The possibilities are endless when it comes to toppings on nachos. You can sub the pork for chicken or make it meatless by subbing a drained can of beans instead. Either way, you won’t be disappointed.

●      Leftover BBQ pork or chicken work great - Both my Shredded BBQ Pork and Shredded BBQ Chicken work great with this recipe.You can also quickly whip up some BBQ chicken by adding ½ cup of BBQ sauce to leftover shredded chicken or pork. I like to use the chicken from a rotisserie chicken from time to time.

●      Nachos are best eaten the day when you make them.

hand pulling up nacho chip with Reynolds® Wrap Non-Stick foil box in background
bbq nachos with Reynolds® Wrap Non-Stick Foil box at the top.
Print Recipe
4.67 from 3 votes

BBQ Nachos Recipe

Level up your nacho game with these BBQ Nachos topped with delicious BBQ pork, jalapeño slices, corn, and other delicious toppings. It’s a quick and easy dinner idea that’s full of bold and amazing flavors.
Prep Time10 minutes mins
Cook Time7 minutes mins
Total Time17 minutes mins
Course: Appetizer, Main Course
Cuisine: American
Keyword: BBQ Nachos, Nachos
Servings: 6 people
Calories: 790kcal
Author: Tanya Harris

Ingredients

  • Reynolds Wrap® Non-Stick Foil
  • 11 oz. bag of tortilla chips
  • 2 cups shredded Monterey Jack cheese
  • 2 cups shredded cheddar cheese
  • 1.5 cups BBQ pork or chicken
  • ½ cup corn kernels
  • 1 cup jalapeño slices
  • ½ cup red onion chopped
  • ½ cup BBQ sauce
  • ¼ cup chopped cilantro leaves
  • ¼ cup sour cream
  • 1 avocado peeled, cored and chopped
  • 2 Roma tomatoes chopped

Instructions

  • Preheat the oven to 375 degrees Fahrenheit.
  • Prepare a large sheet pan by spreading Reynolds Wrap® Non-Stick Foil on it. Make sure the dull side is up as this is the side that is non-stick. Then lay a single layer of chips and half of the cheese. Then add your BBQ Pork (or chicken or beans), corn, and jalapeños. Then top with the remainder of your cheese.
  • Bake in the oven for 7-9 minutes or until the cheese has melted.
  • Top with red onion, tomatoes, cilantro, sour cream, and more BBQ sauce. Serve and enjoy.

Nutrition

Calories: 790kcal | Carbohydrates: 65g | Protein: 33g | Fat: 46g | Saturated Fat: 19g | Cholesterol: 100mg | Sodium: 1315mg | Sugar: 21g | Calcium: 677mg

Air Fryer Salmon Patties

March 22, 2021 by Tanya Harris 9 Comments

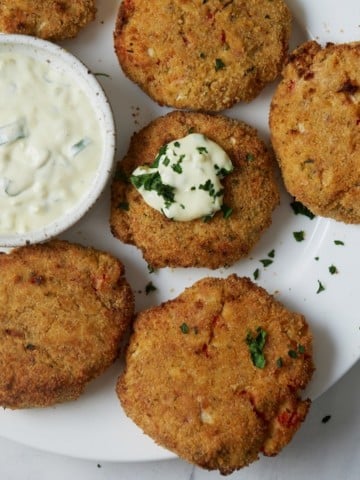
air fryer salmon patties on white plate with tartar sauce on one

Quick and easy to make, these air fryer salmon patties are wonderfully flavorful and so simple to make. Serve as an appetizer or as part of a main for one delicious bite!

Six salmon patties on a plate served with sour cream and a wedge of lemon.

This post contains affiliate links, please read my full disclaimer here.

You’ll find the full recipe with ingredient amounts and instructions in the recipe card at the bottom of this post. Be sure to check out the blog post itself for extra tips and tricks!

I just know that you are going to adore this salmon cake recipe! It's so full of flavor and my take on this classic recipe. I use canned salmon and my air fryer for this recipe, but you could totally use fresh and make it on the stove if you like.

These patties take minutes to make and are great to serve as an appetizer or as part of a quick and easy weeknight meal. Every bite is so flavorful, trust me, you are sure to impress with this dish!

Be sure to check out my Air Fryer Crab Cakes and Air Fryer Crispy Shrimp.

How to make air fryer salmon patties

  • Gather your ingredients.
Ingredients to make the salmon patties in glass bowls.
  • In a bowl, combine drained canned salmon, ½ cup bread crumbs, egg, sweet onion, red bell pepper, garlic, mayonnaise, lemon juice, mustard, and celery salt.
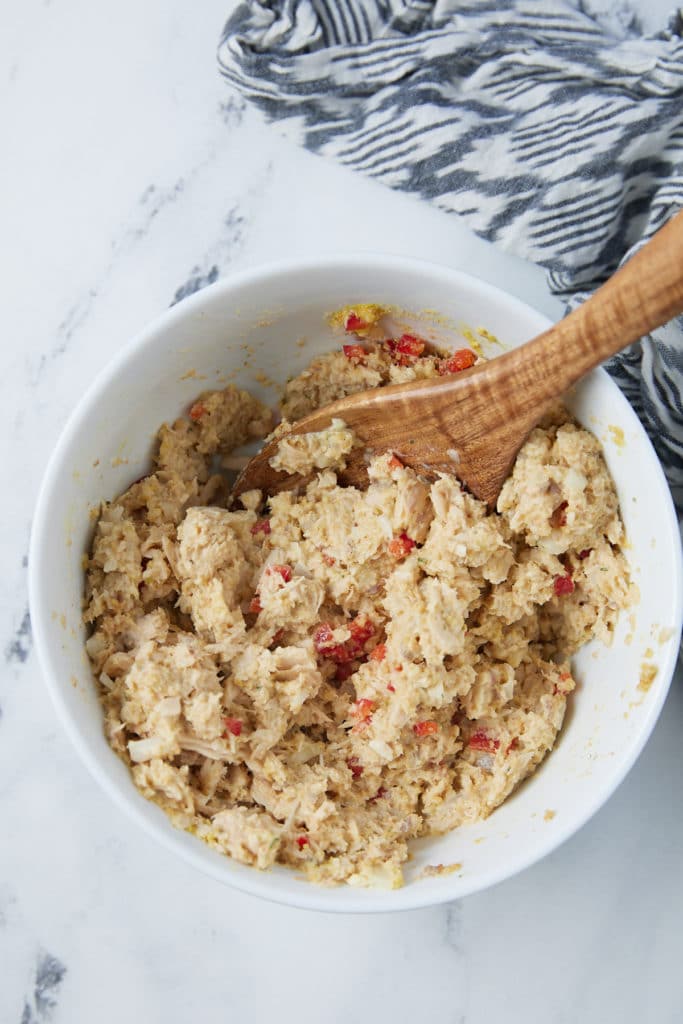
The ingredients mixed together in a bowl.
  • Form mixture into 6 patties and place in the freezer for 15-20 minutes. This will firm them up so they don't break apart.
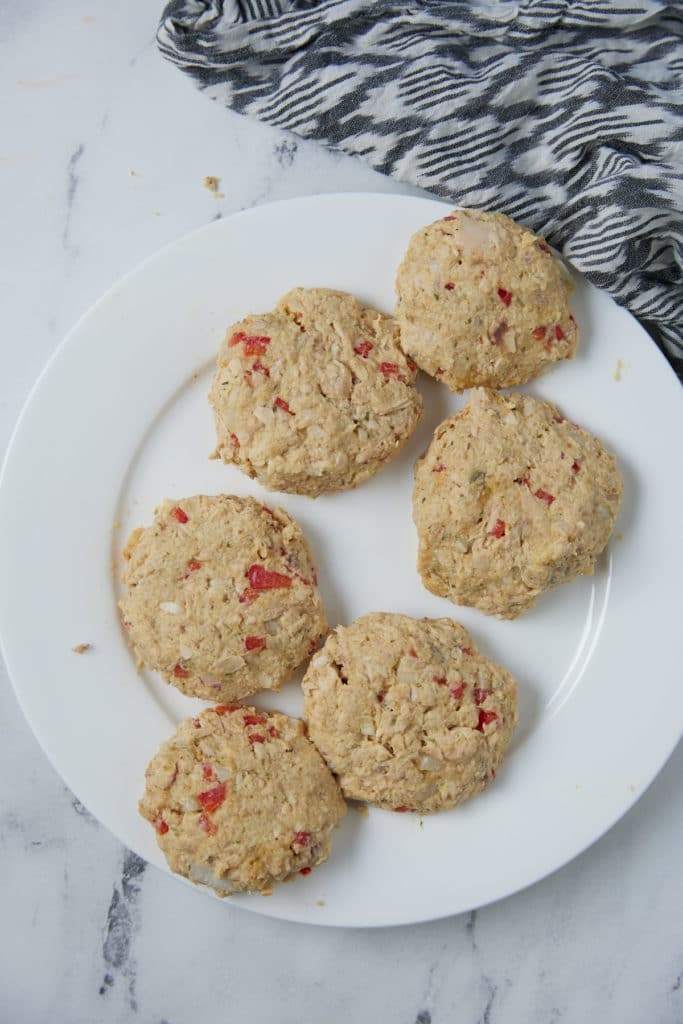
The mixture formed into six patties.
  • Preheat the air fryer to 370 Fahrenheit.
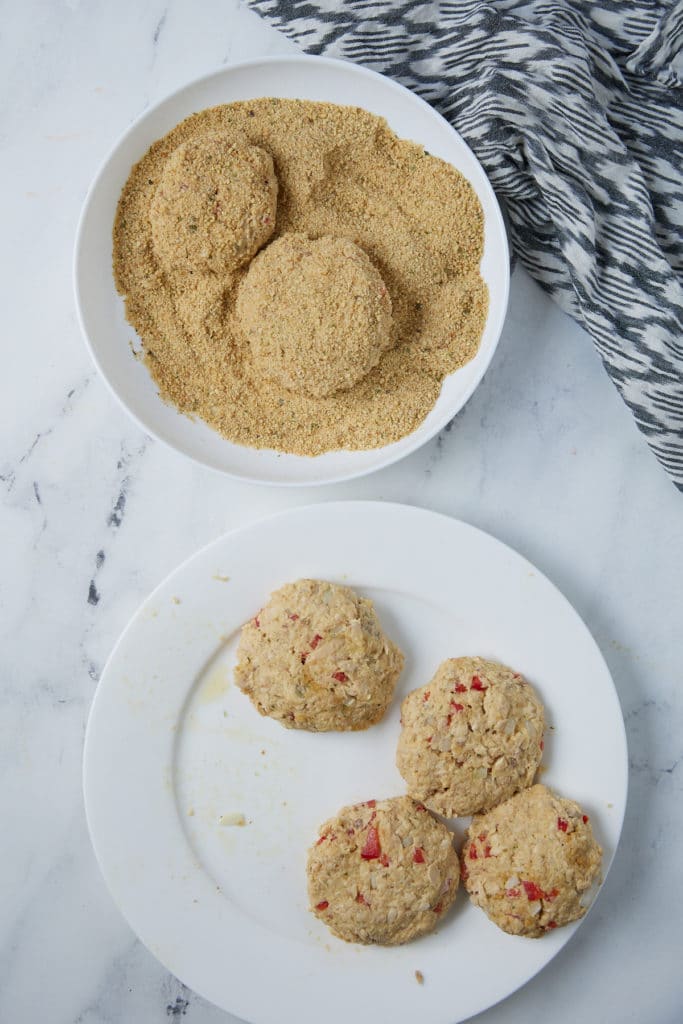
  • Spread the remaining ½ cup of breadcrumbs in a shallow dish. Remove the patties from the freezer and coat patties in the breadcrumbs.
The patties being covered with breadcrumbs.
  • Place in the preheated air fryer basket and cook for 11-13 minutes, flipping and spraying with oil halfway.
The salmon patties in the air fryer before and after cooking.

Serve and enjoy.

salmon patties cooked inside air fryer basket

Can you make these without an air fryer?

These salmon patties are so effortless to cook in the air fryer, but you can pan fry them too. Simply fry the patties in an oiled pan over medium-high heat until browned, about 3-4 minutes each side.

You can also oven bake them, although they won't be as crispy. Place them in a preheated oven at 400F for 20 minutes, flipping halfway through.

What's the best salmon to use?

I like to use canned salmon for this recipe, it makes the dish super convenient and quick. If you have fresh salmon, you can of course use that, but be sure to cook it first, either on the stovetop or in the oven, before flaking and combining with the other ingredients.

What do you serve them with?

I love to serve these as an appetizer with some remoulade or tartar sauce and some lemon wedges. They work great as a light lunch or brunch too, served with a nice fresh salad.

Serve them as a main with some French fries, creamy mashed potatoes and steamed veggies.

Four salmon patties stacked on top of each other and topped with tartar sauce

Recipe Notes and Tips

  • Make them gluten-free by using GF breadcrumbs.
  • Be sure to freeze the patties before breading them or they can fall apart.
  • You can serve these without removing the bones if you prefer. You could also use three 5 oz cans of skinless, boneless, Wild Caught pink salmon.
  • Leftovers will keep well for up to 4 days in the fridge and can be reheated in the air fryer at 360F for 4 minutes.
Salmon patty on white plate cut in half to show inside

More Salmon Recipes

  • Easy Teriyaki Salmon
  • Salmon Wellington
  • Marinated Air Fryer Salmon
  • Pressure Cooker Salmon with Creamy Sauce
air fryer salmon patties on white plate with tartar sauce on one
Print Recipe
5 from 3 votes

Air Fryer Salmon Patties

Quick and easy to make, these air fryer salmon patties are wonderfully flavorful and so simple to make. Serve as an appetizer or as part of a main for one delicious bite!
Prep Time10 minutes mins
Cook Time10 minutes mins
Freezer time15 minutes mins
Total Time35 minutes mins
Course: Appetizer, Main Course
Cuisine: American
Keyword: air fried salmon cakes, air fried salmon patties, how to cook salmon patties in the air fryer
Servings: 6 patties
Calories: 228kcal
Author: Tanya Harris

Ingredients

  • 14.5 oz can of Wild Caught Alaskan salmon , drained, bones and skin removed
  • 1 cup of Italian bread crumbs separated
  • 1 large egg lightly beaten
  • ¼ cup diced sweet onion
  • ½ cup diced red bell pepper
  • ½ teaspoon minced garlic
  • 2 Tablespoon mayonnaise
  • 2 Tablespoon fresh lemon juice
  • 2 teaspoon mustard
  • ¼ teaspoon celery salt
  • Oil for spraying

Instructions

  • In a bowl, combine salmon, ½ cup bread crumbs, egg, sweet onion, red bell pepper, garlic, mayonnaise, lemon juice, mustard, and celery salt.
  • Form mixture into 6 patties and place in the freezer for 15-20 minutes.
  • Preheat the air fryer to 370 Fahrenheit.
  • Spread the remaining ½ cup of breadcrumbs in a shallow dish. Remove the patties from the freezer and coat patties in the breadcrumbs.
  • Place in the preheated air fryer basket and cook for 11-13 minutes, flipping and spraying with oil halfway. Serve and enjoy.

Notes

  • Make them gluten-free by using GF breadcrumbs.
  • Be sure to freeze the patties before breading them or they can fall apart.
  • You can serve these without removing the bones if you prefer. You could also use three 5 oz cans of skinless, boneless, Wild Caught pink salmon.
  • Leftovers will keep well for up to 4 days in the fridge and can be reheated in the air fryer at 360F for 4 minutes.
  • To pan-fry, follow the directions but pan fry the patties in an oiled pan over medium-high heat until browned, about 3-4 minutes each side.

    Nutrition

    Calories: 228kcal | Carbohydrates: 16g | Protein: 20g | Fat: 10g | Saturated Fat: 2g | Trans Fat: 1g | Cholesterol: 86mg | Sodium: 685mg | Potassium: 330mg | Fiber: 1g | Sugar: 2g | Vitamin A: 517IU | Vitamin C: 19mg | Calcium: 240mg | Iron: 2mg

    Vinegar Coleslaw

    March 9, 2021 by Tanya Harris 3 Comments

    This vinegar coleslaw is inspired by the red slaw served with North Carolina BBQ. It has no mayonnaise and is the perfect tangy coleslaw to go along with your bbq.

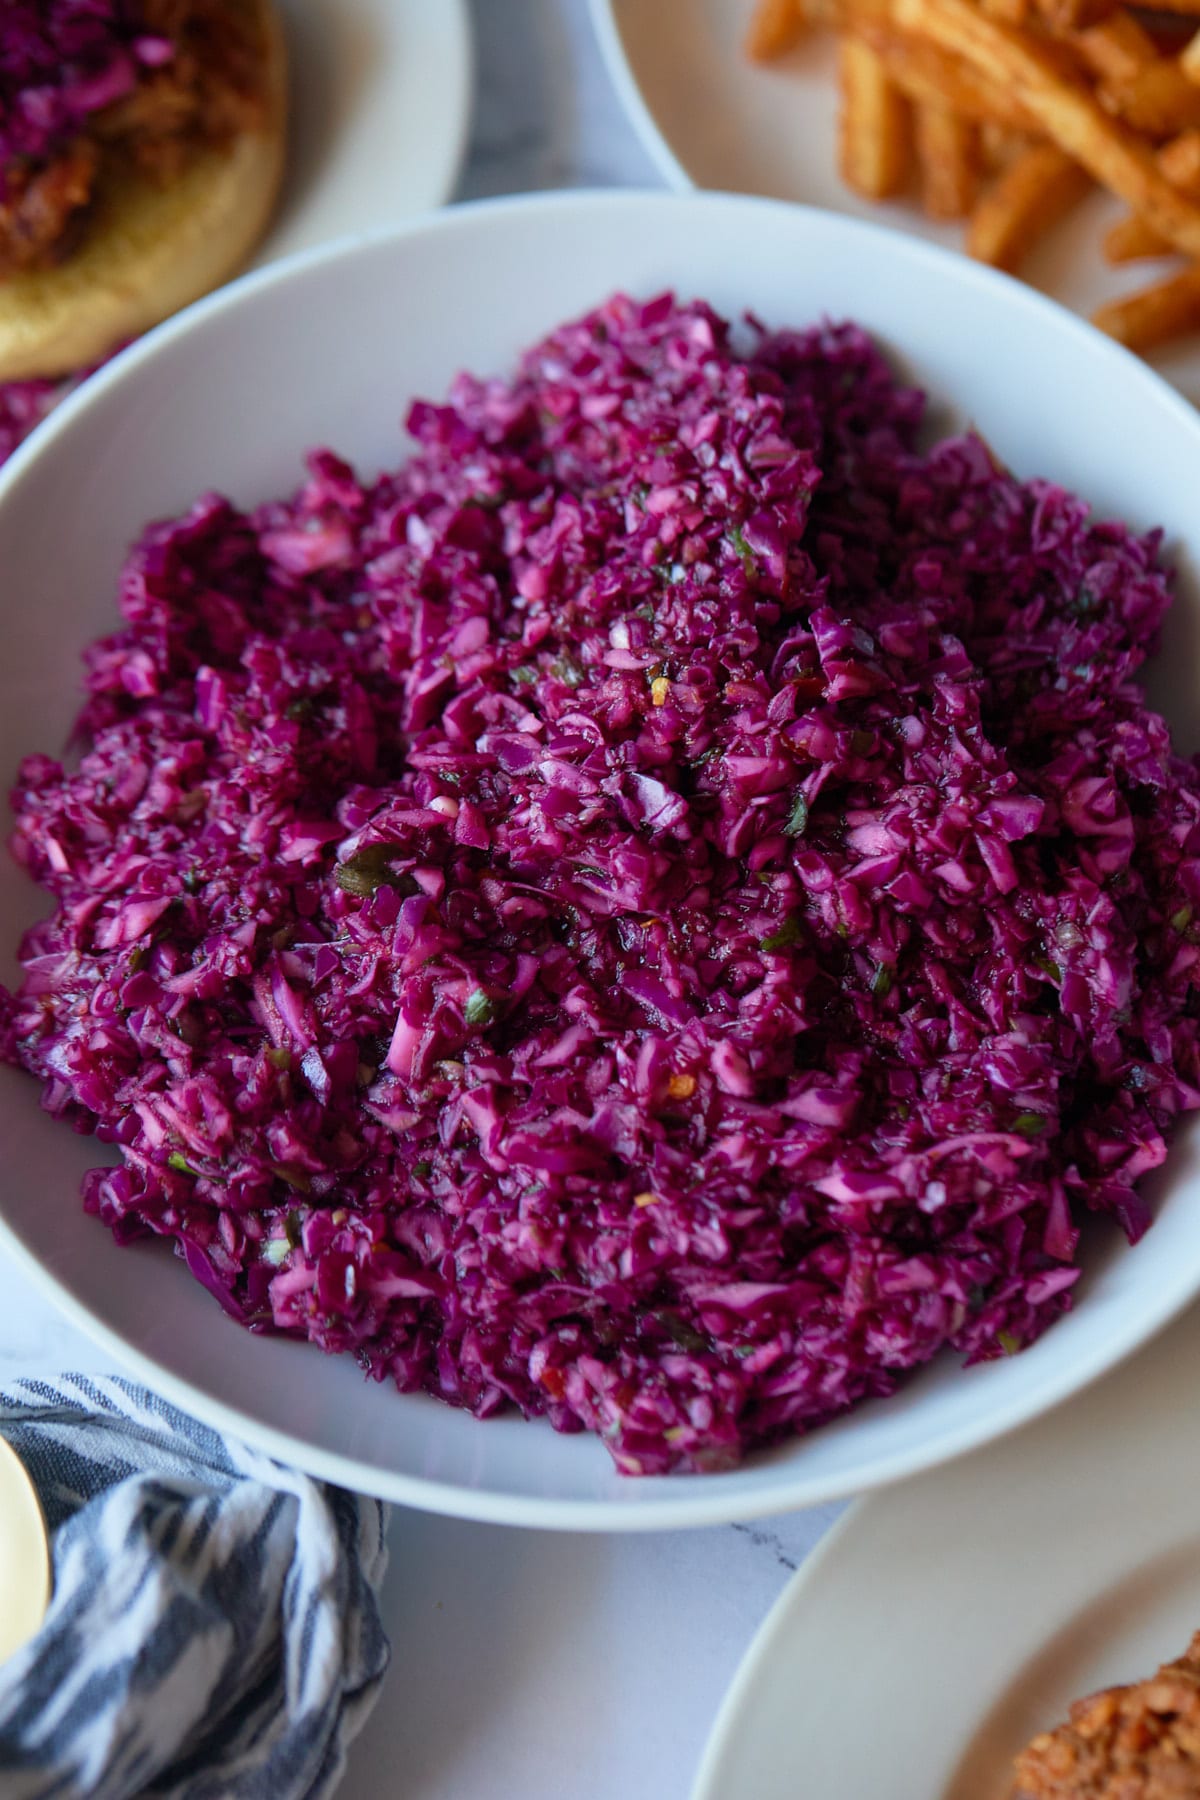
    Red cabbage vinegar coleslaw served in a white bowl.

    This post contains affiliate links, please read my full disclaimer here.

    You’ll find the full recipe with ingredient amounts and instructions in the recipe card at the bottom of this post. Be sure to check out the blog post itself for extra tips and tricks!

    A good slaw is one of my must-haves at any BBQ or picnic, and this vinegar coleslaw ticks all the right boxes! It's the kind of slaw that goes along perfectly with this North Carolina BBQ pulled pork.

    The vinegar slaw you find in North Carolina is usually red, hence the popular name called red slaw. Mine is purple..or greeinish brown depending on the kind of cabbage I use.

    This slaw is made without mayo so it's a healthier option compared to a creamy slaw. Low in fat and calories, it's one tasty side you can feel good about enjoying!

    This is great to serve on top of my air fryer hot dogs or turkey burgers, or as a side for your favorite BBQ meats.

    How to make vinegar slaw

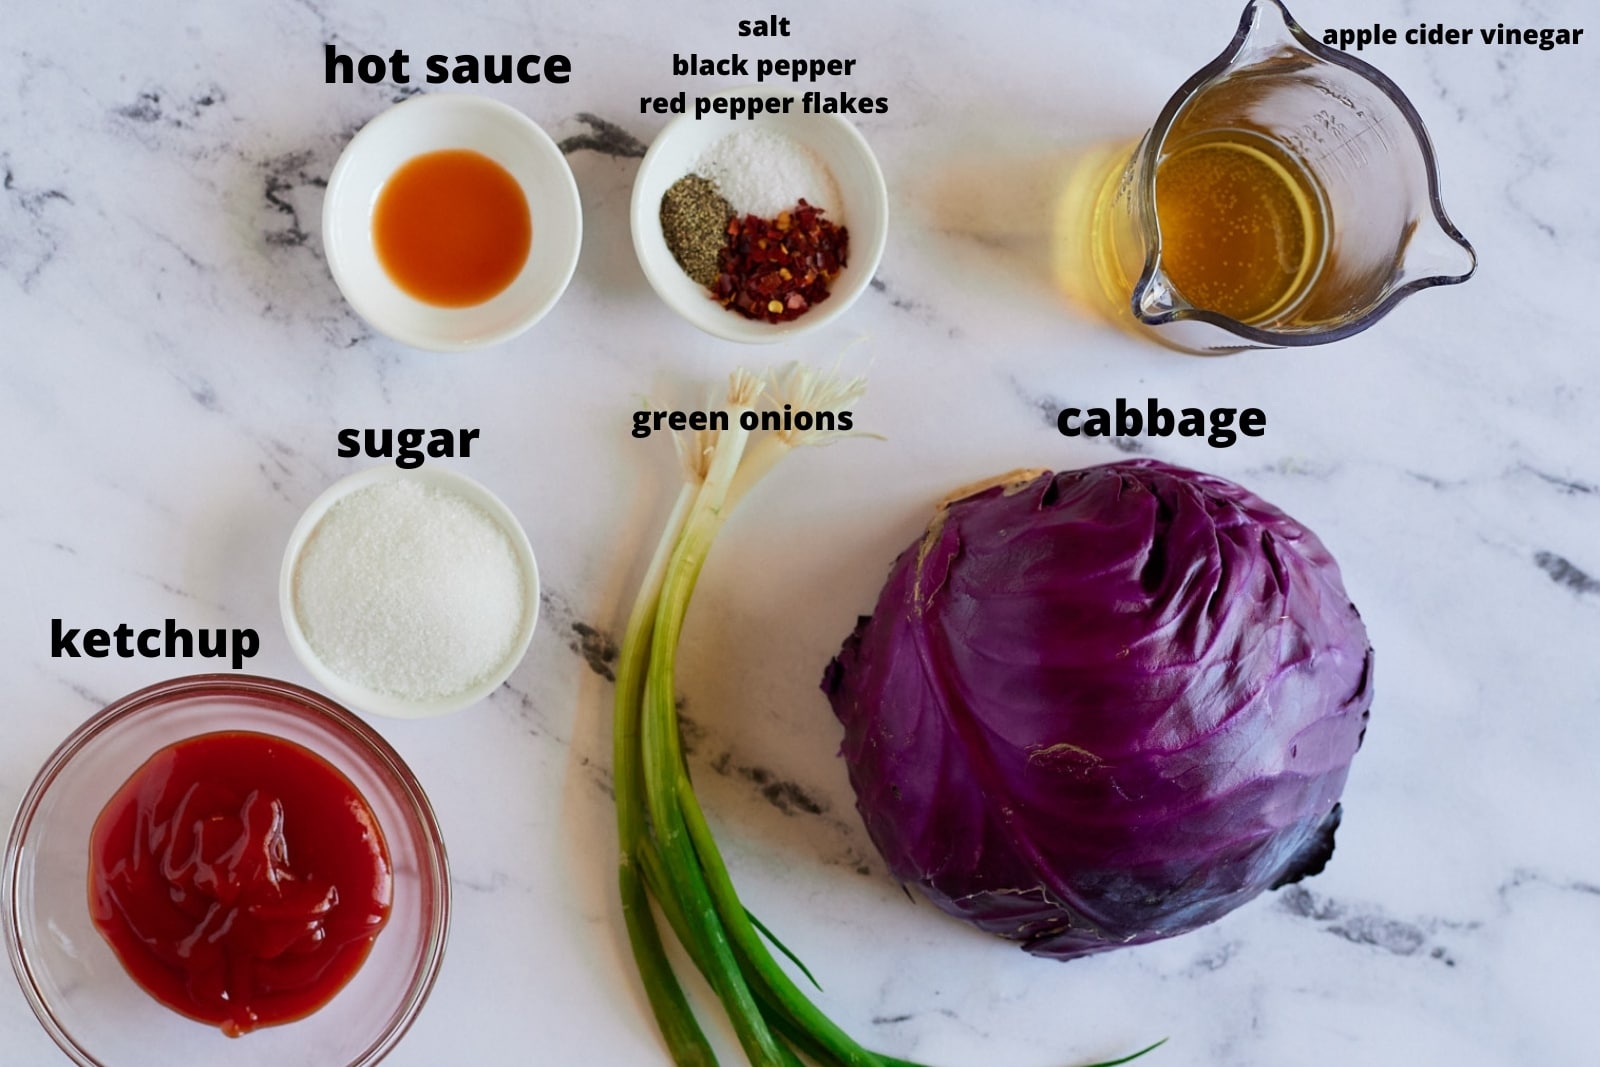
    • Gather your ingredients. Chop your cabbage and green onion.
    Ingredients for the vinegar coleslaw on a marble work surface.
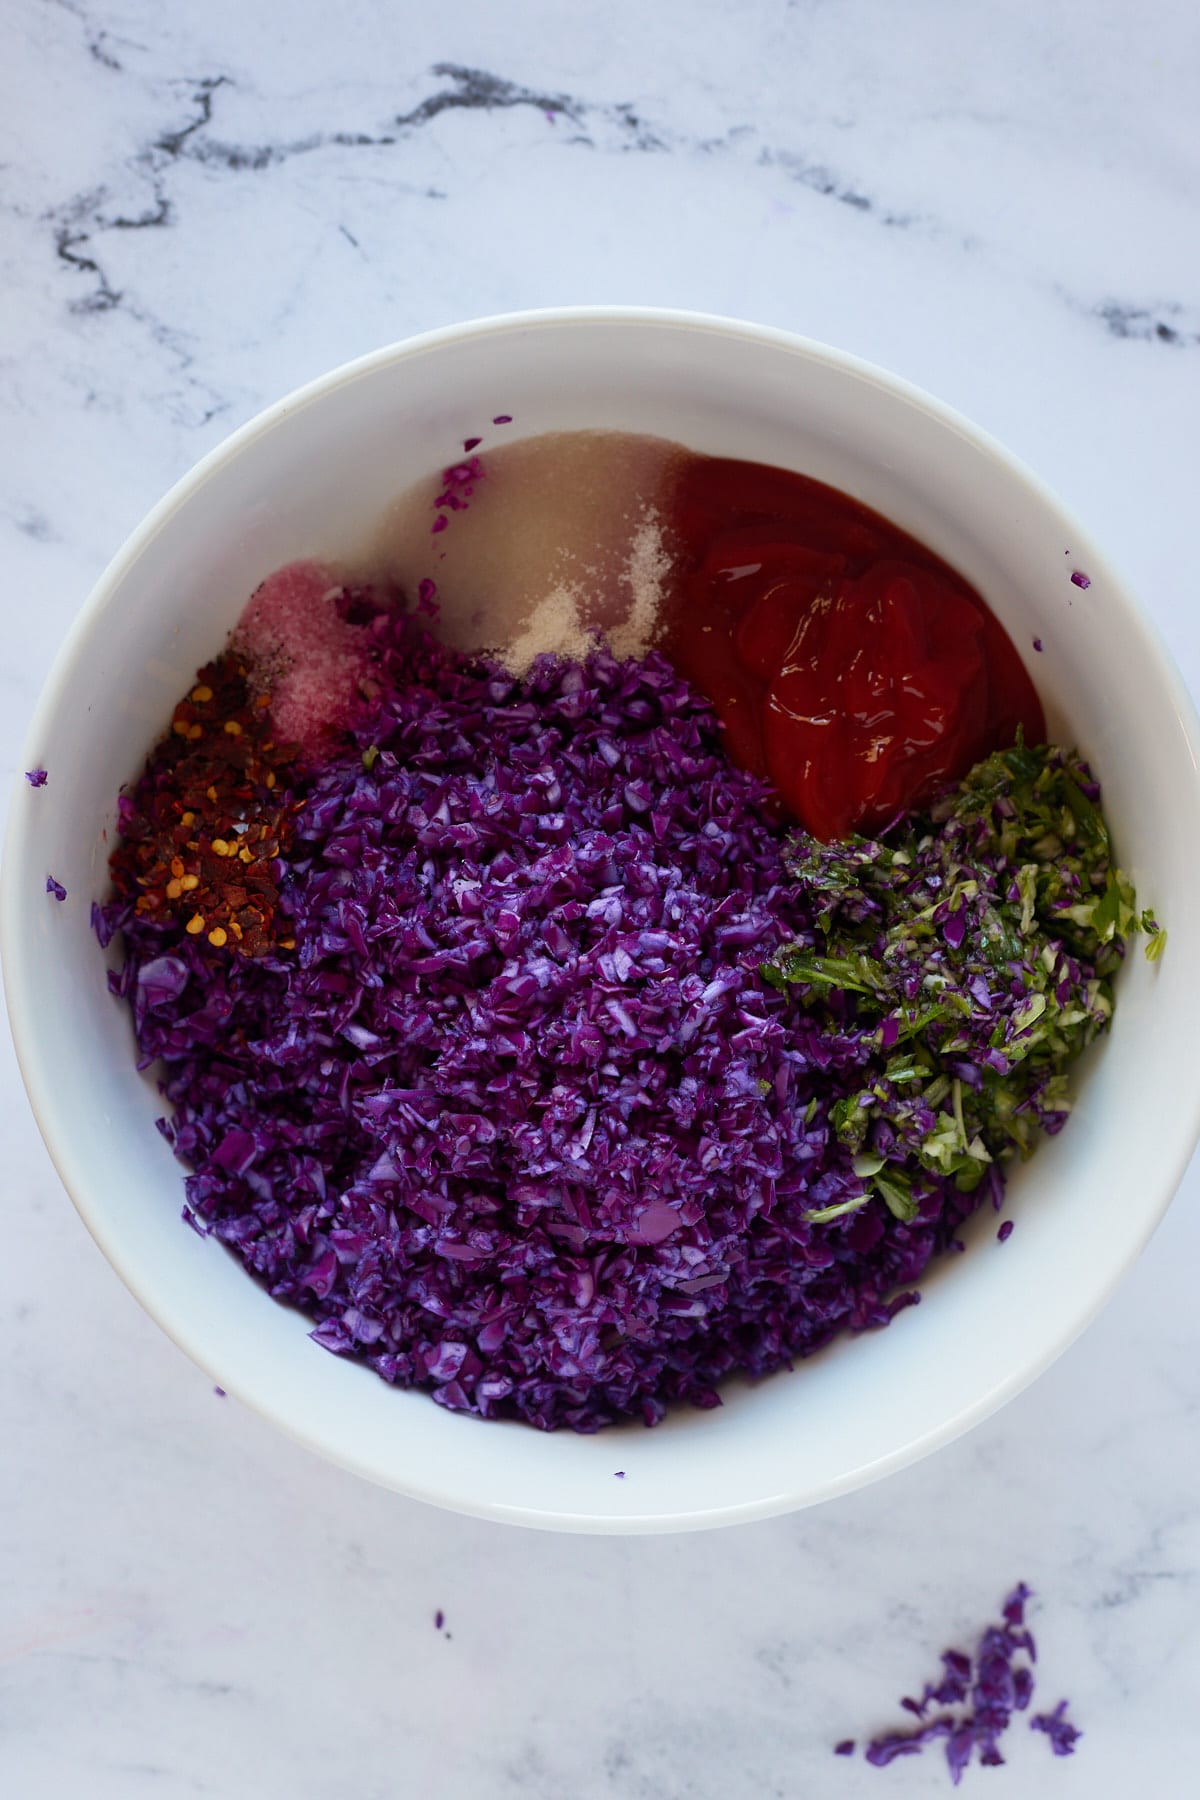
    • Add your chopped cabbage, chopped green onion, ketchup, apple cider vinegar, white sugar, crushed red pepper flakes, salt, black pepper, and hot sauce to a large bowl.
    The ingredients for the slaw in a white bowl.
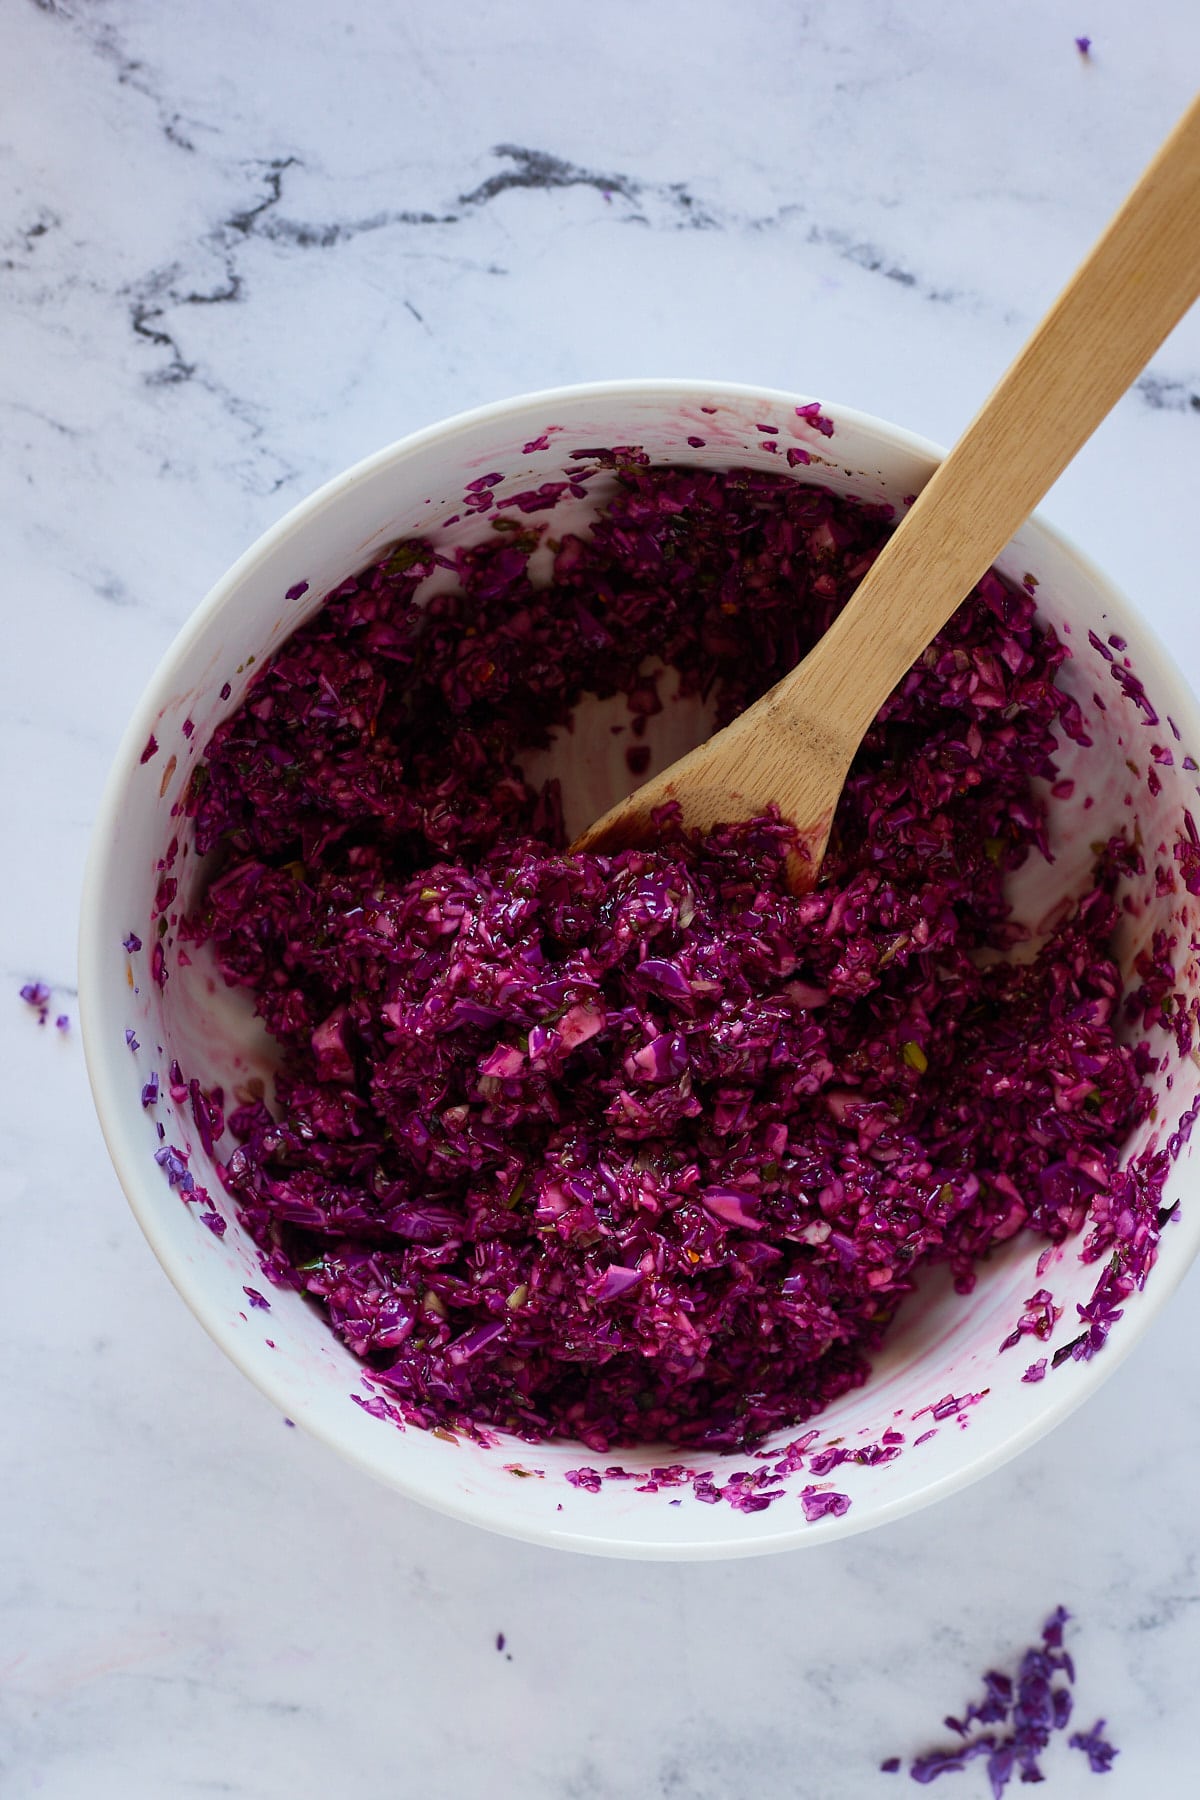
    • Stir until thoroughly combined.
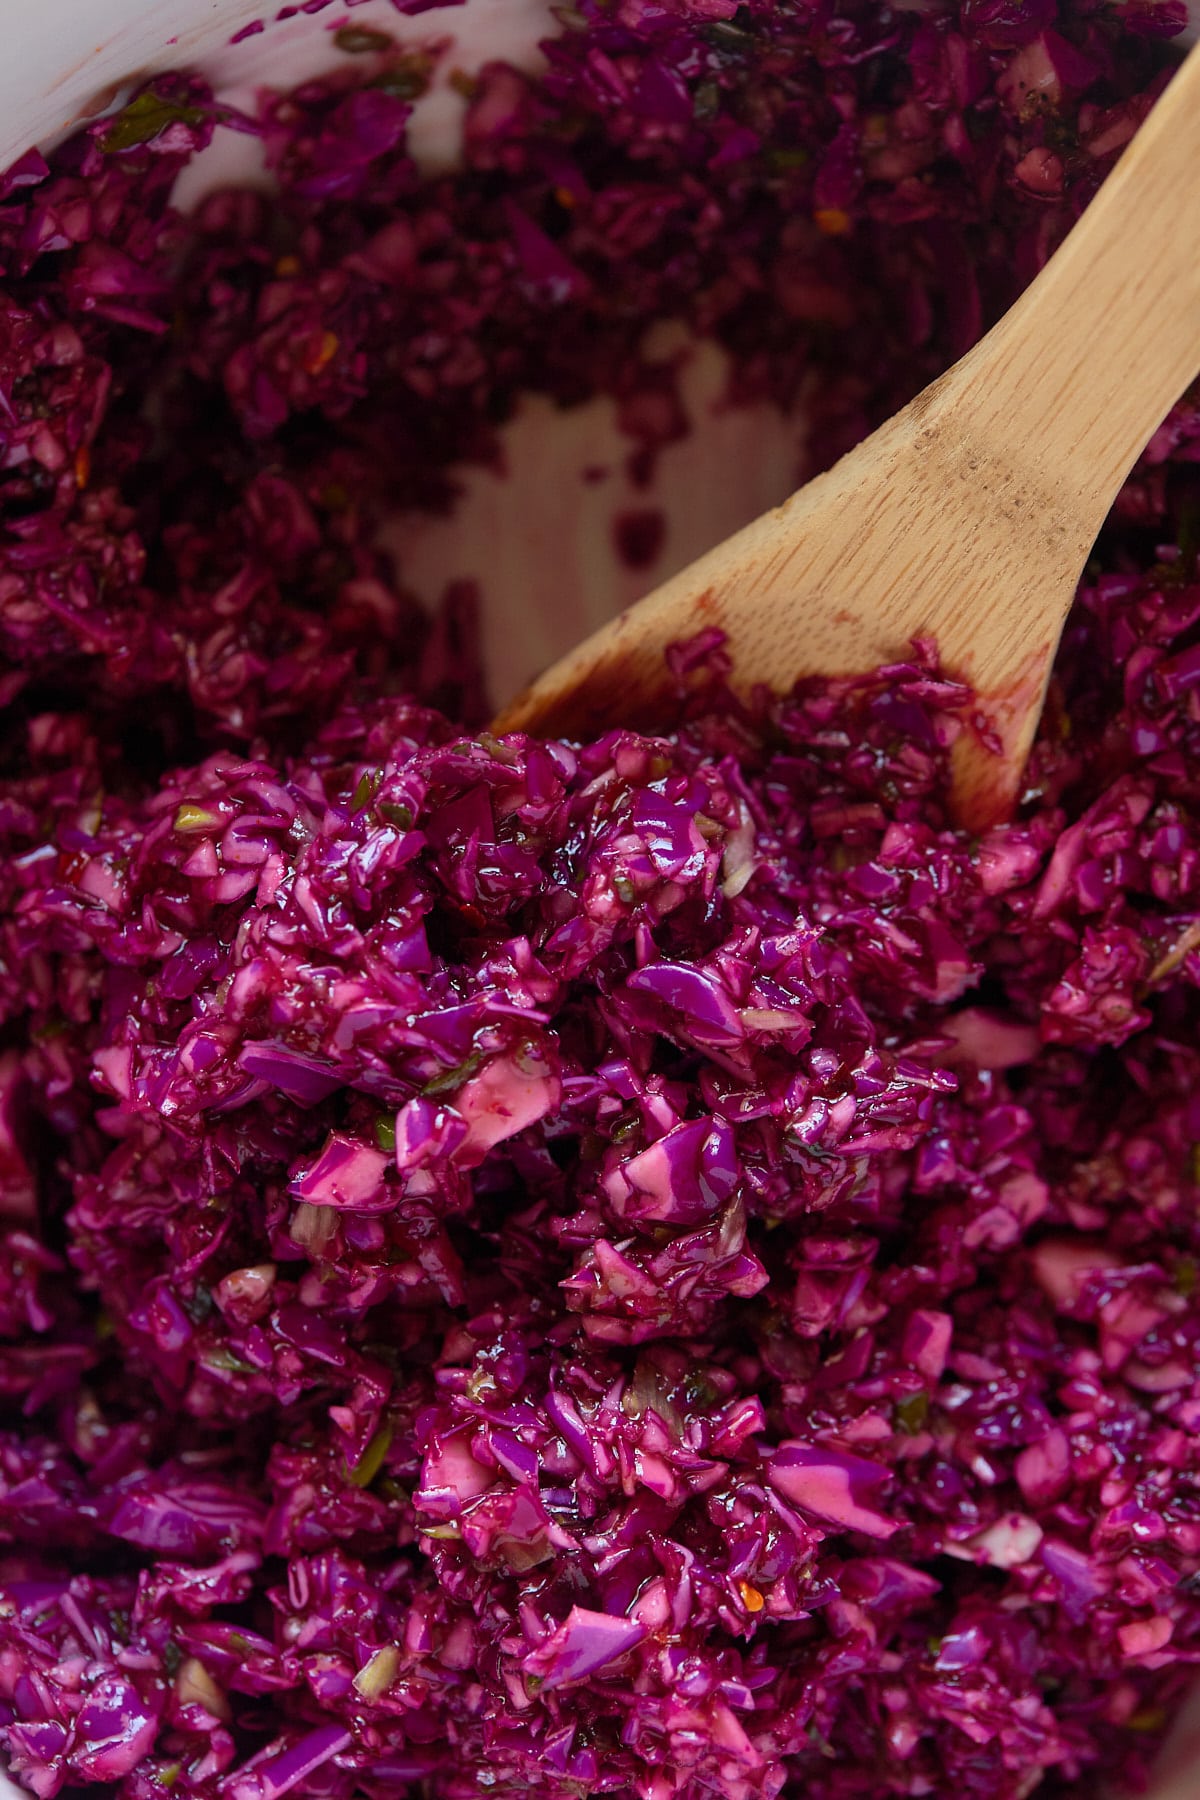
    A wooden spoon mixing the ingredients together.
    • Cover and chill in the refrigerator for at least one hour or up to overnight. Serve and enjoy.

    How long does it keep?

    Once you have made your slaw, keep it covered in the fridge and it will keep well for around 3 to 4 days. After a day, the cabbage will start to release some liquid into the bowl, so you may want to strain this additional water before serving.

    If you can, let the slaw sit for at least one hour before serving to let the flavors develop, and overnight is preferable.

    Can you use green or red cabbage?

    You can use either in this vinegar coleslaw recipe. I love the vibrancy of the red, and I think it works so well with BBQ meats like brisket and ribs, but green will work just as well.

    I find the flavor of green cabbage to be slightly more peppery and red to be a little sweeter, so go with whatever you love!

    What's the best way to shred cabbage?

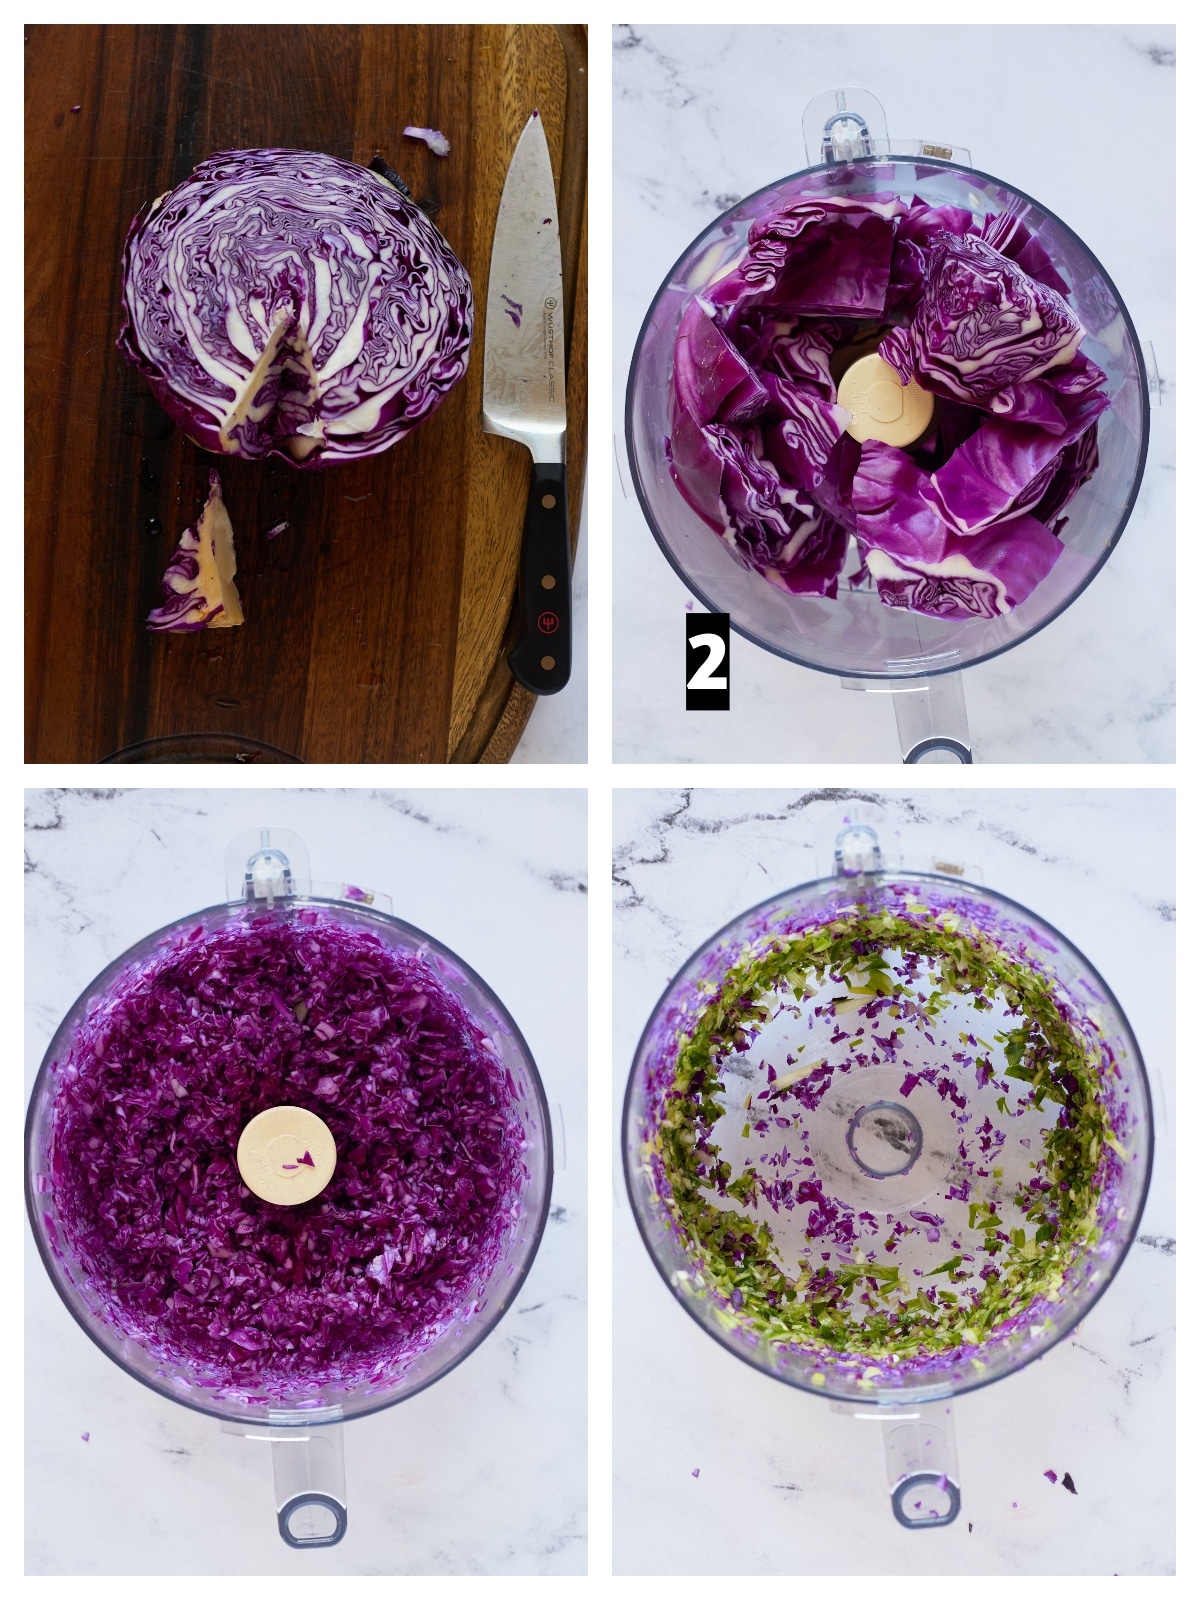
    For this slaw, I wanted to really finely shred the cabbage, so the best way to do this is in a food processor.

    1. Remove the core of the cabbage.
    2. Cut into large pieces and place in the food processor.
    3. Shred.
    4. Remove and process the green onions.
    Four step by step photos to show how to shred the cabbage.

    If you prefer a chunkier slaw, you can of course cut the cabbage by hand into strips. You can also use a vegetable peeler to shred it quickly; cut the cabbage into quarters and run the peeler down the cut side.

    I prefer this vinegar slaw to be super fine, but either way works well.

    Recipe Notes and Tips

    • For best flavor, chilling overnight is recommended. This allows for the flavors to develop and meld together.
    • Eat as a side or top on your favorite BBQ, hot dogs, or hamburgers.
    • You can use green or red cabbage for this recipe.
    • If you do prefer a creamier slaw, you can mix in a couple of tablespoons of mayonnaise.
    Close up of a wooden spoon in the vinegar coleslaw.

    More Salad Recipes

    • Quinoa Avocado Salad
    • Cranberry Pecan Apple Salad
    • Shrimp and Bacon Spinach Salad
    • Carrot Raisin Salad
    Red cabbage vinegar coleslaw served in a white bowl.
    Print Recipe
    5 from 2 votes

    Vinegar Coleslaw

    This vinegar coleslaw is inspired by the red slaw served with North Carolina BBQ. It has no mayonnaise and is the perfect tangy coleslaw to go along with your bbq.
    Prep Time10 minutes mins
    Total Time10 minutes mins
    Course: Salad, Side Dish
    Cuisine: American
    Keyword: bbq coleslaw recipe, no mayo coleslaw, simple coleslaw recipe
    Servings: 4 servings
    Calories: 101kcal
    Author: Tanya Harris

    Ingredients

    • ½ of a medium red cabbage about 4 cups cabbage, finely chopped
    • 3 green onions finely chopped
    • ½ cup ketchup
    • ⅓ cup apple cider vinegar
    • 2 ½ Tablespoon granulated sugar
    • 1 teaspoon crushed red pepper flakes
    • 1 teaspoon kosher salt or to taste
    • 1 teaspoon ground black pepper
    • 1-2 dashes of hot sauce

    Instructions

    • Add your chopped cabbage, chopped green onion, ketchup, apple cider vinegar, white sugar, crushed red pepper flakes, salt, black pepper, and hot sauce to a large bowl and stir until thoroughly combined.
    • Cover and chill in the refrigerator for at least one hour or up to overnight. Serve and enjoy.

    Notes

    • For best flavor, chilling overnight is recommended. This allows for the flavors to develop and meld together.
    • Eat as a side or top on your favorite BBQ, hot dogs, or hamburgers.
    • You can use green or red cabbage for this recipe.
    • If you do prefer a creamier slaw, you can mix in a couple of tablespoons of mayonnaise.

    Nutrition

    Calories: 101kcal | Carbohydrates: 23g | Protein: 2g | Fat: 1g | Saturated Fat: 1g | Sodium: 885mg | Potassium: 344mg | Fiber: 3g | Sugar: 18g | Vitamin A: 506IU | Vitamin C: 44mg | Calcium: 62mg | Iron: 1mg

    Perfect Sous Vide Pork Chops

    March 2, 2021 by Tanya Harris Leave a Comment

    sous vide pork chops sliced on plate

    Make delicious and tender pork chops with this sous vide pork chops recipe. Perfectly juicy and effortless to make with the help of a precision cooker and a water bath.

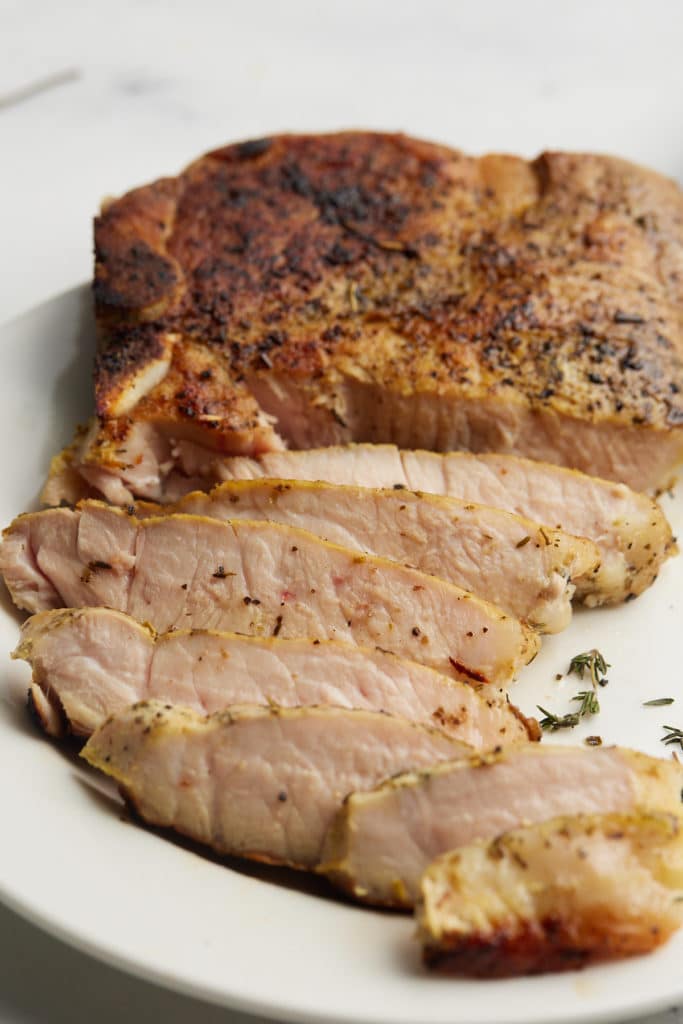
    sliced pork chop on white plate

    This post contains affiliate links, please read my full disclaimer here.

    You’ll find the full recipe with ingredient amounts and instructions in the recipe card at the bottom of this post. Be sure to check out the blog post itself for extra tips and tricks!

    Pork chops are one of my favorite dinners, but if you often run into the issue of overcooked and dry meat, then sous vide is a fool proof way of keeping it nice and juicy and full of flavor.

    This easy technique is so simple, and results in the best pork chops every single time. Give it a go, you'll be so pleased you did!

    For more pork recipes, be sure to check out my perfect air fryer pork chops and my crispy pork carnitas

    What is sous vide?

    If you haven't tried the sous vide method of cooking, it's definitely worth a try - I love mine! You basically vacuum seal your food, and then cook it in temperature controlled water.

    This process means that you will never overcook your food as the water is set to a certain temperature, for pork 140F, so you run no risk of cooking it past that while it's in the water.

    Sous vide meat is then usually quuckly seared to brown the sides.

    Cooking sous vide takes longer than cooking it on the stovetop or in the oven, but the process is extremely hands off.

    How to make sous vide pork chops

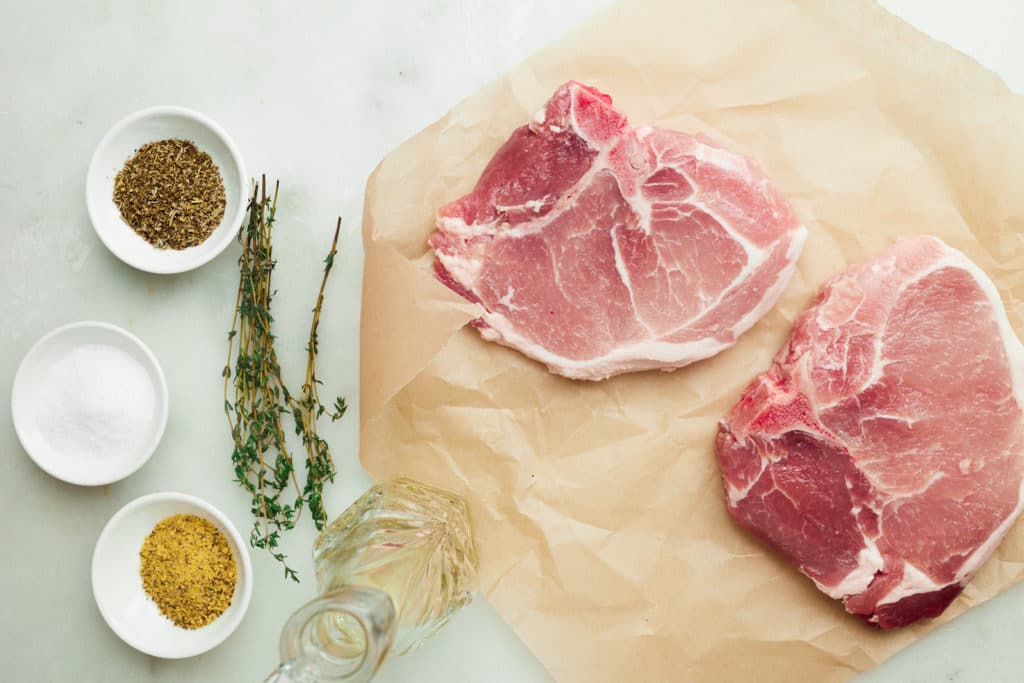
    • Gather your ingredients and equipment. You'll need pork loin chops, seasonings and oil, a immersion circulator, and a large pot or bin with enough water to cover the food. You'll also need sealable plastic bags to place the food in before placing in the water bath.
    ingredients for pork chops on white table
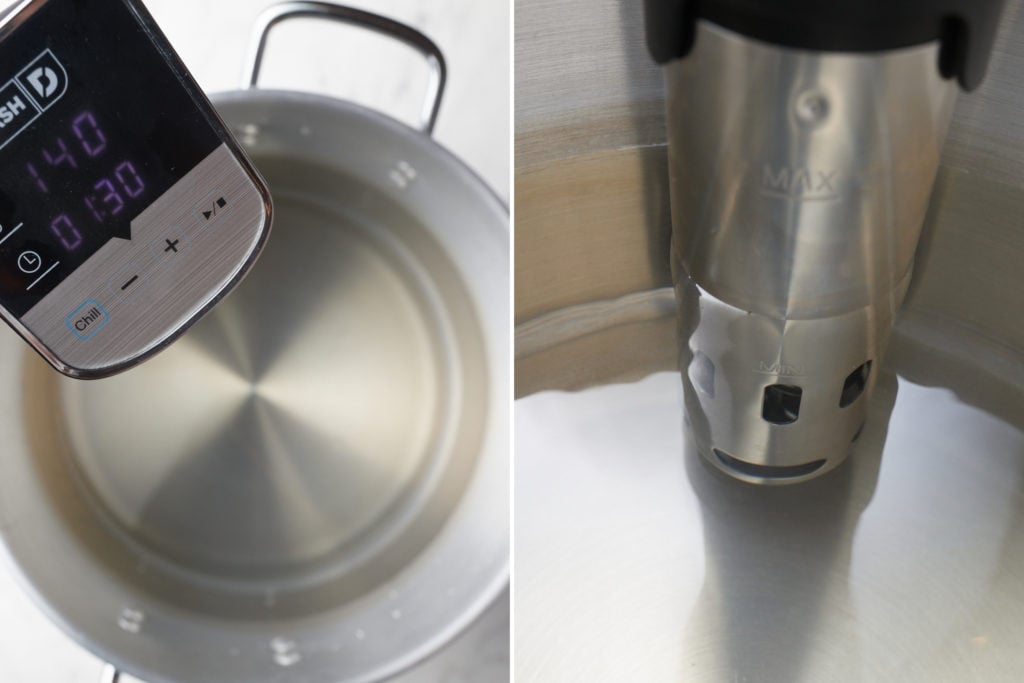
    • Clip the immersion circulator to the side of the large pot or basin, I use a 16qt stockpot. Add water and fill it until the minimum water level of the circulator is reached and there is enough water to cover the food you will cook. Turn on the immersion circulator by setting the temperature to 140F (60C). Set the time anywhere from 1-4 hours.
    immersion circulator in large pot with water filled beyond the minimum line
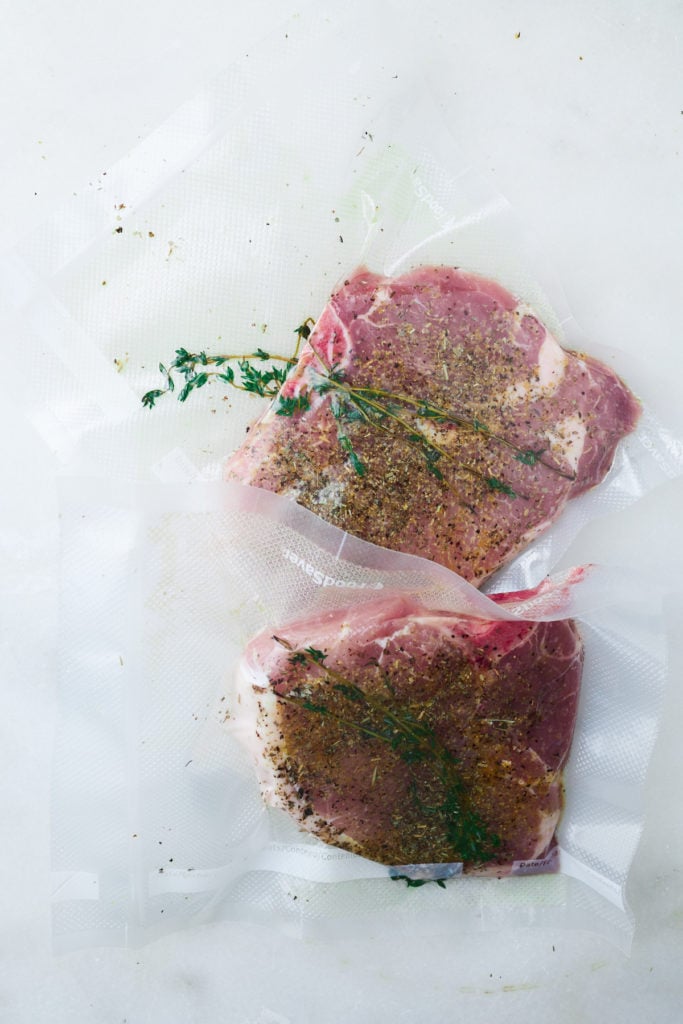
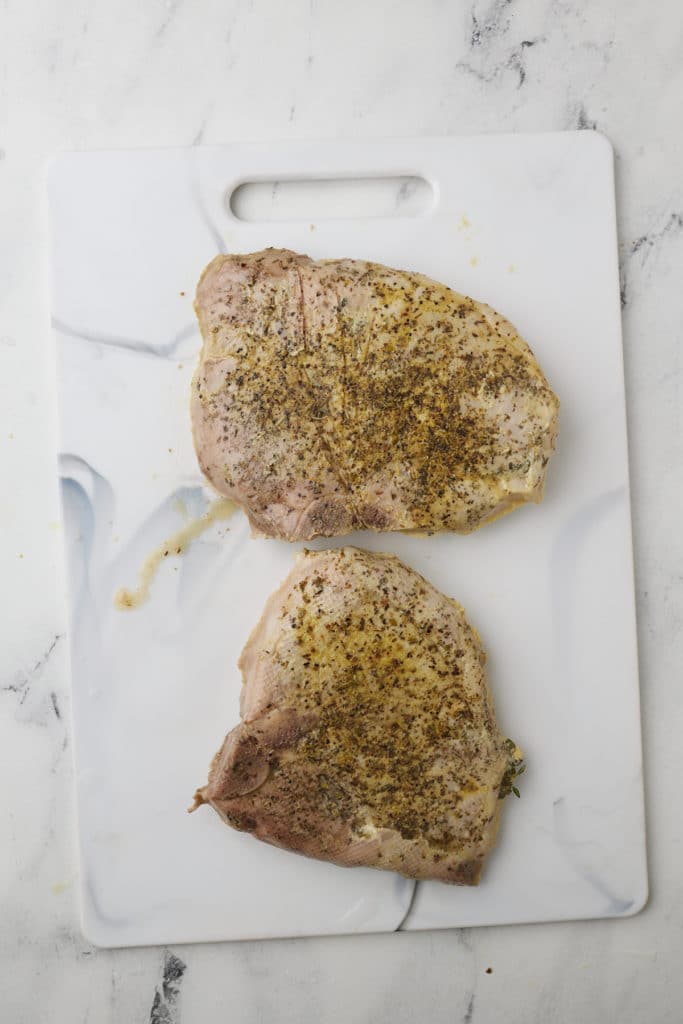
    • Season the pork chops with oil, Italian seasoning, lemon pepper seasoning, thyme, and salt.
    • Add to a plastic sous vide bag or sealable bag. Suck out the air and seal.
    pork chops sealed in bag
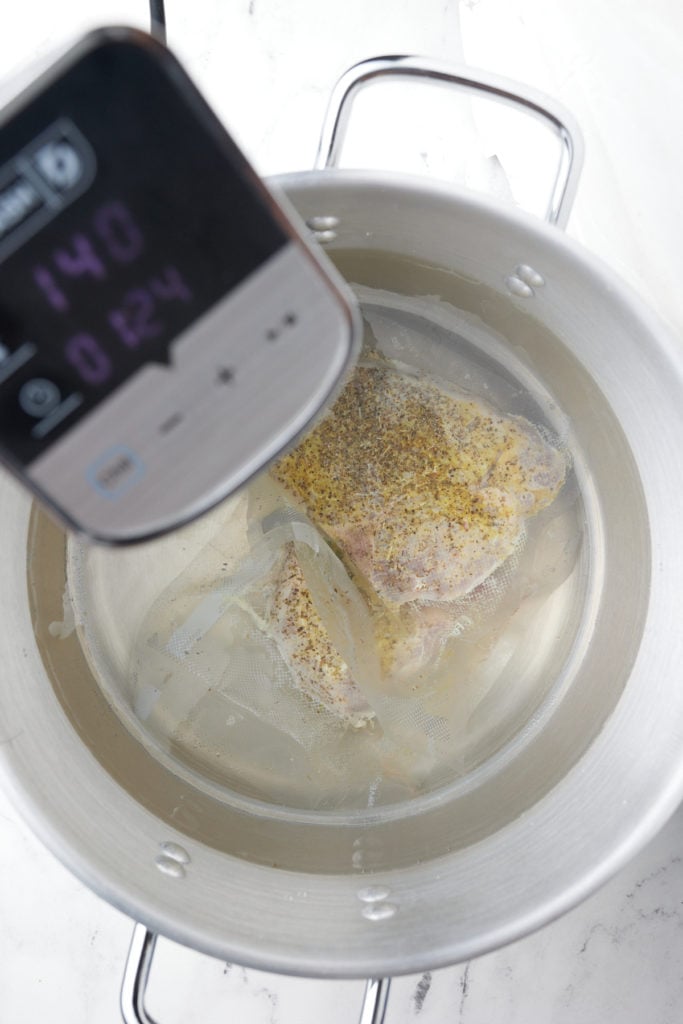
    • Once the temperature in the water bath has been reached, add the sealed pork chops and allow the chops to cook for at least an hour and no longer than 4 hours.
    sealed pork chops in water bath cooking
    • Remove pork chops and pat them dry.
    pork chops on white background
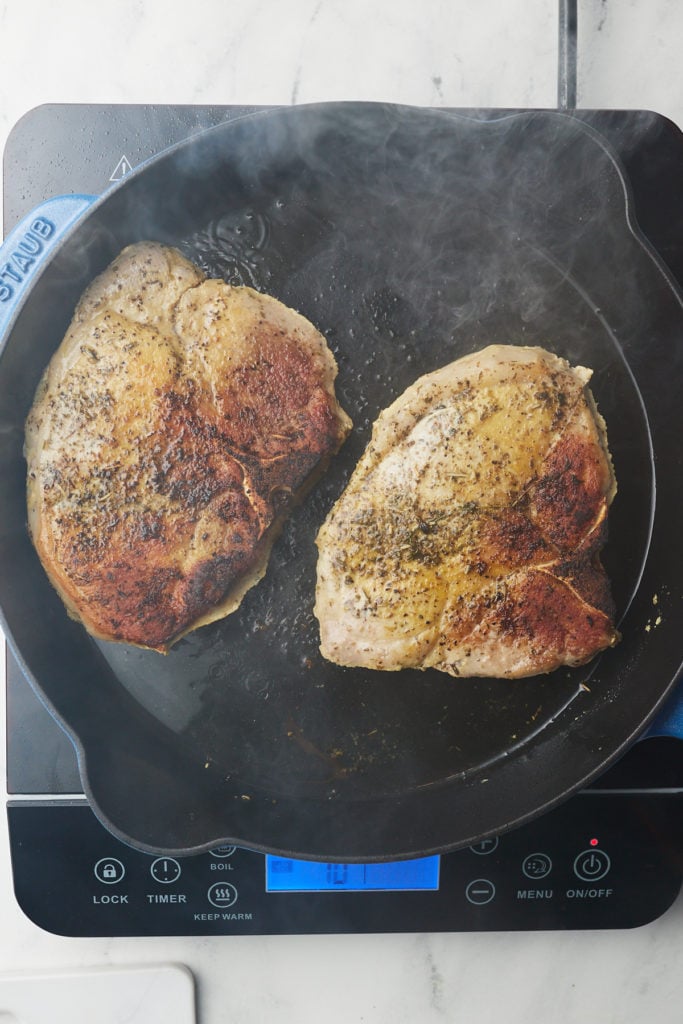
    • Heat olive oil in a medium heavy bottomed skillet over high heat. Add pork chops and sear each side until brown, about 1-2 minutes per side.
    pork chops in skillet

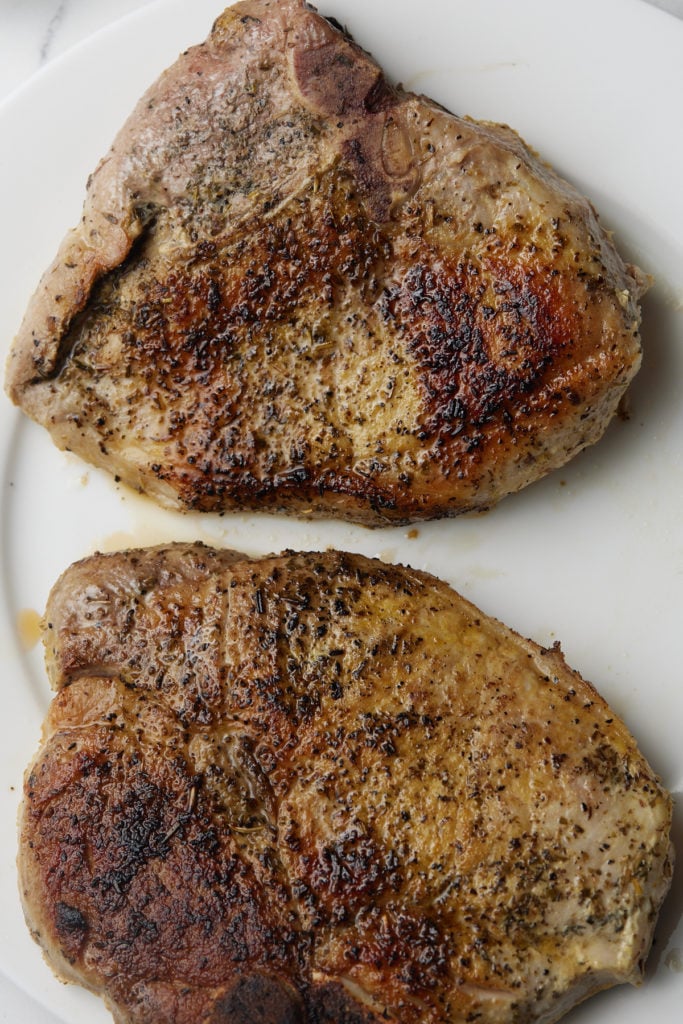
    Remove and serve.

    close up photo of browned pork chops

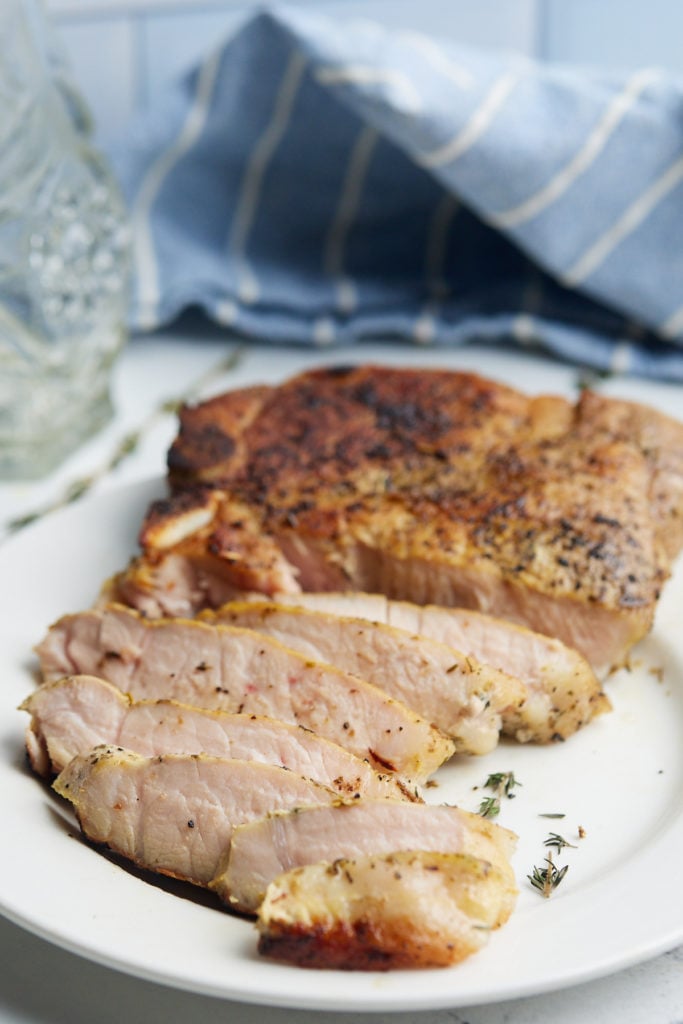
    Enjoy your perfectly cooked pork chop.

    pork chops sliced in front of blue napkin

    Is sous vide worth it?

    So you may feel that this isn't worth the extra time, but you are so wrong! There's a reason why so many restaurants use this cooking technique...because it's so delicious and the perfect hands off way to prepare your food!

    When you slow cook meat, especially tough cuts, the proteins are less likely to overcook and the meat stays wonderfully tender. This cooking method gives you that control.

    Sous vide gives you perfect consistency every time from top to bottom, and because the pork chops cook in their own juices, the flavor is much more bold and you end up with juicy rather than dry chops.

    Sous vide cooking is also a healthier option as you don't need to add as much additional fat during the cooking process.

    Serving Sugestions

    Serve these up with your favorite potato and veggies sides and you have one delicious meal on your hands! Try them with:

    • Seasoned Asparagus
    • Instant Pot Green Beans and Potatoes
    • Air Fried Carrots
    • Creamy Mashed Potatoes

    Recipe Notes and Tips

    • The minimum time it takes for these pork chops to cook in the water bath is 1 hour, however, I always set my timer to at least 90 minutes. Thicker chops (2 inches) need 90 minutes in the water bath. I also like to keep my chops at the correct temperature just in case I get busy and don't take them out at the end of 60 minutes.
    • I tend to add additional kosher salt to sous vide food after cooking. Always salt to taste to bring out the flavors.
    • I use a heavy bottomed skillet to get a nice sear on my pork chops after cooking. You could also toss them onto a grill.

    More Pork Recipes

    • Perfect Air Fryer Pork Chops
    • Mustard Glazed Air Fryer Pork Tenderloin
    • North Carolina Instant Pot Pulled Pork
    • Instant Pot Pork Chops and Gravy
    sous vide pork chops sliced on plate
    Print Recipe
    No ratings yet

    Perfect Sous Vide Pork Chops

    Make delicious and tender pork chops with this sous vide pork chops recipe. Perfectly juicy and effortless to make with the help of a precision cooker and a water bath.
    Prep Time10 minutes mins
    Cook Time1 hour hr 15 minutes mins
    Total Time1 hour hr 25 minutes mins
    Course: Main Course
    Cuisine: American
    Keyword: herbed pork chops, how to sous vide, how to sous vide pork chops, pork sous vide
    Servings: 2 servings
    Calories: 405kcal
    Author: Tanya Harris

    Equipment

    • Large Pot or container
    • Immersion Circulator
    • Water

    Ingredients

    • 2 pork loin pork chops, center cut ¾ inch thick
    • 2 teaspoon Italian seasoning
    • 2 teaspoon lemon pepper seasoning
    • 3 sprigs thyme
    • ¼ teaspoon salt or to taste
    • 3 Tablespoon olive oil
    • Salt and pepper to taste

    Instructions

    • Clip immersion circulator to the side of the large pot or basin. Add water and fill it until the minimum water level of the immersion circulator is reached and there is enough water to cover the food you will cook. Turn on the immersion circulator by setting the temperature to 140F (60C). Set the time anywhere from 1-4 hours).
    • Season the pork chops with oil, Italian seasoning, lemon pepper seasoning, thyme, and salt and add to a plastic sous vide bag or sealable bag. Suck out the air and seal.
    • Once the temperature in the water bath has been reached, add the sealed pork chops and allow the chops to cook for at least 1 hour and no longer than 4 hours.
    • Remove pork chops and pat them dry.
    • Heat olive oil in a medium heavy bottomed skillet over high heat. Add pork chops and sear each side until brown, about 1-2 minutes per side. Remove and set aside. You can serve at this point or make a gravy.

    Notes

    • The minimum time it takes for these pork chops to cook in the water bath is 1 hour, however, I always set my timer to at least 90 minutes. Thicker chops (2 inches) need 90 minutes in the water bath. I also like to keep my chops at the correct temperature just in case I get busy and don't take them out at the end of 60 minutes.
    • I tend to add additional kosher salt to sous vide food after cooking. Always salt to taste to bring out the flavors.
    • I use a heavy bottomed skillet to get a nice sear on my pork chops after cooking. You could also toss them onto a grill.
    •  

    Nutrition

    Calories: 405kcal | Carbohydrates: 3g | Protein: 29g | Fat: 30g | Saturated Fat: 6g | Trans Fat: 1g | Cholesterol: 90mg | Sodium: 371mg | Potassium: 558mg | Fiber: 1g | Sugar: 1g | Vitamin A: 118IU | Vitamin C: 2mg | Calcium: 53mg | Iron: 2mg

    Chili Powder Substitute

    February 16, 2021 by Tanya Harris 2 Comments

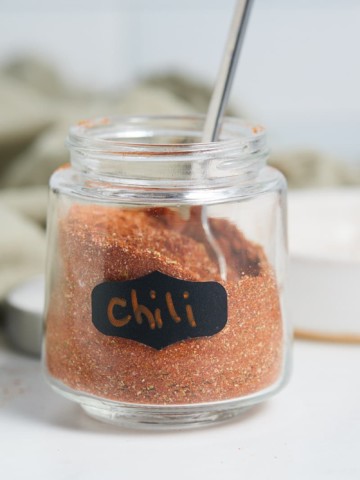
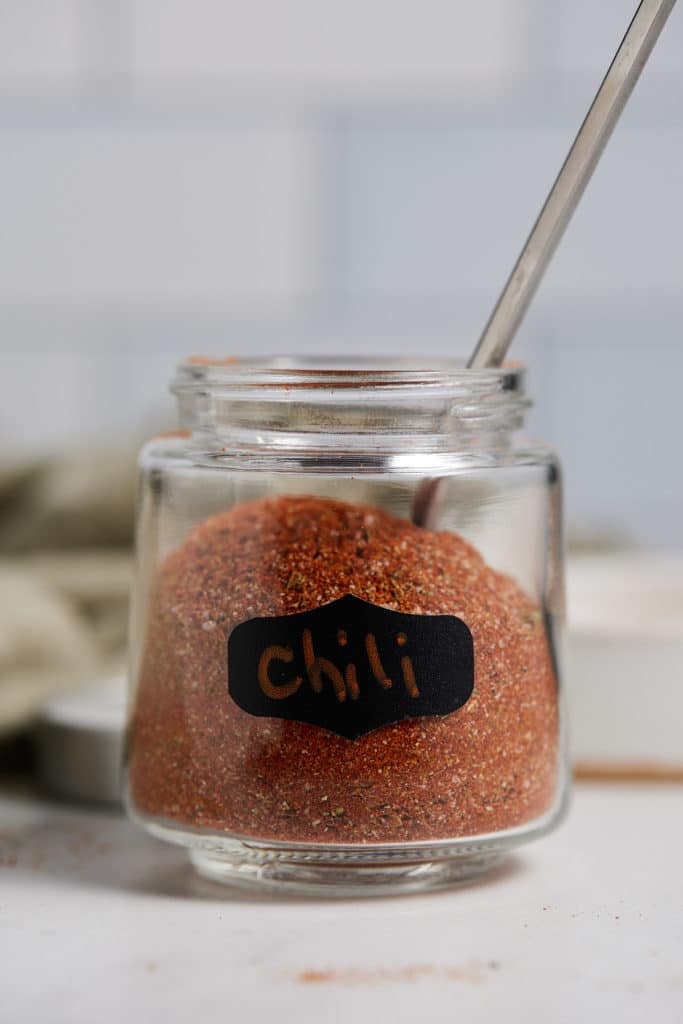
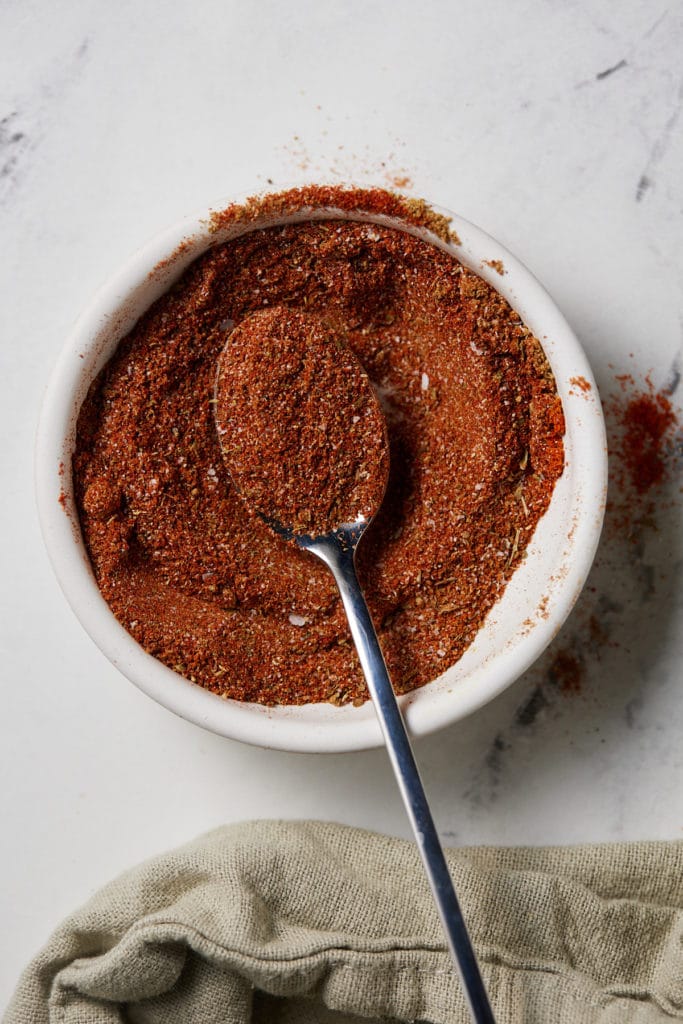
    Chili powder in a glass jar with a spoon.

    Run out of chili powder for your favorite recipe? Fear not! This chili powder substitute is super easy to make with the spices in your pantry. This homemade spice mix is an easy way to add flavor to your dish.

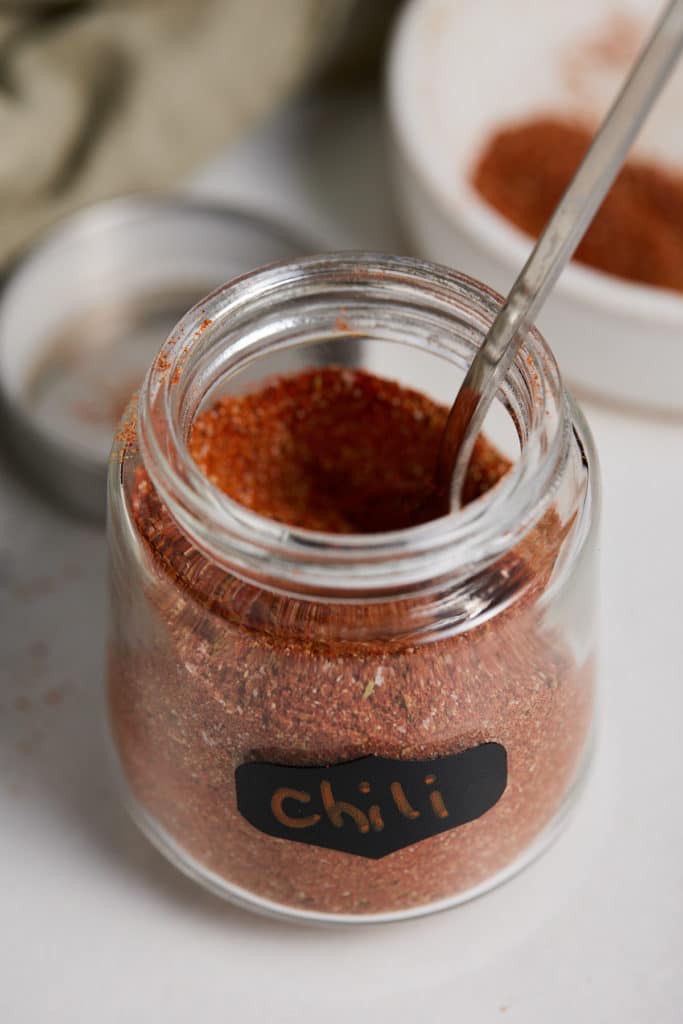
    A labelled jar with chili powder substitute.

    This post contains affiliate links, please read my full disclaimer here.

    You’ll find the full recipe with ingredient amounts and instructions in the recipe card at the bottom of this post. Be sure to check out the blog post itself for extra tips and tricks!

    We've all been there, you're ready to make your favorite chili recipe, you reach in your cupboard and there's none left! This chili powder substitute has saved dinner time on countless occasions in my house!

    Made with a blend of simple dried herbs and spices, whip up a big batch so it's always on hand!

    For more homemade seasonings, be sure to check out my ranch seasoning and dukkah spice mix.

    How to make this chili powder substitute

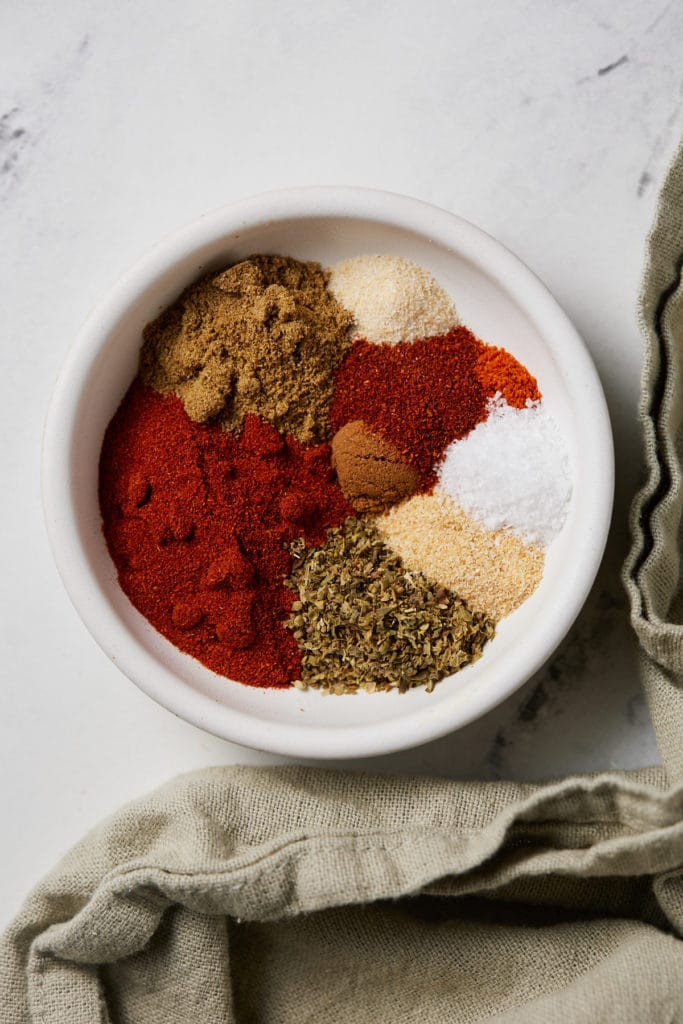
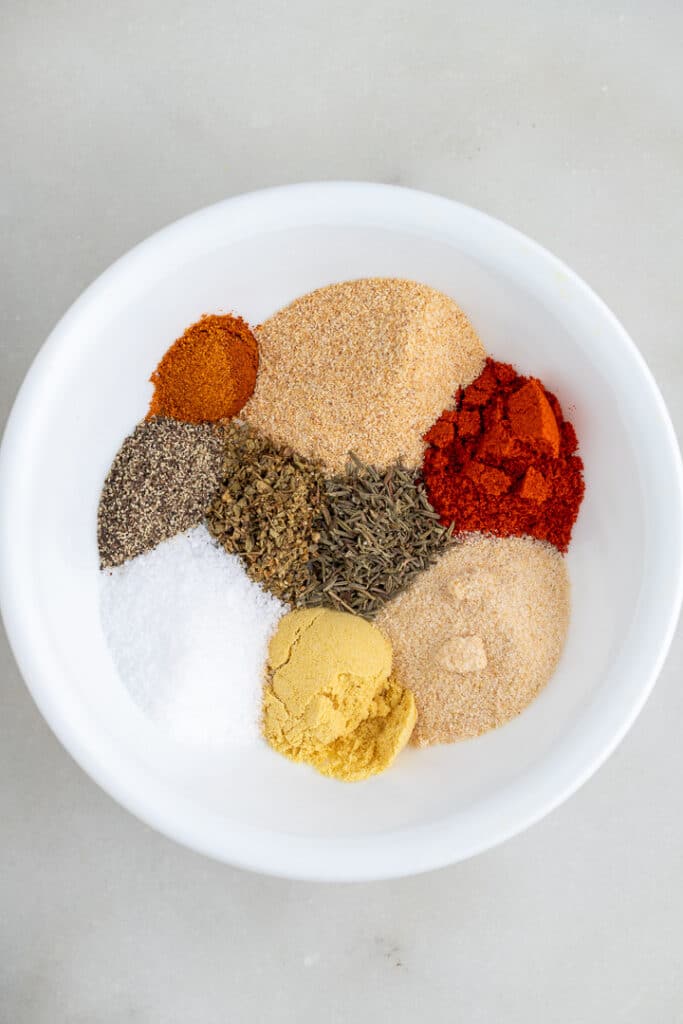
    • Place the ingredients together in a bowl.
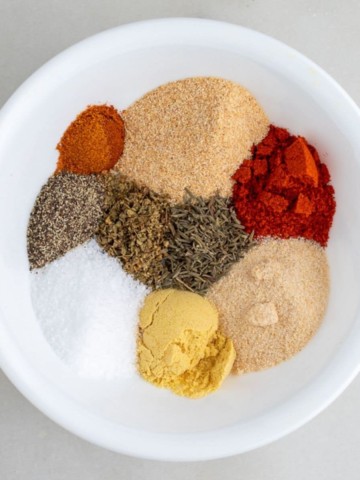
    Spices and herbs in a white bowl.
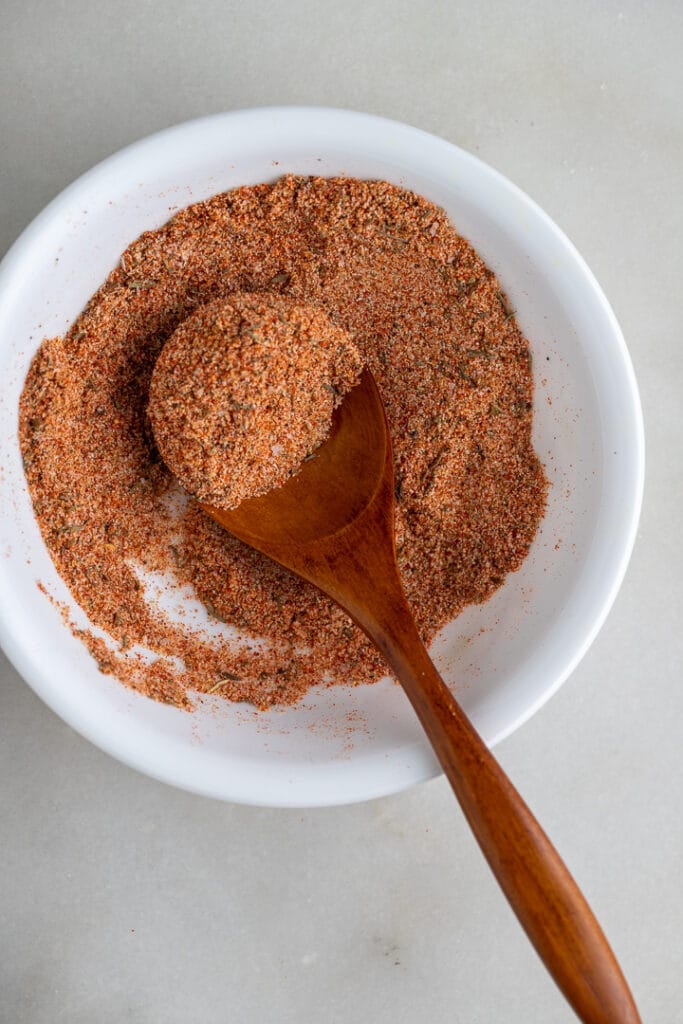
    • Combine and store in an air-tight container.
    The spices and herbs mixed together.

    How long does it keep?

    This chili powder substitute will keep well for at least 6 months. Just keep it in a sealed jar or container, and store it in a cool place out of direct sunlight. Depending on the freshness of your spices, it can easily last for a year plus when stored correctly.

    How do you use it?

    Use this spice mix wherever you would normally use chili powder. Stir it into ground beef and chicken to add flavor to all of your meals. It's great for beef chili, chili dogs, turkey chili, chicken chili, and other soups and stews.

    Why make a homemade seasoning mix?

    Homemade seasonings are a great way to make your meal exactly to your tastes, and this recipe is easy to customize. Add in more or less cayenne depending on how spicy you like things or change the amount of oregano for a herbier flavor.

    If you are anything like me, you always have lots of jars of spices in your cupboard, so there's no need to go out and buy more! Just mix together what you have and save yourself a trip to the store!

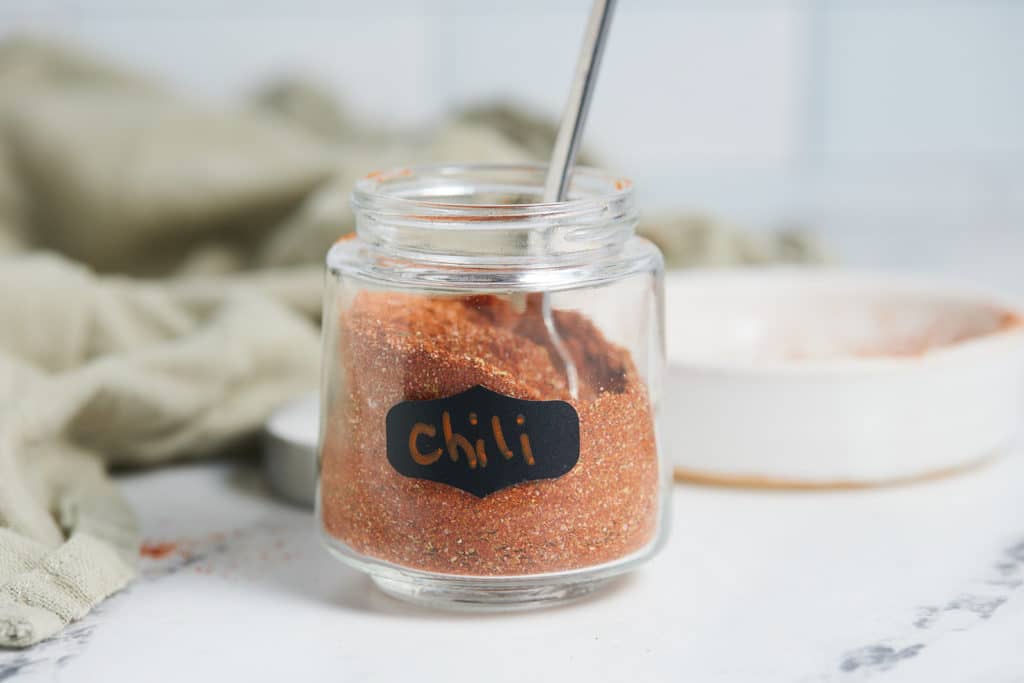
    Chili powder in a labelled jar with a spoon.

    Recipe Notes and Tips

    • Make sure your spices aren't stale before using them. Rub a little between your fingers and it should release an aroma. If it doesn't, it's time to buy some more.
    • Test your chili powder substitute for freshness before using each time.
    • Store in a cool dark place away from moisture and in an airtight container.
    • This recipe is easily doubled.
    Chili powder in a glass jar with a spoon.

    More Homemade Seasonings

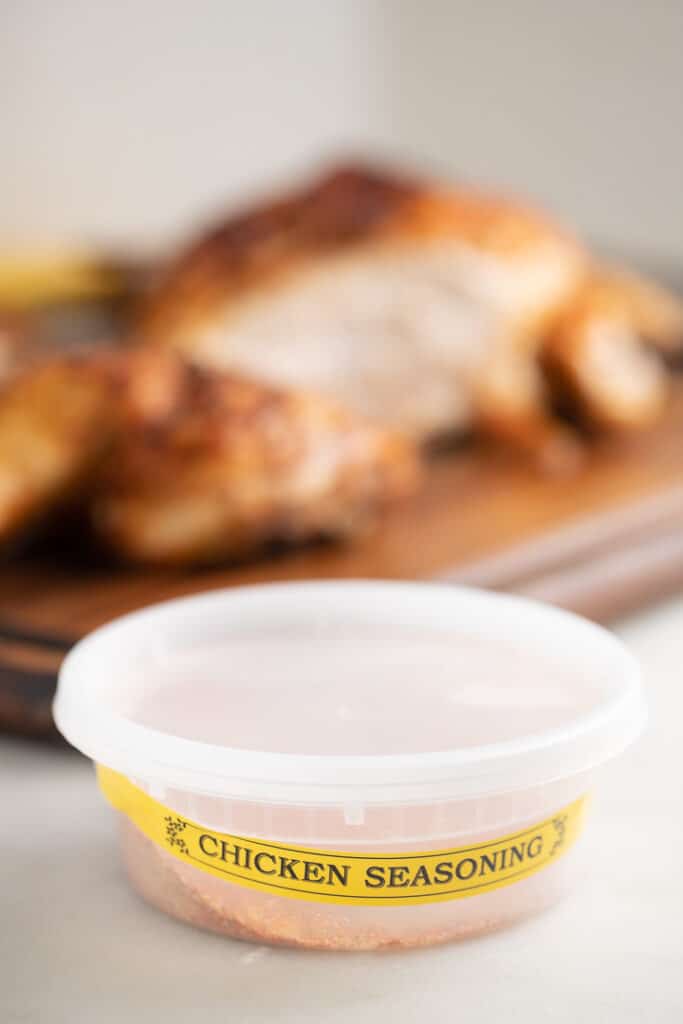
    • Chicken Seasoning
    • Jamaican Jerk Seasoning
    • Homemade Taco Seasoning
    • BBQ Seasoning
    A labelled jar with chili powder substitute.
    Print Recipe
    4.75 from 4 votes

    Chili Powder Substitute

    Run out of chili powder for your favorite recipe? Fear not! This chili powder substitute is super easy to make with the spices in your pantry. An easy way to add flavor to your dish.
    Prep Time5 minutes mins
    Total Time5 minutes mins
    Course: Seasoning
    Cuisine: American
    Keyword: homemade chili powder, how to make chili powder
    Servings: 4 tablespoons
    Calories: 21kcal
    Author: Tanya Harris

    Ingredients

    • 2 Tablespoon paprika
    • 2 teaspoon cumin
    • 2 teaspoon oregano
    • 1 teaspoon garlic powder
    • ½ teaspoon onion powder
    • ½ teaspoon cayenne pepper
    • ¼ teaspoon cinnamon

    Instructions

    • Combine and store in an air-tight container.

    Notes

    • Make sure your spices aren't stale before using them. Rub a little between your fingers and it should release an aroma. If it doesn't, it's time to buy some more.
    • Test your chili powder substitute for freshness before using each time.
    • Store in a cool dark place away from moisture and in an airtight container.
    • This recipe is easily doubled.

    Nutrition

    Calories: 21kcal | Carbohydrates: 4g | Protein: 1g | Fat: 1g | Saturated Fat: 1g | Sodium: 5mg | Potassium: 128mg | Fiber: 2g | Sugar: 1g | Vitamin A: 1858IU | Vitamin C: 1mg | Calcium: 37mg | Iron: 2mg

    The Best Air Fryer Lamb Chops

    February 2, 2021 by Tanya Harris 102 Comments

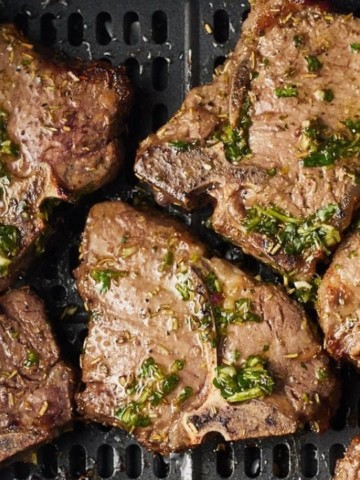
    air fryer lamb chops in the air fryer basket covered with chimichurri sauce

    Cook the most perfect of lamb chops in minutes with your trusty air fryer! Marinated in red wine vinegar and herbs, the chops come out perfectly cooked and tender. Ready to serve in 15 minutes!

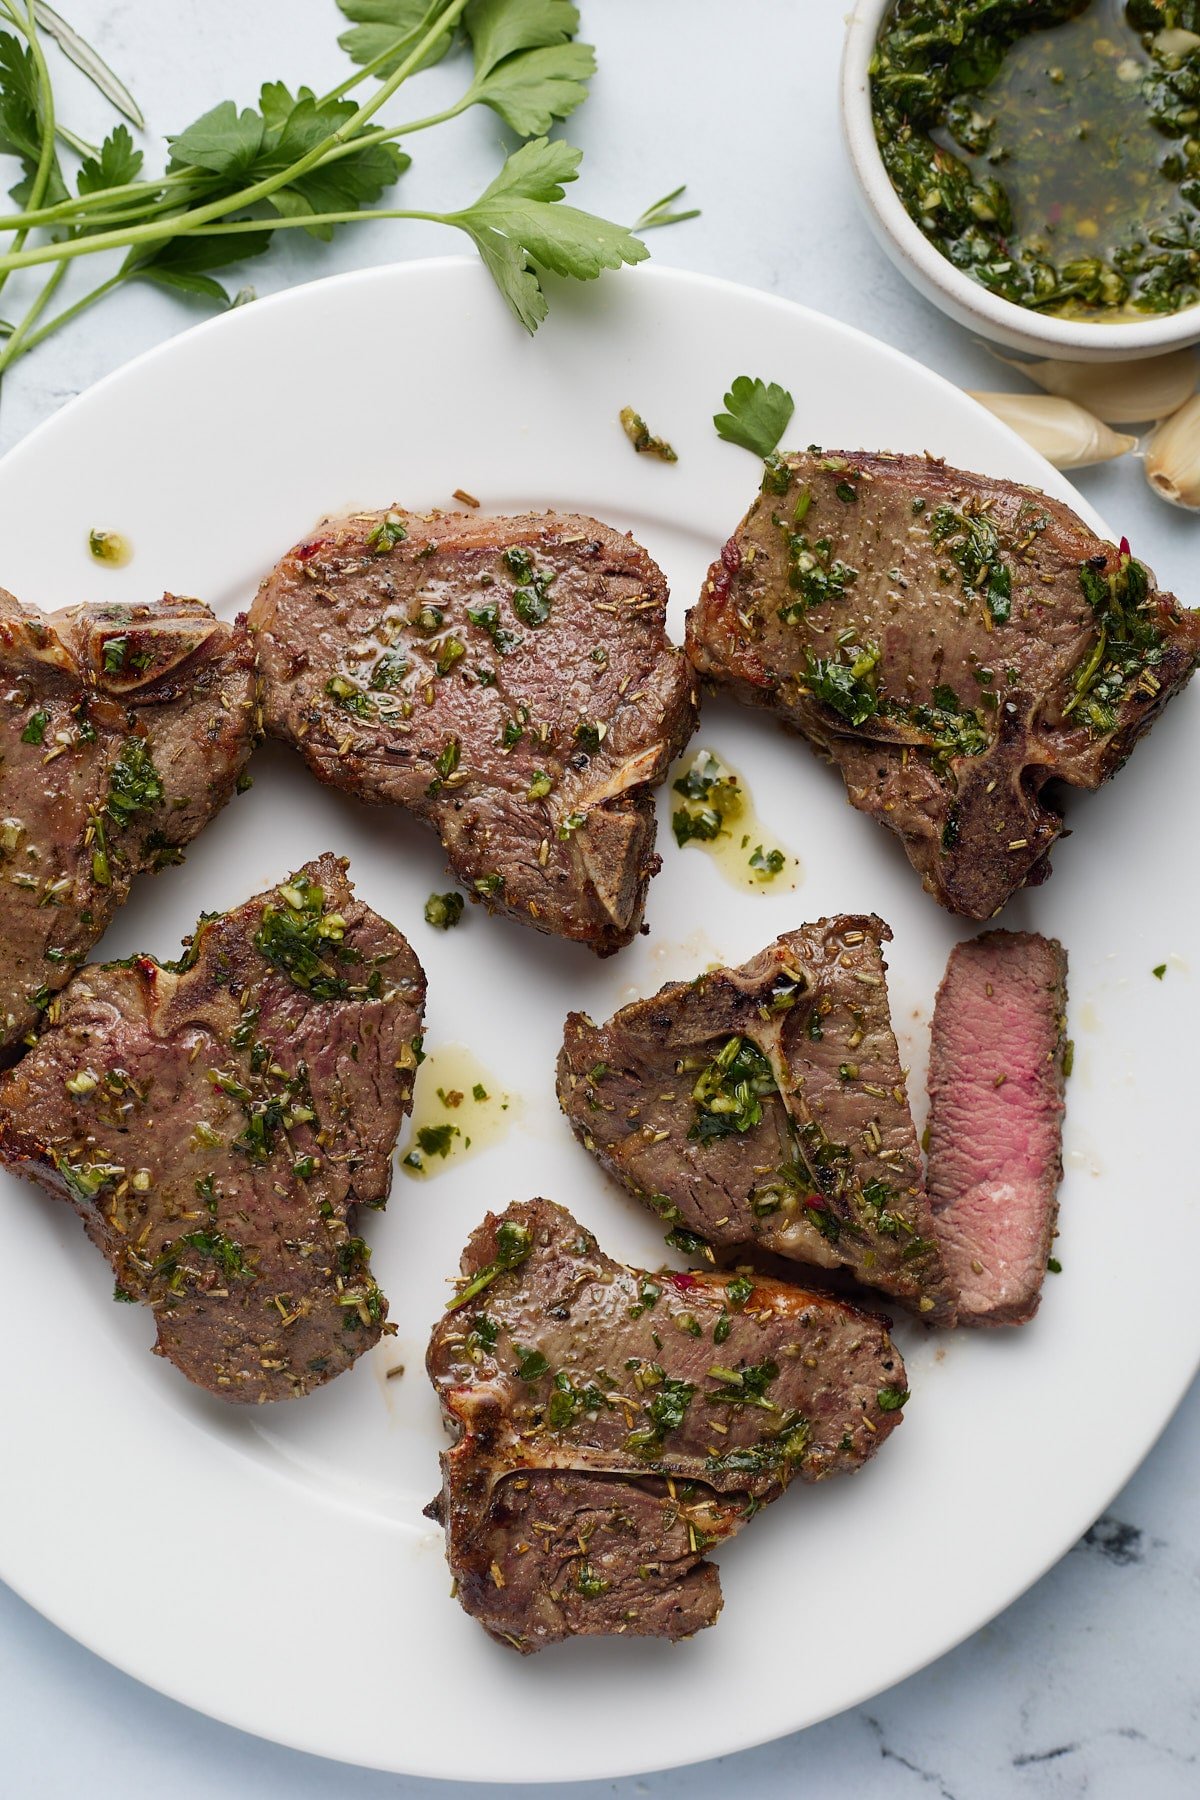
    Six cooked lamb chops on a white plate.

    This post contains affiliate links, please read my full disclaimer here.

    You’ll find the full recipe with ingredient amounts and instructions in the recipe card at the bottom of this post. Be sure to check out the blog post itself for extra tips and tricks!

    Lamb is one of my favorite meats! It has a robust taste that is slightly gamey and grassy and makes a welcome change from beef or chicken.

    When cooked in the air fryer, these lamb chops are so succulent and have a nice crust to them. They come out perfectly cooked and I love that they are ready to serve in minutes!

    If you love lamb, be sure to try my Pan-Seared Lamb Chops with Garlic Rosemary Butter or my Moroccan Soup!

    How to make air fryer lamb chops

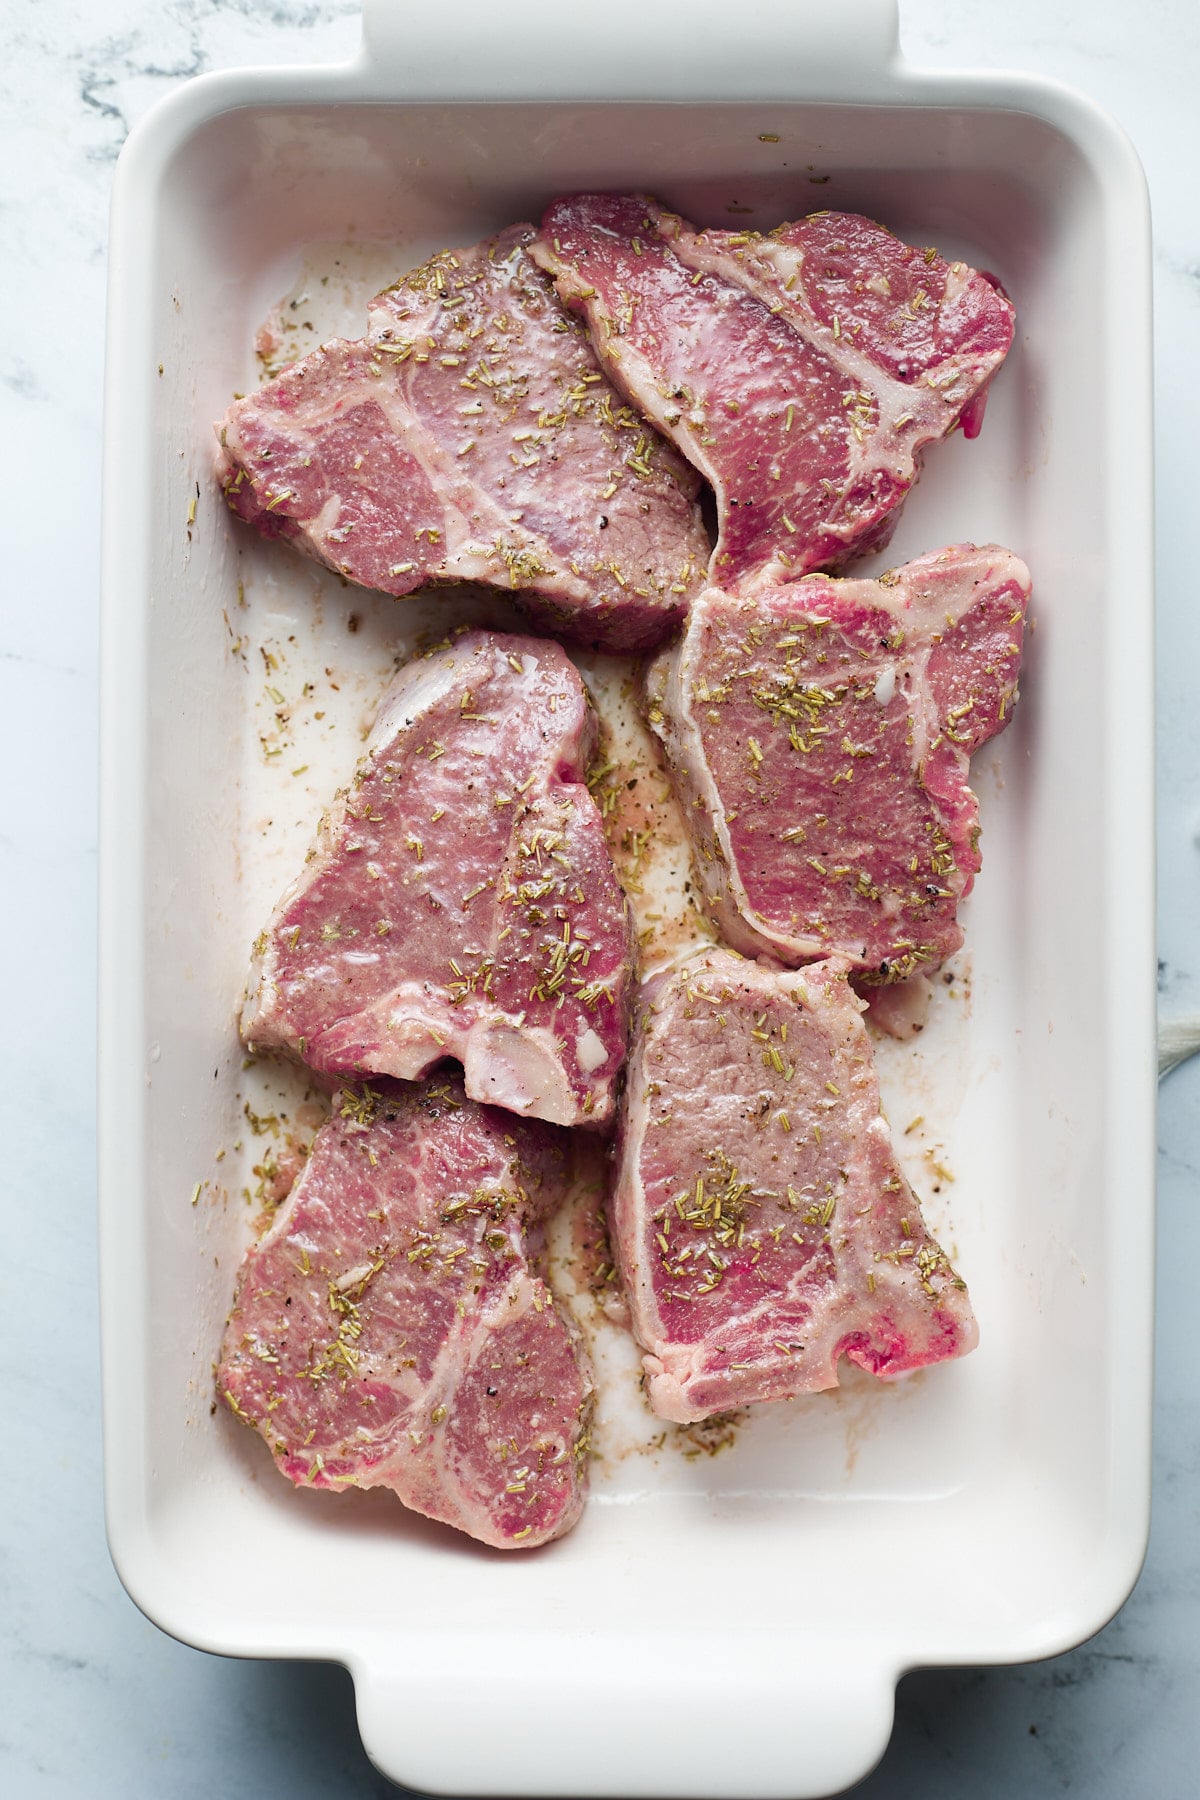
    • Combine lamb chops, olive oil, red wine vinegar, rosemary, oregano, salt, garlic powder, and black pepper in a bowl. Rub the marinade into the meat and cover and chill for 1 hour.
    Raw lamb chops in the marinade.
    • Preheat air fryer to 400 degrees Fahrenheit.
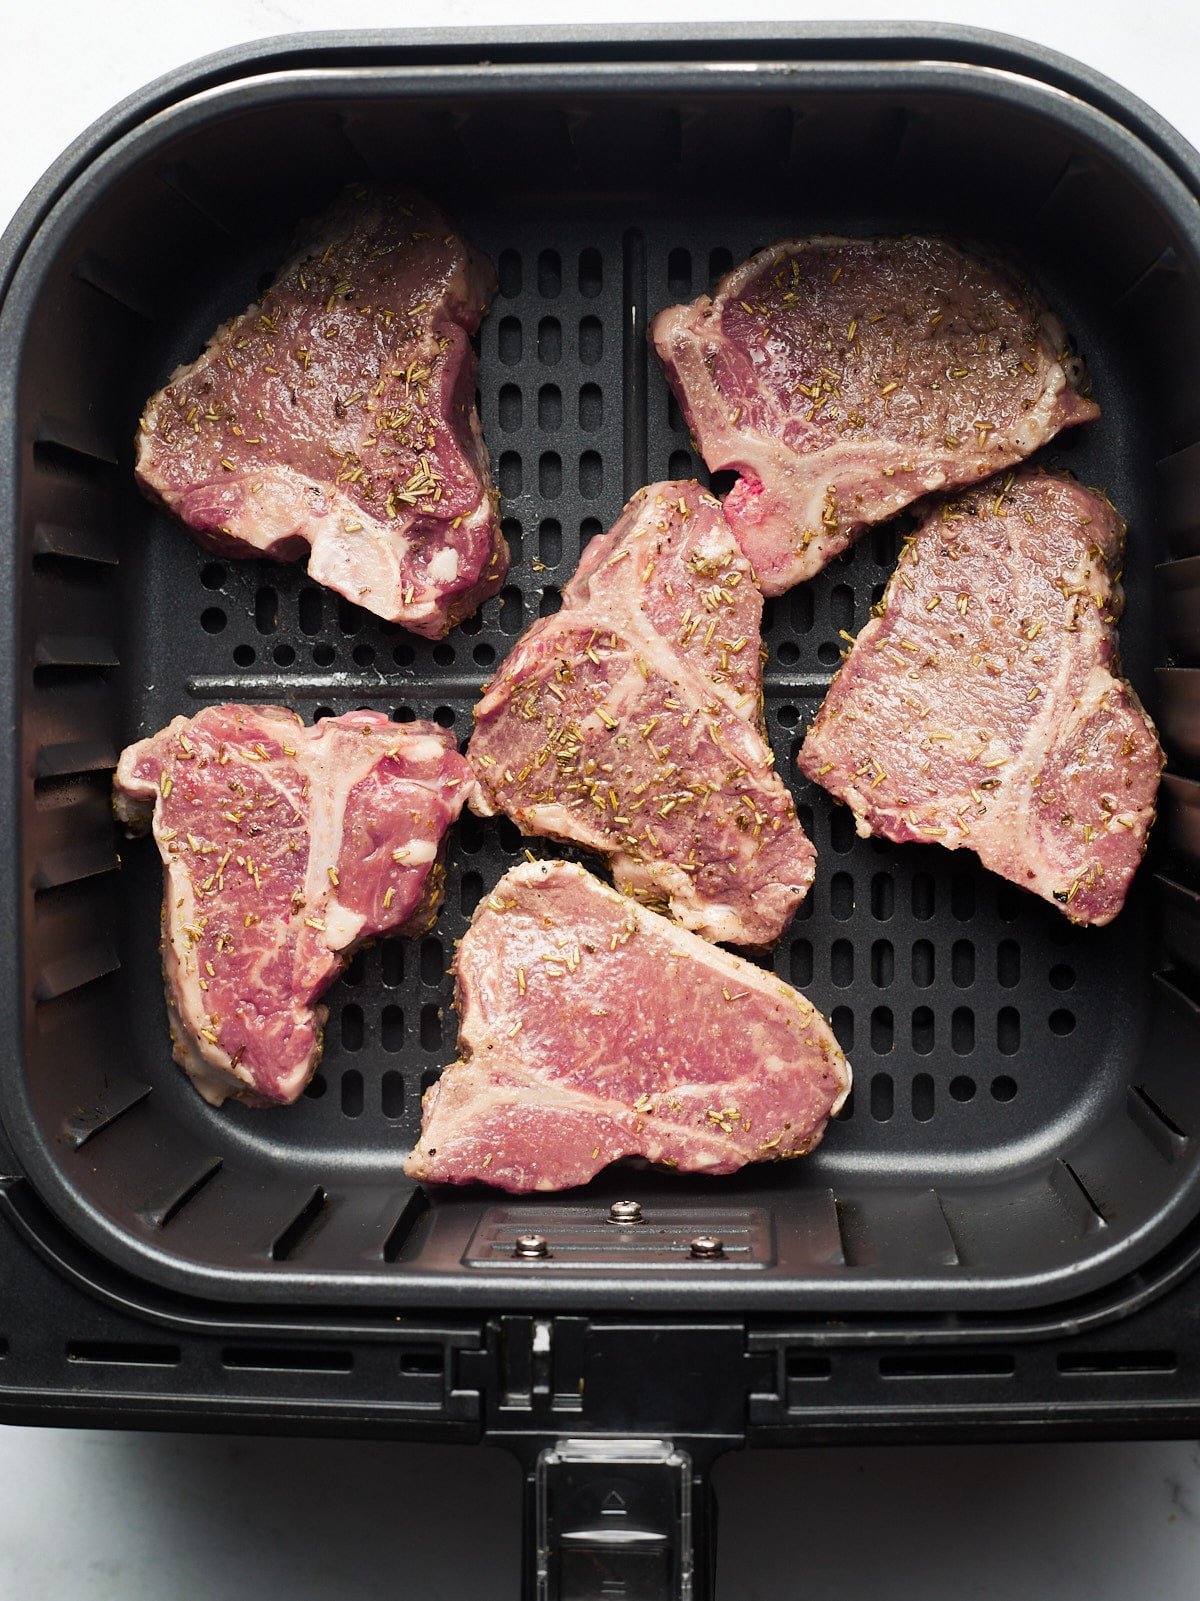
    • Add lamb chops to the air fryer basket.
    Raw lamb chops placed in the air fryer basket.
    • Cook for 7-9 minutes, flipping halfway.
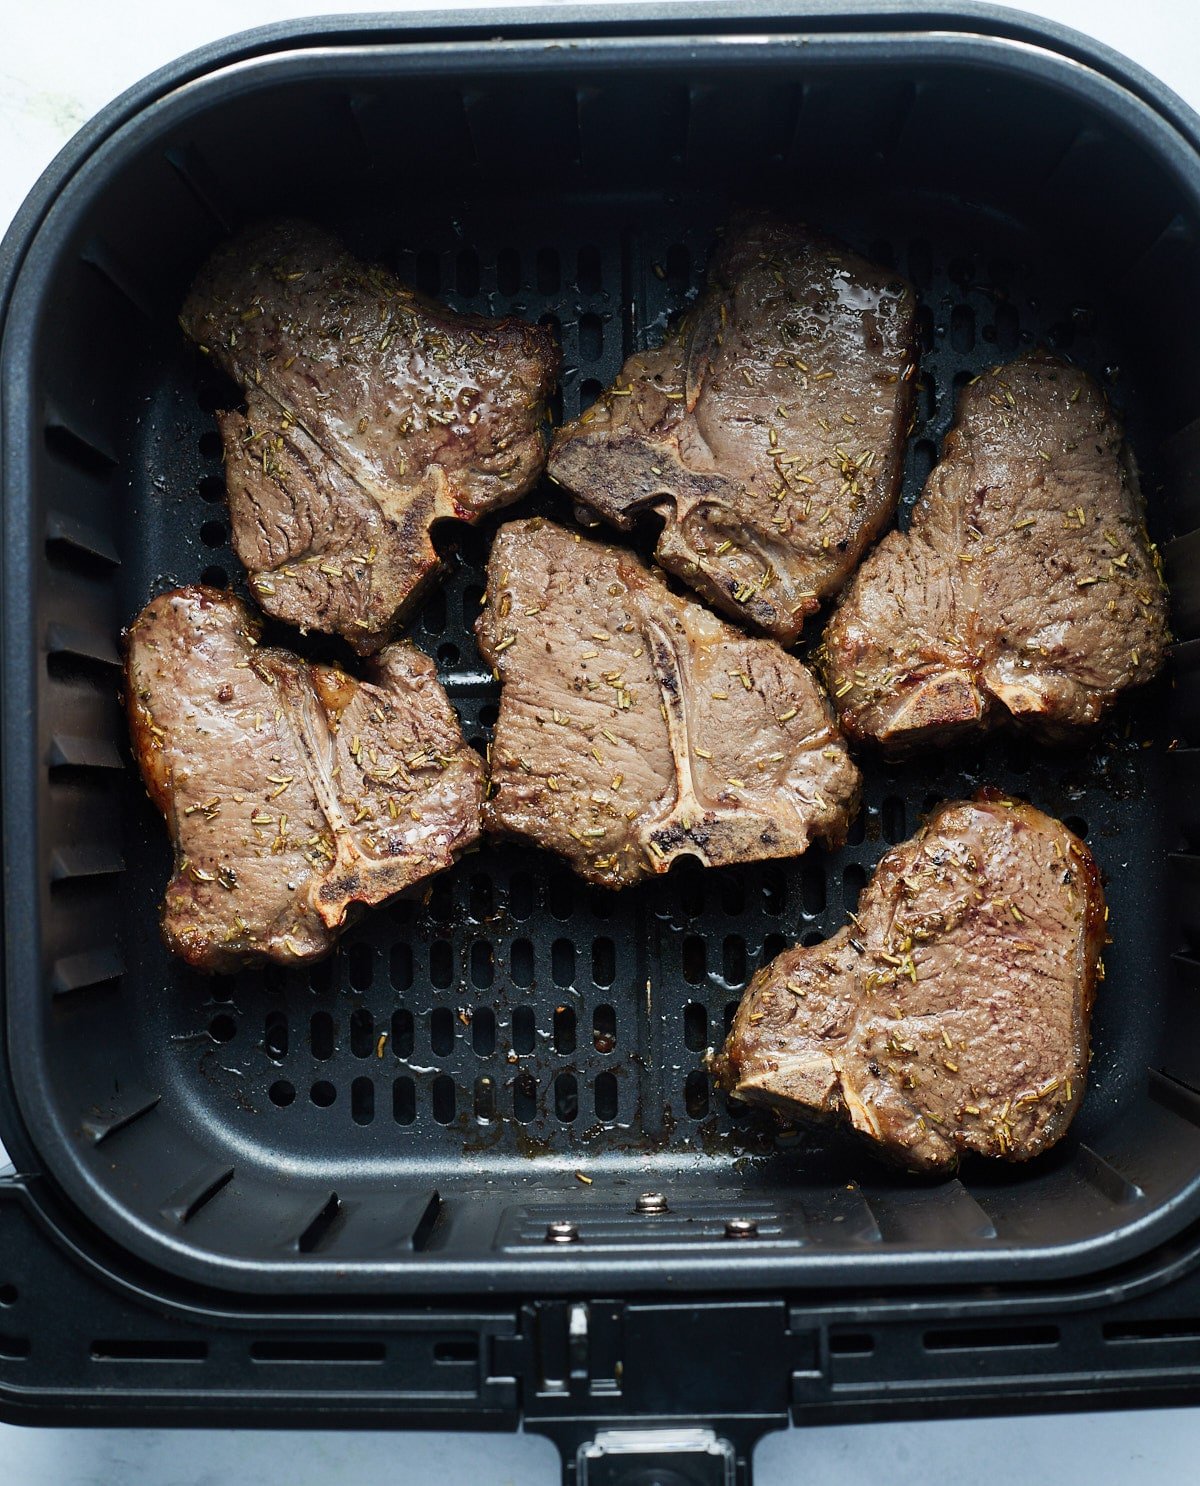
    Cooked lamb chops in the air fryer basket.
    • Serve them as is or cover them with this delicious homemade chimichurri sauce.
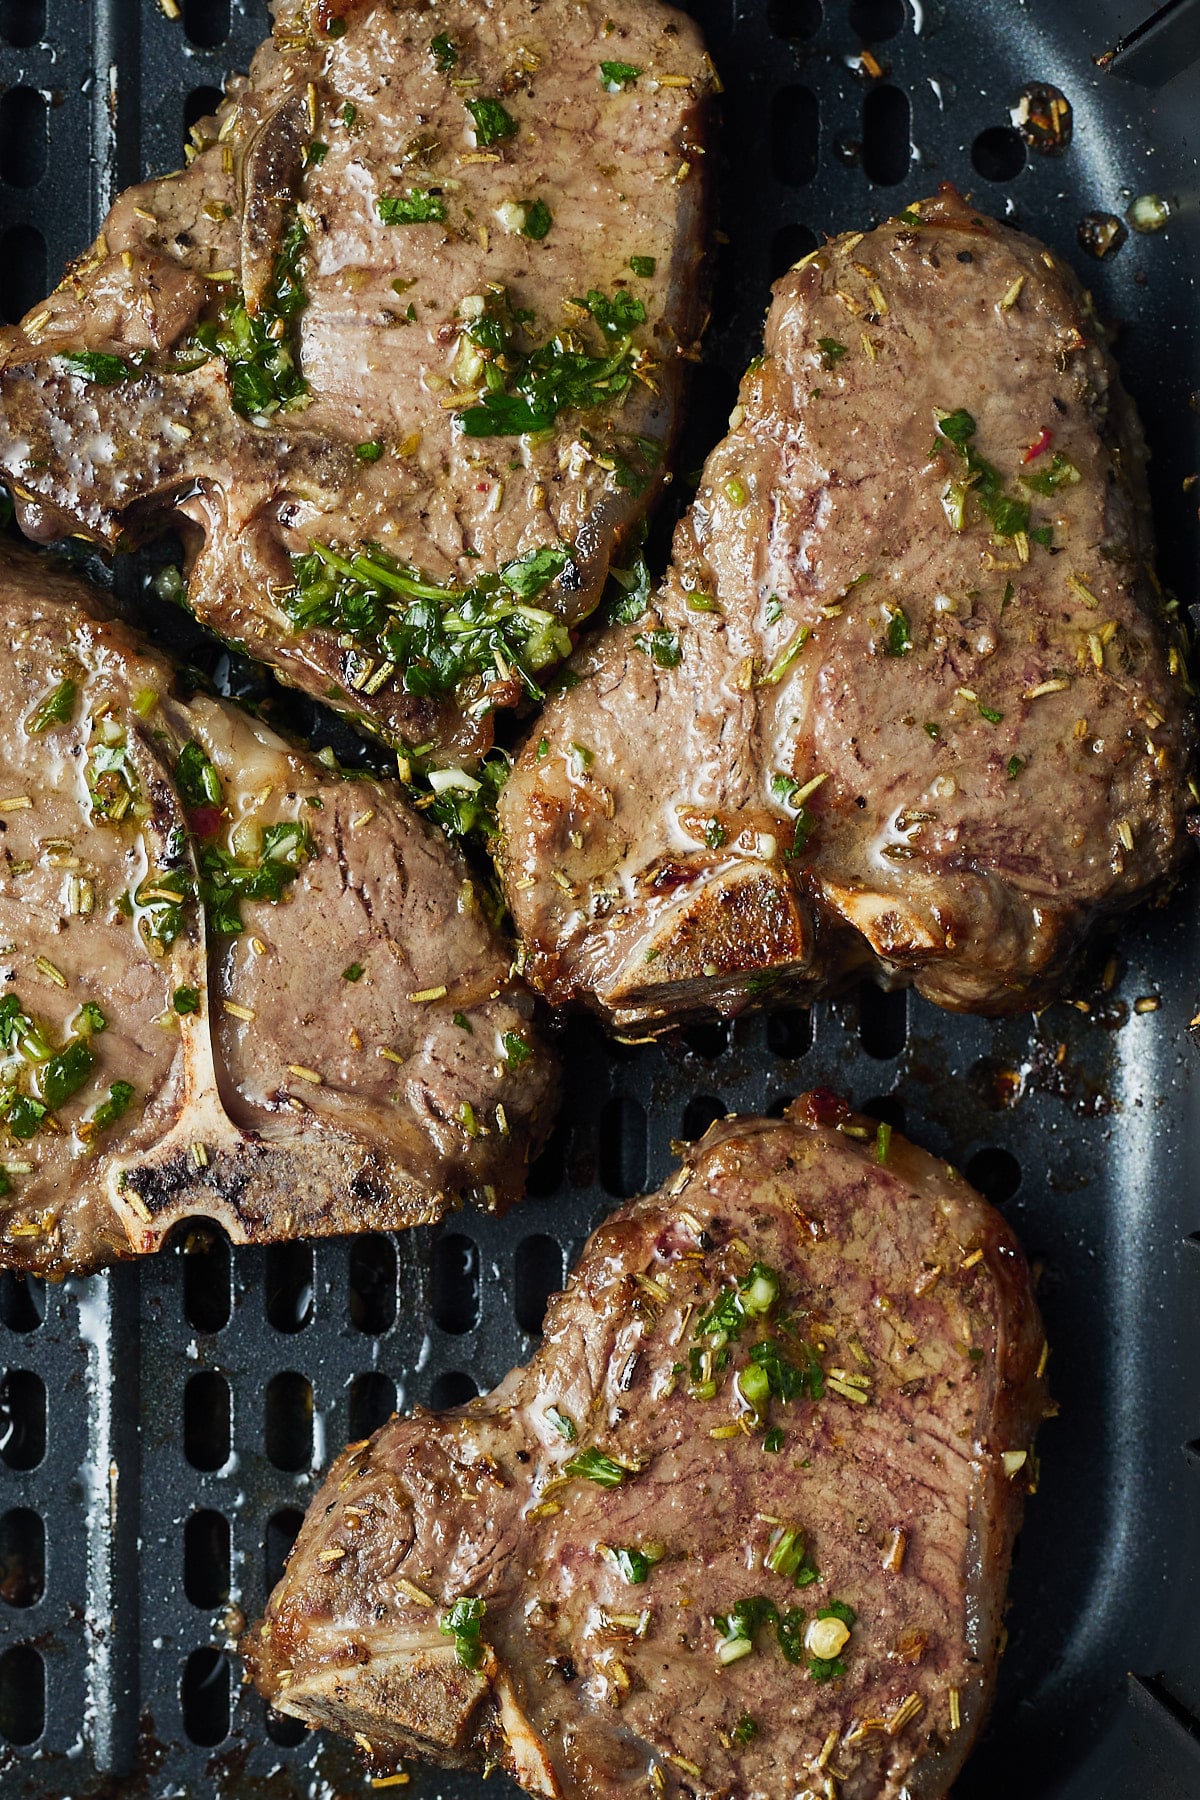
    Close up of the cooked lamb chops in the air fryer with chimicurri sauce on it.

    How do you know when the lamb is cooked?

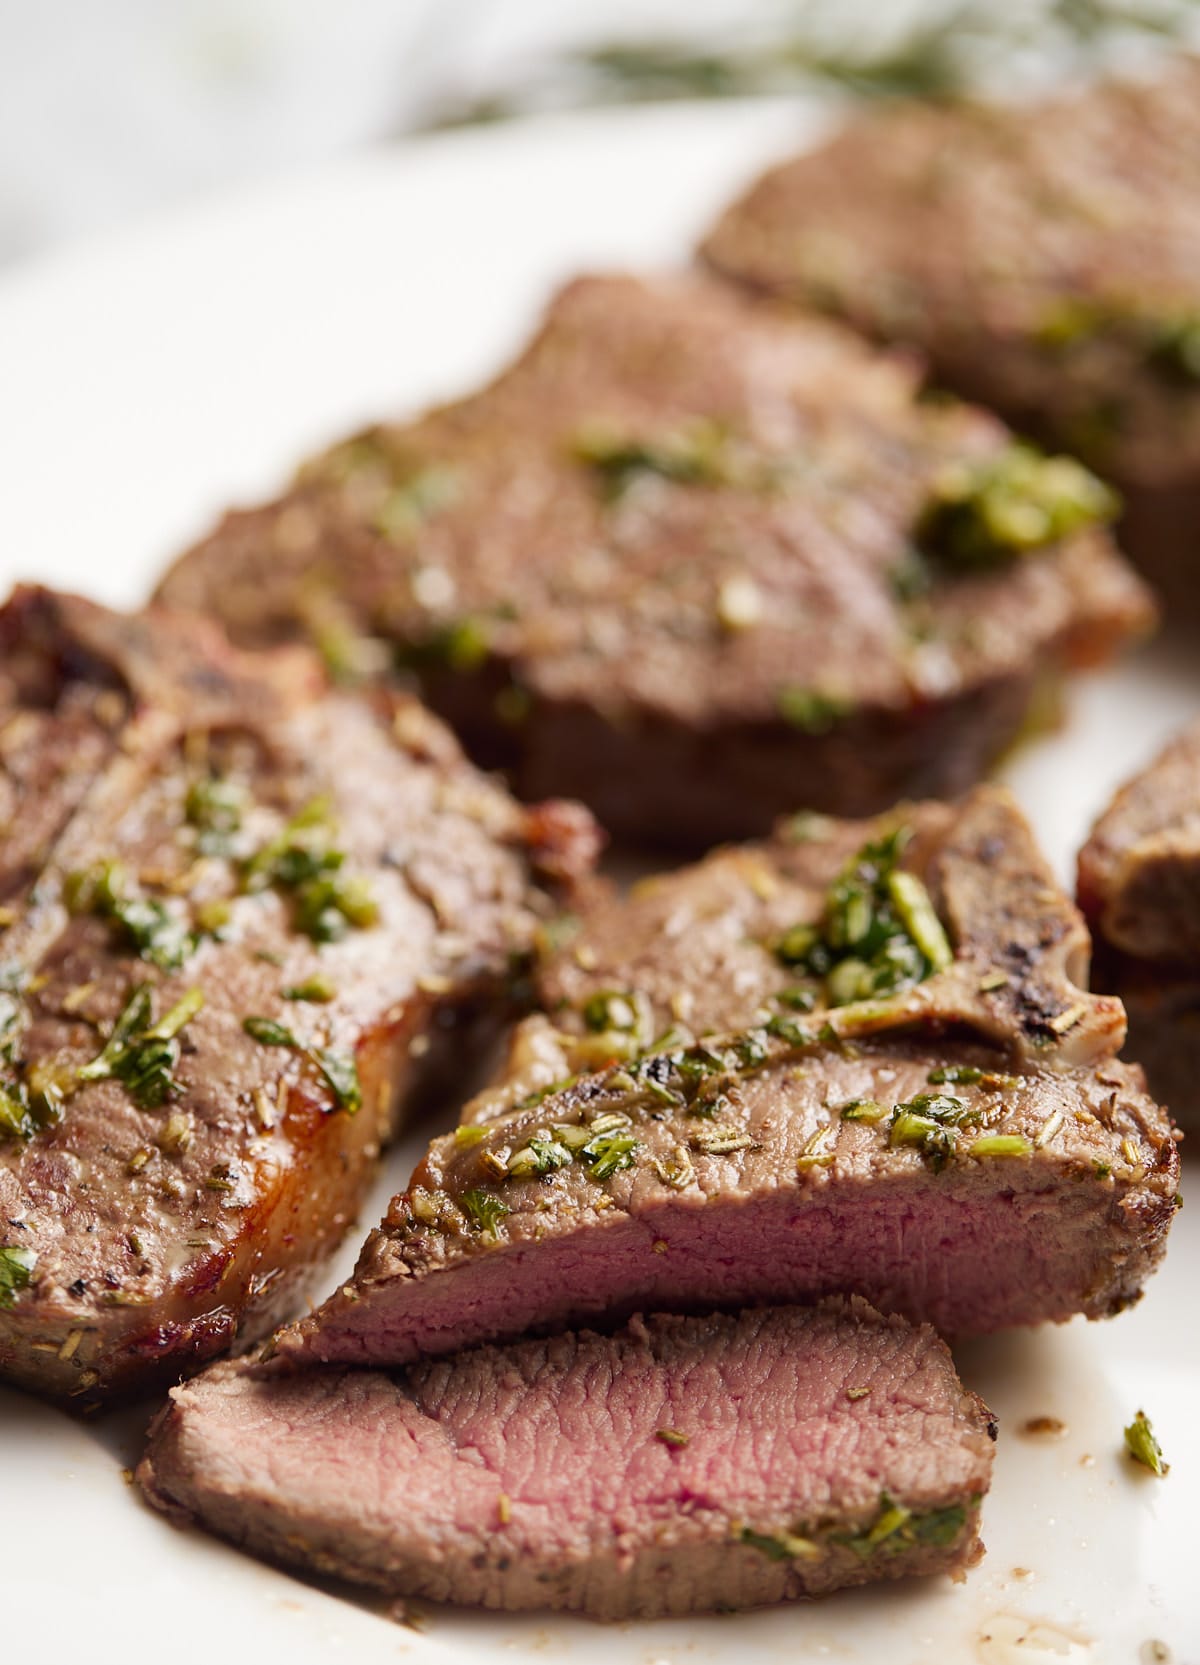
    Cooking the lamb chops in the air fryer will take between 7 and 9 minutes. The easiest way to make sure it is cooked to your liking is to use an Instant read thermometer. At 120F they will be rare, 130F is medium and over 145F is well done.

    When cooked past medium, the gamey flavor of the lamb becomes more pronounced.

    How long can you marinate the lamb?

    Lamb chops are fairly tender, and because we use red wine vinegar in the marinade, they don't need to be prepped too far ahead of time. I find an hour of marinating works perfectly, but you can leave them for up to 5 hours. If you leave them longer than that, the acid can start to break down the fibers too much and your lamb can turn out tough.

    What so you serve with them?

    These air fried lamb chops are perfect to serve as a quick and easy weeknight meal, but fancy enough to serve to guests and they make for an excellent Easter meal. They are great with all kinds of veggie and potato sides. Try them with:

    • Creamy Mashed Potatoes
    • Sautéed Beet Greens
    • Air Fried Carrots
    Lamb chops on a white plate with the end cut off.

    Recipe Notes and Tips

    • The temperature of the lamb should reach an internal temperature of 145 degrees Fahrenheit for medium-well.
    • The cut of lamb makes a difference in the gaminess of the lamb. Lamb Leg Chops will have less of a gamey flavor but they usually are more expensive.
    • This lamb recipe is great accompanied with a homemade chimichurri sauce.

    More Air Fryer Recipes

    • Seasoned Air Fryer Asparagus
    • Air Fryer Grilled Cheese
    • Crispy Air Fryer Bacon
    • Air Fryer Crab Legs
    air fryer lamb chops in the air fryer basket covered with chimichurri sauce
    Print Recipe
    4.82 from 88 votes

    The Best Air Fryer Lamb Chops

    Cook the most perfect of lamb chops in minutes with your trusty air fryer! Marinaded in red wine vinegar and herbs, the chops come out perfectly cooked and tender.
    Prep Time5 minutes mins
    Cook Time8 minutes mins
    Marinating time1 hour hr
    Total Time13 minutes mins
    Course: Main Course
    Cuisine: American
    Keyword: air fried lamb recipe, how to cook lamb chops. inan air fryer, quick lamb chop recipe
    Servings: 4 servings
    Calories: 350kcal
    Author: Tanya Harris

    Ingredients

    • 1.5 lbs lamb chops lamb loin chops or lamb leg chops

    Marinade

    • 2 Tablespoon olive oil
    • 1 Tablespoon red wine vinegar
    • 1 teaspoon dried rosemary
    • ½ teaspoon dried oregano
    • ½ teaspoon kosher salt
    • ½ teaspoon garlic powder
    • ¼ teaspoon black pepper

    Instructions

    • Combine lamb chops, olive oil, red wine vinegar, rosemary, oregano, salt, garlic powder, and black pepper in a bowl. Rub the marinade into the meat and cover and chill for 1 hour.
    • Preheat air fryer to 400 degrees Fahrenheit.
    • Add lamb chops to the air fryer basket and cook for 7-9 minutes, flipping halfway.

    Video

    Notes

    • The temperature of the lamb should reach an internal temperature of 145 degrees Fahrenheit for medium-well.
    • The cut of lamb makes a difference in the gaminess of the lamb. Lamb Leg Chops will have less of a gamey flavor but they usually are more expensive.
    • This lamb recipe is great accompanied with a homemade chimichurri sauce.

    Nutrition

    Calories: 350kcal | Carbohydrates: 1g | Protein: 42g | Fat: 19g | Saturated Fat: 6g | Cholesterol: 129mg | Sodium: 391mg | Potassium: 547mg | Fiber: 1g | Sugar: 1g | Vitamin A: 6IU | Vitamin C: 1mg | Calcium: 25mg | Iron: 4mg

    Chimichurri Sauce

    February 2, 2021 by Tanya Harris 2 Comments

    This easy to make Argentinean chimichurri sauce is a great accompaniment to red meats like steak and lamb and it takes minutes to make at home.

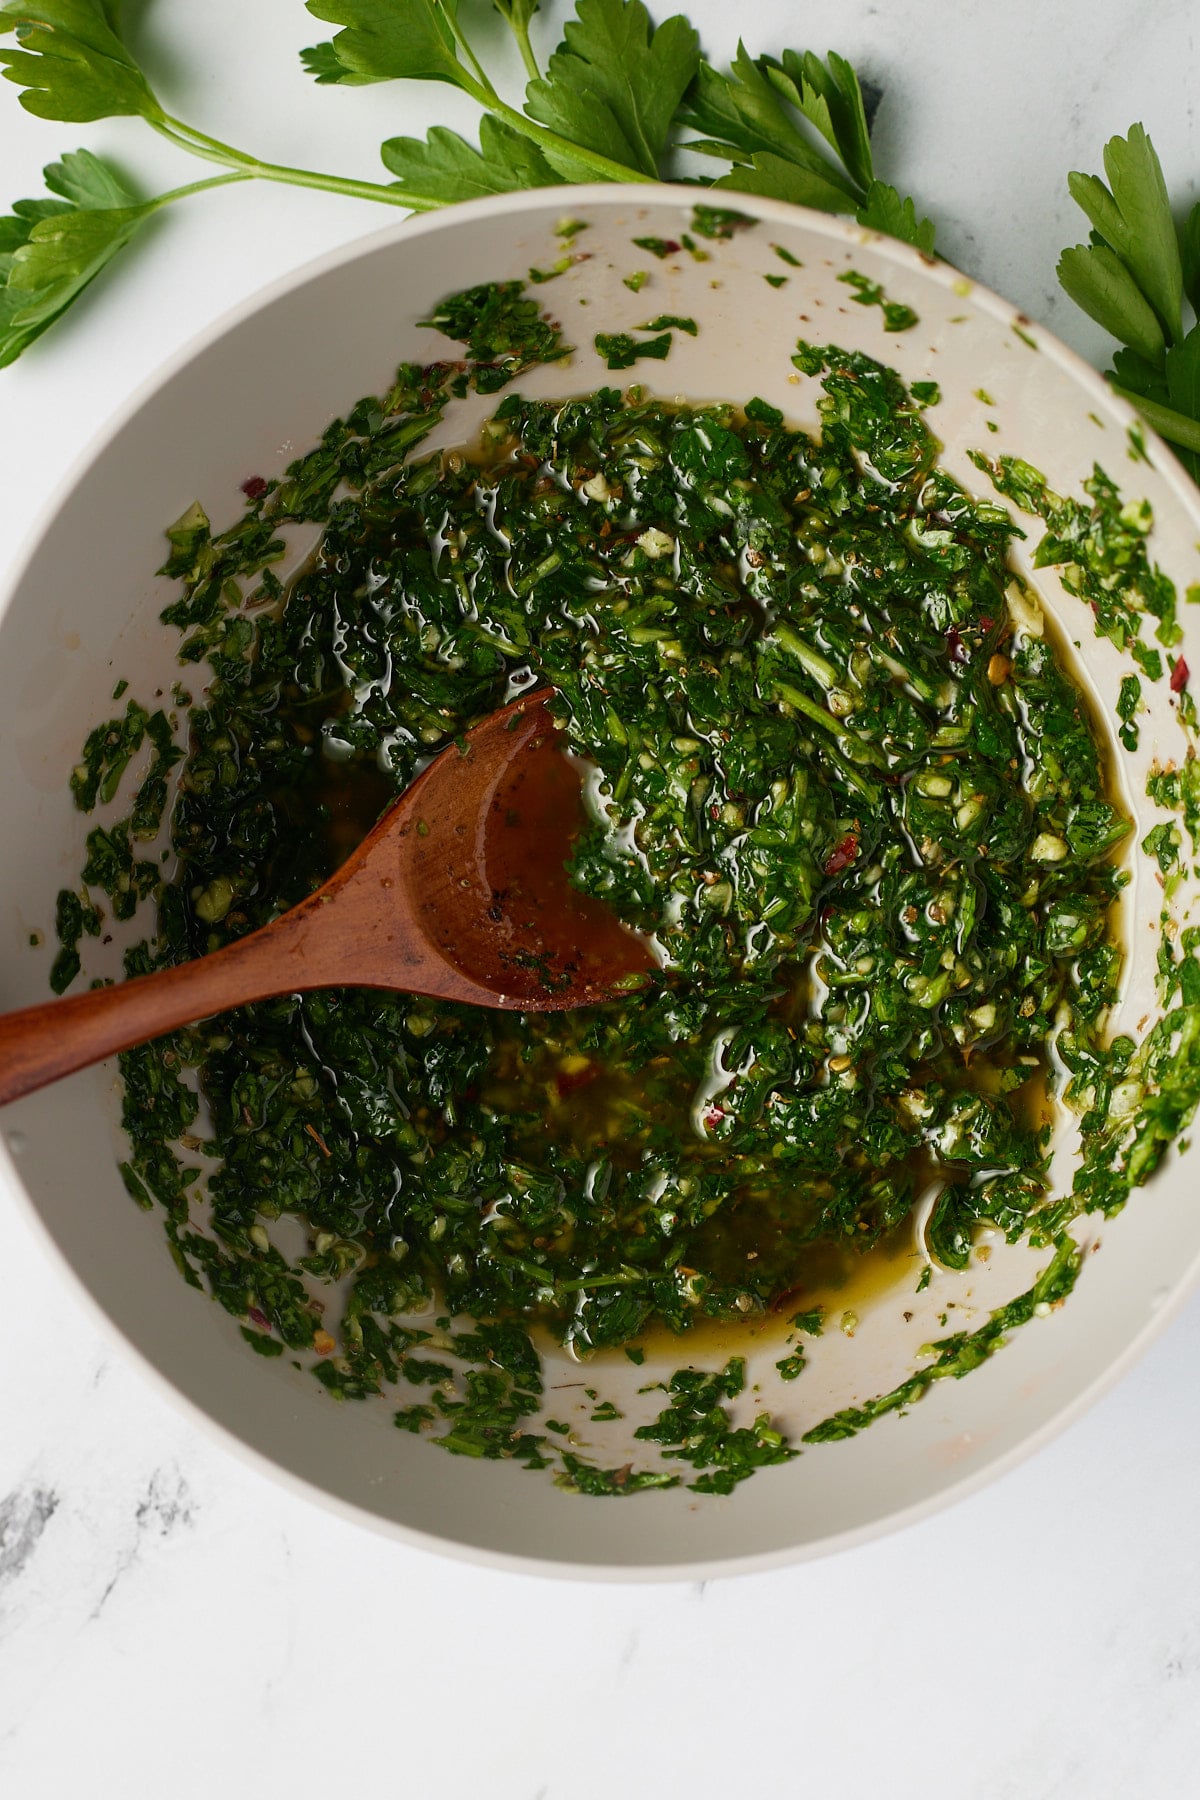
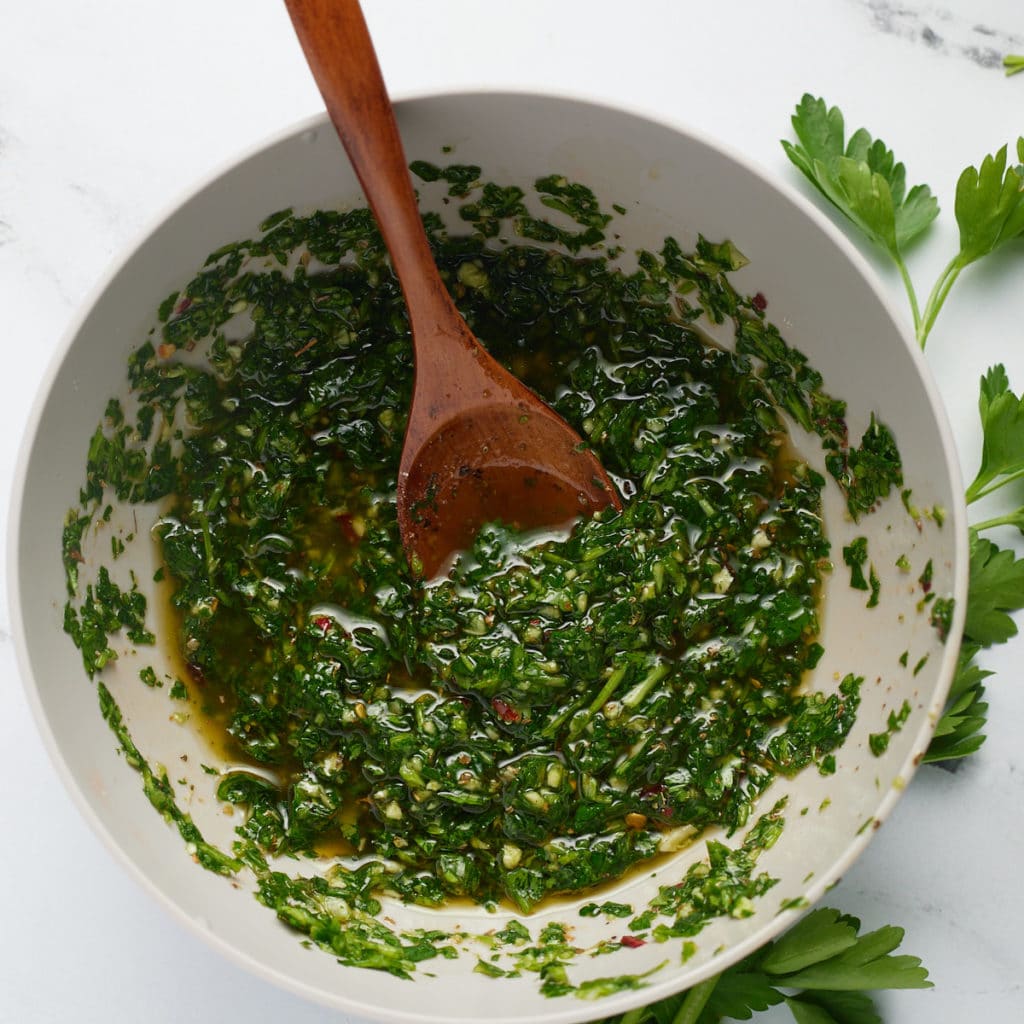
    Chimichurri served in a white bowl with a wooden spoon.

    You’ll find the full recipe with ingredient amounts and instructions in the recipe card at the bottom of this post. Be sure to check out the blog post itself for extra tips and tricks!

    This chimichurri sauce is a quick and easy way to add a burst of flavor to your meals.

    Made with a blend of herbs and spices, it's fresh and bold in flavor and it takes minutes to make.

    This is perfect sauce to top on steak, chicken, lamb chops, and even this rice recipe. Or use it like a marinade, like I did in my chimichurri chicken recipe.

    How to make chimichurri sauce

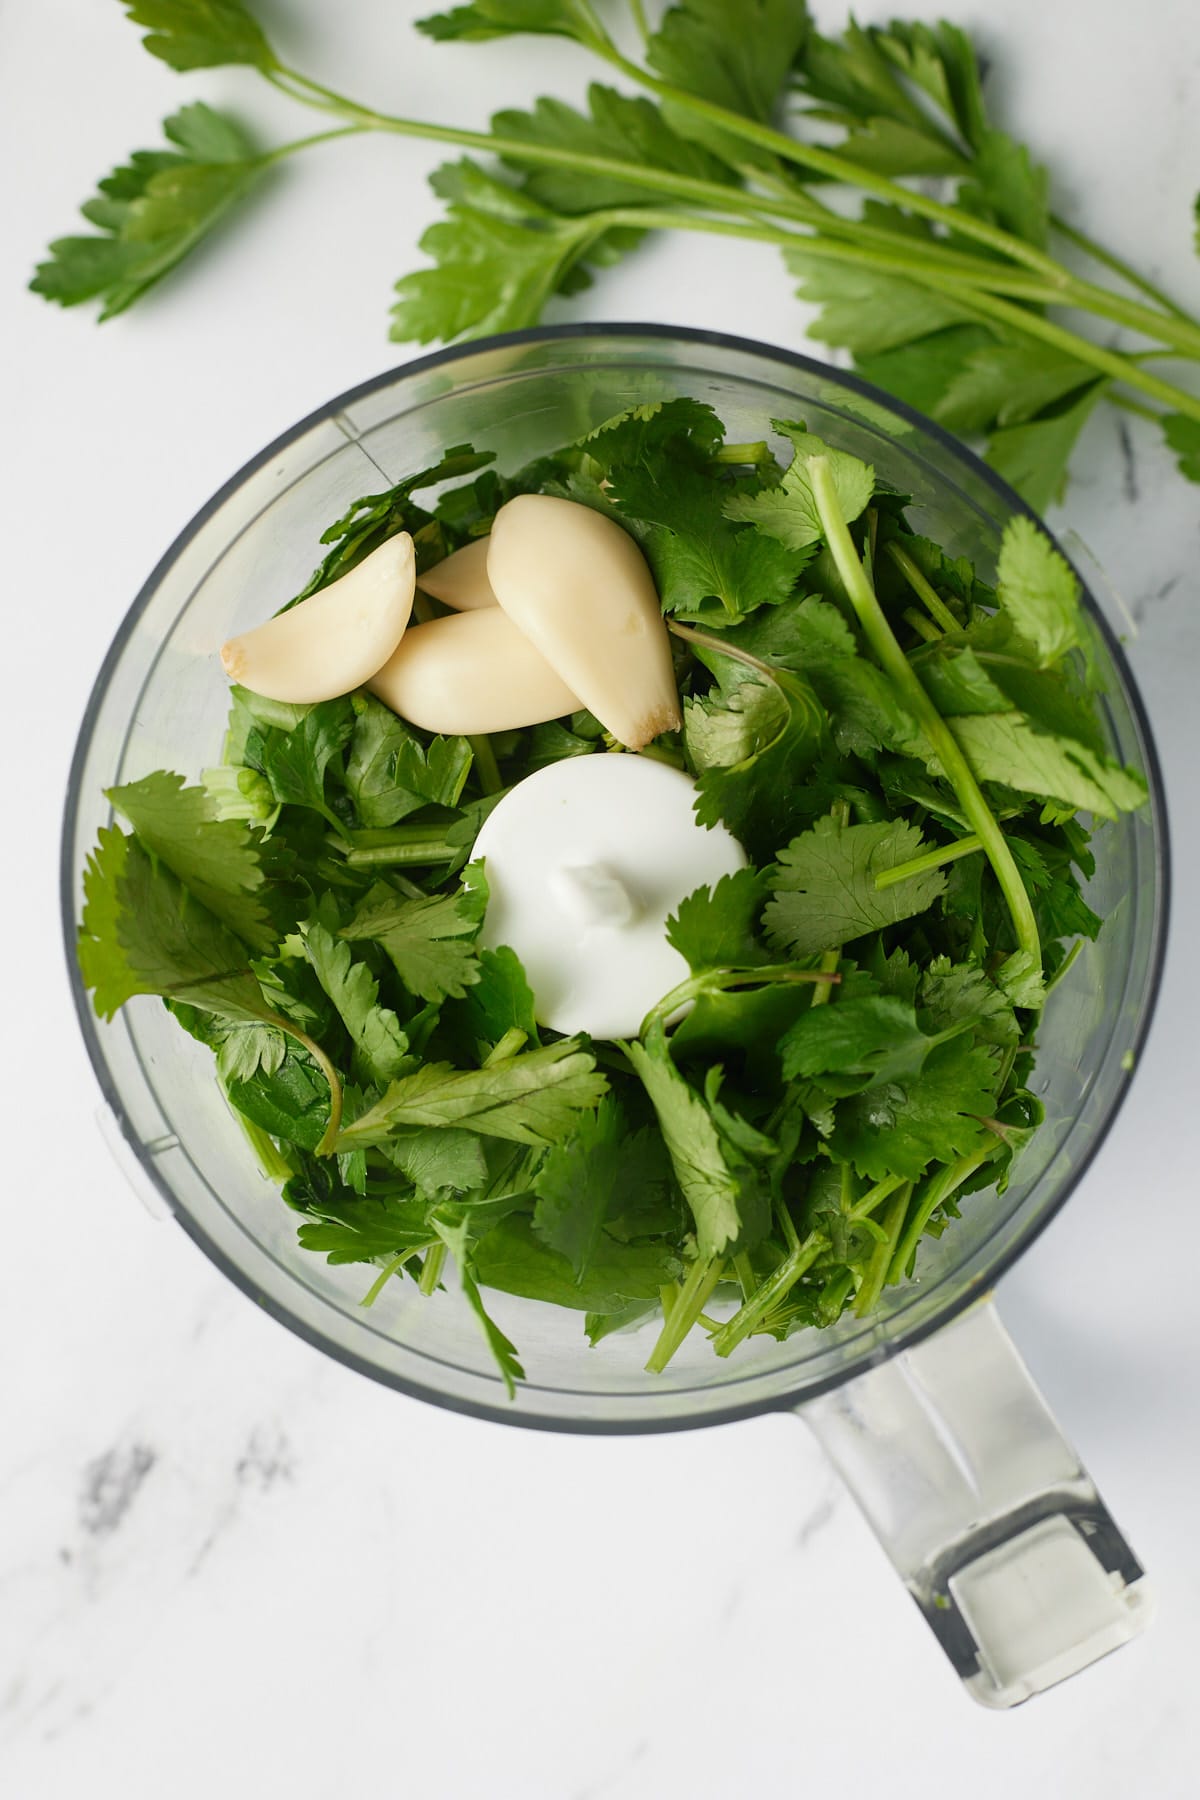
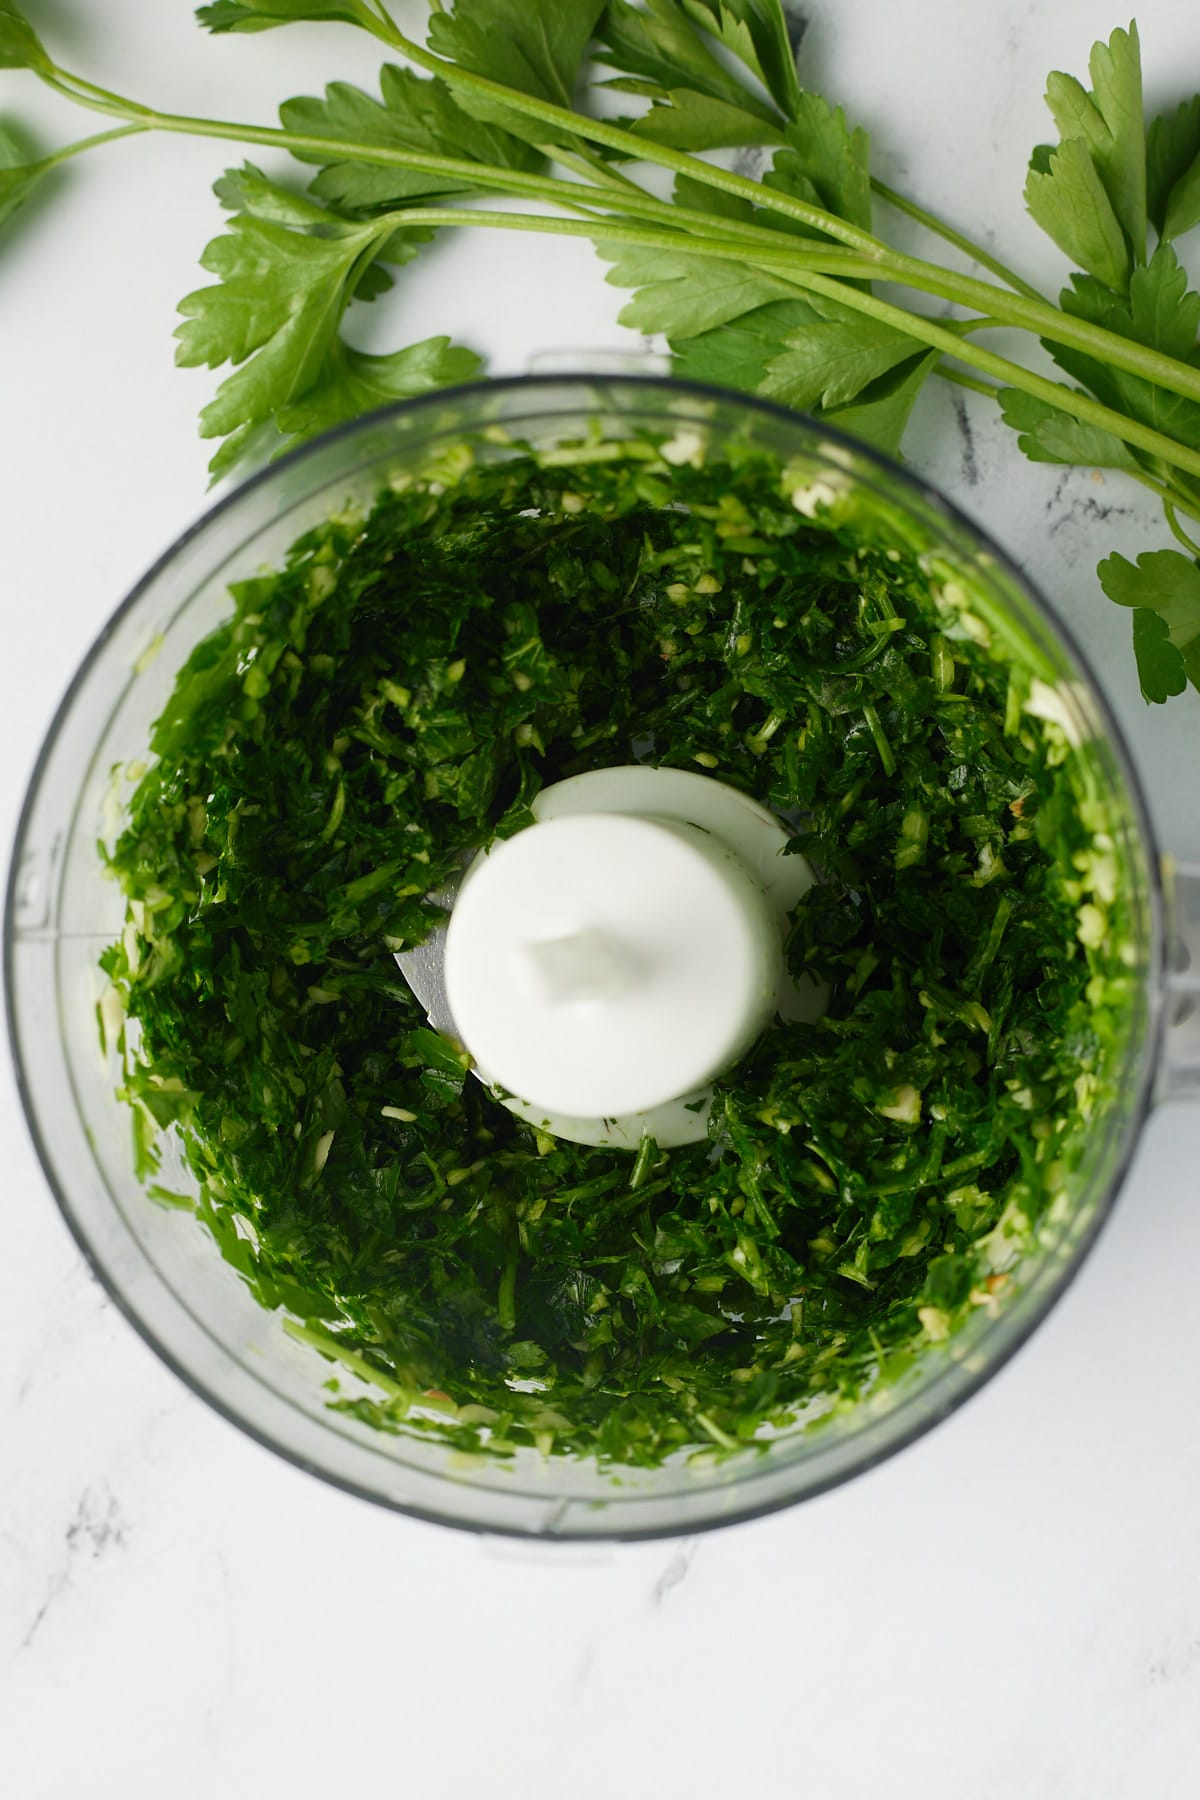
    Finely chop parsley, cilantro, and garlic cloves or add these ingredients to a mini food processor until finely chopped.

    The ingredients in a blender.
    The ingredients blended.

    Add to a medium-sized bowl.

    Add extra virgin olive oil, red wine vinegar, salt, red chili flakes, and black pepper and stir to combine. Serve and enjoy.

    Green chimichurri in a white bowl ready to serve.

    How do you serve it?

    Traditionally, this Argentinean chimichurri is served as a condiment on top of grilled steaks, and it's also great with lamb. You don't need to stop there, though! It's great to use as a topping for a burger, whole roasted fish, drizzled over pizza, or even added to a pasta salad!

    How long does it keep?

    Because we use fresh herbs in this sauce, it doesn't have a super long shelf life. It will keep well, covered in the fridge for 2 to 3 days. If you want to make a larger batch, it freezes really well and will keep well for up to 3 months.

    Recipe Variations

    This is a fairly traditional chimichurri recipe, and it's a classic for a reason, it's so tasty! We use a mix of parsley and cilantro to make it, but if you don't like cilantro, you can make it with all parsley. Red wine vinegar can be swapped for white wine or apple cider vinegar if that's what you have. You can also increase or decrease the amount of chili flakes added to suit your taste.

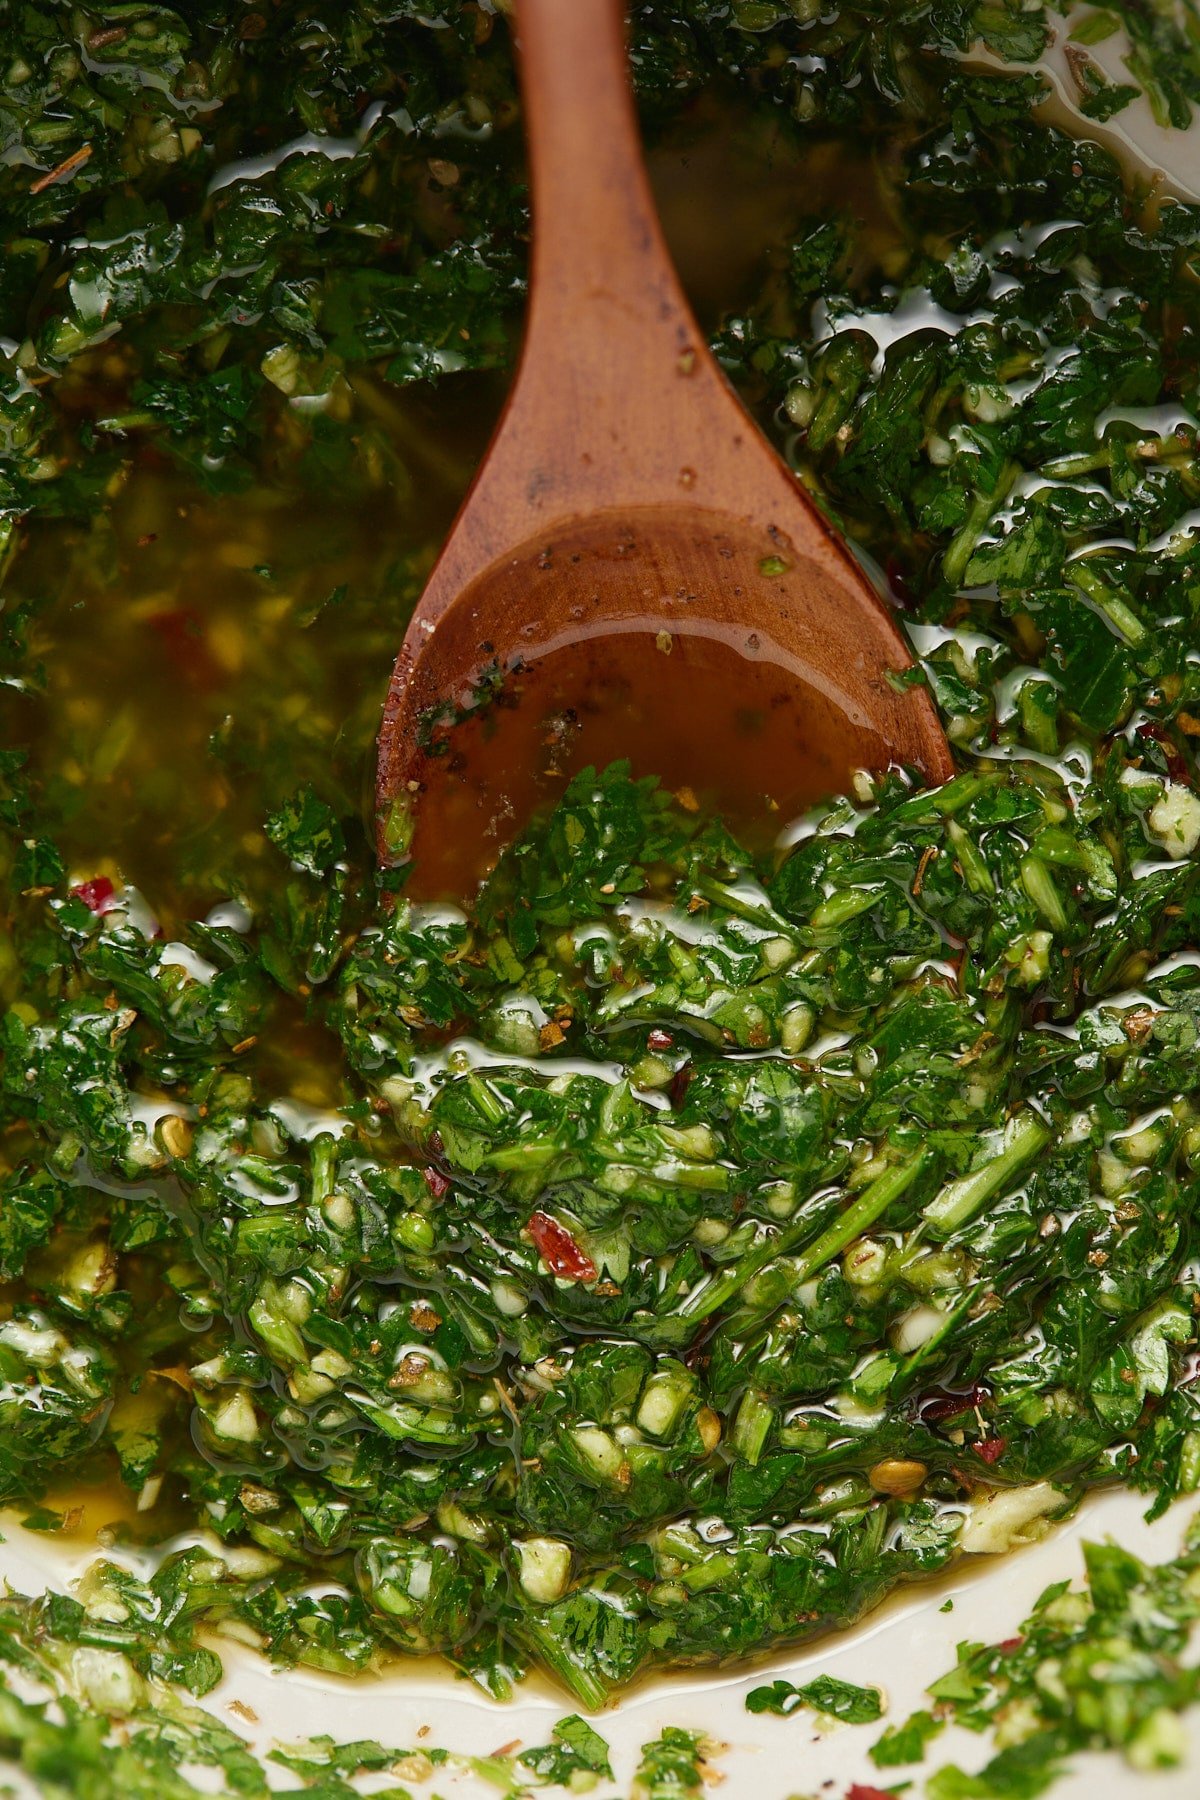
    Close up of a wooden spoon in the green herb sauce.

    Recipe Notes and Tips

    • It's quick and easy to make this sauce in a food processor, but you can easily finely chop everything by hand if you prefer.
    • Make sure your herbs are super fresh for the best flavor.
    • Use extra virgin olive oil rather than regular or light for this recipe.

    More Sauce Recipes

    • Homemade BBQ Sauce
    • Peruvian Green Sauce (Aji Verde)
    • Homemade Remoulade Sauce
    • Cranberry Sauce
    Green chimichurri in a white bowl ready to serve.
    Print Recipe
    5 from 1 vote

    Chimichurri Sauce

    This easy to make Argentinean chimichurri sauce is a great accompaniment to red meats like steak and lamb and it takes minutes to make at home in a blender.
    Prep Time5 minutes mins
    Total Time5 minutes mins
    Course: Condiment
    Cuisine: South American
    Keyword: Argentinean chimichurri sauce, blender chimichurri sauce, how to make chimichurri, sauce for steak
    Servings: 4 servings
    Calories: 171kcal
    Author: Tanya Harris

    Ingredients

    • 1 cup chopped fresh flat-leaf parsley
    • ½ cup chopped fresh cilantro
    • 4 garlic cloves
    • ⅓ cup extra virgin olive oil
    • 2 Tablespoon red wine vinegar
    • ½ teaspoon Kosher salt
    • ¼ teaspoon red chili flakes
    • ⅛ teaspoon black pepper

    Instructions

    • Finely chop parsley, cilantro, and garlic cloves or add these ingredients to a mini food processor until finely chopped. Add to a medium-sized bowl.
    • Add extra virgin olive oil, red wine vinegar, salt, red chili flakes, and black pepper and stir to combine. Serve and enjoy.

    Video

    Notes

    • Chimichurri sauce is on lamb and steaks.
    • It's quick and easy to make this sauce in a food processor, but you can easily finely chop everything by hand if you prefer.
    • Make sure your herbs are super fresh for the best flavor.
    • Use extra virgin olive oil rather than regular or light for this recipe.

    Nutrition

    Calories: 171kcal | Carbohydrates: 2g | Protein: 1g | Fat: 18g | Saturated Fat: 3g | Sodium: 304mg | Potassium: 112mg | Fiber: 1g | Sugar: 1g | Vitamin A: 1436IU | Vitamin C: 21mg | Calcium: 29mg | Iron: 1mg

    Red Velvet Cheesecake (Pressure Cooker Recipe)

    January 21, 2021 by Tanya Harris 8 Comments

    red velvet cheesecake on black plate

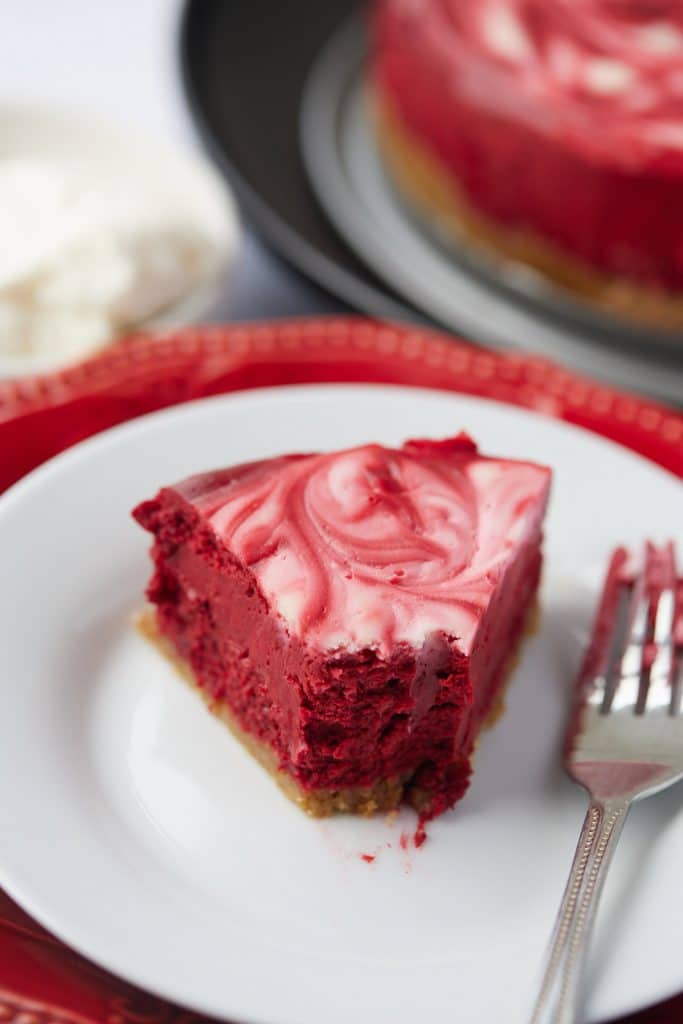
    This delicious red velvet cheesecake is a wonderful treat for Valentine's Day, or any time of the year! Flavored with cocoa powder with a ginger cookie crust, this pressure cooker cheesecake comes out wonderfully light and fluffy.

    A slice of red velvet cheesecake with the end cut off with a fork.

    This post contains affiliate links, please read my full disclaimer here.

    You’ll find the full recipe with ingredient amounts and instructions in the recipe card at the bottom of this post. Be sure to check out the blog post itself for extra tips and tricks!

    Do you have any plans for Valentine's Day? We are pretty low key on the day, but that doesn't mean I won't be enjoying this delicious red dessert!

    This red velvet cheesecake is all kinds of delicious. It has a decadent and rich chocolate flavor and the ginger snap crust is to die for.

    This cheesecake recipe is cooked in the Instant Pot and is totally foolproof. This method ensures the fluffiest and creamiest cheesecake you'll ever make!

    For more cheesecake recipes, be sure to try my Instant Pot Carrot Cake Cheesecake!

    How to make a red velvet cheesecake

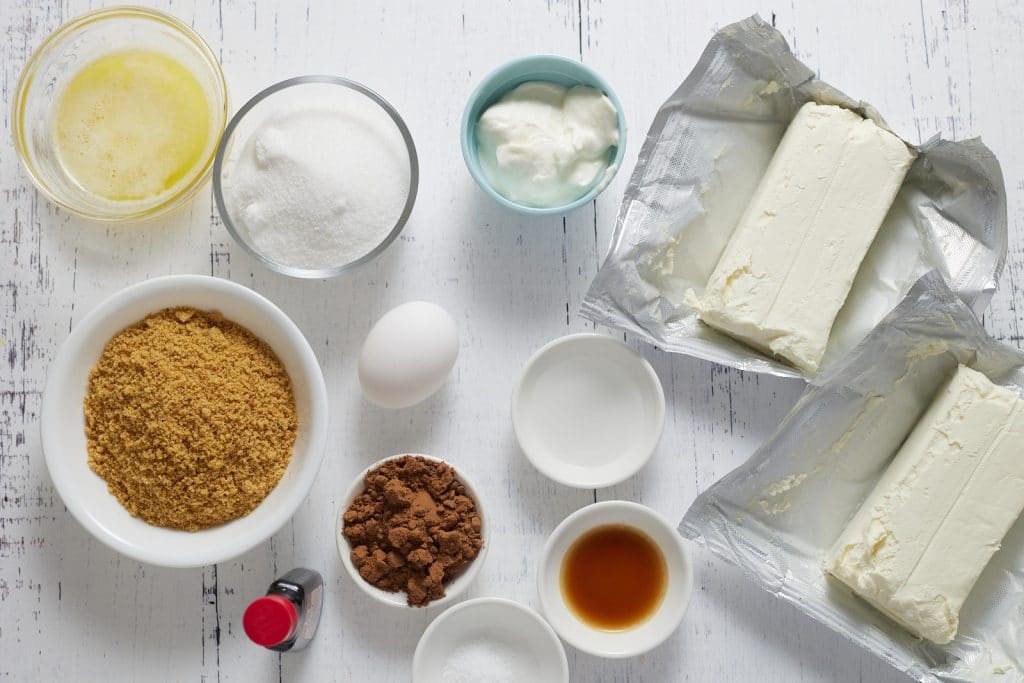
    • Gather your ingredients.
    Ingredients to make the cheesecake.
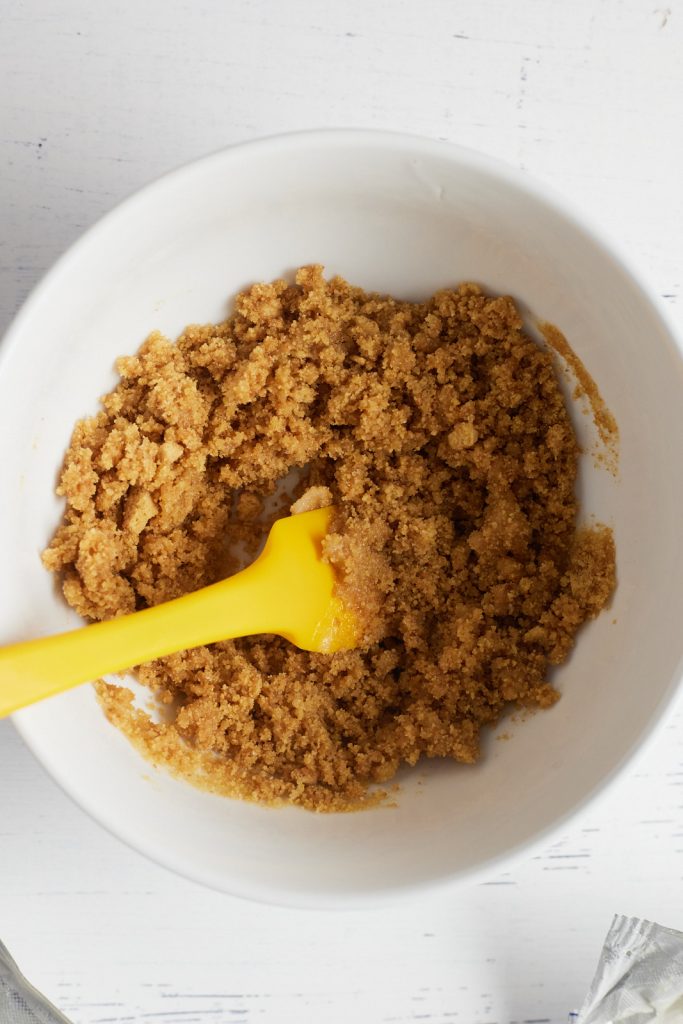
    • Place cookie crumbs, sugar, and unsalted butter in a medium sized bowl and stir until combined.
    The ingredinets for the crust mixed together.
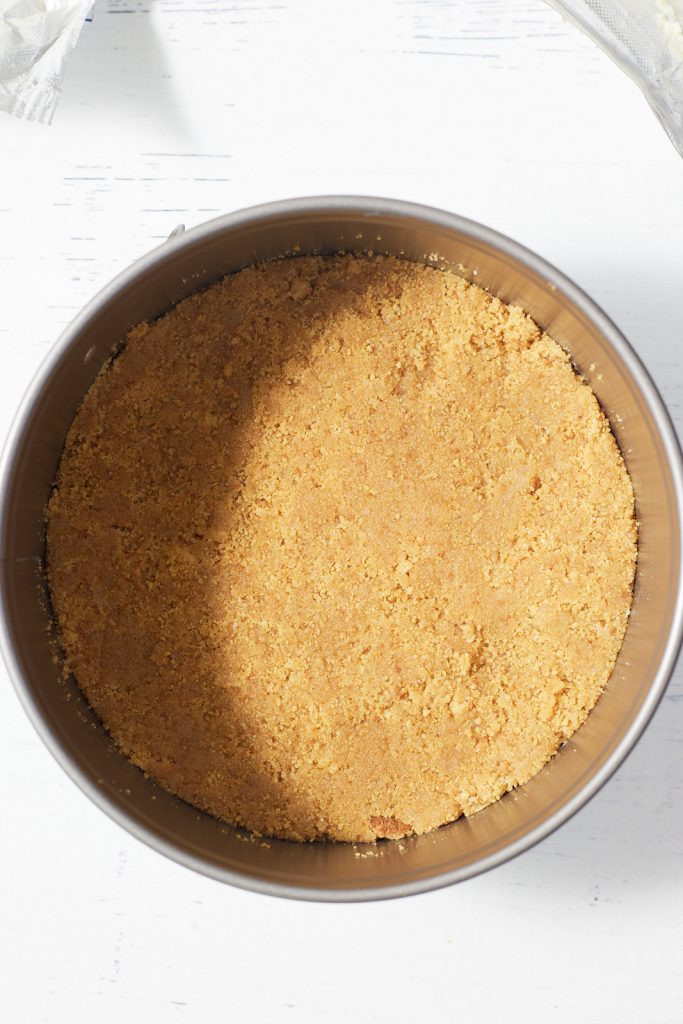
    • Place in the bottom of a greased 7 inch springform pan. Set aside.
    The cheesecake crust in a springform pan.
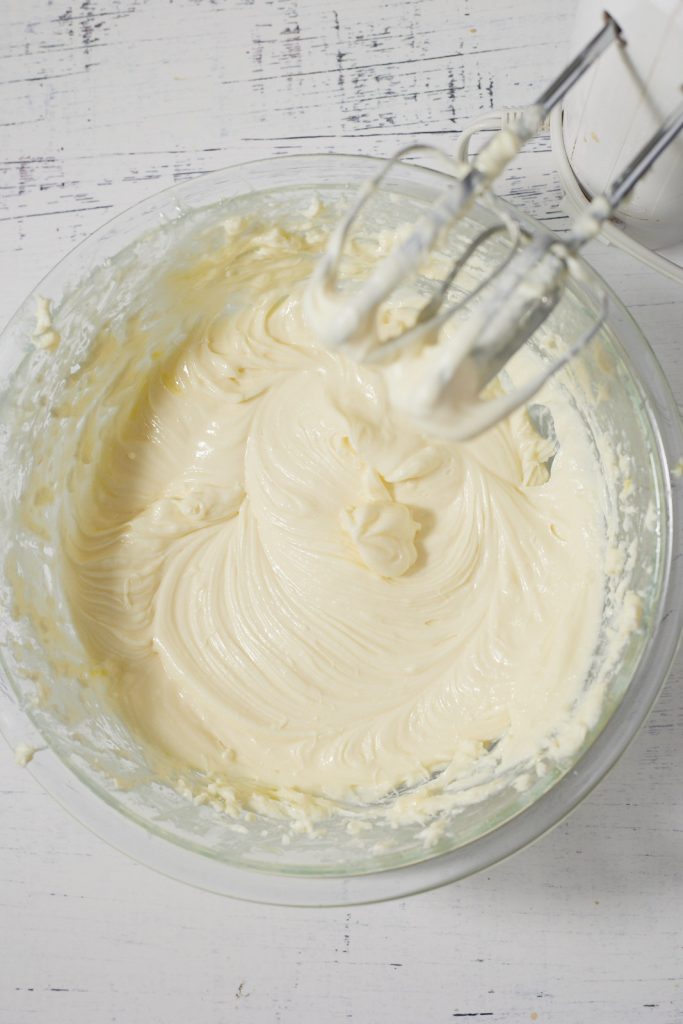
    • Place cream cheese, granulated sugar, and salt in a large bowl. Using a hand mixer, beat the cream cheese and sugar on medium speed until combined. Add sour cream, egg, vanilla extract, and vinegar and beat on medium speed until well blended. Remove about ¼ cup of the batter mixture and set aside.
    The cake batter mixed together.
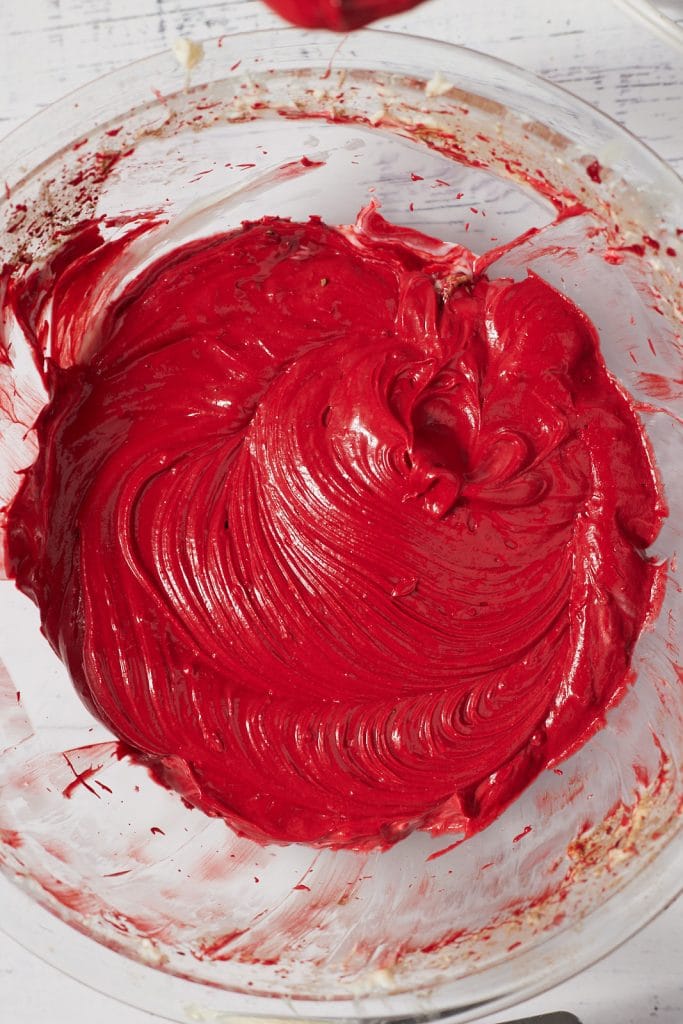
    • Add cocoa powder and food coloring to the bowl and beat until incorporated.
    The red cake batter in a glass bowl.
    • Pour this mixture into the prepared springform pan and smooth the top.
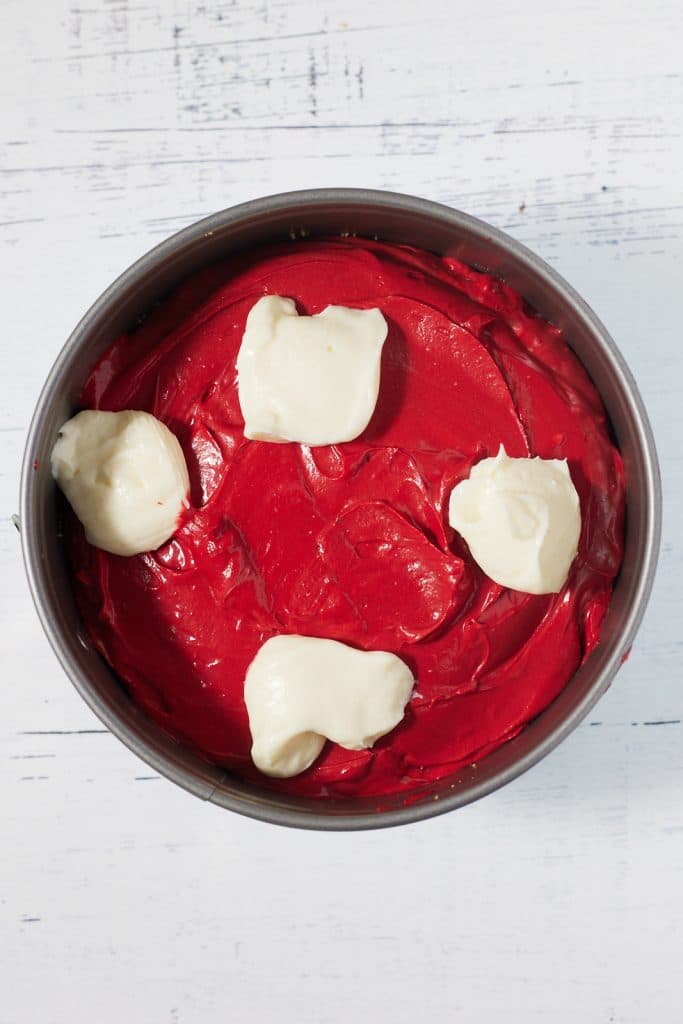
    • Place the ¼ cup of set aside batter mixture on top of the cheesecake.
    Four dollops of white batter on the red cake.
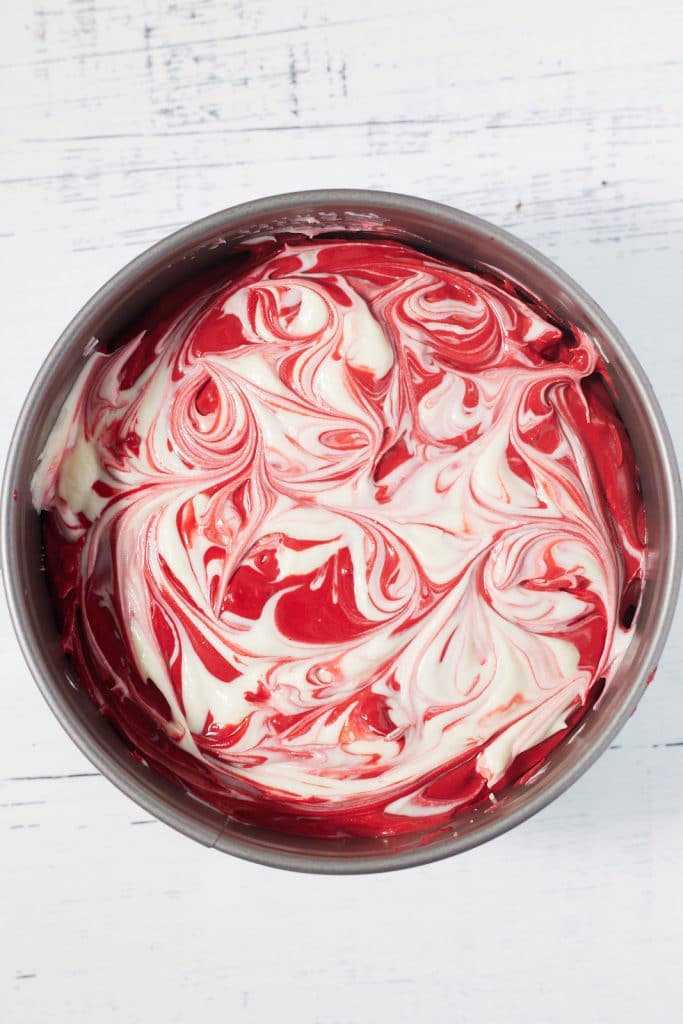
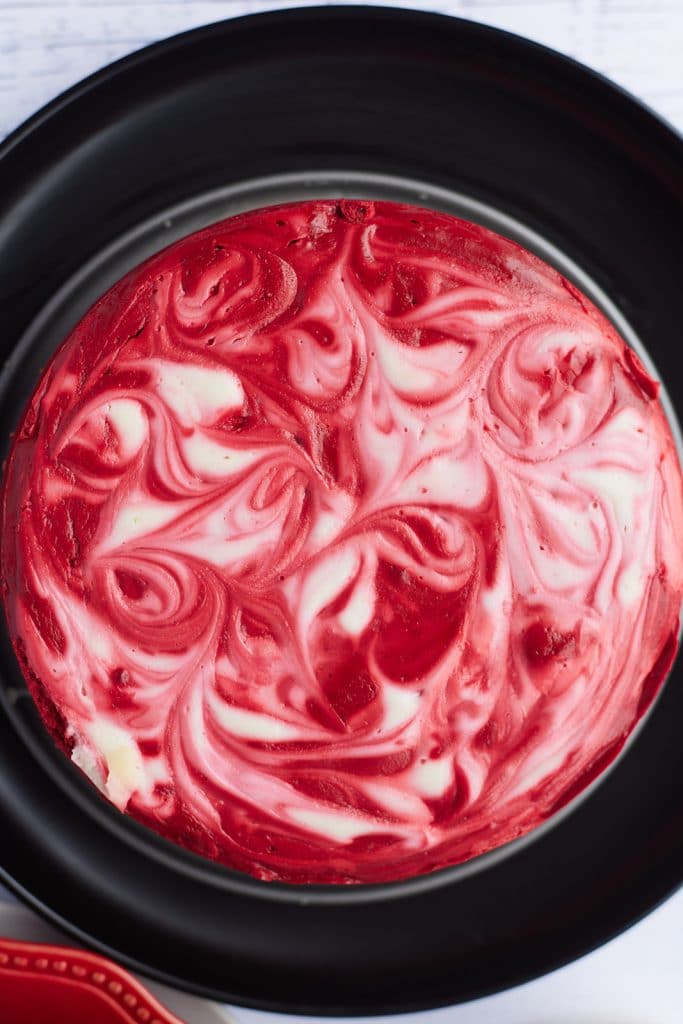
    • Create a swirl with a chopstick or toothpick.
    The white batter swirled into the red cake.
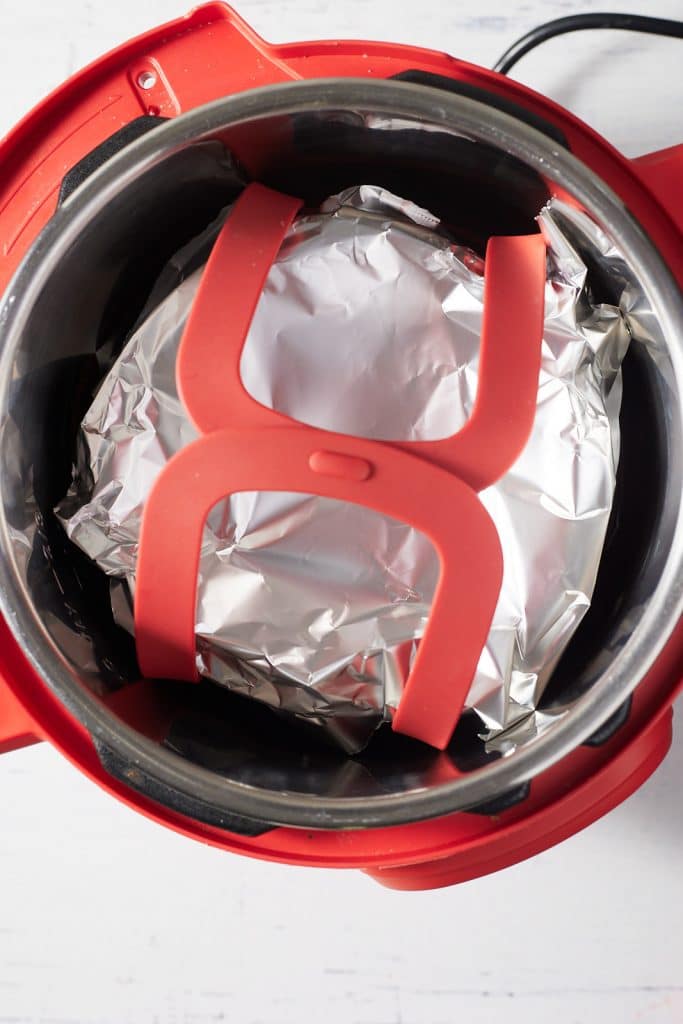
    • Cover springform pan with foil paper.
    • Add 1 cup of water to Instant Pot. Add cake to Instant Pot on trivet or bakeware sling.
    • Cover and cook on high pressure for 35 minutes, allowing for natural release for 10 minutes.
    The ccheesecake wrapped with foil in a pressure cooker.
    • Remove cake and allow to cool on the counter, then transfer to the fridge. Refrigerate 2-24 hours, the longer the better.
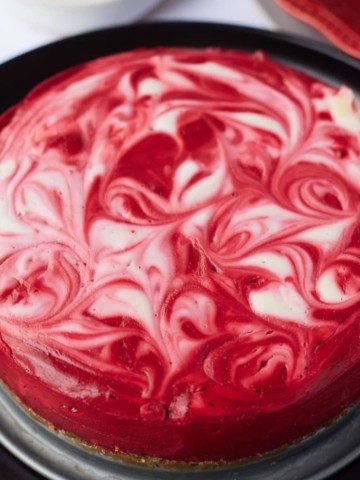
    Overhead view of the red and white cheesecake.

    How do you stop the cheesecake from cracking?

    Cheesecakes can crack for two main reasons.

    1. If the cake batter is over mixed, this can cause cracking. If you whip too much air into it, the cake can rise and then collapse, causing the cracks.
    2. Cheesecakes also crack when the cool too quickly, so be sure to naturally release the pressure in your Instant Pot rather than a quick release.

    How long does it keep?

    Once your cheesecake has cooled in the fridge, cover it loosely with plastic wrap or foil. It's best within the first couple of days, but will keep well for 4 to 5.

    Can you freeze it?

    Yes, cheesecake freezes well, and you can freeze it in slices or whole. If freezing whole, I like to keep it in the springform pan. Wrap several times in plastic wrap and foil and it will keep for up to a month. For individual slices, it's best to freeze them solid on a baking sheet before wrapping and placing in a container or freezer bag.

    Thaw frozen cheesecake in the fridge overnight before enjoying.

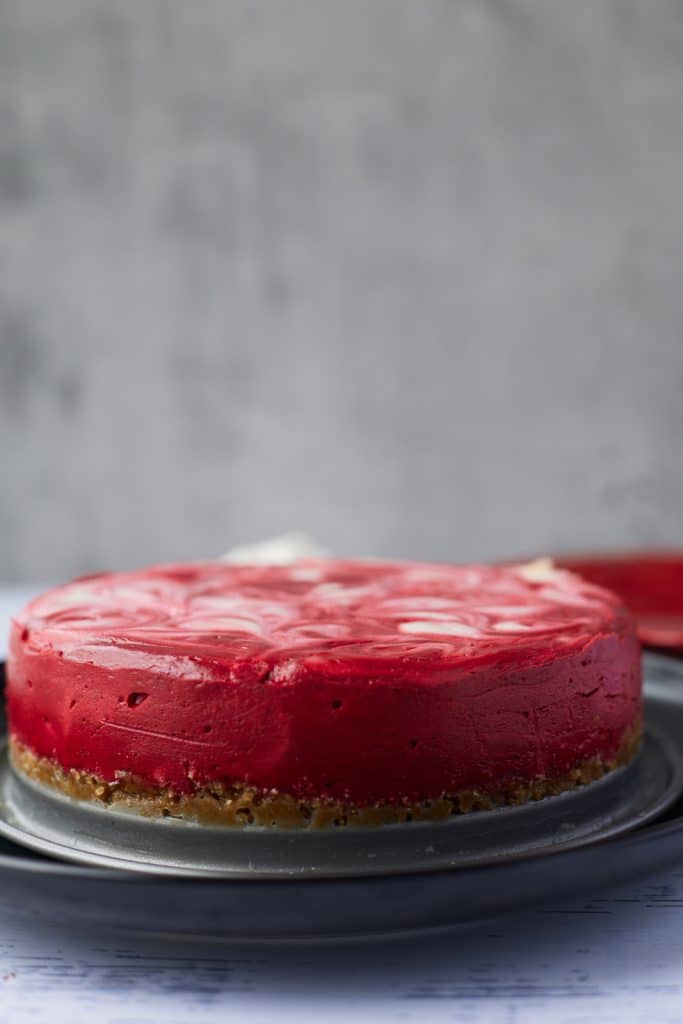
    Side view of the red velvet cheesecake.

    Recipe Notes and Tips

    • Take care not to over mix the batter.
    • Natural release the pressure for the Instant Pot so that the cheesecake doesn't cool too quickly.

    More Pressure Cooker Recipes

    • Instant Pot Carrot Cake Cheesecake
    • Instant Pot Chocolate Molten Cake Bites
    • Pressure Cooker Lemon Curd
    • Instant Pot Rice Pudding
    red velvet cheesecake on black plate
    Print Recipe
    5 from 4 votes

    Red Velvet Cheesecake

    This delicious red velvet cheesecake is a wonderful treat for Valentine's Day, or any time of the year!
    Prep Time15 minutes mins
    Cook Time35 minutes mins
    Natural release10 minutes mins
    Total Time1 hour hr
    Course: Dessert
    Cuisine: American
    Keyword: instant pot cheesecake, pressure cooker cheesecake, velentines day cheesecake
    Servings: 8 servings
    Calories: 381kcal
    Author: Tanya Harris

    Ingredients

    Crust

    • ¾ cups ginger cookie crumbs crushed in a food processor
    • 1 Tablespoon sugar
    • 3 Tablespoon unsalted butter

    Filling

    • 2 8 oz packs cream cheese softened
    • ¾ cup granulated sugar
    • ¼ teaspoon salt
    • ¼ cup sour cream
    • 1 large egg
    • 1 ½ teaspoon vanilla extract
    • 1 teaspoon distilled vinegar
    • 2 Tablespoon cocoa powder
    • 2 oz red food coloring

    Instructions

    Prepare the crust

    • Place cookie crumbs, sugar, and unsalted butter in a medium sized bowl and stir until combined. Place in the bottom of a greased 7 inch springform pan. Set aside.

    Prepare the filling

    • Place cream cheese, granulated sugar, and salt in a large bowl. Using a hand mixer, eat the cream cheese and sugar on medium speed until combined. Add sour cream, egg, vanilla extract, and vinegar and beat on medium speed until well blended. Remove about ¼ cup of the batter mixture and set aside.
    • Add cocoa powder and food coloring to the bowl and beat until incorporated. Pour this mixture into the prepared springform pan and smooth the top.
    • Place the ¼ cup of set aside batter mixture on top of the cheesecake and create a swirl with a chopstick or toothpick.
    • Cover springform pan with foil paper.
    • Add 1 cup of water to Instant Pot. Add cake to Instant Pot on trivet or bakeware sling.
    • Cook on high pressure for 35 minutes, allowing for natural release for 10 minutes.
    • Remove cake and allow to cool on the counter, then transfer to the fridge. Refrigerate 2-24 hours, the longer the better.

    Notes

    • Take care not to over mix the batter.
    • Natural release the pressure for the Instant Pot so that the cheesecake doesn't cool too quickly.

    Nutrition

    Calories: 381kcal | Carbohydrates: 32g | Protein: 5g | Fat: 27g | Saturated Fat: 15g | Cholesterol: 98mg | Sodium: 322mg | Potassium: 152mg | Fiber: 1g | Sugar: 24g | Vitamin A: 967IU | Calcium: 78mg | Iron: 1mg

    Air Fryer Grilled Cheese (3 Ways)

    January 19, 2021 by Tanya Harris 6 Comments

    grilled cheese sandwich in basket

    Level up your grilled cheese game with your trusty air fryer, the results are out of this world and you will have the best grilled cheese on your hands in minutes. Choose from classic cheddar cheese, garlic butter grilled cheese or a BLT!

    A grilled cheese cut in half.

    This post contains affiliate links, please read my full disclaimer here.

    You’ll find the full recipe with ingredient amounts and instructions in the recipe card at the bottom of this post. Be sure to check out the blog post itself for extra tips and tricks!

    Grilled cheese is one of my favorite things in the world, and I know I am not alone!

    This air fryer grilled cheese recipe is one of the most popular in my kitchen, and let me tell you, once you make them like this, you will never cook them on the stovetop again!

    The toast is so perfectly crisp and the cheese is melted all the way through, the hardest thing is choosing which sandwich to make!

    If you love these, be sure to try my Breakfast Sandwiches and Garlic Butter Cheese Steak Sandwiches!

    How to make air fryer grilled cheese

    Cheddar Cheese or Garlic Butter Grilled Cheese

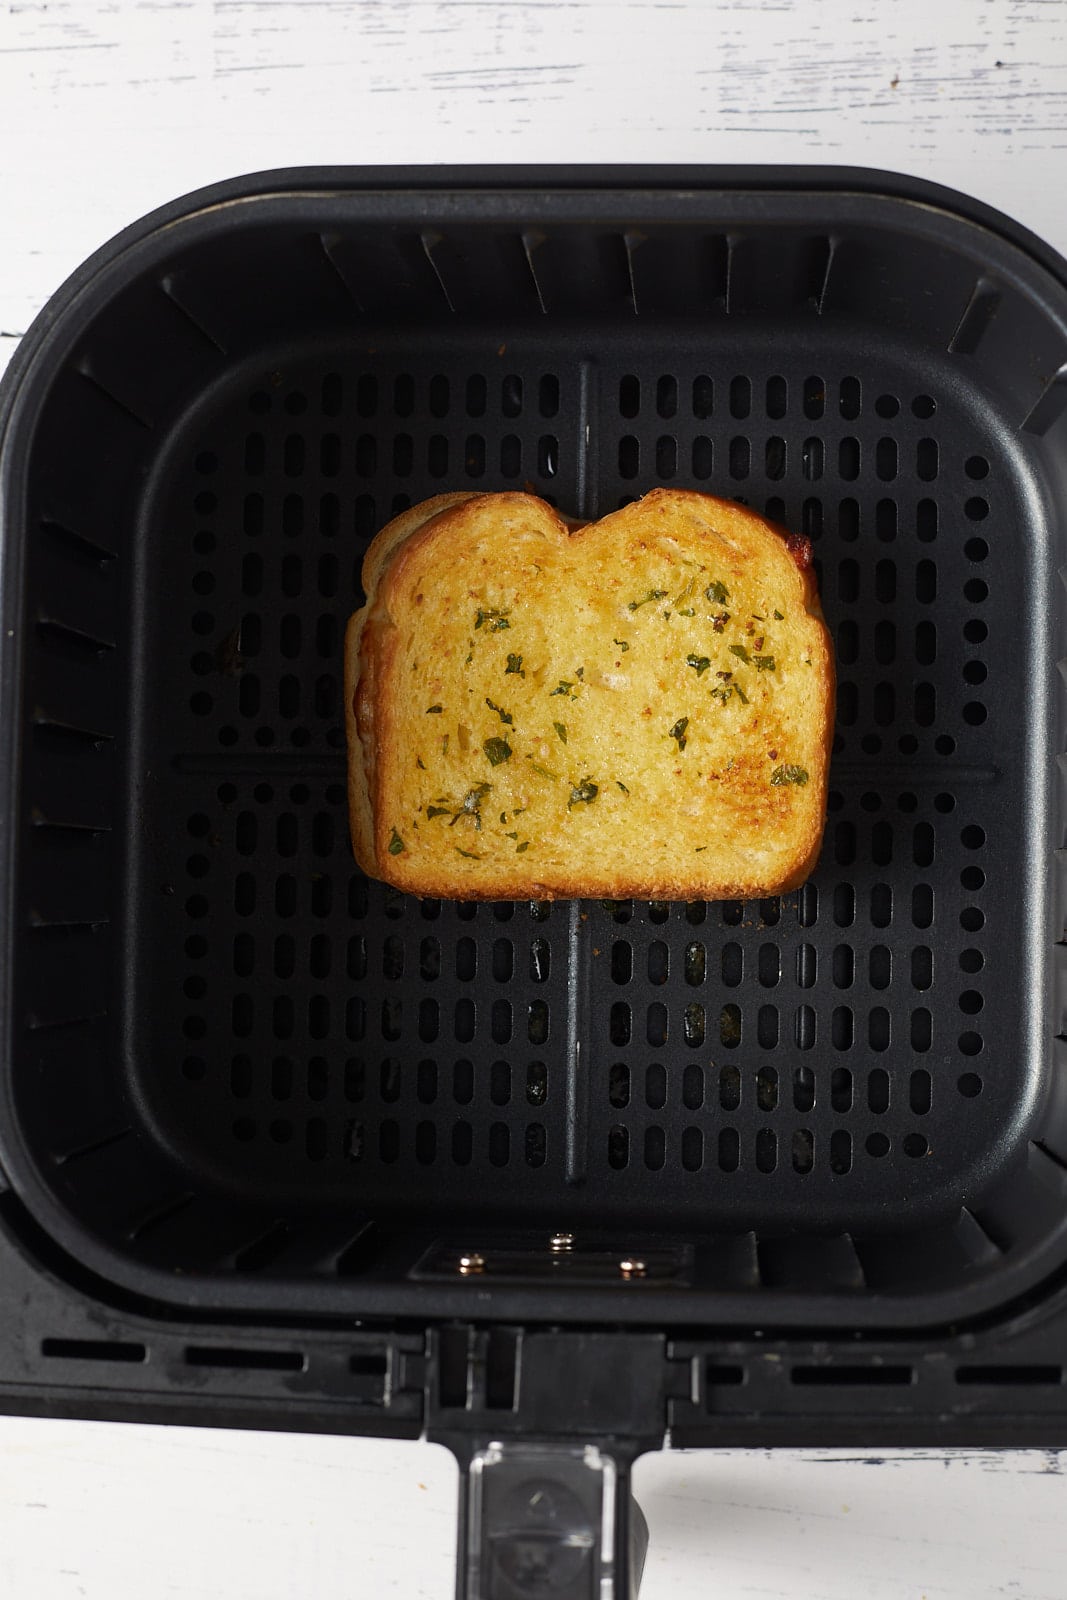
    Preheat the air fryer to 360 degrees Fahrenheit. Place mayonnaise, butter, or garlic butter on one side of each side of the bread. Place cheese on the side of bread that does not have mayo or butter. Put the sides of bread with cheese on it together. Place in the preheated air fryer basket and cook for 3 minutes.

    A grilled cheese in the air fryer basket before being cooked.

    Open the air fryer basket, flip, and cook for an additional 2 minutes or until the bread is toasty and the cheese has melted.

    The grilled cheese in an air fryer basket.

    Remove from air fryer and enjoy.

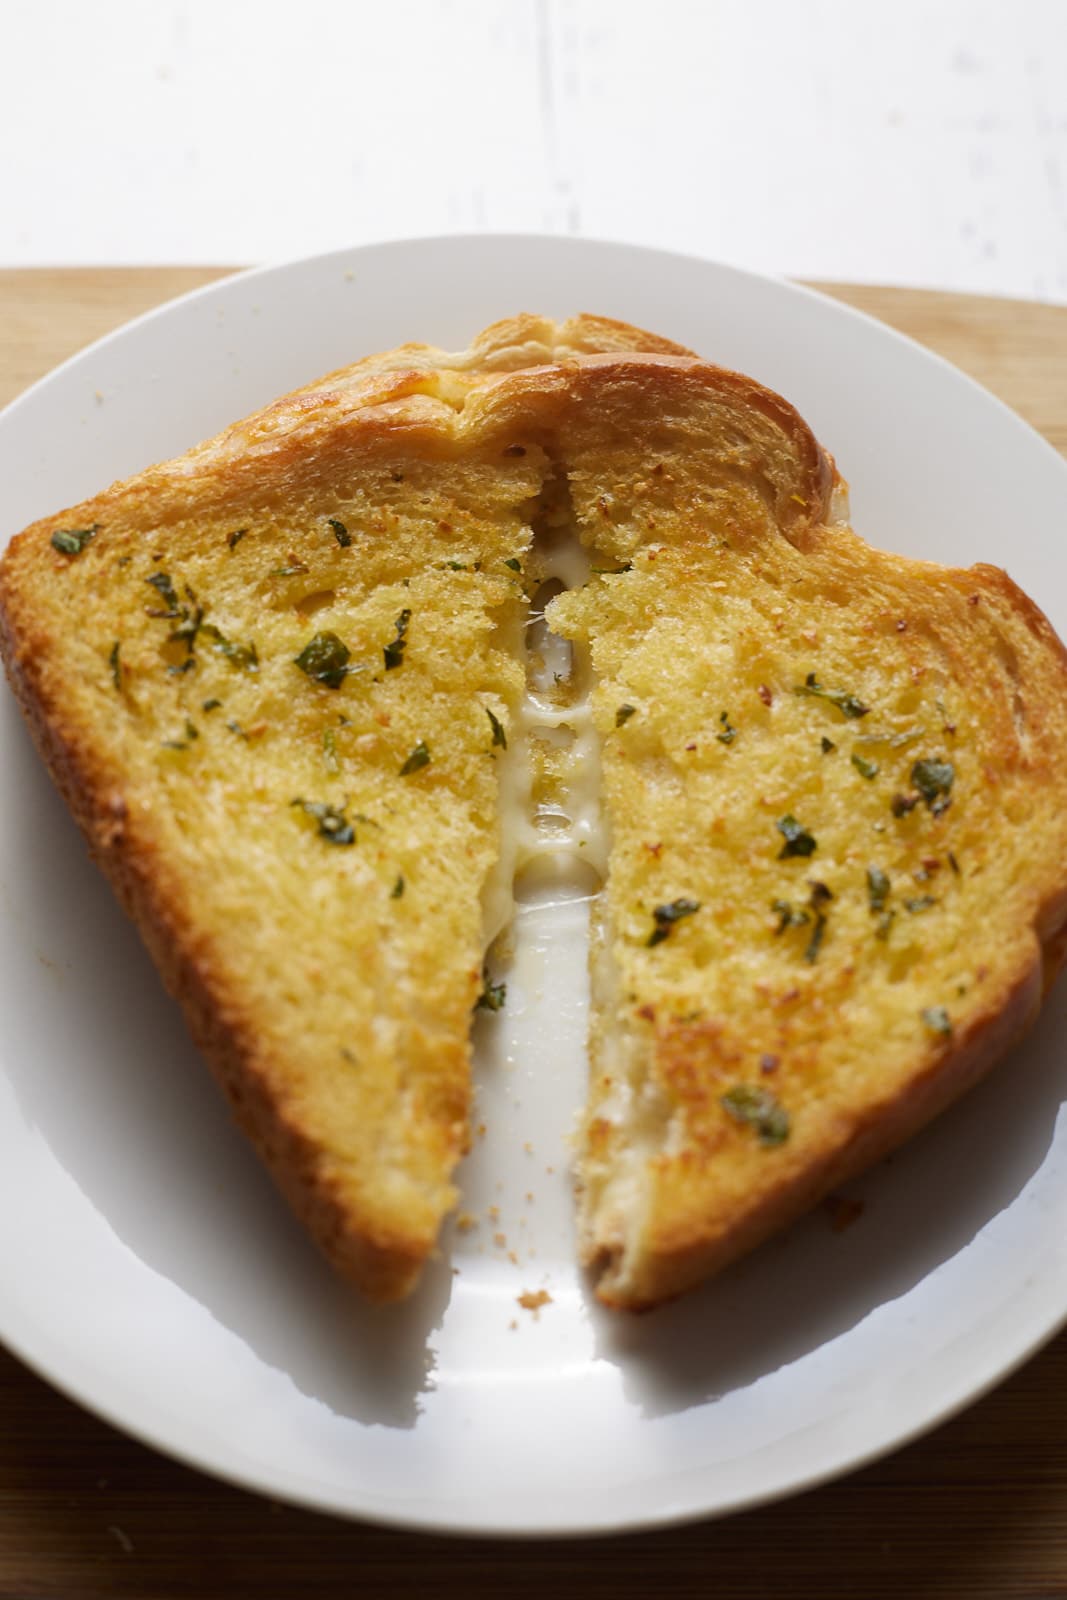
    A grilled cheese sandwich on a white plate cut into two triangles.

    BLT Grilled Cheese

    Preheat the air fryer to 360 degrees Fahrenheit. Place mayonnaise or butter on one side of each side of the bread. Place cheese on the side of bread that does not have mayo.

    Lay the bread on top of each other in a way that they are partially covered. This will make it easier to open the bread to add the remaining ingredients.

    Once slice of bread on top of cheese on a piece of bread in an air fryer.

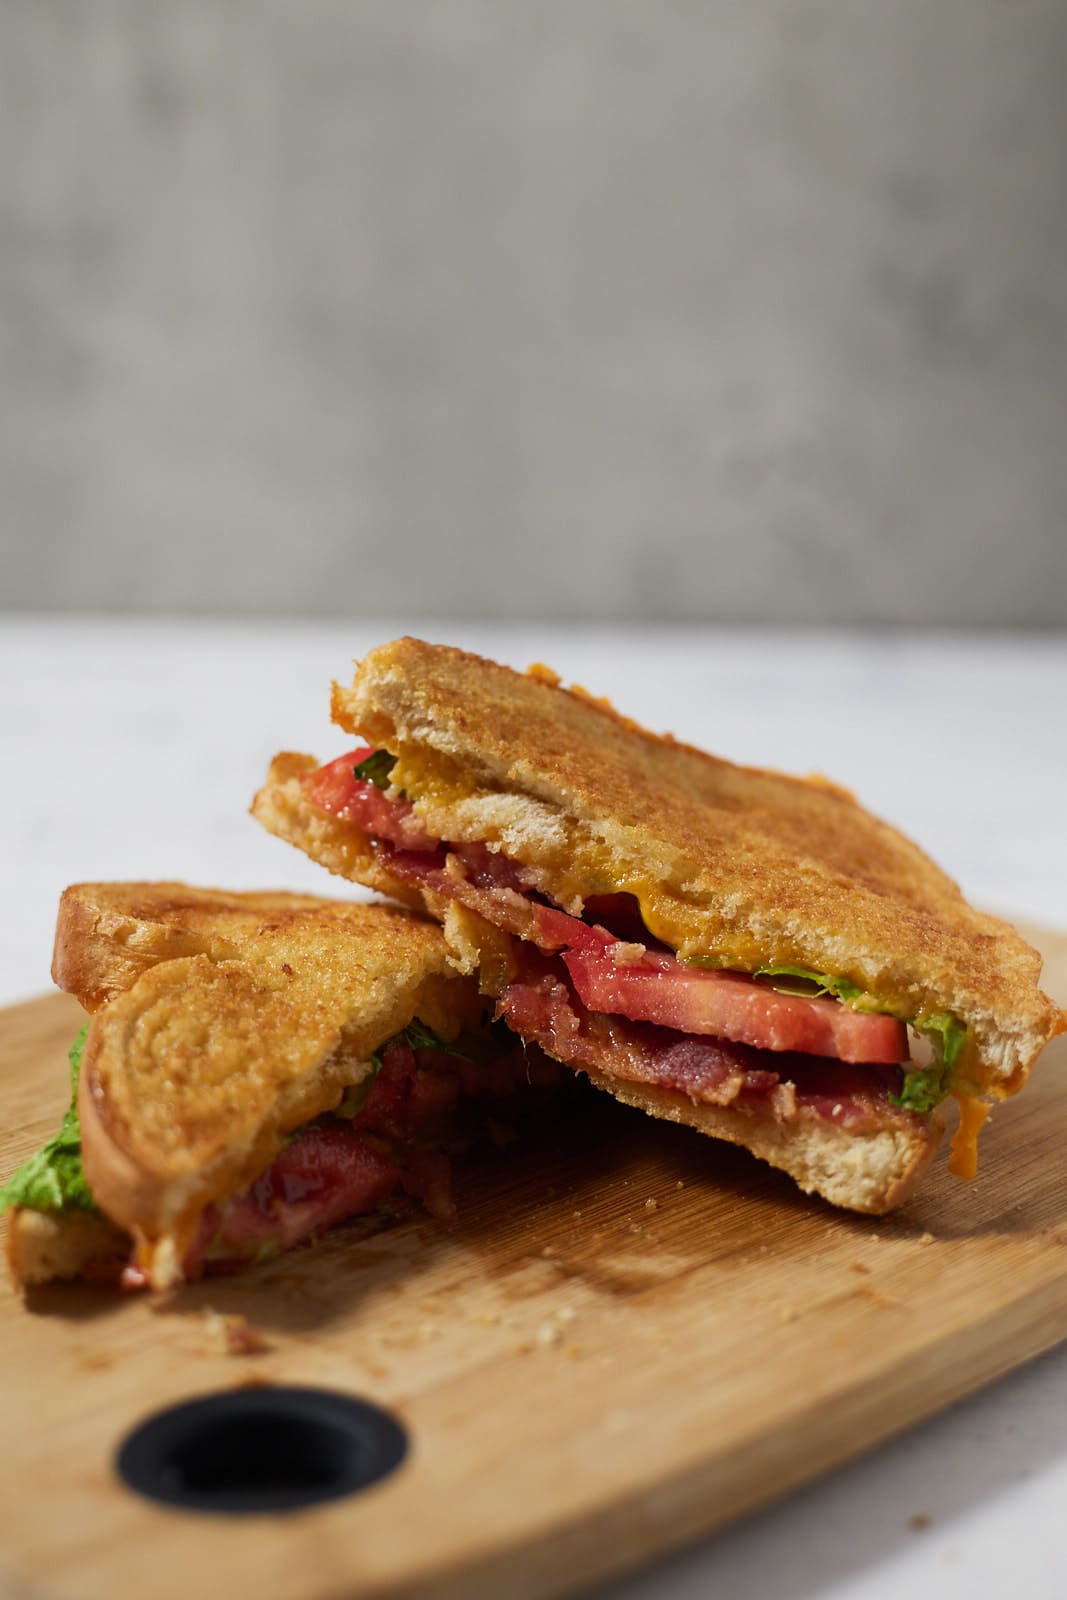
    Cook for 3 minutes. Open the sandwich and place bacon, tomato, and lettuce in the sandwich. Close the sandwich and flip the sandwich and cook for 2 minutes or until the bread is toasty.

    A BLT grilled cheese sandwich in the air fryer.

    Do you use mayo or butter for grilled cheese?

    You can use either butter or mayo for your grilled cheese. I prefer to use mayonnaise and if you haven't tried it yet, you must! The egg in the mayo helps to get the outside of the sandwich super crispy. It also has a higher heat point so you can easily get all the cheese melted without burning the outside. Butter also works well for this recipe. The garlic butter grilled cheese is one of my favorites.

    What do you serve it with?

    A grilled cheese is perfect for literally any occasion! This air fryer recipe is a great go to for a quick and tasty lunch. You can easily make it into a fuller meal by serving it with a side of fries and tomato soup.

    Variations

    A grilled cheese is so easy to make your own! These three recipes are always my go-to, but you can easily add in other ingredients that you have. Mix up your cheeses, or try adding in some shredded bbq chicken or thinly sliced steak.

    A BLT grilled cheese cut in half on a wooden chopping board.

    Recipe Notes and Tips

    You can use whatever bread you prefer for your grilled cheese. If using sliced sourdough bread, you may need an additional minute or two to get the nice golden crust.

    More Air Fryer Recipes

    • Crispy Air Fryer Bacon
    • Air Fryer Crab Legs
    • Easy Air Fryer Pizza
    • Air Fryer Crispy Fried Shrimp
    • Air Fryer Calzones
    A grilled cheese cut in half.
    Print Recipe
    5 from 1 vote

    Air Fryer Grilled Cheese (3 Ways)

    Level up your grilled cheese game with your trusty air fryer, the results are out of this world and you will have the best grilled cheese on your hands in minutes.
    Prep Time5 minutes mins
    Cook Time5 minutes mins
    Total Time10 minutes mins
    Course: Sandwich
    Cuisine: American
    Keyword: Air fried grilled cheese, BLT grilled cheese, how to make grilled cheese in an air fryer
    Servings: 1 grilled cheese
    Calories: 365kcal
    Author: Tanya Harris

    Equipment

    • Large Air Fryer

    Ingredients

    Cheddar Cheese Grilled Cheese

    • 2 Slices of white bread
    • 2 slices of cheddar cheese
    • 1 Tablespoon mayonnaise or butter

    Garlic Butter Grilled Cheese

    • 2 slices of white bread
    • 1 slices of provolone
    • 1 slices of mozzarella
    • 1 Tablespoon garlic herb butter

    BLT Grilled Cheese

    • 2 slices of white bread
    • 2 slices of cheddar cheddar cheese
    • 2 Slices of thick cut bacon cooked
    • 1 Roma tomato sliced thinly
    • 1 lettuce
    • 2 Tablespoon mayonnaise or butter

    Instructions

    For Cheddar Cheese and Garlic Butter Grilled Cheese

    • Preheat the air fryer to 360 degrees Fahrenheit. Place mayonnaise or butter on one side of each side of the bread. Place cheese on the side of bread that does not have mayo. Put the bread together. Place in the preheated air fryer basket and cook for 3 minutes. Open the air fryer basket, flip, and cook for an additional 2 minutes or until the bread is toasty and the cheese has melted.

    BLT Grilled Cheese

    • Preheat the air fryer to 360 degrees Fahrenheit. Place mayonnaise or butter on one side of each side of the bread. Place cheese on the side of bread that does not have mayo. Lay the bread on top of each other in a way that they are partially covered. This will make it easier to open the bread to add the remaining ingredients. Cook for 3 minutes. Open the sandwich and place bacon, tomato, and lettuce in the sandwich. Flip the sandwich and cook for 2 minutes or until the bread is toasty.

    Video

    Notes

    • You can use whatever bread you prefer for your grilled cheese. If using sliced sourdough bread, you may need an additional minute or two to get the nice golden crust.
    • Nutritional values are for one cheddar cheese grilled cheese sandwich.

    Nutrition

    Calories: 365kcal | Carbohydrates: 25g | Protein: 13g | Fat: 23g | Saturated Fat: 9g | Cholesterol: 42mg | Sodium: 546mg | Potassium: 58mg | Fiber: 1g | Sugar: 3g | Vitamin A: 341IU | Calcium: 375mg | Iron: 2mg

    Pressure Cooker (Instant Pot) BBQ Chicken

    January 12, 2021 by Tanya Harris 3 Comments

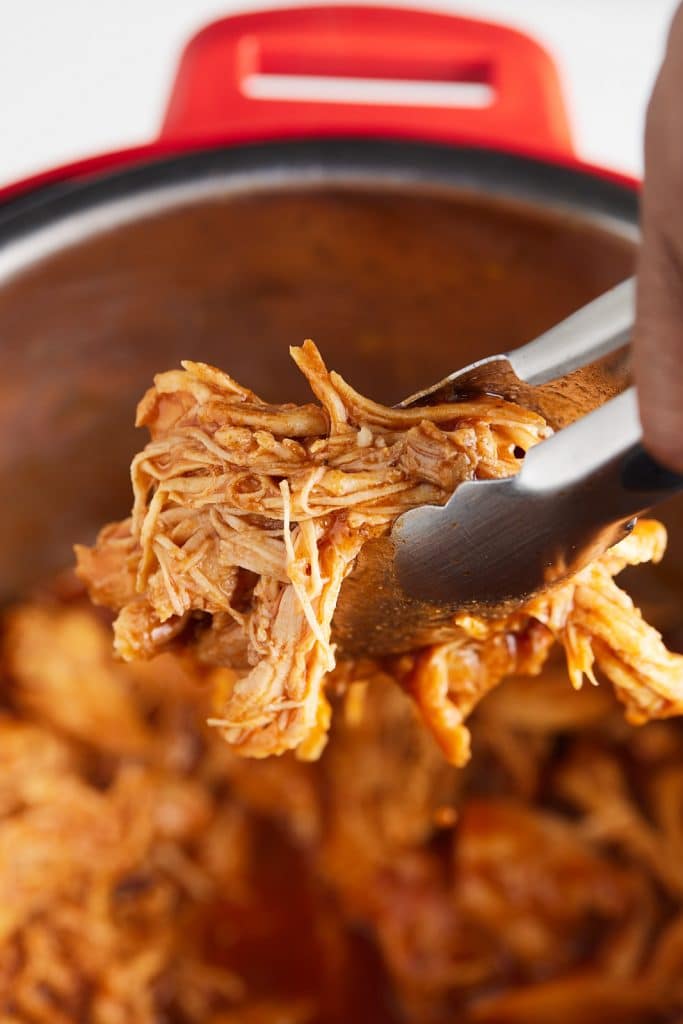
    Shredded BBQ chicken being picked up with tongs.

    It's so quick and easy to make a batch of shredded BBQ chicken in your pressure cooker. You just need four ingredients and it's ready to enjoy in less than 30 minutes!

    Shredded BBQ chicken being picked up with tongs.

    This post contains affiliate links, please read my full disclaimer here.

    You’ll find the full recipe with ingredient amounts and instructions in the recipe card at the bottom of this post. Be sure to check out the blog post itself for extra tips and tricks!

    Time to grab you Instant Pot and make the most delicious pulled BBQ chicken for all your sandwich needs! This pressure cooker BBQ chicken is a true dump and go recipe and it results in the most flavorful shredded chicken.

    This is a great go to BBQ chicken recipe when you are running short on time and have hungry mouths to feed!

    For more BBQ recipes, be sure to try my BBQ Ribs and Sticky Chicken Legs!

    How to make pressure cooker BBQ chicken

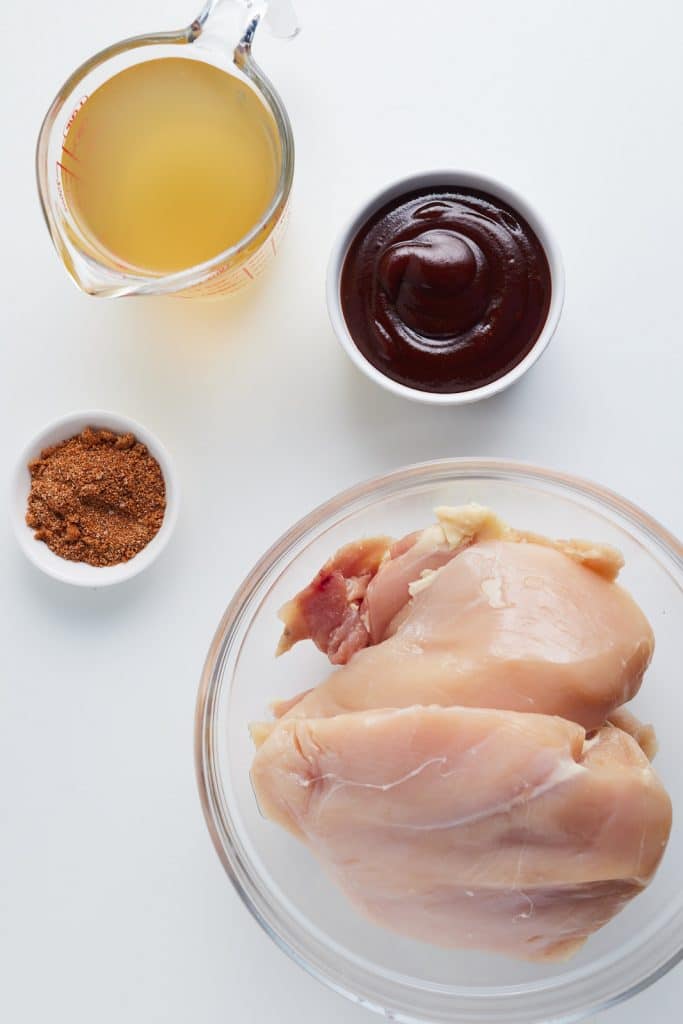
    • Gather your ingredients.
    The ingredients for the recipe ready to use.
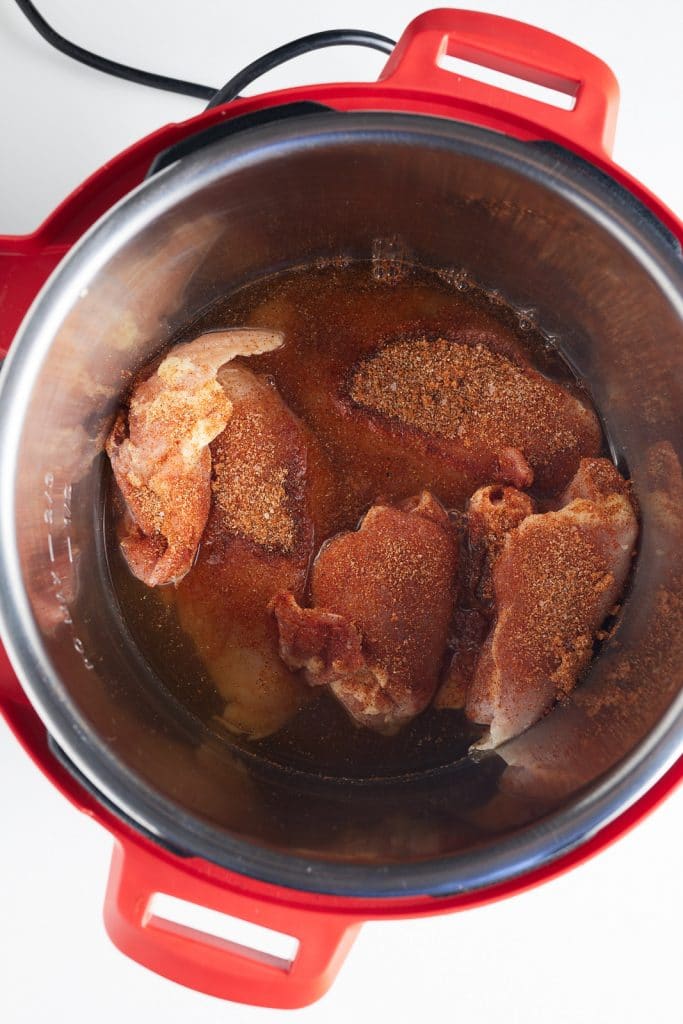
    • Place chicken, chicken broth, and bbq seasoning in pressure cooker insert.
    The chicken and other ingredients in the Instant Pot ready to cook.
    • Close and cook high pressure for 14 min.
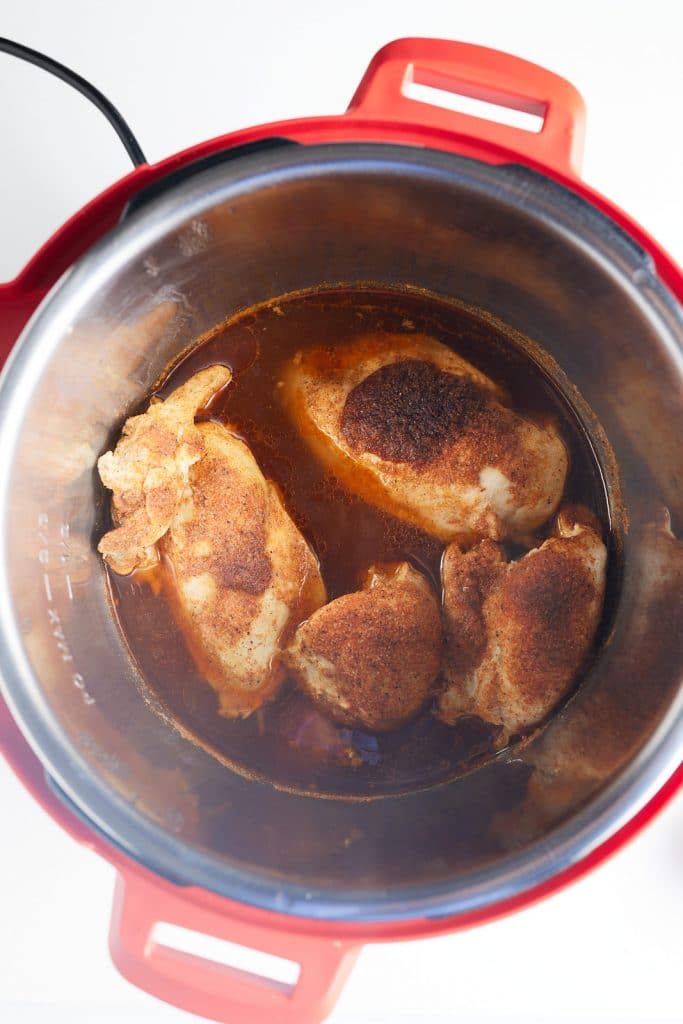
    • After the 14 minutes, allow the pressure cooker to naturally release for 10 min. Quick release any remaining pressure.
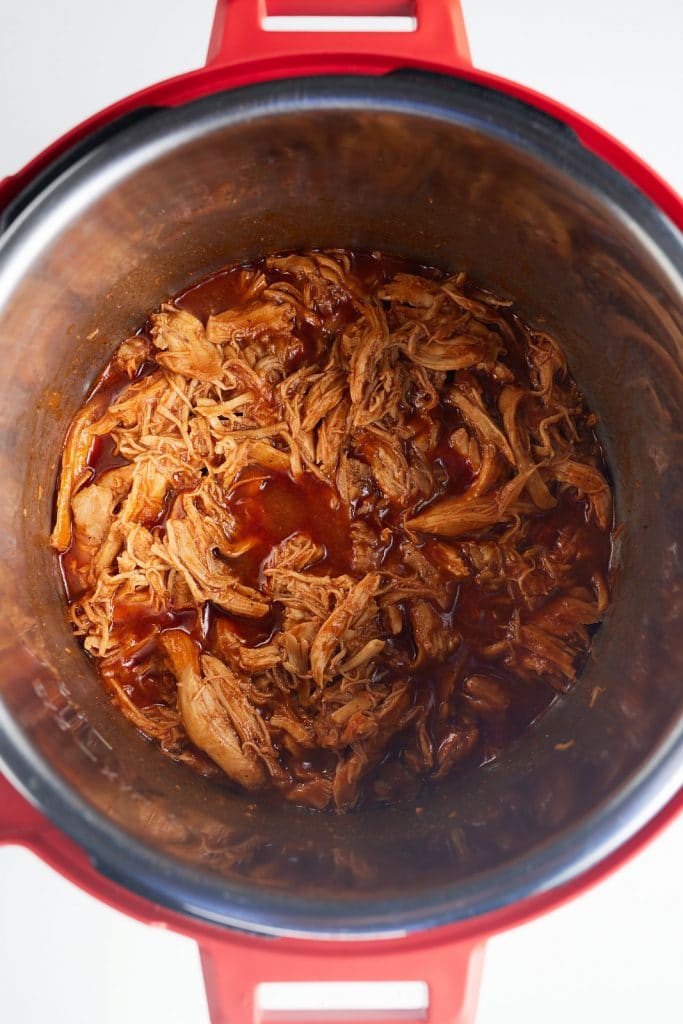
    The chicken in the pressure cooker after cooking.
    • Remove chicken and place in a large bowl and shred.
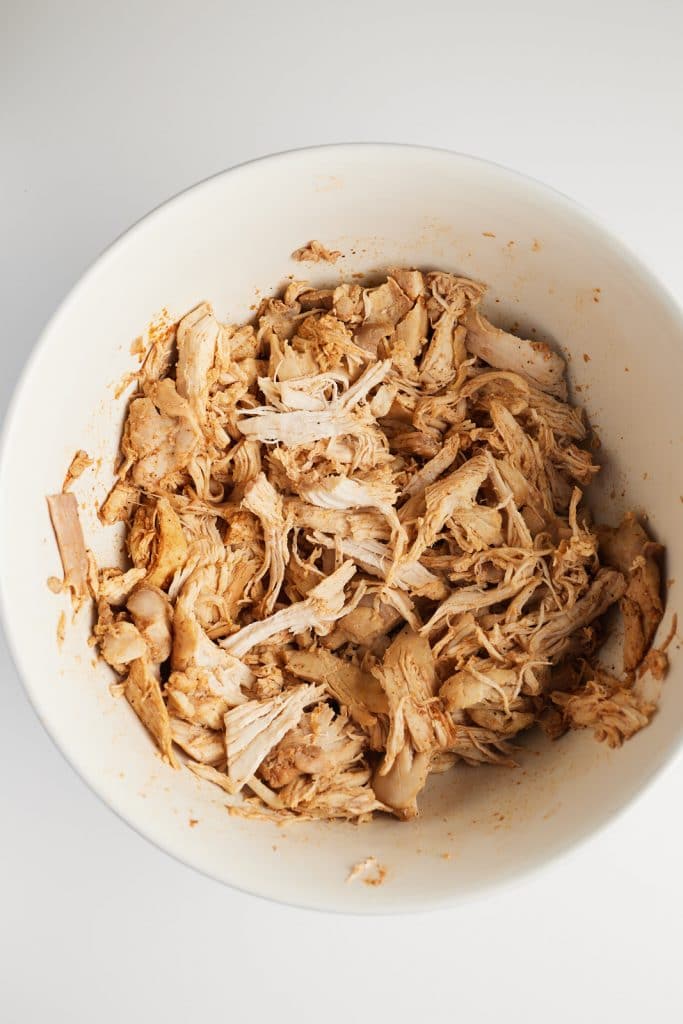
    Shredded chicken in a white bowl.
    • Add bbq sauce and serve how you like.
    BBQ sauce being stirred into the shredded chicken.

    What's the best cut of chicken to use?

    I find the best shredded BBQ chicken is made with a mixture breast and thighs for optimal texture and flavor. The thighs contain more fat to keep the chicken nice and juicy, as well as having a deeper flavor. You can use one or the other if you choose. Use skinless and boneless chicken so that it is easy to shred.

    What's the best BBQ sauce to use?

    You can use your favorite BBQ sauce for this recipe. If you are following a low carb or keto diet, use a sugar free sauce. If you have time, be sure to whip up a batch of my tangy BBQ sauce, otherwise your go to store bought bottle will work just great.

    As far as the seasoning to use in this recipe, my homemade bbq seasoning is perfect.

    Can you make it ahead of time?

    This pressure cooker BBQ chicken is great for meal prep and freezer meals.

    Refrigerate: Make the recipe and let the chicken cool to room temperature. Place it in an airtight container and it will keep well in the fridge for up to 4 days.

    Freeze: Make the recipe and let the chicken cool to room temperature. Place it in a ziplock bag, removing as much air as possible. It will keep well frozen for up to 3 months. Defrost in the fridge overnight before reheating.

    Reheat the chicken on the stovetop on a medium heat, stirring occasionally until heated through.

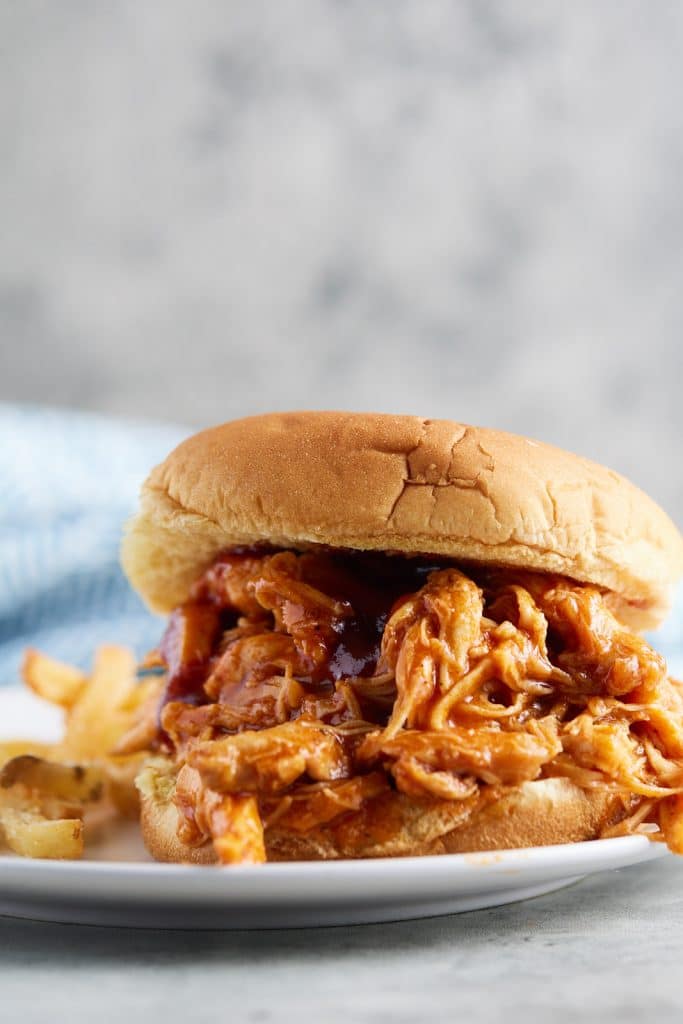
    BBQ shredded chicken served in a bun.

    Recipe Notes and Tips

    • The chicken needs to be naturally released from pressure. Do not quick release until after 10 minutes.
    • This is great to use as sandwiches, over rice, on pizza, and so much more.
    • Do not add the bbq sauce to the pressure cooker while it is pressure cooking.

    More Instant Pot Recipes

    • Instant Pot Chili
    • Creamy Instant Pot Chicken Tacos
    • Pressure Cooker Rice Pudding
    • Hearty Instant Pot Vegetable Soup
    Close up of pressure cooker BBQ chicken served in a burger bun.
    Print Recipe
    5 from 2 votes

    Pressure Cooker BBQ Chicken

    It's so quick and easy to make a batch of shredded BBQ chicken in your pressure cooker. You just need four ingredients and it's ready to enjoy in less than 30 minutes!
    Prep Time5 minutes mins
    Cook Time14 minutes mins
    Release pressure10 minutes mins
    Total Time29 minutes mins
    Course: Main Course
    Cuisine: American
    Keyword: BBQ pulled chicken, how to make shredded chicken, Instant Pot shredded chicken
    Servings: 6 servings
    Calories: 465kcal
    Author: Tanya Harris

    Ingredients

    • 2 lbs boneless and skinless chicken ½ chicken breast, ½ chicken thighs
    • 1 cup chicken broth
    • 2 Tablespoon bbq seasoning
    • 1.5 cup bbq sauce

    Instructions

    • Place chicken, chicken broth, and bbq seasoning in pressure cooker insert.
    • Close and cook high pressure for 14 min.
    • After the 14 minutes, allow the pressure cooker to naturally release for 10 min. Quick release any remaining pressure.
    • Remove chicken and place in a large bowl and shred. Add bbq sauce and serve how you like.

    Notes

    • I prefer to use a combo of chicken breast and thighs for this recipe for optimal texture and flavor. You can use one or the other if you choose.
    • This is great to use as sandwiches, over rice, on pizza, and so much more.
    • Do not add the bbq sauce to the pressure cooker while it is pressure cooking.

    Nutrition

    Calories: 465kcal | Carbohydrates: 33g | Protein: 29g | Fat: 24g | Saturated Fat: 7g | Cholesterol: 113mg | Sodium: 985mg | Potassium: 517mg | Fiber: 1g | Sugar: 24g | Vitamin A: 502IU | Vitamin C: 6mg | Calcium: 92mg | Iron: 4mg

    Winter Fruit Salad

    January 7, 2021 by Tanya Harris Leave a Comment

    orange juice being poured over fruit salad

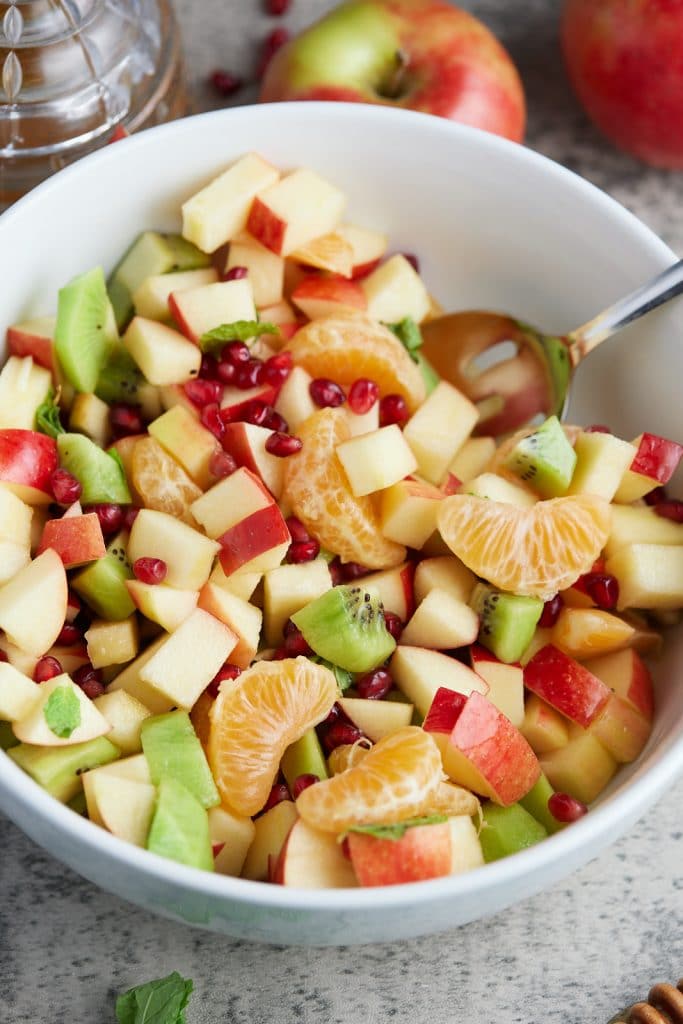
    This easy and delicious winter fruit salad recipe is the perfect side dish for breakfast, brunch, or an easy snack. Made with an array of fruits that are in season in the winter and tossed in a delicious orange and honey dressing. 

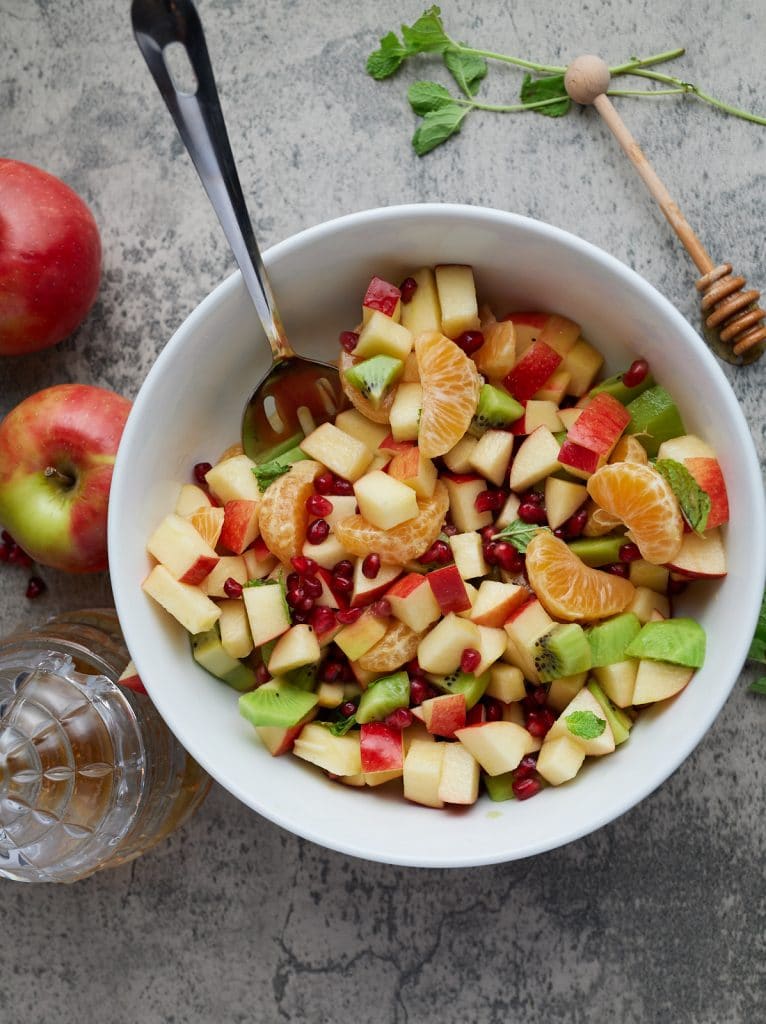
    white bowl with fruit salad inside of it with spoon sticking out in corner

    This post contains affiliate links, please read my full disclaimer here.

    You’ll find the full recipe with ingredient amounts and instructions in the recipe card at the bottom of this post. Be sure to check out the blog post itself for extra tips and tricks!

    Brrr, it’s cold outside. And the only thing I can truly appreciate about this weather are the cute clothes, hot chocolate, and this healthy winter salad. Ha.

    All jokes aside, this salad is so easy you’ll want to make it weekly. It’s perfect for a small gathering or simply for meal prep. Just make the salad ahead of time and enjoy. 

    How to Make a Winter Fruit Salad

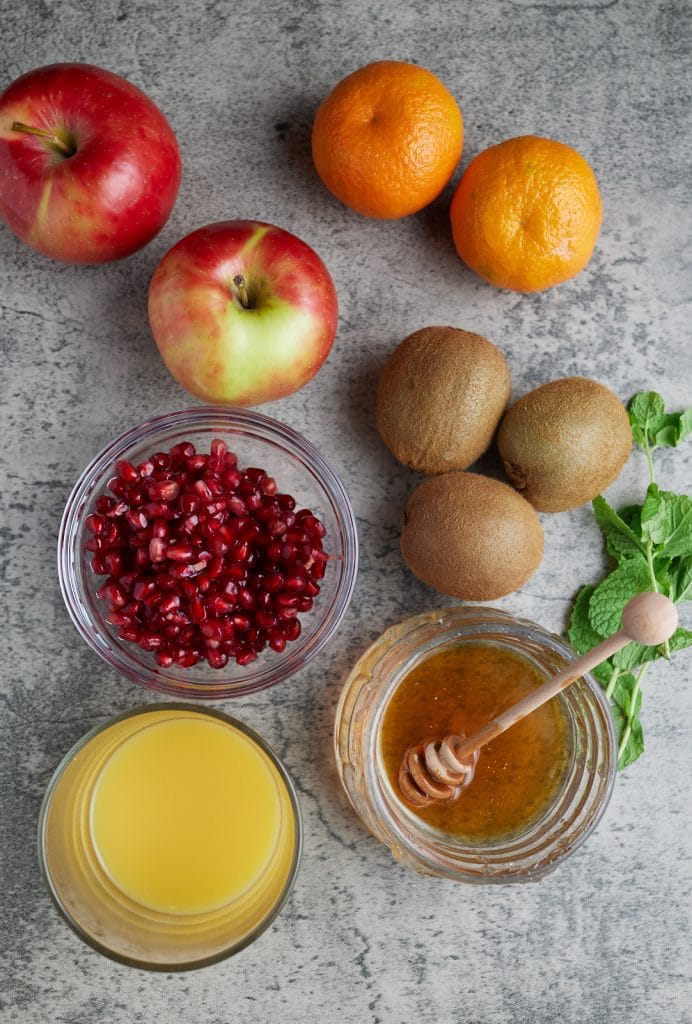
    Gather some of your favorite fruit that is in season in Winter and peel and chop them (except the apples, keep the skin on). Buying fruit that is in season will be cheaper and the quality will be much better. 

    ingredient photo of apples, clementines, kiwi, promegranate seeds, honey, orange juice, and mint leaves

    I opted for apples, kiwi, clementines, and pomegranate seeds. I also added some copped mint for an added burst of flavor. 

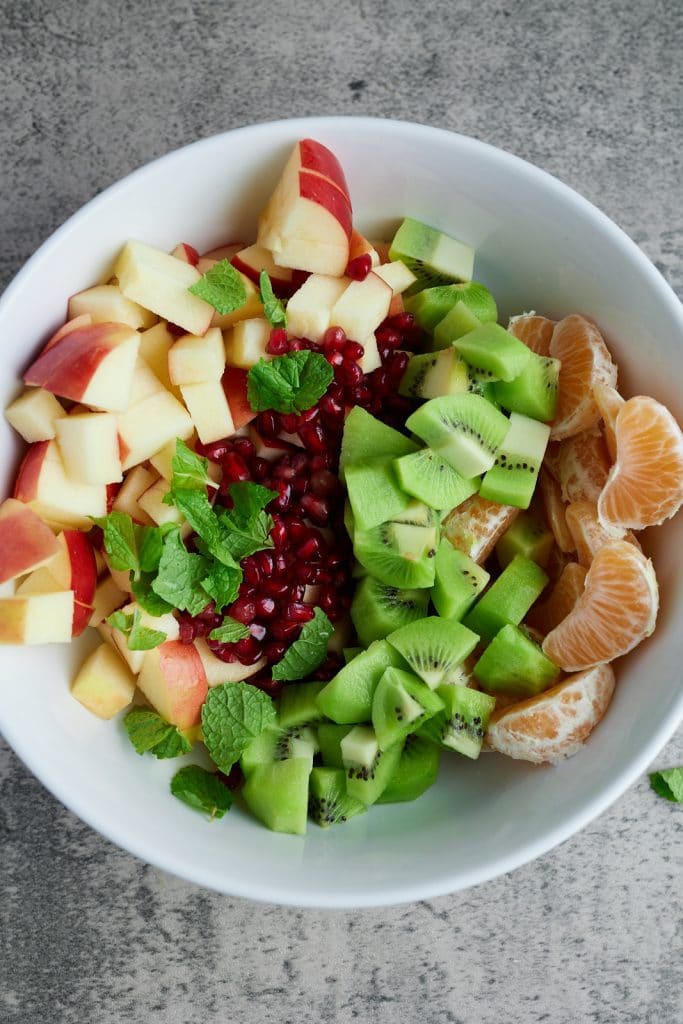
    Place the cut fruit in a large bowl. 

    various fruits in white bowl in rows

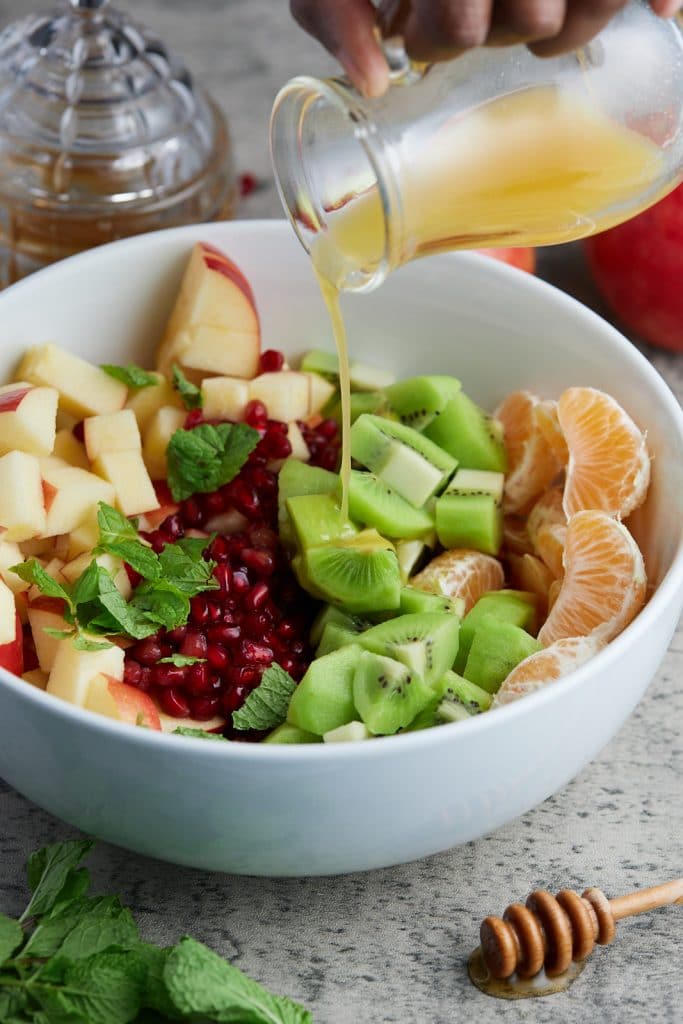
    Prepare the dressing by combining orange juice and honey in a small bowl and whisking until combined. Pour the dressing over the fruit and toss until combined.

    Fun fact, the citric acid, in the orange juice, will allow your apples to avoid turning brown for a couple of days. 

    orange juice being poured over fruit salad

    And there you have it, an easy, really easy, winter fruit salad. 

    winter fruit salad in a white bowl with a honey pot and fruit surrounding it

    Looking for more brunch recipes? Try these out:

    • Zucchini Muffins
    • Homemade Biscuits
    • Million Dollar Bacon
    • Banana Fritters

    Watch this video tutorial and see how I make this Winter Fruit Salad from start to finish.

    orange juice being poured over fruit salad
    Print Recipe
    5 from 1 vote

    Winter Fruit Salad

    This easy and delicious winter fruit salad is the perfect side dish for breakfast, brunch, or an easy snack. Made with an array of fruits that are in season in the winter and tossed in a delicious orange and honey dressing.
    Prep Time10 minutes mins
    Cook Time0 minutes mins
    0 minutes mins
    Total Time10 minutes mins
    Course: Breakfast
    Cuisine: American
    Keyword: fruit salad, winter fruit salad
    Servings: 6 people
    Calories: 101kcal
    Author: Tanya Harris

    Ingredients

    • 2 large apples chopped, honey crisp preferred
    • 2 kiwi fruit peeled and chopped
    • 2 clementines peeled and separated
    • 1 cup pomegranate seeds
    • 2 Tablespoon mint leaves finely chopped
    • ¼ cup orange juice
    • 1 Tablespoon honey

    Instructions

    • Place fruit and mint leaves in a large bowl.
    • In a separate small bowl, add orange juice and honey and whisk until combined. Pour over fruit and toss until combined.

    Video

    Notes

    • This salad can be made up to 3 days ahead. Any longer than that and your fruit may get too soft and your apples will start to brown. You’ll want to store this in an airtight container if making ahead.
    • The flavors in this salad will get stronger overtime, especially the mint. 

    Nutrition

    Calories: 101kcal | Carbohydrates: 25g | Protein: 1g | Fat: 1g | Saturated Fat: 1g | Sodium: 3mg | Potassium: 298mg | Fiber: 4g | Sugar: 19g | Vitamin A: 151IU | Vitamin C: 51mg | Calcium: 28mg | Iron: 1mg

    Air Fryer Basket vs Air Fryer Toaster Oven, Side by Side

    January 4, 2021 by Tanya Harris 60 Comments

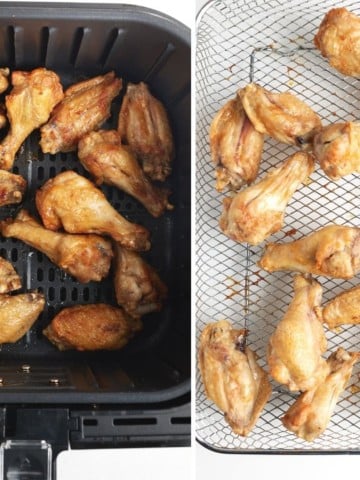
    side by side of chicken wings in basket and air fryer tray

    Many people have either an air fryer basket or an air fryer toaster oven and wonder how they can adapt recipes created for the basket to work in the oven. This blog post will provide you with a step-by-step breakdown of cooking in the basket vs the air fryer toaster oven. 

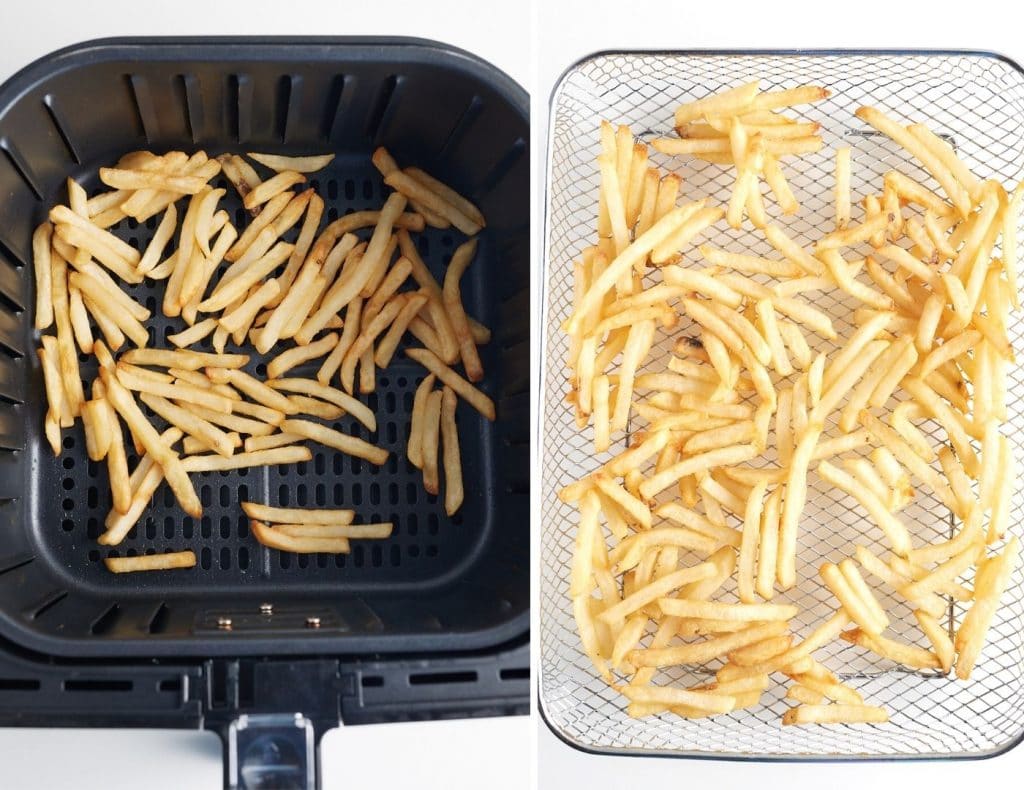
    french fries in air fryer basket on left, french fries in air fryer oven tray on right

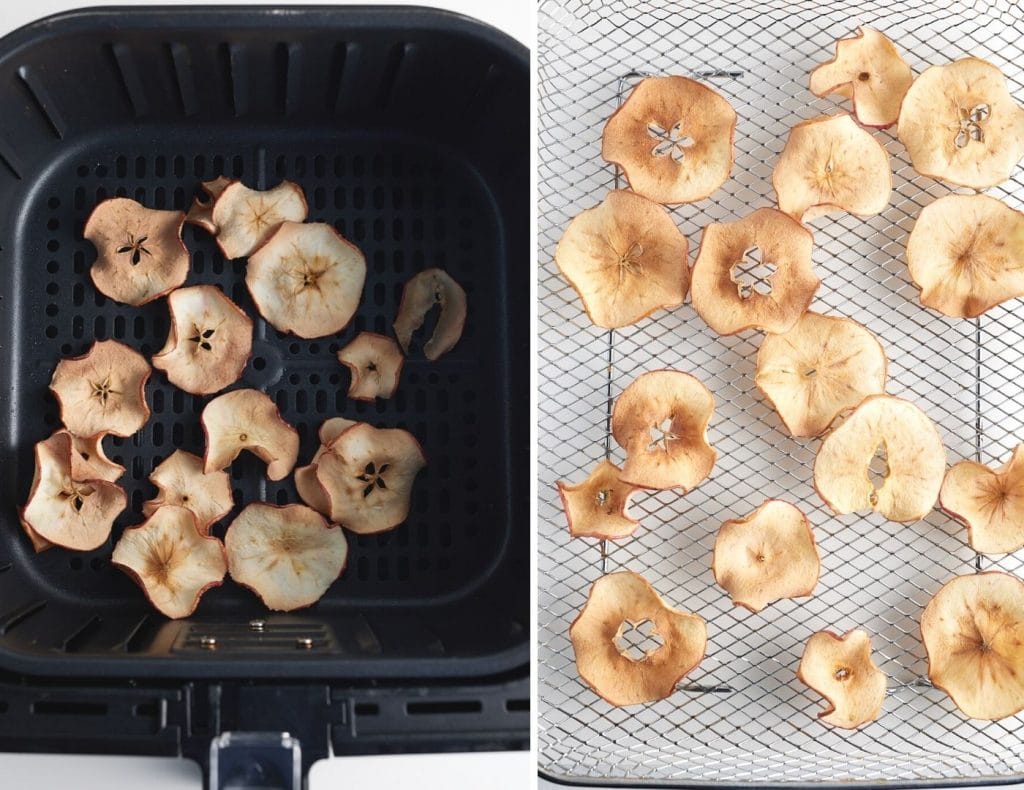
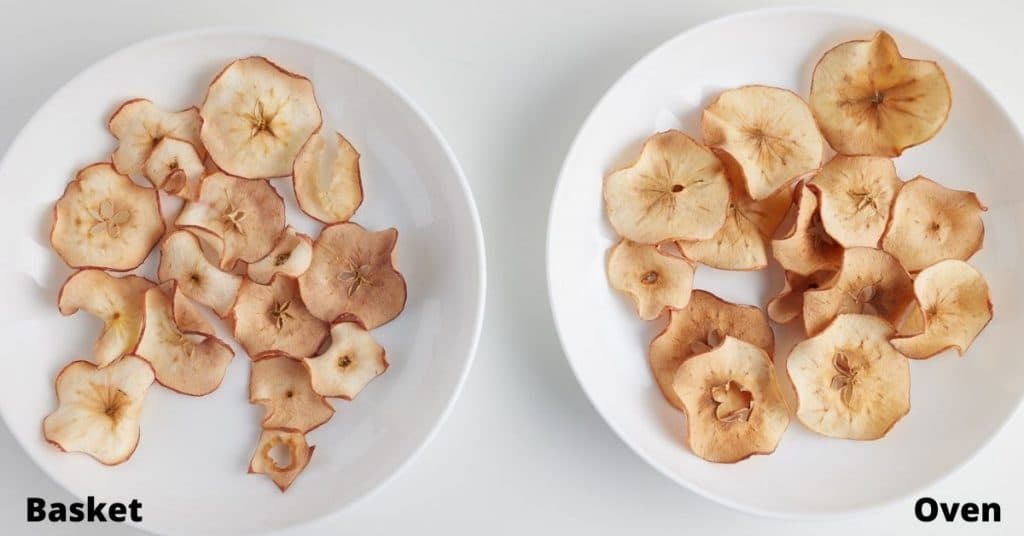
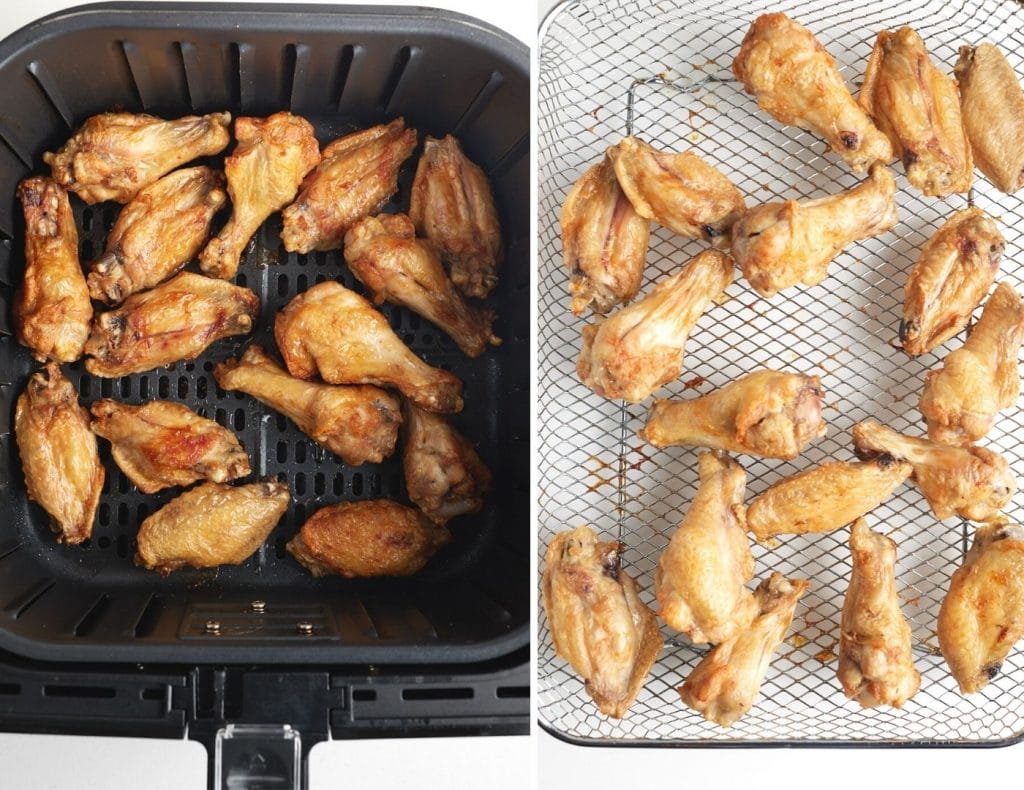
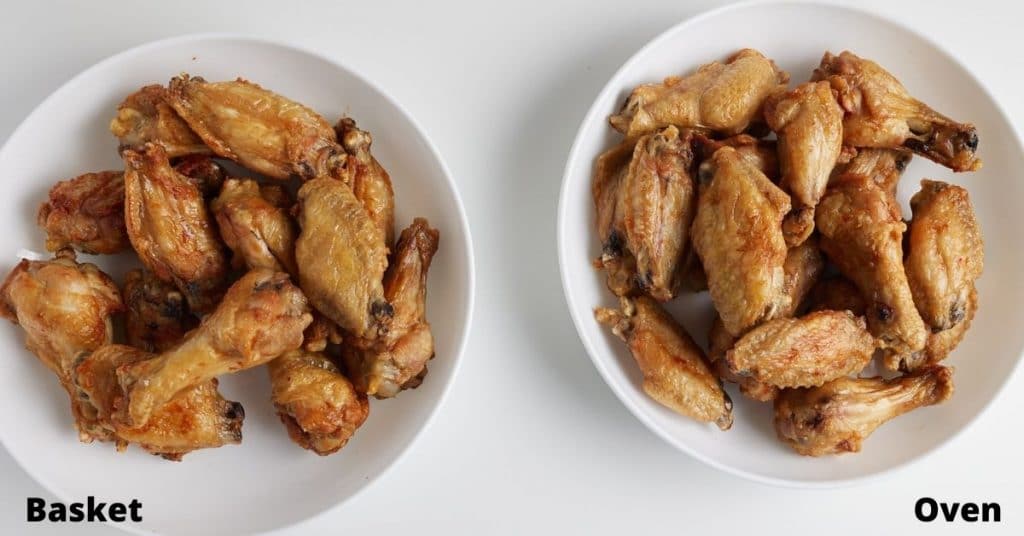
    As a collector of air fryers...Really, I couldn’t stop myself from buying shiny new models. I found myself wondering what the difference was between the air fryer basket and the air fryer oven. The apparent difference is that one is larger than the other (the ovens typically provide more cooking space). Another difference was that baskets provided a nice little handle that allowed me to shake my food. But what about the actual food? Did they produce different results?

    I took some time to note how three of my popular recipes performed in each machine. I chose to make and take note of the following recipes:

    1. Frozen French Fries  
    2. Air Fryer Apple Chips
    3. Air Fryer Chicken Wings

    Things you should know beforehand:

    All air fryer brands are not created the same, so the two I used could have different results from the ones you may have at home. However, your cook times shouldn’t be much different than mine. 

    For the basket, I used the Cosori 5.8qt and for the oven, I used the Instant Omni Plus Air Fryer Toaster Oven. 

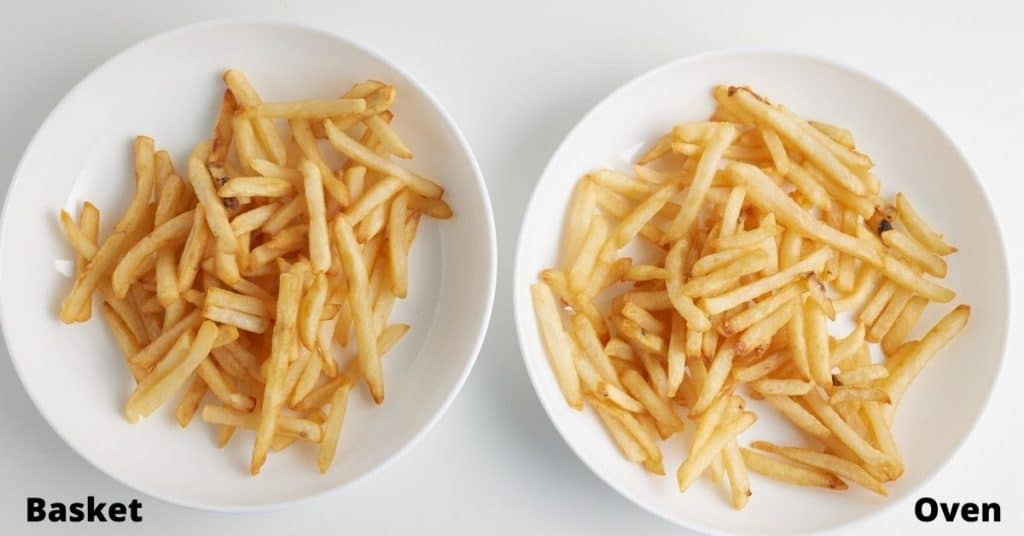
    For the first round of the air fryer basket vs air fryer toaster oven, let's start with frozen French fries...

    Air Fryer French Fries

    fries in air fryer basket on left and fries in air fryer tray for oven on right

    These air fryer French fries are the reason I bought an air fryer in the first place. I used frozen French fries for this side-by-side comparison. I typically air fry French fries anywhere from 8-12 minutes, depending on the type of fries and how thickly cut they are. 

    Amount: .75 lbs of frozen shoestring French fries.

    Preheat:  Both the basket and the oven were preheated at 400 degrees Fahrenheit for 5 minutes. Then, each was cooked at 400 degrees Fahrenheit until it reached the desired crispiness. 

    • Basket: The basket took 8 minutes to cook until it reached the desired crispiness. 
    • Oven: The oven took 13 minutes to cook until the desired crispness was achieved.
    cooked french fries on 2 white plates, with the text basket on left, the text oven on right
     
    • Winner: The basket, by a little...as it cooked a few minutes faster. 

    Air Fryer Apple Chips

    cooked apple slices in air fryer basket on left and apple slices in air fryer tray for oven on right

    These Air Fryer Apple Chips are another quick favorite snack for my girls and me. It’s just one way I can make them get that apple a day to keep the doctor away. I used 1 Gala apple for this recipe.  

    Amount: 1 large Gala apple sliced into 2.5mm slices.

    Preheat: None. I start apple chips from a cold basket. My air fryer oven does an automatic preheat time, so I adjusted the oven cook time to accommodate that. 

    • Basket: Cooked for 16 minutes to reach desired crispiness. 
    • Oven: Cooked for 17 minutes to reach the desired crispiness.
    2 white plates with cooked apple chips, text that says basket on left and text that says oven on right

    Winner: The oven, by a little. My husband said the ones in the oven tasted crispier. I thought they were the same. I’d say it’s a tie and with only a one-minute difference, I’d prefer to do these in the oven since there is more space.

    Air Fryer Chicken Wings

    These Air Fryer Chicken Wings are one of my all-time favorite things to make in the air fryer. So easy, crispy, and delicious. I cooked these wings without added seasonings to show the comparison.  

    cooked chicken wings in air freyr basket on left, cooked chicken wings in air fryer oven tray on right

    Amount: 1.83 lbs of chicken wings placed in each device. 

    Preheat: I preheated each machine to 400°F for 5 minutes before adding the wings.

    • Basket: Took 27 minutes to get the desired color and crispiness on these wings.
    • Oven: It took 38 minutes to achieve the desired color and crispiness on these wings. Please note that the wings in the photo above, on the right, show the oven wings pulled at 27 minutes. They were much lighter than the wings in the basket, so I added them back in until they were a deeper brown.  
    2 white plates with cooked chicken wings, text that says basket on left, text that says oven on right.

    Winner: The basket. The wings were done much faster. However, once I increased the time on the oven wings, I could not tell a difference.

    Conclusions:

    • Whether it’s the air fryer basket or the air fryer oven, both will cook faster than a conventional oven. An air fryer basket and oven typically take 5 minutes to preheat.  
    • The air fryer basket tends to cook foods a little faster than the air fryer oven, and the cooking time will vary between machines and types of food being cooked. 
    • The air fryer oven can hold more food. Although not pictured here, we use our air fryer oven to make pizza in the air fryer. We’re only able to fit one small-sized pizza in the air fryer basket. With the oven, we can fit two pan-sized pizzas side by side. 
    • When converting recipes created for an air fryer basket to an air fryer oven, plan to cook the recipes for a slightly longer time. As each air fryer is different, keep a close eye on the food. You can watch the food in the oven as it cooks, so you don't overcook it.

    I hope you found this side by side comparison helpful. If you’re looking for more helpful articles about air frying, check out these articles:

    • Air Fryer Tips
    • Easy Beginner Air Fryer Recipes
    • Top 10 Accessories for Air Fryers

    11 Delicious Air Fryer Breakfast Recipes

    December 21, 2020 by Tanya Harris 7 Comments

    biscuits in an air fryer basket

    Breakfast is the most important meal of the day and I love when it is quick and easy. That's where my Air Fryer comes in. I have so many amazing Air Fryer breakfast recipes here on My Forking Life. I wanted to compile them into an roundup post to make your meal planning a little easier!

    Air Fryer Recipes, Tips, and More!!

    Subscribe to get my exclusive Air Fryer newsletter and receive my 5 part Air Fryer Companion Guide!

      I won't send you spam. You can also unsubscribe at any time.

      Air Fryer Breakfast Recipes

      Air Fryer Breakfast Bakery Recipes

      blueberry biscuits on white plate with other biscuits in background

      Blueberry Biscuits

      These sweet biscuits are loaded with blueberries and drizzled with a delicious glaze. Super easy to make and you just need a handful of simple ingredients.

      biscuits in an air fryer basket

      Homemade Air Fryer Biscuits

      Not a fan of blueberries or looking to make biscuits and gravy? These Homemade Air Fryer Biscuits are so quick and easy to make and they come out perfect every single time! Wonderfully fluffy, these traditional biscuits are a great make-ahead side.

      air frter donuts on a plate

      Flaky Air Fryer Donuts

      These puff pastry air fryer donuts are wonderfully flaky and delicious! They are so quick and easy to make in the air fryer and require just 5 ingredients. Be warned, they are going to disappear quickly!

      bagels on the plate

      Easy Homemade Bagel Recipe

      These Easy Homemade Bagels are so easy yet delicious. Made with only 3 ingredients, this bagel has a nice outer crust and soft inside, this is the only bagel recipe you’ll ever need.

      Air Fryer Breakfast Meat Recipes

      Image for How to Cook Livermush

      How to Cook Livermush

      If you haven’t tried this classic North Carolina dish, now is the time! Livermush is such a flavorful dish and it’s so quick to cook and it’s great for hearty breakfasts and weekend brunches. I promise you it will be your new favorite!

      cooked bacon in air fryer basket

      Crispy Air Fryer Bacon

      Get the most perfect crispy bacon every single time with your trusty air fryer! So easy and quick to make with no mess and an excellent addition to any breakfast!

      Air Fryer Egg Recipes

      Image for Air Fryer Egg Frittata

      Air Fryer Egg Frittata

      This Air Fryer Egg Frittata recipe is the easiest  way to make a delicious breakfast frittata in your Air Fryer. It’s loaded with veggies and tons of flavor. It’s the perfect Air Fryer Breakfast.

      air fryer whole eggs in basket

      Easy Peel Air Fryer Hard Boiled Eggs

      These Easy Peel Air Fryer Hard Boiled Eggs are easy to make and easy to peel. Yes, there’s a new way to make “boiled” eggs and it’s perfect!

      breakfast sandwiches wrapped in plastic wrap on marble with one sandwich unwrapped

      Freezer Friendly Breakfast Sandwiches

      Make it an easy and delicious morning with these make-ahead breakfast sandwiches made with egg and bacon. You can make a batch of these if you’re serving a large number of people for breakfast or you can make these and freeze them for a grab and go breakfast. Reheat them right in the air fryer.

      Air Fryer Breakfast Side Dishes

      These Breakfast Air Fried Potatoes are crispy on the outside and tender on the inside, just how breakfast potatoes should be. Step by step photos included to get the perfect breakfast potatoes in the air fryer.  #airfryer #healthy #airfriedpotatoes #easy #airfryerrecipes #myforkinglife #potaesintheairfryer

      Breakfast Air Fried Potatoes

      These Breakfast Air Fried Potatoes are crispy on the outside and tender on the inside, just how breakfast potatoes should be. Step by step photos included to get the perfect breakfast potatoes in the air fryer.

      Image for Air Fryer Zucchini Fritters

      Air Fryer Zucchini Fritters

      These Air Fryer Zucchini Fritters are a delicious healthy snack that can easily be made in your Air Fryer. Pair it with a delicious herb dip for a real treat.

      Now the only question left... what are you going to make for breakfast?

      Pressure Cooker (Instant Pot) Chili

      December 10, 2020 by Tanya Harris 13 Comments

      A spoon in a bowl of chili topped with sour cream, shredded cheese and fresh jalapenos.

      Get the most delicious chili in a fraction of the time with your trusty pressure cooker! So rich and flavorful, this chili is easy to make, perfectly comforting and so so tasty!

      A spoon in a bowl of chili topped with sour cream, shredded cheese and fresh jalapenos.

      This post contains affiliate links, please read my full disclaimer here.

      You’ll find the full recipe with ingredient amounts and instructions in the recipe card at the bottom of this post. Be sure to check out the blog post itself for extra tips and tricks!

      Quite honestly, there is never a bad time for chili! It's a constant in our house! When you don't have hours to spend to watch a simmering pot, grab your pressure cooker for an effortless family dinner. If you'd rather make it on the stove, try my Classic Beef Chili.

      So hearty and rich in flavor, this Instant Pot chili is ready to serve within an hour, and it's great for meal prep too!

      For more hearty pressure cooker recipes, be sure to check out my Vegetable Soup and Chicken and Potatoes.

      How to make pressure cooker chili

      Gather your ingredients.

      Ingredients to make the recipe on a white work surface.

      Chop the onion, garlic and jalapeno.

      Chopped onions, garlic and jalapeno on a cutting board.

      Turn the pressure cooker on the high-sauté function. Once the display says “HOT,” add oil. Add onions, jalapeño, and garlic cloves and sauté for about 5-7 minutes, until onions have softened.

      Onions, garlic and jalapeno being cooked in the Instant Pot.

      Add ground beef and stir, cooking until ground beef is no longer pink and is browned. Then add chili powder, cumin, oregano, Worcestershire sauce and stir until combined.

      The beef browned in the pressure cooker.

      Press Cancel on the pressure cooker. Add vegetable juice, water, kidney beans, yellow corn kernels, and brown sugar. Do not stir. Cover the pressure and cook on high pressure for 35 minutes.

      Beans and corn added to the pressure cooker.

      Once pressure cooking time is up, allow the pressure to natural release for at least 15 minutes.

      Once all pressure is released, press Cancel on the pressure cooker and open the lid. Stir the chili. It will appear watery. Press the sauté button and allow the chili to simmer for 5-10 minutes, stirring occasionally, until it’s reduced to your likeness. Salt to taste.

      Some of the cooked shili on a wooden spoon over the Instant Pot.

      What do you serve it with?

      This chili is great to serve by itself in a big bowl with your favorite toppings. I love to serve it with my Cornbread Muffins or you can serve it on a bed of rice.

      When it comes to toppings, for me, you can never have enough! Try topping it with:

      • Shredded cheese
      • Sour cream
      • Fresh jalapeños
      • Sliced avocado
      • Guacamole
      • Salsa
      • Crispy tortilla strips

      Can you make it ahead of time?

      If you are getting organized, pressure cooker chili is a great recipe for meal prep. Once you've made it, let it cool completely before placing in an airtight container and it will keep well for 4 to 5 days. Reheat it gently on the stovetop, or in the microwave, until warmed through to serve.

      The flavors develop even more the next day, so leftovers are always really tasty!

      Can you freeze it?

      Yes! This freezes really well! It will keep well for up to 6 months, I always have some in my freezer! Thaw the chili in the fridge overnight before reheating.

      A bowl of pressure cooker chili with a spoon in it and served with toppings.

      Recipe Notes and Tips

      • The chili will appear watery once you open the lid after pressure cooking as the water hasn’t had the chance to evaporate. Simmer after pressure cooking to reduce the water amount and build flavor.
      • This chili is relatively mild. If you like it spicier, add a little cayenne.
      • Feel free to add in other veggies that you have in your fridge. Mushrooms, bell peppers and carrots all work really well.

      Watch this video tutorial and see how I make this chili from start to finish.

      More Pressure Cooker Recipes

      • Creamy Instant Pot Chicken Tacos
      • Creamy Instant Pot Mashed Potatoes
      • Instant Pot Turkey Breast (Bone-in or Boneless)
      • North Carolina Instant Pot Pulled Pork
      Chili served in a white bowl with a spoon.
      Print Recipe
      4.50 from 2 votes

      Pressure Cooker (Instant Pot) Chili

      Get the most delicious chili in a fraction of the time with your trusty pressure cooker! So rich and flavorful, this chili is easy to make, perfectly comforting and so so tasty!
      Prep Time5 minutes mins
      Cook Time50 minutes mins
      Total Time55 minutes mins
      Course: Main Course
      Cuisine: American
      Keyword: how to cook chili in a pressure cooker, instant pot chili recipe
      Servings: 4 servings
      Calories: 534kcal
      Author: Tanya Harris

      Ingredients

      • 2 Tbs oil
      • 2 yellow onions chopped
      • 2 jalapeño chopped
      • 4 garlic cloves chopped
      • 1 lb ground beef
      • 2 Tablespoon chili powder
      • 1 teaspoon cumin
      • 1 teaspoon oregano
      • 1 Tablespoon Worcestershire sauce
      • 1 ½ cup vegetable juice like V8
      • ¾ cup water
      • 1 can red kidney beans drained and rinsed
      • 1 cup yellow corn kernels frozen
      • ½ Tablespoon brown sugar
      • Salt to taste

      Instructions

      • Turn the pressure cooker on the high-sauté function. Once the display says “HOT,” add oil. Add onions, jalapeño, and garlic cloves and sauté for about 5-7 minutes, until onions have softened. Add ground beef and stir, cooking until ground beef is no longer pink and is browned. Add chili powder, cumin, oregano, Worcestershire sauce and stir until combined.
      • Press Cancel on the pressure cooker. Add vegetable juice, water, kidney beans, yellow corn kernels, and brown sugar. Do not stir. Cover the pressure and cook on high pressure for 35 minutes. Once pressure cooking time is up, allow the pressure to natural release for at least 15 minutes.
      • Once all pressure is released, press Cancel on the pressure cooker and open the lid. Stir the chili. It will appear watery. Press the sauté button and allow the chili to simmer for 5-10 minutes until it’s reduced to your likeness. Salt to taste.

      Video

      Notes

      • The chili will appear watery once you open the lid after pressure cooking as the water hasn’t had the chance to evaporate. Simmer after pressure cooking to reduce the water amount and build flavor.
      • This chili is relatively mild. If you like it spicier, add a little cayenne.
      • Feel free to add in other veggies that you have in your fridge. Mushrooms, bell peppers and carrots all work really well.

      Nutrition

      Calories: 534kcal | Carbohydrates: 37g | Protein: 28g | Fat: 31g | Saturated Fat: 9g | Cholesterol: 81mg | Sodium: 686mg | Potassium: 1029mg | Fiber: 9g | Sugar: 11g | Vitamin A: 2027IU | Vitamin C: 42mg | Calcium: 108mg | Iron: 5mg

      Crispy Air Fryer Bacon

      December 6, 2020 by Tanya Harris 10 Comments

      cooked bacon in air fryer basket

      Get the most perfect crispy bacon every single time with your trusty air fryer! So easy and quick to make with no mess and an excellent addition to any breakfast!

      Air fryer bacon served on a white plate.

      This post contains affiliate links, please read my full disclaimer here.

      You’ll find the full recipe with ingredient amounts and instructions in the recipe card at the bottom of this post. Be sure to check out the blog post itself for extra tips and tricks!

      It's no secret here that I love my air fryer! Such a quick and effortless way to cook so many foods and the results are always so good! Well, bacon is no different!

      This crispy air fryer bacon takes minutes to prep and you can cook a whole pack at the same time, perfect if you are feeding a crowd! Make breakfasts a breeze or crumble it on top of soups or other recipes.

      Use this air fried bacon on top of Sheet Pan Pancakes or in my Shrimp and Bacon Spinach Salad. If you don't have an air fryer, you'll also find my how-to bake bacon in the oven post helpful.

      How to make crispy air fryer bacon

      • Lay bacon in an air fryer basket, bacon can overlap.
      Raw bacon strips in an air fryer basket.
      • Cook on 360 degrees Fahrenheit for 12-15 minutes, turning every 5 minutes.
      Bacon starting to cook the air fryer basket.
      Bacon pieces nearly cooked.
      • Remove and enjoy.
      Overhead shot of the bacon cooked in the air fryer basket.

      My air fryer is smoking when cooking bacon

      Some air fryers are known for smoking while cooking bacon, but you can remedy this pretty easily. Place a little water in the bottom of the basket or a piece of bread to soak up the grease can reduce the smoking.

      Always use a clean air fryer when cooking bacon or other greasy meats to reduce the amount of smoke, and be sure to clean out the grease before using your air fryer again.

      How long does it take to cook bacon in an air fryer?

      A full 12 ounce packet of bacon will take between 12 and 15 minutes to cook, depending on how crispy you like it. If you are cooking less than the full pack, it will take around 8 to 10 minutes. Stir the bacon every 5 minutes or so so that it cooks evenly.

      How long will it keep?

      Once you have cooked your bacon, let it cool and it will keep well covered in the fridge for 4 to 5 days. I like to cook a whole pack of bacon and then I can add it to dishes in the week for a burst of flavor.

      You can also reheat it in the air fryer at 375F for 3 to 5 minutes.

      5 pieces of cooked bacon in the air fryer basket.

      Recipe Notes and Tips

      • Keep an eye on that bacon. Some air fryers will cook bacon faster than others. Watch it closely to avoid overcooking.
      • If you’re cooking less than a pack of bacon, your bacon will cook much quicker, in about 8-10 minutes.
      • This method works for pork and turkey bacon.
      • If you don’t want your bacon to curl, cook less at a time and lay them in a single layer. They’ll still curl a little. I like curly bacon pieces though 🙂
      • I used the oven directions on the back of the bacon to figure out the approximate cook time for the air fryer. I usually go 30 degrees below the recommended oven temperature and I cut the time about 20%. That's one of the best air fryer tips to have.

      More Air Fryer Recipes

      • Air Fryer French Toast
      • Air Fryer Crab Legs
      • Air Fryer Holiday Ham
      • Easy Air Fryer Pizza
      • Air Fried Spatchcock Chicken
      Air fryer bacon served on a white plate.
      Print Recipe
      5 from 3 votes

      Crispy Air Fryer Bacon

      Get the perfect crispy bacon every single time with your trusty air fryer! So easy and quick to make with no mess and an excellent addition to any breakfast!
      Prep Time3 minutes mins
      Cook Time12 minutes mins
      Total Time15 minutes mins
      Course: Breakfast, Main Course
      Cuisine: American
      Keyword: air fried bacon, how to cook bacon in an air fryer, how to cook crispy bacon
      Servings: 6 servings
      Calories: 236kcal
      Author: Tanya Harris

      Ingredients

      • 12 oz pack of bacon

      Instructions

      • Lay bacon in an air fryer basket, bacon can overlap. Cook on 360 degrees Fahrenheit for 12-15 minutes, turning every 5 minutes. Remove and enjoy.

      Notes

      • Keep an eye on that bacon. Some air fryers will cook bacon faster than others. Watch it closely to avoid overcooking.
      • If you’re cooking less than a pack of bacon, your bacon will cook much quicker, in about 8-10 minutes.
      • Some air fryers are known for smoking while cooking bacon. Place a little water in the bottom of the basket or a piece of bread to soak up the grease can reduce the smoking. Also, always use a clean air fryer when cooking bacon or other greasy meats to reduce the amount of smoke.
      • This method works for pork and turkey bacon.
      • If you don’t want your bacon to curl, cook less at a time and lay them in a single layer. They’ll still curl a little. I like curly bacon pieces though 🙂

      Nutrition

      Calories: 236kcal | Carbohydrates: 1g | Protein: 7g | Fat: 23g | Saturated Fat: 8g | Cholesterol: 37mg | Sodium: 375mg | Potassium: 112mg | Vitamin A: 21IU | Calcium: 3mg | Iron: 1mg

      How to Cook Livermush

      November 30, 2020 by Tanya Harris 11 Comments

      If you haven't tried this classic North Carolina dish, now is the time! Livermush is such a flavorful dish and it's so quick to cook and it's great for hearty breakfasts and weekend brunches. I promise you it will be your new favorite!

      Breaking a slice of livermush in half.

      You’ll find the full recipe with ingredient amounts and instructions in the recipe card at the bottom of this post. Be sure to check out the blog post itself for extra tips and tricks!

      Ok, I know the name sounds a bit weird, but trust me, Livermush is delicious!

      My hubby grew up eating this and now we have it on the regular in our house. It's a North Carolina favorite that is super flavorful and it's so quick and easy to cook!

      For more Southern favorites, be sure to check out my Southern Chess Pie and Peach Cobbler Cake.

      How to cook livermush

      So quick and easy to cook, and you can prepare it on the stovetop or in the air fryer.

      • Cut Livermush into slices, about ¼ inch thick.
      Slicing a block of livermush.

      Stovetop

      • Heat oil in a large skillet over medium high heat. Place the slices in a skillet in a single layer.
      Slices of livermush in a skillet.
      • Brown the Livermush, about 4-5 minutes on each side, until the outside is crispy.
      Cooked livermush slices in a skillet.

      Air Fryer

      • Preheat the air fryer to 370 degrees Fahrenheit. Place the slices in an air fryer basket and cook for 12-15 minute, until the outside is crispy.
      Livemush slices in an air fryer basket.

      What is it made of?

      Livermush is made with pork liver and cornmeal and is known as 'poor man's paté' in some circles. It is bound together with cornmeal and seasoned with sage and black pepper. You buy it as a chilled block which you then slice and fry.

      Livermush is not the same as liver pudding or scrapple. While they may sound or even look the same, livermush is made with a little more cornmeal. The other two are looser in texture. You can read more about the history of livermush.

      You can opt to make your own livermush or buy it in the store if you see it in NC.

      What does it taste like?

      If you like sausage patties, you will love this! It has a softer and smoother texture and the sage and black pepper give it a slightly spicy, earthy and herbal flavor.

      How do you serve it?

      Typically eaten as a breakfast or lunch food. It's great to serve in place of a sausage patty in a breakfast sandwich and we also like to serve it with grits.

      Can you eat it raw?

      Livermush is already cooked when you buy it, so it is safe to eat raw...but don't do that. It's much better if you fry it so you get those crispy edges and the flavors are much more pronounced.

      Slices of cooked livermush being served on a white plate.

      Recipe Notes and Tips

      • Livermush is fully cooked and just needs to be crisped up. You can use either the stovetop or air fryer to cook it.
      • I tend to only add oil if I am frying on the stovetop. I do not use oil if I am using the air fryer. You can lightly spray the slices in the air fryer if you like.
      • Take care not to overcook the slices. When overcooked, they can become dry.

      More Breakfast Recipes

      • Air Fryer Bacon
      • Breakfast Air Fried Potatoes
      • Liver and Onions
      • Cheesy Corned Beef Hash Breakfast Casserole
      • Homemade Pumpkin Waffles
      • Winter Fruit Salad
      Overhead shot of cooked livermush served on a white plate.
      Print Recipe
      4.80 from 5 votes

      How to Cook Livermush

      If you haven't tried this classic Carolina dish, now is the time! Livermush is such a flavorful dish and it's so quick to cook and it's great for hearty breakfasts and weekend brunches.
      Prep Time5 minutes mins
      Cook Time10 minutes mins
      Total Time15 minutes mins
      Course: Main Course
      Cuisine: American
      Keyword: easy livermush recipe, how to cook livermush, what is livermush
      Servings: 4 servings
      Calories: 180kcal
      Author: Tanya Harris

      Ingredients

      • 16 oz pack of Livermush
      • 2 teaspoon oil optional

      Instructions

      • Cut Livermush into slices, about ¼ inch thick.

      Stovetop

      • Heat oil in a large skillet over medium high heat. Place the Livermush in a skillet in a single layer and brown the Livermush, about 4-5 minutes on each side, until the outside is crispy.

      Air Fryer

      • Preheat the air fryer to 370 degrees Fahrenheit. Place Livermush slices in an air fryer basket and cook for 12-15 minute, until the outside is crispy.

      Notes

      • Livermush is fully cooked and just needs to be crisped up. You can use either the stovetop or air fryer to cook it.
      • I tend to only add oil if I am frying the Livermush on the stovetop. I do not use oil if I am using the air fryer. You can lightly spray the Livermush in the air fryer if you like.

      Nutrition

      Calories: 180kcal | Carbohydrates: 16g | Protein: 10g | Fat: 10g

      Air Fryer Crab Legs

      November 16, 2020 by Tanya Harris Leave a Comment

      Air fryer crab legs on a white plate and garnished with herbs.

      It's so quick and easy to cook the most perfect crab legs in an air fryer! Ready to serve in less than 15 minutes, they are seasoned with old bay for a great at home boil!

      Air fryer crab legs on a white plate and garnished with herbs.

      If you're looking for another way to make your crab legs at home then this is it.

      Since snow crab legs usually come cooked, they are super quick to warm up in your air fryer, so once you've cleaned them, all you have to do is season them and let the air fryer do its job!

      How to make air fryer crab legs

      • Scrub the legs. I like to use a potato brush to scrub them well. The dry them with a paper towel.
      crab legs in large bowl with water and scrubber
      • Combine crab legs, olive oil, old bay, and garlic powder in a large bowl. Use hands to rub oil and seasoning all over crab legs.
      Crab legs with seasonings in a silver bowl.
      • Place the legs in foil paper and wrap tightly.
      • Place in an air fryer basket.
      • Air fryer crab legs on 380 degrees Fahrenheit for 3-5 minutes.
      • Remove from the air fryer and foil paper. Enjoy 🙂
      The cooked crab legs on foil in the air fryer basket.

      Why cook crab legs in an air fryer?

      Mainly because I love my air fryer. But it's also a great way to quickly "cook" crab legs. I don't have to wait for the water to boil when doing it on the stovetop. I also like the fact that the seasoning sticks to the shells of the crab legs.

      What do you serve them with?

      These air fried crab legs are great served as an appetizer with some melted butter for dipping. Simplicity at it's best! You can of course serve these up as part of a seafood boil with other seafood and lots of sides.

      Make up your own seafood menu with these crab legs served alongside:

      • Air Fryer Sausage
      • Air Fried Lobster Tail Recipe
      • Clams
      • Air Fried Potatoes
      • Air Fryer Corn on the Cob

      What are the best crab legs to use?

      Because we are cooking these crab legs in the air fryer, you want to make sure the legs will all fit in! For that reason, it's best to stay away from Alaskan king crab and go for snow crab instead. Smaller crabs like Dungeness will work well too.

      A crab leg on a white plate.

      Recipe Notes and Tips

      • I prefer to use fresh/defrosted crab legs as I like the seasoning to stick to the crab shells. If you have frozen, you can cook it from frozen by adding a few extra minutes.
      • When the crab legs are cooked they should be a vibrant orange / pink color.
      • Take care not to overcook the legs or the meat can become chewy.

      More Easy Air Fryer Recipes

      • Air Fryer Scallops with Garlic Herb Butter
      • Air Fried Toasted Ravioli
      • Air Fryer Crispy Fried Shrimp
      • Easy Air Fryer Pizza
      • Air Fryer Lemon Garlic Shrimp
      Air fryer crab legs on a white plate and garnished with herbs.
      Print Recipe
      5 from 1 vote

      Air Fryer Crab Legs

      It's so quick and easy to cook the most perfect crab legs in an air fryer! Ready to serve in less than 15 minutes, they are seasoned with old bay for a great at home boil!
      Prep Time10 minutes mins
      Cook Time5 minutes mins
      Total Time15 minutes mins
      Course: Appetizer
      Cuisine: American
      Keyword: air fried crab legs, how to cook crab legs, how to cook crab legs in an air fryer
      Servings: 2 servings
      Calories: 176kcal
      Author: Tanya Harris

      Ingredients

      • 1 lb crab legs cleaned and scrubbed
      • 2 Tablespoon olive oil
      • 1 teaspoon old bay
      • ½ teaspoon garlic powder

      Instructions

      • Combine crab legs, olive oil, old bay, and garlic powder in a large bowl. Use hands to rub oil and seasoning all over crab legs. Place the legs in foil paper and wrap tightly. Place in an air fryer basket.
      • Air fryer crab legs on 380 degrees Fahrenheit for 3-5 minutes.
      • Remove from the air fryer and foil paper. Enjoy 🙂

      Notes

      • You can make these with frozen or fresh crab legs. If frozen, they will take an extra few minutes in the air fryer or you can defrost them fully before you cook them.
      • When the crab legs are cooked they should be a vibrant orange / pink color.
      • Take care not to overcook the legs or the meat can become chewy.
      • These are great on their own or served with melted butter.

      Nutrition

      Calories: 176kcal | Carbohydrates: 1g | Protein: 11g | Fat: 14g | Saturated Fat: 2g | Cholesterol: 24mg | Sodium: 475mg | Potassium: 116mg | Sugar: 1g | Vitamin C: 4mg | Calcium: 34mg | Iron: 1mg

      Air Fryer Holiday Ham

      November 12, 2020 by Tanya Harris 8 Comments

      Sliced glazed ham served on a white plate ready to eat.

      Cook your holiday ham in a fraction of the time in your air fryer this year! Glazed with a sweet and tangy honey sauce, it only takes 30 minutes to make and is a hit with the whole family!

      Sliced glazed ham served on a white plate ready to eat.

      Holiday ham is one of my favorite things to serve over the festive season, and with this recipe, it just got a lot easier and quick to make it at home!

      This air fryer holiday ham comes out so succulent and the honey and mustard spiced glazed will leave everyone asking for seconds!

      Ready to serve in less than 45 minutes, it takes a fraction of the time compared to roasting it in the oven, and the results are so perfect. And of course, the leftovers are delicious!

      For more holiday recipes, be sure to check out my Cranberry Sauce and Sweet and Spicy Air Fryer Brussels Sprouts!

      How to make Air Fryer Holiday Ham

      • Gather your ingredients. I use a boneless pre-sliced ham. You'll want any ham that can fit in your air fryer basket.
      Ingredients to make the recipe.
      • Slice the ham if it isn't already sliced.
      The ham sliced on a wooden chopping board.
      • Wrap ham completely in foil paper and place in the air fryer basket. I like to tear two pieces of foil, put one on the bottom and lay another on the top, and tuck in the corners.
      • Cook on 300 degrees Fahrenheit for 15 minutes.
      The ham covered with foil in the air fryer.
      • Meanwhile, prepare the glaze by whisking honey, brown sugar, dijon mustard, nutmeg, cayenne pepper, and salt in a medium sized saucepan over medium heat. Bring mixture to a boil and immediately remove from heat.
      The glaze in a silver pot.
      • After 15 minutes is up, open foil on ham and brush ½ of the glaze on the ham, brushing in between the slices as well.
      Brushing the glaze on the ham.
      • Cover the ham with foil and cook for an additional 15 minutes on 300 degrees Fahrenheit.
      • Once time is up, remove foil and pour the remaining glaze on top.
      Pouring glaze over the ham.
      • Optional step: If you want a little char on your ham edges, continue to cook ham, uncovered, on 400 degrees for 3-5 minutes.
      The cooked holiday ham in the air fryer basket.

      What do you serve with glazed ham?

      This air fryer holiday ham is great to serve with all of your favorite veggie and potato side dishes for a feast that everyone will love! Try it with:

      • Collard Greens
      • Air Fryer Carrots (Sweet or Savory)
      • Creamy Instant Pot Mashed Potatoes
      • Gravy without Drippings
      • Cranberry Sauce

      How long does a cooked ham keep?

      If you can't get through this ham on the day, it will keep well, covered in the fridge for up to 4 days.

      You can reheat the ham covered in the oven at 275 for 10 to 20 minutes until warmed through. You can also reheat slices in the air fryer at 320F for 2 to 3 minutes.

      Leftovers can also be enjoyed cold in salads and sandwiches, or added to soups and stews.

      Why cook a ham in the air fryer?

      Roasted ham is delicious, but it requires at least a couple of hours of cooking time, in the air fryer, it takes a fraction of that time and it comes out just as tasty! I love that I can also free up my oven for all of those yummy side dishes!

      Overhead shot of a glazed holiday ham served on a white plate next to dinner rolls.

      Recipe Notes and Tips

      • The ham should be cooked on 300 degrees for about 10 minutes per pound. Therefore, if your ham is larger, it will need a longer cook time, smaller, less cook time.
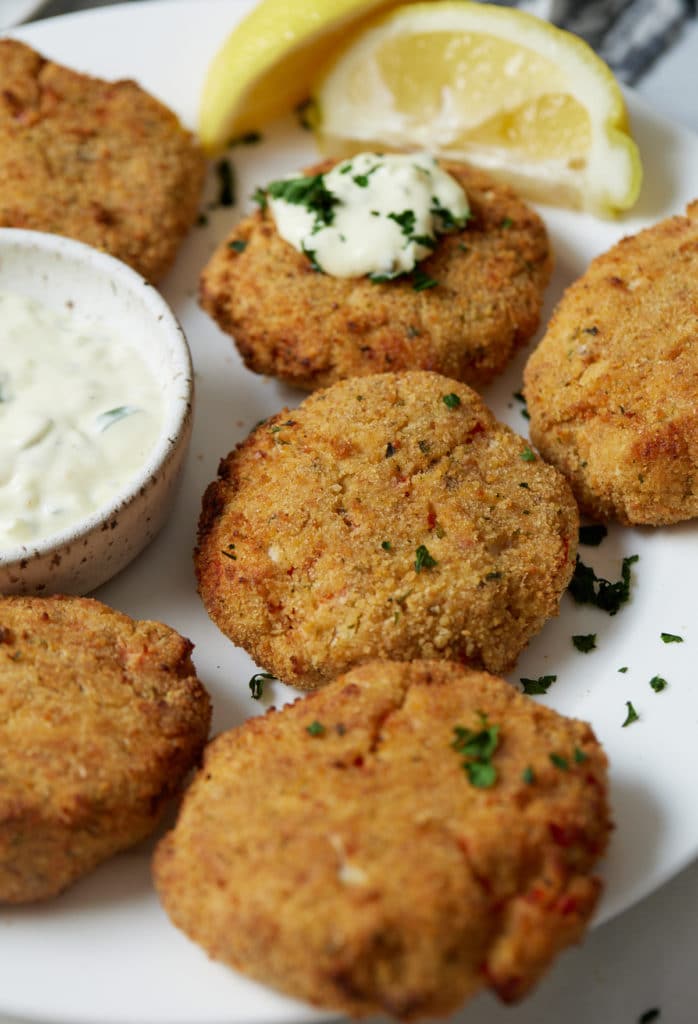
      • Make sure that the ham is wrapped completely in the foil. This allows your ham to stay moist and catch all the delicious juices.
      • Allow for ½ pound of ham per person.
      • If your ham comes with a glaze packet, feel free to use that if you prefer and omit the glaze in this recipe. I just really love the taste of dijon and the hint of cayenne in my glaze.

      More Air Fryer Recipes

      • Air Fryer Roasted Turkey Legs
      • Air Fried Spatchcock Chicken
      • BBQ Air Fryer Ribs
      • Roasted Air Fryer Turkey Breast (Bone-In or Boneless)
      The glazed holiday ham served on a white plate.
      Print Recipe
      5 from 3 votes

      Air Fryer Holiday Ham

      Cook your holiday ham in a fraction of the time in your air fryer this year! Glazed with a sweet and tangy honey sauce, it only takes 30 minutes to make and is a hit with the whole family!
      Prep Time15 minutes mins
      Cook Time30 minutes mins
      Total Time45 minutes mins
      Course: Main Course
      Cuisine: American
      Keyword: glazed holiday ham recipe, how to cook ham in the air fryer, quick glazed ham recipe
      Servings: 12 servings
      Calories: 338kcal
      Author: Tanya Harris

      Ingredients

      • 3 lb boneless spiral ham

      Glaze

      • ½ cup honey
      • ¼ cup brown sugar
      • 2 Tablespoon dijon mustard
      • ¼ teaspoon nutmeg
      • ¼ teaspoon cayenne pepper
      • ¼ teaspoon kosher salt

      Instructions

      • Slice the ham if not pre done.
      • Wrap ham completely in foil paper and place in the air fryer basket.
      • Cook on 300 degrees Fahrenheit for 15 minutes.
      • Meanwhile, prepare the glaze by whisking honey, brown sugar, dijon mustard, nutmeg, cayenne pepper, and salt in a medium sized saucepan over medium heat. Bring mixture to a boil and immediately remove from heat.
      • After 15 minutes is up, open foil on ham and brush ½ of the glaze on the ham, brushing in between the slices as well. Cover the ham with foil and cook for an additional 15 minutes on 300 degrees Fahrenheit.
      • Once time is up, remove foil and pour the remaining glaze on top.
      • Optional step: If you want a little char on your ham edges, continue to cook ham, uncovered, on 400 degrees for 3-5 minutes.

      Notes

      • The ham should be cooked on 300 degrees for about 10 minutes per pound. Therefore, if your ham is larger, it will need a longer cook time, smaller, less cook time.
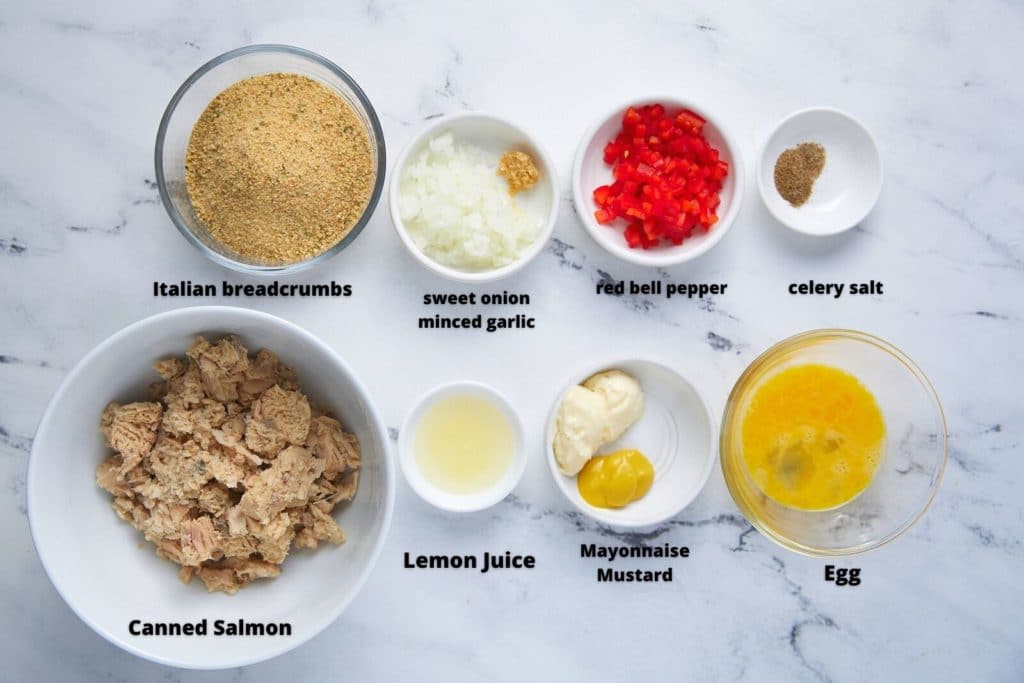
      • Make sure that the ham is wrapped completely in the foil.
      • Allow for ½ pound of ham per person.

      Nutrition

      Calories: 338kcal | Carbohydrates: 16g | Protein: 25g | Fat: 19g | Saturated Fat: 7g | Cholesterol: 70mg | Sodium: 1425mg | Potassium: 341mg | Fiber: 1g | Sugar: 16g | Vitamin A: 16IU | Vitamin C: 1mg | Calcium: 14mg | Iron: 1mg

      Fish Soup

      November 5, 2020 by Tanya Harris 2 Comments

      Fish soup in a blue bowl with a spoon.

      Warming and comforting, this easy fish soup recipe will feed your soul! Easy to make in one pot, this delicious soup is made with white fish and is ready to enjoy in 30 minutes.

      Fish soup with corn served in a bowl with a spoon.

      Soup season is well and truly here, and there's nothing quite like a delicious fish soup. It's one thing I look forward too when the weather starts to get chilly!

      Loaded with flavor, this white fish soup is made with fresh herbs and corn and it comes together quickly and easily. Serve with some crusty bread for a real comfort food meal.

      For more soup recipes, be sure to check out my Beet Soup Recipe and my Roasted Tomato Basil Soup is always a family favorite.

      How to make homemade fish soup

      • Gather your ingredients.
      The ingredients to make the soup on a kitchen worktop.
      • Heat oil in a large pot over medium-high heat. Add habanero pepper (omit if you don't like any spice), onion, garlic cloves and saute for 3-4 minutes, until onions softened.
      The onion and garlic being sautéed in a pot.
      • Add chicken broth, clam juice, thyme, bay leaves, corn cobs, and bring to a simmer. Allow to simmer for 10 minutes.
      Four pieces of corn in the broth.
      • Add fish and cook for an additional 3-5 minutes, until fish is cooked through and flaky.
      • Remove bay leaves and thyme. Top with cilantro and add lime juice. Salt and pepper to taste.
      The fish soup in a pot ready to serve.

      Can you make it ahead of time?

      This soup is best served as soon as you've made it. This is because the white fish cooks quickly so you need to be careful that you don't over cook it or it can become chewy.

      You can however, make the soup ahead of time if you leave the fish out. Make the recipe up to adding the fish and then you can store it in the fridge or freeze it. Warm the soup up when you are ready to serve, and cook the fish through.

      What's the best fish to use?

      I've used both mahi mahi and cod fish in this recipe. Most white fish will work well. Halibut is another great choices. Avoid very delicate fish like sole and oily fish like tuna.

      What's the best stock to use in this recipe?

      I used chicken stock in this soup, it's a great way to add flavor and I always have some to hand. You can use vegetable stock if you are pescatarian. If you do have fish stock, you can use that and leave out the clam juice.

      Soup served in a blue bowl on a white plate with a spoon.

      Recipe Notes and Tips

      • Make the soup in a dutch oven or heavy-bottomed pan so that the heat distributes more evenly.
      • I like to use mini corn cobs in this fish soup, but you can also use frozen corn kernels.
      • The fish only requires a short amount of cooking time, so only add it when you are ready to serve.
      • I add the habanero peppers to my soup because it gives it a little spice. If you aren't a fan of spice, simply leave it out or opt for a milder pepper, like jalapeño with the seeds and ribs removed.

      More Soup Recipes

      • Cream of Mushroom Soup
      • Hearty Instant Pot Vegetable Soup
      • Pressure Cooker Lentil Soup with Sausage
      • Instant Pot Jamaican Jerk Chicken Soup
      Fish soup with corn served in a bowl with a spoon.
      Print Recipe
      No ratings yet

      Fish Soup

      Warming and comforting, this easy fish soup recipe will feed your soul! Easy to make in one pot, this delicious soup is made with mahi mahi and is ready to enjoy in 30 minutes.
      Prep Time10 minutes mins
      Cook Time20 minutes mins
      Total Time30 minutes mins
      Course: Soup
      Cuisine: American
      Keyword: easy fish soup, how to make fish soup, white fish soup
      Servings: 4 servings
      Calories: 251kcal
      Author: Tanya Harris

      Ingredients

      • 2 Tablespoon olive oil
      • 1 habanero pepper seeds removed and chopped
      • 1 yellow onion chopped
      • 4 garlic cloves chopped
      • 2 ½ cups chicken broth
      • 1 cup clam juice
      • 2 springs fresh thyme
      • 2 bay leaves
      • 4 mini corn cobs or ¾ cup frozen corn kernels
      • 1 lb cod fish cut into 2 inch pieces or other white fish (mahi mahi, halibut)
      • ½ cup cilantro chopped
      • 1 Tablespoon lime juice
      • Salt and pepper to taste

      Instructions

      • Heat oil in a large pot over medium-high heat. Add habanero pepper, onion, garlic cloves and saute for 3-4 minutes, until onions softened.
      • Add chicken broth, clam juice, thyme, bay leaves, corn cobs, and bring to a simmer. Allow to simmer for 10 minutes. Add fish and cook for an additional 3-5 minutes, until fish is cooked through and flaky.
      • Remove bay leaves and thyme. Top with cilantro and add lime juice. Salt and pepper to taste.

      Notes

      • Make the soup in a dutch oven or heavy bottomed pan so that the heat distributes more evenly.
      • I like to use mini corn cobs in this fish soup, but you can also use frozen corn kernels.
      • The fish only requires a short amount of cooking time, so only add it when you are ready to serve.

      Nutrition

      Calories: 251kcal | Carbohydrates: 20g | Protein: 24g | Fat: 9g | Saturated Fat: 1g | Cholesterol: 83mg | Sodium: 869mg | Potassium: 826mg | Fiber: 2g | Sugar: 6g | Vitamin A: 559IU | Vitamin C: 25mg | Calcium: 42mg | Iron: 2mg

      Cranberry Sauce

      November 3, 2020 by Tanya Harris Leave a Comment

      Cranberry sauce served in a white bowl with a gold spoon.

      Easy and quick to make with 3 ingredients, this homemade cranberry sauce is made from scratch and takes about 15 minutes to make. An essential sauce to serve for your Thanksgiving or holiday dinner, and wonderfully sweet and tangy.

      Cranberry sauce served in a white bowl with a gold spoon.

      Where has this year gone? Thanksgiving is just around the corner and all thoughts have turned to menu planning!

      My Christmas and Thanksgiving tables are never complete without cranberry sauce. I'll admit, I like the canned jelly stuff that comes in a log that you have to slice, but this homemade cranberry sauce is even better. It's also super easy to make.

      Serve this delicious sauce on the side of my Roasted Air Fryer Turkey Breast or Instant Pot Turkey Breast!

      How to make homemade cranberry sauce

      • First up, gather your ingredients. You only need a few!
      The ingredinets for the sauce on a kitchen countertop.
      • Place cranberries, orange juice, water, sugar, and a pinch of salt in a medium saucepan over medium-high heat.
      Sugar and cranberries in a pot before cooking.
      • Bring to a boil. Reduce heat to medium-low and simmer for 10 minutes, stirring occasionally until cranberries have softened and popped.
      Two photos to show the cranberries cooking down in a pot.
      • Remove from heat and allow to cool. Stir and serve immediately or refrigerate for later.
      The cranberry sauce in a pot with a wooden spoon ready to serve.

      How long does it keep?

      Cranberry sauce is a great make ahead side. Once it has cooled completely, transfer it to a glass jar or air tight container and place it in the fridge. It will keep well for 10 to 12 days and can either be served straight out of the fridge or warmed up.

      Can you freeze it?

      Yes, this delicious sauce freezes really well. Let it cool before placing in freezer bags and it will keep well for two months. You can thaw the frozen sauce in the fridge overnight, or heat it through gently on the stovetop to serve.

      Can you use frozen cranberries?

      I prefer to use fresh cranberries for this recipe as they are readily available this time of year. You can also make this recipe with frozen cranberries though. They will take a little longer to cook, but the recipe remains the same.

      A gold spoon in a white bowl of cranberry sauce.

      Recipe Notes and Tips

      • Cranberry sauce will thicken while it cools and will thicken even more if refrigerated.
      • Don't put the pot on too high a heat, it should be gently simmering rather than boiling.
      • This sauce can be enjoyed warm or cold straight out of the fridge. It's great on turkey sandwiches the next day!
      • If making ahead of time, let the sauce fully cool before storing it.

      More Easy Sides

      • Buttery Instant Pot Green Beans and Potatoes
      • Southern Candied Sweet Potatoes
      • Sweet and Spicy Air Fryer Brussels Sprouts
      • Classic Southern Cornbread Recipe
      Cranberry sauce served in a white bowl with a gold spoon.
      Print Recipe
      No ratings yet

      Cranberry Sauce

      Easy and quick to make with 3 ingredients, this homemade cranberry sauce is made from scratch and takes about 15 minutes to make. An essential sauce to serve for your Thanksgiving or holiday dinner, and wonderfully sweet and tangy.
      Prep Time5 minutes mins
      Cook Time10 minutes mins
      Total Time15 minutes mins
      Course: Condiment, Side Dish
      Cuisine: American
      Keyword: cranberry sauce with orange, easy cranberry sauce recipe, how to make cranberry sauce
      Servings: 16 servings (2 cups)
      Calories: 50kcal
      Author: Tanya Harris

      Ingredients

      • 12 oz fresh cranberries about 3 ½ cups
      • ½ cup orange juice
      • ½ cup water
      • ¾ cup sugar
      • Pinch of salt

      Instructions

      • Place cranberries, orange juice, water, sugar, and a pinch of salt in a medium saucepan over medium-high heat and bring to a boil.
      • Reduce heat to medium-low and simmer for 10 minutes, stirring occasionally until cranberries have softened and popped.
      • Remove from heat and allow to cool. Stir and serve immediately or refrigerate for later.

      Notes

      • Cranberry sauce will thicken while it cools and will thicken even more if refrigerated.
      • Don't put the pot on too high a heat, it should be gently simmering rather than boiling.
      • This sauce can be enjoyed warm or cold straight out of the fridge. It's great on turkey sandwiches the next day!
      • If making ahead of time, let the sauce fully cool before storing it.

      Nutrition

      Calories: 50kcal | Carbohydrates: 13g | Protein: 1g | Fat: 1g | Saturated Fat: 1g | Sodium: 1mg | Potassium: 34mg | Fiber: 1g | Sugar: 11g | Vitamin A: 28IU | Vitamin C: 7mg | Calcium: 3mg | Iron: 1mg

      Southern Chess Pie

      October 29, 2020 by Tanya Harris 2 Comments

      chess pie in pie plate

      This delicious and easy to make Southern Chess Pie is one of my favorite desserts! Made with a few simple ingredients, I just know you will love this sweet and rich pie!

      A slice of chess pie on a blue plate.

      This post contains affiliate links, please read my full disclaimer here.

      You’ll find the full recipe with ingredient amounts and instructions in the recipe card at the bottom of this post. Be sure to check out the blog post itself for extra tips and tricks!

      I don't know about you, but as Thanksgiving gets closer my thoughts turn to pies! I love to serve up my Southern Sweet Potato Pie after dinner alongside this delicious chess pie!

      The sweet and creamy pie is, in my opinion, one of the best Southern desserts out there. This pie originated in England and was found in New England and Virginia, but I fell in love with it in North Carolina. My husband grew up calling it egg custard, which it pretty much is, but in a pie crust.

      It also has a nice crisp and browned top, which makes it the perfect play on textures. There's also a really cute story behind why it's called Chess Pie.

      For more easy desserts, be sure to check out my Homemade Churros and Chocolate Cola Cake!

      How to make a chess pie

      • Gather your ingredients.
      Ingredients to make the chess pie.
      • Preheat the oven to 350 degrees Fahrenheit and make sure there is a rack on the middle rack.
      • In a large bowl, beat eggs and sugar together on medium speed until fully combined, about 1 minute.
      • Add milk, lemon juice, cornmeal, all-purpose flour, vanilla extract, salt, and nutmeg and beat until combined.
      Ingredinets for the pie filling mixed together in a large bowl.
      • Pour into the prepared pie crust. You'll want a crust that has been blind baked or partially baked. You can do this with storebought crust or my homemade pie crust recipe.
      The filling poured into the part baked pie crust.
      • Bake in the preheated oven for 35-40 minutes, until the middle is almost set and has a little jiggle. Remove from the oven and allow to cool for at least 1 hour before serving.
      The baked chess pie on a baking sheet.

      How long does it keep?

      This is a great make ahead dessert, making it a great choice to make during the holiday season. Once baked, it will keep well for 24 hours at room temperature and in the fridge for up to 3 days.

      If refrigerating, let the pie cool completely before covering with plastic wrap or foil.

      Can you freeze chess pie?

      You can freeze the baked pie. Let it cool completely before wrapping in plastic wrap and placing in a freezer bag. It will keep well for up to 3 months. Thaw the pie either overnight in the fridge or at room temperature for a couple of hours.

      If you want to freeze individual slices, wrap them securely in plastic wrap before placing in the freezer bag.

      What to serve with this pie

      Honestly, a slice of this pie and a fork is really all you need, but if you want to be extra indulgent, feel free to serve it with some vanilla ice cream, whipped cream or even some chocolate or caramel sauce.

      The baked chess pie with slices cut out of it.

      Recipe Notes and Tips

      • You can also use a whisk to mix the ingredients if you don’t have an electric beater. Just make sure the ingredients are fully combined.
      • Place pie dish on baking sheet prior to baking to avoid spillage.
      • The pie may bubble up while baking. Don’t worry, it will deflate once it’s removed from the oven and cools.
      • The pie crust used in this recipe should be partially baked.

      More Easy Dessert Recipes

      • Easy Southern Peach Cobbler Cake
      • Blueberry Biscuits
      • Homemade Chocolate Pudding
      • Air Fryer Chocolate Molten Lava Cakes
      • Chocolate Chess Pie
      A slice of chess pie on a blue plate.
      Print Recipe
      4.67 from 3 votes

      Chess Pie

      This delicious and easy to make Southern chess pie is one of my favorite desserts to make. Made with a few simple ingredients, I just know you will love this sweet and rich pie!
      Prep Time10 minutes mins
      Cook Time35 minutes mins
      Total Time45 minutes mins
      Course: Dessert
      Cuisine: American
      Keyword: easy chess pie recipe, how to make chess pie
      Servings: 8 servings
      Calories: 225kcal
      Author: Tanya Harris

      Ingredients

      • 9- inch prepared pie crust
      • 4 large eggs
      • 1 cup sugar
      • ¾ cup milk
      • 1 Tablespoon lemon juice
      • 1 Tablespoon cornmeal
      • 1 Tablespoon all-purpose flour
      • 1 ½ teaspoon vanilla extract
      • ¼ teaspoon salt
      • ¼ teaspoon nutmeg

      Instructions

      • Preheat the oven to 350 degrees Fahrenheit and make sure there is a rack in the middle.
      • In a large bowl, beat eggs and sugar together on medium speed until fully combined, about 1 minute.
      • Add milk, lemon juice, cornmeal, all-purpose flour, vanilla extract, salt, and nutmeg and beat until combined. Pour into the prepared pie crust. Bake in the preheated oven for 35-40 minutes, until the middle is almost set and has a little jiggle. Remove from the oven and allow to cool for at least 1 hour before serving.

      Notes

      • You can also use a whisk to mix the ingredients if you don’t have an electric beater. Just make sure the ingredients are fully combined.
      • Place pie dish on baking sheet prior to baking to avoid spillage.
      • The pie may bubble up while baking. Don’t worry, it will deflate once it’s removed from the oven and cools.
      • The pie crust used in this recipe should be partially baked.

      Nutrition

      Calories: 225kcal | Carbohydrates: 36g | Protein: 5g | Fat: 7g | Saturated Fat: 2g | Cholesterol: 84mg | Sodium: 179mg | Potassium: 76mg | Fiber: 1g | Sugar: 26g | Vitamin A: 156IU | Vitamin C: 1mg | Calcium: 41mg | Iron: 1mg

      Homemade Pie Crust Recipe

      October 27, 2020 by Tanya Harris Leave a Comment

      The pie crust part baked and ready to use.

      Skip the store-bought pie crust, it's so easy to make your own and it tastes amazing! This homemade pie crust recipe is simple to make and is perfect for all of your pie needs!

      The pie crust part baked and ready to use.

      This post contains affiliate links, please read my full disclaimer here.

      You’ll find the full recipe with ingredient amounts and instructions in the recipe card at the bottom of this post. Be sure to check out the blog post itself for extra tips and tricks!

      This homemade pie crust is perfect for all of your dessert needs, and it's my go to for Thanksgiving and the holiday season.

      Made with simple ingredients, this pie crust is perfect for make ahead desserts and is freezer friendly. Fill it with your favorite pie fillings like pumpkin, sweet potato, cherry or apple.

      For more delicious desserts, be sure to check out my Southern Sweet Potato Pie and Chess Pie.

      How to make this homemade pie crust recipe

      • Gather your ingredients.
      Ingredients needed to make the pie crust.
      • Place flour and salt in the base of a food processor. Pulse until mixed through.
      Flour and salt in a food processor.
      • Add butter and shortening.
      Butter squares added to the flour.
      • Pulse until butter and shortening is cut into pieces into the flour.
      • Add 8 tablespoon of water and pulse until the dough starts to pull away from the walls of the food processor. If the dough appears too dry and crumbly, add more water, about ½ tablespoon at a time.
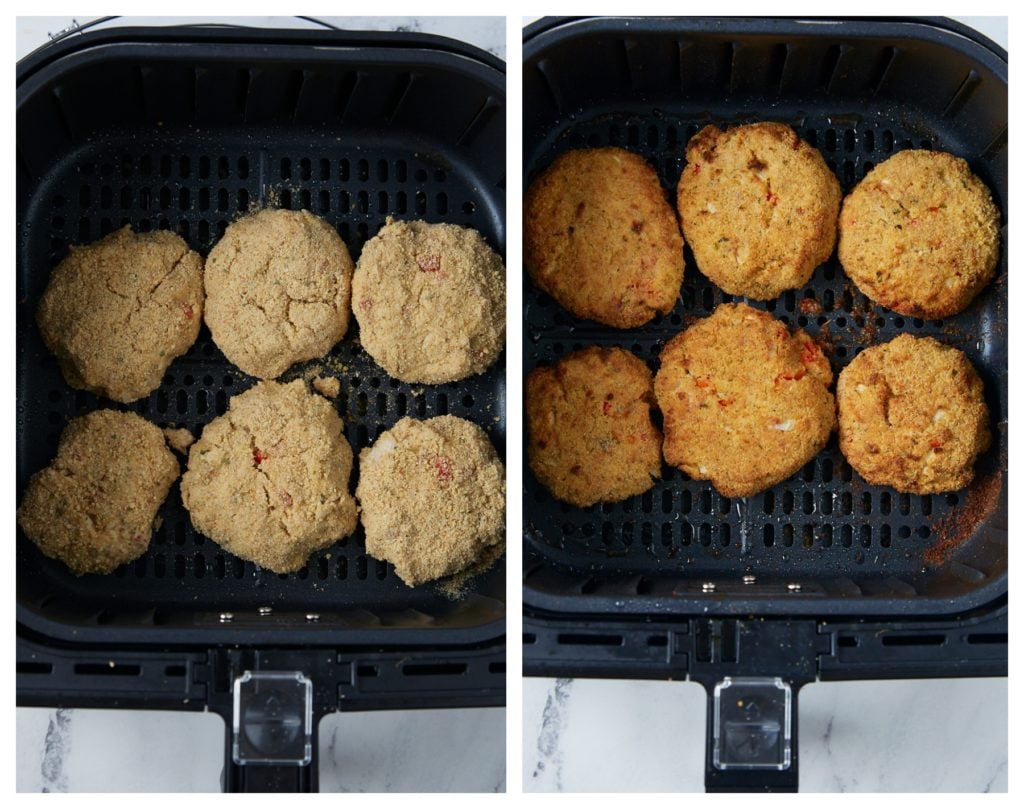
      The butter being mixed into the flour.
      • The dough should be able to smoosh together between your fingers.
      A hand holding a piece of the pie dough.
      • Remove dough and place onto a floured surface.
      The dough on a floured work surface.
      • Use your hands and form dough into a ball, then cut the ball into two separate pieces. Flatten the pieces into two separate disks.
      The dough formed into two balls.
      • Wrap the disk in plastic wrap and place in the fridge for at least 45 minutes or up to 3 days.
      • Remove disk from fridge and allow to sit for around 5 minutes, or until the dough is warm enough to roll out.
      • Place the dough on a floured surface and roll the dough until it’s about ⅛ inch thick and long enough to extend about 1-2 inches beyond your pie plate. Rotate the dough while rolling it out to ensure it doesn’t stick to the board.
      A pie dish on top of the rolled out dough.
      • Roll the dough over your rolling pin and lay it on the pie plate.
      The dough being rolled over a rolling pin.
      • Adjust the pie dough so that it fits in your pie plate but do not stretch it to fit.
      Laing the dough over the pie dish.
      • To decorate the sides of your pie crust, trim or tuck under any excess dough and use your fingers or a fork to crimp the sides. Use crust as instructed in your recipe.
      Trimming the excess dough away from the pie tin.

      I often parbake my crust because I love making custard pies, like sweet potato pie and chess pie.

      To Partially Bake the Crust

      • Preheat the oven to 375 degrees Fahrenheit. After placing the pie in the pie plate, dock the inside of the pie crust all over with a fork. Place the pie crust in the freezer for 10 minutes. Place pie crust on a baking sheet and lay foil paper in the middle of the pie crust, making sure it covers the entire pie crust.
      • Fill the inside with white sugar, pie weights, or beans until the inside is full and the foil paper is laying along the sides of the pie. If using sugar, feel free to reuse it over and over again and store in an airtight container. If using beans, discard them after baking.
      Foil laid over the pie dough.
      • Bake in a preheated oven for 15-17 minutes. Remove foil paper and pie weights and continue baking for 8-10 minutes to bake the bottom. Remove from the oven.
      The part baked pie crust on a metal baking sheet.

      Can you make it ahead of time?

      You can make the dough for this pie crust up to 3 days ahead of time and keep it wrapped in plastic in the fridge. You can also roll out the dough and place it in the pie dish and it will keep covered for up to 5 days.

      Can you freeze it?

      You can freeze the homemade pie crust either part baked or un baked.

      Unbaked: Cover the tin with plastic wrap and place in a freezer bag. It will keep well for up to 3 months. You can bake the crust straight out of the freezer.

      Baked: Baked pie crusts will keep well in the freezer for up to 6 months. Let the cool completely before wrapping and storing. Again, you can just add your filling and bake from frozen.

      Do you need to use shortening?

      I like to use a mixture of shortening and butter in my pie crust. The butter gives it a nice rich flavor and the shortening gives a more tender and flakey crust. You can use all butter or all shortening, but I think some of both is the best way forward.

      Recipe Notes and Tips

      • How small you cut the pieces of butter into the pie dough will depend on how you plan on using the pie dough. For top crust and really flaky pie dough, cut the butter and shortening into the size of peas. For custard pies that need a pre-baked crust, such as sweet potato pie or chess pie, cut the butter smaller, until it resembles coarse cornmeal. This is known as making a mealy pie dough.
      • I place all my cut butter and shortening in the freezer for about an hour before I start to bake the pie. It ensures all my pie crust stays nice and cold in the food processor.
      The sides of the dough crimped.

      Use this homemade crust with these pie recipes:

      • Southern Sweet Potato Pie
      • Pumpkin Pie
      • Chess Pie
      • Pecan Pie

      More Dessert Recipes

      • Blueberry Compote
      • Homemade Chocolate Pudding
      • Homemade Churros (Air Fryer or Stovetop)
      • Moist Chocolate Cola Cake
      The pie crust part baked and ready to use.
      Print Recipe
      5 from 1 vote

      Homemade Pie Crust Recipe

      Skip the store bought pie crust, it's so easy to make your own and it tastes amazing! this homemade pie crust recipe is simple to make and is perfect for all of your pie needs!
      Prep Time15 minutes mins
      Cook Time25 minutes mins
      Chilling time55 minutes mins
      Total Time1 hour hr 35 minutes mins
      Course: Dessert
      Cuisine: American
      Keyword: easy pie crust recipe, homemade pie crust recipe, how to make a pie crust
      Servings: 8 servings
      Calories: 399kcal
      Author: Tanya Harris

      Ingredients

      • 3 cups all-purpose flour
      • 1 teaspoon salt
      • 12 Tablespoon unsalted butter cut into pieces and cold
      • ⅓ cup shortening cut into pieces and cold
      • 8-10 Tablespoon ice cold water

      Instructions

      • Place flour and salt in the base of a food processor. Pulse until mixed through. Add butter and shortening and pulse until butter and shortening is cut into pieces into the flour.*
      • Add 8 tablespoon of water and pulse until the dough starts to pull away from the walls of the food processor. If the dough appears too dry and crumbly, add more water, about ½ tablespoon at a time. The dough should be able to smoosh together between your fingers.
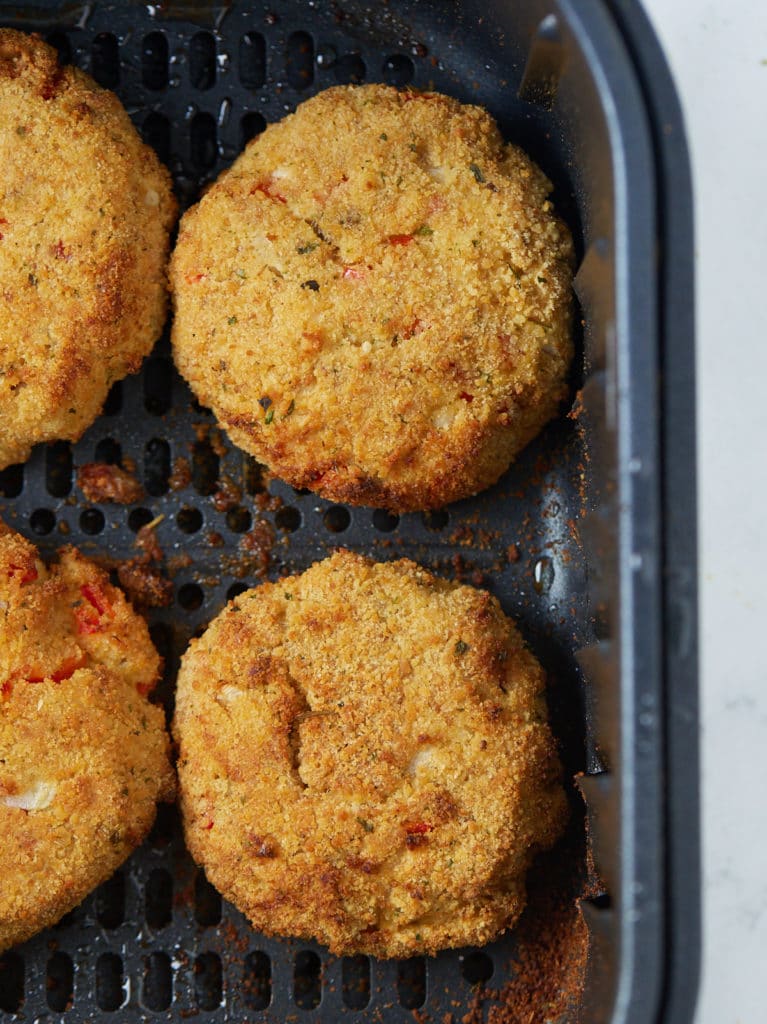
      • Remove dough and place onto a floured surface. Use your hands and form dough into a ball, then cut the ball into two separate pieces. Flatten the pieces into two separate disks.
      • Wrap the disk in plastic wrap and place in the fridge for at least 45 minutes or up to 3 days.
      • Remove disk from fridge and allow to sit for around 5 minutes, or until the dough is warm enough to roll out.
      • Place the dough on a floured surface and roll the dough until it’s about ⅛ inch thick and long enough to extend about 1-2 inches beyond your pie plate. Rotate the dough while rolling it out to ensure it doesn’t stick to the board.
      • Roll the dough over your rolling pin and lay it on the pie plate. Adjust the pie dough so that it fits in your pie plate but do not stretch it to fit.
      • To decorate the sides, trim or tuck under any excess dough and use your fingers or a fork to crimp the sides. Use crust as instructed in your recipe.
      • To Partially Bake: Preheat the oven to 375 degrees Fahrenheit. After placing the pie in the pie plate, dock the inside of the pie crust all over with a fork. Place the pie crust in the freezer for 10 minutes. Place pie crust on a baking sheet and lay foil paper in the middle of the pie crust, making sure it covers the entire pie crust. Fill the inside with white sugar, pie weights, or beans until the inside is full and the foil paper is laying along the sides of the pie. Bake in a preheated oven for 15-17 minutes. Remove foil paper and pie weights and continue baking for 8-10 minutes to bake the bottom. Remove from the oven.

      Notes

      *How small you cut the pieces of butter into the pie dough will depend on how you plan on using the pie dough. For top crust and really flaky pie dough, cut the butter and shortening into the size of peas. For custard pies that need a pre-baked crust, such as sweet potato pie or chess pie, cut the butter smaller, until it resembles coarse cornmeal. This is known as making a mealy pie dough.
      I place all my cut butter and shortening in the freezer for about an hour before I start to bake the pie. It ensures all my pie crust stays nice and cold in the food processor.
      Recipe adapted from: https://www.foodnetwork.com/recipes/ina-garten/perfect-pie-crust-recipe-1919026

      Nutrition

      Calories: 399kcal | Carbohydrates: 36g | Protein: 5g | Fat: 26g | Saturated Fat: 13g | Cholesterol: 46mg | Sodium: 295mg | Potassium: 55mg | Fiber: 1g | Sugar: 1g | Vitamin A: 532IU | Calcium: 12mg | Iron: 2mg

      Beet Soup Recipe

      October 20, 2020 by Tanya Harris Leave a Comment

      Beet soup served in a white bowl with a spoon.

      Hearty, warming and full of flavor, this beet soup is a delicious way to warm up! Quick and easy to make from scratch with simple ingredients.

      Beet soup served in a white bowl with a spoon.

      You’ll find the full recipe with ingredient amounts and instructions in the recipe card at the bottom of this post. Be sure to check out the blog post itself for extra tips and tricks!

      We are now well and truly into soup season, and I for one couldn't be happier! There's no better way to spend a chilly evening than a big bowl of homemade soup!

      pic of Tanya

      This delicious beet soup recipe is bold in color and flavor, and it is incredibly simple to make with just a few fresh and tasty ingredients. I was inspired by Borscht, a traditional Ukrainian soup primarily made with beets.

      For my recipe, I add Italian sausage and navy beans for flavor and heartiness. You'll only use the beet roots for this recipe; you can sauté the beet greens for later or serve them on top.

      ♡ Tanya

      A Quick Look at the Ingredients

      Ingredient amounts and full recipe instructions are on the printable recipe card at the bottom of the post.

      • Red beets – The star of this soup! Fresh red beets bring an earthy sweetness and gorgeous color. I process them in a blender for a finer texture that blends beautifully with the sausage.
      • Carrot and yellow onion – These aromatics add natural sweetness and depth of flavor to the soup base.
      • Italian sausage – Brings savory, seasoned flavor and heartiness to the soup. You can use mild or spicy depending on your preference.
      • Chicken broth and fresh thyme – The flavorful base of the soup. You can substitute with beef broth for a richer flavor or vegetable broth to keep it vegetarian (just skip the sausage or use a plant-based alternative). The thyme sprigs add a herby, earthy note and are easy to remove before serving.
      • Northern beans – These creamy white beans add protein and make the soup more filling. Great Northern beans or cannellini beans work well.
      • Salt and pepper – Essential for bringing out all the flavors. Season to your taste at the end.
      • Sour cream – Optional, but highly recommended! A dollop adds tang and creaminess that balances the earthiness of the beets.

      How to make this beet soup recipe

      Step 1: Gather and prep your ingredients.

        Chopped beats on a wooden chopping board.

        Step 2: Add beets and carrots to a blender or food processor and process until finely ground. Set aside.

          The blended carrots and beets in a food processor.

          Step 3: Brown sausage and onions over medium-high heat in a large heavy-bottom pot.

            Browning the sausage and onions in a dutch oven.

            Step 4: Add ground beets and carrots and sauté for an additional 3 minutes, stirring occasionally.

              Ground beets aded to the pot.

              Step 5: Add chicken broth, thyme, and beans. Reduce the heat to medium, cover, and bring to a simmer. Simmer for 20 minutes, stirring occasionally.

                Stirring in the broth, thyme and beans with a wooden spatula.

                Step 6: Remove from heat, remove thyme, and season to taste. Top with sour cream if using. Enjoy!

                  The beet soup in a dutch oven before serving.

                  How long does it keep?

                  Soups are so great for make-ahead meals. I often cook up a pot on a Sunday and then enjoy it for lunches throughout the week. Once you have made the soup, let it cool to room temperature and then transfer it to an airtight container. The soup will keep well in the fridge for 3 to 4 days.

                  Reheat the soup on the stovetop on medium heat, stirring occasionally to serve. You can also reheat it in the microwave for 3 minutes, stirring every 60 seconds.

                  Can you freeze it?

                  This beet soup recipe freezes really well. I don't know about you, but I always seem to have some soup in my freezer!

                  Let the soup cool before freezing it in a container or ziplock bag, and it will keep well for 2-3 months. Thaw frozen soup in the fridge overnight before reheating.

                  A dollop of sour cream on top of the soup.

                  Tanya's Top Tips

                  • I use a blender or food processor to grind my beets and carrots, giving them a texture similar to the Italian sausage. You can skip this step and finely chop the beets and carrots or grate them on the side of a box grater.
                  • You can use chicken, beef, or vegetable broth in this recipe.
                  • If storing, let the soup cool completely before placing it in a container.

                  More Easy Soup Recipes

                  • Creamy Cream of Mushroom Soup - Rich, velvety, and packed with earthy mushroom flavor, this homemade version is so much better than the canned stuff.
                  • Best Roasted Tomato Basil Soup Recipe - Classic comfort in a bowl with roasted tomatoes and fresh basil that taste like summer any time of year.
                  Beet soup served in a white bowl with a spoon.
                  Print Recipe
                  No ratings yet

                  Beet Soup Recipe

                  Hearty, warming and full of flavor, this beet soup is a delicious way to warm up! Quick and easy to make from scratch with simple ingredients.
                  Prep Time10 minutes mins
                  Cook Time25 minutes mins
                  Total Time35 minutes mins
                  Course: Soup
                  Cuisine: American
                  Keyword: beet and bean soup, beet soup from scratch, how to make beet soup
                  Servings: 6 servings
                  Calories: 249kcal
                  Author: Tanya Harris

                  Ingredients

                  • 3 large beets about 1 ½ lbs, peeled and chopped
                  • 1 medium carrot chopped
                  • ½ lb Italian sausage
                  • 1 yellow onion chopped
                  • 4 cups chicken broth
                  • 2 sprigs thyme
                  • 15 oz can Northern beans rinsed and drained
                  • Salt and pepper to taste
                  • Sour cream optional

                  Instructions

                  • Add beets and carrot to a blender or food processor and process until finely ground. Set aside.
                  • Brown sausage and onions over medium-high heat in a large heavy bottom pot. Add ground beets and carrots and sauté for an additional 3 minutes, stirring occasionally.
                  • Add chicken broth, thyme, and beans. Reduce heat to medium and bring to a simmer and simmer for 20 minutes, stirring occasionally.
                  • Remove from heat, remove thyme, and season to taste. Top with sour cream if using. Enjoy.

                  Video

                  Notes

                  • If you can, make the soup in a heavy bottomed pan or dutch oven. It will distribute heat more evenly and the bottom is less likely to catch.
                  • I use the blender to grind my beets and carrots so it has a similar texture to the Italian sausage. You can skip this step and finely chop the beets and carrots or grate them on the side of a box grater.
                  • You can use chicken, beef, or vegetable broth in this recipe.
                  • If storing, let the soup cool completely before placing in a container.

                  Nutrition

                  Calories: 249kcal | Carbohydrates: 23g | Protein: 12g | Fat: 13g | Saturated Fat: 4g | Cholesterol: 29mg | Sodium: 897mg | Potassium: 662mg | Fiber: 5g | Sugar: 4g | Vitamin A: 1728IU | Vitamin C: 17mg | Calcium: 68mg | Iron: 2mg

                  Easy Teriyaki Salmon

                  October 12, 2020 by Tanya Harris Leave a Comment

                  teriyaki salmon in a pan with green onion and sesame seed on top

                  Get out of your dinner rut with this quick and easy teriyaki salmon recipe. All cooked in one pan, it's ready to serve in less than 20 minutes and the rich sauce is loaded with flavor.

                  The cooked salmon garnished with green onion slices.

                  This post contains affiliate links, please read my full disclaimer here.

                  You’ll find the full recipe with ingredient amounts and instructions in the recipe card at the bottom of this post. Be sure to check out the blog post itself for extra tips and tricks!

                  When I'm short on time after a busy day, I often turn to fish recipes as they are so quick to prep and cook. This teriyaki salmon is so perfect for an easy and quick family meal.

                  The teriyaki sauce that the salmon is cooked in is the perfect balance of sweet and salty flavors, and I promise you, you won't regret ditching the takeout for this!

                  If you love salmon, be sure to try my Salmon Wellington and Marinated Air Fryer Salmon

                  How to make teriyaki salmon

                  Cut the salmon fillet into four pieces.

                  A fillet of salmon cut into 4 pieces.

                  Heat olive oil in a 12-inch skillet over medium-high heat. Place salmon, skin side down, in the skillet and cook for about 4 minutes.

                  Raw salmon skin side down in a pan.

                  Tilt the pan to the side and spoon the oil over the fillets. This is a trick I learned from the Thomas Keller Masterclass. It helps the salmon cook a little quicker and gives it that extra nice sear.

                  Oil being spooned over the fillets.

                  Flip the fillets. Cook the salmon for an additional 3-4 minutes, until the salmon is cooked through.

                  Cooking the salmon in the pan skin side up.

                  Remove from the pan and set aside.

                  Four pieces of cooked salmon on a blue plate.

                  Add soy sauce, brown sugar, rice vinegar, chicken broth, ginger powder, and garlic powder to the skillet and whisk to combine. Reduce heat to medium and allow mixture to simmer for about 2 minutes.

                  The sauce simmering in the pan.

                  Make a cornstarch slurry by placing cornstarch and water in a separate bowl and whisking to combine. Slowly pour the cornstarch mixture into the skillet while whisking the sauce in the skillet. Allow sauce to simmer for an additional 1-2 minutes.

                  Whisking in the cornstarch mixture.

                  Remove skillet from the heat and return salmon to the pan. Top salmon with sauce.

                  Spooning the sauce over the salmon pieces.

                  Garnish with sesame seeds, and green onions, and serve.

                  The cooked salmon in a skillet ready to serve.

                  What is teriyaki sauce?

                  Teriyaki sauce has it's origins in Japanese cuisine. It's wonderfully rich and bold with a savory, sweet and salty taste. Many teriyaki sauces are made with mirin and/or sake but I use what I have on hand with this recipe. The flavor is still incredible.

                  What do you serve it with?

                  This dish is great served up on a bed of white rice, brown rice, or noodles and you can serve it as a vegetable side like Marinated Vegetables or steamed broccoli. You can keep it low carb by serving it with cauliflower rice.

                  Do you need to marinate the salmon?

                  This recipe doesn't require you to marinate the salmon as the sauce is so flavorful and it also means that you don't need to plan ahead! You can marinate the fillets if you prefer in a little oil, soy sauce and brown sugar for 30 minutes, but it definitely does not require it.

                  The cooked salmon teriyaki in a skillet.

                  Recipe Notes and Tips

                  • Take care not to over cook the salmon. It should be an opaque pink color and flake away easily.
                  • Make this dish gluten-free by using tamari sauce in place of the soy sauce.
                  • This teriyaki sauce also works great with chicken and steak!

                  More Easy Seafood Recipes

                  • Oven Baked Salmon or Easy Oven Baked Fish
                  • Jamaican Escovitch Fish
                  • Pressure Cooker Salmon with Creamy Herb Parmesan Sauce
                  • Air Fryer Crispy Fried Shrimp
                  • Fried Catfish
                  • Crispy Air Fryer Fish
                  • Jerk Salmon
                  Close up of four pieces of teriyaki salmon.
                  Print Recipe
                  5 from 2 votes

                  Glazed Teriyaki Salmon

                  Get out of your dinner rut with this quick and easy teriyaki salmon recipe. All cooked in one pan, it's ready to serve in less than 20 minutes and the rich sauce is loaded with flavor.
                  Prep Time5 minutes mins
                  Cook Time15 minutes mins
                  Total Time20 minutes mins
                  Course: Main Course
                  Cuisine: Japanese
                  Keyword: easy teriyaki salmon recipe, how to make teriyaki salmon
                  Servings: 4 servings
                  Calories: 352kcal
                  Author: Tanya Harris

                  Ingredients

                  • 1 Tablespoon olive oil
                  • 1.5 lb salmon cut into 4 pieces or 4 salmon fillets
                  • ¼ cup soy sauce
                  • ¼ cup brown sugar
                  • 2 Tablespoon rice vinegar
                  • 2 Tablespoon chicken broth
                  • ¼ teaspoon ginger powder
                  • ¼ teaspoon garlic powder
                  • ½ Tablespoon cornstarch
                  • 1 Tablespoon water
                  • 1 Tablespoon sesame seeds optional
                  • 1 green onion chopped (optional)
                  • Salt and pepper to taste

                  Instructions

                  • Heat olive oil in a 12-inch skillet over medium-high heat. Place salmon, skin side down, in the skillet and cook for about 4 minutes.
                  • Tilt the pan to the side and spoon the oil over the fillets, then flip the fillets. Cook the salmon for an additional 3-4 minutes, until the salmon is cooked through. Remove from the pan and set aside.
                  • Add soy sauce, brown sugar, rice vinegar, chicken broth, ginger powder, and garlic powder to the skillet and whisk to combine. Reduce heat to medium and allow mixture to simmer for about 2 minutes.
                  • Make a cornstarch slurry by placing cornstarch and water in a separate bowl and whisking to combine. Slowly pour the cornstarch mixture into the skillet while whisking the sauce in the skillet. Allow sauce to simmer for an additional 1-2 minutes.
                  • Remove skillet from the heat and return salmon to the pan. Top salmon with sauce, sesame seeds, and green onions.
                  • Serve and enjoy 🙂

                  Video

                  Notes

                  • Take care not to over cook the salmon. It should be an opaque pink color and flake away easily.
                  • Make this dish gluten-free by using tamari sauce in place of the soy sauce.
                  • This teriyaki sauce also works great with chicken and steak!

                  Nutrition

                  Calories: 352kcal | Carbohydrates: 16g | Protein: 36g | Fat: 15g | Saturated Fat: 2g | Cholesterol: 94mg | Sodium: 925mg | Potassium: 892mg | Fiber: 1g | Sugar: 14g | Vitamin A: 98IU | Vitamin C: 1mg | Calcium: 54mg | Iron: 2mg

                  Easy Applesauce Muffins

                  October 8, 2020 by Tanya Harris 43 Comments

                  Seven applesauce muffins on a wire rack.

                  Make a batch of delicious muffins in no time at all with this easy applesauce muffin recipe. With just 10 minutes of prep time, these muffins are a great snack to make when you are short on time, and they are wonderfully sweet and moist.

                  Seven applesauce muffins on a wire rack.

                  This post contains affiliate links, please read my full disclaimer here.

                  You’ll find the full recipe with ingredient amounts and instructions in the recipe card at the bottom of this post. Be sure to check out the blog post itself for extra tips and tricks!

                  Let's be honest, there is never a bad time for a muffin! These easy applesauce muffins are super quick to make and they are quickly becoming my favorite snack to enjoy with my afternoon cup of coffee.

                  They come out so soft and moist and they are flavored with my favorite fall spice combination of cinnamon and nutmeg. They are also less than 200 calories each, so snack away guilt free!

                  For more easy sweet snacks, be sure to check out my Blueberry Biscuits and Crispy Air Fryer Apple Chips.

                  How to make easy applesauce muffins

                  • Preheat the oven to 350F degrees and line a muffin tin with paper liners.
                  • Gather your ingredients.
                  Ingredients to make the muffins in glass bowls.
                  • In a large bowl, add oats, flour, sugar, baking powder, baking soda, nutmeg, cinnamon, and salt and stir to combine.
                  The dry ingredinets being mixed together into a white bowl.
                  • Pour in applesauce, milk, butter, and vanilla extract and stir until fully combined.
                  Wet ingredients being stirred into the dry.
                  • Place batter into muffin liners.
                  The batter placed into the muffin liners ready to bake.
                  • Bake in preheated oven for for 23-25 minutes or until a toothpick entered in the middle comes out smoothly.
                  Overhead shot of twelve baked muffins.

                  How long do they keep?

                  Once the muffins have cooled completely, transfer them to an airtight container. They will keep at room temperature for 2 days and store them in the fridge for up to 5 days. They will still be good a day or two after this, but will start to dry out.

                  Can you freeze them?

                  These muffins freeze really well. Freeze them solid on a baking sheet before transferring to a freezer bag, or wrap them individually in plastic wrap and freeze them together. They will keep for up to 3 months frozen.

                  Defrost the muffins at room temperature or warm them through on a low heat in the oven.

                  Are they healthy?

                  The applesauce in this recipe means that you don't need any oil to keep the muffins moist and you can also reduce the amount of added sugar and butter. Each muffin is around 180 calories and is low in fat and sodium. They are also made with whole wheat flour so contain whole grains. This is a healthy snack I can get behind!

                  A bite taken out of an applesauce muffin.

                  Recipe Notes and Tips

                  • You can also bake these in your air fryer. To make a smaller batch, cut all ingredients in half and follow the recipe as instructed. Use silicone baking liners and air fry on 320 degrees Fahrenheit for 10-12 minutes.
                  • Make sure that the batter ingredients are fully combined, there should be no dry flour when you place it into the muffin cases.
                  • Bake the muffins in a preheated oven so that they cook through evenly.
                  • Check the muffins after 20 minutes of cooking as ovens can run at different temperatures. An inserted toothpick will come out clean when they are baked through.

                  More Easy Muffin Recipes

                  • Easy Cornbread Muffins
                  • Zucchini Muffins
                  • Easy Strawberry Muffins
                  Applesauce muffins in liners ready to eat.
                  Print Recipe
                  4.53 from 21 votes

                  Easy Applesauce Muffins

                  Make a batch of delicious muffins in no time at all with this easy applesauce muffin recipe. With just 10 minutes of prep time, these muffins are a great snack to make when you are short on time, and they are wonderfully sweet and moist.
                  Prep Time10 minutes mins
                  Cook Time25 minutes mins
                  Total Time35 minutes mins
                  Course: Dessert, Snack
                  Cuisine: American
                  Keyword: easy applesauce muffin recipe, how. tomake applesauce muffins, recipes for applesauce
                  Servings: 12 muffins
                  Calories: 183kcal
                  Author: Tanya Harris

                  Ingredients

                  • 1 ½ cup quick cooking oats
                  • 1 ½ cup whole wheat flour
                  • ½ cup sugar
                  • 1 teaspoon baking powder
                  • ½ teaspoon baking soda
                  • 1 teaspoon nutmeg
                  • ½ teaspoon cinnamon
                  • ½ teaspoon salt
                  • 1 ½ cup unsweetened apple sauce
                  • 1 cup milk
                  • ¼ cup unsalted butter melted and cooled
                  • 2 teaspoon vanilla extract

                  Instructions

                  • Preheat the oven to 350F degrees and line a muffin tin with paper liners.
                  • In a large bowl, add oats, flour, sugar, baking powder, baking soda, nutmeg, cinnamon, and salt and stir to combine.
                  • Pour in applesauce, milk, butter, and vanilla extract and stir until fully combined. Place batter into muffin liners.
                  • Bake in preheated oven for for 23-25 minutes or until a toothpick entered in the middle comes out smoothly.

                  Notes

                  • You can also bake these in your air fryer. To make a smaller batch, cut all ingredients in half and follow the recipe as instructed. Use silicone baking liners and air fry on 320 degrees Fahrenheit for 10-12 minutes.
                  • Make sure that the batter ingredients are full combined, there should be no dry flour when you place it into the muffin cases.
                  • Bake the muffins in a preheated oven so that they cook through evenly.
                  • Check the muffins after 20 minutes of cooking as ovens can run at different temperatures. An inserted toothpick will come out clean when they are baked through.

                  Nutrition

                  Calories: 183kcal | Carbohydrates: 31g | Protein: 4g | Fat: 6g | Saturated Fat: 3g | Cholesterol: 12mg | Sodium: 160mg | Potassium: 182mg | Fiber: 3g | Sugar: 13g | Vitamin A: 160IU | Vitamin C: 1mg | Calcium: 54mg | Iron: 1mg

                  Air Fried Toasted Ravioli

                  October 1, 2020 by Tanya Harris 3 Comments

                  Air fried toasted ravioli on a white plate.

                  When you need an appetizer in a hurry, this delicious air fried toasted ravioli is more than perfect! Ready to serve in around 10 minutes, they are perfectly crispy and a breeze to make!

                  Air fried toasted ravioli on a white plate.

                  Toasted ravioli is one of my favorite appetizers and they are totally hassle free when cooked in the air fryer. They are super crispy on the inside and perfectly soft and creamy in the center.

                  I love not to worry about a pot of hot oil when making these, just pop them in the air fryer and you have a batch to serve in 6 minutes. Perfect when you have a hungry crowd to feed!

                  How to make Air Fried Toasted Ravioli

                  • Preheat the air fryer to 380 degrees Fahrenheit.
                  • Place egg and milk in one bowl and whisk to combine. Place breadcrumbs in another bowl.
                  • Place ravioli in the egg mixture and coat ravioli on both sides, letting any excess drip off. Then place in breadcrumb mixture, coating both sides. Place ravioli in a greased air fryer basket.
                  The dredging station for the ravioli.
                  • Air fryer on 380 degrees Fahrenheit for 5-6 minutes. Halfway through cooking, spray and flip the ravioli.
                  The cooked ravioli in the air fryer basket.
                  • Place the ravioli in a bowl and toss with parmesan cheese. Garnish with parsley.

                  Can you make them ahead of time?

                  This air fryer ravioli is best served as soon as it's made so that it's nice and crispy. If you wan to get ahead of things, the breading can be done the day before and keep the ravioli covered with plastic wrap in the fridge.

                  If you have leftovers, they can be reheated in the air fryer at 350-400F for 3 to 4 minutes and they will get nice and crispy again.

                  Can you make this with frozen ravioli?

                  Yes! You can make this with either frozen or fresh ravioli. There's no need to thaw frozen before cooking it, just add a few extra minutes to the cooking time.
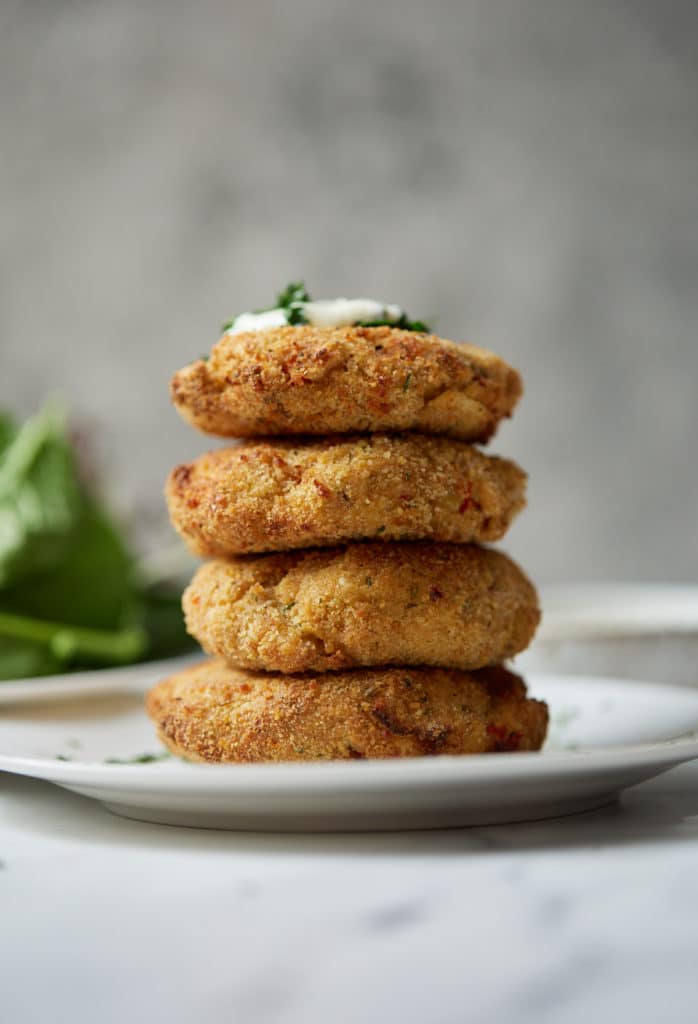
                  What do you serve it with?

                  I like to serve these with some fresh parsley for freshness and a rich marinara sauce for dipping. You can serve then with your favorite dips, garlic and herb, ranch and ketchup all work well.

                  Fried ravioli in a bowl served with marinara sauce.

                  Recipe Notes and Tips

                  • Don't overcrowd the air fryer or the ravioli won't get as crispy.
                  • Spray the ravioli halfway through cooking, not at the beginning. It's a tip I use when air frying anything with breading and I discuss it more in my tips for air fryers post.
                  • If using frozen ravioli, you’ll need to cook a few minutes longer, about 8-10 minutes.
                  • If you want a creamier filling, make sure to purchase ravioli that has a lot of cheesy filling.

                  More Air Fryer Appetizers

                  • Air Fryer Roasted Shishito Peppers
                  • Crispy Air Fryer Beet Chips
                  • Air Fryer Egg Rolls
                  • Air Fryer Crispy Fried Shrimp
                  Air fried toasted ravioli on a white plate.
                  Print Recipe
                  5 from 1 vote

                  Air Fried Toasted Ravioli

                  When you need an appetizer in a hurry, this delicious air fried toasted ravioli is more than perfect! Ready to serve in around 10 minutes, they are perfectly crispy and a breeze to make!
                  Prep Time5 minutes mins
                  Cook Time6 minutes mins
                  Total Time11 minutes mins
                  Course: Appetizer
                  Cuisine: American
                  Keyword: air fryer ravioli, ravioli appetizer, toasted ravioli recipe
                  Servings: 6 servings
                  Calories: 223kcal
                  Author: Tanya Harris

                  Ingredients

                  • 9 oz ravioli fresh or frozen
                  • 1 large egg beaten
                  • ¼ cup milk
                  • ¾ cup Italian bread crumbs
                  • 2 Tablespoon grated parmesan cheese
                  • 1 Tablespoon fresh parsley for garnish
                  • Marinara Sauce for Dipping

                  Instructions

                  • Preheat air fryer to 380 degrees Fahrenheit.
                  • Place egg and milk in one bowl and whisk to combine. Place breadcrumbs in another bowl.
                  • Place ravioli in egg mixture, letting any excess drip off, then place in breadcrumb mixture. Place ravioli in the air fryer.
                  • Air fryer on 380 degrees Fahrenheit for 5-6 minutes, spraying and turning halfway through.
                  • Toss the ravioli with parmesan cheese and garnish with fresh parsley.

                  Notes

                  • Don't overcrowd the air fryer or the ravioli won't get as crispy.
                  • Spray the ravioli halfway through cooking, not at the beginning.
                  • If using frozen ravioli, you’ll need to cook a few minutes longer, about 8-10 minutes.
                  • If you want a creamier filling, make sure to purchase ravioli that has a lot of cheesy filling.

                  Nutrition

                  Calories: 223kcal | Carbohydrates: 28g | Protein: 10g | Fat: 7g | Saturated Fat: 3g | Cholesterol: 53mg | Sodium: 503mg | Potassium: 58mg | Fiber: 2g | Sugar: 2g | Vitamin A: 156IU | Vitamin C: 1mg | Calcium: 70mg | Iron: 5mg

                  How to Spatchcock a Chicken (Video)

                  September 29, 2020 by Tanya Harris 4 Comments

                  a spatchcocked chicken on a wooden board

                  Spatchcock chicken, or butterfly chicken, is an easy way to get a whole chicken prepared for cooking by removing the backbone and getting it to lay flat. This guide will teach you everything you need to know about how to get it done quickly and effortlessly. 

                  a spatchcocked chicken on a wooden board

                  This post contains affiliate links, please read my full disclaimer here.

                  If you’ve ever seen one of those beautiful flat laying whole chickens that looks Instagram worthy and wondered how you could do the same, then look no further. It’s pretty easy to do the same thing. The popular term for this flat laying chicken is called spatchcocked or butterflied.

                  So why would you spatchcock a chicken? Other than it being pretty gorgeous once done, spatchcocking a chicken allows it to cook a little quicker, cook evenly, and generally results in crispier skin. Laying a chicken flat is also good for when you want to grill a chicken.  

                  Things Needed:

                  1. A smaller whole chicken - You’ll want one that’s 2-4lbs. Smaller chickens are easier to spatchcock and it’s easier to cut along the backbone.
                  2.  A cutting board - Make sure it’s not slippery or moving around on your counter. Use a kitchen towel underneath to keep it in place.  
                  3. Sharp Kitchen shears - Makes cutting along the backbone much easier and safer than using a knife. 
                  4. A paring knife - For scoring the cartilage which makes it easier to lay the chicken flat.

                  How to Spatchcock a Chicken:

                  • To Spatchcock a chicken, you'll need to place the chicken breast side down with legs toward you.
                  • Use sharp kitchen shears and cut along the backbone to remove it. You'll end up cutting through the rib bones.
                  • Slit the white cartilage that's in the middle of the breast.
                  • Turn the chicken over and use two hands to pull the breast and wings upward while pushing the middle of the breast down, until it lays flat.
                  • Remove any excess fat from the chicken.

                  And that's it. You can grill the chicken, air fry the chicken, or bake the chicken in the oven on 400 degrees Fahrenheit for 40-45 minutes.

                  a cooked spatchcocked chicken
                  Yield: Spatchcock Chicken

                  How to Spatchcock a Chicken

                  a spatchcocked chicken on a wooden board

                  Learn how to Spatchcock a Chicken with this easy guide.

                  Prep Time 5 minutes
                  Active Time 5 minutes
                  Total Time 10 minutes
                  Difficulty Easy

                  Materials

                  • A 2-4 lb chicken
                  • Cutting Board
                  • Kitchen Shears
                  • Paring Knife

                  Instructions

                    1. Place the chicken breast side down with legs toward you. Cut along the backbone with sharp kitchen shears. scissors cutting along the backbone of a whole chicken
                    2. Slit the cartilage that's in the middle of the breastbone. a knife cutting the cartilage of the chicken between the chicken breast
                    3. Place two hands on the breast and wings and pull them apart while pushing down on the middle of the breastbone. two hands pulling the breast of the chicken apart
                    4. Your chicken will lay flat. Cut off any excess fat. a spatchcocked chicken on a wooden board

                  Notes

                  • Smaller chickens are easier to spatchcock as it's easier to cut along the backbone. I generally use chickens that are around 2-4lbs.
                  • Dry your chicken with paper towels prior to cutting. It'll make grabbing and gripping the chicken easier.

                  Recommended Products

                  As an Amazon Associate and member of other affiliate programs, I earn from qualifying purchases.

                  • Mercer Culinary Millennia 3.5-Inch Paring Knife, Black
                    Mercer Culinary Millennia 3.5-Inch Paring Knife, Black
                  • KitchenAid Shears with Soft Grip Handles, Soft Blue
                    KitchenAid Shears with Soft Grip Handles, Soft Blue
                  • Made in USA, Large End Grain Walnut Wood Cutting Board with Built-in Compartments, Non-slip: 17x13x1.5 with Juice Groove (Gift Box Included) by Sonder Los Angeles
                    Made in USA, Large End Grain Walnut Wood Cutting Board with Built-in Compartments, Non-slip: 17x13x1.5 with Juice Groove (Gift Box Included) by Sonder Los Angeles
                  © Tanya
                  Category: Cooking Basics

                  Cauliflower Pizza Casserole

                  September 28, 2020 by Tanya Harris 4 Comments

                  Overhead shot of the cooked dish in a skillet.

                  This low carb dinner is a delicious recipe that the whole family will love! Cauliflower pizza casserole is easy to make in a skillet, customize it with your favorite pizza toppings to make it your own!

                  Close up of the toppings on the cauliflower pizza casserole.

                  This post contains affiliate links, please read my full disclaimer here.

                  You’ll find the full recipe with ingredient amounts and instructions in the recipe card at the bottom of this post. Be sure to check out the blog post itself for extra tips and tricks!

                  This cauliflower pizza casserole is a great alternative for pizza night and is an easy way to sneak some extra veggies into everyone's day! It comes together so easily with a few simple ingredients, it's sure to be a family favorite!

                  This is a great recipe if you are following a low carb lifestyle, and it's delicious if you're not!

                  If you are looking for more low carb recipes, be sure to check out my Chicken Patties and Air Fryer Shishito Peppers

                  How to make cauliflower pizza casserole

                  • Gather your ingredinets and pre-heat the oven to 375 degrees.
                  ingredients for cauuliflower pizza casserole on a white background with text of ingredients
                  • Heat a 10-inch ovenproof skillet over medium-high heat. Add Italian sausage and cook until browned.
                  Browning the sausage in a skillet.
                  • Remove sausage from skillet and set aside. If there is grease leftover in the pan, add cauliflower and cook until browned, about 2 minutes, stirring occasionally. If there is not any grease, add a little oil to the pan before adding cauliflower.
                  Cooking the cauliflower in the skillet.
                  • Remove pan from heat and add sausage back to pan along with pizza sauce and stir to combine.
                  Cauliflower added to the browned sausage.
                  • Sprinkle cheese, pepperoni, and other toppings across the top.
                  Pepperoni and olives laid on top of the cauliflower.
                  • Place in a preheated oven and bake for 20-25 minutes, until the cheese has melted. Remove from heat and allow to cool in the skillet for 10-15 minutes before serving. Serve and enjoy.
                  The cauliflower pizza casserole being served out of the skillet.

                  What other toppings can you add?

                  The beauty of this dish is that it's so easily customisable with all your favorite toppings. Try it with:

                  • Bell peppers
                  • Mushrooms
                  • Pineapple
                  • Bacon
                  • Jalapeños
                  • Blue cheese
                  • And anything else you fancy!

                  Can you make it ahead of time?

                  You can make the pizza base a few hours ahead of time and add the toppings, then keep it covered in the fridge until you are ready to bake and serve it.

                  This dish is also perfect for meal prep and taste even better the second day.

                  Can you freeze it?

                  It's best not to freeze the cooked casserole, but you can make the base, let it cool, add the toppings and then freeze it. Wrap it in foil and place in a freezer bag and it will keep for a couple of months.

                  You can then cook it right from frozen, just add a few extra minutes to the cooking time.
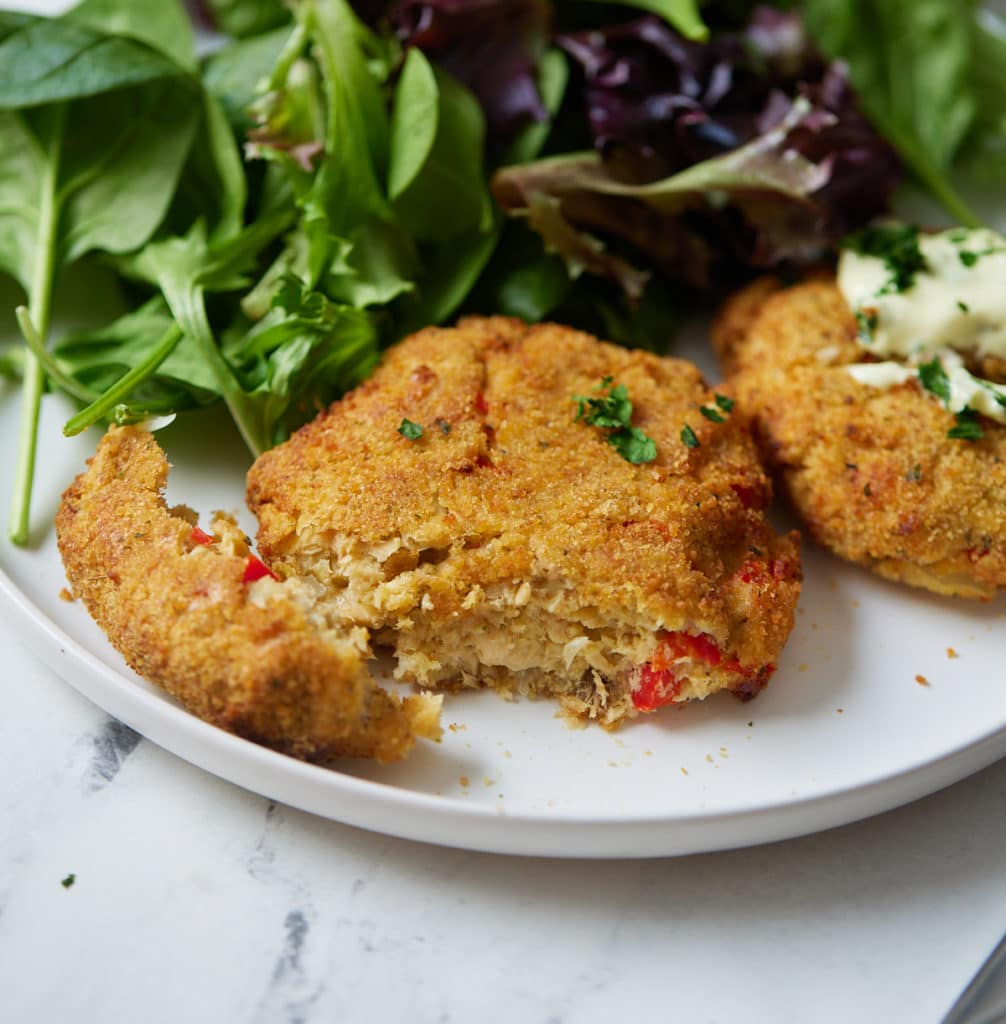
                  Recipe Notes and Tips

                  • Use an oven-safe skillet for this recipe. I use my cast-iron.

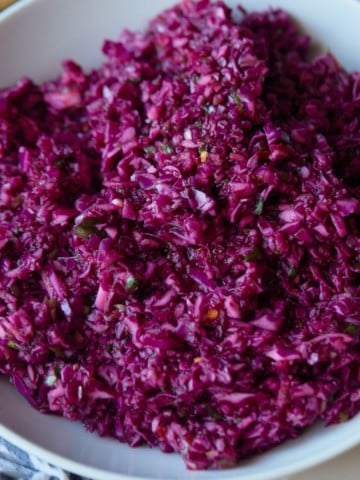
                  • This dish produces a lot of liquid due to the cauliflower. Some of the liquid will soak up while it cools.
                  • Cover this skillet with your favorite toppings.

                  More Easy Dinner Recipes

                  • Balsamic Shrimp and Sausage Skillet Dinner
                  • Air Fried Spatchcock Chicken
                  • Perfect Air Fryer Pork Chops
                  • Hearty Instant Pot Vegetable Soup
                  Close up of the toppings on the cauliflower pizza casserole.
                  Print Recipe
                  5 from 1 vote

                  Cauliflower Pizza Casserole

                  This low carb dinner is a delicious recipe that the whole family will love! Easy to make in a skillet, customize it with your favorite pizza toppings to make it your own!
                  Prep Time10 minutes mins
                  Cook Time25 minutes mins
                  Total Time35 minutes mins
                  Course: Main Course
                  Cuisine: American
                  Keyword: cauliflower pizza casserole, cauliflower pizza recipes, low carb casserole recipe
                  Servings: 6 servings
                  Calories: 350kcal
                  Author: Tanya Harris

                  Ingredients

                  • ½ lb Italian sausage
                  • 1 Tablespoon olive oil optional
                  • 1 medium head cauliflower chopped finely
                  • 14 oz pizza sauce
                  • 2 cups mozzarella cheese
                  • 2 oz of pepperoni
                  • Your favorite pizza toppings

                  Instructions

                  • Preheat oven to 375 F degrees.
                  • Heat a 10-inch oven proof skillet over medium-high heat. Add Italian sausage and cook until browned. Remove sausage from skillet and set aside. If there is grease leftover in the pan, add cauliflower and cook until browned, about 2 minutes, stirring occasionally. If there is not any grease, add oil to the pan before adding cauliflower.
                  • Remove pan from heat and add sausage back to pan along with pizza sauce and stir. Sprinkle cheese, pepperoni, and other toppings across the top.
                  • Place in a preheated oven and bake for 20-25 minutes, until the cheese has melted. Remove from heat and allow to cool in the skillet for 10-15 minutes before serving. Serve and enjoy.

                  Notes

                  • Use an oven safe skillet for this recipe.
                  • This dish produces a lot of liquid due to the cauliflower.
                  • Cover this skillet with your favorite toppings.

                  Nutrition

                  Calories: 350kcal | Carbohydrates: 9g | Protein: 19g | Fat: 27g | Saturated Fat: 11g | Cholesterol: 68mg | Sodium: 1052mg | Potassium: 656mg | Fiber: 3g | Sugar: 5g | Vitamin A: 539IU | Vitamin C: 52mg | Calcium: 227mg | Iron: 2mg

                  Easy No-Cook Pizza Sauce

                  September 25, 2020 by Tanya Harris Leave a Comment

                  The sauce spread on pizza dough.

                  It's so easy to make your own tomato sauce for pizzas and dips! This no-cook pizza sauce takes no more than 5 minutes to make with a few simple ingredients.

                  The sauce spread on pizza dough.

                  This post contains affiliate links, please read my full disclaimer here.

                  You’ll find the full recipe with ingredient amounts and instructions in the recipe card at the bottom of this post. Be sure to check out the blog post itself for extra tips and tricks!

                  When it comes to pizza night, we love making our own pizzas instead of ordering in, and a pizza is only as good as its sauce!

                  Luckily I've got you covered with this easy pizza sauce that doesn't require any cooking, just blend the ingredients and spread it all over your favorite crust. Use it in your favorite pizza recipe, like cauliflower pizza casserole, a calzone, or dip.

                  This recipe is a great way to add flair and flavor to your homemade pizzas and it's great as a dip too, or stir it into some warm pasta.

                  If you are after more dipping sauces, be sure to check out my Homemade BBQ Sauce and Easy Queso Dip.

                  How to make easy no-cook pizza sauce

                  • Add ingredients to a blender or food processor.
                  The ingredients before being blended.
                  • Pulse a few times until desired consistency.
                  The ingredients after blending.

                  Can you make it ahead of time?

                  This recipe makes enough for two cups of sauce, so you are likely to have some leftover. Place the sauce in a sealed jar or airtight container and it will keep for up to a week. It can be used straight out of the fridge.

                  Can you freeze it?

                  This is a great recipe if you are looking for some batch cooking! The sauce will keep well frozen for up to 2 months. Defrost the suace in the fridge overnight before using.

                  Recipe Variations

                  This pizza sauce is pretty good as it is, but there are a few swaps you can make to suit your tastes.

                  • I like to blend whole tomatoes to make this, but you can use a thick canned pure tomato sauce and mix the other ingredients into it.
                  • I like to add red pepper flakes because I like my pizza sauce a little spicy. Feel free to omit the flakes for less heat or add more for spicy pizza sauce.
                  • Depending on the brand of tomatoes you use, you may need to add a little sugar to cut through the acidity, but you can omit this if you prefer. You can also substitute white sugar for coconut sugar for a paleo sauce.
                  Tomatoes in a can.

                  Recipe Notes and Tips

                  • This recipe is easily doubled and tripled.
                  • Spread the sauce evenly on the crust and don't be stingy, add a nice thick layer.
                  • The tomato paste makes the sauce thicker and more spreadable, so don't skip this ingredient.

                  More Easy Sauce Recipes

                  • Homemade Vegetarian Spaghetti Sauce
                  • Homemade Remoulade Sauce
                  • Cocktail Sauce
                  • Tartar Sauce
                  The sauce spread on pizza dough.
                  Print Recipe
                  5 from 1 vote

                  Easy No Cook Pizza Sauce

                  It's so easy to make your own tomato sauce for pizzas and dips! This no cook pizza sauce takes no more than 5 minutes to make with a few simple ingredients.
                  Prep Time5 minutes mins
                  Total Time5 minutes mins
                  Course: Sauce
                  Cuisine: American
                  Keyword: easy pizza sauce, how to make pizza sauce, tomato pizza sauce recipe
                  Servings: 2 cups
                  Calories: 99kcal
                  Author: Tanya Harris

                  Ingredients

                  • 28 oz can of whole tomatoes drained
                  • 1 Tablespoon tomato paste
                  • 2 teaspoon italian seasoning
                  • 1 teaspoon dried basil
                  • 1 teaspoon dried oregano
                  • 1 teaspoon sugar optional
                  • 1 teaspoon red pepper flakes optional
                  • 1 teaspoon garlic powder
                  • ½ teaspoon onion powder
                  • ½ teaspoon salt

                  Instructions

                  • Add ingredients to a blender or food processor.
                  • Pulse a few times until desired consistency.
                  • Add to pizza or use as dip.

                  Notes

                  • This recipe is easily doubled and tripled.
                  • Spread the sauce evenly on the crust and don't be stingy, add a nice thick layer.
                  • The tomato paste makes the sauce thicker and more spreadable, so don't skip this ingredient.

                  Nutrition

                  Calories: 99kcal | Carbohydrates: 23g | Protein: 4g | Fat: 1g | Saturated Fat: 1g | Sodium: 1231mg | Potassium: 888mg | Fiber: 6g | Sugar: 13g | Vitamin A: 913IU | Vitamin C: 39mg | Calcium: 171mg | Iron: 6mg

                  Chicken Seasoning

                  September 10, 2020 by Tanya Harris 2 Comments

                  chicken spices in white bowl

                  Add some flavor to your meals with this homemade chicken seasoning. Made with nine herbs and spices, this dry rub is an easy way to elevate any chicken dinner.

                  The spices for the seasoning in a white bowl

                  This post contains affiliate links, please read my full disclaimer here.

                  You’ll find the full recipe with ingredient amounts and instructions in the recipe card at the bottom of this post. Be sure to check out the blog post itself for extra tips and tricks!

                  When it comes to adding flavor to a dish, you can't go wrong with a homemade seasoning mix. This dry spice and herb mix is a wonderful way to season chicken and it's super quick to make a batch.

                  This recipe yields enough to season one whole chicken, but it's super easy to multiply the recipe to make a big batch to have on hand whenever you need.

                  Be sure to check out my other homemade seasoning recipes.

                  How to make chicken seasoning

                  Simply add the ingredients to a small bowl and mix together until well combined.

                  Chicken seasoning in a white bowl with a spoon

                  How to use it

                  You can rub this spice straight onto a whole chicken or chicken breasts or thighs before cooking. You can also mix with a little oil or melted butter to help to get the chicken skin nice and crispy.

                  A fried spatchcoked chicken on a wooden work top

                  This seasoning rub can be used on beef or pork as well and it's delicious sprinkled over vegetables before roasting.

                  How long does it keep?

                  This spice mix has a pretty good shelf life if you want to make a big batch. Store it in an air tight container in a cool and dark cupboard and it will keep well for up to 6 months depending on the freshness of your ingredients.

                  Make it to your taste

                  I use a little cayenne in this seasoning to give it some spice. If you are particularly sensitive to heat you can reduce the amount or omit it completely. Likewise, if you like your chicken on the spicy side, feel free to add in a little extra.

                  Chicken seasoning in front of a cooked spatchcock chicken

                  Recipe Notes and Tips

                  • Use 3-4 tablespoon for a 4lb chicken.
                  • I like to add 3 tablespoon of olive oil or butter to seasoning before roasting a whole chicken.
                  • Store in a cool dark place in an airtight container

                  More Easy Seasonings

                  • Homemade Ranch Seasoning
                  • Jamaican Jerk Seasoning
                  • Homemade Taco Seasoning
                  • Homemade BBQ Seasoning
                  chicken spices in white bowl
                  Print Recipe
                  4.67 from 3 votes

                  Chicken Seasoning

                  Add some flavor to your meals with this homemade chicken seasoning. Made with nine herbs and spices, this dry rub is an easy way to elevate any chicken dinner.
                  Prep Time5 minutes mins
                  Total Time5 minutes mins
                  Course: Seasoning
                  Cuisine: American
                  Keyword: dry rub chicken seasoning, easy chicken seasoning recipe, homemade chicken seasoning
                  Servings: 4 tablespoons
                  Calories: 16kcal
                  Author: Tanya Harris

                  Ingredients

                  • 2 teaspoon paprika
                  • 2 teaspoon onion powder
                  • 2 teaspoon garlic powder
                  • 1 teaspoon mustard powder
                  • ½ teaspoon thyme
                  • ½ teaspoon oregano
                  • 1 ½ teaspoon kosher salt
                  • ½ teaspoon black pepper
                  • ¼ teaspoon cayenne pepper

                  Instructions

                  • Whisk ingredients until incorporated. Use to season chicken, vegetables, or any other protein.

                  Notes

                  • Use 3-4 tablespoon for a 4lb chicken.
                  • I like to add 3 tablespoon of olive oil or butter to seasoning before roasting a whole chicken.
                  • Store in a cool dark place in an airtight container

                  Nutrition

                  Calories: 16kcal | Carbohydrates: 3g | Protein: 1g | Fat: 1g | Saturated Fat: 1g | Sodium: 3200mg | Potassium: 57mg | Fiber: 1g | Sugar: 1g | Vitamin A: 613IU | Vitamin C: 1mg | Calcium: 7mg | Iron: 1mg

                  Brown Stew Chicken

                  September 1, 2020 by Tanya Harris 487 Comments

                  brown stew chicken in pan

                  This Jamaican Brown Stew Chicken is full of Caribbean flavor and a perfect main dish for any day of the week. It’s the perfect stewed chicken dish when you want to have a taste of the islands.

                  brown stew chicken in pot with blue towel behind it

                  You’ll find the full recipe with ingredient amounts and instructions in the recipe card at the bottom of this post. Be sure to check out the blog post itself for extra tips and tricks!

                  We had brown stewed chicken quite often growing up, and it quickly became one of my favorite stew recipes. It was on a weekly rotation in our house, and we would have it more often than we had this amazing oxtail. 

                  Brown stew chicken takes a little more time than most traditional stew recipes. The meat is washed and then marinated in “seasoning” which includes chopped aromatics and a few dry seasonings. The meat is then lightly browned on the stovetop or in the oven, then stewed for about 30-40 minutes until it falls off the bone. 

                  I’ve ventured away from my parents' recipe by using boneless, skinless chicken, mainly because I’m not a fan of chicken skin in stew. You could use chicken with the skin and bone on, but expect to cook it longer. 

                  How to Make Brown Stew Chicken

                  First, rinse your chicken with a mixture of vinegar and water. I’m sure some will wonder why. This is just a rule from my mom and almost everyone from the Caribbean. So I do it. No questions asked. 

                  Place your chicken pieces in a bowl along with the brown sugar, browning, garlic powder, onion powder, salt, paprika, dried thyme, black pepper, allspice, garlic cloves, ginger, onions, and peppers. That's a lot, but oh so necessary if you want those deep flavors. Mix ingredients, making sure the chicken is fully covered. Cover and place in the fridge, and allow the meat to marinate for at least 1 hour. If you can, allow it to marinate overnight. 

                  raw chicken with peppers, onions, and other seasonings in glass bowl

                  When ready to cook, remove the onions, peppers, garlic, and ginger from the chicken and place them in a separate bowl.

                  two glass bowls, one with peppers and onions and the other with raw chicken

                  Heat a large skillet over medium heat, add oil, and then add chicken pieces and brown on each side for about 2 minutes. 

                  chicken being browned in pan

                  Remove the chicken and add the reserved seasonings to the pot, then sauté until softened, about 5 minutes.

                  peppers and onions being browned in pan

                  Add chicken back to the skillet along with chicken broth, water, and ketchup. Bring the mixture to a simmer, cover, and simmer for 30 minutes, stirring occasionally. Remove the cover and simmer for an additional 10 minutes to reduce the gravy.

                  chicken pieces cooking in pot

                  Serve and enjoy. 

                  close up photo of brown stew chicken in pan with thyme leaves on top

                  Recipes to serve with:

                  • Jamaican Rice and Peas (Pressure Cooker)
                  • Steamed Cabbage

                  Other Jamaican Recipes to Try:

                  • Brown Stew Fish
                  • Jamaican Curry Chicken
                  • Jamaican Jerk Chicken
                  • Rum Punch
                  • Corned Beef and Cabbage
                  • Callaloo and Saltfish
                  • Jamaican Banana Fritters
                  • Jamaican Stew Peas

                  Or have a look at all my Caribbean-inspired recipes.

                  brown stew chicken in pan
                  Print Recipe
                  4.88 from 431 votes

                  Brown Stew Chicken

                  This Jamaican Brown Stew Chicken is full of Caribbean flavor and a perfect main dish for any day of the week. It’s the perfect stewed chicken dish when you want to have a taste of the islands.
                  Prep Time20 minutes mins
                  Cook Time40 minutes mins
                  1 hour hr
                  Total Time2 hours hrs
                  Course: Main Course
                  Cuisine: Caribbean
                  Keyword: brown stew chicken, jamaican brown stew chicken
                  Servings: 6 people
                  Calories: 626kcal
                  Author: Tanya Harris

                  Ingredients

                  • 3 lbs chicken thighs boneless, skinless
                  • 1 Tablespoon brown sugar
                  • 2 teaspoons browning
                  • 2 teaspoons garlic powder
                  • 2 teaspoons onion powder
                  • 2 teaspoons salt or to taste
                  • 1 teaspoon paprika
                  • 1 teaspoon dried thyme
                  • ½ teaspoon black pepper
                  • ¼ teaspoon allspice
                  • 1 yellow onion chopped
                  • 3 spring onions chopped
                  • ½ green bell pepper chopped
                  • ½ red bell pepper chopped
                  • 1 scotch bonnet pepper seeds removed and chopped
                  • 4 garlic cloves chopped
                  • 1 inch ginger chopped
                  • ¼ cup oil
                  • 2 Tablespoons ketchup
                  • 1 cup chicken broth
                  • ½ cup water

                  Instructions

                  • Add chicken, brown sugar, browning, garlic powder, onion powder, salt, paprika, dried thyme, black pepper, allspice, onions, green pepper, red pepper, scotch bonnet, garlic cloves, and ginger to a bowl and mix, rubbing seasoning into the chicken. Cover and marinate in the fridge for at least 1 hour or overnight.
                  • Remove peppers, onions, garlic, ginger and thyme from chicken and set aside. Heat oil in large skillet over medium heat and add chicken, brown for about 1-2 minutes per side. Remove chicken and add reserved onions and peppers to the skillet and sauté until softened, for about 5 minutes. Add chicken back to skillet along with chicken broth, water, and ketchup.
                  • Bring mixture to a simmer and cover and simmer for 30 minutes, stirring occasionally. Remove cover and simmer for an additional 10 minutes, to reduce the gravy. Serve and enjoy.

                  Video

                  Notes

                  • Brown stew chicken is traditionally cooked with a whole chicken that has been chopped into smaller pieces. Feel free to skip this by using chicken thighs or legs.
                  • With any stew, dark meat works best as chicken breast can overcook and dry out. Dark meat also has more flavor. I generally opt for chicken thighs, chicken legs, and chicken wings when it comes to this recipe.

                  Nutrition

                  Calories: 626kcal | Carbohydrates: 11g | Protein: 38g | Fat: 47g | Saturated Fat: 11g | Cholesterol: 222mg | Sodium: 1154mg | Potassium: 633mg | Fiber: 1g | Sugar: 5g | Vitamin A: 818IU | Vitamin C: 29mg | Calcium: 39mg | Iron: 2mg

                  Homemade Pumpkin Waffles

                  August 13, 2020 by Tanya Harris 2 Comments

                  Pumpkin waffles stacked on a plate

                  These delicious homemade pumpkin waffles are perfect for a fall breakfast or brunch. Easy to make and flavored with maple syrup and brown sugar, they are a breakfast that the whole family will love!

                  pumpkin waffles stacked on top of each other on orange and teal plate

                  This post contains affiliate links, please read my full disclaimer here.

                  You’ll find the full recipe with ingredient amounts and instructions in the recipe card at the bottom of this post. Be sure to check out the blog post itself for extra tips and tricks!

                  When it comes to weekend breakfasts in our house, there's always heated discussion over whether we have pancakes or waffles! When I served up these pumpkin waffles, even the pancake lovers devoured them!

                  Super quick and easy to make, they are rich in flavor and taste just like fall!

                  If you love waffles, be sure to check out my Cinnabon Waffles Recipe!

                  Ingredients

                  • All-purpose Flour
                  • Baking Powder
                  • Pumpkin Spice
                  • Salt
                  • Eggs
                  • Milk
                  • Butter
                  • Maple Syrup
                  • Brown Sugar
                  • Pumpkin
                  Ingredients to make the waffles

                  How to make pumpkin waffles

                  • Whisk flour, baking powder, pumpkin spice, and salt in a large bowl until combined.
                  Dry ingredients whisked together in a bowl
                  • In a separate bowl, which eggs, milk, butter, maple syrup, and brown sugar until combined.
                  Wet ingredients mixed together in a bowl
                  • Pour mixture and pumpkin into the flour mixture and whisk until combined. Set aside.
                  Wet and dry ingredients whisked together
                  • Heat a waffle iron until hot and ready for the batter. Spray waffle iron with oil or brush with butter.
                  • Pour batter into waffle iron, close, and cook until done.
                  The waffle batter poured onto a waffle iron
                  The cooked waffles in the waffle iron

                  Can you make them ahead of time?

                  It's best to serve the waffles as soon as you've made them, but if you are serving a crowd you can make them up to an hour ahead of time. Place the cooked waffles on sheet pans and you can reheat them in the oven at 300F for 7-10 minutes, flipping halfway.
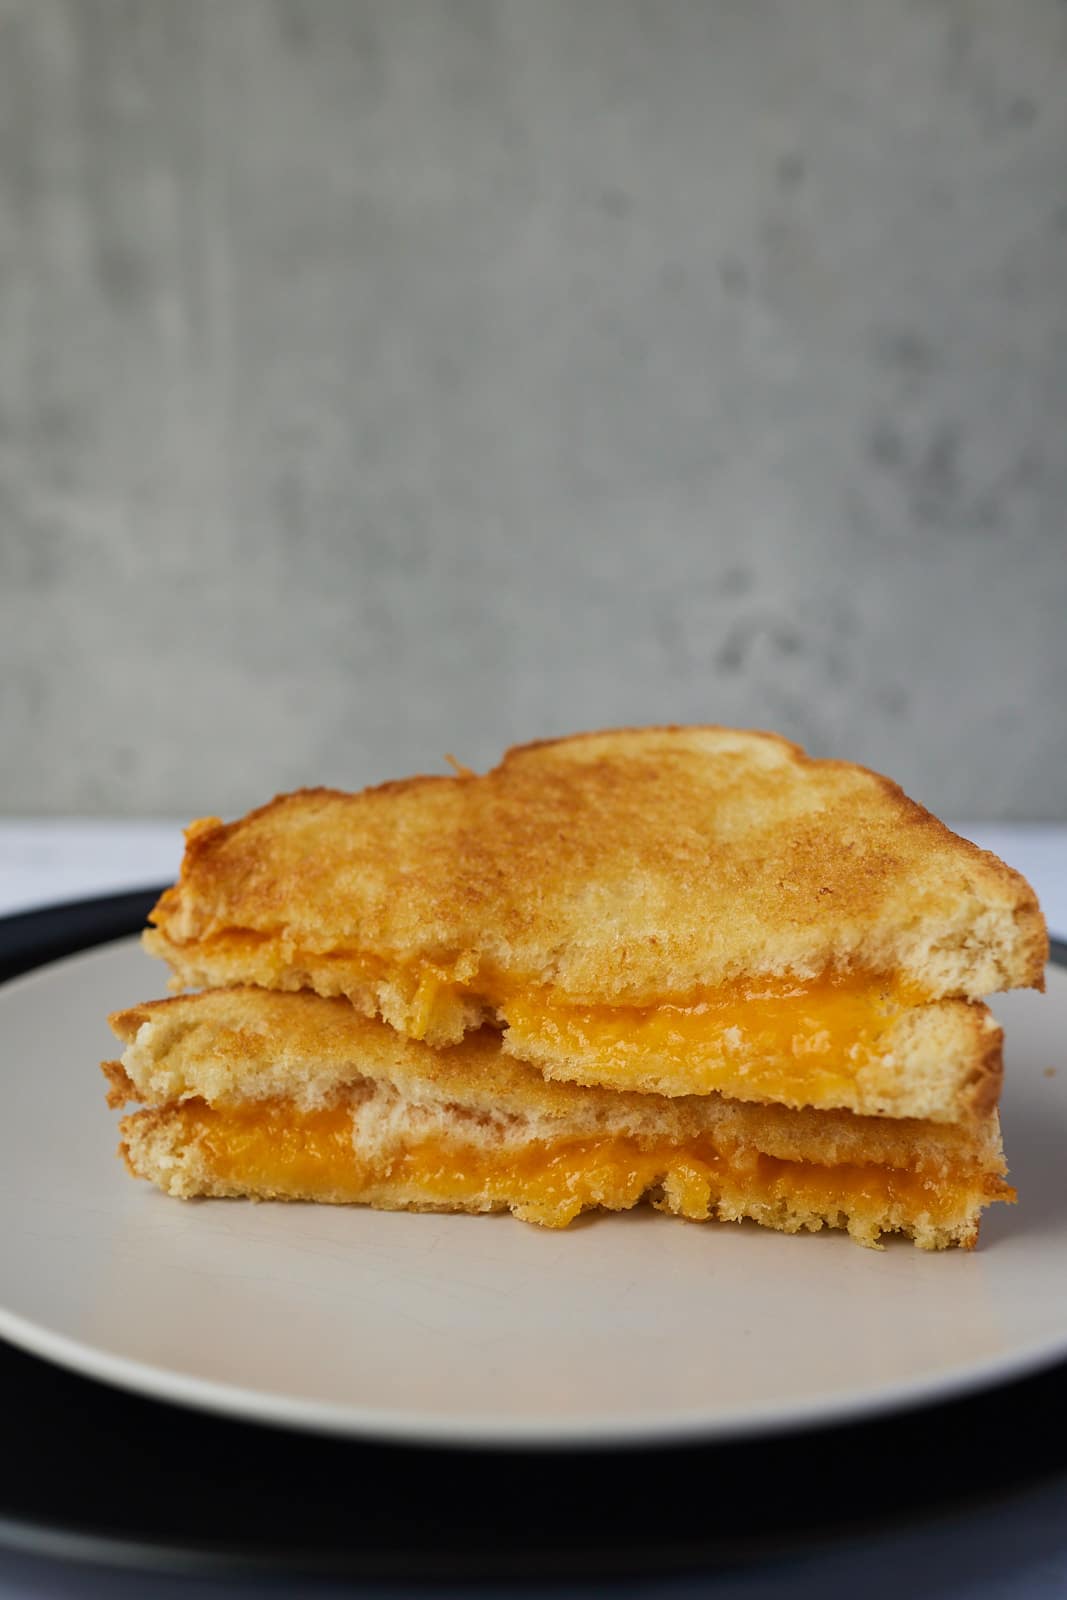
                  You can make the waffle batter the night before and keep it covered in the fridge.

                  You can also freeze these waffles ahead of time. We cook these from frozen for busy mornings. We reheat our waffles in the air fryer on 350 for 5-7 minutes, until heated through.
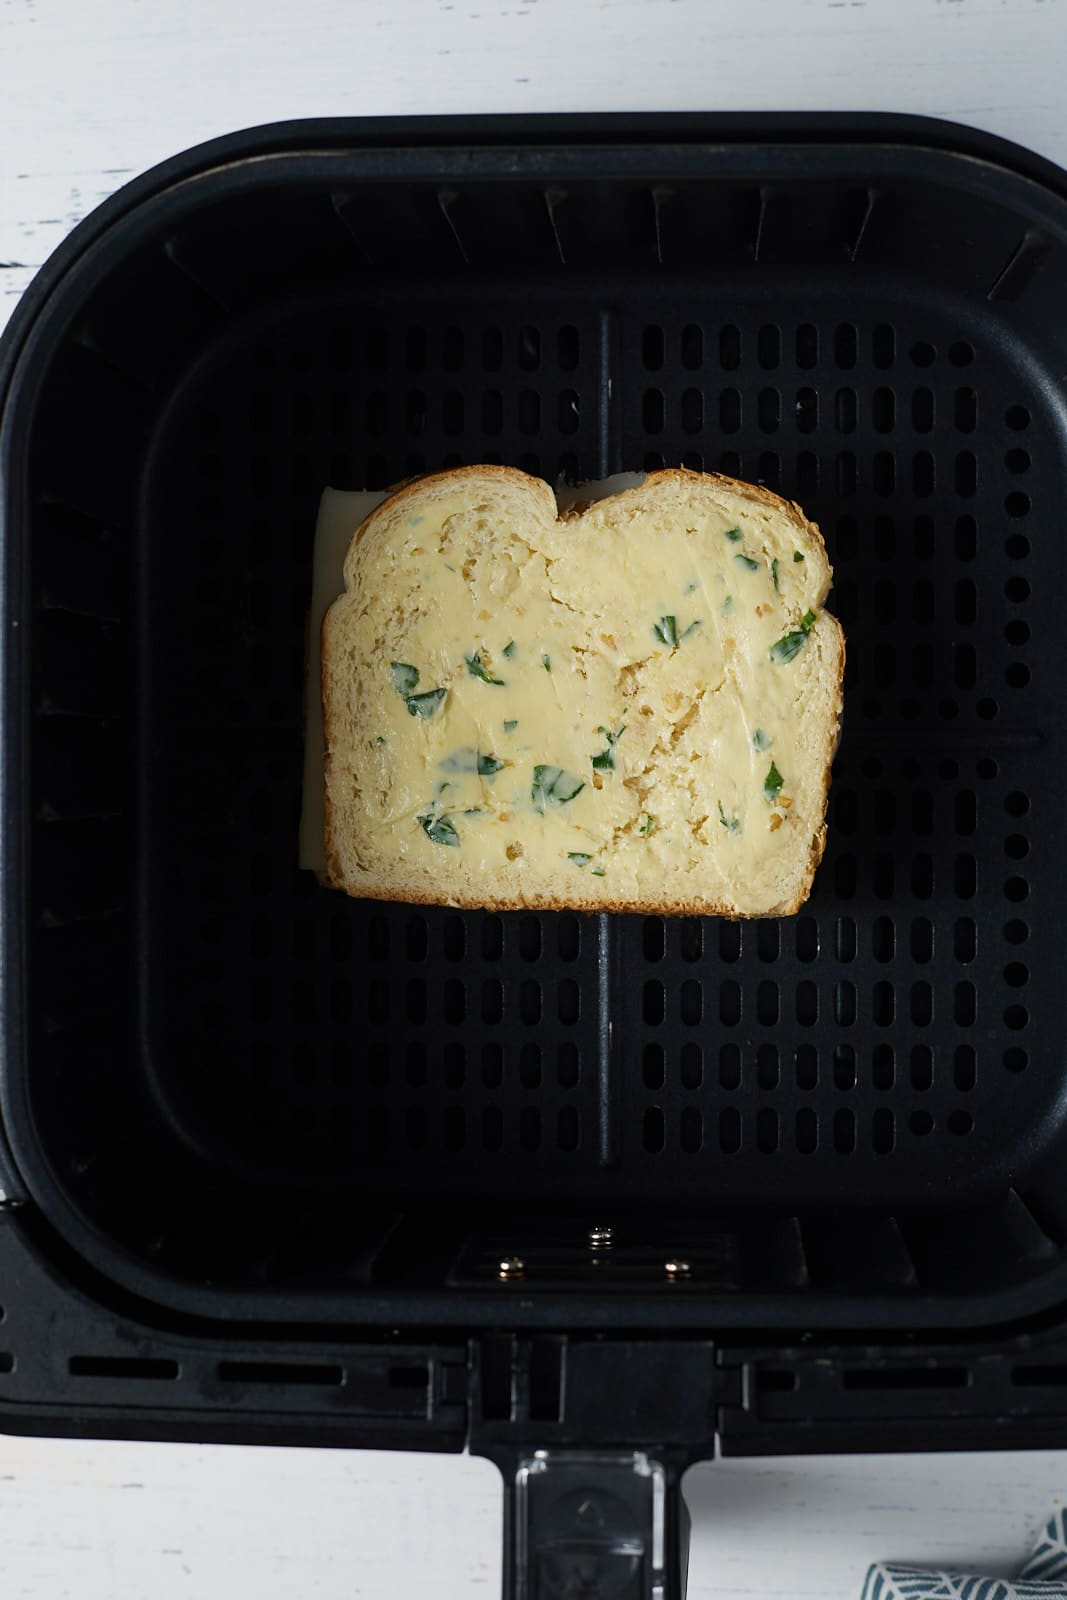
                  What do you serve them with?

                  I like to serve my waffles with a generous helping of maple syrup drizzled on top. You can also serve them with a generous helping of whipped cream, fresh fruits or with some Blueberry Compote.
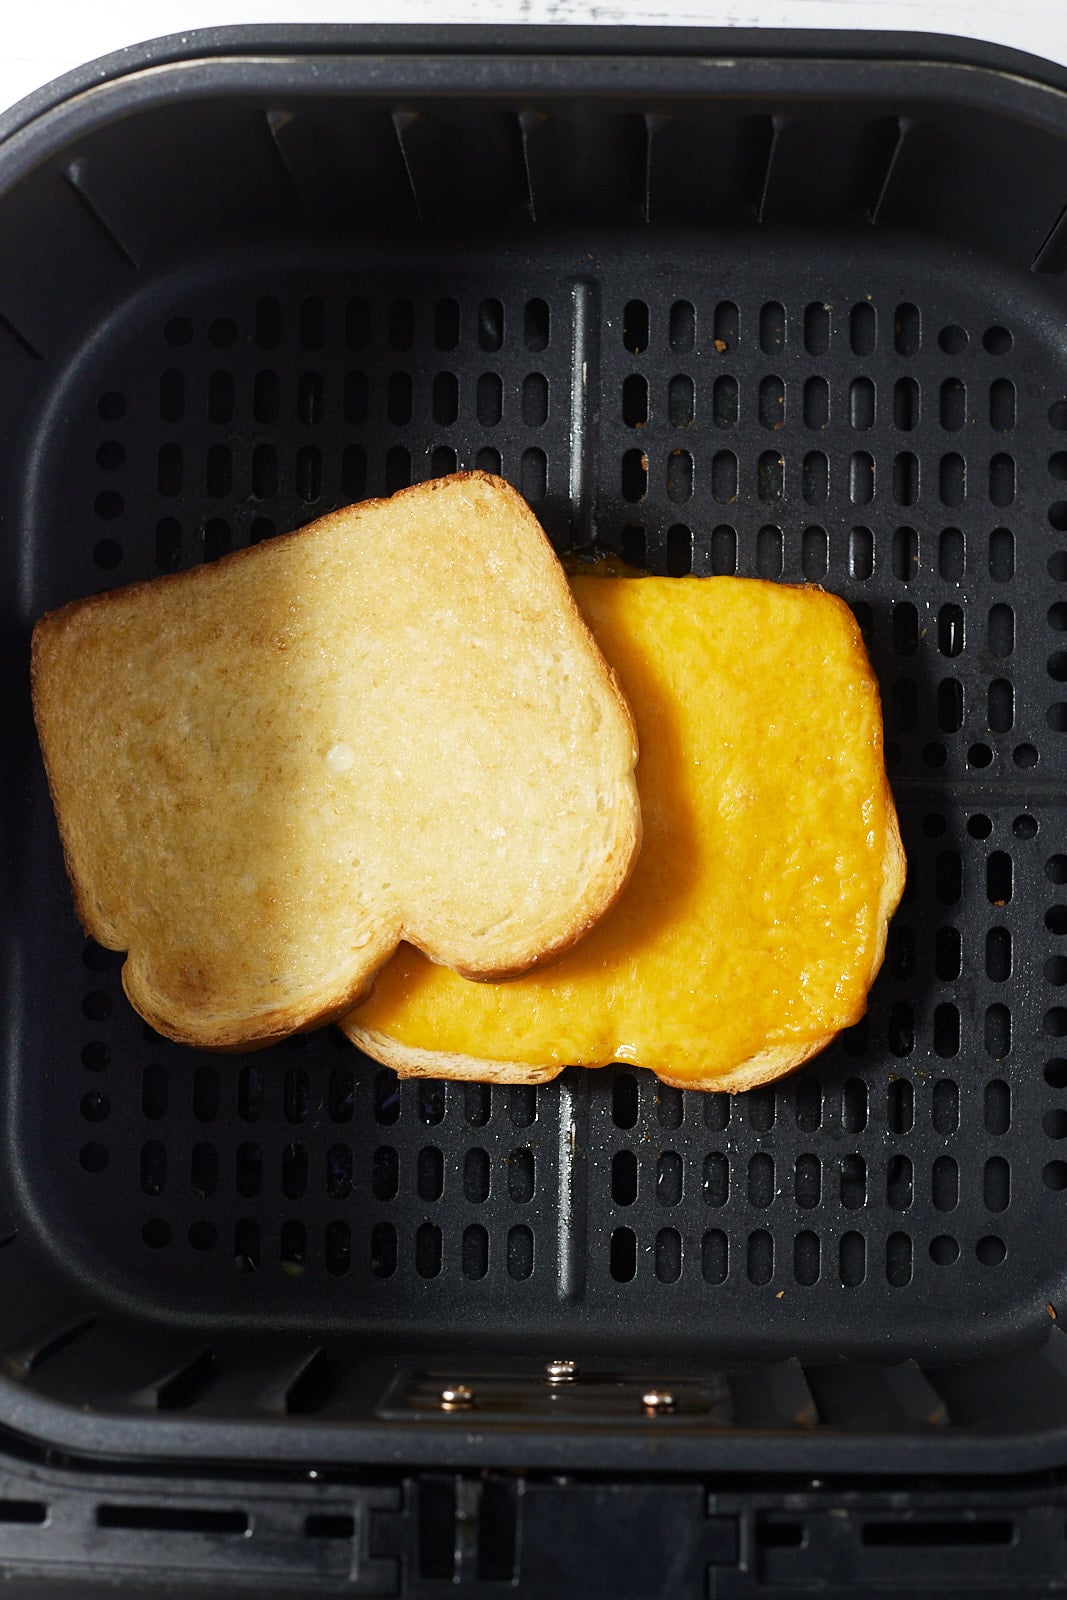
                  What's the difference between pancakes and waffles?

                  The main ingredients for waffles and pancakes are the same, but waffles contain more sugar and fat. The sugar caramelizes and the additional fat helps to get really nice crispy edges. That is why I am firmly in the waffle camp!
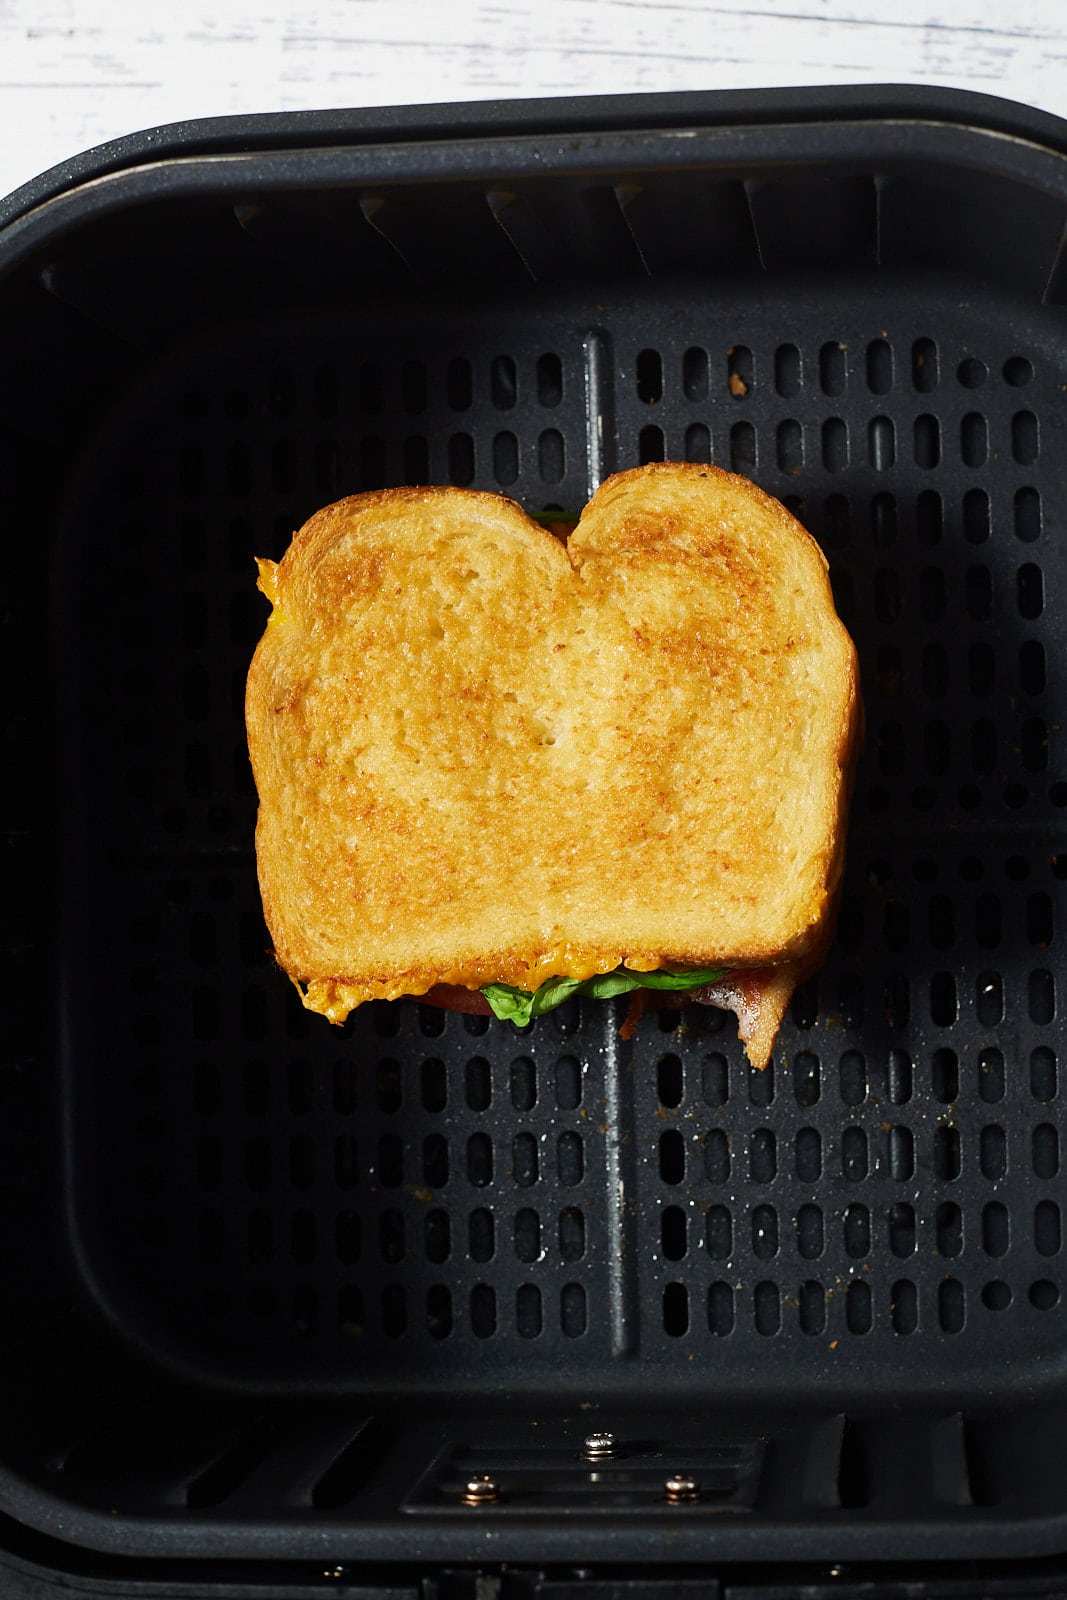
                  Pouring syrup over stacked waffles

                  Recipe Notes and Tips

                  • Do not over mix the waffle batter or they will not rise and get nice and fluffy.
                  • Don't swap the brown sugar for white. The brown sugar contains molasses which gives these waffles a deep and rich flavor.
                  • Use pure pumpkin puree, not spiced, or it will be too overpowering.

                  More Easy Breakfast Recipes

                  • Breakfast Air Fried Potatoes
                  • Oatmeal Raisin Breakfast Cookies
                  • Sheet Pan Pancakes
                  • Cheesy Corned Beef Hash Breakfast Casserole
                  • Banana Oatmeal Pancakes

                  Watch this video tutorial and see how I make these waffles from start to finish.

                  Maple syrup being poured over the pumpkin waffles
                  Print Recipe
                  5 from 1 vote

                  Homemade Pumpkin Waffles

                  These delicious homemade pumpkin waffles are perfect for a fall breakfast or brunch. Easy to make and flavored with maple syrup and brown sugar, they are a breakfast that the whole family will love!
                  Prep Time10 minutes mins
                  Cook Time15 minutes mins
                  Total Time25 minutes mins
                  Course: Breakfast
                  Cuisine: American
                  Keyword: homemade pumpkin waffles, how to make waffles, pumpkin waffles
                  Servings: 10 waffles
                  Calories: 168kcal
                  Author: Tanya Harris

                  Ingredients

                  • 1 ½ cup all-purpose flour
                  • 1 Tablespoon baking powder
                  • 1 Tablespoon pumpkin spice
                  • ½ teaspoon salt
                  • 2 large eggs
                  • ¾ cup milk
                  • ¼ cup unsalted butter melted
                  • ¼ cup maple syrup
                  • 2 Tablespoon brown sugar
                  • ½ cup pumpkin
                  • oil or butter for waffle iron

                  Instructions

                  • Whisk flour, baking powder, pumpkin spice, and salt in a large bowl until combined.
                  • In a separate bowl, whisk eggs, milk, butter, maple syrup, and brown sugar until combined. Pour mixture and pumpkin into the flour mixture and whisk until combined. Set aside.
                  • Heat a waffle iron until hot and ready for the batter. Spray waffle iron with oil or butter. Pour batter into waffle iron, close, and cook until done.
                  • Serve and enjoy.

                  Video

                  Notes

                  • Do not over mix the waffle batter or they will not rise and get nice and fluffy.
                  • Don't swap the brown sugar for white. The brown sugar contains molasses which gives these waffles a deep and rich flavor.
                  • Use pure pumpkin puree, not spiced, or it will be too overpowering.

                  Nutrition

                  Calories: 168kcal | Carbohydrates: 24g | Protein: 4g | Fat: 6g | Saturated Fat: 4g | Cholesterol: 47mg | Sodium: 180mg | Potassium: 219mg | Fiber: 1g | Sugar: 8g | Vitamin A: 713IU | Vitamin C: 1mg | Calcium: 98mg | Iron: 1mg

                  Creamed Cabbage and Sausage Recipe

                  August 6, 2020 by Tanya Harris 10 Comments

                  creamed cabbage in skillet with spatula moving the food

                  This delicious creamed cabbage and sausage is a perfect quick and easy weeknight meal. Ready to serve in less than 30 minutes and all made in one skillet.

                  cabbage in skillet with wooden spoon sticking out

                  This post contains affiliate links, please read my full disclaimer here.

                  You’ll find the full recipe with ingredient amounts and instructions in the recipe card at the bottom of this post. Be sure to check out the blog post itself for extra tips and tricks!

                  If you are stuck in a bit of a dinner rut and looking for something tasty, quick, and super easy, I've got you covered with this creamed cabbage and sausage.

                  All made in one pan with just a few simple ingredients, this is a hearty meal that the whole family will love! Be sure to check out my Air Fryer Sausage and Peppers and Balsamic Shrimp and Sausage Skillet Dinner for more easy weeknight dinners!

                  Ingredients

                  • Smoked sausage
                  • Green cabbage
                  • Heavy cream
                  • Worcestershire sauce
                  • Sugar
                  • Salt and pepper

                  How to make creamed sausage and cabbage

                  • Brown sausage in a medium-sized skillet over medium-high heat, about 2-3 minutes or until the sausage is browned on the outside.
                  Sausage cooking in a skillet
                  • Add cabbage and stir until the cabbage has softened a little, about 5 minutes.
                  Stirring the cabbage into the sausage
                  • Add heavy cream, Worcestershire sauce, and sugar and stir to combine. Reduce heat to medium and simmer until heavy cream is reduced, about 10-15 minutes.
                  The cabbage softened
                  • Remove from heat and add salt and pepper. Enjoy 🙂
                  Overhead shot of creamed cabbage and sausage in a skillet with a wooden spatula

                  What do you serve it with?

                  Don't tell anyone but I can totally eat this just by itself! I also like to serve it with mashed potatoes or rice, something to soak up all of that creamy sauce and a side of veggies like Sautéed Yellow Squash or Sautéed Beet Greens.

                  What's the best sausage to use?

                  I like to use smoked sausage like kielbasa or andouille, but you can easily use whatever sausages you have in your fridge. If you don't use smoked sausage, be sure to cook it a little bit longer in the skillet until cooked through.

                  How long does it keep?

                  Once the creamed cabbage and sausage has cooled to room temperature, store it in an air-tight container in the fridge. It will keep well for 3-5 days.

                  It's best not to freeze it as the texture of the cabbage and cream will change significantly.

                  Stirring the creamed cabbage with a wooden spatula

                  Recipe Notes and Tips

                  • You can use red cabbage in place of white in this recipe if that's what you have, or even use a mixture of both.
                  • I typically use 1 teaspoon salt and ½ teaspoon black pepper when making this recipe.
                  • I prefer to use heavy cream in this recipe, but you can use half and half if you prefer.

                  More Easy Weeknight Recipes

                  • Creamed Spinach
                  • BBQ Cheesesteak Stuffed Peppers
                  • Rasta Pasta
                  • Quick and Easy Mongolian Beef
                  • Korean Sloppy Joes
                  • Instant Pot Cabbage

                  Watch this video tutorial and see how I make this creamed cabbage and sausage from start to finish.

                  creamed cabbage in skillet with spatula moving the food
                  Print Recipe
                  4.50 from 10 votes

                  Creamed Cabbage and Sausage Recipe

                  This delicious creamed cabbage and sausage is a perfect quick and easy weeknight meal. Ready to serve in less than 30 minutes and all made in one skillet.
                  Prep Time5 minutes mins
                  Cook Time20 minutes mins
                  Total Time25 minutes mins
                  Course: Main Course
                  Cuisine: American
                  Keyword: cabbage and sausage recipe, cabbage with sausage, creamed cabbage
                  Servings: 4 servings
                  Calories: 373kcal
                  Author: Tanya Harris

                  Ingredients

                  • 6 oz smoked sausage chopped
                  • ½ medium green cabbage about 5 cups sliced
                  • 1 cup heavy cream
                  • 1 Tablespoon Worcestershire sauce
                  • 2 teaspoon white granulated sugar
                  • Salt and pepper to taste

                  Instructions

                  • Brown sausage in a medium-sized skillet over medium-high heat, about 2-3 minutes or until the sausage is browned on the outside.
                  • Add cabbage and stir until the cabbage has softened a little, about 5 minutes.
                  • Add heavy cream, Worcestershire sauce, and sugar and stir to combine. Reduce heat to medium and simmer until heavy cream is reduced, about 10-15 minutes.
                  • Remove from heat and add salt and pepper. Enjoy 🙂

                  Notes

                  • You can use red cabbage in place of white in this recipe if that's what you have, or even use a mixture of both.
                  • I typically use 1 teaspoon salt and ½ teaspoon black pepper when making this recipe.
                  • I prefer to use heavy cream in this recipe, but you can use half and half if you prefer.

                  Nutrition

                  Calories: 373kcal | Carbohydrates: 12g | Protein: 8g | Fat: 33g | Saturated Fat: 18g | Cholesterol: 112mg | Sodium: 453mg | Potassium: 352mg | Fiber: 3g | Sugar: 6g | Vitamin A: 986IU | Vitamin C: 42mg | Calcium: 92mg | Iron: 1mg

                  Classic Southern Cornbread Recipe

                  August 5, 2020 by Tanya Harris 5 Comments

                  cornbread with slice cut from it and butter on top

                  This Classic Southern Cornbread has a beautiful golden crust with the perfect crumb on the inside. This savory cornbread recipe is the perfect side for your favorite meal. 

                  cornbread in skillet with butter on top

                  This post contains affiliate links, please read my full disclaimer here.

                  You’ll find the full recipe with ingredient amounts and instructions in the recipe card at the bottom of this post. Be sure to check out the blog post itself for extra tips and tricks!

                  There’s a whole long history and debate when it comes to cornbread in the South. The biggest debate is whether or not sugar belongs in Southern cornbread. That’s not a debate I’m looking to get into, but you can read more about the history of Southern cornbread if you like, it’s quite interesting. 

                  This cornbread recipe is the one my family loves when it comes to southern-style cornbread. It’s not sweet, but I do add a little bit of sugar to round out the taste. The sugar is optional in the recipe. If you're looking for a sweeter cornbread, try these cornbread muffins.

                  Ingredients

                  • Cornmeal
                  • All-purpose flour
                  • Baking powder and baking soda
                  • Sugar
                  • Salt
                  • Butter
                  • Buttermilk
                  • Eggs
                  Ingredients in white bowls

                  How to make Southern Cornbread

                  • Preheat oven to 425 degrees Fahrenheit. Place 1 tablespoon of butter in a 10-inch cast-iron skillet and place in the oven on the middle rack for 5 minutes or until the butter has melted.
                  • Remove from oven and swirl butter to spread across the bottom of the skillet.
                  A piece of butter in a skillet
                  • Meanwhile, combine cornmeal, all-purpose flour, baking powder, baking soda, sugar (if using), and salt and whisk to combine. In another bowl, whisk eggs, butter, and buttermilk together. Add wet mixture to dry mixture and whisk until smooth.
                  Whisking together the ingredients in a bowl
                  • Pour into the hot cast-iron skillet.
                  The batter placed into the skillet
                  • Bake in preheated oven on the middle rack for 20-25 minutes, until the cornbread is golden.
                  The baked cornbread in a skillet

                  What do you serve with it?

                  You can serve this savory cornbread as an appetizer, side dish or by itself as a tasty snack! It's great served with soups, stew and chilis as well as grilled meats. It works great with fried chicken too! Try it with:

                  • Jambalaya
                  • Collard Greens or Cabbage
                  • Classic Beef Chili
                  • Turkey Chili Recipe
                  • Hearty Vegetable Soup
                  • North Carolina Instant Pot Pulled Pork
                  • Air Fryer Fried Chicken
                  • Smothered Pork Chops

                  Do you have to cook cornbread in a skillet?

                  I love to use my cast iron skillet for this recipe. It distributes the heat evenly and it's easy to move in and out of the oven. If you don't have an oven safe skillet, you can make the bread in a pyrex dish or a greased tin.

                  What's the best cornmeal to use?

                  I like to use medium ground cornmeal for cornbread, but you can add some fine cornmeal for a lighter texture, or, add in a little coarse ground for a bit of crunch.

                  The cornbread in a skillet and a sliced served on a plate

                  Recipe Notes and Tips

                  • Make sure your skillet is hot when you add the batter to get a nice crust.
                  • The cornbread is ready when the top is golden brown and an inserted toothpick comes out clean.
                  • Once cooled, place the cornbread in an airtight container. It will keep for up to 2 days at room temperature and up to a week in the fridge.
                  • To freeze, wrap the bread in foil or plastic wrap and place in a freezer bag. It will keep frozen for up to 6 months and can be thawed at room temperature.

                  More Easy Bread Recipes

                  • Best Banana Bread Recipe in the World
                  • Easy Homemade Bagel Recipe
                  • Sweet Potato Cornbread
                  cornbread with slice cut from it and butter on top
                  Print Recipe
                  4.75 from 4 votes

                  Classic Southern Cornbread Recipe

                  This Classic Southern Cornbread has a beautiful golden crust with the perfect crumb on the inside. This savory cornbread recipe is the perfect side for your favorite meal. 
                  Prep Time10 minutes mins
                  Cook Time20 minutes mins
                  Total Time30 minutes mins
                  Course: Side Dish
                  Cuisine: American
                  Keyword: classic cornbread recipe, skillet cornbread, southern cornbread recipe
                  Servings: 8 servings
                  Calories: 241kcal
                  Author: Tanya Harris

                  Ingredients

                  • 1 ½ cup cornmeal
                  • ½ cup all-purpose flour
                  • 1 Tablespoon baking powder
                  • ½ teaspoon baking soda
                  • 2 Tablespoons sugar optional
                  • 1 teaspoon salt
                  • ¼ cup butter melted + 1 tablespoon butter
                  • 1 cup buttermilk
                  • 2 eggs

                  Instructions

                  • Preheat oven to 425 degrees Fahrenheit. Place 1 tablespoon of butter in a 10-inch cast-iron skillet and place in the oven on the middle rack for 5 minutes or until the butter has melted. Remove from oven and swirl butter to spread across the bottom of the skillet.
                  • Meanwhile, combine cornmeal, all-purpose flour, baking powder, baking soda, sugar (if using), and salt and whisk to combine. In another bowl, whisk eggs, butter, and buttermilk together. Add wet mixture to dry mixture and whisk until smooth.
                  • Pour into the hot cast-iron skillet. Bake in preheated oven on the middle rack for 20-25 minutes, until the cornbread is golden.

                  Notes

                  • Make sure your skillet is hot when you add the batter to get a nice crust.
                  • The cornbread is ready when the top is golden brown and an inserted toothpick comes out clean.
                  • Once cooled, place the cornbread in an airtight container. It will keep for up to 2 days at room temperature and up to a week in the fridge.
                  • To freeze, wrap the bread in foil or plastic wrap and place in a freezer bag. It will keep frozen for up to 6 months and can be thawed at room temperature.

                  Nutrition

                  Calories: 241kcal | Carbohydrates: 33g | Protein: 6g | Fat: 10g | Saturated Fat: 5g | Cholesterol: 59mg | Sodium: 470mg | Potassium: 312mg | Fiber: 3g | Sugar: 5g | Vitamin A: 286IU | Calcium: 109mg | Iron: 2mg

                  Freezer Friendly Breakfast Sandwiches

                  August 4, 2020 by Tanya Harris 2 Comments

                  breakfast sandwiches wrapped in plastic wrap on marble with one sandwich unwrapped

                  Make it an easy and delicious morning with these make-ahead breakfast sandwiches. You can make a batch of these if you’re serving a large number of people for breakfast or you can make these and freeze them for a grab and go breakfast.

                  close up of cheesy breakfast sandwich

                  This post contains affiliate links, please read my full disclaimer here.

                  You’ll find the full recipe with ingredient amounts and instructions in the recipe card at the bottom of this post. Be sure to check out the blog post itself for extra tips and tricks!

                  I started prepping breakfast when I worked full time as an attorney. Mornings were always a little crazy so I lived by breakfast recipes I could prep ahead and freeze for later, like these pancakes or waffles. 

                  These sandwiches are perfect for prepping on the weekend for the upcoming week. I like to store them in the freezer and grab one before starting my day, although sometimes the whole batch gets devoured before I even have a chance to freeze them. 

                  How to make Breakfast Sandwiches

                  First, preheat your oven to 375 degrees Fahrenheit and gather your ingredients and tools. Prepare two sheet pans by laying parchment paper in them. You can mix up the ingredients for your sandwiches but I use the following:

                  • English muffins (Cinnamon and Raisin kind)
                  • Large eggs
                  • Cheddar Cheese
                  • Turkey Bacon
                  • Strawberry Jam
                  • Chopped Spinach and Tomato
                  ingredients for sandwiches on marble countertop

                  Crack eggs into a large bowl and whisk until beaten. Season with salt and pepper and stir in spinach and tomato.

                  collage of beaten eggs and spinach and tomato in white bowl

                  Pour egg mixture into one sheet pan. Place turkey bacon in the other sheet pan. Place egg mixture on middle oven rack and turkey bacon on bottom oven rack. Bake turkey bacon until cooked, about 12 minutes. Bake egg mixture until set, about 14-15 minutes. Remove from oven and set aside.

                  Once the eggs have cooled a bit, place whatever bread you are using over the eggs and cut squares that are about the size of the bread.

                  collage of cooked turkey bacon and baked eggs with an english muffon on top of eggs

                  Baking the eggs in the oven is perfect for these eggs as they come out perfectly cooked and easy to place on the sandwiches.

                  close up of cut egg mixture on white plate

                  Assemble the sandwiches by placing egg, bacon, cheese, and jam on sadwiches.

                  collage of sandwiches being assembled

                  You can eat the sandwiches now or wrap them in plastic wrap to store in the freezer for later.

                  breakfast sandwiches wrapped on marble

                  How to Freeze Breakfast Sandwiches

                  Place wrapped breakfast sandwiches in a galon sized freezer bag and label them. Store them in the freezer until ready to use. I like to use reusable plastic bags for my sandwiches.

                  freezer sandwiches in freezer bag

                  How to Reheat Breakfast Sandwiches

                  I generally reheat these in my air fryer but the microwave works as well. Unwrap the sandwiches from the plastic wrap before reheating.

                  Air Fryer

                  Separate sandwich and reheat in air fryer on 375 degrees Fahrenheit for 5-7 minutes. If you don't have an air fryer, you could also use the oven but increase the time to about 9-10 minutes.

                  collage of frozen breakfast sandwich and reheated sandwich in air fryer basket.

                  Microwave

                  Place unwrapped sandwich on microwave safe plate. Reheat in the microwave for 60-90 seconds until done.

                  And there ya have it. An easy breakfast sandwich that taste amazing. You get to control the ingredients and make them how you like it.

                  Looking for more breakfast recipes? Try these out:

                  • Oven Baked Turkey Bacon
                  • Million Dollar Bacon
                  • Pressure Cooker Pumpkin Oatmeal
                  • Sheet Pan Pancakes
                  • Pumpkin Waffles
                  breakfast sandwiches wrapped in plastic wrap on marble with one sandwich unwrapped
                  Print Recipe
                  No ratings yet

                  Freezer Friendly Breakfast Sandwiches

                  Make it an easy and delicious morning with these make-ahead breakfast sandwiches. You can make a batch of these if you’re serving a large number of people for breakfast or you can make these and freeze them for a grab and go breakfast.
                  Prep Time10 minutes mins
                  Cook Time15 minutes mins
                  Sandwich Assemble10 minutes mins
                  Total Time35 minutes mins
                  Course: Breakfast
                  Cuisine: American
                  Keyword: breakfast sandwich, breakfast sandwiches, freezer friendly breakfast sandwich, make ahead breakfast sandwich
                  Servings: 6 people
                  Calories: 385kcal
                  Author: Tanya Harris

                  Equipment

                  • Sheet Pan
                  • plastic wrap
                  • Reusable Freezer Bags

                  Ingredients

                  • 6 English Muffins or any kind of bread you prefer
                  • 12 large eggs lightly beaten
                  • 6 slices turkey bacon
                  • 6 slices Cheddar Cheese
                  • Optional add-ins
                  • 1 cup spinach
                  • ¼ cup chopped tomatoes
                  • Salt and Pepper to taste

                  Instructions

                  • Prepare two sheet pans (12x17) by laying parchment paper on the bottom. Preheat oven to 375 degrees Fahrenheit.
                  • Add eggs in a large bowl and whisk until beaten. Stir in spianch and tomato. Pour egg mixture into one baking sheet. Place turkey bacon in the other sheet pan. Place egg mixture on middle oven rack and turkey bacon on bottom oven rack. Bake turkey bacon until cooked, about 12 minutes. Bake egg mixture until set, about 14-15 minutes. Remove from oven and set aside.

                  Assemble Sandwiches

                  • Cut the baked eggs into pieces that will fit onto your bread. Assemble the sandwiches by placing egg, bacon, cheese, and jam on sadwiches.
                  • You can eat the sandwiches now or store for later.

                  Notes

                  Freezer instructions: Wrap sandwiches individually in plastic wrap. Store in freezer in a gallon sized freezer bag. They will last up to 1 month in the freezer. 
                  To Reheat:
                  Remove plastic wrap from each sandwich before reheating. You can use a microwave, air fryer, or oven to reheat. 
                  Air Fryer: Separate sandwich and place in air freyr basket. Reheat in air fryer on 375 degrees Fahrenheit for 5-7 minutes.  If you don't have an air fryer, you could also use the oven but increase the time to about 9-10 minutes.
                  Microwave: Place unwrapped sandwich on microwave safe plate. Reheat in the microwave for 60-90 seconds until done.


                  Nutrition

                  Calories: 385kcal | Carbohydrates: 28g | Protein: 24g | Fat: 19g | Saturated Fat: 8g | Cholesterol: 359mg | Sodium: 838mg | Potassium: 315mg | Fiber: 2g | Sugar: 1g | Vitamin A: 1126IU | Vitamin C: 2mg | Calcium: 210mg | Iron: 3mg

                  Homemade Ranch Seasoning

                  July 29, 2020 by Tanya Harris Leave a Comment

                  herbs and spices for ranch seasoning on a white plate

                  It's so quick and easy to make your own homemade ranch seasoning and it's such a great way to season all of your favorite meals. Easy to make into ranch dressing, or sprinkle it over potatoes and meats for a kick of flavor.

                  Ranch seasoning stored in a glass jar

                  This post contains affiliate links, please read my full disclaimer here.

                  You’ll find the full recipe with ingredient amounts and instructions in the recipe card at the bottom of this post. Be sure to check out the blog post itself for extra tips and tricks!

                  I rarely buy seasonings and dressings any more because it's so easy to make your own in a few minutes!

                  Homemade ranch seasoning has a great shelf life and so many uses. It's a great way to add flavor to so many meals and it's easy to transform into a creamy dressing.

                  Be sure to check out my BBQ Seasoning, Jamaican Jerk Seasoning and Homemade Taco Seasoning - they are always in my cupboard ready to use!

                  Ingredients

                  • Milk Powder (or buttermilk powder)
                  • Dry Parsley
                  • Salt
                  • Mustard Powder
                  • Dry Oregano
                  • Garlic Powder
                  • Onion Powder
                  • Dill Weed
                  • Black Pepper
                  Herbs and spices in a white bowl

                  How to make homemade ranch seasoning

                  It couldn't be easier to make this seasoning mix!

                  • Add the ingredients to a bowl.
                  • Mix until combined.
                  The ingredients mixed together with a wooden spoon

                  Can you make ranch dressing with this recipe?

                  It's really easy to transform this dry seasoning mix into a creamy dressing! I like to do this rather than buying bottled ranch dressing that just sits in the fridge.

                  • Add ½ cup mayonnaise, 2 tablespoon water, and 2 ½ tablespoon of this ranch seasoning to a bowl.
                  • Whisk to combine.
                  Whisking the ranch seasoning with water and mayonnaise to make a sauce

                  How to store

                  This ranch seasoning has a great shelf life and will keep well for up to 3 months. Store the mix in an air tight jar or container and keep it at room temperature. If you are using buttermilk powder rather than milk powder, then store it in the fridge.

                  If you make ranch dressing, it will keep in the fridge for 3 to 4 days.

                  How do you use the seasoning?

                  Aside from making ranch dressing, there's lots of uses for using this seasoning dry. Sprinkle in on French Fries or roasted potatoes, or rub it into chicken or add to shrimp before grilling. It's an easy way to add flavor to meals.

                  Why make your own seasoning?

                  When you make your own seasonings, you are in full control of what you add in so it's easy to adjust to your taste. It also means that you always have a tasty seasoning on hand whenever you need, not too mention, it's also kinder on your purse!

                  Recipe Notes and Tips

                  • Use 2 ½ tablespoon of this seasoning in place of 1 ranch envelope packet.
                  • Check that your herbs and spices aren't stale before making this seasoning. Rub a little between your fingers and they should release an aroma.
                  ranch dressing in bottle

                  More Easy Seasoning Recipes

                  • Homemade Poultry Seasoning
                  • Dukkah Spice Mix
                  • Garlic Herb Butter
                  herbs and spices for ranch seasoning on a white plate
                  Print Recipe
                  No ratings yet

                  Homemade Ranch Seasoning

                  This Homemade Ranch Seasoning is so easy to make and perfect for making your own creamy ranch dressing, dips, or use it to season your favorite meals.
                  Prep Time10 minutes mins
                  Total Time10 minutes mins
                  Course: Seasoning
                  Cuisine: American
                  Keyword: homemade ranch seasoning, how to make ranch seasoning
                  Servings: 12 servings
                  Calories: 20kcal
                  Author: Tanya Harris

                  Equipment

                  • Spice Jars 2
                  • Deli Containers with Lids

                  Ingredients

                  • ⅓ cup milk powder or buttermilk powder
                  • 1 Tablespoon dried parsley
                  • 1 teaspoon kosher salt
                  • ½ teaspoon mustard powder
                  • ½ teaspoon oregano
                  • ½ teaspoon garlic powder
                  • ½ teaspoon onion powder
                  • ½ teaspoon dill weed
                  • ¼ teaspoon black pepper

                  Instructions

                  • Combine ingredients in a bowl or jar. Store in a covered container.

                  Notes

                  • If using buttermilk powder, store this mix in the fridge after opening. 
                  • Store this seasoning for up to 3 months. 
                  • Ranch dressing: Add ½ cup mayonnaise, 2 tablespoon water, and 2 ½ tablespoon of this ranch seasoning to a bowl and whisk to combine.
                  • Use 2 ½ tablespoon of this seasoning in place of 1 ranch envelope packet.

                  Nutrition

                  Calories: 20kcal | Carbohydrates: 2g | Protein: 1g | Fat: 1g | Saturated Fat: 1g | Cholesterol: 3mg | Sodium: 208mg | Potassium: 52mg | Fiber: 1g | Sugar: 1g | Vitamin A: 33IU | Vitamin C: 1mg | Calcium: 36mg | Iron: 1mg

                  Air Fryer Sausage and Peppers

                  July 28, 2020 by Tanya Harris 22 Comments

                  It's so quick and easy to make air fryer sausage and peppers for a delicious family meal. Just 5 minutes prep and the sausages are wonderfully juicy and come out perfect every time!

                  Air fried sausages on top of the cooked vegetables

                  This post contains affiliate links, please read my full disclaimer here.

                  You’ll find the full recipe with ingredient amounts and instructions in the recipe card at the bottom of this post. Be sure to check out the blog post itself for extra tips and tricks!

                  I love a good hoagie sandwich, especially one with sausage and peppers! And with just a few ingredients, you are going to have a really tasty dinner on your hands thanks to your trusty air fryer!

                  These sausages and peppers are perfect for filling hoagie rolls and are so quick and easy to make with no pan watching. Perfect after a busy day!

                  Be sure to check out all my other air fryer recipes like Crispy Fried Shrimp and Nashville Style Hot Chicken Tenders.

                  Ingredients You Need for This Recipe

                  • Tomato Paste
                  • Chicken Broth
                  • Dried Oregano
                  • Red and/or Green Bell Peppers
                  • Sweet Onion
                  • Garlic Cloves
                  • Italian Sausage
                  • Hoagie Rolls
                  Ingredients for the recipe on a kitchen worktop

                  How to make air fryer sausage and peppers

                  • Place tomato paste, chicken broth, and oregano bowl in a 7-inch bowl that will fit inside your air fryer. Whisk until incorporated.
                  Tomato paste and chicken broth mixed together in a bowl
                  • Lay peppers, onion, and garlic in the bowl and toss with broth mixture. Place in air fryer basket.
                  Vegetables laid on top of the tomato mixture
                  • Close air fryer basket and cook on 400 degrees Fahrenheit for 10- 15 minutes, stirring halfway, until onions and peppers have softened a little.
                  • The bowl of vegetables in the air fryer
                  • The air fried vegetables in a bowl
                  • Open the air fryer basket and lay sausage links on top of onions and peppers and cook for 20 more minutes, flipping the links halfway.
                  Uncooked sausages laid on top of the cooked vegetables
                  The sausages after being cooked in the air fryer
                  • Remove and serve sausage and peppers on hoagie rolls. Enjoy!
                  Air fried sausages and vegetables in buns on a plate

                  What are the best sausages to use?

                  I like to use Italian sausages for this recipe, you can use hot or mild. Flavored with fennel and garlic they are so tasty! You can use other pork or beef sausages, but stay away from thinner sausages.

                  What do you serve with sausage and peppers?

                  I love to serve the air fried sausage on peppers on hoagie rolls for a quick and easy dinner, sometimes served up with some French Fries or a veggie side. If you like, you can skip the rolls and serve with a veggie or potato side.

                  Why use an air fryer for this recipe?

                  I love how this meal comes together all in one bowl and the cooking process is pretty hands off. The sausages come out perfectly juicy with crispy skins and because the veggies are cooked under them, the veggies are flavored with the juices. It's one delicious meal!

                  Air fried sausages and vegetables in a bowl ready to serve

                  Recipe Notes and Tips

                  • Make a foil sling so that the bowl will be easy to remove from the air fryer.
                  • Flip the sausages half way through cooking so that they cook evenly all over.

                  More Easy Air Fryer Recipes

                  • Air Fryer Hot Dogs
                  • Flaky Air Fryer Donuts
                  • Crispy Air Fryer Beet Chips
                  • Air Fryer Lemon Garlic Shrimp
                  • BBQ Air Fryer Ribs

                  Watch this video tutorial and see how I make this sausage and peppers recipe from start to finish.

                  Print Recipe
                  4.67 from 9 votes

                  Air Fryer Sausage and Peppers

                  It's so quick and easy to make air fryer sausage and peppers for a delicious family meal. Just 5 minutes prep and the sausages are wonderfully juicy and come out perfect every time!
                  Prep Time5 minutes mins
                  Cook Time30 minutes mins
                  Total Time35 minutes mins
                  Course: Main Course
                  Cuisine: American
                  Keyword: air fried sausages, how to air fry sausages, sausage and peppers
                  Servings: 5 servings
                  Calories: 638kcal
                  Author: Tanya Harris

                  Ingredients

                  • 1 Tablespoon tomato paste
                  • ½ cup chicken broth
                  • ½ teaspoon dried oregano
                  • 1 green bell pepper sliced
                  • 1 red bell pepper sliced
                  • 1 sweet onion sliced
                  • 6 garlic cloves minced
                  • 5 Italian sausage links
                  • Hoagie rolls for serving

                  Instructions

                  • Place tomato paste, chicken broth, and oregano bowl in a 7-inch bowl that will fit inside your air fryer. Whisk until incorporated. Lay peppers, onions, and garlic in the bowl and toss with broth mixture. Close air fryer basket and cook on 400 degrees Fahrenheit for 10- 15 minutes, stirring halfway, until onions and peppers have softened a little.
                  • Open the air fryer basket and lay sausage links on top of onions and peppers and cook for 20 minutes more, flipping the links halfway.
                  • Remove and serve sausage and peppers on hoagie rolls. Enjoy.

                  Video

                  Notes

                  • Make a foil sling so that the bowl will be easy to remove from the air fryer.
                  • Flip the sausages half way through cooking so that they cook evenly all over.

                  Nutrition

                  Calories: 638kcal | Carbohydrates: 49g | Protein: 24g | Fat: 38g | Saturated Fat: 13g | Cholesterol: 85mg | Sodium: 1289mg | Potassium: 520mg | Fiber: 3g | Sugar: 11g | Vitamin A: 882IU | Vitamin C: 58mg | Calcium: 53mg | Iron: 15mg

                  Easy Cornbread Muffins

                  July 21, 2020 by Tanya Harris 2 Comments

                  These delicious cornbread muffins are so quick and easy to make and are a wonderful sweet treat that everyone will love! Light, fluffy and rich in flavor, they are ready to serve in less than 30 minutes.

                  Three cornbread muffins stacked on top of eachother

                  These sweet cornbread muffins are one of my favorite treats! Deliciously light and fluffy and so simple to make. They are always a crowd pleaser! I love to eat them along side my Southern favorites, like Collard Greens or this Buttered Cabbage. This is my go to sweet cornbread recipe when I want something different than savory southern cornbread.

                  Ingredients

                  • All-purpose Flour
                  • Cornmeal
                  • Baking Powder
                  • Salt
                  • Eggs
                  • Butter
                  • Granulated Sugar
                  • Honey
                  • Milk
                  • Vanilla Extract
                  Ingredients for the muffins in bowls

                  How To Make Cornbread Muffins

                  • Preheat oven to 400 degrees Fahrenheit.
                  • In a large bowl, add all-purpose flour, cornmeal, baking powder, salt in a bowl. Stir until combined. Set aside.
                  Dry ingredients mixed together in a large bowl
                  • In a separate bowl, add eggs, butter, sugar, honey, milk, and vanilla extract. Whisk until combined.
                  Wet ingredients mixed together in a bowl
                  • Slowly whisk dry mixture into the wet mixture until combined.
                  The cornbread muffin batter mixed together in a large bwol
                  • Pour batter into liners, making sure each liner is about halfway full.
                  The cornbread muffin batter in a muffin tin
                  • Bake in preheated oven for 14-15 minutes until golden and a toothpick entered in the center comes out clean.
                  Baked cornbread muffins in a tin

                  How long do they keep?

                  Once the cornbread muffins have baked, let the cool before transferring them to an airtight container. They will keep at room temperature for 2 days and in the fridge for up to a week.

                  Can you freeze them?

                  Yes, these muffins freeze really well. Let them cool and wither wrap them individually in foil, or freeze on a baking sheet and transfer to a freezer bag. They will keep well for up to 3 months. They can be thawed in the fridge or at room temperature.

                  What makes the muffins light and fluffy?

                  One of the main tricks to get the most perfect muffins is to have all of your ingredients at room temperature. I like to take everything out of the fridge about 30 minutes before I want to make the muffins.

                  If the ingredients are at room temperature, the batter is smoother and it traps air creating light and fluffy muffins.

                  A cornbread muffin broken in half on a white plate

                  Recipe Notes and Tips

                  • Take care not to over mix the batter. If it is over mixed the muffins won't be light and fluffy.
                  • Make sure you bake the muffins in a pre-heated oven so that they cook evenly through.

                  More Muffin and Cake Recipes

                  • Zucchini Muffins
                  • Easy Strawberry Muffins
                  • Caribbean Rum Cake
                  • Moist Chocolate Cola Cake

                  Watch this video tutorial and see how I make these cornbread muffins from start to finish.

                  Print Recipe
                  5 from 1 vote

                  Easy Cornbread Muffins

                  These delicious cornbread muffins are so quick and easy to make and are a wonderful sweet treat that everyone will love! Light, fluffy and rich in flavor, they are ready to serve in less than 30 minutes.
                  Prep Time10 minutes mins
                  Cook Time15 minutes mins
                  Total Time25 minutes mins
                  Course: Dessert, Snack
                  Cuisine: American
                  Keyword: cornbread muffin recipe, cornbread muffins, how to make cornbread muffins
                  Servings: 12 muffins
                  Calories: 169kcal
                  Author: Tanya Harris

                  Ingredients

                  • 1 cup all-purpose flour
                  • ¾ cup cornmeal
                  • 1 Tablespoons baking powder
                  • 1 teaspoon salt
                  • 2 eggs lightly beaten
                  • ¼ cup butter melted and cooled
                  • ¼ cup granulated sugar
                  • ¼ cup honey
                  • ¾ cup milk
                  • ½ teaspoon vanilla extract

                  Instructions

                  • Preheat oven to 400 degrees Fahrenheit and prepare muffin pan with cupcake liners or grease.
                  • In a large bowl, add all-purpose flour, cornmeal, baking powder, salt in a bowl. Stir until combined. Set aside.
                  • In a separate large bowl, add eggs, butter, sugar, honey, milk, and vanilla extract. Whisk until combined.
                  • Slowly whisk dry mixture into the wet mixture until combined. Pour batter into liners, making sure each liner is about halfway full.
                  • Bake in preheated oven for 14-15 minutes until golden and a toothpick entered in the center comes out clean.

                  Video

                  Notes

                  • Take care not to over mix the batter. If it is over mixed the muffins won't be light and fluffy.
                  • Make sure you bake the muffins in a pre heated oven so that they cook evenly through.

                  Nutrition

                  Calories: 169kcal | Carbohydrates: 26g | Protein: 4g | Fat: 6g | Saturated Fat: 3g | Cholesterol: 39mg | Sodium: 246mg | Potassium: 178mg | Fiber: 1g | Sugar: 11g | Vitamin A: 182IU | Calcium: 67mg | Iron: 1mg
                  • « Previous Page
                  • 1
                  • …
                  • 12
                  • 13
                  • 14
                  • 15
                  • 16
                  • …
                  • 19
                  • Next Page »
                  tanya holding bowl and mixing

                  Welcome!

                  Welcome to My Forking Life! Hi, I'm Tanya, an attorney, busy wife and mom, and lover of quick, easy, and delicious meals.

                  More about me

                  Popular Recipes

                  • Jamaican Oxtails Recipe
                  • brown stew chicken in pan
                    Brown Stew Chicken
                  • Air fryer fried chicken on a white platter
                    Air Fryer Fried Chicken
                  • Jamaican Instant Pot Rice and Beans

                  Holiday Favorites

                  • sweet potato pie on a plate
                    Southern Sweet Potato Pie Recipe
                  • spoon lifting gravy out of gravy dish
                    Easy Recipe for Gravy without Drippings
                  • Stirring the giblet gravy with a spoon.
                    Grandma's Giblet Gravy Recipe
                  • A serving spoon lifting a creamy scoop of mac and cheese from the baking dish.
                    Extra Creamy Baked Mac and Cheese
                  as seen on...various online websites text listed

                  Footer

                  ↑ back to top
                  • Privacy Policy
                  • Contact
                  • About Tanya

                  As an Amazon Associate, I earn from qualifying purchases.

                  Copyright © 2026 My Forking Life

                  Rate This Recipe

                  Your vote:


                  Let us know what you thought of this recipe:

                  This worked exactly as written, thanks!
                  My family loved this!
                  Thank you for sharing this recipe

                  Or write in your own words:

                  A rating is required
                  A name is required
                  An email is required