My Forking Life

  • Air Fryer
  • Jamaican
  • Entree
  • Browse Recipes
  • Breakfast
  • Side Dishes
  • About
menu icon
go to homepage
  • Air Fryer
  • Jamaican
  • Entree
  • Browse Recipes
  • Breakfast
  • Side Dishes
  • About
search icon
Homepage link
  • Air Fryer
  • Jamaican
  • Entree
  • Browse Recipes
  • Breakfast
  • Side Dishes
  • About
×
Home » Recipe Index

Crispy Air Fryer Pumpkin Seeds

September 29, 2025 by Tanya Harris 4 Comments

pumpkin seeds with pumpkin in background

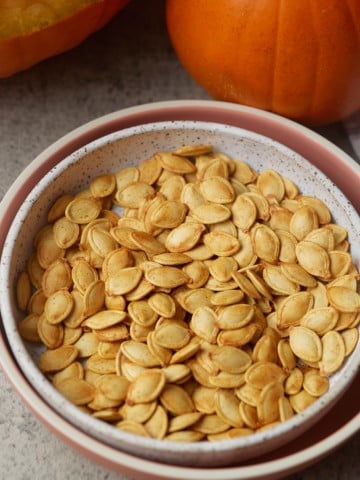
This Roasted Air Fryer Pumpkin Seeds recipe is delicious, crunchy, healthy, and tasty. This snack is the perfect way to use those pumpkin seeds after carving a pumpkin. 

pumpkin seeds with pumpkin in background

You’ll find the full recipe with ingredient amounts and instructions in the recipe card at the bottom of this post. Be sure to check out the blog post itself for extra tips and tricks!

It’s that time of year again. All things Fall are in the air, pumpkin carving is a joyous activity, and we’re getting ready for some of our favorite Fall Holidays. One in particular that we love is Halloween, when we head to the pumpkin patch, pick a pumpkin, and then take it home to carve. 

pic of Tanya

If you’ve ever carved a pumpkin, you’re familiar with the ooey-gooey pulp and seeds that are scooped from the inside. Before you toss those seeds, consider roasting them for a snack. You’ll be plenty surprised at how crunchy and delicious they are. 

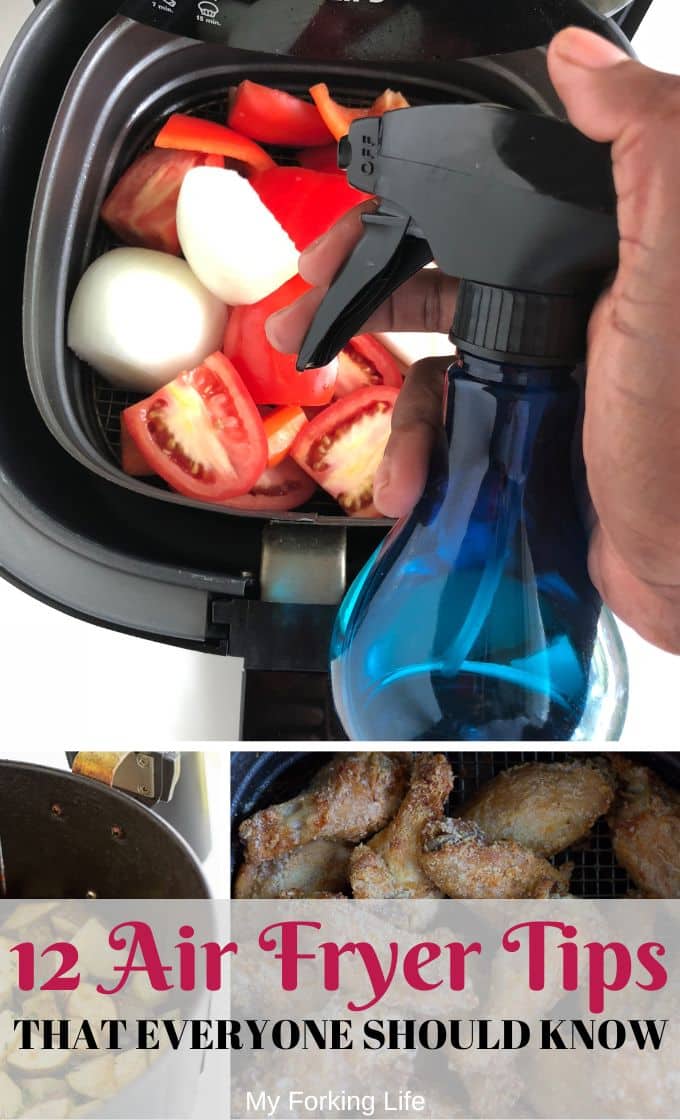
I roast mine in my air fryer because I find that it makes seeds and beans extra crunchy. I followed a similar method when I made these air fryer chickpeas.

A Quick Look at The Ingredients

Ingredient amounts and full recipe instructions are on the printable recipe card at the bottom of the post.

  • Raw pumpkin seeds from a fresh pumpkin (rinsed and cleaned of pulp)
  • Water and salt (for boiling and flavor)
  • A little oil, such as olive oil, canola oil, or avocado oil (to help crisp in the air fryer)
  • Seasonings of your choice (savory or sweet variations work well)

How to Roast Pumpkin Seeds in the Air Fryer

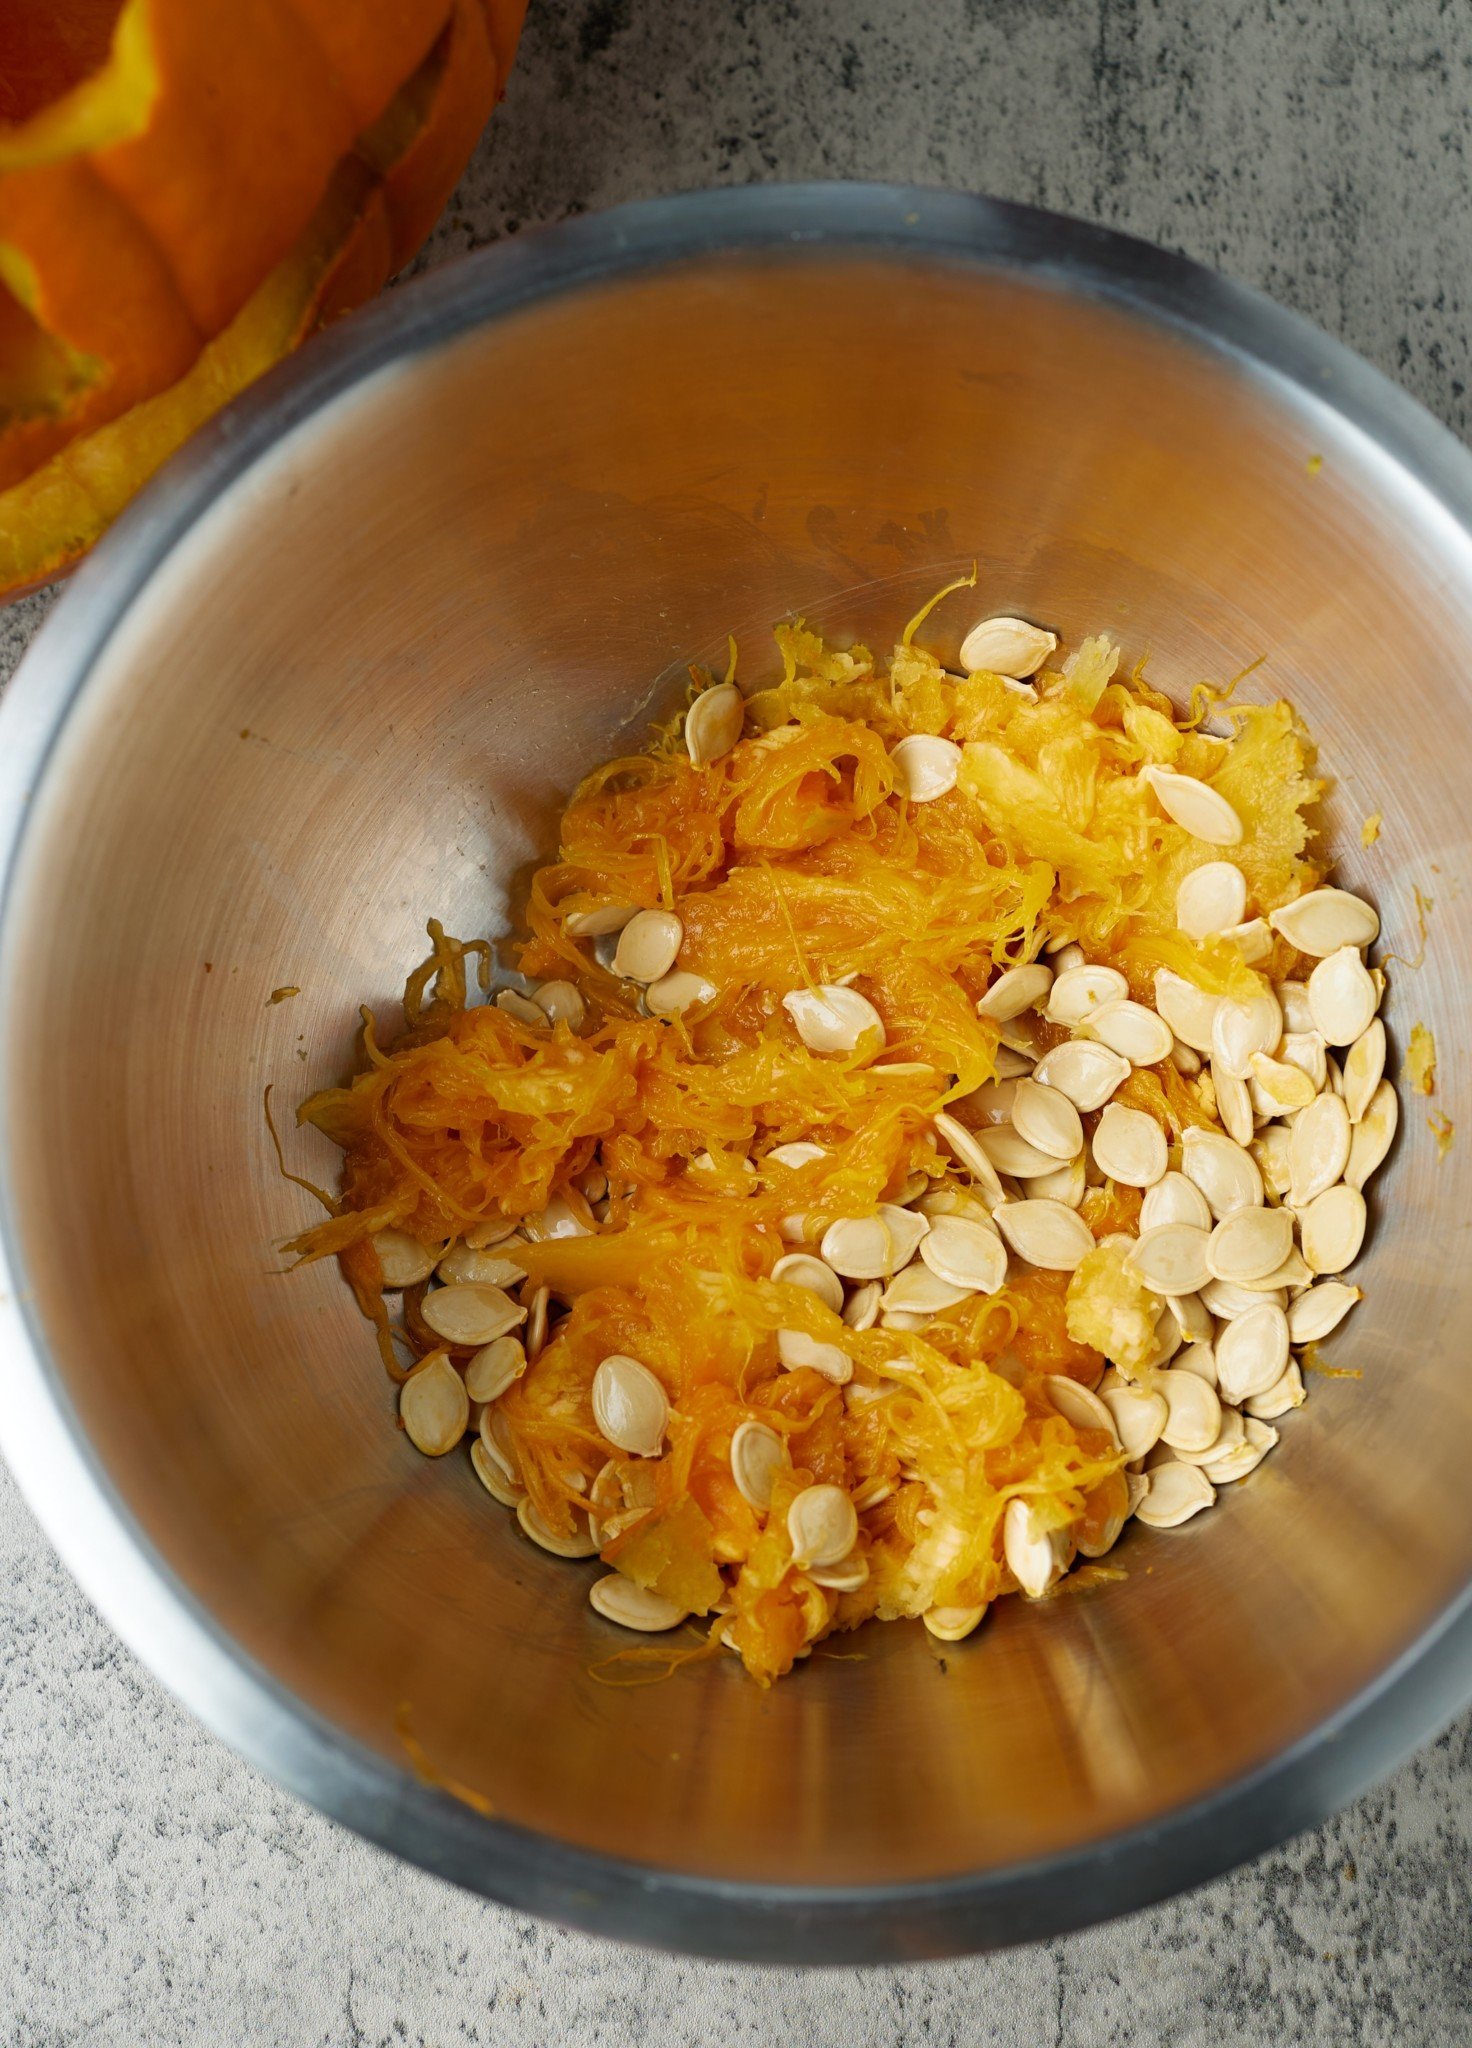
Step 1: Start by prepping the seeds. First, you’ll need to cut the top off the pumpkin and remove the pulp and seeds from the inside. You’ll notice many seeds stuck to a little bit of pulp. Use your hands and gently remove the pulp from the seeds. 

Step 2: Place the seeds in a colander and rinse them. My medium-sized pumpkin yielded about 1 and ¼ cups of seeds.

pumpkin seeds and pulp on silver bowl
raw pumpkin seeds on colander on towel

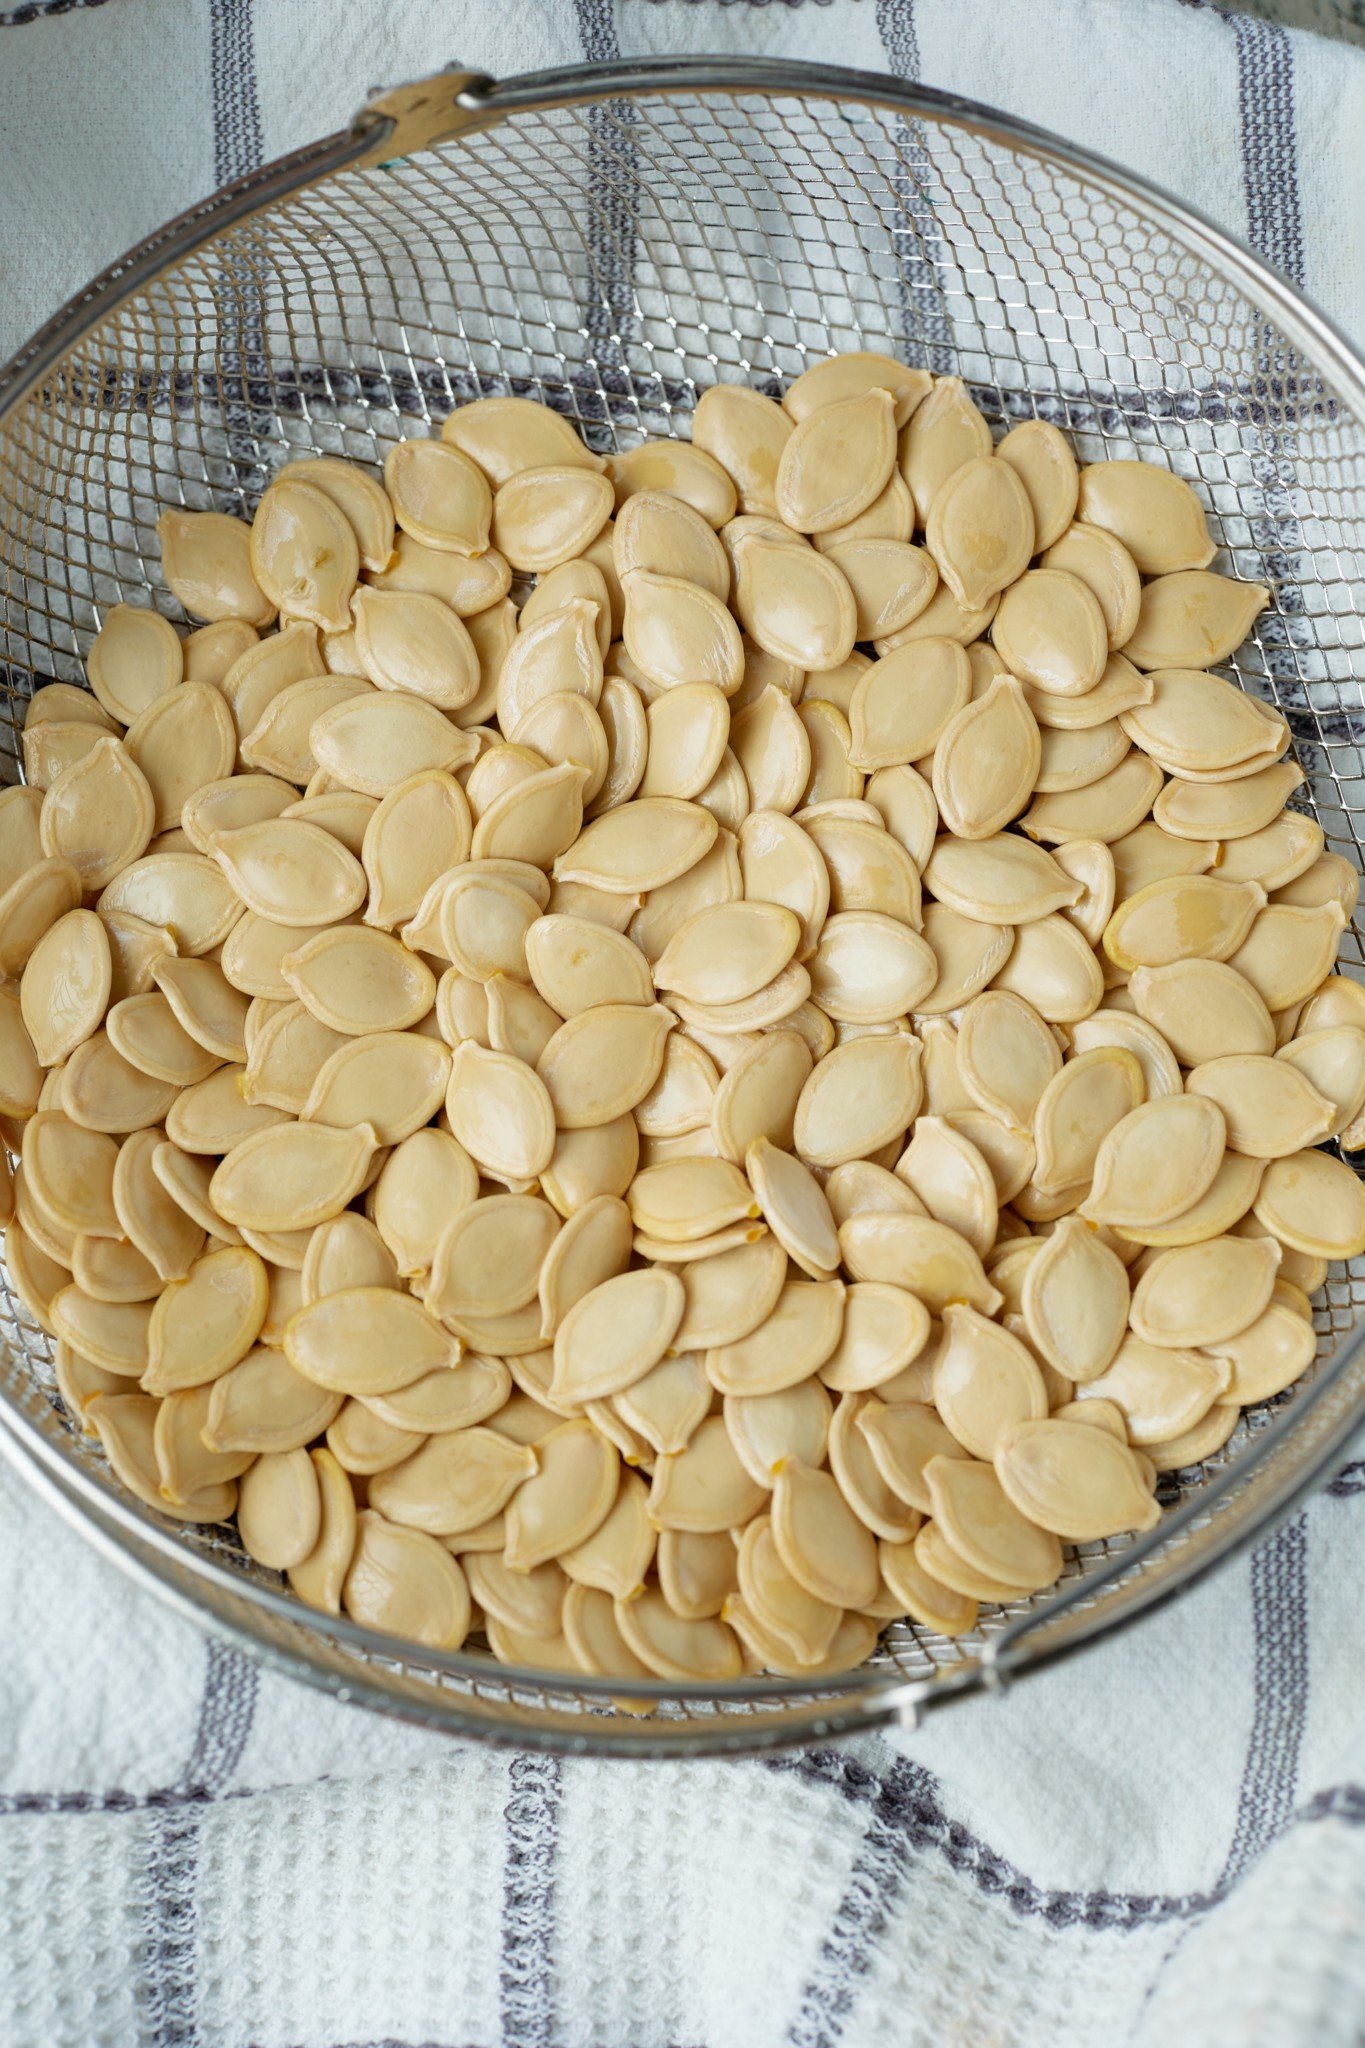
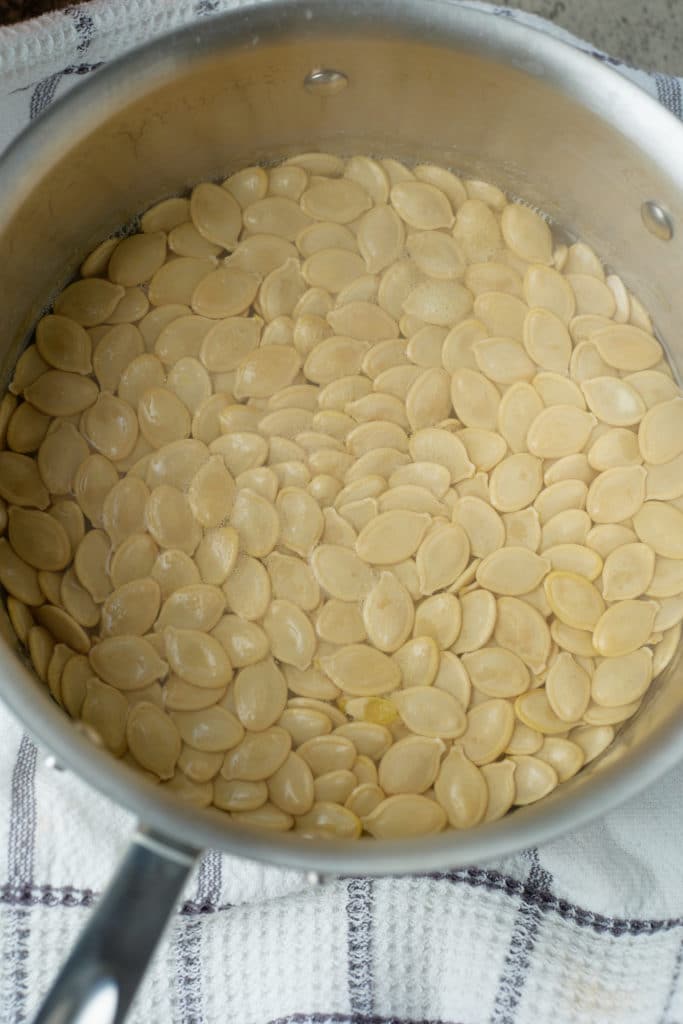
Step 3: Next, place the seeds in a medium-sized pot and cover with 3 cups of water and 1 Tablespoon kosher salt. Bring to a boil and allow them to boil for about 7 minutes. Once done, drain the seeds in a colander and then place them on a clean kitchen towel. 

pumpkin seeds in water in pot
pumpkin seeds on kitchen towel

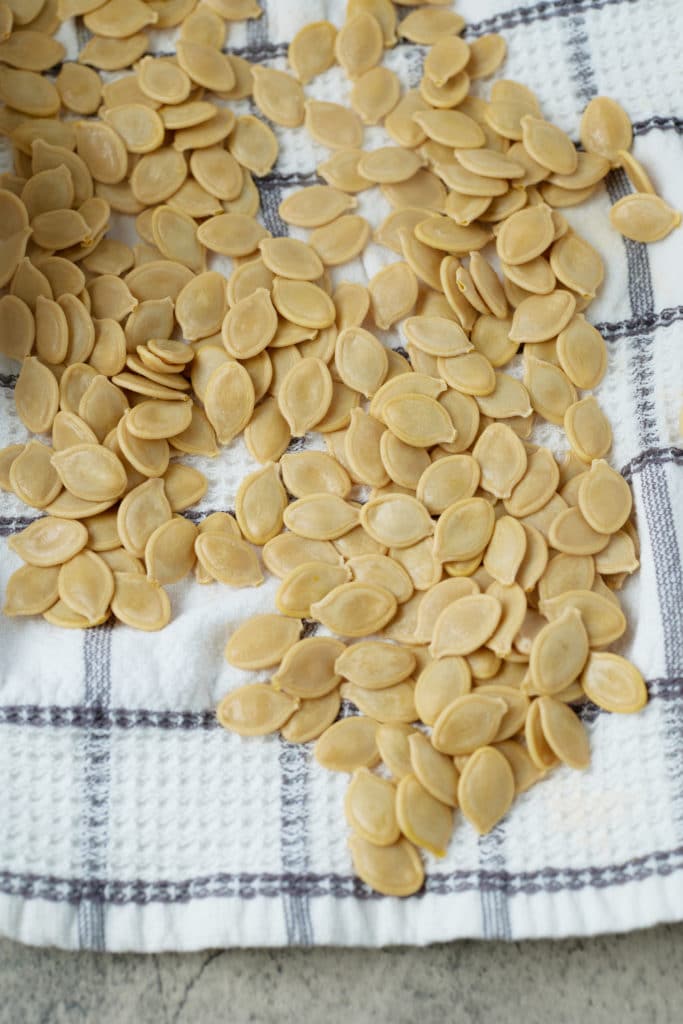
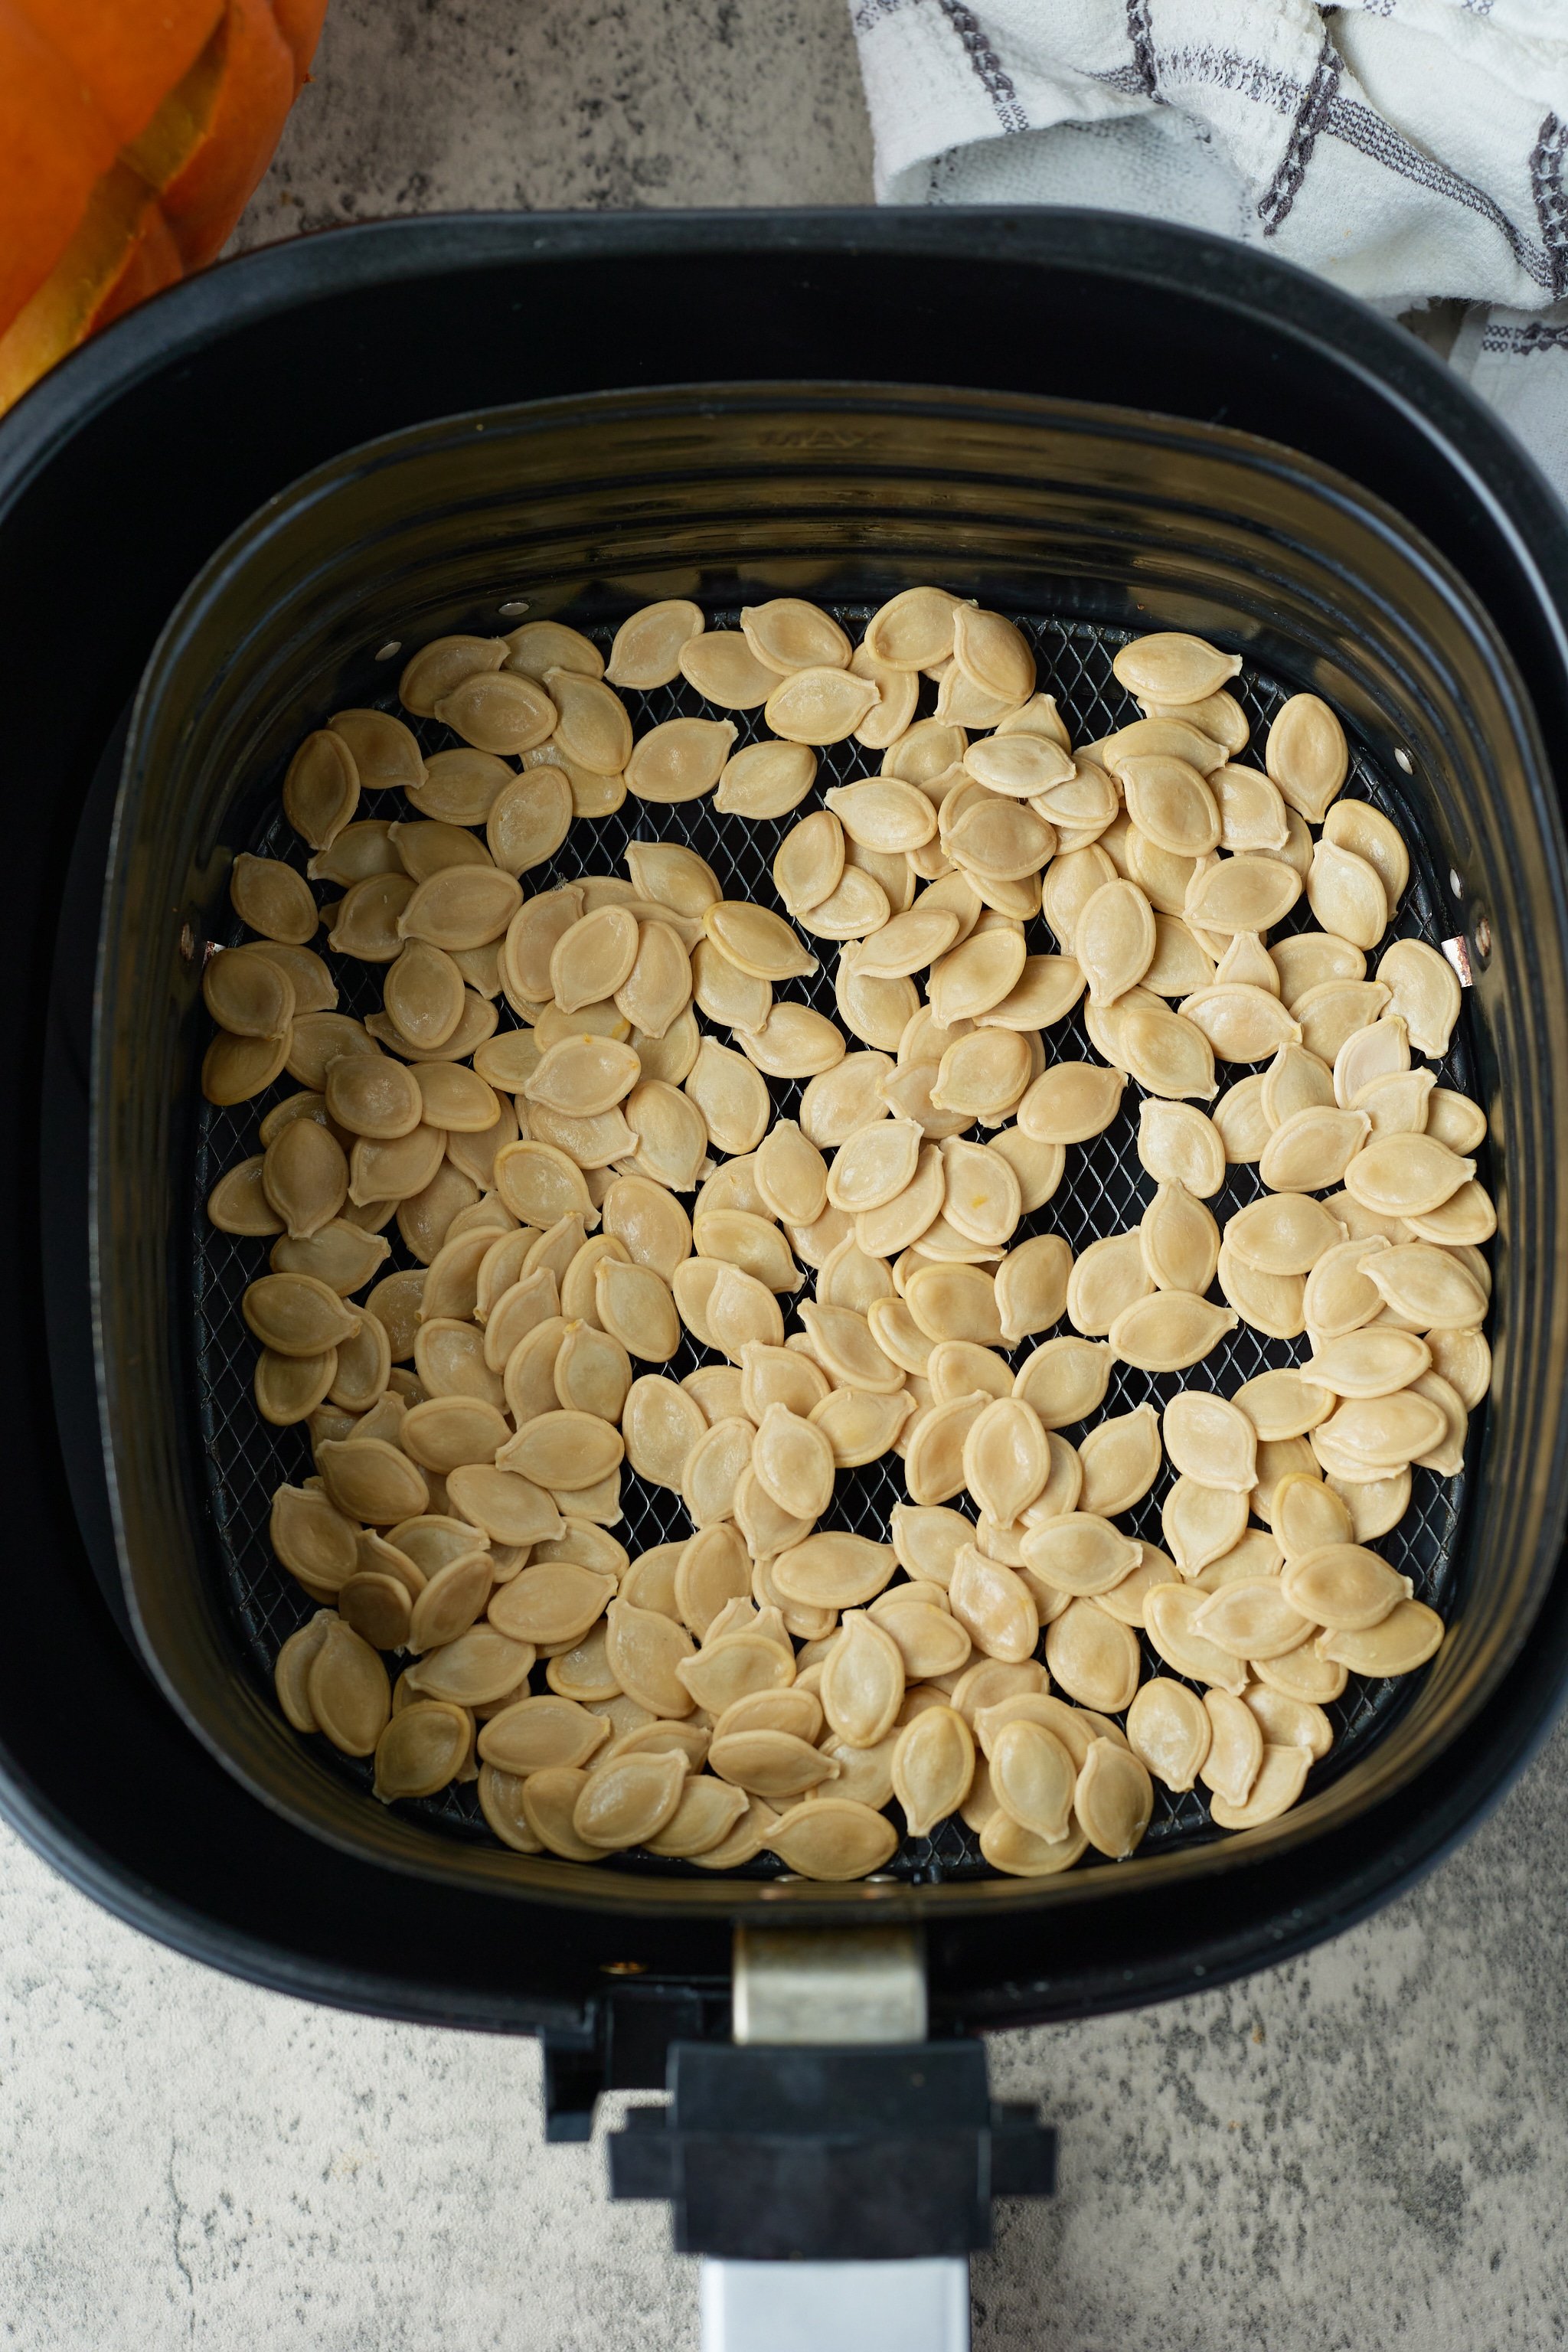
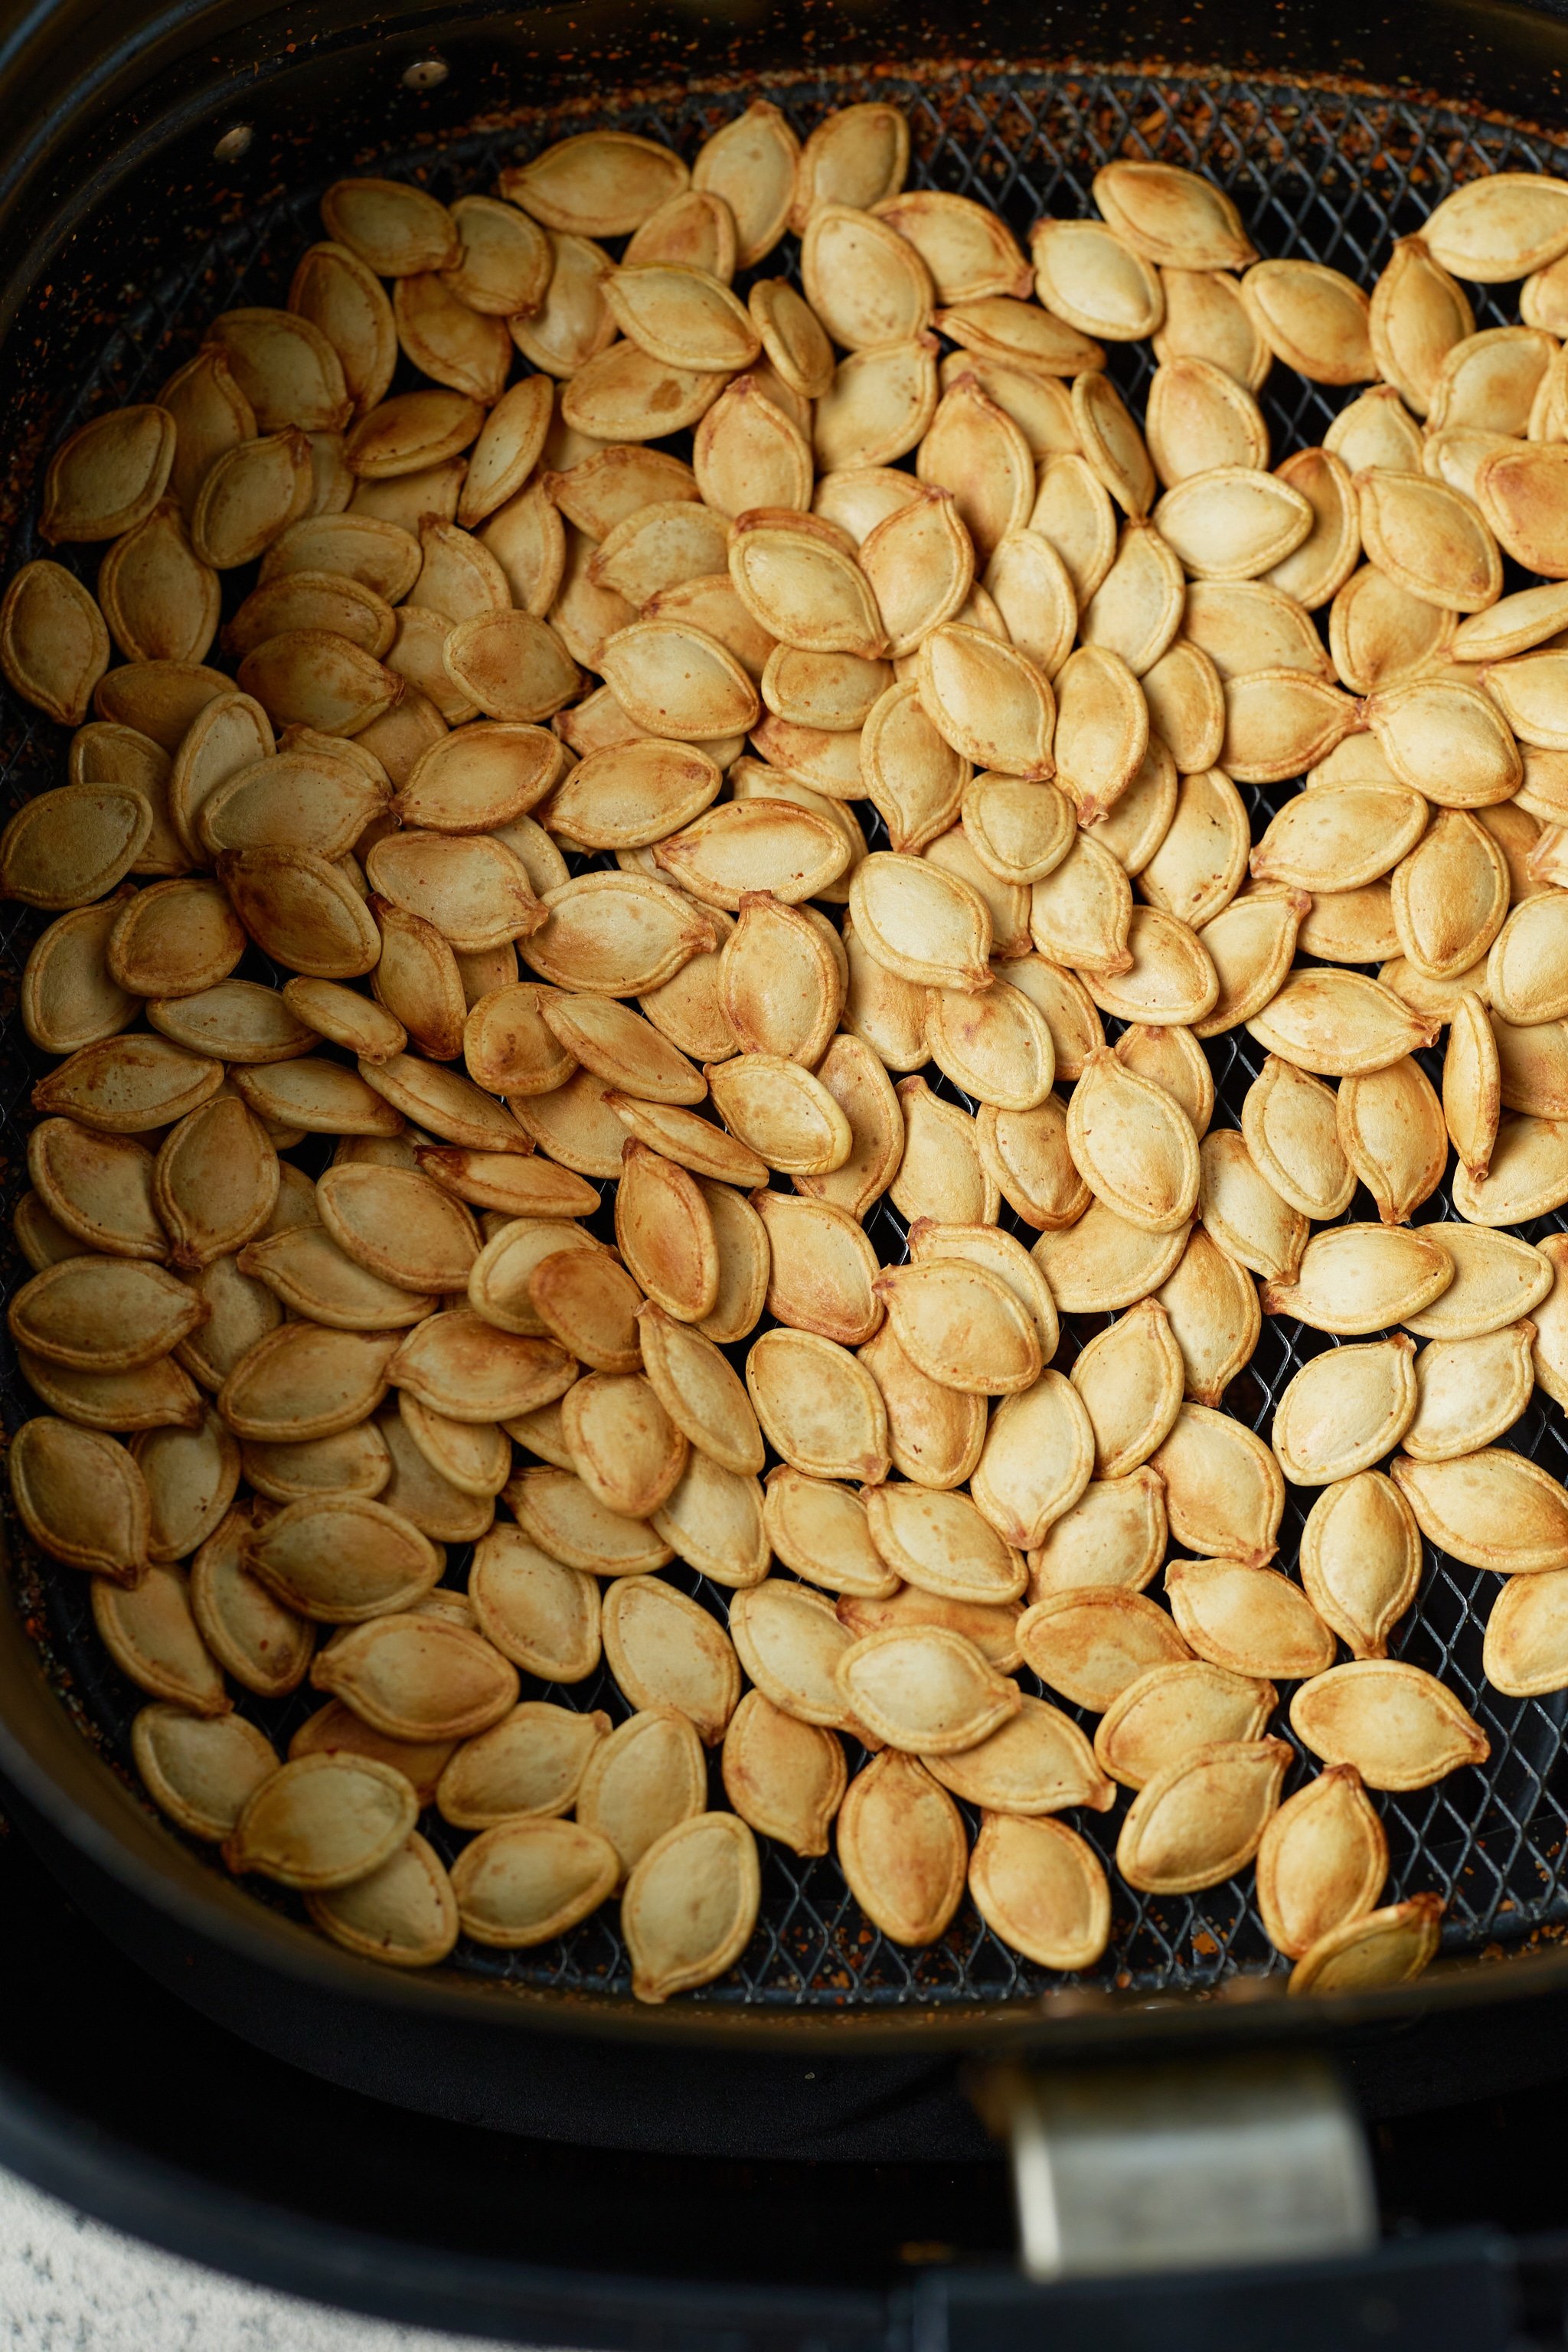
Step 4: Pat the seeds dry and then place them in the air fryer basket. They will still be partially wet, but that is ok. 

Close the air fryer basket and air fry at 350°F (175 °C) for 4 minutes. This will allow our seeds to dry before adding oil. 

pumpkin seeds in air fryer basket before roasting

Step 5: After 4 minutes, open the basket and lightly spray the pumpkin seeds with olive oil, and then stir to ensure all the seeds are covered. Close the basket and cook for an additional 10-12 minutes at 350°F (175 °C), stirring halfway through the cooking time. 

pumpkin seeds in air fryer basket after roasting

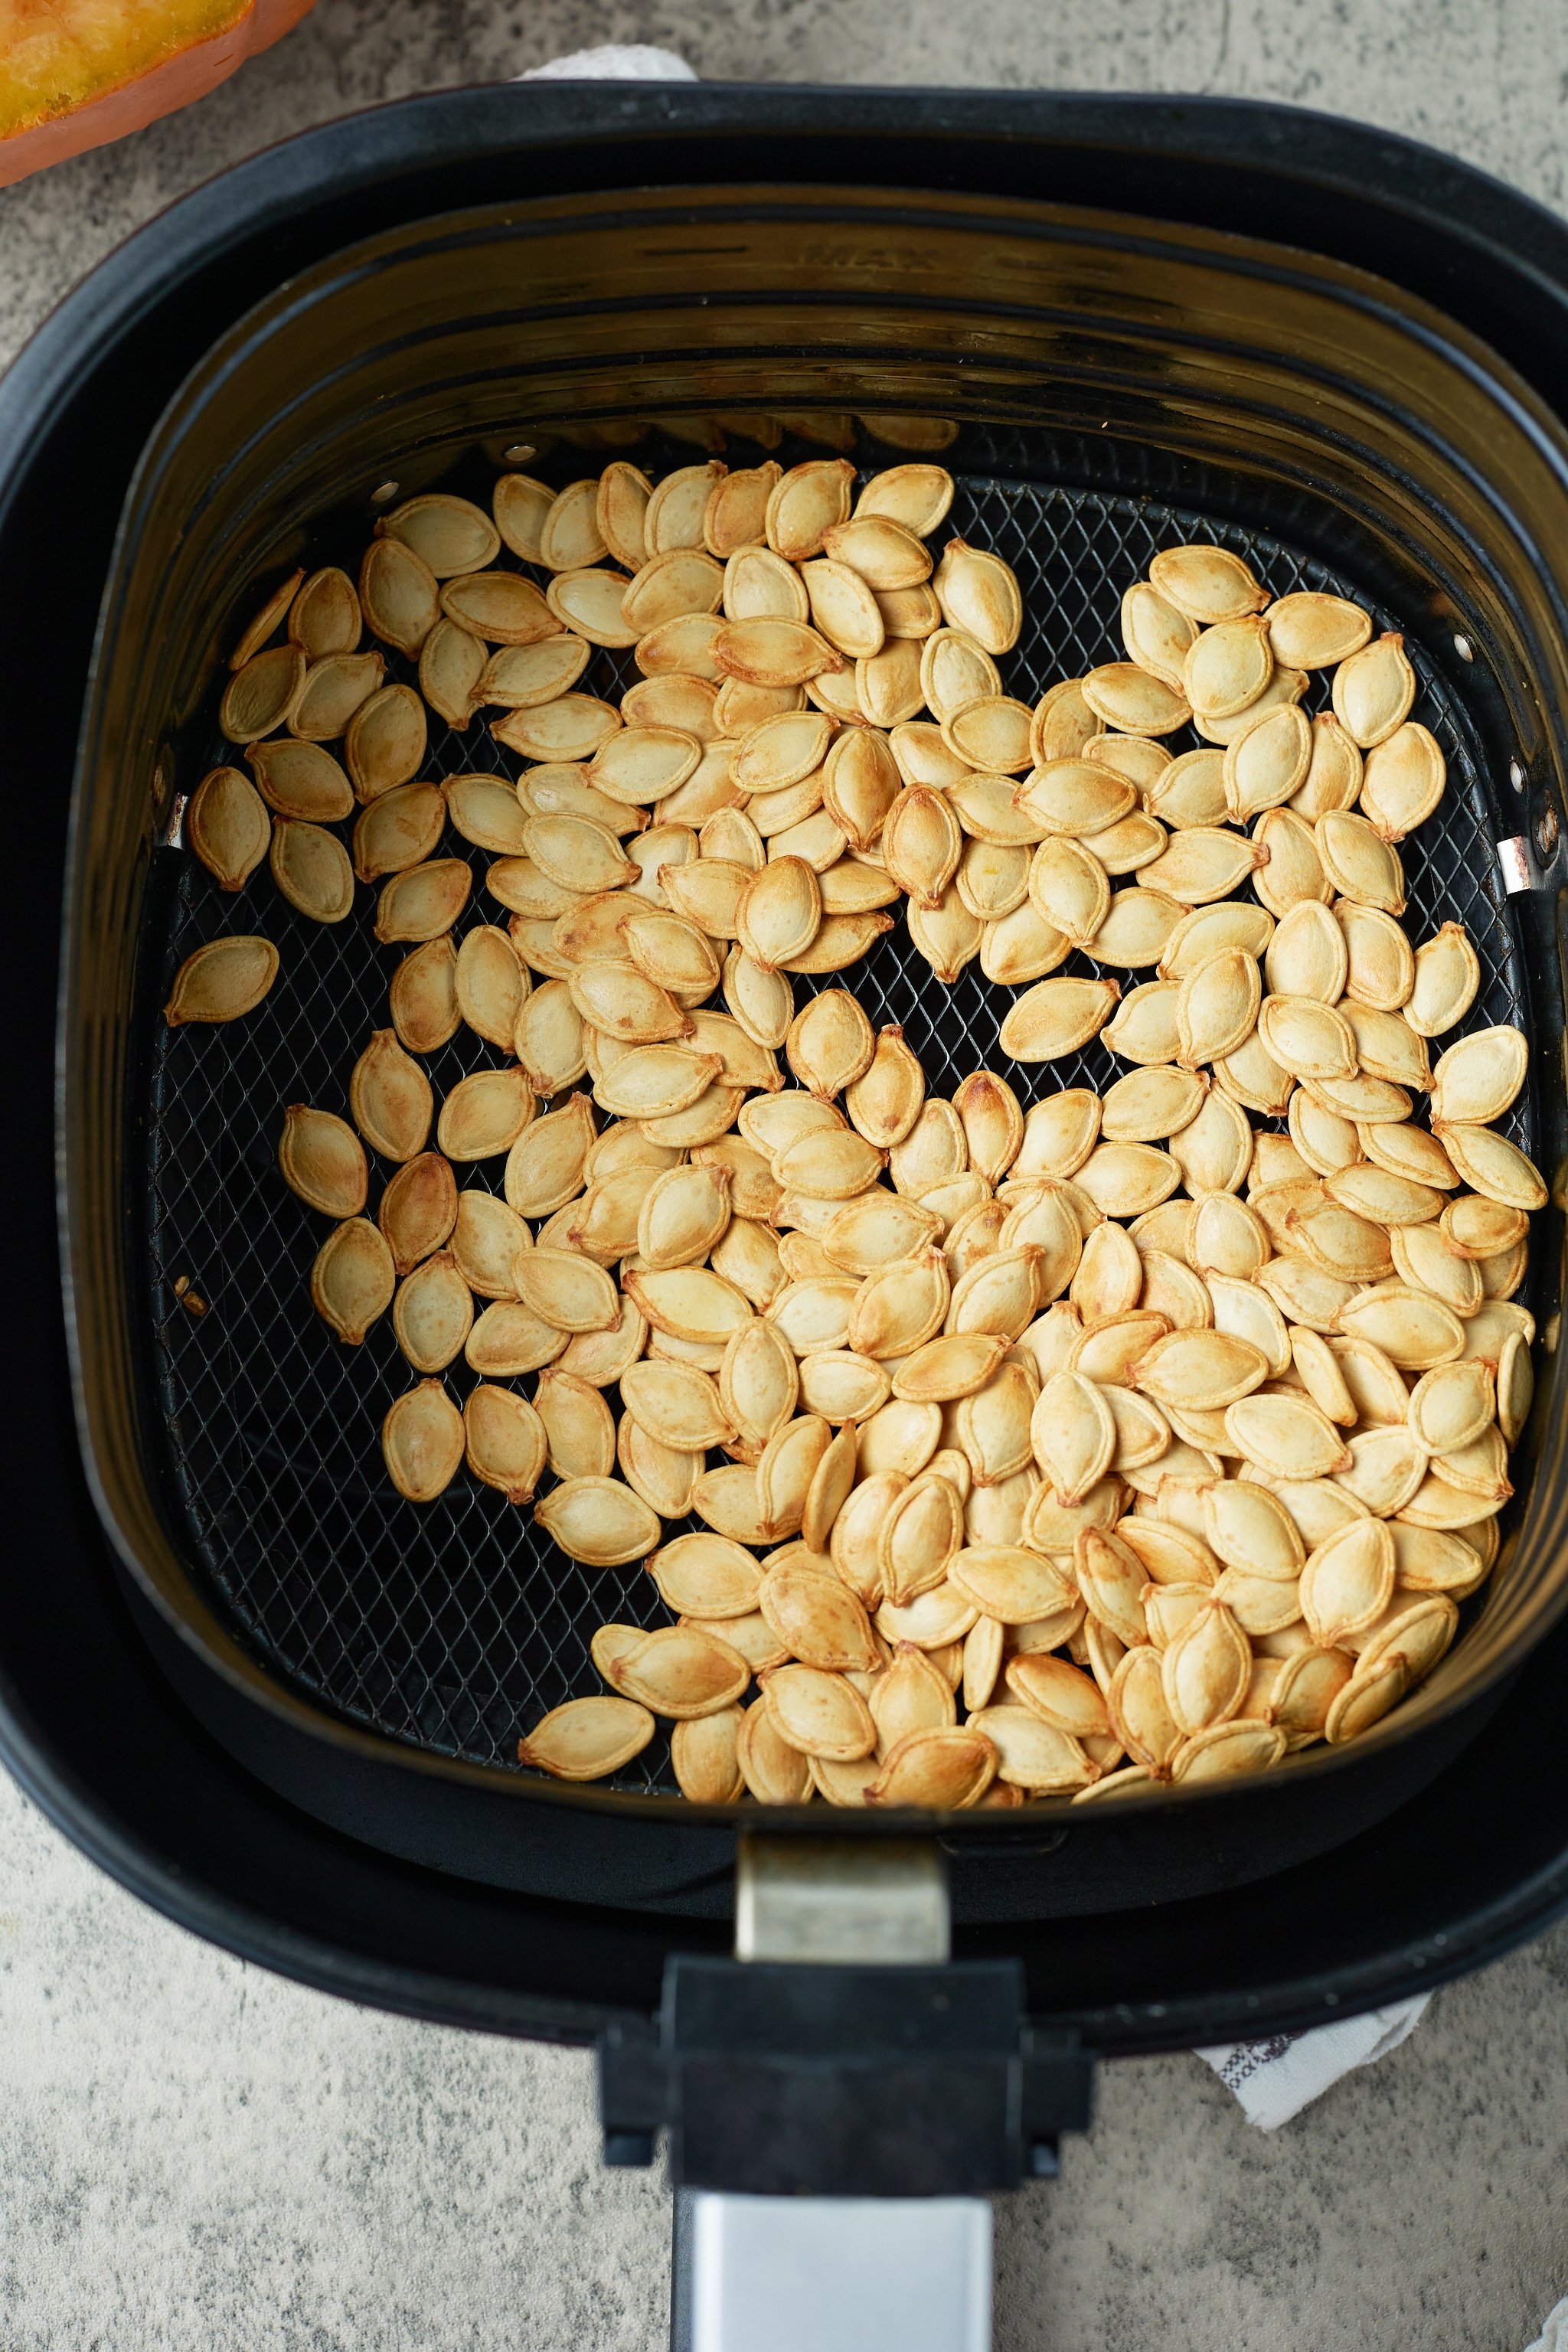
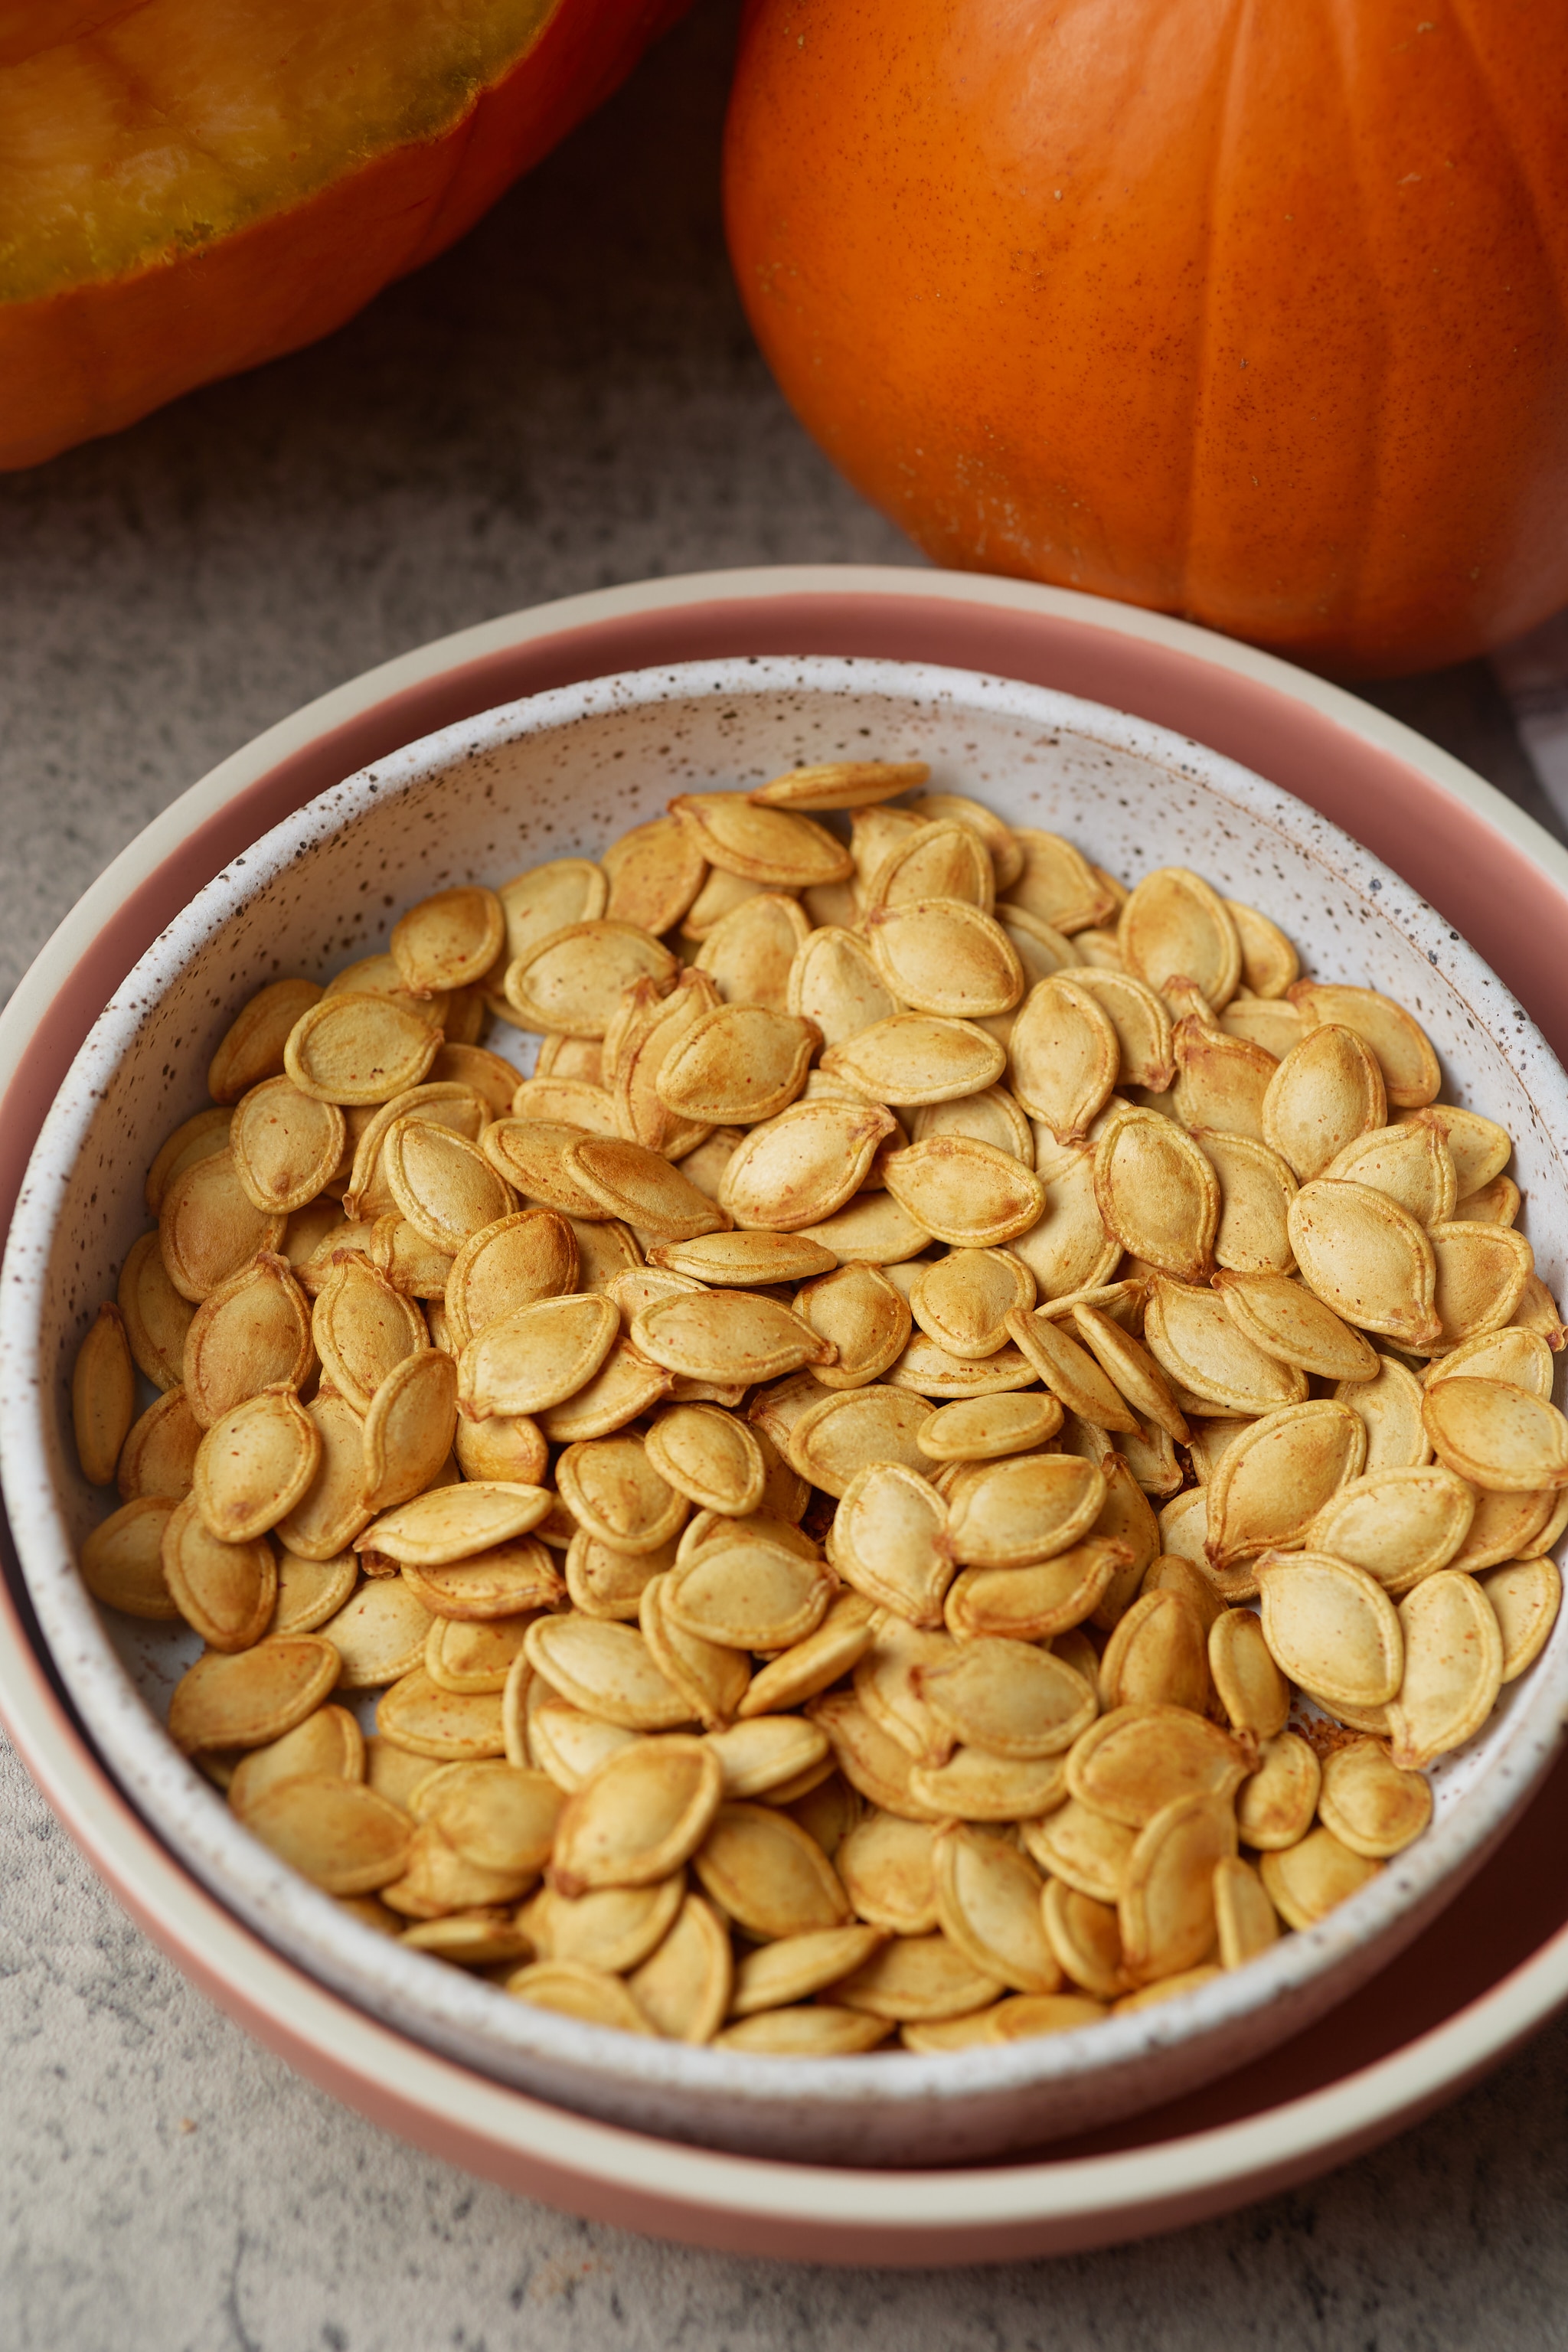
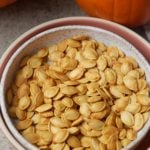
Step 6: When there are about 1-2 minutes left, season the seeds with any desired seasonings. Once the seeds are roasted, remove them and spread them on a sheet pan. Allow them to cool for 10 minutes before serving.

pumpkin seeds on sheet pan

How to Season the Pumpkin Seeds

These seeds will already have a slightly salty taste (thanks to our boiling step), but if you want additional flavors, add seasonings with about 2 minutes left on your cooking time. You do not want to add seasonings too early, or they may burn. 

Seasoning Suggestions

One of the best parts about making pumpkin seeds in the air fryer is how easy it is to switch up the flavors. Here are a few of my favorites:

  • Classic Savory – Garlic powder, onion powder, and smoked paprika.
  • Spicy Kick – Chili powder, cayenne pepper, and a squeeze of lime juice after cooking.
  • Cajun - for a bold taste of the South.
  • Sweet & Crunchy – Cinnamon, nutmeg, and a sprinkle of sugar.
  • Cheesy Twist – Grated Parmesan with Italian seasoning.
  • Everything Bagel – A mix of everything bagel seasoning for a salty, garlicky crunch.

💡 Tip: Add seasonings during the last 1–2 minutes of air frying so they stick without burning.

close up photo of roasted pumpkin seeds in air fryer basket

How to store Roasted Pumpkin Seeds

Store these seeds in an airtight container for up to 2 weeks at room temperature. You could also freeze them for up to 3 months.  

Tanya's Notes on Air Fryer Pumpkin Seeds

  • These are good for snacking as is, but you could also use them in salads, on top of morning oatmeal, or with granola. 
  • Season the seeds like you like. You can use the seasonings I used in my air fryer chickpeas recipe, stick with salt and pepper, or use a little Tajin seasoning.
  • Use any oil with a high-smoke point that you prefer. I usually use canola or avocado oil.

Looking for more Air-Fried Snack recipes? Try these out:

  • Air Fryer Beet Chips - Light, crispy, and naturally sweet. These beet chips are one of my favorite guilt-free snacks straight from the air fryer.
  • Air Fryer Sugar Pecans - I love making these sugar pecans during the holidays and snacking on them while they're still warm.
  • Apple Chips - Simple, crisp, and full of apple flavor. These homemade apple chips make the perfect wholesome treat for the fall season.

I hope you like these pumpkin seeds as much as we do. If you've tried this recipe, I'd love to hear about it in the comments below. Thanks so much for your support.

pumpkin seeds with pumpkin in background
Print Recipe
5 from 1 vote

Crispy Air Fryer Pumpkin Seeds Recipe

These Roasted Air Fryer Pumpkin Seeds are a deliciously crunchy, healthy, and tasty snack. This snack is the perfect way to use those pumpkin seeds after carving a pumpkin.
Prep Time20 minutes mins
Cook Time10 minutes mins
Cooling10 minutes mins
Total Time40 minutes mins
Course: Snack
Cuisine: American
Keyword: air fryer pumpkin seeds, roasted pumpkin seeds
Servings: 8 people
Calories: 56kcal
Author: Tanya Harris

Equipment

  • Large Air Fryer
  • Sheet Pan

Ingredients

  • 1 ¼ cup raw pumpkin seeds from 1 medium-large sized pumpkin
  • 3 cups water
  • 1 Tablespoon kosher salt
  • Seasonings of Choice

Instructions

  • Cut the top off the pumpkin and remove the pulp and seeds from the inside. Place the seeds in a colander and rinse the seeds.
  • Place the seeds in a medium-sized pot and cover with 3 cups of water and 1 Tablespoon kosher salt. Bring to a boil and allow to boil for about 7 minutes. Once done boiling, drain the seeds in a colander and then place them on a clean kitchen towel and pat the seeds dry.
  • Place the seeds in the air fryer basket. Close the air fryer basket and air fry at 350F (175 °C) degrees Fahrenheit for 4 minutes.
  • After 4 minutes, open the basket and lightly spray the pumpkin seeds with oil, and then stir to ensure all the seeds are covered. Close the basket and cook for an additional 10-12 minutes at 350F °(175, stirring halfway through.
  • Add any desired seasonings when there are about 1-2 minutes left on the air fryer cook time.
  • Once the seeds are roasted, remove them and spread them on a sheet pan. Allow them to cool for 10 minutes before serving.

Notes

  • These are good for snacking as is but you could use these for salads, on top of morning oatmeal, or granola.
  • Season the seeds as you like. You can use the seasonings I used in my air fryer chickpeas recipe, stick with salt and pepper, or use a little tajin seasoning.
  • Use any oil with a high-smoke point that you prefer. I usually use canola or avocado oil.

Nutrition

Calories: 56kcal | Carbohydrates: 1g | Protein: 3g | Fat: 5g | Saturated Fat: 1g | Polyunsaturated Fat: 2g | Monounsaturated Fat: 2g | Trans Fat: 1g | Sodium: 877mg | Potassium: 81mg | Fiber: 1g | Sugar: 1g | Vitamin A: 2IU | Vitamin C: 1mg | Calcium: 8mg | Iron: 1mg

This post was originally published on October 25, 2021. It has been updated with new information.

Creamy Slow Cooker Mac and Cheese (No Pre-Boil)

September 27, 2025 by Tanya Harris 2 Comments

slow cooker mac and cheese served in a large bowl

Seriously creamy, seriously cheesy, and seriously delicious! Sharp cheddar and an earthy gruyère cheese bring a beautiful depth of flavor to slow cooker mac and cheese.

slow cooker mac and cheese served in a large bowl

You’ll find the full recipe with ingredient amounts and instructions in the recipe card at the bottom of this post. Be sure to check out the blog post itself for extra tips and tricks!

We all love a set-it-and-forget-it dish. A slow cooker is a perfect vessel! No need to boil macaroni in a separate pot, just pop in all the ingredients, stir, cover, and let the magic happen. Not only that, but slow cookers provide the ability to take your mac and cheese to your next family gathering.

pic of Tanya

I love a good mac and cheese, especially my baked mac and cheese, which always gets rave reviews from family and readers. But this slow cooker version absolutely holds its own.

As the cook, I love that it’s low-effort but high-reward. I can toss everything in, set the slow cooker, and either prep the rest of dinner, or honestly, relax and catch up on my favorite shows while the magic happens. I think you'll love doing the same.

♡ Tanya

My slow cooker mac and cheese is a perfect side dish for any holiday meal. If you love this one, you'll enjoy my Creamy Slow Cooker Mashed Potatoes too. Try both of these alongside your holiday Turkey or Ham.

a spoon full of mac and cheese taken from the slow cooker

A Quick Look at the Ingredients

Ingredient amounts and full recipe instructions are on the printable recipe card at the bottom of the post.

  • Cheese!!! - I use block cheese and shred it myself for the smoothest cheese melt. I use Block sharp cheddar cheese and Block Gruyère cheese.
  • Elbow noodles - uncooked.
  • Dairy - I use whole milk and evaporated milk. I wouldn't substitute this with milk with less fat, as your sauce may break.
  • Unsalted butter - we will be adding our own salt, so I use unsalted butter to control the amount of salt added.
  • Seasonings - Seasoned salt and black pepper
slow cooker mac and cheese ingredients

Tools needed for slow cooker mac and cheese:

  • Slow cooker
  • Food processor or cheese grater
Breville Paradice 9 Cup Food Processor and Dicer
I love using this food processor to shred cheese for my mac and cheese recipes. It’s incredibly convenient and has so many other uses in the kitchen.
Buy Now

How to make Mac and Cheese in your Slow Cooker

Step 1: Shred sharp cheddar cheese and Gruyère cheese. Set aside.

Shredded cheese in a food processor

Step 2: Add elbow noodles, whole milk, evaporated milk, unsalted butter, seasoned salt, and black pepper to a 6-quart slow cooker. Stir to combine. Sprinkle the shredded cheese on top.

all ingredients added to the slow cooker

Step 3: Cover and cook on low heat for 1 hour. After 1 hour, stir the mixture. Cover and cook for an additional 40-50 minutes, until the noodles are softened.

Slow cooker with lid placed on top
cheese sauce and noodles in slow cooker

Step 4: Switch the slow cooker to high heat and cook for an additional 10 minutes, covered, to thicken the sauce.

Step 5: Serve immediately or switch the slow cooker to warm to keep the mac and cheese warm.

thickened slow cooker mac and cheese

Leftover Mac and Cheese Storage

Store any leftovers in an airtight container in the refrigerator for 3-5 days.

Can I freeze leftover mac and cheese? You can freeze mac and cheese. I'd note that after thawing, it may not appear as creamy as it had originally. This is mostly because the pasta has absorbed a lot of that moisture.

To freeze, allow your mac and cheese to cool completely. Portion it into freezer bags, release any extra air, and freeze for up to 3 months.

Variations & Add-Ins

  • Cheeses: Monterey Jack, Mozzarella, Gouda, Pepper Jack
  • Mix-ins: Cooked bacon, ham, roasted jalapeños, breadcrumbs
  • Spices: Smoked paprika, cayenne, garlic powder
  • Gluten-Free: Use GF pasta, adjust timing (check earlier)

Common questions you may have

Do I need to boil the noodles first?

Nope! I think the whole point of a slow cooker is to make our meals as easy as possible but still delicious. In this recipe, it is specified to rinse and drain the noodles. This is to clean the noodles before adding them to the slow cooker.

white bowl full of mac and cheese

Why are my noodles mushy?

There could be a couple of reasons your noodles have turned mushy.

  1. Your crockpot's temperature is higher than it should be. Not every slow cooker can cook at the same temperature. The age of the slow cooker can affect that.
  2. The type and brand of noodles you chose. A thicker elbow noodle or even one with ridges will maintain its structure better than a cheaper, thinner elbow noodle.

The best practice is to keep an eye on your mac and cheese after that initial hour of cooking. Yours may be done sooner or later than the recipe calls for.

My cheese turned out gritty; what happened?

The brand of cheese matters for a smooth cheese sauce. I used the Tillamook sharp cheddar and Boar’s Head Gruyère. It’s best to use block cheese and shred it yourself for the best results. 

Pre-shredded cheese will contain an anti-caking agent, that if used in creamy mac and cheese, will result in a gritty cheese mixture. Even some pre-packed block cheese may turn out the same result.

Find the best cheeses for homemade mac and cheese in either your produce or deli section of the store.

Tanya's Top Tips

  • Slow cooking times may vary. Cook the noodles until they are al dente. 
  • The brand of cheese matters for a smooth cheese sauce. I used the Tillamook sharp cheddar and Boar’s Head Gruyère. It’s best to use block cheese and shred it yourself for the best results. 
  • The cheese sauce will thicken as it stands. If you need to thin it out, add a little more milk and stir.

Looking for more slow cooker recipes? Try these out:

  • Creamy Slow Cooker Mashed Potatoes - another hands-off slow cooker recipe that results in a creamy, delicious side dish.
  • Slow Cooker Garlic Herb Mushrooms - one of my favorites. I love mushrooms, and these mushrooms come out seasoned and cooked to perfection.
  • Slow Cooker Hot Holiday Punch - I love making punch recipes for the Holidays. This one will impress your guests.
  • Slow Cooker Cheesy Hot Shrimp Dip - This dip is not only amazing, but it also boasts a rich flavor and is incredibly easy to make in the slow cooker.

 If you have tried this recipe or any other recipe on my blog, please rate it and let me know how it turned out in the comments below!

slow cooker mac and cheese served in a large bowl
Print Recipe
4.86 from 7 votes

Slow Cooker Mac and Cheese

Seriously creamy, seriously cheesy, and seriously delicious! Sharp cheddar and an earthy gruyère cheese bring a beautiful depth of flavor to slow cooker mac and cheese.
Prep Time10 minutes mins
Cook Time2 hours hrs
Total Time2 hours hrs 10 minutes mins
Course: Side Dish
Cuisine: American
Keyword: slow cooker mac and cheese
Servings: 8 Servings
Calories: 538kcal
Author: Tanya Harris

Ingredients

  • 12 ounce Block sharp cheddar cheese
  • 4 ounces Block Gruyère cheese
  • 16 ounce Elbow noodles rinsed and drained
  • 2 ½ cups Whole milk
  • 12 ounce Evaporated milk
  • 4 tablespoons Unsalted butter
  • 1 teaspoon Seasoned salt
  • ½ teaspoon Black pepper

Instructions

  • Shred sharp cheddar cheese and Gruyère cheese. Set aside.
  • Add elbow noodles, whole milk, evaporated milk, unsalted butter, seasoned salt, and black pepper in the insert of a 6-quart slow cooker. Stir to combine. Sprinkle the shredded cheese on top.
  • Cover and cook low heat for 1 hour. After 1 hour, stir the mixture. Cover and cook for an additional 40-50 minutes, until the noodles are softened.
  • Switch the slow cooker to high heat and cook for an additional 10 minutes, covered, to thicken the sauce.
  • Serve immediately or switch the slow cooker to warm to keep the mac and cheese warm.

Notes

  • Slow cooking times may vary. Cook the noodles until they are al dente. 
  • The brand of cheese matters for a smooth cheese sauce. I used the Tillamook sharp cheddar and Boar’s Head Gruyère. It’s best to use block cheese and shred it yourself for best results. 
  • The cheese sauce will thicken as it stands. If you need to thin it out, add a little more milk and stir.

Nutrition

Serving: 1g | Calories: 538kcal | Carbohydrates: 51g | Protein: 23g | Fat: 27g | Saturated Fat: 15g | Polyunsaturated Fat: 1g | Monounsaturated Fat: 6g | Trans Fat: 0.2g | Cholesterol: 79mg | Sodium: 647mg | Potassium: 406mg | Fiber: 2g | Sugar: 10g | Vitamin A: 827IU | Vitamin C: 1mg | Calcium: 520mg | Iron: 1mg

This post was originally published on November 20, 2022. It has been updated with new information.

Quick and Easy Sautéed Shredded Brussels Sprouts Recipe

September 25, 2025 by Tanya Harris 5 Comments

sauteed shredded brussels sprouts in white bowl with spoon on side

If you think you don't like sprouts, it's time to think again! These sautéed shredded Brussels sprouts are loaded with flavor and are ready to serve in less than 15 minutes. They make for a great last minute side dish for Thanksgiving and the holidays.

sauteed shredded brussels sprouts in white bowl with spoon on side

You’ll find the full recipe with ingredient amounts and instructions in the recipe card at the bottom of this post. Be sure to check out the blog post itself for extra tips and tricks!

Love them or hate them, Brussels sprouts are a must-have at any Thanksgiving or Christmas table, and I promise you, everyone will love these sautéed shredded Brussels sprouts!

pic of Tanya

I don’t make Brussels sprouts like this every day, but when I want a side dish that feels a little more elegant, this is the one. The shredded sprouts cook quickly, and the addition of honey and blue cheese takes things up a notch with minimal effort.

If you’re looking for more easy vegetable sides, I’ve got plenty of favorites. Try these Air Fryer Brussels Sprouts for a crispy twist, or my Southern Fried Cabbage for something a bit heartier. And if you’re planning a full spread, don’t miss these Easy Roasted Carrots.

A Quick Look at the Ingredients

Ingredient amounts and full recipe instructions are on the printable recipe card at the bottom of the post.

  • Vegetables and Fruit - Brussels sprouts and a tart apple, like a Granny Smith.
  • For Cooking - Olive Oil or any other high-heat oil.
  • For Flavor - Honey, Blue Cheese Crumbles, Salt, and Black Pepper
labeled ingredient photos of brussels sprouts

Recommended Tool

Breville Paradice 9 Cup Food Processor and Dicer
I love this food processor for quickly shredding the Brussels sprouts in this recipe.
Buy Now

How to make sautéed shredded Brussels sprouts

Step 1: Gather your ingredients. Shred the sprouts and apple in your food processor.

cut brussels sprouts in food processor
brussels sprouts shredded in food processor

Step 2: Heat oil over medium heat in a large 12-14-inch skillet. Add brussels sprouts in a single layer and allow to cook undisturbed for 1 minute to crisp the bottom.

raw shredded brussels sprouts in pan

Step 3: Add the shredded apples and stir until well combined. Continue to cook for 5-6 minutes, stirring occasionally, until the sprouts are tender.

sauteed shredded brussels sprouts in pan

Step 4: Stir in honey and cook for an additional minute. Remove from heat and sprinkle with blue cheese. Salt and pepper to taste. Serve and enjoy.

sauteed shredded brussels sprouts with spoon in side and in white bowl

Can you make them ahead of time?

This healthy side dish is so quick to cook, and the sprouts are at their best right out of the skillet. To get ahead of things, you can shred the sprouts a day or two before you are due to serve them and keep them covered in the fridge. Don't pre-shred the apple, or it will brown.

Leftovers will keep well in the fridge for 3 to 4 days and you can reheat them in the skillet to serve.

cooked shredded brussels sprouts with raw brusel sprouts on the side

What do you serve them with?

I enjoy these sautéed shredded Brussels sprouts as part of a quick and easy weeknight meal, but they of course won't be out of place at any Thanksgiving or holiday table. Try them with your other favorite sides and these mains:

  • Roasted Air Fryer Turkey Breast (Bone-In or Boneless)
  • Mustard Glazed Air Fryer Pork Tenderloin
  • Air Fried Spatchcock Chicken
  • Perfect Air Fryer Steak with Garlic Herb Butter
  • Salmon Wellington

How do you make Brussels sprouts not taste bitter?

If you usually don't like the bitterness of spouts, I'm here to change your mind with this recipe! By finely shredding the sprouts, you allow the chemical that produces a bitter flavor to escape during cooking, and that's why even the sprout haters will love this!

The blue cheese and honey also balance the flavor, and I promise you, everyone will be asking for more!

Tanya's Top Tips

  • You can purchase shredded brussels sprouts or shred your own with the slicing disk of a food processor.
  • Shredded brussels sprouts can be stored in the refrigerator for 1-2 days.
  • Use the shredding disk of a food processor to shred the apples.
  • If you're not a fan of blue cheese, feel free to substitute it with feta, goat cheese, or even Parmesan for a milder flavor.

More Vegetable Side Dishes

I hope you like this brussels sprouts recipe as much as we do! Looking for more quick vegetable side dishes? Try these out: 

  • Air Fryer Carrots (Sweet or Savory)
  • Southern Candied Sweet Potatoes
  • Sautéed Yellow Squash
  • Sautéed Beet Greens
  • Marinated Air Fryer Vegetables

If you have tried this or any other recipe on my blog, please rate it and let me know how it turned out in the comments below!

sauteed shredded brussels sprouts in white bowl with spoon on side
Print Recipe
5 from 2 votes

Sautéed Shredded Brussels Sprouts Recipe

If you think you don't like sprouts, it's time to think again! These sautéed shredded Brussels sprouts are loaded with flavor and are ready to serve in less than 15 minutes.
Prep Time5 minutes mins
Cook Time10 minutes mins
Total Time15 minutes mins
Course: Side Dish
Cuisine: American
Keyword: how to saute Brussels sprouts, quick brussels sprouts recipe, sprouts with blue cheese
Servings: 4 servings
Calories: 243kcal
Author: Tanya Harris

Ingredients

  • 3 Tablespoons olive oil
  • 16 oz fresh brussels sprouts shredded
  • 1 Granny Smith Apple or other tart apple, shredded
  • 3 Tablespoons honey
  • ¼ cup crumbled blue cheese
  • Salt and pepper to taste

Instructions

  • Heat oil over medium heat in a large 12-14 inch skillet. Add brussels sprouts in a single layer and allow to cook undisturbed for 1 minute to crisp the bottom.
  • Add the shredded apples and stir. Continue to cook for 5-6 minutes, stirring occasionally, until the sprouts are tender.
  • Stir in honey and cook for an additional minute. Remove from heat and sprinkle with blue cheese. Salt and pepper to taste.

Video

Notes

  • You can purchase shredded brussels sprouts or shred your own with the slicing disk of a food processor.
  • Shredded brussels sprouts can be stored in the refrigerator for 1-2 days.
  • Use the shredding disk of a food processor to shred the apples.

Nutrition

Calories: 243kcal | Carbohydrates: 30g | Protein: 6g | Fat: 13g | Saturated Fat: 3g | Cholesterol: 6mg | Sodium: 155mg | Potassium: 511mg | Fiber: 5g | Sugar: 20g | Vitamin A: 944IU | Vitamin C: 98mg | Calcium: 95mg | Iron: 2mg

This post was originally published on November 13, 2020. It has been updated with new photos and information.

Juicy Air Fryer Turkey Breast (Bone-In or Boneless)

September 23, 2025 by Tanya Harris 97 Comments

air fryer turkey breast on wooden board

This Roasted Air Fryer Turkey Breast is juicy and moist, and so easy to make. Use bone-in or boneless turkey breast to make this beautiful, golden roasted turkey in under an hour. 

Air Fryer Roasted Turkey Breast on a cutting board

You’ll find the full recipe with ingredient amounts and instructions in the recipe card at the bottom of this post. Be sure to check out the blog post itself for extra tips and tricks!

Turkey is not just for Thanksgiving. It’s available year-round and is perfect for times when you get tired of simple roasted chicken. The turkey breast in the air fryer is ideal for the times you: 

  • Don’t want to turn on the oven to roast a small turkey breast. 
  • Don’t feel like taking the extra step of brining the turkey. 
  • Want to have a turkey on the table in less than an hour.
  • Love your Air Fryer so much that you make anything and everything in it (this is me, this is me!)

This recipe works for bone-in and boneless turkey breasts and requires no brining. 

Pin this recipe for later ↗
pic of Tanya

I love making turkey breast in the air fryer. It’s quick, easy, and always turns out juicy. It’s perfect for a family dinner or when I need cooked turkey for another dish, like a stack of delicious turkey sandwiches. For this recipe, I use mayonnaise to coat the turkey breast. It's the trick to getting a nice golden crust on my turkey.

In this post, I included directions for both bone-in and boneless cuts, so you can use whichever you prefer.

♡ Tanya

A Quick Look at the Ingredients

Ingredient amounts and full recipe instructions are on the printable recipe card at the bottom of the post.

  • Turkey breast - I have included directions for both bone-in and boneless turkey breast. If using a boneless turkey breast with netting, ensure the netting remains in place while cooking.
  • Mayonnaise - Acts as a binder to help the seasonings stick and promotes a beautifully golden, crispy skin. You can use oil or butter if you prefer to skip the mayo.
  • Seasonings - I use a simple blend of poultry seasoning, salt, garlic powder, and black pepper. These add depth and color without overpowering the turkey's flavor. Feel free to adjust the blend based on your taste or what you have on hand.

How to cook a turkey breast in the air fryer

Bone-in turkey breast in the air fryer

Step 1: First, ensure you have a fully defrosted turkey breast that fits in your Air Fryer basket. Some of those bone-in breasts are huge and literally won’t fit in your everyday basket air fryer. I prefer a breast that weighs 4 pounds or less. I suggest using an air fryer that is at least 5.3 quarts in size. 

Step 2: Rub mayonnaise and seasonings all over the turkey breast. I also season under the skin.

Step 3: reheat your air fryer to 360°F (182°C). For a bone-in turkey breast, I place it on its side and cook it for 25 minutes. Then, I open the basket, carefully flip the turkey, and cook for another 25 minutes. The turkey is done when it reaches an internal temperature of 165°F (74°C) on a quick-read thermometer.

raw turkey breast in air fryer basket
turkey breast in air fryer basket with thermometer testing meat

Step 4: Allow your turkey breast to cool on a cutting board for 5-10 minutes before slicing and serving.

Sliced Air fryer Turkey breast on cutting board

3-pound boneless turkey breast in the air fryer

My boneless turkey breast typically comes with a net around the meat. I like to keep the net on the meat so that the meat cooks together and slices better after cooking.

Step 1: Preheat your air fryer to 360°F (182°C) and season your turkey breast.

Step 2: Place the turkey breast in the air fryer and cook for 1 hour, turning it every 15 minutes to ensure even cooking. I’ve found that boneless turkey breasts can take a bit longer than bone-in, especially if they’re wrapped in netting. Use a quick-read thermometer to make sure the internal temperature reaches 165°F (74°C) before serving.

raw boneless turkey breast in air fryer basket
cooked turkey breast in air fryer basket with thermometer sticking out

Step 3: Allow the turkey breast to cool on a cutting board for 5-10 minutes, then remove the net before slicing.

Sliced boneless Turkey breast

Tanya's Top Tips

These tips will help you make the most delicious turkey breast in the air fryer.

  • I use defrosted turkey breast so I can properly season it and have the seasonings stick to the meat. You can also choose to dry-brine it and let it sit in the refrigerator for a few hours. I usually just season and get to cooking. 
  • I chose mayonnaise to coat the breast because I like the taste and the golden color it gives my breast. You could opt for a reduced amount of oil instead. 
  • If making the boneless breast, be careful when removing the netting after cooking. Some meat may stick to the netting when removing.

Plan Ahead + Storage Tips

  • Prep Ahead: Season the turkey breast up to 24 hours in advance and refrigerate until ready to cook.
  • Leftovers: Store cooked turkey in an airtight container in the fridge for up to 4 days.
  • Freezing: Freeze cooked, sliced turkey for up to 3 months. Thaw overnight in the fridge.
  • Reheating: Reheat in the air fryer at 300°F (150°C) for 10–15 minutes, or until heated through. You can also microwave in short intervals, covered with a damp paper towel to retain moisture.

Additional turkey recipes you may enjoy

I hope you enjoy this recipe as much as we do, or are looking for more ways to cook a turkey breast, try these out:

  • Slow Cooker Turkey Breast
  • Instant Pot (Pressure Cooker) Turkey Breast

How to serve turkey breast

If you need ideas of what to serve this with, try these:

  • Gravy or Giblet Gravy
  • Creamy Instant Pot Mashed Potatoes
  • Instant Pot Southern Style Collard Greens

FAQs:

How do you know turkey breast is cooked?

Cook the turkey until it reaches an internal temperature of 165°F (74°C).

Do I need to brine the turkey before cooking it in the air fryer?

No, I've never brined my turkey, as it's cooked in a delicious blend of spices that pack lots of flavor into the finished turkey breast. However, if you prefer, you can dry-brine the turkey with the spices and let it rest in the fridge for a few hours before cooking.

Can you cook a frozen turkey breast in the air fryer?

I do not recommend it. I recommend fully thawing the turkey breast and adding seasoning to it before air frying. Cooking from frozen may result in the outside browning/cooking too quickly while the inside takes longer to reach the correct temperature.

If you have tried this turkey breast recipe, or any other recipe on my blog, then please rate it and let me know how it turned out in the comments below!

air fryer turkey breast on wooden board
Print Recipe
4.84 from 60 votes

Air Fryer Turkey Breast Recipe (Bone-In or Boneless)

Make juicy and delicious turkey breast right in your Air Fryer. Use bone-in or boneless turkey breast to make the perfect golden turkey breast in your Air Fryer.
Prep Time10 minutes mins
Cook Time50 minutes mins
Total Time1 hour hr
Course: Main Course
Cuisine: American
Keyword: air fryer turkey breast, bone-in turkey breast
Servings: 10 people
Calories: 401kcal
Author: Tanya Harris

Equipment

  • Quick Read Thermometer

Ingredients

Bone-In Turkey Breast

  • 4 lb bone-in turkey breast*
  • ¼ cup mayonnaise
  • 2 teaspoon poultry seasoning
  • 1 teaspoon salt
  • ½ teaspoon garlic powder
  • ¼ teaspoon black pepper

Boneless Turkey Breast

  • 3 lb boneless breast*
  • ¼ cup mayonnaise
  • 2 teaspoon poultry seasoning
  • 1 teaspoon salt
  • ½ teaspoon garlic powder
  • ¼ teaspoon black pepper

Instructions

Bone-In Turkey Breast

  • Preheat air fryer to 360 degrees Fahrenheit.
  • Season turkey breast with mayonnaise, poultry seasoning, salt, garlic powder, and black pepper.
  • Place turkey breast in the air fryer basket on its side. Cook on one side for 25 minutes, flip, cook on the other side for 25 minutes or until internal temperature has reached a temperature of 165 degrees Fahrenheit.

Boneless Turkey Breast

  • Preheat your Air fryer to 360 degrees Fahrenheit.
  • Season your boneless turkey breast with mayonnaise, poultry seasoning, salt, garlic powder, and black pepper.
  • Air fry on 360 degrees Fahrenheit for 1 hour, turning every 15 minutes or until internal temperature has reached a temperature of 165 degrees Fahrenheit.

Video

Notes

*Cook times will vary depending on the size of your turkey breast.
*I find that my boneless breast takes a little longer than bone-in because of the way it is wrapped in the netting.
*Use a quick read thermometer to ensure the internal temperature has reached 165 degrees Fahrenheit.

Nutrition

Calories: 401kcal | Carbohydrates: 1g | Protein: 69g | Fat: 14g | Saturated Fat: 2g | Polyunsaturated Fat: 7g | Monounsaturated Fat: 4g | Trans Fat: 0.1g | Cholesterol: 176mg | Sodium: 1191mg | Potassium: 781mg | Fiber: 0.1g | Sugar: 0.3g | Vitamin A: 92IU | Vitamin C: 0.1mg | Calcium: 54mg | Iron: 2mg

This post was originally published on October 22, 2019. It has been updated with helpful information and storage tips.

The BEST Jamaican Curry Chicken Recipe

September 23, 2025 by Tanya Harris 100 Comments

Jamaican curry chicken in blue pot with spoon on side

This is the best Jamaican Curry Chicken Recipe. The perfect combination of rich flavors on one plate. This is the Caribbean dish to make when you want to taste the islands. 

The finished chicken curry in a blue dutch oven.

You’ll find the full recipe with ingredient amounts and instructions in the recipe card at the bottom of this post. Be sure to check out the blog post itself for extra tips and tricks!

Pin this recipe for later ↗

Growing up, curry chicken was a staple weeknight meal. My mom's curry chicken is hands down the best I've ever had. Getting the recipe from her was a chore, as she measured nothing in the kitchen.

I asked many questions and watched her closely. I obtained a recipe and noted the key steps for making traditional and authentic Jamaican Curry.

pic of Tanya

Many home cooks adore this curry chicken recipe. I veered from traditional methods of cutting a whole chicken to make this recipe. Instead, I opt for boneless, skinless chicken thighs. They're easier to prepare and still result in juicy, flavorful chicken.

♡Tanya

Top Tips to Make the Best Jamaican Curry Chicken Recipe

  1. Rinse the chicken with water and vinegar.
  2. Use the right curry powder and seasonings - Jamaican Curry Powder is a combination of spices. For Jamaican curry, you need to use good curry powder. I use a combination of Hot Blue Mountain Country Curry Powder and Betapac Curry Powder. I also add a little Jamaican all-purpose seasoning.
  3. Use a whole chicken or just dark meat chicken, cut into pieces with skin removed - Curry chicken, like brown stew chicken, is a stew, and you want to make sure your chicken doesn’t dry out. I opt for boneless, skinless chicken thighs, which stay juicy and tender. 
  4. Use only a little water - Curry is known to “sprout its own water.” I only add ¼ cup of water to this recipe when I start cooking, and I end up with about 1 ½ cups of gravy once it’s done. Adding too much water can make your curry bland.

The Ingredients You Need to Make This Recipe

Ingredient amounts and full recipe instructions are on the printable recipe card at the bottom of the post.

  • Chicken: boneless, skinless chicken thighs or whole chicken pieces cut into 2-inch pieces.
  • Seasonings and Spices: Curry powder, All-purpose seasoning, Salt, Black Pepper
  • Vegetables: Yellow onion, Green onions, Green pepper, Garlic cloves, Russet potato
  • Herbs: Fresh thyme
  • Heat: Scotch bonnet pepper (optional)
  • Cooking Fats: Olive oil
  • Liquids: Water

Recommended Curry Powders & Seasoning

  1. Blue Mountain Country Jamaican Curry Powder
    Blue Mountain Country Jamaican Curry Powder

    This is the curry powder I grew up using. It's some of the best on the market.

    Buy Now
  2. Betapac Curry Powder (8oz Bottle)
    Betapac Curry Powder (8oz Bottle)

    Another great curry powder. Use a small amount, it is potent.

    Buy Now
  3. Easispice All Purpose Seasoning 14 Oz
    Easispice All Purpose Seasoning 14 Oz

    A Jamaican all-purpose seasoning blend.

    Buy Now

How to make Jamaican Curry Chicken

Step 1: Add chicken thighs, all-purpose seasoning, 1 tablespoon of curry powder, onion, green onions, green pepper, garlic cloves, scotch bonnet pepper (if using), and thyme to a large bowl and combine. Cover and refrigerate for at least 1 hour or up to overnight.

raw chicken seasoned with curry powder and spices

Step 2: After marinating the chicken, remove the onions, peppers, thyme, scotch bonnet pepper (if using), and garlic cloves. Keep them separate.

Marinated chicken in one bowl and onions, peppers and garlic in another.

Step 3: Heat oil in a large, heavy-bottom pot over medium heat. Add the remaining curry powder and stir, cooking for about 20-30 seconds.

This step, known as "burning the curry," releases the flavors of the spices. You don’t burn anything.

Curry powder and oil in a pot.

Step 4: Add onions, green pepper, scotch bonnet peppers (if desired), garlic cloves, and thyme to the pot. Stir the ingredients until the onions have softened. This should take about 3-5 minutes. If your onions and peppers appear dry, add about 1 tablespoon of water.

Vegetables added to the pot.

Step 5: Add chicken pieces and ¼ cup of water to the pot. Cover and reduce the heat to medium-low. Cook, stirring occasionally, for 30-35 minutes.

chicken added to the pot.

Step 6: When about 15 minutes remain, stir in the potato and continue cooking, covered.

potatoes added to the pot.

Step 7: Once the chicken is cooked and the potatoes are softened, remove the pot from the heat. Salt and pepper to taste.

Jamaican chicken curry in a pot.

What is the best cut of chicken to use?

I prefer using boneless, skinless chicken thighs for this Jamaican Curry Chicken because they remain tender and juicy. If you prefer bone-in chicken, that works too—just cut it into smaller pieces and remove the skin.

For the best results, chop larger pieces into bite-sized chunks. Smaller cuts cook more evenly, soak up the curry flavors better, and are easier to enjoy in a stew or sauce-based dish.

I don’t recommend using only chicken breast here. Since it’s leaner and has less fat, it can dry out quickly during cooking.

Can you make it ahead of time, and how do you store it?

This curry is delicious when freshly made. It tastes even better the next day because the flavors have had time to meld. Let the curry cool to room temperature before transferring it to an airtight container. Store in the fridge for up to 4 days or freeze for up to 3 months.

Reheat on the stovetop on medium heat, stirring occasionally until heated through. Take care to only reheat the chicken once.

What do you serve with it?

This curry is great to serve on a bed of rice. You can serve it with boiled jasmine or basmati rice, or try it with one of these recipes:

  • Jamaican Rice and Peas or white rice
  • Instant Pot Brown Rice
  • Jamaican Cabbage
  • Fluffy Coconut Rice

FAQs

Can I add coconut milk to curry chicken?

Some people add a touch of coconut milk to curry to give it a rich texture. I don't. This recipe mimics the curry you will find in many Jamaican households or Jamaican restaurants, which do not add coconut milk.

Can I make Jamaican curry chicken in the Instant Pot or slow cooker?

Yes. In the Instant Pot, sauté the curry powder and chicken first, then pressure cook for about 10 minutes. For the slow cooker, brown the chicken and curry first, then cook on low for 6–8 hours.

How do I thicken the curry sauce?

The potatoes will naturally thicken the sauce as they cook. If you prefer it thicker, mash a few potato pieces into the sauce or simmer uncovered for a few extra minutes.

What makes Jamaican curry chicken different from Indian curry chicken?

Jamaican curry uses a unique curry powder blend that’s usually heavier on turmeric, allspice, and Scotch bonnet peppers, giving it a bright color and a distinctly island flavor. Indian curries often rely on garam masala, cumin, coriander, and a wider range of spice blends.

More Jamaican Recipes

  • Jamaican Curry Goat - similar to curry chicken, but you'll cook the goat for longer, until it's tender. I usually use my pressure cooker to make curry goat.
  • Jamaican Jerk Chicken - a classic Jamaican dish that is smoky, spicy, and bursting with Island flavors. Typically grilled, you can also bake it or prepare it in your air fryer.
  • Jamaican Oxtail Recipe
  • Jamaican Curry Shrimp - this recipe uses whole, juicy shrimp and coconut milk. It's a quick meal to make, making it perfect for weeknight dinners.

I hope you love this recipe as much as we do. If you've made this recipe, please leave a comment below. I appreciate your support.

jamaican curry chicken in blue pot with a wooden spoon on the side
Print Recipe
4.86 from 68 votes

Jamaican Curry Chicken Recipe (Mom's Recipe)

This authentic and traditional Jamaican Curry Chicken recipe is the perfect combination of rich flavors in one dish. It’s the perfect dish to make when you want a taste of the islands.
Prep Time15 minutes mins
Cook Time40 minutes mins
Marinating Time1 hour hr
Total Time2 hours hrs
Course: Main Course
Cuisine: Jamaican
Keyword: easy chicken curry, how to make chicken curry, Jamaican curry recipe
Servings: 4 servings
Calories: 441kcal
Author: Tanya Harris

Equipment

  • Dutch Oven

Ingredients

  • 2 lbs boneless and skinless chicken thighs chopped into 2-inch pieces
  • 2.5 Tablespoon curry powder separated (see note)
  • 1 teaspoon all-purpose seasoning
  • 1 yellow onion chopped
  • 3 green onions chopped
  • ½ green pepper chopped
  • 4 garlic cloves chopped
  • 1 scotch bonner pepper chopped, seeds removed (optional)
  • 3 sprigs fresh thyme stems removed
  • 3 Tablespoon olive oil
  • ¼ cup water
  • 1 large russet potato chopped
  • Salt and pepper to taste

Instructions

  • Add chicken thighs, all-purpose seasoning, 1 tablespoon of curry powder, onion, green onions, green pepper, garlic cloves, scotch bonnet pepper (if using), and thyme to a large bowl and combine, making sure all chicken pieces are covered with the seasoning. Cover and refrigerate for at least 1 hour or up to overnight.
  • One the chicken is done marinating, remove onions, peppers, and garlic cloves from chicken and set aside.
  • Heat olive oil in a large heavy bottom pot over medium heat. Add remaining curry powder and stir, cooking for about 20-30 seconds. Add onions, green pepper, garlic cloves, thyme, and scotch bonnet pepper (if using) to pot and stir until onions have softened, about 3-5 minutes. If your onions and peppers are looking dry, add about 1 tablespoon of water.
  • Add chicken and ¼ cup of water to the pot. Cover and reduce heat to medium low. Cook, stirring occasionally, for 30-35 minutes.
  • When there is about 15 minutes remaining, stir in potato and continue to cook covered.
  • Once chicken is cooked and potatoes are softened, remove from heat. Salt and pepper to taste.

Video

Notes

  • You can use bone-in chicken if you prefer, just cook until the meat is fall off the bone tender. I don’t recommend using chicken breast in this recipe as it can dry out.
  • The kind of curry you use is important to this dish. I used 2 tablespoon Blue Mountain Country Curry and ½ tablespoon Betapac. Your stew will taste like whichever curry you choose to use.
  • Scotch bonnet pepper is optional in this recipe. Feel free to chop it up and remove the seeds or place it in the pot whole, while cooking, to flavor the chicken.
  • Curry “sprouts” its own gravy. Do not add more than the ¼ cup as listed in the recipe or you’ll have curry soup instead.
  • The potato will thicken the gravy.

Nutrition

Calories: 441kcal | Carbohydrates: 17g | Protein: 46g | Fat: 21g | Saturated Fat: 4g | Cholesterol: 215mg | Sodium: 219mg | Potassium: 956mg | Fiber: 4g | Sugar: 2g | Vitamin A: 293IU | Vitamin C: 29mg | Calcium: 86mg | Iron: 4mg

This recipe was first published on January 14, 2021. It has been updated with additional helpful information.

Stovetop Beef Stew (Hearty and Flavorful)

September 22, 2025 by Tanya Harris 3 Comments

stovetop beef stew in black bowl with spoon in bowl

This Stove Top Beef Stew features tender pieces of beef simmered in a delicious gravy, making it perfect for when you crave a hearty stew with amazing flavor.

stovetop beef stew in black bowl with spoon in bowl

You’ll find the full recipe with ingredient amounts and instructions in the recipe card at the bottom of this post. Be sure to check out the blog post itself for extra tips and tricks!

Pin this recipe for later ↗

Beef stew is my go-to comfort food, especially when the weather turns chilly. It's warm, comforting, and incredibly flavorful when prepared correctly. This recipe was inspired by a beef stew I enjoyed in the Dominican Republic, which featured peppers and onions, as well as a delicious gravy that I loved.

For this recipe, I marinated the beef beforehand to provide a wonderful flavor and help tenderize the beef, using green bell peppers and onions, along with various seasonings, like adobo seasoning, soy sauce, lime juice, and other seasonings.

I cook this recipe entirely on the stovetop for convenience, but you can also bake it in the oven if you prefer a more hands-off approach.

If you like cozy beef recipes, then you'll love this beef and vegetable soup.

pic of Tanya

Many beef stews lean on carrots, potatoes, and peas for heartiness, but this one takes a different path. Instead, it layers bold flavors right into the meat and broth.

Soy sauce and lime juice add depth, while peppers, onions, and garlic create a savory base that makes every bite rich and deeply seasoned. It’s hearty, comforting, and a dish my whole family absolutely loved—I think yours will too!

♡ Tanya

beef stew in black bowl next to napkin

A Quick Look at the Beef Stew Ingredients

Ingredient amounts and full recipe instructions are on the printable recipe card at the bottom of the post.

  • For Marinating the Meat:
    • Beef stew meat - I buy meat that is pre-packaged and already labeled as beef stew meat. You could also use chuck roast or brisket, cut into 1-inch cubes, or any well-marbled cut suitable for slow cooking.
    • Soy sauce, adobo seasoning, onion powder, cumin, lime juice – these ingredients come together to create a flavorful marinade that not only seasons the beef but also helps tenderize it. The combination infuses the meat with a savory, tangy, and slightly citrusy taste that sets the foundation for a rich and delicious stew.
  • For Cooking:
    • Olive oil, yellow onion, green bell pepper, jalapeño, garlic, tomato paste, beef or chicken broth—these ingredients form the aromatic base and savory sauce for the stew. Sautéing the vegetables in olive oil builds flavor, while the tomato paste adds richness and depth. The broth brings everything together, creating a hearty, flavorful gravy that infuses the beef and vegetables as they simmer.
  • Vegetables:
    • Potatoes - I use yellow potatoes to thicken the stew and make it more hearty. You can also substitute red potatoes, russet potatoes, or carrots and potatoes. I add these towards the end of cooking.
  • Garnish:
    • Cilantro - I like the pops of color that fresh cilantro provides at the end of cooking. You can also use parsley if you are not a fan of cilantro.
ingredients for beef stew on a table

Recommended Tools

Mercer Culinary Enameled Cast Iron Round Dutch Oven, 6 qt., Matte Black
Ziliny 2 Pcs Round Food Storage Container with Lid 2 Qt Dough Bucket Clear Translucent Containers with Scale(White)

How to Make Stovetop Beef Stew

Step 1: Combine the beef, soy sauce, adobo seasoning, onion powder, cumin, and lime juice in a large bowl and mix well to coat the beef. Cover and marinate for 1–2 hours in the refrigerator. For the best flavor, marinate overnight if you have time.

💡 Tip: Marinating not only enhances flavor but also tenderizes the beef, making it melt-in-your-mouth tender.

raw beef stew meat marinating in container

Step 2: Heat olive oil in a Dutch oven or heavy-bottomed pot over medium-high heat. Once hot, add the marinated beef in a single layer in the pot, searing each piece for 2–3 minutes per side until browned. Avoid overcrowding the pot to ensure a good sear. Remove the beef and set aside.

💡 Tip: I like to brown only about half of the beef instead of all of it. Browning some pieces adds plenty of flavor without overcrowding the pot or risking the fond (those browned bits) burning. It also saves time. The unseared beef still absorbs flavor as it simmers, so you get a rich stew without the extra hassle.

beef stew meat browning in pot

Step 3: In the same pot, add sliced yellow onion, green bell pepper, and jalapeño. Pour in 2 tablespoons of beef broth to deglaze the pot, scraping up any browned bits stuck to the bottom.

Cook the vegetables for 3–4 minutes, or until they are softened. Stir in the chopped garlic and tomato paste, cooking for another 30 seconds to release their flavors.

peppers and onions and tomato paste in pot

Step 4: Return the seared beef, along with any unseared beef, to the pot. Add 1 cup of beef broth and stir well, scraping the bottom again to ensure nothing is sticking. Reduce the heat to low, cover the pot, and let the stew simmer gently for 45 minutes. Stir occasionally to prevent sticking.

Tip: Keep the liquid level halfway up the beef. If it looks too dry, add a splash of hot water.

raw beef stew meat and peppers in pot
cooked beef stew in pot

Step 5: After 45 minutes, stir in the peeled and chopped potatoes. Cover and continue simmering for another 30–35 minutes, or until the beef is tender and the potatoes are cooked through but not falling apart.

💡Tip: Yellow potatoes are great for this recipe because they hold their shape while adding creaminess to the stew.

beef stew with uncooked potatoes added

Step 6: Once the stew is done, stir in freshly chopped cilantro or parsley for a pop of color and freshness. Taste and adjust the seasoning with salt or pepper as needed.

💡Tip: If you’re not a fan of cilantro, parsley works just as well for garnish.

Step 7: Serve the beef stew. It's excellent over hot rice or with crusty bread.

finished beef stew covered in cilantro

How to Store Beef Stew

  • Refrigerator: Cool completely, store in an airtight container up to 3–4 days. Reheat gently on the stovetop or in the microwave.
  • Freezer: Freeze in airtight containers or freezer bags up to 3 months. Thaw overnight in the fridge before reheating.
  • Reheating Tip: Add a splash of broth or water if it thickens too much.

Tanya’s Top Tips for the Best Beef Stew

  • Use a well-marbled cut like chuck for the most tender beef.
  • Don’t rush the simmer; low and slow is what makes the beef melt-in-your-mouth tender.
  • Browning some (not all) of the beef adds great flavor without making the process too fussy.
beef stew in pot being picked up with spoon

FAQs

Can I make this in a slow cooker?

Yes! After marinating, brown the beef and sauté the vegetables as directed, then transfer everything to a slow cooker. Add broth, cover, and cook on low for 7 to 8 hours or high for 4 to 5 hours, until tender.

 
What can I use instead of potatoes?

Carrots, sweet potatoes, or yucca are great alternatives. Just make sure to cut them into evenly sized chunks so they cook at the same rate.

Do I have to marinate the beef?

Marinating adds extra flavor and tenderness, but you can skip it if you’re short on time. The stew will still be delicious — just season the beef generously before searing.

How do I thicken beef stew?

If the stew is too thin, simmer uncovered for 10–15 minutes to let the liquid reduce. You can also mash a few potatoes directly into the stew for natural thickening.

I hope you love this beef stew recipe as much as we do. If you're looking for more stew recipes, check these out.

  • Brown Stew Chicken - This delicious chicken stew is known all over the Caribbean. It has such a fantastic flavor. My version requires only 40 minutes of stove-top cooking.
  • Brown Stew Fish - a hearty Caribbean classic with bold flavors and tender fish in a rich brown sauce. Comfort food at its best.
  • Stew Peas - a traditional Caribbean stew made with red kidney beans, smoked turkey meat, and coconut milk.

    If you have tried this beef stew recipe, or any other recipe on my blog, then please rate it and let me know how it turned out in the comments below!
stovetop beef stew in black bowl with spoon in bowl
Print Recipe
5 from 2 votes

Stovetop Beef Stew Recipe

This stovetop beef stew is rich, tender, and full of comforting flavor. Marinated beef simmers with peppers, onions, and potatoes in a savory gravy for a hearty one-pot meal that’s perfect with rice or bread.
Prep Time15 minutes mins
Cook Time1 hour hr 15 minutes mins
Marinate Time2 hours hrs
Total Time3 hours hrs 30 minutes mins
Course: entree
Cuisine: American
Keyword: beef stew, stovetop beef stew
Servings: 6 people
Calories: 321kcal
Author: Tanya Harris

Ingredients

  • 2 pounds beef stew meat chuck roast or similar, cut into 1-inch cubes
  • 1 tablespoon soy sauce
  • 2 teaspoons adobo seasoning
  • 1 teaspoon onion powder
  • ½ teaspoon cumin
  • Juice of 1 lime about 2 tablespoons
  • 1 tablespoon olive oil
  • 1 yellow onion sliced
  • 1 green bell pepper sliced
  • 1 jalapeño seeded and sliced (optional, for heat)
  • 6 garlic cloves chopped
  • 2 tablespoons tomato paste
  • 1 cup beef or chicken broth low-sodium preferred; more as needed
  • 2 medium potatoes peeled and cut into 1-inch chunks
  • ½ cup fresh cilantro or parsley, for garnish

Instructions

  • In a medium bowl, combine the beef, soy sauce, adobo seasoning, onion powder, cumin, and lime juice. Mix well to coat. Cover and refrigerate for 1 to 2 hours, or overnight for best flavor.
  • Heat olive oil in a Dutch oven or heavy pot over medium-high heat. Working in batches, sear the beef for 3 to 4 minutes per side until browned. Remove and set aside.
  • In the same pot, add the onion, green bell pepper, and jalapeño. Pour in 2 tablespoons of broth to deglaze, scraping up browned bits from the bottom. Cook for 3 to 4 minutes, until softened. Stir in the garlic and tomato paste and cook for 30 seconds.
  • Return the beef to the pot. Add 1 cup of broth, stirring to release any remaining fond. Reduce the heat to low, cover, and simmer gently for 45 minutes, stirring occasionally.
  • Stir in the potatoes. Cover and continue simmering for 30 to 35 minutes, until the beef is tender and the potatoes are cooked through but not falling apart. Add more broth or a splash of water if the stew becomes too dry.
  • Stir in the cilantro or parsley. Taste and adjust seasoning with salt and pepper. Serve hot with rice, tostones, or avocado.

Video

Notes

  • For the most tender beef, let the stew simmer low and slow. If the beef isn’t tender after the listed time, continue simmering until it softens.
  • Potatoes can be swapped with carrots, sweet potatoes, or yucca. Just cut them into even chunks so they cook evenly.

Nutrition

Calories: 321kcal | Carbohydrates: 20g | Protein: 37g | Fat: 10g | Saturated Fat: 3g | Polyunsaturated Fat: 1g | Monounsaturated Fat: 5g | Cholesterol: 94mg | Sodium: 451mg | Potassium: 1012mg | Fiber: 3g | Sugar: 3g | Vitamin A: 280IU | Vitamin C: 40mg | Calcium: 62mg | Iron: 4mg

Jamaican Sweet Potato Pudding

September 17, 2025 by Tanya Harris 3 Comments

Jamaican sweet potato pudding on plate with fork next to it

Jamaican sweet potato pudding is rich, moist, and full of warm island spices that make every bite unforgettable. This classic dessert is an authentic taste of the island and one you’ll want to bake again and again.

Jamaican sweet potato pudding on plate with fork next to it

You’ll find the full recipe with ingredient amounts and instructions in the recipe card at the bottom of this post. Be sure to check out the blog post itself for extra tips and tricks!

Pin this recipe for later

Sweet potato pudding, the Caribbean way, has been a long-time favorite of mine. Anytime I walk into a Jamaican bakery, I have to order a slice. It's not only the amazing flavor it provides, but also the texture. Although this falls into the dessert category, I love to eat a slice of this pudding for breakfast, as a snack, or whenever the craving hits.

You'll notice that I mentioned the word "slice" because this sweet potato pudding is dense but not hard, and is meant to be sliced and enjoyed. I don't even use a fork when I eat it (mind you, I know I put a fork in the photo lol). But it's definitely an on-the-go dessert.

pic of Tanya

This recipe uses a special kind of sweet potato known as a "batata" potato. You can usually find it in your international grocery store.

It has reddish skin with white to pale-yellow flesh. It's starchy, drier, and sweeter than the orange sweet potatoes.

If you can't find a batata and need to use a traditional sweet potato, you can still make this, but it will be more like a pudding you need to eat with a spoon.

If you enjoy Jamaican desserts, you'll want to try my Jamaican Black Cake recipe.

♡ Tanya

jamaican sweet potato pudding from above with cinnamon sticks on side

In Jamaica, there’s a saying about this dessert: “hell a top, hell a bottom, and Hallelujah inna di middle.” That’s because the pudding was traditionally baked in a Dutch pot with hot coals on top and underneath, creating its signature firm yet tender texture with a rich, custardy center. No worries though, I bake this one in the oven.

A Quick Look at the Ingredients

Ingredient amounts and full recipe instructions are on the printable recipe card at the bottom of the post.

  • Sweet potatoes - This recipe uses a batata sweet potato. This sweet potato can be found in many International grocery stores. It has reddish skin with white to pale-yellow flesh. It's starchy, drier, and sweeter than the orange sweet potatoes.
  • Canned coconut milk - Canned coconut milk is thick in texture and perfect for this recipe. I usually buy two cans, and save any leftover milk I don't use in this recipe to add to my smoothies, curries, or even oatmeal for a creamy, tropical flavor.
  • Light brown sugar - To sweeten the pudding.
  • Vanilla extract - provides the essence for the pudding
  • Spices - allspice, cinnamon, nutmeg, and ginger
  • Raisins - these are optional, but I personally love my pudding to have raisins sprinkled throughout.
ingredients for the sweet potato pudding on a table with labels

Recommended Tool

Breville Paradice 9 Cup Food Processor and Dicer
Traditionally, the sweet potatoes for this recipe are grated. I did that once, and one time only. It made my hand hurt. I now use a food processor to process the sweet potatoes before proceeding with the recipe.
Buy Now

How to make Jamaican Sweet Potato Pudding

Step 1: Preheat oven to 350°F (175°C). Grease and line a 9-inch round pan or loaf pan with parchment paper.

Step 2: Place your peeled and cut sweet potatoes in the bowl of a food processor and process until finely grated. You can also grate the sweet potatoes by hand if you don't have a food processor. In a small bowl, toss raisins in 2 teaspoons of flour from the ½ cup. Set aside.

grated sweet potatoes in food processor bowl

Step 3: In a large bowl, combine grated sweet potatoes, light brown sugar, all-purpose flour, vanilla extract, allspice, cinnamon, nutmeg, ginger, and salt. Stir in 1½ cups of coconut milk until a batter forms. Fold in the raisins that were tossed in the flour.

sweet potato pudding batter in bowl

Step 4: Pour the batter into the prepared pan and smooth the top. Bake uncovered for 1 hour and 30 minutes, until mostly set but still slightly soft in the center.

pudding batter in cake pan before baking

Step 5: While the pudding bakes, make the custard topping. In a saucepan, combine ¾ cup coconut milk, brown sugar, cinnamon, and nutmeg. Cook over medium-low heat, stirring constantly, until slightly thickened (about 2-3 minutes). Do not boil.

Step 6: After 90 minutes of baking, remove the pudding and gently spoon the custard over the top.

baked pudding with custard on top

Return to the oven and bake for an additional 30–40 minutes, until the custard is set and a toothpick comes out mostly clean.

Step 7: Let cool completely in the pan, at least 1 hour. For the best texture, refrigerate for a few hours or overnight before slicing. Serve warm or chilled.

finished pudding before cooling and slicing

Storing Jamaican Sweet Potato Pudding

Refrigeration

To refrigerate sweet potato pudding, allow it to cool completely at room temperature before storing it in the refrigerator. Once cooled, transfer the pudding into an airtight container or cover it tightly with plastic wrap. Store it in the fridge for up to 3-4 days to maintain freshness.

Freezing

For longer storage, freeze the sweet potato pudding. After cooling, portion the pudding into freezer-safe containers or heavy-duty freezer bags. Ensure they are sealed tightly to prevent freezer burn. Label with the date and store in the freezer for up to 2-3 months. Thaw in the refrigerator before serving.

Tanya's Top Tips

  • If adding raisins, toss them in a bit of flour to stop them from sinking to the bottom.
  • Be sure to shake the canned coconut milk so the thick cream and liquid are fully combined.
  • Allow the pudding to cool completely before enjoying. I even suggest refrigerating it overnight. Those flavors really pop when it's cooled.
sweet potato pudding slice on plate

I hope you enjoy this sweet potato pudding as much as we do. Looking for more Jamaican Classics to enjoy this with. Try it with Jamaican Ginger Beer or Sorrel.

If you’ve tried this Caribbean dessert recipe (or any other recipe on my blog), don’t forget to rate it and leave a comment below. I love hearing from you!

sweet potato pudding slice on plate
Print Recipe
5 from 3 votes

Jamaican Sweet Potato Pudding

Jamaican sweet potato pudding is a rich, spiced dessert made with batata, delivering a dense, moist texture and bold island flavor. Coconut, warm spices, and sweet potato come together for that deep, comforting island flavor.
Prep Time20 minutes mins
Cook Time2 hours hrs
Cooling Time1 hour hr
Total Time3 hours hrs 20 minutes mins
Course: Dessert
Cuisine: Caribbean, Jamaican
Keyword: jamaican sweet potato pudding
Servings: 10
Calories: 362kcal
Author: Tanya Harris

Ingredients

For the Pudding Base

  • 2 lbs Jamaican sweet potatoes (batata) peeled and cut into large chunks
  • 1½ cups coconut milk from a can
  • 1½ cups light brown sugar
  • ½ cup all-purpose flour reserve 2 teaspoons to toss the raisins
  • 1 Tablespoon vanilla extract
  • 1 teaspoon ground allspice
  • 1 teaspoon ground cinnamon
  • 1 teaspoon ground nutmeg
  • ½ teaspoon ground ginger
  • ¼ teaspoon salt
  • ½ cup raisins

For the Coconut Custard Topping

  • ¾ cup coconut milk from the remaining portion of the 2 cans
  • 1 Tablespoon brown sugar
  • ⅛ teaspoon ground cinnamon
  • ⅛ teaspoon ground nutmeg

Instructions

For the Pudding Base

  • Preheat oven to 350°F (175°C). Grease and line a 9-inch round pan or loaf pan with parchment paper.
  • Place your cut sweet potatoes in the bowl of a food processor and process until finely grated. In a small bowl, toss raisins in 2 teaspoons flour from the ½ cup. Set aside.
  • In a large bowl, combine grated sweet potatoes, light brown sugar, all-purpose flour, vanilla extract, allspice, cinnamon, nutmeg, ginger, and salt. Stir in 1½ cups of coconut milk until a batter forms. Fold in the raisins that were tossed in the flour.
  • Pour the batter into the prepared pan and smooth the top. Bake uncovered for 1 hour 30 minutes, until mostly set but still slightly soft in the center.

For the Coconut Custard Topping

  • While the pudding bakes, make the custard topping. In a saucepan, combine ¾ cup coconut milk, brown sugar, cinnamon, and nutmeg. Cook over medium-low heat, stirring constantly, until slightly thickened (about 2-3 minutes). Do not boil.
  • After 90 minutes of baking, remove the pudding and gently spoon the custard over the top. Return to the oven and bake for an additional 30–40 minutes, until the custard is set and a toothpick comes out mostly clean.
  • Let cool completely in the pan, at least 1 hour. For the best texture, refrigerate for a few hours or overnight before slicing. Serve warm or chilled.

Video

Notes

  • Refrigerate leftovers for up to 3-4 days.
  • Freeze individual slices for up to 2 months. Thaw in the fridge and rewarm before serving if desired.

Nutrition

Calories: 362kcal | Carbohydrates: 65g | Protein: 4g | Fat: 11g | Saturated Fat: 10g | Polyunsaturated Fat: 0.2g | Monounsaturated Fat: 0.5g | Sodium: 109mg | Potassium: 662mg | Fiber: 4g | Sugar: 39g | Vitamin A: 17436IU | Vitamin C: 19mg | Calcium: 79mg | Iron: 3mg

Slow Cooker Pork Carnitas (Crispy + Tender)

September 12, 2025 by Tanya Harris 1 Comment

pork carnitas in bowl

This slow cooker carnitas recipe delivers tender, fall-apart pork that practically melts in your mouth. Made with a few ingredients, this simple slow-cooked recipe is perfect for using in all types of meals.

pork carnitas in bowl

You’ll find the full recipe with ingredient amounts and instructions in the recipe card at the bottom of this post. Be sure to check out the blog post itself for extra tips and tricks!

One of the best things about a large piece of pork is that it can be slow-cooked until it falls apart, and used in so many different recipes. One of my favorite things to do with a large piece of pork is to make carnitas.

Carnitas are a traditional Mexican dish made by slow-cooking pork until it’s tender, then crisping it up for added texture and flavor. The result is juicy, flavorful meat that’s perfect for tacos, burritos, nachos, rice bowls, or even on its own. It’s incredibly easy to make at home with just a few pantry staples.

For this recipe, I used similar ingredients that I used in an oldie but goodie pork carnitas recipe I did in my Ninja Foodi. I've tweaked that recipe to make it more adaptable to those who like to use a slow cooker.

A quick look at the Ingredients

Ingredient amounts and full recipe instructions are on the printable recipe card at the bottom of the post.

  • Pork Butt (Boston Butt): The star of the dish, pork butt is ideal for slow cooking due to its marbling, which keeps the meat tender and flavorful. You can substitute pork shoulder if needed.
  • Seasonings: kosher salt, oregano, ground cumin, and ground black pepper
  • Aromatics: garlic cloves and yellow onion
  • Citrus: fresh-squeezed orange juice and fresh-squeezed lime juice. This mimics a sour orange, an ingredient commonly used in Mexican cooking. It adds brightness to the pork.
ingredients for pork carnitas on table

Recommended Tools for Carnitas

  • Slow Cooker (6-quart or larger): Big enough to hold a whole pork butt/shoulder without crowding.
  • Rimmed Baking Sheet: Ideal for broiling the shredded pork so it crisps evenly without spilling juices.
  • Sturdy Forks or Meat Claws: Makes shredding the pork quick and easy.
  • Sharp Chef’s Knife: Helpful for trimming excess fat or cutting the shoulder into smaller chunks if you want it to cook faster.

How to Make Pork Carnitas

Step 1: Start by seasoning the pork butt evenly with kosher salt, oregano, ground cumin, and black pepper.

Cut small slits all over the pork and insert garlic cloves into the slits. This infuses the meat with a rich, garlicky flavor as it cooks.

raw pork butt stuffed with garlic and seasoned with seasoning

Step 2: Place the seasoned pork butt into your slow cooker. Pour in the fresh-squeezed orange juice and lime juice. Then, place the quartered onion on top of the pork.

raw pork in slow cooker covered with onions and citrus juice

Step 3: Cover the slow cooker and cook on LOW for 8–10 hours (or HIGH for 4–6 hours). The pork is ready when it’s fork-tender and registers 195-200°F internally, which ensures it shreds easily.

cooked pork in slow cooker

Step 4: Carefully remove the pork from the slow cooker and shred it with two forks. For extra moisture, drizzle some of the cooking liquid over the shredded pork.

Step 5: To achieve that signature crispy texture, preheat your broiler. Spread the shredded pork evenly on a baking sheet, and broil for 5–8 minutes. Keep an eye on it to avoid burning. You're looking for browned, crispy edges.

pork carnitas on sheetpan

Storage and Make Ahead Tips

  • Refrigerating: Store leftover carnitas in an airtight container in the refrigerator for up to 4 days. To reheat, warm them in a skillet over medium heat or in the oven to maintain their crispy texture.
  • Freezing: Carnitas freeze beautifully! Place the shredded pork in a freezer-safe container or bag, along with some of the cooking liquid to keep it moist. Freeze for up to 3 months. Thaw in the refrigerator overnight before reheating.
  • Making Ahead: You can slow-cook the pork a day or two in advance. Store the cooked, shredded pork in the fridge, along with some of the cooking liquid. When ready to serve, crisp it up in the oven or skillet for that signature texture. This method is perfect for meal prepping or hosting gatherings.

Tanya's Top Tips and Notes:

  • Large pork butts/shoulders will take longer to cook. To speed things up, you can cut the shoulder into smaller chunks (about 2-3 chunks) before adding it to the slow cooker.
  • Carnitas can be crisped up in the oven on the broil setting or in a hot skillet for a few minutes. Both methods will give you those golden, crispy edges that make carnitas irresistible.
  • Leave some of the fat cap on the pork butt. It renders down during cooking and keeps the meat moist and flavorful. You can trim away any excess before shredding if you prefer.
pork carnitas on a sheetpan

I hope you love these Slow Cooker Pork Carnitas as much as we do!

Looking for more recipes to try? Check these out:

  • Yellow Rice – the perfect side dish for tacos or burrito bowls.
  • Salsa - Refreshing and a great topping for carnitas tacos.
  • Ninja Foodi Pork Carnitas – another variation if you love using your Foodi.
  • Oven-Baked Fries – turn your carnitas into loaded fries for a fun twist.
  • Watermelon Salsa - A nice, refreshing salsa recipe to top on your carnitas.

FAQs

What cut of pork is best for carnitas?

Pork butt (Boston butt) or pork shoulder is ideal because of its fat and marbling, which keep the meat juicy and flavorful after slow cooking.

Can I make pork carnitas ahead of time?

Yes. Cook and shred the pork, then store it in the fridge for up to 4 days. For best results, crisp the carnitas in the oven or skillet right before serving.

How do I reheat carnitas so they stay juicy?

Reheat in a hot skillet with a splash of the cooking liquid to bring back moisture and crispiness. You can also re-crisp under the broiler.

If you’ve tried this Pork Carnitas recipe (or any other recipe on my blog), don’t forget to rate it and leave a comment below. I love hearing from you!

pork carnitas in bowl
Print Recipe
5 from 1 vote

Slow Cooker Pork Carnitas Recipe

These Slow Cooker Pork Carnitas are tender, juicy, and full of flavor, made with simple spices, fresh citrus, garlic, and onion. Slow-cooked until fall-apart tender, then broiled for irresistible crispy edges, this classic Mexican dish is perfect for tacos, burritos, nachos, or rice bowls.
Prep Time15 minutes mins
Cook Time8 hours hrs
Total Time8 hours hrs 15 minutes mins
Course: Main Course
Cuisine: Mexican
Keyword: pulled pork carnitas, slow cooker carnitas
Servings: 8
Calories: 278kcal
Author: Tanya Harris

Equipment

  • Slow Cooker
  • Baking Sheet

Ingredients

  • 3.5 lb pork butt
  • 2 teaspoons kosher salt
  • 1 teaspoon dried oregano
  • 1 teaspoon ground cumin
  • ½ teaspoon ground black pepper
  • 8 garlic cloves
  • ¼ cup fresh orange juice
  • 2 tablespoons fresh lime juice
  • 1 yellow onion quartered

Instructions

  • Season the pork butt evenly with salt, oregano, cumin, and black pepper.
  • Cut small slits all over the pork and insert the garlic cloves into the slits.
  • Place the pork butt in the slow cooker. Pour in the orange juice and lime juice, then add the quartered onion on top.
  • Cover the slow cooker and cook on LOW for 8–10 hours (or HIGH for 4–6 hours). The pork is ready when it’s fork-tender and shreds easily.
  • Remove the pork from the slow cooker and shred it with two forks.
  • To crisp: Preheat your broiler. Spread the shredded pork on a baking sheet, drizzle with a little of the cooking liquid, and broil for 5–8 minutes, or until the edges are browned and crispy.

Video

Notes

  • Larger pork butts/shoulders will take longer; cut into chunks to reduce cooking time.
  • Crisp the pork under the broiler or in a hot skillet — both give great results.
  • For best reheating, warm in a skillet with a splash of cooking liquid to restore juiciness.
  • Freeze portions with some liquid in freezer bags for up to 3 months.

Nutrition

Calories: 278kcal | Carbohydrates: 4g | Protein: 38g | Fat: 11g | Saturated Fat: 4g | Polyunsaturated Fat: 1g | Monounsaturated Fat: 5g | Trans Fat: 0.1g | Cholesterol: 119mg | Sodium: 712mg | Potassium: 734mg | Fiber: 0.5g | Sugar: 1g | Vitamin A: 26IU | Vitamin C: 7mg | Calcium: 45mg | Iron: 3mg

Spatchcocked Garlic Parmesan Chicken

September 9, 2025 by Tanya Harris Leave a Comment

garlic parmesan sauce in skillet

This Spatchcocked Garlic Parmesan Chicken recipe delivers a beautifully roasted whole chicken. Perfectly cooked, the meat is wonderfully juicy with golden skin covered in a delicious garlic parmesan sauce.

garlic parmesan sauce in skillet

You’ll find the full recipe with ingredient amounts and instructions in the recipe card at the bottom of this post. Be sure to check out the blog post itself for extra tips and tricks!

Pin this recipe for later ↗

I love a good restaurant-quality meal, and this chicken is just that. Inspired by Boston Market's Garlic Parmesan chicken, this whole bird is topped with crispy breadcrumbs and smothered in a rich, cheesy garlic sauce. To reduce cooking time and ensure even roasting, I spatchcock the chicken by removing the backbone, allowing it to lie flat.

This is such a great way to make a roasted chicken, but if you're looking for a more classic recipe, you'll love this whole roasted chicken recipe or this spatchcock chicken roasted in the air fryer.

A Quick Look at the Ingredients

  • Whole chicken (approximately 5 lbs) – I use a whole bird and spatchcock it to reduce cooking time.
  • Olive oil – Helps the seasoning stick and gives the skin a nice crisp.
  • Garlic powder + fresh garlic – Double the garlic means double the flavor.
  • Paprika & onion powder – These add color and a little extra depth to the rub.
  • Salt & black pepper – Basics that bring it all together.
  • Italian breadcrumbs – For that crispy topping that reminds me of the Boston Market version.
  • Heavy cream – This makes the sauce rich and delicious. Feel free to sub with half-and-half.
  • Parmesan cheese – Freshly grated melts beautifully into the sauce for that cheesy finish.
  • Parsley - chopped and added as garnish

Recommended Kitchen Tool

RFX Wireless Probe Starter Kit

I use this wireless probe thermometer kit from ThermoWorks to track meat temperatures while they cook. It connects to my phone and sends alerts when the food is nearly done, so I never have to guess.

Buy Now

How to make Garlic Parmesan Spatchcock Chicken

Step 1: Preheat your oven to 400°F. Combine ¼ cup olive oil, garlic powder, paprika, onion powder, and black pepper in a bowl. Stir until incorporated.

Step 2: Spatchcock the chicken by removing the backbone and any excess fat, cracking the breast bone, and flipping the chicken so it lies flat.

Step 3: Season all sides of the chicken with the olive oil mixture, ensuring the seasoning reaches under the skin.

Place the chicken in a cast-iron skillet or sheet pan, laying it on its back with the breast side up.

raw seasoned whole chicken in skillet with thermometer in thigh

Step 4: Bake in the preheated oven for 40-45 minutes, or until the thickest part of the thigh reaches 160°F and the skin is golden and crisp.

Step 5: When your chicken has about 10 minutes left, add two tablespoons of oil and breadcrumbs to a small bowl.

Remove the chicken from the oven and cover it with the breadcrumb mixture. Return the chicken to the oven and cook for the remaining 10 minutes, or until it is fully cooked.

roasted chicken in skillet

Step 6: Meanwhile, prepare your Garlic Parmesan sauce. Place heavy cream and garlic in a medium saucepan over medium heat. Bring the mixture to a low simmer and allow to simmer for about 1 minute, whisking occasionally.

Remove from heat and stir in Parmesan cheese.

garlic parmesan sauce in saucepan

Step 7: Pour the sauce over the chicken before serving. Cover with parsley for garnish. Serve and enjoy.

chicken covered in white sauce

How to spatchcock a chicken

If you get your chicken from a butcher, you can ask them to spatchcock it for you. It's pretty easy to do by yourself; you need a good pair of kitchen scissors.

  • Place the chicken breast-side down, with the legs towards you.
  • Using sturdy scissors, cut up along each side of the backbone to remove it, cutting through the rib bones as you go.
  • Cut off any excess fat. Use a sharp knife and cut a slit into the white cartilage in the middle of the breast. Turn the chicken over and pull the breast and wings upward while pushing down the middle of the breast, until it lies flat. This will make sure your meat is all one thickness.
step by step of chicken being cut and spatchcocked

What do you serve it with?

This chicken is a great main entree, and pairs great with classic sides like garlic mashed potatoes, sautéed spinach, or yellow rice.

    How to store

    If you have any leftovers, keep them in an airtight container. You can add the shredded chicken to salads, chilis, sandwiches, and stews. You can also use the carcass to make homemade chicken stock.

    chicken in pan that has been cut

    Tanya's Notes and Tips

    • Don’t skip the breadcrumb topping. It adds a delicious crunch that pairs so well with the creamy Parmesan sauce.
    • Let the chicken rest for at least 15 minutes before carving, allowing the juices to redistribute evenly.

    I hope you love this Garlic Parmesan Chicken as much as we do. Looking for more restaurant-quality chicken recipes? Try these out.

    • Nashville Style Hot Chicken Tenders (Air Fryer Recipe)
    • Air Fryer Whole Chicken (Peruvian Style)

    If you have tried this recipe or any other recipe on my blog, please rate it and let me know how it turned out in the comments below!

    garlic parmesan sauce in skillet
    Print Recipe
    No ratings yet

    Garlic Parmesan Spatchcock Chicken

    This easy spatchcock chicken recipe is a quick and easy way to cook a whole chicken. Perfectly cooked, the meat is wonderfully juicy with perfectly crispy skin.
    Prep Time15 minutes mins
    Cook Time50 minutes mins
    Total Time1 hour hr 5 minutes mins
    Course: Main Course
    Cuisine: American
    Keyword: garlic parmesan chicken, spatchcock chicken, whole chicken in a skillet
    Servings: 6
    Calories: 547kcal
    Author: Tanya Harris

    Ingredients

    • 1 4-5 whole chicken the backbone removed and laid flat
    • ¼ cup olive oil + 2 Tbsp
    • 1 ½ teaspoons garlic powder
    • 1 teaspoon kosher salt
    • 1 teaspoon paprika
    • ½ teaspoon onion powder
    • ½ teaspoon black pepper
    • ¼ cup Italian breadcrumbs
    • ¾ cup heavy cream
    • 1 clove garlic crushed
    • ½ cup Parmesan cheese grated
    • Parsley chopped

    Instructions

    • Preheat your oven to 400 degrees Fahrenheit.
    • Combine ¼ cup olive oil, garlic powder, paprika, onion powder, and black pepper in a bowl. Stir until incorporated.
    • Season all sides of the chicken with olive oil mixture, making sure the seasoning gets under the skin.
    • Place chicken in a cast-iron skillet or sheet pan, laying the chicken on it’s back, breast side up. Bake in preheated oven for 40-45 minutes, until the chicken is golden brown.
    • When your chicken has about 10 minutes left, Add 2 tablespoon oil and breadcrumbs to a small bowl. Remove chicken from oven and cover with breadcrumb mixture. Return to the oven and cook for the remaining 10 minutes or until chicken is done.
    • Meanwhile, prepare your Garlic Parmesan sauce. Place heavy cream and garlic in a medium saucepan over medium heat. Bring the mixture to a low simmer and allow to simmer for about 1 minute, whisking occasionally. Pour the sauce over the chicken. Garnish with parsley. Serve and enjoy.

    Video

    Notes

    Let the chicken rest for at least 15 minutes before carving so that the juices redistribute.

    Nutrition

    Calories: 547kcal | Carbohydrates: 6g | Protein: 28g | Fat: 45g | Saturated Fat: 17g | Cholesterol: 155mg | Sodium: 305mg | Potassium: 307mg | Fiber: 1g | Sugar: 1g | Vitamin A: 1024IU | Vitamin C: 2mg | Calcium: 148mg | Iron: 2mg

    This post was originally published July 16, 2020. It has been updated with helpful information and new photos.

    Vibrant Purple Sweet Potato Pie

    August 11, 2025 by Tanya Harris 17 Comments

    slice of purple sweet potato pie on a plate topped with whipped cream

    Visually stunning and just as delicious, this Purple Sweet Potato Pie is creamy, spiced, and naturally stunning. Made with rich purple sweet potatoes, it's a beautiful twist on classic sweet potato pie.

    purple sweet potato pie cut up into slices

    You’ll find the full recipe with ingredient amounts and instructions in the recipe card at the bottom of this post. Be sure to check out the blog post itself for extra tips and tricks!

    Purple sweet potato pie, like the Southern Sweet Potato Pie recipe, is a sweet and creamy custard pie. This unique purple dish will be a fantastic addition to your Thanksgiving menu alongside the traditional pumpkin pie.

    My mother-in-law brought one of these purple beauties to a Thanksgiving dinner, and we were all in awe. Believe me, this is a show-stopper dessert that is as delicious as it is beautiful.

    Sweet potatoes are one of the most versatile root vegetables, equally at home in sweet and savory dishes. For dessert, I love baking them into Sweet Potato Bundt Cake and Jamaican Inspired Sweet Potato Pudding.

    On the savory side, they shine in Sweet Potato Salad or Air Fryer Sweet Potato Wedges.

    slice of purple sweet potato pie on a plate topped with whipped cream

    Ingredients for Purple Sweet Potato Pie

    Ingredient amounts and full recipe instructions are on the printable recipe card at the bottom of the post.

    • Purple sweet potatoes – The star of the recipe, giving the pie its naturally vibrant color and subtly sweet flavor. Stokes or Okinawan varieties work well. You’ll need about 2 cups of mashed potatoes after cooking.
    • Unsalted butter, softened – Adds richness and helps create a smooth, custardy texture.
    • Eggs, lightly beaten – Bind the filling and give it structure.
    • Brown sugar, packed – Sweetens the pie while adding a hint of molasses depth.
    • Coconut milk (canned, shaken well) – Provides creaminess and a subtle coconut flavor. Whole milk or evaporated milk can be substituted if preferred.
    • Vanilla extract – Enhances the overall flavor and warmth of the pie.
    • Spices - ground ginger, salt, ground cardamom, ground cinnamon
    • 9-inch pie crust, store-bought or homemade – The buttery base that holds the filling. A par-baked crust will help prevent sogginess.
    purple sweet potato pie ingredients

    Tools needed for this recipe

    • Baking sheet
    • Parchment paper
    • Food processor
    • Measuring cups & spoons
    • Pie pan

    How to make Purple Sweet Potato Pie

    Preheat the oven to 425 degrees Fahrenheit. Poke the purple sweet potatoes with a fork, and bake them on a sheet pan in the preheated oven until softened, about 40-45 minutes.

    purple sweet potatos on a baking sheet with parchment paper

    Remove the purple sweet potatoes from the oven and set them aside to cool. Once cooled, peel the sweet potatoes, discard skins, and place the cooked purple sweet potatoes in the bowl of a food processor.

    Reduce the oven temperature to 350 degrees Fahrenheit.

    Add butter, eggs, brown sugar, coconut milk, vanilla extract, ground ginger, table salt, cardamom, and cinnamon to the food processor. Process on low until the sweet potato mixture is smooth.

    sweet potato pie filling in a food processor

    Pour the sweet potato mixture into the pie crust. Bake in the preheated oven 350 degrees oven for  55 minutes to 1 hour, until the pie is set in the middle.

    purple sweet potato pie filling in a pie crust not baked

    Remove the pie from the oven and allow it to cool for at least 1 hour. Serve and enjoy.

    baked purple sweet potato pie

    What are purple sweet potatoes?

    Purple sweet potatoes are a root vegetable just like the orange-fleshed variety. Packed with anthocyanins, a pigment that gives purple sweet potatoes and other fruit and vegetables their vibrant colors.

    Not as commonly found as regular orange sweet potatoes, however. Stokes purple sweet potatoes are grown in central California but were originally cultivated in Stokes County, North Carolina.

    An Okinawa purple sweet potato has white skin with purple and white speckled flesh. Often called Hawaiian sweet potatoes, their flavor is mild and sweet but very dry and starchy.

    Molokai purple potatoes have a darker brown and purple skin with darker purple flesh. Also, a resident of Hawaii.

    slice of purple sweet potato pie on a plate topped with whipped cream

    How To Store Purple Sweet Potatoes

    Store purple sweet potatoes as you would regular potatoes, in a cool and dry place.

    Be sure to use your purple sweet potatoes within a week or two due to their shorter lifespan than a regular potato.

    Storing Purple Sweet Potato Pie

    • Room Temperature: Because this pie contains eggs and butter, enjoy it within 2 hours of serving.
    • Refrigerator: Cover leftovers and store in the fridge for up to 4 days—perfect for making ahead.
    • Freezer: For longer storage, wrap the cooled pie in plastic, then foil, and freeze for up to 1 month. Thaw overnight in the fridge before serving.

    Tanya's Top Tips

    • Prepare pie crust according to your recipe or package directions.
    • The cooked sweet potatoes will yield about 2 cups of mashed sweet potatoes. 
    • Sweet Potato Pie is best when it has cooled, so wait to serve it.
    • The best sweet potato pie is made at least a day ahead and chilled. Remove from the fridge at least 30 minutes before serving.

    Looking for more Pie recipes? Try these out:

    • Homemade Pumpkin Pie - Always on our Thanksgiving table, thishas just the right balance of spice and sweetness.
    • Southern Pinto Bean Pie - An old-fashioned dessert that surprises everyone with its rich, nutty flavor.
    • Southern Chess Pie - Sweet, simple, and a family favorite.

     If you have tried this recipe or any other recipe on my blog, please rate it and let me know how it turned out in the comments below!

    slice of purple sweet potato pie on a plate topped with whipped cream
    Print Recipe
    4.64 from 11 votes

    Purple Sweet Potato Pie

    Visually stunning and just as delicious. This Purple Sweet Potato Pie is going to be a showstopper dessert this Thanksgiving.
    Prep Time40 minutes mins
    Cook Time1 hour hr
    Total Time1 hour hr 40 minutes mins
    Course: Dessert
    Cuisine: American
    Keyword: purple pie, purple sweet potato pie
    Servings: 8 servings
    Calories: 1268kcal
    Author: Tanya Harris

    Ingredients

    • 1 ½ pounds Purple sweet potatoes
    • 4 tablespoons Unsalted butter softened
    • 3 large Eggs lightly beaten
    • 1 cup Brown sugar packed
    • 1 cup Coconut milk Canned, shaken
    • 1 teaspoon Vanilla extract
    • ¾ teaspoon Ground ginger powder
    • ½ teaspoon Table salt
    • ½ teaspoon Ground cardamom
    • ½ teaspoon Ground cinnamon
    • 9 inch Pie crust storebought or homemade

    Instructions

    • Preheat the oven to 425°F. Poke the sweet potatoes with a fork, and bake them on a sheet pan in the preheated oven until softened, about 40-45 minutes.
    • Remove the sweet potatoes from the oven and set them aside to cool. Once cooled, peel the sweet potatoes and place them in the bowl of a food processor.
    • Reduce the oven temperature to 350°F.
    • Add butter, eggs, brown sugar, coconut milk, vanilla extract, ground ginger, table salt, cardamom, and cinnamon to the food processor. Process on low until the sweet potato mixture is smooth.
    • Pour the sweet potato mixture into the pie crust. Bake in the oven for 55 minutes to 1 hour, until the pie is set in the middle.
    • Remove the pie from the oven and allow it to cool for at least 1 hour. Serve and enjoy.

    Notes

    • Prepare pie crust according to your recipe or package directions.
    • The cooked sweet potatoes will yield about 2 cups of mashed sweet potatoes. 
    • Sweet Potato Pie is best when it has cooled, so wait to serve it.
    • The best sweet potato pie is made at least a day ahead and chilled. Remove from the fridge at least 30 minutes before serving.

    Nutrition

    Serving: 1g | Calories: 1268kcal | Carbohydrates: 138g | Protein: 17g | Fat: 72g | Saturated Fat: 28g | Polyunsaturated Fat: 8g | Monounsaturated Fat: 30g | Trans Fat: 0.2g | Cholesterol: 85mg | Sodium: 959mg | Potassium: 350mg | Fiber: 6g | Sugar: 27g | Vitamin A: 279IU | Vitamin C: 0.3mg | Calcium: 85mg | Iron: 7mg

    This post was originally published on August 24, 2022. It's been updated with new information.

    Air Fryer Hot Dogs (Juicy, Crispy, and Ready in 10 Minutes)

    August 9, 2025 by Tanya Harris 53 Comments

    hot dogs in buns in air fryer basket topped with ketchup and mustard

    I’ve made hot dogs every way you can imagine, but air frying is my favorite. In less than 10 minutes, you get that perfect snap, juicy inside, and toasted buns all in one easy step.

    hot dogs in buns in air fryer basket topped with ketchup and mustard

    You’ll find the full recipe with ingredient amounts and instructions in the recipe card at the bottom of this post. Be sure to check out the blog post itself for extra tips and tricks!

    I love a good hot dog, but not all hot dog cooking methods are the same. I’ve had them boiled, I’ve had them grilled, and I’ve even had them microwaved. Regardless of your preference, I promise you won’t want them any other way after you’ve Air Fried them.

    Why Make Hot Dogs in the Air Fryer?

    Air frying gives you hot dogs with a crispy outside and juicy inside in under 10 minutes. There’s no need to preheat; you can make one or a whole batch with the same cook time, and you can toast the buns right in the basket for an all-in-one meal.

      Ingredients Needed

      Ingredient amounts and full recipe instructions are on the printable recipe card at the bottom of the post.

      • Hot dogs - I prefer all-natural, 100% beef hot dogs. However, any type or brand will work, including turkey, chicken, pork, or plant-based options. I usually grab whatever's on sale.
      • Hot dog buns - Use your favorite style, from classic white to whole wheat, brioche, or gluten-free. Fresh buns work best, but slightly stale buns crisp up beautifully in the air fryer.
      ingredients for air fryer hot dogs on table

      How to cook hot dogs in an Air Fryer

      First, I like to cut small little slits in my hot dogs. This is not a required step at all. I like to do this to make hot dogs pretty and mimic a grill line. When my hubby makes the hot dogs in the Air Fryer, he does not do this, and it all works fine.

      close up photo of slits in hot dogs

      Then, place your hot dogs in the Air Fryer basket. There is no need to spray or anything; the hot dogs won’t stick to the basket and will release their natural hot dog oils, whatever that is.

      Close the Air Fryer basket and cook at 400 degrees Fahrenheit for 4-6 minutes.

      cooked hot dogs in air fryer basket

      Remove the hot dogs and place them in your hot dog buns. Return hot dogs to the air fryer and cook at 400 degrees Fahrenheit for two more minutes to get a nice crisp on your buns.

      hot dogs in buns in air fryer basket

      Remove and top them with your favorite toppings. Here’s a great list of hot dog toppings to try. You could also add my hot dog chili,  or you can keep it simple with ketchup, mustard, and sauerkraut, which is my favorite.

      air fryer hot dogs in air fryer basket covered in ketchup and mustard

      Frequently Asked Questions about these Air Fryer Hot Dogs

      Do I need to preheat my air fryer for hot dogs?

      Nope! One of the perks of this recipe is that you don’t have to preheat. Just pop the hot dogs in and start cooking. If you prefer an extra-crispy exterior, you can preheat for 2–3 minutes.

      Can I cook frozen hot dogs in the air fryer?

      Yes! Add about 2–3 extra minutes to the first cooking stage. Check them halfway through and separate if they’re stuck together.

      How many hot dogs can I cook at once?

      As many as fit in a single layer in your air fryer basket without overlapping. Most medium baskets hold 4–6 hot dogs.

      How do I reheat leftover hot dogs?

      Place them in the air fryer at 350°F for 2–3 minutes until heated through. If they’re already in buns, reduce the time slightly to prevent over-toasting.

      If you’re looking for more quick and easy Air Fryer recipes, try these out:

      • Air Fryer Pizza
      • Air Fryer Steak
      • Air Fryer Chicken Wings
      • Air Fryer Burgers (Turkey or Beef)
      • Air Fryer Sausage and Peppers

      I hope you love these air fryer hot dogs as much as we do. If you have tried this recipe or any other recipe on my blog, please rate it and let me know how it turned out in the comments below!

      hot dogs in buns in air fryer basket topped with ketchup and mustard
      Print Recipe
      4.95 from 18 votes

      10 Minute Air Fryer Hot Dogs Recipe

      These Air Fryer Hot Dogs are such a quick and easy meal and ready in less than 10 minutes. They are crispy on the outside and juicy on the inside.
      Prep Time2 minutes mins
      Cook Time8 minutes mins
      Total Time10 minutes mins
      Course: Main Course
      Cuisine: American
      Keyword: air fryer hot dogs
      Servings: 6 people
      Calories: 229kcal
      Author: Tanya Harris

      Ingredients

      • 1-6 Hot Dogs
      • 1-6 Hot Dog Buns

      Instructions

      • Place hot dogs in Air Fryer basket and cook on 400 degrees Fahrenheit for 4-6 minutes. Remove hot dogs and place in buns. Place back in Air Fryer and cook on 400 degrees Fahrenheit for 2 more minutes.
      • Remove and top with your favorite toppings. Enjoy 🙂

      Video

      Notes

      • This recipe works for traditional beef or the hot chicken, beef, and pork combination hot dogs.
      • Consider cutting small slits in your hot dogs for appearance. It is not a necessary step.
      • Test your hot dogs around the 4-minute mark to see if they are dark enough. Different Air Fryer wattages and sizes will cook hotdogs at different rates. 

      Nutrition

      Calories: 229kcal | Carbohydrates: 30g | Protein: 9g | Fat: 8g | Saturated Fat: 3g | Polyunsaturated Fat: 1g | Monounsaturated Fat: 4g | Cholesterol: 20mg | Sodium: 520mg | Potassium: 120mg | Fiber: 1g | Sugar: 3g | Vitamin A: 1IU | Vitamin C: 1mg | Calcium: 84mg | Iron: 3mg

      This post was originally published on June 6, 2019. It has been updated with additional information and new photos.

      Easy Oven Roasted Cabbage Steaks Recipe

      August 8, 2025 by Tanya Harris 23 Comments

      4 cabbage steaks on a dish

      My oven-roasted cabbage steaks are tender in the middle, caramelized on the edges, and full of flavor. Best of all, they're ready in under an hour, making them the perfect side for busy weeknights.

      4 cabbage steaks on a dish

      You’ll find the full recipe with ingredient amounts and instructions in the recipe card at the bottom of this post. Be sure to check out the blog post itself for extra tips and tricks!

      Cabbage is a big deal in our house, because my husband and both kids love it. I've pressure-cooked it, made the Caribbean version of cabbage that has a little spice and other vegetables, and I've fried cabbage in plenty of butter. But one of my go-to ways to make it is to simply roast it.

      This low-carb side is as easy as it gets. I cut the cabbage into 1-inch rounds, brush them with oil, sprinkle on seasoning, and put them into a hot oven, flipping halfway. The flavor is amazing and it takes almost no effort.

      close up of a roasted cabbage steak

      Ingredients Needed for Cabbage Steaks

      Ingredient amounts and full recipe instructions are on the printable recipe card at the bottom of the post.

      • Small head of green cabbage - I prefer a firm, dense head for this recipe because it holds together well when sliced and roasted. I usually skip lighter cabbage, like Napa or Savoy, since the leaves are looser.
      • Olive oil - This will help give your cabbage the nice roasted color.
      • Seasoning - I use garlic powder, smoked paprika, kosher salt, and black pepper. You can also use your favorite seasoning blend, like all-purpose seasoning.
      cabbage steak ingredients

      Recommended Tool

      Lodge 15.5"x10.5" Cast Iron Baking Pan, Black
      Lodge 15.5"x10.5" Cast Iron Baking Pan, Black

      I love to roast these cabbage steaks in this cast-iron baking pan. It helps give the cabbage a nice golden sear in the oven.

      Buy Now

        How to make roasted cabbage steaks

        Step 1: Preheat the oven to 400 degrees Fahrenheit.

        Slice cabbage into 1-inch thick pieces and place on a sheet pan.

        process of cutting cabbage steaks on a cutting board

        Step 2: Rub the cabbage slices with olive oil. Sprinkle sides with garlic powder, smoked paprika, kosher salt, and black pepper.

        6 seasoned cabbage steaks on a baking sheet

        Step 3: Place the pan in the preheated oven and roast the cabbage steaks for 30 minutes. After 30 minutes, flip them carefully. Continue roasting the steaks for an additional 10-15 minutes, until tender. Remove from the oven, serve, and enjoy.

        freshly baked cabbage steaks on a baking sheet

        How to cut cabbage for cabbage steaks

        Cutting cabbage is easier and safer with the right tools. A sharp, sturdy chef's knife will slice through even the densest cabbage without much effort. Just remember that cabbage can be slippery, so make sure it's dry before you cut it.

        Trim the root end of the cabbage to give it a flat base. Stand it upright on the cut side, then slice straight down into 1-inch thick "steaks."

        How to store leftover baked cabbage steaks

        Store cooled cabbage steaks in an airtight container in the refrigerator for up to 3 days.

        I don't recommend that you freeze cabbage steaks. The process of freezing ruins the texture of the cabbage.

        Reheating cabbage steaks: Place cabbage steaks on a baking sheet and bake at 350 degrees Fahrenheit until they reach the desired temperature. Alternatively, you can microwave them for a minute or two, depending on your microwave.

        freshly baked cabbage steaks on a baking sheet

        Preventing your cabbage steaks from falling apart

        Before taking the knife to your cabbages, peel away any loose leaves or leaves that are falling apart until you're left with a tight cabbage head.

        While you can get more cabbage steaks by cutting them into thinner pieces, the chances that your cabbage steaks are going to fall apart are higher.

        The ideal width is 1-inch thick slices, though the cooking time will be a bit longer, you'll end up with a sturdy but tender cabbage steak in the end.

        Delicious dishes to serve with roasted cabbage steaks

        These dishes are great for serving alongside these cabbage steaks.

        • Juicy Air Fryer Turkey Thighs - turkey and cabbage go together so well. While your cabbage is roasting in the oven, throw some turkey thighs in the oven.
        • Air Fryer Sweet Potato Wedges - a great vegetable that pairs well with cabbage.
        • Pinto Beans Recipe - This is our favorite way to enjoy pinto beans. Made with smoked turkey meat, these beans pair well with the roasted cabbage steaks.

        Tanya's Cabbage Steaks Notes

        • A small or medium cabbage works great with this dish. Use a sharp knife to cut the cabbage into steaks. 
        • Thicker cut cabbages will take longer to cook.
        • I’ve tested this recipe in the air fryer, but I always come back to the oven. You can roast more at once, get more even caramelization, and the texture is better from edge to center.

          I hope you love this cabbage steak recipe as much as we do. If you have tried this recipe or any other recipe on my blog, please rate it and let me know how it turned out in the comments below!

          4 cabbage steaks on a dish
          Print Recipe
          4.50 from 18 votes

          Roasted Cabbage Steaks Recipe

          This easy roasted cabbage steak recipe is simple to make and so delicious. From oven to table in less than an hour! Tender and full of flavor.
          Prep Time10 minutes mins
          Cook Time45 minutes mins
          Total Time55 minutes mins
          Course: Side Dish
          Cuisine: American
          Keyword: cabbage steaks
          Servings: 6 servings
          Calories: 66kcal
          Author: Tanya Harris

          Equipment

          • 1 Chef's Knife
          • 1 Cutting Board
          • 1 Dark Sheet Pan

          Ingredients

          • 1 Small head of cabbage 1 cut into 1-inch slices
          • 3 tablespoons Olive oil
          • 1 ½ teaspoons Garlic powder
          • 1 teaspoon Smoked paprika
          • ¾ teaspoon Kosher salt
          • ¼ teaspoon Black pepper

          Instructions

          • Preheat the oven to 400 degrees Fahrenheit.
          • Slice cabbage into 1-inch thick pieces and place on a sheet pan. Rub the cabbage pieces with oil. Sprinkle sides with garlic powder, smoked paprika, kosher salt, and black pepper.
          • Roast for 30 minutes. After 30 minutes, flip the cabbage steaks carefully. Continue roasting the steaks for an additional 10-15 minutes, until tender. Remove from the oven, serve, and enjoy.

          Notes

          • A small or medium cabbage works great with this dish. Use a sharp knife to cut the cabbage into steaks. 
          • Larger cabbages will take longer to cook.
          • For best carmelization, use a cast iron or dark sheet pan. 

          Nutrition

          Serving: 1g | Calories: 66kcal | Carbohydrates: 1g | Protein: 0.2g | Fat: 7g | Saturated Fat: 1g | Polyunsaturated Fat: 1g | Monounsaturated Fat: 5g | Sodium: 292mg | Potassium: 18mg | Fiber: 0.2g | Sugar: 0.1g | Vitamin A: 165IU | Vitamin C: 0.01mg | Calcium: 2mg | Iron: 0.2mg

          This post was originally published on September 27, 2022. It has been updated with new information.

          Jamaican Jerk Chicken (Air Fryer, Oven, or Grill)

          August 8, 2025 by Tanya Harris 29 Comments

          Jerk chicken served on a plate with lime wedges.

          Whenever I’m craving big, bold flavor, jerk chicken is one of the first things that comes to mind. It’s smoky, a little spicy, and so full of seasoning that every bite wakes up your taste buds. I love that I can make it in the air fryer when I’m short on time, or fire up the grill when I want that extra hint of smokiness.

          Close up of a lime wedge with pieces of marinated chicken.

          You’ll find the full recipe with ingredient amounts and instructions in the recipe card at the bottom of this post. Be sure to check out the blog post itself for extra tips and tricks!

          Whenever I think of Jamaica, jerk chicken and jerk pork come to mind. It's that dish that always brings me back to the island. Jerk refers to the cooking method, which involves cooking the food over pimento wood and slow-cooking it over a fire, resulting in a nice smoky flavor.

          The spice that jerk is usually known for comes from the wet paste that marinates the food before smoking or grilling.

          With a really good wet rub and some time marinating, you can make some delicious jerk chicken in the air fryer, oven, or grill.

          If you love this recipe, be sure to try my jerk chicken wings and jerk chicken soup.

          A Quick Glance at the Ingredients

          Ingredient amounts and full recipe instructions are on the printable recipe card at the bottom of the post.

          • Chicken pieces - I use all pieces of the chicken, from the breast, legs, thighs, and wings. I will usually break down a whole chicken to get all the pieces I need for this recipe.
          • Jerk Paste - For this recipe, I use either a good store-bought marinade or my jerk marinade made from scratch. Just do what works best for you based on time and preference.

          Recommended Ingredient

          Walkerswood Jamaican Jerk Seasoning Mixed Pack - 10 Oz Each Mild, Hot & Spicy
          Walkerswood Jamaican Jerk Seasoning Mixed Pack - 10 Oz Each Mild, Hot & Spicy

          This is my go-to store-bought marinade. It comes in mild or spicy. Created in Jamaica, Walkerswood gives you the authentic flavor of jerk.

          Buy Now

          How to make Jamaican Jerk Chicken

          Step 1: Rub chicken pieces with jerk wet paste, making sure to rub under the skin too. Then marinate for 4 hours up to overnight. Overnight is best.

          Two step by step photos to show how to marinate the chicken.

          Step 2: Cook according to instructions:

          Air Fryer

          Preheat the air fryer to 360 degrees Fahrenheit. Place chicken pieces in the air fryer basket, in a single layer, skin side down, and cook for 25-30 minutes, flipping halfway.

          The marinated chicken in an air fryer basket.
          The cooked Jamaican jerk chicken in the air fryer basket.

          Conventional Oven

          Preheat oven to 425 degrees Fahrenheit. Place chicken pieces on a baking sheet and bake for 45-50 minutes, flipping halfway.

          Grill

          Place chicken pieces on a grill that has been heated to medium using indirect heat and cook until the internal temperature reaches 165 degrees Fahrenheit. This can take up to an hour on a grill.

          Jamaican jerk chicken on a white plate.

          When the chicken is done cooking, use a sharp knife to chop it further. This is what gives you that authentic jerk experience, rather than serving big pieces.

          How long should you marinate the jerk chicken?

          Because there is minimal acidity in the marinade, which can break down the meat, this chicken can be marinated for a long time. The longer the better. Marinate it for at least 4 hours to allow the flavors to develop, and you can leave it overnight. Overnight is best.

          Storage Options

          This Jamaican Jerk Chicken will keep well in the fridge for up to 4 days.

          It can be reheated in the oven, covered with foil at 325°F for around 20 minutes until heated through. It can be reheated in the air fryer at 350°F for 4 to 5 minutes.

          What do you serve it with?

          This easy jerk chicken is great to serve with rice, veggies, salads, and potatoes. Even use it to make a tasty sandwich if you like! Try it with any of these delicious recipes:

          • Jamaican Instant Pot Rice and Peas - make this a real, Authentic Jamaican meal with rice and peas.
          • Yellow Rice - for those who love a good flavored, colorful dish.
          • Festival - One of the main side dishes served with Jerk Chicken is festival. It's a sweet bread that balances the spicy chicken perfectly.
          • Plantains - Ripe yellow plantain is fried to perfection and served alongside this chicken. I like to air fry mine out of convenience.
          Jamaican jerk chicken cut up on a plate ready to eat.

          Tanya's Top Recipe Notes and Tips

          • I like to use the Jamaican jerk wet paste from Walkerswood. This wet marinade tastes just like the jerk I would get in Jamaica. You can also use a homemade jerk wet rub or jerk dry rub.
          • Jerk is usually served dry without a sauce, but feel free to baste the chicken while cooking with Jerk BBQ sauce if you want a more saucy chicken. You can also serve the BBQ sauce as a dipping sauce on the side. That's what I do.
          • Jerk Chicken does not have to be extra spicy. For less spice, use a mild jerk marinade or leave out the peppers in the homemade marinade. You will still get fantastic flavor.

          More Chicken Recipes You Might Enjoy

          • Jamaican Curry Chicken - This delicious, flavorful curry uses dark meat and tastes absolutely amazing. It's perfect for when you want a saucy Jamaican chicken.
          • Brown Stew Chicken - A Classic Jamaican chicken dish. Sometimes served for breakfast, this chicken is marinated in flavorful spices and then stewed until done.

          I hope you love this Jerk chicken recipe as much as we do. If you have tried this or any other recipe on my blog, please rate it and let me know how it turned out in the comments below! Your feedback is invaluable and helps us grow. I appreciate your support!

          Jamaican jerk chicken on a white plate.
          Print Recipe
          4.90 from 19 votes

          Jamaican Jerk Chicken (Air Fryer, Oven, or Grill)

          Add some flavor to your dinner with this delicious Jamaican jerk chicken recipe. It takes minutes to prep and can be cooked in the air fryer, oven or grill for a delicious bite to suit any occasion.
          Prep Time5 minutes mins
          Cook Time30 minutes mins
          Marinating time4 hours hrs
          Total Time35 minutes mins
          Course: Main Course
          Cuisine: Jamaican
          Keyword: air fryer jerk chicken, easy jerk chicken recipe, how to make jerk chicken
          Servings: 6 servings
          Calories: 299kcal
          Author: Tanya Harris

          Ingredients

          • 2 lbs bone-in chicken pieces patted dry
          • 6 Tablespoon Jamaican jerk wet paste
          • Jerk BBQ Sauce optional

          Instructions

          • Rub chicken pieces with paste, making sure to rub under the skin too.
          • Marinate for 4 hrs up or up to overnight.
          • Cook according to instructions:

          Air Fryer

          • Preheat air fryer to 360 degrees Farhenheit. Place chicken pieces in the air fryer basket, cook for for 25-30 minutes, flipping halfway.

          Conventional Oven

          • Preheat oven to 425 degrees Fahrenheit. Place chicken pieces on baking sheet and bake for 45-50 minutes, flipping halfway.

          Grill

          • Place chicken pieces on a grill that has been heated to medium using indirect heat and cook until internal temp reaches 165 degrees Fahrenheit. This can take up to an hour on a grill.
          • Once chicken is done cooking, use a sharp knife to further chop the chicken,

          Video

          Notes

          • I like to use the Jamaican jerk wet paste from Walkerswood. This wet marinade tastes just like the jerk you would get in Jamaica. You can also use a homemade jerk wet rub.
          • Jerk is usually served dry without a sauce but feel free to baste the chicken while cooking with jerk bbq sauce if you want a more saucy chicken. You can also serve the bbq sauce as a dipping sauce on the side.

          Nutrition

          Calories: 299kcal | Carbohydrates: 2g | Protein: 21g | Fat: 22g | Saturated Fat: 6g | Trans Fat: 1g | Cholesterol: 126mg | Sodium: 99mg | Potassium: 263mg | Fiber: 1g | Sugar: 1g | Vitamin A: 2463IU | Vitamin C: 1mg | Calcium: 31mg | Iron: 1mg

          This post was originally published on May 11, 2021. It has been updated with helpful information.

          Simple Roast Chicken Recipe with Juicy, Flavorful Meat

          August 4, 2025 by Tanya Harris 7 Comments

          golden brown roast chicken on sheet pan

          Nothing beats the aroma of a perfectly cooked roast chicken filling your kitchen with golden, crackling, crispy skin and incredibly juicy meat. My foolproof roast chicken method delivers restaurant-quality results every single time.

          golden brown roast chicken on sheet pan

          You’ll find the full recipe with ingredient amounts and instructions in the recipe card at the bottom of this post. Be sure to check out the blog post itself for extra tips and tricks!

          pic of Tanya

          Growing up, my parents made roast chicken every week, and I carried that tradition into my own kitchen. After roasting countless chickens, I set out to find a better way to get ultra‑crispy skin, deep golden color, and juicy meat.

          After lots of trial and error (and plenty of cookbook research), I landed on this method: start the chicken at a higher temperature, then lower the heat to finish cooking. The high heat quickly renders the fat under the skin for incredible crispiness, while the lower temperature keeps the meat tender and prevents it from drying out.

          This weekly staple is so delicious and versatile that it’s a must in our meal plan. If you love using whole chickens in recipes, you’ll also enjoy the spatchcock version I make in my air fryer.

          SIMPLE ROAST CHICKEN AT A GLANCE

          • Prep Time: 10 minutes
          • Cook Time: 1 hour 5 minutes
          • Resting Time: 10 minutes
          • Total Time: 1 hour 25 minutes
          • Serves: 6 people
          • Best For: Sunday dinners, weeknight meals, meal prep

          A Quick Look at the Ingredients

          Ingredient amounts and full recipe instructions are on the printable recipe card at the bottom of the post.

          • A whole chicken: I recommend using a 4-5 pound chicken for the best results. This size fits perfectly in a standard roasting pan and cooks evenly.
          • Olive oil: Helps the seasonings stick and promotes that gorgeous golden skin. I prefer using oil or even mayo over butter because butter contains water, which can prevent the crispy skin we're after.
          • Seasonings: Kosher salt (essential for flavor and helps draw moisture from the skin for extra crispiness), black pepper, garlic powder, and onion powder.
          • Optional aromatics: Lemon, fresh herbs like thyme and rosemary. These add flavor and moisture to the chicken cavity, but I often skip them and season the cavity directly.
          ingredients for whole roasted chicken on table with labels

          Recommended Tools

          RFX Wireless Probe Starter Kit
          RFX Wireless Probe Starter Kit

          I use this wireless probe thermometer kit from ThermoWorks to track meat temperatures while they cook. It connects to my phone and sends alerts when the food is nearly done, so I never have to guess.

          Buy Now
          Nonstick Carbon Steel Baking Pan & Raised Wire Rack
          Nonstick Carbon Steel Baking Pan & Raised Wire Rack

          A baking sheet with a raised wire rack helps with the airflow, allowing air to get under the chicken.

          Buy Now

          The time needed to cook chicken depends on several factors, including the size of your bird, your oven, and the temperature of your chicken when it goes in. Your best bet is to use a thermometer and insert it into the chicken before roasting. It removes all the guesswork and ensures your chicken is perfectly cooked.

          How to Make Perfect Whole Roasted Chicken

          Step 1: Preheat your oven to 475°F and set up a roasting pan or sheet pan with a wire rack. The rack elevates the chicken, allowing hot air to circulate underneath for even cooking.

          Step 2: Pat the chicken completely dry with paper towels, then rub olive oil all over the surface.

          Step 3: Season the chicken with kosher salt, black pepper, garlic powder, and onion powder, all over. If using aromatics, stuff the cavity with lemon halves, peeled garlic cloves, and fresh herb sprigs.

          raw whole chicken on cutting board, seasoned

          Step 4: Place the seasoned chicken breast-side up on your prepared rack. Insert the probe thermometer into the thickest part of the thigh.

          Step 5: Place the chicken in the oven and roast for 15 minutes at 475°F, then reduce the temperature to 350°F, and continue cooking for 40–50 minutes (total cook time: 55–65 minutes depending on bird size).

          a collage, on the left, raw chicken on sheet pan with rack. on the right, roasted whole chicken on rack after cooking

          Step 6: Check for doneness when the thermometer reads 175°F in the thigh, and juices run clear.

          Step 7: Let the chicken rest for 5-10 minutes before carving.

          close up for whole roasted chicken on sheet pan with rack

          How to Know when your Roasted Chicken is Done

          Using a reliable thermometer is crucial since different chicken sizes will have varying cook times. The most accurate way to ensure your chicken is perfectly cooked is to check that the internal temperature in the thickest part of the thigh reaches 175°F.

          At this temperature, the juices should run clear when you pierce the thigh with a knife. This slightly higher temperature ensures the dark meat is fully cooked while still keeping the breast meat juicy and tender.

          Tanya's Recipe Tips for Success

          • Size matters: Stick to the 4-5 pound range for optimal results. Smaller chickens may cook too quickly, while larger ones may not cook evenly.
          • To truss or not to truss: I don't bother trussing my chicken (tying the legs up) because it cooks just fine without it and saves time. One less step means getting dinner on the table faster.
          • If you don't have a roasting pan: Use a cast-iron skillet or heavy-bottomed Dutch oven instead.
          • Three things I never skip: Dry the chicken thoroughly with paper towels, season it generously all over, and always use a thermometer to check doneness.
          • Let it rest: Those 5-10 minutes of resting time allow the juices to redistribute, ensuring every bite is moist and flavorful.

          What to Serve It With

          This roasted chicken pairs well with a variety of sides. Serve it with vegetables like broccoli or carrots, sides like mashed potatoes, rice, and gravy. Even a simple side salad makes a great pairing.

          You can also roast vegetables along with your chicken in the tray. If doing so, add heartier, larger cut, root vegetables like potatoes, carrots, and onions at the beginning with the chicken, since they can handle the full cooking time and will soak up all those delicious drippings. For more delicate vegetables like broccoli or Brussels sprouts, add them during the last 20-30 minutes to prevent overcooking.

          a chicken drumstick on a black plate with salad on the side

          Storage and Leftovers

          Leftover roasted chicken is incredibly versatile and keeps well in the refrigerator for up to 4 days. Shred the meat for chicken salad, slice it for sandwiches, or dice it for soups and casseroles. The bones make excellent stock, too!

          To reheat, place pieces in a 350°F oven for about 10 minutes, or use the microwave for quick warming. The skin won't be as crispy when reheated, but the meat will still be delicious.

          More Chicken Recipes You'll Love

          I have so many chicken recipes on the site, but here are a few of my most popular:

          • Brown stew chicken - a Caribbean classic. My version cooks quickly and utilizes boneless chicken thighs to make the meal easier to cook.
          • Smothered chicken - A Down South staple, chicken is cooked on the stovetop and smothered in a delicious gravy.
          • Garlic Parmesan whole chicken - One of my favorite ways to enjoy a roast chicken is to cover it with a delicious cheese sauce. This recipe elevates your classic roast chicken.

          I hope you love this roast chicken recipe as much as we do. If you have tried this or any other recipe on my blog, please rate it and let me know how it turned out in the comments below! Your feedback is invaluable and helps us grow. I appreciate your support!

          golden brown roast chicken on sheet pan
          Print Recipe
          5 from 2 votes

          Simple Whole Roast Chicken Recipe

          Nothing beats the aroma of a perfectly cooked roast chicken filling your kitchen with golden, crackling, crispy skin and incredibly juicy meat. My foolproof roast chicken method delivers restaurant-quality results every single time.
          Prep Time10 minutes mins
          Cook Time1 hour hr 5 minutes mins
          Resting Time10 minutes mins
          Total Time1 hour hr 25 minutes mins
          Course: entree
          Cuisine: American
          Keyword: best roasted chicken recipe, roast chicken, whole roasted chicken recipe
          Servings: 6 people
          Calories: 580kcal
          Author: Tanya Harris

          Ingredients

          • 4-5 lb whole chicken giblets removed
          • 3 Tablespoons Olive oil
          • 1 Tablespoon kosher salt
          • 1½ teaspoons black pepper
          • 1½ teaspoons garlic powder
          • ½ teaspoon onion powder

          Optional aromatics for cavity

          • 1 lemon halved
          • 4 garlic cloves peeled and smashed
          • Fresh herb sprigs rosemary, thyme, or sage

          Instructions

          • Preheat oven to 475°F. Set up a roasting pan or sheet pan with a wire rack.
          • Pat the chicken completely dry with paper towels. Rub the olive oil all over the chicken, coating the entire surface.
          • Season the chicken evenly with kosher salt, black pepper, garlic powder, and onion powder, making sure to cover all sides. If using aromatics, stuff the cavity with lemon halves, garlic cloves, and herb sprigs.
          • Place the seasoned chicken breast-side up on the prepared wire rack.
          • Place it in the oven on the middle rack and roast it for 15 minutes at 475°F.
          • Reduce the oven temperature to 350°F and continue cooking for an additional 40-50 minutes, until the internal temperature reaches 175°F when measured in the thickest part of the thigh.
          • Remove from oven and let rest for 5-10 minutes before carving and serving.

          Notes

          • The size of your chicken will determine the exact cook time. Start checking smaller chickens around 50 minutes total cook time.
          • For extra crispy skin, pat the chicken dry again with paper towels before seasoning and let it air-dry in the refrigerator for 30 minutes if time allows.
          • If using a probe thermometer, place it into the thickest part of the thigh. The chicken is done when the juices run clear and the temperature at the thigh reaches 175°F.
          • Let the chicken rest before carving to allow juices to redistribute.

          Nutrition

          Calories: 580kcal | Carbohydrates: 5g | Protein: 41g | Fat: 43g | Saturated Fat: 11g | Polyunsaturated Fat: 8g | Monounsaturated Fat: 21g | Trans Fat: 0.2g | Cholesterol: 163mg | Sodium: 1899mg | Potassium: 487mg | Fiber: 1g | Sugar: 1g | Vitamin A: 315IU | Vitamin C: 19mg | Calcium: 43mg | Iron: 2mg

          Crispy Air Fryer Eggplant with Parmesan & Breadcrumbs

          August 2, 2025 by Tanya Harris 13 Comments

          Cooked crispy eggplant in an air fryer basket.

          Crispy on the outside, tender on the inside, this air fryer eggplant has become a go-to appetizer in my kitchen. It’s a lighter, less messy take on the traditional fried version, but just as satisfying.

          Crispy air fryer egg plant on a plate served with a marinara dip.

          You’ll find the full recipe with ingredient amounts and instructions in the recipe card at the bottom of this post. Be sure to check out the blog post itself for extra tips and tricks!

          Eggplant Parmesan is one of our go-to Italian meals, but honestly, I’m usually just after the crispy breaded eggplant slices, no noodles needed. I love dipping them straight into marinara sauce. With the air fryer, I can skip the frying and still get that same golden, crunchy texture without all the oil.

          This dish is simple to make with just a few basic ingredients; eggplant has never tasted so good! Coated in seasoned Italian breadcrumbs and parmesan cheese, they are a breeze to cook in the air fryer and come out crispy without the need for lots of oil.

          Be sure to try my Air Fryer Fried Mushrooms and Crispy Air Fryer Bacon too!

          A Quick Glance at the Ingredients

          Ingredient amounts and full recipe instructions are on the printable recipe card at the bottom of the post.

          • Eggplant - I typically use standard globe eggplant for this recipe. It’s easy to find and has the perfect size for slicing into rounds. Look for one that’s firm, shiny, and feels heavy for its size. Avoid eggplants with soft spots or wrinkled skin.
          • For the Breading Station - eggs, milk, Italian-style breadcrumbs, parmesan cheese
          • Oil for spraying the eggplant
          Ingredients to make the recipe.

          Recommended Tool

          Evo Oil Sprayer Glass, Non-Aerosol for Cooking Oils
          Evo Oil Sprayer Glass, Non-Aerosol for Cooking Oils

          I love this oil sprayer for getting a light, even coating without overdoing it. It's ideal for air frying.

          Buy Now

          How to make crispy air fryer eggplant slices

          Step 1: Gather your ingredients. Place eggplant rounds on a wire rack in a single layer and sprinkle kosher salt on all sides. Let it sit for 30-40 minutes to release any excess moisture.

          Slices of eggplant on a wire rack.

          Step 2: Rinse the salt off the eggplant and dry it with a towel. Preheat the air fryer basket to 370 degrees Fahrenheit.

          Add the eggs and milk to one bowl and whisk to combine. In another bowl, add Italian breadcrumbs and Parmesan cheese and mix to combine.

          Dip the eggplant rounds in the egg mix, then coat them with the breadcrumb mix.

          Eggplant rounds being coated in the egg and breadcrumbs.

          Step 3: Spray the preheated air fryer basket with a little bit of oil and then add eggplant slices to the basket in a single layer. Note that all your eggplant slices may not fit in the basket, and you may need to cook these in batches.

          Close the air fryer basket and cook eggplant slices at 370 degrees Fahrenheit for 12-14 minutes, flipping and spraying with oil halfway through.

          The breaded eggplant slices in the air fryer basket.

          Step 4: Remove eggplant slices and lightly sprinkle with kosher salt to taste. Cook the remaining eggplant slices the same way. Serve and enjoy.

          The cooked eggplant slices in the air fryer basket.

          Can you make them ahead of time?

          These crispy eggplant rounds are best served immediately after cooking, when they are nice and crispy. You can get ahead of things by salting and breading them earlier in the day, then keeping them covered in the fridge until you are ready to cook and serve.

          How to Store and Reheat

          Leftover eggplant slices can be stored in an airtight container in the fridge for up to 4 days. To reheat, pop them back into the air fryer at 350°F for 3 to 5 minutes until hot and crispy again. I don’t recommend microwaving, as it tends to make the breading soggy.

          Why do you need to salt the eggplant?

          It's essential to salt the eggplant slices before you bread and air fry them. Salting them helps to draw out the moisture so that they crisp up. If you skip this step, the eggplant will steam as it cooks instead of crisping up.

          What do you serve them with?

          Once cooked, I like to sprinkle this crispy air fryer eggplant with a bit of salt and fresh parsley. They are great enjoyed by themselves, but work wonderfully with a dipping sauce like marinara or ranch.

          Cooked crispy eggplant in an air fryer basket.

          Tanya's Recipe Notes and Tips

          • If you want your eggplant slices extra crispy, use panko breadcrumbs for extra crispiness.
          • Cook the eggplant slices in a single even layer so that they get crispy all over and the breading stays intact.
          • These eggplant slices are great for making eggplant parmesan. In the alternative, you can serve them with marinara on the side and dip them in the sauce.
          • These are very crispy once done, but will lose the crispiness the longer they sit out.

          More Easy Air Fryer Recipes To Try

          If you loved this crispy eggplant, here are more reader-favorite air fryer recipes to explore next

          • Air Fryer Carrots - This is one of my most popular air fryer recipes. You can enjoy them either sweet or savory.
          • Air Fryer Fried Pickles - another great appetizer. I prefer this over deep-frying the pickles.
          • Air Fryer Plantain - This fruit, typically deep-fried until tender, is excellent in the air fryer.

          I hope you love this air-fried eggplant as much as we do. If you have tried this or any other recipe on my blog, please rate it and let me know how it turned out in the comments below! Your feedback is invaluable and helps us grow. I appreciate your support!

          Cooked crispy eggplant in an air fryer basket.
          Print Recipe
          5 from 11 votes

          Crispy Air Fryer Eggplant Recipe

          Simple and easy to make, and so delicious, this crispy air fryer eggplant recipe makes for one crowd pleasing appetizer. Eggplant is sliced into rounds and coated with breadcrumbs for a crispy and healthier bite.
          Prep Time10 minutes mins
          Cook Time12 minutes mins
          Resting time30 minutes mins
          Total Time52 minutes mins
          Course: Appetizer
          Cuisine: American
          Keyword: air fried eggplant, breaded eggplant slices, how to cook eggplant in the air fryer
          Servings: 4 servings
          Calories: 286kcal
          Author: Tanya Harris

          Equipment

          • Spray Bottle
          • Large Air Fryer

          Ingredients

          • 1 medium sized eggplant about 1lb, sliced into ¼ inch rounds
          • 4 teaspoons kosher salt for salting eggplant
          • 2 large eggs lightly beaten
          • ¼ cup milk
          • 1.5 cups Italian Breadcrumbs
          • ⅓ cup grated parmesan cheese
          • Oil for spraying olive, canola, or avocado
          • Salt to taste

          Instructions

          • Place eggplant rounds on a wire rack in a single layer and sprinkle kosher salts on all sides. Let sit for 30-40 minutes to release any excess moisture.
          • Rinse the salt off the eggplant and dry with a towel.
          • Preheat the air fryer basket to 370 degrees Fahrenheit.
          • Add eggs and milk in one bowl and whisk to combine. In another bowl, add Italian breadcrumbs and parmesan cheese and mix to combine.
          • Dip the eggplant rounds in the egg mix, then the breadcrumb mix to coat.
          • Spray the preheated air fryer basket with a little bit of oil and then add eggplant slices in the basket in a single layer. Note that all your eggplant slices may not fit in the basket and you may need to cook these in batches. Close the air fryer basket and cook eggplant slices on 370 degrees Fahrenheit for 12-14 minutes, flipping and spraying halfway through. Remove eggplant slices and lightly sprinkle with salt to taste.
          • Cook the remaining eggplant slices the same way.

          Video

          Notes

          • Use panko breadcrumbs for extra crispiness.
          • Cook the eggplant slices in a single even layer so that they get crispy all over and the breading stays intact.
          • These eggplant slices are great for making eggplant parmesan. In the alternative, you can serve them with marinara on the side and dip them in the sauce.
          • These are very crispy once done but will lose the crispiness the longer they sit out.

          Nutrition

          Calories: 286kcal | Carbohydrates: 39g | Protein: 14g | Fat: 9g | Saturated Fat: 4g | Polyunsaturated Fat: 2g | Monounsaturated Fat: 2g | Trans Fat: 1g | Cholesterol: 91mg | Sodium: 3101mg | Potassium: 428mg | Fiber: 6g | Sugar: 8g | Vitamin A: 329IU | Vitamin C: 4mg | Calcium: 216mg | Iron: 3mg

          This post was originally published on September 7, 2021. It has been updated with new information.

          Caribbean Green Seasoning Recipe - Easy Homemade Marinade

          July 31, 2025 by Tanya Harris 4 Comments

          green seasoning in glass jar with herbs surrounding it

          Caribbean Green Seasoning is a fresh, flavorful herb blend that is used for marinating meats, fish, or stirred into stews, and is widely used among the Caribbean islands. This fresh herb paste brings instant island flavor to your table. 

          green seasoning in glass jar with herbs surrounding it

          You’ll find the full recipe with ingredient amounts and instructions in the recipe card at the bottom of this post. Be sure to check out the blog post itself for extra tips and tricks!

          The Caribbean is known for its delicious, bright, and flavorful combinations. The use of fresh herbs, bold peppers, and lots of spice tends to stand out. When I think of authentic green seasoning, I think of Trinidad and Tobago, where this seasoning as I know it originated. Many Caribbean recipes call for a spoonful or two of this herbaceous mix to deepen the flavor.

          In Trinidad, this blend is sometimes called “green seasoning” or simply “seasoning,” and it often features culantro, also known locally as chadon beni, an intensely aromatic herb similar to cilantro but with a stronger, more pungent flavor.

          The formula for green seasoning is to have herbs, a pepper or two, and some lime, vinegar, or water to blend the seasoning with. Once made, it’s either stored in the refrigerator or frozen for later and added to many delicious recipes throughout the week. 

          Traditionally, this seasoning is used as a marinade for meats, fish, and vegetables. I like to use it as a marinade as well as a finishing herb.

          green seasoning in glass jar with herbs surrounding it

          A Quick Look at The Ingredients

          • Cilantro or culantro, or a mix - I can't always find culantro in stores, so I usually use just cilantro.
          • Aromatics - Green Onions, fresh thyme, yellow onion, celery stalks, garlic cloves, red or green pepper, hot pepper
          • Liquids and Seasoning - Lime juice, vinegar, or water, salt

          Recommended Tool

          Breville Paradice 9 Cup Food Processor and Dicer
          Breville Paradice 9 Cup Food Processor and Dicer

          I often reach for this food processor when prepping herbs, vegetables, or sauces. It’s compact, efficient, and powerful enough to handle everything from leafy greens to tougher ingredients—making it a reliable tool for everyday cooking.

          Buy Now

          How to Make Green Seasoning

          Step 1: First, gather all your ingredients and wash all your herbs. I also like to roughly chop my peppers, celery, and onions before adding them to a food processor.

          fresh herbs washed and prepped

          Step 2: Add all the ingredients to a food processor and process until smooth.

          If you like your green seasoning a little chunky, just pulse to your desired consistency. For a wetter more pureed seasoning, process until well blended. I like to keep mine a little chunky so I can also use it as a herb salsa.

          green seasoning ingredients in a food processor
          ingredients for green seasoning in a food processor
          overhead photo of green seasoning in food processor

          Step 3: Use the seasoning as a marinade for your favorite fish, meat, or vegetables.

          green seasonong in white plate with herbs surrounding it

          How to use green seasoning as a marinade?

          This seasoning is usually used as a marinade. I suggest using about 2 Tablespoons for every pound of meat. Add the seasoning to meat, fish, or vegetables and rub it all over. Cover and allow it to marinate in the refrigerator until ready to cook.

          I also like to add about 1 Tablespoon of oil to the seasoning when using it as a marinade.

          How to store green seasoning?

          Green seasoning should be refrigerated. It will last in the fridge for about a week. It can also be frozen and will last in the freezer for up to 3 months.

          To freeze, place green seasoning into small ice cube trays and freeze until solid. Once solid, place in a freezer-friendly bag.

          I love using these small trays for freezing herbs or oils in 2 Tablespoon portions.

          Souper Cubes 2 Tbsp. Silicone Freezer Molds
          Souper Cubes 2 Tbsp. Silicone Freezer Molds
          I like using Souper Cubes 2-Tablespoon Trays to freeze green seasoning in perfectly portioned amounts. They're silicone, easy to pop out, and make it super convenient to grab just what you need for marinating or cooking.
          Buy Now

          Tanya's Notes

          • This will last in the fridge for up to a week. You can also freeze small portions of it. It will last in your freezer for up to 3 months. 
          • Use about 1 Tablespoon green seasoning for 1 lb of meat. 
          • I suggest adding a little oil to meat or fish when using it as a marinade. The oil helps the seasoning coat the protein more evenly and enhances flavor absorption during cooking.
          • For a wetter, more pureed seasoning, process until well blended. I like to keep mine a little chunky so I can also use it as a herb salsa.

          If you have made this green seasoning, I'd love to hear your feedback in a comment below. And if you are looking for other seasonings/sauce recipes, try these out:

          • Chimichurri sauce is another type of green seasoning, perfect for marinating and serving as a finishing sauce.
          • Jamaican Jerk BBQ Sauce is a finishing sauce for any jerk-flavored dish.
          green seasoning in glass jar with herbs surrounding it
          Print Recipe
          5 from 3 votes

          Caribbean Green Seasoning Recipe

          Green Seasoning is a delicious herb blend that is used for marinating meats, fish, or stirred into stews and is used widely among the Caribbean islands. 
          Prep Time5 minutes mins
          Total Time5 minutes mins
          Course: Seasoning
          Cuisine: Caribbean
          Keyword: green seasoning
          Servings: 8
          Author: Tanya Harris

          Ingredients

          • 1 bunch of cilantro leaves and stems, about 3oz
          • ½ bunch Italian parsley about 2 oz
          • 8 whole pimento seeds crushed
          • 1 scotch bonett pepper or habanero pepper seeds and stem removed
          • 1 celery stalk leaves included, and roughly chopped
          • 1 bunch thyme leaves removed from stems
          • ½ red bell pepper roughly chopped
          • ¾ cup lime juice from about 5 limes
          • 1 inch ginger peeled and chopped
          • 8 whole peeled garlic cloves
          • 6 green onions stems removed and roughly chopped
          • 1 teaspoon salt or to taste

          Instructions

          • Add ingredients to a food processor. Pulse until finely chopped or pureed.
          • Use as a marinade for your favorite meats, vegetables, and fish. You may also use it as a fresh topping.

          Video

          Notes

          • While traditional Caribbean green seasoning often uses culantro (also known as chadon beni), I use cilantro in this version since it’s easier to find in most grocery stores. The flavor is milder, but still brings that bright, herbaceous base to the seasoning.
          • This seasoning will last in the fridge for up to a week. You can also freeze small portions of it. It will last in your freezer for up to 3 months. 
          • Use about 1 Tablespoon green seasoning for 1 lb of meat. 

          This post was originally published on January 26, 2022. It has been updated with additional helpful information.

          Southern Stewed Okra and Tomatoes (One-Pot Side)

          July 29, 2025 by Tanya Harris 4 Comments

          stewed okra and tomatoes with spoon in black bowl and fresh okra pods on the side of the dish

          This Southern stewed okra and tomatoes is a classic one-pot side dish that’s packed with flavor. Made with fresh or frozen okra, canned tomatoes, and a few pantry staples, it comes together in under 30 minutes with minimal prep.

          stewed okra and tomatoes with spoon in black bowl and fresh okra pods on the side of the dish

          You’ll find the full recipe with ingredient amounts and instructions in the recipe card at the bottom of this post. Be sure to check out the blog post itself for extra tips and tricks!

          Stewed okra and tomatoes is one of my favorite summer sides. It's packed with vegetables, full of flavor, and super easy to make.

          I fell in love with okra once I moved to the Carolinas, and it became a staple in many of the Southern dishes I tried. I like to eat it okra roasted, or even pickled. But once I tried it with tomatoes, corn, and some simple seasonings, it became one of my go-to Southern vegetable sides.

          I like to serve it alongside dinner recipes, like baked chicken, rice, and cornbread.

          A Quick Glance at the Ingredients

          • Okra – I use fresh okra when it’s in season, but frozen works just as well. Just slice it up and toss it right in—no need to thaw.
          • Corn – Frozen corn keeps it simple, but fresh kernels are delicious if you have them. Canned will work too—drain it first. You can also use fresh corn from the cob; cut the kernels off.
          • Canned Diced Tomatoes – Use a regular 14.5 oz can with juices. Fire-roasted tomatoes add a nice smoky flavor if you want a twist. Leave this undrained.
          • Yellow Onion & Garlic – These build the aromatic base of the dish. Don’t skip them!
          • Vegetable Broth – Adds depth and helps everything simmer together. Chicken broth works too if you don’t need it to be vegetarian.
          • Worcestershire Sauce & Hot Sauce – These boost the umami and give the stew a little kick. Use your favorite hot sauce and adjust to taste.
          • Red Pepper Flakes & Bay Leaves – For a hint of heat and an earthy background note.
          • Salt and Pepper - always a good addition.
          ingredients with labels for stewed okra

          Recommended Tool

          STAUB Cast Iron Dutch Oven 4-qt Round Cocotte
          STAUB Cast Iron Dutch Oven 4-qt Round Cocotte

          This Staub Dutch oven is my go-to for stews like this. It heats evenly, holds moisture beautifully, and looks gorgeous going from stove to table. It’s a bit of an investment—but one you’ll use for years.

          Buy Now

          How To Make Stewed Okra and Tomatoes

          Step 1: Gather and prep your ingredients.

          Heat canola oil in a large pot over medium-low heat. Add onions and garlic and cook until softened and translucent, for about 10 minutes. 

            Step 2: Add the remaining ingredients and simmer, partially covered, for 15 minutes, stirring occasionally.

              okra and tomato ingredients in pot with bay leaves on top

              Step 3: Stir occasionally as the stew simmers. Once the okra is tender and the flavors have melded, remove from the heat and serve warm. Enjoy!

              stewed okra and tomatoes in a large pot

              Make this Stew Your Own

              This stew is pretty perfect as it is, but it's easy to make your own!

              • Instead of canola, cook some bacon in the pot before adding the onions and garlic. This will give the stew a wonderful smoky flavor.
              • If you like things spicy, add in a little extra hot sauce, or omit it altogether if you are sensitive to spicy foods.
              • I used frozen corn for ease and convenience, but fresh corn works wonderfully well. If you are in a pinch, canned corn is a good option. I suggest draining canned corn first.

              What is okra?

              Okra is also known as 'gumbo' or 'ladies' fingers'; it has a mild taste that is often compared to eggplant or green beans. When cooked in this stew, it becomes wonderfully tender. It's a great source of vitamins, minerals, antioxidants, and fiber.

              How to store this okra and tomato stew

              This stew can be made ahead and stored in an airtight container in the refrigerator for up to 3 days. The flavors deepen over time, making leftovers even better. Reheat gently on the stovetop before serving.

              stewed okra and tomatoes in black bowl with plates in background and drink in background

              Tanya Top Tips

              • Cook the stew in a heavy-bottomed pan or Dutch oven. It will help to distribute the heat more evenly, and you won't get hot spots that can scorch the bottom of the stew.
              • Cut the okra into similarly sized pieces so that it cooks evenly.
              • Okra has a naturally slick texture, but cooking it partially covered and avoiding over-stirring and over-cooking helps keep it tender, not slimy.

              More Easy Vegetable Recipes

              • Marinated Air Fryer Vegetables - perfect for summer vegetables.
              • Instant Pot Vegetable Soup - when you want the taste of tomatoes and other vegetables in a warm soup.
              • Sautéed Beet Greens - a great way not to waste the greens of beets. This is the perfect side.
              • Air Fryer Carrots - one of my favorite ways to make carrots. I cook them until tender in the air fryer, and either make them sweet or savory, depending on my mood.
              stewed okra and tomatoes with spoon in black bowl and fresh okra pods on the side of the dish
              Print Recipe
              4.72 from 7 votes

              Stewed Okra and Tomatoes

              A classic Southern side dish made with okra, tomatoes, and bold seasoning. Quick, easy, and full of down-home flavor in just one pot.
              Prep Time5 minutes mins
              Cook Time25 minutes mins
              Total Time30 minutes mins
              Course: Side Dish
              Cuisine: American
              Keyword: okra and tomato stew, okra side dish, vegetable stew
              Servings: 4 servings
              Calories: 154kcal
              Author: Tanya Harris

              Ingredients

              • 2 tablespoons canola oil
              • 1 yellow onion chopped
              • 4 garlic cloves chopped
              • 16 oz okra fresh or frozen
              • ½ cup frozen corn kernels
              • 14.5 oz canned diced tomatoes undrained
              • 2 teaspoons Worcestershire sauce
              • ¾ cup vegetable broth
              • ¼ teaspoon red pepper flakes
              • 2 bay leaves
              • 1 teaspoon hot sauce
              • salt and pepper to taste

              Instructions

              • Heat canola oil in a large pot over medium heat. Add onions and garlic and cook until softened and translucent, for about 10 minutes.
              • Add the remaining ingredients. Bring to a gentle simmer and cook, partially covered, for 15 minutes, stirring occasionally, until the okra is tender and the stew has thickened slightly.

              Notes

              • Fresh or frozen okra works great in this recipe. No need to thaw frozen okra—just toss it in!
              • If you prefer a thicker stew with less moisture, leave the lid slightly ajar while simmering to let steam escape.

              Nutrition

              Calories: 154kcal | Carbohydrates: 21g | Protein: 4g | Fat: 8g | Saturated Fat: 1g | Sodium: 433mg | Potassium: 637mg | Fiber: 6g | Sugar: 7g | Vitamin A: 1063IU | Vitamin C: 40mg | Calcium: 140mg | Iron: 2mg

              This post was originally published on June 9, 2020. It has been updated with helpful information and new photos.

              Homemade Refrigerator Pickles (Only 10-Minute Prep)

              July 23, 2025 by Tanya Harris 15 Comments

              glass mason jar filled with cucumber and sweet onion refrigerator pickles

              My Easy Refrigerator Pickles are the perfect pickles to try if you haven’t made homemade pickles before. The preparation time is minimal; there’s no need to heat anything in a pot.

              glass mason jar filled with cucumber and sweet onion refrigerator pickles

              You’ll find the full recipe with ingredient amounts and instructions in the recipe card at the bottom of this post. Be sure to check out the blog post itself for extra tips and tricks!

              I love making my own easy homemade pickles, and everyone loves them when I prep them for our cookouts. I like making a batch when we have pulled pork or shredded BBQ chicken. They add the perfect acidity to many dishes.

              These pickles require minimal preparation, but you will need to chill them in the fridge for the best results.

              I make these pickles with onion and cucumber. This method can also be used to make different types of pickles. I recommend you give my Quick Pickled Onions recipe a try, too.

              A Glance at the Ingredients

              Ingredient amounts and full recipe instructions are on the printable recipe card at the bottom of the post.

              • Vinegar – I use equal quantities of hot water and white vinegar to make the pickling brine.
              • Sugar – granulated sugar is added to the pickling brine for the perfect balance of sweet and sour.
              • Kosher Salt – I add salt to balance the sweet and sour flavors in this pickle.
              • Black Pepper - I also like to add fresh cracked black pepper to season the pickle.
              • Cucumbers - I use three medium-sized pickling cucumbers, such as Kirby pickles, thinly sliced on a mandoline.
              • Onion - half a sweet onion is added along with the cucumber.
              refrigerator pickles recipe ingredients

              Recommended Tool

              OXO Good Grips Handheld Mandoline Slicer for Kitchen, Adjustable Vegetable Slicer
              OXO Good Grips Handheld Mandoline Slicer for Kitchen, Adjustable Vegetable Slicer

              My favorite mandolin. Hold the handle in one hand, and slice with the other.

              Buy Now

              How to make Refrigerator Pickles

              Step 1: Put hot water, white vinegar, sugar, salt, and pepper in a heat-proof jar. Close the jar and shake until the sugar and salt dissolve. I use a 32-ounce mason jar.

              a mason jar filled with pickling liquid

              Step 2: Add thinly sliced cucumbers and sweet onion to the jar, pushing the cucumbers and onions down into the brine.

              Ensure that the brine covers all the vegetables.

              top down image of a glass jar filled with cucumber and onion pickles

              Step 3: Cover and refrigerate for at least 8 hours before serving.

              Remove pickles and onions from the brine with a fork or slotted spoon to serve.

              mason jar filled with pickles and a fork filled with cucumber and onion pickle

              Tanya's Top Tips

              These tips will help you make the best refrigerator pickles you've ever tried.

              • I suggest using a mandolin to slice the cucumber and onion thinly. However, take care when using a mandolin to avoid cutting yourself and your fingers.
              • If you don’t have a mandolin, a sharp kitchen knife will work well, too.
              • Always ensure that the pickling liquid covers the cucumber and onion to prevent them from spoiling.
              • Always store refrigerator pickles in the refrigerator.
              • These pickles are on the sweeter side, just like how I like them. For a tart pickle, cut the sugar to about ¼ cup.
              mandolin and thinly sliced cucumber and sweet onion set on a wooden board

              Flavor variations

              • You can replace white vinegar with white wine, apple cider, or sherry vinegar.
              • Swap sweet onions for white or red onions or shallots.
              • For an extra flavor boost, add spices like peppercorns, coriander, red pepper flakes, fennel, or mustard seeds to the pickling vinegar.
              • Add a few sprigs of fresh herbs, such as dill, tarragon, or parsley.
              • If you like pickles, use the same process to pickle other vegetables. Try thinly sliced onions, red chili peppers or jalapenos, carrots, radishes, or zucchini.

              Serving suggestions

              These easy pickles go with just about any savory dish. I like to eat them alongside my Southern favorites, like Fried Chicken. I also love them over seasoned fish, like my Whole Oven-Roasted Fish.

              They’ll add a great zing to your hot dogs, burgers, salads, and sandwiches, too. Try these recipes: Oven-Baked Hot Dogs, Air Fryer Turkey Burgers, Korean Sloppy Joes, and Garlic Butter Cheese Steak Sandwiches.

              a white bowl filled with thinly sliced cucumber and sweet onion pickles

              How long will Refrigerator Pickles last?

              Store the pickles in an airtight jar or container, fully submerged in the pickling brine. Keep the container in the refrigerator for up to 3-4 weeks for optimal freshness and flavor.

              Mason jar filled with cucumber and sweet onion refrigerator pickles

              FAQs

              What is the difference between refrigerator pickles and regular pickles?

              You must store refrigerator pickles in vinegar and in the refrigerator to prevent them from spoiling. Regular pickles are pasteurized, allowing them to be stored on shelves for extended periods without refrigeration until opened.

              What vinegar is best for pickling?

              You can use any vinegar for refrigerator pickling; it all depends on the flavors you prefer. I’ve used white vinegar as I like its intense, sharp taste. However, you can also use red wine, white wine, apple cider, or sherry vinegar.

              What's another name for refrigerator pickles?

              They're also known as icebox pickles.

              If you have tried these Refrigerator Pickles, or any other recipe on my blog, then please rate it and let me know how it turned out in the comments below!

              glass mason jar filled with cucumber and sweet onion refrigerator pickles
              Print Recipe
              5 from 6 votes

              Homemade Refrigerator Pickles Recipe

              My Easy Refrigerator Pickles are the perfect pickles to try out if you haven't made homemade pickles before. The preparation time is minimal, there's no need to heat anything in a pot.
              Prep Time5 minutes mins
              Refrigeration Time8 hours hrs
              Total Time8 hours hrs 5 minutes mins
              Course: Condiment
              Cuisine: American
              Keyword: best homemade refrigerator pickles, best refrigerator pickles, easy homemade pickles, easy refrigerator pickles, quick & easy refrigerator pickles, refrigerator pickles, refrigerator pickles with onion
              Servings: 12
              Calories: 65kcal
              Author: Tanya Harris

              Equipment

              • 1 Mandolin
              • 1 32-ounce Mason Jar

              Ingredients

              • ¾ cup hot water
              • ¾ cup white vinegar
              • ¾ cup granulated sugar
              • 1 tablespoon kosher salt
              • 1 ½ teaspoons fresh cracked black pepper
              • 3 medium-sized pickling cucumbers like Kirby pickles, thinly sliced
              • ½ medium sweet onion thinly sliced

              Instructions

              • Add hot water, white vinegar, granulated sugar, kosher salt, and black pepper into a heat-proof jar and cover and shake to combine until the sugar and salt are dissolved. I use a 32-ounce mason jar.
              • Add the cucumbers and sweet onion to the jar, pushing the cucumbers and onions down into the liquid. Make sure all the vegetables are covered with liquid.
              • Cover and store in the fridge for at least 8 hours before serving.
              • To serve, remove pickles and onions with a fork or slotted spoon from the brine.

              Notes

              • These pickles will last in an airtight container in the refrigerator for 3-4 weeks.
              • For this recipe, I suggest using a heat-safe jar. 

              Nutrition

              Calories: 65kcal | Carbohydrates: 15g | Protein: 1g | Fat: 0.2g | Saturated Fat: 0.01g | Polyunsaturated Fat: 0.01g | Monounsaturated Fat: 0.003g | Sodium: 585mg | Potassium: 122mg | Fiber: 1g | Sugar: 14g | Vitamin A: 56IU | Vitamin C: 3mg | Calcium: 16mg | Iron: 0.2mg

              This post was originally published on April 17, 2023. It has been updated with additional helpful information.

              Creamy Cream of Mushroom Soup

              July 22, 2025 by Tanya Harris 156 Comments

              Cream of mushroom soup in a dutch oven.

              This rich, one-pot cream of mushroom soup is easy to make and incredibly comforting. Perfect for make-ahead and freezer meals.

              Cream of mushroom soup in a dutch oven.

              You’ll find the full recipe with ingredient amounts and instructions in the recipe card at the bottom of this post. Be sure to check out the blog post itself for extra tips and tricks!

              This cream of mushroom soup is a tried and tested classic recipe. It's had me hooked for the last few years, and others seem to love it too.

              Earthy and full of flavor, it's so easy to make a batch, and it's perfect to serve as an appetizer or as a main with some crusty bread. If you are after a comforting family meal, this has got you covered!

              If you love mushrooms as much as we do, be sure to check out my Creamy Mushroom and Parmesan Risotto, Cream of Mushroom Chicken, Zucchini Mushroom Chicken, or my Creamy Mushroom Sauce!

              A Quick Glance at the Ingredients

              Ingredient amounts and full recipe instructions are on the printable recipe card at the bottom of the post.

              • Mushrooms: I use baby Bella mushrooms, as I find that they have a more pronounced flavor. However, white button mushrooms will work just fine.
              • Aromatics & Veggies: Yellow onion, celery, garlic.
              • Fat & Thickener: Unsalted butter, all-purpose flour.
              • Liquids: chicken broth and heavy cream.
              • Seasonings & Herbs: Fresh thyme, marjoram, salt, and black pepper.

              How to make Cream of Mushroom Soup

              Step 1: Gather your ingredients. Then, prep and cut up your veggies.

              The chopped vegetables on a board.

              Step 2: Melt butter in a large pot over medium heat. Add onion and celery and sauté until softened, about 4 minutes.

              Onion and celery cooking in a pot.

              Step 3: Add mushrooms, thyme, and marjoram, and stir for about 10-15 minutes, until mushrooms have softened and reduced in volume.

              Mushrooms and herbs added to the pot.
              The mushrooms cooked down in the pot.

              Step 4: Sprinkle flour over the mixture and stir for about 2 minutes to allow the flour to cook.

              The flour mixture added to the mushrooms.
              Mushrooms cooked with the flour mixture.

              Step 5: Stir in the chicken broth and simmer over medium heat for 10-15 minutes, until the mixture has reduced in volume.

              The soup simmering in the pot.

              Step 6: Reduce heat to low and stir in heavy cream.

              Pouring the cream into the soup.

              Step 7: Allow mixture to simmer for an additional 5 minutes. Remove from heat and season with salt and pepper. Enjoy.

              A wooden spoon in a pot of cream of mushroom soup.

              Can you make it Vegetarian?

              Yes, you can easily make this soup meat-free by swapping the chicken broth for vegetable stock. You can use just water, but it won't be as well seasoned.

              How Long Does this Soup Keep?

              Soup is such a great make-ahead meal. I love to cook a batch on a Sunday for easy-to-grab lunches throughout the week. Once you have made it, let it cool to room temperature before transferring to an airtight container. It will keep well in the fridge for 4 to 5 days.

              Reheat the soup on a low heat on the stovetop, stirring occasionally to serve.

              Can you freeze it?

              Yes! Soup is a great freezer meal. You can freeze this cream of mushroom soup in ziplock bags or an airtight container, but I like to freeze it in jumbo ice cube trays; that way, I don't have to defrost the whole recipe each time I want some.

              Souper Cubes 1 Cup Silicone Freezer Molds - Soup Cubes Perfect for Freezing Broth, Rice, Leftovers
              Souper Cubes 1 Cup Silicone Freezer Molds - Soup Cubes Perfect for Freezing Broth, Rice, Leftovers
              Buy Now

              Frozen soup can be thawed in the fridge overnight to reheat, or it can be slowly heated straight from frozen.

              Be sure to stir the soup when you reheat it so that the cream doesn't separate.

              The mushroom soup in a large ice cube tray.

              Tanya's Recipe Notes and Tips

              • Make the soup in a heavy-bottomed pan or Dutch oven. This will help distribute the heat more evenly, so the bottom doesn't get scorched.
              • For a smoother soup, use an immersion blender or a standing blender to blend the soup.
              • Taste the soup before serving and adjust the salt and pepper to suit your tastes.

              More Easy Soup Recipes

              • Broccoli Cheddar Soup
              • Cauliflower Soup
              • Hearty Instant Pot Vegetable Soup
              • Pressure Cooker Moroccan Spiced Soup
              • Instant Pot Jamaican Jerk Chicken Soup
              • Pressure Cooker Lentil Soup with Sausage
              • Carrot and Lentil Soup
              • Cream of Asparagus Soup

               I hope you love this cream of mushroom soup as much as we do. If you've tried this recipe, please rate it and share your feedback in the comments below!

              Cream of mushroom soup in a dutch oven.
              Print Recipe
              4.74 from 119 votes

              Cream of Mushroom Soup Recipe

              This delicious and rich cream of mushroom soup is easy to make all in one pot and is so hearty and comforting. Perfect for make-ahead and freezer meals.
              Prep Time10 minutes mins
              Cook Time35 minutes mins
              Total Time45 minutes mins
              Course: Soup
              Cuisine: American
              Keyword: creamy mushroom soup recipe, how to make cream of mushroom soup
              Servings: 6 servings
              Calories: 307kcal
              Author: Tanya Harris

              Equipment

              • Soup Freezing Cubes
              • immersion blender
              • heavy-bottomed pot

              Ingredients

              • 1.5 lbs baby bella mushrooms sliced
              • 6 Tablespoon butter
              • 6 Tablespoon all-purpose flour
              • 1 yellow onion chopped (about 1 cup)
              • 1 celery stalk chopped (about ½ cup)
              • 1 teaspoon dried thyme
              • 1 teaspoon marjoram
              • 4 cups chicken broth
              • 1 cup heavy cream
              • Salt and pepper to taste

              Instructions

              • Melt butter in a large pot over medium heat. Add onion and celery and sauté until softened, about 4 minutes.
              • Add mushrooms, thyme, marjoram and stir for about 10-15 minutes, until mushrooms have softened and reduced in volume. Sprinkle flour over the mixture and stir for about 2 minutes to allow the flour to cook.
              • Stir in chicken broth and simmer over medium heat for 10-15 minutes, until the mixture has reduced.
              • Reduce heat to low and stir in heavy cream. Allow mixture to simmer for an additional 5 minutes. Remove from heat and season with salt and pepper. Enjoy.

              Video

              Notes

              • Make the soup in a heavy-bottomed pot or Dutch oven. This will help distribute the heat more evenly, so the bottom doesn't get scorched.
              • For a smoother soup, use an immersion blender or a standing blender to blend the soup.
              • Taste the soup before serving and adjust the salt and pepper to suit your tastes.

              Nutrition

              Calories: 307kcal | Carbohydrates: 14g | Protein: 5g | Fat: 27g | Saturated Fat: 17g | Cholesterol: 85mg | Sodium: 703mg | Potassium: 698mg | Fiber: 1g | Sugar: 3g | Vitamin A: 938IU | Vitamin C: 13mg | Calcium: 66mg | Iron: 1mg

              This post was originally published on October 5, 2020. It has been updated with additional helpful information.

              12 Air Fryer Tips Every Air Fryer Owner Should Know

              July 17, 2025 by Tanya Harris

              air fryer tips collage

              Air fryers have experienced a surge in popularity—more than 40% of U.S. households now own one. Yet most owners still fall into a few easy‑to‑avoid traps that keep them from getting crispy, juicy, fool‑proof results. Use (and bookmark!) these twelve tips to cook smarter, eat better, and keep your machine running like new.

              air fryer tips collage

              12 Air Fryer Tips

              #1. Preheat your Air Fryer...but only when your model and recipe need it

              It's common practice to preheat any cooking element. Most brands of air fryers recommend preheating the air fryer to ensure even cooking. I do it sometimes, other times I don't, and my food still turns out delicious.

              If your air fryer does not have a preheat setting, set it to the desired temperature and allow it to run for approximately 3 minutes before placing your food inside.

              #2. Use oil on your foods for the air fryer...well, most of the time

              Vegetables and battered foods benefit from a light mist—it helps with browning, while fatty items (such as chicken thighs, burgers, and salmon) already contain their natural cooking oil.

              Common foods that are enhanced with a bit of oil include roasted vegetables, such as my air fryer broccoli, or battered foods, like air fryer fried fish.

              #3. Grease your Air Fryer Basket

              Wipe or spray a thin coat of high‑smoke‑point oil on the basket grates or use perforated parchment/silicone liners to prevent sticking and make cleanup painless.

              #4. Skip aerosol cans

              Propellant-driven sprays, such as PAM, can damage non-stick coatings over time. Instead, use a pump mister, an EVO sprayer, or a refillable bottle of avocado or grapeseed oil.

              #5. Don't overcrowd the basket

              To achieve crispy fried foods, avoid overcrowding the basket. Placing too much food in the basket will prevent your food from crisping and browning. To prevent this from happening, cook your food in batches or consider investing in a larger air fryer. I use an air fryer that has a basket that is at least 5 quarts in size.

              #6. Shake the basket during cooking for fries, wings, and other items

              Fries, wings, Brussels sprouts—anything bite‑sized—benefit from a quick toss halfway through. The fryer pauses when you pull the basket and resumes at the temperature when you slide it back in.

              Sometimes, I use a pair of silicone kitchen tongs to flip larger items over rather than shaking them.

              #7. Spray halfway through cooking

              I found that spraying with oil halfway through cooking gets the best crisp on most foods. I tend to wait and spray halfway through cooking, unless it's an item that doesn't require spraying, such as fatty meats. Coated food items should be sprayed. Also, spray any dry flour spots that still appear halfway through air frying.

              You can see this in action in this air fryer fried green tomatoes recipe.

              #8. Water/Bread in the bottom stops white smoke

              Greasy foods can smoke as fat hits the hot drawer. Add 1–2 tablespoons of water to the drawer under the basket (or place a slice of bread there) before cooking bacon or burgers. This catches drips and keeps your kitchen haze‑free.

              #9. Be careful of small light items in the air fryer

              The strong fan can whip parchment, kale chips, or egg roll wrappers into the heating element—yikes. Weigh light items down with a rack or a toothpick through the corner.

              #10. Convert oven recipes—minus 30 °F and 20 % time

              It can sometimes be tempting to crank the heat for the Air Fryer to the highest temp to let it run, but be careful, as some foods can dry out quickly. A good rule of thumb is to adjust the temperature and time according to how long you would typically bake it in the oven.

              I like to go 30 degrees below and cut the time by about 20%. For example, if you cooked brownies at 350 degrees Fahrenheit for 20 minutes in the oven, reduce the temperature in the Air Fryer to 320 degrees and cook for approximately 16 minutes.

              #11 Invest in a Good Quick Read Thermometer

              Having a high-quality, quick-read thermometer is crucial when cooking certain meats in your Air Fryer, such as steak, chicken, and pork. I recently invested in a Thermapen One, and I must say it's worth every penny.

              Clean promptly, inside and out

              While the basket is still warm, soak it in hot, soapy water—no metal scrubbers. Wipe the heating element monthly with a damp cloth to prevent burnt‑on grease. Fifteen seconds now saves ten minutes of scrubbing later.

              Those are my Top 12 Air Fryer tips for successful cooking. If you haven't made the jump on purchasing an Air Fryer yet, check out Air Fryer Reviewed for reviews of different Air Fryer brands.

              Do you have any Air Fryer tips? Leave them in the comments below. Happy Cooking 🙂

                          Check Out Air Fryer Recipes

              • Air fryer fried chicken on a white platter
                Air Fryer Fried Chicken
              • crispy breaded air fryer cauliflower wings coated in wing sauce
                Air Fryer Cauliflower Wings
              • Air Fried Macaroni and Cheese Balls
              • pumpkin seeds with pumpkin in background
                Crispy Air Fryer Pumpkin Seeds

              This post was originally published on August 11, 2018. It has been updated with additional helpful information.

              Air Fried Lobster Tail Recipe (Fast & Easy)

              July 16, 2025 by Tanya Harris 30 Comments

              This Air Fryer Lobster Tail Recipe is easy and delicious, and can be prepared quickly in your Air Fryer. It's also coated with a tasty garlic butter sauce and air-fried to perfection.

              lobster tail on plate

              This post may contain affiliate links, please read my full disclosure here. 

              Full Recipe/Instructions are available in the recipe card at the bottom of the post. You can find important tips/tricks in the blog post.

              When I first became obsessed with my Air Fryer a few years ago, a friend of mine suggested that I try cooking lobster tails in it. I was intrigued, yet cautious. Lobster tails aren’t cheap, and I wasn’t sure if it would work. 

              Traditionally, I was taught to boil lobster tails in water. The same with crab legs. But I gave it a try and I’m hooked. Now, any time I can find lobster tails on sale, I grab a few and we eat them for dinner. 

              Lobster is notoriously difficult to get right, and even the most experienced chef can end up with rubbery, overcooked seafood. That's why air fryer lobster tails are so good. You don't need any special skills or equipment, and you can have perfectly cooked lobster on your plate in just a few minutes.

              For this recipe, you will want to do the following:

              • Butterfly your lobster tail
              • Make garlic butter
              • Air Fry your lobster tail with butter on top
              • Have extra butter for dipping if you like

              A Quick Look at The Ingredients

              Ingredient amounts and full recipe instructions are on the printable recipe card at the bottom of the post.

              • Lobster tails - I prefer to find some that are medium-sized, about 5-6 ounces each. If they are frozen, defrost them.
              • Garlic butter mix - unsalted butter, minced garlic, salt, chives, and fresh lemon juice.

              How to cook lobster tail in the air fryer

              First, gather your ingredients and create your garlic butter mixture. I combine butter, minced garlic, freshly chopped chives, salt, and a squeeze of lemon juice and microwave until melted. You could also use this garlic butter mixture I use in this steak recipe. 

              garlic butter melted in a glass jar

              Then butterfly your lobster tails.

              Then, place the lobster tails in your air fryer and spread some garlic butter over them. Close the air fryer and cook at 380°F for 4 minutes. After 4 minutes, open the air fryer basket, add more butter on top, and cook for an additional 3 to 4 minutes.

              hand brushing garlic butter over lobster tails

              Serve and enjoy.

              How to Butterfly a Lobster Tail?

              The butterflying of lobsters is very easy, making the lobster meat easier to eat. It also looks pretty on a plate. The only tools you can use are sharp kitchen scissors and your hands.

              First, cut the top shell with sharp kitchen shears down the middle, being careful not to cut through the meat. Then, slide your finger under the shell to gently separate the lobster meat from the shell. Once the meat is separated from the shell, pull it through the slit you cut and rest it on top.

              If your lobster tail needs to be deveined, devein it at this time.

              step by step photo collage of how to butterlfy a lobster tail.


              Tanya's Top Tips

              • The size of your lobster tails will determine how long you need to cook them. At a minimum, they will need 6 minutes if they are on the smaller side, which is approximately 2 ounces. The ones pictured here took me the full 8 minutes to complete and weighed about 5 ounces each. 
              • Have fun with the butter topping. Feel free to use Cajun butter, jerk butter, or plain butter. You could even not use any butter at all. Butter is optional, just highly recommended.
              cooked lobster tails in air fryer basket

              I hope you enjoy these lobster tails as much as we do. I’m so thankful to have friends who give great ideas when it comes to Air Fryer cooking. 

              How to store

              To refrigerate:  Cooked lobster tails can be enjoyed hot or cold. Once cooked and cooled, place any leftover lobster tails in an airtight container in the refrigerator up to 3 days. If heating up, do so gently so that the lobster warms through without overcooking.

              To freeze: It is perfectly safe to freeze cooked lobster. Once cooked and cooled, wrap the whole tail, including the shell, in freezer-proof clingfilm and a layer of kitchen foil, and store for up to 3 months. Freezing the lobster tail in the shell will stop the meat from drying out.

              To reheat: Preheat your air fryer to 320°F and cook the lobster tail for approximately 3-4 minutes. This will help to preserve the lobster's flavor and moisture.

              What should I serve with these lobster tails?

              I enjoy serving these alongside a good steak, salad, or risotto. You can also prep these in the air fryer and add them to lobster mac and cheese.

              FAQs about Air-Fried Lobster Tails

              What's the best temperature to cook lobster tails in the air fryer?

              The optimal temperature for cooking lobster tails in an air fryer is 380°F. This will ensure that the lobster tail is cooked evenly and thoroughly. Additionally, cooking at this temperature helps preserve the lobster's natural flavor and moisture.

              How to cook frozen lobster tail in the air fryer?

              I recommend defrosting the lobster tails prior to cooking, butterflying, and deveining them. 

              How do I know when my lobster tail is done?

              Lobster meat is ready when it’s no longer transparent and has a white color. The lobster should feel slightly firm to the touch, and there should be no visible signs of pink or red. The best way to tell when your lobster tails are done is to use a meat thermometer. Insert the thermometer into the thickest part of the lobster tail and cook until the internal temperature reaches 135-140 degrees Fahrenheit. 

              Looking for more Seafood Recipes? Try these out:

              • Air Fryer Lemon Garlic Shrimp
              • Air Fryer Scallops
              • Air Fryer Salmon
              • Pressure Cooker Shrimp Boil
              • Air Fryer Fish
              • Pressure Cooker Shrimp Paella
              • Ninja Foodi Fish and Grits
              close up photo of lobster tail in air fryer basket

              I hope you love these lobster tails as much as we do. If you've tried this recipe, please rate it and share your feedback in the comments below!

              cooked lobster tails on white plate with green beans in background
              Print Recipe
              4.79 from 19 votes

              Air Fried Lobster Tails Recipe (Fast & Easy)

              This easy and delicious lobster tail recipe is topped with a yummy garlic butter sauce and air fried to perfection. It’s such a quick and easy recipe.
              Prep Time5 minutes mins
              Cook Time8 minutes mins
              Total Time13 minutes mins
              Course: Main Course
              Cuisine: American
              Keyword: air fryer lobster tails, lobster tail recipe
              Servings: 2 people
              Calories: 108kcal
              Author: Tanya Harris

              Equipment

              • Air Fryer
              • Basting Brush
              • Kitchen Shears

              Ingredients

              • 2 4-6 oz lobster tails
              • 2 Tablespoon unsalted butter melted
              • 1 Tablespoon minced garlic
              • 1 teaspoon salt
              • 1 teaspoon chopped chives
              • 1 teaspoon lemon juice

              Instructions

              • Prepare butter mixture by combining butter, garlic, salt, chives and lemon juice.
              • Butterfly lobster tails by cutting through the shell, removing the meat and resting it on top of the shell.
              • Place in Air Fryer basket and spread butter over top of lobster meat. Close Air Fryer basket and cook on 380 degrees Fahrenheit for 4 minutes.
              • Open Air fryer basket and and spread more butter on top, cook for an additional 2-4 minutes until done.

              Notes

              • Cook time will depend on the size of your lobster tails. A total of 6-8 minutes should work for most lobster tails. 
              • You can make as many lobster tails as will fit in your air fryer basket. 
              • For the oven, preheat it to broil and cook the lobster tails on a baking sheet for about 5-10 minutes.

              Nutrition

              Calories: 108kcal | Carbohydrates: 2g | Protein: 1g | Fat: 11g | Saturated Fat: 7g | Polyunsaturated Fat: 0.4g | Monounsaturated Fat: 3g | Trans Fat: 0.5g | Cholesterol: 31mg | Sodium: 1169mg | Potassium: 26mg | Fiber: 0.1g | Sugar: 0.1g | Vitamin A: 372IU | Vitamin C: 3mg | Calcium: 13mg | Iron: 0.1mg

              This post was originally published on 7/1/2019. It has been updated with new photos and additional helpful information.

              Easy Brunswick Stew Recipe

              July 15, 2025 by Tanya Harris 6 Comments

              Two bowls of Brunswick stew.

              Warm your body and soul with this hearty and comforting Brunswick stew recipe. This tomato-based Southern stew is wonderfully flavorful, made with lots of fresh veggies, smoked meat, and a tangy barbecue sauce (BBQ).

              brunswick stew recipe in white bowl

              You’ll find the full recipe with ingredient amounts and instructions in the recipe card at the bottom of this post. Be sure to check out the blog post itself for extra tips and tricks!

              This Brunswick stew recipe has been a family favorite for many years. Packed full of veggies and made with smoked pulled pork or chicken, this stew is not shy in the flavor department. Made with a tangy BBQ sauce, this is the perfect way to warm up after a long day.

              Made in one pot on the stovetop, this effortless meal is sure to please everyone. It's also a great way to utilize leftovers. I can't recall where I first had it, but I remember some of the best Brunswick stew came from a church fundraiser here in North Carolina. Whenever I want some, but they aren't serving it, I make it at home.

              Be sure to try my Instant Pot Chili and Hearty Vegetable Soup for more classic soup recipes.

              A spoon stirring the Brunswick stew in a pot.

              A Quick Look at The Ingredients

              Ingredient amounts and full recipe instructions are on the printable recipe card at the bottom of the post.

              • Leftover pulled pork or chicken - This is the classic protein found in Brunswick stew. I usually opt for pulled pork, but you can also use chicken if you prefer.
              • Vegetables - Onions, garlic, fire-roasted diced tomatoes, mixed vegetables, and frozen Lima beans.
              • Unsalted Butter - for sautéeing the vegetables. Use olive oil if you prefer.
              • Chicken stock - for liquid and flavor.
              • Vinegar-based BBQ Sauce - I would usually suggest a substitute, but not in this case. The vinegar-based sauce would be looser in this recipe and taste amazing with this stew. I would avoid thick or sweet BBQ sauces.
              • Granulated sugar - to balance the acidity in the BBQ sauce.

              Essential Tools

              • Large heavy-bottomed pot/Dutch oven
              • Wooden spoon or silicone spatula
              • Chef's knife
              • Cutting Board
              • Measuring cups and spoons
              • Ladle
              • Airtight containers or freezer-safe jars (for storing leftovers)

              How to make Brunswick stew

              Gather your ingredients.

              ingredients for the brunswick stew recipe

              Melt butter in a large pot over medium heat. Add the onion and garlic, and sauté until translucent, about 3-5 minutes.

              Softening the onion and garlic.

              Add remaining ingredients to the pot and stir. Allow the mixture to come to a simmer.

              Rest of the stew ingredients added to the pot.

              Reduce the heat and simmer on medium-low for 30-40 minutes. Add salt and pepper to taste.

              Clos e up of the stew in a pot.

              Serve and enjoy your stew.

              Where does Brunswick stew come from?

              This is a traditional Southern stew that makes the most of what you have in your pantry. Traditionally made with small game, such as squirrel or rabbit, it's tomato-based and features beans and vegetables. I love it with leftover pulled pork, and chicken works great too. You can easily adapt the ingredients to suit what you have to hand. BBQ sauce makes this stew stand out from the crowd.

              Can you make it ahead of time?

              This is a great make-ahead stew that's also freezer-friendly. Once made, let it cool completely before transferring to an airtight container. It will keep well in the fridge for 4 days and in the freezer for up to 3 months. Thaw frozen stew in the refrigerator overnight before reheating.

              Reheat on the stovetop over medium heat, stirring until heated through.

              What do you serve it with?

              A big bowl of this Brunswick stew is so hearty and filling, but it's great served alongside other Southern favorites like:

              • Cornbread Muffins
              • Homemade Air Fryer Biscuits
              • Classic Cornbread
              Brunswick stew on a ladle above the pot it was cooked in.

              Tanya's Notes and Tips

              • Your stew will taste similar to the BBQ sauce you choose to use. I prefer to use a homemade vinegar-based BBQ sauce, but any store brand will work just as well.
              • You can easily add different vegetables and beans to suit your taste and save yourself a shopping trip!
              • Stir the stew occasionally as it simmers so that it doesn't stick to the bottom of the pan.

              More Stews and Chilis

              • Jamaican Stew Peas
              • Brown Stew Chicken
              • Hot Dog Chili
              • Pressure Cooker Turkey Chili
              Two bowls of Brunswick stew.
              Print Recipe
              4.86 from 7 votes

              Brunswick Stew

              Warm your body and soul with this hearty and comforting Brunswick stew recipe. This tomato based Southern stew is wonderfully flavorful, made with lots of fresh veggies, smoked meat and a tangy BBQ sau
              Prep Time10 minutes mins
              Cook Time45 minutes mins
              Total Time55 minutes mins
              Course: Main Course
              Cuisine: American
              Keyword: easy Brunswick stew recipe, how to make Brunswick stew, southern Brunswick stew
              Servings: 4 servings
              Calories: 681kcal
              Author: Tanya Harris

              Ingredients

              • 4 tablespoons unsalted butter
              • 1 yellow onion chopped
              • 4 cloves of garlic chopped
              • 14.5 oz can of fire-roasted diced tomatoes undrained
              • 1 cup mixed vegetables
              • 1 cup frozen lima beans
              • 2 cups of chicken stock
              • 2 cups of smoked pulled pork or chicken
              • 1 ½ cups vinegar BBQ sauce
              • 1 Tablespoon granulated sugar
              • Salt and pepper to taste

              Instructions

              • Melt butter in a large pot over medium heat. Add onion and garlic and saute until translucent, about 3-5 minutes
              • Add remaining ingredients to the pot and stir. Allow the mixture to come to a simmer.
              • Reduce Heat and Simmer on medium-low for 30-40 minutes.
              • Add salt and pepper to taste.

              Notes

              • Your stew will taste similar to the BBQ sauce you choose to use. I like to use a homemade vinegar based bbq sauce but your favorite store brand will work too.
              • You can easily add in different vegetables and beans to suit your tastes and to save you a shopping trip!
              • Stir the stew occasionally as it simmers so that it doesn't stick to the bottom of the pan.

              Nutrition

              Calories: 681kcal | Carbohydrates: 97g | Protein: 25g | Fat: 23g | Saturated Fat: 10g | Polyunsaturated Fat: 1g | Monounsaturated Fat: 4g | Trans Fat: 1g | Cholesterol: 85mg | Sodium: 2190mg | Potassium: 712mg | Fiber: 7g | Sugar: 61g | Vitamin A: 3571IU | Vitamin C: 16mg | Calcium: 170mg | Iron: 4mg

              This post was originally published on November 8, 2021. It has been updated with additional helpful information.

              Pan‑Seared Pork Shoulder Steaks (20‑Minute Stovetop Recipe)

              July 14, 2025 by Tanya Harris 2 Comments

              pork steak in skillet

              These pan-seared pork steaks are juicy, golden-crusted, and full of flavor—ready in minutes with just a skillet and a few pantry staples.

              pork steak in skillet

              You’ll find the full recipe with ingredient amounts and instructions in the recipe card at the bottom of this post. Be sure to check out the blog post itself for extra tips and tricks!

              I'll admit that I hadn't heard of pork steaks until a local butcher had them on sale. I, like the nerd I am, did research first, and then added these to my grocery list of "meats I should try." Well, I grabbed them, decided to pan-sear them, and they came out delicious.

              Pork steaks and pork chops are different, as the steaks are cut from the shoulder of the pig. They have more fat and connective tissue, making them a tad bit more flavorful and tender than the chops. They are also more forgiving when cooked, making the meat stay nice and tender when cooked properly.

              If you're a fan of delicious pork meals, try my pan-seared pork chops too.

              A Quick Look at The Ingredients

              Ingredient amounts and full recipe instructions are on the printable recipe card at the bottom of the post.

              • Pork Shoulder Steaks: These come from the shoulder/butt of the pig. My pork steaks were about ½ inch thick, allowing for just a quick sear in the skillet before they were done. If your steaks are 1 inch or thicker, you will need to sear them first and then finish them in the oven to avoid overcooking.
              • Seasonings - Kosher Salt, ground black pepper, and onion powder
              • Olive Oil or High-Smoke Point Oil: like grapeseed, canola, or avocado
              • Unsalted Butter: for richness and browning
              ingredients for pork steak with titles of ingredients

              Essential Tools Needed

              • Cast iron skillet or heavy-bottomed skillet
              • Tongs
              • Paper towels
              • Instant-read thermometer
              • Cutting board

              How to Cook Pork Shoulder Steaks on the Stove

              Step 1: Pat the pork steaks dry thoroughly with a paper towel to help them sear properly and prevent steaming. Remove any excess fat cap from the side of the steaks with a sharp knife or scissors. Side note: The fat cap can be cut up and fried separately for a delicious snack.

              Season both sides of the steaks generously with kosher salt, black pepper, and onion powder.

              cutting excess fat on pork steak
              raw pork steak seasoned

              Step 2: Heat a large cast-iron skillet over low heat for 5 minutes. Then increase the heat to medium-high and let it heat for another 3 minutes until hot. Add the olive oil and butter to the skillet and swirl to coat.

              butter and oil heating in cast iron skillet

              Step 3: Carefully add the pork steaks, laying them down away from you. Sear the steaks undisturbed for about 2–3 minutes, then flip and cook for another 2 minutes until both sides are golden. The pork temperature should be at least 145°F, but I usually cook mine until it reaches an internal temperature of 165°F.

              hand laying pork steaks in skillet

              Step 4: Transfer the juicy pork steaks to a cutting board and let them rest for 3–5 minutes before slicing or serving whole. Resting allows the juices to redistribute for a more tender and flavorful bite.

              cooked pork steak on plate sliced next to salad

              What Should I Serve These Steaks With

              These pork steaks are a great entree, and can be served with dinnertime favorites like mashed potatoes, sautéed spinach, quick pressure cooker collard greens, or asparagus.

              I also like to have these as a part of my big breakfast plate. You could serve with a side of fried apples, a side of grits, and eggs for the ultimate breakfast feast.

              Tanya's Top Tips for Pork Shoulder Steak

              • Thin pork steaks are quick to cook and only need a quick sear on the stovetop. If your steaks are on the thicker side, the best way to cook them is to sear them on the stove and then finish them in the oven.
              • This steak is also delicious with gravy if you prefer it that way. Feel free to make a gravy from the drippings if you want a gravy.
              • If you prefer grilled pork steaks, sear them over direct heat on the grill first, then move to them to indirect heat for even cooking.
              • Have fun with the seasonings. I like to keep it simple with salt, pepper, and onion powder, but you may also like using pork chop seasoning if you have it on hand.
              pork steak in skillets

              How to Make Ahead and Store

              Make Ahead: You can season the pork steaks up to a day in advance and keep them covered in the fridge until ready to cook.

              Store Leftovers: Store cooked pork steaks in an airtight container in the fridge for up to 3 days.

              Reheat: Reheat gently in a skillet over medium-low heat or microwave in short intervals to avoid overcooking.

              Pork Steak FAQs

              What is the best temperature to cook pork steaks to?

              Pork steaks are different from pork chops and can be cooked to a higher temperature without losing their tenderness. You want the temperature to reach at least 145°F for safety, but in reality, your pork shoulder steaks can be cooked up to 185°F and remain tender.

              Where do pork steaks come from?

              Pork steaks come from the shoulder (also known as the butt) of the pig. This cut has more fat and connective tissue than pork chops, making pork steaks more flavorful and tender when cooked properly.

              cooked pork steak sliced on plate with salad with fork picking up steak

              If You Like This, You May Also Like

              • Air Fryer Pork Chops – Juicy and crispy, cooked to perfection in the air fryer. This recipe is seasoned with a herb blend and then air-fried to perfection.
              • Oven Baked Pork Chops– Sweet, savory, and perfect for a weeknight dinner.
              • Pan Seared Beef Steak – Another quick stovetop favorite when you’re craving something meaty and satisfying. This one uses beef steak, but a similar method of a quick pan sear in the oven.

              If you've tried this Pork Steak recipe or any other recipe on my blog, please rate it and share your feedback in the comments below!

              pork steak in skillet
              Print Recipe
              5 from 1 vote

              Pork Steaks Recipe

              Juicy, pan-seared pork shoulder steaks with a golden crust, ready in 20 minutes. Seasoned simply with kosher salt, black pepper, and onion powder, they're the perfect quick dinner.
              Prep Time10 minutes mins
              Cook Time5 minutes mins
              Resting Time5 minutes mins
              Total Time20 minutes mins
              Course: entree
              Cuisine: American
              Keyword: pork shoulder steak, pork steak recipe
              Servings: 2 people
              Calories: 116kcal
              Author: Tanya Harris

              Equipment

              • cast iron skillet

              Ingredients

              • 2 pork steaks from the shoulder/butt, about ½ to ¾ inch thick each
              • 1 teaspoon kosher salt
              • ½ teaspoon ground black pepper
              • ½ teaspoon onion powder
              • 1 Tablespoon olive oil or high-smoke point oil like grapeseed, canola, or avocado
              • 1 Tablespoon unsalted butter

              Instructions

              • Pat the pork steaks dry thoroughly with paper towels on all sides. Season both sides generously with sea salt, black pepper, and onion powder.
              • Place a large, heavy-bottomed skillet (cast iron or stainless steel) over low heat and let it preheat gently for 5 minutes. Increase the heat to medium-high and continue heating for another 3 minutes until the skillet is uniformly hot.
              • Add the olive oil and butter to the skillet and swirl to coat the bottom. Carefully place the first pork steak into the skillet, starting with the edge closest to you, and lower it away from you. Repeat with the second steak, ensuring they do not overlap.
              • Sear the steaks for about 2-3 minutes without moving them, then flip and cook for an additional 2 minutes.
              • Use an instant-read thermometer to check for doneness: remove steaks when the thickest part reads 145°F. Transfer to a cutting board and let rest for 3–5 minutes.
              • Slice against the grain or serve whole. Enjoy.

              Notes

              • Patting the pork dry before seasoning and searing ensures a crisp, golden crust instead of a steamed surface.
              • If your pork steak is 1 inch thick or more, sear the pork steaks first, then transfer them to a 350°F oven and cook until they reach an internal temperature of at least 145°F, about 10-15 minutes.

              Nutrition

              Calories: 116kcal | Carbohydrates: 1g | Protein: 0.3g | Fat: 13g | Saturated Fat: 5g | Polyunsaturated Fat: 1g | Monounsaturated Fat: 7g | Trans Fat: 0.2g | Cholesterol: 16mg | Sodium: 1165mg | Potassium: 17mg | Fiber: 0.2g | Sugar: 0.04g | Vitamin A: 178IU | Vitamin C: 0.1mg | Calcium: 7mg | Iron: 0.1mg

              Jamaican Jerk Seasoning Recipe

              July 11, 2025 by Tanya Harris 9 Comments

              Add some flavor to your meals with this homemade Jamaican Jerk Seasoning. It's so easy to make a big batch to use on meats, fish and vegetables.

              Jamaican Jerk Seasoning in a jar with label and spoon sticking out top

              You’ll find the full recipe with ingredient amounts and instructions in the recipe card at the bottom of this post. Be sure to check out the blog post itself for extra tips and tricks!

              I know that you guys are going to love this Jamaican jerk seasoning recipe! I always have some on hand in my cupboard for a quick and easy way to liven up meals.

              Use it in my Jerk chicken and rice, air-fried Jamaican jerk pork, Jerk Chicken Wings, or my Rasta Pasta. You can even sprinkle a bit on your favorite seafood, like shrimp.

              A Quick Look at The Ingredients

              Ingredient amounts and full recipe instructions are on the printable recipe card at the bottom of the post.

              • Garlic Powder
              • Kosher Salt
              • Onion Powder
              • Cayenne Pepper or Scotch Bonnet Pepper - if you can get your hands on the Scotch Bonnet Pepper, that's the best choice to give this blend the most authentic flavor.
              • Dried Thyme
              • Brown Sugar
              • Sweet Paprika
              • Ground Allspice
              • Black Pepper
              • Ground Cinnamon
              • Ground Nutmeg
              spices and herbs on white plate

              How To Make Jamaican Jerk Seasoning

              Combine all the ingredients.

              Store in an airtight container until ready to use.

              spices and herbs on white plate, mixed with spoon sticking in the middle

              How spicy is this homemade jerk spice blend?

              This seasoning does have a kick to it, but unlike your store-bought mixes, it's easy to adjust the heat to your taste. If you don't like things super spicy, you can reduce the amount of cayenne.

              Why make your own spice mix?

              Making your spice mix is quick and easy, and it's also kinder on your wallet. Store-bought spice blends often contain preservatives and additives that you don't need when you make it at home.

              How long does it keep?

              Once you have mixed your ingredients, transfer them to an airtight jar or container. Keep it in your cupboard and it will keep well for at least a month. Depending on the freshness of the spices you use, it can keep well for up to six months!

              Tanya's Recipe Notes and Tips

              • Check that your spices aren't stale before you use them. Rub a little between your fingers, and if they don't release an aroma, it's time to buy some more.
              • Rub the seasoning on chicken, meat, and fish, or sprinkle it on vegetables before cooking. You can also use it along with my jerk marinade for extra flavor.
              • Store in an airtight container in a cupboard.
              • Ground scotch bonnet pepper is the best pepper to use in this recipe for an authentic taste. However, if you can't find it, cayenne pepper works just fine.
              Jerk seasoning in jar with spoon picking it up

              More Seasoning Recipes

              • Homemade Taco Seasoning
              • Poultry Seasoning
              • Homemade BBQ Seasoning
              • Dukkah Spice Mix
              • Fish Seasoning

              Pin this Recipe for Later

              pinterest pin image
              Print Recipe
              5 from 5 votes

              Jamaican Jerk Seasoning Recipe

              Add some flavor to your meals with this homemade Jamaican jerk seasoning. It's so easy to make a big batch to use on meats, fish and vegetables.
              Prep Time5 minutes mins
              Total Time5 minutes mins
              Course: Seasoning
              Cuisine: Jamaican
              Keyword: easy jerk seasoning, homemade jerk seasoning, Jamaican seasoning
              Servings: 4 oz
              Calories: 111kcal
              Author: Tanya Harris

              Ingredients

              • 1 Tablespoon Garlic Powder
              • 1 Tablespoon Kosher Salt
              • 2 teaspoon Onion Powder
              • 2 teaspoon Cayenne Pepper or Scotch Bonnet Pepper*
              • 2 teaspoon Thyme Dried
              • 2 teaspoon Brown Sugar
              • 1 teaspoon Sweet Paprika
              • 1 teaspoon AllSpice Ground
              • ½ teaspoon black pepper
              • ½ teaspoon ground cinnamon
              • ½ teaspoon ground nutmeg

              Instructions

              • Combine all ingredients. Store in airtight container. Enjoy.

              How to use:

              • Any recipe calling for dried jerk seasoning. It’s perfect on poultry, in pasta dishes, and on vegetables.

              Video

              Notes

              • Check that your spices aren't stale before you use them. Rub a little between your fingers and if they don't release an aroma it's time to buy some more.
              • Rub the seasoning on chicken, meat and fish or sprinkle on vegetables before cooking.
              • Store in an airtight container in a cupboard.
              • Ground scotch bonnet pepper is the best pepper to use in this recipe for an authentic taste. However, if you can't find it, cayenne pepper works just fine.

              Nutrition

              Calories: 111kcal | Carbohydrates: 25g | Protein: 3g | Fat: 2g | Saturated Fat: 1g | Sodium: 6992mg | Potassium: 289mg | Fiber: 5g | Sugar: 8g | Vitamin A: 2840IU | Vitamin C: 11mg | Calcium: 48mg | Iron: 2mg

              This post was originally published March 27, 2020. It has been updated with new information.

              Juicy, Perfect Air Fryer Pork Chops (Air-Fried Pork Chops)

              June 26, 2025 by Tanya Harris 76 Comments

              cooked pork chops in air fryer basket

              These Air-Fried Pork Chops are moist, delicious, and packed with fantastic flavor. Learn the tips and tricks for making tasty, juicy pork chops in your Air Fryer every time.

              cooked pork chops in air fryer basket

              You’ll find the full recipe with ingredient amounts and instructions in the recipe card at the bottom of this post. Be sure to check out the blog post itself for extra tips and tricks!

              Pork chops are perfect for quick dinners, and cooking them in an air fryer is ideal, as they cook quickly.

              I’ve done pork chops in my Air Fryer before; I made these thin Japanese Tonkatsu Pork Chops. I’m now sharing this herb-crusted pork chop recipe for thick and juicy chops.

              When cooked properly, pork chops are moist and delicious and can be prepared in under 20 minutes. The trick is not to cook them too long, as they will dry out.

              Be sure to try my smothered pork chops and my sous vide pork chops.

              A Quick Look at the Ingredients

              Ingredient amounts and full recipe instructions are on the printable recipe card at the bottom of the post.

              • Pork Chops - I usually grab pork loin chops that are about 1-inch thick.
              • Olive oil - Adding a little oil will help the pork chops brown and add delicious flavor.
              • Seasoning - Dried sage, dried thyme, oregano, rosemary, paprika, garlic powder, salt, and black pepper.
              ingredients for air fryer pork chops

              Tools Needed

              • Air fryer (5–6 qt basket style)
              • Instant-read meat thermometer
              • Small mixing bowl
              • Kitchen tongs
              • Plate or cutting board for resting
              • Aluminum foil (tenting)

              How to Make Air Fryer Pork Chops

              Step 1: First, remove your chops and allow them to sit at room temperature for about 15-30 minutes to remove the chill. In a small bowl, combine the sage, thyme, oregano, rosemary, paprika, garlic powder, salt, and black pepper. Set aside.

              dry seasoning mixed in bowl next to pork chops

              Step 2: Preheat your Air Fryer to 360 degrees Fahrenheit.

              While your Air Fryer is preheating, pat the pork chops dry with a paper towel to remove excess moisture. Then, rub a little olive oil over the pork chops and sprinkle the herb mixture over the chops, covering all sides.

              raw pork chops covered in seasoning

              Step 3: Place in the Air Fryer basket, making sure the chops don’t overlap. If your air fryer is not large enough to hold all of them, cook them in batches.

              Cook at 360°F for 10-12 minutes, flipping halfway. Pork chops are done when they have reached an internal temperature of 145°F.

              seasoned pork chops in air fryer basket
              cooked pork chops in air fryer basket

              Step 4: Remove pork chops from the Air Fryer and loosely cover them with foil. Allow them to sit for about 5 minutes.

              And there you have it, quick and delicious juicy pork chops.

              pork chops in air fryer basket

              Tanya's Top Tips for the Most Tender Pork Chops in the Air Fryer

              • Get to know your air fryer - Air fryers cook differently based on factors such as shape, wattage, and altitude. The cook times listed below are for guidance; however, your chops may require less or more cooking time. 
              • The quality of the meat matters - I’ve cooked pork chops to the proper temperature and texture, yet they still tasted off. The issue wasn’t the seasoning; it was the quality of the meat itself. Invest in well-marbled, responsibly raised chops, and the same recipe suddenly shines with real flavor.
              • Rest the chops after cooking - once cooked, allow the pork chops to rest under foil paper for about 5-10 minutes. It’s the same method I use in my air fryer steak recipe to ensure even cooking. Resting the meat allows the juices to be reabsorbed into the meat, resulting in moist and tender pork chops.
              • Cook to perfection with a thermometer - Invest in a quick-read thermometer to ensure your meat reaches 145°F and doesn’t exceed that temperature. The reason why most pork chops become tough and dry is that they can easily be overcooked.

              Cooking Times for Pork Chops in the Air Fryer

              Chop Thickness & TypeAir Fryer TempCook TimeTarget Internal Temp*
              1 in / 2.5 cm boneless360 °F10–12 min143–145 °F
              1 ½–2 in bone-in 360 °F14–16 min143–145 °F
              Thin ¾ in boneless375 °F8–10 min143–145 °F
              Frozen 1-inch chops360 °F18–20 min145 °F

              *Remove chops 2–3 °F early; carry-over heat during the rest will finish the job.

              Flavor Variations

              • I've used bone-in, thick-cut pork chops, but this recipe will also work well with thinner chops, boneless pork chops, or a pork steak. Just ensure you adjust the cooking times accordingly.
              • Pork works well with many spices. I've used paprika, but you can use any other ground spices you enjoy, like anise, cinnamon, coriander, or cumin.
              • Add some chili heat to the marinade by incorporating chili powder or red pepper flakes.
              sliced pork chop on plate

              How to serve Air Fryer Pork Chops

              I like serving potatoes and at least two other vegetable sides with these pork chops.

              Air fryer pork chops and potatoes are a perfect combination, so try my Air Fryer Baked Potato or Creamy Instant Pot Mashed Potatoes. Sweet potatoes are a great alternative to regular potatoes; try my Mashed Sweet Potatoes or my Southern Candied Sweet Potatoes.

              How to store leftover air fryer pork chops

              To refrigerate: Keep any leftover pork chops in an airtight container for 3-4 days. Reheat the next day and warm the pork in the air fryer or oven at 350°F until warmed through.

              To freeze: Once cooked and cooled, place any leftover pork chops into an airtight container and store them in the freezer for up to 3 months. As the pork is already cooked, it can be reheated from frozen in a preheated oven at 350°F. When ready to enjoy, place the frozen pork chops onto a baking sheet and place it in the oven for 30-40 minutes to reheat.

              FAQs:

              Can you put a raw pork chop in an air fryer?

              Yes, absolutely. I cook raw pork in the air fryer on a regular basis. Make sure to place the pork in the basket in a single layer to ensure even cooking.

              What is the ideal temperature for air frying pork chops?

              360 degrees Fahrenheit is my preferred temperature for cooking pork chops

              Why are bone-in pork chops better?

              The bone and fat in pork chops add great flavor to the pork and help retain moisture, stopping the chops from drying out.

              Looking for more Air Fryer Pork recipes? Try these out:

              • Air Fried Jamaican Jerk Pork
              • Mustard Glazed Pork Tenderloin
              • Japanese Thin Pork Cutlets 

              If you've tried this Air Fryer Pork Chop recipe or any other recipe on my blog, please rate it and share your feedback in the comments below!

              pinterest image with pin this and save for later text
              cooked pork chops in air fryer basket
              Print Recipe
              4.77 from 30 votes

              Juicy Air Fryer Pork Chops Recipe

              These Air Fryer Pork Chops are juicy and delicious and full of amazing flavor. The Air Fryer makes perfect pork chops each and every time.
              Prep Time5 minutes mins
              Cook Time10 minutes mins
              Resting Time5 minutes mins
              Total Time20 minutes mins
              Course: Main Course
              Cuisine: American
              Keyword: air fryer pork chops
              Servings: 4 people
              Calories: 248kcal
              Author: Tanya Harris

              Equipment

              • Quick Read Thermometer

              Ingredients

              • 4 pork chops about 1-inch thick
              • 2 teaspoons rubbed sage
              • 2 teaspoons dried thyme
              • 2 teaspoons dried oregano
              • 1 teaspoon crushed rosemary
              • 1 teaspoon paprika
              • 1 teaspoon garlic powder
              • 1 teaspoon salt
              • ½ teaspoon black pepper
              • 1 Tablespoon olive oil

              Instructions

              • Combine the sage, thyme, oregano, rosemary, paprika, garlic powder, salt, and black pepper. Set aside.
              • Preheat your Air Fryer to 360 degrees Fahrenheit (182°C).
              • While you Air Fryer is preheating, rub a little bit of olive oil over the pork chops and sprinkle the herb mixture over the chops, covering all sides.
              • Place in Air Fryer basket making sure the chops don’t overlap.
              • Cook on 360F degrees for 10-12 minutes, flipping halfway. Pork chops are done when they have reached an internal temperature of 145 degrees Fahrenheit.
              • Remove pork chops from the Air Fryer and loosely cover with foil. Allow them to rest for about 5 minutes.

              Video

              Notes

              • Cook times will vary depending on your Air Fryer model and the thickness of the pork chops. 
              • This recipe, as shown, uses thick center-cut pork chops about 1 inch thick. 
              • Thinner pork chops take about 8-9 minutes at 360 degrees Fahrenheit.

              Nutrition

              Calories: 248kcal | Carbohydrates: 2g | Protein: 29g | Fat: 13g | Saturated Fat: 4g | Polyunsaturated Fat: 2g | Monounsaturated Fat: 7g | Trans Fat: 0.1g | Cholesterol: 90mg | Sodium: 647mg | Potassium: 547mg | Fiber: 1g | Sugar: 0.1g | Vitamin A: 318IU | Vitamin C: 2mg | Calcium: 40mg | Iron: 2mg

              This post was originally published on September 24, 2019. It has been updated with additional helpful information and new photos.

              Juicy Air Fryer Steak (Quick & Easy)

              June 16, 2025 by Tanya Harris 181 Comments

              two steaks in the air fryer basket with garlic butter on top

              If you're wondering how to make the perfect air fryer steak, look no further. This method of cooking steak in the air fryer provides a perfect juicy steak every time.

              two steaks in the air fryer basket with garlic butter on top

              You’ll find the full recipe with ingredient amounts and instructions in the recipe card at the bottom of this post. Be sure to check out the blog post itself for extra tips and tricks!

              I had only intended to make fried foods when I purchased my Air Fryer. Little did I know how amazing this appliance was and that it could make much more than fried food. Now I have a ton of air fryer recipes as I use it all the time.

              Initially, I used it to make chicken for my Healthier General Tso's Chicken in the Air Fryer, and I also used it frequently for roasting vegetables. Then I discovered that my air fryer could make juicy steak!

              Top your steaks with my homemade garlic butter that can be whipped up easily and can go on many dishes, including fish, bread, and vegetables. I like to create more than we need for our steaks and save the rest for later in the fridge. I would eat the stuff by the spoonful if I could.

              Be sure to try my Air Fryer Steak Fajitas and Air Fryer Steak Kebabs too!

              A Quick Look at The Ingredients

              Ingredient amounts and full recipe instructions are on the printable recipe card at the bottom of the post.

              • Ribeye Steaks – I use two 8-oz ribeye steaks, approximately 1 inch thick, for their rich, juicy flavor and marbling.
              • Salt & Freshly Cracked Black Pepper – A classic combo to season the steak simply and effectively.
              • Garlic Butter – A flavorful finish that melts over the hot steak:
                • Unsalted Butter – Softened to mix easily.
                • Fresh Parsley – For a pop of freshness.
                • Minced Garlic – Adds bold, savory depth.
                • Worcestershire Sauce – Just a splash for umami.
                • Salt – To balance and enhance all the flavors.
              ingredients for garlic butter on table
              raw ribeye steaks seasoned with salt and pepper

              How to Cook Steak in the Air Fryer

              First Step: Prepare the garlic butter by mixing softened butter, parsley, garlic, Worcestershire sauce, and salt until the mixture is thoroughly combined. Place in parchment paper and roll into a log. Refrigerate until ready to use.

              garlic butter mixed in bowl
              garlic butter on parchment paper
              hands rolling garlic butter in parchment paper

              2nd Step: Remove the steak from the refrigerator, season it with salt and pepper, and let it sit at room temperature for 20 minutes. After 20 minutes, gently pat the steak dry with paper towels to remove any excess moisture.

              3rd Step: Preheat the Air Fryer to 400 degrees Fahrenheit. Once preheated, place steaks in the air fryer and cook for 10-12 minutes, flipping halfway through.

              raw steaks in air fryer basket
              cooked steak in air fryer

              4th Step: Remove from the air fryer and allow to rest for 5 minutes. Top with garlic butter and enjoy.

              cooked steak in air fryer basket

              What's the best cut of steak to cook in the air fryer?

              The beauty of steak in your air fryer is that you can cook different cuts in the machine. I've made delicious filet mignon, skirt steak, and ribeye. Just remember to adjust cooking times according to the steak's thickness and desired doneness. Making beef tenderloin in the air fryer is also a must for my steak lovers!

              I have found that 400°F is the perfect temperature to cook steak in the air fryer. For an 8-ounce ribeye, it will take 10-12 minutes, and remember to flip halfway through.

              An instant-read thermometer is a must for cooking steaks at home, and I've included the recommended temperatures in the recipe below so you can cook them to exactly your liking.

              Can you marinate the steak?

              I love to have my steak seasoned with salt and pepper, but if you prefer, you can use seasoned salt or your favorite liquid marinade for extra flavor. Marinate the steak for at least an hour or up to 8 hours, then let it come up to room temperature before cooking in the air fryer.

              Degrees of Doneness

              For an idea of steak degrees of doneness, follow the times below. Make sure you use a quick read thermometer to check the correct temperatures.

              TemperatureDonenessHow it Looks
              125°F (52°C)rareCool red center
              135°F (57°C)medium-rarered center, warm
              145°F (63°C)mediumwarm pink center, juicy
              150°F (66°C)medium-wellslightly pink center, juicy
              160°F+ (71°C)well-donebrown throughout, chewy
              sliced ribeye steak on plate

              What sides go with steak?

              This recipe is perfect for date night; serve it alongside your favorite veggie and potato sides for a real feast! Try it with:

              • Mashed Sweet Potatoes
              • Garlic Herb Mushrooms
              • Instant Pot Green Beans and Potatoes
              • Carrot Soufflé
              • Air Fried Sweet Potatoes
              • Sautéed Mushrooms

              For a similar recipe, try my Air Fryer Lamb Chops. For other ways to cook your steak, try my pan-seared steak.

              Tanya's Tips for Making Steak in the Air Fryer

              • Make sure that your steak is at room temperature before adding it to the air fryer. This will help it to stay tender and juicy.
              • Preheat your air fryer thoroughly before adding the steak, ensuring it cooks evenly throughout. If your air fryer doesn't have a preheat setting, let it run at 400°F for 5 minutes before placing the food inside.
              • Let the steak rest for 5 minutes before serving. Cover it loosely with foil to keep it warm. This will get the steaks perfectly juicy.
              • The garlic herb butter will keep well for a couple of weeks in the fridge, and it freezes well for up to 3 months.

              Watch this video tutorial and see how I make this air-fried steak from start to finish.

              Please note that in the video, I add olive oil to the steak. I like to add it for added flavor, but I've also come to realize that the ingredient can be skipped. Feel free to add it if you love that in the original recipe.

              I hope you love this method of making steak as much as we do. If you have tried this or any other recipe on my blog, please rate it and let me know how it turned out in the comments below! Your feedback is invaluable and helps us grow. I appreciate your support!

              pinterest image with pin this and save for later text
              two steaks in the air fryer basket with garlic butter on top
              Print Recipe
              4.85 from 92 votes

              Perfect Air Fryer Steak Recipe

              It's so easy to cook a restaurant quality steak in the air fryer, and don't forget to top it with my garlic and herb butter for a dinner to remember!
              Prep Time20 minutes mins
              Cook Time10 minutes mins
              Resting Time5 minutes mins
              Total Time35 minutes mins
              Course: Main Course
              Cuisine: American
              Keyword: air fried steak recipe, air fryer steak, how to cook steak in the air fryer
              Servings: 2
              Calories: 415kcal
              Author: Tanya Harris

              Equipment

              • Quick Read Thermometer

              Ingredients

              Garlic Butter

              • 1 stick unsalted butter softened
              • 2 Tablespoon fresh parsley chopped
              • 2 teaspoon garlic minced
              • 1 teaspoon Worcestershire Sauce
              • ½ teaspoon Kosher salt

              Steak

              • 2 8 oz Ribeye steak about 1-inch thick
              • Kosher salt about ¾ teaspoon
              • freshly cracked black pepper about ½ teaspoon

              Instructions

              Garlic Butter

              • Prepare Garlic Butter by mixing butter, parsley garlic, worcestershire sauce, and kosher salt until thoroughly combined. 
              • Place in parchment paper and roll into a log. Refrigerate until ready to use.

              Air Fryer Steak

              • Remove steak from fridge and allow to sit at room temperature for 20 minutes. Season the steaks with salt and freshly cracked black pepper.  
              • Preheat Air Fryer to 400 degrees Fahrenheit. Once preheated, place steaks in air fryer and cook for 10-12 minutes, flipping halfway through.* 
              • Remove from air fryer and allow to rest for 5 minutes. Top with garlic butter.

              Notes

              *This recipe creates medium-cooked steak. For medium-rare, cook for 8 minutes, flipping halfway through. For medium-well, cook for 12 minutes, flipping halfway through. To ensure it is done to your liking, use a quick-read thermometer to check the temperature.
              The thickness of your steak will determine how long you need to cook it. For thin ribeyes, I lower the cooking time to 7-8 minutes for medium steak.
              Temperatures for Steak are as follows:
              • 125°F for rare
              • 135°F for medium-rare
              • 145°F for medium
              • 150°F for medium-well
              • 160°F for well-done

              Nutrition

              Calories: 415kcal | Carbohydrates: 2g | Protein: 1g | Fat: 46g | Saturated Fat: 29g | Polyunsaturated Fat: 2g | Monounsaturated Fat: 12g | Trans Fat: 2g | Cholesterol: 122mg | Sodium: 630mg | Potassium: 75mg | Fiber: 0.2g | Sugar: 0.4g | Vitamin A: 1752IU | Vitamin C: 7mg | Calcium: 28mg | Iron: 0.5mg

              The OG Photos

              butter with herbs rolled up
              butter rolled in parchment paper
              steak seasoned with salt and pepper on mat
              raw steak in air fryer basket
              cooked steak in air fryer basket
              cooked steak on table

              Post originally published April 9, 2018. It has been updated with additional helpful tips, a few tweaks, and new photos.

              Creamy Cold Seafood Salad with Pasta & Shrimp

              June 5, 2025 by Tanya Harris 41 Comments

              seafood salad in bowl with green onions next to the bowl

              This cold seafood salad recipe is full of flavor and is oh-so pretty. I combine imitation crab and shrimp with pasta, crunchy bell peppers, and green onions, then dress with a special sauce that will get your taste buds dancing. It's a great tasting easy pasta salad recipe to serve at your next social gathering or cookout. 

              seafood salad in bowl with green onions next to the bowl

              You’ll find the full recipe with ingredient amounts and instructions in the recipe card at the bottom of this post. Be sure to check out the blog post itself for extra tips and tricks!

              Summer proves itself to be the best season ever because that's when all the barbecues occur. Family and friends gather, fire up the grill, and invite guests to bring the side dishes and desserts. The most popular side dish at the barbecues I attend is the pasta salad. There are many pasta salads in existence, but my favorite of all favorites is a cold seafood salad with pasta.

              I make my seafood pasta salad with imitation crab, but you can use fresh crab if you prefer. This is the best seafood salad recipe I've come up with and is exactly how I like to eat it.

              If you enjoy cold salads, then try some of these great-tasting salad recipes. My Tuna Pasta Salad, Hawaiian Macaroni Salad Recipe, Thai Cucumber Salad, Vietnamese Chicken Salad, and my Carrot Raisin Salad.

              A Quick Look at the Ingredients

              Ingredient amounts and full recipe instructions are on the printable recipe card at the bottom of the post.

              Here's what you will need to make this cold seafood salad recipe:

              • Pasta - I've used medium-sized seashell pasta, but you can use any size or shape of pasta in this easy seafood salad recipe.
              • Vegetables - I've used a combination of chopped red bell pepper, green bell pepper, and green onions.
              • Crab - forms the base of this salad. I use imitation crab meat, but you can use fresh crab meat if you prefer.
              • Shrimp - I use medium-sized cooked shrimp, but you can add any size of shrimp.
              • Dressing - I combine mayonnaise with French dressing to form the base of the sauce to coat this salad.
              • Seasoning - I use a combination of Old Bay seasoning, garlic powder, salt, and black pepper to season the dressing.
              ingredients for seafood salad layed out

              How to make the best seafood salad recipe

              Step 1: Prepare the pasta according to the package directions, drain, and set it aside.

              Step 2: Add mayonnaise, French dressing, Old Bay seasoning, garlic powder, salt, and black pepper to a big bowl and whisk together until thoroughly combined.

              seafood salad dressing mixed in bowl

              Step 3: Add the remaining ingredients to the bowl, including the cooked and cooled pasta shells. Stir until combined and all ingredients are coated in the sauce.

              seafood salad mixed in bowl

              Step 4: Cover the salad and place it in the refrigerator to chill for 2-4 hours. Enjoy

              Tanya's Expert Tips for this Seafood Salad

              These tips will help you make the best cold seafood salad recipe you've ever tried. 

              • Now, this seafood salad must be served cold, which is why it is a cold seafood salad recipe. Then again, who am I to be a stickler for the rules? Serve warm if you like.
              • This salad is best when left to sit in the refrigerator to chill and allow the flavors to meld together.
              • When cutting the vegetables, chop them into bite-sized cubes, which makes it easier to eat.
              seafood salad in serving bowl with spoon next to bowl

              Flavor variations

              • Crab and shrimp form the base of this salad, but you can use any combination of seafood that you like to eat.
              • I've used sliced green onions, but red onions would be a great swap.
              • Add in extra vegetables like chopped tomatoes, celery, or cucumber.
              • Stir through some fresh herbs like dill, basil, or parsley.
              • I've used regular mayonnaise, but you can use low-fat mayo or Greek yogurt if you prefer.
              • A touch of lemon zest and/or juice is an excellent addition to this salad.

              How to Serve Seafood Salad

              This salad is perfect for summer cookouts and gatherings, serving well alongside grilled meat or seafood.

              For a tasty dinner, serve it alongside my Air Fryer Steak with Garlic Herb Butter, Air Fryer Steak Kebabs, or my Marinated Air Fryer Salmon.

              It also makes a great lunch on the go; I often bring this salad to work when I make it the night before.

              How to Store Seafood Pasta Salad

              Make ahead: This is a great make-ahead dish. Prepare the salad earlier in the day or the day before, then cover the bowl and store it in the refrigerator until you're ready to serve.

              To refrigerate: Leftovers can be stored in an airtight container in the refrigerator for up to 3 days.

              FAQs

              What does seafood salad contain?

              Seafood salad combines a variety of seafood. Then add some crunchy salad vegetables, and seasoning (I use Old Bay seasoning along with garlic powder, salt, and black pepper), and coat in a salad dressing. I like a mayonnaise-based dressing, but you can make a vinaigrette-style dressing if you prefer.

              Imitation Crab vs. Real Crab?

              Imitation crab, made from processed seafood paste, provides a mild, sweet flavor and a firm, chewy texture, and is often used as a substitute in various dishes. Real crab, sourced from different crab species, offers an authentic and flavorful experience with its delicate, rich taste and soft, flaky texture, making it a popular choice for seafood lovers. The choice between the two depends on personal preference and culinary needs.

              If you have tried this cold seafood pasta dish, or any other recipe on my blog, then please rate it and let me know how it turned out in the comments below!

              seafood salad in bowl with green onions next to the bowl
              Print Recipe
              4.70 from 26 votes

              Cold Seafood Salad Recipe

              This creamy cold seafood salad with pasta, shrimp & crab is perfect for BBQs, potlucks &holidays. A quick make-ahead dish that everyone loves!
              Prep Time20 minutes mins
              Chill time2 hours hrs
              Total Time2 hours hrs 20 minutes mins
              Course: Salad, Side Dish
              Cuisine: American
              Keyword: best seafood salad recipe, cold seafood salad, cold seafood salad with pasta, easy seafood salad, seafood salad pasta
              Servings: 6
              Calories: 414kcal
              Author: Tanya Harris

              Ingredients

              • 3 cups medium sized seashell pasta
              • 1 red pepper chopped
              • ½ green pepper chopped
              • 2 green onions chopped
              • 8 oz imitation crab meat chopped
              • 8 oz cooked medium sized shrimp chopped
              • ½ cup mayonaise
              • 2 tablespoon French dressing
              • ½ teaspoon Old Bay seasoning
              • ¼ teaspoon garlic powder
              • ¼ teaspoon salt
              • ¼ teaspoon black pepper

              Instructions

              • Prepare the pasta according to package directions, drain, and set aside to cool.
              • Add the mayonnaise, French dressing, Old Bay seasoning, garlic powder, salt, and black pepper to big bowl and whisk until fully combined.
              • Now add the remaining ingredients to the bowl, including the cooked pasta, and stir until combined and all ingredients are coated in sauce.
              • Refrigerate for 2-4 hours. Enjoy 

              Video

              Nutrition

              Calories: 414kcal | Carbohydrates: 47g | Protein: 17g | Fat: 17g | Saturated Fat: 3g | Polyunsaturated Fat: 10g | Monounsaturated Fat: 4g | Trans Fat: 0.04g | Cholesterol: 73mg | Sodium: 513mg | Potassium: 295mg | Fiber: 3g | Sugar: 5g | Vitamin A: 739IU | Vitamin C: 34mg | Calcium: 45mg | Iron: 1mg

              This post was originally published on June 27, 2016. It has been updated with new photos and additional information.

              Chimichurri Chicken Recipe – Juicy, Flavor-Packed, and Easy

              June 2, 2025 by Tanya Harris 2 Comments

              chimichurri chicken covered in the sauce on black plate

              This chimichurri chicken is packed with bright, herby flavor thanks to a simple homemade chimichurri sauce that doubles as both a marinade and a finishing drizzle. It's a quick and easy way to elevate everyday chicken with fresh herbs, garlic, and a hint of spice.

              chimichurri chicken covered in the sauce on black plate

              You’ll find the full recipe with ingredient amounts and instructions in the recipe card at the bottom of this post. Be sure to check out the blog post itself for extra tips and tricks!

              If you're like me, you're always looking for a chicken recipe that's fast, flavorful, and a little bit different. This one is a favorite because it's fresh, vibrant, and still easy to prepare.

              I'm a huge fan of chimichurri sauce, and I put it on everything. What I love about this recipe is that the sauce serves double duty here, both as a marinade and a drizzle, and trust me, it's worth making from scratch.

              This recipe uses boneless, skinless chicken thighs, which are perfect for soaking up all the chimichurri. It's a flexible recipe, too—you can grill or pan-sear it. And if you've got leftover chimichurri, don't toss it! It's fantastic on roasted veggies, fish, or spooned over a grain bowl.

              A Quick Look at The Ingredients of Chimichurri Chicken

              Ingredient amounts and full recipe instructions are on the printable recipe card at the bottom of the post.

              For the Chimichurri Sauce

              • Fresh parsley and cilantro: Packed tight. Feel free to use only parsley, as authentic chimichurri is made with parsley alone.
              • Garlic cloves: Adds aromatic bite
              • Olive oil and red wine vinegar: The rich base and tangy element of the sauce
              • Crushed red pepper flakes: Gives it a little heat (adjust to taste)
              • Seasonings: Dried oregano, salt, and black pepper

              For the Chicken

              • Boneless, skinless chicken thighs: Juicy and flavorful. For even cooking, ensure chicken thighs are roughly the same thickness, about ½ to ¾ inch thick. If needed, gently pound thicker parts to even them out. You can also use chicken breast if need be.
              • Salt, black pepper, smoked paprika, garlic powder: The dry rub that kicks up flavor
              • Olive oil: Helps the spices coat evenly
              • Chimichurri sauce: For marinating and drizzling
              ingredients for chimichurri chicken on table

              Tools Needed

              • Food processor or blender
              • Mixing bowls
              • Cast iron skillet, grill, or oven
              • Tongs and a meat thermometer

              How to Make This Chimichurri Chicken Recipe

              Start by gathering all your ingredients—mise en place makes this super smooth. First, whip up the chimichurri sauce by pulsing parsley, cilantro, garlic, oil, vinegar, spices, and herbs in a food processor. Set aside ¼ cup for marinating and reserve the remaining ¾ cup for topping.

              chimichurri ingredients in food processor bowl before processing
              blended chimichurri sauce in food processor bowl

              Next, season your chicken thighs with salt, pepper, paprika, and garlic powder. Add olive oil and the ¼ cup of chimichurri you set aside, and toss everything together until well coated. Let it marinate in the fridge for at least 30 minutes—longer if you’ve got the time.

              chicken in marinade in bowl

              To cook, heat your grill or skillet over medium-high. Cook the chicken for about 5–7 minutes per side, or until the internal temperature hits 165°F.

              chicken being grilled in pan

              Let it rest for 5 minutes, then slice and drizzle with that extra chimichurri. Serve and enjoy.

              Serving Suggestions

              Chimichurri chicken is incredibly versatile and pairs well with a variety of sides to round out your meal. Try serving it alongside grilled zucchini, roasted potatoes, or a cilantro lime rice to soak up the extra chimichurri sauce.

              Make Ahead and Storage Instructions

              You can prepare the chimichurri sauce up to 3 days in advance; store it in an airtight container in the refrigerator. The chicken can be marinated up to 24 hours ahead.

              If you have leftovers, keep them in the fridge for up to 4 days or freeze for up to 3 months.

              chicken sliced on plate covered in chimichurri sauce

              Variations

              • Use chicken breasts if you prefer a leaner option—just be sure not to overcook.
              • Swap out chicken for shrimp or steak using the same marinade.
              • Add a squeeze of lemon to the chimichurri for a citrusy twist.

              Many recipes use chimichurri sauce, such as grain salads, grilled vegetables, or other easy weeknight meals.

              Tanya’s Top Tips for Chimichurri Chicken

              • Don’t skip the resting time after cooking—it helps lock in those juices.
              • Taste your chimichurri before using; add more vinegar, salt, or chili if needed.
              • A hot cast iron skillet creates a beautiful sear and cooks evenly.
              • For the juiciest, most tender chicken thighs, cook them to 175°F—that little bit higher than 165 makes all the difference.

              FAQs

              What is chimichurri?

              Chimichurri is a fresh, herby sauce that comes straight out of Argentine and Uruguayan kitchens—and it’s one of my favorite ways to add bold flavor to just about anything. Made with parsley, garlic, red wine vinegar, and olive oil, it’s bright, garlicky, and just a little spicy. I love using it as a marinade and a finishing sauce—it’s seriously good on everything from chicken to veggies.

              Can I use chicken breasts instead of thighs?

              Absolutely! Chicken breasts work great with chimichurri too—just keep an eye on the cook time so they don’t dry out. I like to pound them to an even thickness so they cook evenly and stay juicy.

              If You Like This, You May Also Like:

              • Air Fryer Chicken Thighs – Juicy meat with minimal effort.
              • Air Fryer Lamb Chops - also good covered in chimichurri sauce.
              • Chipotle Chicken – Perfect for tacos or a fresh summer dinner bowl.

              I hope you love this recipe as much as we do. If you have tried this or any other recipe on my blog, please rate it and let me know how it turned out in the comments below! Your feedback is invaluable and helps us grow. I appreciate your support!

              chimichurri chicken covered in the sauce on black plate
              Print Recipe
              5 from 1 vote

              Chimichurri Chicken Recipe

              This easy chimichurri chicken recipe features juicy chicken thighs marinated and topped with a vibrant, herby chimichurri sauce made from fresh parsley, cilantro, garlic, and spices. The versatile sauce doubles as both a marinade and finishing sauce, creating a flavor-packed dish that's perfect for weeknight dinners or casual entertaining.
              Prep Time15 minutes mins
              Cook Time12 minutes mins
              Minimum Marinade Time30 minutes mins
              Total Time57 minutes mins
              Course: Main Course
              Cuisine: Latin American inspired
              Keyword: chimichurri chicken
              Servings: 4 people
              Calories: 589kcal
              Author: Tanya Harris

              Ingredients

              For the Chimichurri Sauce

              • 1 cup fresh parsley packed
              • ½ cup fresh cilantro
              • 4 garlic cloves
              • ½ cup olive oil
              • 2 tablespoons red wine vinegar
              • ½ teaspoon crushed red pepper flakes adjust to taste
              • 1 teaspoon dried oregano
              • ½ teaspoon kosher salt or to taste
              • ½ teaspoon black pepper or to taste

              For the Chicken

              • 2 pounds boneless skinless chicken thighs patted dry
              • ½ teaspoon kosher salt
              • ½ teaspoon black pepper
              • 1 teaspoon smoked paprika
              • 1 teaspoon garlic powder
              • 2 tablespoons olive oil
              • Extra chimichurri for serving

              Instructions

              For the Chimichurri

              • Add parsley, cilantro, garlic, olive oil, red wine vinegar, crushed red pepper flakes, oregano, salt, and black pepper to a food processor. Pulse until combined. Set aside ¼ cup of the sauce for the marinade, set the rest aside for topping and/or dipping.

              For the Chicken

              • In a large bowl, combine the chicken, salt, pepper, smoked paprika, garlic powder, and olive oil. Add 1⁄4 cup of the prepared chimichurri sauce to the chicken and toss until well coated. Cover and marinate in the refrigerator for at least 30 minutes, preferably 2–4 hours.
              • Heat your grill or skillet over medium-high. Cook the chicken for about 5–7 minutes per side, or until the internal temperature hits 165°F. Let the chicken rest for 5 minutes before slicing.
              • Drizzle with additional chimichurri sauce and serve.

              Notes

              • Pat chicken dry with paper towels before seasoning to help the spices stick better and achieve a better sear.
              • You can also use chicken breast instead of thighs. Just adjust cooking time to about 4-5 minutes per side, or until internal temperature reaches 165°F, as chicken breast cooks faster than thighs.
              • For even cooking, ensure chicken thighs are roughly the same thickness, about ½ to ¾ inch thick. If needed, gently pound thicker parts to even them out.

              Nutrition

              Calories: 589kcal | Carbohydrates: 4g | Protein: 45g | Fat: 44g | Saturated Fat: 7g | Polyunsaturated Fat: 6g | Monounsaturated Fat: 28g | Trans Fat: 0.04g | Cholesterol: 215mg | Sodium: 799mg | Potassium: 703mg | Fiber: 1g | Sugar: 0.3g | Vitamin A: 1785IU | Vitamin C: 21mg | Calcium: 62mg | Iron: 3mg

              Jerk Shrimp Skewers with Jerk Butter Glaze

              May 30, 2025 by Tanya Harris Leave a Comment

              close up photo of jerk skewers

              These jerk shrimp skewers are a flavor explosion and one of my favorite ways to bring bold Caribbean vibes to the dinner table. Juicy shrimp roast on the grill or in the oven with pineapple, peppers, and onion, then get brushed with a glossy jerk butter glaze for the perfect sweet and spicy bite.

              close up photo of jerk skewers

              You’ll find the full recipe with ingredient amounts and instructions in the recipe card at the bottom of this post. Be sure to check out the blog post itself for extra tips and tricks!

              I love the flavors of jerk, and I love seasoning shrimp with it. I’ve always been a fan of meals that bring heat and flavor, and jerk shrimp never disappoints. This shrimp skewer recipe is a quick and easy way to achieve that irresistible jerk flavor without requiring a lengthy list of ingredients or hours of preparation. It’s a go-to for summer cookouts or when I want to bring a little island flair to our dinner table.

              I prepared this version in the oven, but it's also perfect for grilling. What I love most is how customizable these skewers are. You can add veggies or pineapple right on the stick with your shrimp. And there is that buttery jerk glaze. Feel free to skip it if you want to keep it light, but we love it. It’s so good you’ll want to drizzle it on everything.

              If you love skewer recipes, then check out my air fryer steak kebabs.

              A Quick Look at the Ingredients You’ll Need

              Ingredient amounts and full recipe instructions are on the printable recipe card at the bottom of the post.

              For the Shrimp and Marinade

              • Large shrimp: Peeled and deveined for easy eating. Large or jumbo size works best.
              • Jamaican jerk marinade (wet): Your favorite store-bought or homemade jerk marinade.
              • Olive oil: Helps distribute the marinade.
              • Brown sugar: Balances the heat with a hint of sweetness.
              • Lime juice: Brightens up the flavors.

              Veggies and Fruit

              • Red bell pepper: Adds crunch and color.
              • Red onion: Brings a sweet-savory bite.
              • Pineapple chunks: A tropical touch that pairs beautifully with jerk seasoning.

              For the Jerk Butter Glaze

              • Unsalted butter: The base of a rich, glossy glaze.
              • Jerk marinade: Echoes the shrimp seasoning for a big flavor.
              • Brown sugar or honey: Adds a touch of sweetness.
              • Lime juice: Keeps the glaze bright and balanced.

              Tools Needed

              • Mixing bowls
              • Skewers (wooden or metal)
              • Grill or grill pan (or oven with broiler)
              • Small saucepan
              • Basting brush
              ingredients for shrimp skewers

              How to Make Jerk Shrimp Skewers

              Gather your ingredients and get ready to cook!

              Step 1: Marinate the Shrimp

              In a bowl, whisk together the jerk marinade, olive oil, brown sugar, and lime juice. Add the shrimp to the mixture and toss to coat. Refrigerate for just a few minutes, up to 20 minutes, to allow the flavors to absorb.

              Step 2: Assemble the Skewers

              Thread the marinated shrimp onto skewers, alternating with red bell pepper, onion, or pineapple chunks if using. Leave a little space between pieces for even cooking.

              shrimp, pineapple, red bell pepper, and red onion on metal skewers

              Step 3: Cook the Kebabs

              Preheat your broiler or grill to the appropriate temperature before cooking.

              • Grill: Heat to medium-high and cook the skewers for just a few minutes per side until the shrimp turn opaque pink with a bright red tail.
              • Broiler Option: Place skewers on a broiler pan (or foil-lined baking sheet) and set the oven rack to the top position, about 6 inches from the broiler. Broil on high for 4–5 minutes, flipping once, until the shrimp are pink and slightly charred.

              Shrimp cooks very quickly, so keep an eye on them to avoid overcooking.

              Step 4: Make the Jerk Butter Glaze and Brush Skewers

              Melt butter in a small saucepan over low heat. Stir in jerk marinade, brown sugar or honey, and lime juice. Let it simmer for 1–2 minutes until it’s smooth and glossy.

              Brush skewers with glaze during the last 1–2 minutes of grilling/broiling, and again just before serving

              cooked jerk shrimp with glaze being rubbed on it

              Jerk Butter Glaze

              The jerk butter glaze is what takes these shrimp skewers to the next level. To make it, simply combine melted butter with jerk seasoning, brown sugar, and lime juice and brush over your shrimp during the last few minutes of grilling or broiling.

              Whether you’re making oven-baked shrimp skewers or firing up the grill, the glaze melts into the shrimp, adding a rich, spicy, and slightly sweet flavor.

              Make Ahead and Storage Instructions

              • Marinate ahead: Prep the shrimp and marinade up to 12 hours in advance.
              • Leftovers: Store cooked shrimp in an airtight container in the fridge for 2–3 days.
              • Reheating: Warm gently in a skillet or under the broiler to retain the shrimp's juiciness and flavor.
              jerk shrimp skewers on black plate

              Serving Suggestions

              Jerk shrimp is incredibly versatile and can be served in so many delicious ways. For a simple appetizer, arrange the shrimp on a platter with a side of cocktail sauce or a jerk BBQ sauce.

              As a main course, serve the shrimp over cilantro lime rice, with a sprinkle of fresh parsley or cilantro and a side of roasted peppers or a crisp salad.

              Variations

              • Try using the same jerk marinade and glaze on chicken, tofu, or even grilled veggies.
              • Add chunks of mango or jalapeño to your skewers for a sweet or extra spicy twist.

              Tanya’s Top Tips for These Skewers

              • Use gloves when handling hot peppers in your jerk marinade to protect your hands from the heat.
              • If using wooden skewers, soak them in water for at least 30 minutes to prevent burning.
              • For extra flavor, brush the skewers with glaze during the last minute of cooking.

              If You Like This, You May Also Like

              • My jerk chicken recipe, that can be cooked on the grill, in the oven, or the air fryer.
              • My jerk fish recipe, where I use whole fish.

              I hope you love this recipe as much as we do. If you have tried this or any other recipe on my blog, please rate it and let me know how it turned out in the comments below! Your feedback is invaluable and helps us grow. I appreciate your support!

              close up photo of jerk skewers
              Print Recipe
              No ratings yet

              Jerk Shrimp Skewers with Jerk Butter Glaze

              Juicy jerk shrimp skewers are paired with pineapple, peppers, and onions, then finished with a sweet and spicy jerk butter glaze. This bold, Caribbean-inspired recipe is quick, flavorful, and perfect for weeknight dinners or entertaining.
              Prep Time15 minutes mins
              Cook Time6 minutes mins
              Marinate Time20 minutes mins
              Total Time41 minutes mins
              Course: Main Course
              Cuisine: Caribbean
              Keyword: jerk shrimp skewers, shrimp skewers
              Servings: 4 people
              Calories: 341kcal
              Author: Tanya Harris

              Ingredients

              For the Shrimp

              • 1 lb large shrimp peeled and deveined
              • 2 tablespoons jerk marinade
              • 1 tablespoon olive oil
              • 1 teaspoon brown sugar
              • Juice of ½ a lime about 1 tablespoon

              Other Skewer Ingredients

              • 1 red bell pepper cut into chunks
              • ½ red onion cut into chunks
              • 4 cups Pineapple chunks fresh or canned in juice

              For the Jerk Butter Glaze

              • 2 tablespoons unsalted butter
              • 1 tablespoon jerk marinade
              • 1 teaspoon brown sugar or honey
              • Juice of ½ a lime about 1 tablespoon

              Instructions

              Marinate the Shrimp

              • In a bowl, whisk together the jerk marinade, olive oil, brown sugar, and lime juice. Add shrimp and toss to coat. Marinate for 20 minutes in the refrigerator.

              Assemble the Skewers

              • Thread shrimp onto skewers, alternating with bell pepper, onion, or pineapple chunks if using. Leave a little space between each piece.

              Cook the Skewers

              • You can grill or broil the skewers.
                Grill: Grill over medium-high heat for 2–3 minutes per side, until shrimp are pink and opaque.
              • Broil: Place skewers on a broiler pan (or foil-lined baking sheet) and set the oven rack to the top position, about 6 inches from the broiler. Broil on high for 4–5 minutes, flipping once, until the shrimp are pink and slightly charred.

              Make the Glaze

              • In a small saucepan, melt the butter over low heat. Stir in jerk marinade, brown sugar or honey, and lime juice. Simmer for 1–2 minutes, until smooth and glossy.
              • Brush skewers with glaze during the last 1–2 minutes of grilling/broiling, and again just before serving

              Video

              Notes

              • If using wooden skewers, soak them in water for at least 30 minutes to prevent burning.
              • Adjust the amount of jerk marinade to control the heat level—Scotch bonnet-based marinades can be quite spicy!

              Nutrition

              Calories: 341kcal | Carbohydrates: 46g | Protein: 18g | Fat: 12g | Saturated Fat: 4g | Polyunsaturated Fat: 1g | Monounsaturated Fat: 4g | Trans Fat: 0.2g | Cholesterol: 158mg | Sodium: 746mg | Potassium: 626mg | Fiber: 6g | Sugar: 38g | Vitamin A: 3208IU | Vitamin C: 61mg | Calcium: 128mg | Iron: 2mg

              Ground Chicken and Rice Recipe (Caribbean Dirty Rice)

              May 23, 2025 by Tanya Harris 4 Comments

              ground chicken and rice ina skillet

              Ground chicken and rice have never tasted so good. This one-pot side dish is bold, savory, and full of Caribbean flavor. It's quick, easy, and perfect for a weeknight meal.

              ground chicken and rice ina skillet

              You’ll find the full recipe with ingredient amounts and instructions in the recipe card at the bottom of this post. Be sure to check out the blog post itself for extra tips and tricks!

              Dirty rice, made with meat, vegetables, and broth, has always been a favorite in my kitchen. They call it dirty because the white rice in the dish turns brown once all the meat and other ingredients are added.

              Once I was set on making a Caribbean version, this recipe came together fast. I use ground chicken for a lighter spin, green seasoning to bring that herb-filled island flavor, and a bit of browning sauce to deepen the color, so it looks and tastes like dirty rice should.

              The best part? It all comes together in under an hour. If you're into one-pot dishes like my Caribbean Rice and Peas or Stew Peas, this one's a must. It also holds up great for meal prep and makes some of the best leftovers.

              A Quick Look at the Ingredients

              Ingredient amounts and full recipe instructions are on the printable recipe card at the bottom of the post.

              Protein and Rice

              • Ground Chicken: Lean and flavorful—browns up quickly and works perfectly in one-pot meals. Feel free to substitute with ground turkey, pork, or beef.
              • Long-Grain White Rice: Rinsed so it cooks up fluffy, not sticky. Depending on your preference or what you have on hand, you can also use cooked brown rice, cooked rice, or jasmine rice as an alternative.

              Veggies and Aromatics

              • Yellow Onion, Celery, and Bell Peppers: The base trio for flavor and texture. It's also the base for authentic dirty rice.
              • Garlic and Ginger: Adds even more flavor.
              • Scotch Bonnet or Habanero: Optional, but it brings real Caribbean heat.

              Seasoning and Flavor

              • All-purpose Seasoning, Dried Thyme, Black Pepper: Bold and earthy.
              • Green Seasoning: Adds a fresh, herby punch.
              • Soy sauce and browning sauce are used for umami and rich color.
              • Bay Leaves: Subtle background flavor.

              Garnish

              • Green onions and Cilantro: Fresh and bright to finish the dish.
              ingredients for ground chicken and rice

              Tools Needed

              • Large Skillet or Dutch Oven
              • Knife and Cutting Board
              • Measuring Cups and Spoons
              • Small Bowl (for mixing sauces or spice blends)
              • Wooden Spoon or Spatula

              How to Make Caribbean Ground Chicken and Rice, aka Dirty Rice

              Gather your ingredients and get ready to cook—this comes together fast.

              Brown the chicken: Heat oil in a large skillet over medium-high heat. Add ground chicken and cook 6–8 minutes, breaking it apart until browned and fully cooked.

              Add veggies: Toss in onion, celery, and bell peppers. Continue cooking 4–5 minutes until softened.

              ground chicken and vegetables in pan

              Aromatics and seasoning: Stir in garlic, ginger, and hot pepper. Add all-purpose seasoning, thyme, and black pepper. Mix well.

              Add sauces: Stir in green seasoning, soy sauce, and browning sauce. Let it simmer for a minute or two.

              Add rice and liquid: Mix rice, broth, and water. Lay the bay leaves on top. Bring to a boil.

              ground chicken and ingredients in pan before cooking

              Simmer: Lower the heat to medium-low, cover, and simmer for 20 minutes until the rice is tender and the liquid is absorbed.

              Finish: Open the lid and remove the bay leaves. Fluff with a fork and stir in the green onions and cilantro. Serve warm.

              finished ground chicken and rice in skillet with spoon lifting some ip

              Serving Suggestions and Presentation

              This ground chicken and rice is as versatile as it is flavorful, making it easy to customize for any occasion. It can be served as a main course or a side dish. I've been taking it as a side dish to our recent get-togethers, and my family loves my Caribbean twist on traditional dirty rice.

              Make Ahead and Storage

              This ground chicken and rice dish is great for meal prep. Store in an airtight container in the fridge for up to 4 days. Reheat in the microwave or on the stove with a splash of water. You can also freeze it—thaw overnight in the fridge before reheating.

              dirty rice in skillet with spoon picking it up

              Variations

              • Ground turkey, ground pork, and Rice: Try using different bases, such as cauliflower rice for a low-carb option, jasmine rice for a fragrant and affordable choice, or cooked brown rice for a hearty, whole-grain alternative. You can also switch up the proteins.
              • Rice Bowls Variations: This recipe can be adapted into customizable rice bowls—top your choice of rice with proteins, veggies, and your favorite sauces for a quick, balanced meal.
              • Ground Chicken Fried Rice: Use leftover rice for a quick skillet meal—skip the broth and water. Jasmine rice or cooked brown rice both work well for fried rice.

              Tanya's Top Tips

              • Want less heat? Skip the hot pepper or remove the seeds.
              • No browning sauce? Leave it out. It's still delicious, just lighter in color.
              • You can opt for ground chicken breast (if you want a lighter meat choice) or ground chicken, whichever works best for you.

              If You Like This, You May Also Like

              • Caribbean Rice and Peas – A flavorful and easy one-pot side dish that goes with anything.
              • Jamaican Jerk Chicken – Spicy, smoky, and perfect alongside this dirty rice.
              • Yellow rice - rice with a bit of color and lots of flavor.
              • Stuffed Bell Peppers - Use this rice-and-chicken mixture to stuff bell peppers for a delicious dinner.

              I hope you love this recipe as much as we do. If you have tried this recipe, please leave a comment below.

              ground chicken and rice ina skillet
              Print Recipe
              5 from 1 vote

              Ground Chicken and Rice Caribbean Style

              A vibrant one-pot rice dish made with ground chicken, colorful bell peppers, and bold Caribbean flavors. Green seasoning brings a fresh herbaceous kick that sets this version apart from traditional dirty rice.
              Prep Time15 minutes mins
              Cook Time30 minutes mins
              Total Time45 minutes mins
              Course: Side Dish
              Cuisine: American, Caribbean
              Keyword: ground chicken and rice
              Servings: 6 people
              Calories: 354kcal
              Author: Tanya Harris

              Ingredients

              • 2 tablespoons olive oil
              • 1 pound ground chicken
              • 1 medium yellow onion finely chopped
              • 1 stalk celery finely chopped
              • ½ green bell pepper finely chopped
              • ½ red bell pepper finely chopped
              • 3 cloves garlic minced
              • 1 teaspoon fresh ginger minced
              • 1 Scotch bonnet or habanero pepper minced (optional, for heat)
              • 2 teaspoons all-purpose seasoning
              • 1 teaspoon dried thyme
              • ½ teaspoon black pepper
              • 2 tablespoons green seasoning homemade or store-bought*
              • 2 teaspoons soy sauce
              • 1 ½ teaspoons browning sauce
              • 1½ cups long-grain white rice rinsed
              • 1½ cups low-sodium chicken broth
              • 1 cup water
              • 2 bay leaves
              • 1 green onions chopped
              • ⅓ cup fresh cilantro chopped

              Instructions

              • Heat olive oil over medium heat in a large skillet or Dutch oven. Add ground chicken and cook for 6–8 minutes, breaking it apart with a spoon, until browned and fully cooked.
              • Add onion, celery, green bell pepper, and red bell pepper. Sauté for 4–5 minutes, stirring occasionally, until the vegetables soften. If using leftover cooked vegetables, add them at this stage and heat through.
              • Stir in garlic, ginger, and Scotch bonnet. Cook for about 30 seconds until fragrant.
              • Season with all purpose seasoning, thyme, and black pepper. Stir well.
              • Add green seasoning, soy sauce, and browning sauce. Let it cook for 1–2 minutes to allow the flavors to soak into the meat.
              • Stir in rinsed rice, then pour in chicken broth and water. Add bay leaves and bring the mixture to a boil. If using cooked rice, stir it in and heat through instead of simmering.
              • Reduce heat to low, cover, and simmer for 20–22 minutes or until rice is tender and liquid is absorbed.
              • Remove from heat, discard bay leaves, and fluff rice with a fork. Stir in green onions and cilantro. Serve hot.

              Video

              Notes

              • If you don't have browning, you can leave it out—the dish will still taste amazing, just be slightly lighter in color.
              • Browning sauce and green seasoning can be homemade or store-bought. Both options can be found at international grocery stores. 

              Nutrition

              Calories: 354kcal | Carbohydrates: 43g | Protein: 19g | Fat: 12g | Saturated Fat: 3g | Polyunsaturated Fat: 2g | Monounsaturated Fat: 6g | Trans Fat: 0.05g | Cholesterol: 65mg | Sodium: 191mg | Potassium: 640mg | Fiber: 2g | Sugar: 2g | Vitamin A: 623IU | Vitamin C: 28mg | Calcium: 67mg | Iron: 2mg

              Juicy Broiled Chicken Breast Recipe (How to Broil Chicken in the Oven)

              May 14, 2025 by Tanya Harris 2 Comments

              broiled chicken breast on broiler sheet

              Broiled chicken is your go-to for quick, juicy, and flavorful meals—perfect for busy nights. Whether chicken breasts, thighs, or wings, broiling brings out big flavor with minimal effort.

              broiled chicken breast on broiler sheet

              You’ll find the full recipe with ingredient amounts and instructions in the recipe card at the bottom of this post. Be sure to check out the blog post itself for extra tips and tricks!

              I like having my go-to easy ways to make protein. Whether chicken in the air fryer or fish in the oven, having a solid, easy method of making juicy broiled chicken has become one of my favorites.

              I first discovered this method in the How to Cook Everything book, and it quickly earned a spot in my weeknight rotation. It's quick, reliable, and delivers tender chicken every time—very fast- no fuss. 

              This chicken is great for dinner entrees or meal prep. I like to make a batch at the beginning of the week and use it in pasta and salads for quick meals. If you like this method of cooking, check out my broiled shrimp recipe. 

              A Quick Look at the Ingredients

              Ingredient amounts and full recipe instructions are on the printable recipe card at the bottom of the post.

              • Chicken—I usually broil boneless, skinless chicken breasts. I opt for medium-sized breasts, about 6-8 ounces each. 
              • Seasoning - Kosher salt, paprika, black pepper, garlic powder, onion powder, Italian seasoning
              • Olive oil—I always add a little oil when broiling or baking chicken breasts. That helps them brown.

              Tools Needed

              • Oven with broiler setting
              • Wire rack and baking sheet or broiler pan
              • Meat thermometer
              • Tongs
              • Small mixing bowl

              How to Broil Chicken Breast in the Oven

              Preheat the Broiler: Set your oven to broil on HIGH and position the rack 5–6 inches from the heating element.

              Prepare the Seasoning: In a small bowl, mix kosher salt, black pepper, paprika, garlic powder, onion powder, and Italian seasoning.

              ingredients for broiled chicken breast
              seasonings for broiled chicken breast mixed

              Prep the Chicken: Pat the chicken breasts dry with paper towels. Next, place them between two sheets of plastic wrap or inside a large zip-top bag, then set them on a cutting board.

              Gently pound them to an even thickness—around ½ inches is ideal. This step helps the chicken cook evenly and stay juicy. Lightly rub both sides with olive oil. Lightly grease the wire rack.

              hand patting chicken breast dry
              chicken breast under plastic wrap with meat cleaver next to it

              Season: Sprinkle the spice mix evenly over both sides of the chicken breasts.

              Broil: Arrange the chicken skin-side up on the greased wire rack over a baking sheet. Broil for 6–8 minutes per side, or until the internal temperature reaches 165°F (74°C).

              raw seasoned chicken breast on broiler plate
              close up of chicken breast

              Rest: Remove from the oven and let the chicken rest for 5 minutes before slicing.

              sliced chicken breast on plate with salad on side

              Choosing the Right Chicken

              Boneless, skinless breasts or thighs are my go-to for broiling—they cook fast and stay juicy. You can also use tenders or cut up a whole chicken and adjust the time.

              I look for fresh chicken without added hormones or unnecessary preservatives. Season simply with salt and pepper, or add flavor with paprika, garlic, or lemon pepper.

              Broiling Times for Other Chicken Cuts

              Chicken CutBroil Time (Total)Notes
              Boneless, skinless breasts12–16 minutesFlip halfway; check for 165°F internal temp.
              Bone-in, skin-on thighs20–25 minutesFlip halfway; the skin should be crispy.
              Drumsticks25–30 minutesFlip halfway
              Wings20–24 minutesFlip halfway; ensure crispy skin.

               Make Ahead

              You can season the chicken and refrigerate it up to 24 hours in advance. This allows the flavors to penetrate the meat, resulting in a more flavorful dish. Remove chicken from the marinade before broiling to ensure it cooks properly.

              Storage Instructions

              • Refrigerator: Store leftovers in an airtight container for up to 4 days.
              • Freezer: Freeze cooked chicken for up to 3 months. Thaw in the fridge overnight before reheating.
              • Reheating: Warm in a 350°F oven until heated through, or microwave in 30-second intervals.
              2 broiled chicken breast on broiler pan with parsley on top

              Variations for this Broiled Chicken Recipe

              • Have fun with the seasonings. I like switching between jerk seasoning, Cajun seasoning, all-purpose seasoning, chicken seasoning, or just salt and pepper.
              • Use a marinade—Feel free to marinate your breast before broiling. Avoid using a marinade with too much sugar, which can burn quickly under the broiler's high heat.

              Broiling is a favorite method for cooking chicken due to its flavorful and juicy results.

              Tanya's Top Tips

              • If your chicken breasts are on the larger side, split them in half for even cooking. I also suggest pounding them to an even thickness—about ½ inches—so they cook quickly and stay nice and juicy under the broiler.
              • Use a meat thermometer to ensure your chicken reaches exactly 165°F without overcooking.
              • Let the chicken rest after broiling so the juices redistribute—just 5 minutes makes a big difference in keeping it moist and flavorful.
              • Use a foil-lined baking sheet for easy cleanup.
              • Use a cookie sheet as an alternative to a broiler pan for convenience and easy cleaning.
              • Use a cooling rack to elevate the chicken for even cooking.
              • Position the chicken close to the heat source for optimal broiling results.

              Looking for other delicious chicken recipes? Try these out:

              • Oven Baked Chicken Tenders
              • Baked Chicken Quarters
              • Oven-Fried Chicken

              I hope you love this recipe as much as we do. If you have tried this or any other recipe on my blog, please rate it and let me know how it turned out in the comments below! Your feedback is invaluable and helps us grow. I appreciate your support!

              broiled chicken breast on broiler sheet
              Print Recipe
              No ratings yet

              Juicy Broiled Chicken

              Broiled chicken is your go-to for quick, juicy, and flavorful meals—perfect for busy nights. Whether it’s chicken breasts, thighs, or wings, broiling brings out big flavor with minimal effort.
              Prep Time15 minutes mins
              Cook Time15 minutes mins
              Total Time30 minutes mins
              Course: entree
              Cuisine: American
              Keyword: broiled chicken
              Servings: 2
              Calories: 319kcal
              Author: Tanya Harris

              Ingredients

              • 1 ¼ teaspoon kosher salt
              • 1 teaspoon paprika
              • ½ teaspoon black pepper
              • ½ teaspoon garlic powder
              • ½ teaspoon onion powder
              • ½ teaspoon Italian seasoning
              • 2 boneless skinless chicken breasts (about 6–8 ounces each)
              • 1 tablespoon olive oil

              Instructions

              • Preheat the broiler to HIGH and position the oven rack 5–6 inches from the heating element.
              • In a small bowl, combine the salt, paprika, black pepper, garlic powder, onion powder, and Italian seasoning. Set aside.
              • Pat the chicken breasts dry with paper towels.Next, place them between two sheets of plastic wrap or inside a large zip-top bag, then set them on a cutting board. Gently pound them to an even thickness—around ½ inches is ideal. Lightly rub both sides with olive oil. Lightly grease the broiler pan or wire rack.
              • Sprinkle the spice mix evenly over both sides of the chicken.
              • Place the chicken on a greased wire rack set over a baking sheet. Broil for 6–8 minutes per side, or until the internal temperature reaches 165°F.
              • Remove from the oven and let the chicken rest for 5 minutes before slicing.

              Notes

              If using larger chicken breasts, consider slicing them in half horizontally for more even broiling.

              Nutrition

              Calories: 319kcal | Carbohydrates: 2g | Protein: 19g | Fat: 26g | Saturated Fat: 6g | Polyunsaturated Fat: 5g | Monounsaturated Fat: 13g | Trans Fat: 0.1g | Cholesterol: 111mg | Sodium: 1542mg | Potassium: 282mg | Fiber: 1g | Sugar: 0.2g | Vitamin A: 592IU | Vitamin C: 0.1mg | Calcium: 25mg | Iron: 1mg

              Easy Blueberry Compote (15-Minute Recipe)

              May 12, 2025 by Tanya Harris 8 Comments

              blueberry compote with plate with spoon in the middle

              This easy blueberry compote bursts with sweet, juicy flavor and comes together in 15 minutes. It's the perfect topping for waffles, pancakes, or your favorite dessert.

              blueberry compote with plate with spoon in the middle

              You’ll find the full recipe with ingredient amounts and instructions in the recipe card at the bottom of this post. Be sure to check out the blog post itself for extra tips and tricks!

              This blueberry compote recipe will take your brunches and desserts to the next level! It's sweet, vibrant, and versatile—perfect for topping pancakes, Dutch baby pancakes, waffles, baked cheesecake, or even my air-fried brownies and donuts for an indulgent twist.

              I've been making this blueberry compote for years, especially when I've got a bunch of fresh berries to use up. Compote is a simple fruit sauce made by simmering fruit with sugar and a splash of lemon juice. Unlike jam, it keeps that juicy, chunky texture we love.

              If you enjoy fruit compote, try my strawberry compote next!

              A Quick Look at The Blueberry Compote Ingredients

              Ingredient amounts and full recipe instructions are on the printable recipe card at the bottom of the post.

              • Blueberries - fresh or frozen
              • A medium-sized Lemon - for the zest and the lemon juice
              • White Granulated Sugar
              • Water and Cornstarch
              blueberry compote ingredients on table

              Tools Needed

              • Medium-sized saucepan
              • Measuring cups and spoons
              • Citrus zester (for lemon zest)
              • Whisk (for cornstarch slurry)
              • Wooden spoon or silicone spatula (for stirring)
              • Small mixing bowl (for slurry)
              • Storage jar or container (if making ahead)

              How To Make Blueberry Compote

              Add blueberries, lemon juice, lemon zest, and ½ cup water to a small saucepan over medium heat. Stir until combined.

              blueberry compote ingredients in saucepan

              Bring to a simmer and allow to simmer uncovered for 10 minutes, until the blueberries expand. Stir occasionally.

              blueberry compote simmering in pot

              Create a cornstarch slurry by whisking one tablespoon of water with one tablespoon of cornstarch in a separate bowl. Slowly stir the mixture into the blueberries and allow it to cook for an additional minute. Remove from heat.

              blueberry compote in pot and picked up with spoon

              Can you use frozen blueberries?

              While I used fresh blueberries in this recipe, you can easily use frozen ones if that's what you have. The recipe remains the same, allowing you to use what's available without compromising taste or texture.

              Make Ahead and Storage Instructions

              Compote keeps well. Let it cool to room temperature, and it will keep for about a week in a covered container. You can also freeze the compote, which will easily keep for 3 months. The compote freezes effectively; try freezing it in ice cube trays for easy portioning.

              spoon picking up blueberry compote

              Make It Your Own!

              It's so easy to make this compote with whatever fruits you like! Try swapping the blueberries for:

              • Strawberries
              • Peaches
              • Blackberries
              • Mango
              • Cherries
              • Raspberries

              The possibilities are endless!

              Tanya's Notes and Tips

              • Mix the cornstarch with the water before adding it to the fruit. If you add it straight in, it can become clumpy.
              • If making ahead of time, let it cool before storing.
              • Let the compote cool slightly before serving.
              blueberry compote on waffles

              More Easy Fruit Recipes

              • Southern Peach Cobbler
              • Strawberry Muffins
              • Orange Poppy Seed Bundt Cake
              • Air Fryer Apple Chips
              • Grapefruit Cake
              blueberry compote with plate with spoon in the middle
              Print Recipe
              4.34 from 3 votes

              Blueberry Compote Recipe

              This delicious blueberry compote is a wonderful addition to any brunch, topped on waffles and pancakes, or use it to top desserts. Ready to use in 15 minutes and made with just a few simple ingredients.
              Prep Time5 minutes mins
              Cook Time10 minutes mins
              Total Time15 minutes mins
              Course: Sauce
              Cuisine: American
              Keyword: blueberry compote, fruit compote, how to make compote
              Servings: 6 servings
              Calories: 71kcal
              Author: Tanya Harris

              Ingredients

              • 2 cups fresh blueberries
              • 3 tablespoons fresh lemon juice
              • 1 teaspoon lemon zest
              • ¼ cup white granulated sugar
              • ½ cup water + 1 tablespoon water separated
              • 1 tablespoon cornstarch

              Instructions

              • Add blueberries, lemon juice, lemon zest, sugar, and ½ cup water to a medium-sized saucepan over medium heat. Bring to a simmer and allow to simmer uncovered for 10 minutes, until the blueberries expand.
              • Create a cornstarch slurry by whisking one tablespoon of water with one tablespoon of cornstarch in a separate bowl. Slowly stir the mixture into the blueberries and allow it to cook for an additional minute. Remove from heat. Enjoy.

              Notes

              • Mix the cornstarch with the water before adding it to the fruit. If you add it straight in, it can become clumpy.
              • If making ahead of time, let it cool before storing.
              • Let the compote cool slightly before serving.

              Nutrition

              Calories: 71kcal | Carbohydrates: 18g | Protein: 1g | Fat: 1g | Saturated Fat: 1g | Sodium: 2mg | Potassium: 63mg | Fiber: 2g | Sugar: 14g | Vitamin A: 27IU | Vitamin C: 14mg | Calcium: 8mg | Iron: 1mg

              This recipe was originally published on May 8, 2020. It has been updated with new photos and minor edits.

              Crispy Air Fryer Fish Recipe

              May 9, 2025 by Tanya Harris 148 Comments

              air fryer fish on white plate with tatar sauce and lemons

              Air Fryer Fish delivers the perfect crispy, golden crust without the grease of deep frying. This easy recipe gives you flavorful, tender fish with a delicious crunch you'll want to make again and again.

              air fryer fish on white plate with tatar sauce and lemons

              You’ll find the full recipe with ingredient amounts and instructions in the recipe card at the bottom of this post. Be sure to check out the blog post itself for extra tips and tricks!

              Summer fish fries are my favorite outings. I’m talking about catfish, whiting, and perch—yummy! I had those days when I wanted that amazing fish at home, but didn’t want to deal with frying it in oil.

              I bought an air fryer on a whim during my pregnancy. Now, I can easily make delicious golden-fried fish filets without all the grease, whenever I want.

              The floured and seasoned white fish is flavorful, simple to prep and cook, and the crust is addictively crispy.

              Be sure to try my Easy Oven-Baked Fish too!

              fish on plate with fork separating fish

              Ingredients for Crispy Air Fryer Fish

              Ingredient amounts and full recipe instructions are on the printable recipe card at the bottom of the post.

              Fish and Oil

              • Whiting fish fillets, or other suitable types of white fish, like cod, tilapia, haddock, or halibut
              • Oil (for misting) - any high-heat oil will do. I use olive oil or avocado oil.

              Fish Seasoning

              • Old Bay seasoning
              • Salt
              • Paprika
              • Garlic powder
              • Black pepper
              • Very fine cornmeal
              • Flour

              How to make Crispy Air-Fried Fish

              Air-fried fish is pretty straightforward and takes about four simple steps. The beauty of this recipe is that you don't need any extra ingredients outside of your typical fish breading and a little oil in a spray bottle. All you'll do is:

              Add fish seasoning to a sealable bag, like a Ziplock bag, and shake. Set to the side. You could also use your favorite fish batter mix.

              Rinse and pat dry your fish fillets with paper towels. They should still be damp.

              Place fish fillets in a ziplock bag and shake until fillets are fully covered with seasoning.

              Place fillets on a baking rack to allow any excess flour to fall off.

              dredged air fryer fish on baking tray

              Grease the bottom of your air fryer basket and place the fillets in it. Cook the filets at 400 degrees for 7-10 minutes.

              air fryer fish in basket before cooking

              Open the basket and spray the fish on the side facing up before flipping, ensuring that the fish is fully coated.

              cooked fish in air fryer basket

              Flip and cook on the other side for 7-8 minutes.

              cooked air fryer fish filet on paper
              Remove fish when done and enjoy with tartar sauce, cocktail sauce, hot sauce, or as is.

              What's the best fish to use?

              I use whiting fish in this recipe; however, this method will work for other white fish. If making a fried catfish version, soak it in milk first.

              Can you make this recipe with frozen fish?

              I suggest using fresh fish fillets for this recipe or good-quality frozen fillets. If using frozen, ensure they are fully thawed before seasoning them, and pat them with a paper towel to remove excess water.

              Is air-fried fish healthier than deep-frying?

              Fish is a great source of protein and works well in all kinds of meals. Air fryer fish gives you a crispy, golden crust similar to deep frying, but uses less oil and comes out crispier than oven-baked versions.

              What do you serve it with?

              This crispy air fryer fish is perfect for an easy weeknight family dinner with potato and veggie sides and some hot sauce, remoulade sauce, and tartar sauce! Serve it up with some of these favorites:

              • Air Fryer Potato Wedges
              • Vinegar Coleslaw
              • Air Fryer French Fries

              Recipe Notes and Tips

              • Spray your oil only halfway through cooking, as this will increase crispiness.
              • Do not overcrowd your air fryer basket; your fish will steam rather than fry.
              • When spraying, make sure the fish and all seasoning are fully covered in oil, with no flour spots showing. You will not get that good golden color if flour spots are showing.
              • Eat fried fish immediately. All fried foods are better that way.
              • You must have hot sauce. I mean, it's just a must.
              • Serve with lemon wedges.
              fried fish being covered in hot sauce

              I hope you love this air-fried fish as much as we do. If you've tried this recipe, please leave us a comment below. We appreciate your feedback.

              More Air Fryer Fish & Seafood Recipes

              • Lobster Tails in the Air Fryer
              • Marinated Air Fryer Salmon
              • Air Fryer Tilapia
              • Air Fryer Whole Fish
              • Air-Fried Scallops

              fish on plate with fork separating fish
              Print Recipe
              4.78 from 44 votes

              Air Fryer Fish

              Grab your Air Fryer and make this Crispy Air Fryer Fish ASAP. Covered in a crispy delicious crust, you can have guilt free fried fish as often as you like. White fish is perfectly seasoned and comes out so flakey. Get that fried flavor with a lot less oil!
              Prep Time10 minutes mins
              Cook Time17 minutes mins
              Total Time27 minutes mins
              Course: Main Course
              Cuisine: American
              Keyword: air fryer fish fillets, crispy air fried fish, how to cook fish in the air fryer
              Servings: 4 people
              Calories: 313kcal
              Author: Tanya Harris

              Ingredients

              • 4-6 Whiting Fish fillets cut in half
              • Oil to mist

              Fish Seasoning

              • ¾ cup very fine cornmeal
              • ¼ cup flour
              • 2 teaspoon old bay
              • 1 ½ teaspoon salt
              • 1 teaspoon paprika
              • ½ teaspoon garlic powder
              • ½ teaspoon black pepper
              • OR
              • Your favorite fish seasoning

              Instructions

              • Combine ingredients for fish seasoning in a Ziplock bag and shake. Set to the side. In the alternative, you could use your favorite fish seasoning.
              • Rinse and pat dry your fish fillets with paper towels. They should still be damp.
              • Place fish fillets in ziplock bag and shake, until fillets are fully covered with seasoning.
              • Place fillets on a baking rack to allow any excess flour to fall off.
              • Grease the bottom of your air fryer basket and place the fillets in the basket. Cook filets on 400 degrees for 7-10 minutes.
              • Open basket and spray the fish on the side that is facing up before flipping, ensuring that the fish is fully coated. Flip and cook on the other side for 7-8 minutes. Remove fish and serve. 

              Video

              Notes

              *Adjust cook times if needed depending on the thickness of the fillet.
              Highly Recommended Tools
              Air Fryer
              Non-Aerosil Oil Sprayer Bottle
              Silicone Kitchen Tongs
              • Spray your oil only halfway through cooking, as this will increase crispiness.
              • Do not overcrowd your air fryer basket, or your fish will steam rather than fry.
              • Make sure when spraying, the fish is fully covered in oil and all seasoning has been fully covered with no flour spots showing. If flour spots are showing, you will not get that good golden color.
              • Eat fried fish immediately. All fried foods are better that way.
              • You must have hot sauce. I mean, it's just a must.

              Nutrition

              Calories: 313kcal | Carbohydrates: 29g | Protein: 38g | Fat: 5g | Saturated Fat: 1g | Polyunsaturated Fat: 1g | Monounsaturated Fat: 2g | Cholesterol: 85mg | Sodium: 963mg | Potassium: 644mg | Fiber: 3g | Sugar: 1g | Vitamin A: 274IU | Vitamin C: 1mg | Calcium: 33mg | Iron: 3mg

              pin image of air fryer fish filets

              Find more Air Fryer Tips and Trick here. 

              This post was originally published on August 31, 2019. It has been updated with additional information and photos.

              Air Fried Spatchcock Chicken

              May 1, 2025 by Tanya Harris 15 Comments

              roasted chicken on cutting board

              It's incredibly easy to cook a spatchcock chicken in the air fryer, and the results are truly exceptional! The skin is perfectly crispy, and the meat is tender and juicy. Ready to serve in about 45 minutes and is made with three ingredients.

              A fried spatchcoked chicken on a wooden work top

              You’ll find the full recipe with ingredient amounts and instructions in the recipe card at the bottom of this post. Be sure to check out the blog post itself for extra tips and tricks!

              A roasted chicken is one of my favorite comfort foods, but I don't always have the time to make it. This air-fried spatchcock chicken is a great, hassle-free way to cook a whole chicken, and the results are excellent!

              Super quick and easy to prep, this chicken is perfect for a family meal, and the cooking time is pretty hands-off. I'm confident you'll love this recipe!

              Be sure to check out my other air fryer recipes, such as Air Fryer Sausage and Peppers and Air Fryer Lemon Garlic Shrimp.

              A Quick Look at the Ingredients

              Ingredient amounts and full recipe instructions are on the printable recipe card at the bottom of the post.

              • A whole chicken - my suggestion is to find one that is about 4 pounds or smaller. A chicken bigger than that may have a hard time fitting in your air fryer.
              • Oil - Any high-heat cooking oil will work here. I usually use light-tasting olive oil.
              • Seasoning - I use dry seasoning, usually a homemade blend of either Chicken seasoning or Cajun seasoning.

              How to Make Air Fryer Spatchcock Chicken

              Spatchcock the chicken by removing the backbone and any excess fat, cracking the breast bone, and flipping the chicken so it lies flat.  

              A flattened spatchcock chicken

              Dry the chicken with paper towels. Season the chicken with oil and seasoning, ensuring that the entire chicken is covered and that the seasoning is applied under the skin. 

              A spatchcock chicken rubbed with seasoning

              Place the chicken in the air fryer basket, breast side up, ensuring it lies flat in the basket. 

              The seasoned chicken in the air fryer basket ready to be cooked

              Air fry at 360°F for 35-40 minutes, until a quick-read thermometer inserted in the thickest part of the thigh registers 165°F.

              Using an instant read thermometer to check if the chicken is cooked

              Remove from the air fryer and allow to rest for 15 minutes before cutting. Serve and enjoy.

              Close up of the air fried chicken being carved

              Why spatchcock a chicken?

              By removing the backbone of the chicken, you can flatten it out, allowing it to cook evenly all the way through and much quicker than if it were cooked whole. It's an excellent, foolproof method for cooking breast and thigh meat simultaneously, ensuring that neither dries out.

              collage of chicken being butterflied

              Can you make this recipe in the oven?

              I love making this recipe in the air fryer because the skin gets super crispy with minimal effort. If you don't have an air fryer, you can roast the chicken in the oven at 400°F for approximately 40-45 minutes. To get the crispy skin, you may need to place it under the broiler for a few minutes.

              What do you serve it with?

              This air-fried spatchcock chicken is great to serve with a variety of vegetables and potato side dishes, and the leftovers are delicious the next day, served over a fresh salad. Try it with:

              • Buttery Instant Pot Green Beans and Potatoes
              • Southern Candied Sweet Potatoes
              • Air Fryer Carrots (Sweet or Savory)
              • Roasted Cauliflower and Sweet Potato Recipe
              A cooked spatchcok chicken in an air fryer basket

              Recipe Notes and Tips

              • The size of your chicken and the type of air fryer you use will determine the cook time. For smaller chickens, start checking around 30 minutes after they are placed in the coop. Larger chickens may need a longer cook time.
              • Season all over the chicken, including under the skin.
              • I used a 5.8-qt air fryer for this chicken.
              • Let the chicken rest for at least 15 minutes before carving. This allows the juices to redistribute.

              More Air-Fried Chicken Recipes

              • 15 Easy Air Fryer Chicken Recipes
              • Crispy Korean Air Fried Chicken Wings
              • Fried Chicken Tacos (Air Fryer)
              • Air Fryer Fried Chicken
              • Sticky BBQ Air Fryer Chicken Legs

              Watch this video tutorial and see how I make this chicken from start to finish.

              roasted chicken on cutting board
              Print Recipe
              4.59 from 12 votes

              Air Fried Spatchcock Chicken

              It's so easy to cook spatchcock chicken in the air fryer and the results are out of this world! The skin is perfectly crispy and the meat is tender and juicy. Ready to serve in about 45 minutes and made with 3 ingredients.
              Prep Time10 minutes mins
              Cook Time35 minutes mins
              Total Time45 minutes mins
              Course: Main Course
              Cuisine: American
              Keyword: air fried spatchcock chicken, how to air fry spatchcock chicken
              Servings: 4 servings
              Calories: 590kcal
              Author: Tanya Harris

              Equipment

              • Large Air Fryer
              • Quick Read Thermometer

              Ingredients

              • 4 lb whole chicken giblets removed
              • 3- Tablespoon of oil
              • 3-4 Tablespoon of chicken seasoning or another seasoning of your choice.

              Instructions

              • Spatchcock the chicken by removing the backbone and any excess fat, cracking the breast bone, and flipping the chicken so it lays flat.
              • Dry the chicken with paper towels. Season the chicken with oil and seasoning, making sure to cover the entire chicken and to season under the skin.
              • Place in air fryer basket, breast side up, making sure the chicken lays flat in your basket.
              • Air fry on 360 degrees Fahrenheit for 35-40 minutes, until a quick read thermometer inserted on the thickest part of the thigh registers at 165 degrees Fahrenheit.
              • Remove from air fryer and allow to rest for 15 minutes before cutting. Serve and enjoy

              Notes

              • The size of your chicken and air fryer brand will determine the cook time. For smaller chickens, start checking around 30 minutes. Larger chickens may need a longer cook time.
              • I used a 5.8qt air fryer for this chicken recipe.
              • Season all over the chicken including under the skin.
              • Let the chicken rest for at least 15 minutes before carving. This allows the juices to redistribute.

              Nutrition

              Calories: 590kcal | Carbohydrates: 8g | Protein: 41g | Fat: 44g | Saturated Fat: 10g | Cholesterol: 163mg | Sodium: 155mg | Potassium: 551mg | Fiber: 5g | Sugar: 1g | Vitamin A: 493IU | Vitamin C: 4mg | Calcium: 201mg | Iron: 6mg

              This post was originally published on September 10, 2020. It has been updated with new information.

              Country Style Ribs Recipe (Tender with BBQ Sauce)

              April 29, 2025 by Tanya Harris 7 Comments

              country style ribs on plate with mashed potatoes and green beans

              These country-style ribs are tender, juicy, and slathered in the most delicious sticky BBQ sauce. They're cooked low and slow in the oven, giving you all the smoky, sweet, and savory flavors without having to fire up a grill.

              country style ribs on plate with mashed potatoes and green beans

              You’ll find the full recipe with ingredient amounts and instructions in the recipe card at the bottom of this post. Be sure to check out the blog post itself for extra tips and tricks!

              I didn’t grow up eating a lot of BBQ, but as I started cooking for my own family, I fell in love with it. The smell of ribs cooking, the sound of sauce bubbling, and the first juicy bite feel like a celebration.

              When my family started craving ribs, I knew I had to make something tasty. This recipe brings big BBQ flavor to the table.

              If you love ribs like we do, make sure you also check out my Oven Baked Beef Ribs and my BBQ Air Fryer Ribs. You’ll also want to grab my Homemade BBQ Rub and Homemade BBQ Sauce to take these ribs to the next level.

              A Quick Look at the Ingredients

              Ingredient amounts and full recipe instructions are on the printable recipe card at the bottom of the post.

              This recipe keeps things simple but flavorful — just the way I like it:

              • country-style pork ribs - For this recipe, you’ll want to grab country-style pork ribs — not baby back ribs, not spare ribs. Country-style ribs come from the shoulder or blade end of the pig, which means they’re meatier, thicker, and perfect for slow cooking. They’re usually boneless or have just a small bone running through them. 
              • the seasonings and sauce - yellow mustard, light brown sugar, paprika, kosher salt, garlic powder, onion powder, ground black pepper, BBQ sauce - The yellow mustard acts as a binder to hold all those beautiful spices in place, the brown sugar adds that hint of sweet caramelization, and the spice blend layers in smoky, savory flavor. A good quality BBQ sauce brings it all home.
              ingredients for pork ribs on table

              Tools Needed

              • 13x9-inch baking pan (to catch all those delicious juices)
              • Aluminum foil (to keep the ribs moist while they slow-cook)
              • Pastry brush (for slathering on your BBQ sauce)

              If you're looking for my favorite pans and brushes, you can check out my kitchen essentials here.

              How to Make Country Style Pork Ribs

              Step 1: Preheat your oven to 300°F. Place the ribs in a 13x9-inch baking pan.

              Step 2: In a small bowl, mix the mustard, brown sugar, paprika, salt, garlic powder, onion powder, and black pepper. Rub this mixture evenly over the ribs.

              country style ribs seasoned with dry spices

              Step 3: Cover the pan with aluminum foil and bake for 2 hours and 15 minutes.

              Step 4: Remove the foil, brush the ribs generously with BBQ sauce.

              country style ribs with fresh bbq sauce on it

              Step 5: Raise the oven temperature to 350°F. Bake uncovered for 15 more minutes. The sauce should become glossy and caramelized.

              country style ribs with baked bbq sauce

              Helpful Tip: For even more sticky goodness, brush with a little extra BBQ sauce right before serving.

              Substitutions

              • If you don't like mustard or don't have any, use a thin layer of olive oil instead to help the rub stick.
              • For a lower sugar option, skip the brown sugar and use a sugar-free BBQ sauce.
              • Add a pinch of cayenne or crushed red pepper flakes to the spice mix if you like your ribs spicy.
              country style ribs being held with tongs

              Variations

              • Smoky twist: Add a few drops of liquid smoke to the BBQ sauce.
              • Kid-friendly: Stick with a sweet BBQ sauce and serve with mac and cheese.
              • Deluxe version: Top the finished ribs with crispy fried onions or a drizzle of hot honey.

              How to Store/Make Ahead

              Store leftovers in an airtight container in the fridge for up to 4 days.

              Freeze cooked ribs for up to 2 months. Reheat in a 300°F oven until warmed through.

              Make-ahead tip: Bake the ribs the day before, then reheat and glaze with sauce right before serving.

              To reheat: Reheat ribs in a 300°F oven, covered with foil, for 15–20 minutes. Brush with extra sauce to bring them back to life.

              Tanya's Top Tip

              Be patient. Low and slow cooking is key for melt-in-your-mouth ribs. Don't rush it — the payoff is worth it when you bite into that perfectly tender meat.

              FAQ

              What are country-style pork ribs?

              They're a cut from the pork shoulder, not actual ribs. They're meatier and juicier — perfect for slow roasting.

              Can I grill these instead of baking?

              Absolutely! You can grill country-style ribs low and slow over indirect heat until they’re tender, then finish them over direct heat for that beautiful char. Or, if you prefer a more straightforward method, bake them first until tender, then finish them off on a hot grill for a few minutes to get that smoky flavor.

              I hope you like these ribs as much as we do. Check out these recipes that would go great with these ribs.

              • Southern Potato Salad
              • Creamy Coleslaw
              • Cornbread

              Other Recipes

              Looking for other recipes? Try these:

              • Two crispy fried pork chops served on a dark plate with fresh green beans and cherry tomatoes.
                Fried Pork Chops (Crispy Southern Style)
              • Strawberry baked oatmeal in a casserole dish
                Strawberry Baked Oatmeal
              • garlic butter rice with butter, head of garlic in background
                Easy Garlic Butter Rice
              • New Orleans-style BBQ shrimp in a skillet with a spoon and bread surrounding it
                New Orleans BBQ Shrimp Recipe
              country style ribs on plate with mashed potatoes and green beans
              Print Recipe
              4.67 from 3 votes

              Country Style Ribs Recipe

              These country style ribs are tender, juicy, and packed with smoky BBQ flavor. This easy oven baked recipe brings big barbecue taste without a grill!
              Prep Time15 minutes mins
              Cook Time2 hours hrs 30 minutes mins
              Total Time2 hours hrs 45 minutes mins
              Course: entree
              Cuisine: American
              Keyword: country style pork ribs, country style ribs
              Servings: 6
              Calories: 345kcal
              Author: Tanya Harris

              Ingredients

              • 3 lbs country-style pork ribs
              • 2 tablespoons yellow mustard
              • 2 tablespoons light brown sugar
              • 2 teaspoons paprika
              • 2 teaspoons kosher salt
              • 2 teaspoons garlic powder
              • 1 teaspoon onion powder
              • 1 teaspoon ground black pepper
              • ½ cup BBQ sauce

              Instructions

              • Preheat the oven to 300°F (150°C). Place the ribs in a 13x9-inch baking pan.
              • In a small bowl, mix the mustard, brown sugar, paprika, salt, garlic powder, onion powder, and black pepper. Rub the marinade evenly over the ribs, ensuring they are well coated.
              • Cover the pan with aluminum foil and bake in the preheated oven for 2 hours and 15 minutes.
              • Remove the ribs from the oven, take off the aluminum foil, and brush the ribs generously with BBQ sauce.
              • Increase the oven temperature to 350°F (177°C). Return the ribs to the oven, uncovered, and bake for an additional 15 minutes to allow the BBQ sauce to caramelize.
              • Serve and enjoy.

              Notes

              • Make sure you're using country-style pork ribs — not baby back or spare ribs. Look for thick, meaty cuts from the shoulder.
              • For extra sticky ribs, brush on an additional layer of BBQ sauce after baking and broil for 1–2 minutes. Keep a close eye so they don't burn!

              Nutrition

              Calories: 345kcal | Carbohydrates: 15g | Protein: 29g | Fat: 18g | Saturated Fat: 4g | Polyunsaturated Fat: 2g | Monounsaturated Fat: 4g | Trans Fat: 0.1g | Cholesterol: 109mg | Sodium: 1171mg | Potassium: 572mg | Fiber: 1g | Sugar: 12g | Vitamin A: 399IU | Vitamin C: 0.3mg | Calcium: 52mg | Iron: 2mg

              Easy Crab Fried Rice Recipe

              April 25, 2025 by Tanya Harris 2 Comments

              overhead view of crab fried rice in wok with spoon in it

              This Crab Fried Rice is a quick, flavorful meal with tender crab meat, savory aromatics, and fluffy rice. It's a simple and satisfying dish with Thai flavors, making it a homemade dinner that feels a little extra special without the extra work.

              overhead view of crab fried rice in wok with spoon in it

              You’ll find the full recipe with ingredient amounts and instructions in the recipe card at the bottom of this post. Be sure to check out the blog post itself for extra tips and tricks!

              Fried rice is one of those meals I always have on standby. It's easy, quick, and perfect for using leftovers. So when my husband brought home some fresh claw crab meat, I knew exactly what to do. This crab-fried rice came together fast, and with a few pantry staples and that beautiful crab, it turned into a meal we couldn't stop eating.

              If you love fried rice, check out my steak kimchi fried rice.

              Ingredients Needed

              Ingredient amounts and full recipe instructions are on the printable recipe card at the bottom of the post.

              • Base Ingredients (the foundation for the fried rice): Cooking oil for stir-frying, cooked white rice (preferably day-old for best texture)
              • Eggs (for richness and texture): Large eggs, beaten with a pinch of salt
              • Aromatics (for bold, fresh flavor): Fresh ginger (minced), garlic (minced), green onions (white and green parts separated), Thai bird chiles (finely sliced, optional for heat)
              • Seasonings and Sauces (for depth and balance): Fish sauce (for salty umami flavor), hoisin sauce (for a hint of sweetness), soy sauce (for savory depth), ground white pepper (for mild spice)
              • Crab and Fresh Herbs (the star ingredients): Cooked claw crab meat or lump crab meat (use fresh if possible), fresh cilantro (chopped)
              • For Serving (to finish the dish): Lime wedges for squeezing over the top
              ingredients for crab fried rice

              Tools Needed

              • Large skillet or wok
              • Spatula
              • Cutting board and knife
              • Small prep bowls for organized cooking

              How to Make This Crab Fried Rice

              Step 1: Gather all your ingredients and prep them. Beat the eggs and cut all the aromatics.

              Step 2: Heat 1 tablespoon of cooking oil in a large skillet over medium-high heat. Add the beaten eggs and gently scramble until just set. Remove from the skillet and set aside.

              eggs scrambled in wok

              Step 3: Add another tablespoon of cooking oil. Stir-fry the ginger, garlic, white parts of the green onions, and Thai bird chiles for about 15 seconds until fragrant.

              aromatics in wok

              Step 4: Add the cooked rice, breaking up any clumps. Stir-fry for 2–3 minutes until heated through.

              Step 5: Add the fish sauce, hoisin sauce, soy sauce, and white pepper. Stir well to coat the rice evenly.

              rice being stirfried in wok
              sauces added to rice in skillet

              Step 6: Return the scrambled eggs to the skillet and add the crab meat. Toss gently to distribute the crab without breaking it up too much.

              Step 7:  Stir in the green parts of the green onions and chopped cilantro just until they are wilted. Remove from the heat and serve immediately with lime wedges on the side for squeezing over the top.

              crab fried rice in skillet

              Variations

              • Vegetable Add-Ins: Toss in peas, diced carrots, or chopped bell peppers right after sautéing the aromatics for extra color and crunch.
              • Different Crab: Lump crab meat adds a sweet, delicate flavor. Dungeness crab also works if you can find it.
              • More Heat: Want it spicier? Add extra Thai chiles or a drizzle of chili oil on top before serving.

              Why Use Day-Old Rice for Fried Rice?

              Day-old rice is drier than freshly cooked rice, which helps the grains stay separate and prevents the fried rice from turning mushy. If you only have fresh rice, spread it on a tray and place it in the fridge to speed up the process. I usually let it sit in the refrigerator for 20 minutes.

              Can I Use Lump Crab or Canned Crab?

              Yes! Lump crab meat or well-drained canned crab are great options for this fried rice. Lump crab will give you nice pieces and a sweeter flavor, but canned crab works fine, too. If using canned crab, drain it well and gently pat it dry with a paper towel to avoid adding extra moisture to the dish.

              crab fried rice in wok

              Tanya's Top Tips

              • Prep Everything First: Stir-frying goes quickly, so make sure all your ingredients are chopped and ready to go before you heat the pan.
              • Handle the crab Gently: Add the crab at the end and stir gently to keep the meat in nice, chunky pieces.
              • Taste and Adjust: Always taste before serving. Depending on your preference, you might want to add a splash more fish sauce or a squeeze of lime.

              I Hope You Love This Crab Fried Rice!

              If you're looking for more delicious seafood or rice recipes, check these out:

              • Crab Cake Sandwich – A crispy, flavorful crab cake tucked into a soft bun with creamy sauce.
              • Cilantro Lime Rice – Light, fresh, and perfect for any meal.
              • Yellow Rice – A savory, vibrant rice dish made with simple pantry ingredients.
              overhead view of crab fried rice in wok with spoon in it
              Print Recipe
              5 from 2 votes

              Crab Fried Rice Recipe

              This Crab Fried Rice is a quick, flavorful meal with tender crab meat, savory aromatics, and fluffy rice. It's a simple and satisfying dish with Thai flavors, making it a homemade dinner that feels a little extra special without the extra work.
              Prep Time15 minutes mins
              Cook Time10 minutes mins
              Total Time25 minutes mins
              Course: entree
              Cuisine: Thai
              Keyword: crab fried rice
              Servings: 4
              Calories: 411kcal
              Author: Tanya Harris

              Ingredients

              • 4 tablespoons cooking oil divided
              • 2 large eggs beaten with a pinch of salt
              • 2 tablespoons minced ginger
              • 2 cloves garlic minced
              • 4 green onions chopped (white and green parts separated)
              • 2 Thai bird chiles finely sliced (optional)
              • 4 cups cooked white rice
              • 1 tablespoon fish sauce
              • 1 tablespoon hoisin sauce
              • 2 teaspoons soy sauce
              • ¼ teaspoon ground white pepper
              • 1 cup cooked claw crab meat or lump crab meat if preferred
              • ½ cup cilantro chopped
              • Lime wedges for serving

              Instructions

              • Heat about 1 tablespoon of cooking oil in a large skillet over medium-high heat. Add the beaten eggs and gently scramble until just set. Remove and set aside.
              • Add 1 tablespoon of cooking oil to the skillet. Add minced ginger, garlic, the white parts of the green onions, and Thai bird chiles. Stir-fry for about 15 seconds until fragrant.
              • Add the cooked rice, breaking up clumps, and stir-fry for 2–3 minutes until heated.
              • Season the rice with fish sauce, hoisin sauce, soy sauce, and white pepper. Stir well to combine.
              • Return the scrambled eggs to the skillet. Add the crab meat. Mix thoroughly to distribute all ingredients evenly.
              • Add the green parts of the green onions and cilantro. Stir briefly until just wilted.
              • Remove from heat and serve immediately with lime wedges on the side.

              Notes

              • Make sure Everything is chopped and ready before stir-frying.
              • Peas, carrots, or bell peppers are easy add-ins if you want to load the dish more.

              Nutrition

              Calories: 411kcal | Carbohydrates: 49g | Protein: 14g | Fat: 17g | Saturated Fat: 2g | Polyunsaturated Fat: 5g | Monounsaturated Fat: 10g | Trans Fat: 0.1g | Cholesterol: 115mg | Sodium: 812mg | Potassium: 266mg | Fiber: 1g | Sugar: 2g | Vitamin A: 393IU | Vitamin C: 8mg | Calcium: 77mg | Iron: 1mg

              General Tso's Shrimp Recipe (Crispy and Saucy)

              April 23, 2025 by Tanya Harris 4 Comments

              general tso's shrimp in skillet

              This General Tso's Shrimp recipe is bold and full of flavor. The shrimp are crispy, the sauce is sweet and tangy, and everything comes together in about 30 minutes.

              general tso's shrimp in skillet

              You’ll find the full recipe with ingredient amounts and instructions in the recipe card at the bottom of this post. Be sure to check out the blog post itself for extra tips and tricks!

              General Tso’s chicken is one of my all-time favorite dishes when ordering Chinese food, but I also love it with shrimp. I’ve air-fried General Tso’s chicken, which always turns out crispy and flavorful. That got me hooked on the sweet, tangy, slightly spicy sauce—it just hits all the right notes.

              So, of course, I had to try it with shrimp. This version cooks quickly and has all the flavor I love. It’s a great choice for busy nights when I want something quick and satisfying.

              Serve it over white rice and you have the perfect meal.

              A Quick Look at the Ingredients

              Ingredient amounts and full recipe instructions are on the printable recipe card at the bottom of the post.

              For the Shrimp:

              • Shrimp (peeled, deveined, tails off). I prefer to use medium-sized shrimp
              • Egg, water, salt, cornstarch
              • Canola oil (for frying)

              For the Sauce:

              • Vegetable oil
              • Garlic (minced), ginger (minced), green onions (chopped)
              • Light brown sugar, low-sodium chicken broth, low-sodium soy sauce
              • Rice vinegar, sesame oil
              • Cornstarch slurry (cornstarch + water)
              • Dried red chilies (optional)
              ingredients for general tso's shrimp

              Tools Needed

              • Large mixing bowl
              • Large skillet or wok
              • Measuring cups and spoons
              • Whisk or fork for the slurry
              • Tongs or a spatula
              • Paper towels for draining

              How to Make This Recipe

              Step 1: In a bowl, combine cornstarch, egg, water, and salt. Mix into a batter and coat the shrimp evenly.

              shrimp coated in cornstarch and egg

              Step 2: Heat canola oil in a large pan over medium-high heat. Fry shrimp in batches for 2-3 minutes per side until golden and crisp. Remove and drain on a paper towel.

              shrimp frying in skillet

              Step 3: Drain excess oil from the pan, leaving about 2 Tablespoons in the pan. Sauté garlic, ginger, chilies, and green onions until fragrant. Add brown sugar, broth, soy sauce, rice vinegar, sesame oil, and salt. Simmer for 3 minutes.

              Step 4: Stir the cornstarch slurry and pour it into the sauce. Cook until thickened.

              sauce in skillet

              Step 5: Add shrimp back to the pan and toss to coat. Garnish with extra green onions and sesame seeds.

              general tso shrimp in sauce garnished with green onions

              Variations for this Recipe

              This recipe can be swapped with other proteins for a delicious twist. Here are some options:

              • Swap shrimp for cubed chicken, tofu, or tempeh.
              • For a gluten-free version, use tamari instead of soy sauce.
              • Add veggies like bell peppers or broccoli for extra crunch.

              Serving Suggestions

              Serve over steamed jasmine rice or fried rice. To balance the heat, add a side of sautéed bok choy, snap peas, or a cucumber salad.

              Is General Tso Shrimp Spicy?

              Dried red chilies contribute mild to moderate heat to this dish. You can leave them out for a milder version or add red pepper flakes for more kick.

              general tso's shrimp on plate with rice

              What Is General Tso Sauce Made Of?

              General Tso's sauce is a sweet and tangy mix. It includes soy sauce, rice vinegar, sugar, broth, and sesame oil. Aromatics like garlic and ginger add flavor. Cornstarch thickens the sauce, giving it a sticky texture.

              How to Use Leftover Sauce

              If you have leftover General Tso sauce, save it! It’s great for tossing with roasted veggies, noodles, or even pan-fried tofu later in the week.

              Make-Ahead and Storage

              You can prep the sauce ahead of time and store it in an airtight container in the fridge for up to 2 days. For the best texture, wait to batter and cook the shrimp until you're ready to eat. Cook the shrimp and assemble them when ready to eat.

              Leftovers can be stored in an airtight container in the refrigerator for up to 3 days. To loosen the sauce, reheat gently in a skillet over low heat with a splash of water, or use the microwave in 30-second intervals until warmed through.

              general tso's shrimp with spoon picking it up

              Tanya's Top Tips

              • Don't overcrowd the pan when frying shrimp—work in batches. It takes me two batches to fry all my shrimp in a large 12-inch skillet.
              • Garnish with sesame seeds and green onions for flavor and presentation.
              • Serve it with white rice to soak up all that saucy goodness. 
              • Do not eat the red chillies. They add plenty of flavor, but are spicy.

              I hope you love this General Tso Shrimp recipe as much as we do! If you're looking for more Asian-inspired takeout-style meals, try these:

              • Garlic Noodles – Buttery, garlicky noodles are perfect as a side or main. 
              • Mongolian Beef – Sweet, savory, and ready in under 30 minutes. My absolute favorite!
              • Chicken and Green Bean Stir Fry - This is a quick and easy stir fry with tender chicken and crisp green beans tossed in a savory sauce.
              general tso's shrimp in skillet
              Print Recipe
              3.34 from 3 votes

              General Tso's Shrimp Recipe

              This General Tso's Shrimp is crispy, saucy, and packed with sweet, tangy, and slightly spicy flavor. Lightly battered and pan-fried, it's a balanced takeout-style dish. Serve with steamed rice and broccoli for an easy homemade favorite.
              Prep Time10 minutes mins
              Cook Time15 minutes mins
              Total Time25 minutes mins
              Course: entree
              Cuisine: Chinese
              Keyword: general tso shrimp, general tso's shrimp
              Servings: 4 people
              Calories: 631kcal
              Author: Tanya Harris

              Ingredients

              For the Shrimp

              • ½ cup cornstarch
              • 1 large egg + 2 Tablespoons water
              • ¼ teaspoon salt
              • 1 pound large shrimp peeled and deveined, tail off
              • ½ cup canola oil for frying

              For the Sauce

              • 2 cloves garlic minced
              • 1- inch fresh ginger minced
              • ¾ cup light brown sugar
              • ½ cup low-sodium chicken broth
              • ½ cup low-sodium soy sauce
              • 2 tablespoons rice vinegar
              • 1 teaspoon sesame oil
              • 2 teaspoons cornstarch mixed with ¼ cup water slurry
              • 6 dried red chilies optional, adjust to taste
              • 2 green onions chopped
              • Sesame seeds for garnish

              Instructions

              • In a large bowl, combine cornstarch, salt, water, and egg. Mix thoroughly to create a batter. Add shrimp and coat evenly.
              • Heat canola oil in a large skillet or wok over medium-high heat. Fry shrimp in a single layer on each side for 2–3 minutes until golden. Drain on paper towels.
              • Drain excess oil from the pan, leaving 2 tablespoons. Sauté garlic, ginger, dried red chilies, and green onions for 30 seconds.
              • Stir in brown sugar, chicken broth, soy sauce, rice vinegar, sesame oil, and salt. Simmer for 3 minutes.
              • Stir the cornstarch slurry and slowly add it to the sauce. Simmer until thickened, about 2–3 minutes.
              • Return shrimp to the skillet and toss to coat. Garnish with green onions and sesame seeds.

              Notes

              Adjust the chilies to control the spice level.
              Great with jasmine rice, snap peas, or bok choy.
              Enjoy your homemade takeout night!

              Nutrition

              Calories: 631kcal | Carbohydrates: 66g | Protein: 22g | Fat: 32g | Saturated Fat: 3g | Polyunsaturated Fat: 9g | Monounsaturated Fat: 19g | Trans Fat: 0.1g | Cholesterol: 184mg | Sodium: 1980mg | Potassium: 584mg | Fiber: 2g | Sugar: 44g | Vitamin A: 966IU | Vitamin C: 99mg | Calcium: 130mg | Iron: 2mg

              Crab Cake Sandwich

              April 21, 2025 by Tanya Harris Leave a Comment

              crab cake sandwich on a plate

              This crab cake sandwich features a tender crab cake patty that has been perfectly pan-seared to golden-brown perfection. Tucked inside a toasted bun and layered with crisp lettuce, juicy tomato slices, and tartar sauce.

              crab cake sandwich on a plate

              You’ll find the full recipe with ingredient amounts and instructions in the recipe card at the bottom of this post. Be sure to check out the blog post itself for extra tips and tricks!

              As much as I love crab cakes, I had to share one way I love to enjoy them...in a sandwich. I remember the first time I tried this, I was blown away by how the flavors came together. I stack mine high with crisp lettuce, tomato, and a big spoonful of my homemade tartar sauce or bold remoulade. Both recipes are on the blog if you need them! 

              Serve it with a side of my creamy coleslaw or oven-baked fries, and you’ve got a meal that always hits the spot.

              A Quick Look at the Ingredients You Will Need

              Ingredient amounts and full recipe instructions are on the printable recipe card at the bottom of the post.

              For the Crab Cakes: Lump crab meat, egg, mayonnaise, Dijon mustard, Worcestershire sauce, Old Bay seasoning, fresh lemon juice, finely crushed saltine crackers, salt and freshly ground black pepper, unsalted butter, vegetable oil

              For the Sandwiches: Brioche or potato buns, tartar sauce (store-bought or homemade), lettuce (Romaine, Bibb, or Iceberg), tomato slices, butter (for toasting buns), lemon wedges for serving

              Tools Needed

              • Mixing bowl
              • Measuring spoons and cups
              • Large skillet or nonstick pan
              • Spatula (preferably a fish spatula)
              • Plate or baking sheet (for chilling patties)
              • Knife and cutting board

              How to Make Crab Cake Sandwiches

              Step 1: In a large bowl, gently mix the crab meat, egg, mayonnaise, Dijon mustard, Worcestershire sauce, Old Bay seasoning, lemon juice, and crushed saltine crackers. Season with salt and pepper to taste. Mix carefully to maintain the lump texture of the crab meat.

              crab cake ingredients mixed in bowl

              Step 2: Divide the mixture into 4 equal portions and shape each into a patty, about 1 inch thick. Place them on a plate, cover, and refrigerate for at least 30 minutes to firm up.

              crab cakes formed into patties

              Step 3: Heat butter and vegetable oil in a large skillet over medium-high heat. Once hot, add the crab cakes and cook for 3-4 minutes per side until golden brown and cooked through. Remove from the skillet.

              crab cakes being seared in a skillet

              Step 4: In the same skillet, melt 1 tablespoon of butter over medium heat. Toast the cut sides of the buns until golden brown, about 1-2 minutes.

              Step 5: Spread tartar sauce, or remoulade sauce, on the bottom half of each toasted bun. Add a leaf of lettuce, a tomato slice, and a crab cake. Top with the remaining bun halves. Serve immediately with lemon wedges and extra tartar sauce on the side.

              crab cake sandwich with crab cake showing on sandwich

              Storage & Make-Ahead Tips

              Make Ahead: Form the crab cake patties up to 24 hours in advance. Cover and refrigerate—they’ll hold together better when cooked.

              Storing Leftovers: Cool cooked crab cakes completely, then refrigerate in an airtight container for up to 3 days. Store buns and toppings separately to avoid sogginess.

              Freezing: Uncooked: Freeze formed patties on a lined tray until solid, then transfer to a freezer-safe bag (with parchment between layers). Freeze up to 2 months. Thaw overnight before cooking.

              Cooked: Cool, wrap individually, and freeze for up to 1 month. Thaw overnight, then reheat in the oven.

              Reheating: Warm in a 350°F oven for 10–15 minutes or in a skillet with butter. Microwave only if needed—it can make them soft.

              crab cake sandwich cut open to show inside of sandwich

              Tanya's Top Tips

              • Refrigerating the formed patties for at least 30 minutes helps them hold together better during cooking. This will make your crab cake sandwich stay together.
              • Invest in the best lump crab meat you can find. It's the star of the show and worth the splurge.
              • Make sure your pan is hot enough before adding the crab cakes to achieve that perfect golden crust.
              • If you prefer, you can make the crab cakes in the air fryer.

              I hope you love these sandwiches as much as we do. Looking for more seafood recipes? Try these out.

              • Shrimp Po' Boy (Air Fryer Method)
              • Salmon Patties
              crab cake sandwich on a plate
              Print Recipe
              No ratings yet

              Crab Cake Sandwich Recipe

              This crab cake sandwich features a tender crab cake patty that has been perfectly pan-seared to golden-brown perfection. Tucked inside a toasted bun and layered with crisp lettuce, juicy tomato slices, and tartar sauce.
              Prep Time15 minutes mins
              Cook Time8 minutes mins
              Chill Time30 minutes mins
              Total Time53 minutes mins
              Course: entree
              Cuisine: American
              Keyword: crab cake sandwich, crab cake sandwich recipes
              Servings: 4 people
              Calories: 357kcal
              Author: Tanya Harris

              Ingredients

              For the Crab Cakes

              • 1 pound lump crab meat drained, picked over for shells
              • 1 large egg
              • 2 tablespoons mayonnaise
              • 1 teaspoon Dijon mustard
              • 1 teaspoon Worcestershire sauce
              • 1 teaspoon Old Bay seasoning
              • 1 tablespoon fresh lemon juice
              • ¼ cup finely crushed saltine crackers
              • Salt and freshly ground black pepper to taste
              • 2 tablespoons unsalted butter
              • 2 tablespoons vegetable oil

              For the Sandwiches

              • 4 brioche or potato buns lightly toasted
              • 4 leaves of lettuce Romaine, Bibb, or Iceberg
              • 4 tomato slices
              • ¼ cup tartar sauce store-bought or homemade
              • 1 tablespoon butter for toasting buns
              • Lemon wedges for serving

              Instructions

              For the Crab Cakes

              • In a large bowl, gently mix the crab meat, egg, mayonnaise, Dijon mustard, Worcestershire sauce, Old Bay seasoning, lemon juice, and crushed saltine crackers. Season with salt and pepper to taste. Mix carefully to maintain the lump texture of the crab meat.
              • Divide the mixture into 4 equal portions and shape each into a patty, about 1 inch thick. Place them on a plate, cover, and refrigerate for at least 30 minutes to firm up.
              • Heat butter and vegetable oil in a large skillet over medium-high heat. Once hot, add the crab cakes and cook for 3-4 minutes per side until golden brown and cooked through. Remove from the skillet.

              For the Sandwich

              • In the same skillet, melt 1 tablespoon of butter over medium heat. Toast the cut sides of the buns until golden brown, about 1-2 minutes.
              • Spread tartar sauce on the bottom half of each toasted bun. Add a leaf of lettuce, a tomato slice, and a crab cake. Top with the remaining bun halves.
              • Serve immediately with lemon wedges and extra tartar sauce on the side.

              Notes

              • Form the crab cake patties up to 24 hours in advance. Cover and refrigerate—they’ll hold together better when cooked.
              • Top the sandwiches with your favorite sauce. Tartar, remoulade, or spicy mayonnaise are all great choices. 

              Nutrition

              Calories: 357kcal | Carbohydrates: 8g | Protein: 23g | Fat: 25g | Saturated Fat: 8g | Polyunsaturated Fat: 9g | Monounsaturated Fat: 6g | Trans Fat: 0.4g | Cholesterol: 117mg | Sodium: 1787mg | Potassium: 364mg | Fiber: 1g | Sugar: 2g | Vitamin A: 666IU | Vitamin C: 14mg | Calcium: 79mg | Iron: 2mg

              Maryland Crab Cakes Recipe (with Lump Crab and Minimal Filler)

              April 18, 2025 by Tanya Harris Leave a Comment

              crab cakes on plate with lemon on side

              This Maryland Crab Cakes Recipe is packed with sweet, delicate lump crab meat and just enough binder to hold them together. Pan-seared to golden perfection, they deliver that unmistakable Chesapeake Bay flavor in every bite.

              crab cakes on plate with lemon on side

              You’ll find the full recipe with ingredient amounts and instructions in the recipe card at the bottom of this post. Be sure to check out the blog post itself for extra tips and tricks!

              I deem myself the crab cake expert because every time I go somewhere and I'm able to get crab cakes, I get them. I've had all kinds, but Maryland crab cakes reign supreme. I may be biased because I spent years in Hyattsville, Maryland, as a kid. Or maybe these are just the best crab cakes ever.

              Maryland crab cakes have minimal ingredients but focus on the most essential thing: lump crab meat and more crab meat than filler.

              This simplicity leads to moist and flavorful crab patties that focus on the flavor of crab.

              This recipe focuses on pan-frying the crab cakes, but you could also make crab cakes in the air fryer. Serve these crab cakes with a squeeze of lemon, tartar sauce, or cocktail sauce.

              Ingredients Needed

              Ingredient amounts and full recipe instructions are on the printable recipe card at the bottom of the post.

              • Unsalted butter and vegetable oil - Combined for the perfect pan-searing medium
              • Lump crab meat—Please use lump crab meat for this recipe. Authentic Maryland crab cakes are made with blue crab, known for its sweet, delicate flavor. If you can’t get fresh blue crab meat, refrigerated pasteurized lump crab (often found near the seafood counter) is the next best thing. Avoid claw meat, which is stronger in flavor and often requires more binder.
              • Large egg and mayonnaise - Acts as binding agents to hold the cakes together
              • Dijon mustard, Worcestershire sauce, Old Bay seasoning - The flavor foundation of Maryland crab cakes
              • Fresh lemon juice - Brightens all the flavors
              • Saltine crackers, finely crushed - The traditional Maryland filler that adds just enough structure
              • Salt and freshly ground black pepper - For seasoning to taste

              Tools You Will Need

              • Large mixing bowl - For gently combining ingredients
              • Measuring cups and spoons - For precise ingredient amounts
              • Plastic wrap - To cover cakes during refrigeration
              • Large skillet - Preferably non-stick or well-seasoned cast iron.
              • Fish spatula or thin turner - For carefully flipping delicate crab cakes
              • Paper towel-lined plate - For draining excess oil after cooking

              How to Make This Maryland Crab Cakes Recipe

              Step 1: Prepare the mixture by gently combining the crab meat with egg, mayonnaise, Dijon mustard, Worcestershire sauce, Old Bay seasoning, lemon juice, and crushed saltines. The key word here is GENTLY – you want to maintain those beautiful lumps of crab meat.

              crab cake ingredients mixed in bowl

              Step 2: Form the crab cakes into four equal patties, about 1 inch thick. Don't pack them too tightly, or they'll become dense. Refrigerate for at least 30 minutes. This crucial step helps the cakes hold together during cooking.

              crab cakes formed into patties

              Step 3: Pan-sear with butter and oil until golden brown, about 3-4 minutes per side. The butter adds flavor while the oil prevents burning.

              crab cakes being seared in a skillet

              Step 4: Serve immediately with lemon wedges and your choice of dipping sauce.

              Why Use Saltines Instead of Breadcrumbs?

              True Maryland crab cakes use crushed saltine crackers rather than breadcrumbs as the binder. Saltines provide just the right structure while adding a subtle saltiness that enhances the crab's natural sweetness. They also absorb less moisture than breadcrumbs, keeping your crab cakes light rather than dense.

              When crushing your saltines, aim for a fine texture, but don't pulverize them into dust. Those tiny bits of cracker help create the perfect consistency.

              Make Ahead and Storage Options

              Make Ahead: Form patties up to 24 hours before and refrigerate covered with plastic wrap. The extra chilling helps them hold together better.

              Storage: Cooked crab cakes can be stored in an airtight container in the refrigerator for up to 3 days. For longer storage, uncooked crab cakes can be frozen for up to 2 months—just freeze them on a baking sheet first, then transfer them to a container with parchment between layers.

              Reheating: Warm in a 350°F oven for 10 minutes or in a skillet over medium-low heat with a bit of butter. Avoid microwaving to prevent rubbery texture.

              Close up on Maryland crab cakes

              Tanya's Top Tips

              • The refrigeration step is non-negotiable. Cold crab cakes hold together much better during cooking.
              • Use a light touch when mixing and forming the crab cakes. Overworking will break up those beautiful lumps of crab.
              • Let the cakes develop a good crust before flipping. Patience is key to preventing them from falling apart.

              FAQs

              Can I bake Maryland crab cakes instead of pan-frying them?

              Yes! Bake at 375°F for 12-15 minutes until golden. They won't develop quite the same crispy crust as pan-fried, but they'll still be delicious with less oil.

              What's the best type of crab meat to use if I can't find fresh lump blue crab?

              Refrigerated pasteurized lump crab meat is your next best option. Avoid imitation crab altogether - it's processed fish and won't give you an authentic experience.

              I hope you love this Maryland crab cakes recipe as much as we do. If you're looking for more seafood recipes to try, check out these favorites:

              • Crab Bisque
              • Air Fryer Crab Legs
              • Salmon Patties
              crab cakes on plate with lemon on side
              Print Recipe
              No ratings yet

              Maryland Crab Cakes Recipe

              These authentic Maryland crab cakes are packed with sweet, delicate lump crab meat and just enough binder to hold them together. Pan-seared to golden perfection, they deliver that unmistakable Chesapeake Bay flavor in every bite.
              Prep Time10 minutes mins
              Cook Time8 minutes mins
              Chilling Time30 minutes mins
              Total Time48 minutes mins
              Course: Appetizer
              Cuisine: American
              Keyword: crab cakes recipe, Maryland crab cakes
              Servings: 4 people
              Calories: 310kcal
              Author: Tanya Harris

              Ingredients

              • 1 pound lump crab meat picked over for shells
              • 1 large egg
              • 2 tablespoons mayonnaise
              • 1 teaspoon Dijon mustard
              • 1 teaspoon Worcestershire sauce
              • 1 teaspoon Old Bay seasoning
              • 1 tablespoon fresh lemon juice
              • ½ cup finely crushed saltine crackers
              • Salt and freshly ground black pepper to taste
              • 2 tablespoons unsalted butter
              • 2 tablespoons vegetable oil

              Instructions

              • In a large bowl, gently mix the crab meat, egg, mayonnaise, Dijon mustard, Worcestershire sauce, Old Bay seasoning, lemon juice, and crushed saltine crackers—season with salt and pepper to taste. Be careful not to overmix to maintain the lump crab texture.
              • Divide the mixture into four equal portions and shape each into a patty about 1 inch thick. Place them on a plate, cover, and refrigerate for at least 30 minutes to firm up.
              • Heat butter and vegetable oil in a large skillet over medium-high heat. Once hot, add the crab cakes and cook for 3-4 minutes per side until golden brown and heated through.
              • Remove from the skillet and drain on a paper towel-lined plate. Serve warm with lemon wedges and your favorite dipping sauce.

              Notes

              • Refrigerating the crab cakes before cooking helps them hold together better.
              • To prevent the crab cakes from breaking apart, avoid flipping them too soon. Let them develop a golden crust before turning.

              Nutrition

              Calories: 310kcal | Carbohydrates: 8g | Protein: 23g | Fat: 20g | Saturated Fat: 6g | Polyunsaturated Fat: 8g | Monounsaturated Fat: 5g | Trans Fat: 0.3g | Cholesterol: 107mg | Sodium: 1125mg | Potassium: 285mg | Fiber: 0.5g | Sugar: 0.5g | Vitamin A: 282IU | Vitamin C: 10mg | Calcium: 71mg | Iron: 2mg

              Creamy Shrimp Bisque Recipe

              April 16, 2025 by Tanya Harris 2 Comments

              shrimp bisque in bowl with shrimp on top

              This elegant shrimp bisque recipe is a velvety soup that balances the sweetness of shrimp with aromatic vegetables and a hint of brandy. The combination of simple ingredients transforms into a restaurant-worthy meal.

              shrimp bisque in bowl with shrimp on top

              You’ll find the full recipe with ingredient amounts and instructions in the recipe card at the bottom of this post. Be sure to check out the blog post itself for extra tips and tricks!

              I love a good appetizer soup, and bisques are my absolute favorite. I shared my crab bisque recipe years ago, and it still gets made often around our house. However, crab meat is expensive, so sometimes, I opt for this shrimp version instead.

              I've kept the flavors consistent with classic bisque recipes, using brandy and wine to elevate the soup. I quickly make a seafood stock with the shrimp shells for this recipe, which makes the soup taste even better.

              Ingredients Needed

              Ingredient amounts and full recipe instructions are on the printable recipe card at the bottom of the post.

              • Seafood Base: Medium shrimp (peeled and deveined, shells reserved), seafood stock
              • Aromatics & Vegetables: Onion, carrot, celery (all finely chopped), garlic (minced)
              • Flavor Builders: Tomato paste, brandy, dry white wine, paprika, Old Bay seasoning, fresh thyme, bay leaves
              • For Richness: Unsalted butter, olive oil, all-purpose flour, heavy cream
              • Finishing Touches: Lemon juice, salt and black pepper, chopped parsley or chives (for garnish)
              ingredients for shrimp bisque

              Tools Needed

              • Large heavy-bottomed pot or Dutch oven
              • Medium saucepan (for making shrimp stock)
              • Fine-mesh strainer
              • Immersion blender or countertop blender
              • Wooden spoon and whisk
              • Small skillet (for cooking garnish shrimp)
              • Measuring cups and spoons

              How to Make This Shrimp Bisque

              Step 1: Make shrimp stock: Heat olive oil and sauté shells until pink. Add water and simmer for 10 minutes—strain and set liquid aside.

              shrimp shells in pot after cooking
              water on shrimp shells in pot
              drained stock with shrimp shells on side

              Step 2: Melt butter in a large pot. Sauté onion, carrot, and celery until soft. Add garlic and cook for 1 minute.

              Step 3: Add tomato paste and cook 2 minutes. Sprinkle flour over the mixture and stir constantly until incorporated.

              vegetables covered in tomato paste and flour cooking in pot

              Step 4: Add brandy and wine, scraping up browned bits. Add reserved shrimp stock, paprika, Old Bay, thyme, and bay leaves. Bring to a boil, then reduce to simmer for 20 minutes.

              shrimp bisque broth ingredients in pot

              Step 5: Remove bay leaves. Blend soup until smooth.

              immersion blender in pot of soup

              Step 6: Heat the remaining olive oil in a skillet. Sauté the shrimp for 2-3 minutes until just cooked. Reserve 4-6 shrimp for garnish; chop the rest.

              cooked shrimp in skillet

              Step 7: Add cream to the soup and bring to a gentle simmer. Add chopped shrimp, lemon juice, salt, and pepper.

              Step 8: Serve in bowls, garnish with chives, parsley, and reserved whole shrimp.

              shrimp bisque with shrimp on top in pot

              Variations

              • Add a pinch of cayenne pepper or a dash of hot sauce for some spice.
              • Replace brandy with cognac for a slightly different flavor profile.
              • If you prefer a chunkier texture, don't blend all of the vegetables - leave some pieces for added texture.

              Serving Suggestions

              • Pair with a simple green salad dressed with vinaigrette for a light lunch or dinner.
              • Serve in small cups as an elegant starter for a dinner party.
              • Enjoy with crusty artisan bread or homemade croutons for dipping.

              How to Store this Shrimp Bisque Recipe

              • Refrigerator Storage: Shrimp bisque can be stored in an airtight container in the refrigerator for up to 3 days. To reheat, warm gently in a saucepan over low heat until just heated through, being careful not to boil as this may cause the cream to separate.
              • Freezer Storage: For extended storage, freeze the bisque in airtight containers for up to a month. Thaw overnight in the refrigerator, then reheat slowly on the stovetop.
              • Make-Ahead Option: This bisque improves in flavor when made a day ahead, making it perfect for entertaining. Reheat gently before serving, and add any garnishes at the last minute.
              shrimp bisque in bowl with spoon on the side

              Tanya's Top Tips

              • This delicious soup is based on homemade shrimp stock. If you don't have time to make it or can't find seafood stock at the grocery store, a little clam juice with water is a good substitute.
              • Avoid boiling the soup after adding the cream to prevent curdling; a gentle simmer is all you need.
              • The bisque tastes even better the next day, so consider making it ahead for company.

              I hope you love this shrimp bisque recipe as much as we do. If you're looking for more creamy appetizer soups, try these out:

              • Crab Bisque - My original love and weekend splurge when I'm feeling fancy; worth every penny for that sweet crab flavor.
              • Cream of Mushroom Soup - Nothing like the canned stuff; this homemade version converted even my mushroom-skeptic husband.
              • Zuppa Toscana - Our family's Friday night favorite that disappears in minutes: creamy, savory, and comforting.
              • Creamy Carrot Soup—This recipe convinced my kids that vegetables can be delicious. It's silky smooth and has a touch of ginger.
              shrimp bisque in bowl with shrimp on top
              Print Recipe
              5 from 1 vote

              Shrimp Bisque Recipe

              A creamy, elegant shrimp soup with layers of flavor from homemade shrimp stock, aromatic vegetables, and a splash of brandy.
              Prep Time15 minutes mins
              Cook Time35 minutes mins
              Total Time50 minutes mins
              Course: Appetizer
              Cuisine: American
              Keyword: shrimp bisque recipe
              Servings: 4 people
              Calories: 458kcal
              Author: Tanya Harris

              Ingredients

              • 1 lb medium shrimp peeled and deveined (shells reserved for stock)
              • 2 tablespoons olive oil divided
              • 4 cups water
              • 3 tablespoons unsalted butter
              • 1 medium onion chopped (about 1 cup)
              • 1 medium carrot chopped (about ½ cup)
              • 1 stalk celery chopped (about ⅓ cup)
              • 3 cloves garlic minced
              • 2 tablespoons tomato paste
              • ¼ cup all-purpose flour
              • ¼ cup brandy
              • ¼ cup dry white wine
              • 1 teaspoon paprika
              • 1 teaspoon Old Bay seasoning
              • 3 sprigs fresh thyme leaves stems removed
              • 2 bay leaves
              • ½ cup heavy cream
              • 1 tablespoon lemon juice
              • Salt and black pepper to taste (1 teaspoon kosher salt, ½ teaspoon black pepper recommended)
              • Chopped parsley or chives for garnish

              Instructions

              • In a pot, heat one tablespoon of olive oil over medium heat. Add reserved shrimp shells and sauté for 3–5 minutes, until pink and aromatic. Add water and bring to a simmer. Cook for 10 minutes, then strain, discarding the shells. Set shrimp stock aside.
              • In a large pot, melt butter over medium heat. Sauté onion, carrot, and celery for 6–8 minutes until softened. Add garlic and cook for 1 minute.
              • Stir in tomato paste and cook for 2 minutes. Sprinkle flour over the mixture, stirring constantly, to form a roux.
              • Add brandy and allow to reduce slightly, then add white wine, scraping up any browned bits. Pour in the reserved shrimp stock and add paprika, Old Bay, thyme, and bay leaves. Bring to a boil, then reduce to a simmer for 20 minutes.
              • Remove bay leaves. Blend the soup until smooth using an immersion blender or carefully in a blender in batches.
              • Heat the remaining tablespoon of olive oil over medium-high heat in a separate skillet. Add shrimp and sauté for 2–3 minutes until just cooked through. Remove from heat. Set aside 4-6 whole shrimp for garnish; roughly chop the remaining shrimp.
              • Stir heavy cream into the blended soup and bring to a gentle simmer. Add chopped shrimp back to the soup, warming through for about 1 minute.
              • Finish with lemon juice and season with salt and pepper to taste. Serve garnished with whole seared shrimp and parsley or chives.

              Notes

              • Shrimp bisque can be stored in the refrigerator for 3 days. Reheat gently on the stove. For more extended storage, freeze in airtight containers for up to a month. Thaw in the refrigerator before reheating.
              • For an elegant touch, serve the bisque in shallow bowls and sprinkle with Parmesan cheese.

              Nutrition

              Calories: 458kcal | Carbohydrates: 15g | Protein: 3g | Fat: 27g | Saturated Fat: 13g | Polyunsaturated Fat: 2g | Monounsaturated Fat: 10g | Trans Fat: 0.3g | Cholesterol: 56mg | Sodium: 106mg | Potassium: 274mg | Fiber: 2g | Sugar: 4g | Vitamin A: 3678IU | Vitamin C: 7mg | Calcium: 61mg | Iron: 1mg
              • « Previous Page
              • 1
              • 2
              • 3
              • 4
              • …
              • 18
              • Next Page »
              tanya harris holding a fork

              Welcome!

              Welcome to My Forking Life! Hi, I'm Tanya, attorney, busy wife and mom, and lover of quick, easy, and delicious meals.

              More about me

              Popular Recipes

              • Jamaican Oxtails Recipe
              • brown stew chicken in pan
                Brown Stew Chicken
              • Jamaican Instant Pot Rice and Beans
              • Pressure Cooker Shrimp Paella

              Holiday Favorites

              • sweet potato pie on a plate
                Southern Sweet Potato Pie Recipe
              • spoon lifting gravy out of gravy dish
                Easy Recipe for Gravy without Drippings
              • Stirring the giblet gravy with a spoon.
                Grandma's Giblet Gravy Recipe
              • creamy baked macaroni and cheese, the best baked macaroni and cheese, creamy mac and cheese
                Creamy Baked Macaroni and Cheese
              as seen on...various online websites text listed

              Footer

              ↑ back to top
              • Privacy Policy
              • Contact
              • About Tanya

              As an Amazon Associate, I earn from qualifying purchases.

              Copyright © 2025 My Forking Life

              Rate This Recipe

              Your vote:


              Let us know what you thought of this recipe:

              This worked exactly as written, thanks!
              My family loved this!
              Thank you for sharing this recipe

              Or write in your own words:

              A rating is required
              A name is required
              An email is required